Forum adverts like this one are shown to any user who is not logged in. Join us by filling out a tiny 3 field form and you will get your own, free, dakka user account which gives a good range of benefits to you:
No adverts like this in the forums anymore.
Times and dates in your local timezone.
Full tracking of what you have read so you can skip to your first unread post, easily see what has changed since you last logged in, and easily see what is new at a glance.
Email notifications for threads you want to watch closely.
Being a part of the oldest wargaming community on the net.
If you are already a member then feel free to login now.
I was inspired by this excellent video tutorial on making a murky swamp. He has some really great stuff and you should check his videos out if you are not familiar with his work.
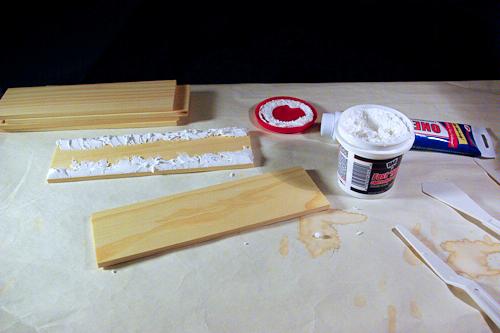
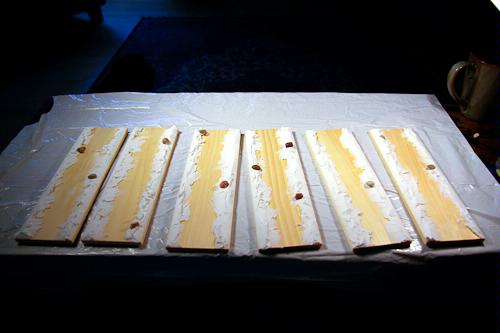
After watching all four parts I decided to make a river for my table. I bought 3 packs of wooden planks from the hobby store. Hard wood, not balsa; I wanted to be sure it didn't warp. I've never worked with "Realistic Water" before and not sure how it would behave on a more porous wooden piece. First I used Spackle to create embankments on each long edge of the wooden planks.
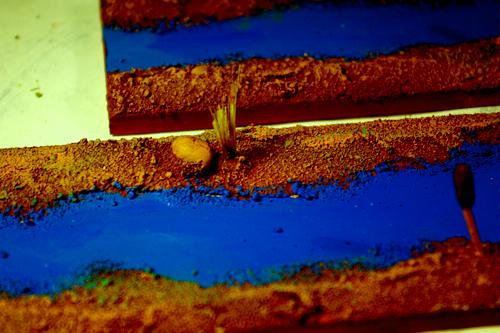
I used "Fast 'N Final Lightweight Spackle" that I bought from the local grocery store. It's a little hard to work with as it doesn't initially want to stick to the wood. I definitely had to buy some plastic sculpting tools to do this. The Spackle was only about $3 and that tiny tub had enough to cover all 6 pieces of wood. I also stuck a few smooth, rounded pebbles in the embankments while it was all still freshly wet.
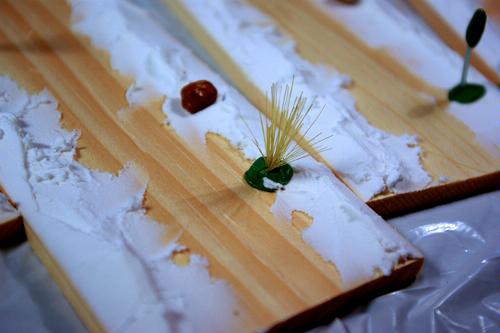
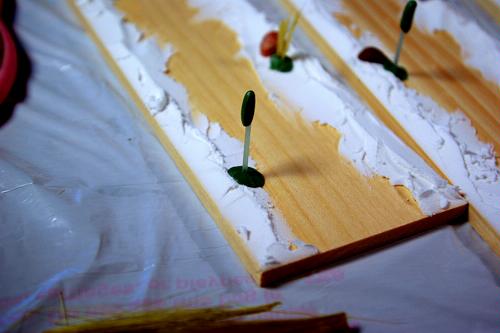
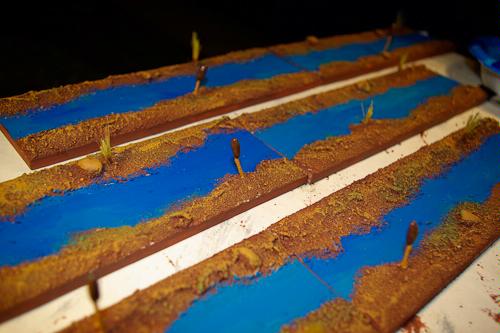
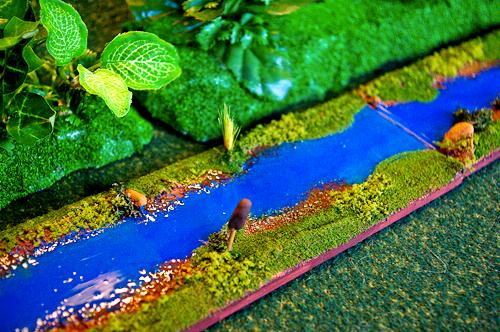
I then pulled all the bristles from an old paint brush to make field grass from. I made tiny donuts of green stuff like in the video tutorial and stuck the bristles into that donut. I then pressed it all down to the river and pressed the green stuff down to seal the bristles to the board. I also made some cat-tails from insulated wire and Green Stuff and attached them to the boards in the same way as the bristles.
I coated the embankments with watered down glue and then some fine grit & sand. When all of that was dry, I painted the textured embankments medium-dark brown and heavily dry-brushed it with a khaki brown. For the river, I used two shades of blue paint and just kind of mixed them so that the river bed was slightly gradiated with both shades. It's subtle and doesn't show up well in the photo. Hopefully it will be more apparent in the final shots with the realistic water added.
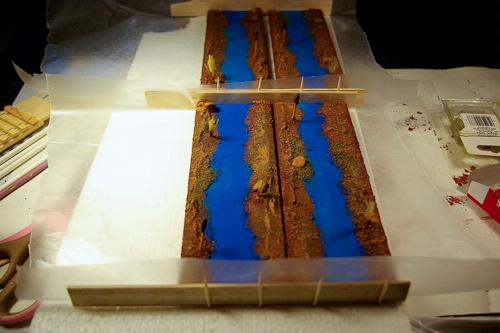
The planks were placed atop some wax paper and affixed to a thick piece of foam. I used toothpicks and small wooden strips to wall up the ends so when I pour in the liquid water it traps it (I hope.) I am also hoping the wax-paper will be easy to pull off of the dried water effect (It was.)
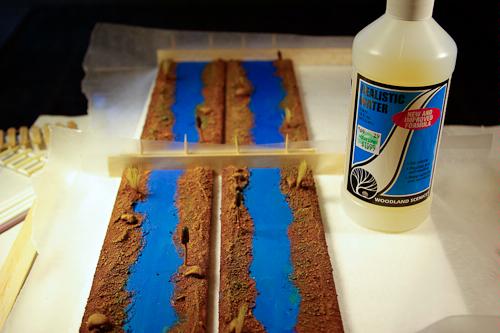
I used "Realistic Water" bought at the hobby store. The video tutorial shows a mixed epoxy method for water and so this is what I initially intended to do. But when I found this one-liquid method I had to try it. Besides, the hobby store doesn't sell epoxy. The bottle was $20, more than I wanted to spend, but now I can make several other water terrain pieces to go with this river. Maybe a flooded crater?
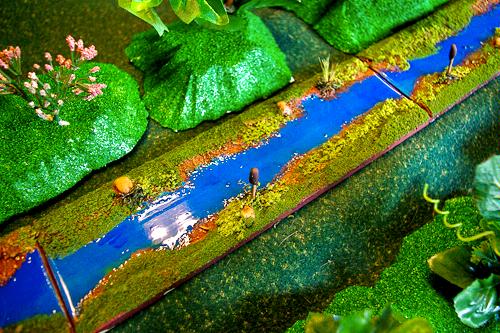
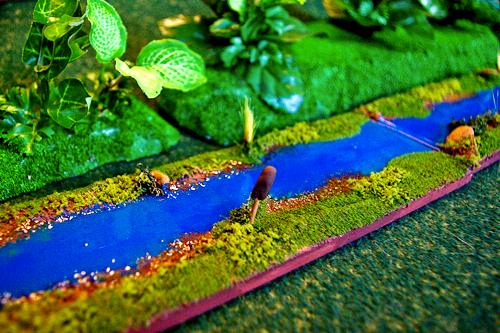
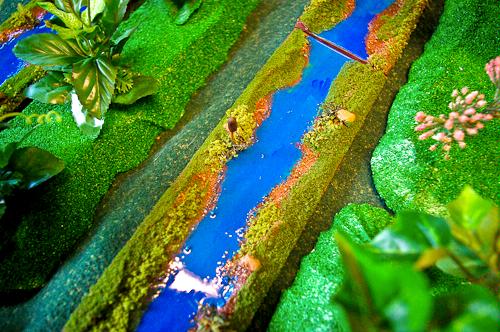
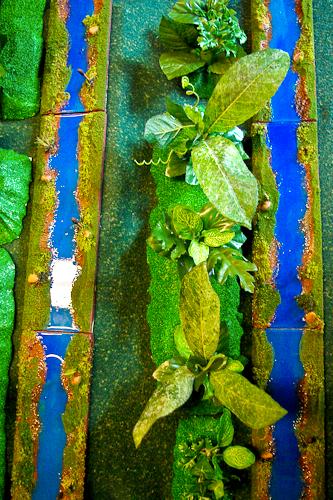
Here are some shots of the finished pieces. I added some fine flocking in 2 colors, a little lichen and that's it.
I'm really happy with the way these turned out. It's got me wanting to make a canal set for my city terrain next.
This message was edited 2 times. Last update was at 2010/05/20 00:49:04