Here is a blast from the past from Feb. 2010 to show you the might of the foot eldar. Fear the power of the almighty guardian!!!!
Here are the first 3 batreps:
Game #1
http://www.dakkadakka.com/dakkaforum/posts/list/281069.page
Game #2
http://www.dakkadakka.com/dakkaforum/posts/list/281688.page
Game #3
http://www.dakkadakka.com/dakkaforum/posts/list/283230.page
Broadside Bash Game #4
So after a Loss, a Minor win and a Massacre, I start day #2.
I finally get matched up against another army that has as many battle points as I do!
Game # 4 Eldar vs. Ultramarines
My List:
HQ
Avatar
Eldrad
Elite
6 Harliquins w/2 Fusion Pistols, 6 kisses
Shadowseer W/Kiss
Troupe Leader w/Power Weapon
Troops
10 Guardians w/Bright Lance
10 Guardians w/Bright Lance
10 Guardians w/Bright Lance
3 Jetbikes w/Shuriken Cannon
Warlock w/Singing Spear, Destructor
Fast Attack
7 Warp Spiders
Warp Spider Exarch w/2 Death Spinners, Power Blades, Withdraw
7 Warp Spiders
Warp Spider Exarch w/2 Death Spinners, Power Blades, Withdraw
Heavy Support
Wraithlord w/Brightlance, Missile Launcher, 2 Flamers
Wraithlord w/Brightlance, Missile Launcher, 2 Flamers
3 War Walkers w/Scatter Lasers
My Opponents List:
HQ
Sicarius
4 Command Squad w/4 Plasmaguns, Power Sword, Company Standard
Apothecary
Drop Pod
Master of the Forge (with the
HQ)
Servo Harness
Elites
4 Sternguard Veteran Squad w/2 Heavy Flamers, 2 Combi-Flamers
Sergeant w/ Combi-flamer
Drop Pod
4 Sternguard Veteran Squad w/2 Meltaguns, 2 Combi-Melta
Sergeant w/Melta Bomb
Drop Pod
Troops
9 Tactical Marines w/ Flamer, Missile Launcher
Sergeant w/Power Fist
Drop Pod
9 Tactical Marines w/ Flamer, Missile Launcher
Sergeant w/Power Fist
Drop Pod
9 Tactical Marines w/Meltagun, Multimelta
Sergeant w/Combi-Meltagun, Power Weapons
Drop Pod
Heavy Support
Ironclad Dreadnought w/Heavy Flamer x2
Drop Pod
Dreadnought w/Multi-Melta
Drop Pod
Scenario: Take and Hold
Mission: Each Player places 2 objectives in the center of the board at least 14” in from all edges.
Special Rules: Deep Strike, Infiltrate, Scout, Outflank, random game length.
Deployment: Spearhead 12” from long table edge.
I win the dice roll to go first and I give it to him.
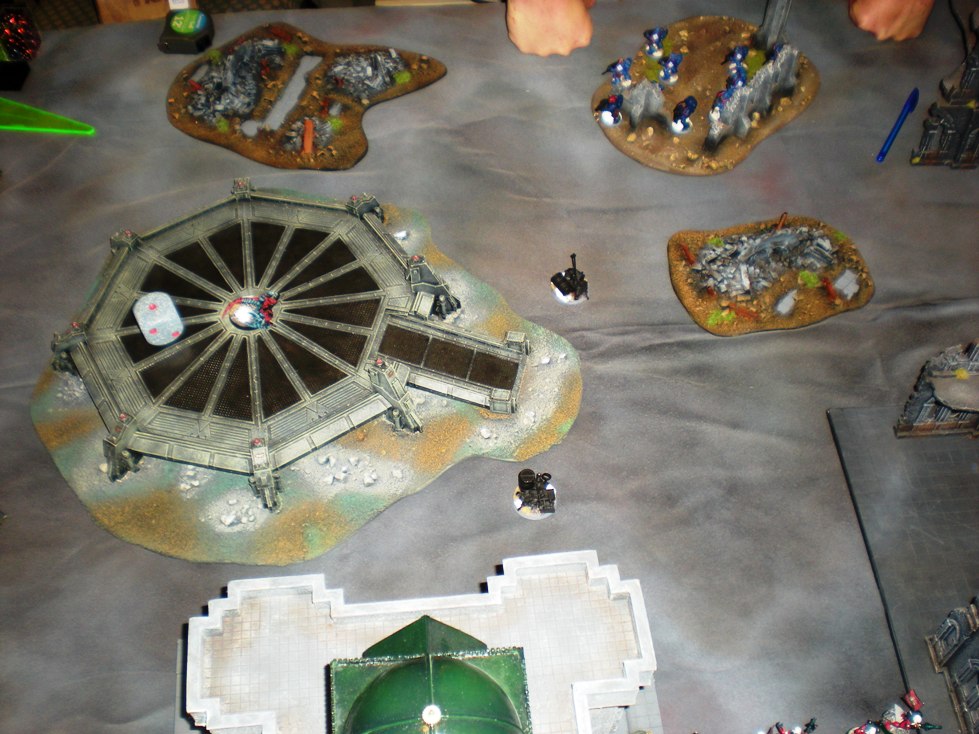
His set up
He sets up his multi-melta squad in cover
Also this is a good look at the objectives. There are two to the right on the landing pad, on on the center of it, and one to the left off camera.
 My setup
I set up in my usual anti-deep strike defense of turtling up in a corner. That way they come down and kill some guardians, and then I shoot the crap out of them before hitting them with my counter assault.
 The long view.

It looks like we are only going to use a quarter of the table,
Turn #1
Top of turn #1
He comes down and BBQs some guardians. Normally I do not see that many flamers in armies, but he is packing them, and has pods able to get them into play. He has a
tac marine squad just off camera to the upper left that had a bad scatter. Then his Sternguard with flamers took out a guardian squad and then we have Sicarious with his band of merry men in the middle who did some wounds to my poor Avatar, and the dreadnought with its heavy flamers roasts another guardian squad. I guess because this is an objective mission he is trying to eliminate my troops.
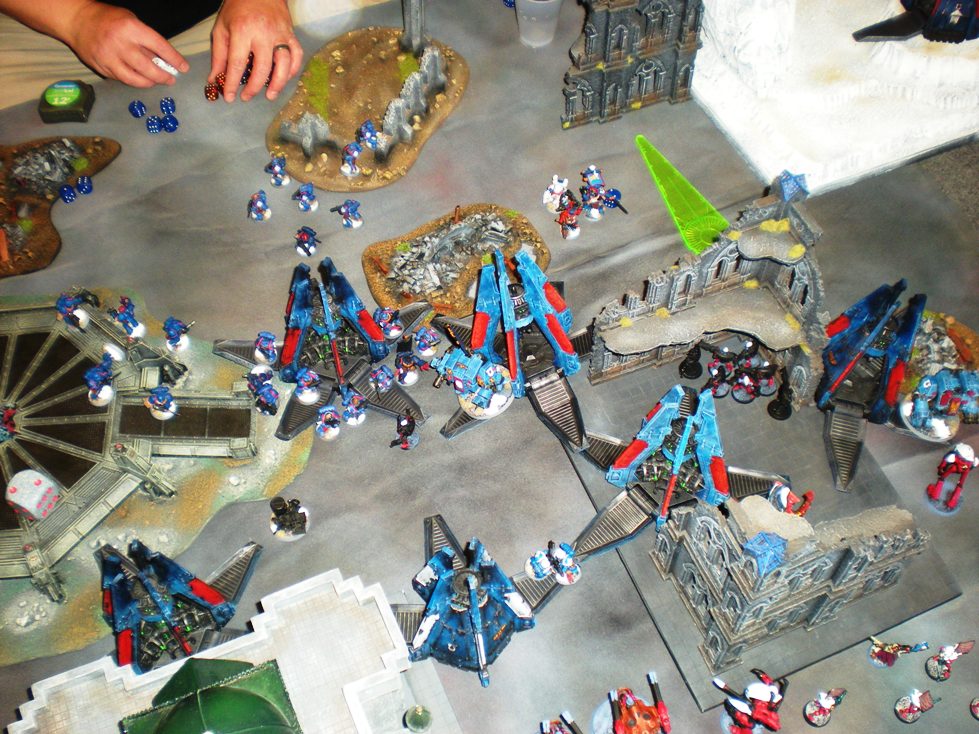
 Bottom of turn #1
Kill my guardians? Now it is on!
It is now just a matter of using the right units to take out his units.
On the left I go after the
tac squad with my warp spyders and kill a few of them. He chooses to break in the shooting phase (I guess he was afraid of assault even thought the WSs can’t beat their way out of a wet paper bag, and also he does not know that warp spyders have a movement in the assault phase to stay within 6”), My war walkers shoot the sternguard and then the very few Harlequins that I have left go after them in assault (they got burned up in the overflow wihen the guardians got flamed. There is a fine line between being close to the front rank so you can assault in the next round, and being too close so you end loosing them to shooting). I shoot up Sicarious and his merry men and they roll an 11 and they run for it with the warp spyders in hot pursuit. The dreadnought gets stunned, so that buys me some time before I have to assault it with a wraithlord. I am also down to two troops so I am very cautious with them.

Another view
 Turn #2
Top of turn #2
Turn #2
Top of turn #2
More crap falls from the sky.
He gets his dreadnought and his last
tac squad on and he realizes that my warp spyders are going to walk his
tac squad that is falling back off the board, so he goes after them so now there is one brave spyder left.
Those stupid sternguard are killing my harlequins!
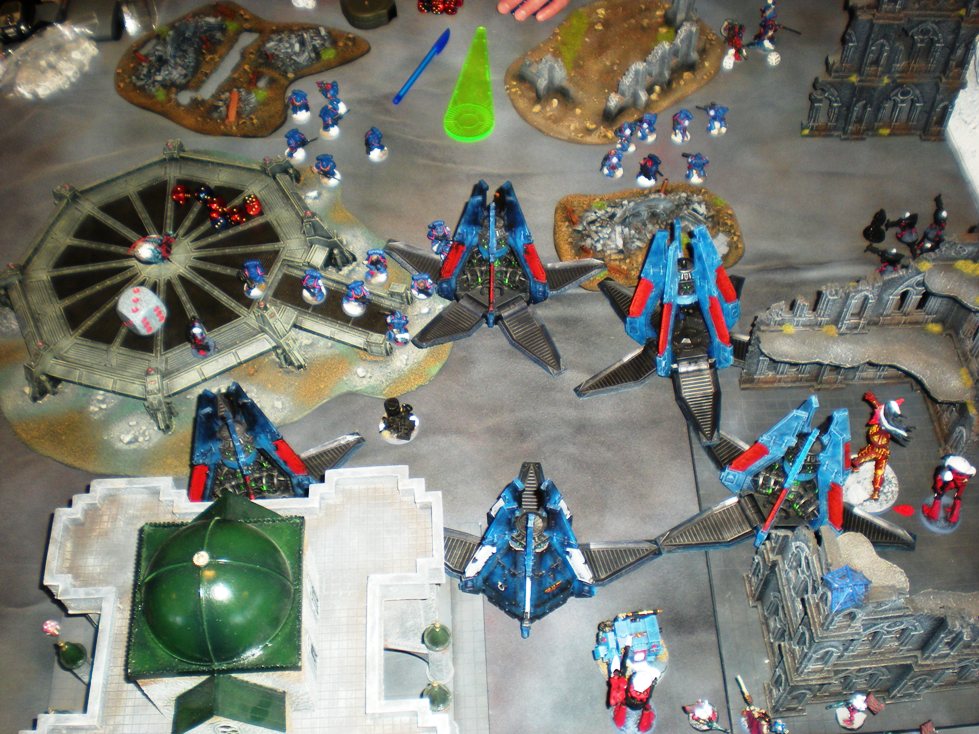
 Bottom of turn #2
Well, my last Spyder on the left jumps up on the landing pad to try to stay out of trouble, and to keep the
tac squad falling back. My Wraithlord has to step in and take care of those pesky sternguard, and shooting chews up Sicarious’s squad and they are being walked off the table by spyders. Shooting takes out the ironclad dreadnought.
 Turn #3
Top of turn #3
Turn #3
Top of turn #3
He falls back with his 2 units. My warp spyder on the left lives! He goes after my Wraithlord with his dreadnought and they end slugging it out.

Wide view
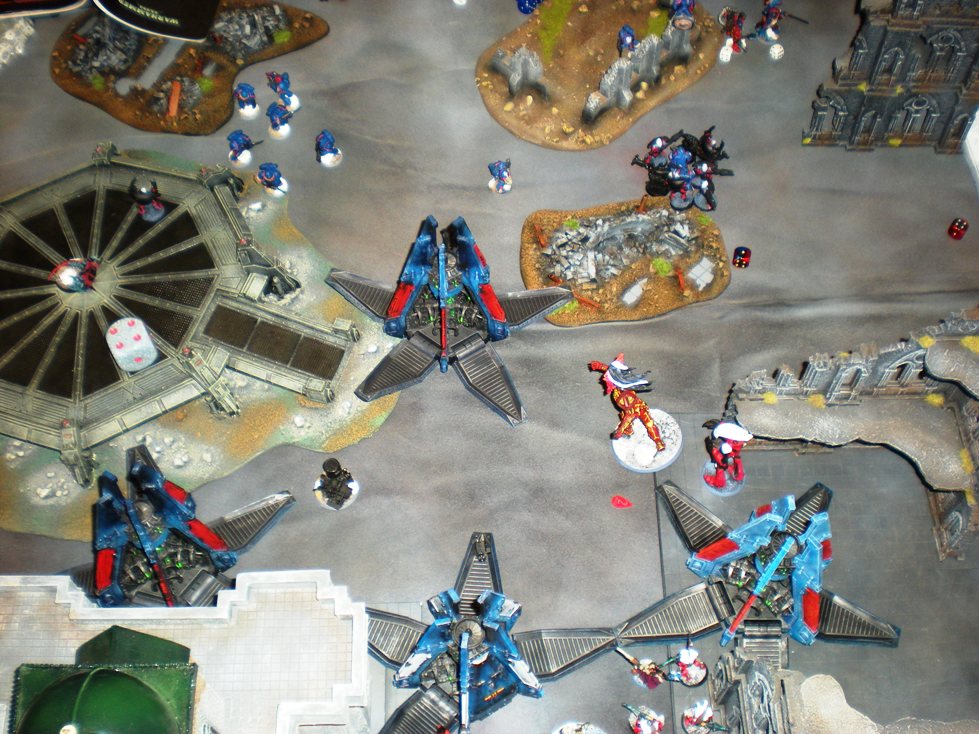
 Bottom of turn #3
More of the same. He keeps running. I shoot up his multi-melta
tac squad and assault them with warp spyders. Mostly to tie them up and keep them from the objectives. I shoot the center
tac squad with my war walkers and everything else and they disappear.
 Turn #4
Top of turn #4
Turn #4
Top of turn #4
His melta sternguard come down and hide behind their pod. They shoot the last Warp Spyder that was following the
tac squad that was falling back. The empty drop pod from the squad that started on the board drops down to be a barrier between me and the objectives.
(No Pic)
Bottom of turn #4
I need to start to get to the objectives, but I am trapped by all of these pods!
 Turn #5
Top of turn #5
Turn #5
Top of turn #5
Not much left for him. His sternguard take some pot shots with their bolters and do the final wound to my Avatar.
Bottom of turn #5
I turbo boost my jetbikes so they can hold 2 objectives.

We roll for the end of the game, and it ends!
So at the end I had 2 objectives for a major win!
It was a good game. I think the problem was that he did not know what Warp Spyders do (and thus my question about how much you have to disclose to your opponent). He choose to fail his leadership check from shooting to keep from getting assaulted which would be a good move normally, but with the Warp Spyders being able to move in the assault phase, they were able to jump to within 6” and keep them running falling back.


