Switch Theme:

Challenge - Write A Tutorial.  [RSS] Share on facebook Share on Twitter Submit to Reddit
»
Author Message
Advert


Forum adverts like this one are shown to any user who is not logged in. Join us by filling out a tiny 3 field form and you will get your own, free, dakka user account which gives a good range of benefits to you:
  • No adverts like this in the forums anymore.
  • Times and dates in your local timezone.
  • Full tracking of what you have read so you can skip to your first unread post, easily see what has changed since you last logged in, and easily see what is new at a glance.
  • Email notifications for threads you want to watch closely.
  • Being a part of the oldest wargaming community on the net.
If you are already a member then feel free to login now.


Made in gb
Dipping With Wood Stain


England

"Storage Hints and Tips" or "How Not to End Up With a Big Pile of Stuff"

We all know how it goes. First thing you do is buy one small box of miniatures, or maybe just one book. You turn around and there's maybe two unopened boxes, a bunch of miniatures in various stages of completion, some bitz hanging around in a tin sharing space with stray buttons and paperclips, and the next thing you know you've lost one of your units and find it two years later under a bed.
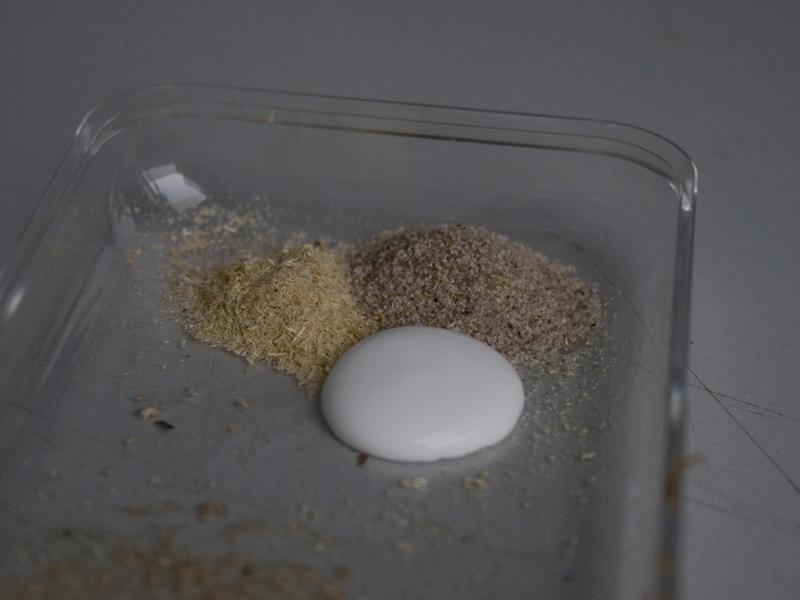
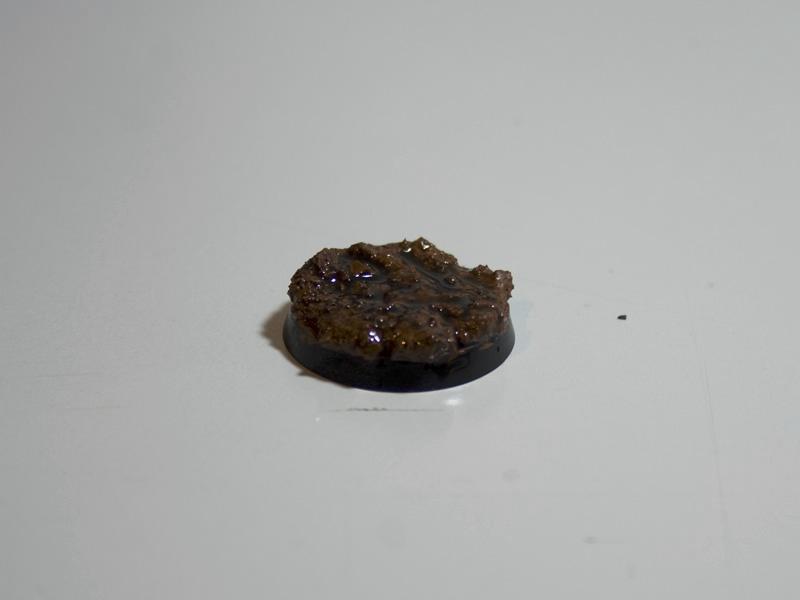
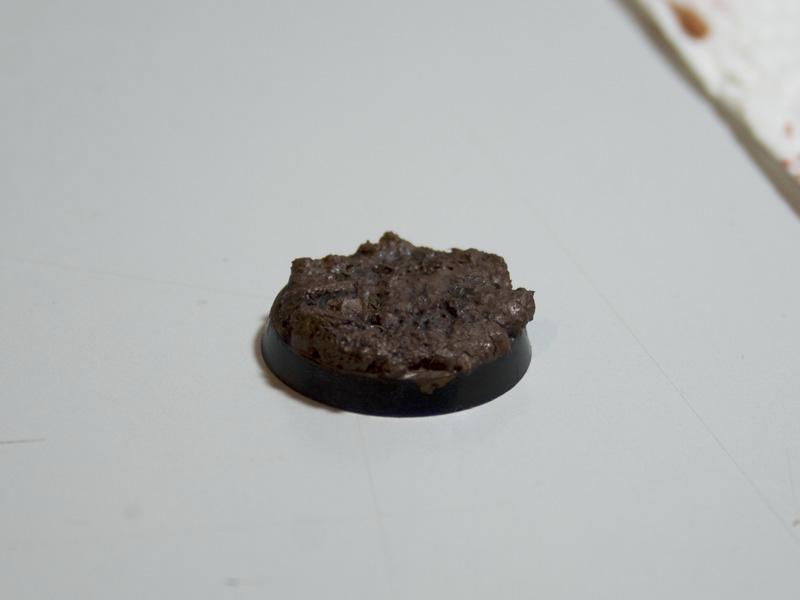
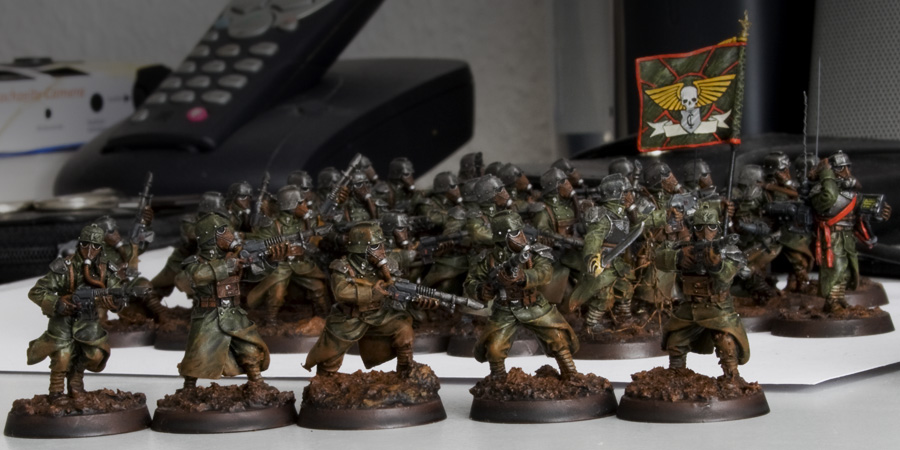

Pictured: 
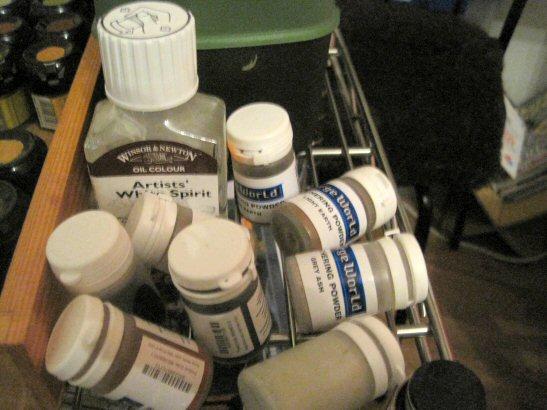
Homeless stuff, strewn about, needing a home. Will you help a poor weathering powder today?

In order to avoid this fate, your best bet is to store your models and other modelling and painting related gear is a single area, organised for simple retrieval of any one thing that you know you need. Each set-up is unique, based on the space and facilities available. My first set-up was done in the corner of a largish bedroom, moved to its own room, and is now back in the corner of our lounge because it's simply more social there.


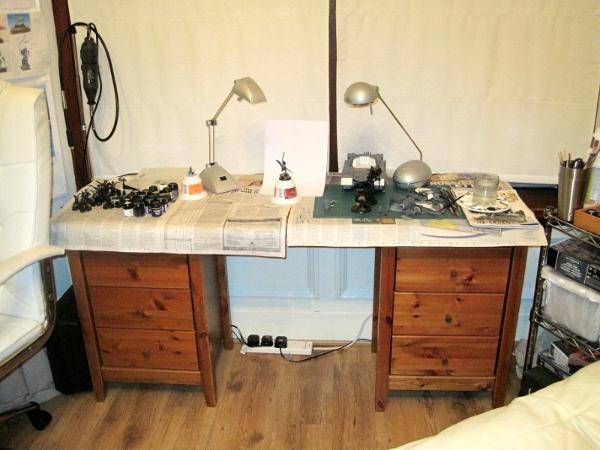
On a side note, this solid wood desk was £45 including delivery from a local second-hand furniture store.

The cardinal rules of organisation are fairly simple. I'm sure you've probably already heard of the first one.

Rule #1: A place for everything, and everything in its place.

This simply means that you have to plan your storage, even if only a small amount. I have 'X' amount of stuff and need to store it. You find an area where you can store this, and then figure out what kind of storage is most suitable for what needs to be stored. Then you remember where everything "should" be. This is so you can put it back, which is where the second part of the phrase comes in. If it's not in its place once you've finished with it, then it's just clutter.

Rule #2: Organisation relies not on remembering where everything is, but on the linking of themes.

Somewhat of a difficult one to explain, but you can think of it as a mental filing system. It is far easier to remember that your hobby saw is a tool and should be in the tool section than it is to remember that it's in Box 3B, under the random collection of things you dumped in there. Compartmentalize the things you associate with the hobby. Brushes, paints, tools, basing materials, bitz and miniatures are probably the sections most people use. I separate my basing materials into pre- and post-painting (Box1 and Box2), but that's purely a personal and space thing. Also use larger boxes or other storage solutions (a general term for "things to put stuff in") to help keep together linked items.


Rule #3: Use suitable containers for both storage and use.

Just as it says, think about what storage you're using. Often, what the product came in is not the best thing to keep it in for storage and use. Let us take for example the humble miniatures box. While it is fine to keep some unpainted miniature sprues together, actually keeping your lovingly painted and assembled models in the box later is simply asking for trouble and scratched pieces. Make sure what you're using is suitable, easy to store and easy to use. It's all very well keeping sand in a plastic bag, but it's a pain in the bum to get some out and on the base without ending up with a living room looking like the Sahara Desert. Also keep in mind what you will be using regularly as opposed to what you'll only need access to occasionally. I use my paints a lot, so they're on the top of my shelves, easy to pick up or put back at a moment's notice. However, I have to dig for Box2, which holds post-painting basing stuff and generally means I'll be finishing off an entire unit with it, so it's worth the extra time to drag things off and put them back afterwards. I'll cover ideas for suitable, cheap storage for the various types in Hints and Tips next.

Rule #4: Make the most of your available space.

Space is always at a premium, or it will be if you haven't filled things up yet. Making sure that no inch of that shelf unit is wasted is common sense, though it can take a lot of trial and error to fit things together without gaps. If you're very organised, you can plan it with measurements and everything before you start, but most people will fiddle about until it works.

******

Hints and Tips

Recycling is a brilliant way to get all sorts of fun storage containers for your hobby stuff. While I'd always recommend using a miniatures case specifically built for that purpose (or at least the foam is), storing basing materials, paint pots, tools and other such things can be relatively cheap. Especially if you or anyone you know have a coffee addiction.


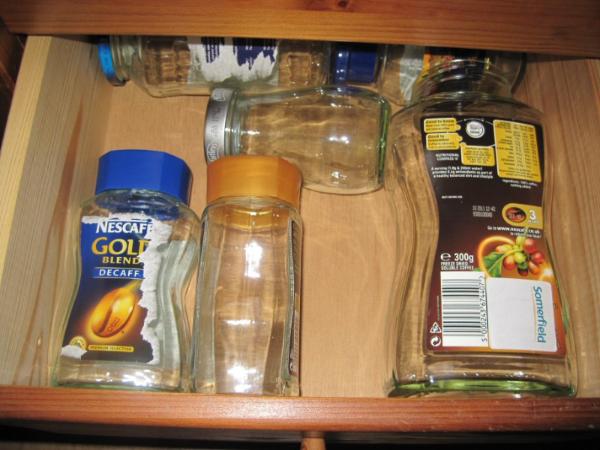
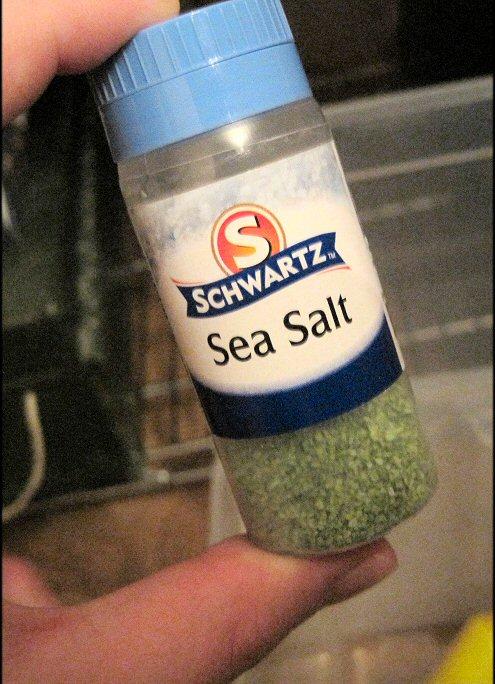
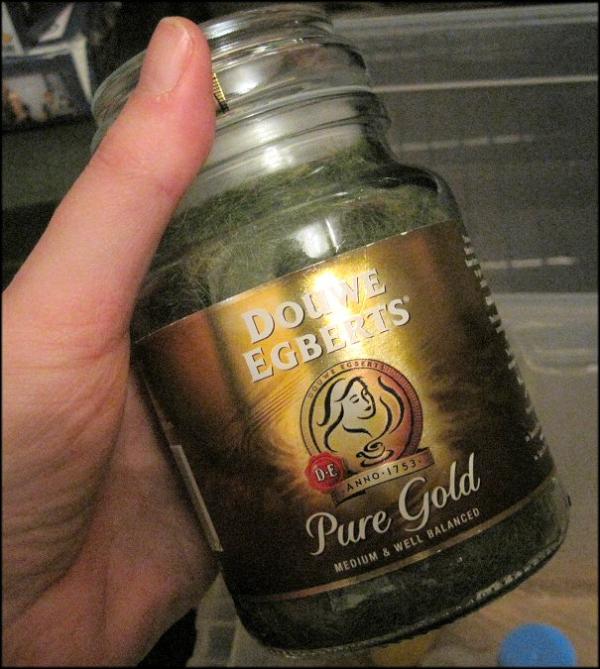
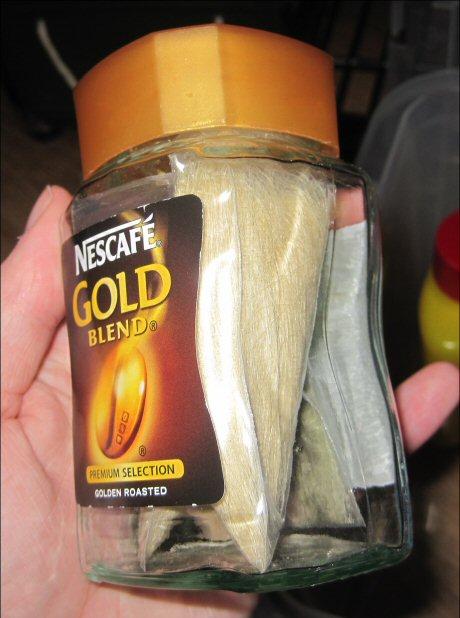
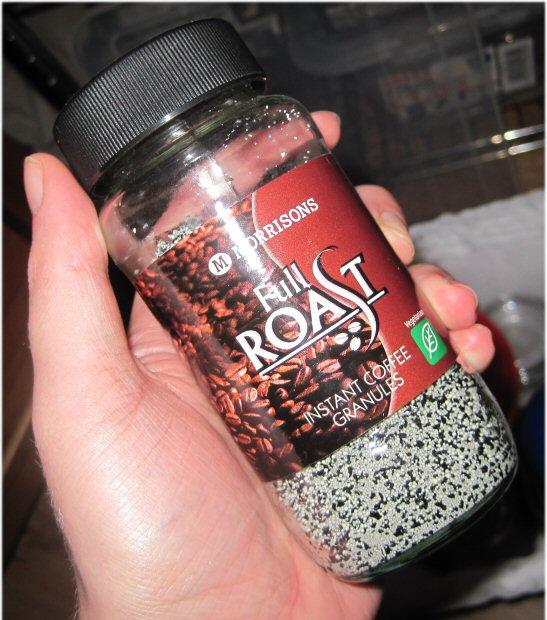
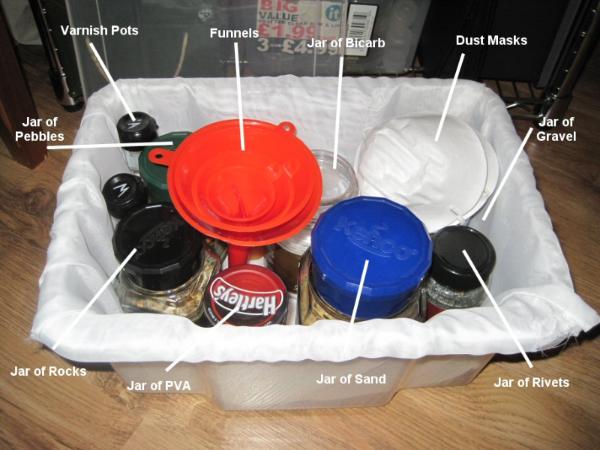
Coffee jars are solid containers that are easy to clean, difficult to stain and relatively spacious. They also usually come in all sorts of sizes. Small empty spice or salt jars often have lids with shakers, perfect for leaf litter or similar scatters. Jam jars are mostly waterproof and good for holding things which need a bit more insurance against accidental spillage than coffee jars do. Glass is always better than plastic unless you're dealing with children or very clumsy people, as glass is very unreactive and will generally hold anything without - for example - unexpectedly melding with the substance or at the extreme end, melting a hole in the bottom.


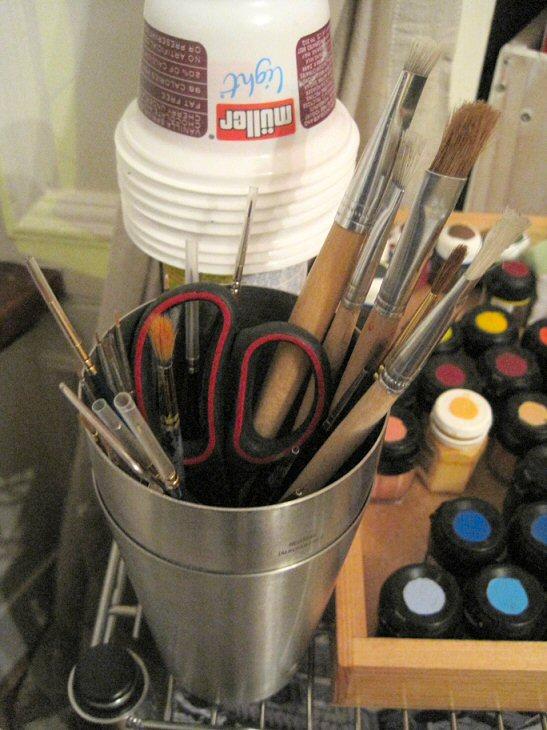
My brush pot is an old cocktail shaker.


Shaker pots can be very useful! Make sure you get one which can be closed when not in use though.


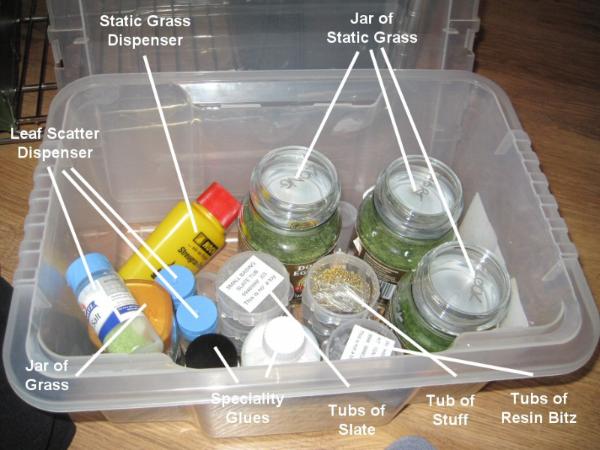
Static Grass is evil, evil stuff. I have a dispenser and some funnels, but getting it from the one to t'other is a nightmare.


This stuff is great but needs speciality glue to stick properly. Also, why does everyone always do huge tufts with no surrounding vegetation with it? That's not how grass works...


Got this from Imperial Armour: Model Masterclass, it's full of the contents from a used Britta filter, and can be used for rivets.


Sure you can get a huge bag of masonry sand sitting in your front room, or you can buy extensively overpriced modelling sand, but have you ever actually looked at bird sand? Also bird grit, mixed together for really interesting textures. Comes in 1kg bags for about 80p, pour into a decently sized coffee or jam jar and enjoy for the next year or so.

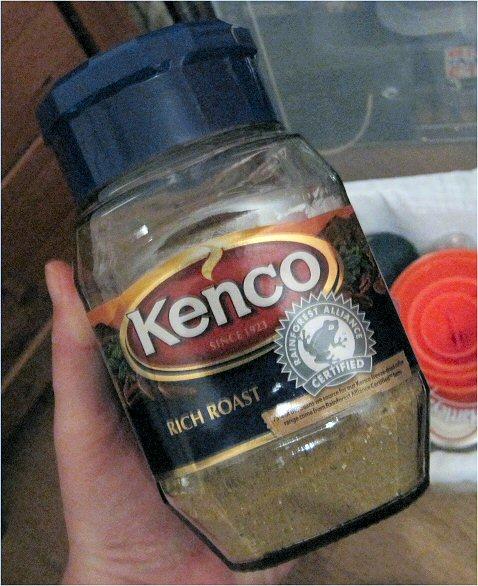
I do not discriminate about my coffee, but it has to be said, I like Nescafe Gold the best.


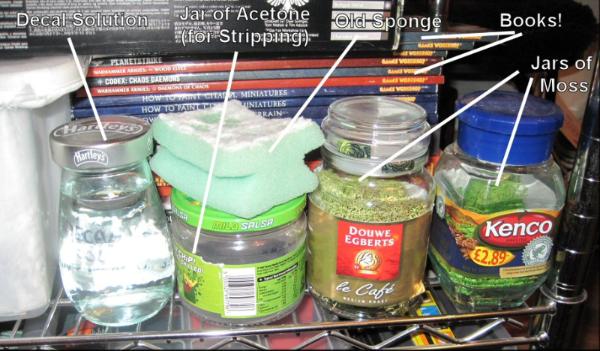
More jars. Acetone for stripping models, decal solution for softening decals and making it easier to place them. I got the mixture of white vinegar and water from a recipe online, but haven't tried it yet. Moss for making small bushes or canopies. All of these really stink when used, but keeping them in jars means the room remains stink-free until they're needed. Don't forget to store your books somewhere, though your own bookshelf, if you have room, is perfectly fine.


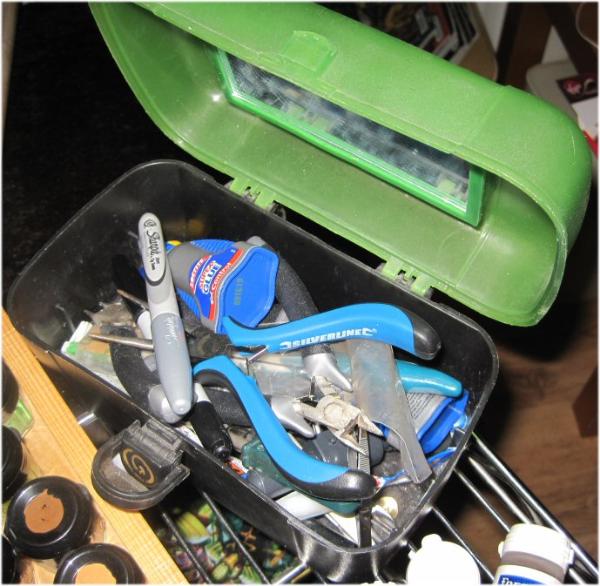
This used to be an old make-up box, hence the mirror. Really, I'd prefer a proper toolbox, but this takes up very little space and keeps everything together.


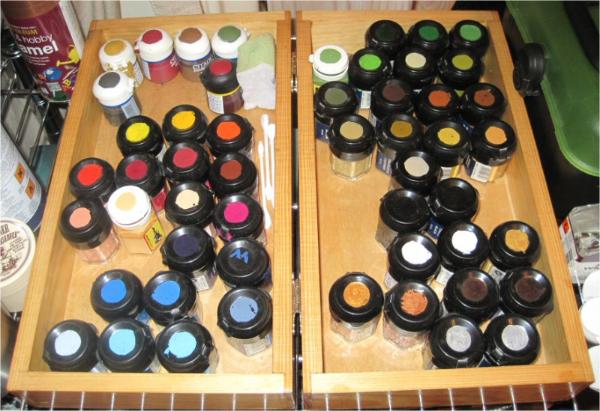
While I have an open artist's travel box for putting my paints in, and have painted the tops to give me an idea of each paint's colour, most people go for paint carousels for their paint collections. I try to keep my paints in order, but sometimes it gets a bit messy . I have at least one of every main colour, all the inks and most of the foundation paints, but half of them are currently on the desk, ready to be used.


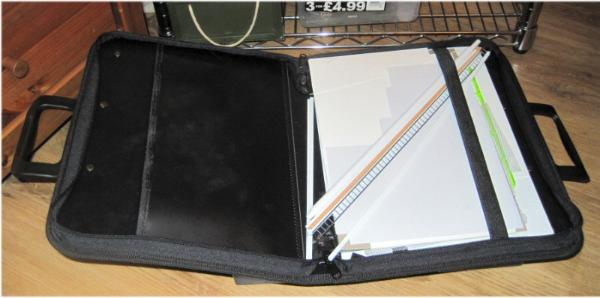
This is a simple, cheap black A4 Portfolio Case from The Works. It holds all my plasticard sheets and tubes, keeps them together, unbent and not in the way of anything and takes up hardly any space. One of my favourite ideas/finds.


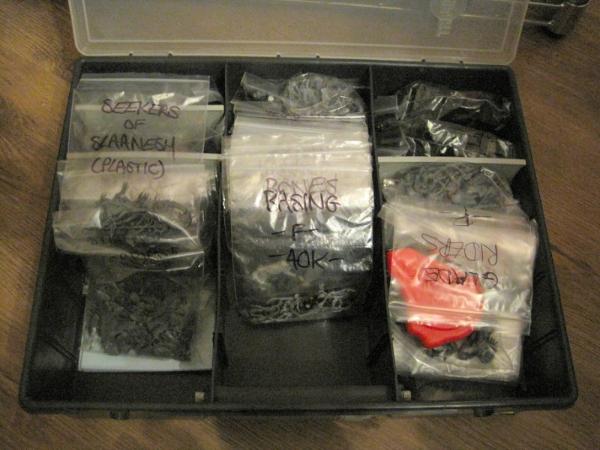
Toolboxes from DIY places such as B&Q are the natural choice for Bitz Boxes. The partitions allow you to keep the bitz seperate depending on use. I go the whole hog and put each kits bitz in individual plastic bags and label them for quick identification and being able to get to "that bit from the Dragon sprue" within seconds, but I'm quite clearly crazy .


My desk has six drawers, two full of empty glass jars 
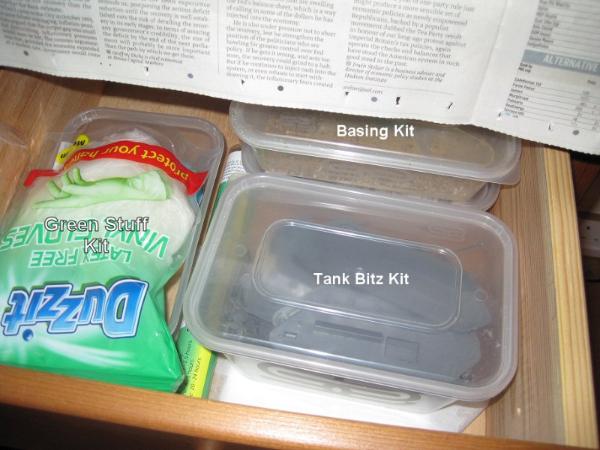
, one with the Dremel bits in, one for my slightly more dangerous or larger tools that won't fit in my toolbox (hobby saw anyone), one with my camera stuff in, and one that holds a selection of plastic tubs from Chinese takeaways. The one underneath the latex gloves (green stuff gives me a rash), holds my sculpting tools and a small tub of Vaseline, so when I want to sculpt, I just lift it out. Another tub holds a premade mix of sand, grit and a plastic spoon from an old picnic set. I can easily pour the mixture onto PVA with the spoon, over the tub so as not to make any mess. Once I'm done, I put the lid back on and back in the drawer it goes. My partner keeps his tank bitz he can't fit into the bitz box in another tub here, and another one for holding stamped plastic sheets for his basing, they're just the right size for them.

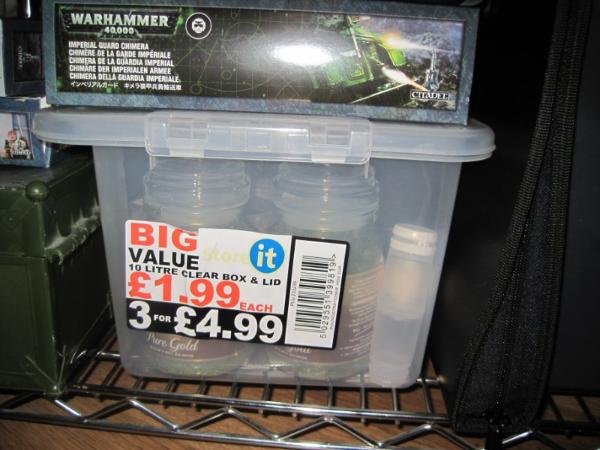
Most places like Poundstretchers or other "generic" cheap stores will have cheap plastic boxes with lids, often transparent or brightly coloured, marketed as storage solutions. You can get creative with these, but there are a few things I would check before you buy any. First, and foremost, measure the space, it's all very well eyeballing it but if it's out by an inch, now what? Secondly, think about interesting, out of the way things to do with these. There are some great "under-the-bed" ones which simply roll under the bed and back out again, which could be perfect for some sets of scenery, and some beds. They're usually very cheap. I use them to keep my jars all together and easier to find and less likely to fall over, also for holding scenery and my partner's tanks as he hasn't got a tank box yet.


They really are very cheap!


Pre- and post-painting basing, but lack of space has made some things shift out of place. Sometimes I have to check both boxes to find what I want. Pebbles and rocks from my parent's gravel driveway (ahahahaha) - cleaned of course. Really do need to swap some things from this one to the other and vice-versa. Great slate tubs from the 40k and Fantasy scenery box. Okay resin pieces.


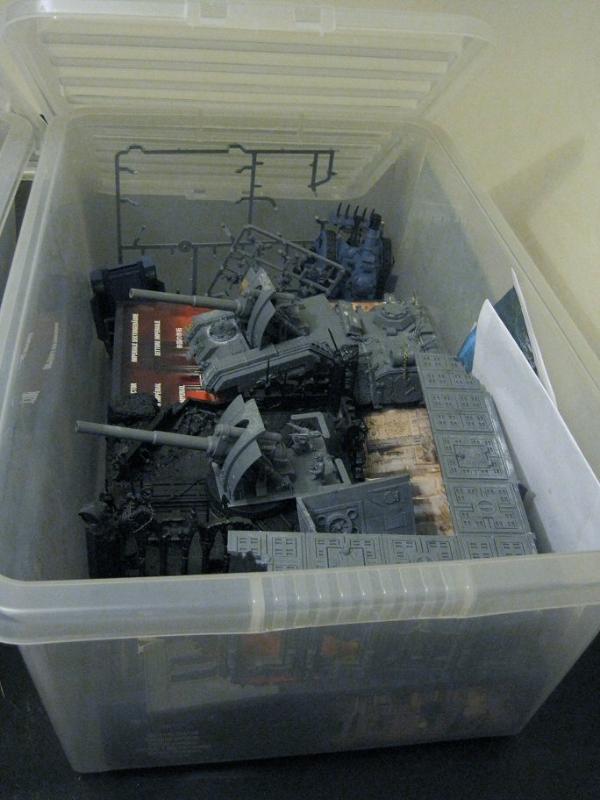
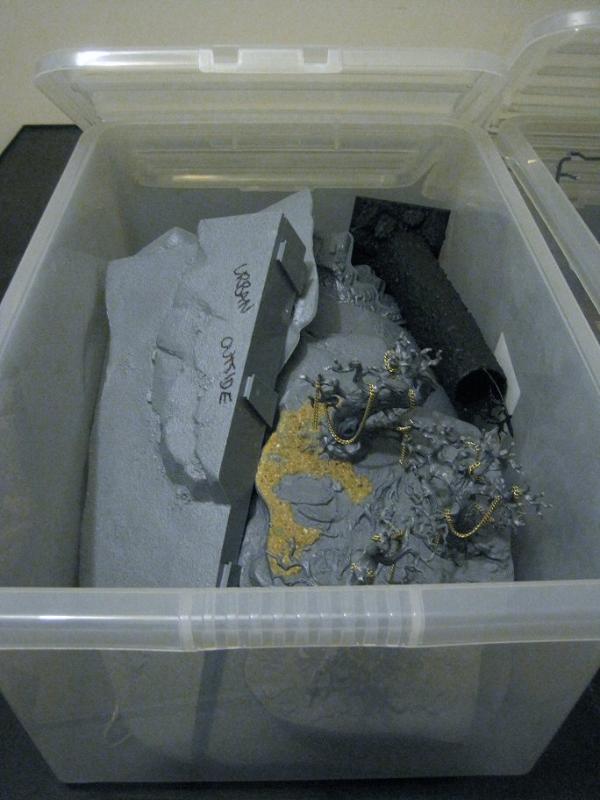
Scenery! (and tanks)

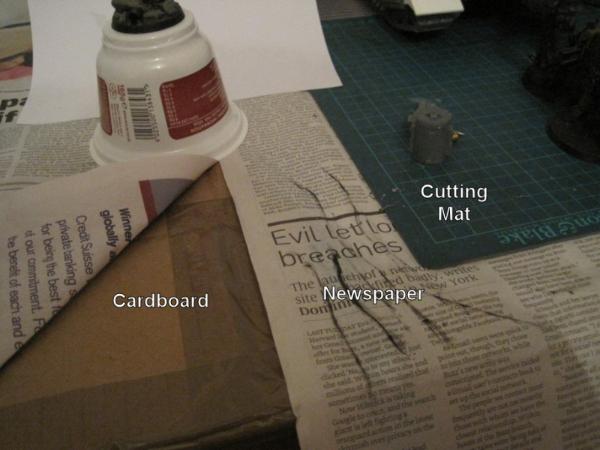
And finally, my last tip:

Protect your Surfaces

This message was edited 1 time. Last update was at 2010/10/02 01:01:46


DR:80+S+GM++B+I++Pw40k07#-D+A+/mWD300R+T(M)DM+ 
   
Made in gb
Dipping With Wood Stain


England

Well, posted up my tutorial at last. Or article anyway. It wasn't really a tutorial. Hope someone finds a few sage words of wisdom in it amongst the ramblings.


DR:80+S+GM++B+I++Pw40k07#-D+A+/mWD300R+T(M)DM+ 
   
Made in is
Thunderhawk Pilot Dropping From Orbit


Iceland

And who do you challenge?

Btw, great toutorial/ramble

   
Made in gb
Dipping With Wood Stain


England

I challenge doubleT, master of the Death Korps of Krieg. *sends PM challenge*


DR:80+S+GM++B+I++Pw40k07#-D+A+/mWD300R+T(M)DM+ 
   
Made in nz
Nurgle Chosen Marine on a Palanquin


Whangarei , New Zealand

Holy crap your organized Cassandra! I shake my head at my desk in shame

 BobtheInquisitor wrote:
I tend to glue metal models with a combination of BSI cyanoacrylate and my tears of frustration.
 
   
Made in de
Shroomin Brain Boy


Berlin Germany

really nice and helpful tutorial, like some of your ideas i will try them out. everything sounds like common sense and everytime i try to make order in my workspace mysticaly it grows into a mess again, its most stressing^^

   
Made in de
Feldwebel


Hamburg, Germany

LadyCassandra wrote:I challenge doubleT, master of the Death Korps of Krieg. *sends PM challenge*

PM: I challenge you to write a tutorial on this thread . I recommend your fabulous mud effects.


Challenge Accepted, and thank you.

Am I on a schedule? Or can I take pics first and post tomorrow?


--+- Death Korps of Krieg - Muddy Times -+--
--+--+--+--+--+--+--+--+--+--+--+--+--+--
 
   
Made in gb
Purposeful Hammerhead Pilot


Scotland

thank you for the good tutorials, I hope to see more.

~You can sleep when you're dead.~
 
   
Made in us
Grisly Ghost Ark Driver


Bay Area CA

somone post a silver tower tutorial!

   
Made in de
Feldwebel


Hamburg, Germany


I challenge you to write a tutorial on this thread. I recommend your fabulous mud effects.


Thanks again, Cass, I hope this tutorial is what you've been looking for.

I didn't have any miniature ready to be based so I made an empty mudbase.


--+--+--+--+--+--+--+--+--+--+--+--+--+--
Mud Base Tutorial
--+--+--+--+--+--+--+--+--+--+--+--+--+--


What you'll need:
- a base
- wood glue
- fine sand
- sawdust

--+--+--+--+--+--+--+--+--+--+--+--+--+--


Mix all the components with a little drop of water.

--+--+--+--+--+--+--+--+--+--+--+--+--+--


Put it all on the base with a toothpic or an old brush and let it dry.


--+--+--+--+--+--+--+--+--+--+--+--+--+--


Drown it in Bestial Brown - no need to thin it.

--+--+--+--+--+--+--+--+--+--+--+--+--+--


Drown it in Devlan Mud Wash.

It'll look like this when it' dryed:


--+--+--+--+--+--+--+--+--+--+--+--+--+--


For a little dry-brush touch up and mud on clothes, I add a drop of Bestial Brown and a drop of Scorched Brown next to each other on a plate or something.

--+--+--+--+--+--+--+--+--+--+--+--+--+--


Dip the brush in between bos and mix them a little, then drybrush the mud for a nice finish and the clothes of the miniature to add dirt and weathering.

--+--+--+--+--+--+--+--+--+--+--+--+--+--


Results:


You can see lots of minis where I used this technique in my project:
--+--+--+--+--+--+--+--+--+--+--+--+--+--
--+- Death Korps of Krieg - Muddy Times -+--
--+--+--+--+--+--+--+--+--+--+--+--+--+--


I hope you like it,

Torben.


PS: For the next challenge, I contacted someone with great plasticard- and conversion skills and hope he can find the time to give us some insight in his art.
I challenge the plasticard-wizard: Klaus, not Santa

This message was edited 1 time. Last update was at 2010/10/05 00:16:54


--+- Death Korps of Krieg - Muddy Times -+--
--+--+--+--+--+--+--+--+--+--+--+--+--+--
 
   
Made in gb
Dipping With Wood Stain


England

Really nice tutorial there, doubleT . Sawdust, eh? I never would have guessed that was the secret ingredient.


DR:80+S+GM++B+I++Pw40k07#-D+A+/mWD300R+T(M)DM+ 
   
Made in gb
Dipping With Wood Stain


England

Have you sent Klaus a PM, doubleT? It'd be a pity to see this disappear into the nether.


DR:80+S+GM++B+I++Pw40k07#-D+A+/mWD300R+T(M)DM+ 
   
Made in se
Boosting Ultramarine Biker


Stockholm/Sweden

There's a major flaw in this thread, people ready with possibly great knowlage might not be called out by people here, hence turning this into an internal thing for the few people who bother to get to know one and another on these boards...

"Pain Is Temporary, Glory Lasts Forever"

My Space Wolves WIP Thread

My Miniature Blog 
   
Made in gb
Dipping With Wood Stain


England

Well, as I got picked by someone I don't know and picked someone I don't know, but loved his blog when I wandered upon it, that doesn't seem to be the case.


DR:80+S+GM++B+I++Pw40k07#-D+A+/mWD300R+T(M)DM+ 
   
Made in de
Feldwebel


Hamburg, Germany

Sorry, I am really busy these days. I tried to contact him on two boards but he seems to be busy, too.

Unfortunately I don't really know a lot of people I could ask, so I'm open for suggestions, or feel free to challenge someone on my behalf.


--+- Death Korps of Krieg - Muddy Times -+--
--+--+--+--+--+--+--+--+--+--+--+--+--+--
 
   
Made in is
Thunderhawk Pilot Dropping From Orbit


Iceland

Hmm. Maybe Lennysmash? I know he has alot of very nice minitures and I'd personally love to have a toutorial from him

   
Made in be
Tough-as-Nails Ork Boy


nice base tutorial over there!!
that wil help me alot!!
thank you!!!


I am White/Green
Take The Magic Dual Colour Test - Beta today!
<small>Created with Rum and Monkey's Personality Test Generator.</small>

I am both orderly and instinctive. I value community and group identity, defining myself by the social group I am a part of. At best, I'm selfless and strong-willed; at worst, I'm unoriginal and mindless.
 
   
Made in ca
Phanobi


Canada,Prince Edward Island

Thanks DoubleT for the amazing mud tutorial, it was just perfect! And thanks monketroll for showing me where it was

I would write a tutorial, but my lack of progress is amazing even by dakka standards! I have still not finished the crashed valk from 2 months ago!

This message was edited 1 time. Last update was at 2010/10/10 00:52:15


Made in gb
Bounding Assault Marine


.

This message was edited 1 time. Last update was at 2011/04/03 01:31:12


Made in gb
Longtime Dakkanaut


Essex, UK

Here's one i made earlier.

Painting Faces

irst off, this technique has been developed from the heavy metals face painting technique, in fact it is almost identical as far as I can remember but its what I find works best.
Before doing anything please remember to keep your paint quite thin, not wash thin, but not straight out the pot. This is because thick paint can easily ruin the detail of a face by filling in the recesses. Because of this I would recommend that thought be taken over the priming of the model, white spay applied in 2 or 3 thin coats is what I find to work the best. But do make sure each coat is completely dry before applying the next.
Now that the basics are out of the way here is how I paint faces and skin.
1. A base coat of Tallarn flesh, one or two thin coats should provide a solid colour.

2. Really thin down Dark flesh and wash over all of the Tallarn flesh making sure it gets right into the detail.

3. Mix Dark flesh, Scorched brown and Chaos black 2:2:1 into a wash, make sure it still looks brown, not black and wash it into the deepest details of the face.

4. Once the washes are completely dry, Mix Tallarn flesh, Fortress grey and Bleached Bone, 2:1:1. Paint this over all the visible skin apart from the recesses.

5. The next layer is a 1:1 mix of Tallarn flesh and Bleached bone. Paint this “nearly” all over the visible skin leaving a little more of the recesses than stage 4.

6. Now paint the raised areas of the face with a 2:1 mix of Bleached bone and Dheneb stone.

7. A 1:1 wash of Bleached bone and Regal blue is then painted under the eyes, this give the mini a little more depth, try not to get wash anywhere else. The Rega blue can be replaced with other colours of your choice to represent the pallor/character of the skin, Liche Purple, Warlock purple, Hormagaunt Purple and Dark angles green can give very interesting effects.

8. Now wash a mix of 1:1 Scab red and Bleached bone to the bottom lip. Again the Scab red can be added to or replaced by other colours to change the character of the face.

9. An equal mix of Bleached bone, Skull white and Dheneb stone is then carefully painted onto the highest raised areas, this defines the “look” of the face.

10. Final high light of pure Skull white very, very carefully applied to he details just to tidy up the expression.

11. Now the eyes, Firstly paint Chaos black extra carefully onto the eyes. You don’t want to slip a splodge black all over the face you have been so expertly painting.

12. Paint Skull white over the black leaving a thin line of black still showing.

13. Finally dot Chaos black in the centre of the white, make sure you paint the pupil overlapping the white to the black outline, or else the mini will look shock or afraid.
You can of course do a thin pupil if shock and/or fear is what your going for. Also, you don’t have to place the pupil dead centre; you could have then to one side, “looking” at something. But make sure they are in the same place on each eye or they will end up looking cross eyed!

14. Now is the time to decide if your mini needs/wants any facial hair or stuble. This is achieved by mixing Scorched brown and/or Codex grey into the flesh tone used in stage 5. I find 2-3 layers from darkest to lightest works well. To lighten the mix i use Dheneb stone.

15. To achieve a natural looking facial hair effect try gently dabbing/stippling the layers on. Also why not search the web for real life reference pics.

Here are a few examples of faces painting with this technique


Notes*

- If you want dead/rotting looking skin, used Rotting flesh instead of Bleached bone and try lightening the mix with a little more Dheneb stone. Also, why not try subtly mixing in greens, blues or purples into the flesh tones. You could even Use washes to give a dead feel to the face.

-If you want “glowing eyes”, just mix in the light colour of your choice into the skin around the eyes getting lighter towards the eyes. Finishing at white in the dead centre.

-Finally, what ever you do, don’t paint eyebrows on your 28mm miniatures, IMO it just looks a bit stupid. And they end up looking a little like clowns. (unless the eyebrows are sculpted on)

Feel free to chance around anything above, and if you have any questions please feel free to PM me. And if anyone wants any advice about anything else you many need to know about painting, i will try my best to help you out.
   
Made in de
Feldwebel


Hamburg, Germany

Came online today with the intention to look out to challenge someone else but then I saw that the thread is going!

Thanks Cypher871 and Hits_the_spot! And sorry that I wasn't able to find someone. It's quite busy here the last days.

Great post there, Hits_the_spot!


--+- Death Korps of Krieg - Muddy Times -+--
--+--+--+--+--+--+--+--+--+--+--+--+--+--
 
   
Made in gb
Longtime Dakkanaut


Essex, UK

Thanks, I forgot to tag the next person. If he has enough time I would love to see something from migsula. May be the colour build up for the armour of his beautifal alpha legion?
   
Made in gb
Freelance Soldier


Bristol, UK

This thread is pure gold, thanks to all the contributors so far and to Gretar for starting it up.

Can I suggest skipping forward 10 years to the age where you don't really care about what people say on the internet. Studies show that it decreases your anger about life in general by 37%. - Flashman 
   
Made in gb
Longtime Dakkanaut


Essex, UK

Having spoken to Migs, i dont think he will be putting a tutorial up soon, as he is inundated with work and other projects.
   
Made in us
[SWAP SHOP MOD]
Decrepit Dakkanaut


OH-I Wanna get out of here

May wanna call out another sucker then. I mean.....


....nope I mean sucker
   
Made in gb
Longtime Dakkanaut


Essex, UK

eeeeeeeeeeeeeeer......................................SONS of ORAR
   
Made in gb
Bounding Assault Marine


Somerset, UK

is that a hint??? lol

THE EMPEROR PROTECTS

have a look at my blog: http://www.dakkadakka.com/dakkaforum/posts/list/274891.page 
   
Made in nz
Mutilatin' Mad Dok


New Zealand

Great thread. Lots of small tips are given out, even if it's just about basic stuff, like pinning, because everyone has their own methods for doing them.

I wonder what Orar will do.
   
Made in de
Dakka Veteran


Hi guys, sorry I was stalling the post, but I was out sick for a few days with some Kideny issues :(
I know Cypher871 and Hits_the_spot already picked up the challenge by DoubleT, but I would like to post my Stained Glass Window Step-by-Step anyway.
I hope you will find it helpfull.

Some of you may have seen my ATHENA aircraft carrier, wich contains several mural windows. Especially for the rear hangar window I designed an Imperial Propaganda theme "Vade Retro Xenos" - "Begone Xenos!" depicting an Imperial Champion killing an Ork and showing the chopped head.
The window will be positioned at the rear end of my ATHENA airship, and provide light to the hangar, as well as it is to motivate the crew while working in the hangar (well, that's the fluff at least).
So here's the pencil freehand, with some additional symbols like the XIX division logo, a fleur-de-lil, templars cross ect.

Next I copied the image with a fine black pen onto a sheet of transparent paper.

Then I flipped the transparent paper over to its backside - this is where all the paining happens.


For stained glass one paints from front to back. Which means you must start with the highlights and shadows, as well as any details, and then do the main color.


So here I started with the red, using Blazing Orange for the highlights and Red Gore for the Shadows. Using it on all the background window tiles as well as the actual red items.

When flipped back to the front it looks like this.


Then the remaining red items are filled with Blood Red.


And from front you get the first impression on how this works out.


Next was green. Goblin Green for the highlights and Dark Green Ink for the shadows.


Filled with Green (I use my own mixture for Ork hide) it looks like this.


Next was Gold.
For this I used Sunburst Yellow for the highlights and Bubonic Brown for the shadows.

Filled with Golden Yellow it looks like a nice gold mix.


For the blue items I started with Ice Blue for the highlights and Midnight Blue for the shadows.


Enchanted Blue completes these items.


Then I continued this way with the details.


Finally I applied a layer of Chaos Black around the windows itself. And this completes the actual window work.


To mount the window I completed a part of the rear structure that will hold the window.
Since I'm not yet sure about the final paint scheme of the ATHENA itself, I limited the work to the actual window frame.

Then I glued the transparent paper from the backside to the frame.


To give it a more glassy apearance (and to cover some of the glue spills I produced) I gave the windows a glossy finish with 'Ard Coat.
Mounted on the ATHENA it will look like this

Well, I hope you find this little step-by-step useful and it helps you to create your own stained windows in your next project.
Cheers
Klaus

-

my Blog: DEI GRECI  
   
Made in us
Fresh-Faced New User


Klaus, most excellent! I always wondered how you did this. I my just have to give this a try.

Ixajin
   
 
Forum Index » Painting & Modeling
Go to: