OK, any quick search of the P&M Tutorials section for magnets will yield plenty of results, however having just undertaken a big magnetizing project, I realized there was no Comprehensive Guide to cross-magnetizing vehicles, covering almost all variants.
So, this guide is intended to demonstrate how easy (and fruitful!) cross magnetizing your space marine vehicles can be

.
I have chosen to use the following kits:
-Land Raider kit
-Land Raider Crusader/Redeemer conversion kit (available from games workshop online)
-Predator Kit
-Razorback kit
This will allow you to field the following units:
-Land Raider standard variant (or Godhammer pattern)
-Land Raider Crusader
-Land Raider Redeemer
-Land Raider Terminus Ultra
-Rhino
-Predator with Autocannon (Destructor)
-Predator with Lascannons (Annihilator)
-Razorback, with either
tl Lascannons,
tl Heavy Bolters, or
tl Assault Cannons
What you will also need:
-X-acto knife (or any good hobby knife with a sharp blade)
-Superglue (I used Cyanoacrylate Zap-A-Gap, but i recommend a thicker-consistency superglue)
-Plastic glue
-Spare sprue frames
-clippers
-files
-green stuff (or simple gap-filling in assembly)
-Pin vice or drill (for predator only)
-Tweezers
MAGNETS:
There are various magnets of various dimensions readily available all across the world; a quick internet search will find them.
I have chosen to use disc-shaped rare earth magnets. These are 3mm in Diameter, and 2mm thick.
The supplier I used was Lodestone Industries (you can find them online) as they are the closest supplier in my city.
I you choose to magnetize the predator YOU WILL NEED to find a drill bit of suitable size to fit a magnet. In my case I used a 3mm drill bit. The importance of this will be explained later.
With all your magnets (you will need about 30-40 in all) it is helpful to paint or mark one side of each with a permanent pen or something else, to make sure your components fit together and the nodes match up.
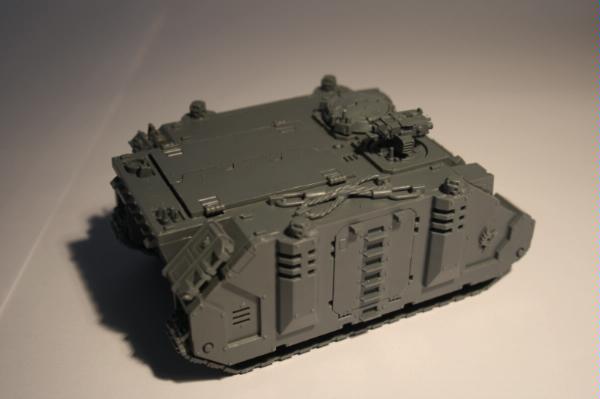
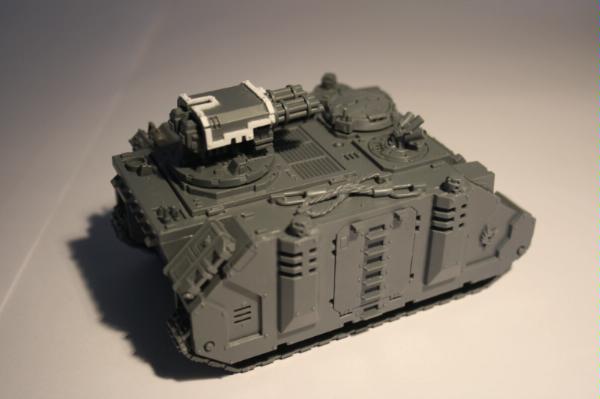
PART 1: THE LAND RAIDER
Assemble the Land Raider base as normal, leaving the doors, hatches and sponsons unattached and unassembled.
1A: TOP HATCHES
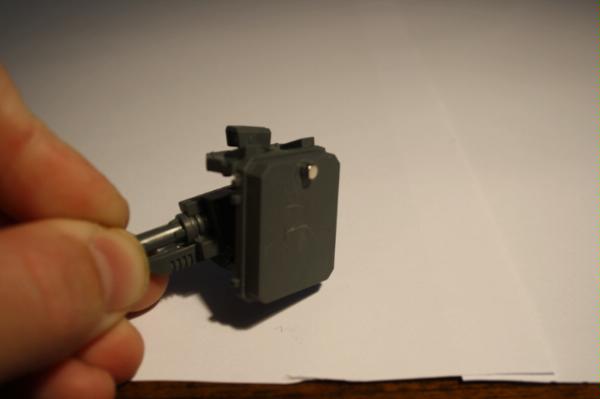
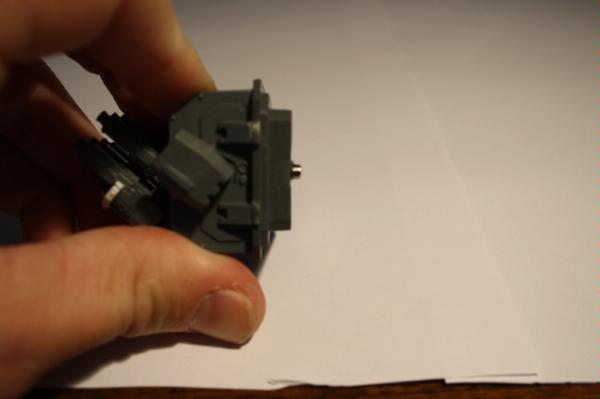
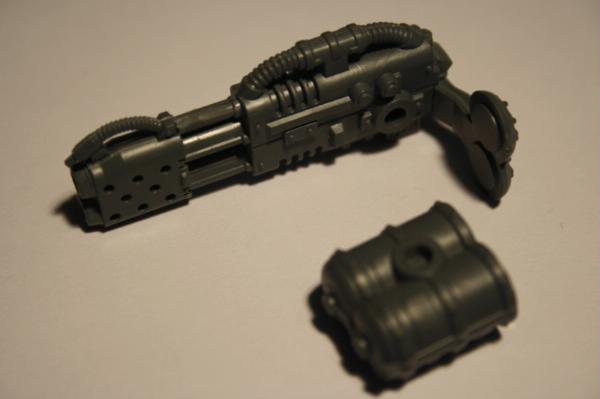
For the hatches, i will demonstrate using the multi-melta. Assemble the multi-melta as normal, with the hatch doors closed.
Here's where the sprue frames come in. To make sure you can interchange the hatches, it's important to establish a set level at which the magnets will contact. I find having this flush with the hatch rims is best.
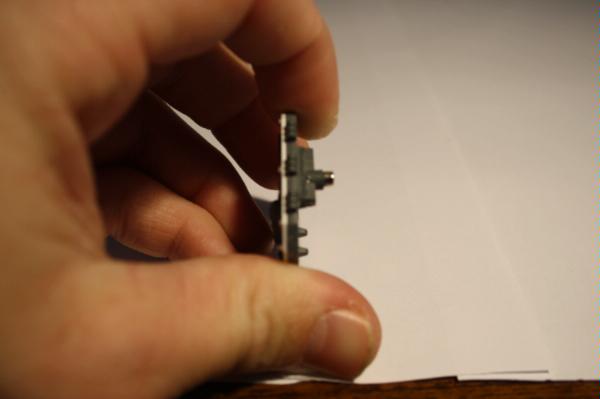
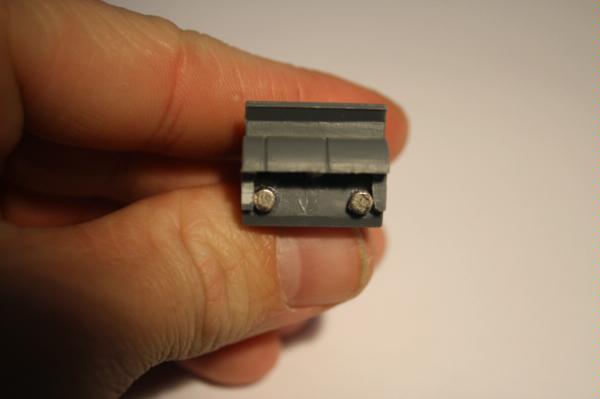
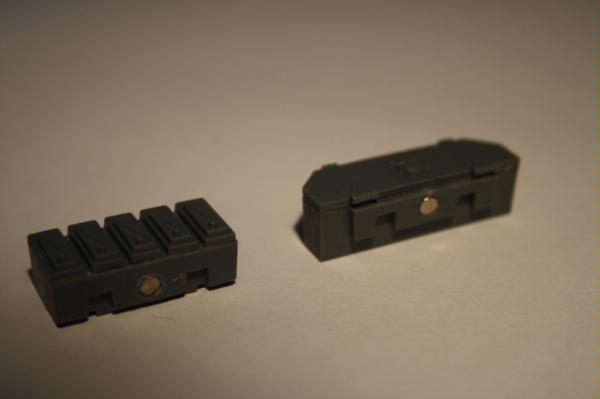
Cut a small piece of frame using clippers, and glue it to the underside of the hatches as shown. Center the magnet on top of this and glue it using super glue.
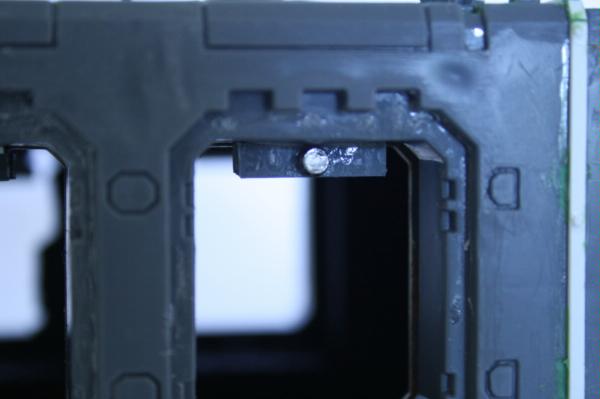
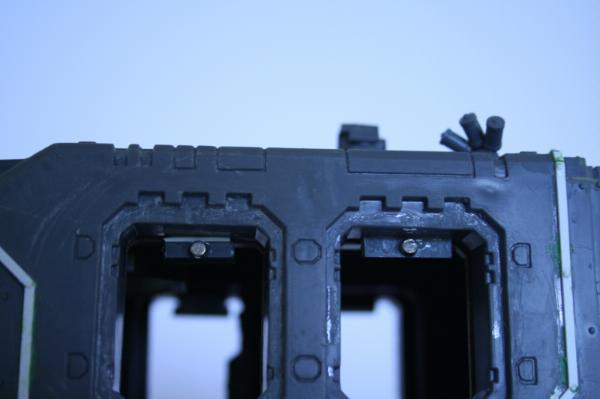
Next, construct a mount for the magnet sitting inside the hull. Do this by using a length of frame larger than the opening, with blocks of frame at either end. Pre-assemble this, and if you have glued the land raider together, glue it in, using tweezers to position it.
The 3 things to note here are that:
1 the magnets need to be glued
AT THE CENTRE of the hatch/opening
2 they should be aligned to ATTRACT one another
3 They should be flush such that they CONTACT one another.
The attached hatch weapon can be seen below.
1B: SIDE SPONSONS
Assemble the lascannon sponsons for a start as usual, but do not glue them to the land raider.
Also assemble the Predator sponsons. You may have to choose between heavy bolters and lascannons at this point unless you know a way to swap the two. I found this too fiddly and did not really want the heavy bolters, so simply used the lascannons. YOU WILL NEED to have atleast the option of lascannon sponsons for the terminus ultra variant.
Glue magnets at the top centers of the sponsons as shown below.
As with the Hatches, make sure one of the poles is facing inwards for all the magnets. This will mean they are easily interchanged.
Now, with the magnets attached to the sponsons, you need to make blocks to mount the magnets glued to the openings themselves.
Take a length of frame, and, shaving it so that there is a right angle rather than the sloped edge, glue it to the inside of the door frame as shown.
Note: the mounts on the front door frames connecting the predator sponsons should be set further inwards than the rear doors. This is because the Land Raider weapons sit further out than the inserted predator sponsons.
Assemble the Flamestorm Cannons / Hurrican Bolters as shown, but don't glue them to the supports, as they can be interchanged easily for different variants.
1C: DOORS
Using the same mounts for the predator sponsons already on your landraider, use some sprue frame lengths to align magnets on the insides of your doors as shown. As said, because they are further set in, the sprue mounts on the doors will help make the magnets contact for a stronger bond.
1D: FINAL ASSEMBLY
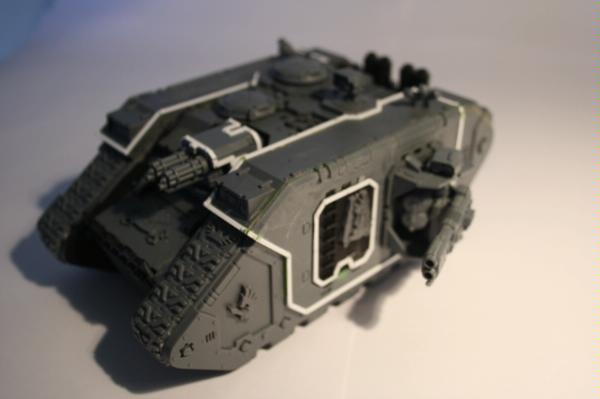
Assemble your Hull-mounted weapons as normal. You should have the following:
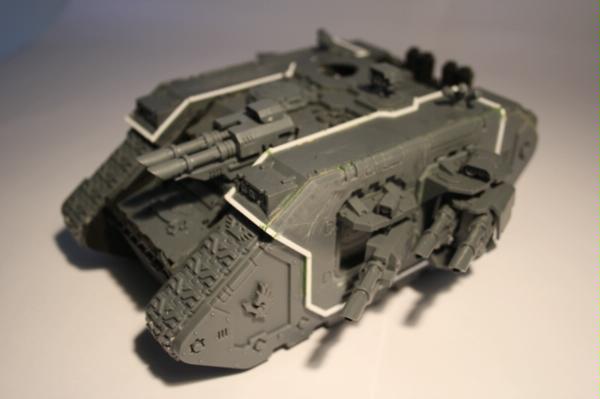
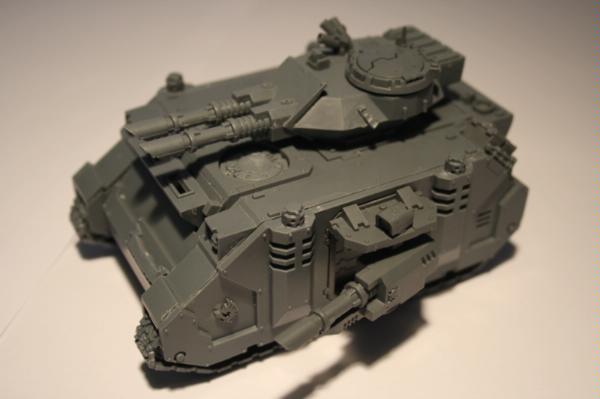
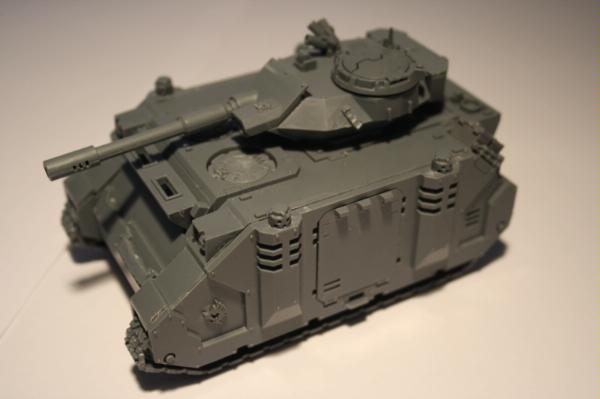
Now mix-and match to your heart's content! Here's the variants I knocked up!

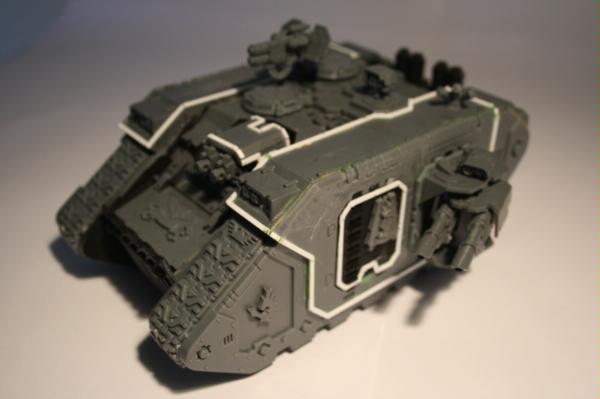
Godhammer
Terminus Ultra
Redeemer
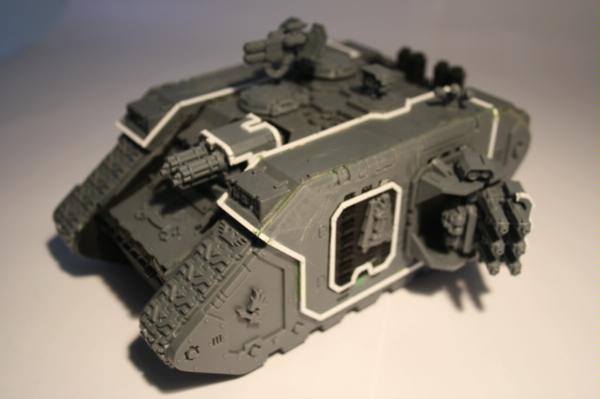
Crusader
PART 2: THE PREDATOR
Assemble the Predator base as normal, leaving the doors, hatches and sponsons unattached and unassembled.
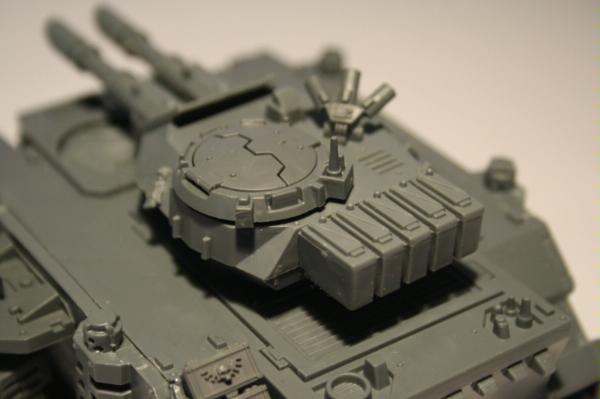
2A: THE TURRET
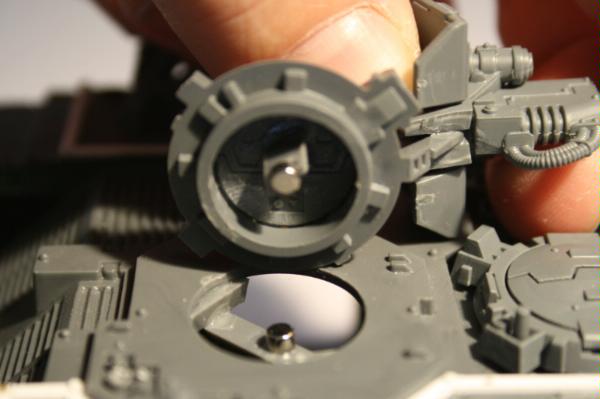
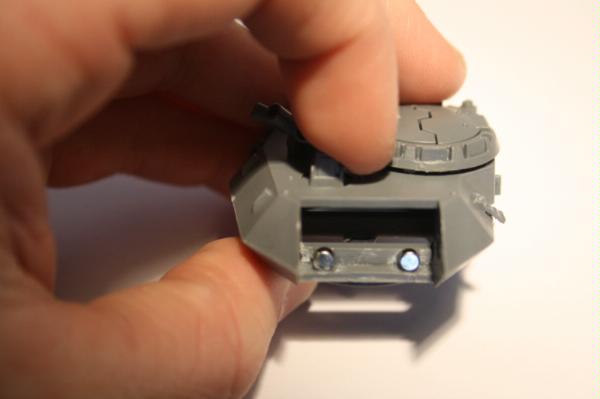
Assemble the turret as shown, but using the same ideas as before, place another magnet in the centre of the bottom opening and flush with the rim.
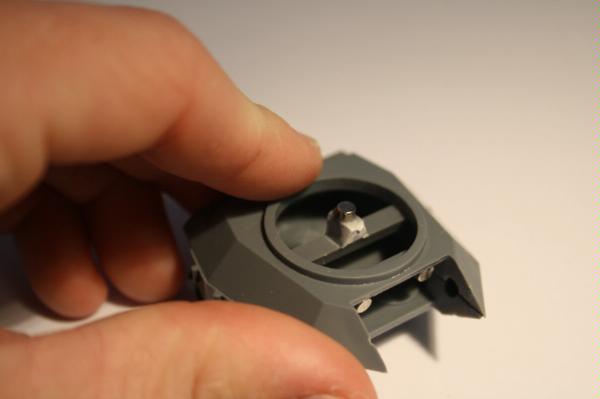
Do the same for the Predator mount shown below.
Now here's the tricky part to work out. Doing a weapons swap here means that they will not be able to swivel up and down, but this is the only limitation and probably the best method I've stumbled upon.
Trim the circular tabs off the sides of the predator main weapons and cut a right-angled section as shown below.
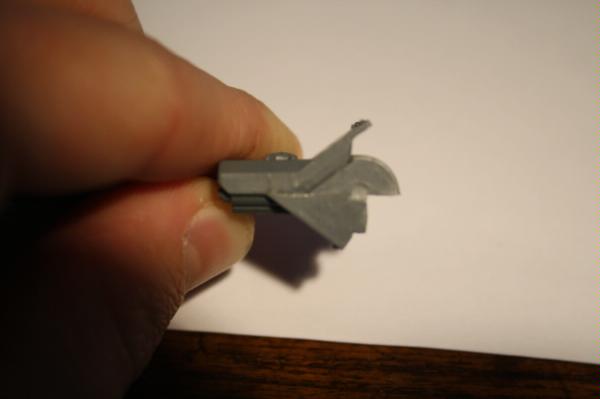
Having trimmed the tabs, glue the magnets to the inside as shown below.
Create a mount for the magnets on the inside of the turret using a length of sprue frame shaved to a right angle as before. Then glue the magnets as shown.
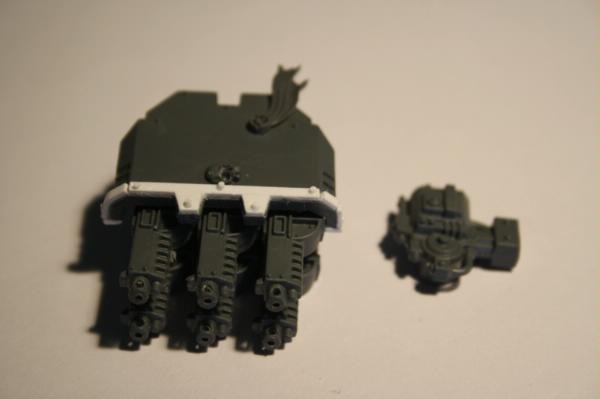
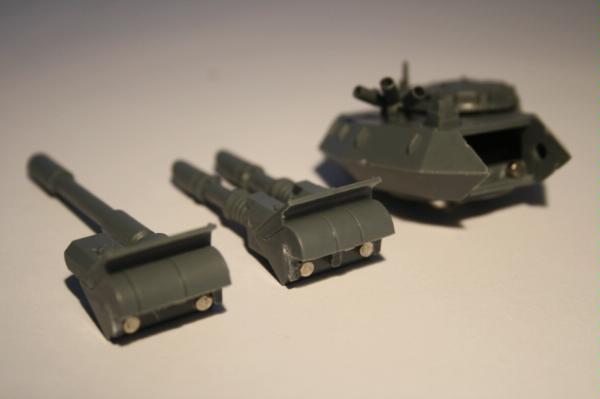
You should have the following finished components now.
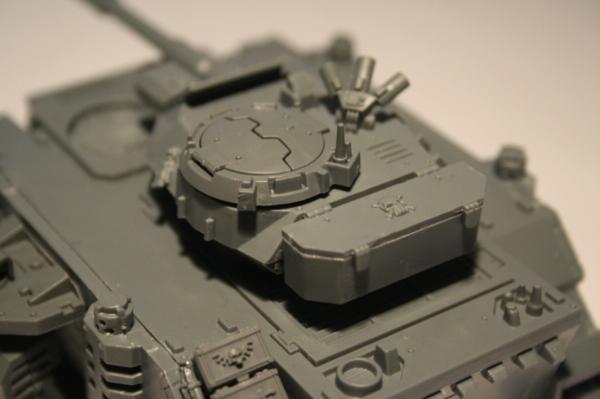
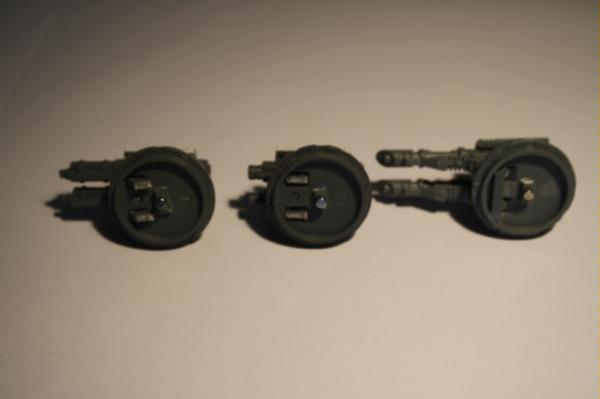
2B: TURRET BACK COMPARTMENTS
Now to magnetize the various ammo compartments that it on the back of the turret. They already have grooves to help keep them aligned, so one central magnet is enough to keep them fixed on.
Using your drill bit, drill a hole the width of the magnet and glue one in place as shown below.
Align the compartments to fit and then drill another hole in each, inserting and then gluing a magnet in place as shown.
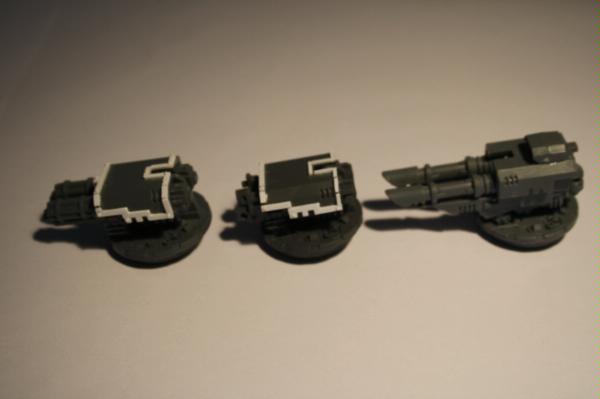
You should be able to assemble the Lascannon and Autocannon options as well as ammo compartments as shown below.
2C: SPONSONS
The sponsons, with magnets already affixed during the STAGE 1B, should fit nicely into the door openings on your predator chassis. Now just glue magnets to the inside of the doors as shown below.
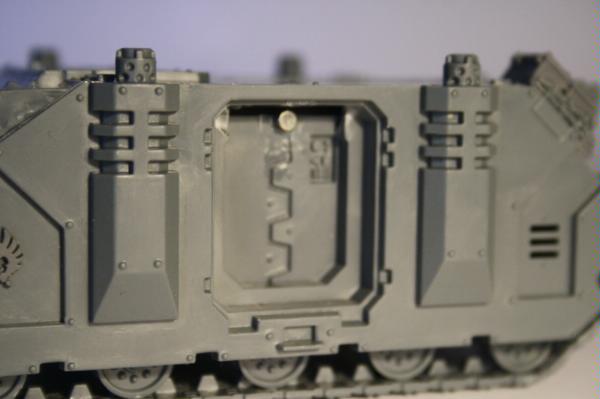
I had to shave off about half a millimetre of plastic beneath each magnet to make the sponsons sit flush, but this is purely a factor of the width of my magnets being 2mm. If you have access to smaller width this won't be a problem.
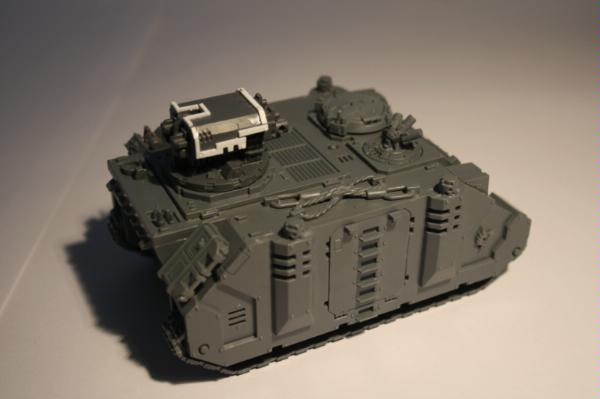
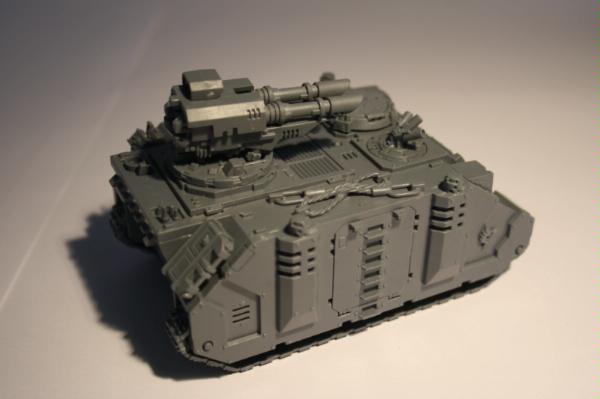
2D: FINAL ASSEMBLY
Place the top mount on the predator chassis (don't glue it, as you can swap it out for the rhino doors), then, as before, mix and match, and bask in the glory of your predator!

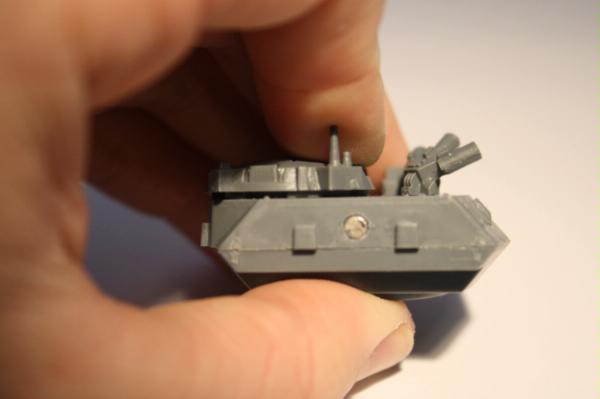
annihilator
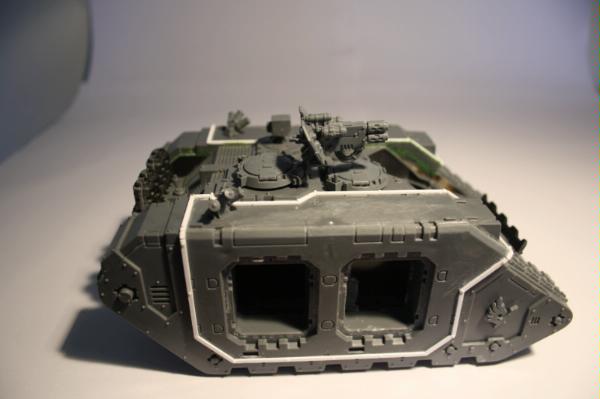
Destructor without sponsons (the doors are explained in the next part

)
STAGE 3: RHINO AND RAZORBACKS
If you've followed all the above steps, the following steps required to field rhinos and razorbacks are both few and simple.
With your predator model, take some rhino side doors and create mounting blocks on the inside for magnets to sit on. These should line up with the magnets connecting the sponson weapons on, and can be seen below.
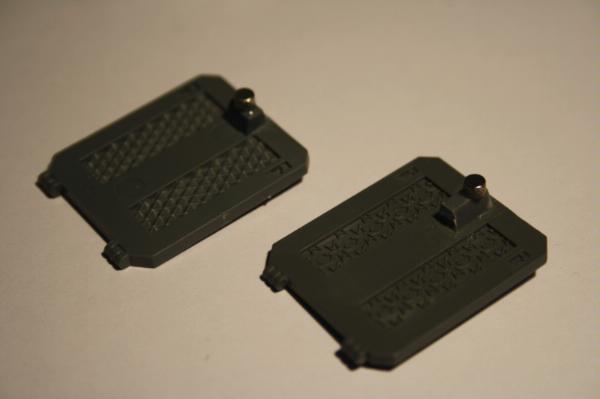
Grab a pair of rhino doors, and using a piece of sprue frame as reinforcement, glue them as shown below.
This can be simply inserted into the top hatch space, and doesn't need to be magnetized (although doing so would be quite simple). Add a storm bolter and hatch, and you've got a rhino!
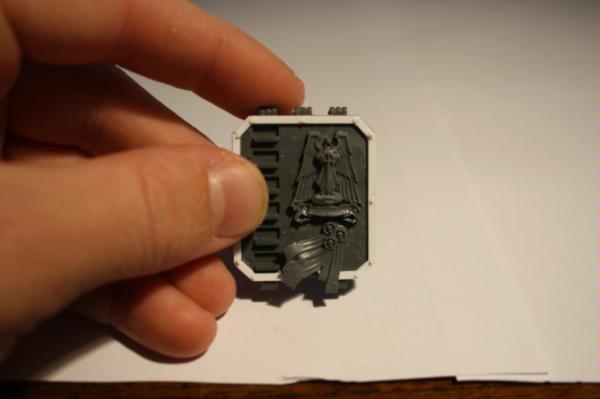
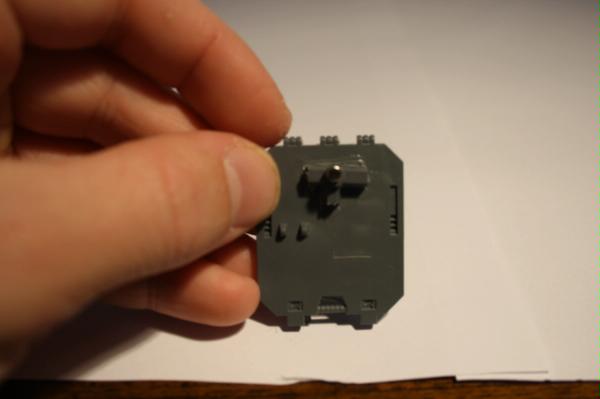
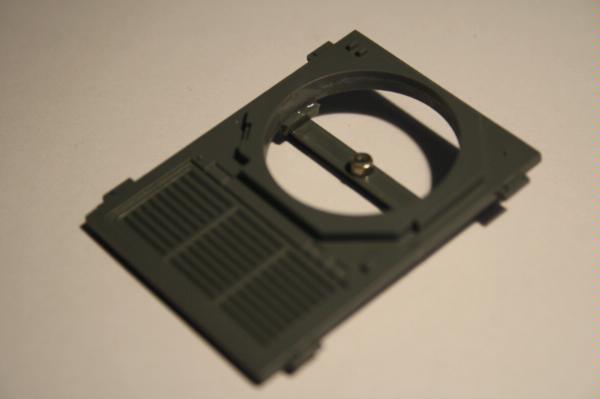
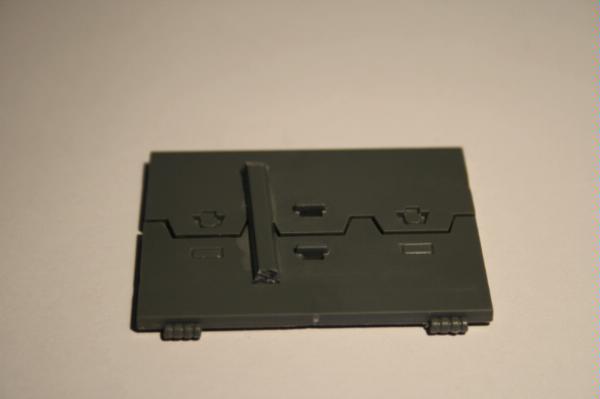
For the razorback, start of by grabbing some existing components. You should have the rectangular hatch with a hole in it from the predator stage, shown below.
Now, take your hull-mounted land-raider weapons, and place magnets beneath them as shown below, using sprue frames as mounting blocks to get the levels right.
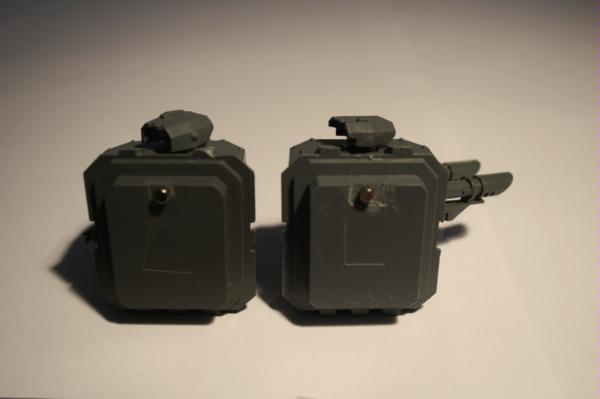
You should now have the following razorback options!
twin-linked heavy bolters
twin-linked lascannons
twin-linked assault cannons
And that, my friends, is that!
Questions?

Constructive criticism?

All welcome! Please tell me what you think!
Hope this helps some people!


 Chemos' Seekers
 "Whilst we stand, we fight. Whilst we fight, we prevail. Nothing shall stay our wrath"
  Guilliman and the Ultramarines are like Manchester United, everyone hates them because they are so awesome!

 4742 Points
  1843 Points


 ).
).


