The Hands of Vengeance, in the pursuit of their Penitent Crusade, had encountered a wide variety of enemies. It would be the actions taken on this day that eventually caused the historians to begin debating whether or not the path of Chapter Master Yadon Napthal took a turn to the heretical. While he adamantly declared that all of his actions were taken in The Name of the Emperor and according to His Will, we must be reminded of that ancient adage: The road to hell is paved with good intentions.
The points of contention in the debate are numerous as details of the event are unclear. The Hands of Vengeance may have attacked the Crimson Fists without warning, or vice versa. There may be some long-simmering blood feud between the Chapters, some have even postulated that the Crimson Fists encountered were in truth the traitors, as the descriptions of their heraldry does not match Administratum records and the deceits of the heretic are without number. The less controversial interpretation of the evidence is that the two Chapters came to blows over the resources of one of the multiple abandoned colonies around the warp anomaly known as The Maelstrom.
Mission: Seize Ground, Four Objectives
Deployment: Spearhead
His List(from memory and looking at pics, pretty close):
Pedro Kantor
(X2)Tactical Squad: 7 Bolters, Melta Gun, Lascannon; Sgt with
BP and Power Weapon; Rhino with
HK Missile
Sternguard: 3 Combi-Meltas, 3 Combi-flamers, Sgt with Bolter and Power Fist; Rhino with
HK Missile
Sternguard: 3 Bolters, 2 Plasma Cannons(at first I thought,
WTF? But he explained that it's basically a scoring Devastator Squad. Good idea.)
Dreadnought with
TLLC,
DCCW
Whirlwind
Vindicator
This is his all-comers list that he brought to play with in the league, and is competitive, so I didn't feel too bad about...
My List:
Vulkan
Tactical Squad: 7 Bolters, Melta Gun, Missile Launcher; Sgt with Combi-Melta and Powerfist; Rhino
Tactical Squad: 7 Bolters, Melta Gun, Missile Launcher; Sgt with Combi-Melta and Powerfist; Drop Pod
Dreadnought:
MM,
DCCW; Drop Pod
Ironclad Dreadnought: Seismic Hammer with Melta,
DCCW with Heavy Flamer, Ironclad Assault Launchers; Drop Pod
5
TH/
SS Terminators
Land Raider; Phobos pattern with
MM and XA
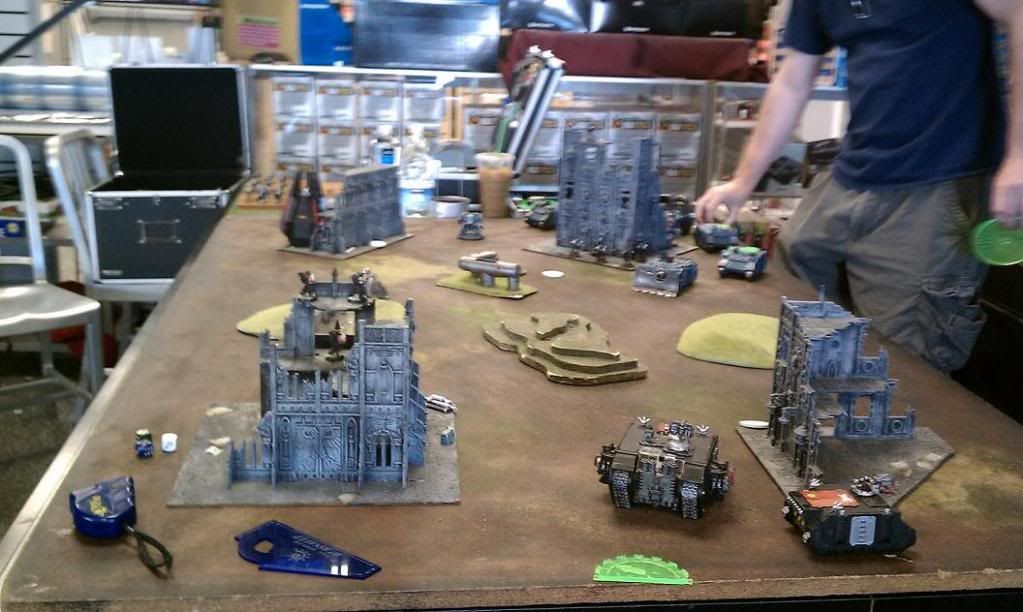
The objectives are placed in every corner of the table, following the
BRB's guidelines requiring that they be at least 12 inches from the table edge and each other. They are represented by white poker chips.
I won the roll to go first, but declined. My opponent, Doug, chose to deploy in a tall ruin with easy access to an objective. After combat squads are formed, 2 squads of Sergeants and special weapons are in the Rhinos on the right while their Heavy Weapon carrying battle brothers are on top of and at the bottom of the ruin, respectively. The Sternguard with the Plasma Cannons are also in the ruin on the middle level. Kantor and the larger squad of Sternguard are in the Rhino to the left and you can see the Whirlwind in the back. +1 internets if you can figure out where he deployed the Vindicator.


I deployed my Tactical Squad with the Rhino and my Land Raider. The combat Squad with the Missile Launcher is claiming an objective as of now, and my Rhino is hiding behind the Land Raider. Armor Value 14 don't fail me now! The Dreadnoughts and the other Tactical Squad are in reserve in their Drop Pods.

I fail to Seize the Initiative, though I don't even know why I tried. I can't help myself!
Turn One!
Top:
Doug moves his Rhinos forward toward me a bit, angling for a better shot at my Land Raider with those Hunter Killer missiles. The Dreadnought also advances toward the Raider while the Sternguard and Whirlwind shuffle around a bit behind the ruin and deploy their smoke launchers in preparation for the impending Drop Pod Assault. The Vindicator insinuates itself between the Land Raider and the ruin with all of Doug's heavy weapons.
Shooting sees a hail of Lascannons and Missiles bounce off of my Land Raider, no doubt making a terrible mess of it's paint job.
Bottom:
My Dreadnought scatters back behind the building to my opponent's right, and my Ironclad lands right smack in the middle of the ruin in his Deployment Zone. The Land Raider scoots forward 6 inches while the Rhino drives behind the ruin opposite me preparing to claim the objective in front of it at some point in the future.
The Dreadnought runs behind the building some more since it doesn't have a good enough shot at anything to risk dying over. The Ironclad immobilizes one Rhino, and the Land Raider's Lascannons immobilize the other. My missile launcher marine misses the Dreadnought.
Score is Hands of Vengeance: 1 Crimson Fists: 0
Turn 2!
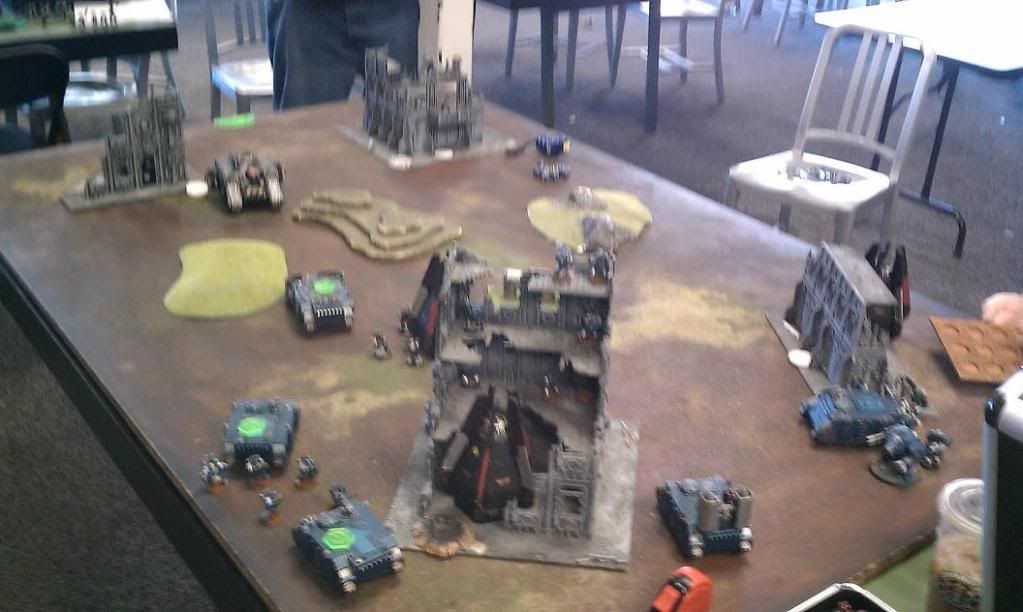
Top: The Sternguard pile out of their Rhino and prepare to unleash their combi-meltas onto my Dreadnought while one tactical combat squad does the same for my Ironclad. The other Combat Squad stays put, content to shoot out of their top hatch. The Whirlwind moves back behind the ruin, biding it's time.
Shooting will see my Dreadnought who didn't run far enough explode from the one melta gun that was within
2d6 range. The first melta gun fired at the Ironclad misses, and the second blows his seismic hammer off. One of the Plasma Cannon toting Sternguard didn't pay attention to his instructor on "What to do in case of an overheat day" as a neophyte and dies, while the other blast scatters wide of the Ironclad's rear armor. Both Tactical Lascannons shoot at the Ironclad but either miss or can't get through the cover provided by the building. The Crimson Fists' Dreadnought finally gets a penetrating hit through the cover and explodes the Ironclad. The Vindicator is about 3/16s of an inch short of the Land Raider with it's Demolisher Cannon. The two Immobilized Rhinos fail to repair themselves.
Bottom: My Tactical Squad in the Drop Pod comes in, I land it directly on the Objective in Doug's DZ. Well, it scattered 3 inches or so but still... I decide to combat squad them.
My meltas go toward the Vindicator while 4 Bolters and the Missile Launcher(and his bolt pistol) prepare to open up on the bottom most lascannon squad. Land Raider moves 12 inches straight at the Vindicator while the Rhino claims a second objective.
The meltas in the combat squad wreck the vindicator, while the bolters from their counterparts kill 2 Marines from the Lascannon squad. The heavy Bolter kills a Sternguard from the ruins, the Stormbolters from two of the Drop Pods kill another. All Morale Checks are passed. doh! My Missile Launcher misses the Dreadnought. Again.
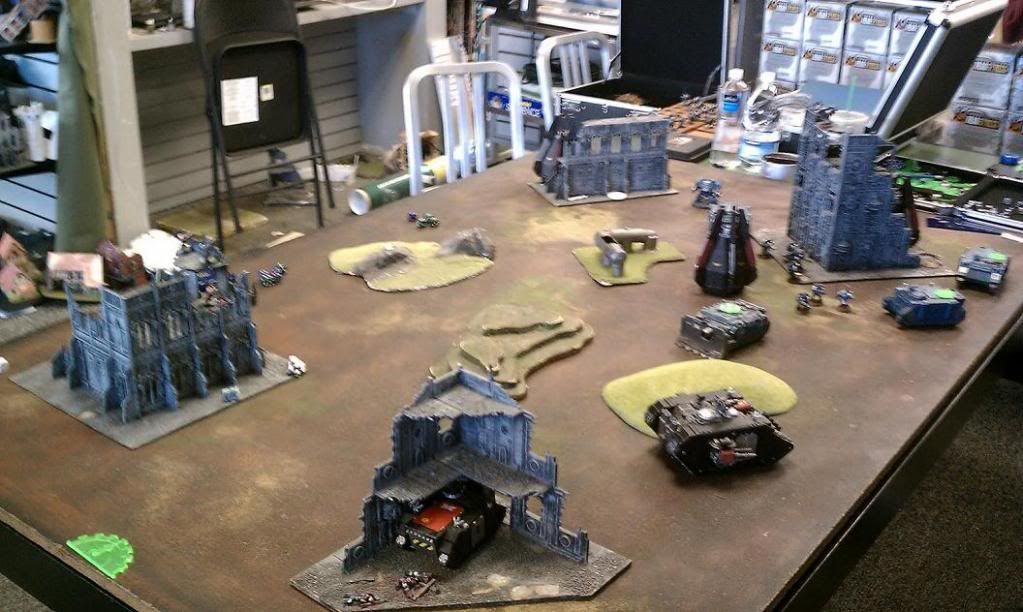
Score HoV: 3
CF: 0 This picture is from the other end of the table as the others, thought I'd show the other perspective.
 Turn 3!
Top:
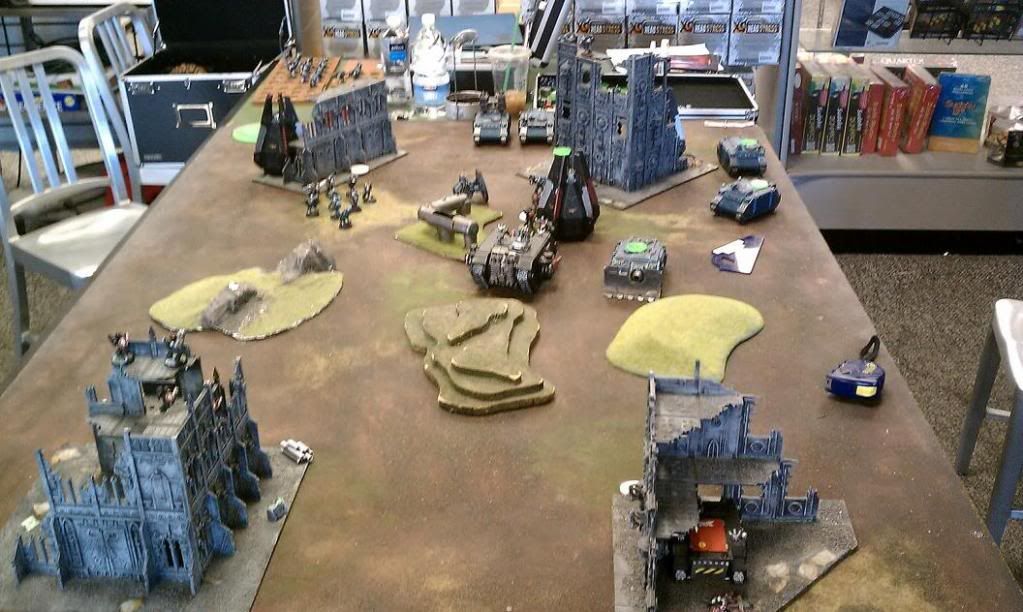
Turn 3!
Top: The Whirlwind backs off a bit so it can direct fire while still be screened by the ruin, Kantor and his Squad get back in their Rhino and race back toward their home objective. The two squads closest to my Bolter/Missile Launcher Combat Squad move in to assault and the Dreadnought moves to get a better shot at my Land Raider.
The Rhinos don't self-repair, again. The Dreadnought glances the Land Raider but I make my 5+ cover save(it was iffy, but it was my opponent's idea). The Whirlwind kills two Marines from my Sergeant's combat squad from the Drop Pod while the Plasma Cannon scatters away.
The two Crimson Fists combat squads assault my one, and between Kantor's bonus attack and a Power Weapon the 5 marines are predictably slaughtered to a man.
Bottom:
The Land Raider moves 12 inches, screening itself with a hill. The Combat Squad with the melta gun and the Power Fist move toward the squad with the Power Weapon, which was not a good idea as you will soon see.
The Heavy Bolter from the Land Raider kills another Sternguard, who happened to have the last Plasma Cannon. No one is left of the squad but the sergeant, though he makes his Morale Check. My melta gun vaporizes a marine from the combat squad that is about to make angry love to them, two Storm Bolters kill another. Guess what my missile launcher does? It misses the Dreadnought!

My three remaining marines in the combat squad with the fist assault three other Marines. I do nothing at initiative four, and he does 3 wounds with normal attacks and one power weapon wound. Of course, my Power Fist dies to the one wound I allocated to him, leaving my melta gunner all alone. He fails his leadership test but is caught and fails both of the No Retreat! saves.
Score HoV: 2
CF: 0
Turn 4!
Top: Kantor's Rhino goes tearing across the board to get to one of my objectives. The Dreadnought wants a clearer shot at the Land Raider and moves to attempt to do so. The recently victorious Combat Squad with a melta gun moves toward the Drop Pod in his ruin while the Lascannon team prepares to assault the Pod on the objective.
The melta from the squad still inside the rhino stuns it, the other melta removes it's storm bolter. The Lascannon from the top of the ruin as well as the Dreadnought fail to hurt the Land Raider.
Assaults with Krak Grenades on the Drop Pods from the two Combat Squads capable of doing so see the one functional storm bolter in Doug's deployment zone removed.
Bottom:
My Land Raider moves up on top of the hill, 6 inches.
Two Godhammer-Pattern lascannons wreck Kantor's Rhino, and my miserable failure of a Missile Launcher marine redeems himself by killing on of the Sternguard that pile out with a frag missile. It is a bit harder to miss with those... They pass their pinning check.
The units still in base contact with my Drop Pods don't do any damage.

Score HoV: 2
CF: 0
Turn 5!
Top:
Not much movement other than Kantor's squad moving toward the Objective directly behind them, and the Dreadought walking toward the drop Pod.
The tactical squads' lascannons wreck the Drop Pod on the objective in the Crimson Fists' deployment zone, and the Dreadnought doesn't manage to hurt the Land Raider, yet again. Kantor runs, but not far enough.
Bottom:
The Land Raider moves up and Vulkan and the Terminators all hop out.
The Multi-Melta from the Land Raider kills the dreadnought, and the Missile Launcher on my objective fires a frag missile at Kantor's squad but doesn't do much.
Vulkan and the Assault Terminators predictably hurt the Tactical Marines on the objective that they were holding quite badly, consolidating away from the Sternguard on the other side of the Whirlwind and wrecked Rhino.
We roll to see if the game ends, and it's a 2. I win!
After Action Report:
I caught a huge break in the early game with his Rhinos being immobilized. Being able to get from point A to point B in a Seize Ground mission is really important and Doug was going to have a tough time getting out of his deployment zone after that. If he had popped smoke instead of shooting his
HKs things might have gone differently, but then if he had immobilized my Land Raider with those things it wouldn't have been bad either.
Well, for him.
I have to say that the Land Raider was huge in this game. Killing and immobilizing rhinos at range, soaking up a disgusting amount of shots and then wrecking the Dreadnought at the end while delivering it's contents to the Objective on turn 5 was everything I would have hoped it would do. As always, with Vanilla Marines in an objective based mission such as this one, it's a good idea to keep your focus on the mission and not get carried away with trying to kill as much as possible.
Full Disclosure: I played a
KP mission with Doug immediately after this and he trounced me 5-2.

vengeance!
I have to play like a maniac with my Drop Pods. I can't help it.


 2000 pts
