Got bored so had a game. Tested out modified lists for Angels and 'Nids. I've also got more pictures this time for all those who requested
 Blood Angels "Wing Striker" - 2,000 points
HQ
Blood Angels "Wing Striker" - 2,000 points
HQ
Librarian - shield of sanguinus & unleash rage
Librarian - shield of sanguinus & unleash rage
Honour Guard w/ Razorback - 2 x flamers - Razorback w/ lascannon & twin-linked plasma gun
Honour Guard w/ Razorback - 2 x meltaguns - Razorback w/ lascannon & twin-linked plasma gun
Elite
1 x Sanguinary Priest
Troops
5 x Assault Marines w/ Razorback - 1 x flamer - sgt w/ power weapon - Razorback w/ lascannon & twin-linked plasmagun
5 x Assault Marines w/ Razorback - 1 x flamer - sgt w/ power weapon - Razorback w/ lascannon & twin-linked plasmagun
5 x Assault Marines w/ Razorback - 1 x flamer - sgt w/ power weapon - Razorback w/ lascannon & twin-linked plasmagun
5 x Assault Marines w/ Razorback - 1 x meltagun - Sgt w/ infernus pistol - Razorback w/ lascannon & twin-linked plasmagun
5 x Assault Marines w/ Razorback - 1 x meltagun - Sgt w/ infernus pistol - Razorback w/ lascannon & twin-linked plasmagun
5 x Assault Marines w/ Razorback - 1 x meltagun - Sgt w/ infernus pistol - Razorback w/ lascannon & twin-linked plasmagun
Heavy Support
5 x Devastators - 3 x missile launchers
5 x Devastators - 3 x missile launchers
Total: 1,995
Tyranids "Hive Fleet Kraken" - 2,000 points
HQ
Hive Tyrant - 2 x twin-linked devourers, adrenal glands, old adversary & wings
Elite
2 x Hive Guard
2 x Hive Guard
2 x Hive Guard
Troops
Tervigon - crushing claws, adrenal glands, toxin sacs stinger salvo & catalyst
Tervigon - crushing claws, adrenal glands, toxin sacs stinger salvo & catalyst
10 x Termagants
10 x Termagants
5 x Genestealers - scything talons
5 x Genestealers - scything talons
Fast Attack
15 x Gargoyles - toxin sacs
4 x Raveners - rending claws
Heavy Support
Trygon Prime - adrenal glands
Trygon - adrenal glands
Total: 2,000
*Notes
Due to lack of Tyranid models I'm doing a lot of proxies. Daemon Princes are Tervigons, Hormagaunts are Termagants, Guardsmen are Genestealers and Gargoyles are Hormagaunts which are close to the Tyrant. You will notice Guardsmen with plasma guns in a ruin too, these are Devastators.
Game: Seize Ground + Pitched Battle
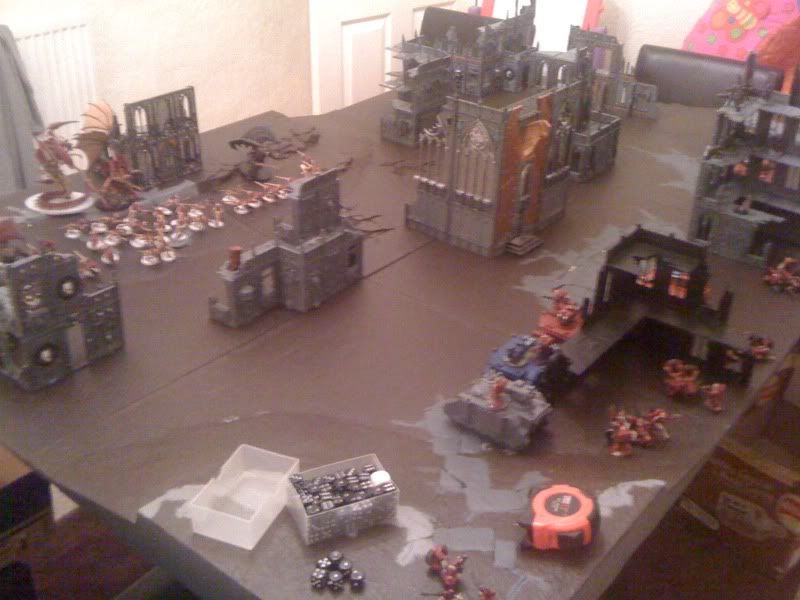
Deployment
Objectives were placed in the ruined tower, hab block ruin, factorum ruin and administratum ruins - these objectives are orange oil barrels
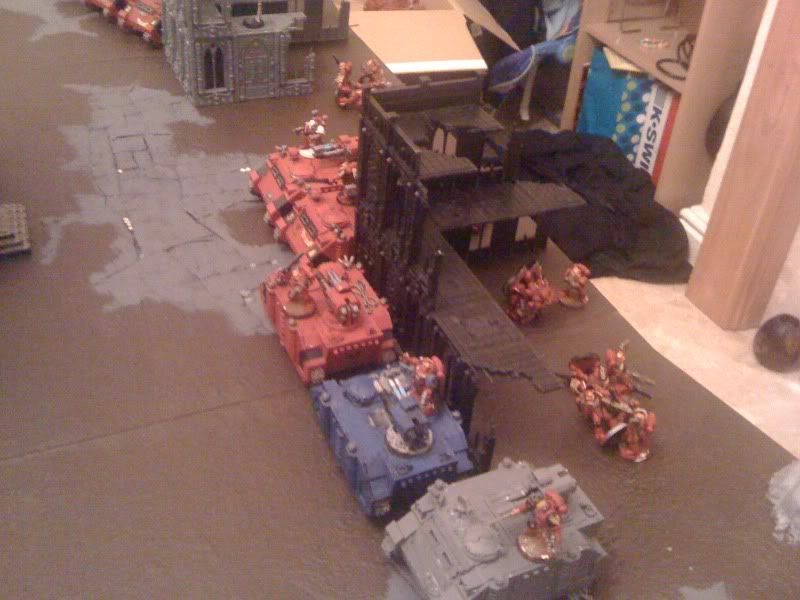
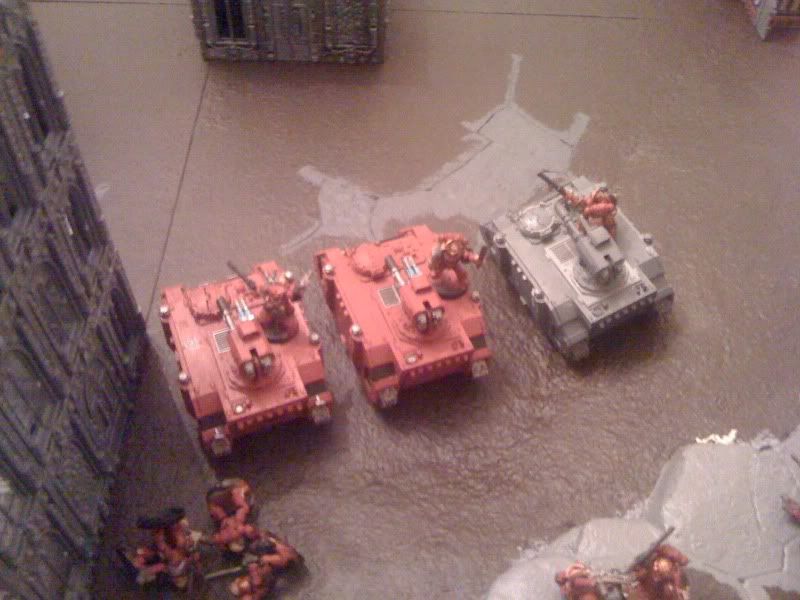
Angels won the roll off and deployed first putting three Razorbacks containing the flamer Honour Guard squad, and two melta Assault Squads on the right flank - H.G was in the centre to give all tanks the shield cover save. Centre both
Dev squads were deployed in the hab block ruin along with three Razorbacks containing a flamer Assault Squad with the Priest, another flamer squad and a melta unit. Moving across from the centre flank towards the left was a line of Razorbacks with the remaining squads, Honour Guard with the other Librarian was in the centre of these to give shield cover saves.
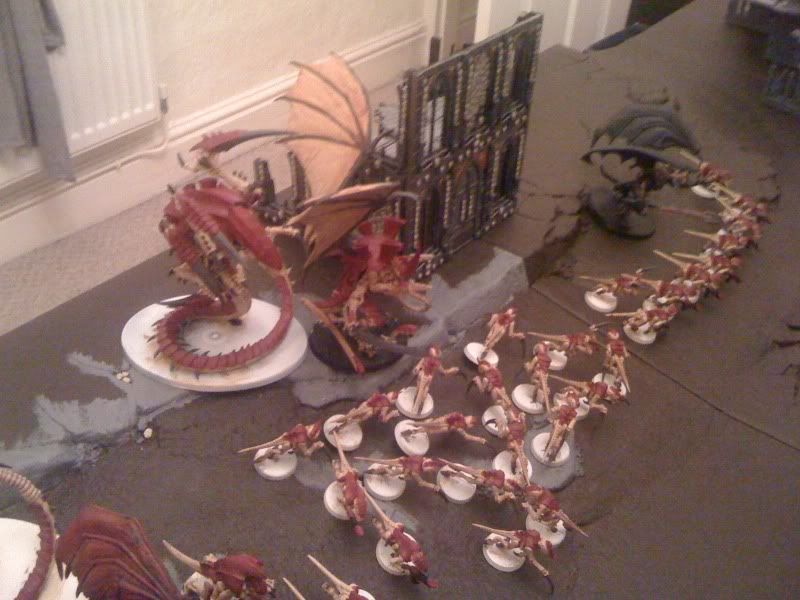
Tyranids deployed putting a single unit of Hive Guard on the administratum ruin everything else was deployed on the left flank in a "steeped shield" formation - Termagants at the front, Hive Guard behind, Tervigons behind then Tervigon. Hive Tyrant had Gargoyles deployed in front and then a Trygon behind. Everything should have cover, though debatable if Tervigon gives Trygon a cover save.
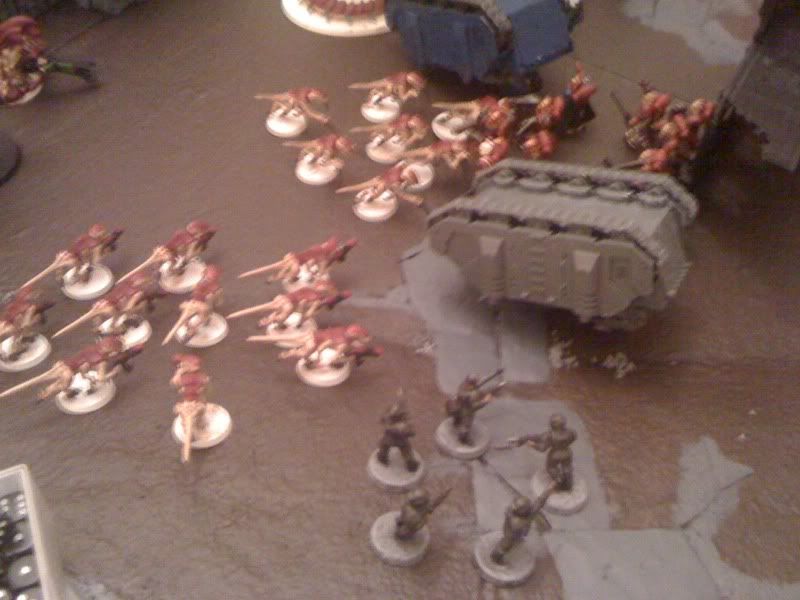
* Pictures below were taken after Angels first round of shooting, though nothing had moved at that point so still same as deployment
 * Tactical Notes
Ok this is gonna be a bit weird writing tactical notes for two armies, but here's what I'm planning to do in order to disable the other army.
Blood Angels will hold position and torrent Hive Guard and Tervigons with lascannons, then over time move up unleash las/plas death and mass assault.
Tyranids will move up with Tervigons spawning Termagants to race over to the administratum objective on the top right flank and on the factorum ruin while casting feel no pain on Termagants to keep the cover intact or whatever else needs it.
Turn 1
Blood Angels hold position, nothing moves at all.
Shooting lascannons blast out and wipe out a unit of Hive Guard in front of a Tervigon; the Tervigon gets blasted now without cover and suffers 3 wounds.
All Tyranids move forward coming down the left flank using a ruin for cover, a Termagant brood peels off and runs towards the administratum objective.
Shooting Hive Guard on the right flank blast the Honour Guard Razorback, Librarian casts shield ok but suffers a weapon destroyed result - lascannon gone. Hive Guard on the left flank open up and pop a Razorback spilling out a flamer Assault Squad.


 * Tactical Notes
Going well for both sides so far. Blood Angels have wiped out a Hive Guard unit with mass fire and halfed the amount of wounds on a Tervigon, plus the Termagants have failed morale and fallen back. Angels plans for next turn would move up the right flank and pop smoke which will give better saves from the Hive Guard, they cannot see the Hive Guard anyway to shoot them. The rest will reposition and focus fire on the wounded Tervigon.
Tyranids have took out a single Razorback and weapon destroyed on another so not bad going. Next turn the wounded Tervigon will spawn more Termagants which can grab the tower objectives. Rest of the horde will move forward, Hive Guard will pop tanks and hopefully the Hive Tyrant and Trygon can assault what is inside.
Turn 2
Razorback trio on the right flank moves fall 12" and pops smoke. Razorbacks on the centre and left flanks rearrange to draw
LOS better on the wounded Tervigon. Assault Squad from the wrecked Razorback on the left flank run into the tower ruin and claim the objective.
Devastators launch mass frags at the Termagants going to the objective on the right flank and leave five left, they fail morale and fall back 4". Lascannons blast out long with plasma, but due to poor rolls and extremely good cover save rolls the Tervigon survives with a single wound!
Tyranids turn, the Tervigon with the single wound casts dominion power extended synapse range putting the Hive Guard and falling back Termagants into synapse range, it then spawns 13 Termagants which run into the tower ruin while the Tervigon runs and takes shelter in the shrine ruin in the centre of the board. The rest of the Tyranid horde move down the left flank with the Gargoyles peeling off from the Tyrant ready to shoot and assault the flamer Assault Squad which got popped out their ride. Tyranids also call in reserves at the start of the turn, one Stealer unit arrives and outflanks on the right flank, ready to assault a Razorback after they run closer towards it.
Shooting Hive Guard on the right flank blast a Razorback and pop it after it fails smoke saves. On the left flank Hive Guard blast the Honour Guard Razorback along with the Tervigons stinger salvo and Tyrants devourers causing it to be weaponless and immobilised. Gargoyles fire into the Assault Squad.
In assault Genestealers charge the Razorback and only manage one hit, it then manages to roll another two 6+ in row auto penetrating and making the tank go boom killing a single Stealer and Honour Guard along with scoring a wound on the Librarian in the blast. The Hive Tyrant assaults the immobilised Honour Guard Razorback and pops it. Gargoyles charge the Assault Squad and benefit from the Tyrants old adversary rule, though combat remains on after the Gargoyles lose the fight, tying up that unit for next turn.


 * Tactical Notes
Not a bad turn for Angels but could have been better. A combination of bad rolls for Angels and good rolls for Tyranids still sees that Tervigon alive, also a shame those Termagants didn't fall back, however I think they should have fallen back before the dominion power is used. Next turn Honour Guard will burn the Genestealers while the Assault Squad out the transport goes for the tower objective as the remaining Razorback rushes the administratum objective. Left flank will see the Hive Tyrant eat melta, plasma and lascannons along with any Trygons which are getting close.
Tyranids did great with the Hive Guard and Genestealers busting two Razorbacks on the right flank, sure the 'Stealers will die to mass flamers from the H.G next turn but they have done there job. Pity the Hive Guard didn't pop the Honour Guard Razorback on the left flank, though they're now out the tank thanks to the Tyrant - though the Tyrant will no doubt get torrented next turn, at least the wreck of the Razorback gives it 50% cover . Next turn Tyranids will move up keeping pressure on the left flank, hopefully Trygons should get into combat then. Tervigons will spawn more Termagants to take objectives and swarm the Angels.
Turn 3
Flamer Assault Squad with the Priest drive back towards the hab block ruin in order to get closer or claim the objective. Melta squad bail out a Razorback ready to support Honour Guard with shooting or support the flamer Assault Squad in combat with the Gargoyles. Remaining Razorbacks shuffle about as the last Razorback on the left flank moves up 12" towards the objective.
Shooting Honour Guard burn the Genestealers with bolter and flamer killing them all. Missile launchers along with plasma and lascannons kill off the approaching Trygon. Hive Tyrant gets blasted by melta, plasma and lascannons but thanks to cover saves has a single wound left.
In assault Honour Guard charge the Hive Tyrant, Tyrant allocates three hits to the Librarian and one to the squad, fails to wound the Librarian and kills a Honour Guard, though Librarian wipes the Tyrant out with his force weapon. Gargoyles get battered in combat and fall back having just seven of them left now.
Tyranids call for reserve and the other 'Stealer unit comes on the left flank and runs towards the Assault Marines which just beat the Gargoyles in combat. Tervigon in the shrine spawns plenty more Termagants which move towards the administratum objective, it moves out of terrain towards a Razorback snapping those crushing claws...other Tervigon spawns five Termagants and burns itself out, it casts feel no pain on a unit of Termagants which move towards the Assault Squad which panned the Gargoyles. Trygon Prime slithers through cover ready to assault as the Gargoyles auto rally and move towards the Honour Guard.
Shooting Hive Guard on the right flank immobilise and shake the last Razorback. Tervigon fires stinger salvo at the Razorback and immobilises it, ready to get those claws into action next turn! Hive Guard blast a empty Razorback which the Assault Squad bailed out of and immobilise it, easier for the Prime to tear to pieces! Gargoyles blast the Honour Guard as a unit of Termagants blast the Assault Squad.
In assault Genestealers and Termagants charge the Assault Marines and wipe them out thanks to rending claws, furious charge and toxin sacs along with feel no pain goodness. Tervigon rolls a D3 for extra claw attacks and gets 6, that's 7 attacks on the charge which makes the Razorback go boom! Prime charges the other Razorback and wrecks it. Gargoyles charge the Honour Guard and stay in combat thanks to being fearless.

 * Tactical Notes
Wow, the Tyranids have really come back hard this turn! The bugs have cleaned house almost on the left flank leaving a single melta Assault Squad, Honour Guard tied with Gargoyles, and a battered flamer Assault Squad which took wounds from the tank exploding. Right flank isn't doing massively well with the last Razorback immobilised and the administratum objective infested with Termagants and Hive Guard. Tyranids nex action next turn will be to sweep on the left flank taking out remaining units and move onto the hab block objective.
Angels have took a lot of damage this turn and not dealt out a huge amount. Many tanks have gone boom along with a Assault Squad thanks to a mass assault. Next turn hopefully the Honour Guard can smash those Gargoyles, the Honour Guard and Assault Squad by the tower can tackle those Termagants on the objective and then the melta squad inside the immobilised Razorback can bail out and tackle Hive Guard and Termagants.
Turn 4
Honour Guard on the left flank move to use flamers on the Termagants in the tower ruin as the melta squad bail out their Razorback and move onto the administratum objective to blast some Hive Guard with melta. Melta Assault Squad which supported the Honour Guard blasting the Hive Tyrant moves to assault the Termagants which just killed off a flamer Assault Squad. Flamer Assault Squad with the Priest bail out the Razorback and make sure they claim the hab block objective as the Razorback moves away 6" towards the bugs.
Shooting krak missiles, plasma and lascannons kill the Trygon Prime. Termagants on the tower ruin get hit by bolt pistols, melta and flamer from the Honour Guard and melta squad on the objective, they fail morale and fall back 3". Other melta squad blasts the Hive Guard wounding one. Left flank, melta squad blasts the Termagants but thanks to good feel no pain rolls only one 'Gant dies from a melta shot.
In assault Honour Guard charge the Termagants and wipe them out, they consolidate towards the administratrum objective. Honour Guard on the left flank wipe out the Gargoyles as the melta squad assaults the Termagants, which pass leadership (using the Tervigons) and get counter assault - combat remains on. Melta squad charges the Hive Guard and wipes them out, consolidates 6" up the ruin.
Tyranids turn Termagants both on the administratum objective fail synapse tests. Stealers move ready to engage the melta Assault Squad locked in combat with the Termagants as both Tervigons move to assault the Honour Guard, each Tervigon casts feel no pain though the single wound one fails the psychic tests and kills itself - luckily no Termagants were in 6"!
Shooting last Hive Guard unit blasts the last operational Razorback and blows off the plasma gun and crew stuns it. Tervigon fires stinger salvo into the Honour Guard. Termagants on the administratum objective open up on the melta squad which killed the Hive Guard, three Marines fall and they fail morale and fall back 4"
In assault the 'Stealers charge the Assault Squad, combat remains on but only three Marines left. Tervigon charges the Honour Guard takes no wounds and leaves just the Priest surviving - Librarian had earlier took a wound and attacks got allocated against it after the Tervigon rolled a 6 for extra attacks for the crushing claws - Honour Guard fail morale and fall back 7".


 * Tactical Notes
Looks like on the left flank the Tyranids have it under control. Sure the Trygon Prime is dead which would have been the best bug to get to the hab block objective, but there's little Blood Angel presence on the left flank now. On the right flank Angels are thoroughly claiming the tower objective and it appears the administratum objective may belong to them too...
Angels will blast the Termagants from the administratum objective with bolt pistol, flamer and fist.
Tyranids will keep the pressure on the left flank finishing anything off they can and moving towards the hab block as the factorum objective is secure.
Turn 5
Only movement from Angels is units falling back because they cannot regroup because a enemy unit is within 6", solo Priest and melta squad fall back.
Shooting Honour Guard unleash flamers on the Termagants on the administratrum objective as Devastators unleash mass krak missiles are the last Tervigon leaving it with three wounds left.
In assault Stealers and Gants kill more Marines leaving a single one left who passes morale. Honour Guard charge the Termagants and wipe them out, they consolidate contesting the objective against the other small Gant unit which went over to the objective at the start of the game.
Termagants on the administratum objective fail synapse. Tervigon moves towards the hab block.
Shooting Termagant do nothing to the Honour Guard while the last Hive Guard pops the last operational Razorback.
In combat Stealers kill the last Marine with rending claws, both Stealers and Termagants consolidate 1".
 * Tactical Notes
Looks like things have turned for the worse for the Tyranids, if it was a kill point game they'd be kicking ass, though, Termagants have failed and the administratum objective is contested and means Angels hold two objectives and contest one now - Tyranids need to get to the hab block objective to score a draw.
Angels plan is to torrent the Tervigon with krak missiles while the Honour Guard beat up more Termagants.
Turn 6
Game continues....Honour Guard unleash flamer into the Termagants killing them all, Honour Guard firmly contest the administratum objective. Krak missiles blast the Tervigon but poor shooting and wounding leaves it with two wounds left.
Tyranids turn everything moves towards the hab block, but it's too far and nothing can be done.
Blood Angels win claiming two objectives and contesting one Tyranid claim one.


 Summary
That was a really exciting and cool game, considering there was only one player

. Though this game was all about discovery and there's plenty of stuff I learnt.
Firstly, Blood Angels, not many changes to the list but those changes helped. The Devastators work more in tandem with the Razorbacks allowing the army to put down a lot of fire power first turn such as wiping out a Hive Guard squad and taking three wounds from a Tervigon, that's seven T6 wounds taken in the first turn from the Tyranids. I would like a forth missile launcher but it's not going to happen and to be fair three work ok plus gives me a spare wound instead of losing missile launchers. Infernus pistols worked well as they didn't need to get into melta range, although due to unlucky Sgt armour saves only two infernus pistols actually got fired and one of those failed to wound, though because they don't need to get into melta range with Tyranids they worked nicely - I'll be keeping them because even against armour that single S8 AP1 shot will help.
Tyranids put up a massive fight against the Angels and I thought they had it in the bag, it was the Termagants which let them down in the end and without Tervigon support Termagants are cack. A lot of things I learnt with Tyranids today and that they need to work together to get the benefits. I tried the Tervigon with toxin sacs and while the sacs are massive benefits to the Termagants (they got re-roll to wound when charging which was very cool) those toxin sacs don't hold the Tervigon back too much. I did last minute at crushing claws which did a lot of damage, I know they're 25 points each but those claws generated a extra seven attacks for the Tervigons collectively over the game, plus Tervigons are I1 so doesn't really cause much problems.
A lot of mistakes Tyranid side, rules and tactics. First was deployment, I should have put a Tervigon with the Hive Guard on the right flank keeping them in synapse range and then it could buff the Termagants and act as a counter assault unit, could have been a game changer that one. You'll notice Raveners are in the list but not mentioned in the game, that's because I forgot to deploy them! This is what happens when you proxy stuf...ah well. Probably would have deployed them on the right flank using terrain to sneak up and attack those three Razorbacks and then move onto the hab block ruin. Also, Tyranids was under points due to last minute changes so even though five Genestealers were used they didn't have scything talons, which I added because they are meant to be a suicide anti tank unit and re-rolling those 1's can help.
Rule wise I'm not sure when a unit falls back and when synapse is checked. In the rulebook it just says units fallback in the movement phase, doesn't say at the start so I guess it's just when they come to move. In the Tyranid codex synapse is just a 12" radius doesn't say when this is measured, though dominion is used at the start of the turn, which is before movement so I guess it was fine those units regrouped, however, when those units did regroup they should have just moved 3" according to the regroup rules instead of moving normally like the Gargoyles did.
Both lists I'm happy with and I'm going to leave as is. I know some people will say crushing claws are overcosted rubbish, they are expensive but they did well this game. I know scything talons isn't always the first upgrade for 'Stealers but against tanks they do not need toxin sacs and before in the old codex 'Stealers were awesome without toxin sacs then, scything talons should help them a little bit more.


 Blood Angels - 2000
  Iron Warriors - 2000
  Orks -2000
  Imperial Guard - 2000
 Eldar - 2000
  Hive Fleet Krakken - 2000
  Dark Eldar - 2000
  Necrons - 2000
  Grey Knights - 2000
  Daemons - 2000
  Ravenwing - 2000

