Switch Theme:

Blood Angel Jumpers Battle Reports  [RSS] Share on facebook Share on Twitter Submit to Reddit
»
Author Message
Advert


Forum adverts like this one are shown to any user who is not logged in. Join us by filling out a tiny 3 field form and you will get your own, free, dakka user account which gives a good range of benefits to you:
  • No adverts like this in the forums anymore.
  • Times and dates in your local timezone.
  • Full tracking of what you have read so you can skip to your first unread post, easily see what has changed since you last logged in, and easily see what is new at a glance.
  • Email notifications for threads you want to watch closely.
  • Being a part of the oldest wargaming community on the net.
If you are already a member then feel free to login now.


Made in us
Blood Angel Neophyte Undergoing Surgeries


My brothers (loudenswain and Revackey) along with my friend (TzapMind) participated in a 1250pt three-round tournament at Gaming, Etc. in Stratford, CT, a couple weeks ago (2/27/11). It was good fun and I ended up going 2-1 for the day with Strike Fleet Antebellum. I played the following list (everything has jump packs):

Librarian
Honour Guard (5) w/ meltagun x3
Sanguinary Priest (2) w/ power weapon
Assault Squad (10) w/ meltagun x2, power fist
Assault Squad (10) w/ meltagun x2, power fist, hand flamer
Vanguard Veterans (5) w/ storm shield x2, glaive encarmine, thunder hammer, lightning claw & storm shield


First game was against mech imperial guard using an inquisitor and mystics, psyker battle squad, infantry platoon, 2 basiliks, a medusa, and a manticore. The mission was dawn of war, seize the ground. This was my first game against IG (surprisingly) and my first game against an inquisitor with mystics. Well, I tried to deep strike everything near him and I lost close to 10 guys (a third of my army) right off the bat. The second turn reduced me to about 10 models and by the end of turn four I was wiped. I made a huge mistake with by having 'square peg, round hole' symptom. After realizing that if I deep striked (deep struck?) within 4d6" of his inquisitor, that the squad would get an artillery round in its face, I continued to try and deep strike close to him. I also did not know of the large minimum range of his basilisk and manticore? (the thing with the four missiles). I could have easily dropped the rest of my army in relative safety and it would have been a decent game. Oh well.

--------------------------------------------------------------------------------

Game two. At this point I was on table 10 (last or second to last place). I faced my buddy Bruce (we have somehow played at three quarters of the tournaments we were both at) who also has blood angels. His forces were made up of three 5 man assault squads with a flamer (2 in rhinos), a bare-bones captain, 5 shooty terminators, 2 furioso's (1 with blood talons, 1 with frag cannon) in drop pods, and regular dreadnought with twin-linked heavy flamer. The mission was spearhead, annihilation with a secondary objective to control more table quarters than your opponent. I won the roll-off and set up first.

I started on the board with both 10-man assault squads with a sanguinary priest attached to each and the librarian attached to the larger one. He deployed opposite me with an assault squad in a rhino on each flank, one supported by the dreadnought and assault squad with jump packs, the other by the terminators.
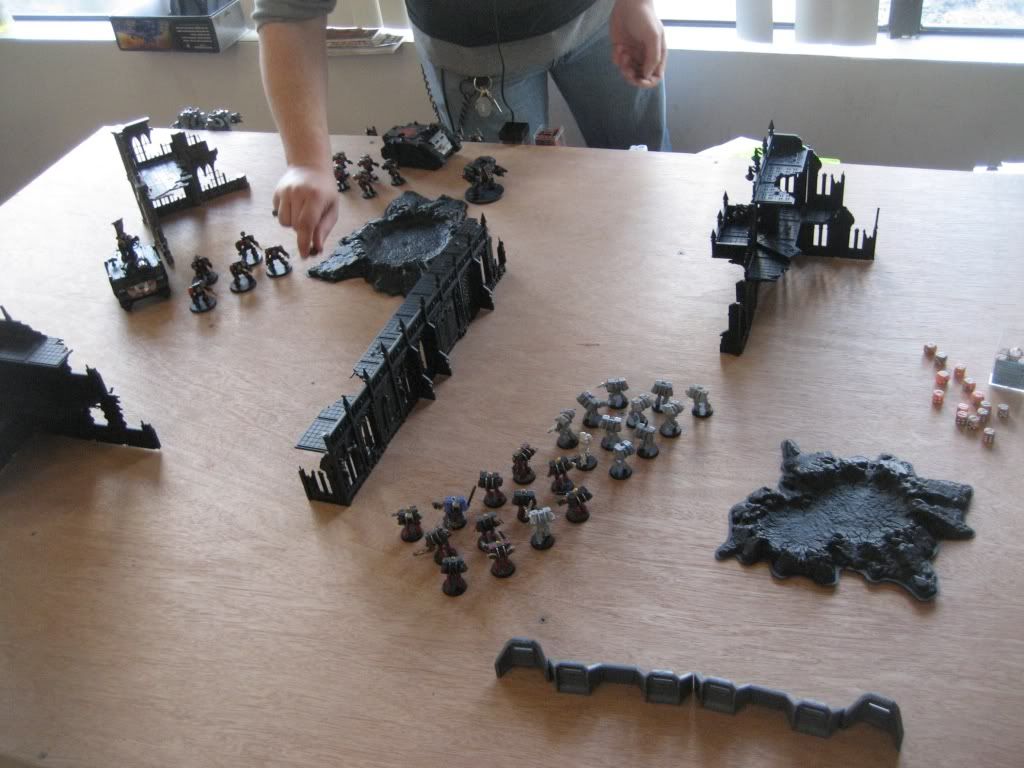
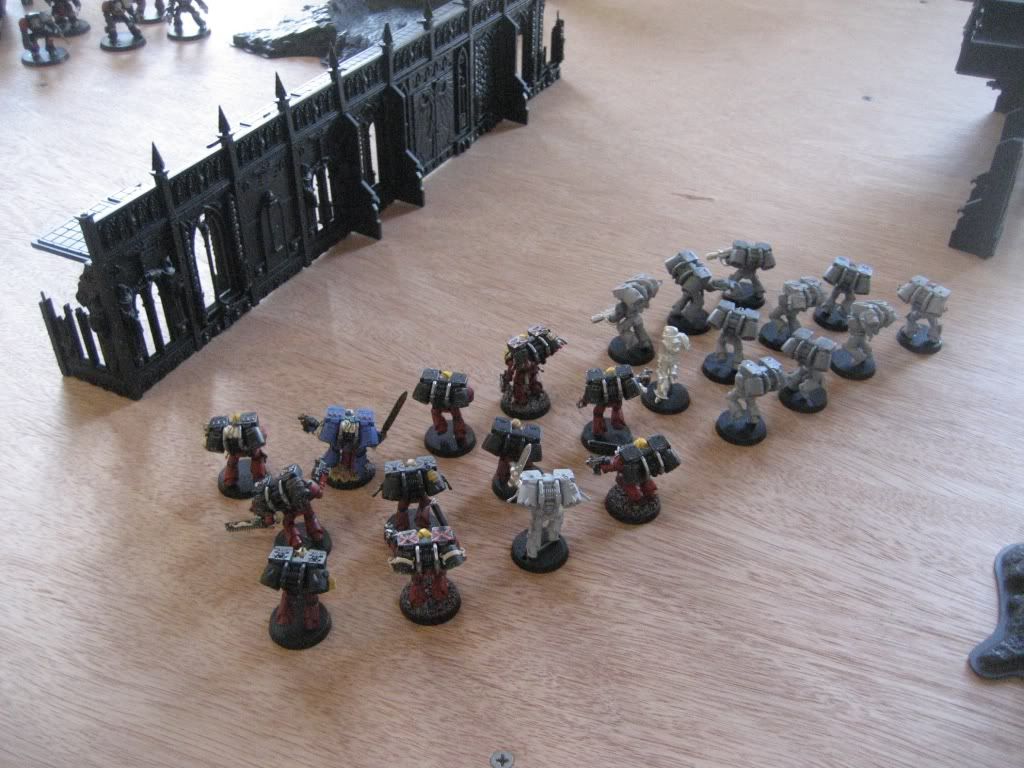


My first turn was uneventful with both assault squads moving up to the cover of the wall. The librarian joined the gray squad as well. No running, no shooting, no assaulting.


His first turn saw the furioso with a frag cannon land right behind me while his dreadnought, rhino, and assault marines moved up my right flank and his rhino and terminators move up on my right. He shot the frag cannon and at least two heavy flamers at me from the dreadnoughts, killing 2 marines and my priest (he caused that many wounds with the frag cannon) which caused them to run. I don't believe he shot at me with the terminators though.
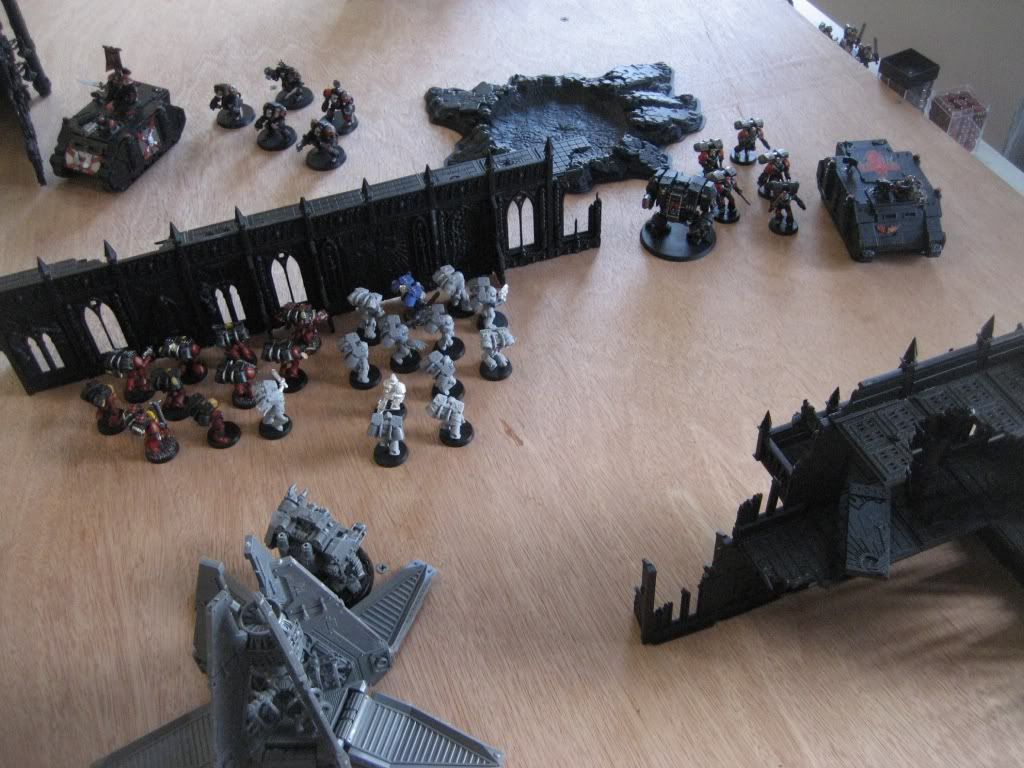
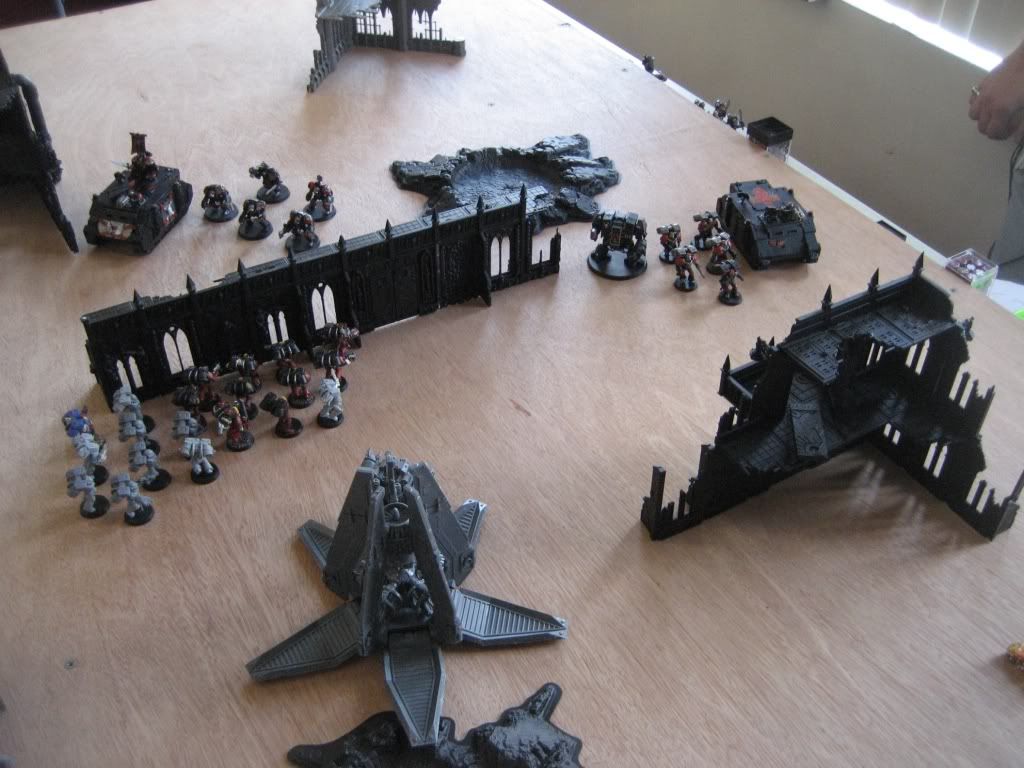

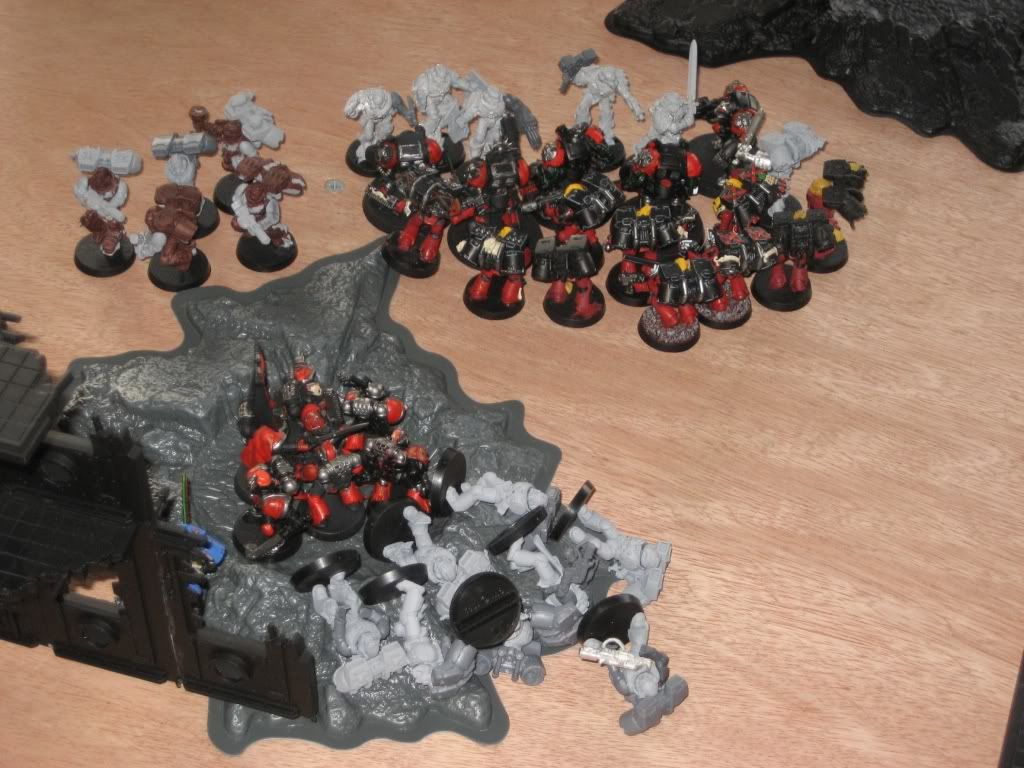
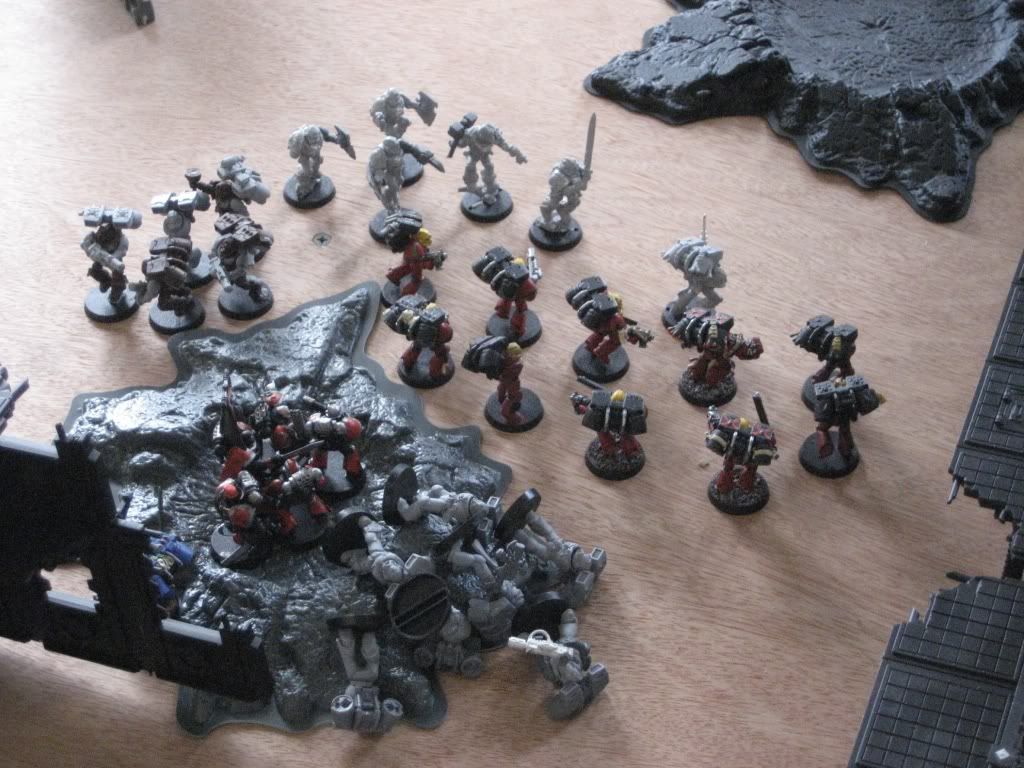
My turn two only happened this way because I was lucky enough to have both the veterans and honour guard come in from reserves. I dropped my honour guard right behind his rhino and the veterans right behind his terminators while both assault squads hopped over the wall and got ready to assault. I shot all three meltaguns from the honour guard at the back of his rhino and managed to immobilize it but I then got lucky with blood lance which managed to explode it (which managed to kill no one). I didn't shoot the painted assault squad at the terminators for fear that I might kill one and be out of assault range (although looking at the picture, I would have had to kill three of them). I then assaulted his terminators with my veterans and the painted assault squad, bringing them down before they were able to strike with sheer weight of attacks (31 regular attacks, 10 power weapon attacks, 6 power fist/thunder hammer attacks ... at Str 5). The other assault was a draw (I believe). We each lost a marine. (That crater was not model friendly >)


His turn two had his furioso with blood talons come in right next to my honour guard. Both his dreadnoughts and his rhino moved back toward me, while his assault squad continued into my quarter (I believe to claim a table quarter). I got shot a few more times with heavy flamers, frag cannons, and magna grapples (which did not hit all game), and lost a marine from the painted squad . In the assault, his captain squared off against my librarian (doing nothing to each other), and my squad killed another one of his marines; he passed his leadership test.
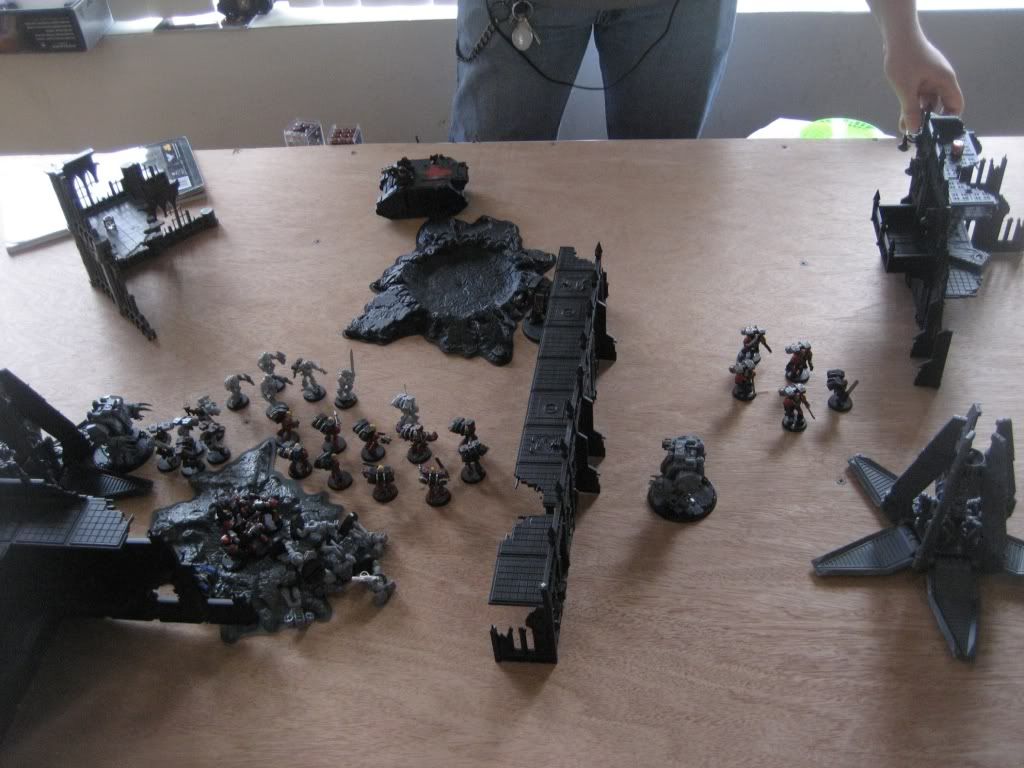
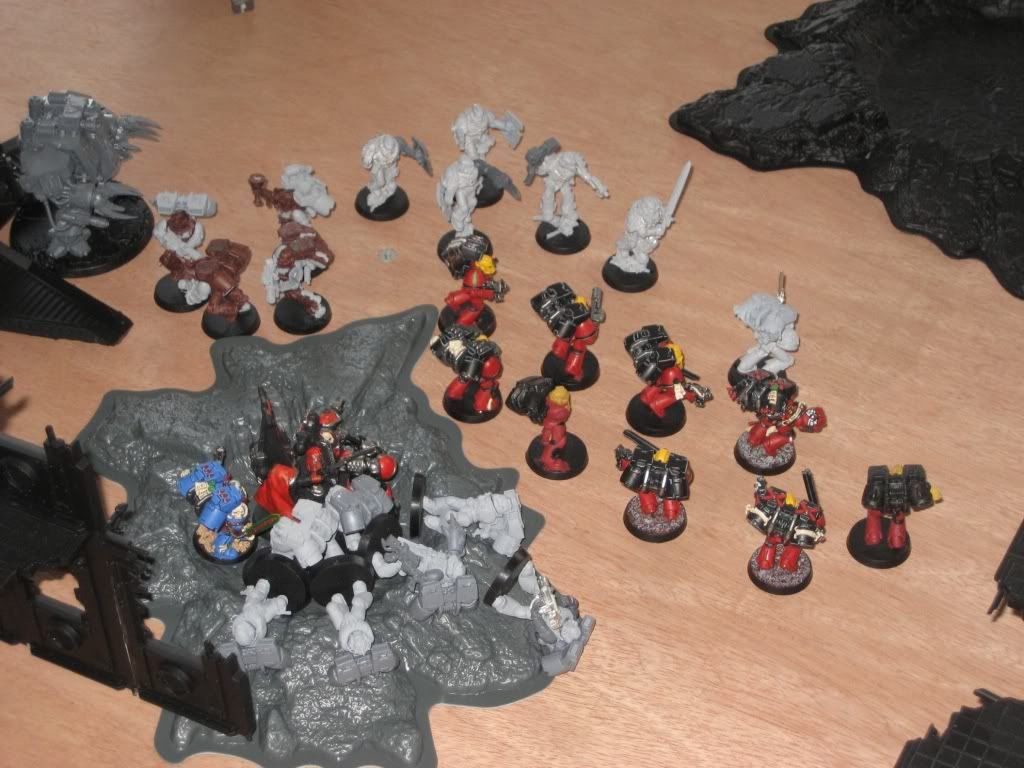

My turn three was repositioning. I moved everything away from the right side of the board where he had two dreadnoughts and an assault squad. The veterans and painted assault squad moved to intercept his rhino/assaut squad, while the honour guard hoped that three meltaguns could bring down a furioso ... luckily they did. The furioso exploded (killing a meltagunner from the honour guard) and the rhino also exploded (killing no one). Unfortunately, both my veterans and my assault squad were out of range of assaulting. The combat continued at the bottom, with my marines killing two of his, and losing none of their own; he again held morale.
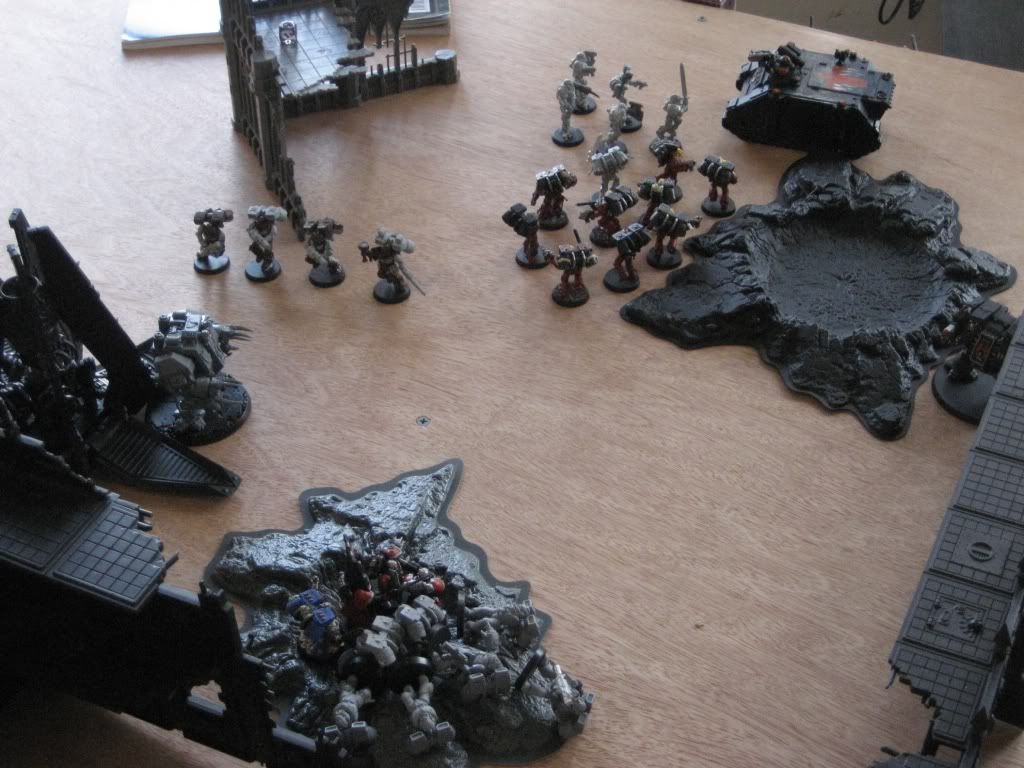
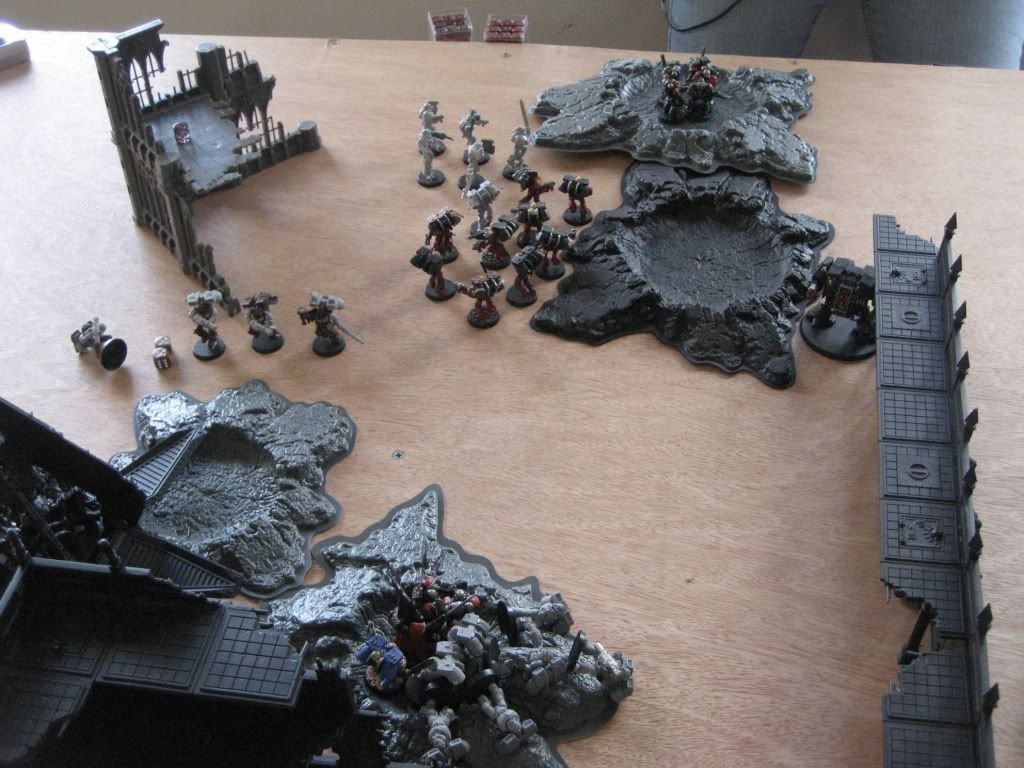
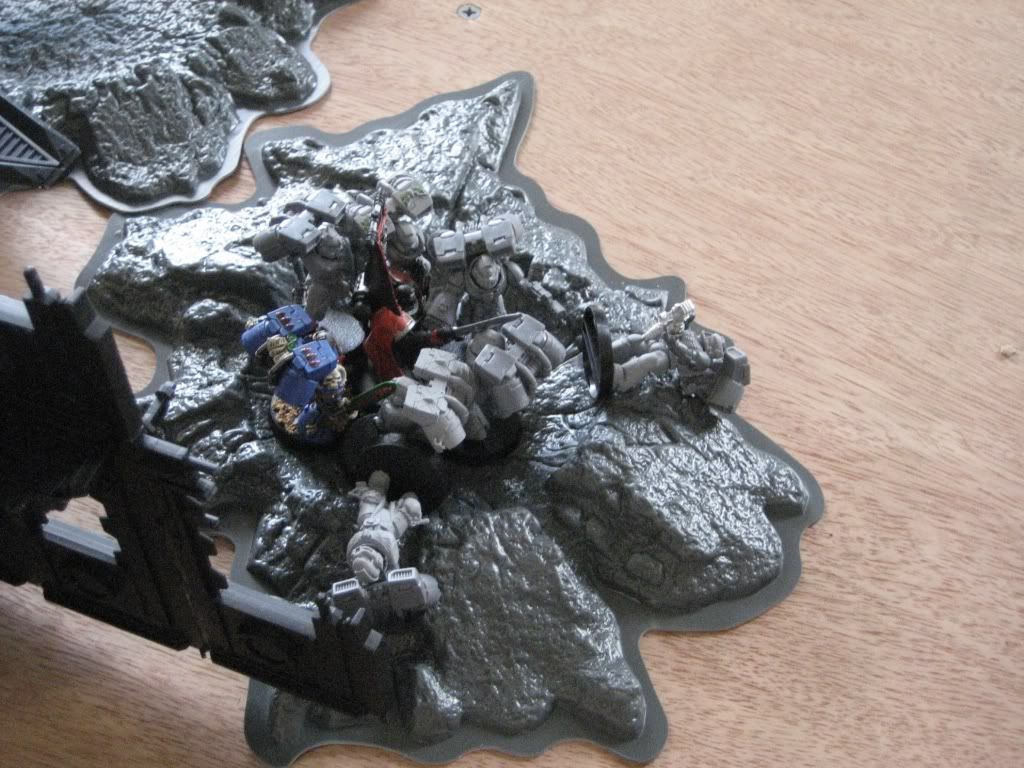

His third turn had his two remaining dreadnoughts move closer to me, the furioso toward the combat with his commander, and the regular one toward my assault marines and veterans. His disembarked assault marines moved out of the crater to assault the veterans, while his other assault marines stayed out of the battle in my original table quarter. I lost another marine to the heavy flamer while his assault marines assaulted my veterans (who I believe failed to kill them all). My power first sergeant also squished his commander just in the nick of time.
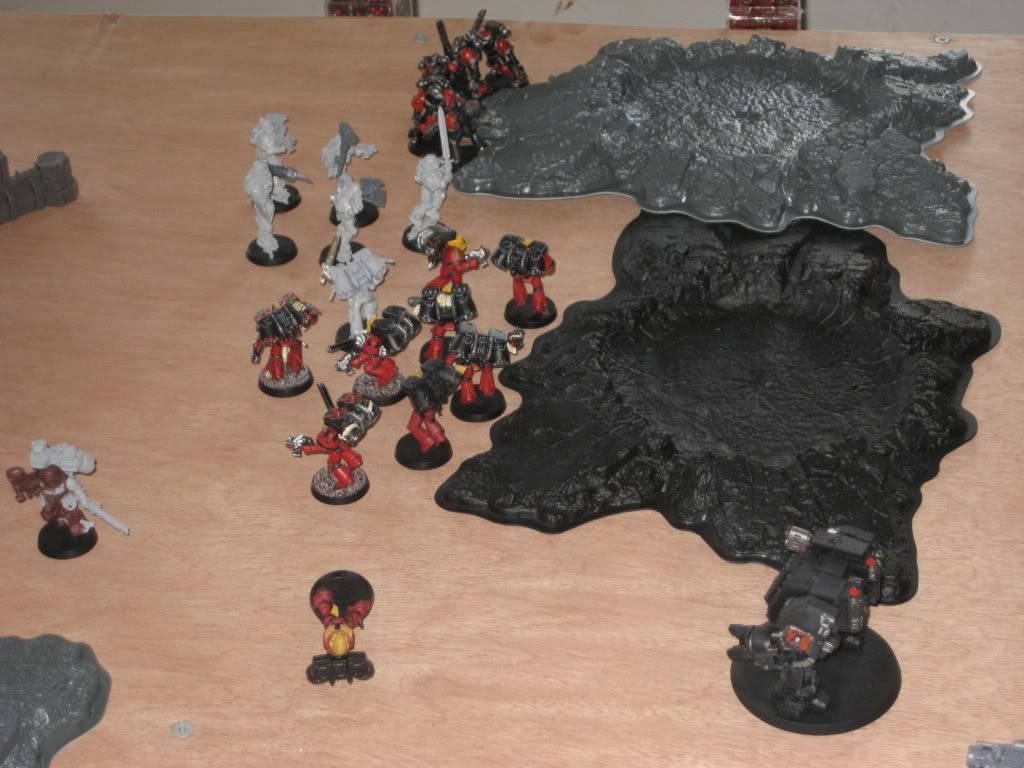

My fourth turn is when I put the nail in the casket so to speak. I hopped my painted assault squad over the combat with my veterans and then moved both my honour guard and gray assault squad with the librarian to take out his two dreadnoughts. One dreadnought fell to blood lance, while the other died to a pair of meltaguns from the honour guard. My assault marines charged into his remaining marines up top and wiped them out.
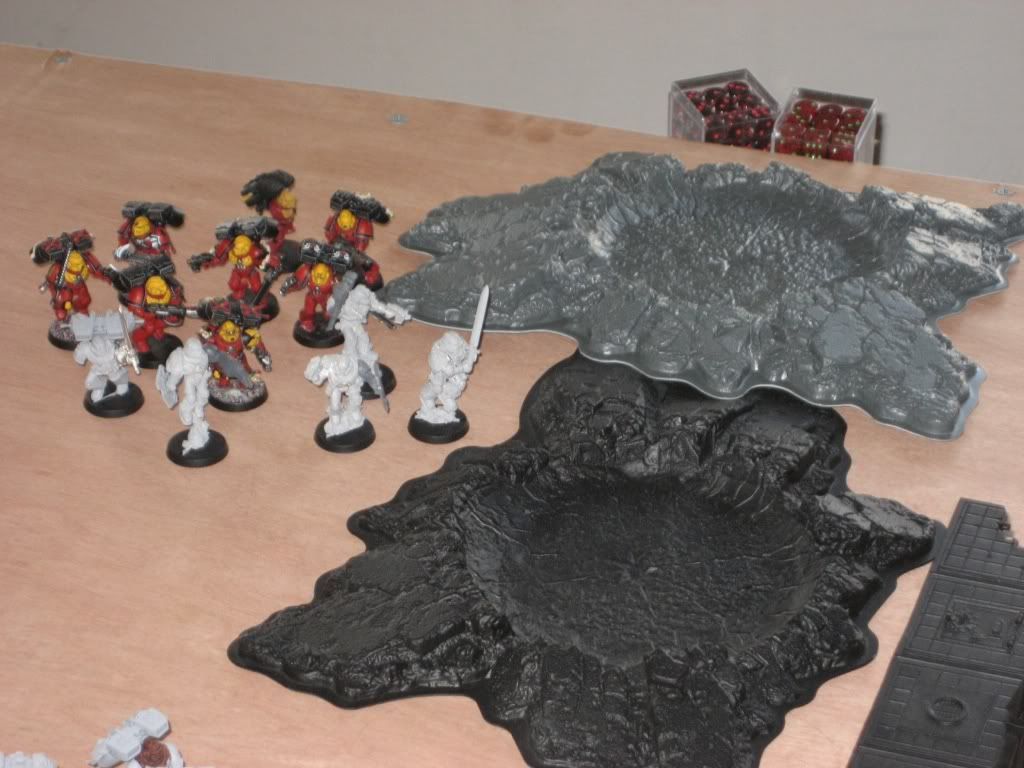
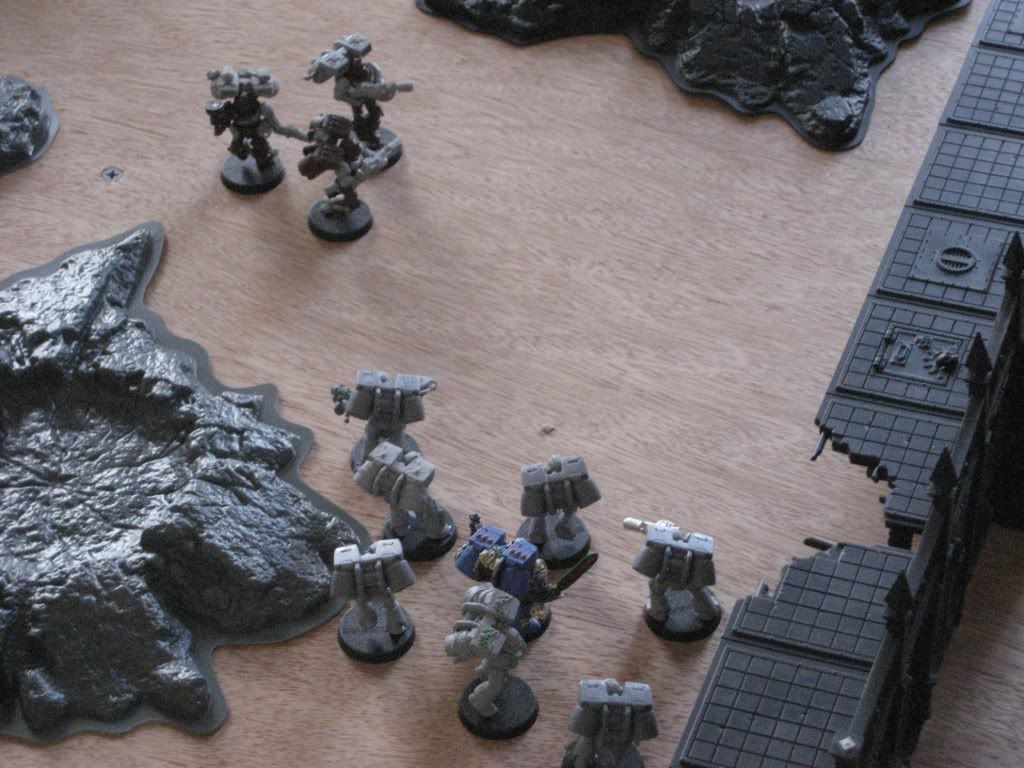

His fourth turn consisted of shooting me with his missiles from the drop pods and repositioning his remaining assault marines.

My fifth turn, I attempted to take out his two drop pods that were in range. I failed to destroy them with the honour guard or assault marines and so assaulted both of them. I ended up blowing one up with a power fist or a krak grenade.

His fifth turn had his assault marines assault my marines and librarian. I don't remember what happened, but we called the game after that.

--------------------------------------------------------------------------------

Second game was against my friend TzapMind and his Thousand Sons chaos space marines. His army was a Tzneetch demon prince with warp time and breath of chaos, 9 thousand sons with a sorcerer with bolt of change (I believe) in a rhino, 5 man chaos marine squad with a meltagun and a power weapon in a rhino, three obliterators, and a 9 man havok squad with 2 lascannons and 2 missile launchers in a rhino. The mission was pitched battle, capture and control. We rolled off and I don't remember who won, but I set up and went first (he failed to seize the initiative).

I set up in the center with the gray assault squad combat squadded (the squad with the 2 meltaguns got red thirst) and my honour guard and veterans in reserve). He set up across from me with his heavies in either corner, the thousand sons and marines flanking the large ruins and the demon prince behind the ruins.
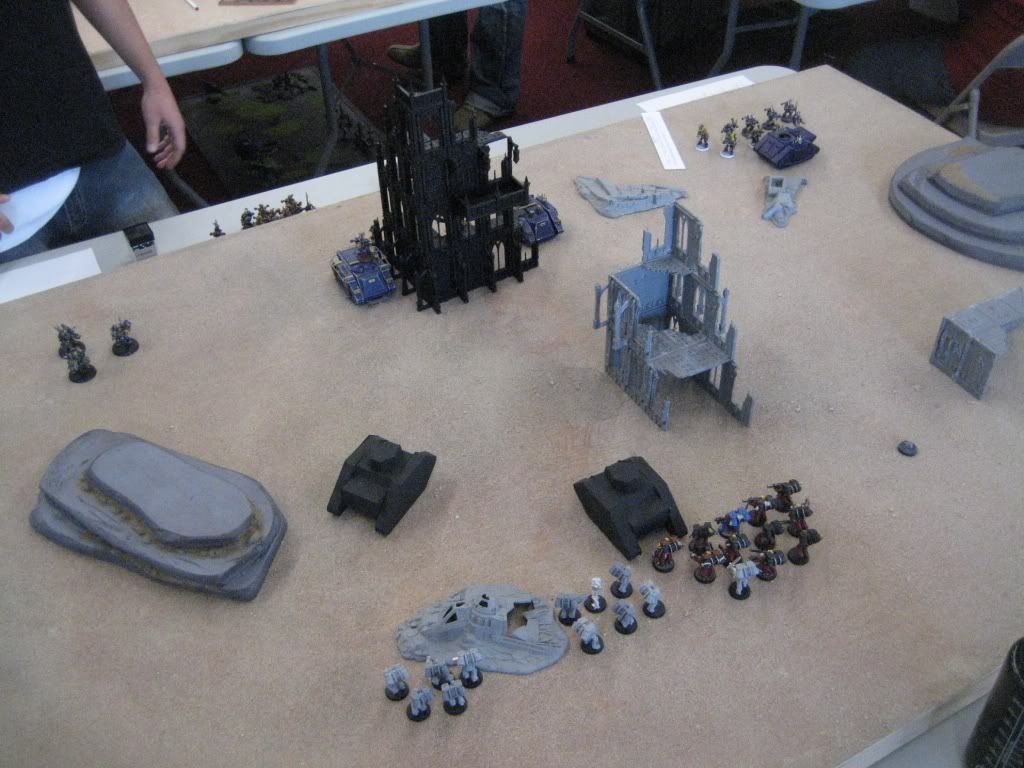

My first turn had me tentatively advance (I did not want to get within 18" charge range of his demon prince). The double meltagun combat squad moved to the left, hidden behind the hills, while the other two squads took as much cover as they could get. I made sure to get a marine close enough to the librarian so that they could be covered by shield of sanguinius. (If I could do this again, I think that I would move everything to the left so that they could take cover from the obliterators.)
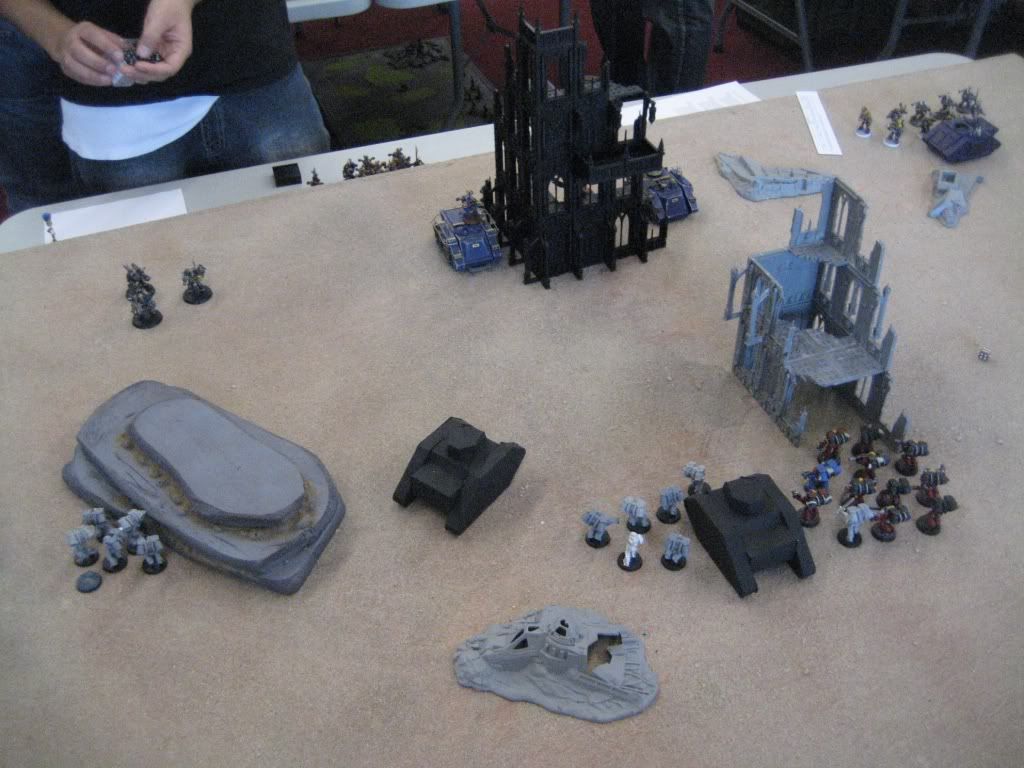

In his first turn, he moved his obliterators up, he disembarked his thousand sons and set up a gunline, and moved his marines in the rhino behind the ruin. His shooting was quite effective, with his havoks and obliterators killing 8 marines from the painted squad and his thousand sons killing two from the gray combat squad.

My second turn brought both of my reserves in. I tried to place my veterans first, right next to his demon prince, but they scattered into him and were placed back in reserve (luckily). Because of that, I brought the honour guard down right next to his obliterators. I moved the two remaining painted assault marines to a hiding spot near my objective and had the surviving librarian and sanguinary priest join up with the gray combat squad. The double melta combat squad hopped the hills and got ready to fire upon and assault the obliterators. Both my double melta squad and the triple melta honour guard fired upon the obliterators, killing two and wounding the third with a bolt pistol. They then assaulted and lost one marine, failing to take off the last wound.

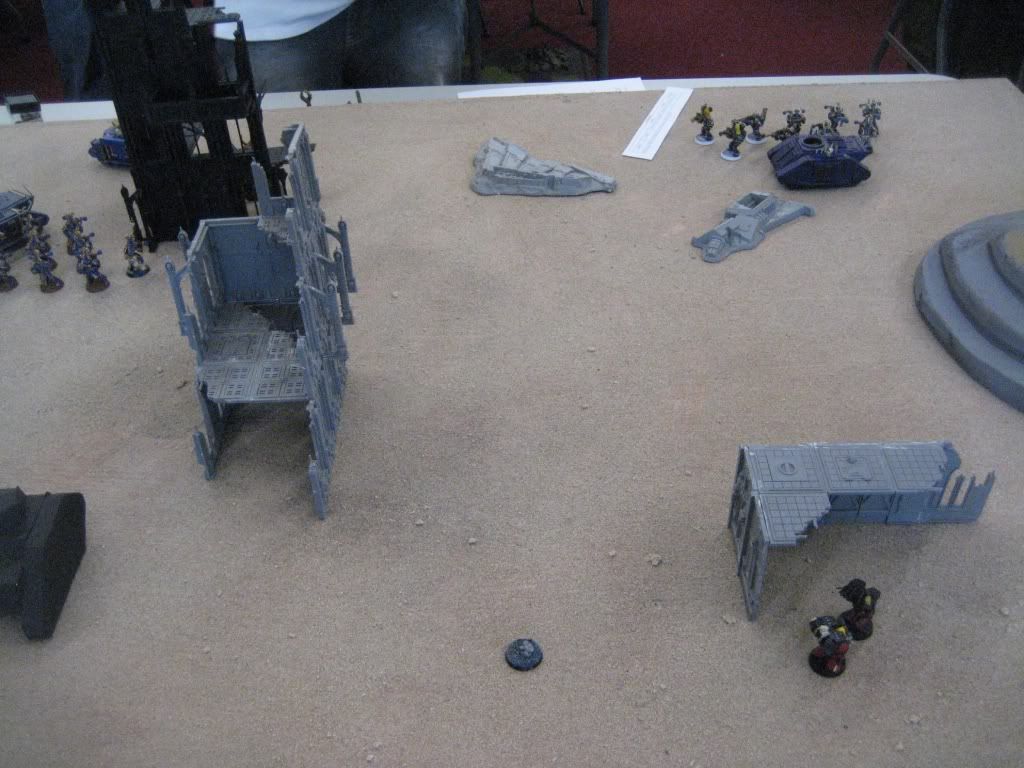

His second turn saw him move his marines in the rhino and demon prince toward my assault squad on the right, and to move his thousand sons into a better spot to shoot at my honour guard. His thousand sons took out two of my honour guard, while in combat, the demon prince and obliterator took out the last four marines of the double melta combat squad. Both consolidated back toward the ruins.
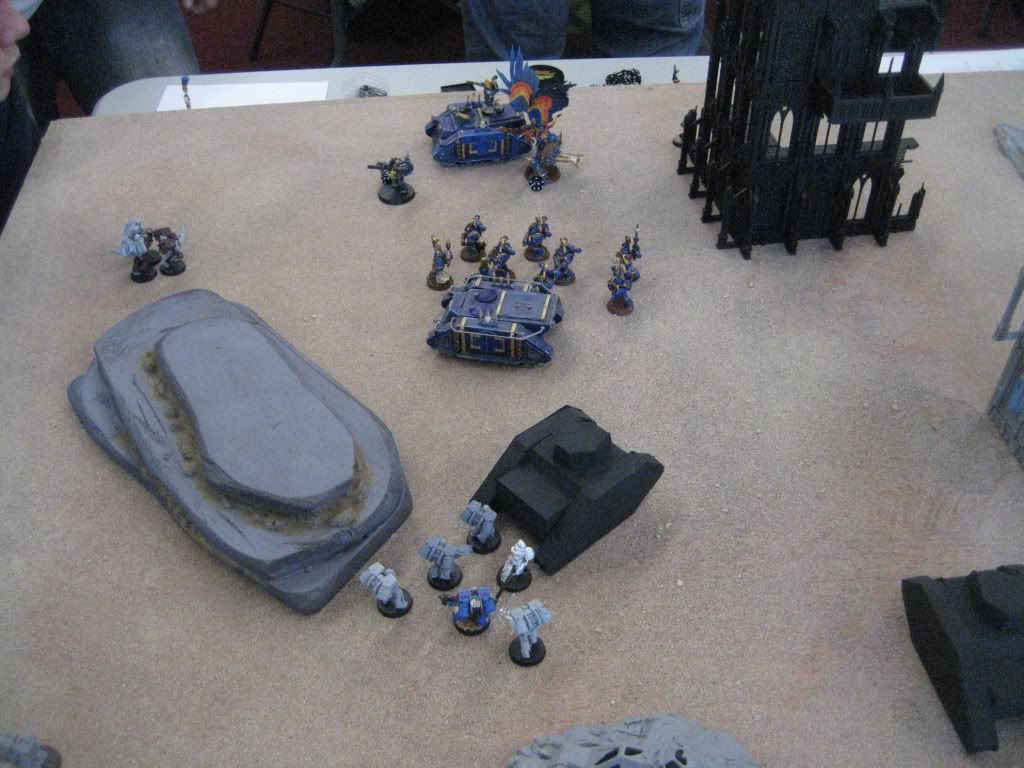

My third turn had my veterans come in again, and again scatter. This time, they scattered into the ruins, out of assault range of everything (luckily I didn't loose any to dangerous terrain). I moved my assault marines and honour guard into a position to assault his thousand sons. My librarian exploded his rhino and killed a thousand son with blood lance, but failed to wound his demon prince. I killed another one or two thousand sons with shooting between the two squads. In assault, I killed three of his marines, losing none in return, and another one of his marines died to fearless wounds.
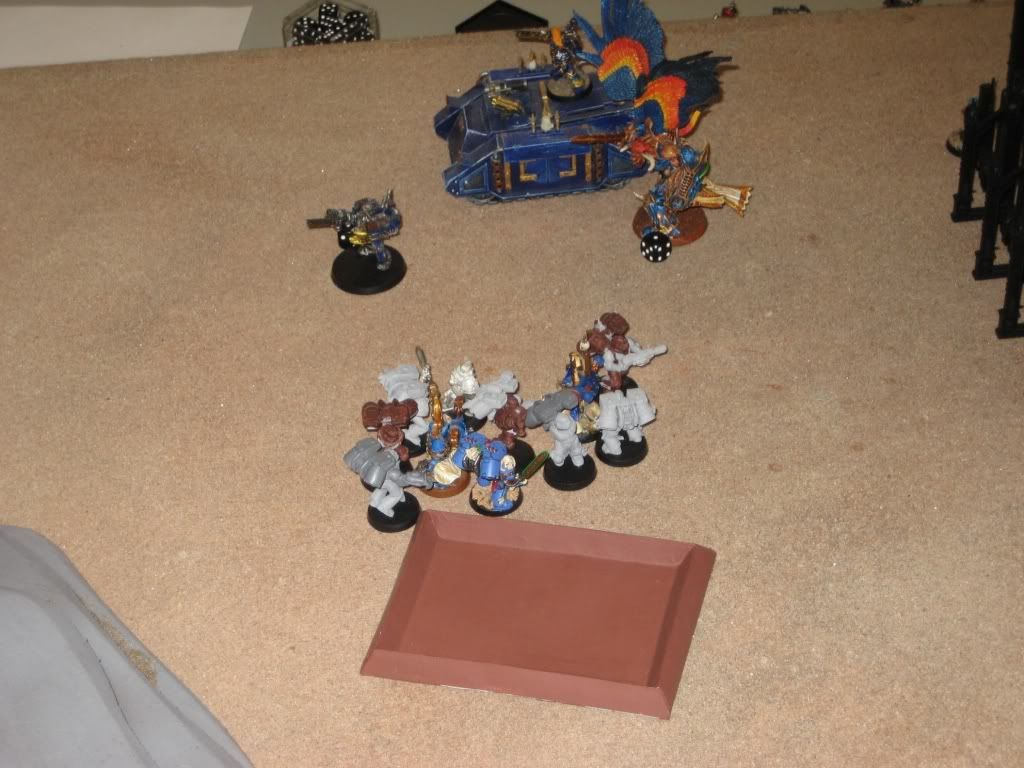

In his third turn, he moved his demon prince over to assault my veterans and moved his obliterator to assault my honour guard. His marines in rhino moved toward my objective. His havoks shot at my veterans, killing one, and my librarian nullified breath of chaos (thankfully). His obliterator charged in, killing two of the honour guard, while my marines, priests, and librarian finished off his thousand sons. The librarian died here to the sorcerer. At this point, my assault squad was no longer in combat (which changed the game), and they were able to consolidate toward the ruins.
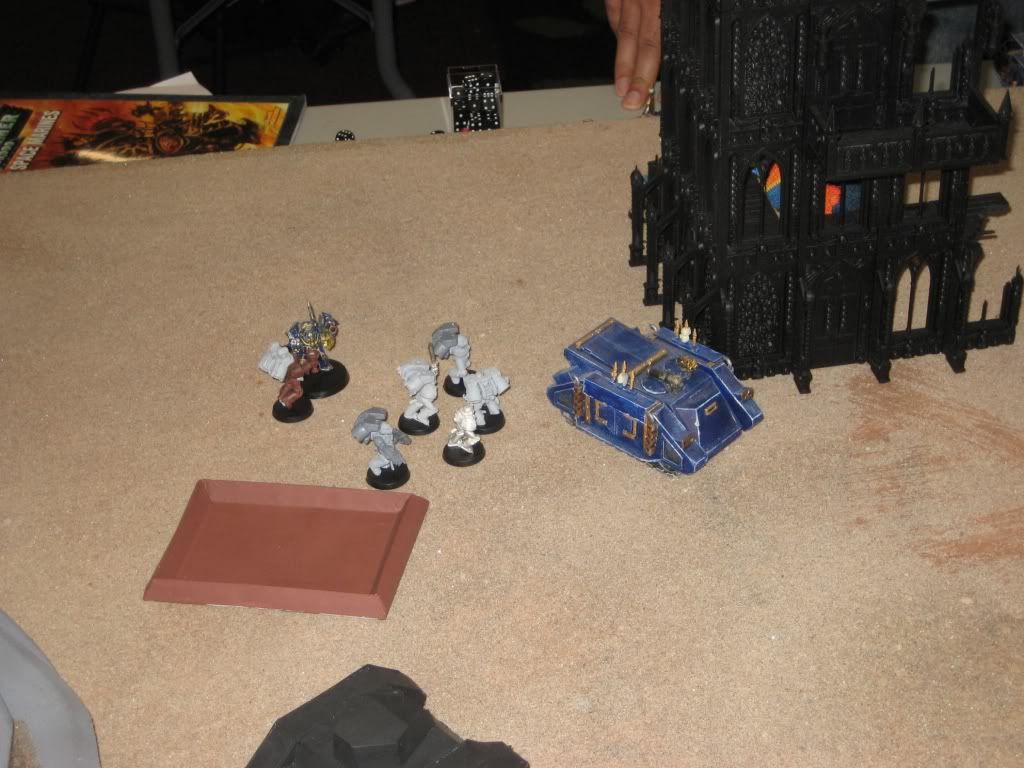

For my fourth turn, I moved the assault marines and one priest into position to assault his demon prince, while I moved the other priest to help the honour guard kill the obliterator. No shooting. The obliterator died to the priest's power sword, and the two moved toward the rhino. The assault squad charged and did quite well against the demon prince, losing two but putting at least 2 wounds on it. The final wound came from the last weapon I rolled (lightning claws I think) of my veterans. The two squads consolidated to the far side of the ruins to gain cover from his havoks.
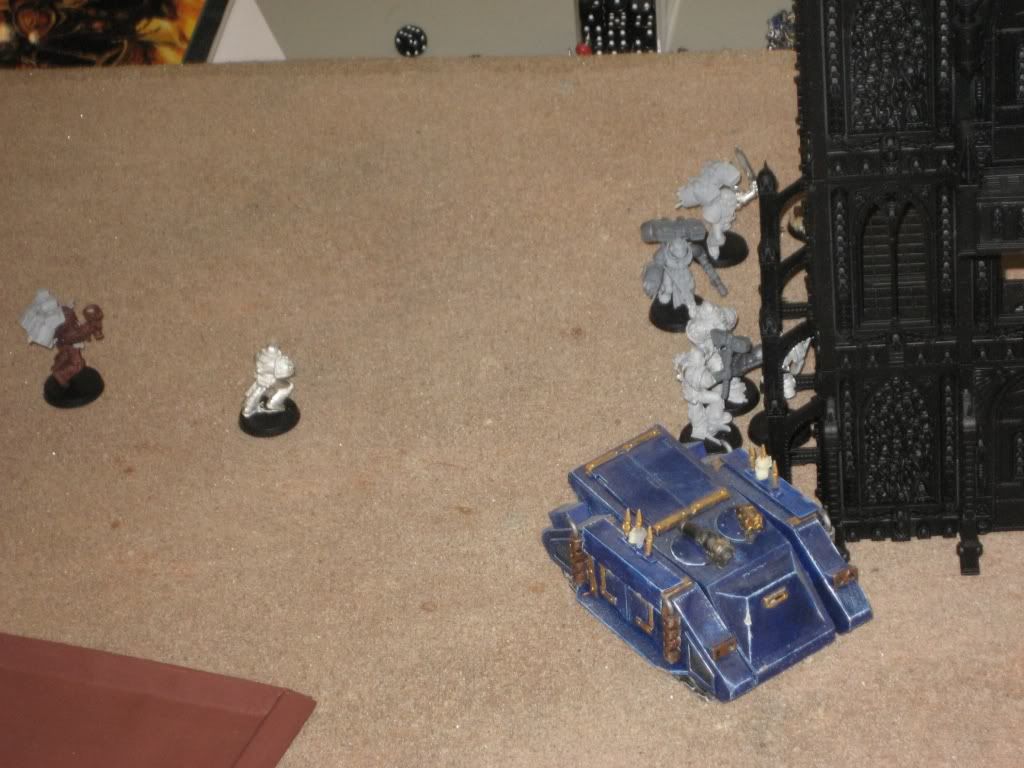

He moved his rhino toward my objective again in his fourth turn, and opened fire on my veterans with his havoks, killing one.

For turn five, I moved my 2 hidden marines out to claim/contest the objective in my table half and moved the remaining marine and priests near his objective to claim/contest it. My honour guard priest and veterans followed his rhino into midfield, but failed to do anything to it in assault (hitting on 6's sucks).
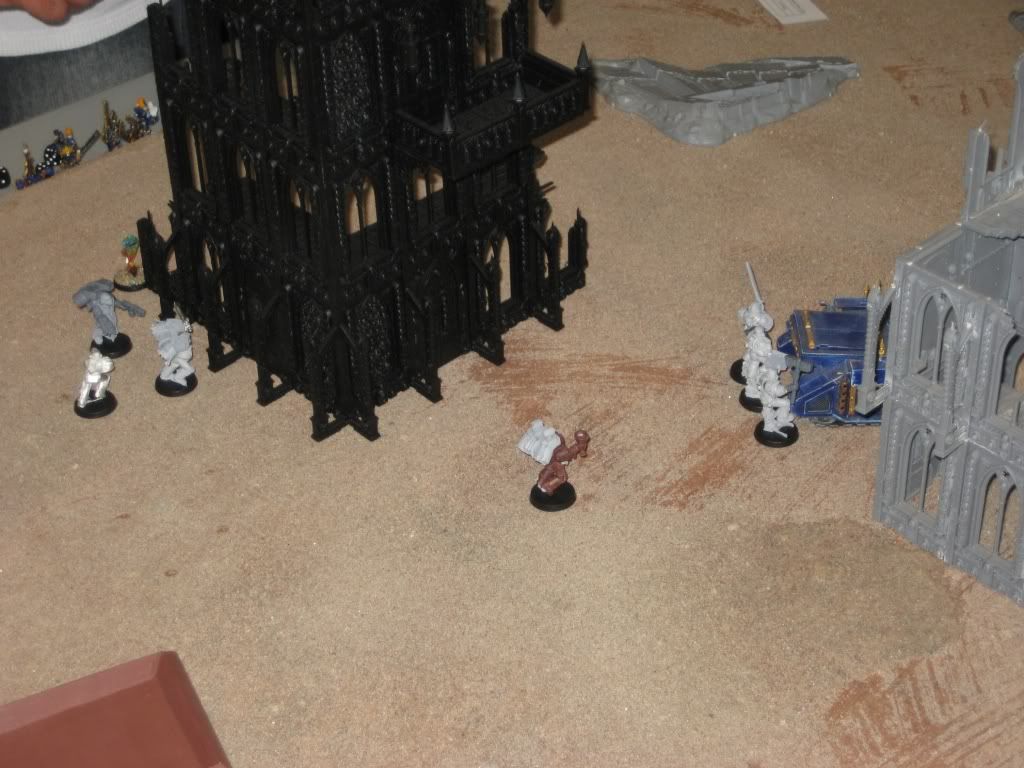

In his turn five he moved his rhino back up toward his objective and fired at my veterans, killing one. The game ended here. I controlled both objectives. It was a close game and we are sure to have a rematch.

--------------------------------------------------------------------------------

Any comments or criticisms are welcome.

Thanks and enjoy!

This message was edited 1 time. Last update was at 2011/04/19 01:05:00


Made in us
Sure Space Wolves Land Raider Pilot


Looks good though I dont like DOA

Your end has come. The sight of us will be your last. We are Wrath. We are Vengeance. We are the Rainbow Warrioirs."

*Silence*

-Snigger-

fatelf 
   
Made in us
Blood Angel Neophyte Undergoing Surgeries


What don't you like about Descent of Angels?

   
Made in us
Widowmaker


Georgia

Excellent battle report and congrats on the win.


Khador - 25pts
Tau Empire - 500pts  
   
Made in us
Blood Angel Neophyte Undergoing Surgeries


Thank you. Next time I write the reports up I am going to try to add a few paragraphs of reasoning. Why I did this and didn't do this. What I might have done differently. Etc.

   
Made in us
Blood Angel Neophyte Undergoing Surgeries


I've got a few new battle reports with my Angels Encarmine jumper list. This time the games were at 1500 pts. Once again the games were at GamingETC in Stratford, CT; they run monthly 40k tournaments, just hosted the Warhammer 'Ard Boyz tournament. Yeah, that was a shameless bump for the club; great place to play.

My List (everything has jump packs):
Librarian
Honour Guard (5) - x3 meltagun
Sanguinary Priest (2)
Assault Squad (10) - x2 meltagun, hand flamer & power fist
Vanguard Veterans (5) - x3 storm shield, glaive encarmine, thunder hammer, lightning claw

Game 1

Deployment type: Spearhead

Objective: The table will be broken into 4 table quarters and a center circle with a radius of 12”. Each one of these is an objective worth one point except the center circle which is worth 2 points. Normal rules for holding objectives are in effect with the exception that a unit can only hold one objective at a time and if it is in two table quarters it will count as being in the section the majority of the unit it is in, if there is no majority then the controlling player may pick which quarter they are in.

In order to contest an objective you must simply have a unit in the table quarter. For determining points at the end of the game no unit may count as being in two quarters use the rules as above for determining what section they are in. If a unit is in a vehicle and it has no majority on either side then roll for both the unit inside and the vehicle to determine what side quarter they are in.

Opponent: My opponent played Salamanders Space Marines. The list consisted of Vulcan riding with a 5-man? Tactical Squad in a Rhino; a 5-man scout squad; 3 Venerable Dreadnoughts with double close combat weapons, heavy flamer, and meltagun in drop pods; two Thunderfire Cannons in drop pods; two Landspeeders with multi-melta and heavy flamer; and a Land Speeder Storm with a multi-melta or heavy flamer.

The Game: I don't remember who won the roll-off but I ended up deploying first. I chose the bottom right quarter and set up both combat squads (one with two meltaguns, one with the sergeant) of marines, the librarian, and priest behind the hill. I chose the bottom right corner mainly for the fact that it left my opponent with little terrain to hide behind. Any other corner would have given him places to hide or cover to deploy in. I reserved and deepstruck everything else. He set up the storm centrally with the other speeders on his flanks. He deployed his cannons in the corner. He reserved his Rhino, outflanked his Scouts, and deepstruck all his Dreadnoughts/Pods. He didn't try to seize.

First turn I moved up and then ran along the side of the hill toward his lines.

His turn two empty pods landed in my table quarter (the two shown). A Dreadnought landed on the bottom part of the hill to the left (not shown in the picture) and popped smoke. He then castled up with his Landspeeders, again keeping the Storm in the center. His thunderfire cannons opened up on both squads, killing one marineI made A LOT of saves and feel no pain rolls this game. Luck was certainly on my side as you will see. Both of my squads were now considered to be in cover.


Second turn all of my reserves came in thanks to descent of angels. I first tried to deploy very offensively with the first Veteran squad attempting to land just out of range of the Storm; it didn't and it scattered off the board and was lost. This was a huge mistake for me as I was thinking (for some reason) that I needed to be six inches away from the Landspeeder Storm's base instead of its hull. I was more than six inches away from the base, but not the hull and got caught in whatever it is that causes units to scatter 4d6". Big mistake and it may have cost me the game. I deployed the second Veteran squad much more defensively and they scattered backwards. The Honour Guard, and both combat squads of Assault Marines (one with the Priest) landed without trouble. I dropped my meltaguns with plans to take out his Dreadnought and hopefully a speeder. My original two combat squads moved on foot (since they were considered to be in difficult terrain); those two combat squads, the Veterans, and the combat squad without meltaguns ran to spread out. The Honour Guard successfully wrecked his Dreadnought (three meltaguns, one hit, one pen, ka-boom!) while the combat squad with meltaguns took the multi-melta off one of his speeders. All in all not bad. I eliminated the immediate threat of the Venerable Dreadnought.


His second turn brought both of his remaining Dreadnoughts in and his Scouts. One Dreadnoughtlanded where he wanted it to (right in line to flame one squad), the other scattered back onto my quarter. His Scouts outflanked and came on the left table edge; the moved on and got in the Landspeeder Storm. The third drop pod in one table quarter essentially sealed the deal on me ignoring that quarter for the rest of the game. He had no scoring over there and three armor 12 pods would be too time consuming to remove. His Landspeeders repositioned themselves to block me off from his Thunderfire Cannons. He shot me to pieces this turn (I stupidly forgot to cast shield of sanguinus with my Librarian and it cost me as multi-melta shots, heavy flamers, and the Thunderfire Cannons hammered my squads). I lost three Honour Guard, the librarian, and seven Assault Marines between both combat squads to his shooting this turn. Luckily everything held.


In my third turn I moved to strike. My two Assault Marine combat squads moved in to fire upon and assault his Landspeeders, while my single meltagunner moved to suicide himself against the closest Dreadnought. My Honour Guard were stuck in difficult terrain from the Thunderfire Cannon so they moved as far as they could from the Drop Pod. The Veterans and other combat squad moved up into the center. I moved the Honour Guard into a position to take out the Drop Pod so that I could conceivably claim the bottom left quarter. I was moving the two other squads toward his corner and away from his other Dreadnought, but I probably should have moved them to engage the Dreadnought or move to take the top right quarter. My Honour Guard ended doing nothing to the Drop Pod and against all odds, the lone meltagunner wrecked the Dreadnought. My combat squads did next to diddly against his speeders and I assaulted them, destroying the Landspeeder Storm and killed two Scouts in the process.


On his turn, Vulkan and the Tactical Squad, both in the Rhino, came on in the upper right quarter between the ruins. His Dreadnought came at me and popped smoke so that I couldn't wreck it and his two Landspeeders moved to use their heavy flamers on my larger combat squad. The Scouts moved to assault my two meltagun combat squad. He fired one Thunderfire at my combat squad right in front of him and fired the other at my Veterans (due to scatter, both the Honour Guard and Assault Marines were also hit). Nothing died to that or the Landspeeder fire (I told you I rolled really well with saves). His Scouts assaulted my marines and it was a stalemate.


My fourth turn. Almost everything was in difficult terrain due to the Thunderfire Cannons so the combat squad on the top moved in to assault one gun while the combat squad at the bottom and the Veterans moved towards the top right corner. The lone meltagunner and the Honour Guard moved closer to the Drop Pod and ended up wrecking it; the Honour Guard then ran back toward the center of the board. I fired ineffectually into the Thunderfire Cannon and then assaulted it, wiping out the Techmarine. I rolled a two for my difficult terrain test with the Assault Marines and was just over two inches away ... lucky. The combat with the Scouts was another stalemate.


He moved his Landspeeders, Rhino, and remaining Dreadnought toward the center of the board. He hit my Veterans with the Thunderfire Cannon again, putting them in difficult terrain, but not killing any. The combat with the Scouts was another stalemate (seeing a pattern?).

My fifth and possibly final turn. I moved my lone Assault Marine meltagunner down behind the green pillars to hide and capture/contest the bottom left quarter. My Honour Guard and Veterans moved to the left and my combat squad moved to assault either his speeders or his Drop Pod. My strategy at this point was to clear the top left quarter of his models and hopefully keep him from capturing any quarters himself. I again did little with shooting, and so ran with a few units. I assaulted and killed the Techmarine, ending the torture of jumppack troops in difficult terrain. The combat with the Scouts was ... a bloodbath. He killed both of my Marines and I killed two of his three Scouts. His surviving scout consolidated 6" down, towards my captured table quarter. I ended up assaulting the drop pod and destroying it. I am not sure if this was the best move. I think my thoughts were that it would be much easier to take out the drop pod than to even hit the speeders.


He continued the Scouts run to my table quarter and moved his Dreadnought into assault range with my Honour Guard. One Landspeeder and the Rhino moved to block me and not allow me to consolidate into the top right quarter, while Vulcan got out to assault me. The other Landspeeder flew down to contest the bottom left corner. One thing that I realized and my opponent didnt, was that the Landspeeder was not contesting the quarter, but rather the center circle. This could have won me the game if it weren't for ... The Scout ran and rolled a 6, moving him into my bottom left quarter. Damn! Vulcan ended up killing two Assault Marines without taking a wound and the marines ran toward my table edge, while the Dreadnought charged the Honour Guard, killing only one. The fact that one Honour Guard survived changed the outcome of the game. The Assault Squad and Priest running away really killed me for victory points.


He rolled for end of turn and got a two. Game over. Draw. His Scout contested the bottom left board quarter while his Landspeeder contested the top left. My Honour Guard was just inside the center 12" circle and so contested that. By the rules of the mission, if a unit is in multiple zones, wherever most of the model/unit is where the unit captures/contests. His Rhino with the Tactical Squad was mostly in the center circle.


Overall it was a great game and a nail biter to be sure. It came right down to the last turn and in my opinion, it could have gone either way with one more turn. I made a few judgment mistakes (losing a whole squad of Veterans) and didn't use the other squad of Veterans at all. He made a couple mistakes as well at the end with his Tactical Squad/Rhino, which could have easily captured the top right quarter. He ended up beating me in victory points, mainly due to the Assault Squad that was running away counting as destroyed.

----------

Questions/comments are welcome and appreciated.

   
Made in us
Blood Angel Neophyte Undergoing Surgeries


Game 2

Deployment type: Pitched Battle

Objective: Annihilation with the following exception. At the start of the game each player nominates 1 primary target in their opponents list if this model/unit is killed they are worth 3 kill points, the player also nominates 2 other secondary targets in their opponents list if these models/units are killed they are worth 2 kill points each. Every other model/unit are worth the normal 1 kill point each. Note the term model only applies to models that have the Independent character rule or are always considered a unit of 1. One Veteran Squad and the Honour Guard ended up with Blood Rage.

Opponent: My opponent played foot Eldar. The list consisted of Eldrad with 5? Dark Reapers; the Avatar; 6 jetbikes; two units of guardians with a starcannon? platform; two Wraithlords, and 6? Fire Dragons in a Wave Serpent.

The Game: I believe my opponent won the roll off and decided to go first. He chose the side with terrain in it and set up in a pretty standard pitched battle line with his Guardians on either end, followed by the Wraithlord and then his Jetbikes, Reapers, and Wave Serpent in the middle. We didn't realize it at the time, but he forgot about the Avatar. He ended up bringing it on from reserve around fourth turn. I set up nothing, keeping everything in reserve. I didn't try to seize. He chose my two Veteran squads and my Honour Guard as the high kill-point targets, while I chose his Wave Serpent, Eldrad, and the Reapers. I probably would have chosen different targets, but we had forgotten about them until I had already deepstruck my units on turn two. I decided not to choose targets near me that I knew I would destroy that turn for fairness.

On his first turn, he moved everything up toward the center of the board. The Guardians on the right ran into the bunker.

I had nothing on the board for my first turn, and on his second turn, he chose not to move anything. His battle line ended up being long and somewhat spread out. If I attacked one flank, the other flank would not be able to support them. If he deployed in one corner or in a more compact fashion, I would have had a more difficult time taking him out piecemeal.

On my second turn, everything came in except for one Veteran Squad. I dropped everything on one flank, hoping to destroy it before the opposite side could support it. The Honour Guard scattered into the woods and them and my Veterans set up to take out the Wraithlord. One Assault Squad landed in hopes of taking out the Wave Serpent, while the other landed with the intention of killing the Guardians in the bunker. I did nothing to the Wraithlord with shooting. One Assault Squad did nothing to the Wave Serpent thanks to its rule that ignores immobolized, while the other Assault Squad fired into the Guardians, killing three and causing them to run. After killing the Wraithlord in assault with the Veterans (I lost two), I consolidated them toward the forest. I could have kept them near his Guardians to keep them falling back, but truthfully, I didn't want to be mean.


Third turn. He moved the jetbikes, Wraithlord, and Guardians on the left toward me, and moved the Wave Serpent over, letting the Fire Dragons out the back. His shooting was fairly ineffectual, killing a Veteran, two Honour Guard, and an Assault Marine (things on the left shot at the Assault Marines, Reapers fired at the Honour Guard, and I believe the Guardians and Fire Dragons fired at the Veterans). His Fire Dragons assaulted the Veterans, which resulted in a stalemate. I don't know if this was his best option, but it was either assault or get assaulted.


My second squad of Veterans came in and landed on the left side of the Bastion, ready to take out the second Wraithlord. Both squads of Assault Marines moved up, one to take out the Wave Serpent, the other to assault the Jetbikes. The Honour Guard moved down a bit to lend its shots to the Wave Serpent; blowing it up and killing an Assault Marine in the process. The unpainted Marines then fired upon the Guardians, killing three. The other Assault Marines killed one Jetbike with shooting before assaulting them and wiping them out. The Veterans also killed the Wraithlord. My strategy thus far was to remove the largest two close combat threats in the Wraithlords. With them out of the way, my 3+ armor and feel no pain should be able to weather the storm of small arms fire from the Eldar.


It is now the fourth turn and the forgotten Avatar walks on from his side of the board. Both Guardian squads move forward and the combined fire from them, the Reapers, and the Avatar kill two Veterans and three Assault Marines. I also lost two of the remaining three Honour Guard, probably from the Guardians on their side. The I ended up killing a Fire Dragon in close combat, but the squad held.


I moved my Veterans and a priest up to assault the Avatar, one Assault Squad to assault the Reapers, and the other Assault Squad to assault the remaining Guardians. I killed the Guardians on the right with shooting and with combined shooting and assault, killed the Reapers except for Eldrad. The Veterans and Avatar did nothing to each other.


On his fifth turn, he had little remaining and ended up killing the last Honour Guard with his Guardians. I ended up killing Eldrad and consolidated out of the forest, while the Avatar killed two Veterans; they held due to being fearless.


On my possibly last turn, I just had to run cleanup. My Assault Squad on the right moved up and charged the remaining Fire Dragons, killing them. The Assault Squad in the middle moved up and charged the Avatar, dealing at least a wound or two to the monster; in return, it killed the remaining Veteran and Priest.


The game went on one more turn. I ended up killing the Avatar between the two close combat phases and my Assault Marines killed off his remaining Guardians. Wipeout. It was an okay game as my opponent was a bit inexperienced and I am not sure if he has played against an army like mine before. I certainly learned a few things about the Eldar: avoid the Avatar and Wraithlords and then hit them with overwhelming force.

----------

Questions/comments are welcome and appreciated. One more report to come.

   
Made in us
Abhorrent Grotesque Aberration


Connecticut, USA

Liking the reports.

This message was edited 2 times. Last update was at 2011/04/23 21:12:28


Made in us
Blood Angel Neophyte Undergoing Surgeries


Game 3

Deployment type: Dawn of war

Objective: This will follow the rules for the capture and control as outlined in the main rulebook with the following exception. Instead of only counting up the number of objective you have at the end of the game you count at the end of each one of your player turns. So player 1 goes and if he is on his objective at the end of his turn 1 he will receive a point. Then player 2 goes but is not on his objective at the end of his player turn so they receive zero points.

Opponent: My opponent played Deathwing. His army consisted of Belial; five squads of 5-man thunderhammer & storm shield terminators (four squads had 1 chain fist and one squad had an apothecary; all squads had a cyclone missile launcher); two Landspeeder Typhoons with a heavy flamer.

The Game: My opponent won the roll to go first and chose to go first. His objective was deployed in the ruins on the left while mine was behind the bunker in the center. Things started off bad here as I placed my objective horribly. If I placed it on the edge of the board, behind the hill on the right, or closer to my board edge, I think I would have fared better as I could have used more blocking techniques to hold off the unstoppable terminators. It was dawn of war so I set up my Librarian, and two combat squads of Assault Marines so that they were spread out and would keep him further away from me with deepstriking. Looking at the pictures, I realized that I cheated by having a Sanguinary Priest on the board at the start of the game. Didn't help. He set up one squad in the ruins with Belial and another on the opposite side. The two Landspeeders set up near his table edge. I didn't seize.

On his first turn, he dropped two of the Deathwing squads in reserve to the left of me and the three squads and the Landspeeders that could fire, fired krak missiles at me. I ended up losing two Marines from each squad (night fight helped a bit).


My turn was quick. I hid my Assault Marines on the objective from half of his squads and moved up with the other Assault Squad and the librarian. At this point I figured I could take him off the objective pretty quickly when my veterans came in, jump to an early lead and then hold him off/contest the objectives for the rest of it ... it didn't work that way.


He took out the Librarian and an Assault Marine on his turn, moving his squads closer to my objective.


All of my reserves came in except a Veteran squad and most were on target. The Veterans landed right in front of the ruins, ready to assault/contest the objective. My Honour Guard and two meltagun combat squad landed close to his Landspeeders to take them out, and my other combat squad landed in between the two objectives, unsure of what they should do. If I could place them again, I think I would have placed them in my bottom right corner, behind his two Terminator Squads. This would force them to deal with the squad and therefore move away from the objective. I ended up blowing up both Landspeeders and assaulting Belial and his squad. I think I killed two Terminators and lost four Veterans.


On his third turn, he continued to move up with his Deathwing on my right. I don't think there was any shooting. In assault, he wiped out my remaining Veteran and consolidated back onto his objective.

My third turn brought my final squad of Veterans who landed right in front of his objective again. My Honour Guard jumped down, hoping to help out near my objective. My two Assault Marines also hopped out, hoping to block the advance of his Terminators.At this point, I was confident that my eleven marines could take out three Terminators... I was also hoping that he would have to assault me to get by and would end up with a low consolidation roll. The two squads charged his objective again, killing Belial and bringing the squad down to a single terminator.

On his fourth turn, his last squad of Terminators walked on, right next to his objective. His three squads near my objective moved closer, one sneaking by me next to the hill. The marines got assaulted, killed, and he had a decent consolidation roll, sealing the deal on any chance of me winning by contesting my objective. His terminators also assaulted his objective, killing off ... everyone; I did finish off the first squad though.


Things were looking bad, horribly desperate. I moved one combat squad so that it was contesting my objective, moving the other combat squad and the Sanguinary priest for some heroics and to try to pull his guys away from my objective. My Honur Guard flew up to try to take/contest his objective. The Sanguinary Priest somehow killed a terminator with one bolt pistol shot (this was the highpoint of the game...) before charging them in the rear and pulling the strung out Terminators away from my objective. The combat squad assaulted too. All of my guys died, none of his did.


Possibly the last turn. He moved closer and ended up assaulting my remaining combat squad, killing them all. The Honour Guard died on his objective too. Wipeout.

It was a really interesting scenario, and one I would like to play again, but against an opponent I have a chance of beating. I really don't think that I have any chance to beat a Deathwing army as I have no long-ranged firepower and my ability to torrent just isn't large enough to take out 25 Terminators. Rock meets scissors.

----------

Questions/comments are welcome and appreciated.

This message was edited 1 time. Last update was at 2011/04/25 01:51:26


Made in de
Fighter Pilot


Strasbourg France

Nice battle reports, enjoyed the pics !
Need some work on the terrain in general imo, but great reports none the less !
   
Made in us
Blood Angel Neophyte Undergoing Surgeries


Thanks!

Yeah, the terrain could be a bit better ... not much area terrain. But it has gotten better. The store was running 13 tables that day I believe ... the most they have run so far.


Forum Index » 40K Battle Reports
Go to: