Hi all,
Just a quick and hopefully useful tutorial for converting the infamous Realm of Battle Gameboard skull pits into lakes. When I first got the RoBG I decided early on that I wanted to have a snow/ice theme, since desert was the only other scheme that interested me but I wasnt entirely sure how to go about it.
In keeping with this, I didnt think the skull pits fit in at all with the snow theme and in addition I wanted to have some sort of water feature to compliment the board.
So with a bit of brainstorming and some trial and error below is what I came up with.
To achieve this look you will need the following materials:
Various brush sizes (I used
GWs tank, large and standard brushes)
Spray can - black
Spray can - white
Paint - shadow grey
Paint - white
Paint - regal blue
'Ardcoat (
GWs gloss finish effect)
2 packs of "Blutack"
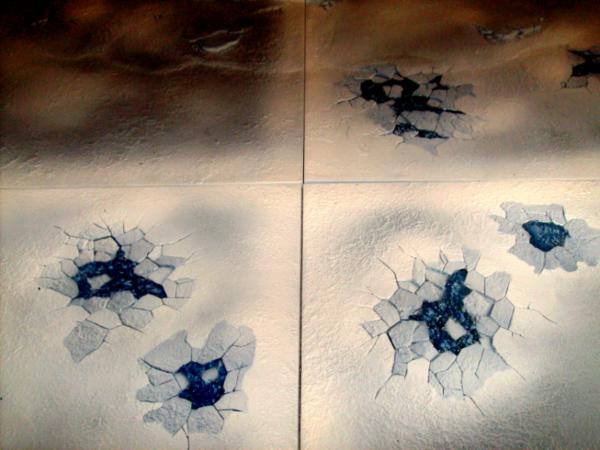
Stage 1:
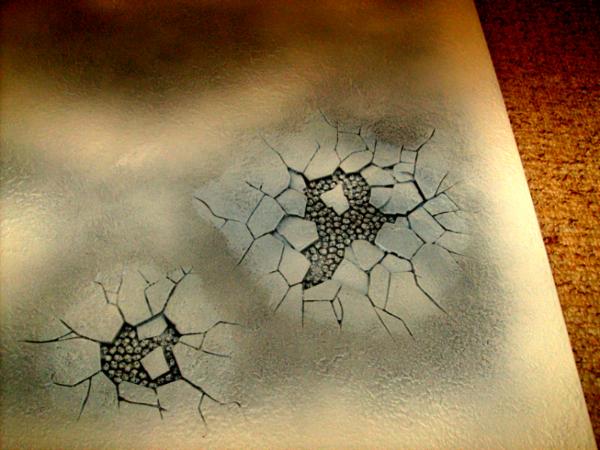
I began by sparying my board segments in black undercoat. After that I "dusted" each segment in white, varying the coverage and density to achieve a snow covered look (dusting involves holding the spray can anywhere from one to two feet away from the board and spraying).
Tip: for more on dusting see here: http://www.games-workshop.com/gws/content/article.jsp?categoryId=cat440008a&aId=2400002a
This is what the pits should look like at after stage one:
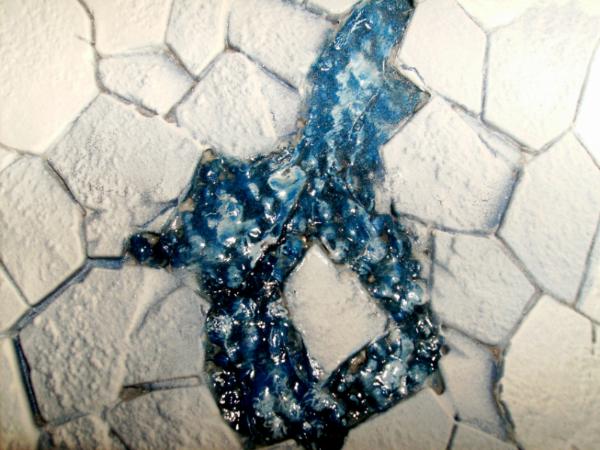
Stage 2:
The next stage involves covering the pits in blutack. This does two things:
It obviously covers the skulls themsleves but it also gives your lakes an uneven surface which replicates the effects of ripples/waves. Blutack also takes surprisingly well to
GW paints.
Tip: After some trial and error I found the best way to do this was to take a very large piece of blutack and mold it between your fingers into one large "sheet". At first I was trying to do lots of little sheets and fit/mold them into the corners/curves of the pits. However taking a large sheet and covering most of the pit seemed to work better in the end (faster and easier to mold to corners). Just make sure the blutack dosent break up as you do this - stretching it too thin usually causes this. You can also use smaller pieces to fill the corners/trickier areas that dont get covered.
Followng this you should end up with something like this:
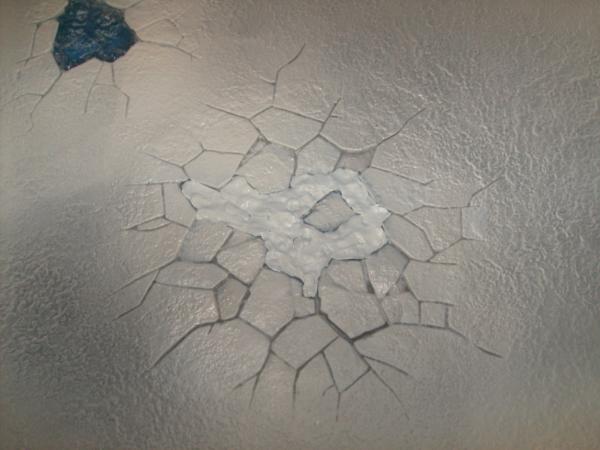
If you zoom in on both of the above pics you can see the undulations in the blutack which give the wave effects somewhat better.
The next stage (3) is optional.
The RoBG has several rocky outcrops and ridges that I had painted in shadowgrey before dusting. This enabled me to break up the rather monotonous look of snow/white. I wanted to achieve some consistency across the board and as a result decided to paint the surrounding rocks of the lakes in shadowgrey too. This would make them stand out a little more and fit with the overall look I was trying to achieve. You can of course just leave the rocks white.
This is what stage 3 finished should look like:
Stage 4:
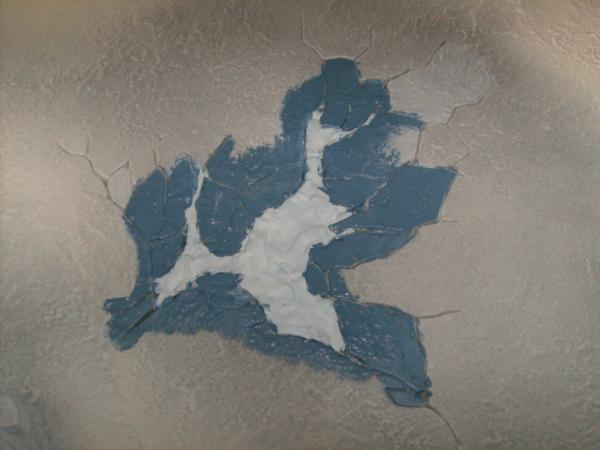
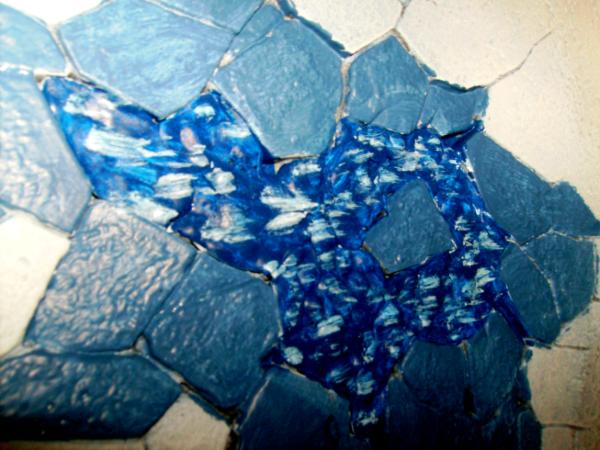
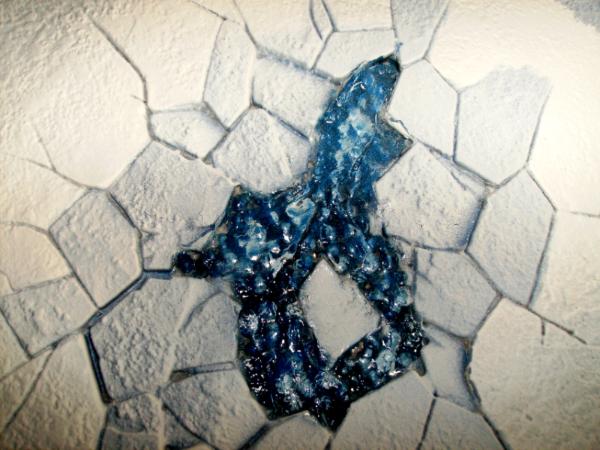
Next up was to paint the water itself. For this I used regal blue. I chose regal because it is relatviely dark compared to the other choice of blues out there and would contrast well with the overall white of the board. However feel free to experiment with other blues (originally I had dabbled with enchanted blue mixed with a little black).
Heres how it should be looking.
Tip: Neatness here is important since you dont want the regal to overlap onto your rocks or miss any areas. Dont forget the mini "islands" in the lake centres!
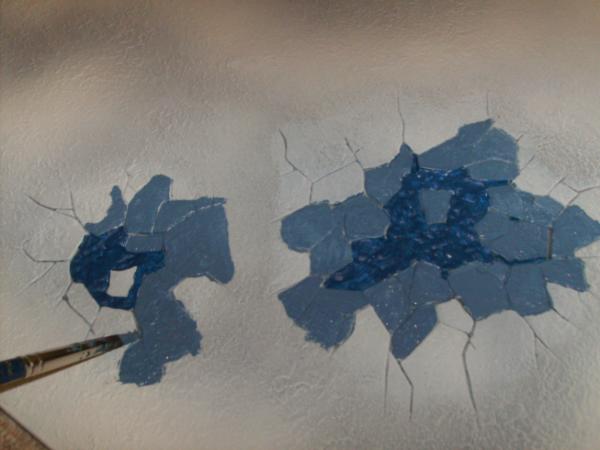
Stage 5:
Stage five involves simple white highlights to emulate the effect of wave crests and to make the lakes more visually interesting. I had quite a bit of trouble with this stage as I couldnt seem to find a way of getting a good effect. I eventually settled on a light drybrushing (always going in one direction to give a wind blown effect). I had tried heavy drybrusing and picking out an area(s) but neither of them came out very well. However more experienced modellers may recommend something better.
Heres how mine turned out:
(fully finshed)
Stage 6:
This simply involves coating on the Ardcoat gloss to achieve a watery effect.
Tip: I subsequently found out GW do an actual water effect product (the name escapes me right now). So feel free to try that or any other product that emulates a glossy water effect.
Tip 2: I found the GW product had a nasty tendancy to form minute bubbles if applied in small cracks/divets etc so be careful with this. I found simply blowing them away with your mouth worked well. An even, heavy coat is recommened in general for the gloss.
Stage 7:
So at stage 7 you should have your blutack laid down and painted with blue/highlighted with white and ardcoated and optionally your rocks done in shadow grey.
The final stage is to give the rocks around the lakes the same dusting as the rest of the board.
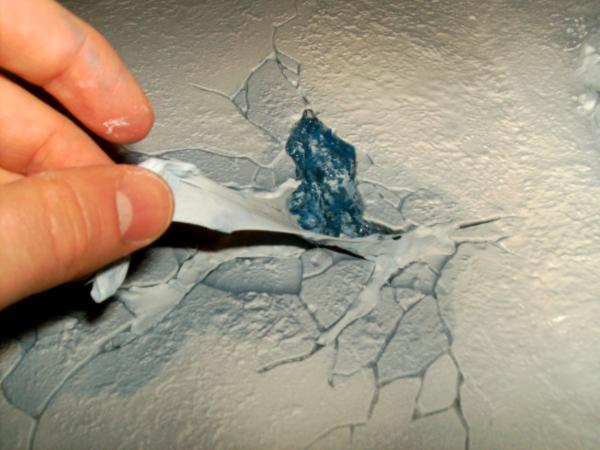
Heres where it gets a bit tedious. In order to stop your water getting dusted and ruining the effect you will have to reapply a layer of bluetack to protect it as you dust. I tried paper and toilet paper first angling it around the lake whilst dusting.
However this happened:

As you can see the paper/roll caused a very angular and unnatural effect during the dusting. Reapplying the blutack carefully I found to be much better.
Tip: Now I know the inevtitable question is "hey Ratty why not dust before you paint the blue/white waves?" The simple answer, on a personal level, is that I am not a particularly neat painter and on my first few tries doing this, the blue got on the surrounding rocks and looked pretty aweful.
Of course if you are neater then me you can simply do the rocks/dusting first and then the water which saves you reapplying the blutack!.
Tip 2 CAUTION! If you are following my method be very careful when peeling off the protective blutack layer. Make sure your lake paint is bone dry and gently peel the blutack off. I found if I was too rough it caused the underlayer to peel too (even with the ardcoat applied). Take it nice and easy and dont press the proetctive layer down - iits only job is to sit on the water and prevent the white dust from getting on the lake surface.
Rocks after dusting:

So thats it really. You should end with somethng like this once finished:
Terminators supported by a Dreadnought, protect a governors mansion and surrounding grounds whilst awating extraction.
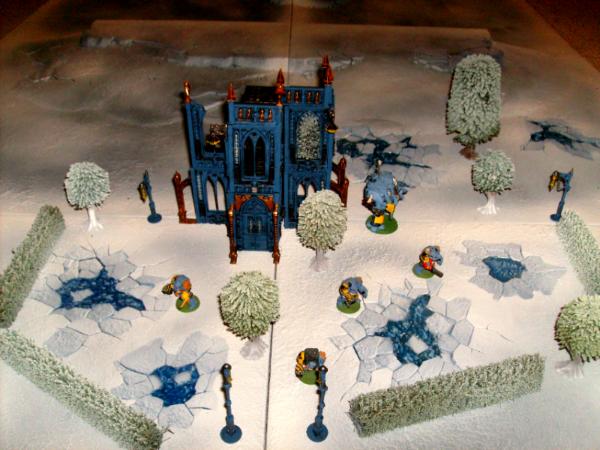
Hope it gives you all some ideas and that the tutorial was helpful. Feedback, as always appreciated.


 For the Dragon and the Forefather
  My DOW based RPG!


 &
& 
 2000 ultrasmurfs 4th

 good idea, ough
