Sorry for the grainy photos. These were taken years ago on a not so great digital camera.
It may not be the most detailed step by step. So, if you have questions or want more detail just ask, and I will do my best to help.
My Plasmagun Conversion.
Dec. 2003
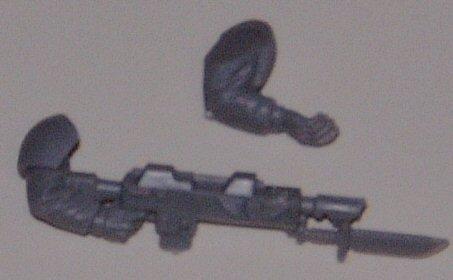
Note: The lasgun spur that comes with the arm with the open hand.
Doesn't work to well if you plan to put a scope on the gun.
The scope gets in the way of the head. All the other arms work well with scopes.
Guide to making plasma rifles.
Items used. Space Marine Plasma pistol, and scope. Regular Guard Arms with lasguns. Minus the one shown above.
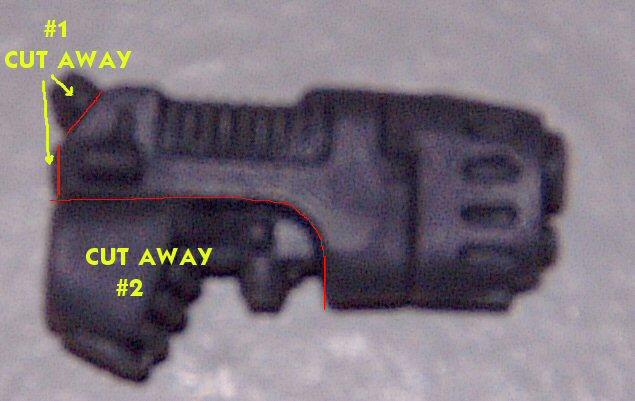
#1. I cut away both these pieces the top round knob gets in the way of the scope, and the back square knob interferes with the fit.
The detail in this photo is poor but if you look at your plasma pistol you will see what pieces I mean. You can use both right and left hand pistols.
Added Note: Now going back and looking at the plasmagun, you may want to keep the nub in the back of the plasma pistol, and glue it on the bottom of the lasguns clip, or maybe the back of the lasgun. Not sure how it will look though.
#2. Cut out this whole section. make it smooth. Like you would when removing flash. see step #9 for how it looks when done. You will need to use this as a guide when cutting you lasgun. Try and get a good fit.
Don't worry if you don't. As long as its close, its easy to go back and fill in the gaps with green stuff.
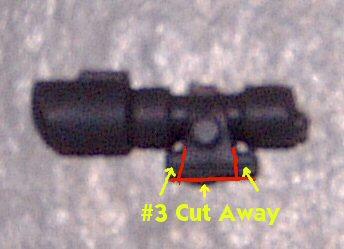

#3. cut the sides even with the slope of the scope mount.
Optional: On the bottom cut the ridge off and make it smooth. I did my first few like this, and found later that it works just as well if you leave it. The scope just sits a bit higher. You might want to wait to see how the scope will fit on each gun before deciding on the bottom cut.
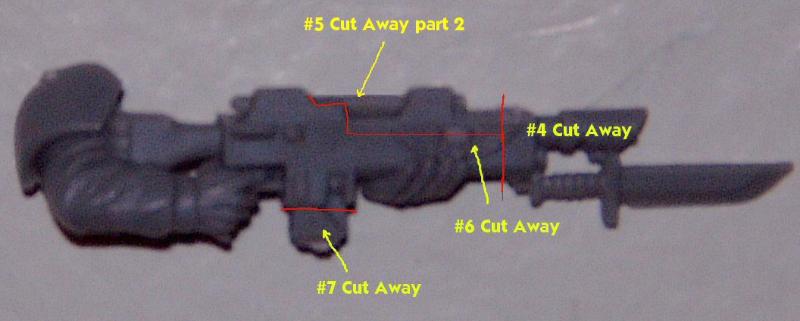
#4. Cut the front of the gun off just past half way of the wing from the skull. Don't cut to close to the skull. You want extra gun to work with later when tweaking you cuts.
#5. This step has lots you want to look at. Cut the tube away. Then cut straight down from where the arrow points in the pic below. Note Pic. #5 cat away part 2. Also take the time to look at the next photo of the reverse side.
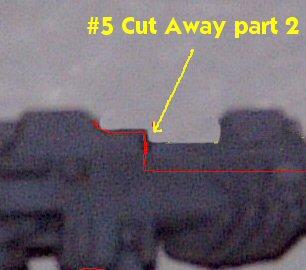
If you look at the angle here in this pic. (#5 Cut Away part 2) I double the distance of this.
You will need to mach the lasgun to the shape of the plasma pistol. This takes some scraping away till it fits the way you want.
Scroll down and take a look at step #8 to see how this will look when done.

Make note of the thumb in pic. (#5 Cut Away not cut above the thumb) You want to make your first cut above it. On some lasguns you get very close to the thumb when trimming. This could lead to an accidental loss of said thumb. You should never need to cut the thumb on any of the guns.
#6. Take your sharpest modeling knife and just slice the skull and wings off. Then do what you do the get rid of flash, to smooth it out.
#7. Cut off the lasgun clip that's sticking out of the lasgun. Leave the rest. I think it looks like a energy cell clipped inside, with a release button for replacements.
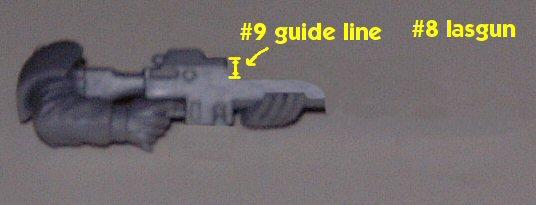
#8. This is just what the lasgun looks like when all the parts are cut off. Notice too in this pic. That the end of the lasgun is rounded to fit the shape of the plasma pistol.
#9. This space should be the same size as the very back of the plasma pistol. Its hard to determine here because the pictures are of such different scale. The Plasma guide line is the same size as the notch in the lasgun.
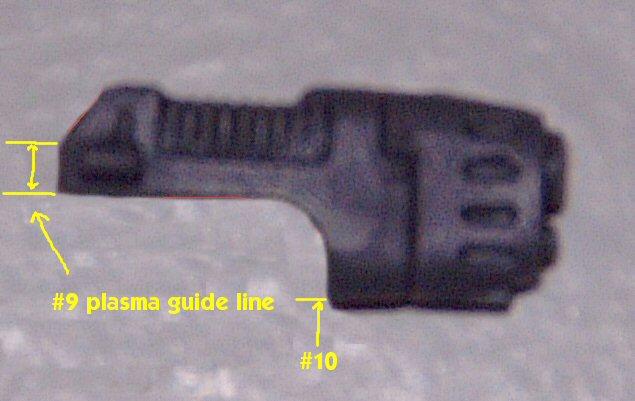
#10.Most of the time you have a little over hang here on the plasma pistol. It drops down just below the lasgun. It still looks good when done. If you want you can file it to smooth it out when its all glued together.
On the picture below it lined up about even.
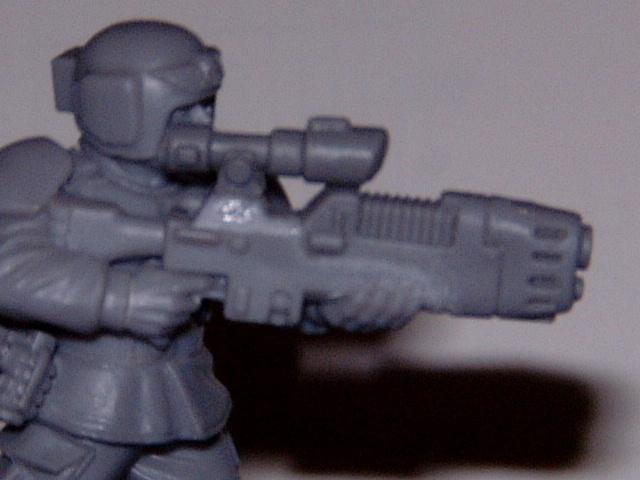
#11 Now just glue it together. The plasma gun is a tad wider then the lasgun. But this works out well when lining it up to be straight. After you can go back and smooth it out. The scope takes some care to line up. I look at the outside of the model when lining everything up. Any overtures I leave on the inside where the arms and chest will help hide it. I had very few problems to hide. It took me a few guys to perfect this conversion. Once I had it down it all lined up quite well. Hope this helps. Thanks for the interest too.


 4000 pts
 2500 pts (half Flesh Tearers, soon to be all)
 1k
1k
 Fresh start
