Some of you may have been following the Round Robin Rumble of late. However the size of the thread due to pics and lenght has become unwieldy so the rest of the games will be in single threads from here on in.
The original can still be viewed here though:
http://www.dakkadakka.com/dakkaforum/posts/list/410232.page
and the standings looked liked this going into the second round of games:
Eldar P3 W2 D1 L0 Pts 7
Orks P3 W1 D2 L0 Pts 4
SW P3 W0 D3 L0 Pts 3
IG P3 W0 D1 L2 Pts 1
Game 7 saw the
IG take on the Space Wolves.
Imperial Guard 1487
Company Command Squad, Krak Grenades + Vox Caster + Grenade Launcher x2 + Plasma gun x1
1 Company Commander Power Weapon
Ministorum Priest Eviscerator
5 Psyker Battle Squad
Overseer
9 Veteran Squad + Vox Caster+ Meltagun x2
1 Veteran Sergeant Power Weapon
1 Chimera + Extra Armor
Platoon Command Squad,+ Krak Grenades + Vox Caster + Flamer x2
1 Commissar base cost + Power Weapon
1 Platoon Commander Melta Bombs + Bolt Pistol + Power Fist
1 Chimera Extra Armor + Pintle Storm Bolter
9 Infantry Squad + Vox Caster + Meltagun x1
Sergeant Power Weapon
9 Infantry Squad + Vox Caster + Flamer x1
Heavy Weapons Squad + Lascannon x3
Heavy Weapons Squad + Autocannon x3
Scout Sentinel + Missile Launcher
Scout Sentinel + Missile Launcher
Leman Russ Battle Tank + Lascannon + Multi-melta Sponsons x2 + Extra Armor
Leman Russ Battle Tank + Lascannon + Heavy Flamer Sponsons x2 + Extra Armor
Griffon
Space Wolves 1500
Rune Priest in Power Armour Melta Bombs Master of Runes
Wolf Guard Battle Leader in Power Armour + Melta Bombs + Frost Weapon
1 Dreadnought Extra Armor + Heavy Flamer + Twin-Linked Lascannon
7xGrey Hunters Pack + Meltagun
Grey Hunter + Power Fist
Rhino + Extra Armor + Pintle-mounted Storm Bolter
7xGrey Hunters Pack + Wolf Standard
1 Grey Hunter Power Fist
Rhino Extra Armor Pintle-mounted Storm Bolter
7xGrey Hunters Pack, + Mark of the Wulfen + Wolf Standard
Grey Hunter w/ Mark of the Wulfen,
Grey Hunter + Power Fist
5 Long Fangs Pack + Missile Launcher x5
1 Squad Leader
Razorback Pintle-mounted Storm Bolter + Twin-Linked Lascannon
Land Raider Redeemer Multi-melta
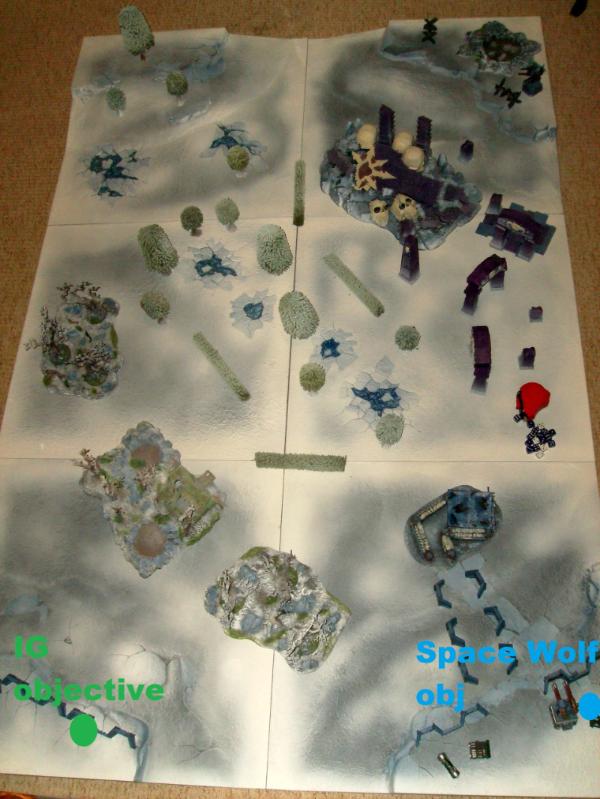
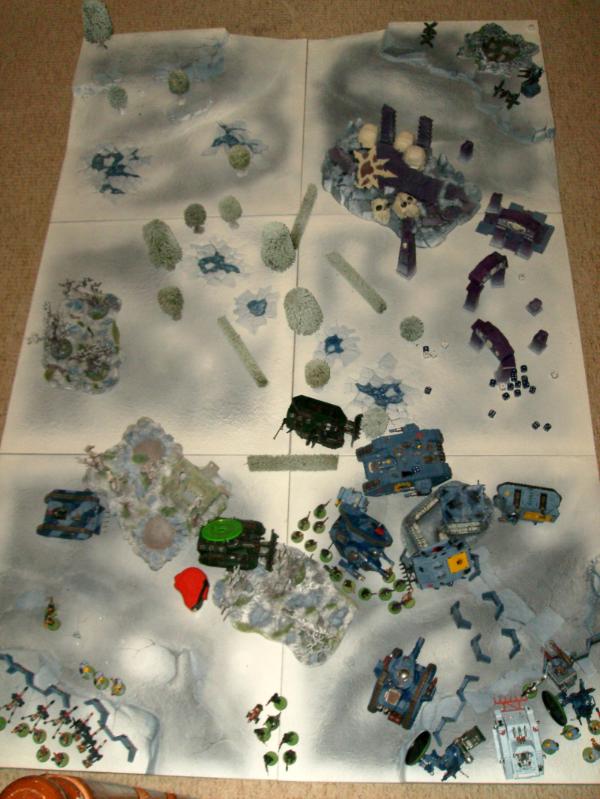
Map rolled was number 2, pitched battle, capture and control.

Objective placements.
Since the
IG were at home they had the chioce to go first or second and let the Space Wolves go first.
They chose the right hand table side and setup their objective on the hill in the far bottom corner near the aegis defense line. The aegis would give the best cover saves on the baord (4+, compared to 5-6 everywhere else), the hill had good
LoS and it meant the
SWs could face the
IG full force on force rather then getting split up around the board and picked off.
The
IG placed their objective almost exactly opposite the
SW one on the left hand table side, behind their aegis lines. The idea was to form an armored wall and simply push on through the
SW obj whilst holding their own with the
HWTs.
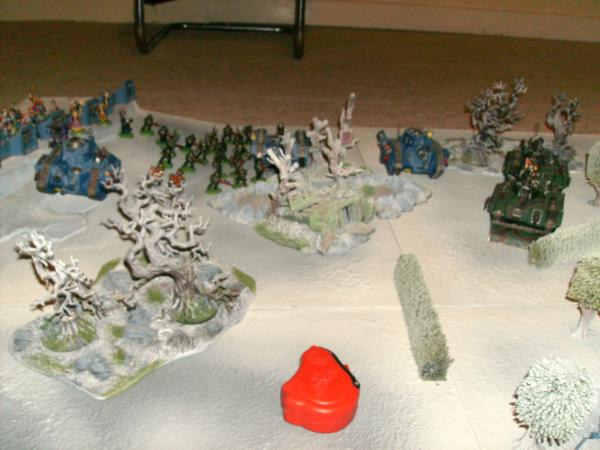
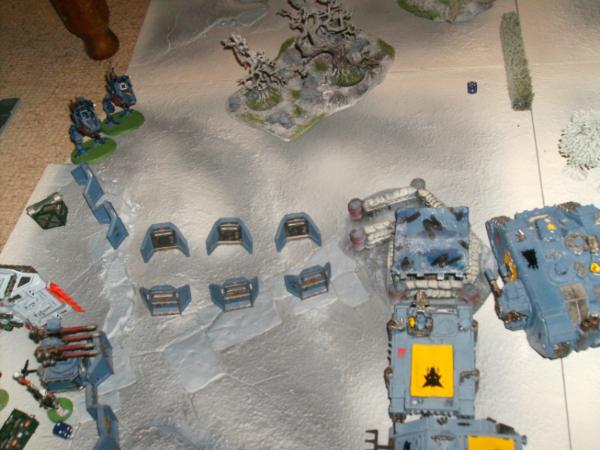
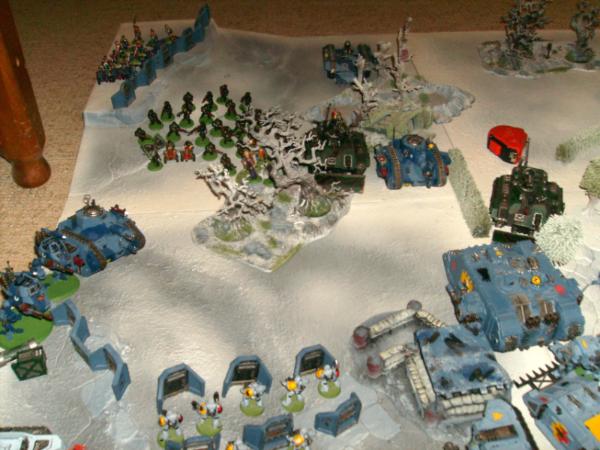
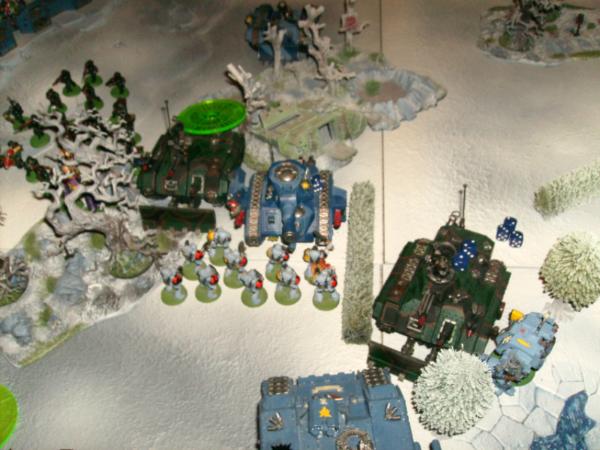
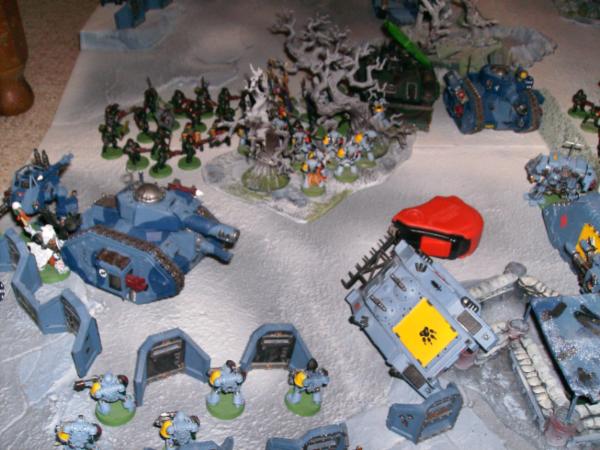
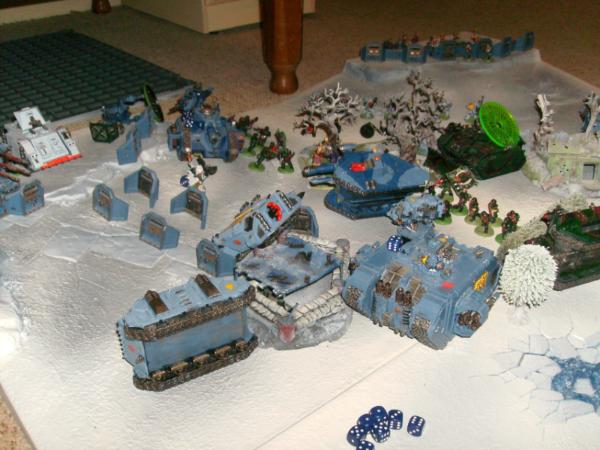
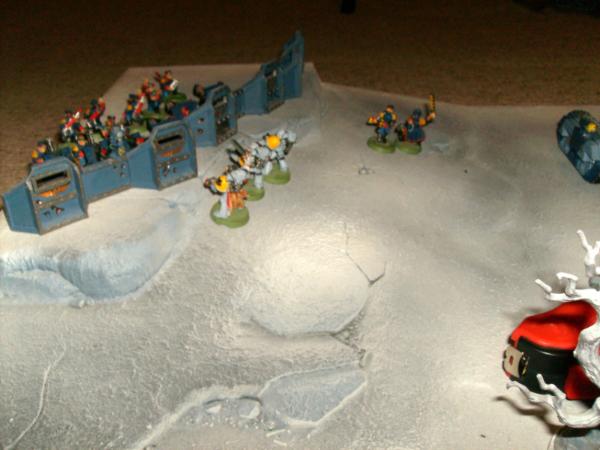
Space Wolf deployment.
In hindsight for the
Sws their aegis line didnt provide a great amount of cover so the Razorback was setup infront of the Long Fangs and Rune Priest with the intention of weathering the
IGs first shooting phase and then moving out of their way to retaliate. The
LR setup with the
GH/Battle Leader behind it ready to embark first turn and move forward.
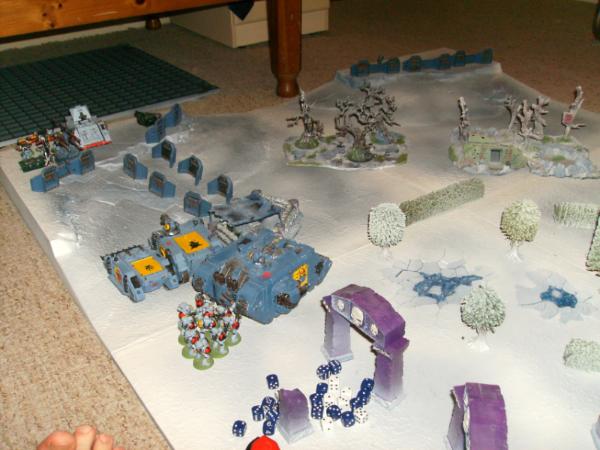
Both Rhinos setup behind the command post covering each other whilst the Dreadnought tucked in behind the
LR as best he could.
The
SWs had considered a full reserve but coming in piecemeal without getting the chance to return fire early seemed a waste. With most of the vehicles in cover and the ever reliable AV14
LR it was hoped the plan would work. In hindsight some flankers or podders would have been great for this setup.
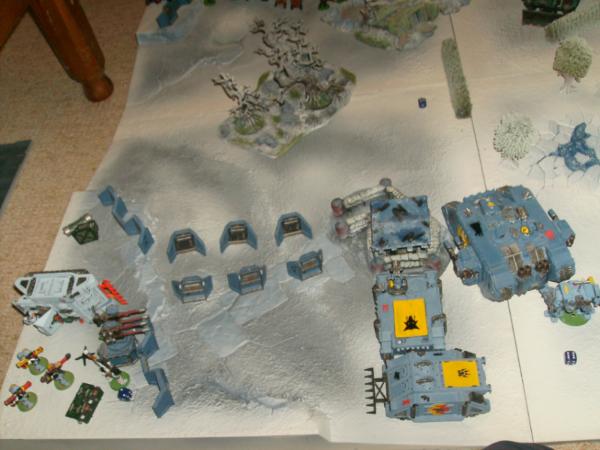
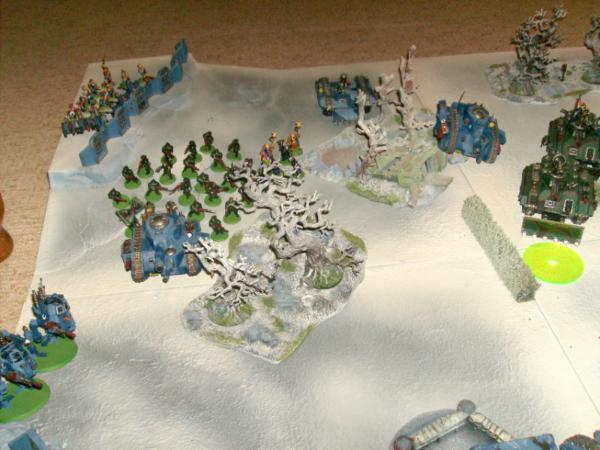
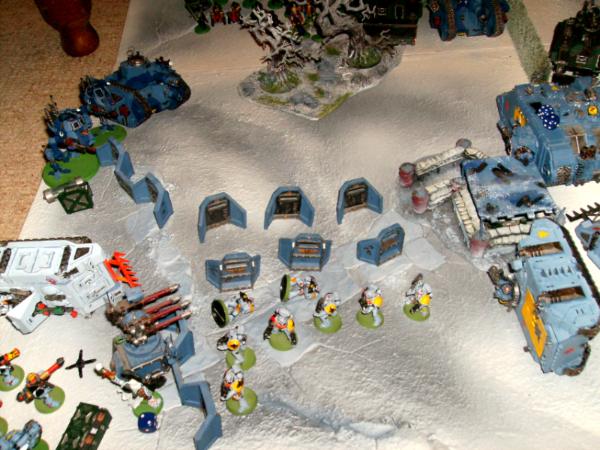
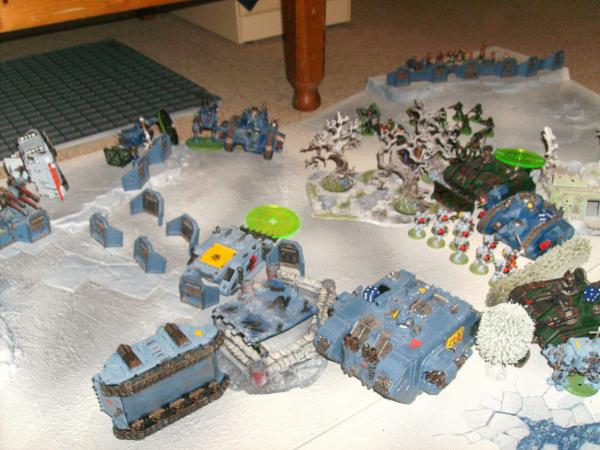
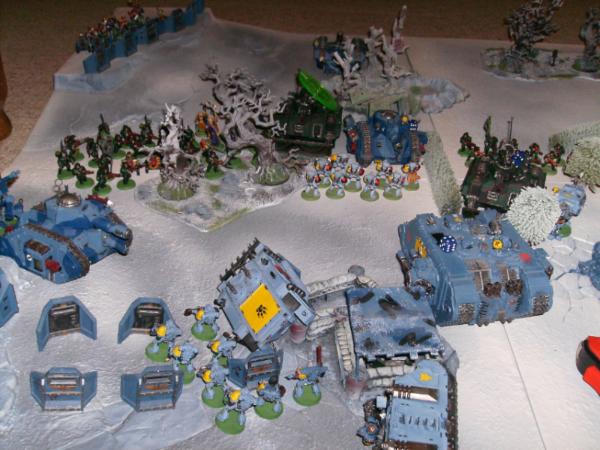
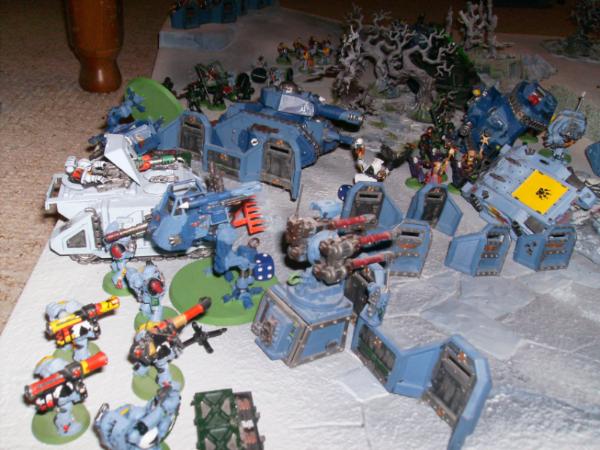
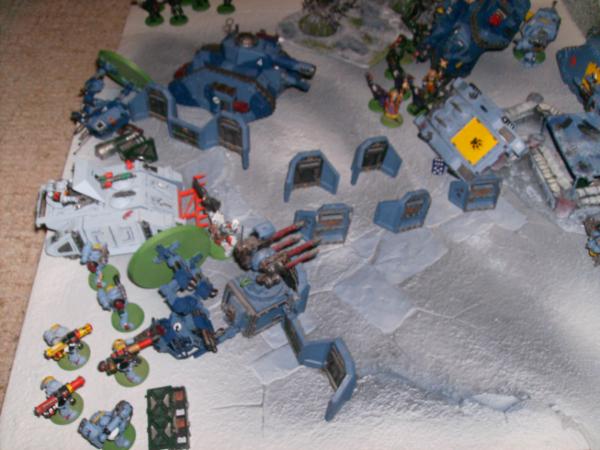
IG deployment.
Having seen how the
Sws had setup the
IG stook to their plan and deployed their
HWTs along with thier Command Squad on their obj behind the aegis lines. Both platoon squads took up a position centally flanked by both Leman Russes (the multimelta
LR setup opposite the Land Raider).
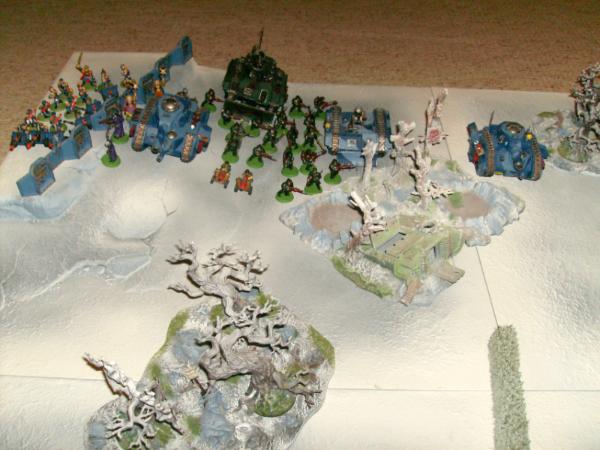
The Griffon setup behind the forest to lay down barrages every turn and both Chimeras took up a flanking position on the
IG left flank (we moved one post deployment).
The Sentinels chose to outflank.
 IG
IG turn 1.
Movement for the
IG saw both
LRs shuffle forward 6” as did the Chimeras. Nothing else moved, it was felt a good opening barrage was more important to try and destroy some
SW armor then take up a central position early. In addition the
IG were very wary of the
LR and its contents threat radius.
In the shooting phase under orders the autocannon
HWTs fired on the Razorback wrecking it.
The Griffon then fired at the Lng Fangs behind it scoring a great hit and killing two. They passed their test however.

Neither the lascannon
HWTs on the hill or the missile launchers in the platoon squads could see the Rhinos which they intended to shoot so switched to theLR instead, failing to damage it.
Being out of range with the
LR multimetlas and Vets meltaguns the two Leman Russes tried a long shot vs the Landraider and with some luck managed to hit but scatter on top of it. The scatter however was minimal and a pen was scored, stunning the crew.
Nothing else was in range this turn.
SW turn 1.
The
GH and Battle Leader immediately embarked the Land Raider. The Dreadnought tucked in more behind the
LR to fire some shots at the Chimeras whilst the Long Fangs and Rune Priest also turned their attention in that direction.
The plan to use the Razorback as cover hadnt really worked, it had been wrecked and now blocked the Long Fangss
LoS to the
IG weapon teams o the hill aswell as their two latoon squads. Being armed with missile launchers this was a blow.
No other
SW movement took place, it was felt a combined movement was better then going piecemeal and with the
LR stunned the Rhinos held their ground for a turn.
Shooting saw the
Lfs and Dreadnought shoot at the lead Chimera which was stunned and lost its heavy flamer.
The idea overall was to pop the
IG transports and mop up the troops as they advanced.
The Rune Priest fired off Living Lightning too but failed his psychic test and took a wound.
That concluded the
SW turn 1.
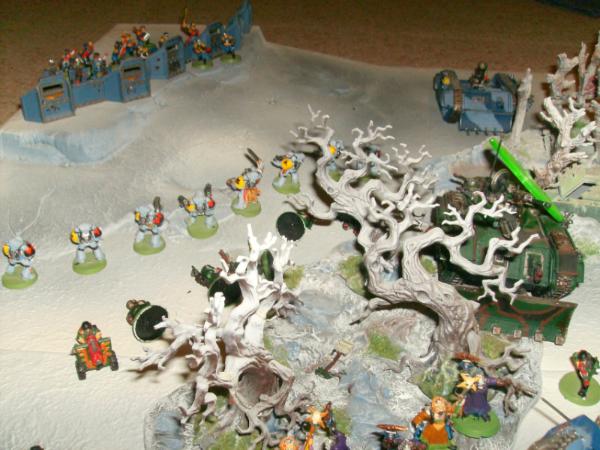
IG turn 2.
Turn two saw both Sentinels arrive at the same time on the same side of the board. They chose the
IG right flank to put pressure on the Rhinos and sweep into the Long Fangs later.
On the left flank the still mobile Chimera moved infront of its compatriate to give it cover and popped its smoke launchers. Both Leman Russes moved forward, one passing its difficult terrain test, the other supported by both infantry platoons who still didnt have any great
LoS to targets. The Psyker squad moved forward in support too.
In the shooting phase the Lascannon
HWT fired on the
LR (they failed their order this turn) but only managed to shake it.
With few other targets both Leman Russes fired on the lead Rhino and obliterated it. The
Ghs inside disembarked and passed their pinning test.
The Grioffon again fired on the Long Fangs but its shot scattered off table. The autocannon
HWT now with
LoS to the second Rhino fired on it but failed to hit/do any damage.
So far not too bad, two
SW transports were down and the
LR was being constantly shook/stunned.
It also meant two
SW squads were now on foot which were easier prey.
SW trun 2.
The Grey Hunters from the destroyed Rhino immediately moved behind the aegis lines for cover.
The
LR decided it was time to move forward, another turn could not be wasted sitting in deployment. The second Rhino swung around to position itself behind the
LR for cover, whilst the Dreadnought moved up too.
The
Lfs and Rune Priest held their positions.
In the shooting phase the Long Fangs and
LR assault cannon opened up on the lead Chimera scoring a plethora of hits but with some stunning saves it saved every one and emerged unscathed from the barrage!

The Grey Hunters then fired on the advancing Sentinels, one of which had a meltagun with some aweful rolling failed to any damage again.
The Rune Priest then fired off
JotWW on the advancing platoon squads, killing 3 who were in a line.
Not a great turn at all, some very poor/very luckly rolls prevented any major damage to the
IG forces.
IG turn 3.
On the
IG right flank the flamer Leman Russ moved up to support the Sentinels. Centrally the platoon squads held their ground now having good
LoS to the
Ghs behind the aegis line. The Psyker squad moved into the forest for cover. The Chimera that had been stunned last turn moved centrally (in hindsight we cant reacll why this was – seemed like a poor move and non productive). The other Chimera moved itself nose to nose with the Land Raider to have its Vets fire their meltaguns into it.
The shooting phase saw the entire
IG right flank open up on the Grey Hunters. Between some poor hits and the 4+ aegis line however, only two fell to the fire. However they failed their break test and fled around 4”.
The Vets and the Lascannon
HWT then fired on the Land Raider shaking it but more importantly immobilising it.
The autocannon
HWT and second Leman Russ could not see their respective targets – the second Rhino and Dreadnought so the
IG turn concluded.
At this point things were looking quite good, the
SW were far back from the
IG obj, the advancing wall was relatively unscathed and scoring units were 5 to 3.
SW turn 3.
A bad blow having the
LR immobilsed and worse was to follow for the
SWs as the Grey Hunters who had been broken failed to rally and promptly fled off the board.
At this point the
Sws had only two scoring units, one of which was tied up midfield and the other that was needed to go after the
IG objective.
The plan evolved to holding their own obj with the
Lfs/Rune Priest, getting a contest a best and trying to break through the
IG lines to take their objective. As such the surviving Rhino moved back centrally and popped smoke, ready to make a dash forward in subsequent turns.
The
GH deathstar disembarked from the Land Raider and prepared to charge forward. The Rune Priest emerged from cover to tackle the oncoming Sentinels.
The shooting phase saw the Long Fangs shake the lead Chimera and the Land Raider fire on the Leman Russ but fail to damage it.
In the combat phase the Rune Priest charged the lead Sentinel destroying it with his melta bombs and consolidating slightly.
The Dreadnought charged the shaken Chimera but could only stun it further.
The
GH deathstar then multicharged both the Leman Russ and command Chimera. Under a flurry of melta bombs, power fists and wolfen attacks the Chimera was destroyed but the
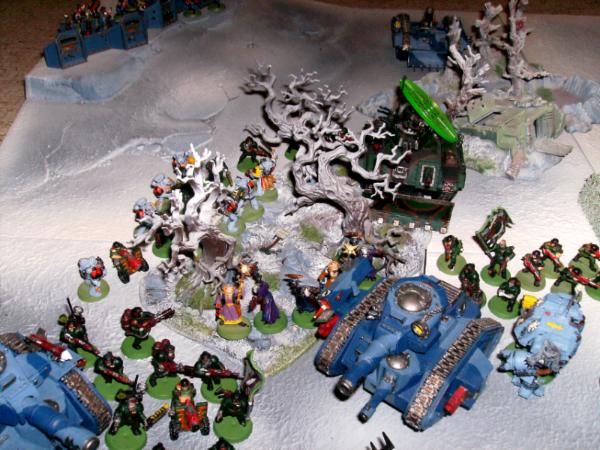
LR survived only being stunned.
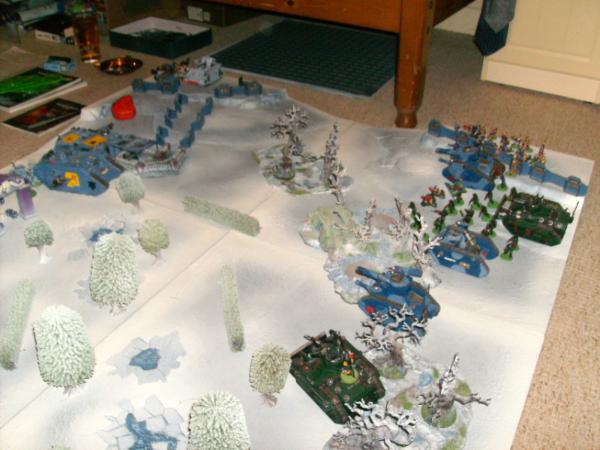
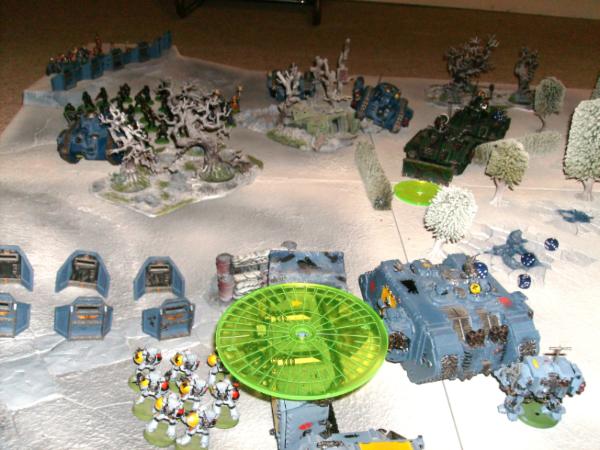
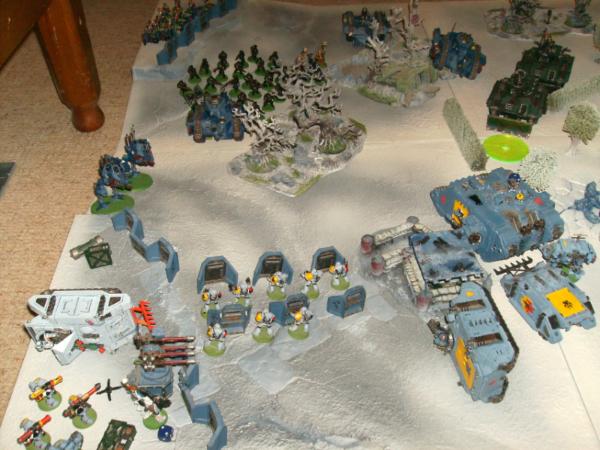
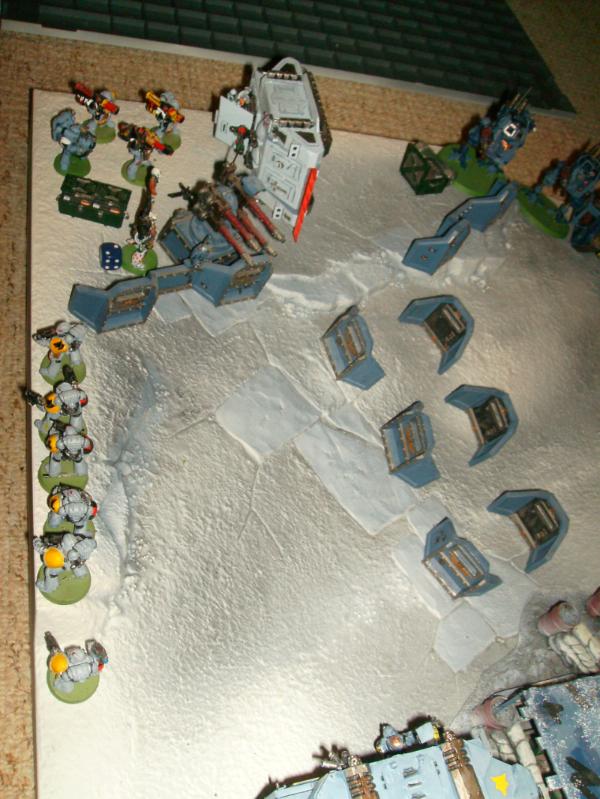
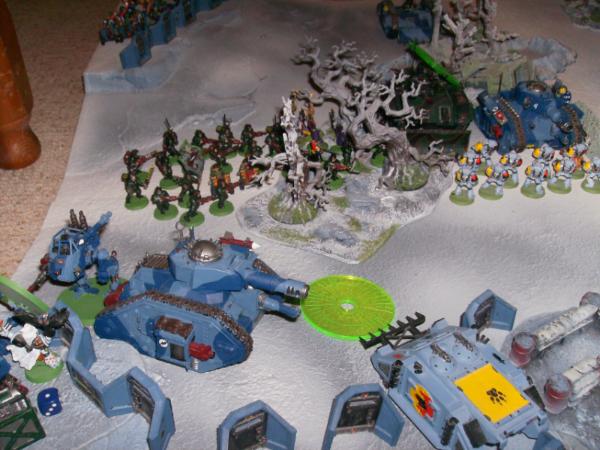
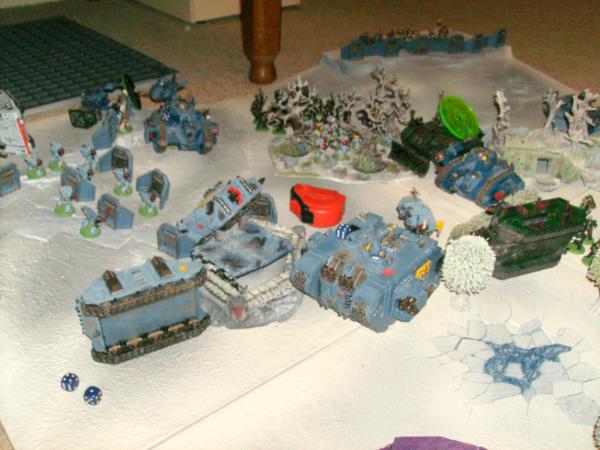
End of turn 3 looked like this.
 IG
IG turn 4.
The Deathstar had done some damage but things were still going well and they were now badly exposed and on foot for the rest of the game.
Movement saw the Sentinel and Leman Russ on the right flank advance to engage the Rune Priest and surviving Rhino respectively.
The command squad with Commissar from the destroyed Chimera moved into the forest to block off the
Ghs/Wolf Leader, supported by the Psyker squad and two platoon squads to their right.
With the other Chimera and Leman Russ being stunned, the last of the movement saw the Veterans disembark from their Chimera to fire on the Dreadnought with their meltas.
With that
IG shooting commenced. The Sentinel fired on the Rune Priest but failed to hit him. The Leman Russ then fired on the remaining Rhino but only managed to stun it. Under orders the Lascannon team then opened up on it and wrecked it. The Grey Hunters disembarked, not taking any casualties and passing their pinning test. The autocannons fired on them to thin their numbers but failed to kill any due to saves from the aegis lines.
On the other flank the Vets fired on the advancing Dreadnought but did no damage. It was felt taking it out would stop it rampging through the Vets – a scoring unit and leave the stunned albeit still mobile Cimera intact. The Command squad then unleashed four flamers into the Deathstar and casused 7 wounds. But with 3+ armor in saves only one fell to the firestorm. The Psyker squad then fired on them but failed to hit.
It proved to be an average turn, popping the last Rhino now put the entire
SW force on foot and a good distance from the
IG objective but the Deathstar was looking menacing.
SW turn 4.
SW movement saw the remeining Grey Hunters in backfield move into the aegis line and to within 3” of their objective to hold it. The Rune Priest moved to engage the first Leman Russ whilst the Dreadnought moved against the remaining Chimera. The
GH Deathstar moved into the forest to confront the
IG command squad.
Shooting saw the Land Raider fire its multimelta at the Leman Russ but fail to damage it. The Long Fangs then fired on the other Leman Russ who had left itself very badly exposed to side armor shots and immobilised it.
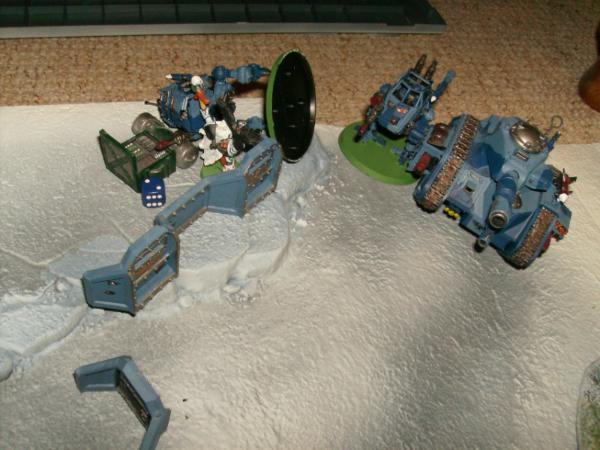
In the combat phase the
RP charged the Leman Russ, getting free hits on it and causing a weapon destroyed and stunned result.
Not surprisingly the Dreadnought having survived the turn earlier charged the last Chimera destorying it and leaving the
IG with no viable transports left.
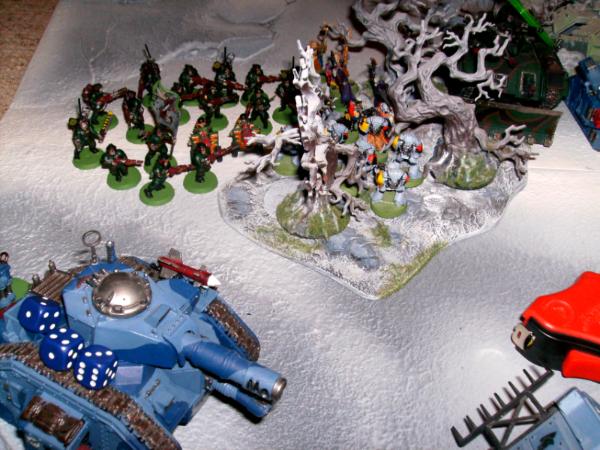
In the forest the fighting was fierce with the
Ghs killing all but the Commisar who stood firm but only managed to kill one
GH himself.The
Ghs consolidated around him ready to finish him off.
 IG
IG turn 5.
A tough turn to come but things were still in hand.
Reasoning that despite his zeal the Commisar was dead this turn one of the
IG platoon squads setup a perimeter around the forest to prevent the
GHs consolidating closer to their obj this turn or making a run for it next. They would have to fight their way through the platoon squad and then the backfield to sieze it.
The Psyker squad moved forward slight to both present a charge target to the Deathstar and /or fire on the backfield
Ghs.
The still mobile
LR on the left flank advanced 6” along with the Vets who ran to keep up with it. They planned on using it as a shield to get into the
SW obj.
The second command squad ran forward 12”, again to pressure the
SW obj in the final turn.
The shooting phase saw the Sentinel again miss the Runepriest.
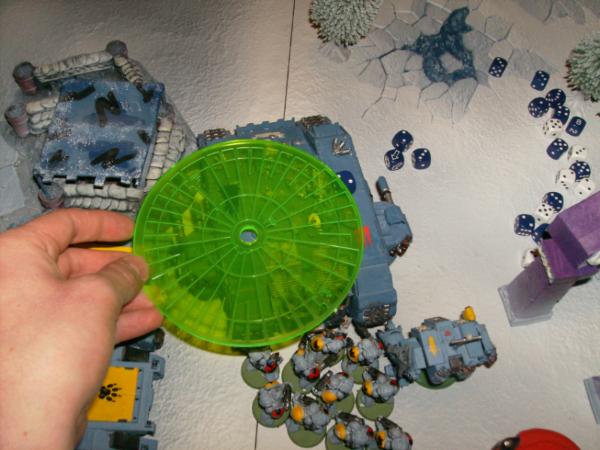
The Griffon and second Leman Russ then truely pie-plated the
Ghs in the aegis line killing 5 but they luckily passed thier break and pinning tests.
The Psyker squad also fired on them but missed.
In combat the Commisar fell valiantly and the
Ghs consolidated ready for a next turn charge vs the
IG platoon squad, surrounding the forest.
SW turn 5.
SW movement saw the backfield
Ghs tuck right in behind the wrecked Razorback out of
LoS of a lot of the
IG forces and still holding their obj.

The Runepriest moved to engage the forward platoon squad since they were the only scoring squad within range of the obj. The Dreadnoguth manouvered for a charge on the mobile Leman Russ.
In the shooting phase the Long Fangs fired on the Pysker squad – the only viable
LoS target but failed to kill any.
With no other shooting left the
SWs charged. The Dreadnought obliterated the last Leman Russ.
In combat with the platoon squad the Rune Priest took another wound but managed to kill two himself. With a bad break roll they fled but the
RP failed to sweep them.
There was little chance for the other platoon squad on the forests edge as the
Ghs emerged bellowing and cut them down wholsesale before consolidating with a decent 4” towards the
IG obj.
 IG
IG final turn.
This one was going down to the wire for sure and was still winnable. The Deathstar needed to be stopped to have any chance of winning however, since no scoring units were close to the
SW obj but it could be contested.
The Vets and Psyker squad moved up 6” to try and get in range of the turtled
Ghs at the
SW obj. The other platoon squad who had broken earlier couldnt rally due to the Deathstar being within range and continued fleeing. The remaining Sentinel moved to fire on and then try and fight the
Ghs in combat to prevent a
SW scoring unit being on their obj.
Shooting saw the Griffon and Psyker squad try and pieplate the backfield
Ghs but both missed when needed most.
The
HWTs on the
IG obj under orders then unleashed everything they had on the Deathstar in conjunction with the Command Platoon. Killing a respectable four the Command Squad then charged.
In combat the Sentinel killed one of the backfield
Ghs but they held firm, meaning the
IG were now still contesting.
The command squad killed one
GH with no losses and so the fight and game would go right down to the wire.
 SW
SW final turn.
Obviously the Dreadnought, Long Fangs and
LR were still alive for the Space Wolves but the game was so exciting we cut right to the chase here.
The Rune Priest charged the Sentinel to try and dislodge it from the
SW obj as the Deathstar/Command Squad fight continued.
In combat the Runepriest armed with his trusty meltabombs wrecked the Sentinel – a very lucky roll.
Led by the Wolf Leader the Deathstar killed three of the
CS with no losses forcing them to break and flee. They failed to catch them however and with a decent consolidation roll got to within 3” of the
IG obj, conluding the game.
Result: Space Wolf held their home obj and contested the
IGs. A Space Wolf win.
IG final thoughts.
What to do to win a game. Right up to the last dice rolls it was winnable and was a little unlucky not to.
Things went wrong around the
GH Deathstar, it was a tough unit but with more concentrated firepower it could have been brought down or at least weakened sufficently so it couldnt have made it to the obj. Small tactical erros again crept in with the Vets and second platoon not getting forward fast enough when the Chimeras went down. The Sentinel was definetly unlcuky, it nearly survived until the end, earning a draw and missed the darn Rune Prist 3 times with shooting.
Looking at the final position of troops at the end there simply werent enough units further forward, having said that, the constant stuns/immobilies from the
SW forces did not help.
HWT firebase did well however. Another game thrown away rather then won unfortnately.
Space Wolf final thoughts.
A very tough game. Around turn 4 things looked grim with no transports, left and only two scoring units. However the Deathstar proved to be the winner. It cut through everything that it faced whilst surviving a lot of shooting too. The
IG needed to neutralise it better and faster however.
Strategy sort of went out the window late game and it really came down to micro management and small tactical manouvers/choices which make for an interesting game too.
Knowing what to focus on and what to ignore in a C&C game is key. In hindsight the
IG got fairly bogged down in midfield which helped to win the game and with so many stuns/shaken/immobilises it was going to come down to the troops to win it.
A great game though and a much needed 3 points for the league table.


