The other night, my regular opponent and I engaged in a 2,000 point battle: his Black Templar vs my Imperial Guard. We each decided to try something a little new this time. We rolled a few proxies, as is our way of play, partially because we're both still trying to build up full armies (and slow about it) and we both like to experiment with new ideas (and don't want to pay the money for something we may never use). I've been out of the game for about three or four years up until about four months ago, and he's been out of it a whole lot longer than that, so we're still getting used to what we like and how the tactics work. The game wasn't
WYSIWYG, but it's close enough to avoid serious confusion in the pictures.
Imperial Guard:
I used mostly my standard structure for Imperial Guard, so I was a bit less adventurous in my experimentation: a solid core of infantry and heavy weapon teams supported by tanks. For experimentation this time, I mobilized my veterans (previously they were just part of the gun line) and the use of a Leman Russ Executioner. I also decided to try out a special character for the first time ever.
*Company Command Squad w/Standard, Chimera
*Platoon:
-Platoon Command Squad
-5x Infantry Squads w/ plasma rifles, missile launchers
-1x Lascannon Squad
-1x Autocannon Squad
*Veterans w/ 3x plasma rifles, Sarge w/plasma pistol, Chimera
*Veterans w/ 3x melta guns, Sergeant Bastonne
*Squadron of 2x Leman Russ Battle Tank w/ hull lascannon
*Leman Russ Demolisher w/ hull lascannon, multimelta sponsons
*Leman Russ Executioner w/ hull lascannon, plasma cannon sponsons
*Sentinel w/ Autocannon
Black Templar
My opponent went a bit more out of the box, designing his list around more fluff Black Templar: a lot of troops getting ready to charge the enemy line, versus his proven effective tactic of walls of missiles. He's sending me his whole list later, so I can get more detailed then.
*Emperor's Champion
*Command Squad in Land Raider Crusader
*4x Rhino w/ 10 man marine squad; each squad had 1 power fist, 1 melta gun, 3 neophytes
*2x Dreadnoughts w/ assault cannon, missile launcher
*1x Venerable Dreadnought w/ assault cannon, missile launcher
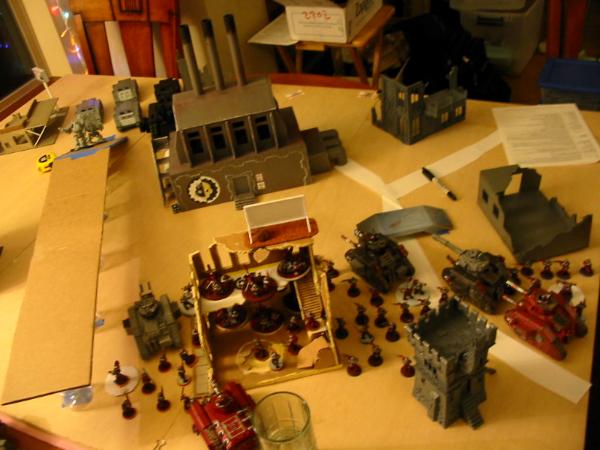
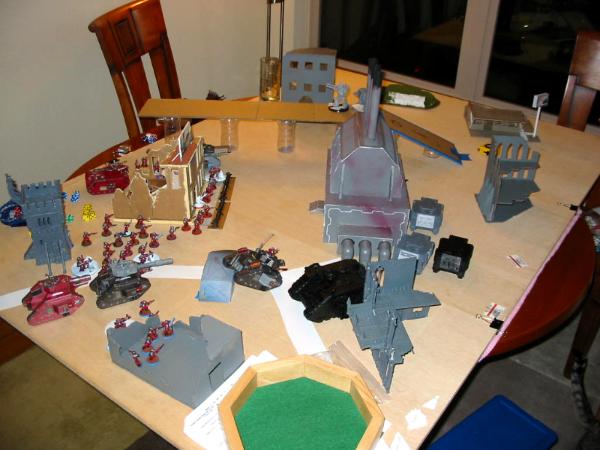
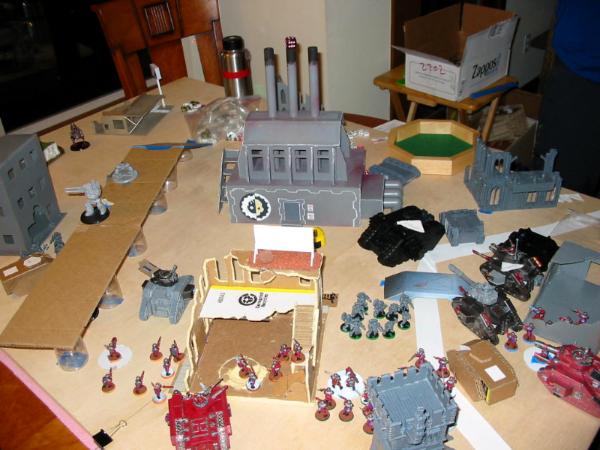
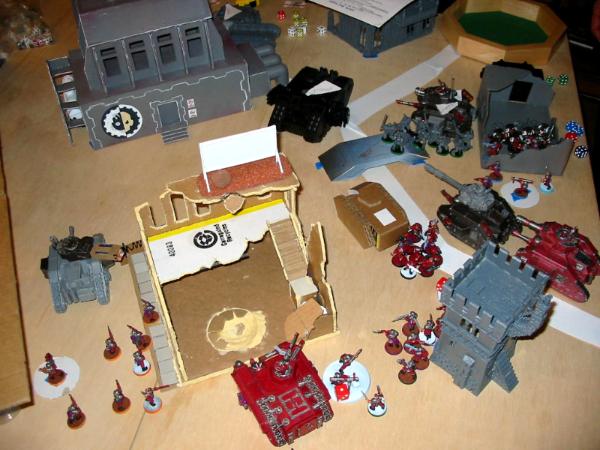
The Battlefield
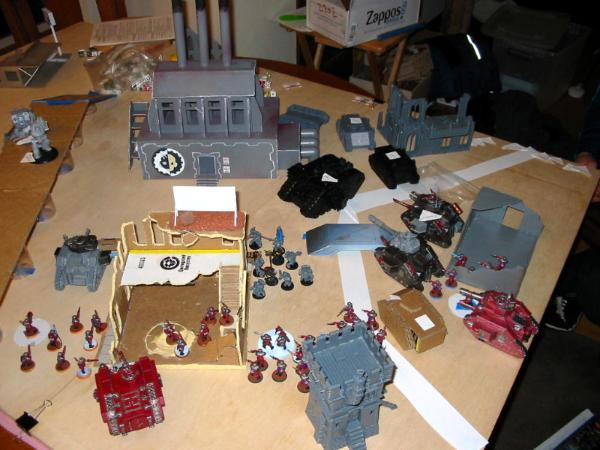
We spent a bit of time on the terrain here: we wanted to make a battlefield that felt like a real city, something people would actually fight over. I've been working to construct a lot of modular terrain to this effect, some of which is done and some of which is half done. We decided to experiment this time with our freeway overpass idea, and decided it was a booming success, enough so to put time and effort in to finishing it; moving
40k in to three dimensions adds whole new elements to the way you deploy, move, and fight. The overall layout still allowed movement for vehicles between every building (with a little squeezing by the
LRC sponsons) but had enough objects to give cover saves/break line of sight and therefore allowing effective maneuvering of units. Check out that awesome factory in the middle, I'll have how it (as well as the administration building on the left and the Burger Tank you can barely see in the back right) were built up on my gallery eventually.
 Setup
Setup
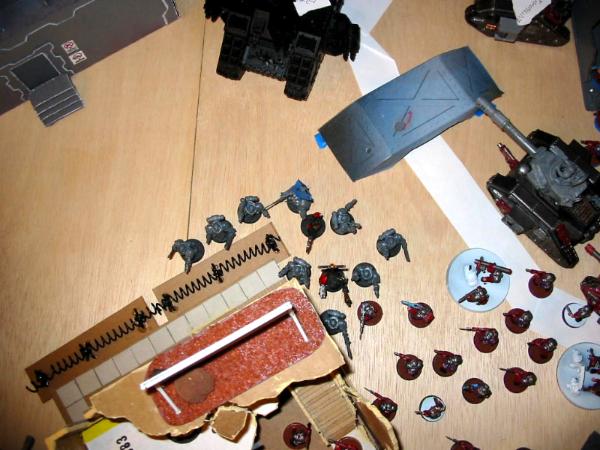
Battle type and deployment were both rolled for randomly, to which we got Annihilation (kill points) and Seize Ground (table quarters). The Imperial Guard won the roll off and decided to deploy first, taking the administration building as their quarter. I was looking for three things: clear lines of fire, enough room to deploy and maneuver the vehicles, and somewhere to dig in the troops for cover (
IG do love their cover saves). In retrospect, the office building in the upper right (just past the freeway) might have been a better choice, because then he couldn't have used the factory for so much cover. It could also be that I really like my administration building.
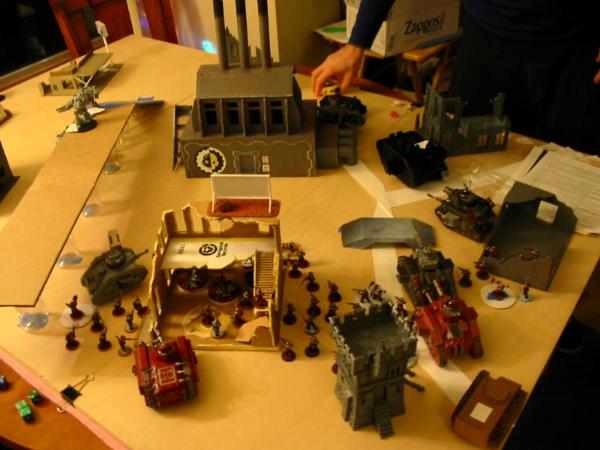
I deployed with the above in mind. The heavy weapon teams went in the building, and I kept the Sentinel in reserve (for flanking and shooting dreads/rhinos in the rear) as well as the Veterans, since I wanted them to be able to respond to my opponent's movement (and there was nowhere in my spawn I could do that and not have to drive through my own troops). Meanwhile, the Black Templar deployed to try to break line of sight to the majority of my forces to avoid turn 1 shooting; he's been on the receiving end of a similar army before and does not like it. He pulled it off very well: anything I could see had enough cover for a save. Didn't matter in the long run, though, since he seized the initiative.
From here on out, all camera pictures will be taken from the Imperial Guard side of the table (with some slight moving around), and any reference to direction (left flank, right flank) will be from the Imperial Guard side.
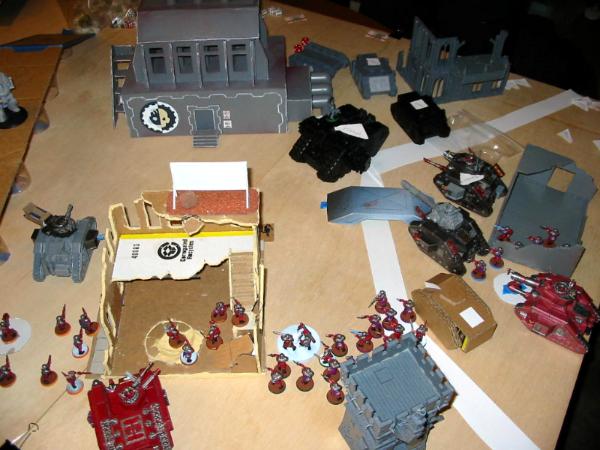
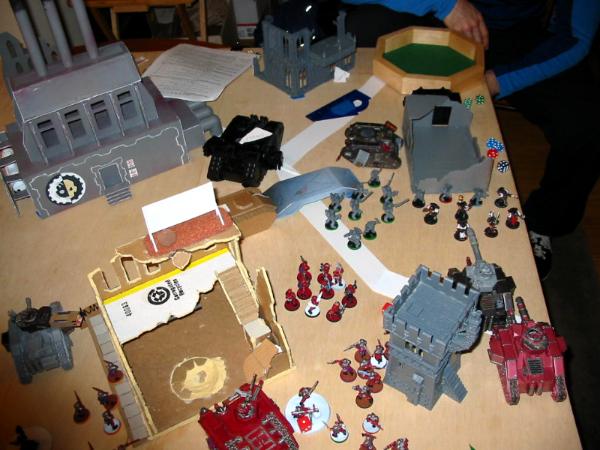
Turn 1: Black Templar
Since he'd seized the initiative, I lost my chance to maneuver some of my units in to a better position (outside of my deployment zone) before I'd have to deal with his forces. In keeping with his initial strategy, the rhinos used the factory for cover while the dreads used the freeway for the same (as well as to get higher firing positions). The angle I'd be forced to respond to their fire at meant they'd still get cover from most of my units.
The dreadnoughts were still out of range for the most part, so a few missiles failed to hurt my tanks. The venerable, however, made short work of the lascannon team on the second floor. I have to say, of all the changes the newer
IG codex made, making heavy weapon teams a single Toughness 3, Wounds 2 model is the one I hate the most for a couple of reasons,
ID being one of them.
Turn 1: Imperial Guard
Movement was mostly along the right flank, getting blue squad in to cover and maneuvering the tanks for better shots on their intended targets.
The majority of the fire was directed at his dreadnoughts, and I was arguably as successful as my opponent had been at doing damage (although I did have a lot more lead to sling in his direction) with a lot of shaken and stunned results. Some tank fire directed at the barely visible
LRC reminded me why I've got heavy weapon teams (or would...) for that job, though.
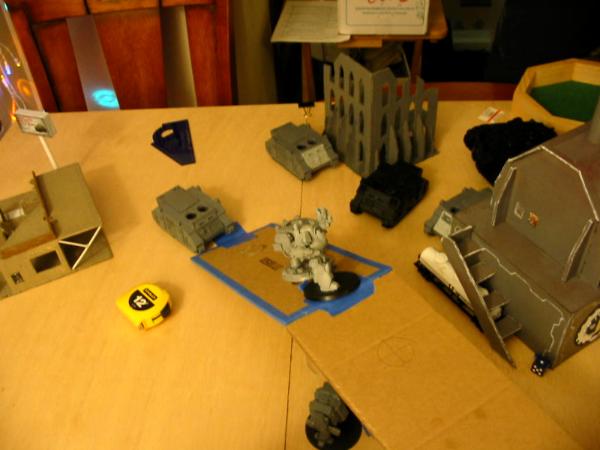
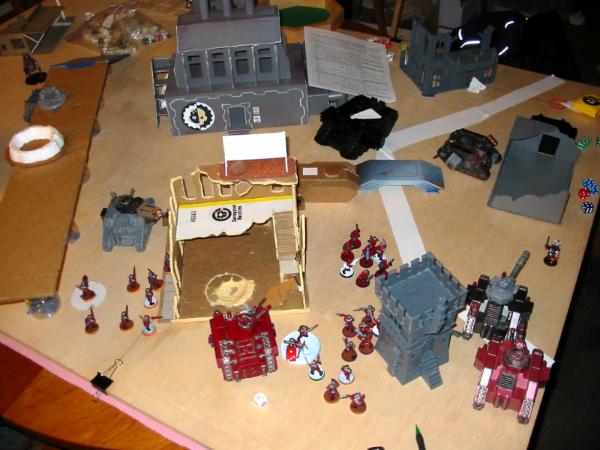
Turn 2: Black Templar
The advance continues. My opponent is taking it slow and steady on this one, keeping his more vulnerable rhinos out of line of sight and letting the
LRC take the brunt of the beating. Meanwhile, the dreadnoughts continued their hike up the freeway; since they were all shaken I fortunately would not be taking fire from them this turn, so my opponent strove to move them up but keep them covered. Fire, as a result, was light and the single multimelta shot the
LRC cracked off missed its Demolisher target. Time to get it out of there, and hopefully cripple that Crusader.
Turn 2: Imperial Guard
The sentinel and the plasma veterans (that cardboard Chimera on the right) come in, and I flank the former off to the left to pop dreads and move the latter in behind my line to get some support against the brunt of his push. Meanwhile, the tanks maneuver to get better shots, the majority of which is going to be directed at the
LRC: I'm hoping to crack it with the Demolisher so the rest of my tanks can get at the goodies inside.
Unfortunately, that fails to happen, although I do shake the vehicle (yay). As a result, I redirected most of my fire off to the left flank in the hopes of keeping those sentinels down. The sentinel performed admirably (as he would continue to do so for the rest of the game, why did I not always take these?), immobilizing the rhino on the left and all but removing its threat from the fight. I cracked open one of the rhinos on the right as well and got busy patting myself on the back; little did I know my opponent had a solution to that.
End of turn 2, casualties are light and the fate of this game is still very much up in the air. We haven't had a game like this in a while.
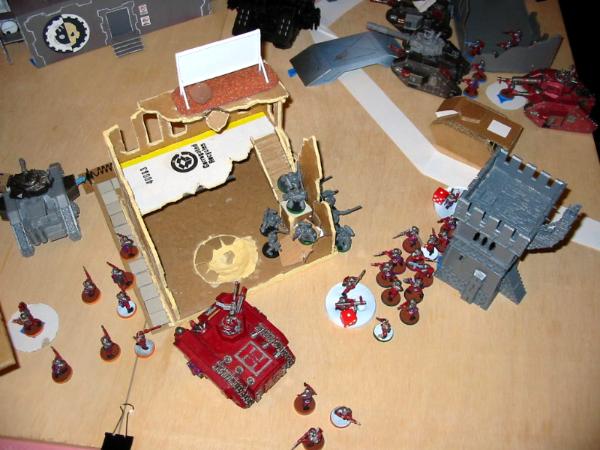
Turn 3: Black Templar
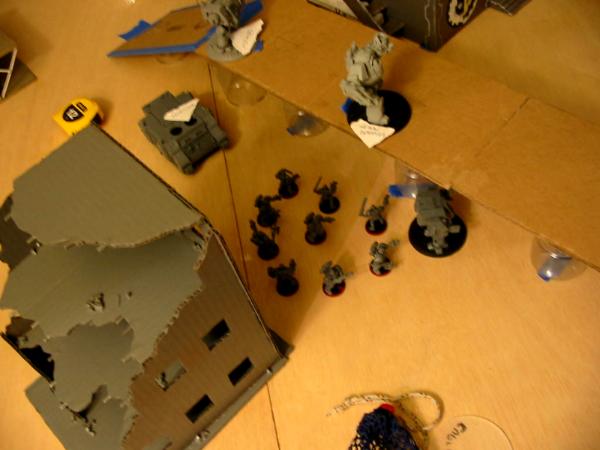
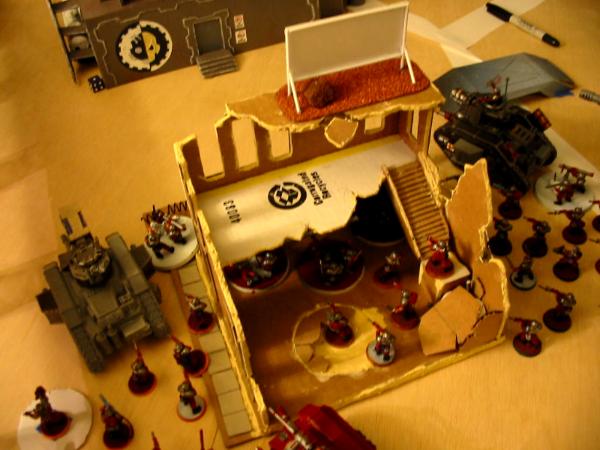
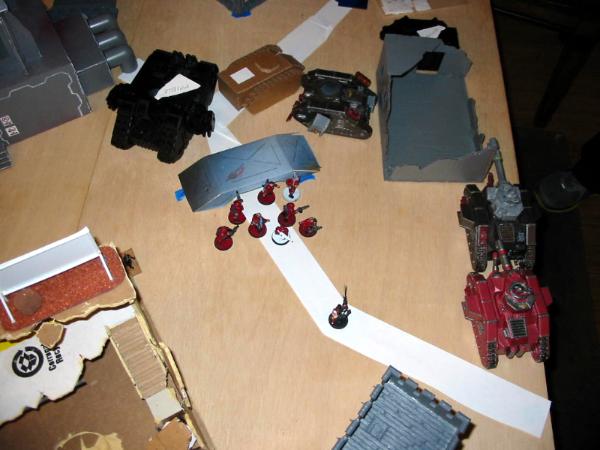
There's the left flank, red squad having bailed out of their rhino to see if they could get stuck in. That dread beneath the overpass had two motives, the second of which was to shield his cohorts from return fire while they charged in, which proved an effective trick. Those dreads lay in to my remaining heavy weapon team and I once again cursed instant death as they soaked up fire and died.
So begins the assault, his command squad piling out of the
LRC and straight in to combat with red squad. The barbed wire did me little good, he positioned just right to get around it. This was going to hurt, but I had a plan for when it was all over. One of the things that used to ruin me in 4th edition was the ability to consolidate in to assault: can't do that anymore, and my turn was up next with that juicy squad right in the center of my firepower. He tried to beat this by getting in with both red
IG squad and their neighbors, but it didn't pan out.
Hey, you notice the green black templar squad is gone? The ones who were behind the factory? That's because he climbed over the outflow pipes and popped them in to the Land Raider after evacuating the command squad, earning himself
AV 14 and an additional 8" of movement when they come assaulting out the front. Clever.
The results of that assault in front of the administration building. Between a complete and total wipe of the squad (no big surprise there) and a 1" consolidate move, they were in for a world of hurt.
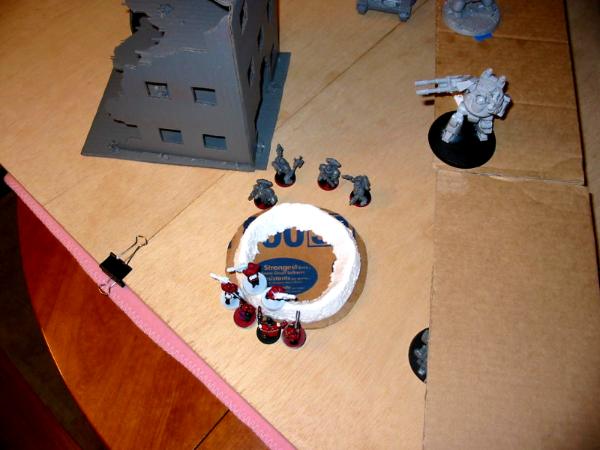
Turn 3: Imperial Guard
And hurt it did:
Before and after pictures show the results of the carnage. It took a lot of deployed orders and the majority of the army's firepower however, so while I'd dealt with the immediate threat there were still a lot of other ones on the board. The rhinos were still bearing down on me, the
LRC was immobile but weaponized, and the dreadnoughts were all still up and running, if a little worse for wear. All but one, that is, thanks to the sentinel (see what I mean?) Fortunately, I got help that turn:
The melta vets, led by Corporal Cutter (or Sergeant Bastonne, if you prefer). The plan was to use them to crack those dreads initially, then hope the vehicle lasted long enough to let them blast away at the marines. The first part of the plan failed miserably, the second part was to go pretty well though.
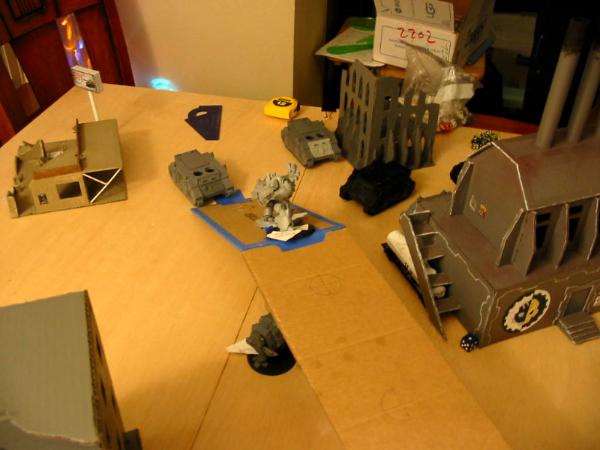
Turn 4: Black Templar
Commence
LRC troop volley. I'd originally maneuvered
IG squads purple and green away from his command squad so I could shell it without worrying about them; I realized the mistake in my movement plans when we realized the black templar squad could now assault in to both easily, locking them in to combat, reducing my firepower, and potentially both wiping the two squads AND keeping him locked up through to my turn (good for him, bad for me since I wouldn't be able to shoot the troops).
Not how it ended up working out, though. The two squads each suffered minimal casualties before breaking. Both escaped and moved a minimal distance on fallback, and both would regroup come the beginning of next turn. In other words, exactly what I wanted to happen, and exactly what he didn't. Speaking of that,
On the left flank, a combination of fire from the dreadnought and Black Templar red squad detonated the veteran's Chimera, killing some of them but wreaking equal havoc on the nearby space marines. The resulting difficult terrain made it impossible for the marines to get in to assault. Once again, not the perfect outcome for me but definitely one of the worst for him.
Turn 4: Imperial Guard
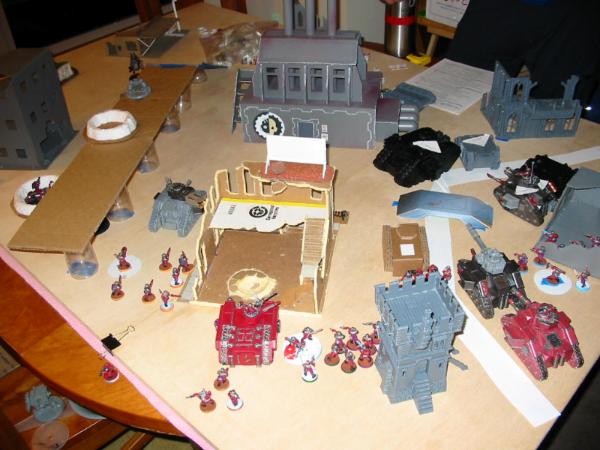
Not a lot of maneuvering but a whole lot of dakka: on the right flank, combined firepower reduced the Black Templar green squad to a steaming pile of metal and anger. Once again took most of my army to do it though. On the left flank you may note a crater on the overpass: sentinel strikes again, blowing apart the venerable dreadnought with one six after another, and the remainder of the red squad ate melta and power weapon.
Once again, I was feeling pretty good about my chances, and my opponent was feeling pretty bad about his until we started totaling up kill points and discovered I was only one ahead (and he still had two squads to deploy, this time on top of my lines). Not only that, we'd already figured out I had nearly twice his number of
KPs on the field, meaning I could walk out of this with nearly half my army and still lose. All of a sudden things looked a lot more desperate.
Turn 5: Black Templar
They were about to get more so. Those two rhinos you've been seeing in the upper right had moved in to position last turn and despite the occasional pot shot were still up and ready to go. Out came a couple of squads, and a turn of assault later they'd ripped a gaping hole in my poor Leman Russ Demolisher and crushed blue squad like so many bugs. Not only that, the single remaining dreadnought got up close and personal with Cutter and his men, and between bullets and big feet brought the total kill points for my opponent up to three for the turn. Ouch.
Turn 5: Imperial Guard
The game could end this turn, and my opponent was up by 2. We both agreed the objective at this point was prioritizing: what did we stand the most chance of killing the easiest? It was a balance between that and what stood to do the most damage to me next turn, should it go to a sixth, because there were still four squishy squads of guardsmen (and therefore four kill points) in easy reach of his remaining assault squads.
I maneuvered everything to give clear fields of fire, and minimize friendly fire from scatter, as well as to get squads in to rapid fire range while still within order bubbles. The enemy weren't in cover (except, in some cases, from my own troops) which helped a lot in what was about to happen.
The Leman Russ Squad finally got their act together and laid down the hurt, a couple of landed shells and lascannons accounting for the entirety of the green black templar squad (haven't we seen them before? Yeah, my opponent didn't want to get his blue squad out of the box so just reused the other ones). As a result, I got to hit the other squad with everything else I had and for once, try as I might, I couldn't take them all. Most of them, yes. Everything without a name, sure. For once though, despite everything I could put in to him including ridiculous amounts of plasma (and two dead gunners), the Emperor's Champion did not die.
This might be destined to be the first game he actually lived through.
Final results: two kill points, between the dead squad and the sentinel racking up another rhino (4 turns, 3 kills, I love that thing).
With the score tied 7 to 7, the question arose: Would it end? Nay, for the dice doth rolled a 6!
Turn 6: Black Templar

Not that there was much to do, of course. This was by far the fastest turn of the game, with the Emperor's Champion sticking in to find something he could kill (he didn't, they held, although they're hiding behind the building in this shot) and the remaining Dreadnought making for assault (to save himself from the lot of anti-tank fire lining up on him). With no additional killpoints under his belt, I just had to kill something, anything, and the game would be mine. Unless the Champion killed the purple squad he was locked in with on my turn, which was pretty likely.
Turn 6: Imperial Guard
What could I do, what could I shoot? My opponent only had five things left on the board: the Champion (locked in assault), the Dreadnought (locked in assault), a pair of hiding rhinos and a Land Raider. That last had been hard enough just to damage, my chances of killing it with what I had seemed unlikely, so I focused my attention on the rhinos. Everything I had at the black rhino hiding behind the building, and a lot of Crew Shaken results. Everything, of course, except for the lone sentinel: he was off dropping autocannon shells at the rhino behind the factory and, lo and behold, blew it to smithereens.
Which was good, because the Champion promptly finished off purple squad, earning him that extra kill point.
In Closing
Final Score: 8 to 8
A great game for all. It didn't feel to me like some games have, where "you feel like you're going to win on your shooting phase, and like you're going to lose on his". My opponent reported about Turn 4 that he felt the game was over, that is until we computed kill points and decided to play it out. Neither of us have really liked kill point missions up to this point, we've only played a few rounds of it, avoided them when we could, and preferred the old victory points (seemed more fair). It definitely adds a different element to the game as to how you protect your units and approach attacking the opponent's.
As for the experiments I think some turned out well and some less well.
The Sentinel wasn't an experiment, but I think I should free up some points and put 2-3 on the ground. More kill points for the opponent (unless I squadron them), but they have never failed to perform on flanking. I used to hate them in fourth edition, but now that you don't have to walk on in front of his guns they've got a whole new depth.
The Executioner was a mild success. When it was on it did well, landing plasma cannon blasts on marine squads with generally good results. The problem is the high scatter inherent in
IG weapons (
BS 3), the small blast template, and the unreliability that entails. They're also mediocre to bad against even light vehicles because of that scatter, and so despite the glee I see at 4-5 plasma cannon shots a turn, it's not a unit that will be seeing much table time for me. I'll hold on to the little cardboard barrel shroud though, just in case.
Mechanized Veterans and Corporal Cutter (Bastonne) were useful; I could put them in position where I needed them rather than letting the opponent come to me, and keeping them in reserve felt less like a loss of firepower and more like a gain in flexibility, which I was quite happy with. I automatically feel myself shying away from anything the internet calls an uber list (and mechanized meltavets are one of them), but I don't think it could hurt to have a squad or two. Cutter performed admirably, although not really worth the points due mostly to my poor usage of him. First of all, he should have been with the plasma team, not the melta team. Second of all, he didn't get much chance to be awesome, other than an order here and a power weapon there. Worth trying again, though.
As for my opponent, in our post-game talks he'd revealed a few learnings from this game. One: Land Raiders are sometimes worth the points (his previous attempts, he had some run-ins with melta weapons) as a delivery vehicle but also as a weapons platform/deterrent. Secondly, proper maneuvering is very important for a mechanized assault force going up against a heavily armed gun line: it may take you longer to get in, but it means your opponent isn't shooting at you the whole way. Finally, dreadnoughts are awesome and he hates opponents who roll lots of plasma.


