This is a HUGE topic. It is kind of like saying "paints, how do I use them?" Weathering powders are an incredibly powerful tool, and will have some great applications for an
IG army. This article from Forgeworld is very helpful:
http://www.forgeworld.co.uk/Downloads/Product/PDF//w/weathering-powders.pdf
The Forgeworld Imperial Armor Model Masterclass has even more in depth information and was a really indefensible guide for me.
Before getting into weathering powders I should mention, starting with weathering powders is a perfect opportunity to start using oil washes, because they require the same prep and finish, e.g. sealing off the acrylics and sealing again when you are done. As I mention below, paint thinner/spirits are the superior sealing/mixing medium for powders, so you are already using it. Oil washes are a truly amazing tool for weathering, with tons of applications. They are easy to create, just mix oil paints with some thinner. Burnt umber (a beautiful brown) and black are your go-to colors here. The umber wash really has a mind of its own, and has a lot more depth and richness of color than any acrylic. Just load up your brush and touch it to a seam, crease, or any detail, and marvel at how it races into every nook and cranny. The black, being an oil paint, has a fantastic oily sheen to it, perfect for oil leaks, seeps and drips on engines, caps, and moving joints. You place a few dots randomly on the surface and gently scrub in and off with a thinner soaked rag to really bring out the detail in the model.
I'll go over just a few tips and techniques:
Alcohol or paint thinner/spirits are your best choices as fixative, with thinner/spirits being superior due to its low surface tension. For a display model that is good enough. For a game model you will need to varnish seal it or it will wipe off over time.
Sealing with varnish will dull many of the effects, so if you are going to seal go for a little stronger effect than you want in the final product.
You can apply dry with a brush, either in cracks for rust effects, or on surfaces for gentle shading effects.
Always try to use 2-3 colors for any given effect (2 reds and a brown for rust, 2 yellows and a brown for sand, etc.) It adds depth.
You can (and for many techniques, should) wipe powder off after you apply it. Even just doing it with your finger will provide very realistic wearing.
Apply dirt tones to corners for nice shading.
Mix with ard coat or some other varnish for a mud effect.
Dry apply black around vents, engines, etc. for soot effects.
If you have an airbrush (a spray bottle might work too): Mix a little with thinner/alcohol, apply it to a brush/toothbrush and flick it onto the side of your tank. Then spray a coat of thinner/alcohol over it, place it upright, and let it sit. The spots will slowly dilute and run, creating great rust spots.
If you don't have a way to spray: 'paint' the area with thinner/alcohol first, then do the flicking technique. It will run, though not quite as well.
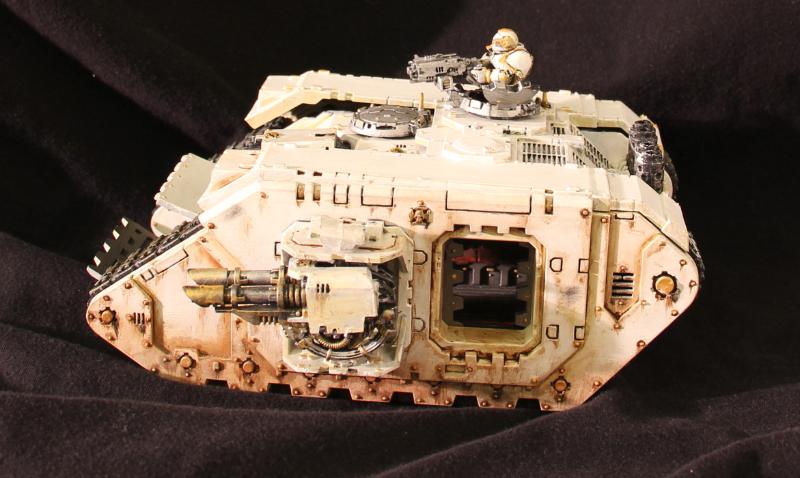
Black will REALLY sell blast effects and impacts. A good blast effect has 3 layers: exposed 'primer' (an important step for selling the effect), exposed metal, and scorch. So for a beam or glancing impact you would: paint an elongated oval with a dark grey (chardonite granite foundation if you are using
GW products). Next create a smaller steel/silver oval towards the 'front' of the original oval. Later, during the weathering process, apply a little black weathering powder in front of the painted area, and more behind it. Blast impacts can be created with a similar technique, but instead of painting circles, randomly apply the grey with a sponge, then carefully, and lightly fill in the areas with the most grey with metal, and surround with powder.
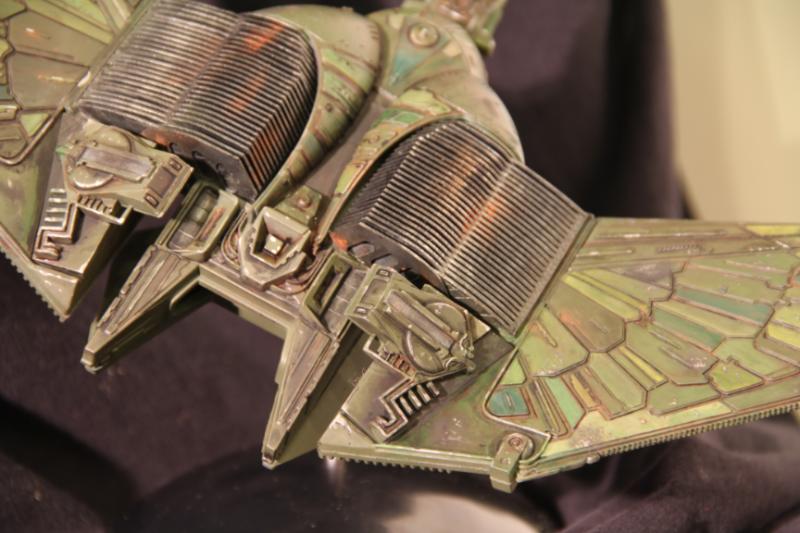
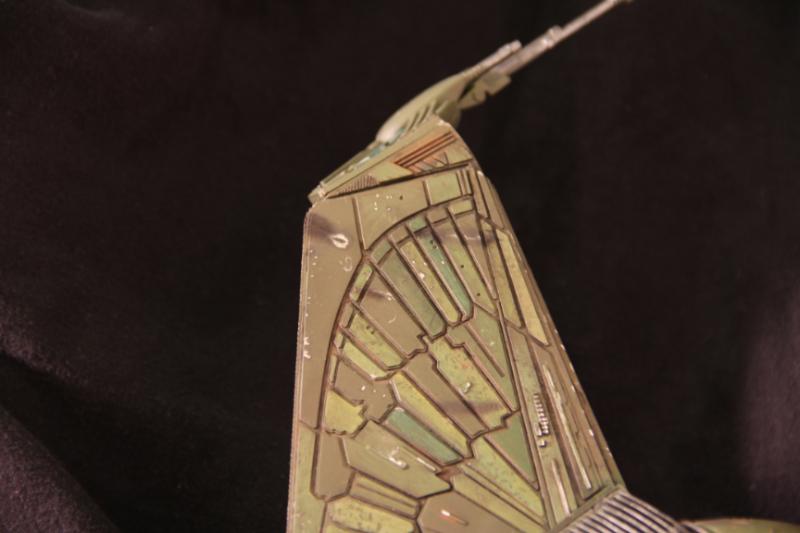
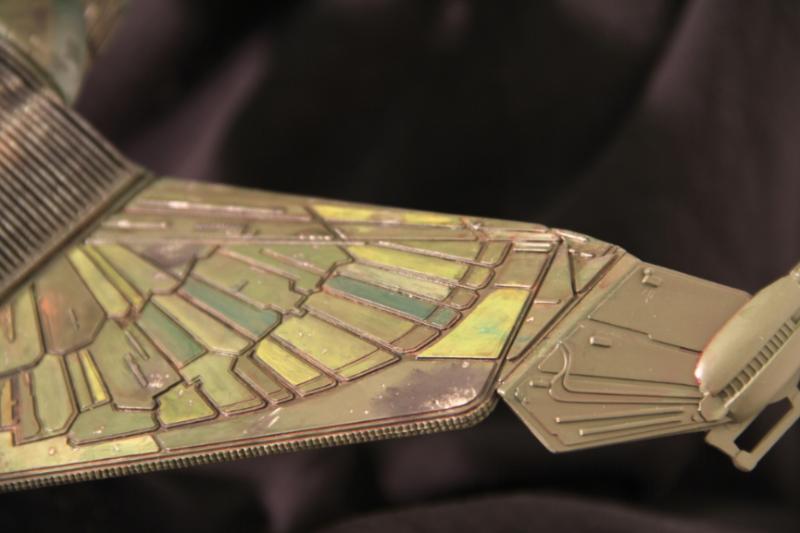
Hope that helps. Here are a few pictures of those techniques in action.


 The heat of a thousand suns shall destroy you!
  We are the Imperial Guard! It's time we started acting like it!
 1500
1500  1500
1500 

