| Author |
Message |
 |
|
|
|
|
Advert
|
Forum adverts like this one are shown to any user who is not logged in. Join us by filling out a tiny 3 field form and you will get your own, free, dakka user account which gives a good range of benefits to you:
- No adverts like this in the forums anymore.
- Times and dates in your local timezone.
- Full tracking of what you have read so you can skip to your first unread post, easily see what has changed since you last logged in, and easily see what is new at a glance.
- Email notifications for threads you want to watch closely.
- Being a part of the oldest wargaming community on the net.
If you are already a member then feel free to login now. |
|
 |
2012/11/03 20:52:03
Subject: Bommer Goes Woosh Woosh Woosh
|
|

Been Around the Block
with Waldo
|
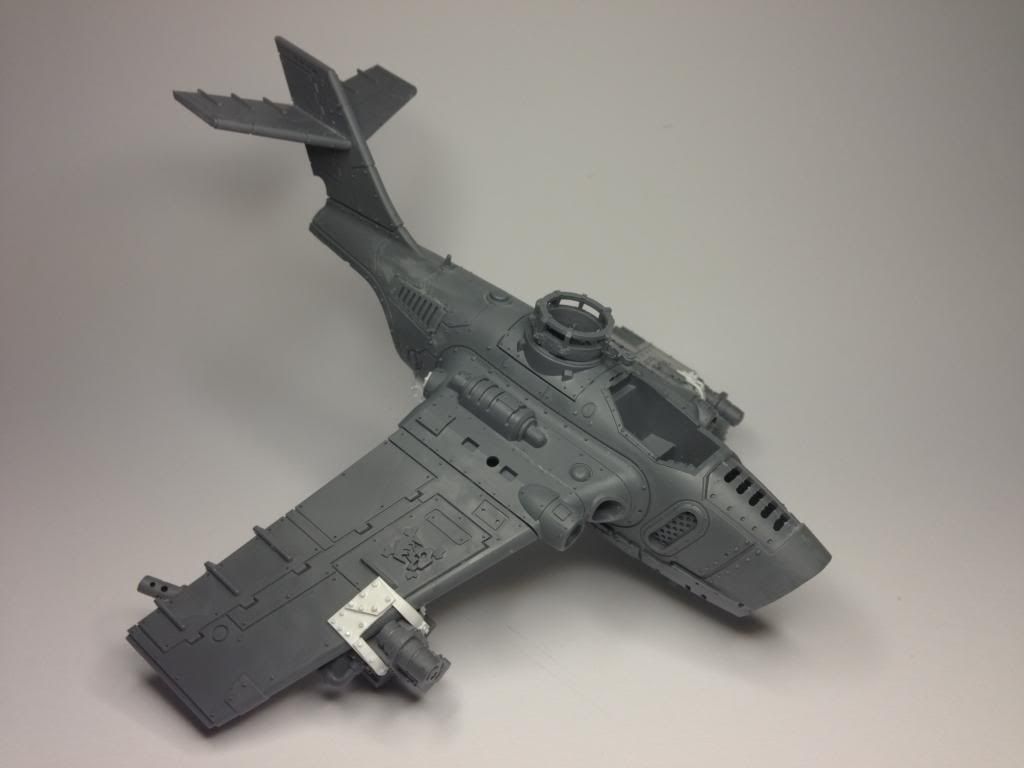
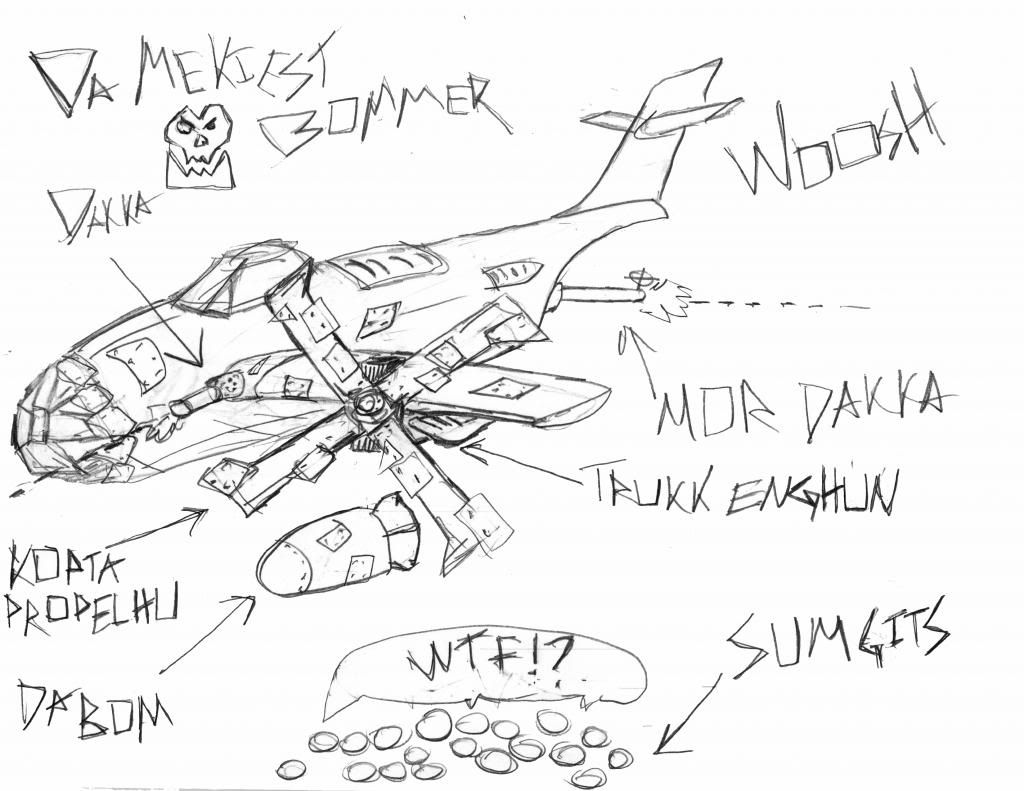
I picked up Dakka Bommer in lfgs. Once I looked through the sprues, my inner mek decided it was time to start moduhfekatuns. I came up with a blueprint of how I want to build it.
|
|
This message was edited 1 time. Last update was at 2012/11/05 02:22:46
|
|
|
 |
|
2012/11/05 02:40:38
Subject: Re:Bommer Goes Woosh Woosh Woosh
|
|
Been Around the Block
with Waldo
|
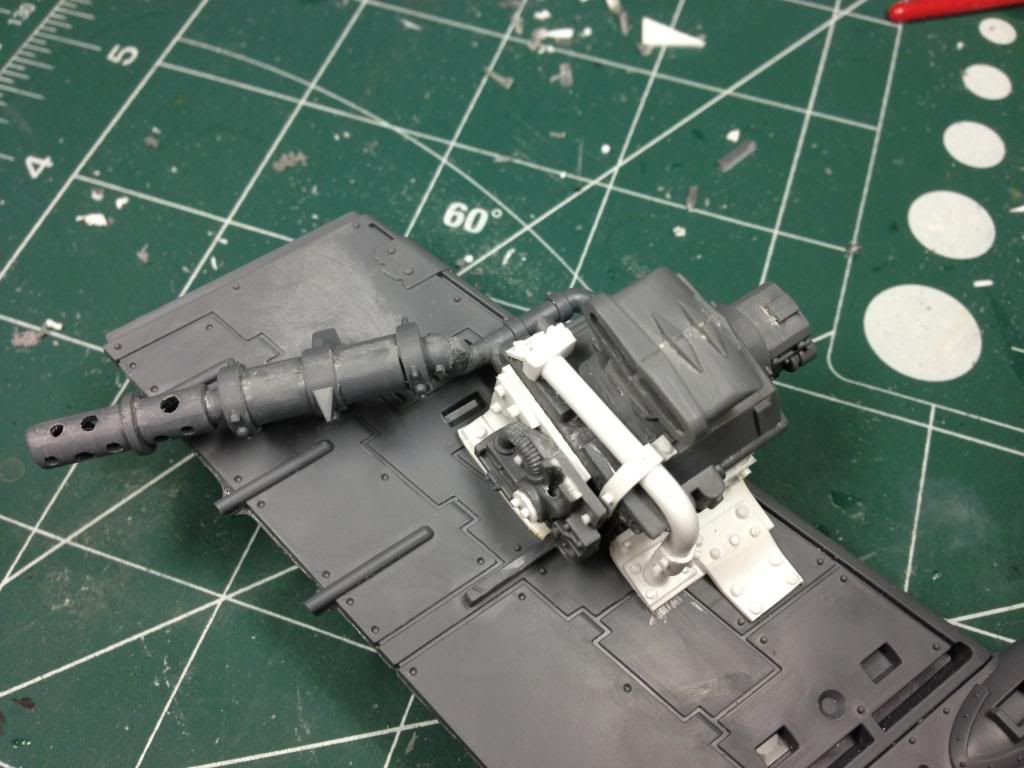
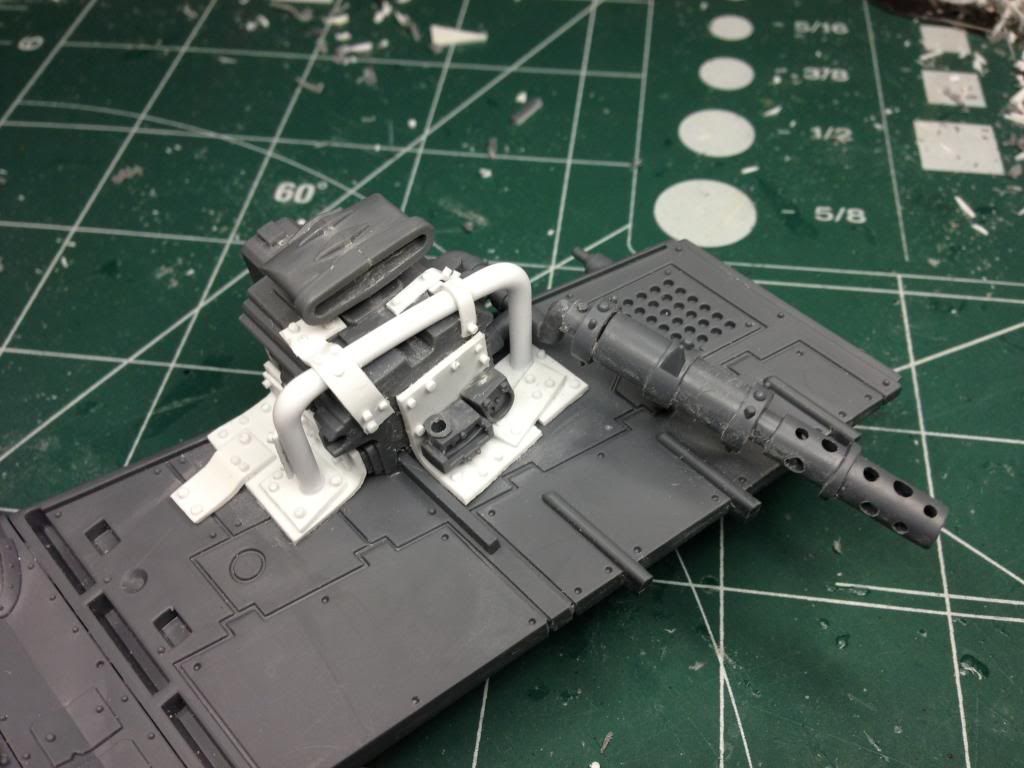
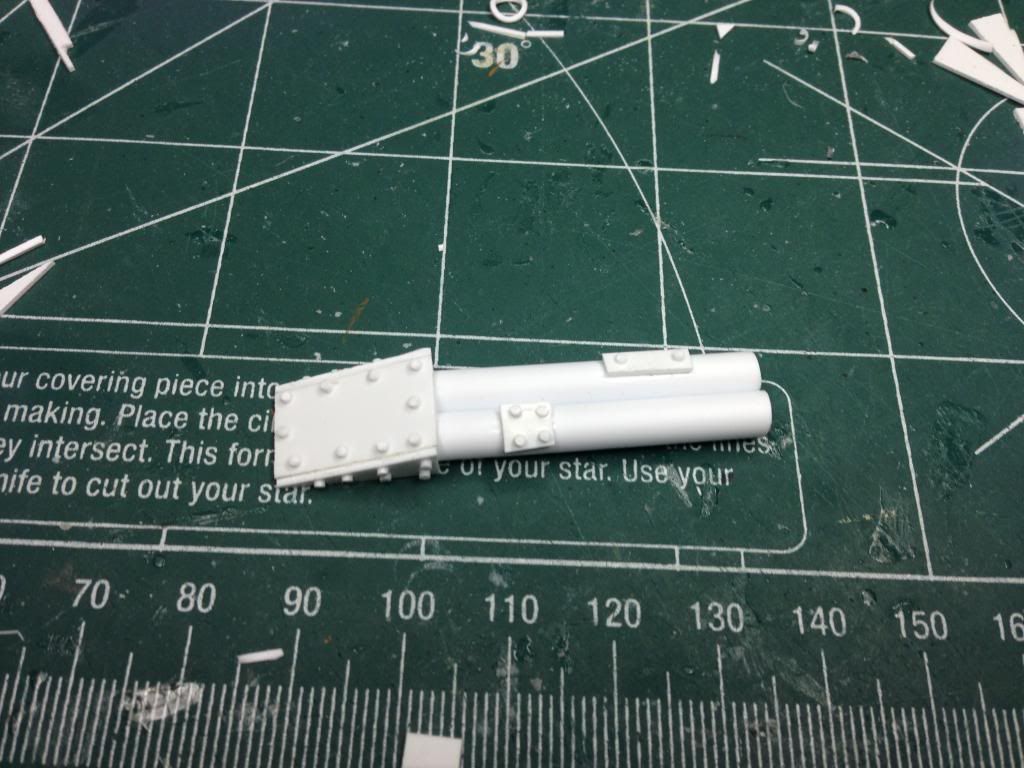
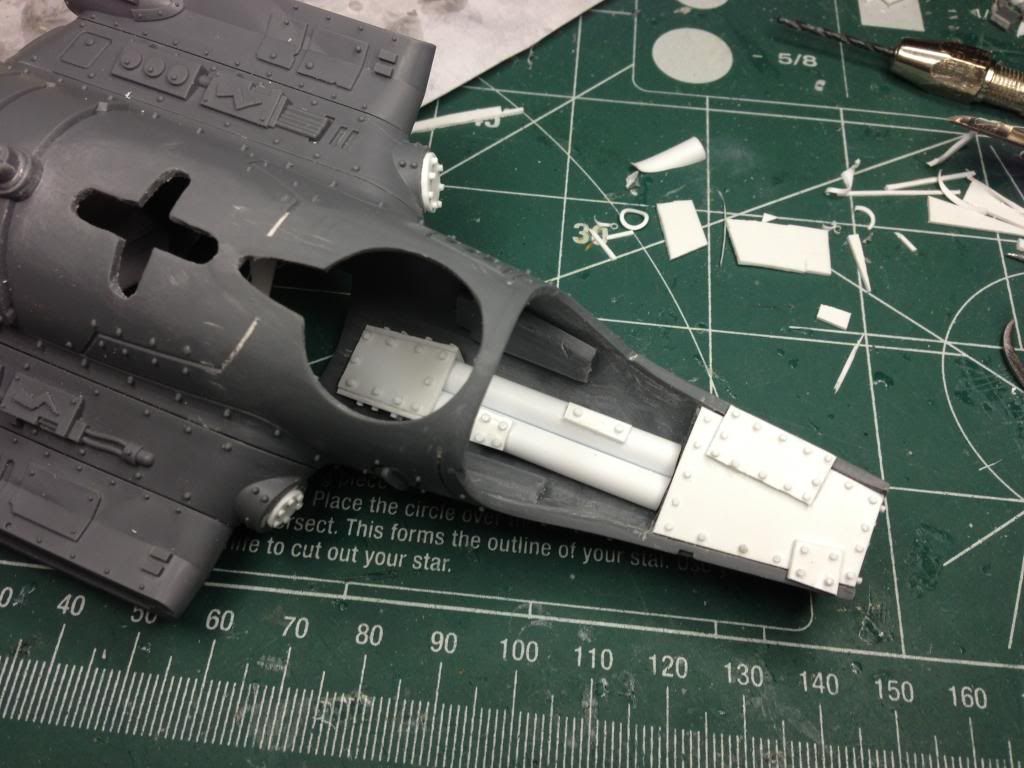
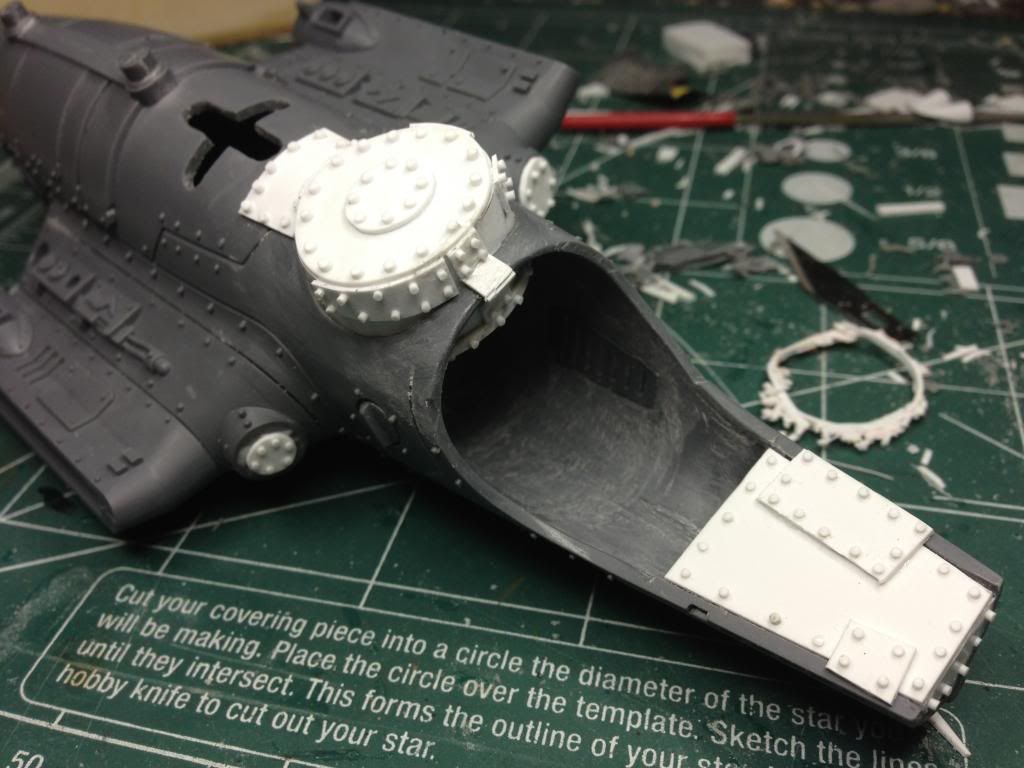
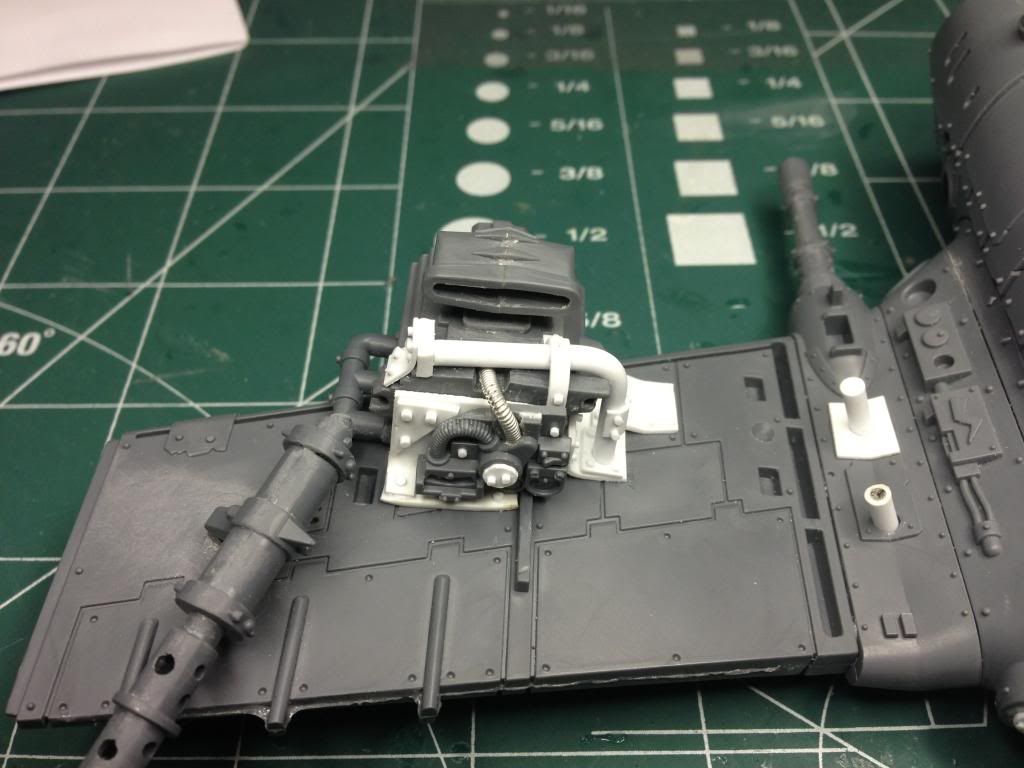
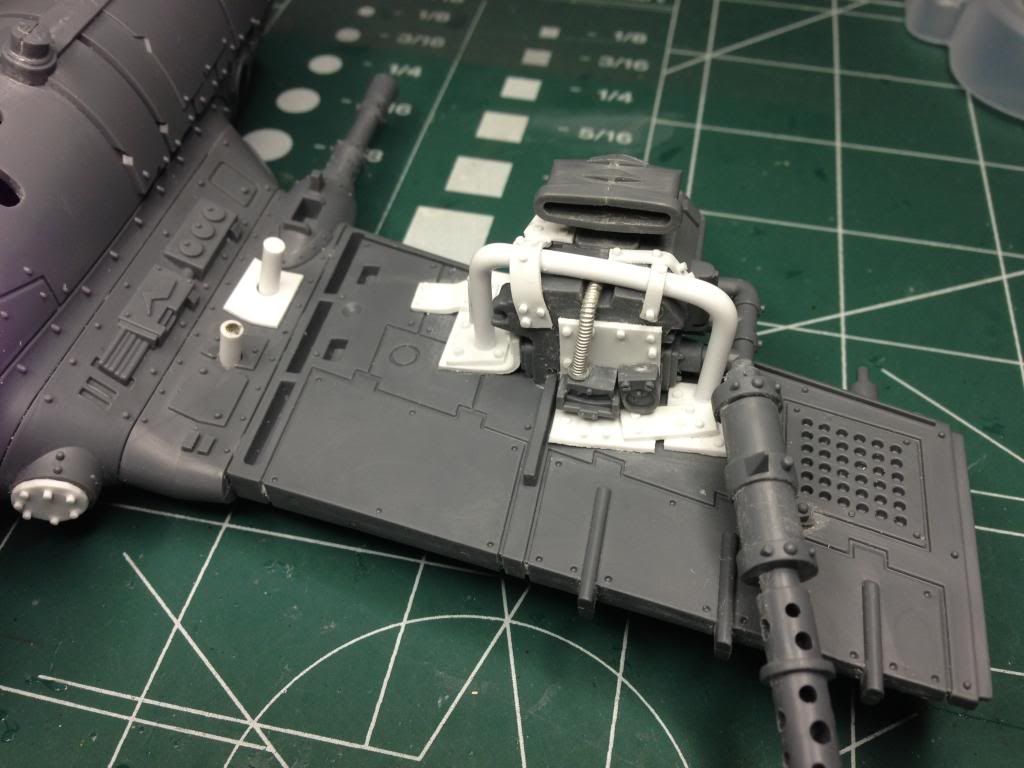
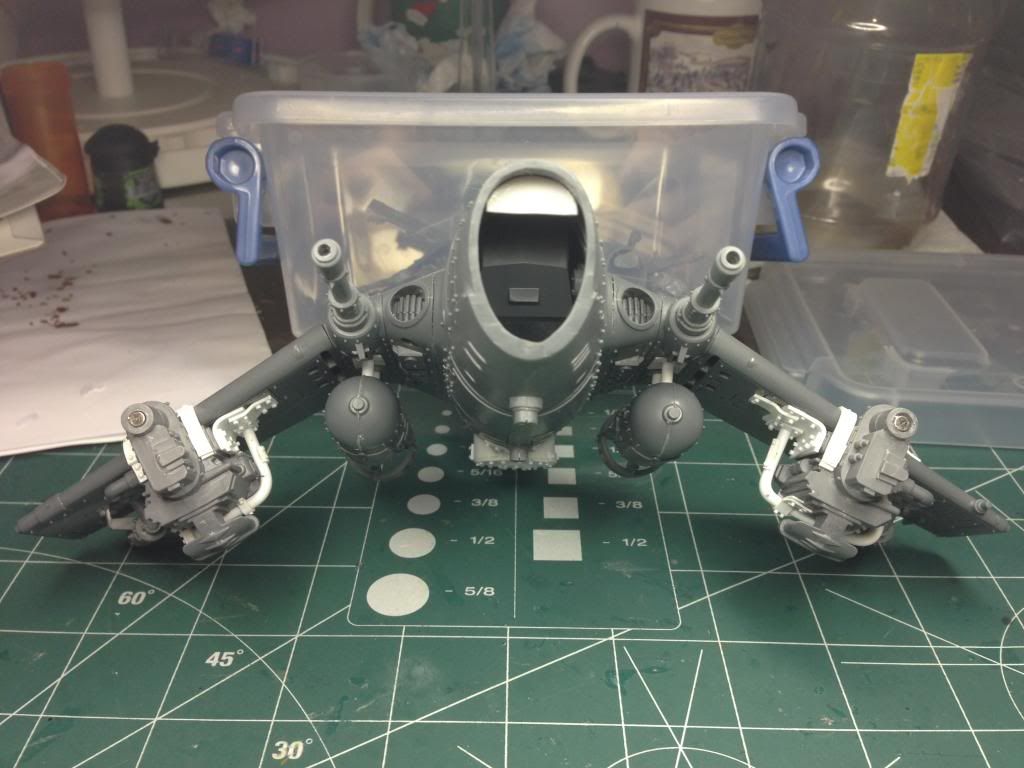
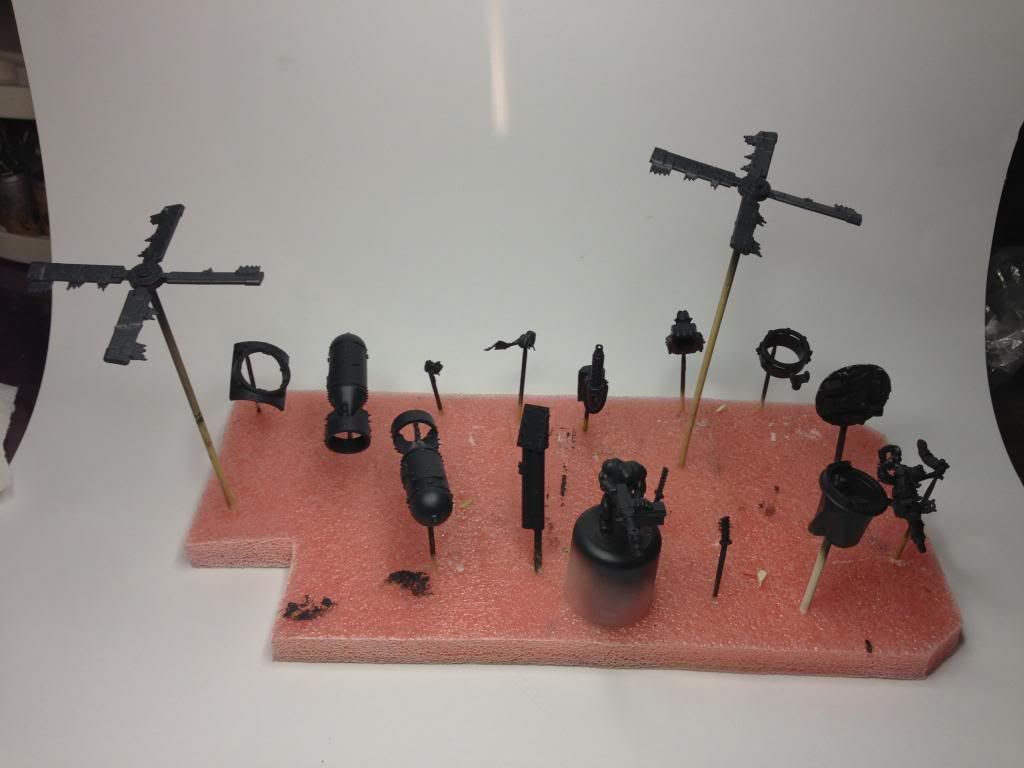
Started working on the model. Glued up some essential pieces and gutted the jet engine. I am still deciding whether to have the wings to point up or down.
My plan is to cut out the rectangle in the back of the plane and fit a turret with a grot.
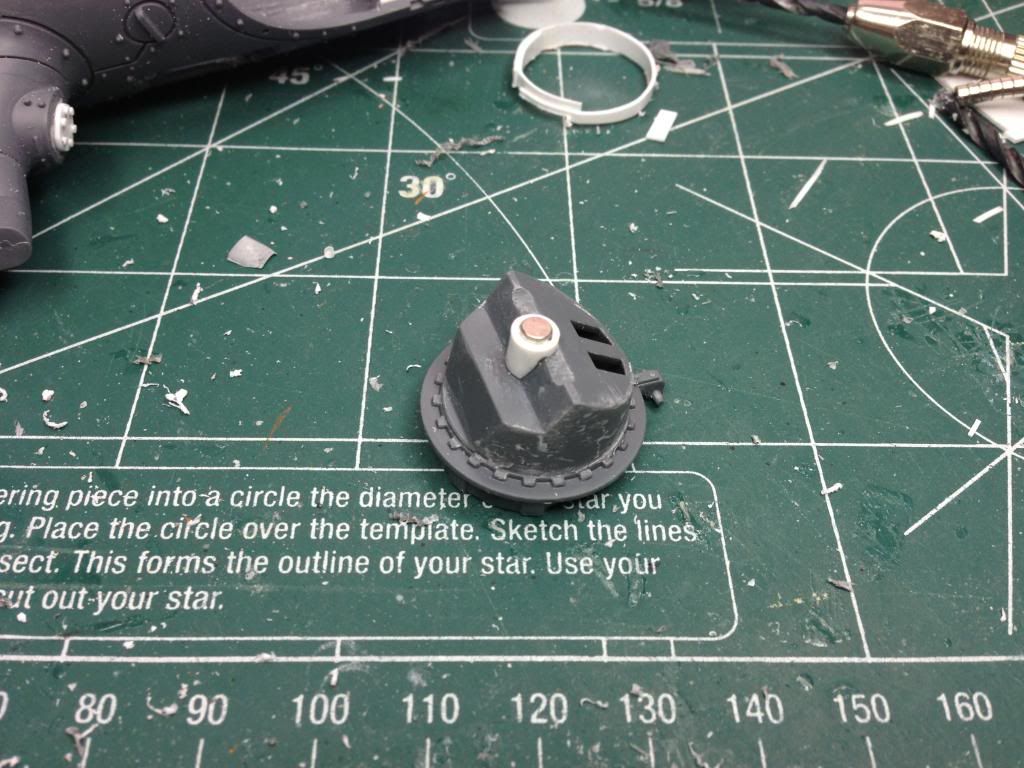
For the front, I want to trim the orky bits and fit a dome with machine gun.

|
|
|
|
|
2012/11/05 02:50:15
Subject: Bommer Goes Woosh Woosh Woosh
|
|
Nigel Stillman
|
Angled down I think.
Love the sketch btw.
|
|
|
|
|
|
2012/11/05 08:39:32
Subject: Re:Bommer Goes Woosh Woosh Woosh
|
|
Been Around the Block
with Waldo
|
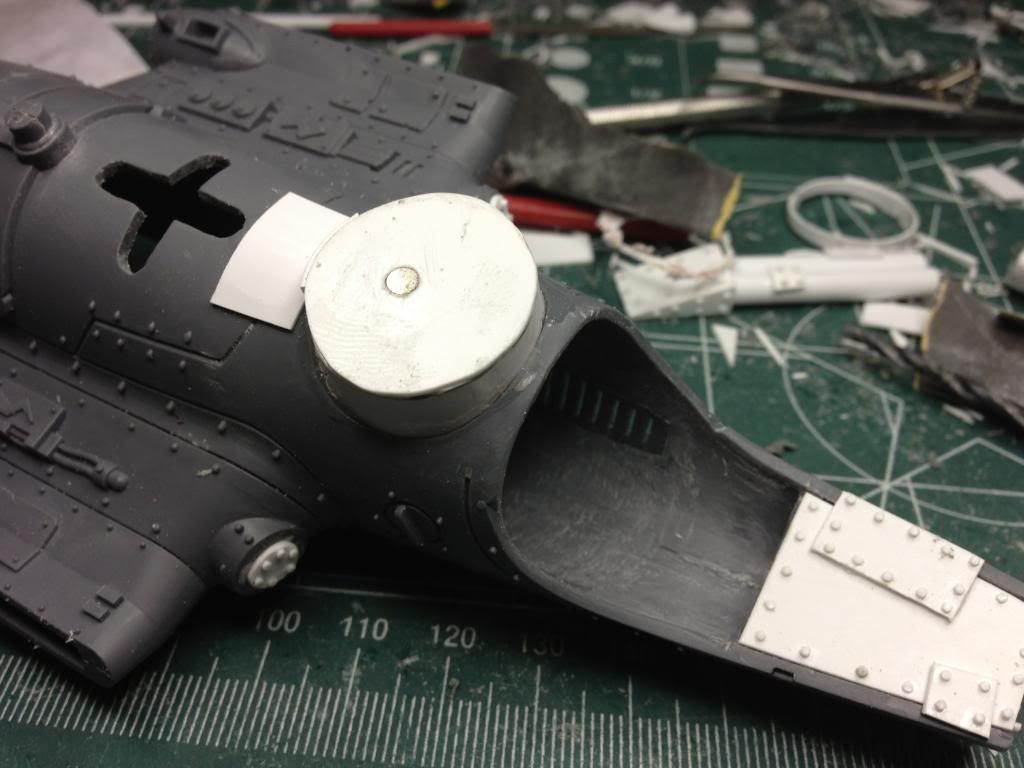
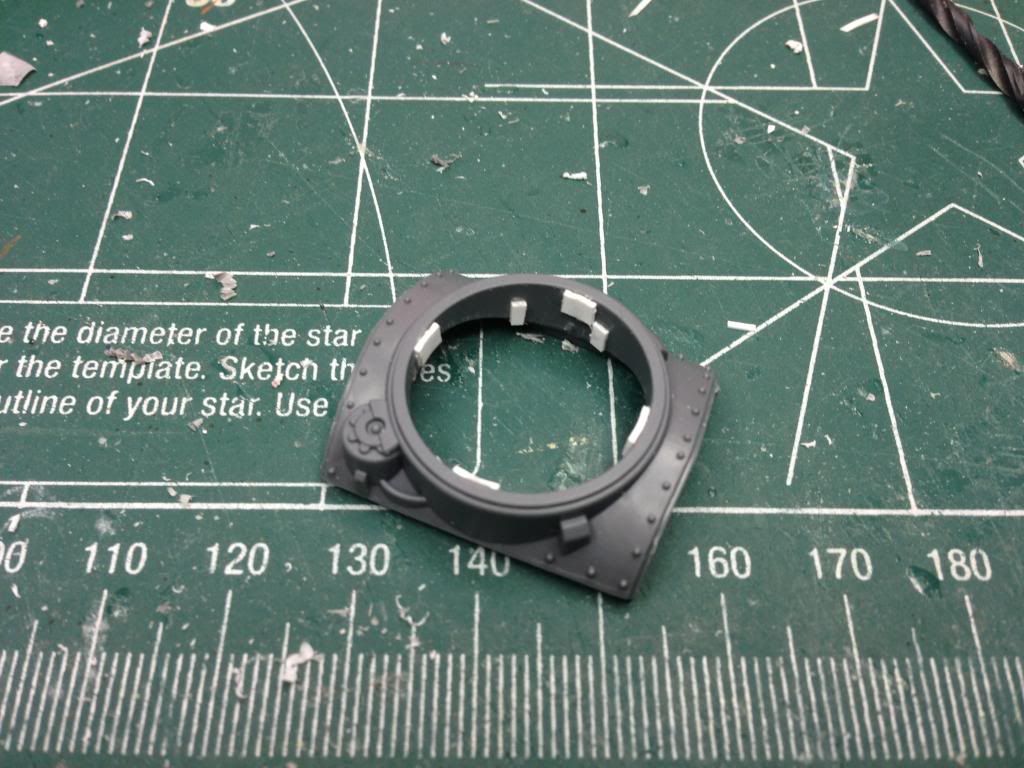
Made this wall to go behind a grot who will be sitting with a machine gun.
|
|
|
|
|
2012/11/13 08:54:46
Subject: Re:Bommer Goes Woosh Woosh Woosh
|
|
Been Around the Block
with Waldo
|
|
|
|
|
|
2012/11/26 08:05:14
Subject: Re:Bommer Goes Woosh Woosh Woosh
|
|
Been Around the Block
with Waldo
|
|
|
This message was edited 2 times. Last update was at 2012/11/26 08:07:02
|
|
|
|
|
2012/11/26 08:21:56
Subject: Bommer Goes Woosh Woosh Woosh
|
|

Esteemed Veteran Space Marine
|
very interesting project. im loving the engines you build 
|
|
|
|
|
|
2012/11/26 10:50:04
Subject: Bommer Goes Woosh Woosh Woosh
|
|
Poxed Plague Monk
|
looks great! really orky 
|
 ~1200 pts ~1200 pts
*poison wind mortar explodes* "Oh well. At least I tried." |
|
|
|
|
2012/11/26 22:44:22
Subject: Re:Bommer Goes Woosh Woosh Woosh
|
|
Been Around the Block
with Waldo
|
Thank you everyone for the comments . They keep my lazy behind motivated and getting stuff done.
|
|
|
|
|
2012/11/27 03:49:24
Subject: Bommer Goes Woosh Woosh Woosh
|
|
Smokin' Skorcha Driver
|
Awesome! You could easily hav ejust mounted guns and propellers where there were none before, but you really paid attention to adding detail in every spot. I'm working on a dakkajet conversion right now and this is a good reminder to stop and take an extra moment to really go the extra mile.
|
|
|
|
|
|
2012/11/27 05:39:52
Subject: Bommer Goes Woosh Woosh Woosh
|
|
Dakka Veteran
|
I really like this, gives me a ton of ideas on what I can do to the unopened dakka jet I have on my bookshelf. Keep the pictures coming. By the way, what are the common sizes of plasticard that you use?
|
"It's time to bring the pain Jack..." -- Uncle Si |
|
|
|
|
2012/11/27 05:43:05
Subject: Bommer Goes Woosh Woosh Woosh
|
|

Nasty Nob
|
Woosh Woosh Woosh!
|
|
|
|
|
|
2012/11/28 03:08:45
Subject: Re:Bommer Goes Woosh Woosh Woosh
|
|
Been Around the Block
with Waldo
|
 Mephistoles1 wrote: Mephistoles1 wrote:Awesome! You could easily hav ejust mounted guns and propellers where there were none before, but you really paid attention to adding detail in every spot. I'm working on a dakkajet conversion right now and this is a good reminder to stop and take an extra moment to really go the extra mile.
I actually like less neat ork builds, but I cant omit details. In the long run, imo its better because right details here and there make whole model better.
 Synister_Intent wrote: Synister_Intent wrote:I really like this, gives me a ton of ideas on what I can do to the unopened dakka jet I have on my bookshelf. Keep the pictures coming. By the way, what are the common sizes of plasticard that you use?
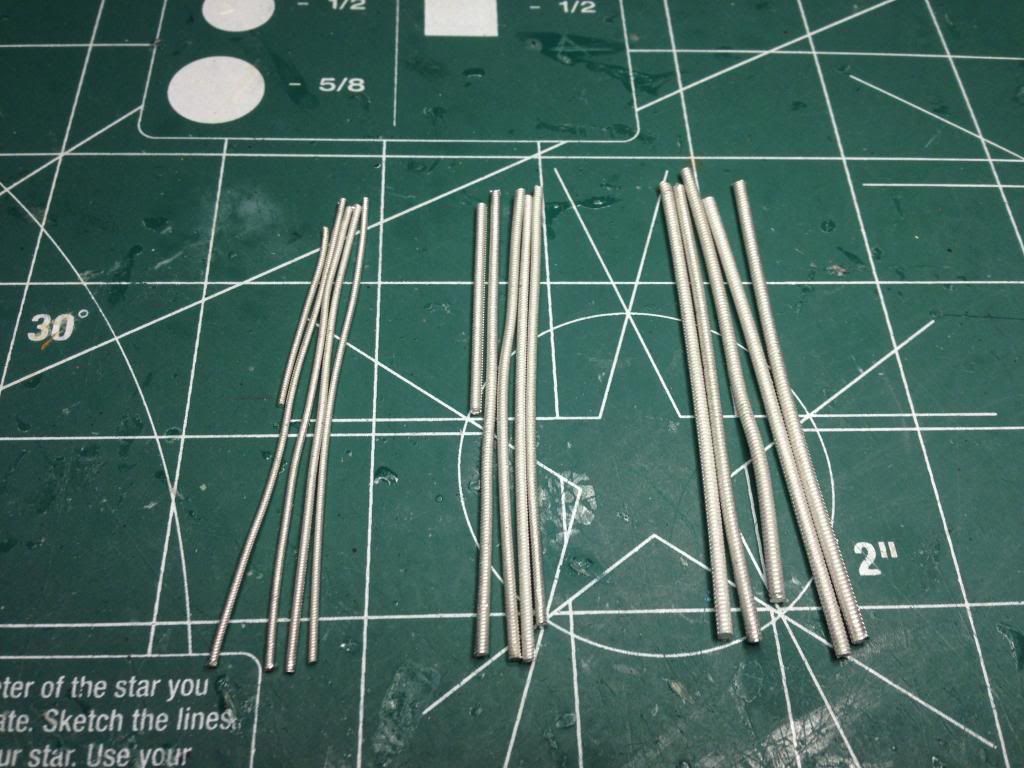
I mostly use 0.8mm, and 0.5mm for more detailed work. In rare occasions I go with 1.5mm.
-------------------------------------------------------------------------------------------------------------------------------
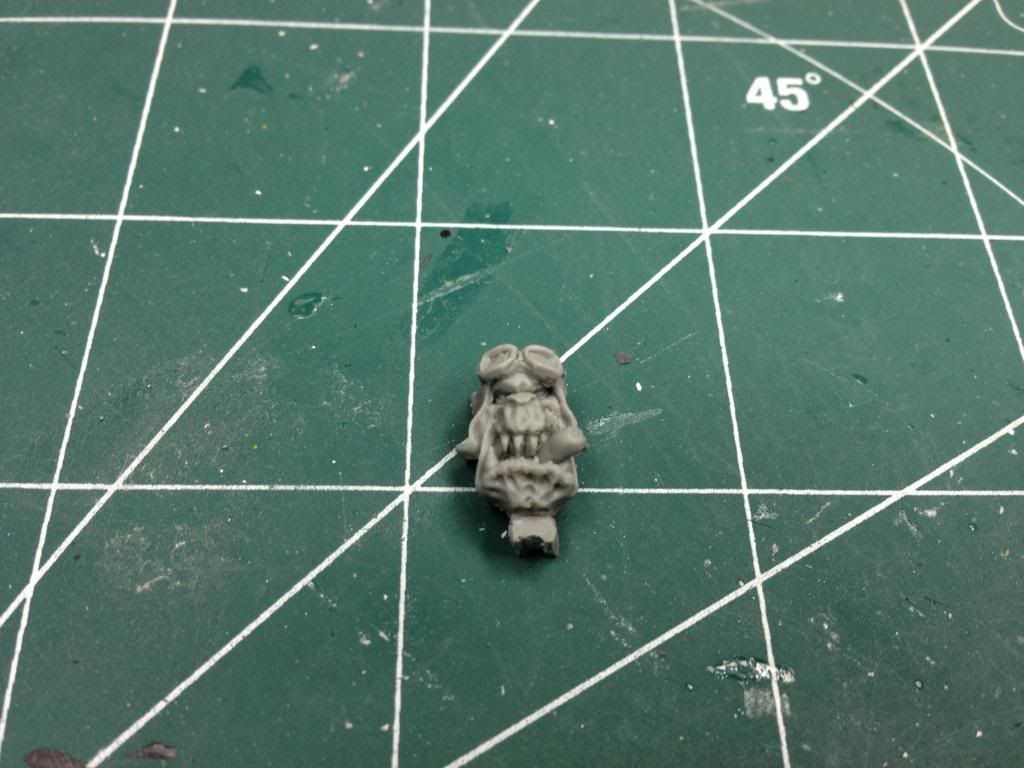
The other day I got flying squadron heads from Spellcrow. They included one cool sample head that I want to use for a pilot.
|
|
This message was edited 1 time. Last update was at 2012/11/28 03:11:55
|
|
|
|
|
2012/12/03 07:25:10
Subject: Re:Bommer Goes Woosh Woosh Woosh
|
|
Been Around the Block
with Waldo
|
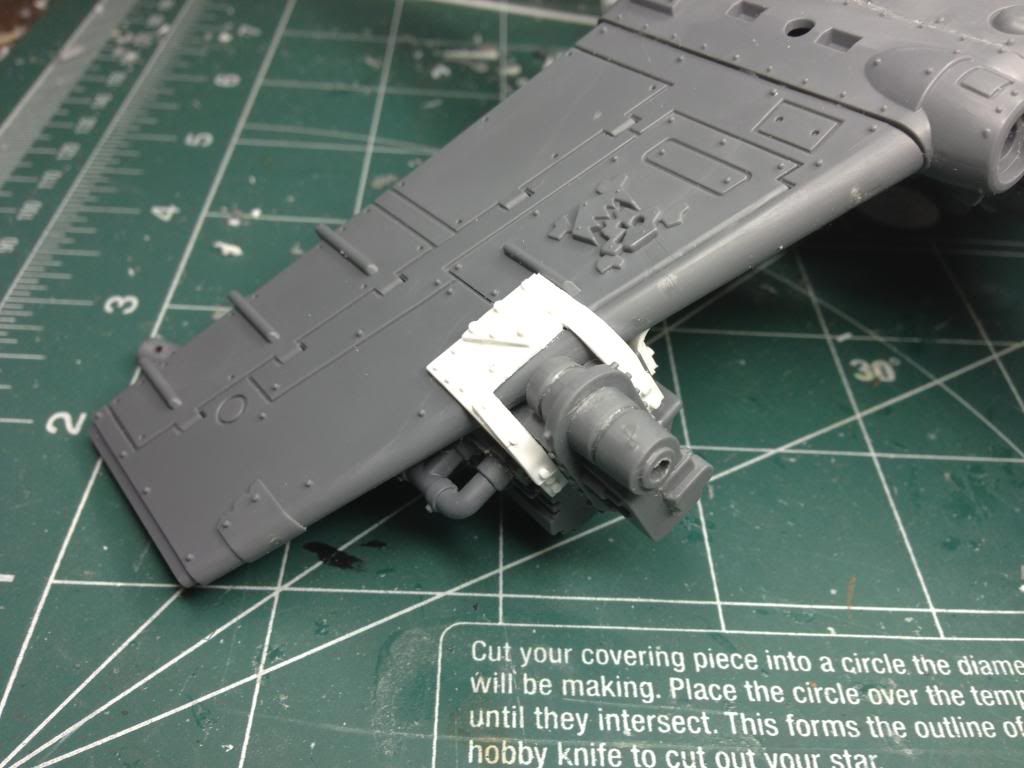
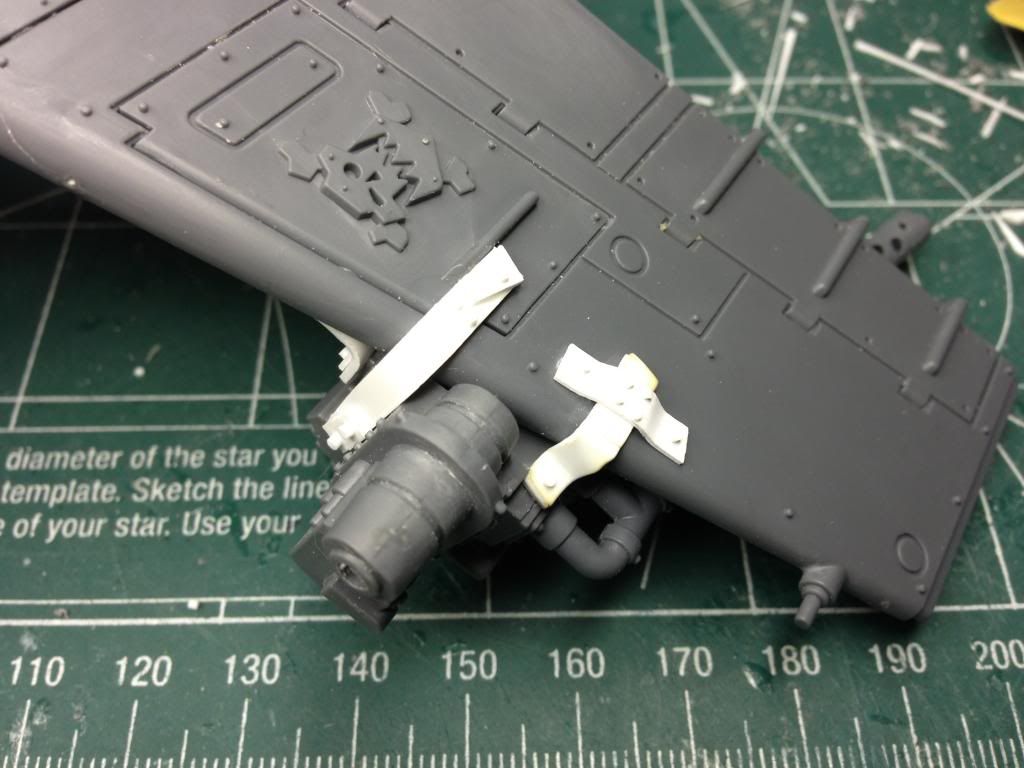
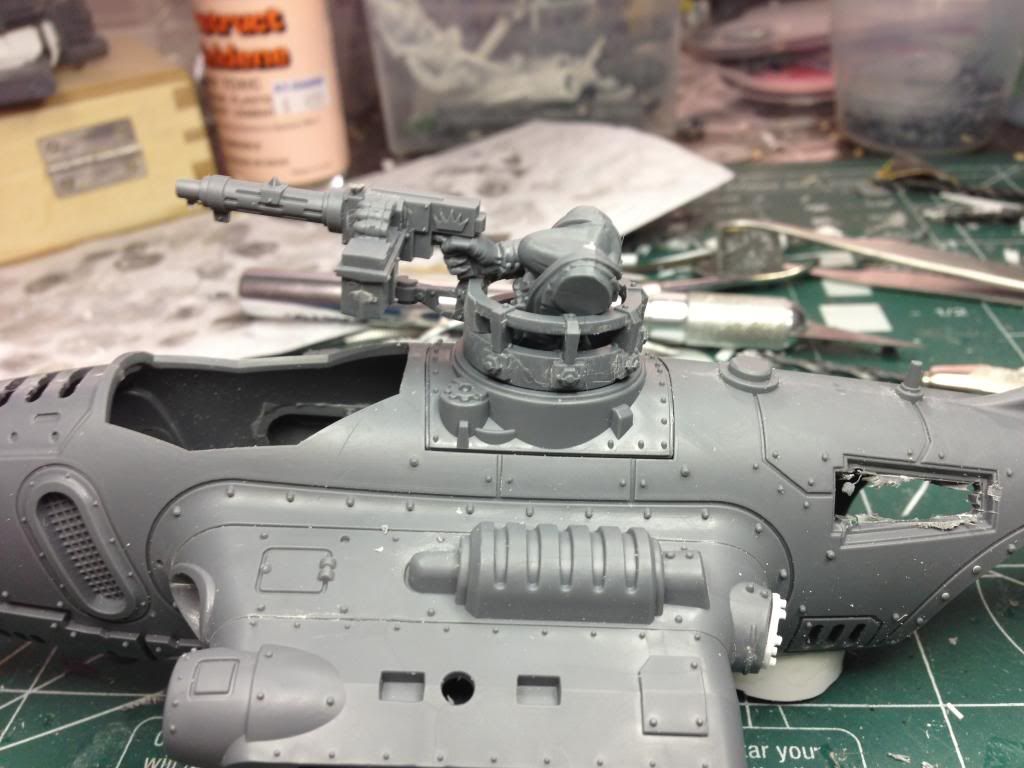
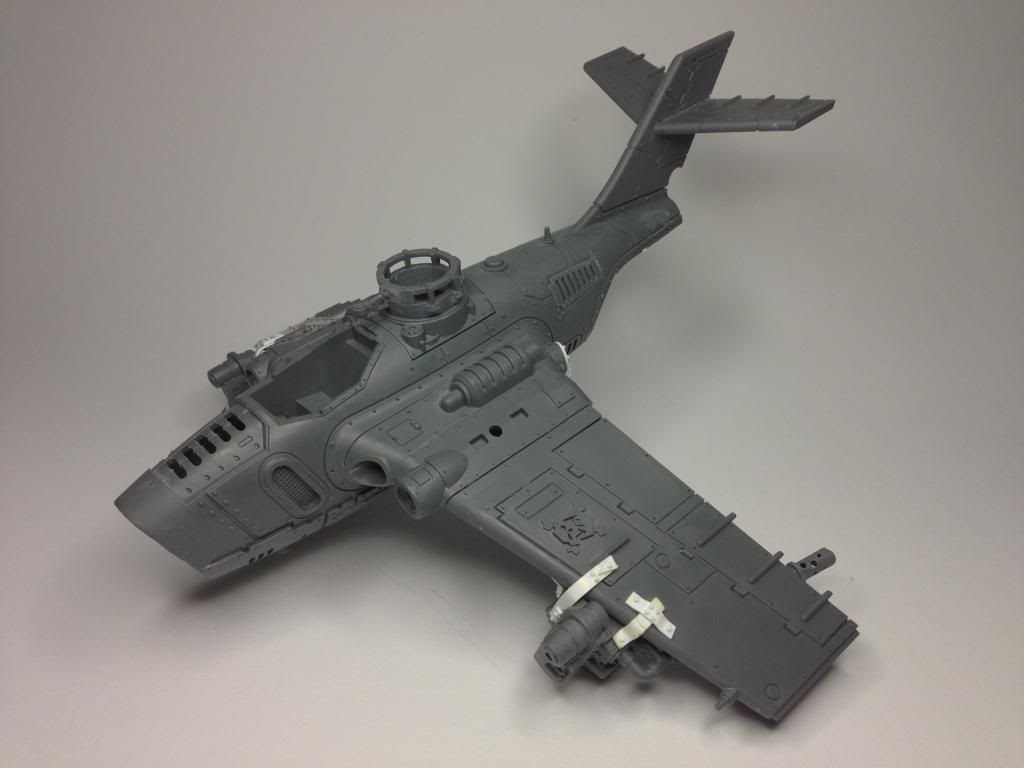
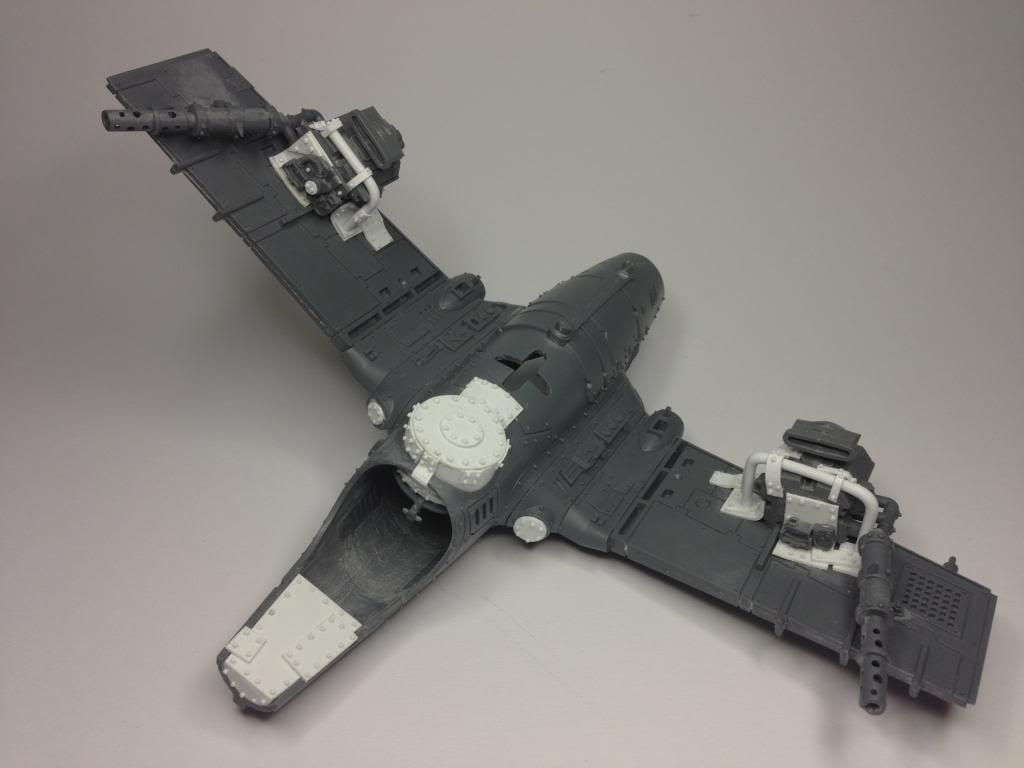
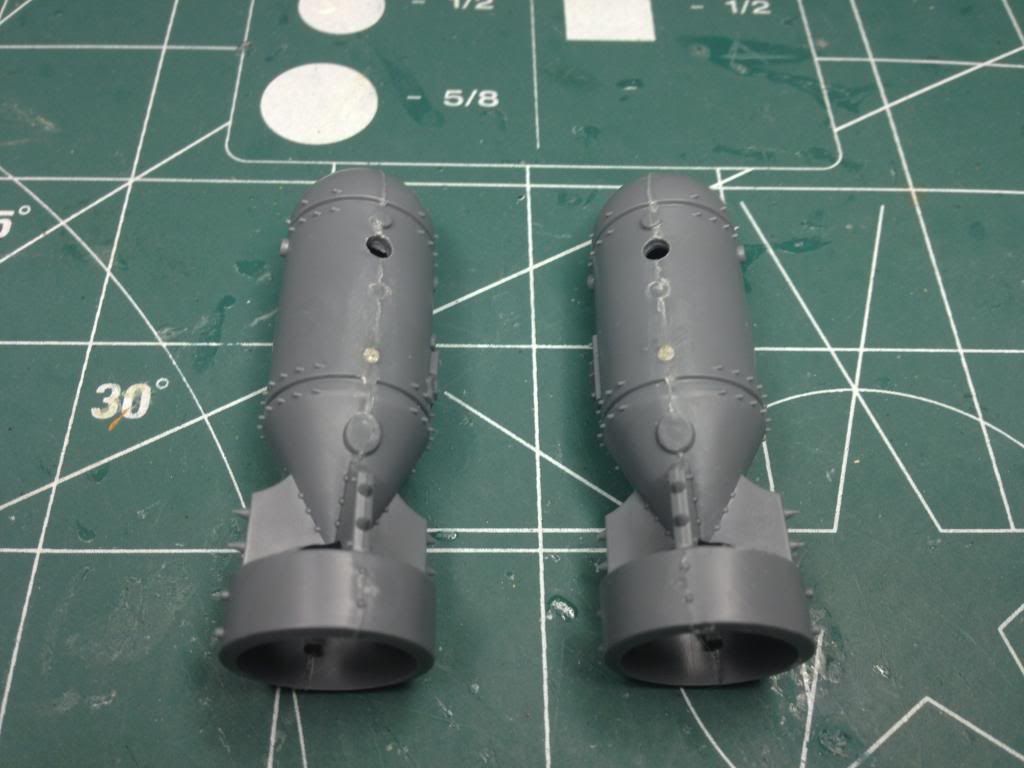
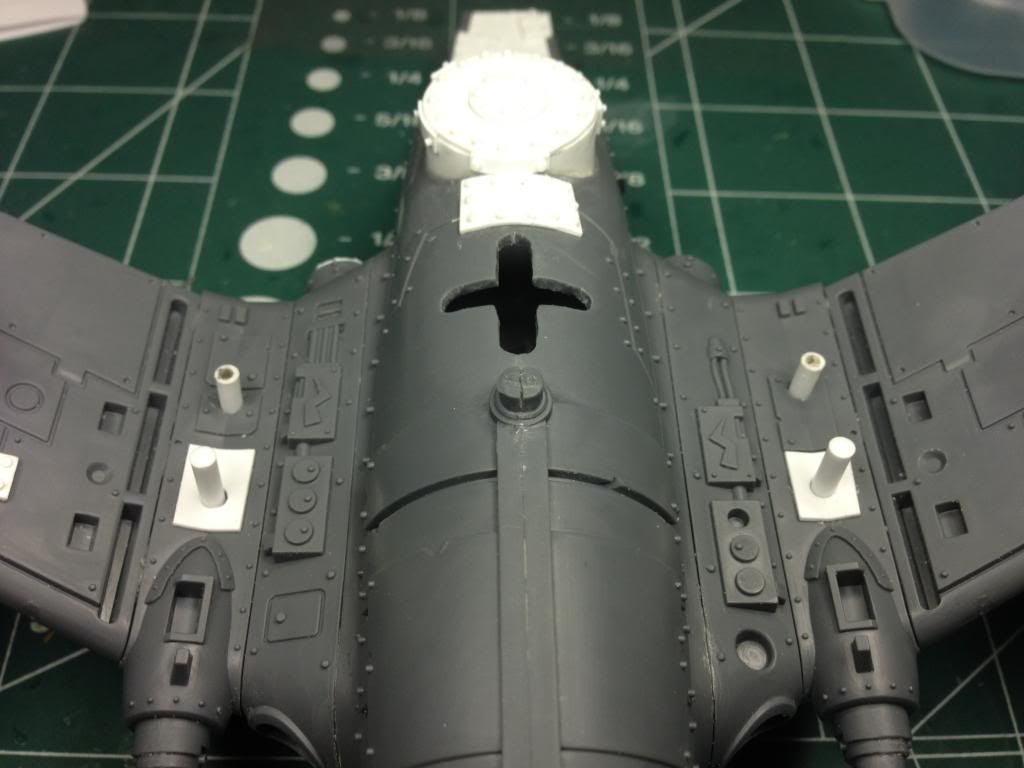
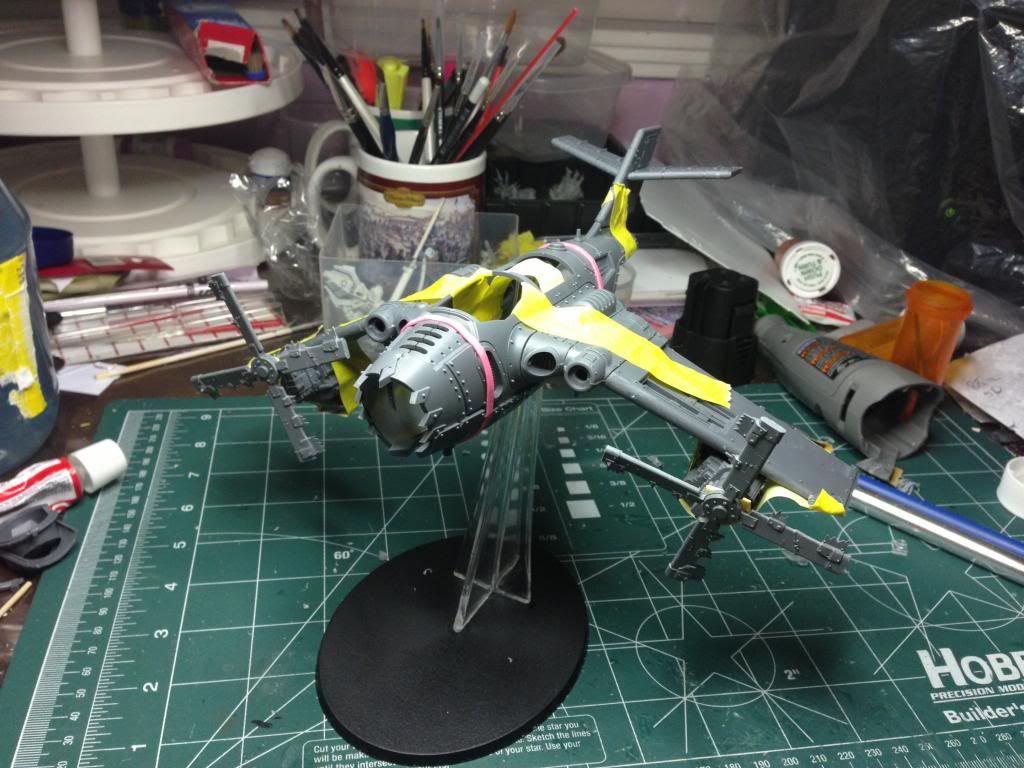
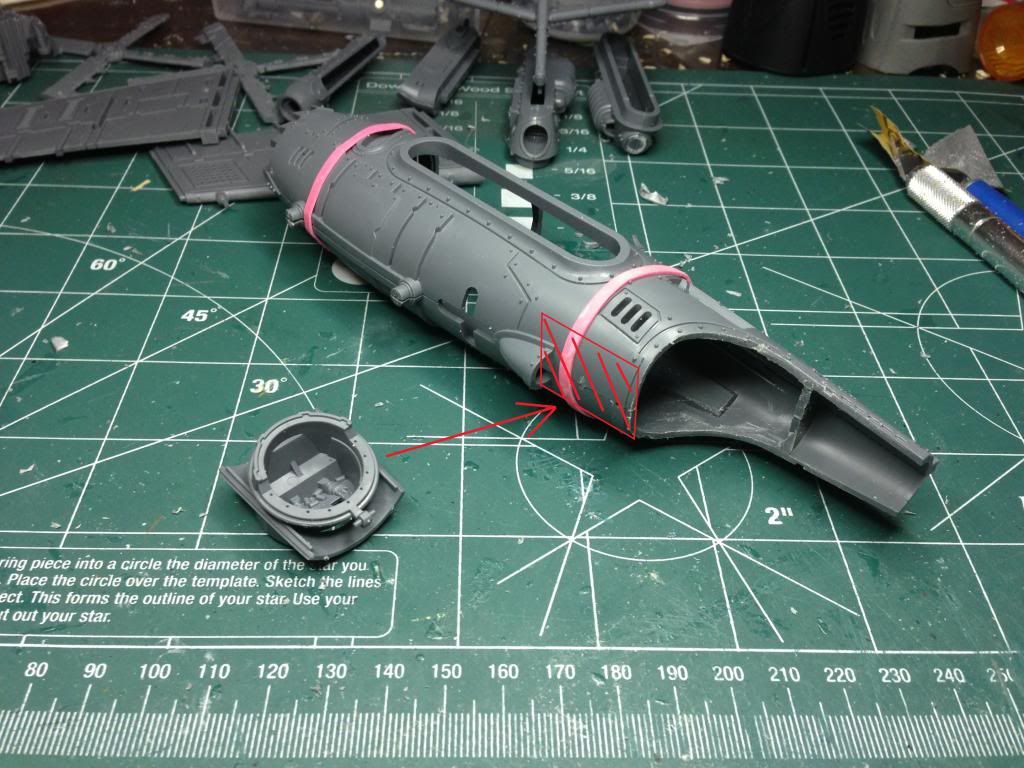
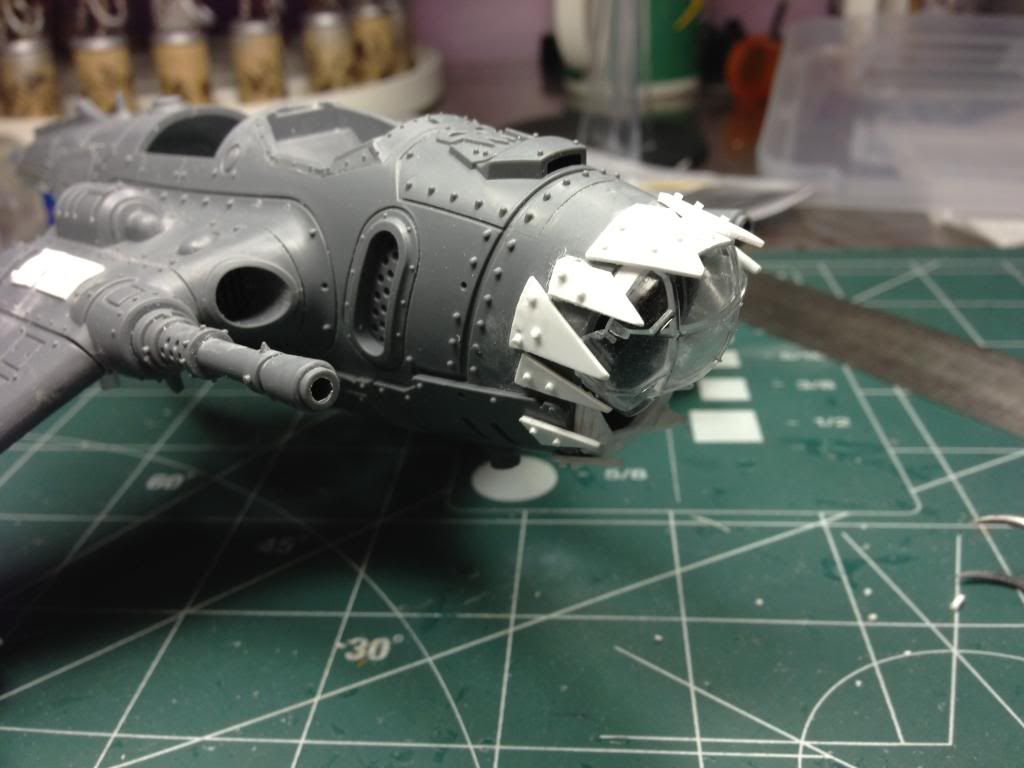
Pretty much done with putting together the bommer. Just got couple things here and there that will be glued after getting painted.
Trukk gunner's arm was in the way of a head that came with the bommer, so I had to cut it in the wrist and adjust to create more space.
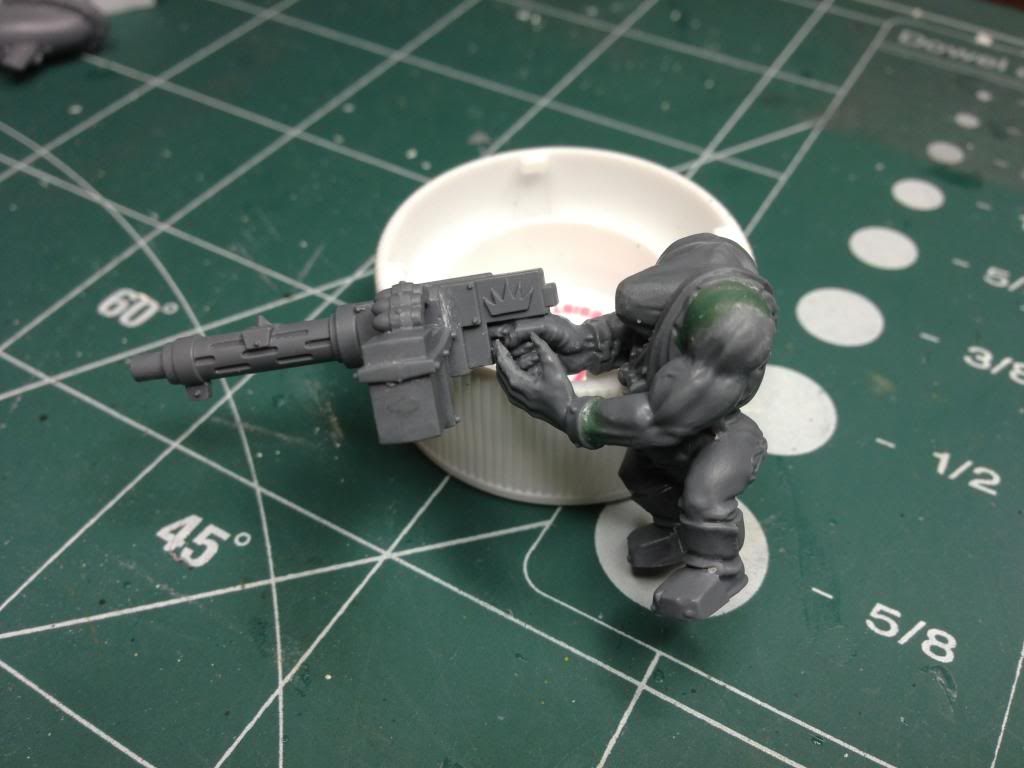
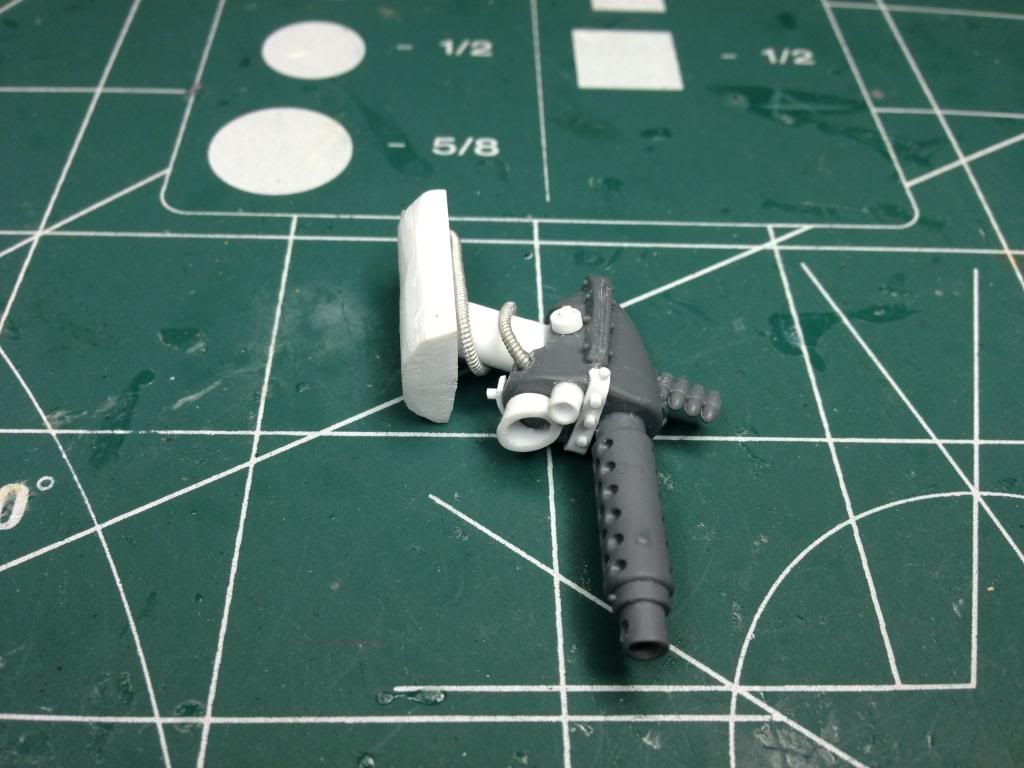
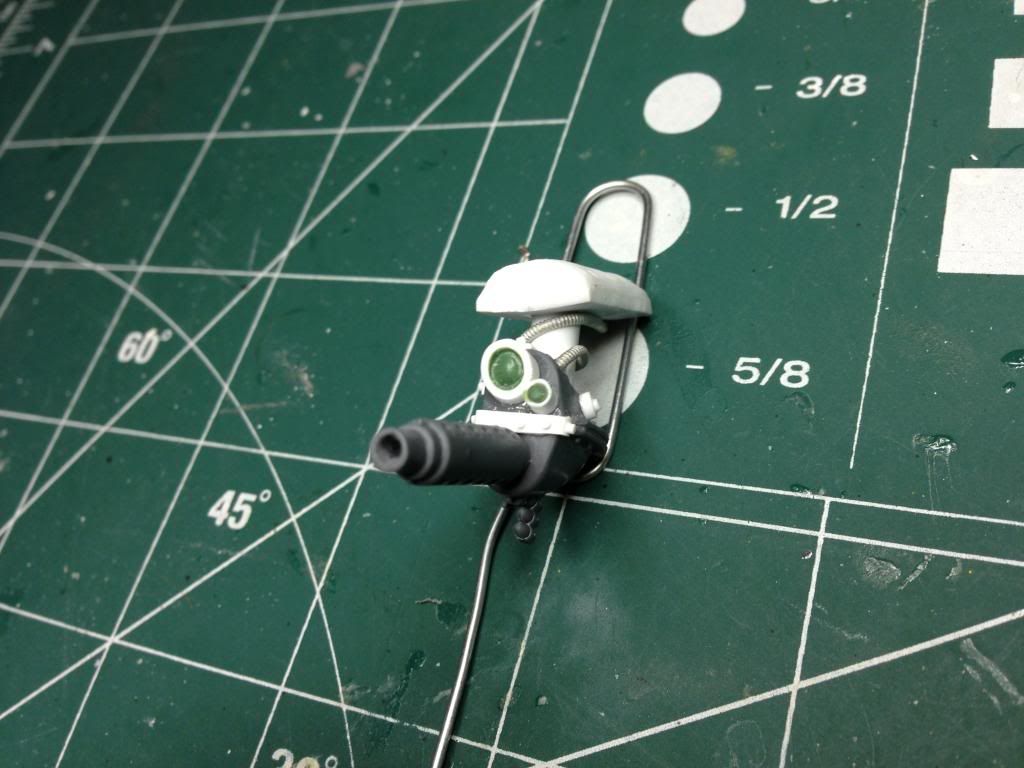
Used greenstuff to make lenses for the remote-controlled gun.
Sculpted welds in bunch of areas including turret mount.
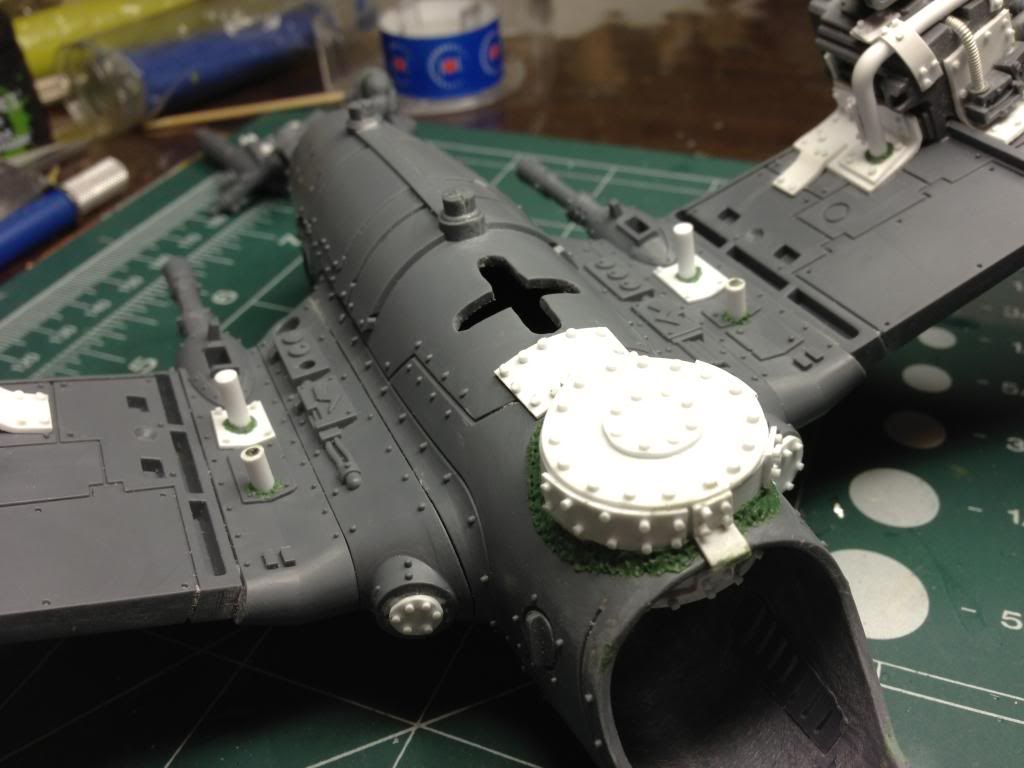
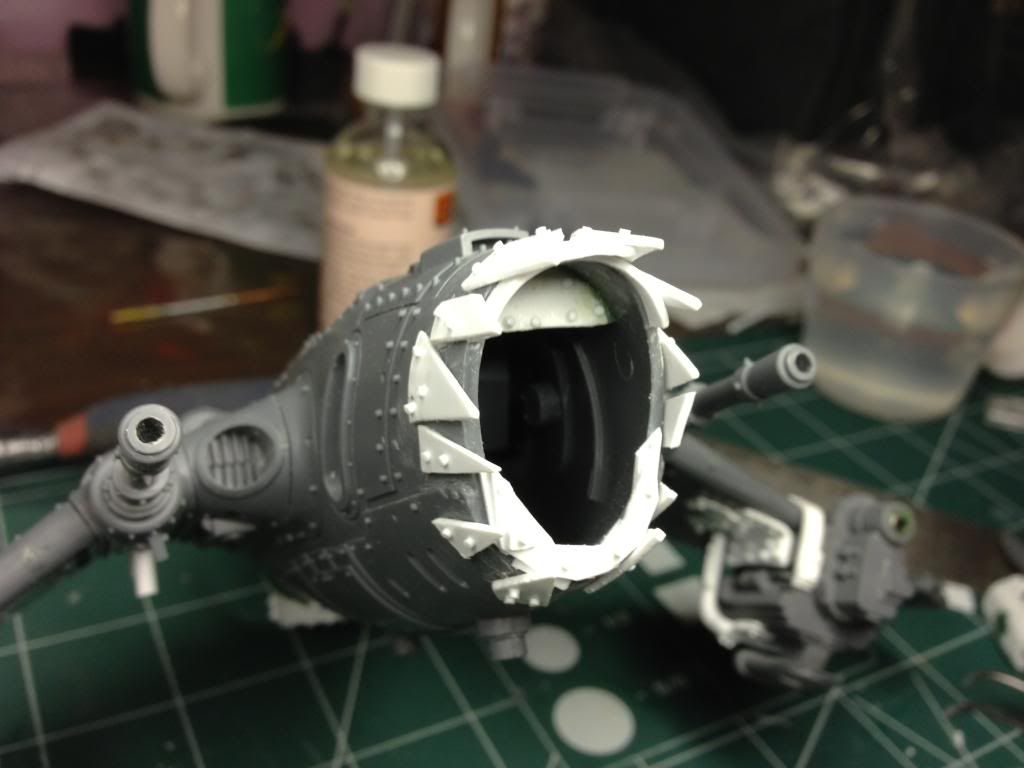
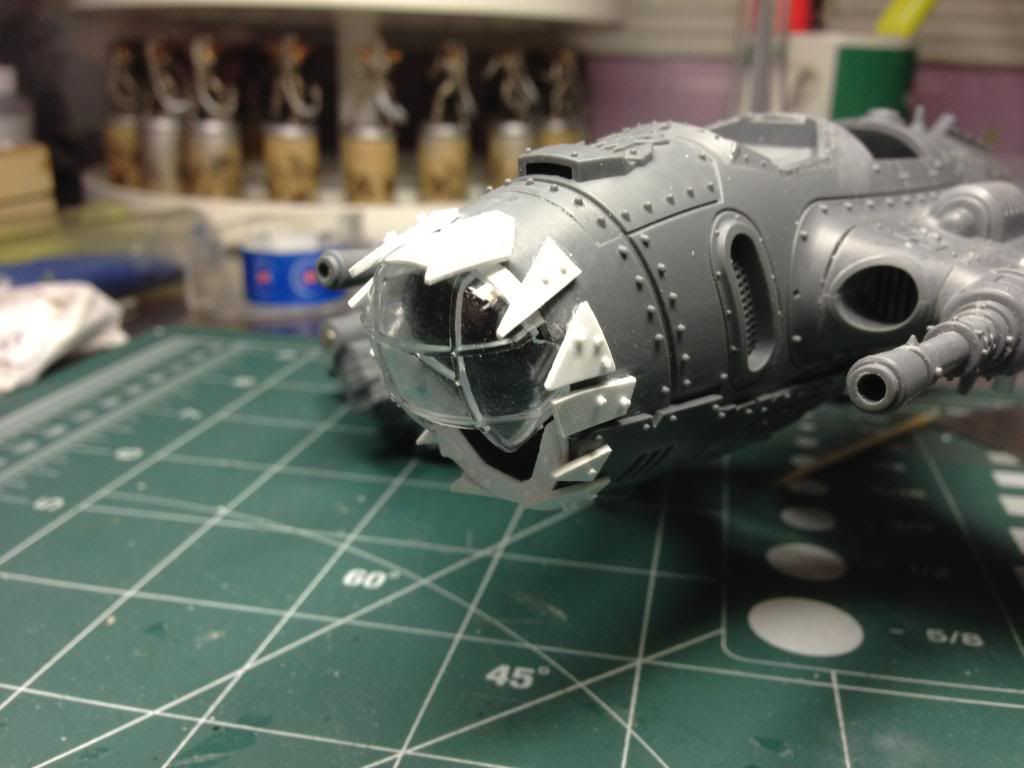
I liked the original front design, but it would take too long to adjust it to my plans. It was easier to file everything and stick styrene spikes instead. Canopy will be glued on after painting the plane.
|
|
This message was edited 1 time. Last update was at 2012/12/03 07:26:09
|
|
|
|
|
2012/12/05 02:04:22
Subject: Re:Bommer Goes Woosh Woosh Woosh
|
|
Been Around the Block
with Waldo
|
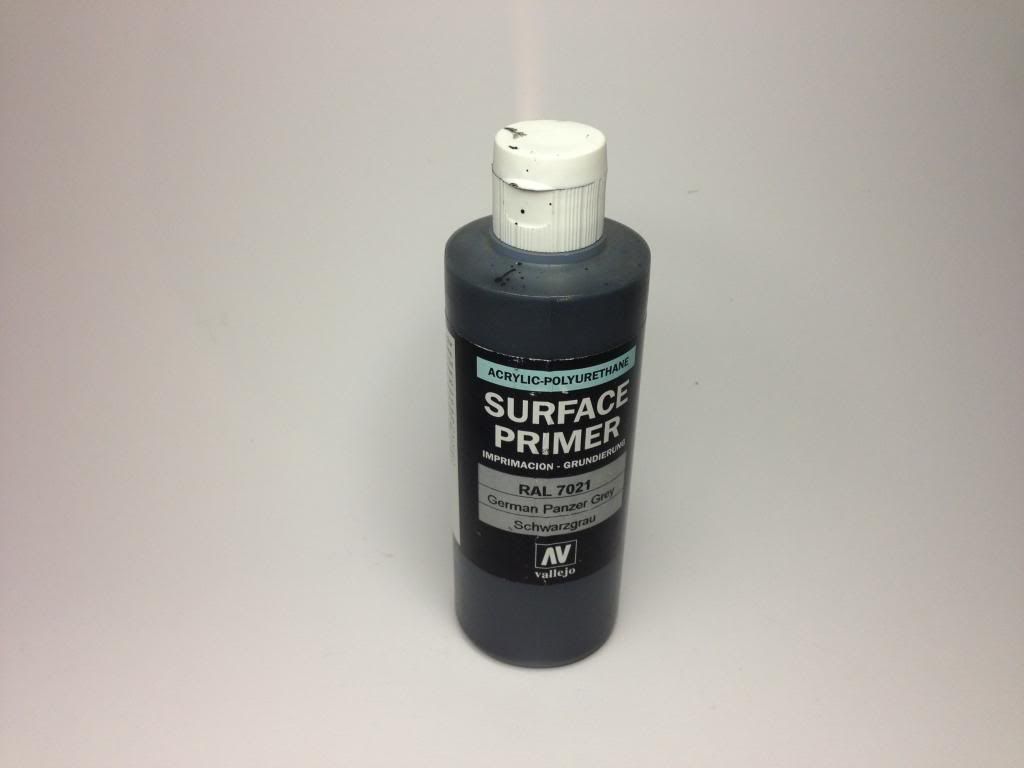
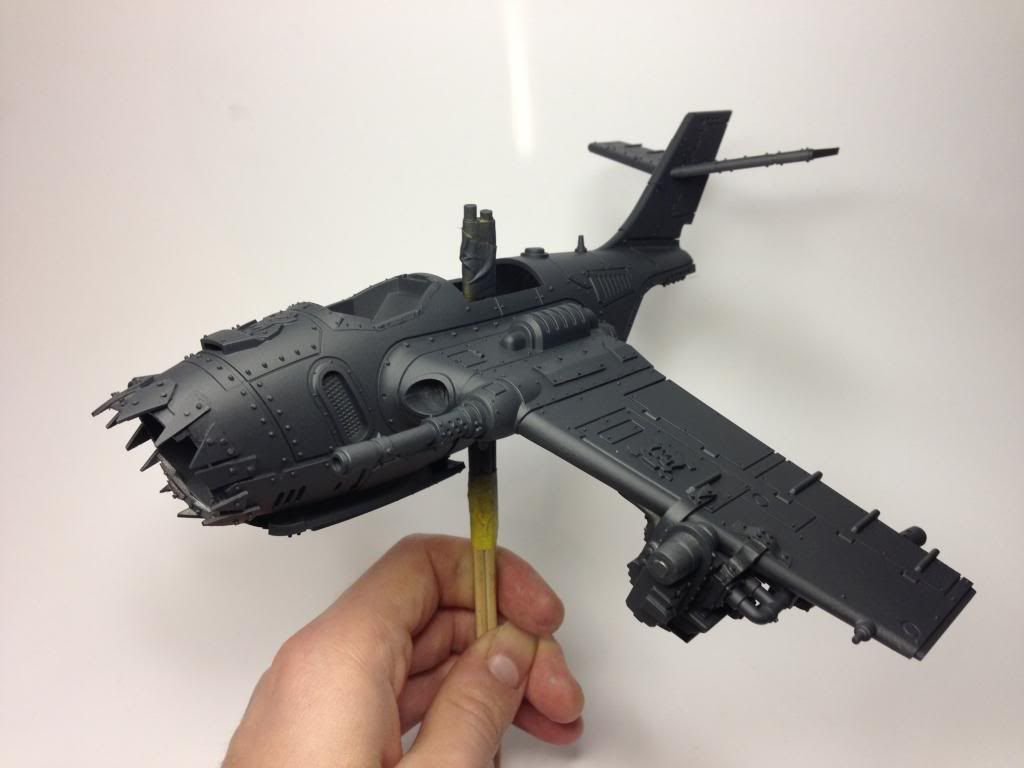
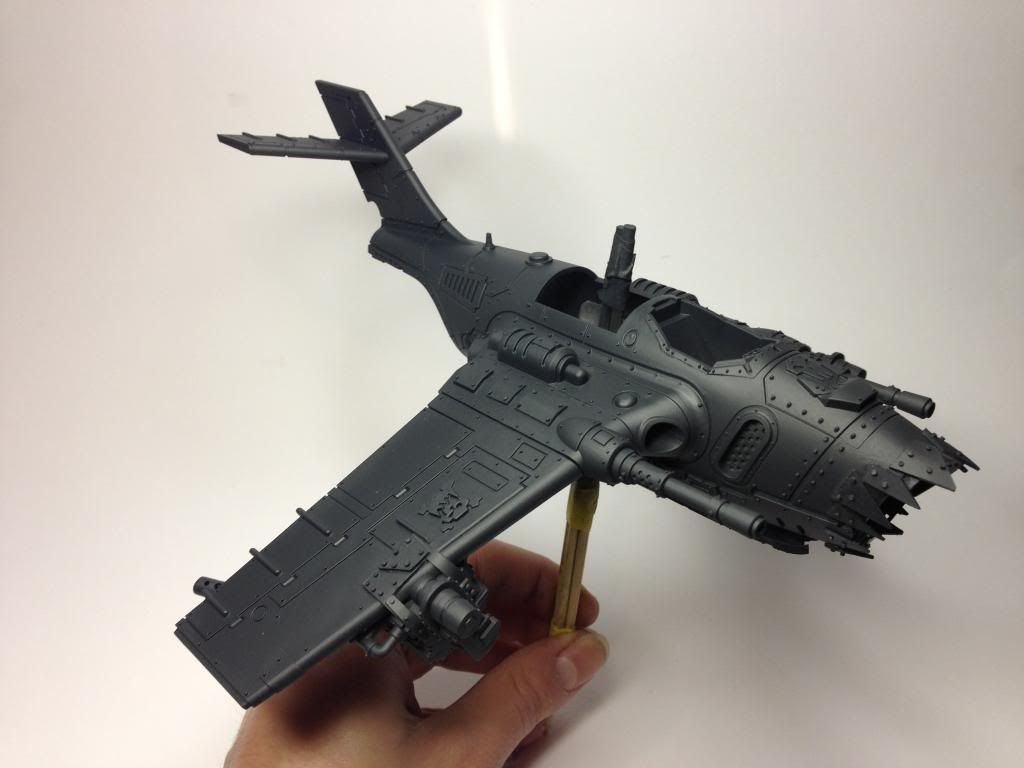
Today primered everything. I have been using rattle can primers for years, but decided to try Vallejo acrylic surface primer. I have Iwata HP- CS airbrush and found that 35-40psi was the optimal pressure range for applying primer. Since the primer is acrylic, I needed to get used to putting uniform coats without flooding the detail. Aside from constantly cleaning the tip, I didnt have any issues. The odor reminded me of interior wall paint.
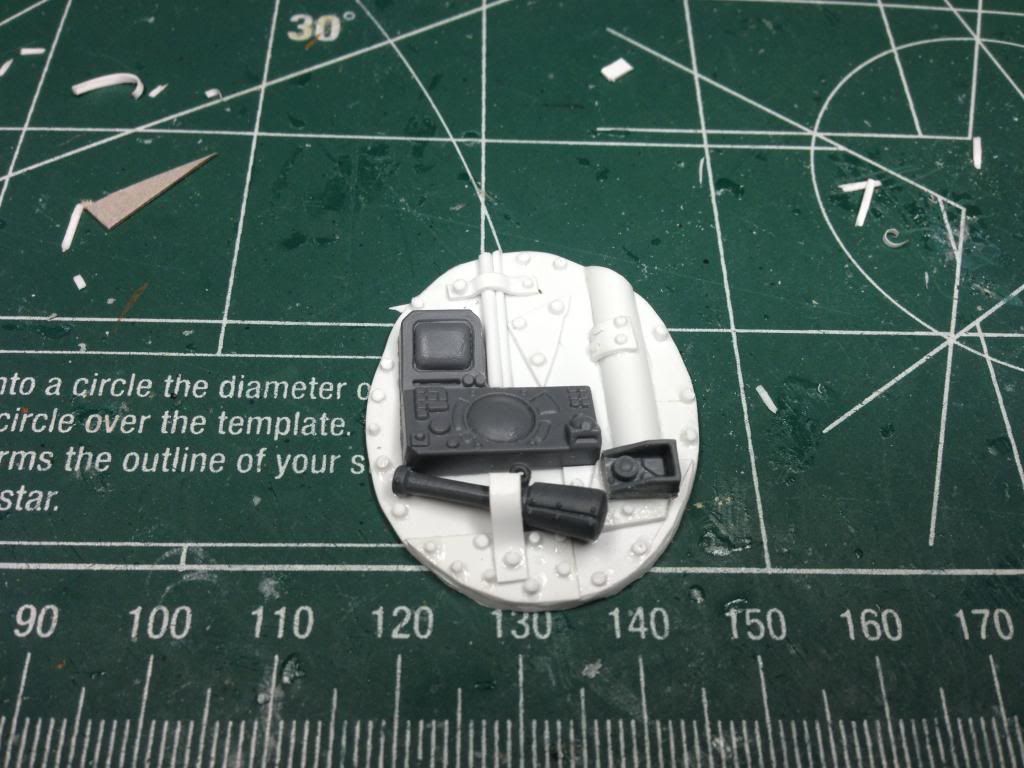
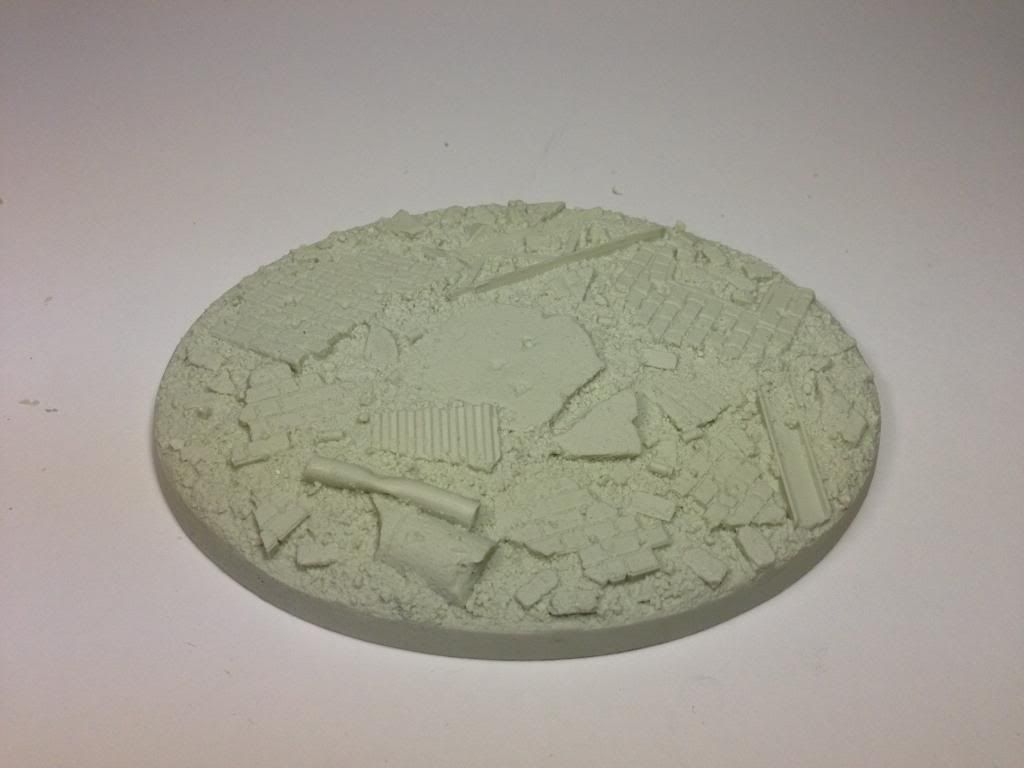
I got Urban Ruble Wasteland Oval 120mmx95mm Set One base from Dragon Forge.
|
|
This message was edited 1 time. Last update was at 2012/12/05 06:32:01
|
|
|
|
|
2014/08/09 03:49:19
Subject: Re:Bommer Goes Woosh Woosh Woosh
|
|
Been Around the Block
with Waldo
|
I have been working on the jet slowly and have not posted images.
I will be continuing my progress at the following thread:
Warboss Gorwazzov's Waaaagh!
|
|
|
|
|
2014/08/09 07:40:10
Subject: Bommer Goes Woosh Woosh Woosh
|
|

Using Inks and Washes
|
Saw this first on your other blog, its going to look awesome with all the gubbinz on.
|
|
|
|
|
|
2014/08/10 22:52:55
Subject: Bommer Goes Woosh Woosh Woosh
|
|
Black Templar Recruit Undergoing Surgeries
Belfast, Northern Ireland
|
Great work sir.... Subbed !
|
Growing Old is Inevitable, Growing Up is Optional! |
|
|
|
|
|
|