Forum adverts like this one are shown to any user who is not logged in. Join us by filling out a tiny 3 field form and you will get your own, free, dakka user account which gives a good range of benefits to you:
No adverts like this in the forums anymore.
Times and dates in your local timezone.
Full tracking of what you have read so you can skip to your first unread post, easily see what has changed since you last logged in, and easily see what is new at a glance.
Email notifications for threads you want to watch closely.
Being a part of the oldest wargaming community on the net.
If you are already a member then feel free to login now.
2013/02/01 14:53:40
Subject: Two quick 1000 pointers (Tau Vs Nids & IG foots VS Mechs)
Mission rolled was Big Gunz with Pitched Battle deployment.
5 objs were rolled for, Tau got 3, Nids got 2.
Nightfight was not in effect turn 1.
Warlord traits:
Cant recall these Im afraid, dont remember them being anything spectacular though.
Forest types:
It was agreed forests would be standard this game.
1 special objective was agreed on, the ammo bunker, centre table and it rolled Skyfire.
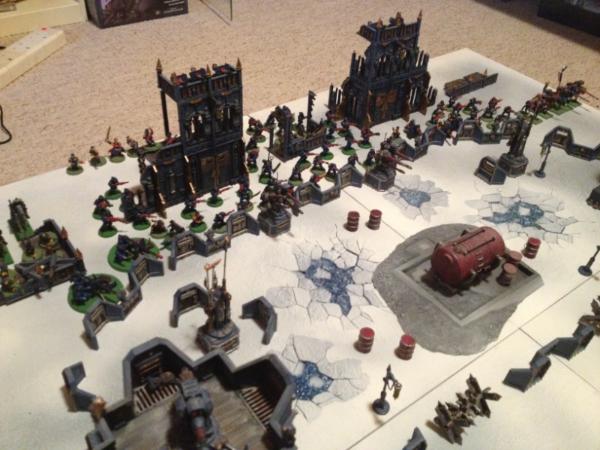
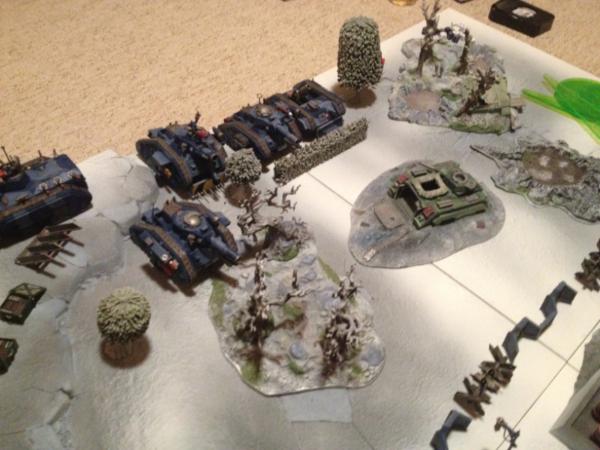
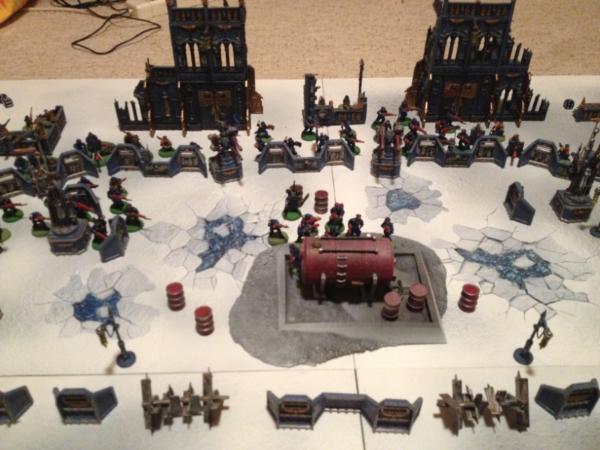
Terrain and objective placement: We played on a standard 6X4 table with moderate terrain evened out.
Tau rolled higher and placed the first objective. We alternated then.
Taus 3 objs were the 3 white communication relays/gunpods. Nids 2 were the small gray blocks centre table.
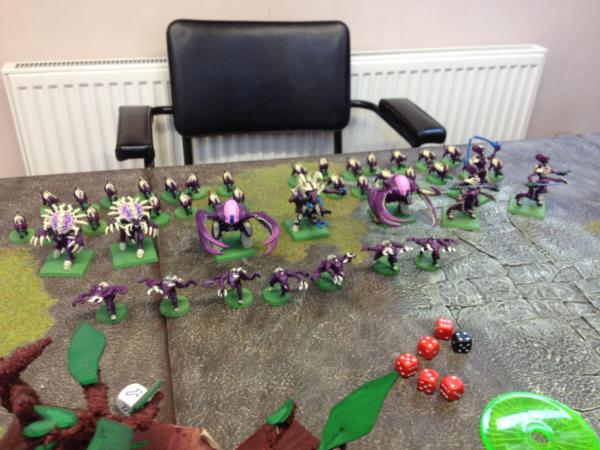
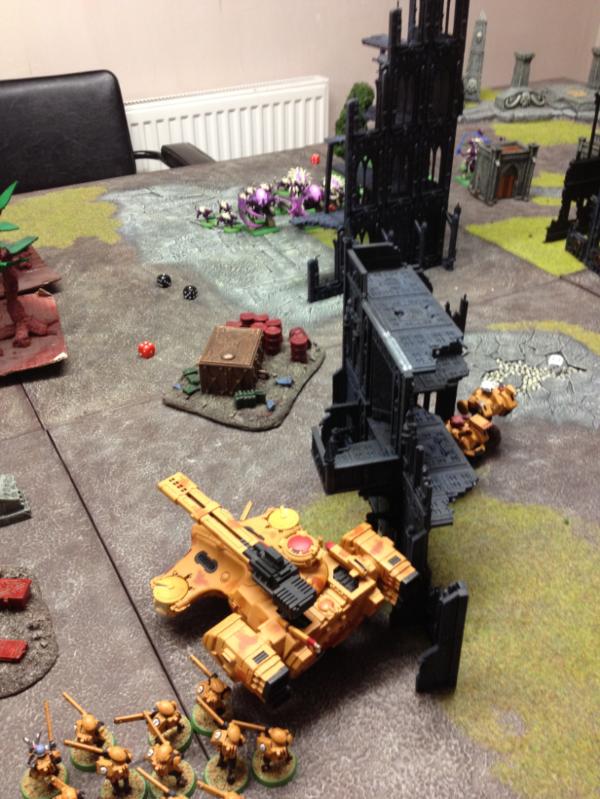
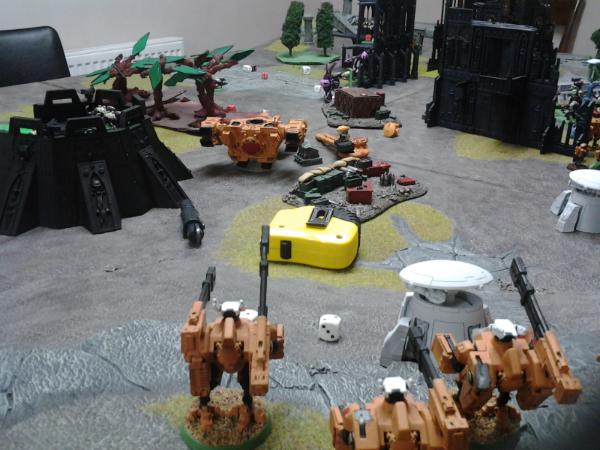
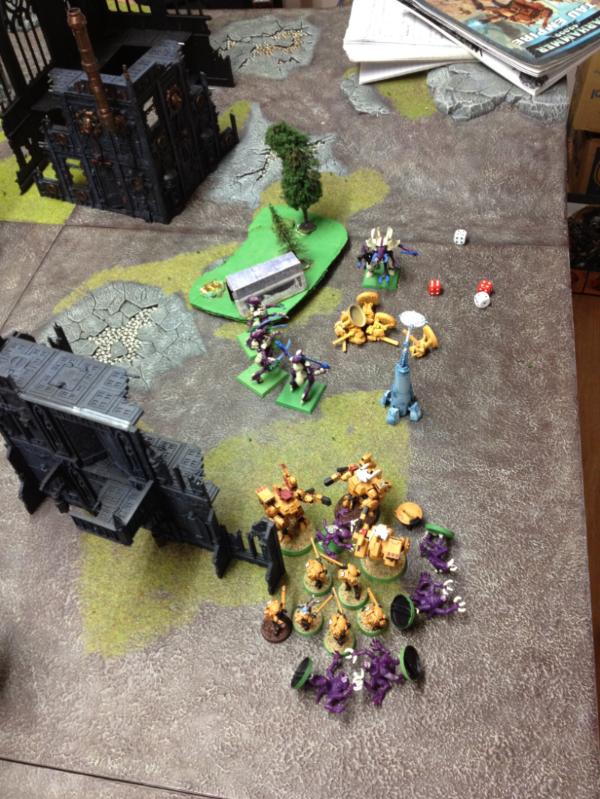
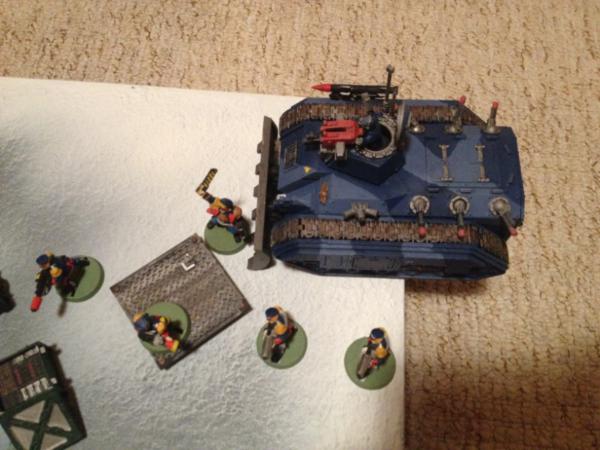
Tau deployment: The Tau Heavy suits setup on the hill, being heavy they could claim that obj automatically. It also gave them a very good field of fire.
The first FW squad deployed centrally around obj #2 to hold it. The Hammerhead and Command unit setup in cover near obj #3.
Finally the last FW squad setup in the forest on the right flank.
Spoiler:
Nids deployment: Nids setup one unit of Termagants on their right flank to make a dash for the black bunker and then onto their central objective mid/late game. It was also hoped they might distract the Broadsides somewhat.
The rest of the army deployed in and around the tall central cathedral ruin for cover.
The Ymargls chose the central black ruin in the Tau DZ as their entry point.
The basic plan was to go up the left flank with the Tyrant and Shrike supported by the Fexs and capture each obj in turn along the Tau DZ, basically trying to wipe out each Tau unit as they came across them.
The Broadsides were going to be a big problem however as there was little terrain around them for cover (charge) and they had a good field of fire.
Nids were definitely outgunned so an early Ymargl entry and good Tyrant/Shrike charge were needed early on to tie up some Tau units as fast as possible.
Scoring units were equal, 4 a side.
Tau got the first turn and Nids failed to sieze.
Spoiler:
Tau turn 1. Movement:
Tau elected not to move this turn except to jump the Command squad forward to do a JSJ and Hammerhead forward slightly for better LoS on the main Nid units.
Spoiler:
Shooting:
The central FW squad and Command squad fired on the Termagants on the far right flank, killing 8 of them in total. Miraculously however they passed their morale check (well outside of Synapse!).
The second FW squad opened up on the Hive Tyrant scoring a wound on him.
The Broadsides and Hammerhead then fired on the lead Carnifex scoring 3 wounds on him.
The Command unit JSJ'd back towards the forest area.
Nid turn 1. Movement:
Both the Tyrant and the Shrikes jumped 12” and then ran into the Manifactorum ruins near the Tau forrest.
Spoiler:
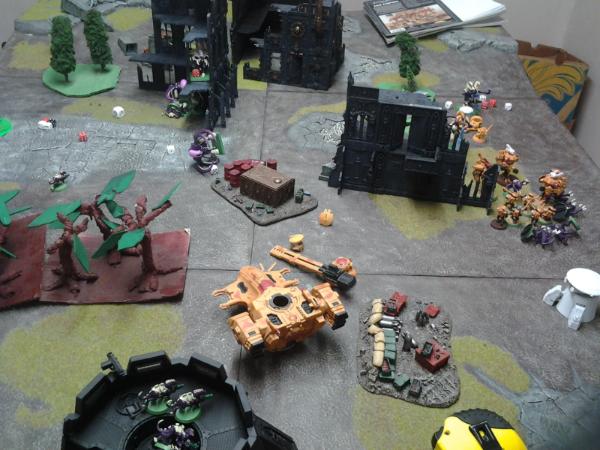
Seeing the amount of potential firepoweer lined up against them early on, the Carnifexes, Termagants and Zoanthropes moved into the ruins for cover rather than venturing forward/into open. They felt it was better to have the Tyrant/Shrikes soften up the line first.
The second Termagant unit again passed its Synapse test adn moved/ran into the black bunker.
Spoiler:
Shooting:
Both Zoanthropes failed to hit with their Warp lances.
The Termagant units were out of range/LOS for any Tau units.
Tau turn 2. Movement:
Both the Command unit and FWs in the forest moved back centrally towards the ruins to get out of range of the Tyrant/Shrike charge.
The Hammerhead moved slightly to get a better angle on the Nids in the ruins.
Spoiler:
With little LoS to anything the other FW unit also moved a bit more centrally toward the ruins.
Shooting:
The Broadsides fired on the wounded Carnifex and scored a few wounds, felling him.
Spoiler:
With few other choices the Hammerhad then fired in blast mode on the Termagants in the same ruins, killing 7 of them.
Spoiler:
The Command unit could not see the Shrikes or Tyrant. However, the Fws could and fired on them causing 1 wound.
The second FW squad did not have LoS to anything.
Spoiler:
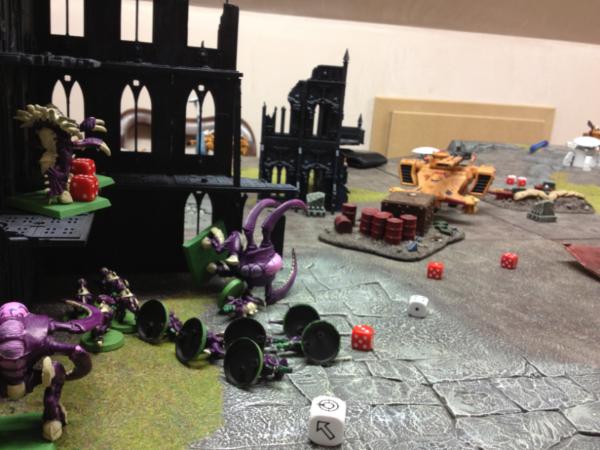
Nid turn 2. Movement:
The Ymargls luckily passed their morale check and arrived in the central Tau ruins.
The Termagants in the back bunker were not as lucky however and failed their Synapse roll, lurking instead.
Both the Tyrant and the Shrikes jumped near the forest to try and assault the FWs there.
The Carnifex and remaining Termagants shuffled to try and get better cover from the Tau.
Shooting:
Both Zoanthropes fired on the Hammerhead with their Lances and scored two pens. One was crew shaken, however the second managed to wreck it.
Hand to hand:
The Ymargls multicharged the Command unit and first FW squad.
They lost two to overwatch. In combat they killed 7 Firewarriors. However the remaining Fws and Command unit reduced them to one. The Tau however passed their morale check.
The Tyrant and Shrikes then charged the second FW unit. The Tyrant took another wound to OW, leaving him with one left.
Spoiler:
However they wiped the squad to a man on the charge. The Tyrant consolidated into the forest, whilst the Shrikes moved behind the ruins slightly.
Tau turn 3. Movement:
With all units tied up and the Broadsides not needing to move, the Tau movement phase ended.
Shooting:
The Broadsides decided to fire on the Tyrant even though they had other options. He would however yield 2 points if killed.
Even with a cover save he lost his last wound however.
Hand to hand:
In combat the Command unit finished off the last Ymargl for the loss of one Fw. Both units consolidtaed to the other side of the ruins as far as they could.
Spoiler:
We forgot to take any remaining pics after this unfortunately (the booze demon rolled a double 6)
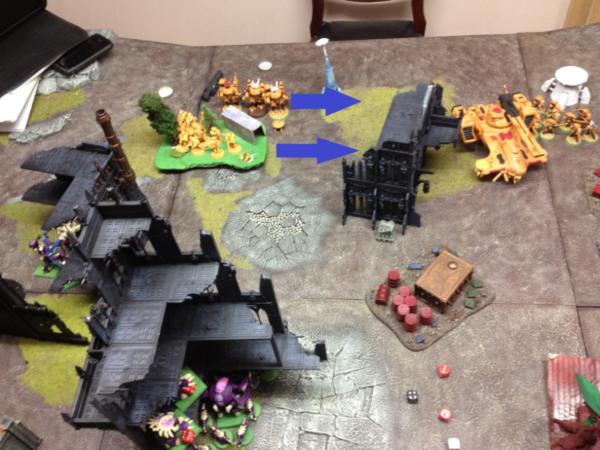
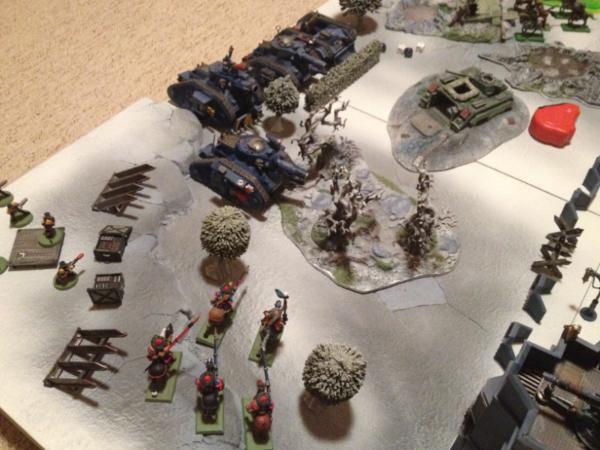
Nid turn 3. Movement:
The remaining Termagants in the ruins along with the Zoanthropes moved and ran to try and capture the two central Nid objectives.
The last Carnifex moved and ran also to the obj near the ruins where the Tau Command unit was.
The Shrikes then jumped over the ruin ready to charge the Command unit and/or FWS.
Shooting:
The Shrikes fired on the Command unit before charging causing 1 wound.
Hand to hand:
They then multicharged the Command and FW units. Overwatch caused no wounds on the Shrikes.
They killed 3 FWs and caused a wound on the Command units bodyguard. In retaliation the Command unit/Fws killed one Shrike causing 3 wounds. The Tau took a morale check but passed.
Tau turn 4. Movement:
No movement again.
Shooting:
The Broadsides chose to fire on the Termagants near the Nid objective and killed the last of them denying them the obj.
Hand to hand:
In combat the Shrikes killed both bodyguards from the Command unit. In retaliation the remaining Fws and Commander caused 2 wounds. The Tau again passed their morale check.
Nid turn 4: Movement:
The Termagants in the black bunker were now in Synapse range thanks to the Zoanthropes run and they moved for the central Nid obj near the ammo dump.
The Carnifex decided to leave is obj and try and charge the Tau Command unit.
Shooting:
Both Zoanthropes were out of range of the Broadsides.
Hand to hand:
Using its smash attack the Carnifex luckily insta gibbed the Tau Commander whilst the Shrikes finished off the Fws.
The carnifex consolidated into one of the Taus backfield objectives.
We decided to call it here, it was late our alcohol riddled brains were getting hazy.
Final score:
Spoiler:
Tau: 10 – Nids: 13 First blood First blood
Slay the Warlord Slay the Warlord
1 obj Linebreaker
2 objs
Post game thoughts. Not much in that one being honest despite the score at the end.
Definitely some mistakes from both sides (more from me being honest!) and the booze never helps.
In hindsight deployment was poor. I should have put the 2 Carnifexes on the other flank with a Zoanthrope and pressured the Broadsides.
They had free reign the whole game and earned 6 points themselves untouched.
The flank attack with the Tyrant and Shrikes worked well however, their mobility is very good.
Bear was very unlucky not to have killed the last Ymargl in my turn, it would have freed up his Command unit and Fws and it would have been a rout after that.
Tieing up both units worked well however with the Ymargls.
Definitely needed to be a bit bolder in the game and take some more shooting units.
Im really starting to see the value of objs in 6th – 3 points per each really can swing a battle, even holding two gives a 6 points lead which is very tough to come back from especially in small games such as this.[/spoiler]
Leman Russ Battle Tank
Leman Russ Battle Tank
Leman Russ Battle Tank
Pregame:
Spoiler:
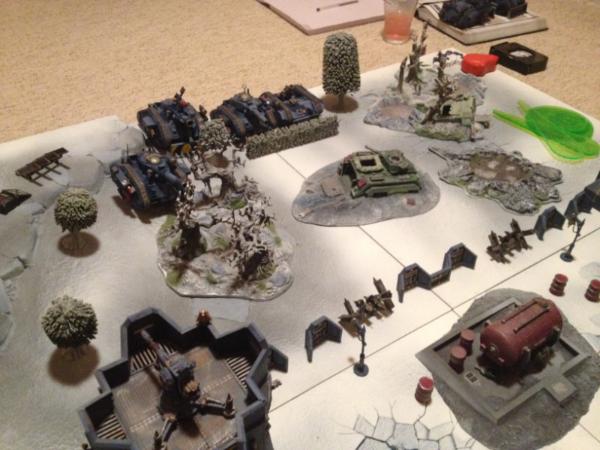
A special scenrio was chosen – whoever controlled the water tank terrain piece at the end would earn 5 Vps. Normal mission objectives applied too.
Nightfight was in effect turn 1.
Warlord traits:
Foots: Outflanking for Command unit.
Mechs: HQ becomes scoring.
Water terrain (lakes) were icebloods (reroll failed saves).
Both bunkers were given twin linked lascannons with 360 LoS.
Forest types:
1 forest was an ironbark (3+ save)
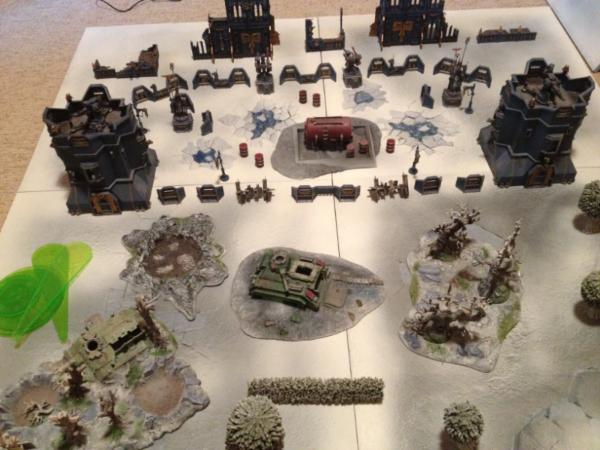
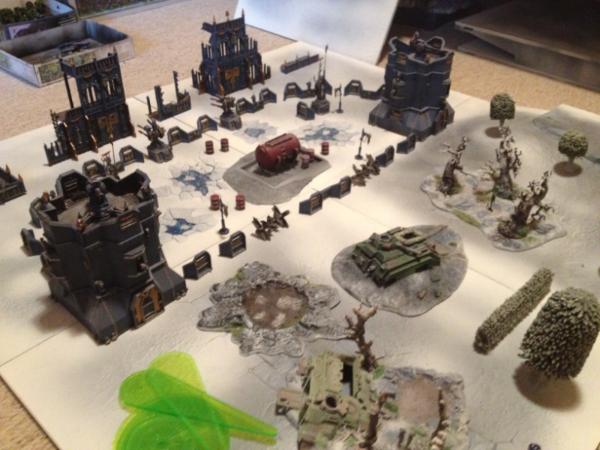
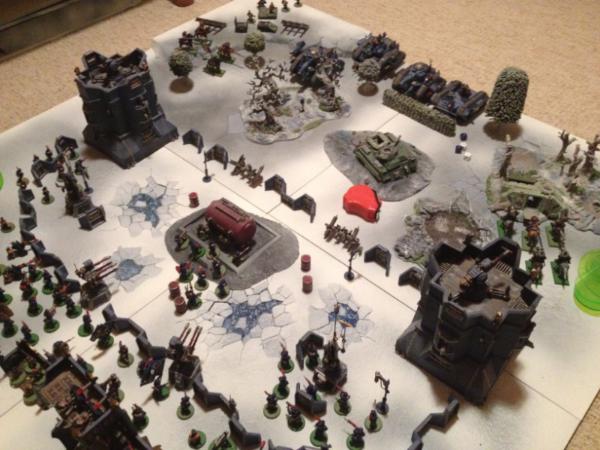
Terrain:
Spoiler:
The Footsloggers won the roll and chose to go first.
Spoiler:
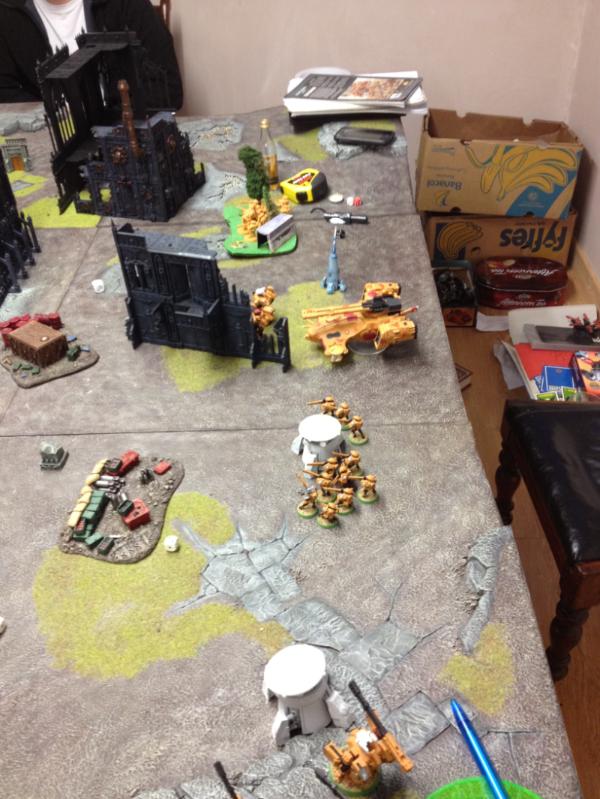
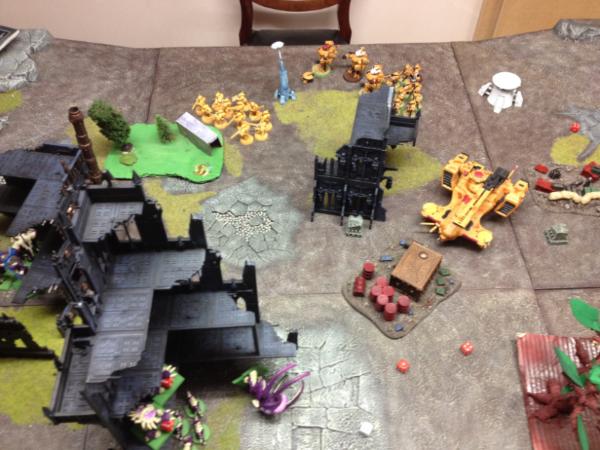
Foots deployment and plan. The Foots setup their Lascannon teams in the tall ruins at the back of their DZ. Each Roughrider unit took a flank ready to advance as quickly as possible up them and engage the Mech tanks with meltas. The 3 platoon units plan was to move up behind each bunker on each flank and wait there out of Los until late game and then dash for the objs. This would ensure minimum Vps given away.
The Ratlings deployed in cover, useless Vs mech at this stage but ready to support if infantry showed up.
The Foots Command unit elected to outflank, hopefully to pressure the Mech tanks froom the side.
Spoiler:
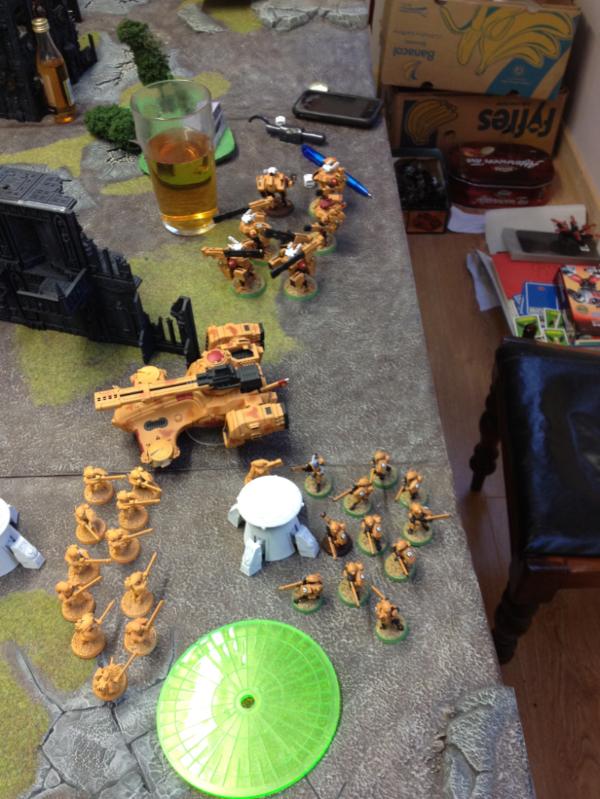
Mech deployment and plan. The Mechs Chimeras chose to reserve and this included their Command unit platoon and Vets.
The rest of the tanks deployed as far back as possible.
The plan was to basically pound the enemy troops with pie plates early on and once weakened hopefully get the Chimeras in with a consolidated assault into their lines to capture the obj.
Spoiler:
Mechs failed to sieze and the game began.
Spoiler:
Foots turn 1. Movement:
Both Roughrider units moved/ran behind each bunker on the flanks for cover.
Platoon quad 1 moved to capture the water works whilst #2 and 3 both moved to the comms relays on either side of it. Platoon #4 held its position.
The PCS moved up 6”.
Spoiler:
Shooting:
Both lascannon and autocannon teams fired on the forward most Leman Russ but with nightfighting in effect could only score one hit which failed to penetrate.
Spoiler:
Mech turn 1. Movement:
The Mechs chose not to move this turn.
Shooting:
The Griffon mortared Platoon #1 but missed and hit nothing.
The first Leman Russ then fired on Platoon #3. They chose to go to ground for a 4+ save and with NF in effect only killed one.
The other two Lrs then fired on the Lascannon team in the ruin, killing two. They passed their morale however.
The second shot luckily scattered into the Auotcannon team who went to ground losing 1 model.
Spoiler:
Foots turn 2. Movement:
The Foots outflanking Command squad luckily arrived and with even more luck rolled the side where the Lrs were. They moved on to try and engage them.
The left flank RR unit moved forward 12” to try and melta the same LR.
The right flank RR unit then moved/ran to try and engage the Griffon next turn.
Everything else held position.
Spoiler:
Shooting:
Both the HQ squd and RR fired on the exposed LR but completely failed to hit!
The 2nd autocannon squad then fired on the Griffon scoring 2 pens, one of which was saved. It lost a HP and took a crew shaken result.
Both lascannon teams then opened up on it, scoring another pen, leaving it with 1 HP left.
Spoiler:
Mech turn 2. Movement:
The Mechs HQ unit Chimera arrived via reserve and immediately tank shocked the Foots HQ unit.
A question arose here:
Spoiler:
Under the tank shock rules the vehicle must stop as soon as it reaches the intended target model/unit. However it was not fully on the board at this point. What should have happened?
It was allowed to continue in this game but should it have been destroyed?
They passed their test however. They chose to Death or Glory with a melta bomb and amazingly penned and then rolled a 6! obliterating the Chimera. 3 members of the Foots HQ were killed in the resulting blast whilst 4 were killed from the Mechs HQ.
They both passed their morale check and the Mechs also passed their pinning check.
Spoiler:
The Vets Chimera arrived and chose to attack the RRs on the other flank.
Spoiler:
Shooting:
The Griffon fired on a lascannon team in the ruins. It hit and wounded 3, wiping out the unit.
All 3 Lrs then fired on the second lascannon team, reducing them to 1 wound after they went to ground. They passed their morale however.
The Chimera and its Vets then fired on the Rrs on the left flank. They killed 4, however the last one passed his morale check.
At the end of turn two the scores were:
Spoiler:
Foots: 9 - Mechs: 1
Water works obj
First blood
Linebreaker
Foots turn 3. Movement:
The remaining RR moved to shoot/assault the Griffon whilst the second unit moved to shoot the Mechs HQ unit. The Foots HQ squad also moved to target them.
Platoon #3 moved fully in behind its bunker.
Spoiler:
Shooting:
The lone RR shot and penned the Griffon destroying it with wrecked.
Spoiler:
The second RR unit along with the Foots HQ then shot the Mech HQ killing the Priest who had a few lucky saves.
The remaining heavy weapons teams the fired on the Vets Chimera but failed to hit.
Hand to hand:The Roughtriders and Foots HQ charged the Mechs lone Commander who issued a challenge. The Foots Commander accepted. Only one wound was caused by the Foots Commander but the Mechs held valiantly passing morale.
Spoiler:
Mech turn 3. Movement:
The second Vets unit failed to arrive from reserve whilst the first moved forward 12” behind the left flank bunker.
Shooting:
Still in range of the last RR the Vets fired on him and despite going to ground was killed.
The first LR then fired on the platoon holding the water works. They went to ground and only suffered 1 wound.
The second LR then fired on the same unit, killing 2 more but they passed their morale check.
The last LR fired on the weakened lascannon team and though they went to ground too, they were wiped out.
Hand to hand:
In the dual between Commanders the Mech failed to hit. The Foots Commander however caused another wound. Rolling a 10 for his morale check the Mechs Commander unceramoniously fled off the board.
The victors consolidated towards the first LR.
Spoiler:
With time running late it was decided this would be the last turn.
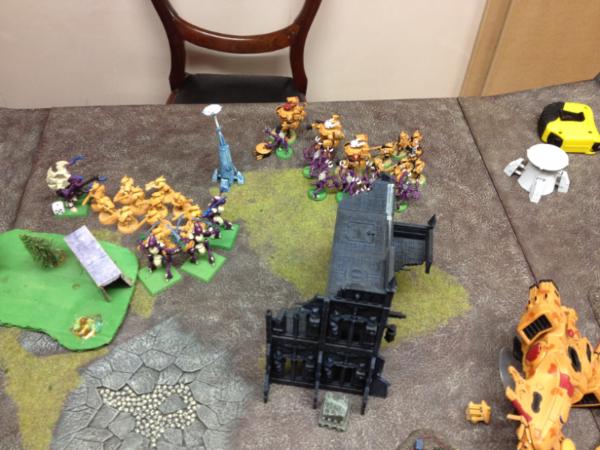
Foots turn 4. Movement:
The RR moved behind the first LR to get rear armor shots whilst the Foots HQ prepared to charge the second with melta bombs.
Platoon #2 behind the bunker withdrew and ran behind the aegis line away from the oncoming Vets squad.
Shooting:
With no heavy weapons left to damage the Lrs it was up to the RR to try and destroy them.
Scoring two pens they duely obliged, wrecking the first LR.
Hand to hand:
The Foots HQ unit charged the second LR but failed to pen it even with melta bombs.
Mech turn 4. Movement:
The Vets Chimera tank shocked into the Platoon holding the water works passing its DT tests on the way. They failed their Death or glory attempt and fled from the water works. The Vets then disembarked to capture the obj themselves!
Shooting:
The second LR turned and fired on the Foots HQ unit obliterating them.
The last LR then fired on the Platoon near the second bunker. It failed to hit however and the game drew to a close.
Final score:
Spoiler:
Foots: 8 - Mechs: 9
First blood Slay the warlod
Linebreaker Water works (5VPS)
Slay the Warlord
Post game thoughts:
Well at one point that looked like it was going to be an utter rout.
9-1 down I think at one stage for the Mechs!
Basic plan for the Foots worked pretty well overall – hold the backline with HWTs and the objective whilst using the Rrs and outflanking HQ to pressure the Mechs tank line.
The Rrs did very well overall, packing melta and with good mobility they are a threat if a litte fragile.
Some pretty lucky morale checks throughout for the Foots, they could ahve lost more squads with worse rolling.
A bit unlucky to lose the water works in the last move of the game. Losing the 5 Vps cost the win, even if it was worth 3 they would have won/tied.
Probably should have had a few more platoons around it but wasnt really expecting the Chimera rush.
The Mech army was fun to play but lacked close tank support and the outflanking hurt. Probably a bit unlucky with the Griffon/pie plates too, I've seen other games where they really do damage.
The Commander duel was fun however.
Great Chimera grab for the last turn and after a shakey first few turns started to put a few points on the board.
Oh also, do the HWT teams attached to the platoon count as VPs? If so final score was 8-11
[/spoiler]
Thanks for reading as always.
This message was edited 2 times. Last update was at 2013/02/01 17:27:27
Dman137 wrote:
goobs is all you guys will ever be
By 1-irt: Still as long as Hissy keeps showing up this is one of the most entertaining threads ever.
"Feelin' goods, good enough".
2013/02/01 16:24:51
Subject: Two quick 1000 pointers (Tau Vs Nids & IG foots VS Mechs)
Thanks BO, yeah been plugging away with stripping them and adding some of the new kits of late.
I'll use the 2nd ed as my core for sure though - too cool imo to update or substitute out
Spoiler:
This message was edited 1 time. Last update was at 2013/02/01 16:31:25
Dman137 wrote:
goobs is all you guys will ever be
By 1-irt: Still as long as Hissy keeps showing up this is one of the most entertaining threads ever.