 Color Sgt. Kell wrote:
Those are pretty cool. No offense but pretty cheesy

reminds me of a ray harryhausen skeleton movie. I like the undead look though and it is really retro and cool. Totally rogue trader style and I like it.

LOL Skeletons are incoming for sure. The
RT style is on purpose and I have used a massive amount of rogue trader era space marine bits on upcoming models.
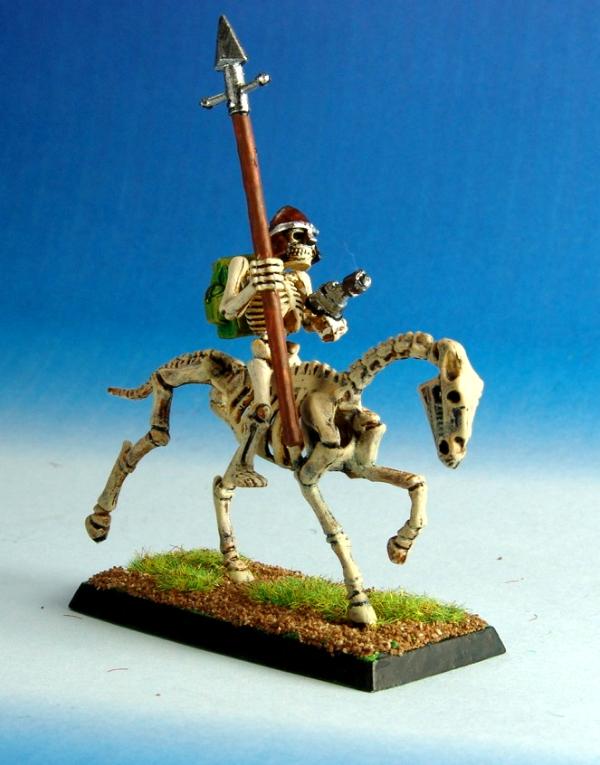
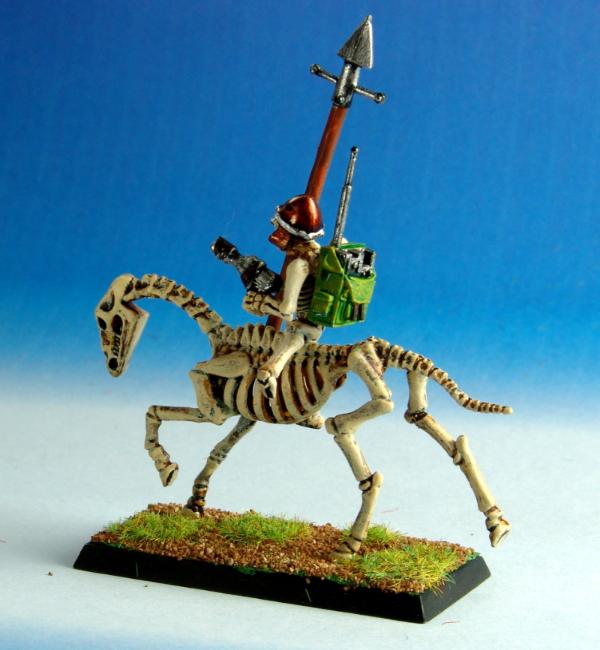
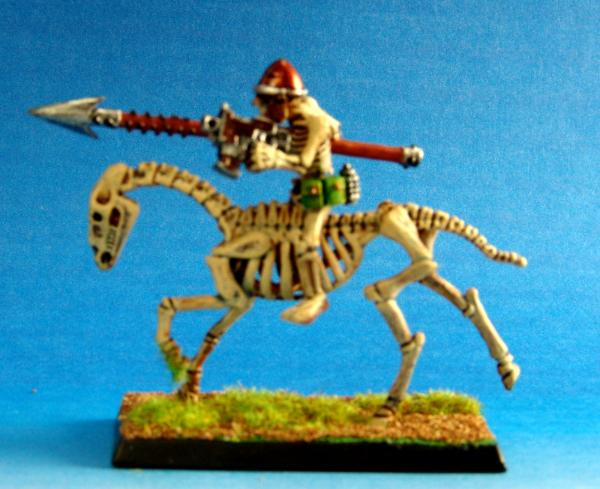
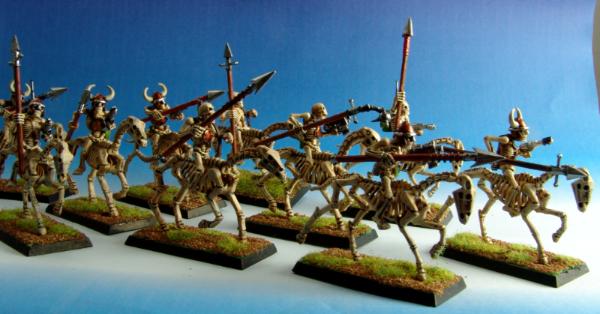
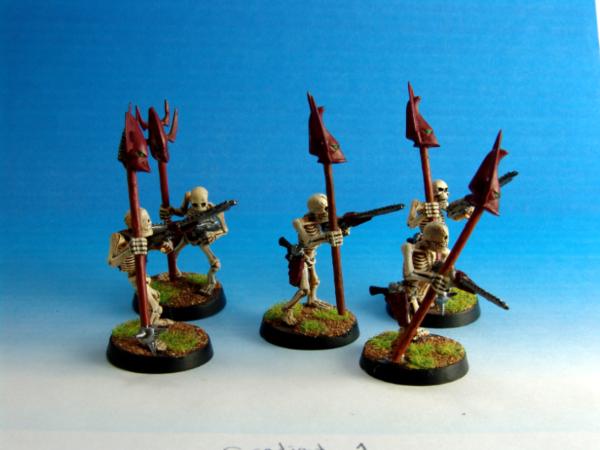
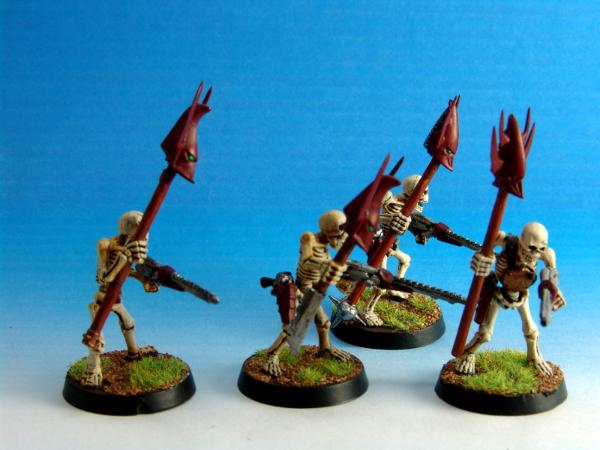
Rough Riders!
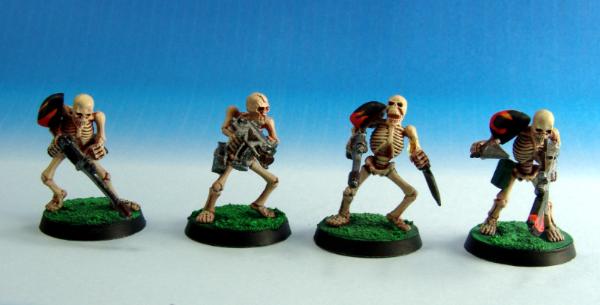
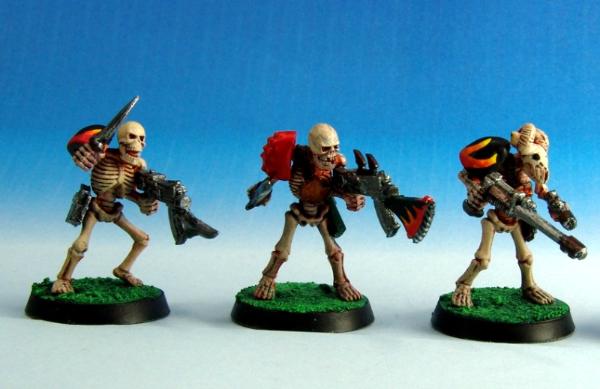
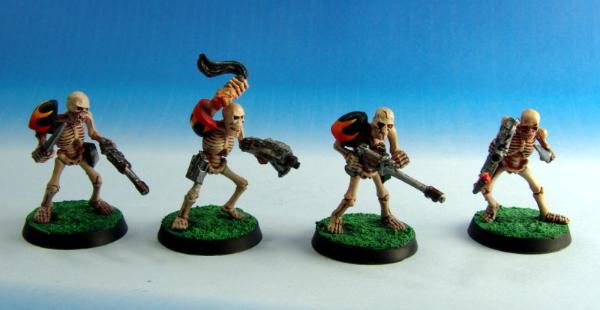
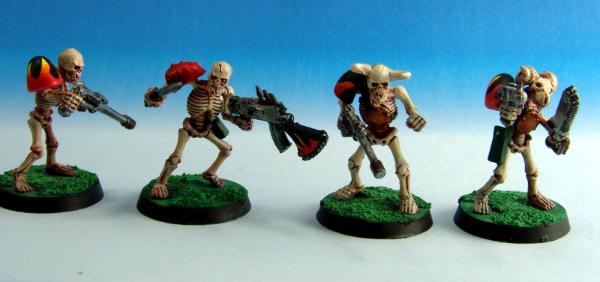
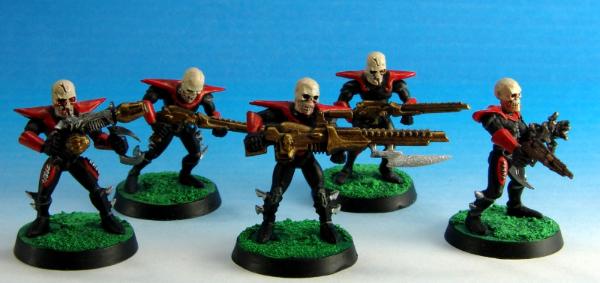
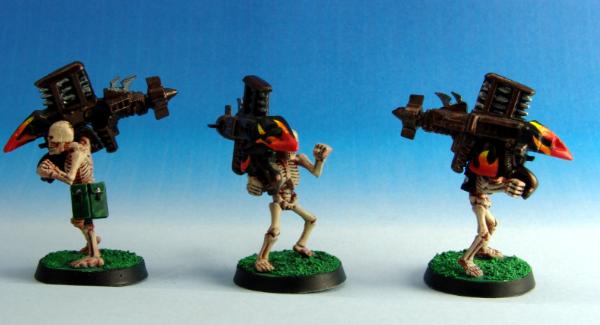
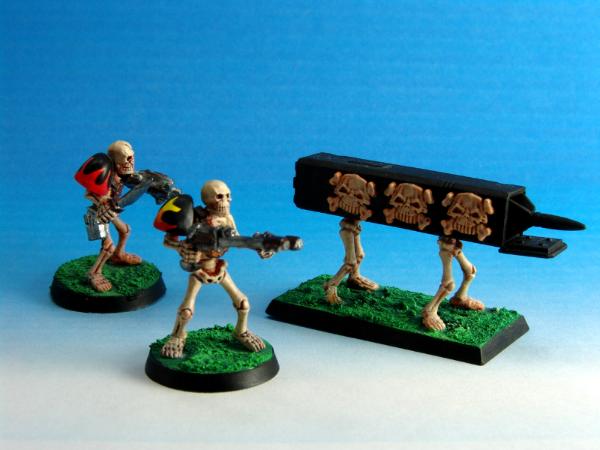
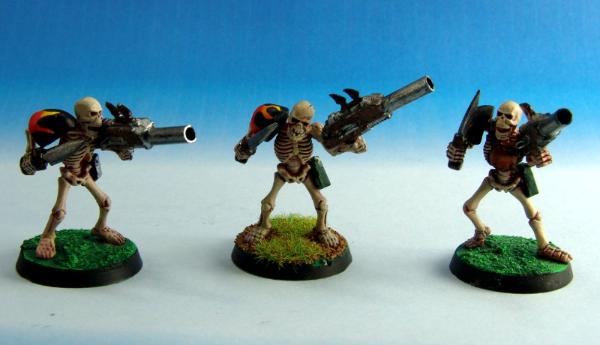
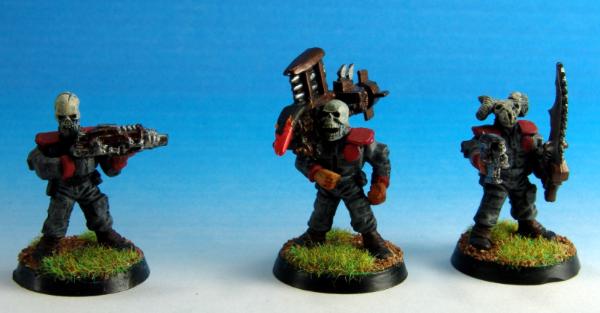
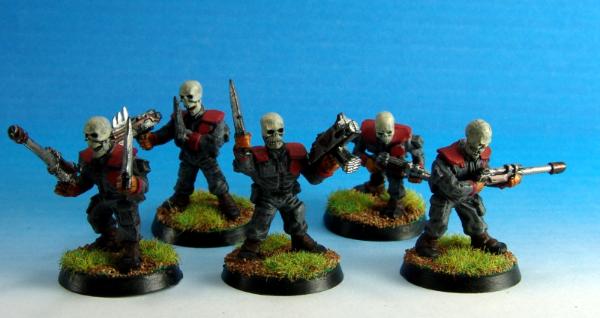
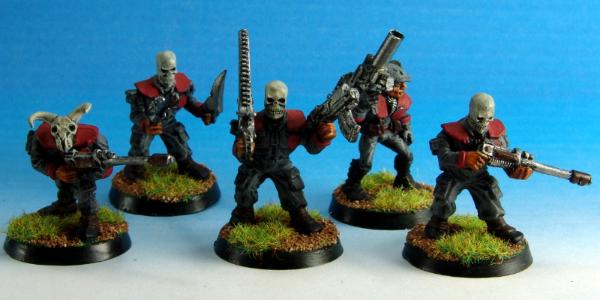
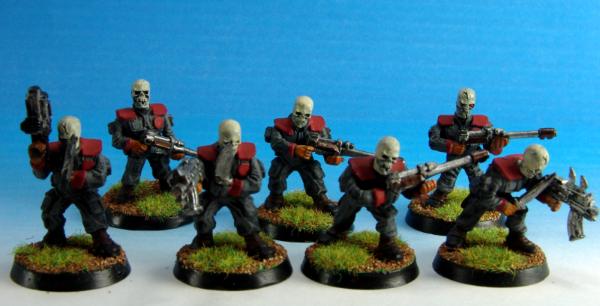
Skeleton Infantry
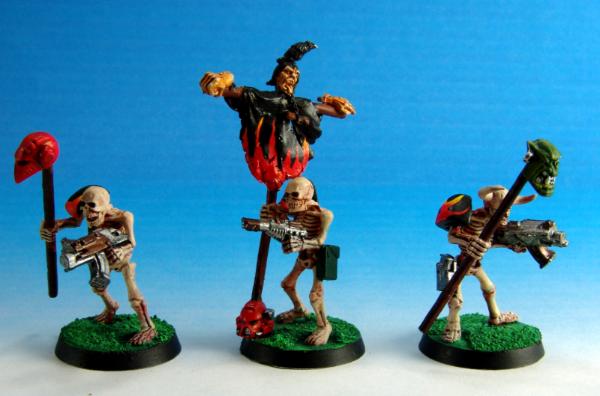
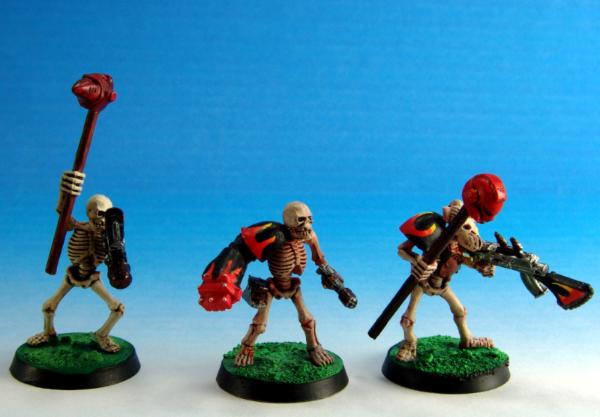
The following heavy weapons are from the old plastic
IG and
SM plastic sprues. Now I have these magnetized (bases) and they fit in 60mm bases with a second infantry figure to match current rules. Pictures forthcoming on the bases.
Missile Launchers
Las Cannons
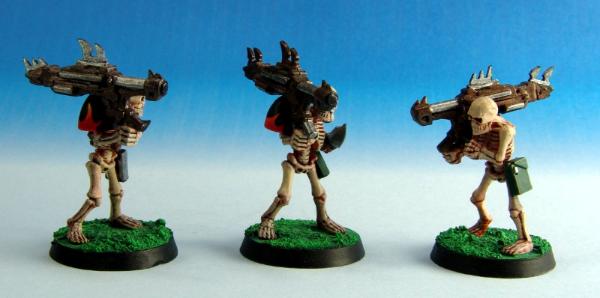
Heavy Bolters
Missile Launcher Team
Plasma Proxies
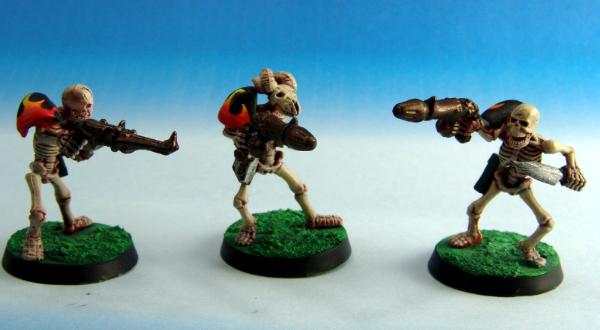
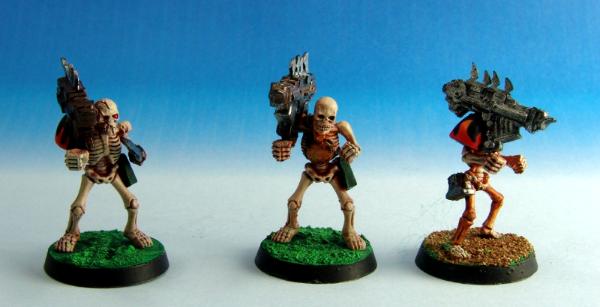
Custom Made Grenade Launchers
Lasgun, Melta and Plasma
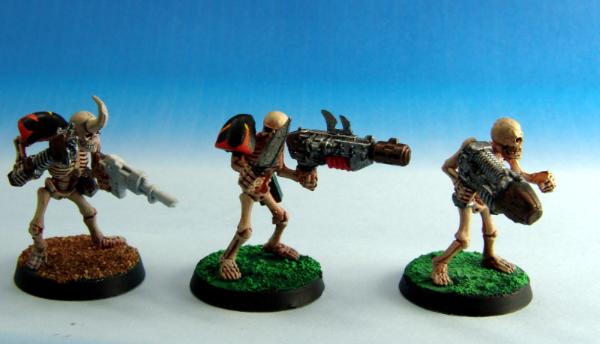
Flamers
 Automatically Appended Next Post:
These sentinels started life as the legs and gear from the old Space Marine game Beetle Back Warlord titans. The cockpit is based on seats from the
RT era land speeder surrounded by shields. Once I finish basing them and finish the back banners I will post pictures.
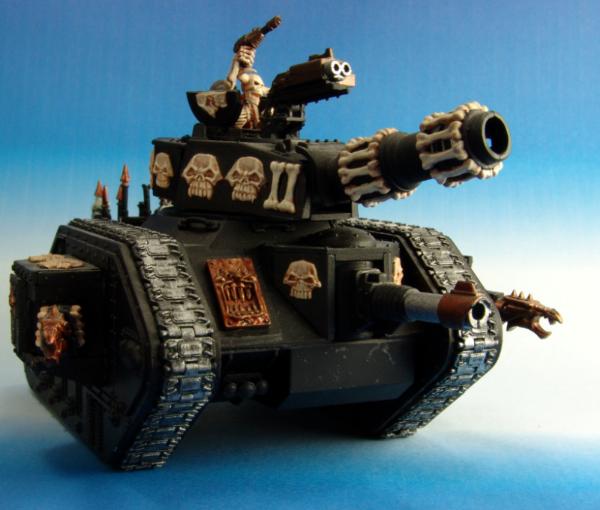
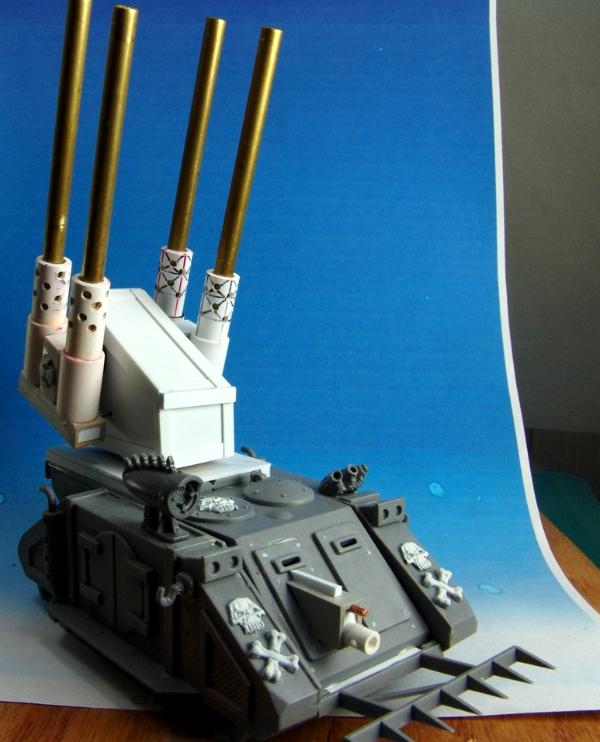
The twin gatling guns are the top half of epic scale Khorne Brass Scorpions, Kinda pricey conversion these days!
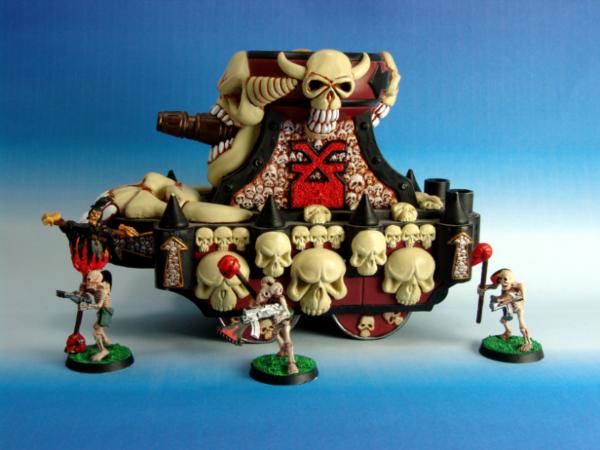
 WIP
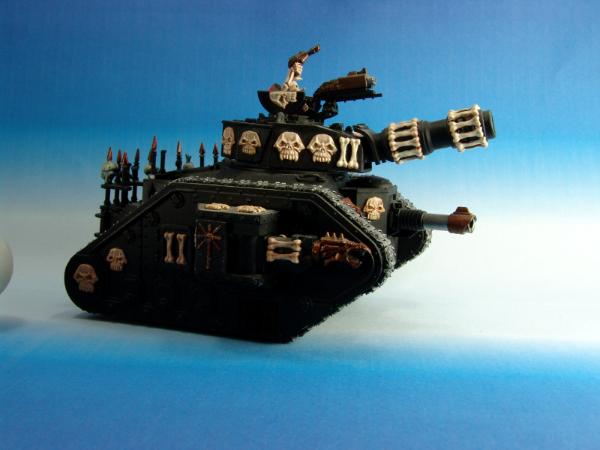
WIP Leman Russ, lots to paint on my vehicles
 WIP
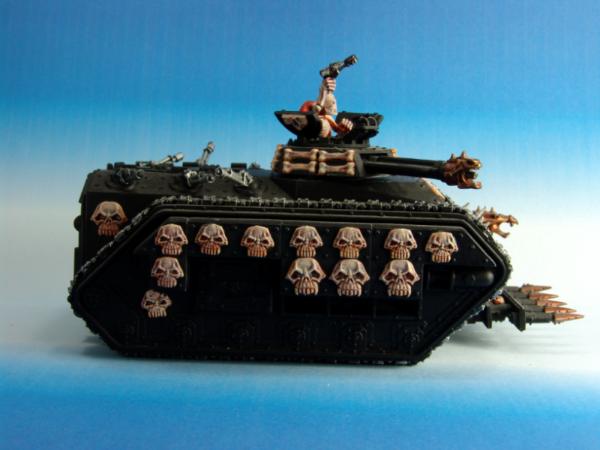
WIP Chimera
 WIP
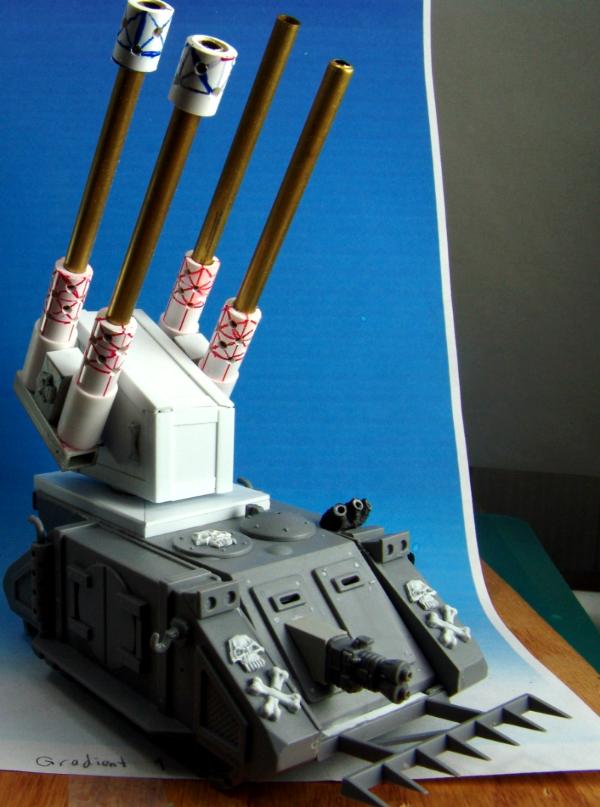
WIP Hydra with heavy flamer
 WIP
WIP Hydra with Heavy Bolter
___________________________________________________________________
___________________________________________________________________
HOW
TO BUILD A TRAITOR SENTINEL FROM AN EPIC SCALE WARLORD TITAN
Despite their age, plastic Warlord titans are relatively cheap and easy to find on ebay. The most important thing in this project is to use the glue that matches the materials being joined. For wood to wood, woodglue is best and for plastic to plastic, plastic cement is best. For mixed materials, use a good two part epoxy. Do not use superglue if you want your model to hold up during play and carting it around.
For this project I am building a two man sentinel with a pilot and a tailgunner (for looks). You can build the one man version following by basically following the steps I outline here just dont build the rear cockpit.
Importantly, use your own bits box and dont worry about the parts I used. The second important thing is to build a strong framework or chasis and then you can do your own thing adding weapons, railing, shields and spiky bits. I strongly recommend using basswood instead of balsa wood. Basswood can be found in any good hobby shop and is is usually mixed in with the balsa wood products. Remember to cut away from your hands and follow good safety practices and instructions on the glues.
Figure 1. Find a beater warlord titan with weapons and arm bits. You do not need the carapace armor.
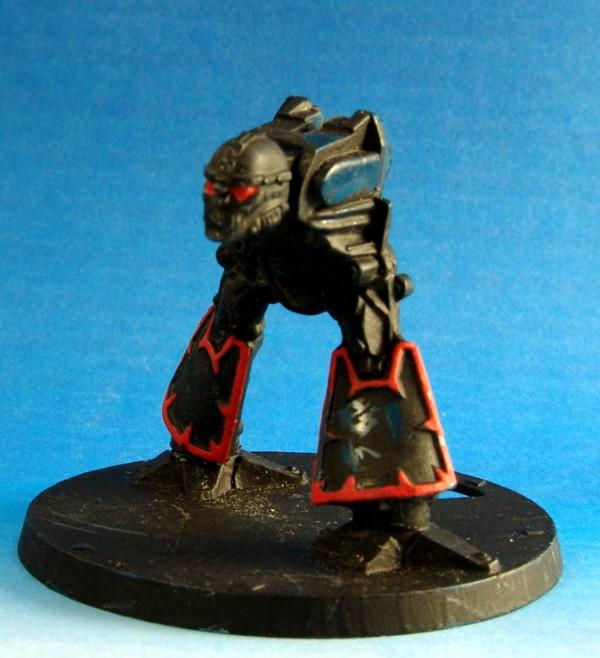
Figure 2. Into the stripping solution of your preferred choice.
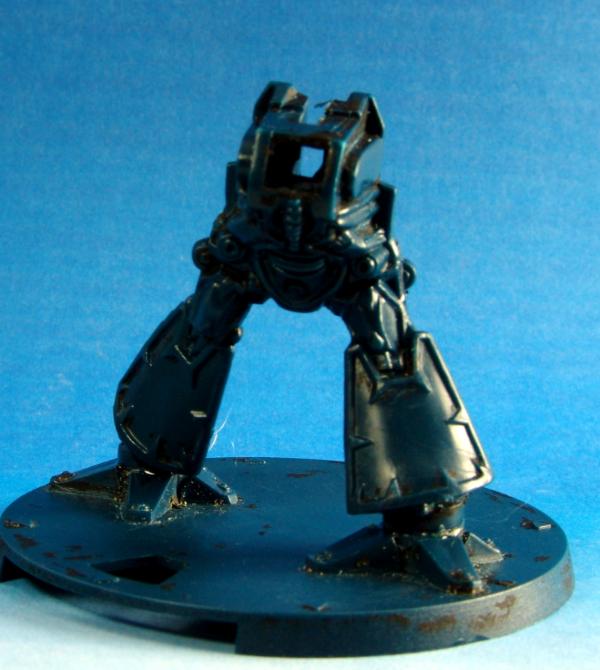
Figure 3. At the back of the model you will find were the weapon mounts attach. You need to drill those out and run a plastic rod of the same diameter as the inside diameter of the weapon mounts. If you do not do this you will find that the weapon mounts will droop or just fall off during play. The rod I am talking about is white in the following picture.
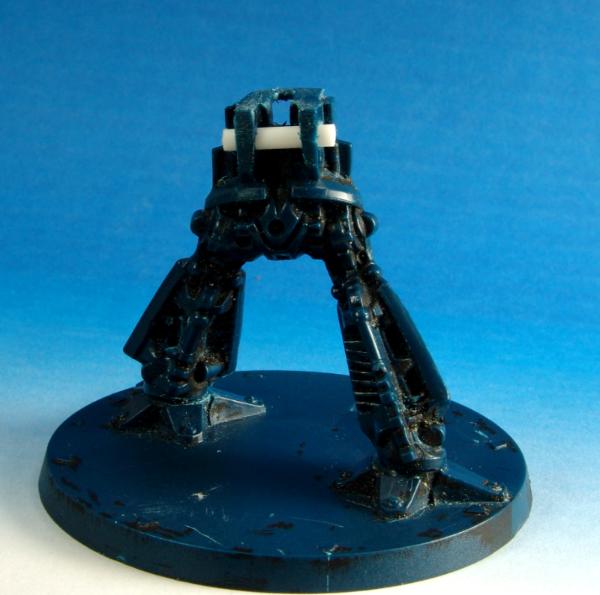
Figure 4. Test the weapon mounts but dont glue them on yet. The weapon mounts red plastic in the picture below.
The figure below shows how I have trimmed the model behind where the titan head was formerly positioned to make a place for the cockpit chairs to rest on. You will also notice a small metal pin sticking out the front of the titan. This is extremely important to help stabilize the front cockpit.
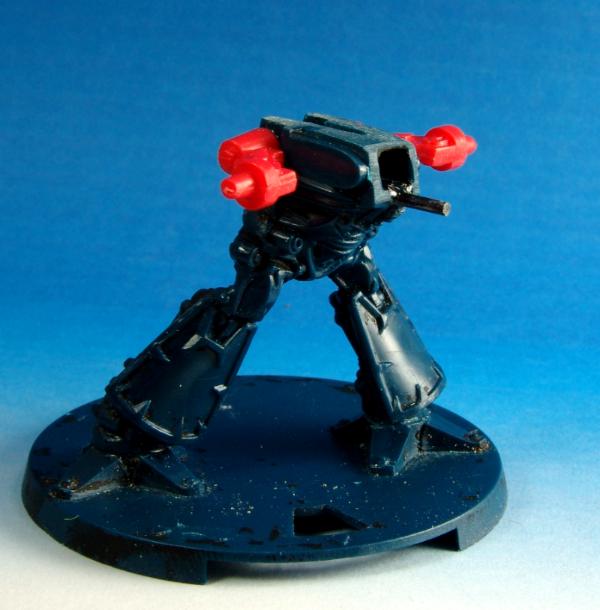
Figure 5. Next we begin to build the cockpit chairs. Just look at the picture for the general plan. Dont glue it on yet. You need to test fit the models a lot so assemble the pilot/gunner ahead of time.
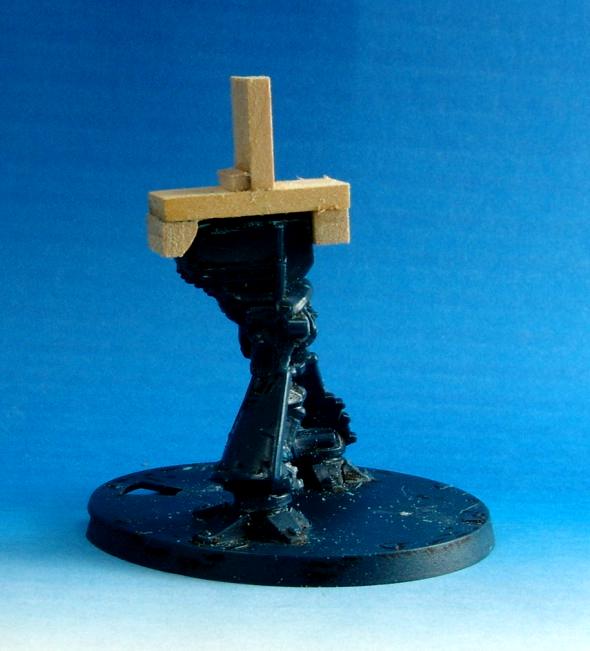
Figure 6. Test fit the models.
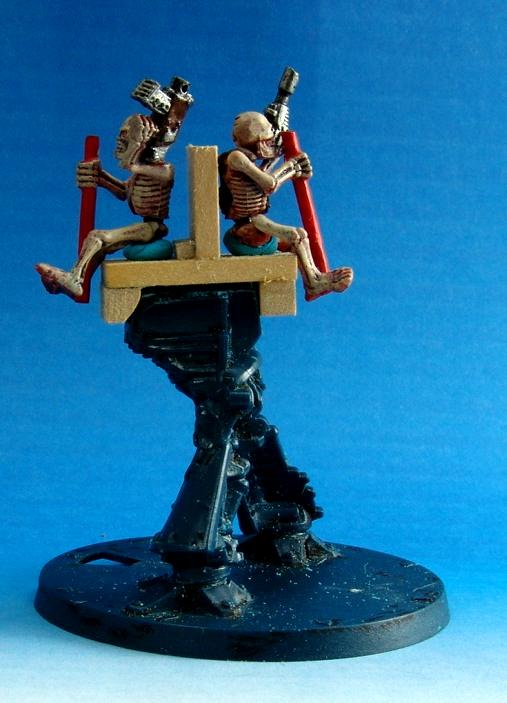
Figure 7. Now we extend the floor pans for the front cockpit and tail gunner section.
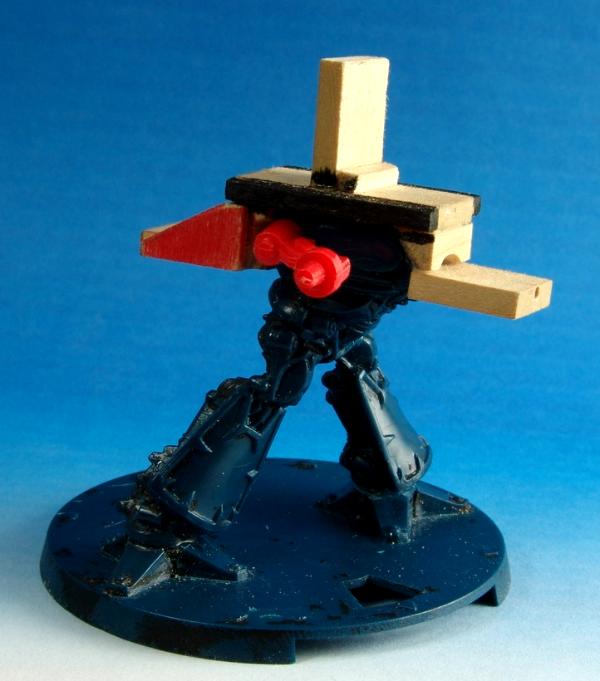
Figure 8. Test Fit, then glue everything together.
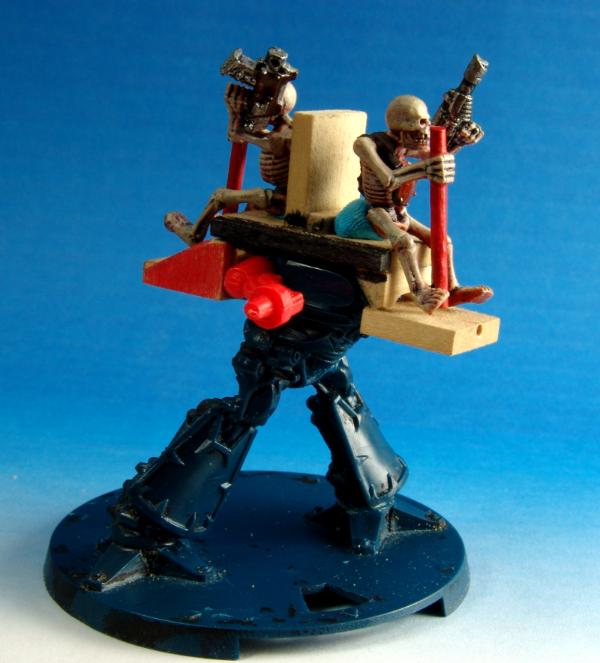
Figure 9. The purpose of this figure is just to show the mount for the front cockpit shield. It is the trapezoid piece of wood attached to the front floor pan. Note that it is pinned in place and dont blow off pinning it.
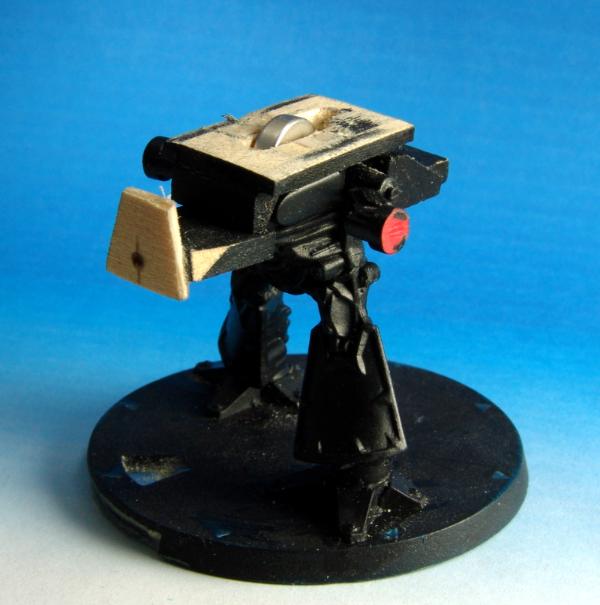
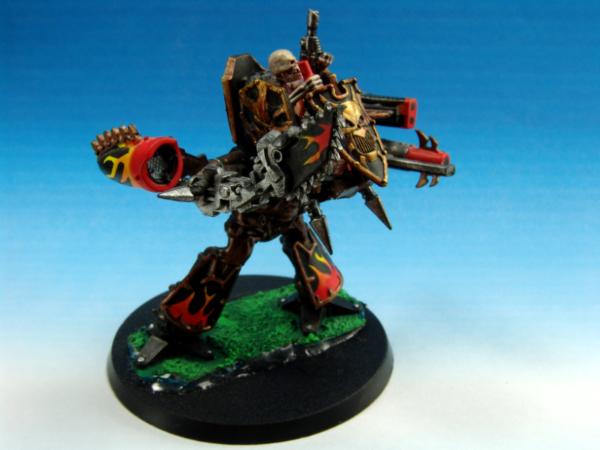
Figure 10. Sentinel Left side and front view. With gatling gun and close combat weapon (decoration only). The rest is entirely up to what you have in your bitz box. I had fantasy chaos shields and chaos vehicle sprue parts so thats what I used. I have no idea where the tail gun came from. I magnetized the weapon arms and weapons, but again that is up to you.
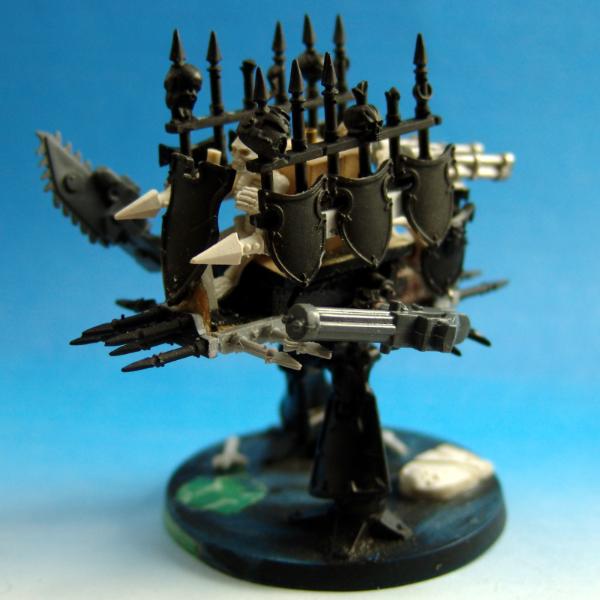
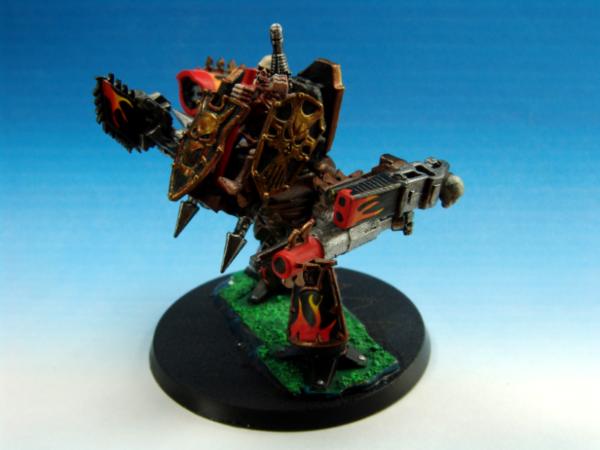
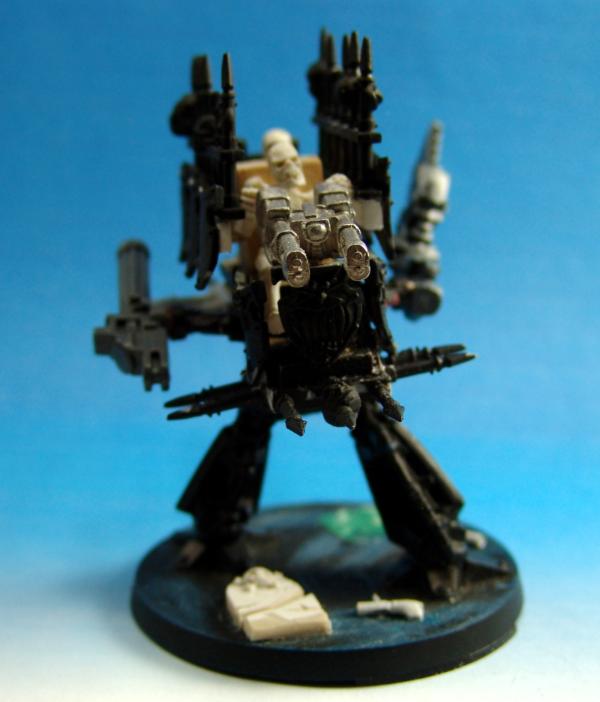
Figure 11. Sentinel Right side view.
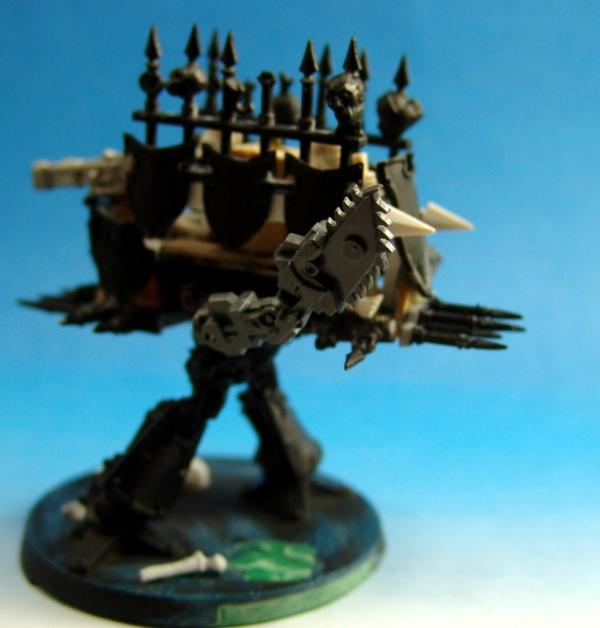
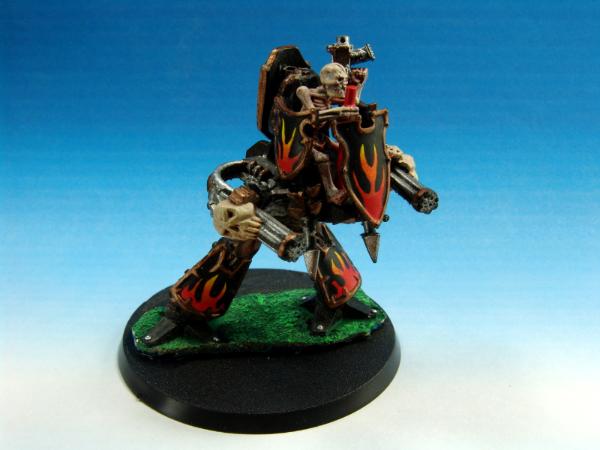
Figure 12. Sentinel rear view left side. It is easy to sea how the vehicle sprue spiky fence is glued onto the wood and the shields are glued to the spiky bits.
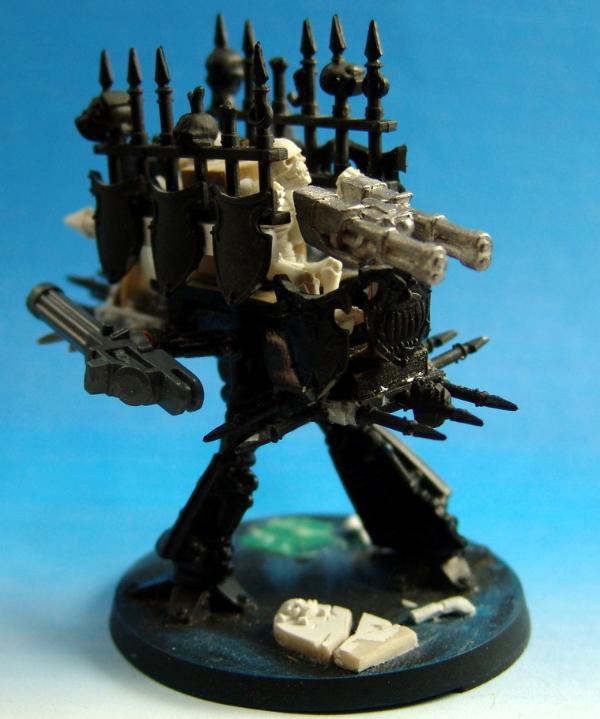
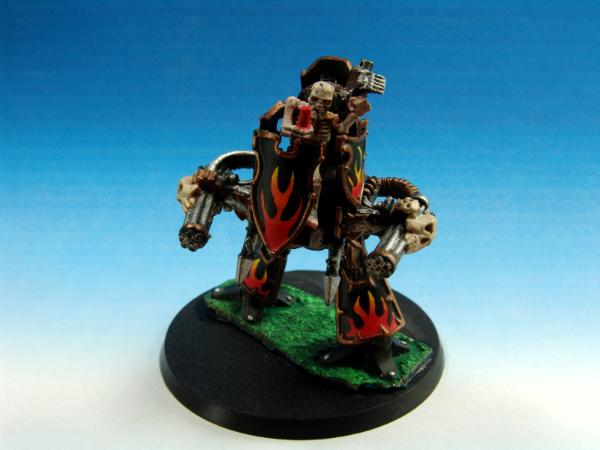
Figure 13. View of tail gunner from directly behind sentinel.


 Did you know? The Reach belongs to the Forsworn.