So there has been a little interest in how I made the impact craters for the Mycetic Spores that I cast (THAT process will be in another tutoral!) so I figured I'd let you know my secrets!
LOL!!
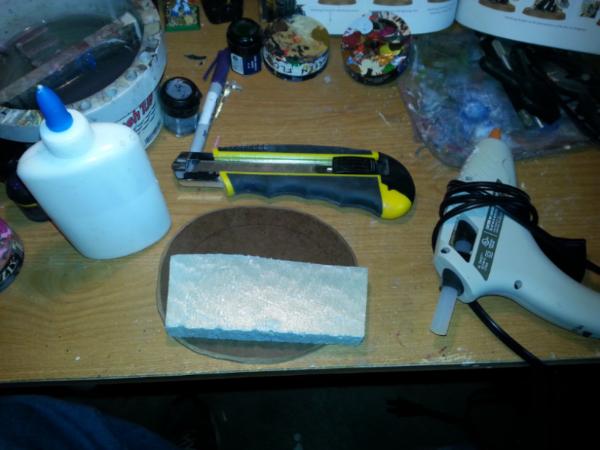
Here's what you will need:
MDF board 1/8 inch (Ive heard it called brown board or even plain masonite)
Blue or pink insulation board 1 inch thick
Drywall mud
Sand
Small gravel
Cheap primer
Paint (I use the cheap craft paint from Wally World for terrain)
Hot glue gun
Large razor knife
Old or cheap paint brush
PVA/white glue
I'm sure I forgot someting, but HEY! let's get started anyway!!!!
The first thing you'll need to do is cut your
MDF into an elliptical shape and bevel the edges on it. I figure you should already know how to operate a saw and a sander, so I'm not going into all of that. I will say that for mine, I used one of the monster bases and added about an inch all the way around, before cutting it out and using my handy Dremel to sand the edges (Gotta love that Dremel tool!!).
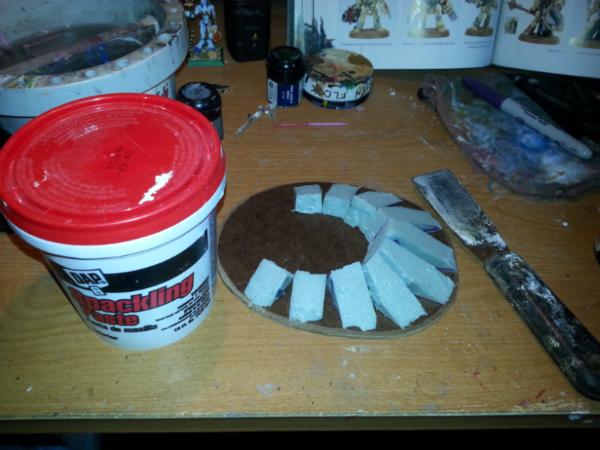
Now mark your piece of insulation foam like I did (its about 2 1/2 by 7 inches or so). The arrows are there so you remember to put that side up!
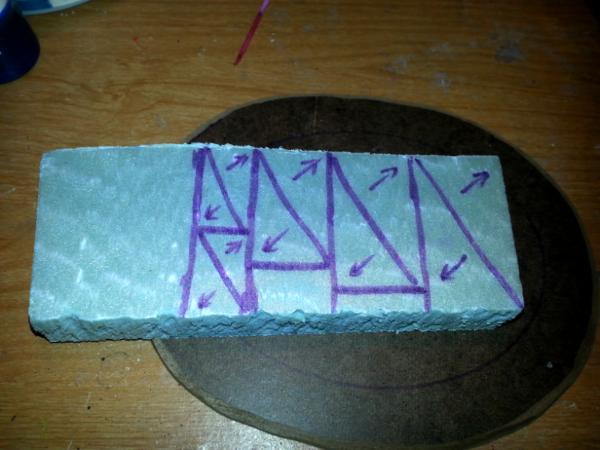
and use your giant razor knife to cut it apart and arrange it something like this!
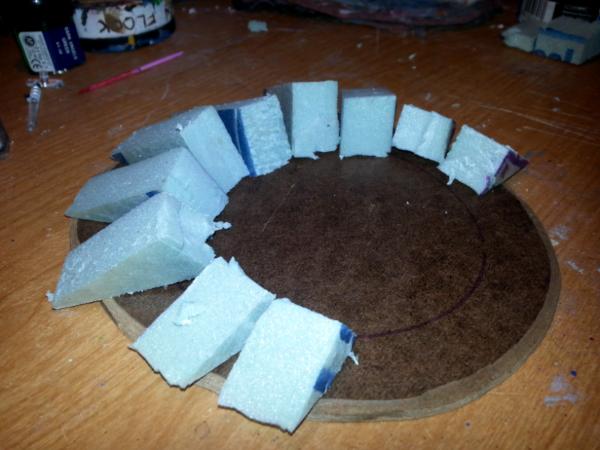
You may need to trim a few pieces to get it on there the way you wanted, so make sure you do that BEFORE you hot glue them down, If you compare the next pic to the previous one, you can see what I'm talking about. Don't worry if a few of them hang over the edge, you can trim them dowm once they are secured.
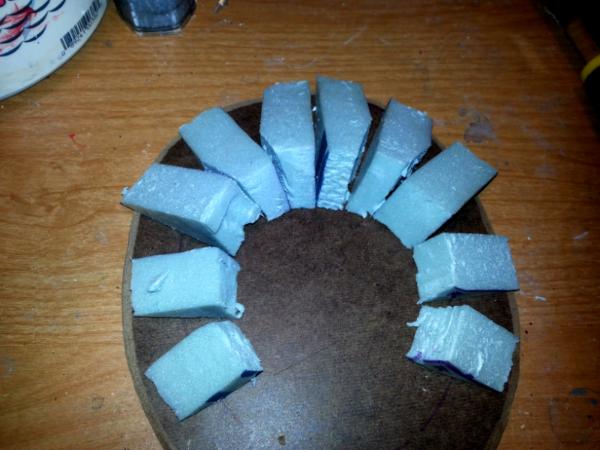
Now get that hot glue gun going and carefully glue the foam to the
MDF board. I always start with the bigest pieces and work my way to the smallest, alternating between the sides so that I can keep them kind of even. Anything that is hanging off the base trim off with your razor knife, so that it is all nice and even with the base.

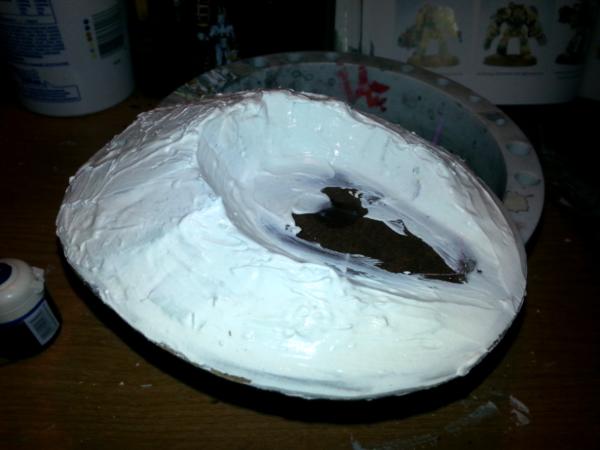
Now on to the fun/messy part! get out your drywall mud and your small scraper. You can do this with a popsicle stick or even with your fingers, but I don't reccomend it!
Fill in the gaps and smooth it along towards the low end of the foam. I usually put an extra glob in the middle and radius the inside radius with a wet finger also
Wasn't that FUN!!!
LOL! OK, now set it somewhere and walk away. It takes a while for the mud to dry so I suggest leaving it overnight before you try to do anything else with it.....
Sometime later.....
Glad thats over. I hate to wait, but until I figure out a better way...
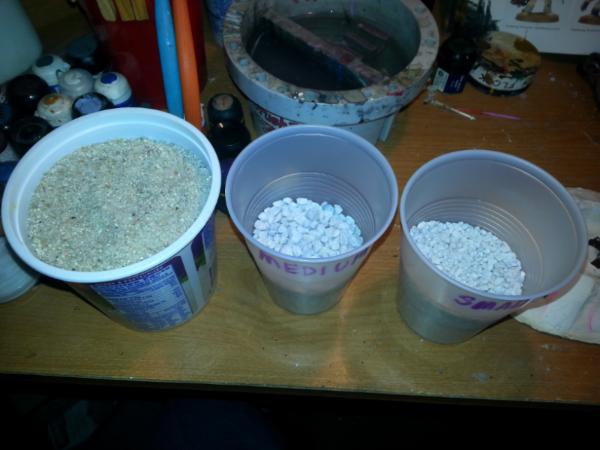
Next step: TEXTURE!!! I use a lot of different things to get texture on my minis and my terrain. For this I'm going to use beach sand and a couple of different sizes of small rocks.
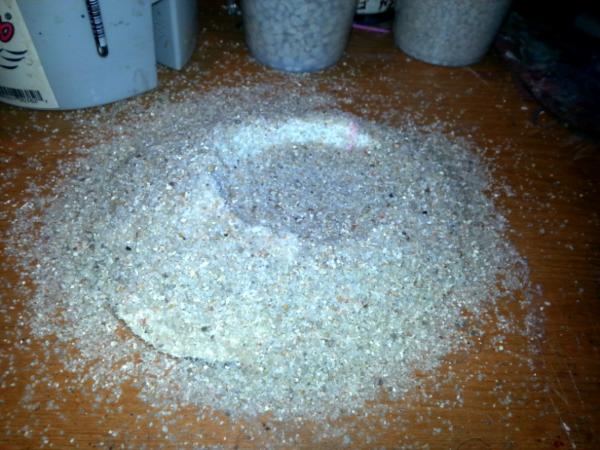
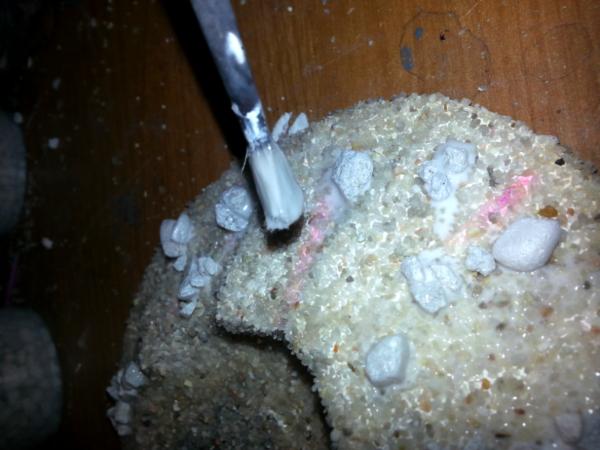
First, get out the PVA glue and drizzle it over your crater as if is was a streudle
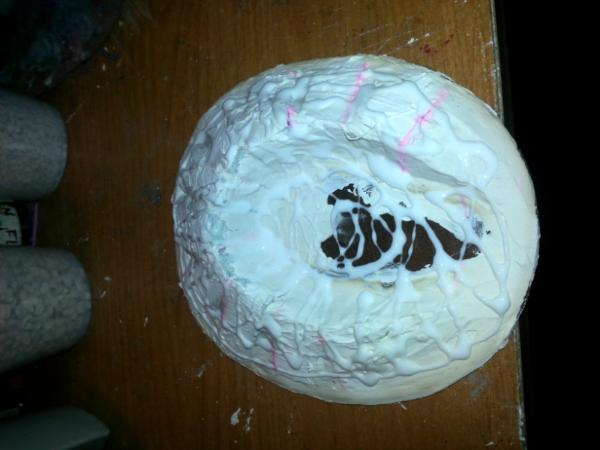
Now take your old paintbrush, get it a little wet and use it spread the glue evenly over the entire thing. You are basically watering down the glue a little as you are spreading it around. Be sure and get it to cover every little crack and crevice. Got it glazed with the sticky stuff? Good job! Now liberally sprinkle (dump) sand on it. Cover it with the stuff! My wife suggests that you do this in the middle of some newspaper for easy cleanup, but what does she know?!? I don't have time for all of that (as you can see from the pics), I'm creating!!!!
Remember a couple of steps back where you had to walk away for a bit? Well its that time again.. Gotta let the sticky stuff do its thing......
OK! Back again!
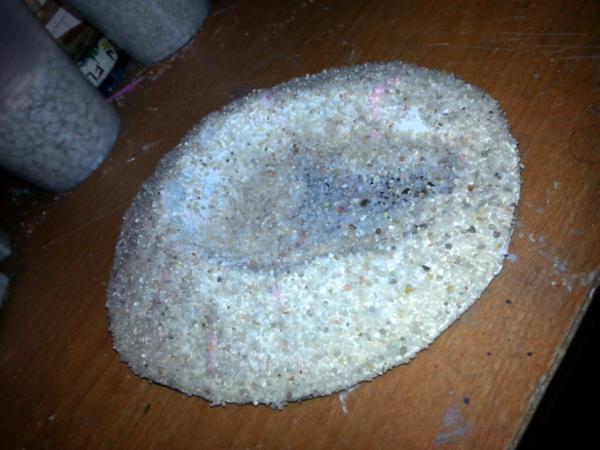
LOL!! Shake the extra sand off of your crater, stand back and admire you handiwork! This thing is starting to come together! Yeah!!!
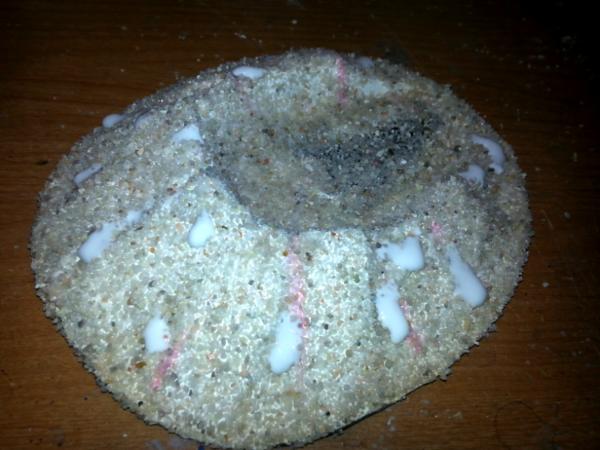
Get out your medium and small rocks. At this point, I dab PVA directly onto the slopes and put one or two of the bigger rocks in that spot. You can push them into the foam/mud a little if you want, also.
There is no right way to do this. Play with it and see what you like. I then sprinkle smaller gravel around the larger stuff, letting whatever wants to fall off, fall off.
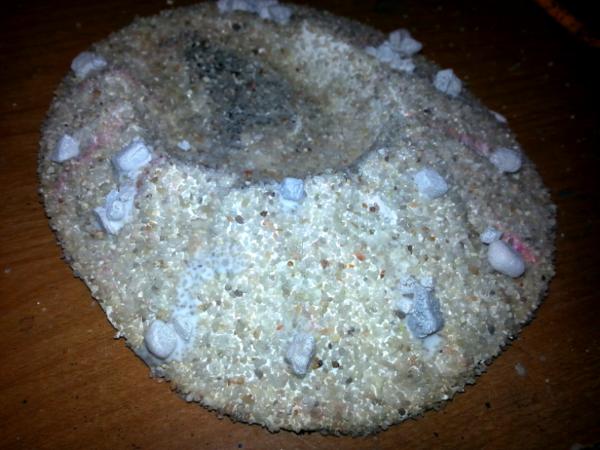
Next, take some watered down PVA and liberally brush it/dribble it onto the areas that you you just stone/graveled. This will lock everthing into place (when it dries).
Once agan, walk away.... Let it dry, or your life will be miserable!
Hopefully you've been patient and have given your crater plenty of time to dry. Now it's time to paint that puppy!
I use cheap craft paint from WalMart for scenery. I'm not as worried about the consistency as I am about the fact that I'm trying to cover WAY more area and I'm not trying to go broke buying Valejo colors or
GW paint to do it!
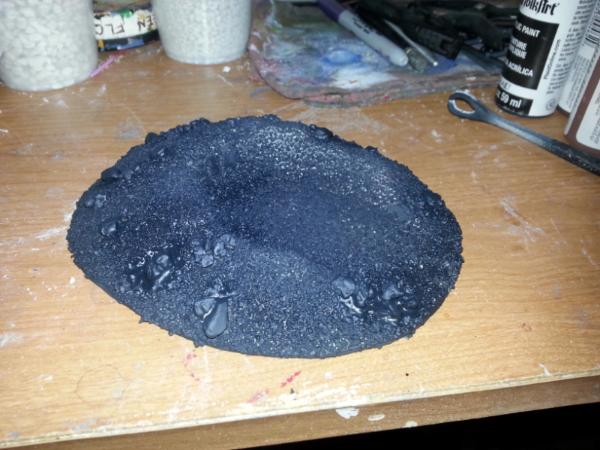
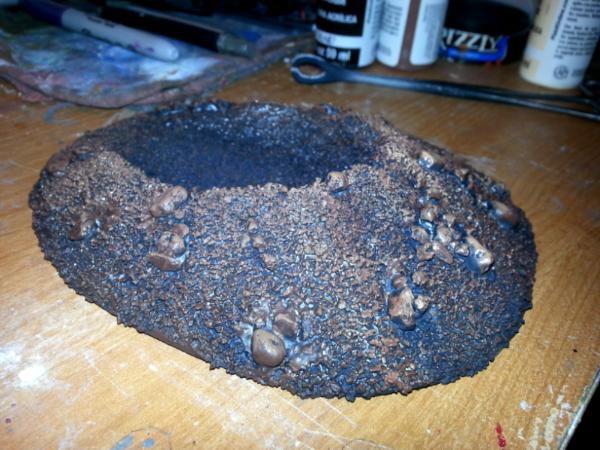
First step, primer it black. Once again, I use CHEAP black primer for this, not the good stuff.
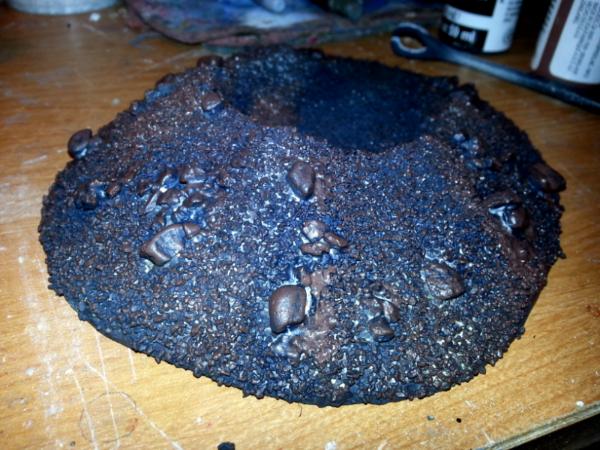
Next, I used a dark brown and gave the whole thing a very heavy drybrush
followed by a medium brown. I tried to go from the crater towards the outside with this and the following, lighter colors
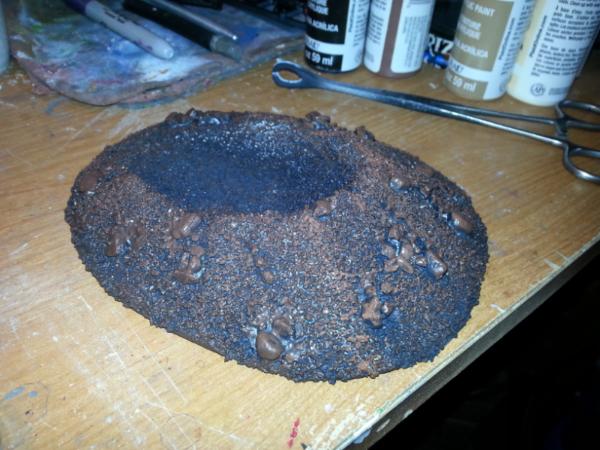
finishing up with a cream color (NEVER WHITE!)
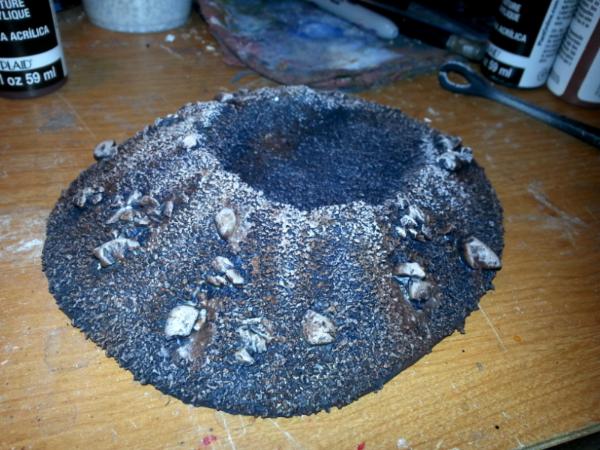
If you noticed, I kind of followed the high spots left by the foam with the highlights.
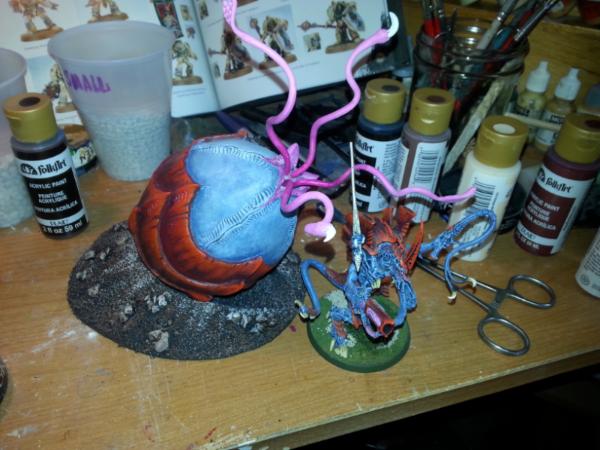
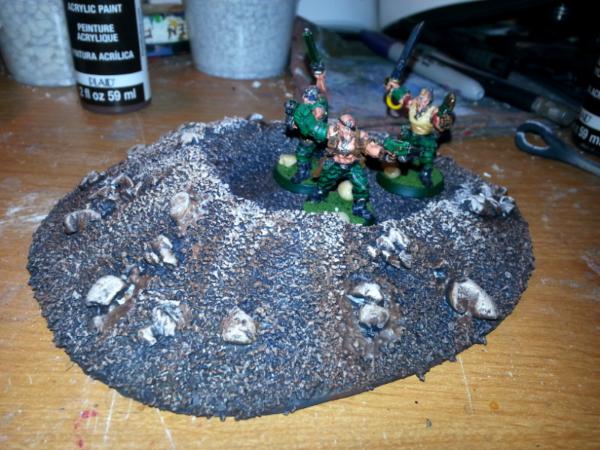
So there you go! You can use them to base your Alien Spore/Mycetic Pod, or as a good hiding spot for some Catachans!
Using these same guidelines, you can make all sorts of craters!
Questions/Comments are welcome!


 -3500+
 -1850+
 -2500+
 -3500+
 --3500+