Forum adverts like this one are shown to any user who is not logged in. Join us by filling out a tiny 3 field form and you will get your own, free, dakka user account which gives a good range of benefits to you:
No adverts like this in the forums anymore.
Times and dates in your local timezone.
Full tracking of what you have read so you can skip to your first unread post, easily see what has changed since you last logged in, and easily see what is new at a glance.
Email notifications for threads you want to watch closely.
Being a part of the oldest wargaming community on the net.
If you are already a member then feel free to login now.
2014/07/14 16:01:20
Subject: How To: Stormtalon Conversion (Aerodynamic)
If you are like me, you think that the GW Stormtalon is a giant flying turd; It's as if the designers figured that air resistance will no longer exist in the 40k century. However the concept of a airborne weapons platform is good, if the model could be made appealing. Enter the Dru. After some due diligance, i found a conversion online that was acceptable, but not quite there IMO*. After completing the first of two stormtalons, i wanted to chronicle my fairly easy and effective conversion. I will be breaking down the project into 2 areas: Conversion and Assembly.
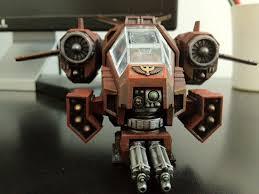
We are gonna go from this:
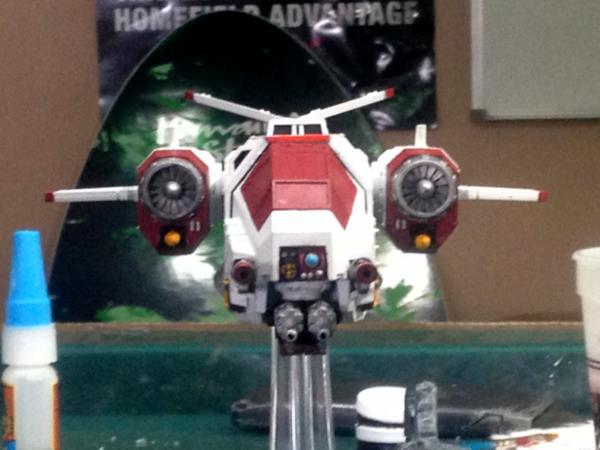
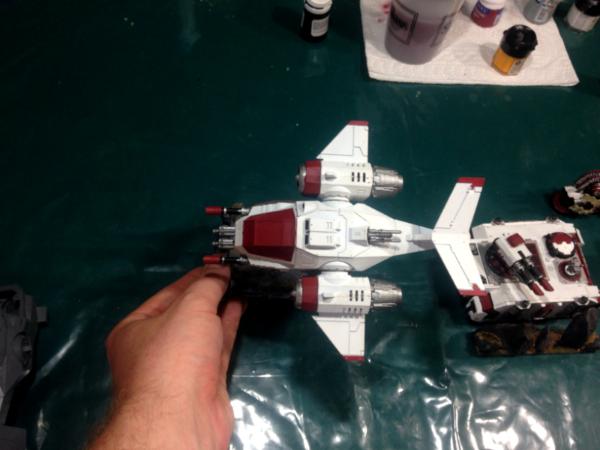
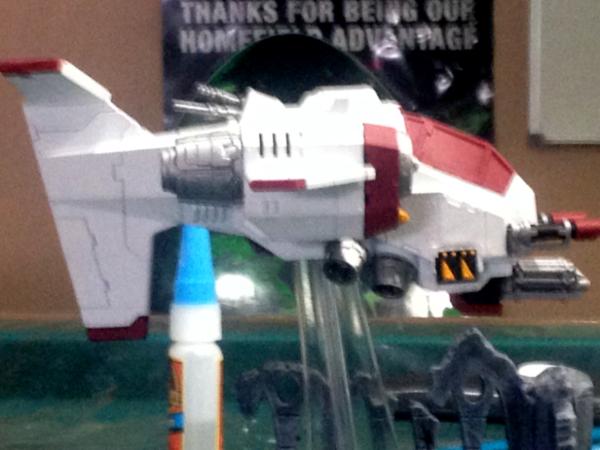
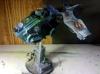
To this:
CONVERSION!
There are four distinct areas that you will be converting, The twin-linked assault cannon, The side-cockpit weapons mount, The engine compartments on the wings, and The tail's landing shoe.
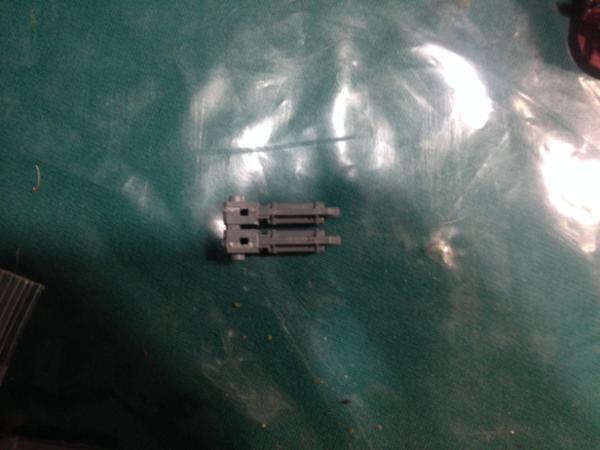
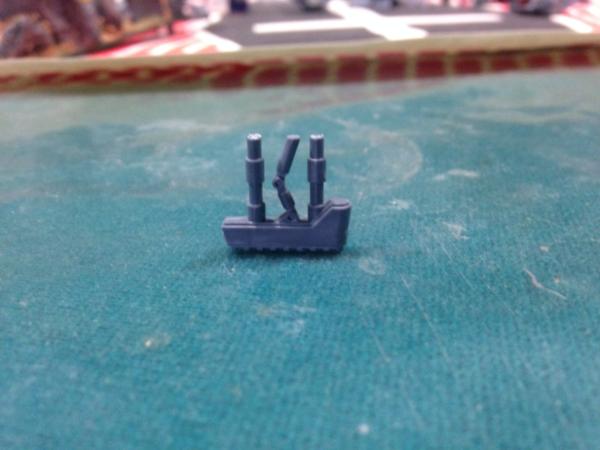
Twin-linked Assault Cannon.
Spoiler:
My problem with the original design is the amount of surface area added by this weapons mount, particularly when looking at the plane's silhouette. In order to accommodate the assault cannon without adding too much to the profile of the vehicle, I chose to ignore the vast majority of the weapons mount, and just glue the guns directly to the fuselage. This conversion will eliminate the need for Bits #5-8,72,73, as well as removing the pivot option of your assault cannon.
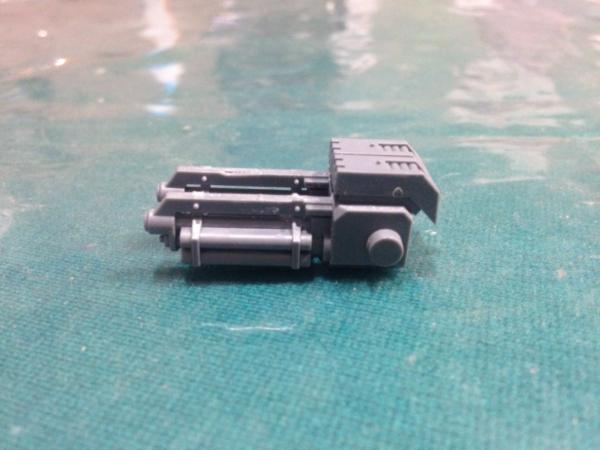
First, assemble the individual cannons, Bits #9+#10 and #11+#12, respectively.
Then, if you align the cannon so that the rounded pegs are 'out' you will notice that the assault cannons will notch into each others vents. Glue the two cannons together as shown.
Lastly, take the ammo hopper Bit #45 and glue it to the underside of the cannon assembly.
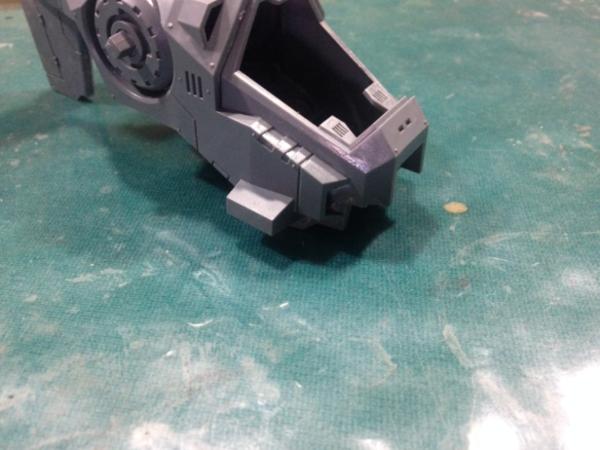
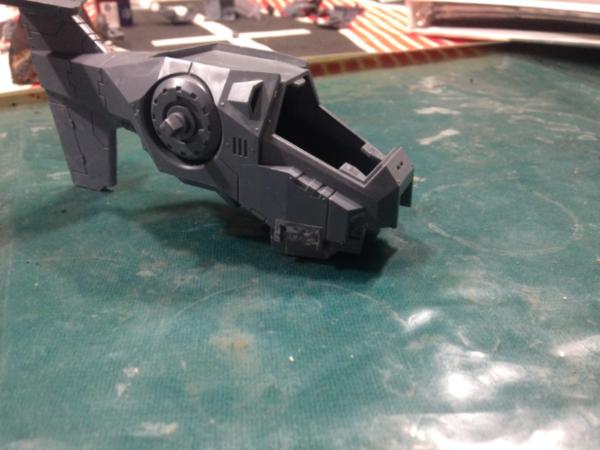
Side-cockpit Weapons Mount
Spoiler:
This was the second major problem for me, there is no reason that anyone would ever mount the weapons like they are designed, and that ruins the imagery for me. This conversion will eliminate the need for Bits #21, 22, 61-66, 68, 69, 84-89. They make excellent land speeder tornado upgrades!
Starting with the stock model.
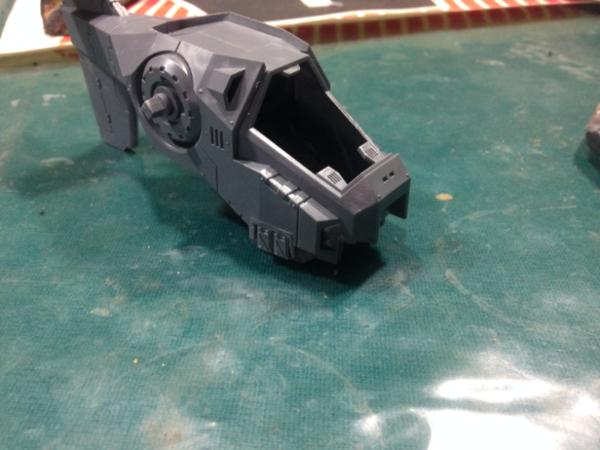
First, remove the blocky nodes that protrude from the side of the cockpit. (this is a soft plastic, but the cut is still fairly thick: use a heavy duty exacto knife, and be very careful!!)
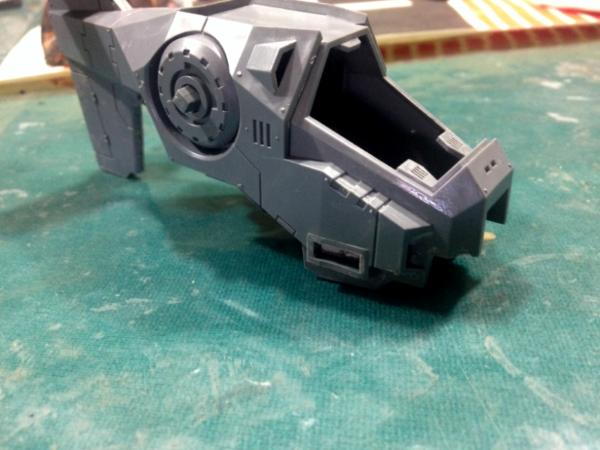
Now, remove the bottom edge of the rectangular opening.
Next, trim the back of the Lascannon batteries, BIT # 55+56, so that they will lay flat, and nestle into the newly created nooks.
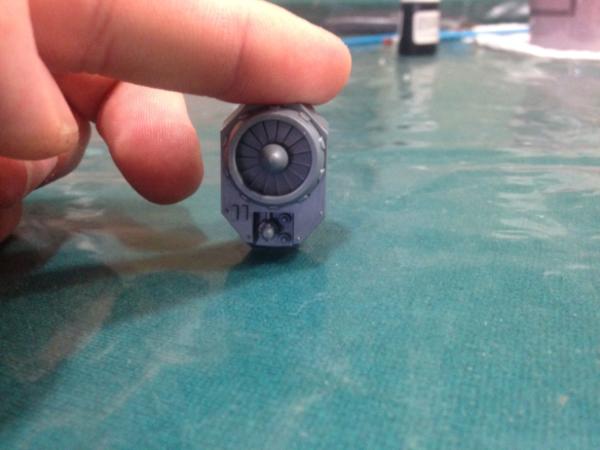
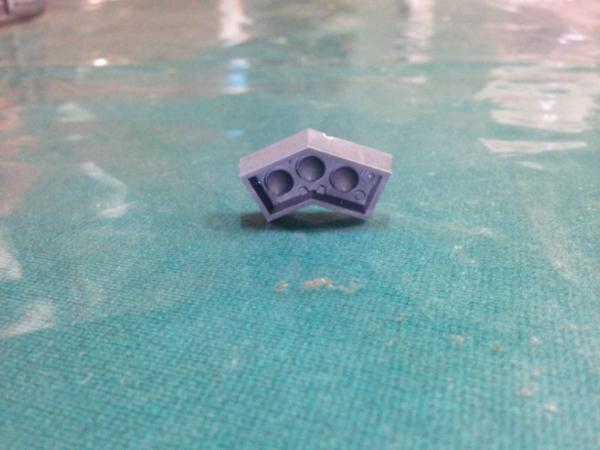
The Engine Compartments
Spoiler:
There isnt much need for conversion here, but rather finding the space to accommodate the missiles we removed in the previous conversion step.
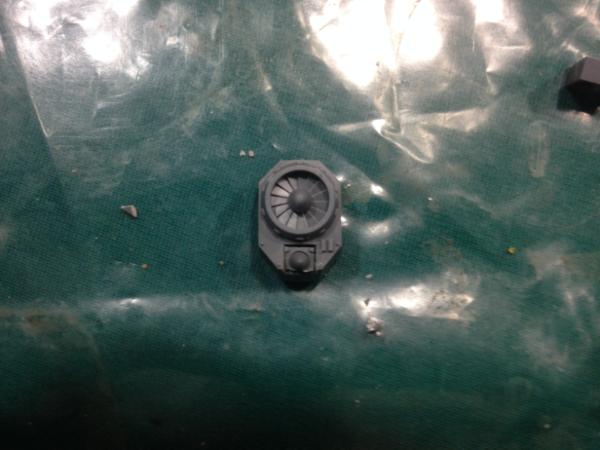
Starting with the stock model:
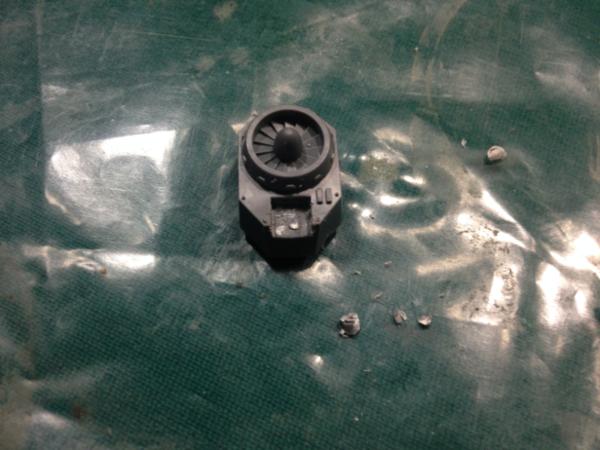
First, Cut/Grind the do-dads below the jet intake into a flat surface.
Then, Starting with the Stock Missile Bit #61:
Cut a missile from Bit #61 to fit inside the nook you just created. You can create missiles for both engines from one of the stock bits(this is a soft plastic, but the cut is still fairly thick: use a heavy duty exacto knife, and be very careful!!)
Last, slide the reduced missile bit into the nook we created in the engine compartment.
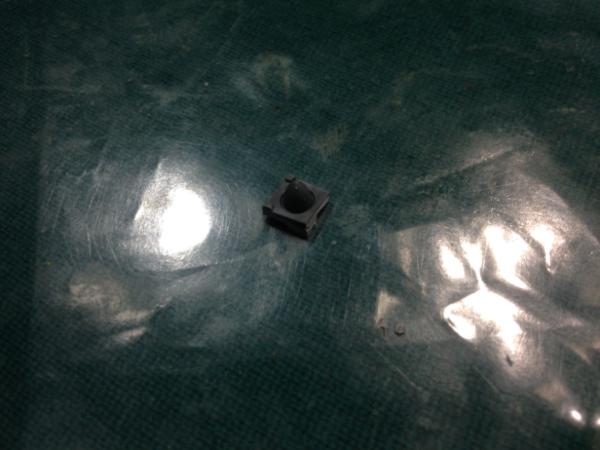
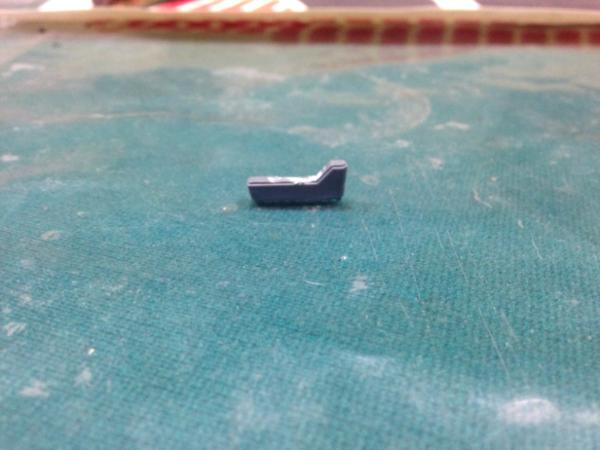
The Wing Shoe
Spoiler:
This is minor, but i wanted to include it anyway. The designed landing shoe is modeled in a landed position with the pneumatics deployed. this annoys me as the stupid thing is designed to be flying.
Starting with the stock piece Bit # 54:
Remove the pneumatic extenders, they make great bionics/techmarine doodads!
I'm not the best photographer, and ive never made a how to before, so im learning as i go!
General Advice on how to make a better Tutorial.
1.) Take PIctures of all steps before posting tutorial.
2.) Crop Photos before posting.
3.) Comparison Shots Since this tutorial is how to convert a Storm Talon to look different, it would have been awesome to have shots of a regular Storm Talon included as well, as a frame of reference, so the changes you made will be clear. There is no guarentee that your reader has more than a passing familiarity with what a Storm Talon looks like.
4.) Descriptive Title ThreadHow To Convert a 40K Storm Talon to be more Aerodynamic
Only thing that got to me here was the three weapon loadout bit. Surely you recognise that they can't mount all three guns? (the asscans, missiles and lascannons?)
Thanks for the comment! You are welcome to take whatever you want from the tutorial, even if you choose to focus on the negative. But, for the last time, stop calling me Shirley.
Fantasy: 4000 - WoC, 1500 - VC, 1500 - Beastmen
40k: 2000 - White Scars
Hordes: 5/100 - Circle of Orboros
Thats a good catch, and one that kind of illustrates how dumb the designers really were. The tail looks better (more aerodynamic) in a swept back position, similar to how we design planes today. However, the elevators were molded for the tail to sweep forward, which is just another totally backward aspect of the original design.
You are welcome to mold a proper tailfin (and mail me a couple!) But barring that, this is the best i could do with the materials on the sprue.
Fantasy: 4000 - WoC, 1500 - VC, 1500 - Beastmen
40k: 2000 - White Scars
Hordes: 5/100 - Circle of Orboros
2014/08/07 13:17:05
Subject: How To: Stormtalon Conversion (Aerodynamic)
Forward swept wings aren't necessarily unaerodynamic, they have pros and cons, the cons usually outweigh the pros for most aircraft, but they do have some aerodynamic benefits.
2014/08/07 13:31:53
Subject: How To: Stormtalon Conversion (Aerodynamic)
Keep up with your good works. The only beef that I have with the Imperial planes, is that they have to lift capabilities. the leading edges are a solid wind deflector. When I convert my WH40K planes I tend to round the leading edges to give it a semblance of lift. Thanks for sharing and waiting to see more.
Strength and Honor
Silveroxide
2014/08/08 13:32:35
Subject: How To: Stormtalon Conversion (Aerodynamic)
Wow guys, over a thousand views... and i have only been a dozen or so of those. I hope that you are getting something from this How To, even if it is just inspiration for your own projects! feel free to post any of Storm Talons that you construct with this template, or any improvements to my design!
Skink, im sure my terminology didnt help there... i was calling the horizontal stabilizers on the empennage "tailwings".
Silver, thanks for the encouragement. The weird thing with the 40k aircraft is that some seem legitimately feasible, and others are jsut so blatantly wrong. orcs for instance fly something to the effect of a hot-rodded p-51 mustang... which to me is vastly more advanced in terms of aeronautic understanding than the flying bricks the spacemarines bring to the table.
(Edit: words are hard)
This message was edited 1 time. Last update was at 2014/08/08 16:42:45
Fantasy: 4000 - WoC, 1500 - VC, 1500 - Beastmen
40k: 2000 - White Scars
Hordes: 5/100 - Circle of Orboros
2014/08/20 17:51:49
Subject: How To: Stormtalon Conversion (Aerodynamic)
Derp, i can definitely see the purple stripes now that im on a pc... ill refrain from commenting while on my laptop from now on: too much glare, not enough video card.
It looks great anyway!
Fantasy: 4000 - WoC, 1500 - VC, 1500 - Beastmen
40k: 2000 - White Scars
Hordes: 5/100 - Circle of Orboros
2014/08/26 03:27:37
Subject: How To: Stormtalon Conversion (Aerodynamic)
Excellently timed, I'm just on with my first talon now and am in the process of weaponising it (or more specifically figuring out how many guns I can fit on the model without killing the silhouette). This thread will do nicely as a point of reference, thanks!


 Pre Renegade Soul Drinkers 7,000+
 Khan's 3rd Company 1500+


 1850 0 - 0 - 0
 Marines 1850 1 - 0 - 0
 210 points Trolls 9 - 0 - 3