Greetings all! This is just a simple step by step tutorial on how I paint various skin tones and hair.
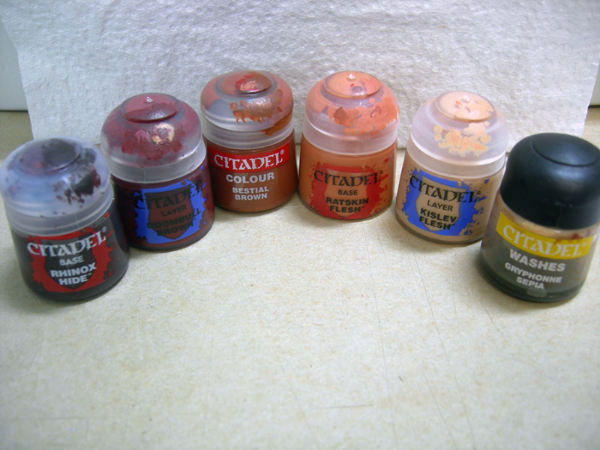
These are the colours I use for the different shades of skin: Rhinox Hide, Doombull Brown, Bestial Brown (or the newer equivalent), Ratskin Flesh, Kislev Flesh, and Gryphonne Sepia (or Seraphim Sepia) wash. You'll also need some kind of decent fine-detail paint brush.
First off, a darker skin tone!
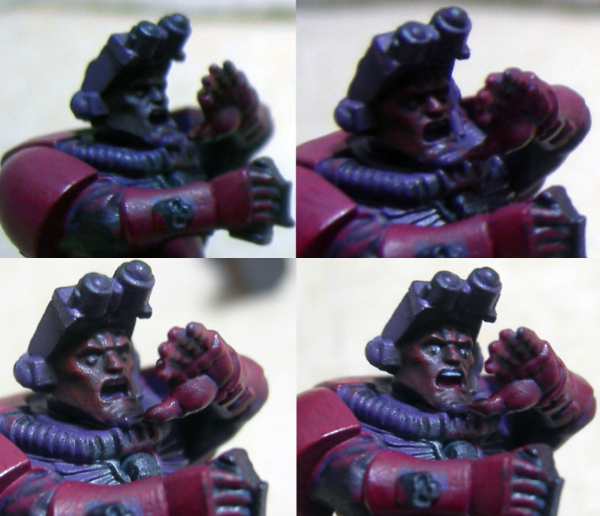
- First layer is Rhinox Hide for the base coat.
- Once that's dry, use Doombull Brown on the raised areas of the face. Make sure to thin your paint - it should be about the consistency of milk. Test it on a palette or even just the lid of your paint bottle first!
- Once that's dry, use the sepia wash to help blend the two colours together and darken the recesses. You can then carefully retouch the very highest areas of the face - such as the tip of the nose, the cheekbones, the edges of the ears, and the brows, with Doombull Brown again.
- The final step is those horrible fiddly little details like the eyes and mouth! I just used Scab Red for the inside of the mouth, then Shadow Grey and White for the teeth. I have no real advice for the eyes other than 'thin your paints!', 'use a really fine brush!' and 'practice/patience!', heh.
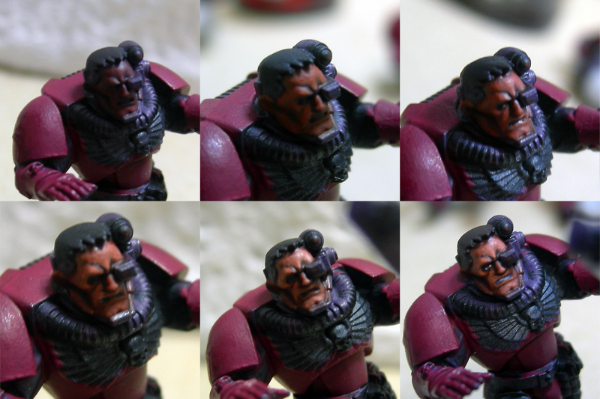
- Start off with the first two steps from the previous model - Rhinox Hide, then Doombull Brown.
- Next is a thin layer of Bestial Brown.
- Then a quick wash with the Sepia.
- Another thin layer of a mix of Bestial Brown and Ratskin Flesh on the higher areas of the face.
- Another Sepia wash, and retouch the very highest areas such as nosetip and brow with the Bestial Brown/Ratskin Flesh mix.
- Finally those fiddly little details!
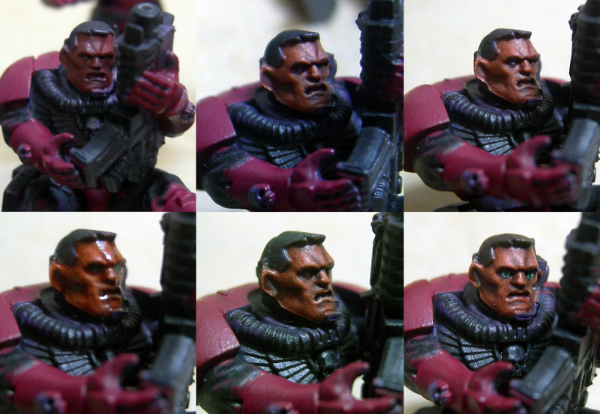
- I wanted this guy to have slightly lighter skin, so the base layer is Doombull Brown.
- Then a thin layer of Bestial Brown.
- Another thin layer of Ratskin Flesh.
- Sepia wash - I managed to get a photo of it while it was still wet. XD
- Retouch the highest areas with Ratskin Flesh.
- Then the final details!
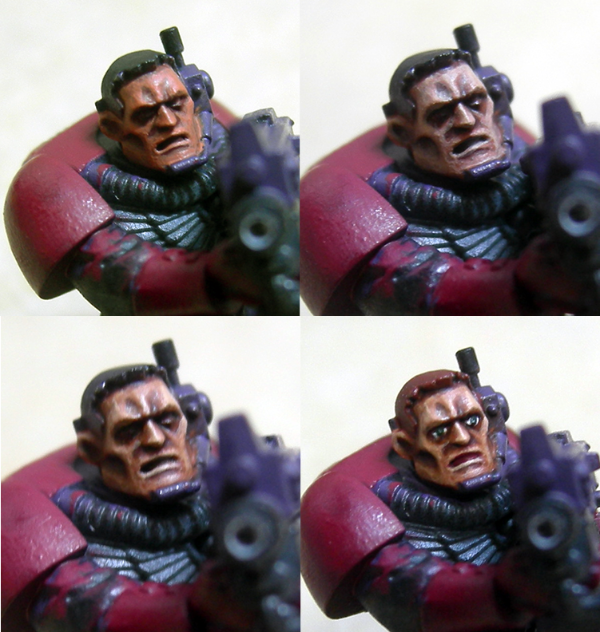
- First few steps are the same as the previous model - Doombull Brown base, thin layer of Bestial Brown, thin layer of Ratskin Flesh.
- Then a thin layer of Kislev Flesh to bring out the higher areas of the face.
- Sepia wash.
- Fine details!
Now for the hair! First off, brown-black and blue-black hair.
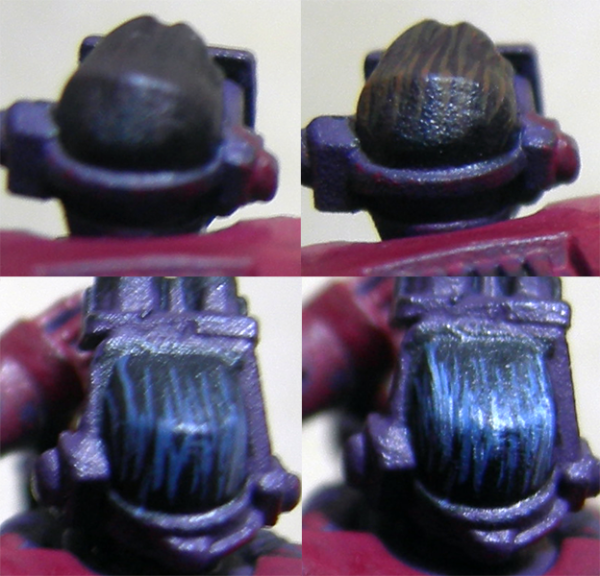
- Basecoat of black for both of them to start with
- For the brownish hair, add thin lines of Rhinox Hide, then Doombull Brown.
- Finally, add thin lines of Bestial Brown to the 'edges' of the head, to imitate highlights in the hair.
- For the blue-black hair, first add thin lines of Shadow Grey, then more thin lines of Shadow Grey/White mix.
- Finally, add very fine, short lines of White to the 'edges' of the head.
Brown hair!
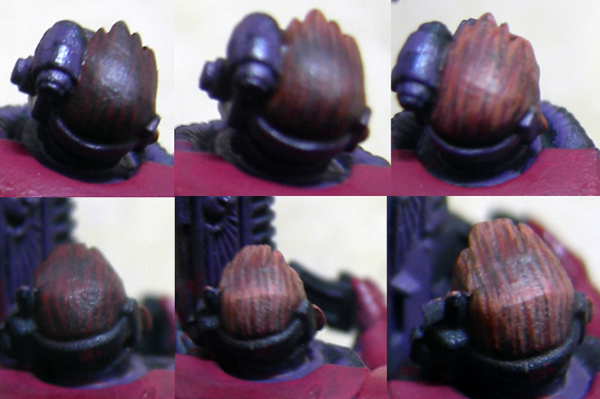
- Basecoat of Rhinox Hide for both of them, then thin lines of Doombull Brown and Bestial Brown.
- For the lighter brown hair I then added fine lines of Ratskin Flesh as well.
Red and Blond hair!

- Both of these started with a base of Doombull Brown. For the red hair, I then added fine lines of Red Gore, then Blood Red.
- Highlighted the red hair with fine lines of Troll Slayer Orange.
- For the blond hair, I used Bestial Brown, then a bit of Ratskin Flesh, then Ushabti Bone.
- I then added a Sepia wash, and carefully used a little bit of White for highlights.
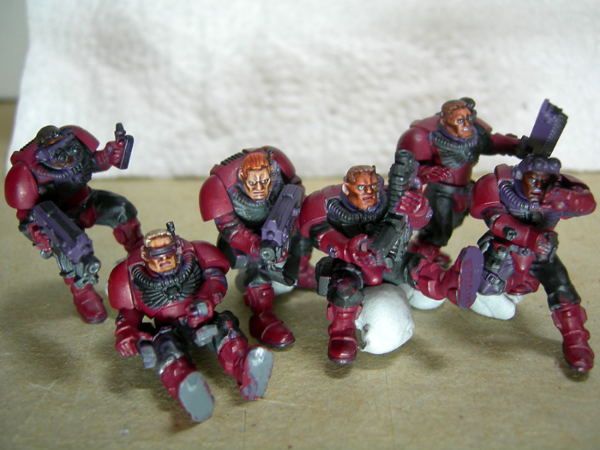
And here they all are with hair and skin (and NOTHING ELSE) finished!

I hope this tutorial is useful to you all. Comments and feedback are welcome!


 Hive Fleet Aquarius 2-1-0