So funny, Plunkenator -- I just saw your message on my gallery, and sent you a
PM, and then I saw this post immediately after! But anyhow, just so others have an idea of how I do it, here's a copy-paste of what I just sent

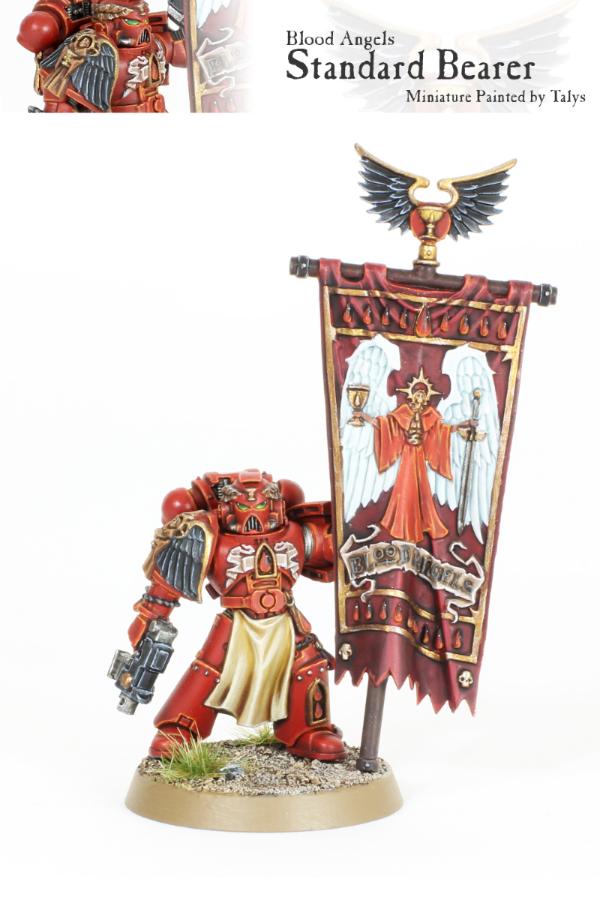
For reference, this is the cloth that Plunkenator asked about on my gallery --
The standard
GW formula hasn't changed since the "How to Paint Citadel Miniatures" book that came out with the paint range (note that this is not what I did). It's quite easy to do --
1. Basecoat Zandri Dust
2. Layer Ushbanti Bone
3. Wash Seraphim Serra
4. Layer Ushbanti Bone, avoid deepest recesses
5. Layer/Highlight Screaming Skull at highest points
6. Highlight very tips with White Scar
I find that this recipe is quite easy but can leave harsh transitions. This technique is really good for armor, but I think not so good for cloth, where the transitions should be softer, since you don't have surfaces with hard edges. If you want to use the
GW formula, I would highly recommend keeping your paints extra-thin at step 4 and 5 to avoid those stark vertical lines. Even so, where the usbanti layer meets the washed area leaves an unnatural looking vertical line,
IMO.
So, I basically do 1-3 the same. Then:
Step 4, I feather in Ushbanti bone on the highlights, blending it to the washed area. If you're not familiar with the technique, this is where you paint with a color, then quickly before the paint dries, paint the edge with a damp brush (with clean water) to soften it. If I mess up, I use XV-88 for the recess, and just do a little wet blend. XV-88 and Steel Legion Drab are pretty close to Ushbanti + Seraphim, at least close enough for a minor correction.
At step 5, wet-on-wet blend some diluted Screaming Skull to the Ushbanti Bone (you could just feather this too, and careful glazing is also a workable technique). Then, I do an extra step of highlighting I the raised ridges again with not-much-thinned Screaming Skull to brighten it a little more. I also edge highlight with Screaming Skull; for example, the bottom of the tabard.
At step 6, I do final highlights (only a tin bit!) with Pallid Wych Flesh instead of White Scar. I find it's a little softer, and gives a more natural flow to the cloth.
It sounds long and involved, but it's actually really fast and easy once you do a few (like, a 15 minutes, tops, if you're doing a bunch at the same time and not waiting for stuff to dry). Because it's cloth, you don't need ultra precision, and it's easy to cover up little mistakes. The first couple you do might look a little weird, mostly because you might accidentally go too far with one of the light layers, and overpaint the shadows. But with a little practice, it just comes naturally.
There are many cloth applications, and it's essentially the same process for just about any color (for example, the banner in my mini)
Hope that helps!!
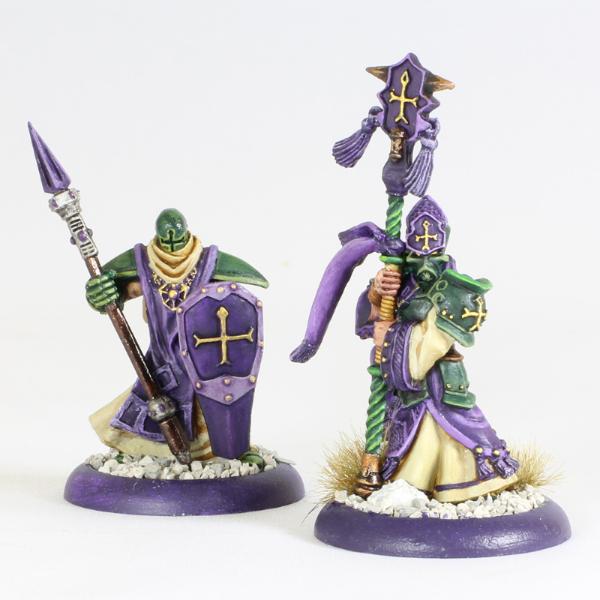
Edit -- For comparison purposes these minis were painted using the
GW recipe. You can see the harsher breaks visible on the sleeve of the mini on the right and on the folds both on the neck and near the shield on the mini on the left. It's still acceptable, I think, but "you get what you pay for [in time and effort]".