Forum adverts like this one are shown to any user who is not logged in. Join us by filling out a tiny 3 field form and you will get your own, free, dakka user account which gives a good range of benefits to you:
No adverts like this in the forums anymore.
Times and dates in your local timezone.
Full tracking of what you have read so you can skip to your first unread post, easily see what has changed since you last logged in, and easily see what is new at a glance.
Email notifications for threads you want to watch closely.
Being a part of the oldest wargaming community on the net.
If you are already a member then feel free to login now.
It's been a while since my last projects in 40k but I decided to work a bit on my sculpting skills. I will mostly work on random stuff just to try out new things and to work on problem areas (like heads).
My supplies should arrive at some point this week so that's when I can jump into the action (and hopefully start posting good WIP pictures).
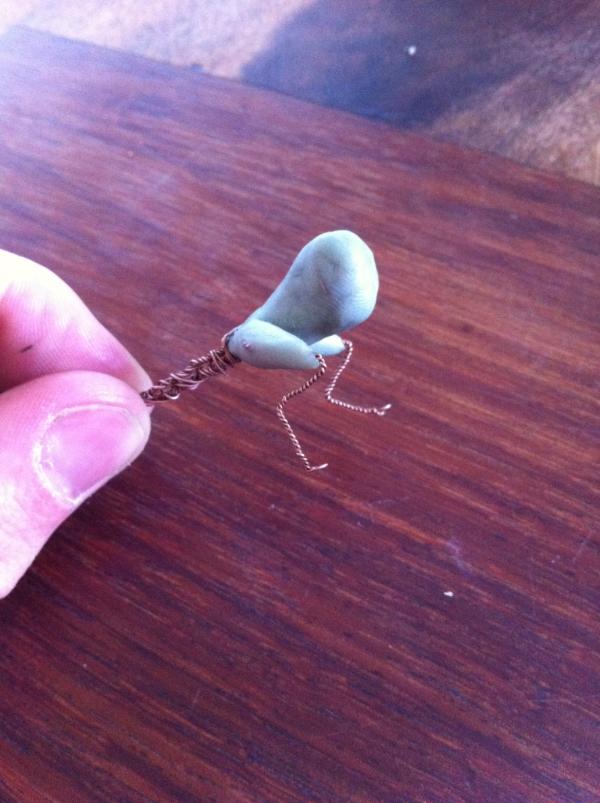
My first project will be a Pit Lord from Heroes of Migt and Magic V, simple because I always liked those guys. I'll try to upload some pictures of my armature so far.
This is the art that inspired the idea
This message was edited 1 time. Last update was at 2015/11/01 19:53:16
I'll be mostly using aves (I think it's called, I'll post a picture of my tools and puttys when I have them)
But I also got some regular green stuff to work with.
Care package finally arrived last night. So now I'll hopefully have a steady supply of WIP pictures, it'll most likely be small steps because I have no way to cure my putty faster. It's also very likely that I'll have more than one project running at a time so I can use my excess putty as well as actually being able to sculpt for an hour or two a day.
As promised here are some first pictures of what I was able to do last night.
I got some more bulking out done as well as another armature. I can't really go into detailed sculpting yet as I don't have a good lubricant (besides licking my tools which I don't really like) so I'll probably bulk out both models by the weekend and then get some more supplies.
@LeCacty
It's only a portion of my tools, I got heaps more back in Germany but to be honest I really only use 3 of them most of the time.
@Warboss_Waaazag
Yeah this'll most likely be baby steps in terms of progress. I'm currently in New Zealand for a work and travel year so I only get a little time to sculpt each day. By the time I go back I'll hopefully have a few sweet models to start a daemon army.
@Xendarc
It's always been my favorite creature in the game just because it was so unique compared to most others. The wings are just weird as they serve no purpose but still fit perfectly on the model.
*Edit: I'll fix the pictures tomorrow by uploading them to dakka, it keeps screwing up my attachments
Blowup doll head with added teeth and a bit of facelifting
A potential bloodthirster
My 3 most used tools
And again the chicken pit lord as it seems like I messed it up in the previous post
And at last a zombie head?! Wasn't supposed to turn into this but I think its still a good result
I think this should fix future picture problems.
@evildrcheese
Thanks, I hope I can supply a steady flow of WIP pictures to keep this interesting.
@Kahnawake
He's hilarious, I'm almost tempted to leave it @Xendarc
It's a bit to small for that, I honestly haven't given it any thought but I suppose you could use him as a chaos spawn maybe?! I will probably end up putting him on a little display pillar. If he turns out really well I might make a bigger version as a bloodthirster or khorne DP. (Khorne daemonkind anyone? )
Well I did manage to go into town and get some supplies today, I should be able to build myself a holder for my armatures so that I can work without touching the actual figure. As far as sculpting goes I didn't get that much done today. I only manage to do a bit on the head, the one with the mouth closed, I added some eyelids, made the nose stick out a bit more as well as adding some more putty to the forehead.
I hope I get more done tomorrow and then I'll show you pictures of the updated head as well.
@LeCacty
You know my plan was to leave an actual reply (not just a thanks or any other one word reply) to everyone replying to me here, but I have to say that it is kinda hard to find a proper reply to "Ha!". So I suppose thanks for your constructive criticism I do appreciate the fact that you left a reply tho, so I'll leave the decision to you if the mouth closed head should get any hair treatment and if so what kind you'd want it to be
This message was edited 1 time. Last update was at 2015/11/07 08:53:35
I think a closed mouth is fine. Your other spoilered pics of the two heads show that you can do that quite well, too. For hair... hmmmmm well I love me some nurgle, but I'm not entirely sure about the look you're going for.
I like seeing someone go step by step and I'm terrible at sculpting myself. When I've done better its been by going very, very slowly - one item at a time. I'll subscribe too.
Here is the finished head (sry for the bad quality, I'll try to take some better pictures soon). It now has a horn bursting from the left side, a spot on the right where the skin is open (kinda hard to see) and a little tentacle mout on his neck. I'm kinda happy with how it turned out.
I'll do se sculpting on my big guys after having some dinner and then show you guys the progress.
@LeCacty
I hope the head is to your liking, it's pretty much as nurgly as I could get it without bulking it up to much or cutting stuff away. I think for a really nurgle head I would've left the lower jar away and replaced it with tentacles and stuff hanging out.
@kestral
Thanks! Getting feedback and responses to my work really helps sticking to it too and practice is the way to go to actually get better at it.
I managed to do a bit of progress (spoilers pictures) as wells as finishing one upper leg of the pit lord. I'll probably give you guys some pictures of him when his legs are done.
Spoiler:
Here is Ed once more with his nurgle head, this time a different angle so you can see the spot on his right side.
A big axe for the bloodthirster, I hope I'll be able to sand it a bit otherwise I'll have to make a new one.
And here is the small open mouth head, now with a bit more depth to the face as well as teeth.
@evildrcheese
Ed it is then And thanks, do you mean the small or big head?
@LeCacty
Glad you like it, it was kinda hard to do because I didn't want to destroy or cover up to much of the head. I like to imagine that he suffered a big wound on his neck at some point and wasn't prepared to die from it so he asked for Nurgles blessing and BAM! Mouth with tentacles on your neck
Nice stuff. I'm trying to learn the dark art of sculpting too so I'll be watching with interest.
I've heard about but never used Aves. How does it compare to GS? Is it as waxy before setting like GS or is it like Milliput and dry rock hard when cured?
Well guys, sorry for the break in updates. I had quite a bit of work the last couple of days. I managed to do one leg of the pit lord as well as some work on a potential flesh hound counts as (pictures tomorrow but it's starting from the LotR Warg set) I might even be able to do a how to as I've captured every step I did so far but that depends on the interest one here.
The good news is that I managed to get a free day tomorrow (Yay!!) so I'll hopefully get lots of work on the pit lord done.
The reason he's going so slow is because I always have to wait for the putty to completely set, which wouldn't be to bad on it's own, but I forgot to leave the wire in his legs a bit longer so I can't clamp/ glue him onto anything so that I could work without touching him. This means it'll be as slow as it is right now until I got the legs and tail done and then I can just glue him onto something am work on the rest.
@Drone21c
Thanks! I feel like sculpting and converting is the best part of it all simply because you get to create your army exactly the way you want it. Aves is more like miliput as far as sanding and curing goes, it cures very hard and can then be easily sanded or cut. I personally feel like it's easier to smooth and nicer to work with than miliput. Greenstuff is stilly way to go for fine detail work but the best way in my opinion is to mix them both (50/50 was my last mix) together because then you get the benefits of both puttys. Oh and I think it's cheaper than green stuff too which is an advantage as well.
Well guys I definitely did some work today and it's only 1:30 yet! Unfortunately it has been a slow day for the pit lord again (I'm sorry guys, please don't hate me) but in return you'll get the promised flesh hounds/Warg pictures.
Those guys have definitely been fun to work on today and I'm already looking forward to finishing them. The idea is to make 2 left and 2 right sides just like the normal Warg model and then I could hopefully cast them (long way to go for that tho since I'm not home) and then have as many as I need. The advantage of the Warg set is that by sculpting two wargs in their separate halves gives you 4 different poses in the end. With a little converting or base variety you should be able to make each squad have unique members.
Last thing before we start with the pictures: the following images might be disturbing to people who really liked the original Warg model.
Spoiler:
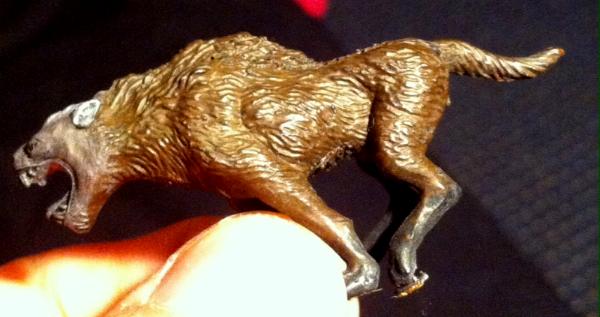
Here, just to refreshen your memory, the original Warg.
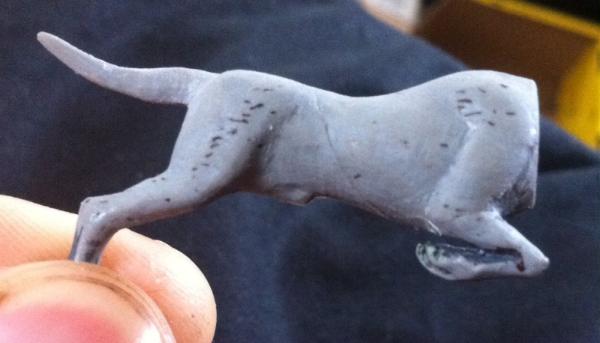
This Warg then had the mold lines as well as the paint removed. I might've removed a bit of detail in the process as well.
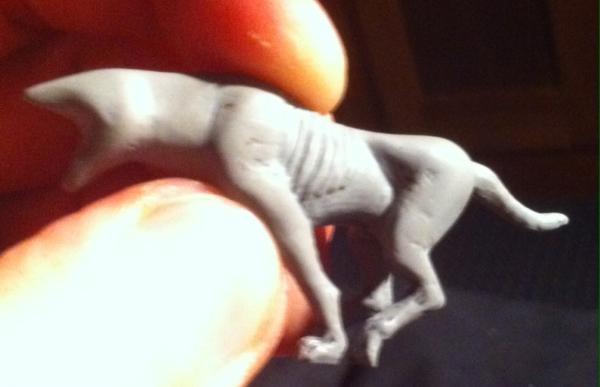
Next step was to add some markings for a ribcage because angry hounds are often starved to get wild.
After that we go in again with a small knife to carve out the ribcage and give it a bit of depth.
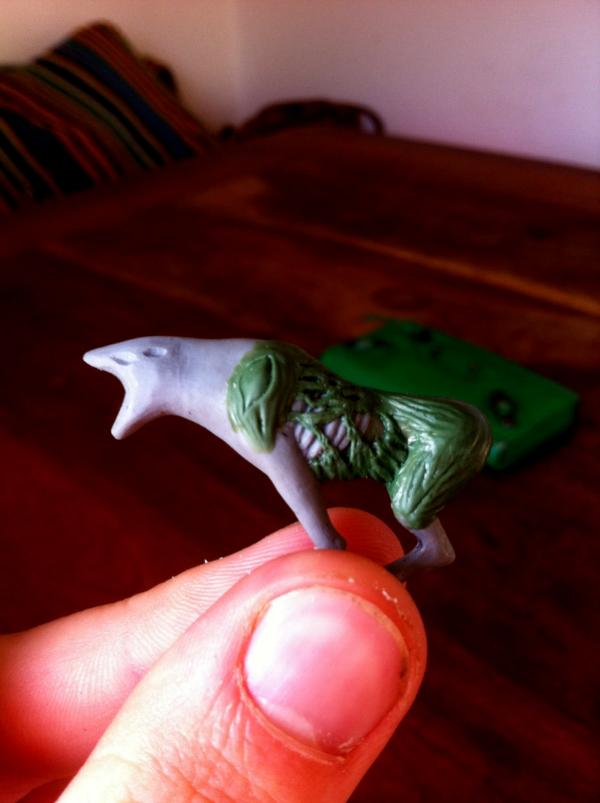
Now that we have a nice base armature that has an exposed rib cage we go in with out sculpting tools to work on it. I wanted my hounds to be a bit stronger than the normal Warg so I started by bulking out the shoulders a bit. I also started a bit of work on the stomach.
The next step was to finish up the torn stomach.
And my last step so far was bulking out the back leg as well as giving it some texture again.
That's how far the furthest developed of the 4 sides is. One side has the shoulder and stomach done the other two only got the shoulder done. The model will eventually be completely covered in GS. The head I want to leave as a surprise for you guys for now but the plan is to add a spine or something like that running down the length of the back so that there are no big flat areas. I'm unsure about the tail so far but I might just extend the spine into it and have a boney one?
Anyway. Let me know what you guys think of it so far!
@evildrcheese
I think that one still needs his teeth the axe is unfortunately already quite thick so it wouldn't look good if I would do the other side.
Next after the hounds might be some rat ogres turning into chaos spawns
Automatically Appended Next Post: Sorry for the double post guys, but I got the other sides up to the torn stomach step. I'll leave them drying until tonight and then maybe do some more work on them.
This message was edited 1 time. Last update was at 2015/11/13 02:58:49
Quick update for you guys. I carved out two eye sockets on each side so that I can start working on the head tonight.
@Warboss_Waaazag
Thanks! I found a picture online that inspired this idea as I found it to be perfectly fitting for some aggressive hunting/killing dogs (or dogish daemons mor likely). I'll probably post the picture when I have my hounds finished, that way it won't be to disappointing when I don't match it very good
This message was edited 1 time. Last update was at 2015/11/13 19:42:55