It's not hard at all. Here's my version, which isn't exactly the same, but it keeps the "flavor" of it:
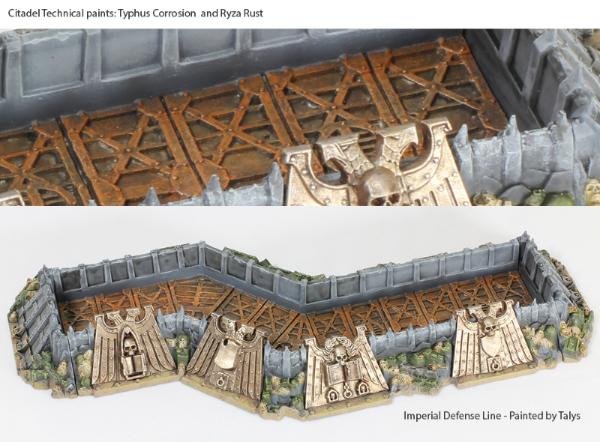
1. Basecoats - Mechanicus standard grey for the verticals, leadbelcher for the floor tiles and few guns in the front, zandri dust for the skulls, castellan green for the
IG parts (like helmets) and crates.
2. Do the floor boards - Wash them with Nuhln Oil (just drown it), let it dry, then gunk it up with typhus corrosion, let it dry (!!!!) and then drybrush with Ryza Rust. Use something like a business card to keep the much Ryza rust from getting onto the vertical stone parts. Be a little irregular with both technical paints so it doesn't look homogenous. Fix the stone parts that got orange on them with Mechanicus standard grey.
3. Washes - grey parts with Nuhln Oil, but more gently than the floor. Green parts with the green wash, and bone parts with agrax earthshade.
4. Drybrush - DB the stone parts with Dawnstone from near the color demarcation (but a little higher), work up to a stronger drybrush at the top. Drybrush the tops with administratum grey. DB the bone with ushbanti, then screaming skull. Fix any greens with bone db on them, then DB green parts with Ogry Camo.
5. Ground weathering - if you want to, drybrush the areas that touch the ground with your choice of browns or greys. I hit it with 3 layers of drybrush of varying colors to get a variation of dirt, grime, mud, etc.
6. Do the badges (which shouldn't be glued on yet) -- I used warplock bronze, drybrush runelord brass, agrax earthshade, then drybrush runelord brass again (but lighter). A tiny bit of Runefang silver. And then glue it together, and done


