Forum adverts like this one are shown to any user who is not logged in. Join us by filling out a tiny 3 field form and you will get your own, free, dakka user account which gives a good range of benefits to you:
No adverts like this in the forums anymore.
Times and dates in your local timezone.
Full tracking of what you have read so you can skip to your first unread post, easily see what has changed since you last logged in, and easily see what is new at a glance.
Email notifications for threads you want to watch closely.
Being a part of the oldest wargaming community on the net.
If you are already a member then feel free to login now.
2016/01/05 03:32:40
Subject: 1850 ITC game Tyranids Endless swarm vs Imperial super friends: scars/dark angels/ad mech
After the holidays, I'm finally getting another test game in. This is against a powerful tournament list. White scars, Dark angels, and ad mech all bringing the fun with cover ignoring shenanigans and fifteen drop pods. No that is not a misprint, 15 drop pods.
Well we can start with my list, it has changed as time and some competitive urges have prevented me from fielding a couple of the models. Don't worry though, the endless swarm is still the focus of the army. This will be a good test to see if I can manage time and psychic powers and still keep in time.
Dark Angels CAD Techmarine w/ Auspex 70
5 man Tac Squad/Melta, Melta Bomb Sgt 85
Drop Pod 35
5 man Tac Squad/Melta, Melta Bomb Sgt 85
Drop Pod 35
Dreadnought, Hvy Flamer Multi Melta 110
Drop Pod 35
5 Man Commnd Sqd, 5 Flamers 115
Drop Pod 35
Drop Pod 35
Drop Pod 35
Drop Pod 35
DeathStorm Drop Pod 75
DeathStorm Drop Pod w/ DP Assault 100
DeathStorm Drop Pod w/ DP Assault 100
WHITE SCARS CAD Libby lvl 1, Hunter's Eye Power Sword 85
5 man Tac Squad flamer 75
Drop Pod 35
5 man Tac Squad flamer 75
Drop Pod 35
This will be a great practice, I haven't had a chance to take on a null deploy army like this with my endless swarm. I know it gave me fits when I was rolling my Falcon drop bomb last TSHFT. The pods themselves are a pain because av 12 is difficult for me to deal with. Crazy right, nids have a tough time with smashing drop pods. The hunters eye white scar dude will allow my opponent to delete one of my units with the grav weapons. I can't bubble wrap far enough to cancel out those crazy grav cannons. 36" range on troops, oof.
Looking deeper at the list the hunters eye is my primary goal. If I have first turn I can get the flyrants in the air, and position them near the malanthropes. Bubble wrap should protect the bunker and at least one of the malanthropes. I'll have to place the other high importance models near the bunker as well. Perhaps a malanthrope near a board corner as well to spread out the shrouding and target priority. Drop pod traps will be in full effect, hopefully I can net a unit or two with that, or alternately force him to place his units too far away. Infiltrating spore mines will really be somewhat limited in this game if he does truly null deploy. Actually I believe he has three pods with no occupants....Ah allows him to drop more full pods in the first wave, or throw down dummy pods and keep full pods for the second set. That is a pretty neat list tactic, and I don't think I have seen it before.
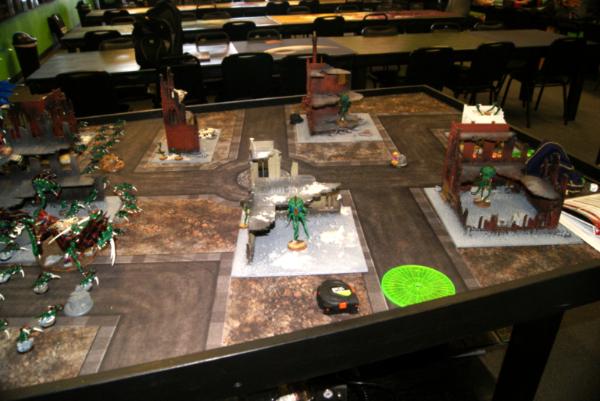
Deployment:
Spoiler:
Mission: ITC The scouring (Hammer and anvil)
Psychic powers:
Flyrant: (warlord/night fighting.) Catalyst, Paroxysm, Dominion
Sword-rant: Catalyst, The horror, Dominion
Zoat: Warp lance, Onslaught
White scars librarian: Prescience
My opponent won the roll off, but decided to give me first turn so he could scoop up the objectives last.
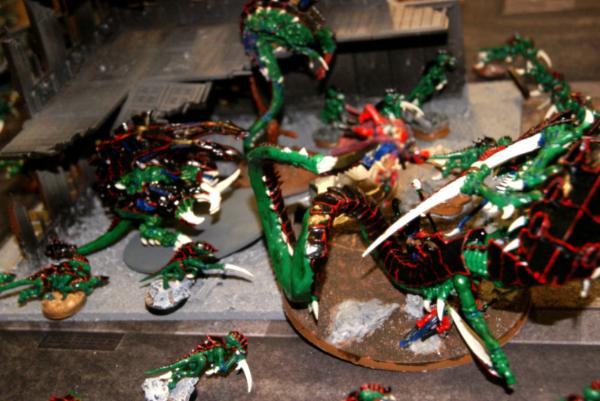
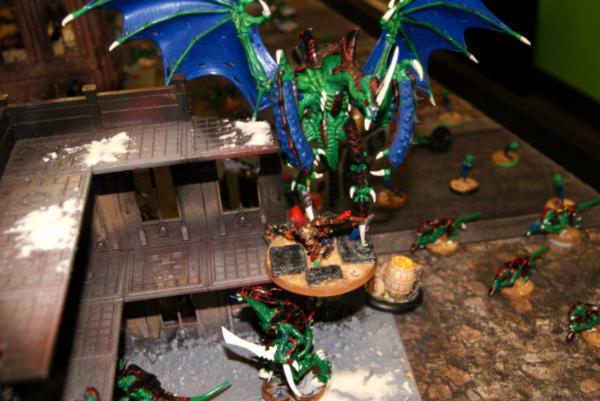
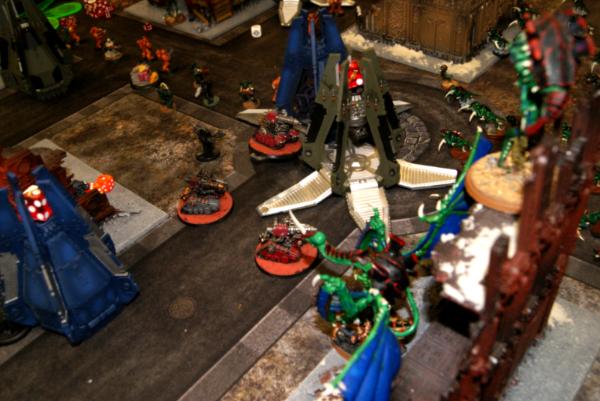
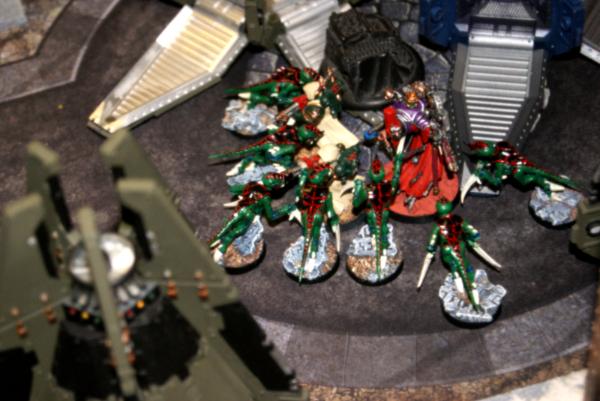
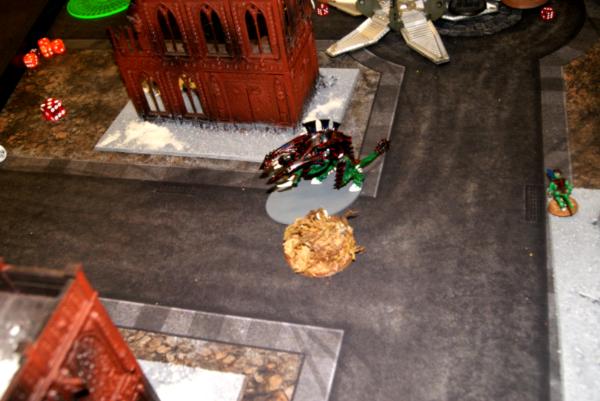
I chose my side of the board and laid out my bunker, placing the malanthrope inside, and the escape hatch 12" straight forward. Due to all the pods coming in I decided to deploy the trygon instead of deep striking it. I figured the more models on the board available for the counter strike, the better. Also it looks really sweet, so hopefully he would consider it a high priority target.
Said trygon went on the right flank with the second malanthrope. Far right flank in the ruins was the zoanthrope to act as a backup synapse, and keep it out of the primary targeting area. Super-fex was deployed near the middle behind the malanthrope, this gives me an option to go left or right towards those pod traps. Or to charge straight ahead if my opponent has a drop pod land close to my line.
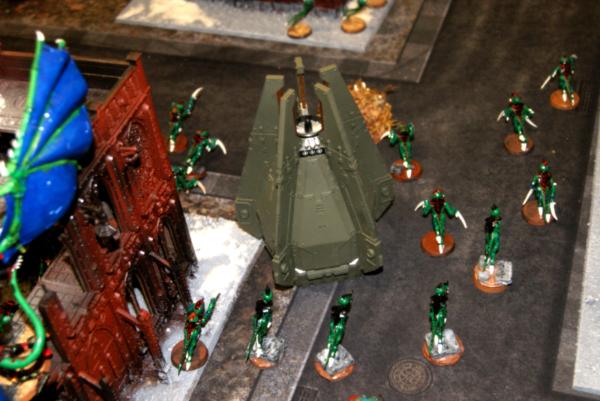
My opponent, being an all drop pod list, declined the opportunity to deploy, which allowed me to place mucolids and spore mines wherever I wanted. I placed all six squads with an equal spread to try and create a threat wherever he would land.
First turn:
Spoiler:
Nids missions: 4/5
Marines missions: 4/5
Tyranid turn one:
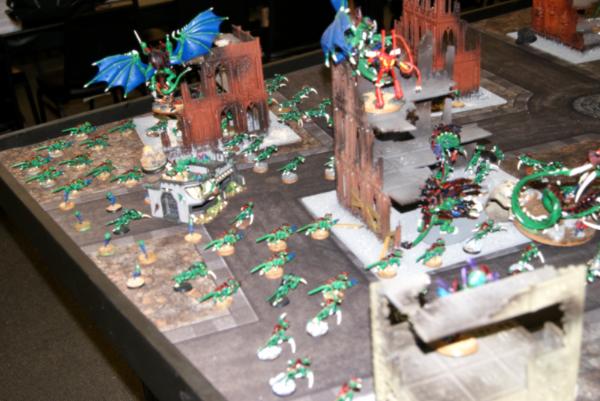
Having the first turn allowed me to have my flyrants on the table right from the start. I had placed them in such a way that I was able to fly at right angles along the board and stay within 6" of a malanthrope. Next turn they can both move upfield and attack whatever units he has brought out. If he had taken the first turn I likely would have had to keep the flyrants in reserve to keep them alive.
I left two pod traps near the bunker, hoping he would place a pod with melta weapons in one of those spots, or nearby and have them drift into that space.
I had control of objective 1 and 3 that were in my deployment zone. The only other actions I took during my turn was to use Catalyst on the flyrant/trygon, and on the swordrant/malanthrope. However, my warlord flyrant (the one without the sword) took a perils, a wound, but didn't fall from the sky.
Marines turn one:
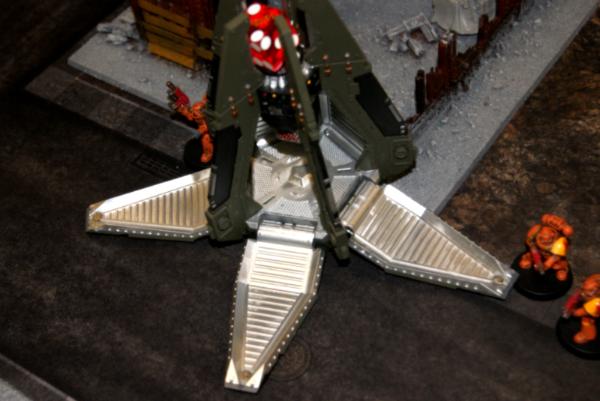
First pod landed in a pod trap, but it was a deathstorm drop pod. I did not realize they were able to fire D3 ignore cover large blasts at every unit within 12" So these two pods that dropped in were able to nearly pay for themselves by getting one or two shots at every unit that I posses.
The second deathstorm pod landed on my right flank, allowing it to hit all the gribblies and monsters over there. Not understanding the use of these pods cost me a wound on a warrior, about 15 hormagaunts, and about 10 termagants. They did nothing to my big guys.
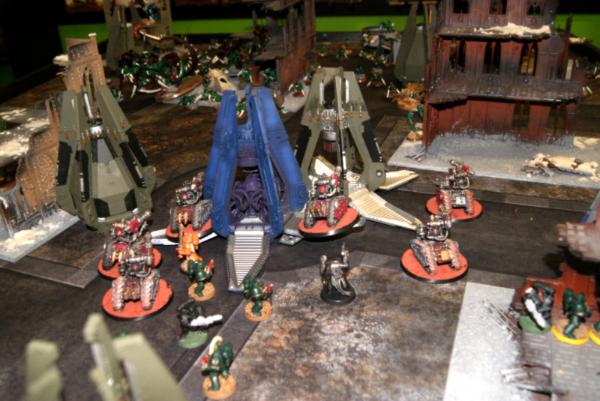
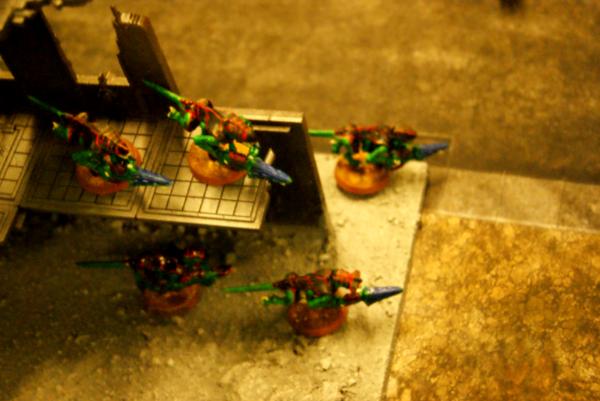
The larger portion of his drop pods came in near the center by the objective there, and a couple back in his deployment zone. Scatters were generally kind to him, although one pod landed in terrain and promptly failed its test, losing two hull points. Grav kataphrons with their friends unloaded in the center of everything. A couple of dark angel squads with melta weapons, and one with a flamer piled out.
His psychic phase was a theme for him the whole game. Rolling only a 1 he had the minimum two dice necessary to try and cast prescience. He did not succeed.
Aside from the deathstorm pods, his drop in group did very little. The grav cannons who had ignore cover due to the hunters eye missed half their shots without prescience, and managed all of 7 wounds. Normally that would be plenty, but having given him feel no pain in my turn, he promptly saved four out of the seven wounds. The other unit of grav cannons was unable to cause any damage to their target, the malanthrope, as they couldn't ignore his 2+ cover save. The rest of the space marine squads targeted mucolids and spore mines that were threatening his every flank. He managed to cause two wounds to one, and a single wound to another. One unit of spore mines took a casualty.
Wrap up:
Tyranids: 0
Marines: 0
Well I super misjudged the abilities of the drop pods, at least the deathstorm version. The firepower of the rest of the army was super underwhelming. No units were killed, and even the super death star with it's ignore cover cannons was unable to kill a big scary. Neither one of us got the kill an enemy unit that we needed, so that worked out. His dreadnought in a pod scattered off the table and went back into reserves, that was potentially a lucky roll, as the fex is about the only thing I have to deal with it. This is where the game really starts, and I look forward to getting some maelstroms accomplished, and start killing marines.
Second turn:
Spoiler:
Tyranid mission: 3/5
Marines mission: 3/4
Tyranid turn two:
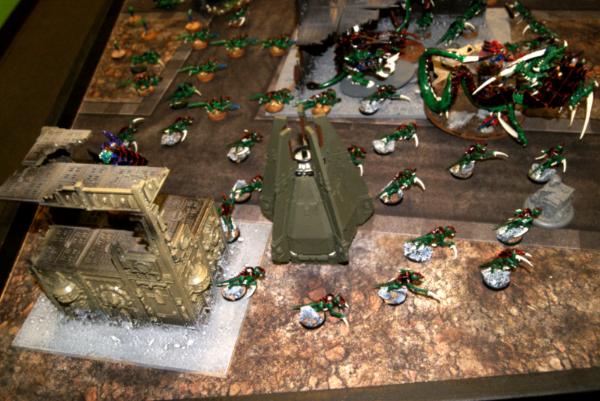
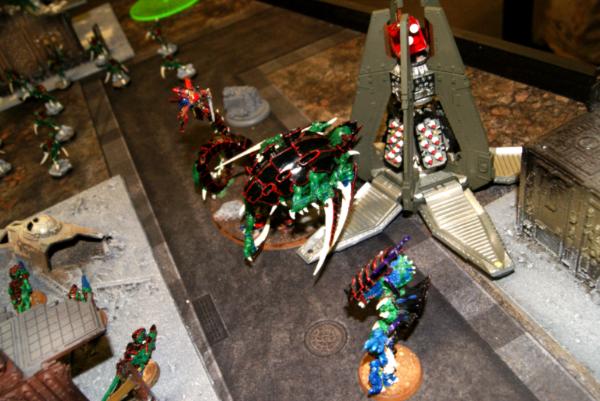
Two mucolid reserves did not come in, so on to the movement phase. The flyrants both turned and came up field towards the marines. Each flyrant targeting a squad of the grav cannons. The malanthrope in the box came out of the escape hatch and joined the now left flank flyrant with double brain leech worms. All of the swarm came running forwards as there were not viable charging targets for the gribblies. The warriors took up a solid position to provide synapse and fire their stranglethorn towards the massed troops in the center of the battle field. The trygon on the right flank set up to charge the deathstorm drop pod.
The sword flyrant attempted to use catalyst for itself and the right flank malanthrope, and failed. The warlord flyrant succeeded in using catalyst on the second malanthrope. The zoanthrope on the right flank attempted its warp lance to take out that sides deathstorm drop pod and failed. (This would be a theme.) A final charge was paroxysm at the grav cannon squad without the hunters eye, reducing them to weapon skill and ballistic skill 1.
biovores and stranglethorn fired, putting a couple wounds on the death star grav cannons. The flyrant was the star though, electro shock grubs caused the nearby drop pod to explode, killing a pair of my spore mines, but putting more wounds on his grav cannons. Six twin linked devourer shots managed to kill off the three grav cannons completely, although no wounds to the librarian.
On the other side the odds evened out and a full onslaught from the flyrant killed a single grav cannon kataphron.
The rapid shooting phase over, the more impressive assault phase began. A single wound mucolid died to over watch, but regenerated to come in next turn. Spore mines attacked the same squad and killed one marine.
On the right flank a mucolid was unharmed in its charge and killed all but the melta gunner, and took a hull point off the nearby drop pod.
On the right flank the trygon slammed into the drop pod, and using his mighty smash....did one hull point of damage.
In the center of things, the carnifex charged the most dangerous of the deathstorm drop pods, and failed the charge due to being in cover. (It wasn't until next turn I remembered that move through cover allows MCs to ignore the penalty when charging.)
Marines turn two:
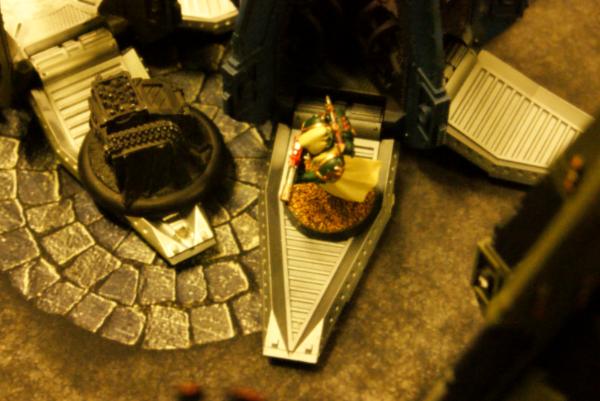
More drop pods came in, although many did not. Two empty pods became walls to help break up the incoming tyranid swarm, one of them landed in terrain and for the second time in a row failed it's dangerous terrain test. The marine command squad landed in front of the foremost hormagaunts and burned ten of them to a crisp.
The worst piece of luck however was the second entrance of the dreadnought. This time it scattered off the board and my opponent rolled a 1. Sadness as the powerful relic of the dark angels missed and went off a cliff.
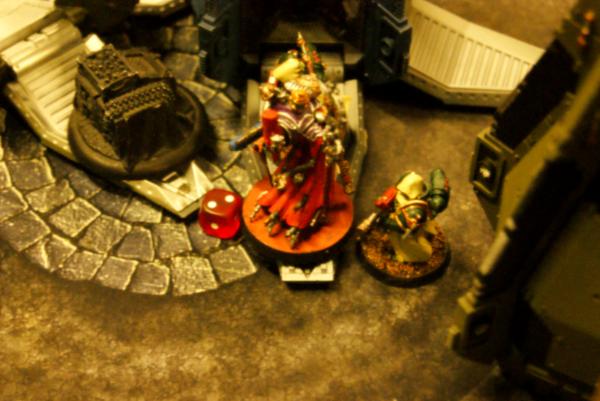
Aside from the flaming death of half a squad of hormagaunts, there was again very little damage. Deathstorm pods were able to kill a handful of gaunts and gants, put a wound on one of the warriors, but the rest of the army flailed away at mucolids and spore mines to little effect. The white scars librarian joined the other gravcannon squad since his had been shot away. However since they were BS 1, and he had failed to get prescience off again, he fired at the flyrant. Down a grav cannon platform, they only hit once, and feel no pain took care of the one wound.
In assault my trygon ignored the smash mode and instead glanced the drop pod to death using its weight of attacks.
Wrap up:
Tyranids: 1
Marines: 1
Numbers are telling at this point. My opponents high damage output units are fading, while my swarm is just approaching. There are a lot of pods in my way, but a steady diet of carnifex and trygon should start taking them out. I've taken heavy casualties, but currently outnumber him three to one. My mucolids continue to regenerate and I'll have three of them deep striking next turn. If I can get ahead of him on maelstrom I'll be golden.
Third turn:
Spoiler:
Tyranid missions: 1/6
Marines missions: 2/4
Tyranid turn three:
Spore mines and two mucolids auto deep strike, only one of the two in reserve come in naturally. Movement is pretty standard at this point. All the small beasties run forward except for those who can get a charge in. Two units of hormagaunts are ready to assault the dark angel command squad with dominus (warlord) attached. The right flank malanthrope also might be able to get in on this combat. My Flyrants flip sides of the board similar to the first turn, allowing one to fire at the command squad, while the second takes aim at the once more cover ignoring grav squad.
Warriors on the left flank step up into the ruins, affording them a better look, and putting two squads in control of objective one. A squad of gaunts and the zoanthrope move to secure objective two which is his goal. The carnifex moves within an inch of his targeted deathstorm drop pod, as does the trygon on the other side of the table.
Psychic phase is quick, catalyst for both flyrants and both malanthropes. (The zoanthropes warp lance still has not successfully gone off.)
Shooting is very ineffectual. One grav kataphracti tractor dies, a drop pod is glanced, and one marine from the command squad goes down, plus two wounds on the dominus. Assault is a little better as the hormagaunts make it into combat and three of the four remaining command squad flamers are dragged down.
The carnifex explodes his drop pod easily, and the trygon on the other side slashes his pod to pieces as well. Hormagaunts just fail their charge for the kataphrons. Most of the bombs deep struck this turn so were unable to charge.
Marines turn three:
Space marines begin to retreat from the swarm. A couple of empty drop pods arrive, landing farther back by the marine deployment zone. Marines and ad mech tractors move almost straight back six inches before preparing to fire again. The single remaining grav cannon targets a malanthrope, but only causes two wounds, one of them shrugged off by feel no pain. A couple of hormagaunts are shot, but the reappeared mucolids are drawing most of the fire power.
In the assault phase the lone melta gunner charges a bomb, causing it to explode on him rather then charging a larger squad next turn. The remaining command squad and dominus manage to kill off the hormagaunts that were left attacking them. They consolidate towards an objective and safety. The hormagaunts however make their roll and will be back.
Wrap up:
Tyranids: 3
Marines: 3
Lost my first actual unit this turn. Large bugs are closing in, shooty small bugs are getting in range. I'm walking him off the board much as planned. Regenerating bugs don't have the benefit of the trygon hole, but it was well worth it to keep the big guy in, I might have to consider that a better plan in general unless I expect to really rely on the regenerating gribblies. If the maelstroms set me up for success, I should start pulling away next turn.
Fourth turn:
Spoiler:
Tyranids missions: 1/4
Marines missions: 3/4
Tyranids turn four:
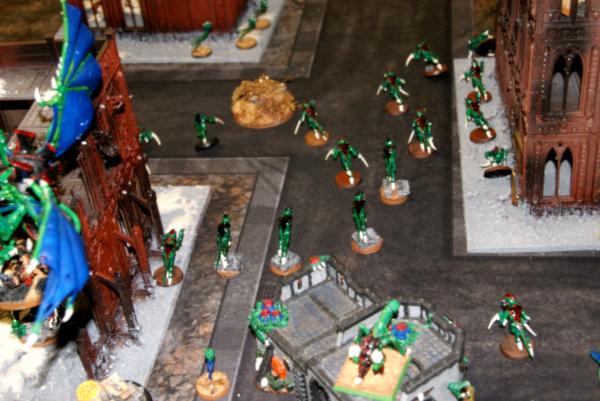
Squad of twenty hormagaunts walks on and immediately goes into the bunker. Next turn they can pop out nearly mid field after their run. I have three units including the warriors currently securing objective one, while two squads of termagants are making there way to mid-field.
I still haven't needed to take an instinctive behavior test. It's time for the retreat to be wrapped up so I push a flyrant deep into his deployment zone on ruins in the middle. He is now behind everything he has and will either circle around them to board right and still be able to hit them, or land next turn to take control of an objective. The other flyrant moves to deep in his territory on the right flank, effectively boxing in a set of marines there. Trygon moves up towards board middle in support of hormagaunts and a malanthrope. On the left flank another squad of hormagaunts and a malanthrope are trailed by the carnifex who has one more deathstorm drop pod to snack on.
Sword flyrants catalyst is denied, so the warlord flyrant shares with him, continuing the flyer durability as much as possible. Zoanthrope once more can't develop psychic powers.
Termagants that had made it forward through ruins fire at the Dominus and remaining command squad. One flamer dude left.
Shooting from blasts is ineffectual as the marines are now scattered and hard to reach. Sword wielding flyrant shoots the last kataphron to death, still leaving the librarian alive somehow. Other flyrant kills a couple of marines.
In assault the carnifex dutifully eats his pod and is set up to get to mid board next turn, planning on charging the one objective secured drop pod that is left.
A deep struck mucolid charges into a pod detonates, fails to damage the pod, but kills two nearby marines.
Marines turn four:
15 remaining marines and 7 drop pods, the pods stay put, the marines all move towards their deployment zone, except for the tech marine who strides forward to take on the left flank malanthrope by himself. Gun blazing he charges in and is promptly wrapped up in the malanthropes grasping tail. Malanthrope misses all of it's attacks, and the marines one swing whiffs too. So much for glory. To add insult to injury, the one wound the malanthrope had taken is healed. All other shooting results in two dead hormagaunts.
Wrap up:
Tyranids: 5
Marines: 4
At this point I feel really good. I have a couple squads about to assault. I can clear him from the center of the board with my big monstrous creatures next turn, and my flyrants will likely land to start controlling objectives. I have to kill three marines, and one drop pod to have control of 4 objectives. (He doesn't have models to contest close enough.) As it is, I control 3 and he controls 2. I finally pulled ahead in maelstroms, and should be able to continue to do so as the game winds down.
Fifth turn:
Spoiler:
Tyranid missions: 4/6
Marines missions: 4/5
At this point due to time and such we called it a tie. If we'd completed turn five it was conceivable that he would have 2 objectives, I would have 2 objectives, and we would be contesting 2 objectives. I was happy with the result, and we both agreed that if the game had run through six turns, it likely would have been a tabling. All in all, a really good game.
Sixth turn:
Spoiler:
Game over.
Seventh turn:
Spoiler:
Game over.
Final thoughts:
Spoiler:
Well, the new version of my list unsurprisingly points to flyrants being good. Shock right? The psychic phase really didn't have a great impact on the time it took to play the game, while at the same time it had a pretty massive impact on the outcome. Feel no pain was key right from the get go. I think using it on the trygon made it the primary focus of my opponents death star. Killing a malanthrope likely would have been much more important for him long term. Even without the trygon though, that would have been a deathstorm pod and a couple of normal pods that I couldn't remove. Zoanthrope sure wasn't doing its job as far as warp lance goes. However, it did give me more synapse. Three out of my four games synapse has been no problem now. Suppose it's time to get into the nitty gritty.
Deployment:
The idea of pod traps is great....if your enemy doesn't have deathstorm drop pods. Plugging those holes would have been easy and could have saved my gribblies a lot of wounds. Although tempting them to be close enough to be carni-snacked also had its benefits. Although if they had been out front of my units, all of my monstrous creatures would have been charging towards the enemy strong points instead of laterally wasting time. Everything else I was really pretty pleased with, even the trygon did well.
First turn:
Nothing I really could have done here, flying and psychic powers. He had nothing on the table. Do it again I might have extended up the board a little with my gribblies to push closer to where his units would come in. I didn't want to open up my deployment zone though.
Second turn:
My carnifex is at mid field at turn four with one more pod destroyed if I had remembered the way move through cover works in assault. That was the largest glaring mistake. I also could have worked a little harder in getting both flyrants in a position to shoot at the white scars librarian. This turn was the closest I came to getting rid of him, and while that wouldn't have had a huge change in outcome, it would have freed up my fliers somewhat from hugging terrain.
Third turn:
I deep struck mucolids into the open instead of in ruins because I wanted to spread them out. No other reason. With no str 6 blasts that ignore cover there was no reason to avoid bunching up a couple of mucolids. If anything gathering my spores together has worked well to confuse opponents and force him to overwatch the unit of my choice while other more dangerous units charge.
Fourth turn:
The tide had turned at this point and I was shepherding him into an open space where I could shoot and assault him to pieces. The return of the hormagaunts would only have an effect on turn 5 or 6 due to the lack of a trygon hole. It's really tough to get across the board in hammer and anvil and that is something I should pay attention to even against a drop pod army.
Fifth turn:
Never really happened even though we rolled for objectives. The rosy hued tint of a week or so has colored my perspective to believing that I really had this game in the bag at that point. On the other side of the coin however, he did have a handful of objective secured units, including at least one pod that was sitting on an objective. I could reach it with both the carnifex and trygon though.
Final, final thoughts:
We discussed alternate deployment options he could have had, putting down units and dropping his pods in as a wall. Could have worked, but it would have been very susceptible to the flyrants templates. It also would require none of his pods scattering away from the line. I think the tyranids aside from my mistake with deathstorm pods was pretty solid. Speed was not up to tournament par, but I was a hurting unit. Even so we got four turns in less then three hours including a drawn out set up period due to me unpacking from my box. Psychic powers can be such a powerful bonus, its important for the nids to have it even at the concern of slowing down the game. Next stop should be TSHFT itself. I'll bring camera and such and we will see how it goes.
This message was edited 8 times. Last update was at 2016/01/12 23:43:28
~seapheonix
2016/01/08 06:32:28
Subject: 1850 ITC game Tyranids Endless swarm vs Imperial super friends: scars/dark angels/ad mech


 7000
7000
 5000
5000
 1000
1000
 3000
3000