Switch Theme:

Project Log - Stompa #2 Big Mek Stompa  [RSS] Share on facebook Share on Twitter Submit to Reddit
»
Author Message
Advert


Forum adverts like this one are shown to any user who is not logged in. Join us by filling out a tiny 3 field form and you will get your own, free, dakka user account which gives a good range of benefits to you:
  • No adverts like this in the forums anymore.
  • Times and dates in your local timezone.
  • Full tracking of what you have read so you can skip to your first unread post, easily see what has changed since you last logged in, and easily see what is new at a glance.
  • Email notifications for threads you want to watch closely.
  • Being a part of the oldest wargaming community on the net.
If you are already a member then feel free to login now.


Made in ca
Sneaky Kommando


Canada

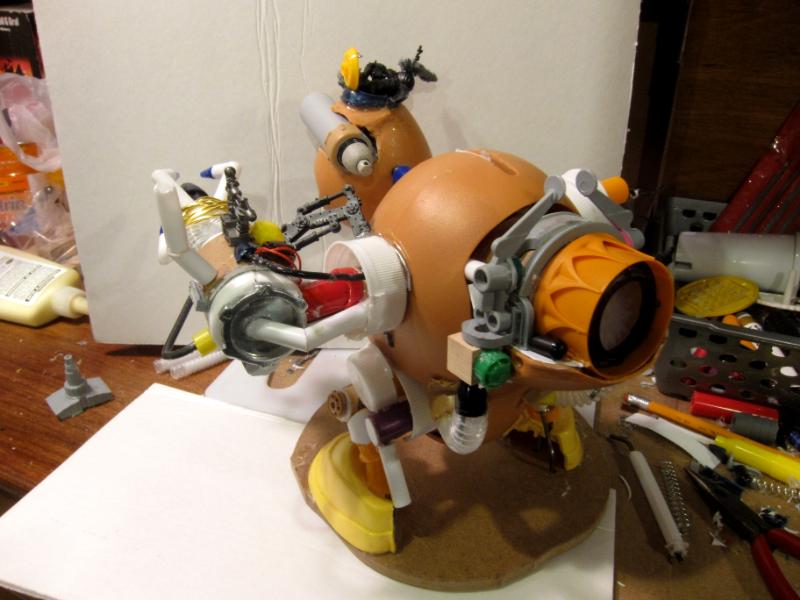
So I had posted images of a potato head stompa I built this year. I'm going to do another (I introduced the second in this post 
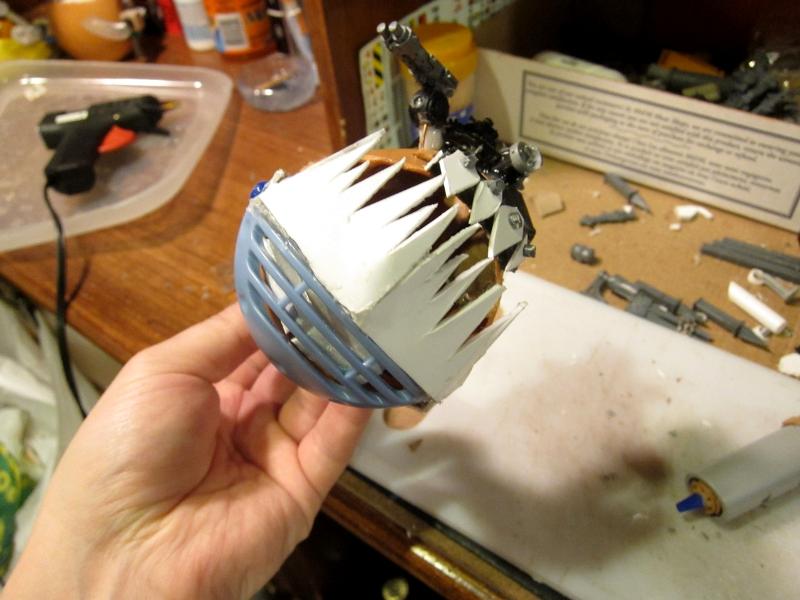
http://www.dakkadakka.com/dakkaforum/posts/list/677377.page#8403225), but I want a separate project log for this model as it's going to be its own thing. For one, because the first was unashamedly a reproduction, and I wanted to be sure to give credit to Irondog's original work in the title of that thread and in the body. Here, while I'm inspired by Rabtar's inverted potato head for the body, I'm going to go in my own direction with this model. Second, as you'll see from the images below, I'm changing my original design a bit. I've ripped apart the head, and cut a hole for a BIG deff kannon in the belly, and I'm going to rework the arms and weapons entirely.

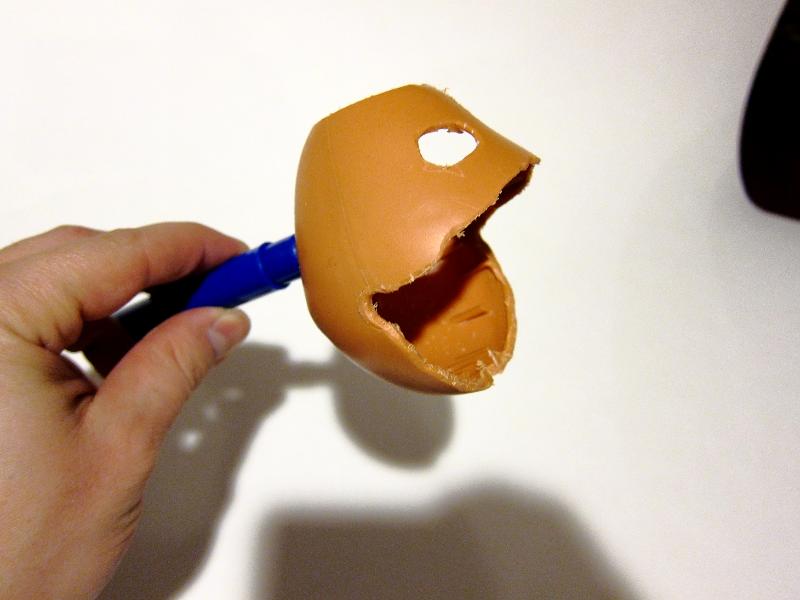
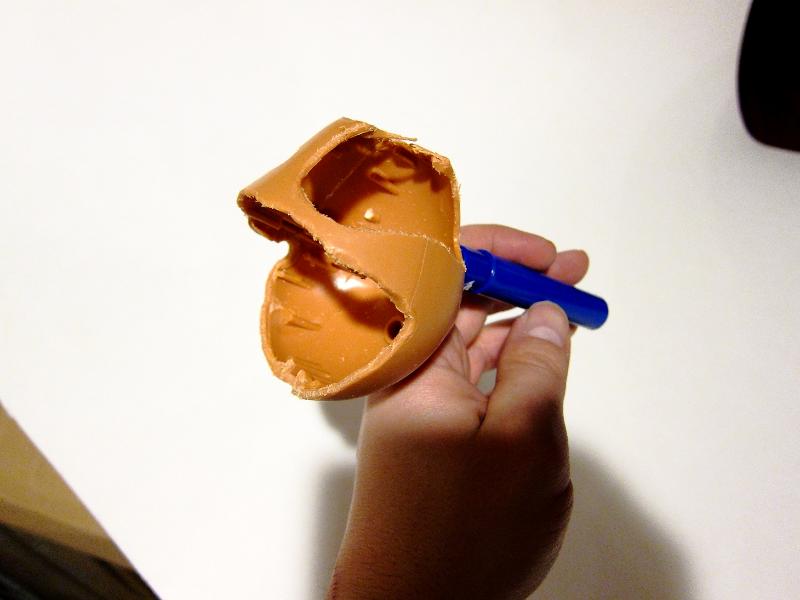
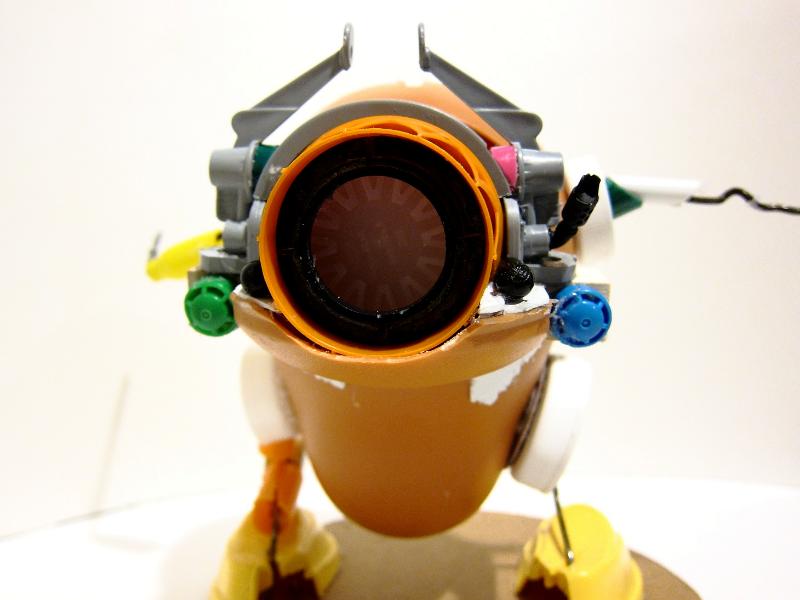
For the head, I originally just slapped on a turret/crows nest and some teef. But the teeth bothered me . They looked a bit 'tacked on' to me - even the two right/leftmost teeth were literally on the outside of the 'ring' of teeth - it looked really lazy 
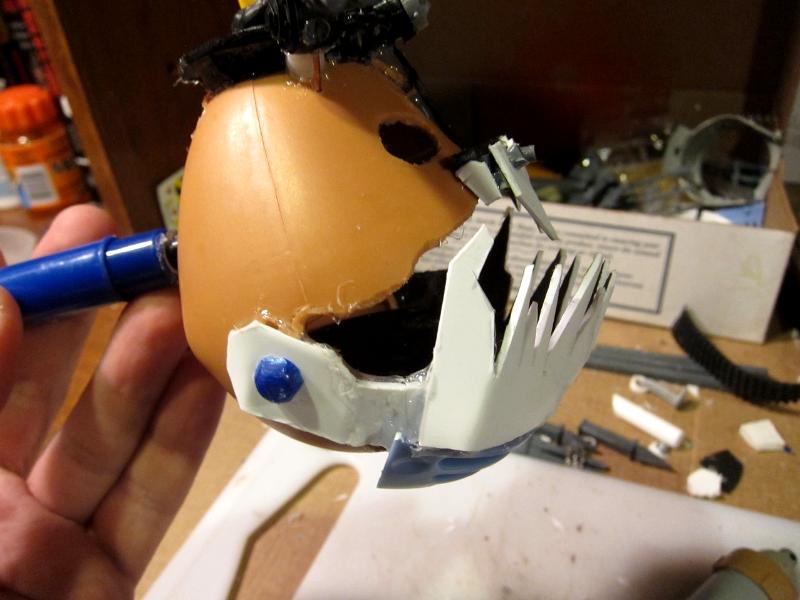
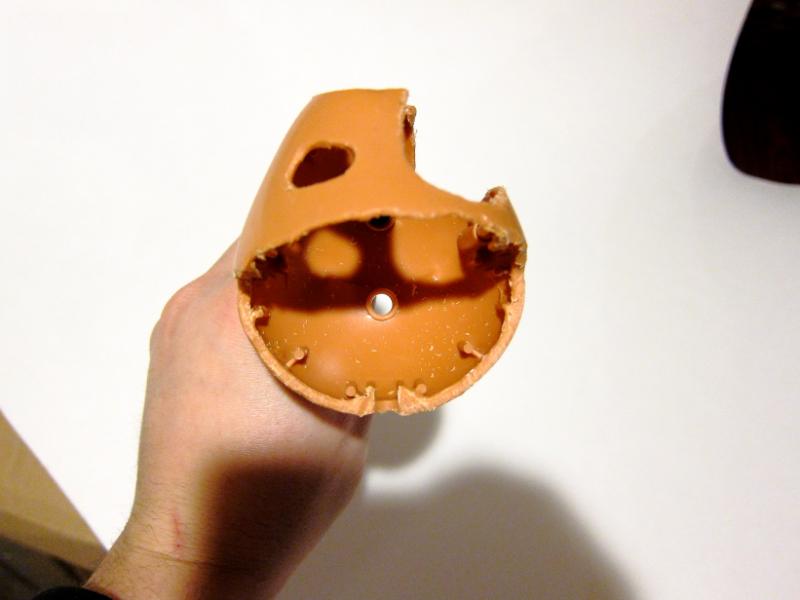
. The right idea, but not a good execution. The crow's nest is still an idea I liked, and I've kept the build/piece, but for now i've removed it to make room for something else I've decided. I opted to cut a huge hole for his mouth (fully 25% of his head) and a chunk out for this eye piece. Right now he looks a bit like a muppet, but I wanted enough space to make a large chompy mouth with big teef!


a face only a parent could love.


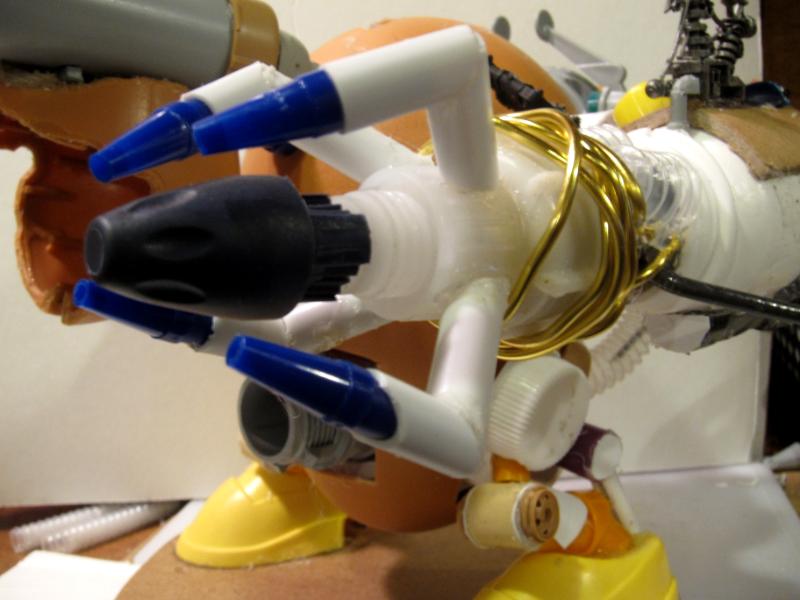
I've also carved out the side of his head and left eye socket, because I plan on installing a large cylinder I'll use for a big eye (for his gaze of mork).


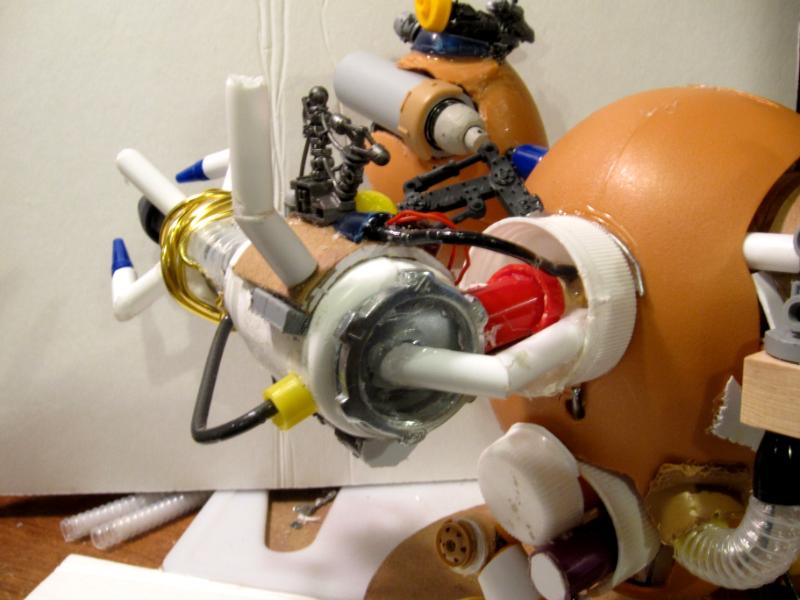
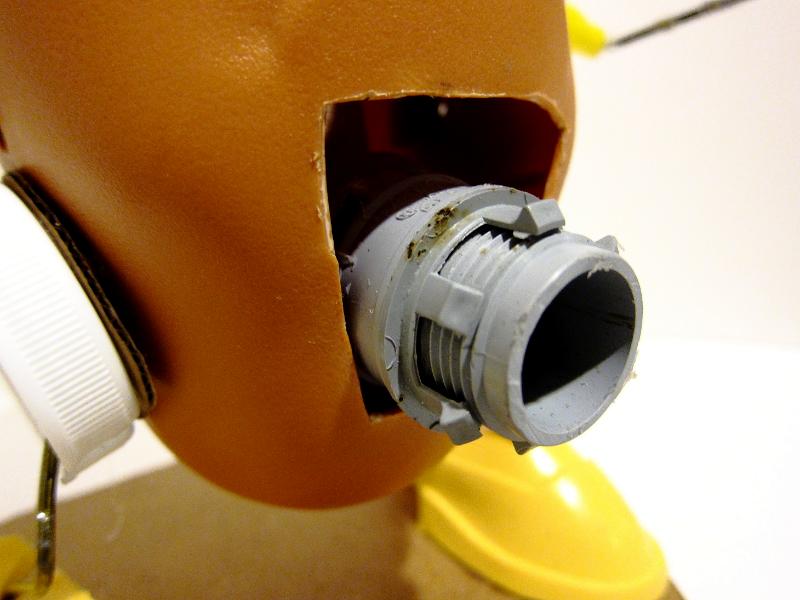
For his body, I've removed the arms from before - thaw klaw needs to be re-considered, and I want to take a different approach to the lifta dropa entirely. But I've added in a massive hole for this super huge deff kannon!


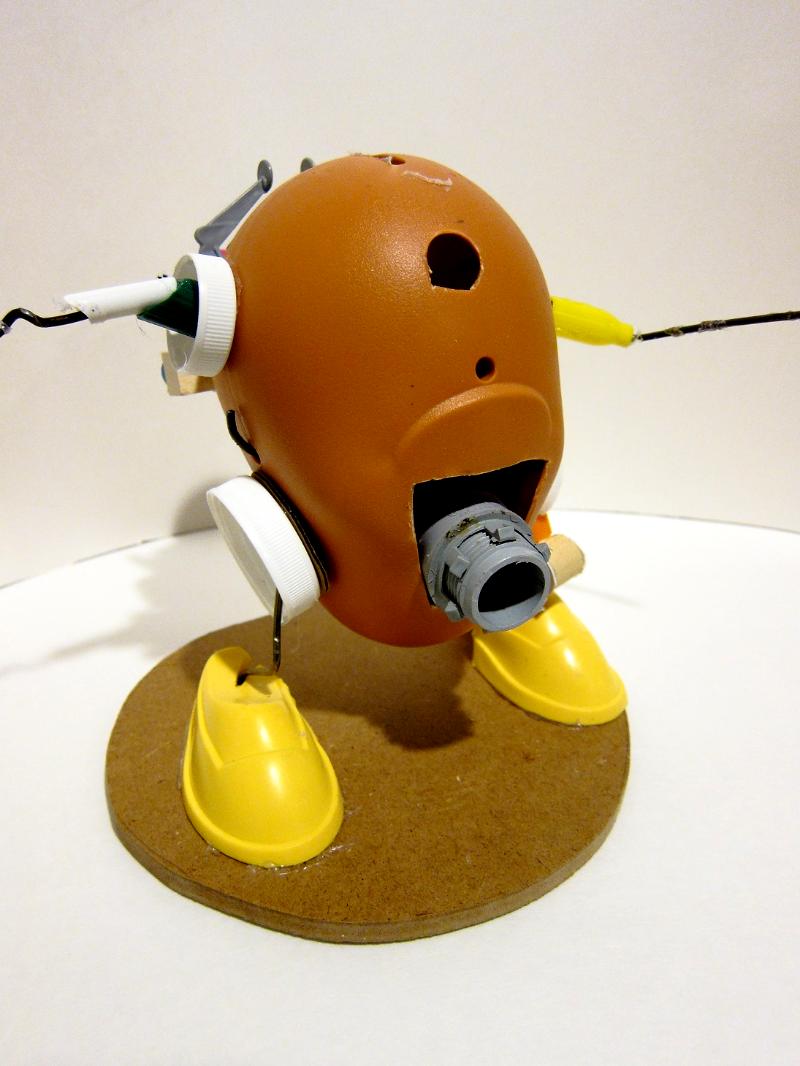
The deff kannon will be angled upward when it's finished--right now it's just sitting in that hole, without glue.


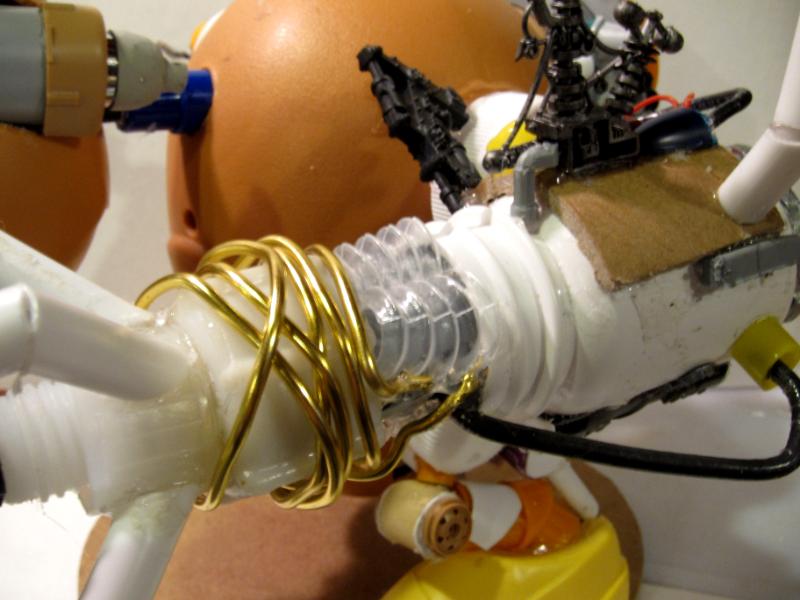
This power plant was going to just be a series of pipes and tubes like on the first stompa, but when i saw that massive, orange juice container lid I just loved its design, and immediately thought of some sort of turbine engine. I'm just adding bits as I find them/whatever inspires me/whatever compliments the general shape of the engine core.


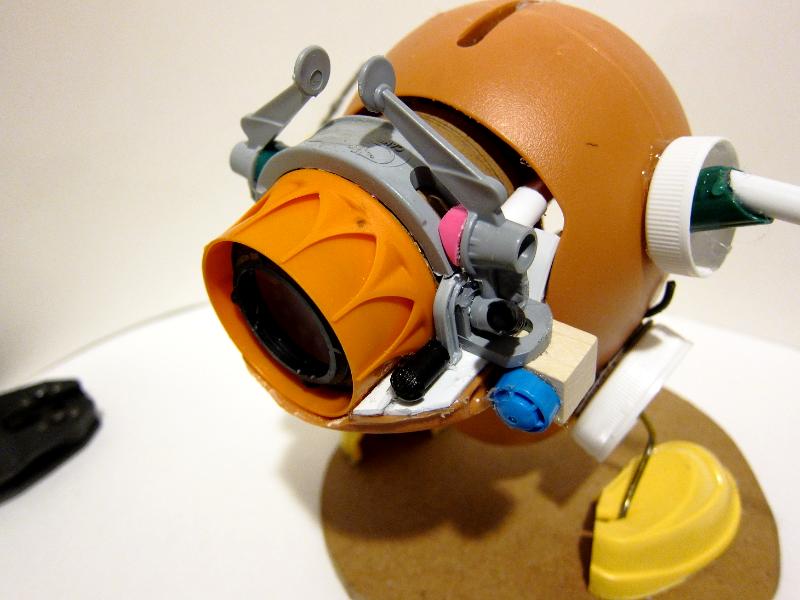
I found an interior seal to another juice/pop bottle lid, and when I removed it, it had a neat 'fan' like mold to it. I've inserted it into the orange juice lid and it fits perfectly! I added a black ring around it, but I can remove that still - not sure if I should leave the 'fan' bit fully visible or not (there's a 5mm gap b/w the 'fan' piece and the outter orange lid if I don't have that black ring in there). I'm also thinking this should be some bright red/yellow or some bright blue/white turbine when finished, maybe?


So, I'm off to it! The last one took me about 7.5 months to complete (and I'm still painting him). While this one will likely take a bit less time now that I'm more familiar with some of the more challenging aspects (like structural integrity), I still anticipate this project taking me a few months. Thanks for looking, and as always, any comments/questions/recommendations are encouraged/welcome!!

"Sir, the enemy has us encircled!"

"Most excellent. They can't escape us now!"
 
   
Made in us
Lone Wolf Sentinel Pilot


I like the direction you're taking this one. If the execution is close to as good as your first was (it'll probably be even better), then the final results are gonna look fantastic.

Revel in the glory of the site's greatest thread or be edetid and baned!
 BobtheInquisitor wrote:
Every trip to the FLGS is a rollercoaster of lust and shame.

DQ:90S++G+M+B++I+Pw40k13#+D+A++/sWD331R++T(S)DM+ 
   
Made in ca
Sneaky Kommando


Canada

Thanks Kiln, those are kind words!

I got some time tonight to work on this guy some more. I wanted to try and top my previous stompa, so this time I'm going to add a few features. The Big Mek Stompa comes with the Gaze of Mork - and what better way to have a gaze of Mork than to have his eye actually light up! In theory, making his eye light up was fairly simple: I needed an LED light, a switch, a power source, etc. But then I got to realizing that I'd want this all to fit into a cylinder, be bright enough, have the switch be subtle enough, and have the battery pack accessible without taking the whole damned thing apart once the model's completed and assembled. I thought about using an LED keychain light, but wasn't sure if I'd find one that would be appropriate.


Lo, and behold! I found just such a light! About 1.5" long, 1/2" in diameter, it would be small enough to fit and not seem obnoxious! The push button switch is located at the back, which also happens to be where the battery access opens (the cone shaped silver piece). This was perfect, because I could replace the batteries after I'm done the model without too much trouble, and the button will look like an exhaust when I'm done (I'll tone down the plastic chrome). And what's more, I picked it up for a buck!


I then took some 3/4" grey plastic pipe, and cut a piece to be just shorter than the keychain light (so I can still screw off the battery lid). it was a bit too tight, so I filed it down with a curved file. The light was WAY too bright, and also it's white, which I didn't want. I wanted an orange glow...so the answer was filters! I ended up using a translucent organge lego piece, which dimmed the light enough without losing the glow.

[Thumb - IMG_9346.JPG]

[Thumb - IMG_9347.JPG]

[Thumb - IMG_9348.JPG]

[Thumb - IMG_9349.JPG]

[Thumb - IMG_9350.JPG]

[Thumb - IMG_9352.JPG]

[Thumb - IMG_9354.JPG]


"Sir, the enemy has us encircled!"

"Most excellent. They can't escape us now!"
 
   
Made in ca
Sneaky Kommando


Canada

Some images of the head once I installed the light/Gave of Mork. I added some plating over the pipe to cover excess exposed hole and help "hold" it in place, and added a crow's nest. It looks a bit messy with the glue atm, but that'll be remedied before too long.

[Thumb - IMG_9356.JPG]

[Thumb - IMG_9359.JPG]

[Thumb - IMG_9360.JPG]


"Sir, the enemy has us encircled!"

"Most excellent. They can't escape us now!"
 
   
Made in gr
Longtime Dakkanaut


Halandri

It looks like something from a Tim Burton film at the moment!

The power plant and the kannon are both awesome. You know if you take apart a soap dispenser there are lots of cool parts and worky bits that are great for orky projects?
   
Made in ca
Sneaky Kommando


Canada

nareik wrote:
It looks like something from a Tim Burton film at the moment!

The power plant and the kannon are both awesome. You know if you take apart a soap dispenser there are lots of cool parts and worky bits that are great for orky projects?


Hm...that's not a bad idea....

"Sir, the enemy has us encircled!"

"Most excellent. They can't escape us now!"
 
   
Made in ca
Sneaky Kommando


Canada

I was out of town for a few weeks, and so I wasn't able to work on this guy for a while. But I"m back now, and found some time today to add a bit more. I fixed his legs (they looked too thin and spinly for a titan!), and then got to work on the Lifta Dropa arm. It took me a while to find a design I was satisfied with. I had a necron weapon I was going to use as it looked like two prongs arched over a hexagonal pylon - but it didn't fit well with other parts I had. Finally, I took the top off a glue bottle and the bottom of a marker to make the 'prism', and made four prongs from pens (well, the shell from ballpoints anyway - all hail the Dollar store!)

I used a coat hanger wire, attaching it at the 'cone' of the weapon, about 5" long, around which I could glue the various tubes and such that would form the body of the lifta dropa. I needed this wire to connect inside the stompa itself (there was already 5" of coat hanger sticking out of the stompa in position to accept an arm - I merely tightly wrapped copper wire around the two coat hanger wires to secure them and tightly hold the lifta droppa arm to the body of the stompa itself. From there, it was just a matter of adding the cylindrical objects which would form the body. Then I just added bits and pieces, including some other coated wires to serve as 'gas lines' and 'electrical wiring' for the crazy weapon.


As always, comments, feedback and questions are always welcome and encouraged! His head's still creepy, I know. I need to work on that mouth!

"Sir, the enemy has us encircled!"

"Most excellent. They can't escape us now!"
 
   
Made in ca
Sneaky Kommando


Canada

Last night I got to this project again - I keep switching between them, I know. The sock puppet/Tim Burton head was bothering me, mocking me. So I decided to finally make the chompy jaw:


"Sir, the enemy has us encircled!"

"Most excellent. They can't escape us now!"


Forum Index » Painting & Modeling
Go to: