| Author |
Message |
 |
|
|
|
|
Advert
|
Forum adverts like this one are shown to any user who is not logged in. Join us by filling out a tiny 3 field form and you will get your own, free, dakka user account which gives a good range of benefits to you:
- No adverts like this in the forums anymore.
- Times and dates in your local timezone.
- Full tracking of what you have read so you can skip to your first unread post, easily see what has changed since you last logged in, and easily see what is new at a glance.
- Email notifications for threads you want to watch closely.
- Being a part of the oldest wargaming community on the net.
If you are already a member then feel free to login now. |
|
 |
2016/06/20 03:31:00
Subject: Can you stack 2 transfers on a shoulder pad? [Yes]
|
|

Perfect Shot Dark Angels Predator Pilot
|
I am trying to make a unit of space marines with proper unit markings, I'd love to have the troops arrow and a squad number on the right shoulder. I am concerned that the transfer sheets will not stack, however, and I am a little wary to experiment on otherwise finished models.
Has anyone tried this? Is there anything I can do to make life easier (seal it or something?)
Thanks in advance for the advice!
[EDIT] worked for me. I let lower layer dry, went smoothly Don't be afraid to try it if you haven't 
|
|
This message was edited 1 time. Last update was at 2016/07/01 13:57:42
 "And the Angels of Darkness descended on pinions of fire and light... the great and terrible dark angels" "And the Angels of Darkness descended on pinions of fire and light... the great and terrible dark angels" |
|
|
 |
|
2016/06/20 03:54:24
Subject: Can you stack 2 transfers on a shoulder pad?
|
|
Never Forget Isstvan!
|
Yeah they should stack, but if you are concerned you could always seal the first transfer and then use that seal as a backing for the 2nd transfer and then seal it in. Of course remember to use thin layers of gloss or what not.
|
|
|
|
|
|
2016/06/20 04:17:16
Subject: Can you stack 2 transfers on a shoulder pad?
|
|

Grizzled Space Wolves Great Wolf
|
Yeah it works fine. Use decal solvent on the first decal to get it settled before applying the 2nd. You can apply a gloss between the decals if you want to make sure you don't damage the first one, I typically don't do that though.
|
|
|
|
|
2016/06/20 04:27:44
Subject: Can you stack 2 transfers on a shoulder pad?
|
|
Incorporating Wet-Blending
|
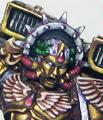
Works fine, this is two over the top of each other;
|
|
|
|
|
2016/06/20 09:32:33
Subject: Re:Can you stack 2 transfers on a shoulder pad?
|
|
Blood-Drenched Death Company Marine
|
Yes it can easily be done. I stacked two decals on top of each other for this effect: 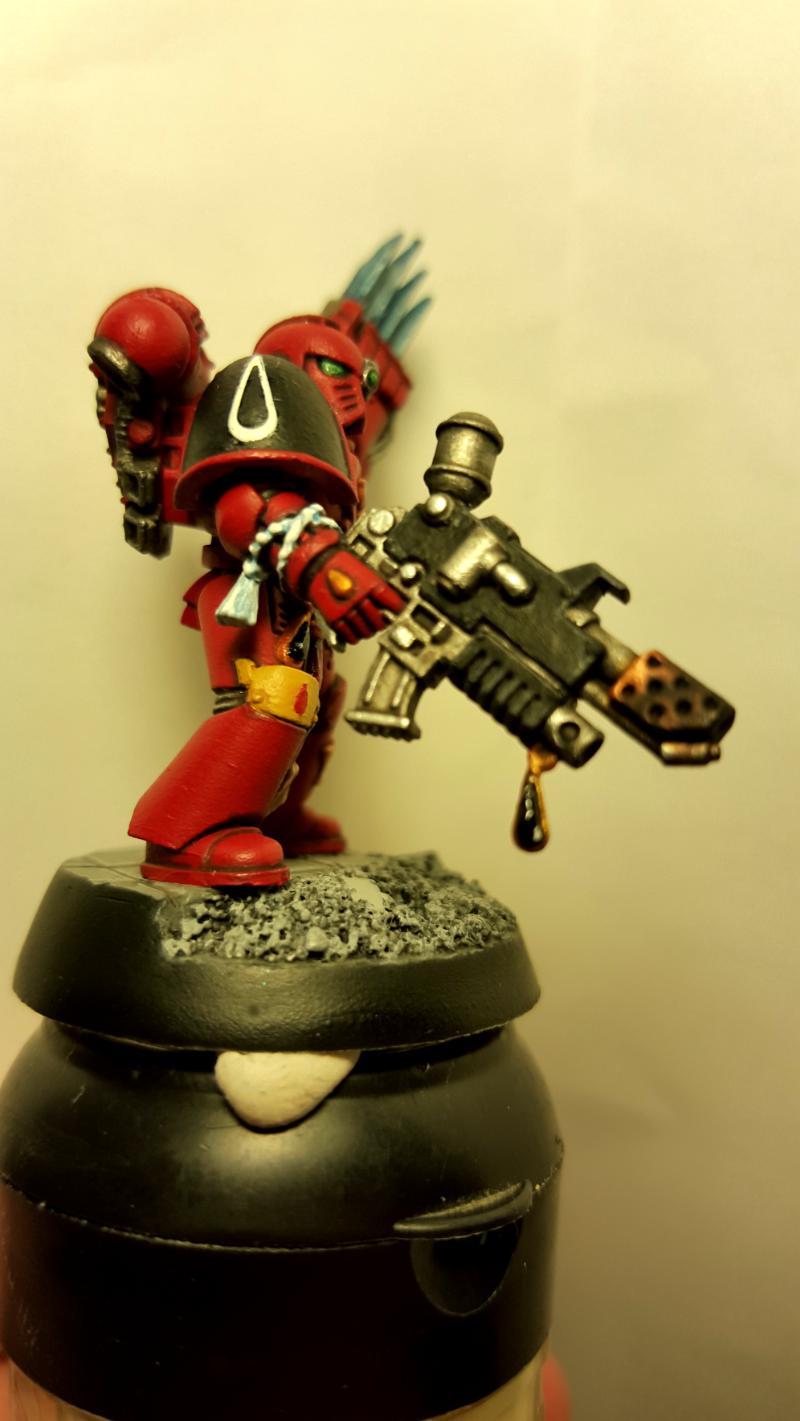 Placed one decal (white tear drop) over the black shoulder pad, then painted over it using white paint once it was dry and set. I then let the paint dry completely and placed the smaller black tear drop shape over it and, once it was dry and set, painted over it with black paint. Using a varnish also helps 'hide' the decal lines quite nicely. Gloss varnish first then a matte varnish (Spray or brush on) to help knock the shine down. Best of luck & take it easy. -Red__Thirst-
|
|
This message was edited 1 time. Last update was at 2016/06/20 09:33:38
You don't know me son, so I'll explain this to you once: If I ever kill you, you'll be awake, you'll be facing me, and you'll be armed. |
|
|
|
|
2016/06/20 13:42:16
Subject: Re:Can you stack 2 transfers on a shoulder pad?
|
|
Rampaging Furioso Blood Angel Dreadnought
|
Yeah I do it... the trick is finish the first decal completely. SO -- Gloss the entire shoulder, apply decal with whatever decal-softener you use (microset and microsol are the best), Gloss entire shoulder AGAIN. Now apply the new decal with your decal softener, then Gloss a final time - then Matte or Dulcote the entire thing.
|
|
|
|
|
|
2016/06/20 14:02:17
Subject: Can you stack 2 transfers on a shoulder pad?
|
|
Grizzled Space Wolves Great Wolf
|
I never really found any benefit for glossing over the first decal before the second decal.
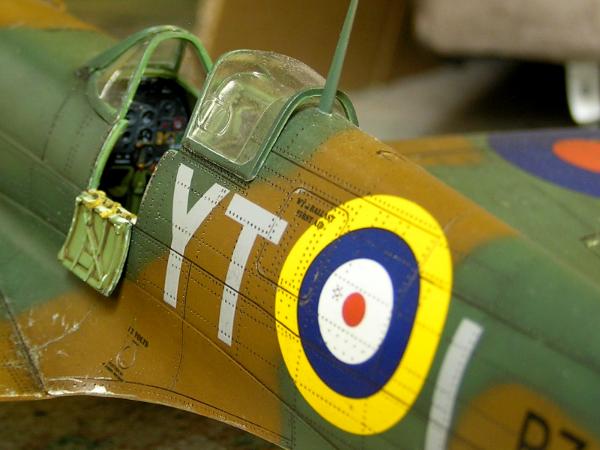
The yellow/blue/white of the roundel is one decal, the "ballast/first aid" is another decal and the red dot in the middle of the roundel is a 3rd decal. It was just done as gloss over the model, 1st decal, solvent, 2nd decal, solvent and then a final sealer. I don't think you can see any edge where the decals overlap, at least not any worse than the areas where the decal doesn't overlap.
|
|
|
|
|
2016/06/20 14:10:17
Subject: Can you stack 2 transfers on a shoulder pad?
|
|
Rampaging Furioso Blood Angel Dreadnought
|
The reason I like glossing over the first decal is because A) most of the 40K decals have big "clear" footprints, and B) most importantly - it helps create a flatter, smoother surface if the decals will not be sitting perfectly on top of each other.
But I bet you're right, I bet like in your plane example where one decal fits entirely within the other it doesn't matter as much.
|
|
|
|
|
|
2016/06/20 14:40:12
Subject: Can you stack 2 transfers on a shoulder pad?
|
|
Perfect Shot Dark Angels Predator Pilot
|
Thanks for the awesome advice, folks. Much appreciated.
|
"And the Angels of Darkness descended on pinions of fire and light... the great and terrible dark angels" |
|
|
|
|
2016/06/20 20:32:11
Subject: Can you stack 2 transfers on a shoulder pad?
|
|
Grizzled Space Wolves Great Wolf
|
 Gunzhard wrote: Gunzhard wrote:The reason I like glossing over the first decal is because A) most of the 40K decals have big "clear" footprints, and B) most importantly - it helps create a flatter, smoother surface if the decals will not be sitting perfectly on top of each other.
But I bet you're right, I bet like in your plane example where one decal fits entirely within the other it doesn't matter as much.
That Ballast and First Aid decal does have a big clear bit (in fact it's mostly just carrier film with some small text printed on it) and it does sit over the edge of the other decal, it's not entirely within the other, it's half way over the other decal. The red dot in centre of the roundel obviously sits entirely within the larger decal, but that primarily wasn't the one I was referring to.
It's literally exactly what you describe in your first paragraph, a decal with a big clear footprint and doesn't sit perfectly on top of the other decal. 
|
|
|
|
|
2016/06/21 06:21:16
Subject: Re:Can you stack 2 transfers on a shoulder pad?
|
|
Douglas Bader
|
IMO the reason to gloss the first decal before applying the second is so that you don't disturb the first one while positioning the second. The gloss coat will seal the decal under a layer of varnish and ensure that you don't tear it or knock it out of position even if you have to re-float and poke the second one a bunch to get it lined up.
|
There is no such thing as a hobby without politics. "Leave politics at the door" is itself a political statement, an endorsement of the status quo and an attempt to silence dissenting voices. |
|
|
|
|
2016/06/21 20:49:19
Subject: Re:Can you stack 2 transfers on a shoulder pad?
|
|
Colonel
This Is Where the Fish Lives
|
 Peregrine wrote:IMO Peregrine wrote:IMO the reason to gloss the first decal before applying the second is so that you don't disturb the first one while positioning the second. The gloss coat will seal the decal under a layer of varnish and ensure that you don't tear it or knock it out of position even if you have to re-float and poke the second one a bunch to get it lined up.
Pretty much what Peregrine said.
Yes, it is entirely possible to layer decals on top of each other without sealing each individual one first. That being said, a lot of people tend to err on the side of caution (myself included) and will take the time to seal each decal before moving on to the next one. MicroSol can and will affect a dried decal that has not been sealed and I would prefer not to risk damaging a decal I've already laid down when trying to adjusted another one on top.
|
 d-usa wrote: d-usa wrote:"When the Internet sends its people, they're not sending their best. They're not sending you. They're not sending you. They're sending posters that have lots of problems, and they're bringing those problems with us. They're bringing strawmen. They're bringing spam. They're trolls. And some, I assume, are good people."
|
|
|
|
|
2016/06/22 13:51:57
Subject: Can you stack 2 transfers on a shoulder pad?
|
|
Rampaging Furioso Blood Angel Dreadnought
|
MicroSol can and will affect a dried decal that has not been sealed
Yeah this exactly.
|
|
|
|
|
|
2016/07/01 13:56:26
Subject: Can you stack 2 transfers on a shoulder pad?
|
|
Perfect Shot Dark Angels Predator Pilot
|
Ok, quick update - you can stack them no problem, and I did not seal between layers. I let layer 1 dry completely (overnight) before applying layer 2. I also did not 'float' layer 2, only pushed the wet decal around with a brush. I did not use microsol - I used a clear semigloss paint (non GW) to seal both layers at the same time. It applied white, but dried clear. Seemed to do the trick.
|
"And the Angels of Darkness descended on pinions of fire and light... the great and terrible dark angels" |
|
|
|
|
2016/07/01 14:38:54
Subject: Can you stack 2 transfers on a shoulder pad? [Yes]
|
|
Rampaging Furioso Blood Angel Dreadnought
|
Nice!! ...make sure you throw some pics up!
|
|
|
|
|
|
2016/07/01 20:58:08
Subject: Re:Can you stack 2 transfers on a shoulder pad? [Yes]
|
|
Perfect Shot Dark Angels Predator Pilot
|
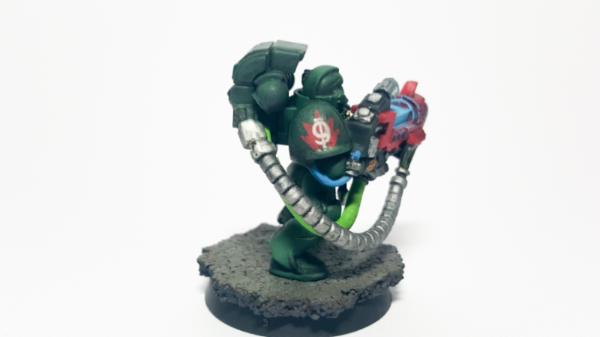
Ok, here they are. I think I used the wrong sized number (forgeworld transfer sheet isn't very clear) but it's not unbearable. Ill know for next time.
These models were actually reposed, stripped, and repainted. They belonged to someone else and were pretty ugly.
They won't be winning any golden demon now, but for a redone tabletop job I was pleased with how they came out. I wish I had original pics for you, that was two phones ago...they were pretty derpy.
Edit: I did find two previous pics - none before I fixed the poses though. I ripped off 50% of the arms, 80% of the heads, and chopped off a bunch of randomly glued-on grenades and weapon parts.
|
|
This message was edited 1 time. Last update was at 2016/07/01 21:07:42
"And the Angels of Darkness descended on pinions of fire and light... the great and terrible dark angels" |
|
|
|
|
2016/07/02 01:07:38
Subject: Can you stack 2 transfers on a shoulder pad? [Yes]
|
|
Rampaging Furioso Blood Angel Dreadnought
|
They look great dude, solid work.
|
|
|
|
|
|
|
|