Here is the final squad for my Chaos Undivided army. Lots of Rhinos and ready for the fun of 5th edition. Hobby list for sure, but it will be fun with a ton of Fearless troops heh.
When you paint models the best thing to do is plan out your color design, before you start. That way you can figure out the best way to build colors and washes correctly. Since this is Nurgle, I plan on starting with green, and going into yellows and browns, thus giving me a broad range of shades, with a very easy way to do it using the new washes and inks.
Welcome to painting Quick and dirty with Thomas aka GoatboyBBMA
Step 1 - Black
Paint em black. This is because that fits for my coloring style and my own choice for doing any kinda of design. Some people prefer white, but I like them painted black first.

Step 2 - Knarloc Green
Dry brush with foundation colour Knarloc jzbzbzx cGreen. I dry brushed it fairly loose and thick in places to give it a nice chunky look. Like bits of flesh and to create more texture on the form.
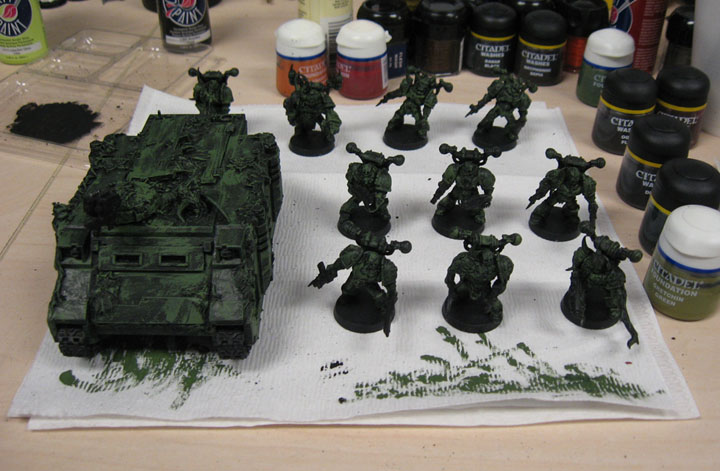
Step 3 - Gretchin Green
I dry brushed using foundation Gretchin Green to bring up the greens. These initial stages are not meant to be that detail intensive, they are just there to create varying shades of color and small bits of texture do the amount of paint hitting the model.

Step 4 - Thraka Green & Bubonic Brown
I used the new Thraka Green wash on the model, as well as added a layer of bubonic brown to the zombie flesh bits to bring up that color and make it stand out from the rotten old armor.

Step 5 - Sepia Wash
I used the Sepia wash on the models in order to try and pull the recesses darker and create more shades of the model. Washes are great, because the double the amount of colors on the model with one swip. Lets say you have 3 layers of green. An ink or a wash, will create 3 new shades based on those 3 greens. The wash/ink will darken each color, thus creating a new color. The old colors will still be there, maybe not as bright as before, but they will be there.
Step 6 - Tin Bitz
Here I added tin bitz as the base color for the metal. Tin bitz works great as a beginning rust color. It is dark enough and has enough of a purple in it to help with any rust colors you want to add in later. IE Flesh Wash ink and anything else.

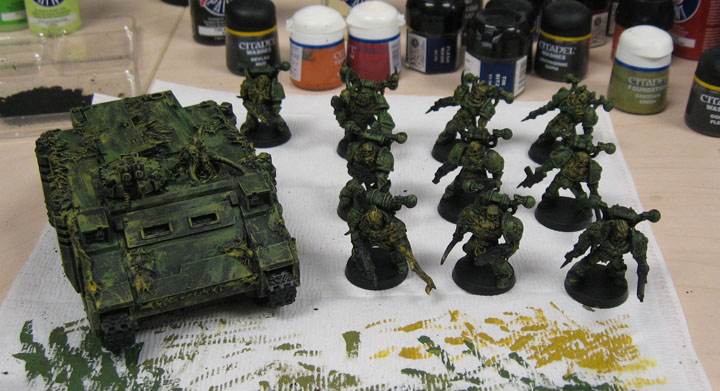
Step 7 - Antique White
Here is where it starts to look like my normal minis. My tried and true, super cheap Antique white dry brush. I like the cheap paint, because the amount of pigment is very light, thus it allows me more control over the drybrushing and overall detail work. Antique white is the same color as bleached bone, so you can use that as well. I use the models texture and forms that were already created, to slight put a lightened layer of white on top, to highlight the model.
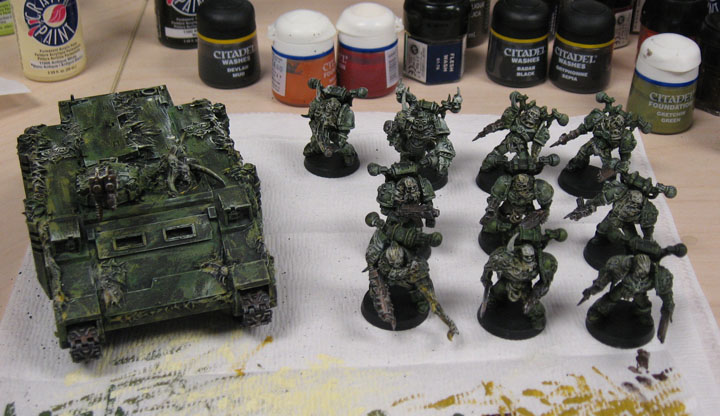
Step 8 - Mechrite Red, Blood Red, Fiery Orange
Here I add detail work, like a new highlight color to break up the monotony of the form. I picked red, due to the fact a lot of my army has red shoulder pads, and it helps keep it a part of the Chaos Undivided theme that I want to play with. I start with a foundation paint Mechrite Red, go to a Blood Red from there, and then end with a small bit of dry-brushing of Fiery Orange.

Step 9 - Flesh wash,devlan mud or ogryn flesh
Almost finished, here I add a bit of Flesh Ink to the zombie bits and red parts of the armor. This brings down the color, and gives another grimey shade to the flesh. It also breaks it from the armor more and helps make it look like the armor and flesh parts are leaking some kind of brown, brackish liquid. If you put Boltgun Metal on your metal parts, using the flesh ink on it, will create a rust type of effect that looks pretty good. You can see this on my Ork Nob Bikers.

Step 10 - Antique White, Bleached Bone, Sharpie Black
Here there are finished, after putting in one more layer of Antique white/Bleached Bone on the flesh parts and basing the models. And I used a fine point Sharpie pen in order to create lines of black in parts of the armor. This will help it stand out more and give a nice bit of contrast to the model. Thanks to Larry from Belloflostsouls for the tip on this.

Finished
If I did this at home, and not at work, most likely this would have been a 2 hour job at most. If you do models in batches of 10, most of the time you can finish the last model and the first model you started should be dry by now.
But yeah, there you go, get a nice table quality squad in a few hours. Hell if you had 20 models you could most likely finish them in 3 hours or so.
Close up of the most zombie like Plague Marine. I call him George.
