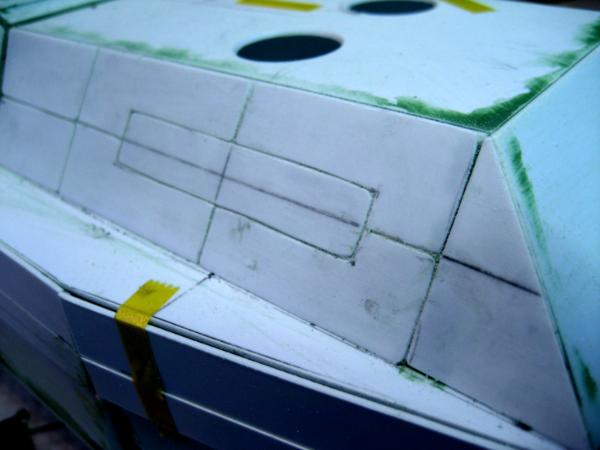
Stormwall wrote: That is beautiful Klaus. How do you get your plasticard to bend so nicely? My heatgun skills just aren't there yet.
No heating at all I cheated and used the thinner .5mm plasticard, which bents nicely and with the rather fast curing Revell glue it was quite easy
Automatically Appended Next Post: So, after the rather traumatic experience with the rubber tracks for the EPIALES vehicle, I decided to try the Trumpeter plastic track links instead.
For this PHRIKE vehicle I used the suspension, road wheels, return roller and drive sprocket of the Trumpeter T-54B kit that "Baynerd" sent me as a gift The kit contains rubber tracks, which are usually very twisted and bent, and somehow I never gotten around to find the proper means to glue it in place.
I was amazed to find the kit on Amazon for a reasonable price - 10.79€ - and Prime shipping.
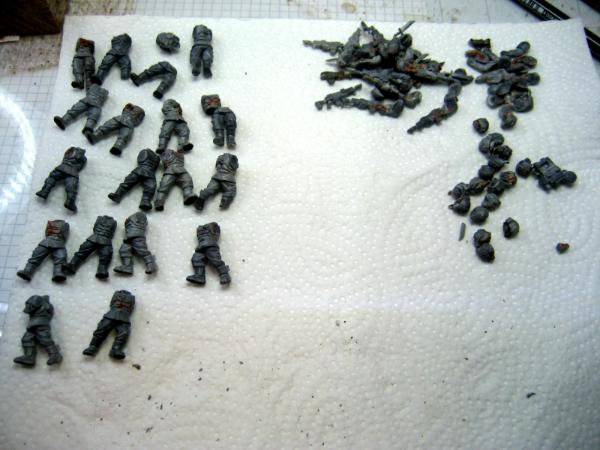
The kit seems rather straight forward consisting of 248 separate pieces.
Since I only use 4 road wheels and the vehicle is considerable shorter, I won't need all of them.
First task is to clean up the pieces.
A nice little pile - very little flash, just getting it out of the sprue and removing the little positioning pieces.
The instructions are also quite simple.
I mounted them first in pairs and then sections of fours.
5 sections of 4 were needed for the base area.
The mounting of the sections is easy, they work well with the glue and fit nicely to the kit.
But then I got to the drive sprocket and got a nasty surprise!
The links did not quite fit the sprocket's teeth.
Despite both being Trumpeter and the links being explicitly for the T-54.
I didn't expect that.
So I quickly shaved off the inner teeth.
This then worked to get the links mounted around the drive sprocket.
I was lucky that the tracks counted out perfectly and they met without stretching Just the way I wanted them!
For the other side of the PHRIKE I need to display a thrown track in the process of being re-mounted.
With the exact link count from the other side, I first mounted the ground section and then the thrown pieces.
Again, the pieces work together quite nicely and are very easy to position the way needed.
So, despite the surprise with the drive sprocket, the track links work like a charm.
Especially if you want to picture the tracks in an unusual position the plastic track links are a lot better than the original rubber ones and in my opinion worth the price.
A clear recommendation form my side!
Cheers
Klaus
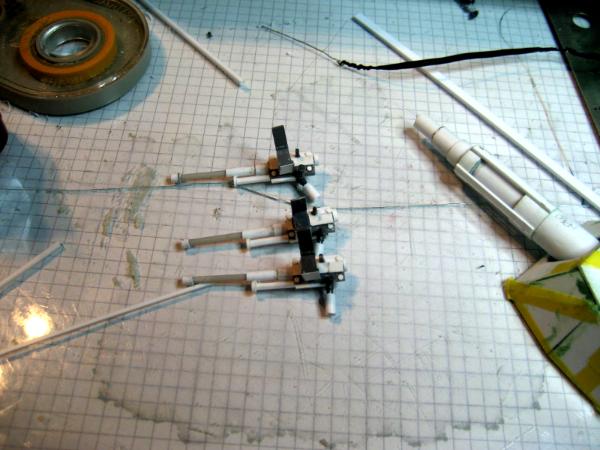
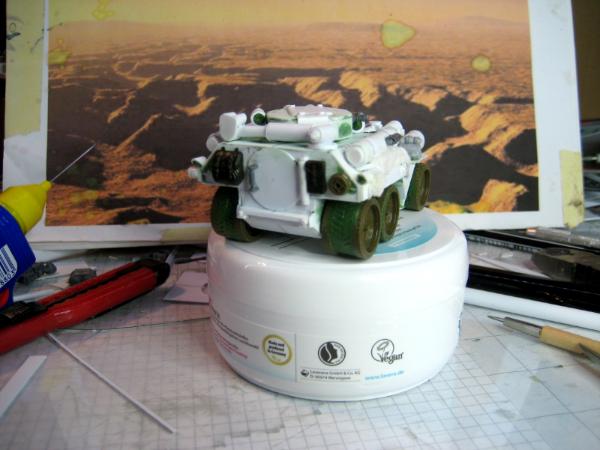
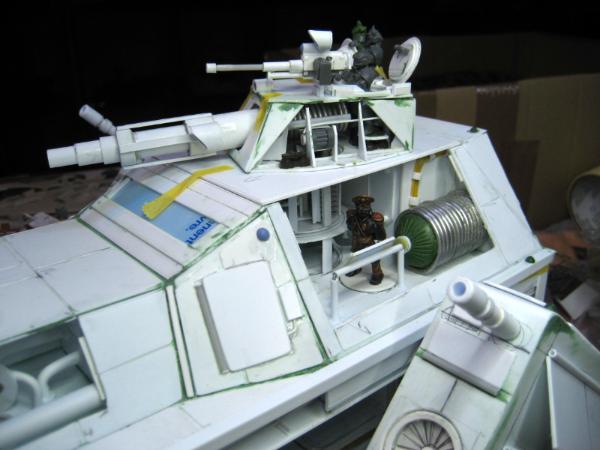
One thing left for the PHRIKE were antennae. So I heated some plastic from a leftover sprue and slowly pulled it apart, creating nice thin antennae.
Since it is a scout tank, I opted for 3 antennae.
This completed the actual build for the PHRIKE.
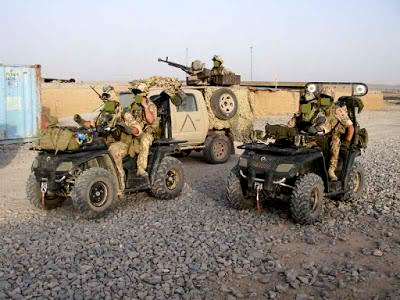
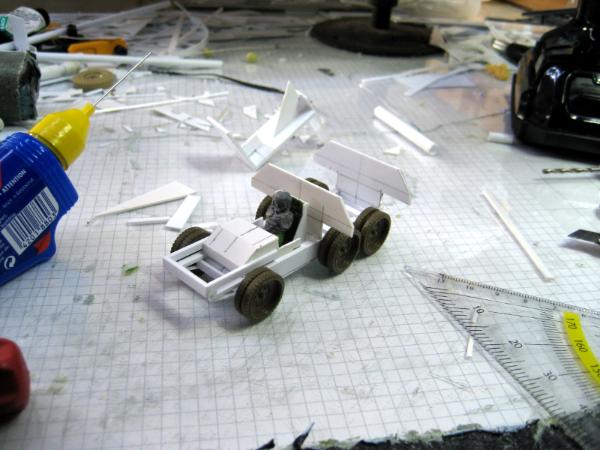
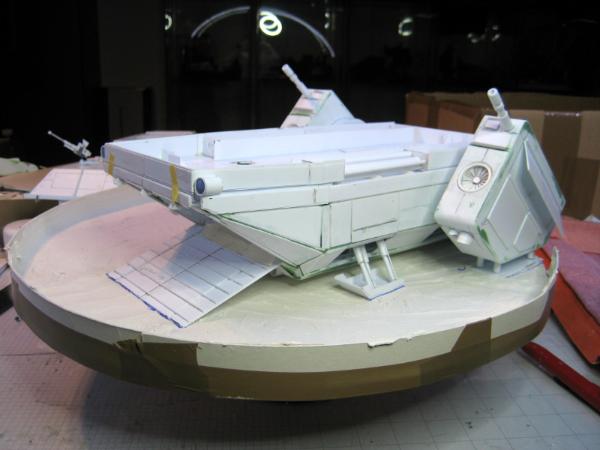
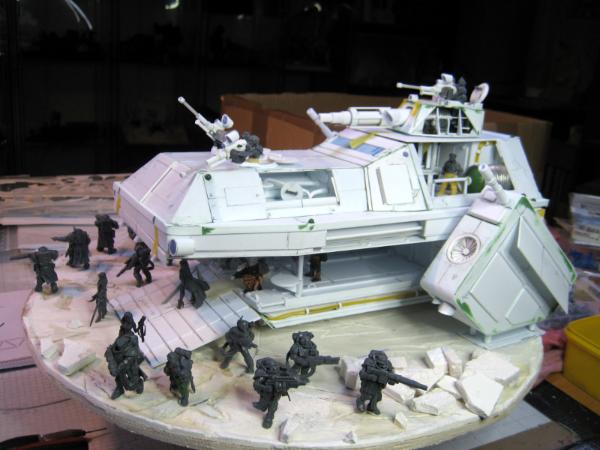
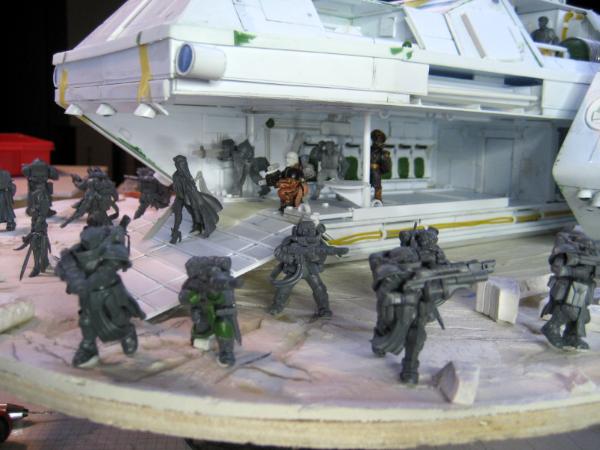
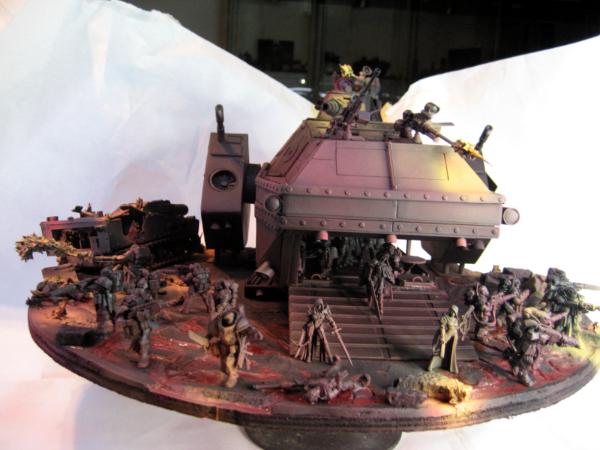
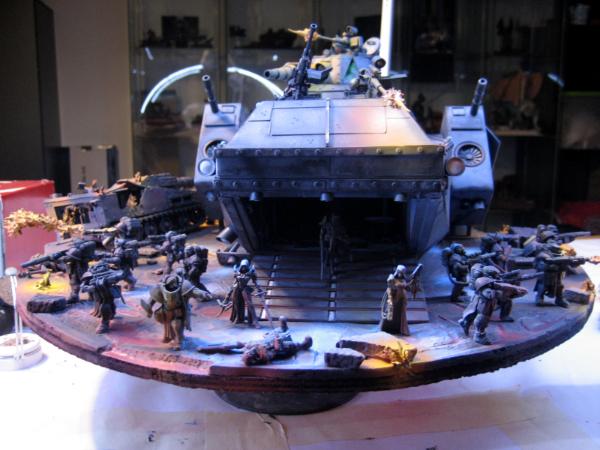
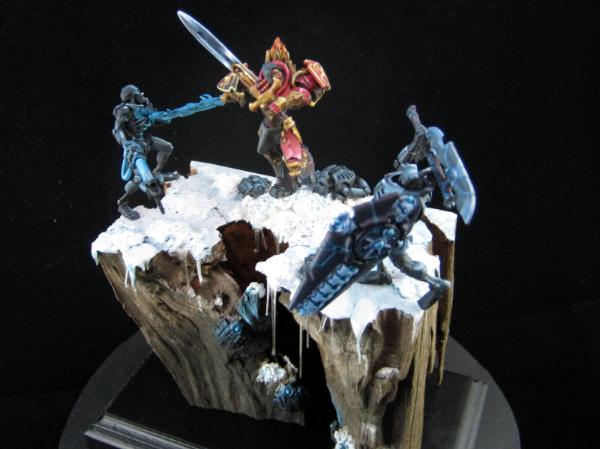
As I had mentioned in the first post, the diorama idea is the meeting of scouts, with the PHRIKE having thrown a track, and a KAIROS armored reconnaissance vehicle being also on the scene.
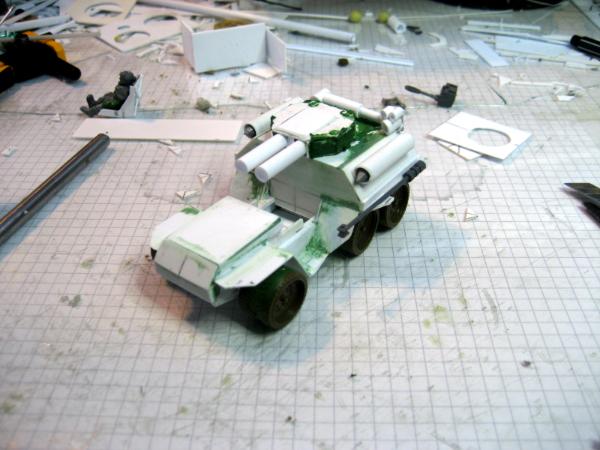
The KAIROS will be loosely based on the UK Fox Armored Reconnaissance Vehicles
https://en.wikipedia.org/wiki/Fox_armoured_reconnaissance_vehicle
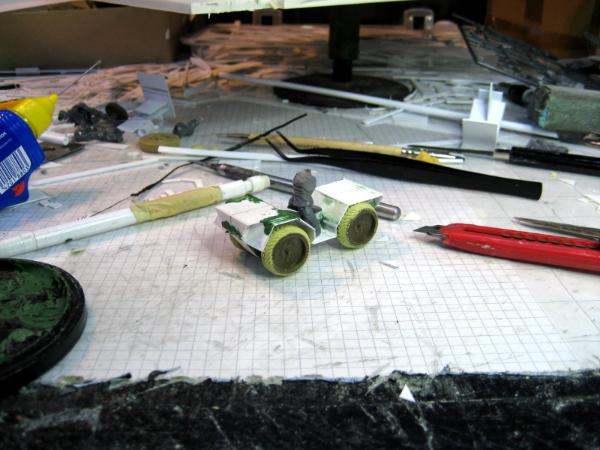
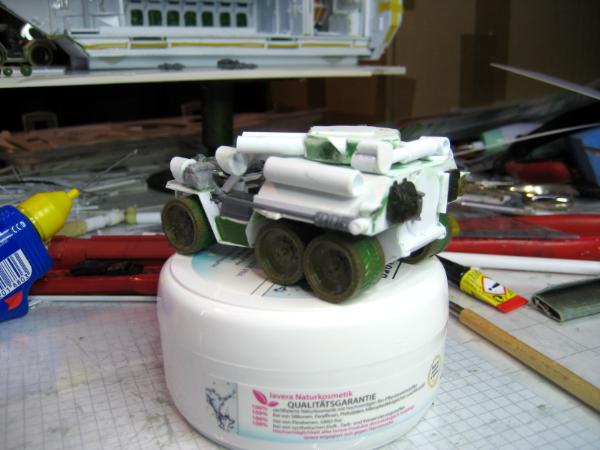
Somehow I had the idea to build it with a almost functioning suspension (don't ask me what brain-fart had ridden me)
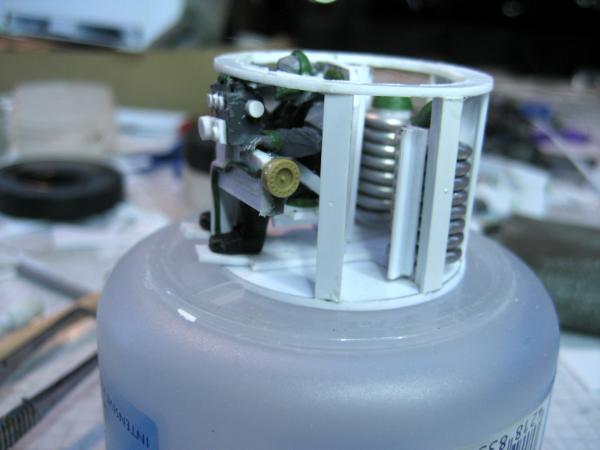
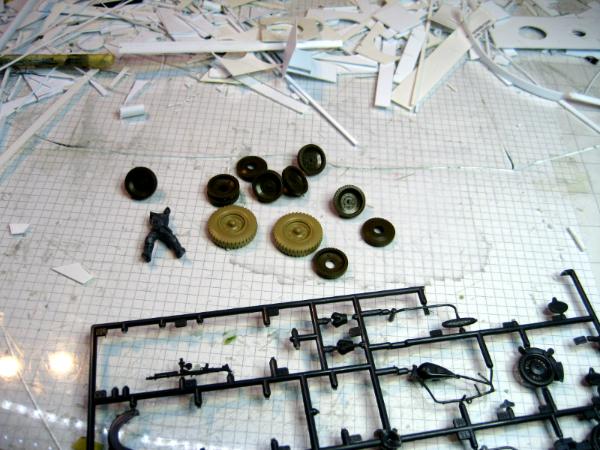
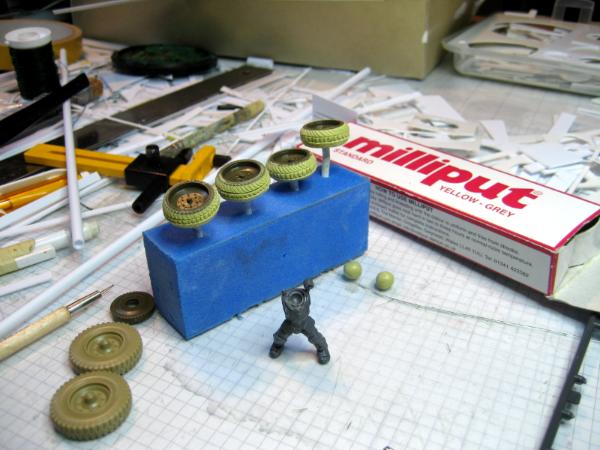
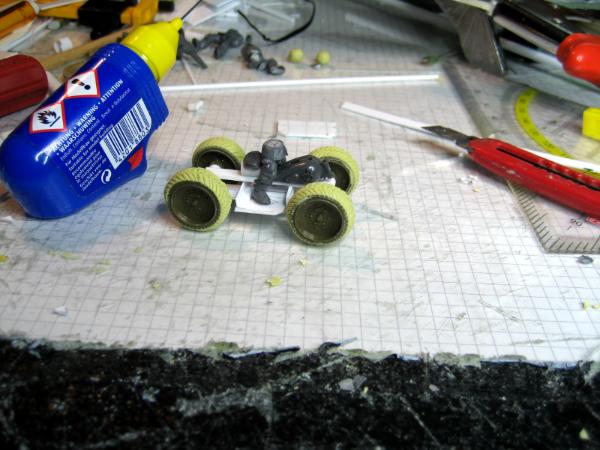
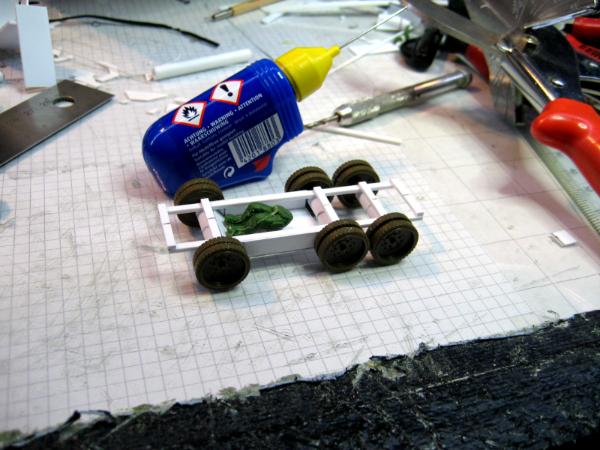
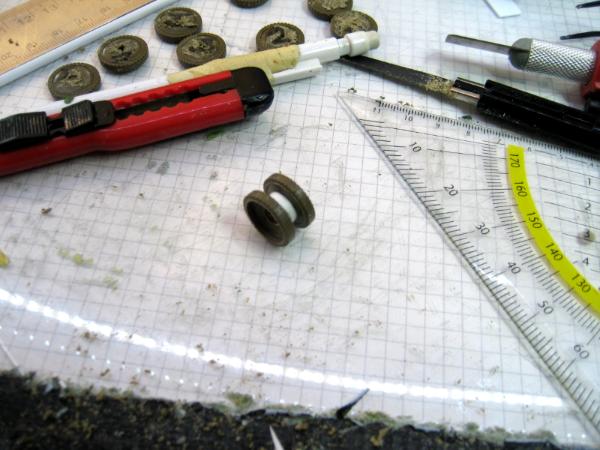
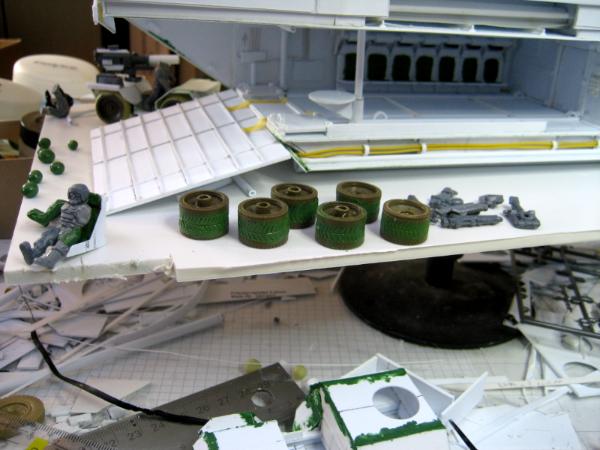
I had some wheels from a Tamiya US M3 Scout Car that I wanted to used. Together with some springs retrieved from a ballpoint pen I started out.
Pretty simple.
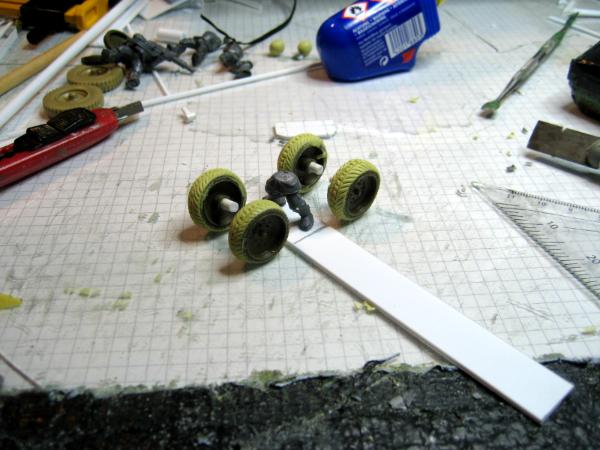
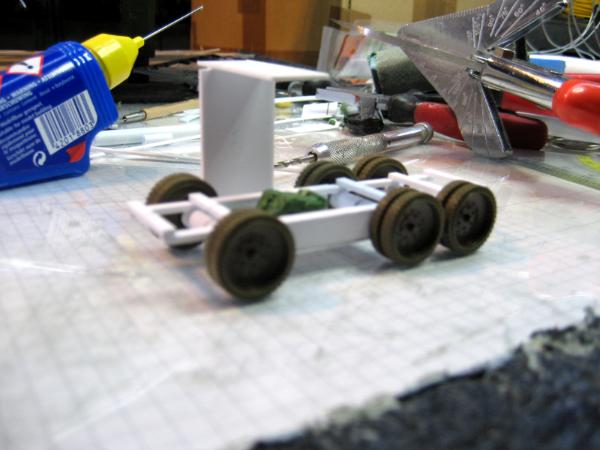
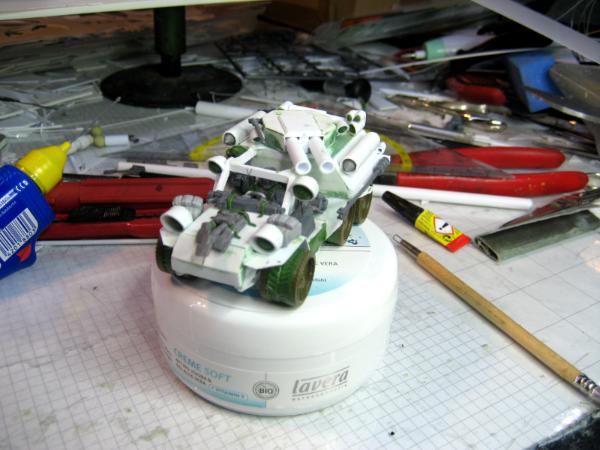
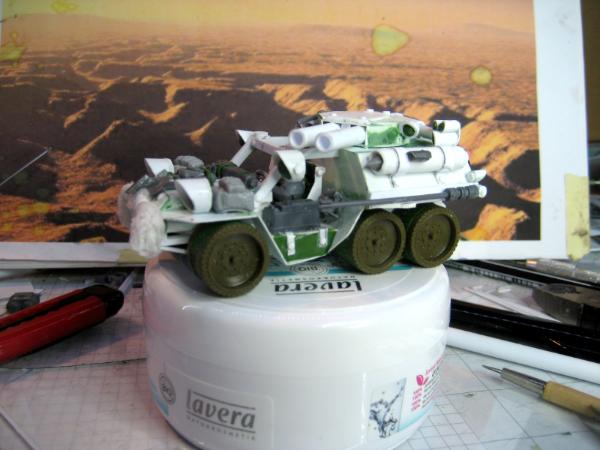
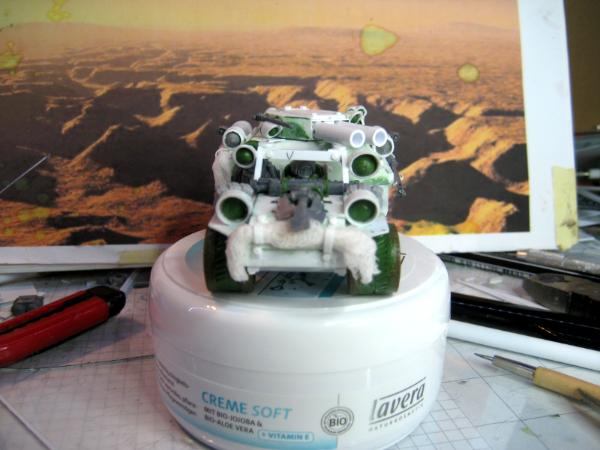
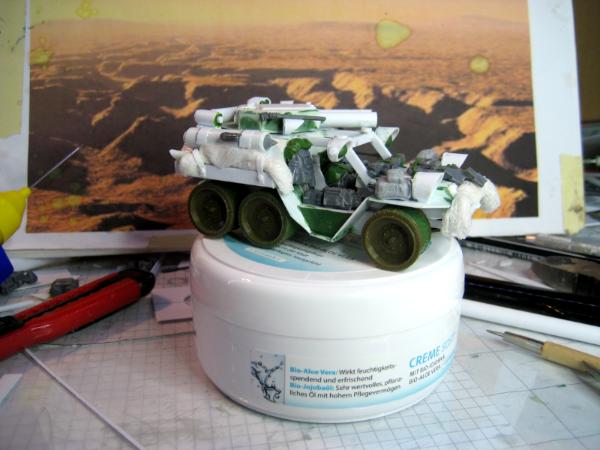
Since I wanted to picture the KAIROS with turned front wheels I thought I needed to also build functioning steering.
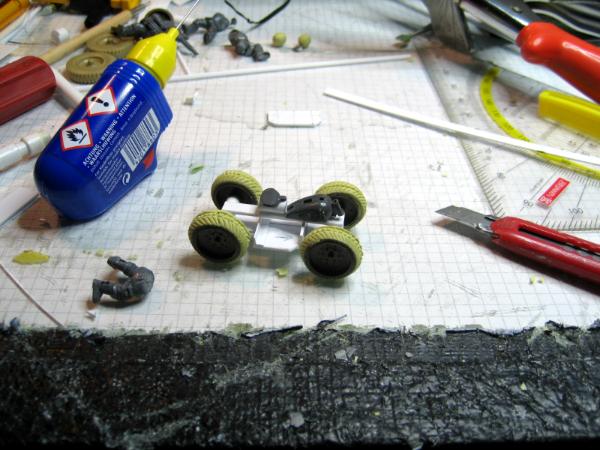
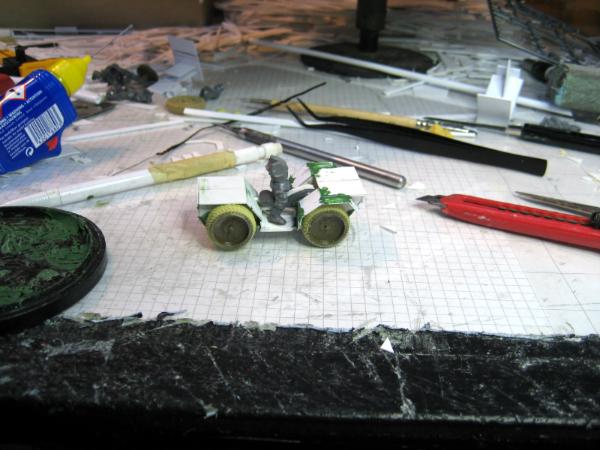
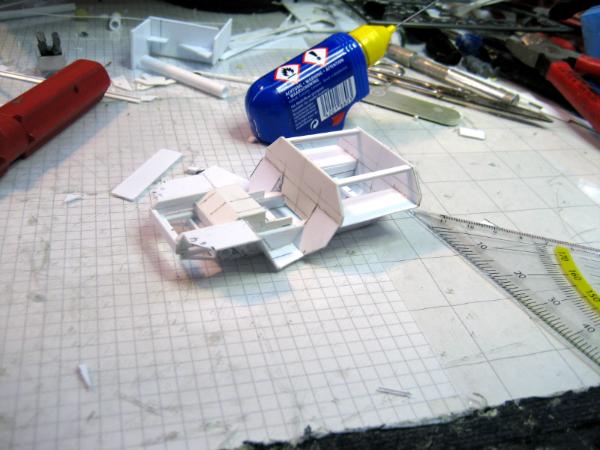
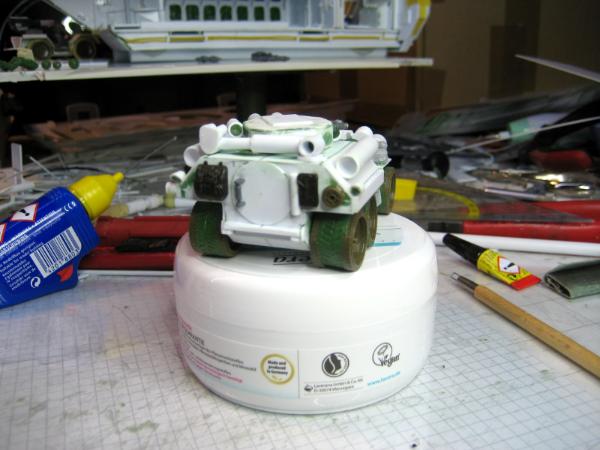
Basic function accomplished, I started to built the sides based on my plans.
But during the building of the hull I kept on breaking the steering. So I cannibalized an old Tamiya SdKfz 251/1.
This seemed to be a bit more stable and so I continued with the hull. During sanding I broke the axles again (sigh)
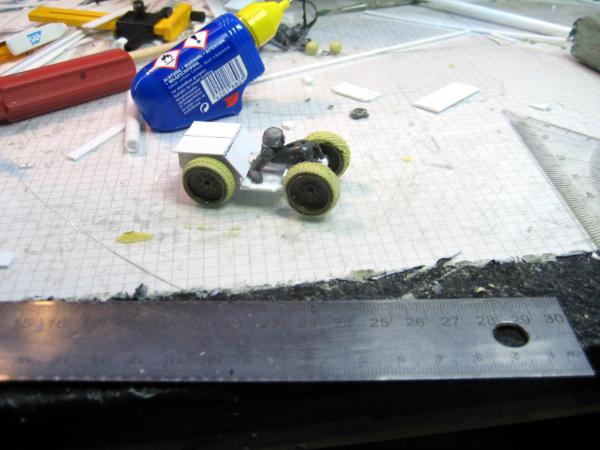
With the basic hull completed, I realized I had build the whole vehicle rather wrong, and I was about to throw it away and start anew.
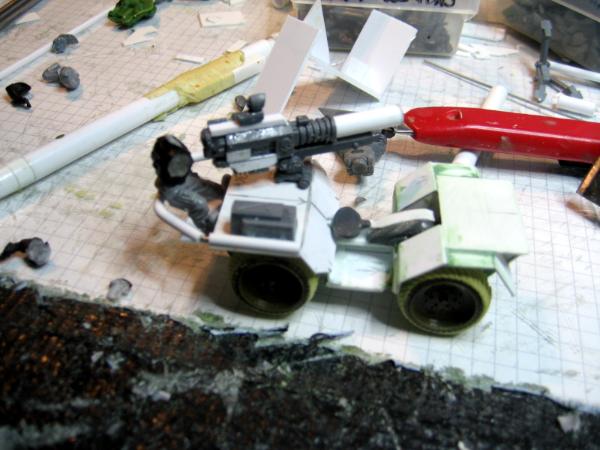
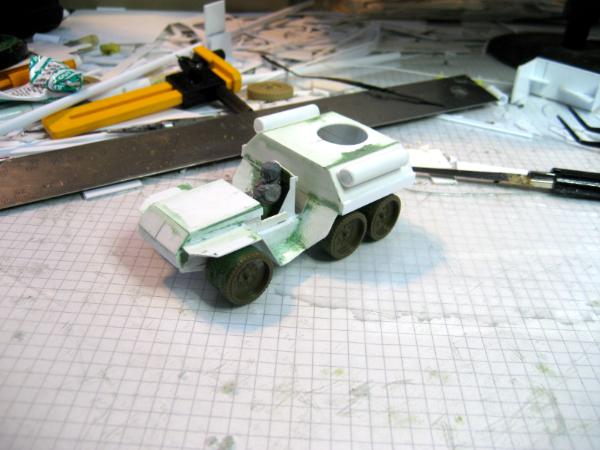
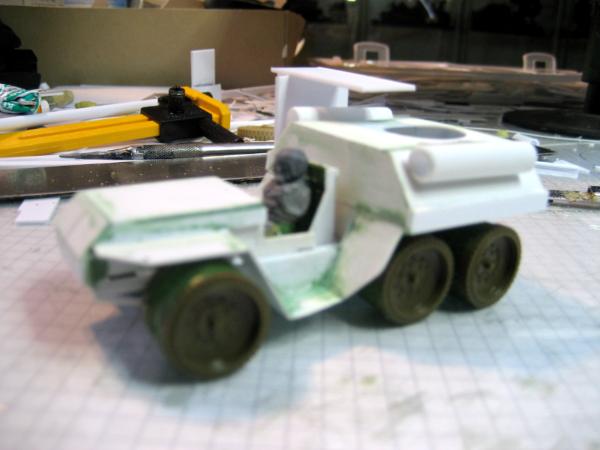
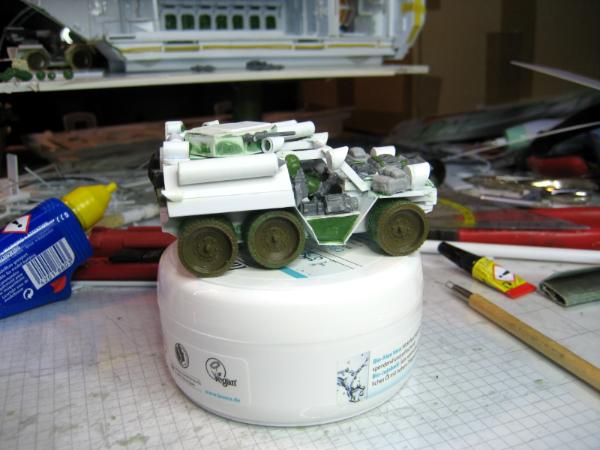
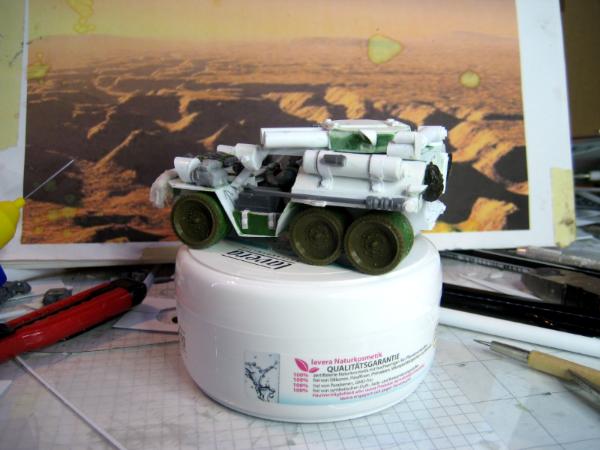
But I bit my teeth together, glued the front wheels in position and rebuilt most of the upper superstructure.
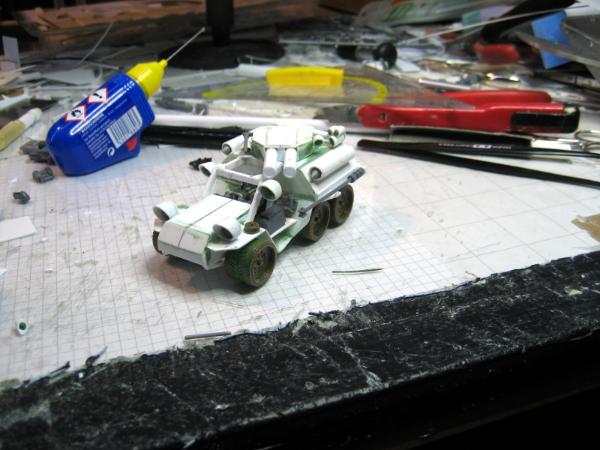
I think it now comes rather close to the Fox, isn't it?
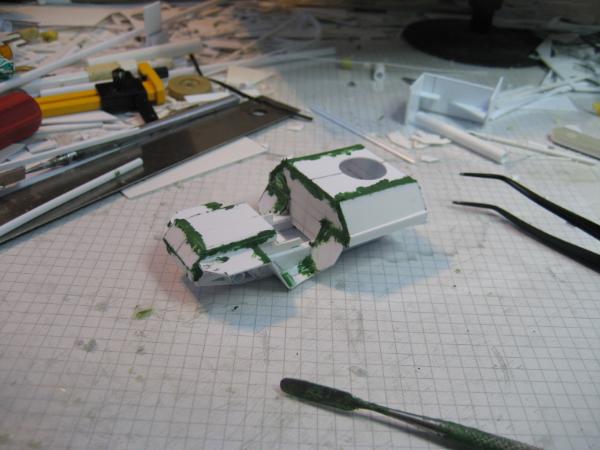
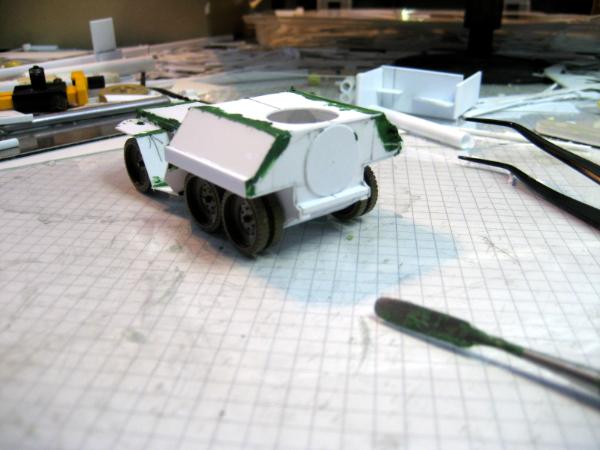
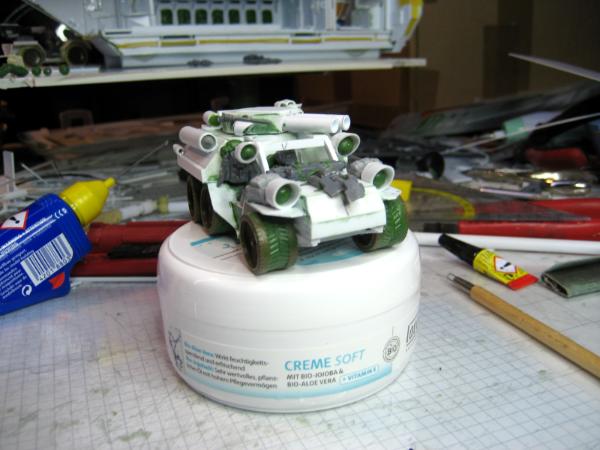
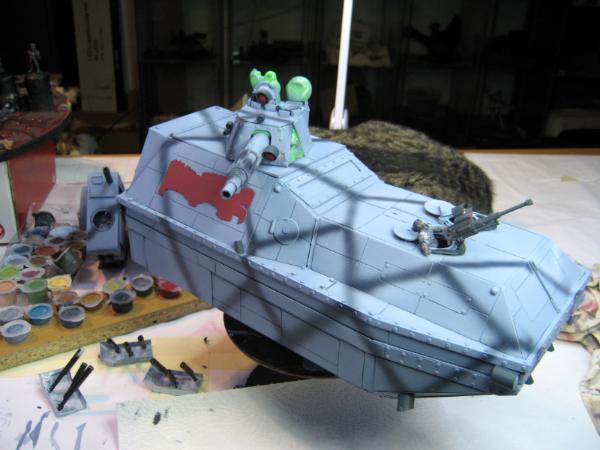
And once it has the headlights, it will fit into the PONOS family nicely. For the turret I'm also orienting towards the original Fox turret, but with twin Lasers.
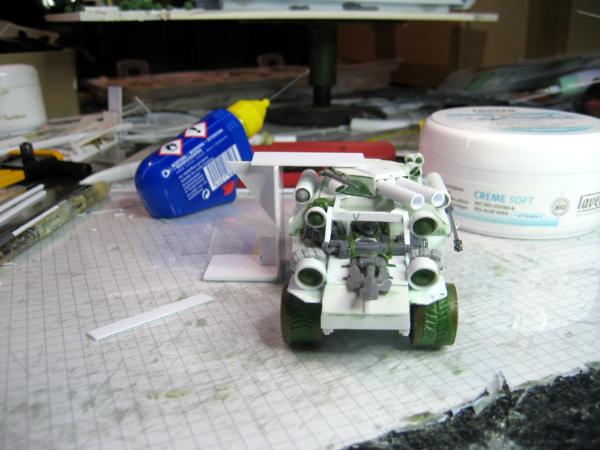
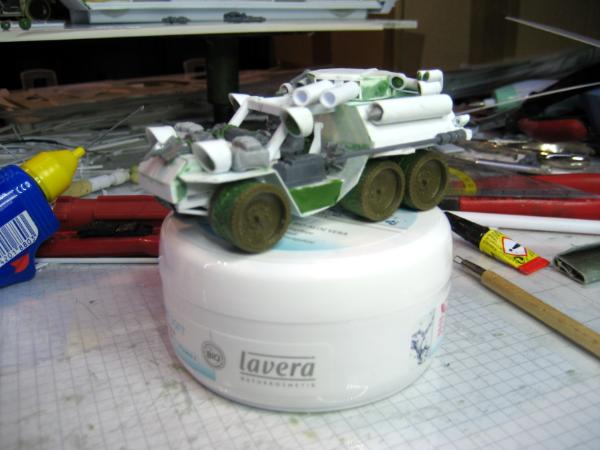
The first version however was too high. Looked very unbalanced.
So the second version is 1cm high instead of the initial 1.5cm - and with lots of putty.
Now, what do you think?
Is the KAIROS OK?
Thanks
Klaus
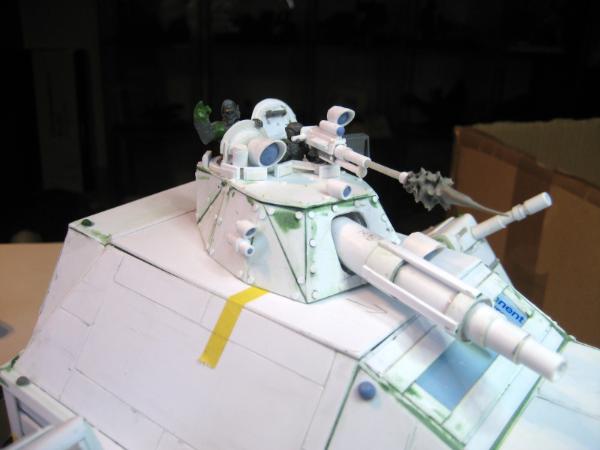
last night I was able to work some more on the turret.
After sanding the turret looks quite nice.
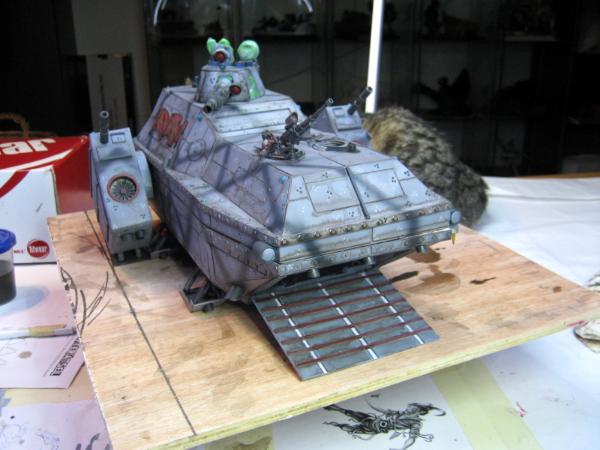
And with the Lasers mounted on the KAIROS
Noble Korhedron over at Warseer wrote:
New turret is grand, just don't expect me to believe a man can fit in there!!
Well, if I compare it to the other WH40K turrets, I think it is even on the large side Especially since it is a Laser-Gun, which would have no recoil and no ammo feed or loading mechanism...
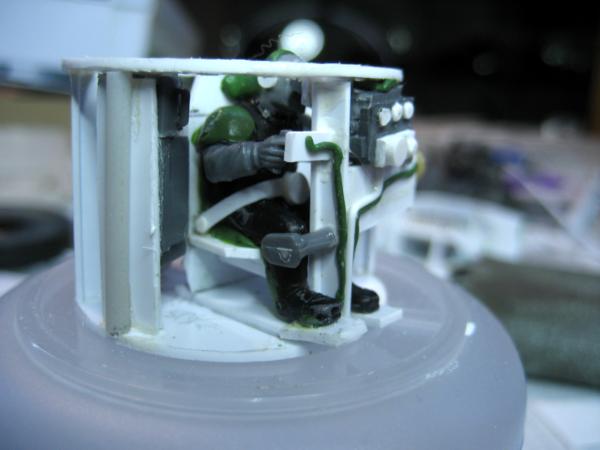
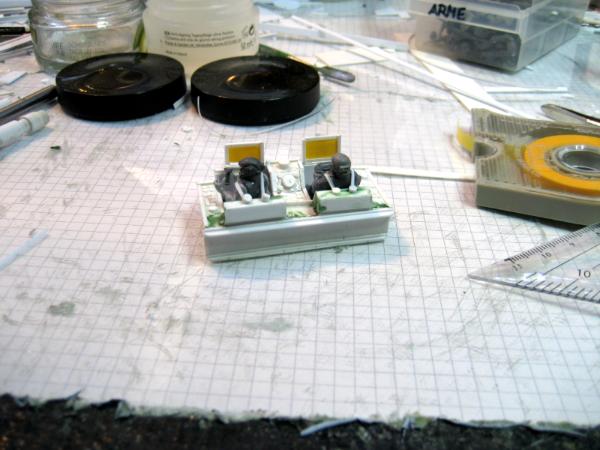
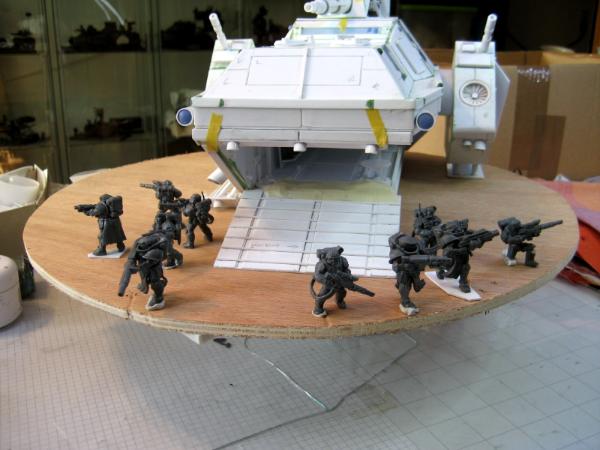
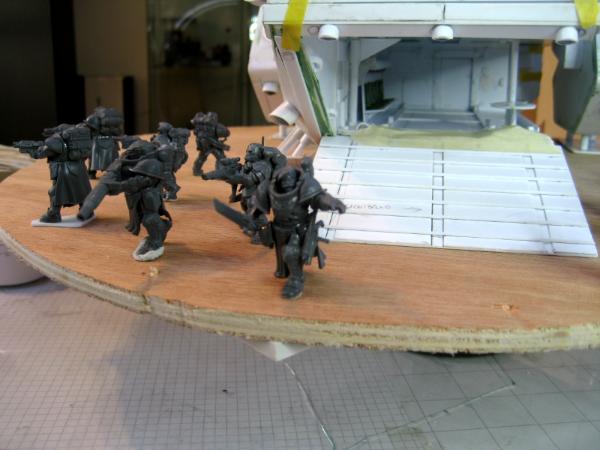
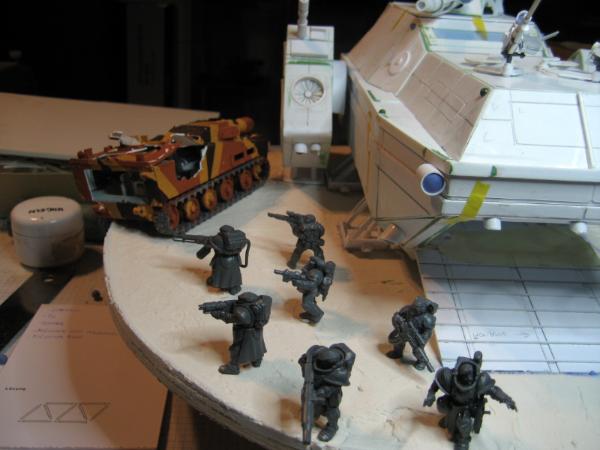
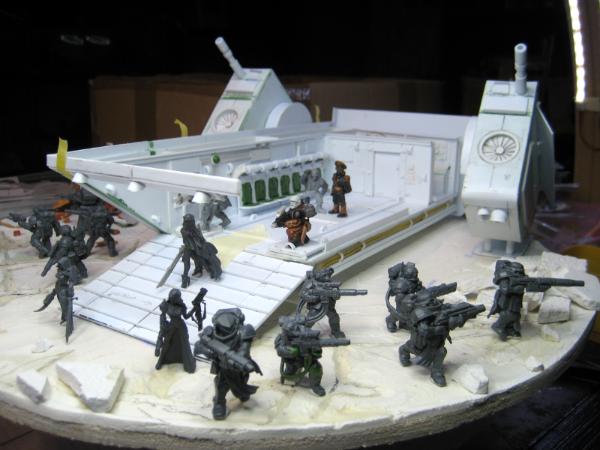
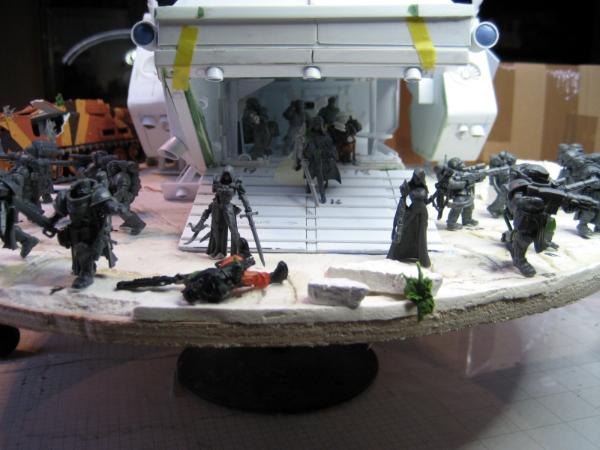
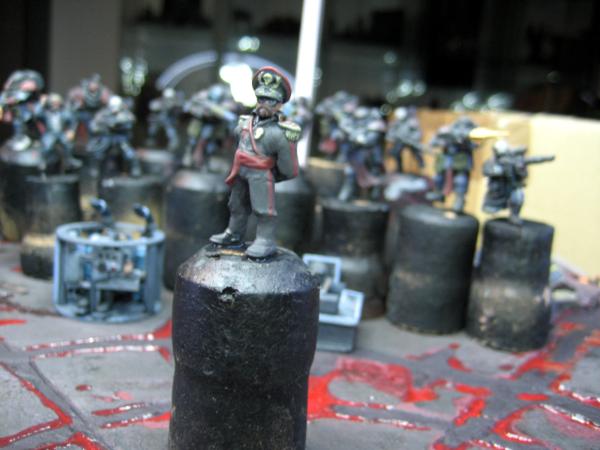
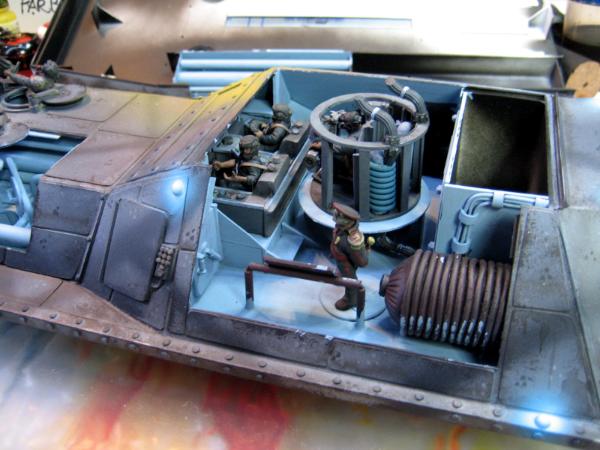
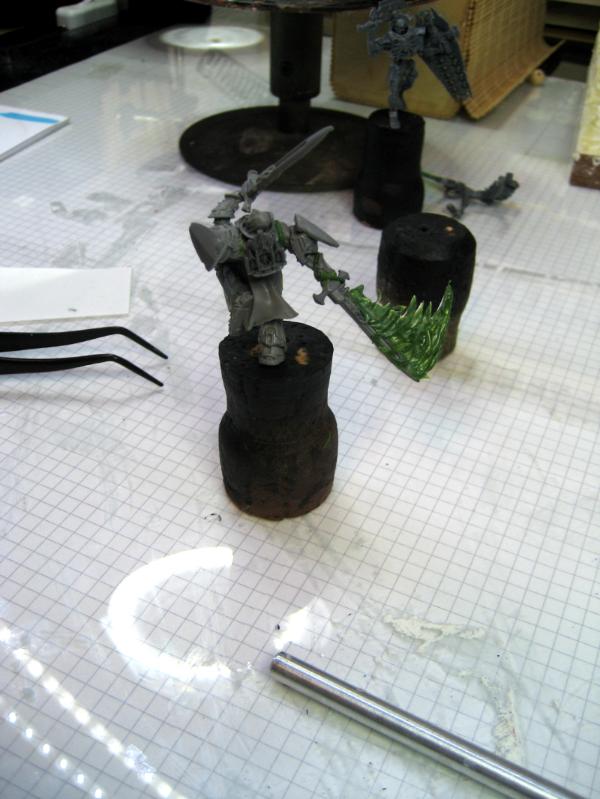
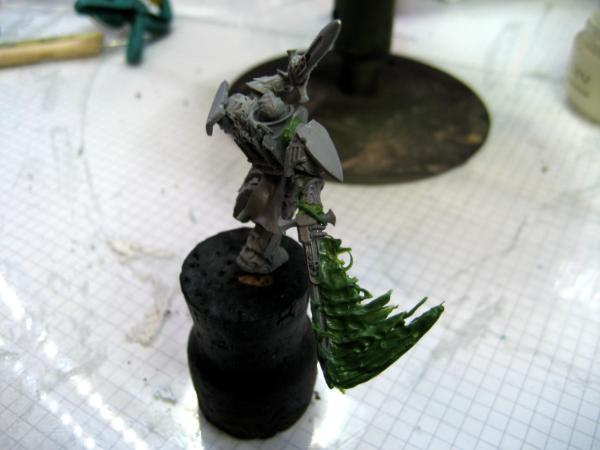
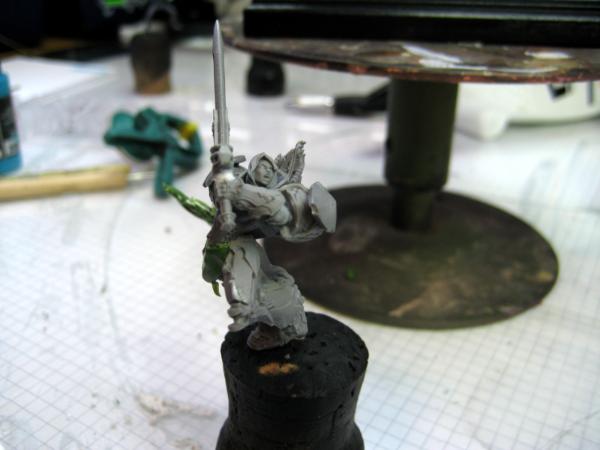
But anyhow, a man doesn't need to fit in there - it'll be two ladies
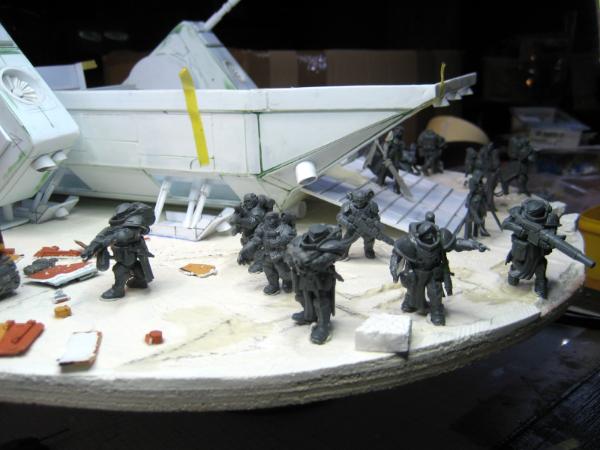
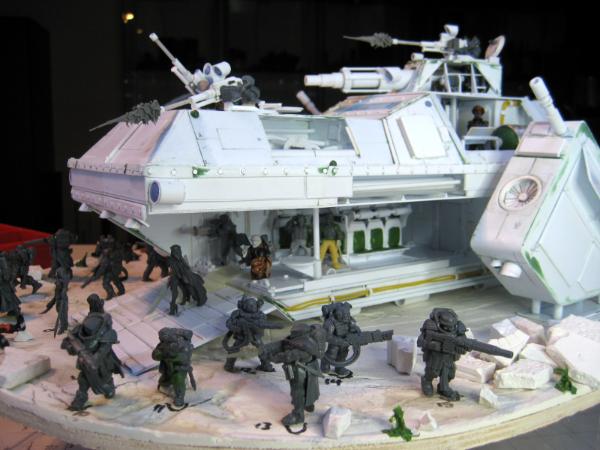
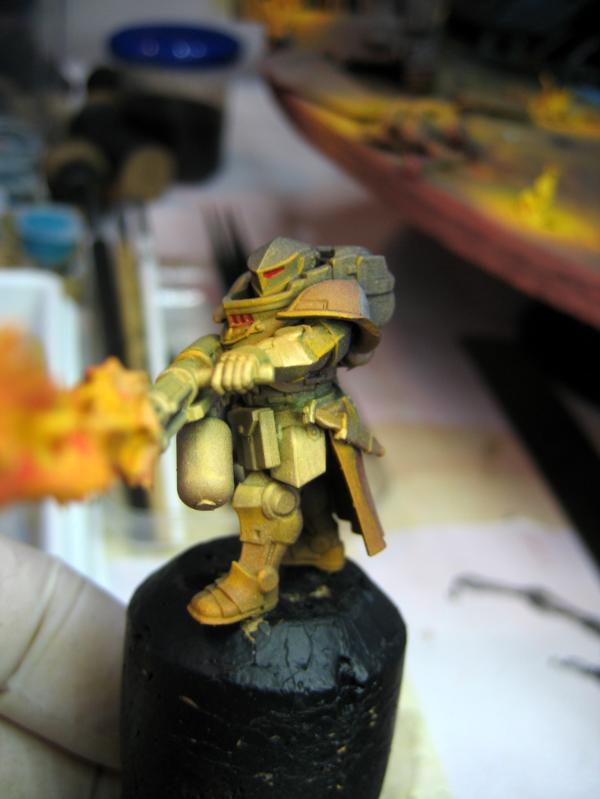
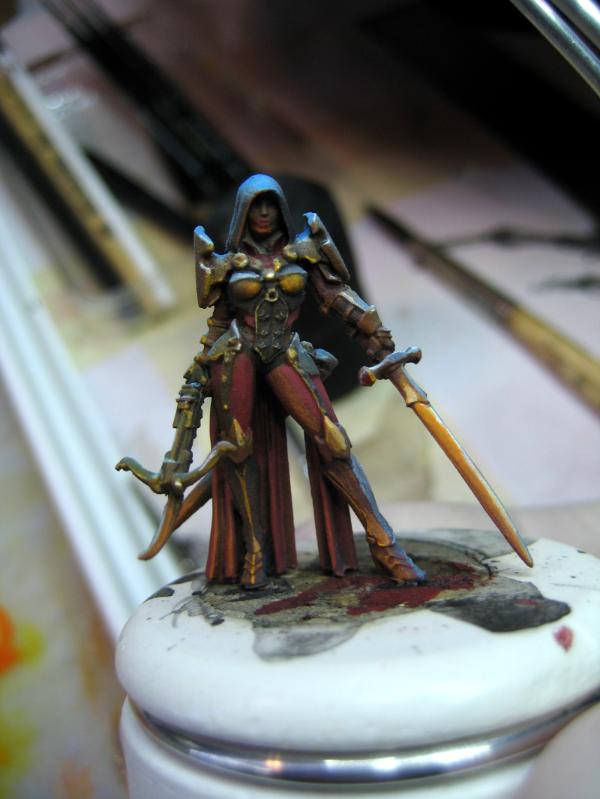
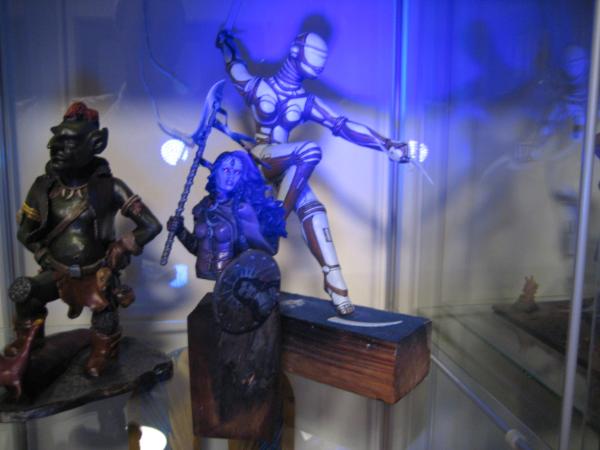
These two are from the Raging Heroes Kickstarter "The Toughest Girls of the Galaxy"
I really like their look.
They are tiny compared to the bulky 40K trooper, but I think they will mix well in the diorama.
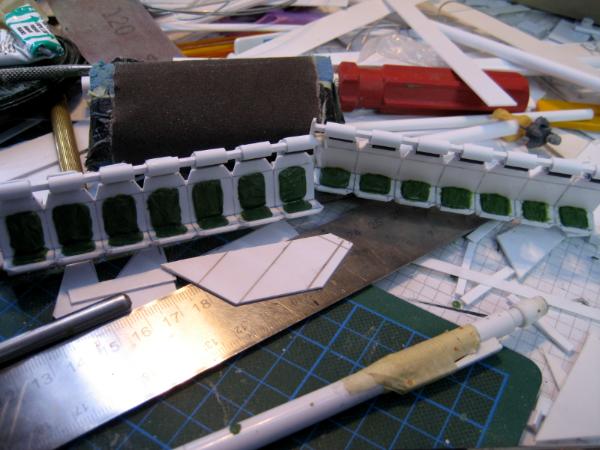
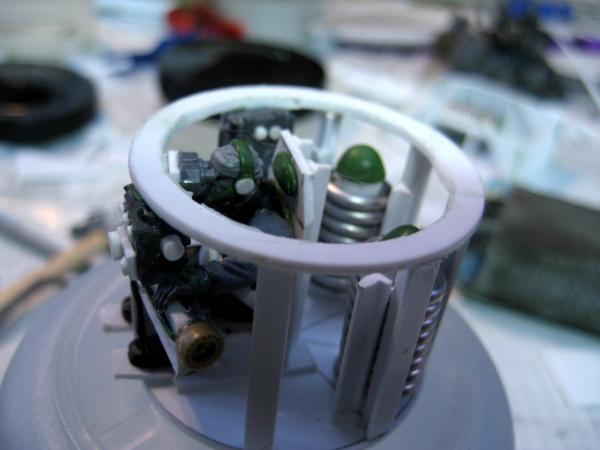
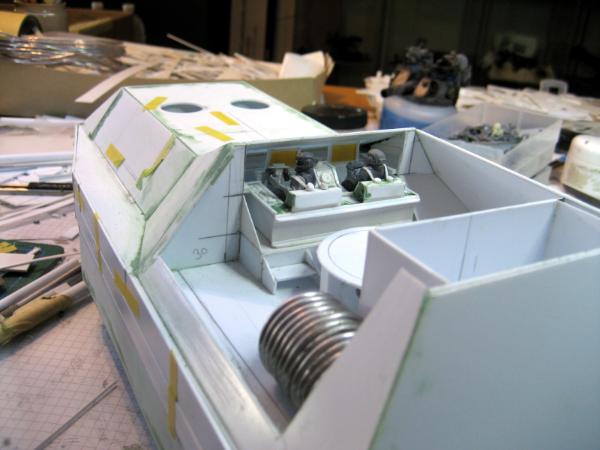
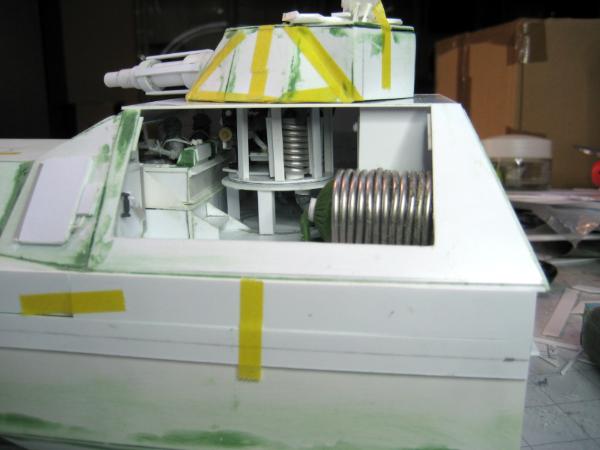
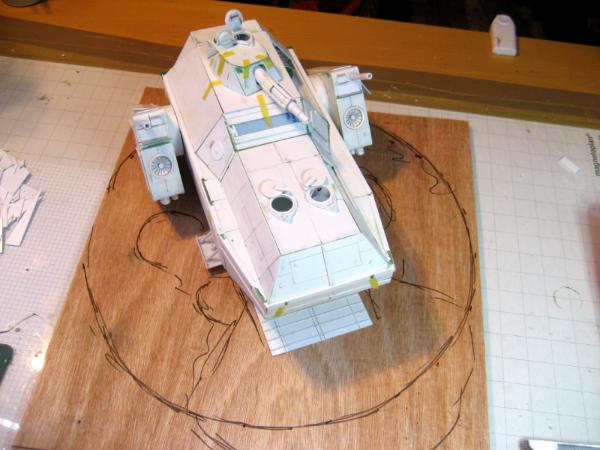
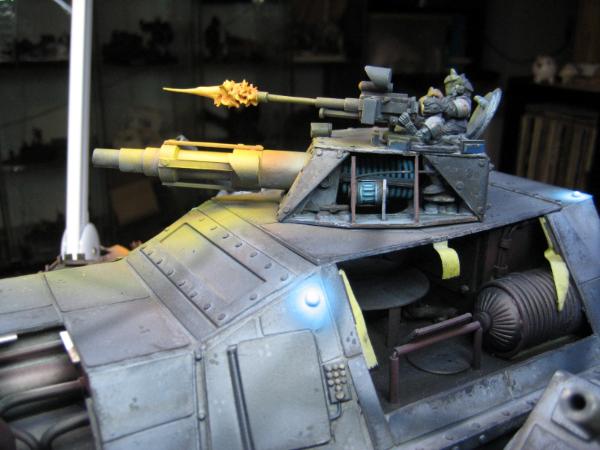
Last not least I put together the elevated sensor platform for the KAIROS.
What do you think?
Will that work?
It still needs all the vision blocks, sights, lights, luggage and camo nets - and of course rivets
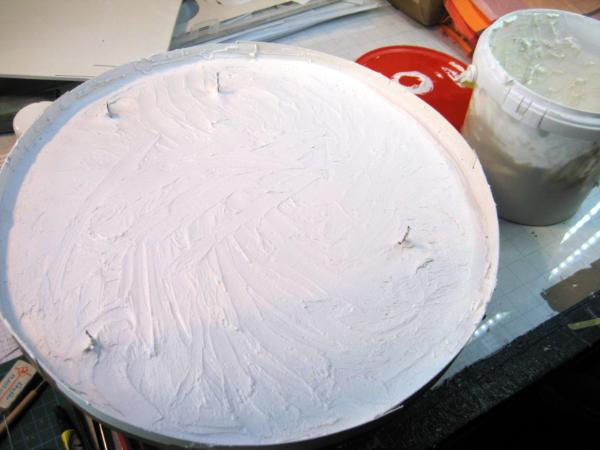
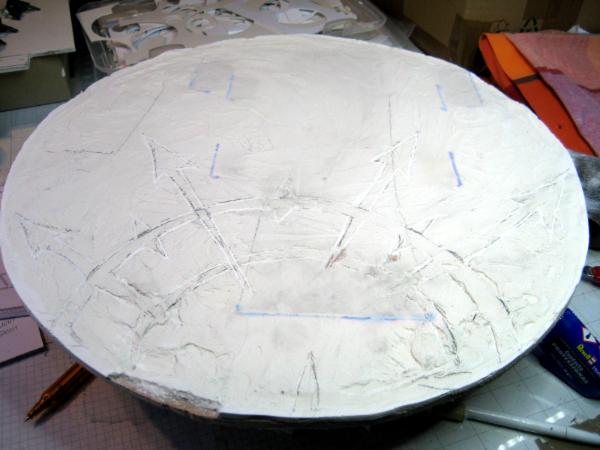
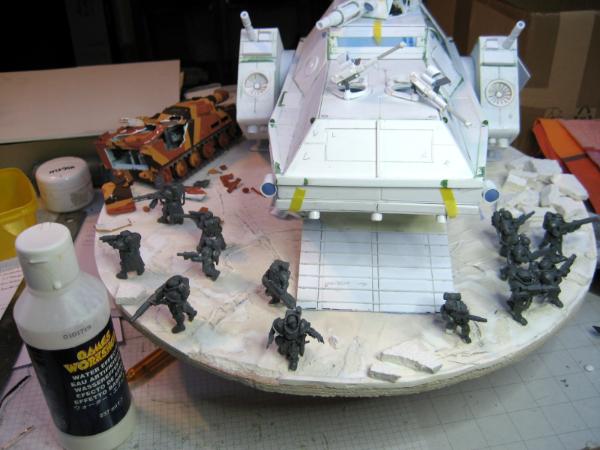
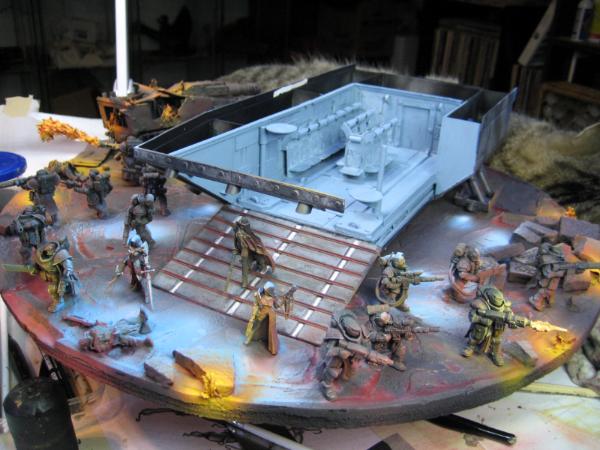
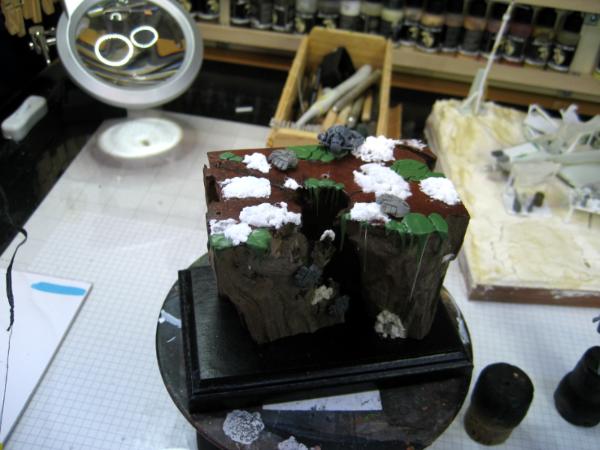
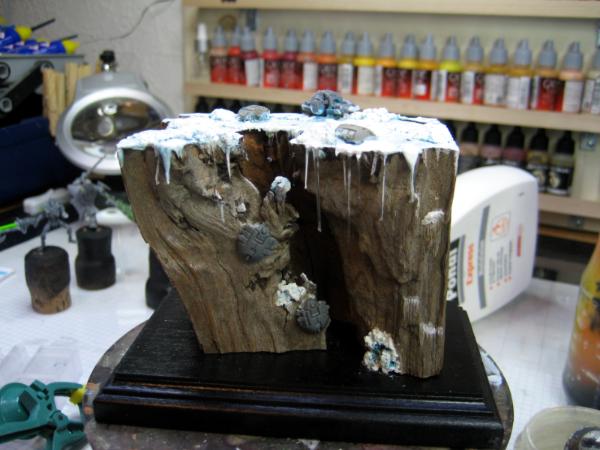
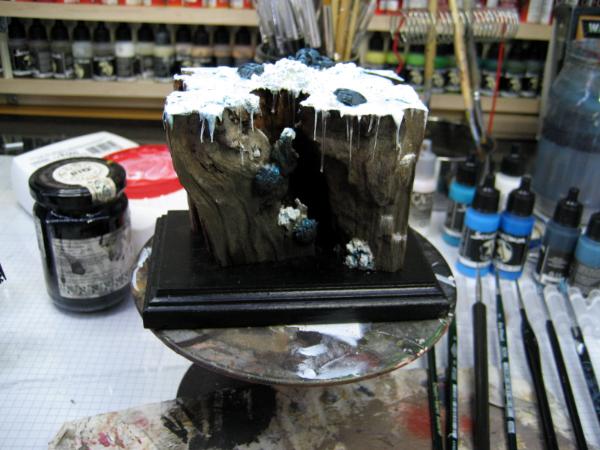
With the crew settled, I started the diorama base. As usual I used "Molto-Fill Compact" as I can manipulated it pretty well during curing and I can ensure to have nice cracks.
I also used my Hirst Arts brick molds with Stewalin to create the bricks for the caravansary.
As envisioned, the base has some nice cracks - it is relatively easy, when the top of the mass is starting to cure and getting solid, while the deeper mass is still a bit liquid to manipulate the top and create cracks.
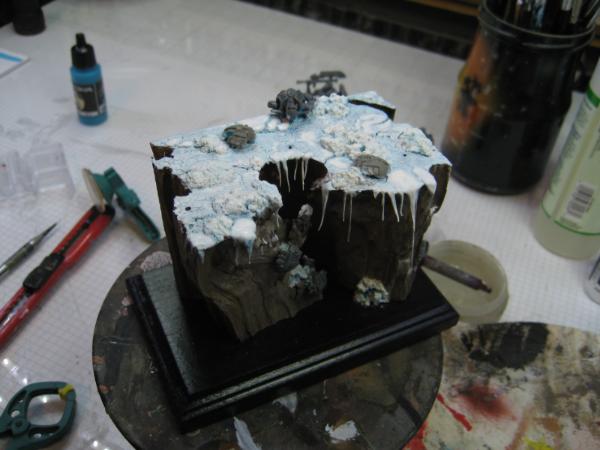
With the caravansary erected.
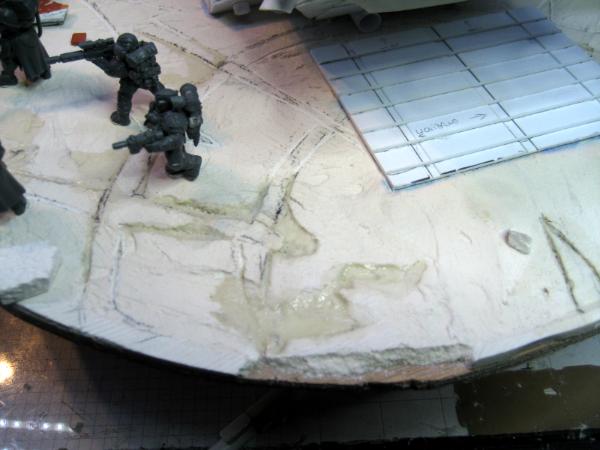
Next I carved the patterns and cobblestone into the base,
and then applied dirt and debris.
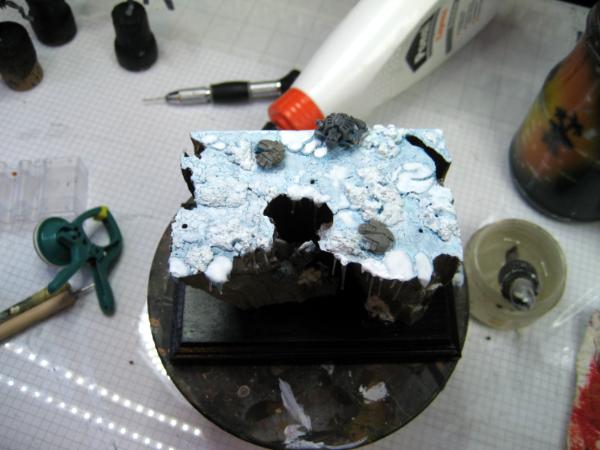
Finally I added some more details, like the straps for the tarps and nets.
I added the cable to pull the track.
Some more personal equipment for the TC as well as a nice mustache.
Almost there.
After watching another Star Wars trailer I was tempted to add a BB-8 droid, but couldn't come up with a convincing (WH40K)design.
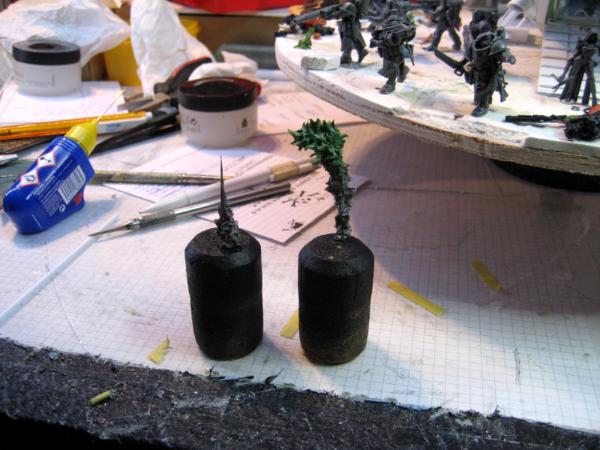
So I decided to use one of the Raging Heroes mascots and modify it to fit the scene
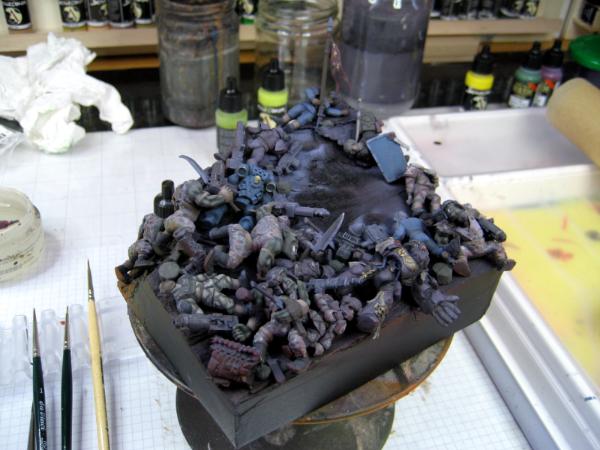
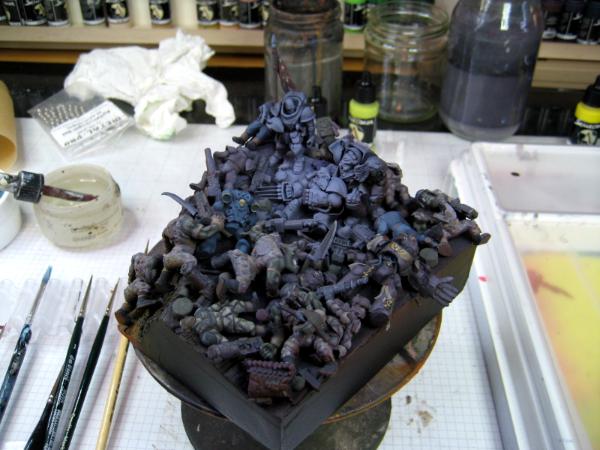
Everybody ready for priming.
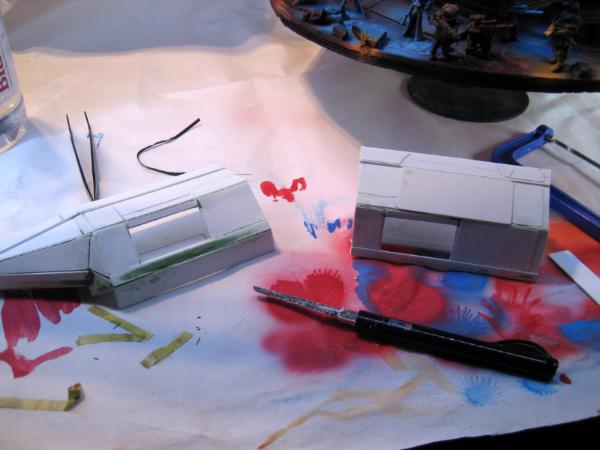
Re-arranged the desk for painting.
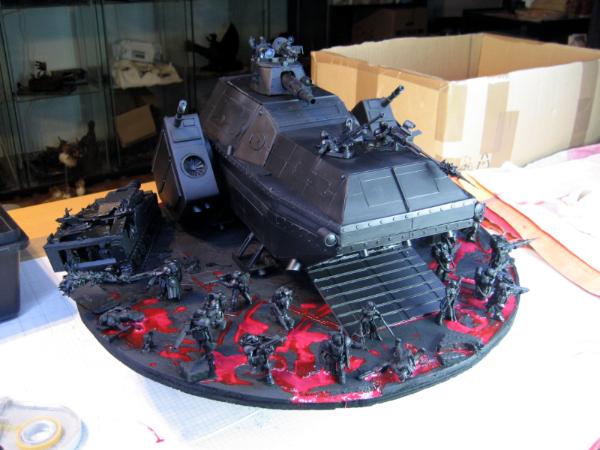
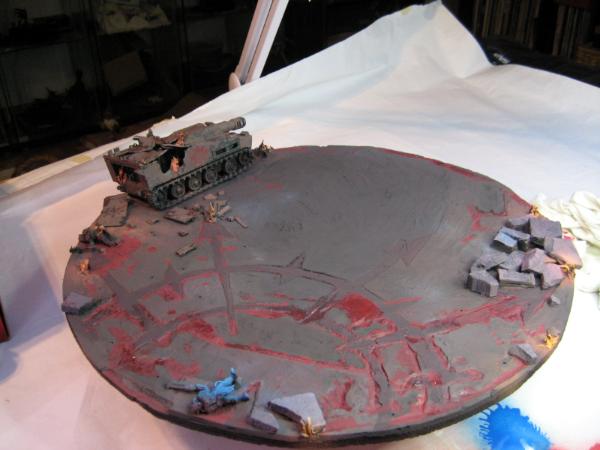
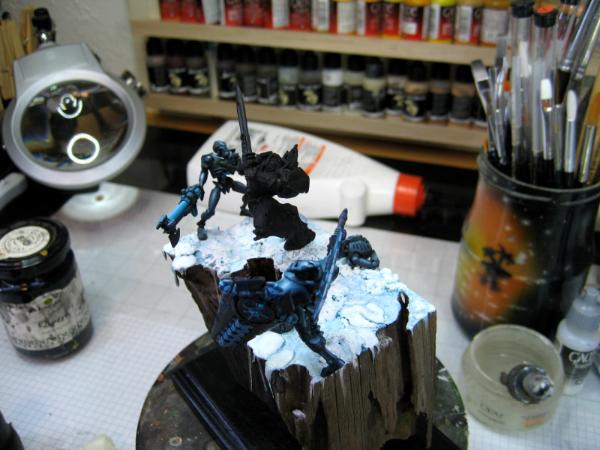
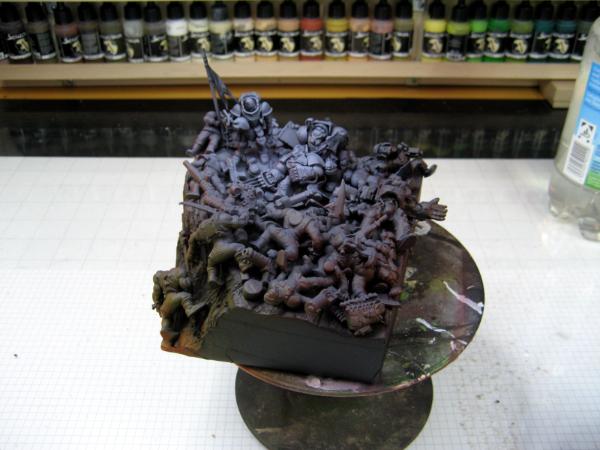
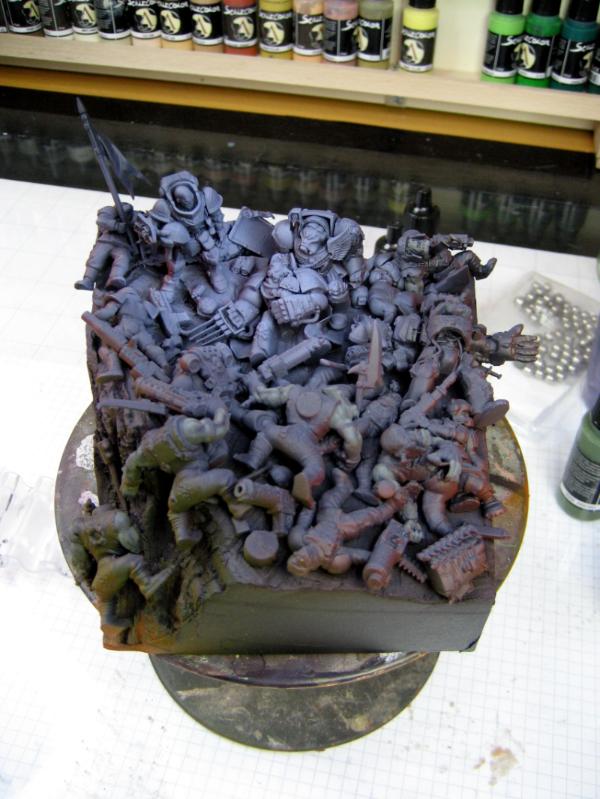
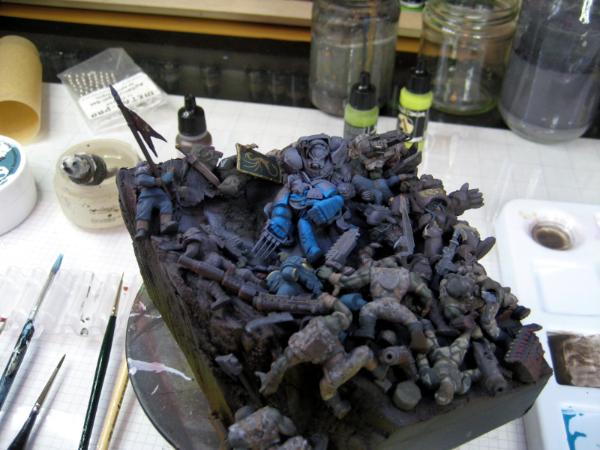
And started with the base.
First were the base colors,
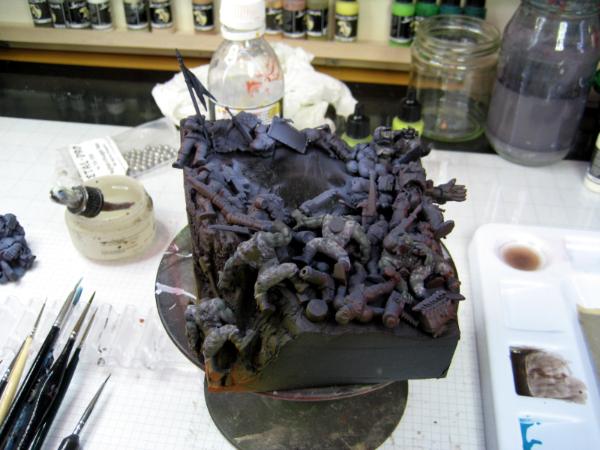
then some hefty washes,
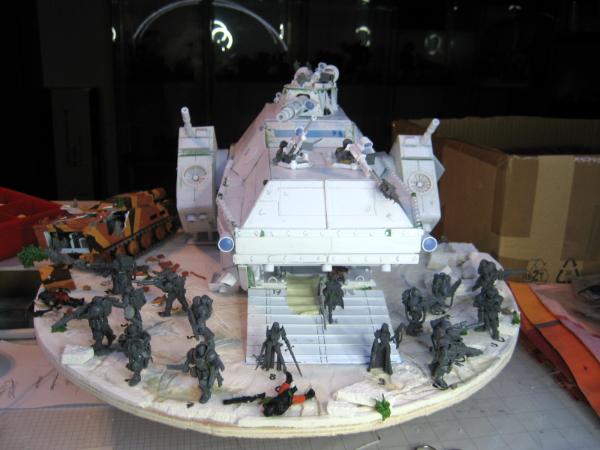
and finally pigments to represent the Martian-style landscape of Dencara V.
Well, this is as far as I got.
What do you think? Anything still missing?
Cheers
Klaus
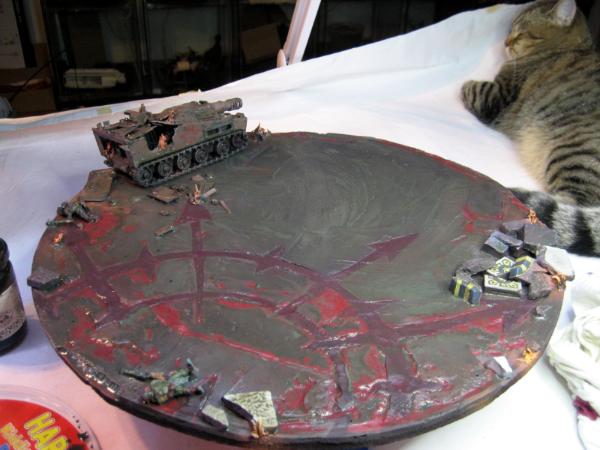
Thank you Camkierhi - yes the wall still looks a bit plain.
I added some more scorch marks - but I think I will revsisit it again
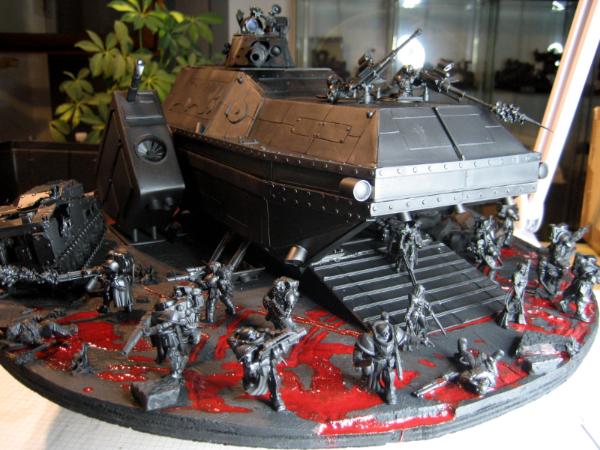
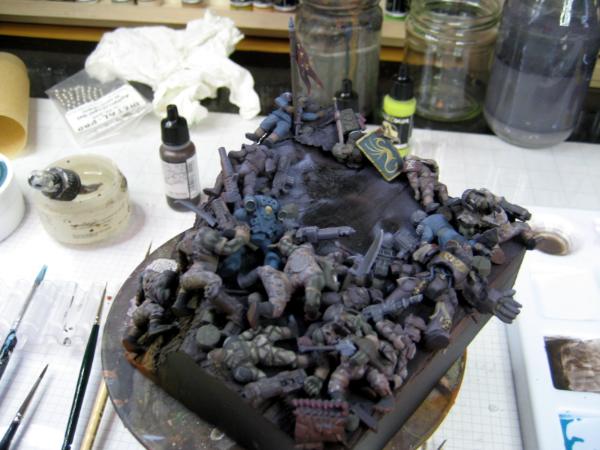
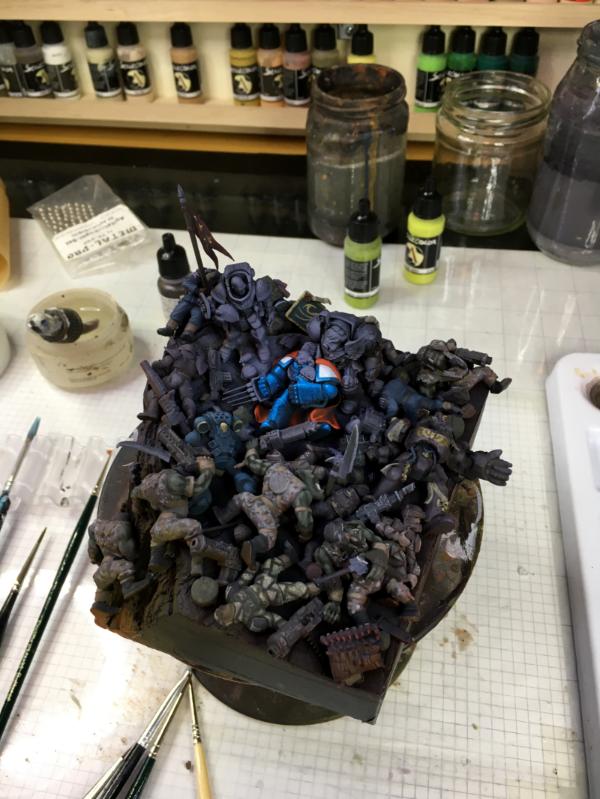
Well, today just a small paint update.
Here you can see the base with the pigments - before varnish.
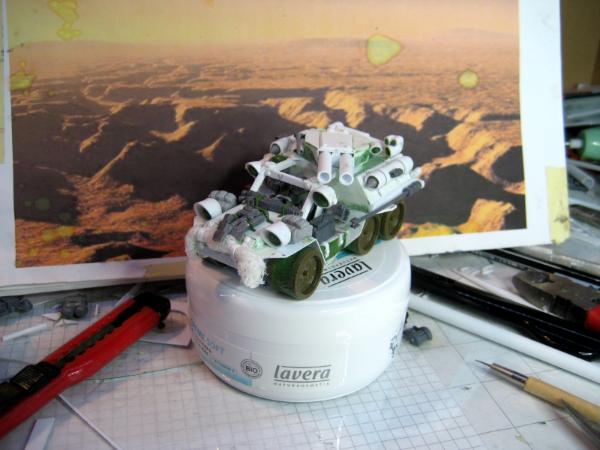
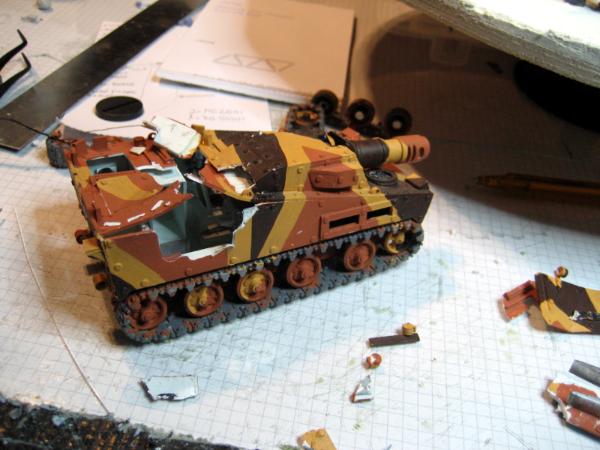
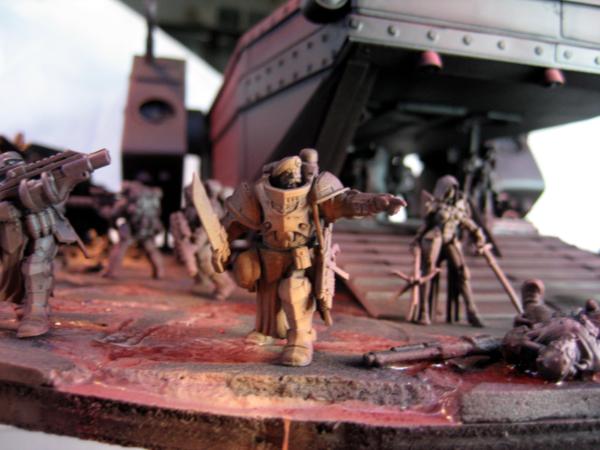
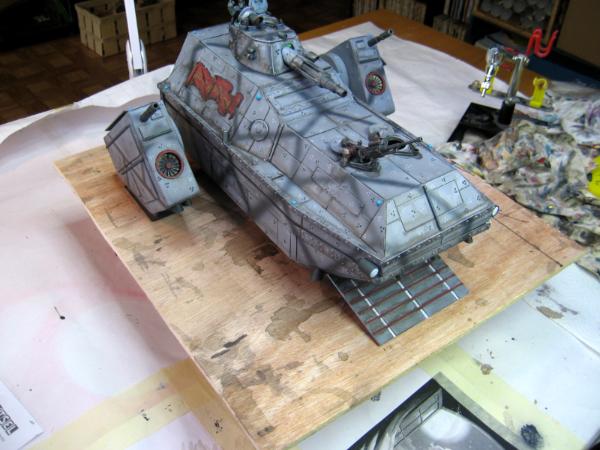
With the base mostly done, I started the vehicles. Since the scouts will operate outside any of the major settlements they will not receive the urban camo I used on the POLEMOS and EPIALES, but rather the standard Tiger Flash used on the HERCULES and PONOS.
For this I started with the "Terracotta" base color.
Then I added the "Ocre" flash stripes.
And inlined them with the "Mahagony" stripes.
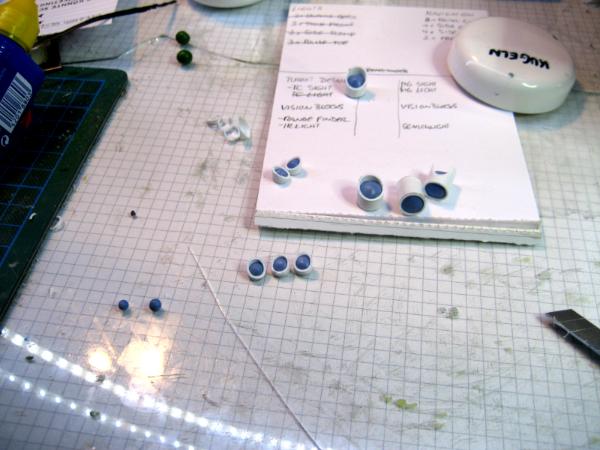
After the basic camo they received the tripple-dot patterns (light and dark), the canvas tarps were painted in a light brown color, the camo nets got a pattern and I painted the vision ports and some of the lights in blue.
That's as far as I got.
Next are the sights in red, black on the roadwheel rubber, the Smoke Launchers, and the tracks.
So what do you think?
Cheers
Klaus
Well, English isn't my Mother tongue and admittedly I'm not too verse in the WH40K universe So if you have some time and like to help me out, I would surely appreciate some editing, suggestions, improvements and so forth.
THANKS!!!
Hi all,
today I only have a very short 5 image update.
Since the last update I added the red and black color for the remaining lenses.
Then I decided to do a small freehand for the KAIROS door.
"Foxy Lady" as a tribute to the FOX Armored Reconnaissance Vehicle and the female crew.
Then some more black for the roadwheels, Track base and Smoke launchers.
Next I did some small unit markings for the PHRIKE.
Vehicle D6 of 3/69 (Armor) of the XIX Guards.
The "Wyvern"
You can also see that I started to work on the tracks, giving them some rust and dust.
That's as far as I got this weekend.
I hope you like it.
Cheers
Klaus
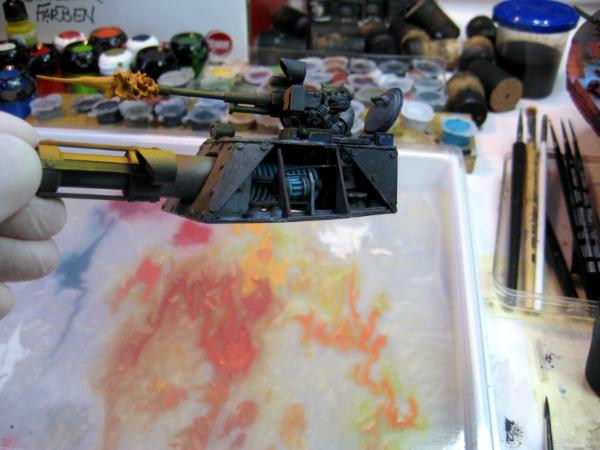
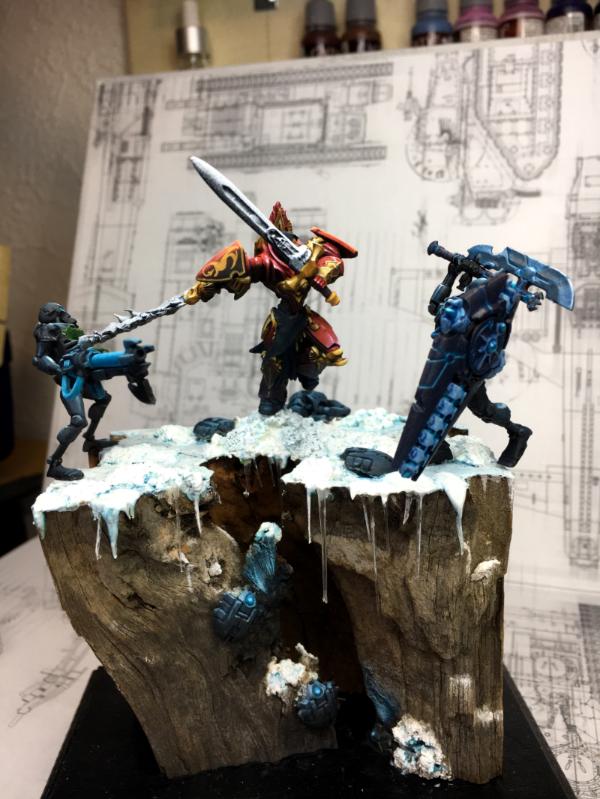
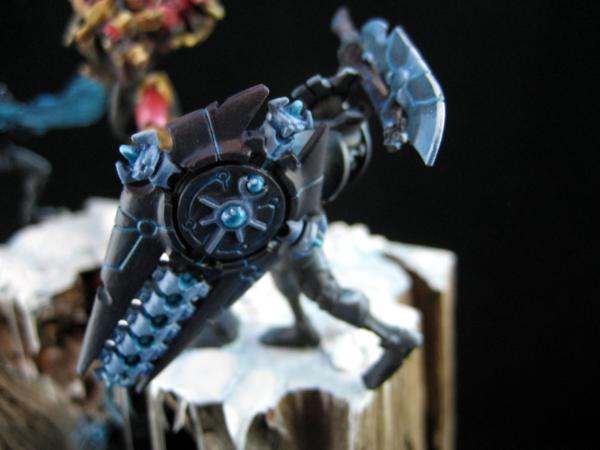
But I would like your feedback specifically on this bit:
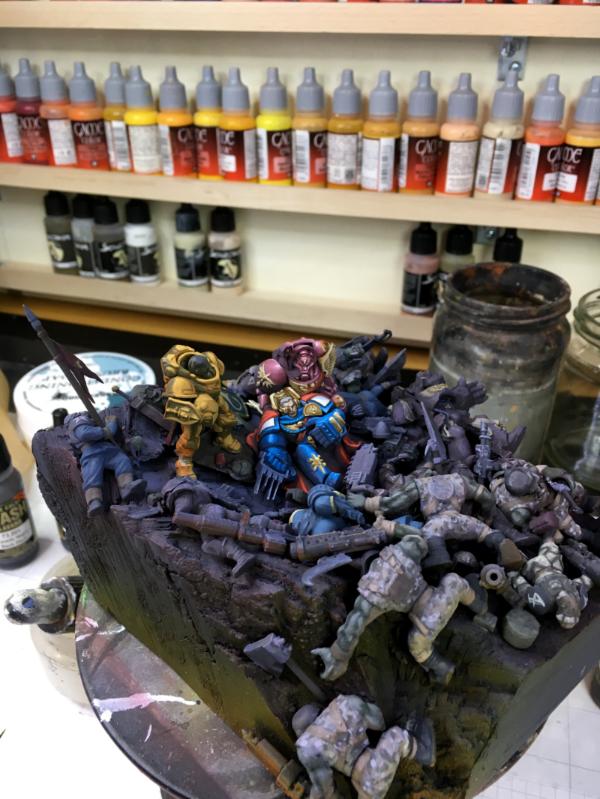
the NEMESIS weapons platform was finally in position to join the fight.
The enormous weapon was loaded with a projectile as big as some of the smaller ships. Energy banks were charging up, lining up magnetic fields that would accelerate the projectile faster than the speed of sound and hurl it at the enemy.
One after another the relays were charged up and indicator lights on the bridge of the NEMESIS turned green.
“FIRE!”
Despite being in the non-atmospheric voids of space a glowing ball erupted from the rail as the projectile was launched. Its tip glowed as it raced across the distance between the NEMESIS and the most forward Ork ship.
While the projectile was still in flight crews of slaves manned machinery and cranes opening the breech mechanism of the gun and positioning a new projectile into it.
The impact of some hundreds of tons of especially hardened alloys and the tremendous kinetic energy resulted in a gigantic explosion. The resulting fireball was spectacular to say at least.
The enemy ship was torn apart and many secondary explosions ripped through the remaining sections, now floating through space.
Does it make sense? Is it "dramatic" enough? I mean faster than sound...we can do that today, can't we? Or are rail guns different?
Does it sound "huge" enough?
It's 40K after all. The rail gun should be so big it can't be in a cruiser size ship and is instead mounted in a slow and cumbersome "Weapons Platform" that is bound to a solar system (not interstellar).
The slow, but forbidding weapons platform was lumbering behind. But with its enormous range and destructive power it didn’t need to be any faster – all it needed was a clear line of fire.
I would really appreciate your input here Thanks guys!
That is looking great bud, really great colours, with the blue lenses really popping. Free hand is brilliant, but almost too crisp and clean. Brilliant though.
As to the story, I must go and read it all, however that bit seems to do what you are asking, but there are some translation issues I think. "spectacular to say THE least". That's being picky though. The passage certainly conveys a sense of a massive gun, I think the speed of sound has well and truly been broken, and this would realistically need to be way faster if it has a range as vast as it is portraying. But finally, I have enjoyed what I have just read, and will be off to read more, great stuff.
@Camkierhi - thank you. Weathering is well under way and most of the colors are now muted, toned down. Started paint chipping via sponge last night. So it ain't crisp and clean any longer.
Changed the "at" to "the" I hope you don't mind that you (Camkierhi) are now a member of the noble house of Cesca
@EDC - THANKS!
Yes, started weathering last night - it will hopefully bring everything together.
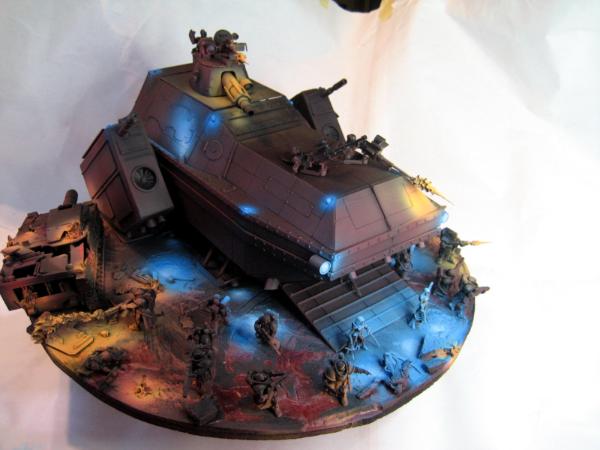
I hope you are all well I'm currently a bit down with a cold - you know the one that's a sneeze to women, but life-threatening to men But luckily I was able to complete the diorama.
You will see, the washes have toned down all the colors nicely and the blue of the lenses is now much better aligned with the rest of the colors.
So, here is the last shot of the PHRIKE and KAIROS in a "pristine" state. Already toned down with washes, but no paint chipping yet.
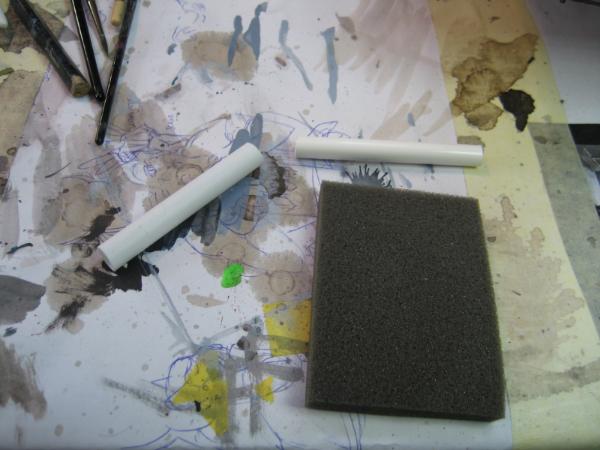
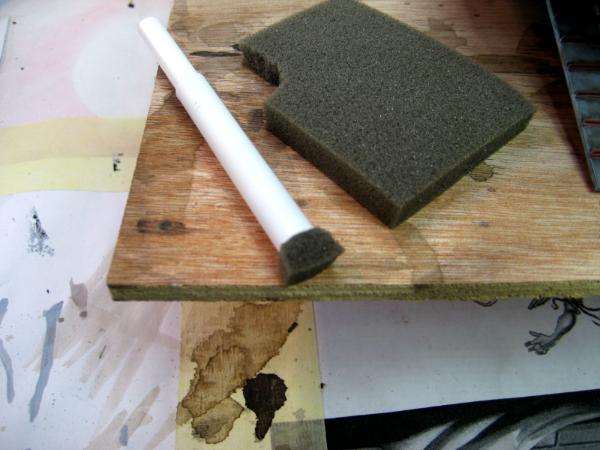
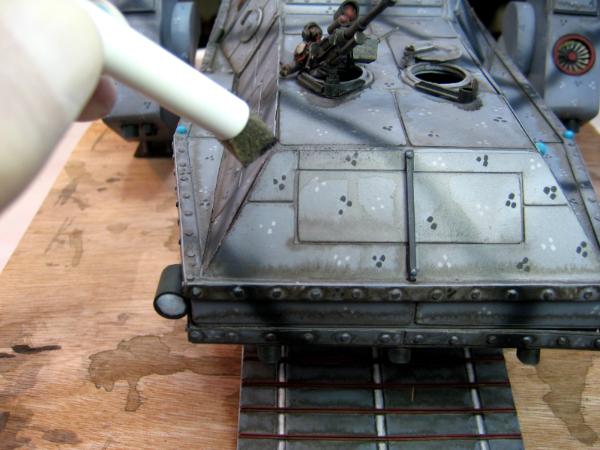
I started the weathering with my "damage mix" a dark blue-grey that I apply with a sponge.
Once I've completed the basic chipping I added some metal effects. The minor ones with a pencil, the larger one with Boltgun Metal - applied with a brush.
I think it works quite convincing.
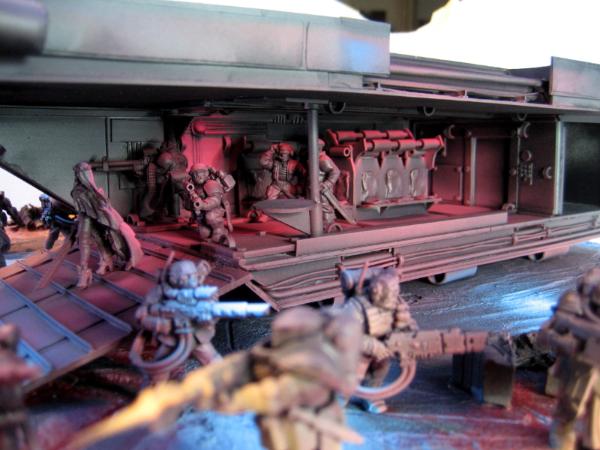
Also on the PHRIKE.
And finally I painted the lenses and lights.
Done!
Oh wait!
There's the crew :(
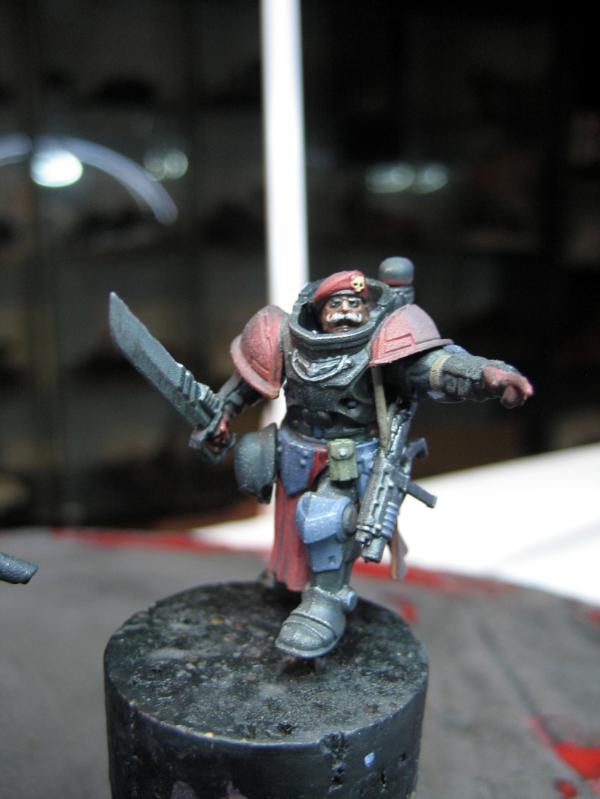
They all get the Dencara Tiger Flash pattern.
Lots of details
Last image before the washes and highlights.
But now!
Too bad the auto-focus didn't agree with me.
But I think you get the idea
Even though I'm not 100% satisfied with the lady's face, I think I can live with it
To bring it all together I applied some more pigments to the vehicles and the scene.
I think this makes it look a bit more realistic.
And the completed scene
I hope you like it.
I want to thank you very much for accompanying me on this little journey and I hope you enjoyed the ride.
Thank you for your feedback, suggestions and comments.
They lifted this project a bit higher and made it better.
THANKS!
But honestly I'm not sure how far I will get this time.
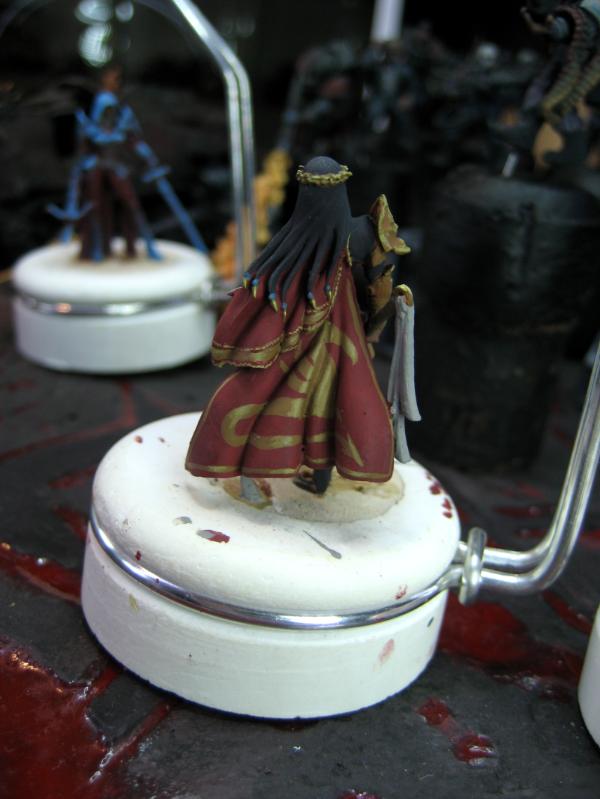
By now the plastic is very brittle, and many pieces started to warp.
She's still a beauty though.
Got some real spider webs
So now I'm taking stock
Some pieces are broken and she needs a good cleaning.
Sheesh, probably a whole spider colony.
So I started to repair some of the broken pieces - a wheel on the STRIX VTOL aircraft and a blade on the propeller.
As said, no promises.
I'm trying to enter her at the SMA Big Spring Contest as "Shelf Queen" for which she definately qualifies But I will be out for two weeks - visiting Scottland - and then I'll see.
Well, last night I decided to remove all the masking off the windows and stuff - or rather see if it still comes off after 3 years.
It was never intended to remain so long on the windows - and I don't think it was made for it.
But luckily the rubber mask from Vallejo came off pretty well.
First time in years these 3 guys see the light of day again
Another important part is the bridge.
After a battery recharge, the lights still work.
How would the Tamija Masking Tape come off?
Great!
No problems at all. No damage to the Goddess.
The large rear mural was covered in standard, no-brand masking tape...
Lots of paint ripped off :(
But well. I already have an idea here.
So I checked the wiring and lights for the body area. Still working.
Lower observation room too
And this morning she was still on my desk
So I decided the first thing to fix was the rear area.
I simply changed the scene here, so that the two guys *should* actually be painting the rear are, but are taking a break and do some golf
Even added some spilled paint.
Then it was time for some serious work.
Damages.
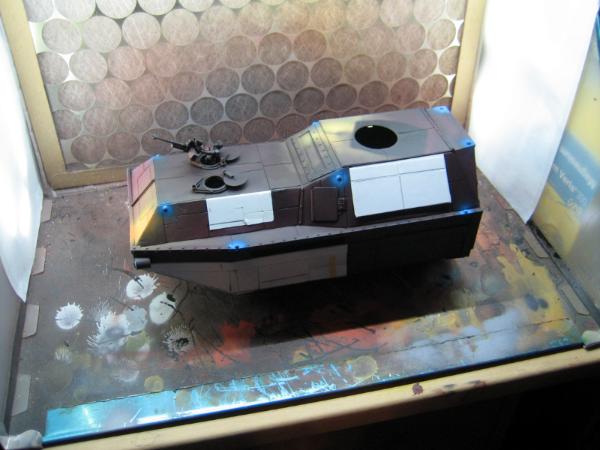
Like last time I started with the dark grey.
Then Terracotta in the upper parts (simulating the rust resilient paint) and Fortress Grey for the lower highlights.
Then the dark grey with a sponge.
And finally Boltgun Metal for the deeper damage areas.
The top of the deck received a new paint coat to support the scene there, where a bunch of guys are in process of painting the deck.
You can also see the simulated color transition of the "cloud pattern" with the two colors.
Well, that's as far as I got.
Feels good to have the old lady back on the desk.
Cheers
Yes, I think it is time for the old lady to be finally completed. She survived 3 cats and began to think she was cursed.
Currently we are without cats - so what better time ?
Well I decided to experiment a bit more with the already painted part. Trying to tell more of the "painters" story. So one understands what is exactly happening.
So I took the challenge of doing the Dencara Cloud Pattern with a brush.
While that dried I completed the damage of the upper story of the body.
Wow, that damage stuff IS time consuming.
So maybe more already painted elements?
I also started the blue ornamental flag on the observation deck.
I still need a good Latin phrase - so if you can spare one
To provide more context on the paint process, I also provided a strip of bare metal in front of the rust resilient paint.
Uff!
The base for the body damage done.
It starts to tell a story of its own.
But it took my quite some hours to get all the damage painted on her.
So how could I continue with the upper decks?
More damage?
I decided to take the easier route The upper and command deck is already painted. She is returning to Xantium after a successful campaign in the south and we want her to look representable when she returns for her parade.
Of course the command deck with the officers as well as the landing platform where first visitors are arriving, must be spit-shining sharp, right?
So I started to do the cloud pattern to the sides.
Here at the front some bare metal.
Then the lower deck left.
Not much new here.
And the right side lower deck.
Back to the front
Here you can see the instructions for the paint detail.
Indicating the two colors (Solarblau and Sturmgrau) as well as the transition line.
And this is how she looks
This will be the last post for the next two weeks.
I hope I will continue when I return from Scotland.
But right now I feel pretty confident I will
So, what do you think of the different paint versions and the story to it?
Cheers
Klaus
Loving the battle damage and the ad hoc repairs of bolting on pieces to cover serious wounds. The partly painted parts are also really nice as it shows that they are taking the time to repair such an honored vessel.
I like "fac fortia et patere"- do brave deeds and endure (not seen that used before), I think it's fitting with all the battle damage done to the ship, but there were other good ones on the list as well.
Enjoy your trip....watch out for sheep....and their mates
Hey ishkatar,
well maybe it was misleading, but no.
During the ATHENA build time I lost 3 cats...
But hey!
I'm back The trip to Scotland was great!
We had excellent weather,
visited SAS country,
did some boat trips,
listened to many Pipers,
and enjoyed the local pub-live
Scotland really is worth the trip
And against fears, the ATHENA was still on my desk when I got back, and she continued to draw me to her.
I think this time I'll finish her.
The first thing I did was to extend the "clean-and-paint" scene.
So I added some platforms
and extended the areas already re-painted.
The entire front of the ATHENA is now freshly painted,
while the rest is being worked on.
The Tech-Priest has already added his instructions and paint guide.
And here on the right, I will add a welding scene.
Similar to what I did for the "Prototype" dio.
Here you can get a rare glimpse of the underside.
As you can see most of the paint is already "stripped" and some rust resilient paint applied.
While completing most of the body paint, I was thinking about adding another piece to the nose area.
This is the first sketch.
But first I had to complete the rest of the paint job.
Top deck and radar completed.
I added the paint with the closed armored shutters over the windows.
But mounted them open.
Top deck and railing completed.
I also completed the railings for the main deck.
And the rotors.
One of the rotors is already painted in rust-resilient paint
With the body completed I started with the weapon systems - like the
KERES Forward Rocket Launcher System
Then I painted the Hydras.
And the NEMESIS Mk MCMLXIX CWIS Trieste Pattern
Wow, this really felt like the final spurt.
Only some more weapons!
The PHRIKE Quad Lasguns and POLEMOS Mk XV Fuzz Pattern AA-System
So I decided to add another Athena image to the nose area.
Pretty stylized and golden.
Yesterday I had some daytime hobby time and was able to build the stand for the ATHENA.
I used some 4mm Plexiglas.
Wit this I can add the belly-mounted AA system and it generally looks like flying I'm pretty pleased with the result - first time working with Plexiglas.
And I decided I need a proper backdrop for her. I still had some mounted canvases around and splashed some paint on it
Sorry for the blurry pic.
And last not least I finished the nose image.
I still have to add the slogans to the two flags on the observation deck to finish the ATHENA itself.
After that I will paint the various crew members and painters.
MAYBE (but that's a large maybe) I'll add a shuttle scene to the landing deck, where a high ranking representative is landing and being welcomed...
We'll see.
Wow guys!
It's been quite a trip from here
And I thank you all for being part!
I can't count all the comments, suggestions and encouragement you provided.
THANKS!
Well, for those interested in the Dencara Story, I have added some new story elements, including the legendary Colonel Estara (remember the first pics of the ZEUS on page 1? ), as well as Colour Sergeant Gunnarson, and slave N056223.
thank you all for your feedback on the ATHENA Unbelievable, but she's done - everything left is now Eye Candy. Whatever is not finished now won't hurt the ATHENA at all.
But I still have many ideas for the ATHENA.
The painters and welders on the ATHENA will be important to tell the story and make the paint-job better understandable.
There are also the two golf players on the rear deck
And as mentioned before I'm looking at a shuttle/reception scene for the landing deck.
I already have some characters sculpted for this:
So the idea now is to have s shuttle on the landing deck.
The shuttle transported an important passenger - I'm thinking of a female Consul or Ambassador or a High General - and a reception party is waiting for her to exit the shuttle...
maybe with a piper?
:-D
So I drew out some plans.
Maybe you can see the first images on the right, were leaning towards my old THANTALOS Airborne Carrier (Dec 2007)
But I'm also trying to incorporate the newer PONOS family looks into the design.
Still bulky, brutal and retro.
Lets see if it works.
The job of the HERMES is similar to the old Sikorsky Sky Crane
Which could also carry a personnel pod/container.
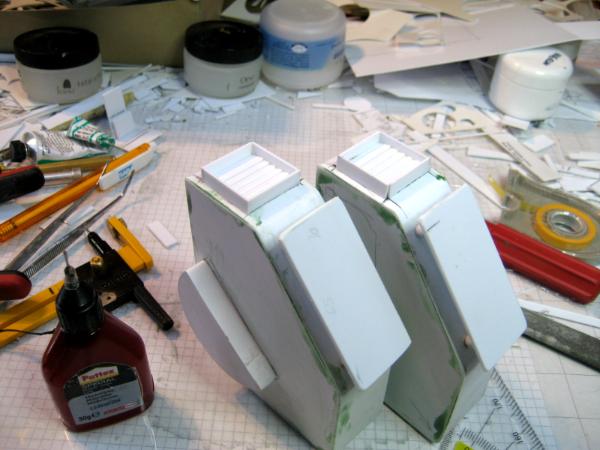
So I started with the passenger pod.
With doors at the side
As usual a lot of Green Putty is needed
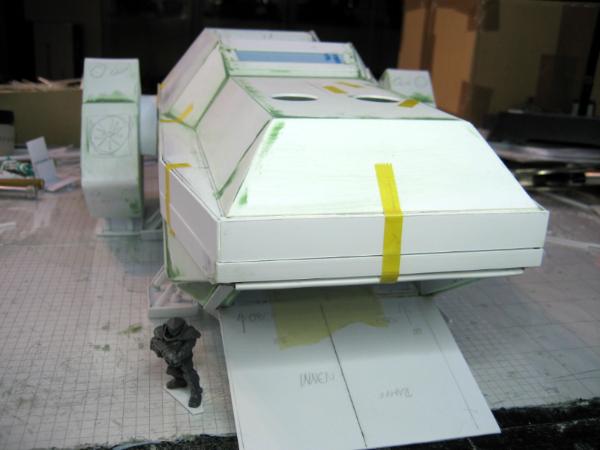
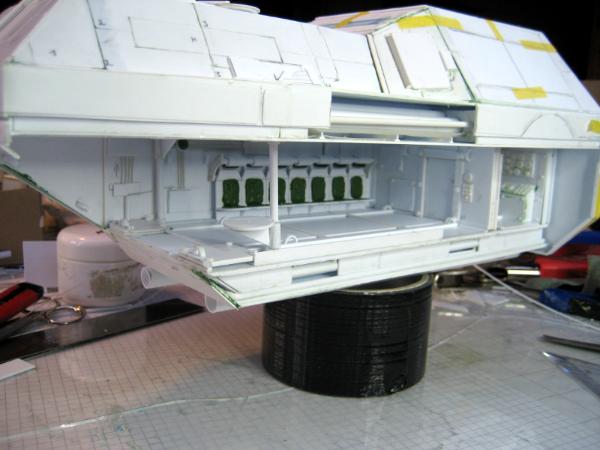
And here's the basic body of the HERMES already on top of the pod.
Needs putty.
Initially I had planned to do a visible cockpit like I had on the THANTALOS,
but the windows will be way too small and narrow. So it will be painted windows instead.
Next I worked on some of the thrusters.
Which are mounted on the underside.
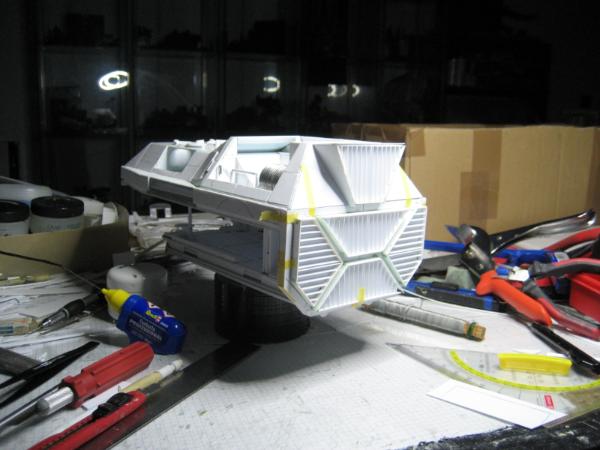
After an extended sanding session the basic body of the HERMES looks very much like I intended.
Then some more thruster works for the "wings".
And a first layout plan for the passenger pod.
Maybe you can see that the VIP pod will have a large throne like seat at the left -centered to the rear wall - with two consultants seat next to the door, and then 4-6 bodyguard seats along the right center line.
Well, that's the plan So, what do you think?
Cheers
Klaus
thank you for the comments and feedback As promised to Malevengion here's what I've planned for the passengers.
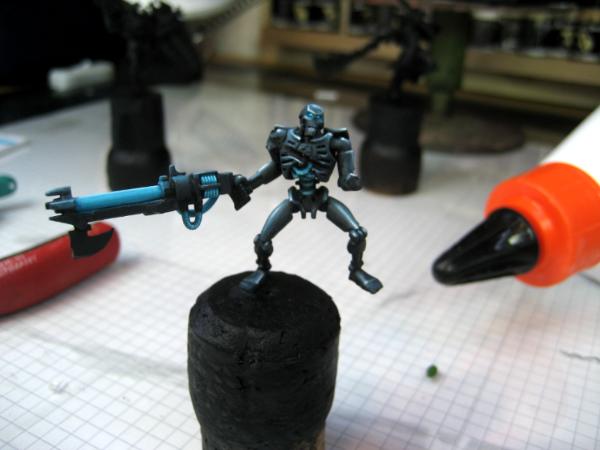
I absolutely want to try these Eisenkern Stromtroopers
and these Female Panzerjägers.
Both sets are from Dreamforge Games, come at a reasonable price and offer some nice poses and weapon choices.
From a modding perspective the parts offer lots opportunities and scale wise they fit nicely into the WH40K scale.
For the two females I'm not sure if they'll be additional Bodyguards and get weapons, or if they'll be more assistants, maybe holding PDA's or the like.
What would you think?
as usual thank you for the feedback, comments and emails I hope you had a great weekend with lots of family- and hobby-time.
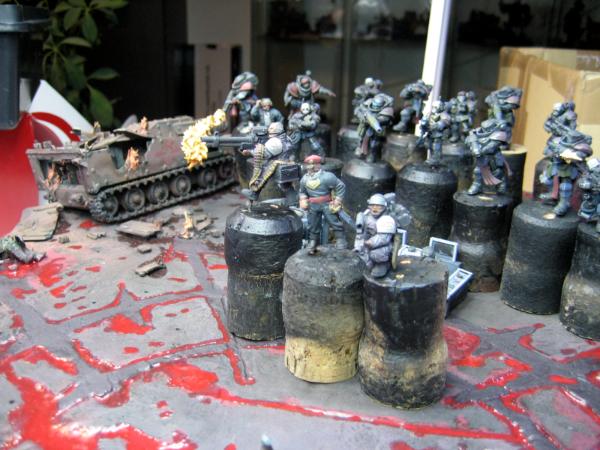
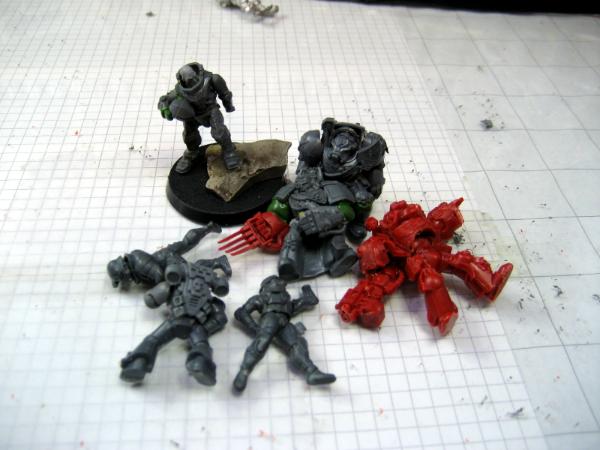
Some of you have asked me for a scale-/comparison-shot of the Eisenkerns and TGG compared to the 40K Guards.
Here's a 40K trooper between an Eisenkern and a Tough Girl.
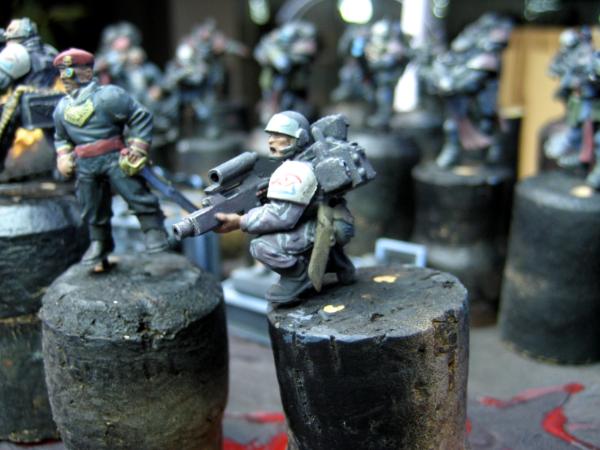
Here I mounted two standard IG arms on an Eisenkern Panzerjäger female.
And this Panzerjäger has two Forgeworld Krieg arms, with a standard IG trooper on the right.
All-in-all I think they fit together well and since the Empire of mankind spans many different worlds with very different gravities, the differences in physique can be explained easy.
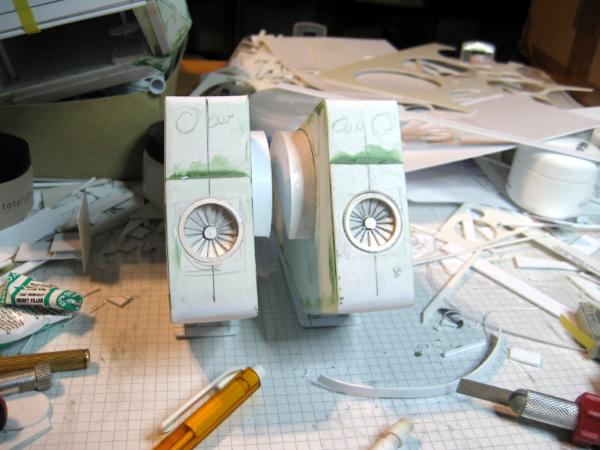
Well, in the meantime I built another, greater turbine fan.
And I mounted it in the forward section of the HERMES.
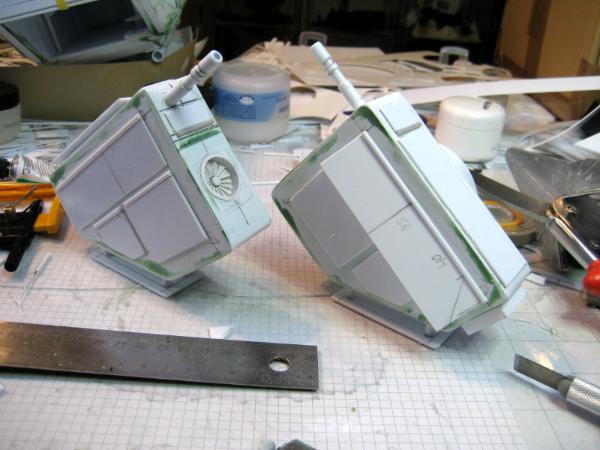
With this last major piece of the built in place I started to add armor plates and a front grill.
With the help of the great tool by Camkierhi it was quite quick. These PVC Cutters make the cutting/snapping of thicker (1.5 or 2mm) plasticard really easy.
Thank you Camkierhi!
Before I could add more plates and panels I wanted to try and add light effects again Those LED strips are really easy and once you know how it's done you can lights quite quickly.
I decided to add light effects for the thrusters first.
Powered by a 9V block battery.
I mounted the cables, so they would add to the Imperial look and feel of the HERMES shuttle.
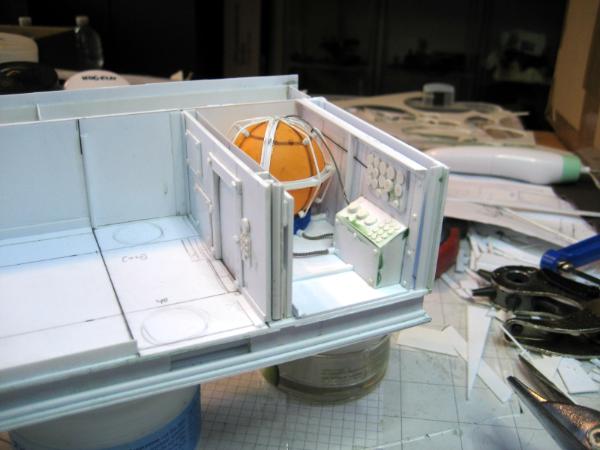
While digging through some of my old build stashes I found this old seat section I had build for some obscure project
With these it was quite easy to build the interior of the VIP pod.
And of course the Pod needs lights too, right?
I also tinted the thruster LED's blue and the interior lights red, using Airbrush transparent ink.
The VIP pod also needed a throne like seat for the governess.
Then the pod doors.
Which are mounted in the open state for the scene.
Together with the ramps.
Light test
After the successful lighting of the model I completed the additional panels and plates.
The final HERMES.
So I started to finalize the reception scene. For this I decided I'll need a piper
After some GreenStuff sessions I got this.
The two female Eisenkerns received assistant's accessories.
And I decided I needed a saluting officer on the deck.
Two guards for this side.
The complete reception scene.
A welder working on the bomb shaft completes the crew.
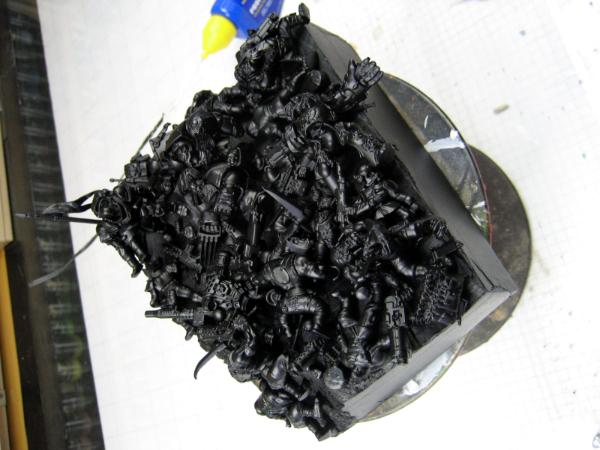
The 23(!) crew memebers assembled for priming.
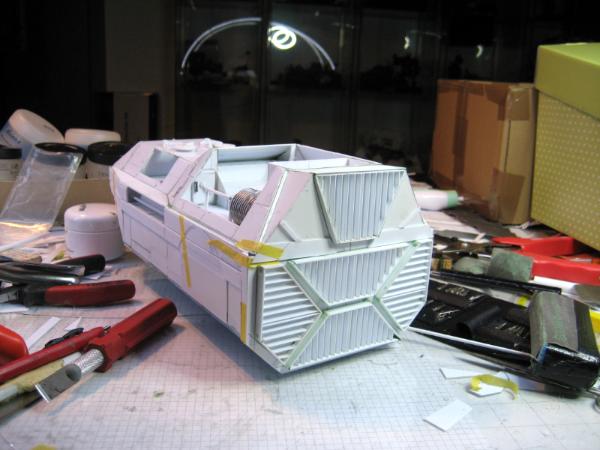
The VIP pod received the first lick of paint.
Since the HERMES with the black primer looked quite menacing to me, I decided not to go for any of the Dencara campuflage patterns, but to keep it (almost) black instead.
So I painted it in a very dark violett.
And I will try to add dark red highlights and maybe skull ornaments, similar to what I did with the ZEUS.
Well done, Klaus. I would have said "on finishing the Athena", but you are still adding to it and making, what is already an amazing model, even better.
Well, as I stated in the last post, I don't want to paint the HERMES in any of the Dencara camouflage patterns.
So I started out with a dark red and a parchment/cream color pattern.
Together with bronze highlights and metal drybrush it keeps the menacing dark appearance,
but also the VIP style.
Since this is the personal shuttle of Governess Felicitas zu Hammerstein it needs her coat of arms.
Her house is also symbolized by the golden Griffin.
Which is needed on both sides.
For the VIP I decided on a more Inquisitorial symbol.
The whole shuttle.
For the other side too...
And this is now the finished HERMES shuttle - VIP version.
On the ATHENA deck
With the Dencara background.
And her current residence in my office.
With this now completed I began painting the crew.
First is of course the piper.
Here's the start of the tartan pattern.
And the finished pattern.
I hope you like the look so far.
While I still have a lot to do - painting the 23 crew characters that is - I'm already thinking forward to the next projects.
Plenty lot of ideas
Aurelius 12 Reborn on Warseer suggested:
Dare I open up the floodgates by asking if you're considering modular cargo as your next project.
Which re-kindled an old idea I already had.
An Airborne Assault!
And with the HERMES I think I have a nice delivery vehicle.
Probably based on something like this here:
Even though I think of an "almost touch down" of a militarized version of the HERMES maybe on a hilltop and the troopers leaving the assault pod - more seats, bigger doors.
I hope I can restraint myself from starting until I have the 23 painted
Thank you Dr. H well it's not going to be anything Chinooky It'll ba a HERMES air assaulting and the soldiers disembarking like on the Chinook image.
Well, I'm trying hard to finish the project, but progress is slow right now and this is just a little update.
I was able to finish Felicitas zu Hammerstein last night.
She's the visiting VIP on the ATHENA deck.
I think the colors work pretty good.
Yes, it's a bit of black-red-gold ;-)
I also finished the Piper last night.
Amazing to see how plump those WH40K models are when you compare them to the TGG and Eisenkern models.
After the washes the tartan pattern is tones down, but still visible.
I hope he'll look good on the ATHENA.
Well, last not least I worked a bit on her entourage.
These guys still need some love and I'm considering adding the golden griffin to the shoulder pads.
But other than that, I think I won't add any other details, or should I?
I hope you had a great weekend with lots of hobby and family time - and for my US friends I hope you had a great 4th of July!
I spent the weekend in Munich with my wife and friends and we had a blast despite the ever changing weather - what happened to summer again???
Nevertheless, I did get some work done
I still had to work on the Eisenkern bodyguards. And one thing I wanted was a good crest for the shoulder pad.
Since they belong to Felicitas zu Hammerstein I wanted to have a griffin.
Here you can see the development of the crest from left to right.
Once pleased with the design I tried it on the first trooper, using Bubonic Brown as base color.
With some minor adjustments I applied it to all the bodyguards.
For the other shoulder I wasn't sure at all. I tried to do something with the Inquisitorial colors - white, red, black, gold - Red, white, black was out of the question, as it resembles the German Kriegsflagge. Red, white, red is the Austrian flag, which I didn't want to use either.
So I experimented with red, white, gold a bit.
But that didn't work out either.
So in the end I used the red, white, red with a black Inquisitorial "I" superimposed.
Still a touch too much WWII Germans for my liking, but without historical legacy, it looks great.
So here are the finished bodyguards.
I'm quite pleased with the result.
I wasn't quite happy with Felicitas zu Hammerstein and some of the color transitions.
So I reworked some areas - especially the face.
She acquired an eye-patch and I think it looks better now.
So here's the visiting party on the ATHENA deck.
I can't suppress a grin.
The piper.
And last not least I started with the ATHENA reception party.
They're all in Dencara Navy Blues.
Still a long way to go, but I'm actually pleased with the progress.
What do you think?
Cheers
Kid_Kyoto wrote: Loving this project, the Hermes is a great shuttle in the flying box tradition.
I wonder if it would be possible to replicate it in MDF and have one of the many MDF companies licence it?
My plasticard skillz are not up to the job but I bet I could do it with a wood kit.
Thanks Mate!
Well, since I plan to build another one in the military assault version, I'll try to make some plans. Should be not too hard, as it is pretty box, mostly straight lines
Hi all,
wow, almost there
Amazing feeling to see this project on it's final stretch.
So here's the ATHENA reception party.
Unfortunately the Praetorian from Lord Gordon's 20th Praetorians has to wear Dencara Blues, as I have lost the color scheme.
Also I rearranged my hobby room to give the ATHENA a new home.
She now sits on a separate shelf about 150cm long and 60cm wide, with the landscape canvas as background and it is at standard desk height (90cm I think) so you can look at it from top without problems.
It is also furthest away from the windows, so it won't be bombarded by UV any more - the plastic card is already old and pretty brittle.
I pinned the characters in their final position.
And this is the final batch of figures to paint.
I did some minor changes last night.
The "painters" received paint tanks and connecting hoses, and received orange coveralls - they are on disciplinary detail after all.
The final leg was somehow exhausting and I had the feeling those 5 troopers were reluctant to be finished.
All kind of things were more important than those 9 dudes on my desk
But here they are shortly before the finish.
And the welder at work
Better visible with the flash.
And the disciplinary detail painting, over watched by a Tech Priest.
So, this is it Over the next few days I'll try to make some good images and wrap it all up.
Thank you for being part of the journey!
We started out in 2009
I know I lost quite a lot of you between the individual legs and I disappointed many when I abandoned the project time and again.
But in the end we made it
All in all 12 months work time:
22. May 2009 – 21. Dec 2009 (7 months)
4. Nov 2010 – 29. Nov 2010 (1 month)
19. May 2012 – 28. June 2012 (1 month)
5. July 2013 – 3. Sept 2013 (2 month)
10. May 2016 – 10 June 2016 (1 month)
Here here. Outstanding work. A masterpiece. We have all said it before, but it is genuine, this is one of the best models ever. Just so much inspiring detail and on an epic scale.
It's been a pleasure to watch it come together (even though I've not been on DDakka for the whole time), and there has been many things to learn along the way.
And it's not as if you haven't produced many epic models in the down-time from this project.
sir...i am proud of you... the athena was a project that usually lands on the shelf of shame for so many of us...the sheer proportions of this project are beyond huge...so many little and big scenes make the mosaic of the athena...i feel a bit robbed of something...dunno if that is understandable...but originally when i started with this hobby, the athena and the boreas imp walker were the two items that showed me that you could make things from cardboard and plasticcard and form whole worlds with... seeing this beauty finished is like finishing a book where youo dived in deep and now don´t want to close it...
congratulations my friend...you showed us that big projects indeed can be finished...
Very inspiring Klaus. You have a way of making it look very easy. Your Hermes shuttle is incredible, that project in itself would have taken me months and would have been a huge undertaking, but it seemed like it was so quick and simple for you. Oh, and you added lights too...
You are a true master craftsman and engineer. To be able to see your ideas and construct them. To boil them down to the basic shapes and build up from there is an incredible gift.
May I ask, how do you cut your polystyrene/ plastic so well, especially the circles? The clear plexiglass you used for the stand for the Athena looks like a professional cut.
You are an inspiration Klaus, thank you.
Edit: I missed the pictures of the finished Athena. What an incredible piece. With all the small stories going on throughout the ship. I have been in modeling for thirty years, and my most loved diaramas are the "everyday" pieces, the war torn ship being patched up, the painters cleaning her up, the camouflage being scribed out, the fantastic free hand murals, the meeting of the minds in the conference room, getting their stories straight before the dignitary walks in...not the war torn scenes. You have surpassed anything I have seen...and it's all scratch built.
I look forward to the next project, but in a way, saddened to see this project complete.
Viktor von Domm wrote:sir...i am proud of you... the athena was a project that usually lands on the shelf of shame for so many of us...the sheer proportions of this project are beyond huge...so many little and big scenes make the mosaic of the athena...i feel a bit robbed of something...dunno if that is understandable...but originally when i started with this hobby, the athena and the boreas imp walker were the two items that showed me that you could make things from cardboard and plasticcard and form whole worlds with... seeing this beauty finished is like finishing a book where youo dived in deep and now don´t want to close it...
congratulations my friend...you showed us that big projects indeed can be finished...
Thank you Vik You make me sniff here in front of the PC Yes, I know what you mean. It's weired to come down to my hobby room and see the ATHENA ...DONE
It's amazing.
But you know me - always another project just around the corner - wait for the update.
shingouki wrote:The dedication and skill on display here are truly epic.I rarely comment but was so blown away i just had to.
Thanks
Januine wrote:What a seriously amazing build, paint and narrative piece. Just WOW!!! Absolutely fantastic sir. You have won the internet!
Thank you Where can I pick up my price?!?!
jabbakahut wrote:So many great details. I love the work. Fun project!
Thanks Mate - yes it wasa a lot of fun, especially staging the littel side stories.
Oguhmek wrote:That is really cool. And huge! And cool! Awesome work.
Thank you!
Reforger wrote:Thank you for sharing this with us.
Very inspiring Klaus. You have a way of making it look very easy. Your Hermes shuttle is incredible, that project in itself would have taken me months and would have been a huge undertaking, but it seemed like it was so quick and simple for you. Oh, and you added lights too...
You are a true master craftsman and engineer. To be able to see your ideas and construct them. To boil them down to the basic shapes and build up from there is an incredible gift.
May I ask, how do you cut your polystyrene/ plastic so well, especially the circles? The clear plexiglass you used for the stand for the Athena looks like a professional cut.
You are an inspiration Klaus, thank you.
Edit: I missed the pictures of the finished Athena. What an incredible piece. With all the small stories going on throughout the ship. I have been in modeling for thirty years, and my most loved diaramas are the "everyday" pieces, the war torn ship being patched up, the painters cleaning her up, the camouflage being scribed out, the fantastic free hand murals, the meeting of the minds in the conference room, getting their stories straight before the dignitary walks in...not the war torn scenes. You have surpassed anything I have seen...and it's all scratch built.
I look forward to the next project, but in a way, saddened to see this project complete.
Feels funny to be finally done with the ATHENA.
I have a collage up at Coolminiornot:
http://www.coolminiornot.com/401100 the score is OK so far.
As previously mentioned I have an idea for a dio with a militarized version of the HERMES conducting an air assault and dropping off some troops.
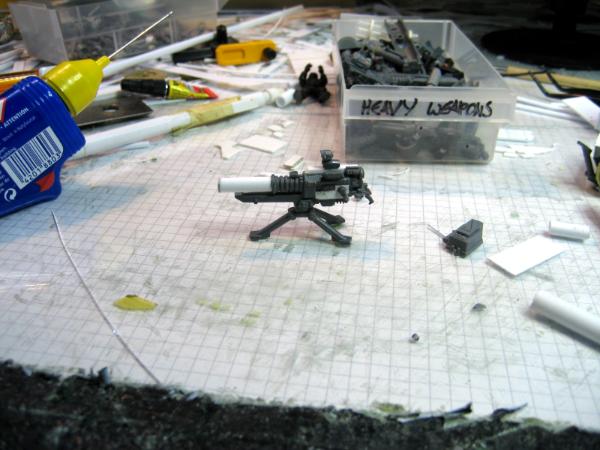
The first sketch for the MkII version shows the new nose and the chin mounted mini-gun.
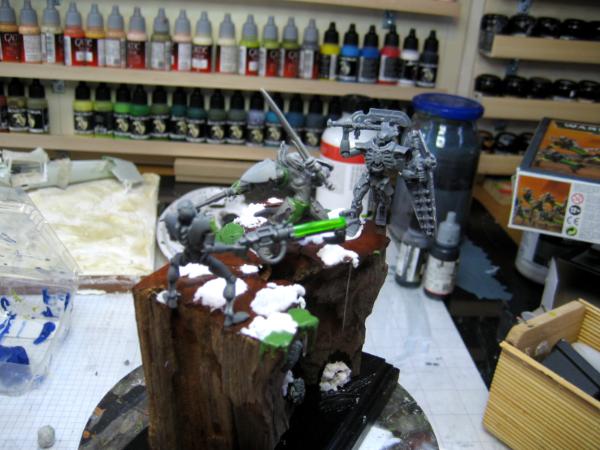
I had the mini-gun already built a few weeks ago for the "Meeting of Scouts" diorama but didn't use it. So now it will be a part of the new HERMES.
Since the pieces are almost identical to the original HERMES the build was pretty fast.
Here's a comparison between the MkI and MkII
Next up were the wings and rotatable fins.
As usual the generous help of Green Putty was required
I changed the details a bit and here you can see the rear fin being rotated to a "forward" position, while the front fin is rotated to the "landing" position.
But for the diorama both will be in the landing position.
The MkII also received two auto-cannons for the wings.
The start of the rear/main thruster.
Not exactly the same as on the MkI
But looks similar
Then I built the thrusters for the nose and underbelly
But they were too high - not looking good!
So I built another set of thrusters and they are now the same height as the MkI HERMES.
Next I added some details to the chin gun - mainly the ammo feed.
The pilots windows are also a bit different form the original ones.
Finally I built some rocket launchers for under the wings.
Only 7 shots each, but a nice extra punch I think.
But be warned, it is huge and will take a long time to load.
The build of the HERMES continued over the last few days, and I think I made good progress.
First I added the intake fan.
Then the first armor panels and the front grill.
More panels.
After that I started to build up the passenger pod.
Fits snugly under the body.
Other than the VIP pod, this one has sliding doors.
As Malevengion commented:
One thing I wonder about the HERMES design is how is it intended to maneuver? It's got plenty of thrust and vectored thrust nozzles for VTOL capability but seems a bit light on control surfaces. Of course, it's a bit of a roar in there and cause carnage sort of aircraft so it works (and it's looking good too!) but that's just my take. I look forward to seeing this diorama come along!
Maneuver? We're Imperial Guard! We only go straight! And we're only going forward 'cause we can't find reverse
Just kidding.
I added some flaps to the fins (top and side) that should allow some additional maneuver force to the various thrusters.
With most of the inside completed I worked on the passenger pod.
First was the bench.
GreenStuff for the cushions.
And some holders/handles for the seats (in open position).
Mounted together with some grab handles.
Almost done!
Still needs the lights and a million of rivets I really like this version of the HERMES.
Dr H wrote:Great work, Klaus. Really liking the seating in particular.
Thank you Actually it is pretty simple, but I was too quite pleased with the result
Illumini wrote:Amazing work on the Athena, must feel good to close such a huge project
Thanks and yes, it does indeed
xXWeaponPrimeXx wrote:That is amazing work Klaus, and so quickly too.
Is there any way I can convince you to do some tutorials for newb scratch builders who want to get to your level??
Weeeheeel...
usually I'm better at answering specific questions, than give random advice.
So, what would you be mostly be interested in? And what format?
In my Dei Greci blog and here I usually have tons of images accompanying my builds.
In my part of Germany the summer is very hot and very humid - murky - and we have quite a lot thunderstorms.
One could say Germany now has "rainy season".
It makes working and live a bit exhausting, breaking sweat just by moving a finger
But I got to work a bit more on the HERMES.
I started off with cutting the wood to the base size (30x30cm).
Then I built up the mountain on which the air assault is to happen.
I used Styrofoam as base.
And covered everything up with cheap masking tape.
I want it to look as if the HERMES is hovering above ground while unloading the troops.
Once satisfied with everything I covered it with instant plaster.
And while the plaster was still wet I added sand and little rocks. The sand is standard bird cage sand and some small black deco rocks.
The HERMES on the cured mountain section.
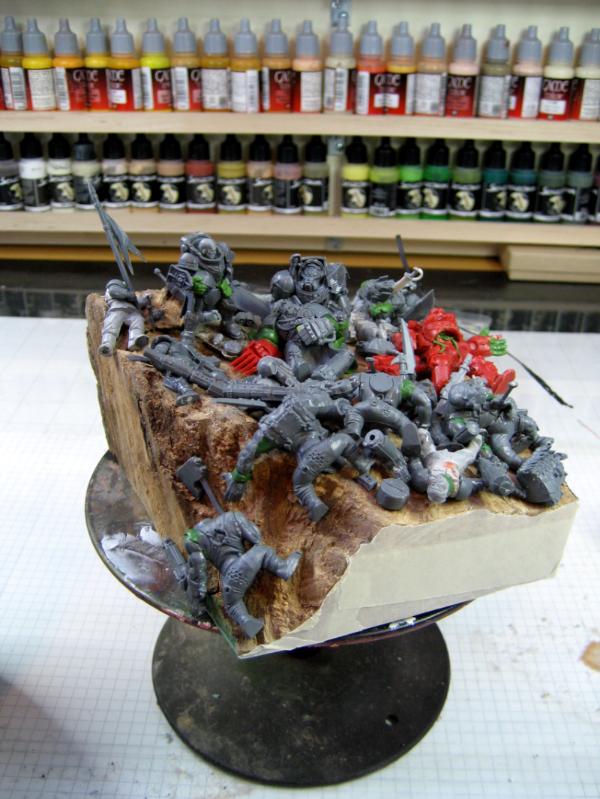
While the plaster cured I started to build some assault rifles and dismantled heavy weapons.
You can see I folded the tripod for the heavy Bolter and mounted the bi-pod for the mortar to the tube in a folded position.
Next I started to position the troops.
As you can see there's still a lot to do, much, much cleanup.
i have to agree, the most impressive detail atm is the for me too the seatings...
i pictured the scene more associated with rope ...rapelling...currently the scene looks more calm...straight to the book so to say... like the different guys securing the area .
gotta ask tho ...where did you get the styrofoam these days from? i once had a suply of pink insulation foam from OBI...but they´re not listing the stuff any more...which is kinda sad...nowadays you often get this sub par styrodor with the sandwich look...and with slot and key too...not that nice to work with...
Great work as always Klaus!! After a time away it is awesome to come back and see the inspirational level of your work! That troop carrier dio looks really cool so far! Cant wait to see more
well thing never seem to go the way planned, do they?
I had already started a different project, but it didn't "catch" me the way I expected, so I abandoned it rather quickly.
Typical ADHS
However, as mentioned there are several ideas percolating in the back of my head, so I had plenty to chose from - haha!
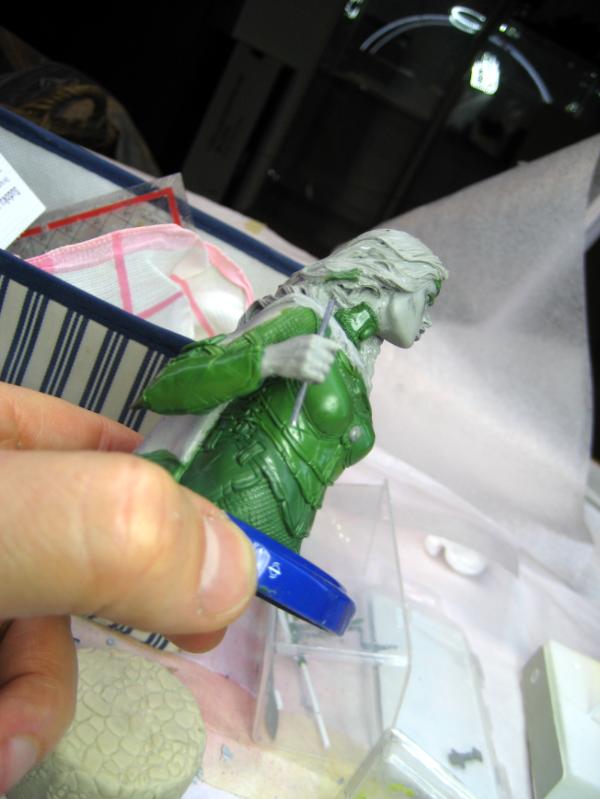
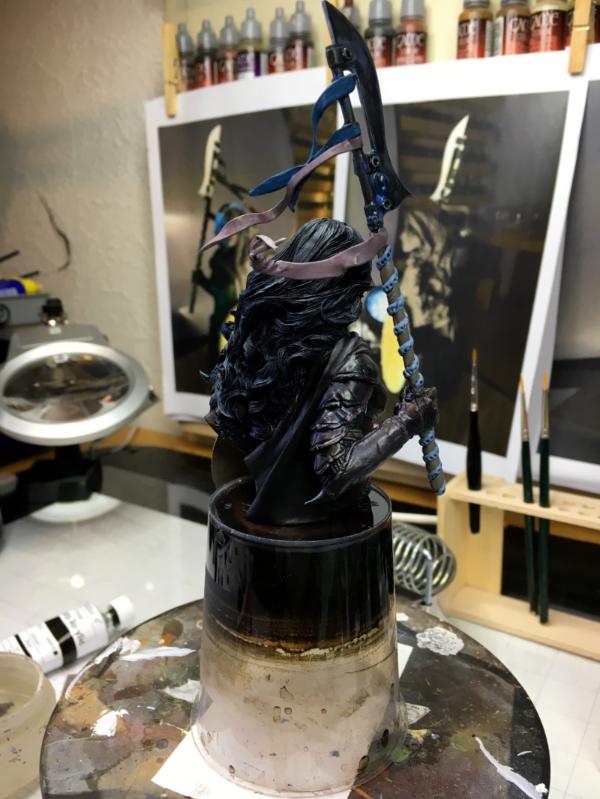
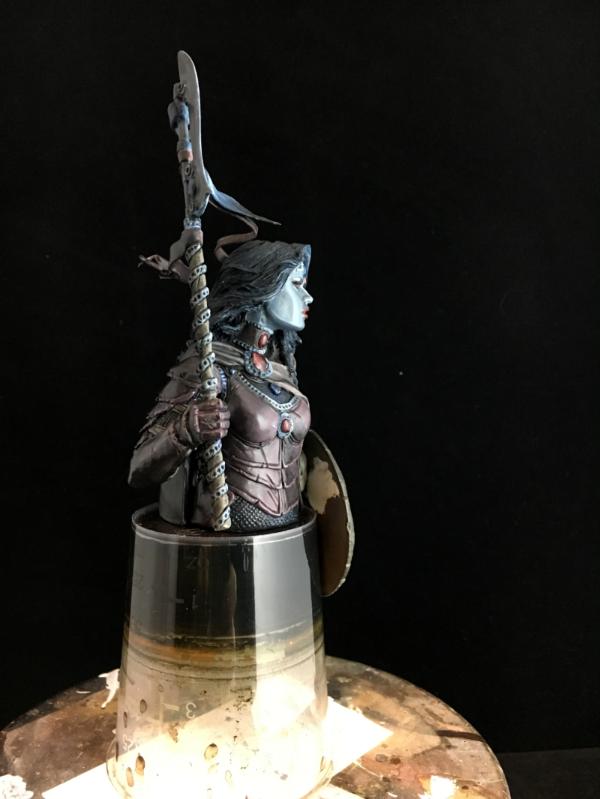
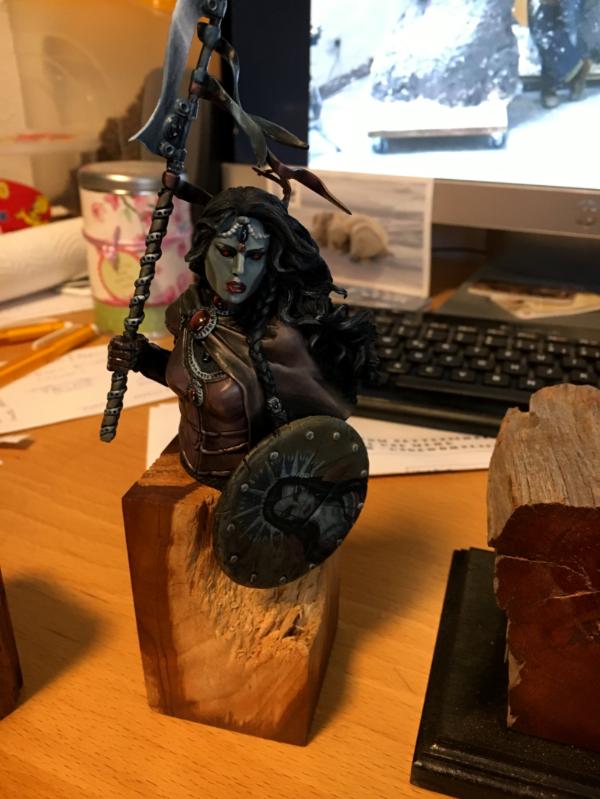
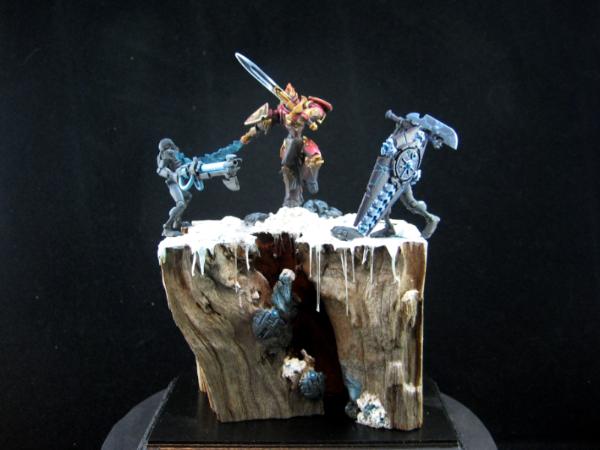
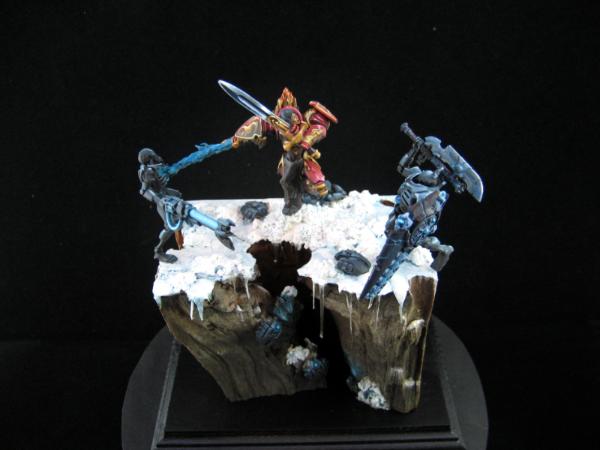
And if nothing else works, a dragon always does.
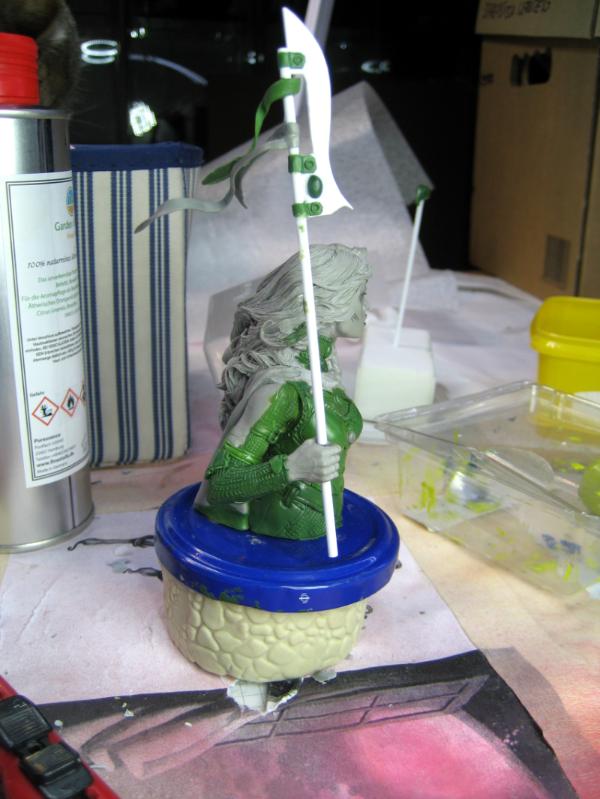
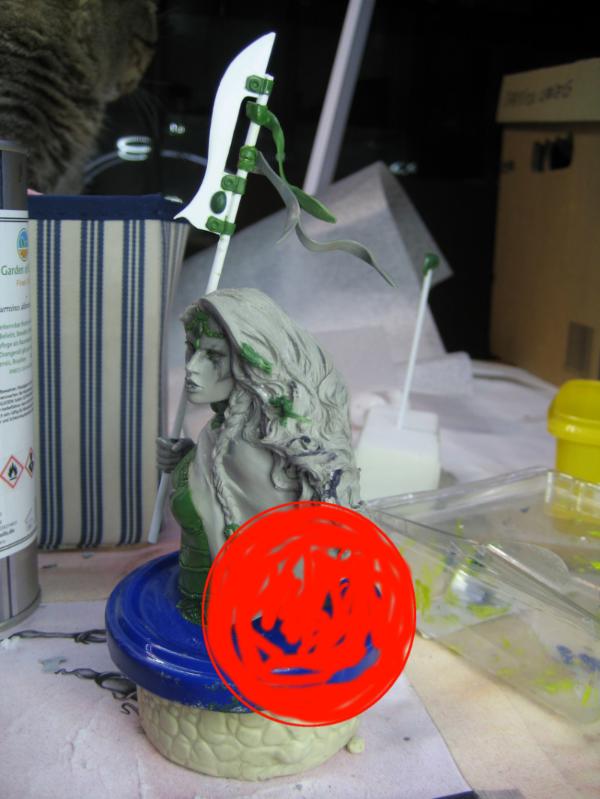
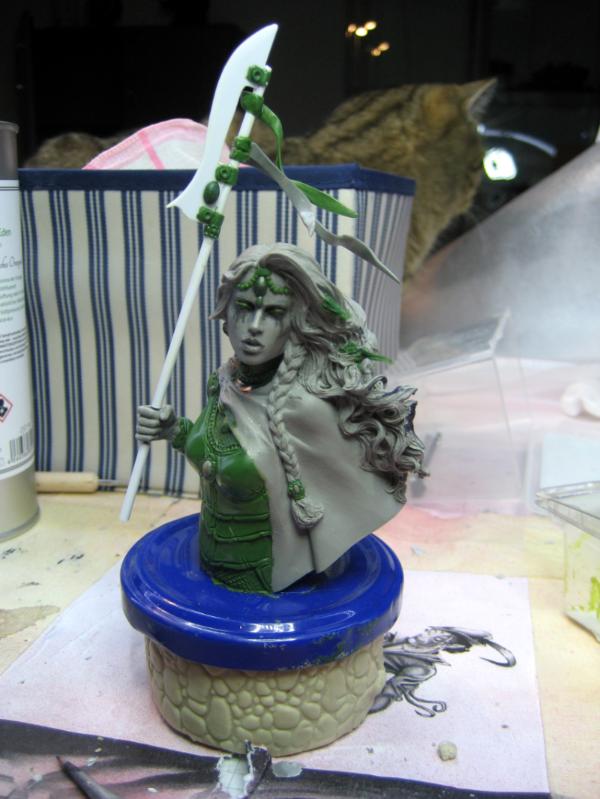
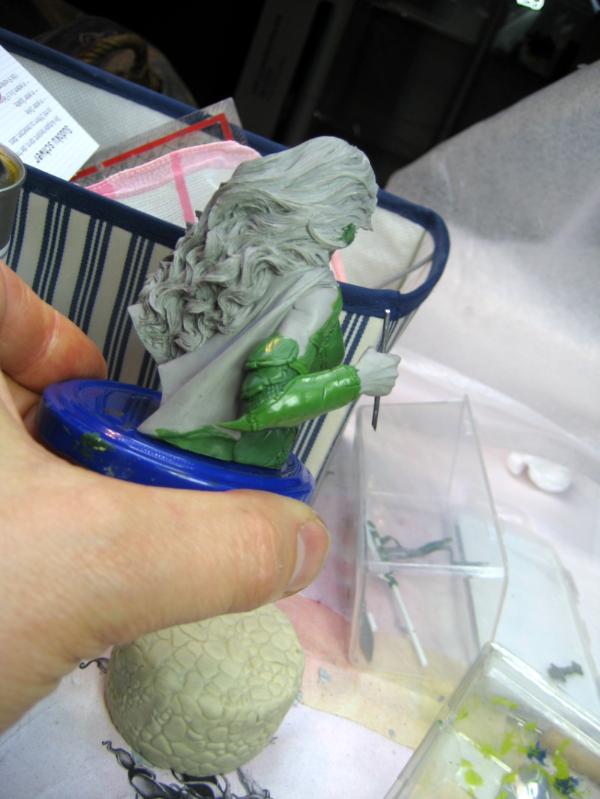
These images are from about the last two weeks.
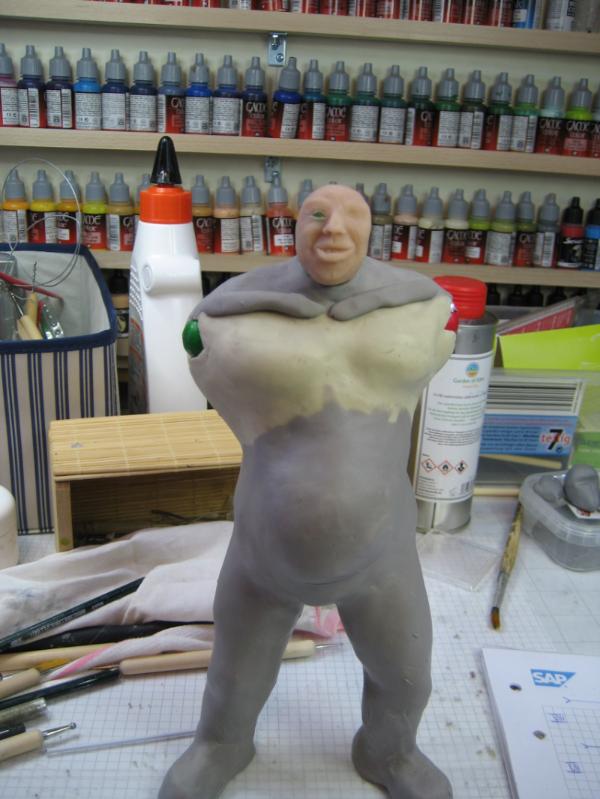
I have the idea of a stalking dragon, coming down the steps of ... well, maybe a ruin?
and being accompanied by a (usually beautiful) women...
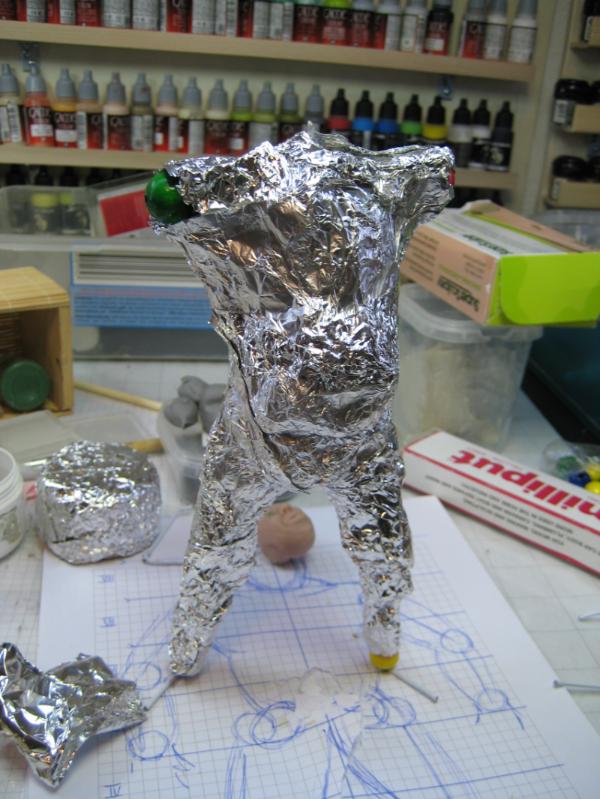
So I started off with a wire skeleton, which I fixed with some FIMO.
Once the wire was set I wrapped it in paper and masking take and applied a first layer of FIMO. Once the main body was prepared in FIMO I sent it to the oven to cure.
After it cooled off, I started the actual sculpting process with SuperSculpey.
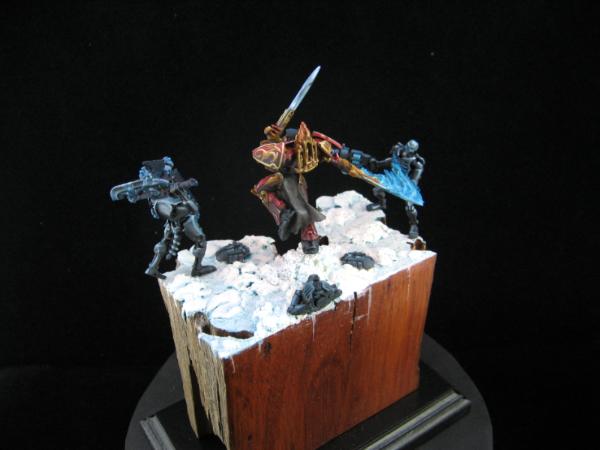
This is a female body I had started for a different project (was to be a Cat Woman) and will be used in this project.
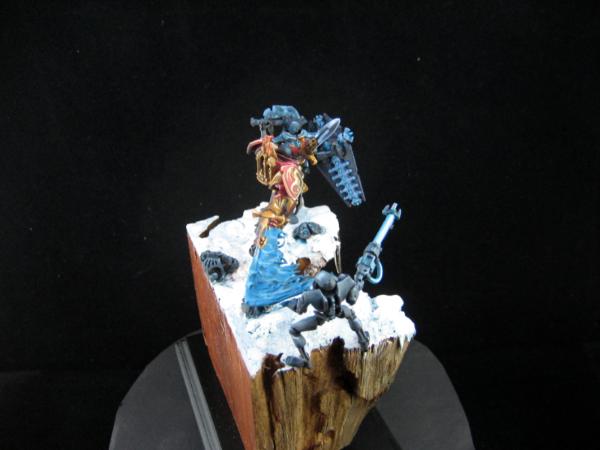
Another position check with the girls - I broke her arms to reposition
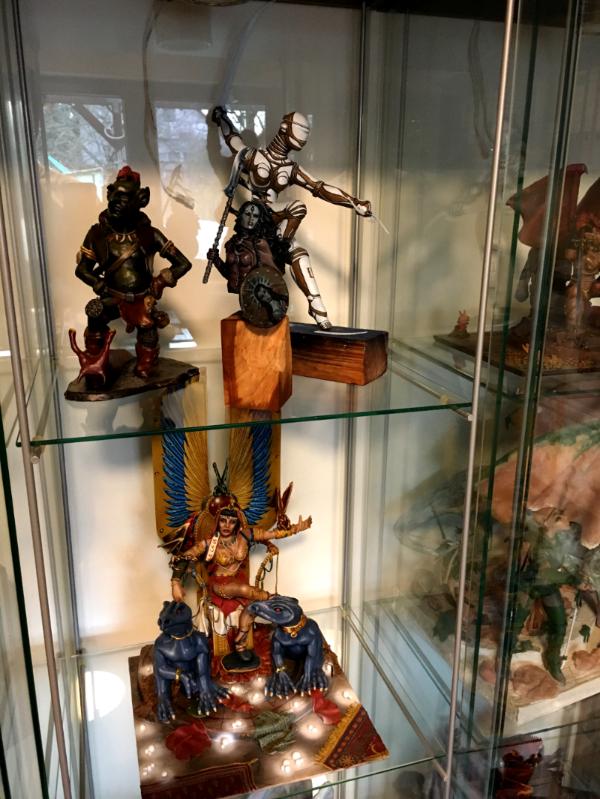
And did a check to see if it would still fit the cabinet.
With that in mind I started to build out the base.
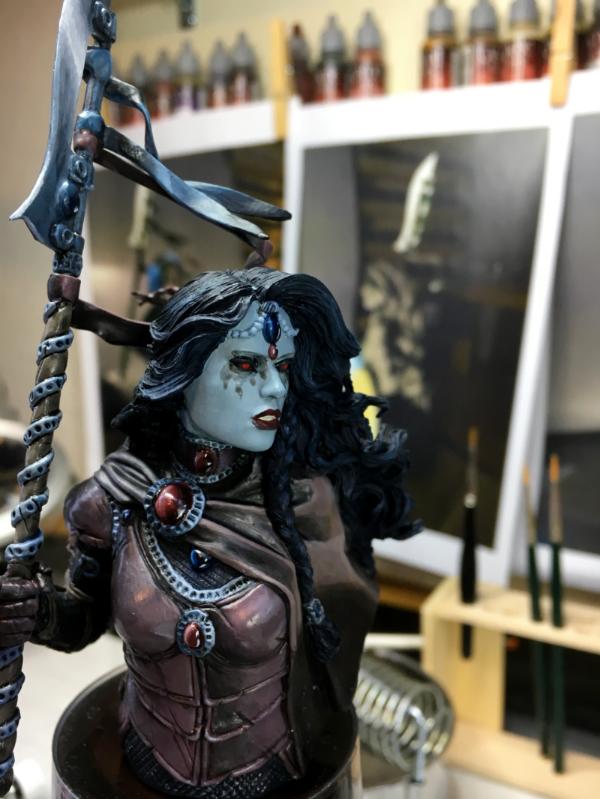
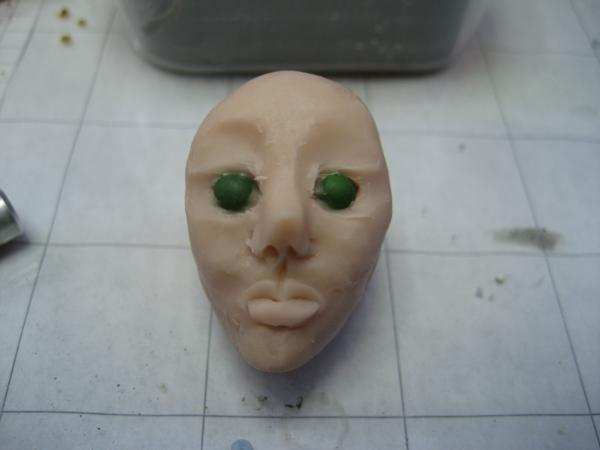
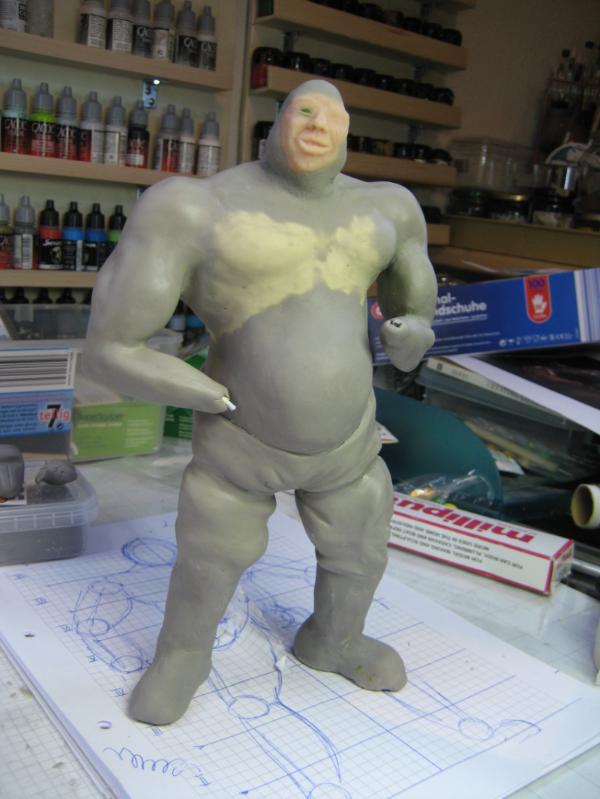
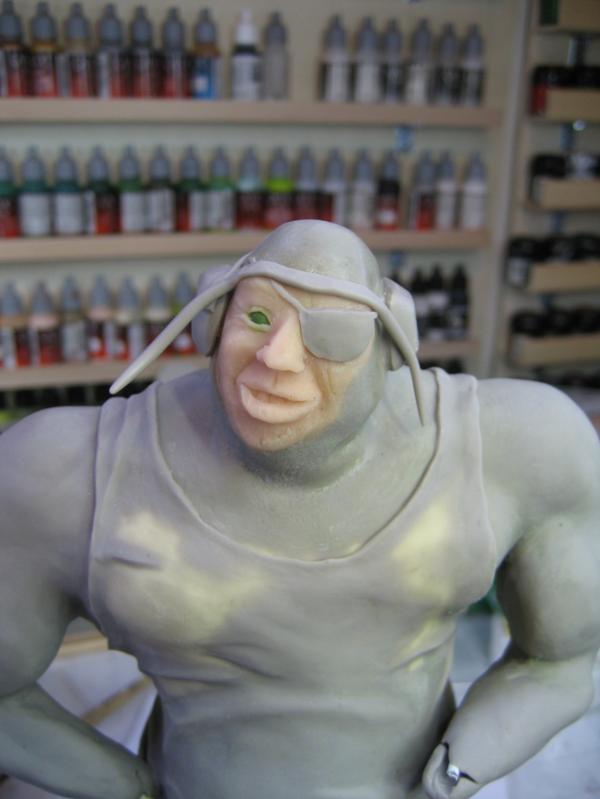
While the base cured I started to sculpt the head. As usual I started of with some beady eyes and slowly added facial features.
But still a toothless smile
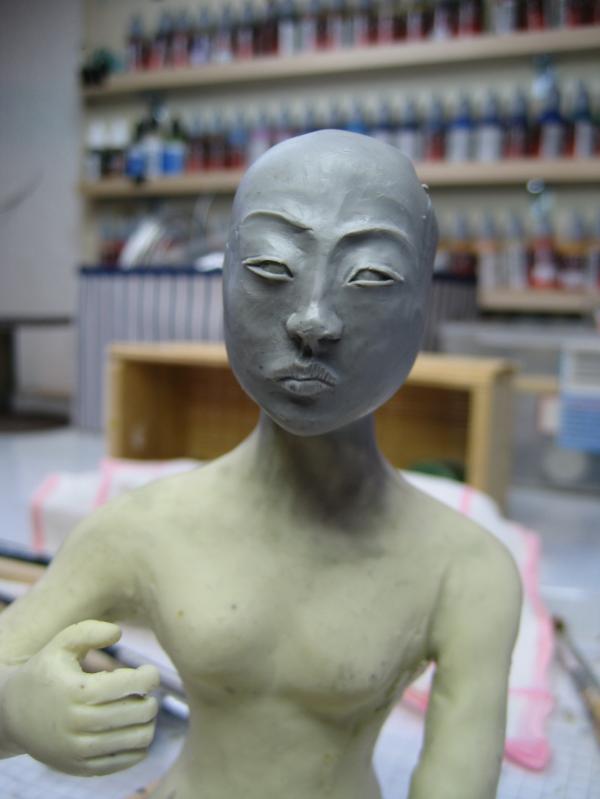
So I sculpted teeth, horns, and spikes with GreenStuff.
Bad hair day?
Ah!
Looks better.
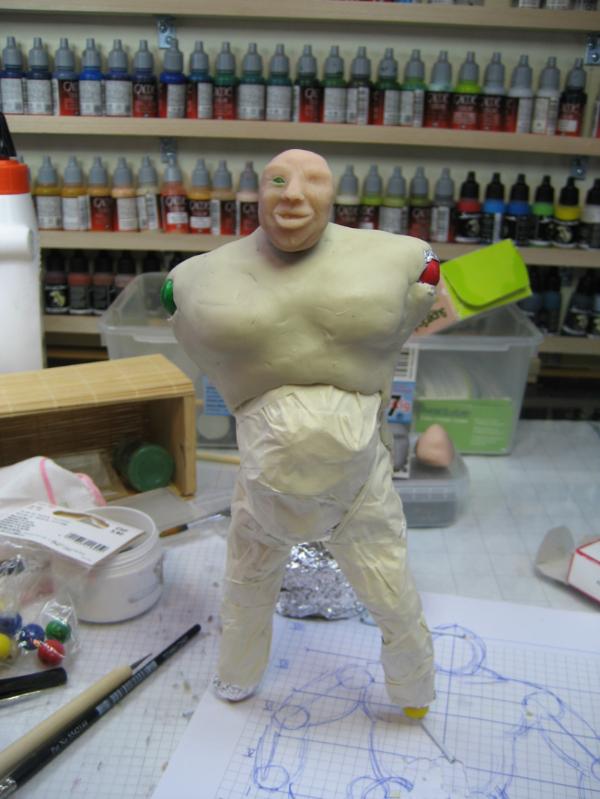
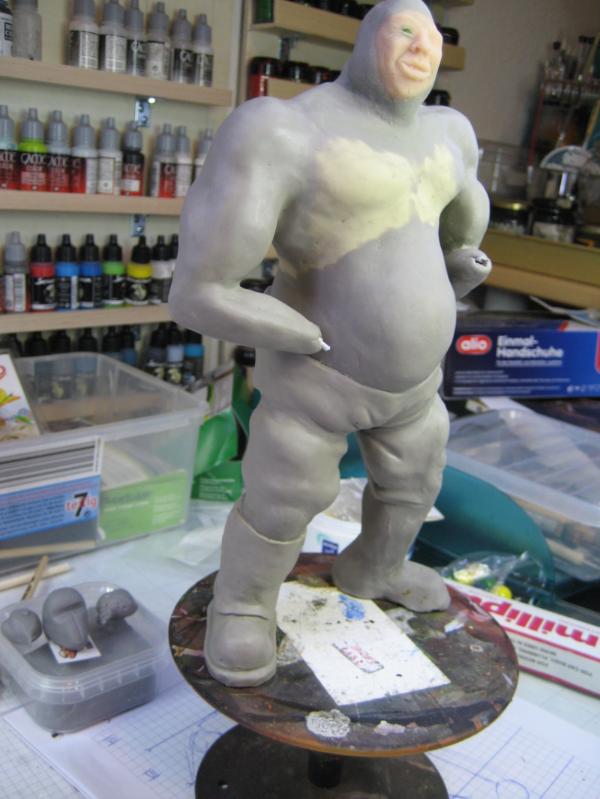
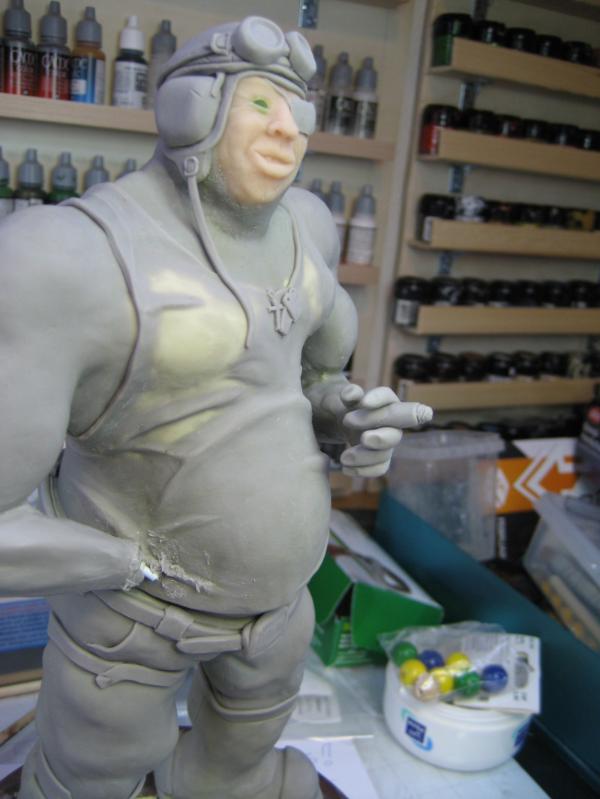
With the body and head cured for the first time, I started to add the final muscles and adding more facial details
As you can see I reworked the front paw completely.
Face and muscles done!
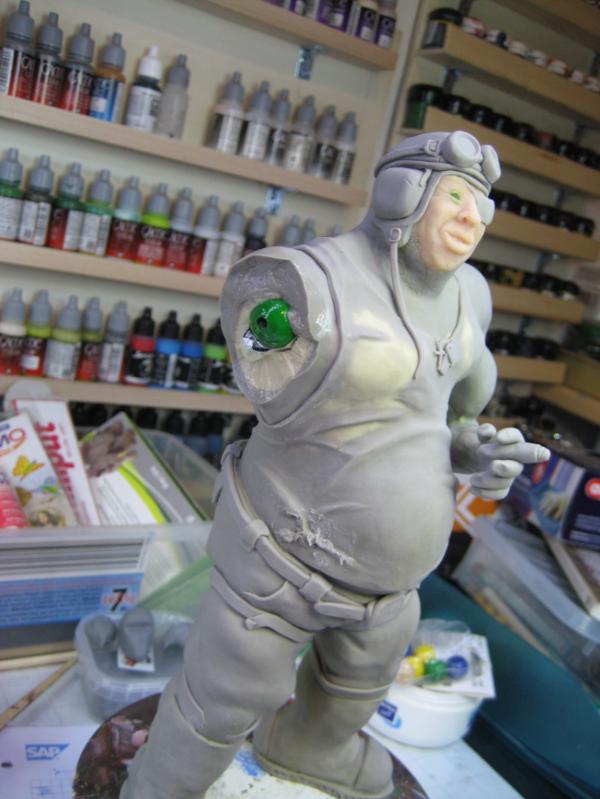
I added a layer of liquid GreenStuff smoothing the surface and began fleshing out the wings. Last not least I sculpted the skin for the wings.
But I'm afraid the skin is too thin and fragile - a first crack already appeared on the outer section of the wing.
I will look at the other wing and try a thicker skin there - if that works better, I re-do the right wing.
So!
What do you think?
Any suggestions or comments?
I look forward to hearing from you Cheers
Amazing work. Got a very Boris Vallejo feel to it.
How does the sculpy react to being stuck in the oven multiple times, something I have wondered.
For the skin of the wings you could try my method of styrene sheet heated to form the wavey shapes, did that for the giant bat I did for Gitsplitta. You could add a texture coat over the top after but it gives a nice firm but thin layer.
I think maybe working on the way the wing folds could help- both with the look, and with the thickness/cracking issue. Maybe a couple deeper, more folded sections, to thicken up those parts and create more support for them.
Thank you guys!
@Camkierhi - so far it works pretty good. SuperSculpey has a tendency to shrink (I think about 2%) while being in the oven. But so far I had no issues with each laer being burned over the already hard last layer.
@Anvildude - thanks for the idea!
Well, as mentioned I wasn't quite happy with the thickness and sturdiness of the wing skin, so I decided to make the skin thicker.
For this I created a two-layer skin
with a layer of aluminum foil in between.
That's now relatively thick and sturdy.
The two skin types in comparison (left is the thinner original skin)
For the already sculpted wing, I removed the already burned skin.
Tip to yourself:
"Don't recycle too much - after a while the aluminum foil gets too fragile and disintegrates"
It was quite a task to remove all the little bits of foil.
But the finished result was worth it.
The wing with the new thick skin.
Looks good!
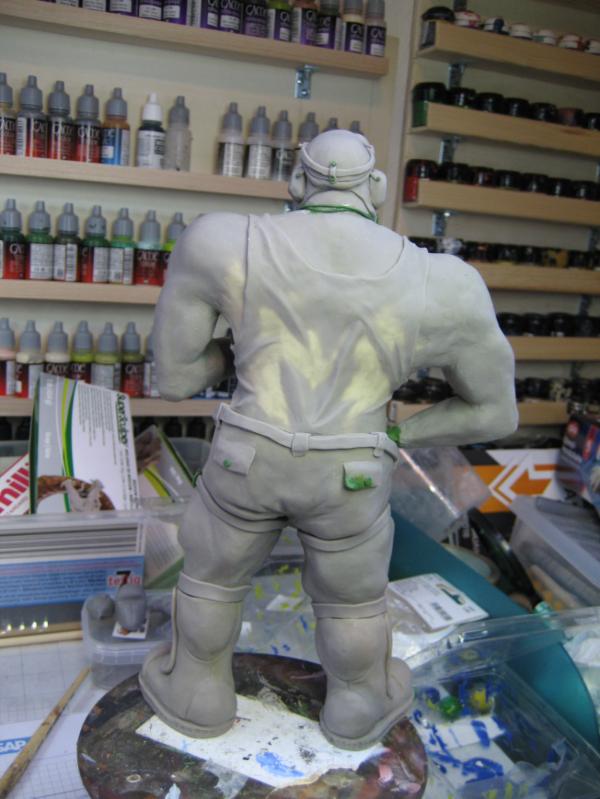
After some cleanup and improvement (this time with Green Putty) I did another position check with the girl.
The wings are rather massive, so I have to change her position a bit.
Due to the weight the wings now tilt forward and I have a rather large gap to fill.
Since I can't fit the whole dragon including wings into the oven, I have to use self-curing GreenStuff to sculpt the wing base.
But I think this works just fine I still have to do the second wing, but I'm quite happy.
So what do you think?
I look forward to your comments and feedback.
Cheers
Klaus
I think you ought to do some varying of the edge of the wing skin- right now they're very 'straight across curtains'- even doing some nicks and tatters might help take that away- though better would be to cut inwards a little to give a bit of an arc to that edge.
again it's been a bit since the last update. Sorry, but I had the stomach flue - gakky indeed @EDC - thank you Mate!
@Ruglud - @Anvildude - agreed, but now with the very thick and sturdy skin its kinda hard to tatter the seams.
Also, looking at actual bat wings - as fragile as they are - I harldy find any images of tattered seams.
But it's still on my list!
Thanks
So, what happened since the last update?
I completed the wings base and now have a (hopefully) seamless transition from shoulder to wing.
and this completed the actual build of the dragon
So it was time to look at the girl.
I repositioned her arms and filled the gaps with SuperSculpey.
As you can see I plan to position a Fire Lizard (similar to the ones from the "PRINCESS") on her right arm.
With the position defined I sculpted and burned the arms.
And then came the most frustrating part of the project so far.
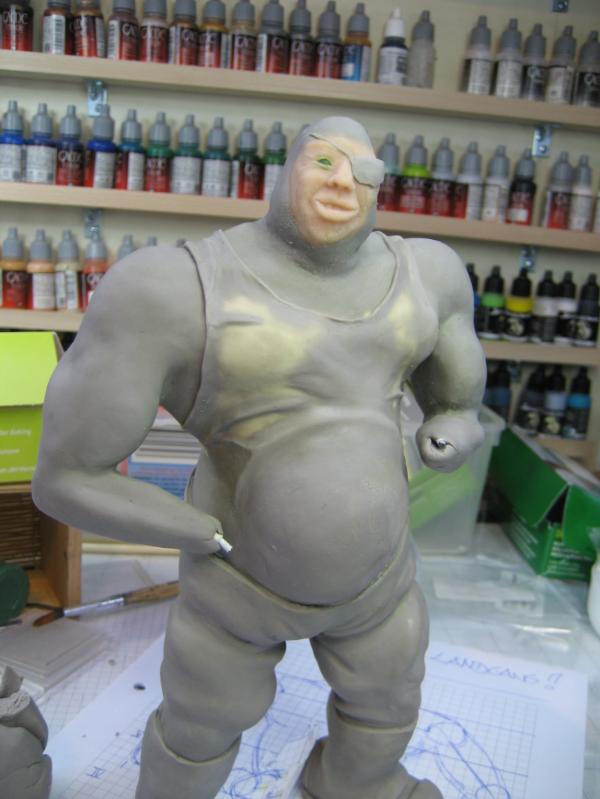
For once I started to feel sick in the stomach and the head/face didn't come along at all.
Actually I planned something "alien" - extraterrestrial human - but the first 3 or 4 results were just crappy :(
This was the first face that came close to my vision, but the head was completely wrong.
So I cured the face with the heat-gun and left the rest soft.
Once the face and hand was completely cured I re-sculpted the head.
As you can see I went for an elongated head and "different" ears.
With a view up to the sky, a slight smile around her mouth - maybe looking at another Fire Lizard?
Next I went from SuperSculpey to self-curing Green-Stuff.
I gave her some lashes - again alien - and started with her clothes.
After the pants I started the bra.
First details.
The bra finished and the right shoe started.
If you've worked with GreenStuff before, you probably know that you can only work in small sections and then you have to let it cure - otherwise the danger of destroying your work is way too great.
In addition I always wear plastic gloves - so I don't leave fingerprints.
In case you wonder about the GreenStuff on her left arm....well, I dropped her and it broke her arm, so I had to fix it.
In addition she got a neckband.
More on the legs.
First details for the shoes.
The Overknees.
And starting with the jacket.
And this is as far as I got.
So?
What do you think?
I really look forward to your feedback and ideas.
What do you think about the alien face?
Should she get some hair?
Anything missing?
Hi all,
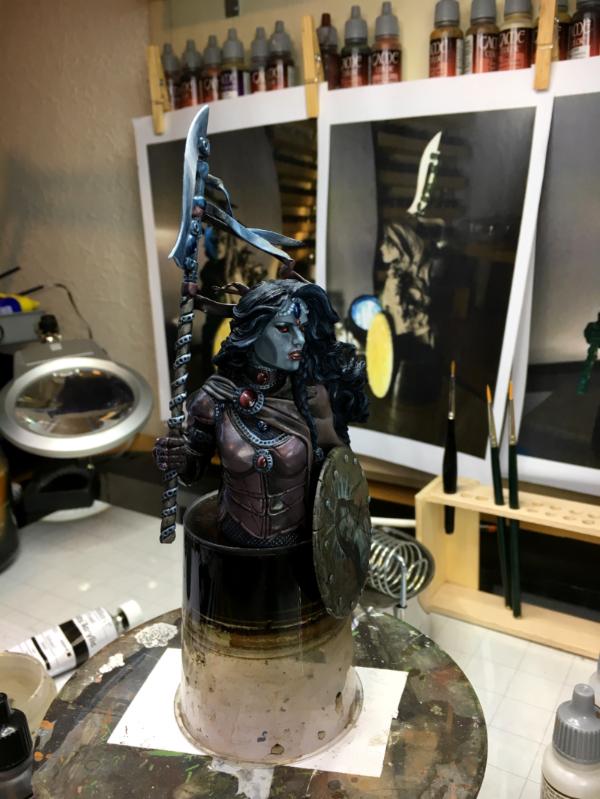
as you can see by the title I finally settled on the names for the two protagonists.
The Dragon is Barduch and the girls is Allayah.
I started working on the armor for her left arm.
But the hair topic kept going around in my head.
So here are some quick experiments for Allayah's hair.
A- tentacles
This is an ides inspired by the Star Wars Ashoka Tano, a Togruta Jedi.
B - Medusa
Well, yes, Medusa or Gorgon inspired. The individual strands would be snakes.
C - Dragon
Large horns, similar to the horns that Barduch is sporting.
D - Demon
Two large horns like on a demon.
E- Plate
This would be a horn plate with supporting ribs looking like a crown.
F - Five Braids
This would be 5 thick braids, a bit like tentacles ending in a thick pigtail
G - Three braids
Similar to F, but only 3...
H - Ponytail
Well, just that, a bald head with only a ponytail on the end.
I - Iroquois
Not sure if it would be hair, skin, or some kind of horn stuff, but formed like a Mohawk
Looks a bit like an 80's punk
J - swept back horns
Again 2 large horns, but swept back and aligned with the form of the head
K - more horns
Again 2 swept back horns, but at a different angle...
L - Spikes
A set of horn spikes arranged like a crown.
M - Sepia
Three tentacles closely following the contours of the head and ending like on a Sepia.
N - Princess
a diadem, horn?
Well?
Now I REALLY need your help!
Which one looks best - or do you have another idea?
Please let me know.
You can also use the poll on the side.
THANKS!
Klaus
thank you for your feedback.
@Vik - hey! Nice to see you here - been a while What are you up to - I don't see any updates to your posts - or did you start a new one?
Unfortunately I didn't get as many responses as I hoped for, but there is still time Gathering the votes from the poll, the comments, and the forums we have 5 favourites.
Tentacles = 3 votes
Medusa = 3 votes
Dragon = 4 votes
Demon = 3 votes
Five Braids = 3 votes
all others have 0 or 1 vote
So currently "Dragon" has most votes. I still have some work on her equipment and armour, so I keep the vote open for about a week or so.
Other than that I slowly worked on her clothes and equipment.
First she got one sleeve on the right arm, with a scale pattern.
Once that was cured she got some shoulder armour, suspenders for her legs, and fringes for the jacket.
Buckles for the boot straps
A collar, right lower arm armor, belt, feather ornament, some chains, and a shoulder strap for a bag.
Two straps on her leg to mount a dagger.
Speaking of the dagger, here is the initial piece of plastic.
Some more straps, chains, and ornaments.
And the first details for the dagger.
What do you think?
Anything missing, any suggestions or ideas?
Please feel free to comment - and if you haven't, vote for the hairstyle
I like "Tentacle" as well- but more than that, I like the variants with a more relaxed, 'falling over the shoulder' look/feel, rather than the ones that are thrusting up from her head.
And you could always put some ornamentation on, whichever you go with- studs and piercings if you go with hard materials, or ribbons and beads (or studs and piercings, of course) if you go with something softer.
I didn't get much done last night, but I sculpted some pouches and small bags for Allayah last night.
I also rearranged the shoulder strap again - I'm thinking about adding a large bag or a bedroll here.
All too soon I started to touch still curing parts of GreenStuff, so I had to stop and let it all cure.
In the meantime I continued with the dagger.
I'm still undecided about the hairstyle.
Last night I was thinking about a similar style as "Bian the Red"
but looking at her this morning I thought it would probably best to go with the simple ponytail.
This would emphasize the ET head form and leave me room to add some tattoo's to the side of her head, and maybe even some goggles to her forehead?
What do you think?
Cheers
After the last update I realized the best position for the dagger would actually cover the two buckles I had already sculpted.
So it was time for another operation and Doctor Klaus got to work
This is now the position I plan to use, once the dagger is completed.
I also finished her right hand with some rings and armour, as well as she got a little ornament on her forehead.
The finished dagger - unfortunately not the best of images.
And in position with the new straps and the repositioned buckles.
And finally the bedroll
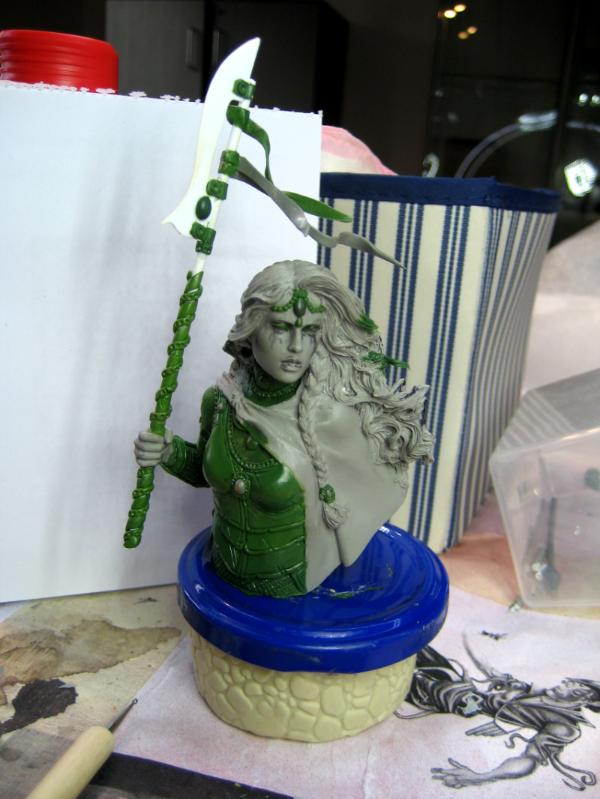
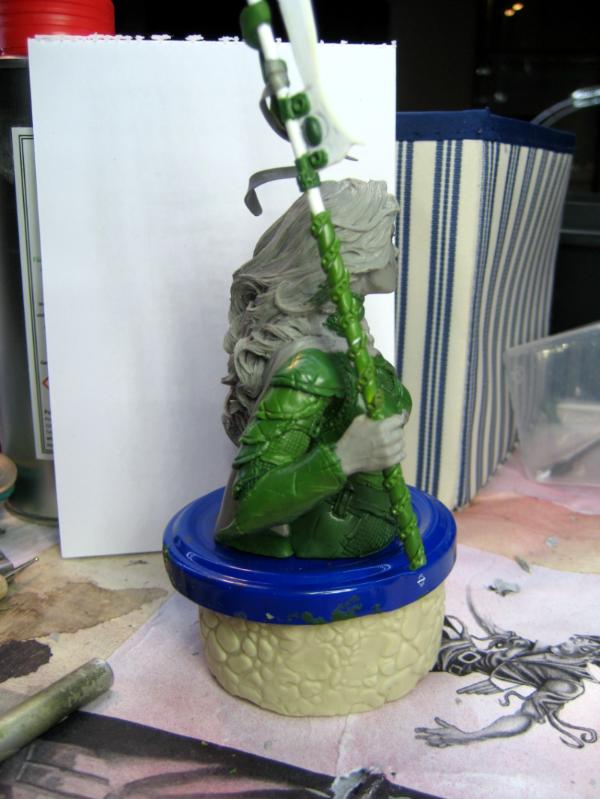
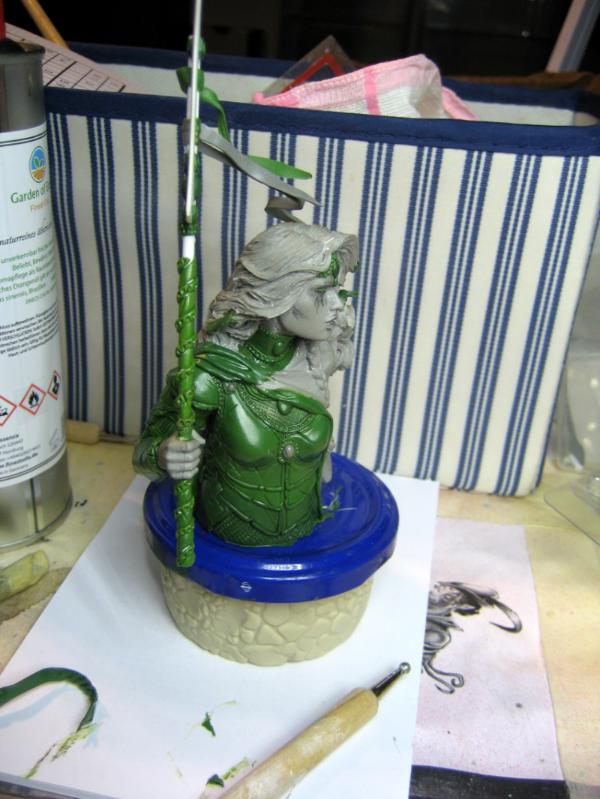
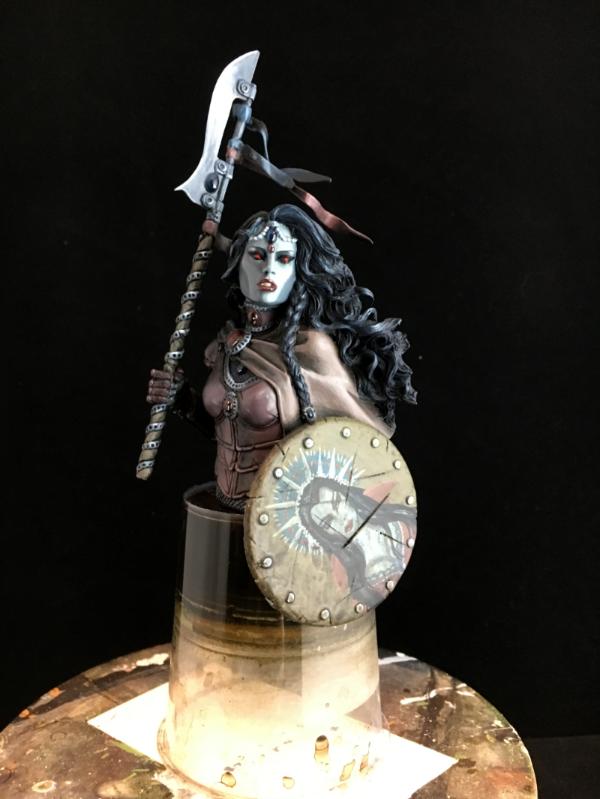
And this concludes the work on Allayah.
Well, there's still her spear!
So here's the blade to be cut from plastic card.
And a first position check with white tac.
The blade cut, sanded
and mounted.
And about an hour later all ornaments, ribbons and feathers were in place.
That's Allayah
Now I have to do one or two Fire-Lizards and most likely some more scenery work.
Anything missing?
Some suggestions, any final changes?
I look forward to hear from you.
Cheers
With Allayah mostly done I started to sculpt the Fire-Lizards.
There will be three of them - two on the ground.
The one in the foreground will be looking under something - maybe a rotten banner?
The basic body is sculpted from SuperSclupey
I added the first muscles on this one.
I'm a bit unsure on the final look - they are different than the Fire-Lizard form "The Princess".
So instead of finishing the body and head first I started to work on the wings.
Here's the basic wire frame for the wings.
I hope it will look good when it has its wings spread while on Allayah's arm.
The wire coated with SuperSculpey.
Both wings.
I'm still a bit unsure about the final position for the wings.
Any ideas or suggestions?
I also started to sculpt the first two heads.
But are still missing the lower jaws.
So what to you think?
How are the wings?
I look forward to your feedback.
Cheers
Klaus
Beautiful sculpting on the clothing, details in general are outstanding. Is the dragon on the arm cooked yet? With the wings up like that it looks like it is about to take off, which is cool, but the head could do with dropping a little in that case, you could fold the wings a little, as if on the up stroke of opening. All round genuinely amazing as we always expect from you.
For the wing positions, I'd look at photos of birds (if you haven't already) to get an idea of wing to body position. These may not be birds, but when looking at winged creatures we have very few references outside birds (think of it like the uncanny valley for humans). The more the positions look like birds the more believable they will appear.
Hi all,
Thank you for the feeback @Anvildude - I know, I know, you despise the bat wings But for thise littel Fire-Lizards they are just the perfect fit (I hope). If you read Anne McCarfrey's Dragonriders of Pern series, you'll probably see that Dragons and Fire-Lizard need these wings
Well, I made little progress since the last update.
Mainly because I spent the weekend at Massive Voodoo's Beginner Workshop in Heidelberg.
It was a great workshop with lots of inspiration and new ideas. Got to know a lot of new people in my region.
Nevertheless there is progress I started sculpting the feet for the little Fire-Lizard on Allayah's arm.
And the second Fire-Lizard on the ground got his first muscles.
I took the opportunity to discuss scene with Roman on the workshop, who provided me with a lot of tips and ideas.
I now have a pretty good idea of the atmospheric setting and primary color setting.
During transport Barduch suffered some injuries.
But these were fixed quickly on Monday.
I also reworked the wing position on the first Fire-Lizard. I think this is now good.
The chat with Roman also made me rethink some details of the scene.
As a result Barduch lost his head
Well, actually the neck.
In the old position most of his face was lost, so I decided to reposition the neck and head.
This is a lot better now.
So I started to build up the new neckline.
After masking tape I added Milliput (standard) to build up the mass.
I couldn't used SuperSculpey as Barduch won't fit the oven any longer.
On Tuesday, after the standard Miliput was cured, I started to sculpt the details using Fine Miliput.
I also used thinned Milliput smoothing some more of the skin areas.
I'm now quite happy with Barduch and the scene.
I still want to change some minor things on the base and add some more stuff, to integrate the two Fire-Lizards on the ground better.
And of course I still need to complete the Fire-Lizards. That'll take a few days I'm afraid.
Oh yeah! I made up my mind on the hairstyle!
No hair She'll stay as she is, bald.
So, what do you think?
I look forward to your feedback and comments.
Cheers
klaus
To be fair, McCaffrey's dragons and fire-lizards also had irridescent compound eyes.
Though that would be an interesting diorama- a dragon chowiing down on Fire-stone, or if you were feeling up to it, a more aerial scene with a dragon fighting off something else.
I wonder if you could get commissions from the McCaffrey estate to do limited-edition sculpts for the series. I'd love to see a Watch-Wehr.
well I'm amazed if anyone is still here reading, but hopefully I can recapture my audience.
As some of you know I'm diagnosed with relapsing depression. It's not quite as bad as manic-depressive, but still a bite to chew.
I can usually keep it in check nicely by listening carefully to my mind and body and taking enough time for myself. The creative hobbies do help a lot, but sometimes they can also be the initiator of another depressive phase.
This is usually heralded by a boost of creativity and a frenzy of building, drawing, sculpting and the like.
And then...
nothing
Just a blank mind, no initiative, no fun, no colors.
If I (or my family) catch the signals in time there are ways to hold the depression in check and get back to a normal behaviour.
If not, well that's the longer route out and in especially tough cases some medication is needed.
In March I slipped into another depressive phase, which wasn't heralded as clearly as usual and so we missed the signs. Luckily it wasn't a deep depression, but it "took the wind out of my sails".
At the time is was working on Allayah and her Fire-Lizards.
Unfortunately it was a lot of GreenStuff work, so I could only do a little at a time and then had to let it cure. This piecemeal work didn't really help me and so she gathered dust on my desk.
As so often I switched to computer games to keep me occupied.
Then a few weeks back I felt a first hobby twitch.
I looked at the air assault scene with the Hermes Air Assault (which I worked on last year in July last).
I started to do some improvements and reworked the scene, but it didn't really captivate me.
And then finally on July 8th the hobby urge was back!
With the help of my cats (this is Ben) I got to work on a new project.
Since I wasn't sure if I would get anywhere I did make photos, but I didn't post anything.
Now, 3 weeks later the project developed to a stage where I can share - and even if I should not finish it, it will hopefully entertain you and provide some inspiration and maybe some new ideas for you.
It is called THANATOS Atmospheric Assault Carrier
It's a pimped version of the HERMES - with some new ideas and twists.
We'll see how far I'll get.
I hope to have you with me on this little trip.
Cheers
Klaus
Hi all,
as I've written in my previous post (http://fischers-design-shop.blogspot.de/2017/07/an-update.html)
this project started already on July 7th - but I simply wasn't sure if I could carry it through for any distance.
But now almost 3 weeks later I'm still at it and even if won't finish it, I think it can be entertaining and inspiring.
So here we go.
The THANATOS Atmospheric Assault Carrier is more or less a pimped version of the HERMES - a bit bigger with some improvements to it. If everything works out as planned it will be part of a diorama attack scene - if not, just a chunk of plastic gathering dust But with the help of my cats it is great to be in the hobby again and be creative and get things done.
So here is Ben helping me with the Chopper.
I was cutting plastic tube pieces which are used as head-rests for these seats.
As you can see by the seats (7 per side compared to the 5 per side in the HERMES),
The THANATOS will be bigger.
With the 7 seats there is still room to spare.
And the isle between the seats is also comfortably wide - 2 abreast can easily fit.
Once I had the basic passenger bay outlined I started to build up the sides
and the ceiling.
The THANATOS will use a front ramp for quick entry and exit.
Since I want to detail some of the interior sections most pieces are not glued but rather taped together.
This is the passenger bay with the built-up sides.
I'm using a Dream Forge Eisenkern trooper for scale.
The idea is that the first troopers disembarking will be heavy assault troops, followed by lighter storm trooper (Scions), followed by standard troopers (IG).
As you can see here I plan to have a clear window to the cockpit.
Not sure if I can pull this through to have visible interior, but hey why not plan big :-P
still here mate...and it seemsa lot of good peeps here have similar problems... i had two therapies already....and every now and then that dark and glum time washes over me too...only recently i was dragged towards the hobby by my kids...that s quite a fortunate perk when being a dad...otherwise i quite often i would have need way more time to come out again...
and i really like thanasos...(death related?)
especially (yet aagain) i like how you did the seats... that is a details i still have on my long term agenda to rebuild^^...
We are still here , though I too am in and out and my latest scheme has already fallen to the curb. Eagerly anticipating your next installment as you and the_Blackadder are two of my favorite scratch builders and you both seem to be active currently .
Viktor von Domm wrote:still here mate...and it seemsa lot of good peeps here have similar problems... i had two therapies already....and every now and then that dark and glum time washes over me too...only recently i was dragged towards the hobby by my kids...that s quite a fortunate perk when being a dad...otherwise i quite often i would have need way more time to come out again...
and i really like thanasos...(death related?)
especially (yet aagain) i like how you did the seats... that is a details i still have on my long term agenda to rebuild^^...
Thank you Vik!
Glad you're still around and thanks for the feedback.
In regards to Thanatos, I was initially looking around HERMES - as the carrier was to be something like the big brother to the HERMES. But he had no brother and the father was ZEUS - already taken...
So the personification/bringer of death was an alternative for an Assault Carrier that drops troops in the midst of the enemy
Theophony wrote:We are still here , though I too am in and out and my latest scheme has already fallen to the curb. Eagerly anticipating your next installment as you and the_Blackadder are two of my favorite scratch builders and you both seem to be active currently .
Thank you Theophony!
Thank you for being around and providing suggestions and feedback!
Moltar wrote:Klaus, you madman! Great to see you back at the workbench.
Thank you all for the positive feedback and messages!
I really appreciate your comments and messages - THANK YOU for your support.
Well, here is part 2 of the build process so far and it covers the steps from 17. July to 24. July.
I had to mix some GreenStuff for the end of the Volcano Cannon and some other pieces anyway, so I used the remainder to quickly shape the cushions for the seats.
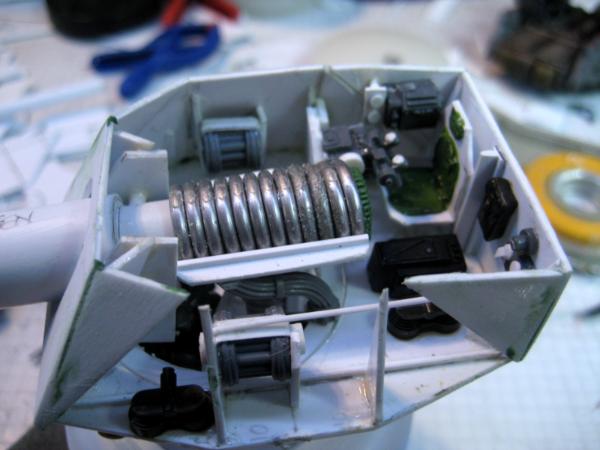
While the GS cured I built the gunner position for the turret.
I think it's a nice amount of detail,
for the gunner
and the turret interior.
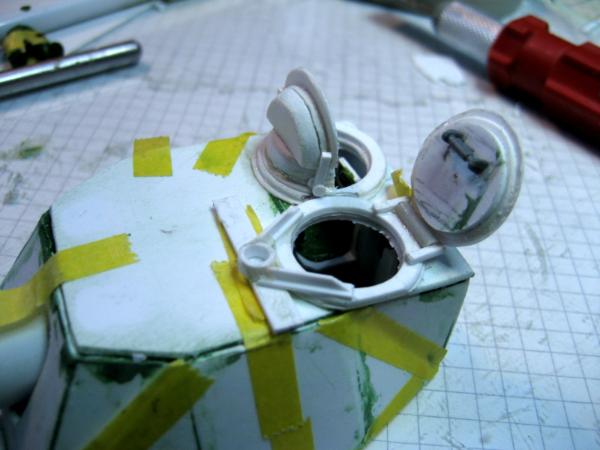
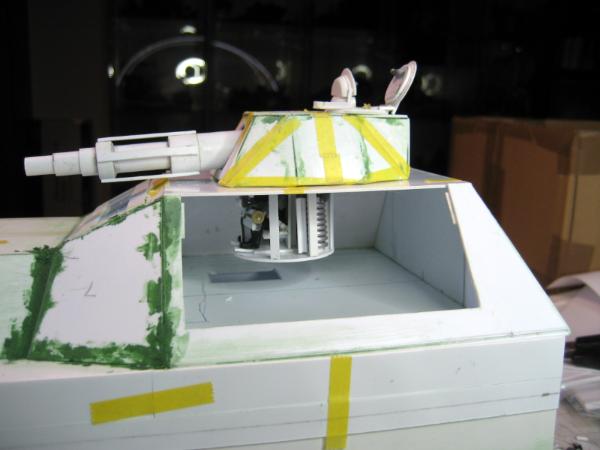
I also began detailing the turret roof, starting with the hatches.
This is how it would look on the THANATOS.
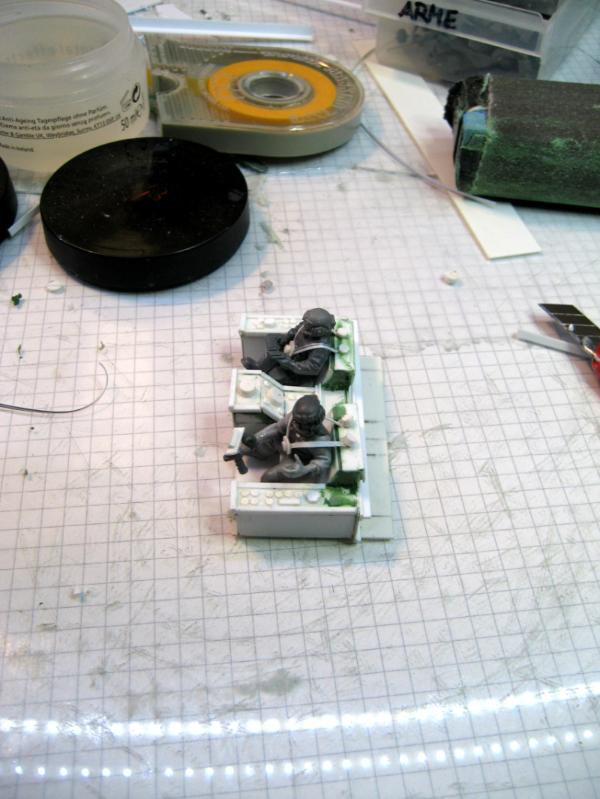
With the gunners position done I built the pilots positions.
From the taped area you can see that I plan to use HUD (Head Up Displays).
Not sure if it's going to be visible at all...
But I tried
With this part of the interior done, I decided to work on the outer engines.
They are pretty much what I already used for the HERMES - just a bit bigger.
In addition to the outer engines I need the landing gear. For this I cut the base first.
Then the pistons to it.
And the landing gear in position together with the outer engines.
This is as far as I got to July 24.
2 weeks of work
So what do you think?
Let me know and send some feedback, ideas and suggestions my way.
Great to see you writing and working again Not Santa! Yours was one of the first blogs I read first to last when I found Dakka Dakka. You were one of the primary influences on me (amongst some other great modelers here on the site) that helped push me over the line from straight kitbashing to actual scratch-building. Before you know it, you jokers will have me doing a build from the axles up!
I very much enjoy your work- especially how 'the inside matches up with the outside'- by which I mean that you don't have hatches or gun ports or whatever just stuck on wherever you like- there is a logical plan behind how everything fits together on your vehicles. Especially the Athena- what an epic build.
I'm also really liking this air assault carrier- can't wait to see how the project progresses.
Just as water can be a poison in sufficient quantity- all things in life in their proper measure. Face forward into the sun and carry on- I have a lot to learn from you yet!
I really get an inquisitor stealth landing craft vibe from the whole thing. Not sure if you read the HH novels, but the one with the assassin team that sets out to kill Horus has a ship, and this is pretty much what was in my head.
It does not matter if anyone ever sees the interior, you know it is there and now so do we, fantastic work as always, and so inspiring. Your timing is perfect, I was wondering how to do a cockpit design, and here you are showing me the way.
I know your pain sir, we are here, this group of silly people are amazing, helping me with similar issues. So wonderful to see you active.
Great work. I love all the little details and fully appreciate the never to be seen again interior work. Knowing it is there is more important than seeing it in the finished model. It's how I build.
I understand hobby burn-out, having had one of those recently. I took some time to re-charge and have started to ease my way back in. Looks like you dove right in. Impressive dive too. I'll score it a 10.
Meer_Cat wrote:Great to see you writing and working again Not Santa! Yours was one of the first blogs I read first to last when I found Dakka Dakka. You were one of the primary influences on me (amongst some other great modelers here on the site) that helped push me over the line from straight kitbashing to actual scratch-building. Before you know it, you jokers will have me doing a build from the axles up!
I very much enjoy your work- especially how 'the inside matches up with the outside'- by which I mean that you don't have hatches or gun ports or whatever just stuck on wherever you like- there is a logical plan behind how everything fits together on your vehicles. Especially the Athena- what an epic build.
I'm also really liking this air assault carrier- can't wait to see how the project progresses.
Just as water can be a poison in sufficient quantity- all things in life in their proper measure. Face forward into the sun and carry on- I have a lot to learn from you yet!
Thank you Meer_Cat - you don't know how much this means to me Thanks
whalemusic360 wrote:I really get an inquisitor stealth landing craft vibe from the whole thing. Not sure if you read the HH novels, but the one with the assassin team that sets out to kill Horus has a ship, and this is pretty much what was in my head.
Thanks!
No unfortunately I don't read any 40K stuff at all (sorry), maybe if there were audiobooks, but usually the 40K stuff is too over the top for me BUT wow, this is great to hear that the THANATOS comes close to what you were imagening for an assassin team carrier.
I gotta keep this in mind.
THANKS
xXWeaponPrimeXx wrote:This... this is amazing. I forgot how awe inspiring your work is Klaus. Keep it up! I want to see more!
Thank you Mete!
This means a lot to me
Moltar wrote:Loving that gunner seat and the pilots
Thank you Moltar - yes I really like them to - and check out the new post today and the idea I have there for these postitions
Camkierhi wrote:It does not matter if anyone ever sees the interior, you know it is there and now so do we, fantastic work as always, and so inspiring. Your timing is perfect, I was wondering how to do a cockpit design, and here you are showing me the way.
I know your pain sir, we are here, this group of silly people are amazing, helping me with similar issues. So wonderful to see you active.
Thank you Cam!
This means soooo much to me And I'm always glad when my builds inspire or help someone with their own project - So I hope to see a similar cockpit in your Warhound, right?
no pressure
Dr H wrote:Always here and following, Klaus.
Great work. I love all the little details and fully appreciate the never to be seen again interior work. Knowing it is there is more important than seeing it in the finished model. It's how I build.
Thank you Dr H - check out todays update - maybe it will be visible after all
Ruglud wrote:Wonderful stuff Klaus, always a joy to watch your work no matter what you're into. The cockpit and gunners position are masterpieces - simply stunning
Thank you Ruglud!
You too will hopefully be pleased by todays update and the view it will (hopefully) offer
THANKS!
Red Harvest wrote:Excellent work, Klaus. Truly amazing detail.
I understand hobby burn-out, having had one of those recently. I took some time to re-charge and have started to ease my way back in. Looks like you dove right in. Impressive dive too. I'll score it a 10.
Thank you Red Harvest!
This really means a lot to me - and scoring a 10 (out of 10 I hope ) what else can I ask for!
THANKS
THANATOS AAC (3)
Hi all,
thank you for your feedback and comments!
Well, since the last update I added intake vents to the side engines.
As well as exhaust jets/grills
Finally I added two auto-cannons as well as hatches and maneuver flaps.
And this is how it will look in the diorama scene.
Courtney Hollyoake at my blog commented on the width of the THANATOS
With the troop compartment being quite wide, what about loading it up with some assault bikes or similar?
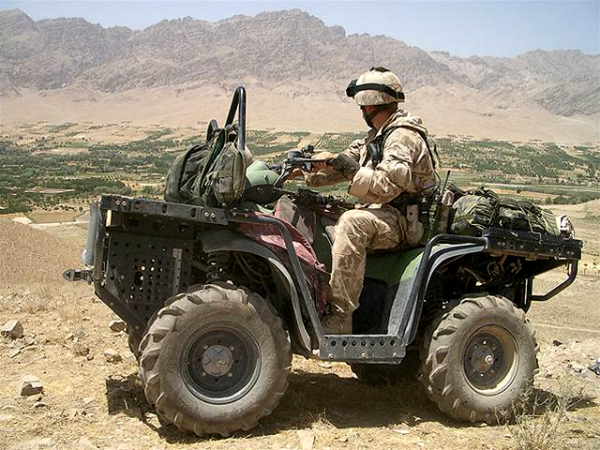
Well, I didn't want to reveal it yet, but yes, I plan to build a quad actually.
A quad, loaded with ammo and (dismantled) heavy weapons. Ready to come down the ramp
What I had not touched so far was the rear.
Typically the exhausts jets for the HERMES are round, but I think for this size flyer with VTOL capabilities I probably need something different.
So I go more for a spaceship (Ion?) engine...
Built with L-shaped profiles
Cool, eh?
Not sure if any kind of rudder or flaps make sense - what do you think?
Another thing I wanted to try was paneling (as this gives tremendous opportunity for weathering)
I think this will work, don't you?
Next on the list were the two hatches with machine gun mount (the taped strip is just to support the mounts while curing)
Since the two hatches are in front of the cockpit window, I made them with a flat, sideways opening.
And they need machine guns too.
The 3 MG mounted.
Then it was time to complete the paneling for that side.
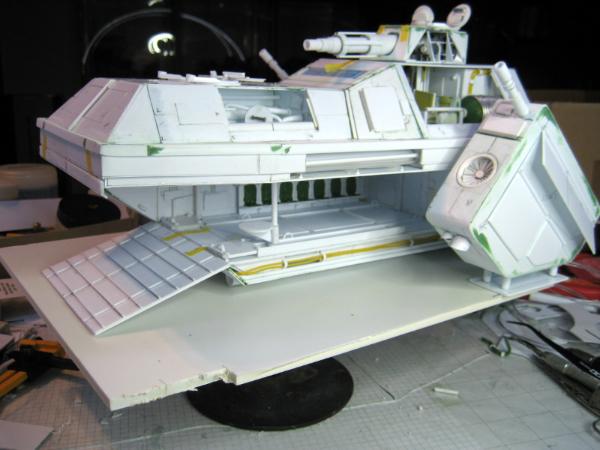
And here is now an idea I was hiding so far:
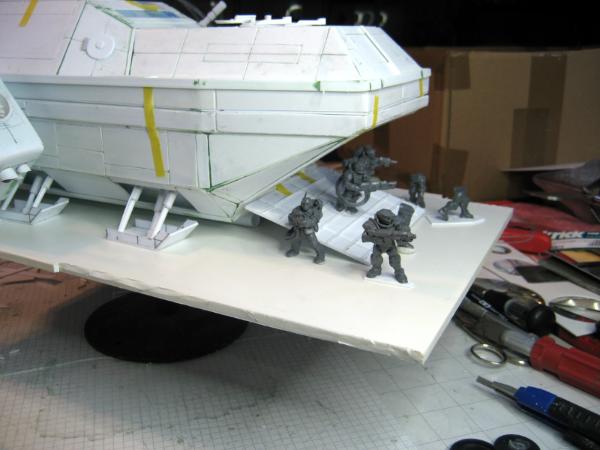
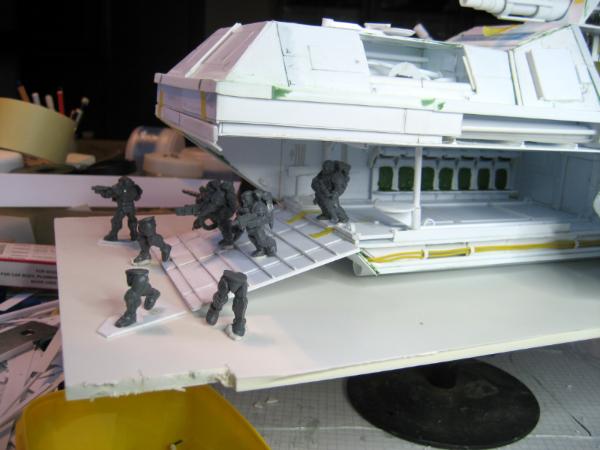
If everything goes to plan, the THANATOS will sit in the diorama like this.
And while the troopers disembark and engage the enemy (Orks as usual)
We can all take a look inside and see what is happening there.
Even though the one side engine would partially block the view
It would still allow a view of most of the action.
IF I can pull it through
And here are the individual sections of the THANATOS
Oh, and I could also allow a glimpse at the gunner position here
or keep it closed.
OK, here I am after 3 weeks of building.
What do you think?
Any suggestions? What about the maneuver flaps for the engines, or the paneling?
Thanks!
Klaus
I too, suffer something similar, but I have just learned to cope with it with the understanding that My hobby/creative/leisure activities are cyclical. I'll build hobby for awhile, then lose interest, like you said, then I'll play video games for awhile, this usually culminates with the feeling that I've just wasted x amount of hours and x amount of weeks worth of free time with absolutely nothing tangible to show for it, and I'll switch to something else. I don't know if this is depression, but rather the normal cyclical rotation of a creative person forced to do something else for a living. It's probably safe to say you are an introvert by nature. I am too. Try approaching the problem with the understanding that creativity is cyclical, and it's perfectly healthy and normal for people with our types of brains.
Wouldn't rule out the depression thing, cause creative minds have a lot more to cope with than unimaginative peeps...for instance unimaginative peeps...so there is that...but otherwise I can sign beneath every word above!
Dave what you are referring to as a waste of time may actually be an example of this https://en.wikipedia.org/wiki/Incubation_(psychology) And it's quite a useful thing too, since I suspect that it keeps obsessive behavior at bay.
Apologies in advance for the preachiness. Depression, in the sense of a mental illness, is something entirely distinct. And requires medical treatment, as does any illness. Untreated, a mental illness can kill just as readily as untreated diabetes.
To Klaus's question about maneuver flaps and panelling. I would look into the various concept art for dropships for inspiration. Maybe borrow some ideas from the dropships in Elysium, for example?
Stunning work. Those guns look the bee's knees, perfect. Details like the hatches are wonderful and set models like this apart. Real thought in the design.
Not sure on the flaps, tend to see directional jets on the real deal, so maybe think more along the lines of the ability to redirect the output elsewhere. Maybe secondary thruster outlets on the belly.
Cut away design is inspired.
As to panelling, yes definitely, Though one of the tricks I have learned is small random squares, 0.5 mm styrene, 2-3mm square. Random placement. Most of the GW imperial range has these to break up larger areas.
Excellent as always, thank you so much for sharing.
Spoiler:
I am still fighting a really bad patch of depression, having a few good words and some inspiration to keep going means so much more than just about anything else. Creatively we can get distracted easily, one of the things I have done is to concentrate my efforts, I don't do other things, gives me a problem with obsessive issues, and when it does not go well, it goes really bad, but I understand the need for what Dave is saying, most things are cyclic, and it would appear our mojo is one of them. And what I think Dave is saying is acceptance of the knowledge is a big part of it. For instance, on many things in life, like work for instance, a "It is what it is! So get on with it!" attitude gets me through much better than trying to buck the system. Above all true friends are the key, and we are here, maybe it is only a few words on a screen, but they mean so much to me. Hang in there kid, remember we love and care for you, and seeing your work helps to brighten my day at least, and I suspect it helps many other people more than you think.
I too, suffer something similar, but I have just learned to cope with it with the understanding that My hobby/creative/leisure activities are cyclical. I'll build hobby for awhile, then lose interest, like you said, then I'll play video games for awhile, this usually culminates with the feeling that I've just wasted x amount of hours and x amount of weeks worth of free time with absolutely nothing tangible to show for it, and I'll switch to something else. I don't know if this is depression, but rather the normal cyclical rotation of a creative person forced to do something else for a living. It's probably safe to say you are an introvert by nature. I am too. Try approaching the problem with the understanding that creativity is cyclical, and it's perfectly healthy and normal for people with our types of brains.
Yes, sounds familiar - however, I am diagnosed with a relapsing depression - I seem to have it for a long time now and it has a lot to do with my childhood. Mayn things I learned in therapy - I can tell you, there are plenty of things one doens't really want to know about him/herself, but it is essential to know, so one can cope
Viktor von Domm wrote:Wouldn't rule out the depression thing, cause creative minds have a lot more to cope with than unimaginative peeps...for instance unimaginative peeps...so there is that...but otherwise I can sign beneath every word above!
Thanks Vik!
Red Harvest wrote:Dave what you are referring to as a waste of time may actually be an example of this https://en.wikipedia.org/wiki/Incubation_(psychology) And it's quite a useful thing too, since I suspect that it keeps obsessive behavior at bay.
Apologies in advance for the preachiness. Depression, in the sense of a mental illness, is something entirely distinct. And requires medical treatment, as does any illness. Untreated, a mental illness can kill just as readily as untreated diabetes.
To Klaus's question about maneuver flaps and panelling. I would look into the various concept art for dropships for inspiration. Maybe borrow some ideas from the dropships in Elysium, for example?
Thanks Red!
Yes, I ruled out the flaps - they are nonsense - the Elysium tip was very helpful, gave me a few new ideas
Dr H wrote:Great work, Klaus.
I like the removable panels / cutaway idea for the interior.
Thank you Dr H!
Lets see what you think of the new interior details
Camkierhi wrote:Stunning work. Those guns look the bee's knees, perfect. Details like the hatches are wonderful and set models like this apart. Real thought in the design.
Not sure on the flaps, tend to see directional jets on the real deal, so maybe think more along the lines of the ability to redirect the output elsewhere. Maybe secondary thruster outlets on the belly.
Cut away design is inspired.
As to panelling, yes definitely, Though one of the tricks I have learned is small random squares, 0.5 mm styrene, 2-3mm square. Random placement. Most of the GW imperial range has these to break up larger areas.
Excellent as always, thank you so much for sharing.
I am still fighting a really bad patch of depression, having a few good words and some inspiration to keep going means so much more than just about anything else. Creatively we can get distracted easily, one of the things I have done is to concentrate my efforts, I don't do other things, gives me a problem with obsessive issues, and when it does not go well, it goes really bad, but I understand the need for what Dave is saying, most things are cyclic, and it would appear our mojo is one of them. And what I think Dave is saying is acceptance of the knowledge is a big part of it. For instance, on many things in life, like work for instance, a "It is what it is! So get on with it!" attitude gets me through much better than trying to buck the system. Above all true friends are the key, and we are here, maybe it is only a few words on a screen, but they mean so much to me. Hang in there kid, remember we love and care for you, and seeing your work helps to brighten my day at least, and I suspect it helps many other people more than you think.
Thank you Camkierhi!
Yes this illness really is a killer. I realized during therapy how dependend I was on feedback and gratification, and how little I could cope with compliments and even less with critique. I was constantly knoting my own mortal coil. going in circles all the time.
By now I'm a lot better, I can accept compliments and I can work with critiques - it's still a painful process and a long way to go, but it helps me to work with the illness.
And yes, "It is what it is" is a very good motto to live by.
By now I like to say "wenn's klappt, klappt, wenn nicht, dann nicht!" - "if it works, it works, if not, not" It's not giving up and blindly accepting fate, but it is working with the circumstances and chaos called live
Automatically Appended Next Post: Allright then!
Enough of depression and mental illness - back to business
Hi all,
thank you for your comments and feedback!
Since the last update I completed the paneling of the left side of the THANATOS
For the interior details I built a "reactor" to power the ship.
And designed an engineering room for it.
It is removable for detailing and painting.
But it fits neatly into the section.
Even though much of it will be covered by the side engine, I feel better with this section in place
Another section I wasn't very pleased with was the rear section of the superstructure
So besides the top thruster I added some more panels
and I think this works better now.
To complete the interior details I still had to do the passenger bays ceiling.
You may be able to see that I added clear plastic card to the center allowing me the option to add LED lights if I should fancy it
Tie-downs and rails complete the interior here.
Another item on my to-do-list was the visible machine-gun position.
I opted for a blast door to the troop compartment and a vertically adjustable platform
But I can still close it seamlessly.
And finally I worked on the "bridge".
Any reputable bridge needs a captains chair, right?
Though pretty cramped this could work.
But a captain needs some displays to look at. Since the wall ahead is taken by an access door, I'm trying to add a display to the chair.
What do you think?
Will this work?
This is as far as I got.
Week 4 of the project.
Cheers
Absolutely amazing Klaus! The Cutaway concept is brilliant, the execution of the concept...GENIUS! Did you spend a lot of time looking at cutaway drawings like this?
Great interior work. All looks spot on to me.
Like the added screen for the cap'n chair, and I like the inclusion of tie-downs; that's the kind of detail thinking I like.
dsteingass wrote:Absolutely amazing Klaus! The Cutaway concept is brilliant, the execution of the concept...GENIUS! Did you spend a lot of time looking at cutaway drawings like this?
Thanks!
Well I looked very closely at this one:
https://goo.gl/images/qKx7q7 But that's pretty much it. I had to think a lot on how to build it modular - that was a lot of fun The result was often very clumsy and unstable, but with each step it got better (closed gaps and such) and a lot sturdier - and now that I'm sure I will keep it open, I can enforce some sections and improve them
Dr H wrote:Great interior work. All looks spot on to me.
Like the added screen for the cap'n chair, and I like the inclusion of tie-downs; that's the kind of detail thinking I like.
Thank you Dr H!
And those details are so much fun - they are part of telling the story - and they help me develop the situation.
Right now I'm stuck with building the quad.
Never did it before and I'm kind of diving in murky waters here - but I hop I can post an update tomorrow.
Cheers
Klaus
Love that cut-away. Wonderful idea. Perfect for display, and even play...
That compass cutter you have, the yellow and black tool in a few of your photos, where did you get it?I've been meaning to get a better one -- better than the one I currently have-- for a while now.
Red Harvest wrote:Love that cut-away. Wonderful idea. Perfect for display, and even play...
That compass cutter you have, the yellow and black tool in a few of your photos, where did you get it?I've been meaning to get a better one -- better than the one I currently have-- for a while now.
Thank you Red Harvest!
Currently I use this here:
https://smile.amazon.de/gp/product/B000BK7NWC/ref=oh_aui_detailpage_o03_s00?ie=UTF8&psc=1 It is OK, but I'm still looking for a strudier one - maybe out of metal...
When it comes to 1mm and thicker it is really a struggle - the blades tend to angle and all of a sudden you're cutting a spiral. Fastening all the adjustable screws really hard with a plier helps, but of course this makes adjustments harder.
not the perfect solution.
JeffyP wrote:Very cool project! Your scratch building is just beyond belief...
Thank you JeffyP!
Automatically Appended Next Post: Hi all,
well, this week's progress was rather slow.
One of the things I still need to solve with the planned "cut-open" diorama is the landing gear.
It looks good on the closed side,
but on the open side....
I could just leave the skids....
But I guess in the end I will just not have the landing gear on the open side.
Any ideas or suggestions?
From the plan and layout the scene will look like this.
With the Eisenkerns in the lead and the Scions following.
You may recall I mentioned a quad that I'd like to add as a ammo carrier and maybe even support vehicle.
Maybe like the US MV700 and MV850 quads
So I looked through my stash to find suitable wheels.
In the end I decided to use 1:48 T-34 road wheels, pimped with milliput.
Not the best wheels, but they'll do the job (I hope).
To be honest, I'm somehow operating completely in the dark when it comes to this quad. I took me forever to just get the simplest of starts.
In the end I used a motorcycle tank and saddle from a WWII German Zündap
The build is very slow as I add and remove things time and again.
I think the basic rear is now OK
and it would fit into the THANATOS passenger bay.
It took me two evenings to get a half-way decent front.
I think I can live with that one...
Well, week 5 is almost over and compared to the previous weeks the build slowed considerably, but I hope once I'm past the basic quad design I can pick up pace again.
Any ideas or suggestions?
Cheers
I like the quad Klaus, but it looks a little big on the front end. The back doesn't matter too much since you said was going to be an ammo/gear carrier. Maybe add some cut down bolters to the front to give reason to the bulk?
Good job on the quad', Klaus. Works for me.
Good idea to start from motorbike parts, they are after all a bike with 4 wheels, the middle is basically the same for both.
For the landing gear, I'd be tempted to attach the rear of the two and cut-away the hull above it. So that it shows how the internal structure interacts with the depth required for the gear's mechanism. It'd be a lot more work than leaving them off though.
I mean, it's not like the gunner is going to be sitting in his position during transit, right? Or is this meant as an Assault vehicle, where the angry soldiers just come boiling out ready to flashlight things to death?
Thanks mate - lets hope it's my opus magnus - not my opus medcorum...or such
Moltar wrote:That lil buggy is awesome, Klaus. Great job building it!
Thank you Moltar!
Dr H wrote:Ha, yeah we've all done that: "yes, this new bit looks cool right there... oh, it doesn't fit any more"
Few of us then go on to build a larger (yet smaller) thing to replace it.
Nice work.
Hehe - you know me.
Size is realtive and "It's bigger on the inside"
Anvildude wrote:I mean, it's not like the gunner is going to be sitting in his position during transit, right? Or is this meant as an Assault vehicle, where the angry soldiers just come boiling out ready to flashlight things to death?
Yeah, that sums it up nicely
shasolenzabi wrote:So, now a drop ship, with small vehicles to support the troops it lands to a battle zone, Impressive work as always Klaus!
Thank you shasolenzabi!
xXWeaponPrimeXx wrote:I like the new buggy
Of course the AGL could've folded down like the gun on the aliens APC
All looking awesome though!
Yeah, should've thought about that before - but hey, there is always a next time
evildrcheese wrote:Aw man that buggy looks totally awesome.
EDC
Thank you Mate!
Automatically Appended Next Post:
Hi all,
thank you for your feedback and suggestions!
I really appreciate you participating
So I finished the Dencara Tauros, by adding camouflage netting and all the other little details.
I am quite pleased with the result.
And it fits into the passenger bay.
hehe
Well, this ain't old-fashioned programming, this is rivet making.
While recovering from rivet making I started to figure out the actual scene.
Here you can see where I envision the light to spill....
Hmm, maybe a round base?
While tinkering with these ideas (and it was at night, so I couldn't use the saw) I continued with details.
Like creating the lights and sights for the turret.
The next day I cut half of the wooden plate rectangular and the other half to a circle - so I still have the option to select either.
Then I positioned the troopers
After the initial positioning I decided I need an officer leading - this is an interesting mix of Eisenkern Valkir and Imperial Scion parts - and honestly, I love how the guy turned out!
I also added a flame trooper - for the sheer effect of a flame thrower at night
And another heavy Eisenkern with a "big gun".
So, please take a look at the composition.
Is it too static, would you position differently?
What are your thoughts here?
Right now I'm going with the idea of the round base and started to cover it in instant plaster.
And positioned the ship on it (also to leave impression marks on the ground).
And this is where I am now.
Please let me know what you think.
I look forward to your feedback!
Cheers
Klaus
Are you going for dry ground, or mud? Because it could be a really neat little terrain effect if you used some plaster and sculpted up some big 'squishes' where everything is landing. Could put footprints out to the troops, as well.
Very much like how the buggy turned out Klaus- and am looking forward to seeing you one day do one with the AGL that folds over the back a' la Aliens.
Regarding the composition and positioning of the deploying troopers- that looks pretty realistic also. The gun dogs should be fanning out to either side of the ramp to establish a perimeter around the drop ship, with the officer and probably his RTO more or less centered on the ramp. With the buggy deploying down the ramp, he would naturally be off to the side.
Unless the drop ship is only one of many (whether we can see the other ships or not) in which case the officer would be leading his detachment to a rally point to form up as part of a larger force.
I love working with the Dream Forge Eisenkern figures- great pieces with a million variations you can build in.
Great work!
Positions look fine to me.
One thing you could add; with the removable side, maybe add one last soldier inside... ready to shut the ramp, or some other job... just to give a reason to open it up (beyond the interior details).
Good lord, I never know what to say to these posts. Beautiful detailing, great work. Every time I think you must be finished with something there are more layers. Thank you for posting inspirational things
Littletower wrote:Build is as great as usual, and the squad looks great.
Also liking the round base, it makes for an interesting composition. Are you planning to add some other element on the rear, starboard side?
Might look a bit empty otherwise, but it is early to say...
Keep it up!
Thank you Littletower - yes I do agree and in the meantime I added a wreck on one side and some rubble on the other.
Anvildude wrote:Are you going for dry ground, or mud? Because it could be a really neat little terrain effect if you used some plaster and sculpted up some big 'squishes' where everything is landing. Could put footprints out to the troops, as well.
Great idea Anvildude!
Unfortunately Dencara is a rather dry planet. But your suggestion inspired me to try soemthing new.
Since they will be raiding the palace of a governor that has been driven into Chaos' hands, I now plan to add some (blood) puddles on the ground Thanks for the inspiration!
Meer_Cat wrote:Very much like how the buggy turned out Klaus- and am looking forward to seeing you one day do one with the AGL that folds over the back a' la Aliens.
Regarding the composition and positioning of the deploying troopers- that looks pretty realistic also. The gun dogs should be fanning out to either side of the ramp to establish a perimeter around the drop ship, with the officer and probably his RTO more or less centered on the ramp. With the buggy deploying down the ramp, he would naturally be off to the side.
Unless the drop ship is only one of many (whether we can see the other ships or not) in which case the officer would be leading his detachment to a rally point to form up as part of a larger force.
I love working with the Dream Forge Eisenkern figures- great pieces with a million variations you can build in.
Great work!
Thank you Meer_Cat.
Yeah I'm still tinkering with the central element of the scene...
Maybe you recall whalemusic360's remark on the previous page:
really get an inquisitor stealth landing craft vibe from the whole thing. Not sure if you read the HH novels, but the one with the assassin team that sets out to kill Horus has a ship, and this is pretty much what was in my head.
and now I'm thinking of an "Executioner" with the above mentioned scenario of a governor driven into Chaos' hands....
dsteingass wrote:The Tauros is fantastic! Just built out of thin air? Did you just look at the Forge World pictures and recreate it?
I like the troop scene, perhaps make the troopers fan out, and have the commander coming out in a more dramatic fashion?
Well, I really looked at a lot of images of the FW Tauros and then "just" started to recreate it - with a bt of Dencara flavour
Dr H wrote:Great work.
Positions look fine to me.
One thing you could add; with the removable side, maybe add one last soldier inside... ready to shut the ramp, or some other job... just to give a reason to open it up (beyond the interior details).
Thank you Dr. H - yes I totally agree.
Marshall_Argos suggested on my blog to add a "crew chief" on the inside, that is communicating with the crew via headset. I really love that idea
Scarper wrote:Good lord, I never know what to say to these posts. Beautiful detailing, great work. Every time I think you must be finished with something there are more layers. Thank you for posting inspirational things
Thank YOU Scarper!
I'm always glad to see new commentators and it makes me very, very happy if I can inspire anyone here!
Thank you!
Red Harvest wrote:Love that cut-away. Wonderful idea. Perfect for display, and even play...
That compass cutter you have, the yellow and black tool in a few of your photos, where did you get it?I've been meaning to get a better one -- better than the one I currently have-- for a while now.
Thank you Red Harvest!
Currently I use this here:
https://smile.amazon.de/gp/product/B000BK7NWC/ref=oh_aui_detailpage_o03_s00?ie=UTF8&psc=1 It is OK, but I'm still looking for a strudier one - maybe out of metal...
When it comes to 1mm and thicker it is really a struggle - the blades tend to angle and all of a sudden you're cutting a spiral. Fastening all the adjustable screws really hard with a plier helps, but of course this makes adjustments harder.
not the perfect solution.
Danke, Klaus. It appears sturdier than mine, but not by much. I think I'll need to make my own.
Just going to repeat what Cam said. Stunning work. The circular base works very well. The one thing that came to mind is the potential to add even more landing lights --aircraft are festooned with them-- and maybe a pair of large searchlights/spotlights to illuminate the LZ. Maybe they retract into the hull when not in use.
Positions look fine to me.
One thing you could add; with the removable side, maybe add one last soldier inside... ready to shut the ramp, or some other job... just to give a reason to open it up (beyond the interior details).
That would be the guy working the automatic weapon to give covering fire to the assault troops. I think it would be a nice addition. Perhaps the weapon is suspended from the ceiling?
The actual setting of the scene also changed.
The story I choose is set on Dencara V, where the Governor of Port Singh, on the Terra Perpierit became corrupted by the Chaos and called out a revolution.
In the typical Dencaran style the response will be swift and thorough...
So the scene is now set in the courtyard of the Governors palace, where the assault force lands.
The corrupted occupants wasted no time and began converting the palace to Chaos...
On DakkaDakka Anvildude suggested to use some mud and water splashes for the scene.
Unfortunately Dencara is very dry and desert-like planet.
But hey! With a revolution ongoing, there will be blood. Lot's of blood. Puddles of blood So I poured some water effects on the base where the blood will gather.
Unfortunately the plaster is very porous and so the water effects vanished over night.
I will re-pour them after the scene is primed
And this brings me to another new element of the scene.
I decided to leave the TAUROS off - he will get his own little scene together with the Quad - and instead add an "executioner" - thank you whalemusic360:
...really get an inquisitor stealth landing craft vibe from the whole thing. Not sure if you read the HH novels, but the one with the assassin team that sets out to kill Horus has a ship, and this is pretty much what was in my head...
These 3 are from the newest Raging Heroes range "Daugthers of the Crucible" amazing minis.
So here is now the assemble gathered on the stage
Dr H and Red Harvest on DakkaDakka suggested:
That would be the guy working the automatic weapon to give covering fire to the assault troops. I think it would be a nice addition. Perhaps the weapon is suspended from the ceiling?
And so I added these two troopers covering from the inside of the passenger bay.
No assault goes without causality and so one of the machine gunners bit the dust...
Wow , I haven't been on dakkadakka enough to comment on all the great projects lately, but the progress here is fantastic. I like the idea of the change of scenery to being an execution force coming for a corrupt governor. . The fact that the blood soaked into the ground is also a possible blessing in disguise as it could be the ground itself has become corrupted and thirsty for it.
The tauros vehicle is really cool. Perhaps a seperate but still attached story wise display base for it and the quad.
Theophony wrote: Wow , I haven't been on dakkadakka enough to comment on all the great projects lately, but the progress here is fantastic. I like the idea of the change of scenery to being an execution force coming for a corrupt governor. . The fact that the blood soaked into the ground is also a possible blessing in disguise as it could be the ground itself has become corrupted and thirsty for it.
The tauros vehicle is really cool. Perhaps a seperate but still attached story wise display base for it and the quad.
Rivets are going on great as well.
Keep up the great work not santa.
Thank you Theophony !
Right now I have the idea of the two assault vehicles (Quad and Tauros) racing in front of a dust cloud into an (Ork?) camp, guns blazing
whalemusic360 wrote:I like it. You get the feeling that the one coming down the ramp is a VIP, and has a very specific job to do.
Thanks!
It was your idea that planted this specific seed
Dr H wrote:Yeah, I'm liking it. Especially the one on the ramp. Just get the feeling of the soldiers running about and the VIPs calmly strolling along.
Yeah, she's calmy walking through the carnage, leaving a swath of death and destruction on her way. She has just one goal - eliminate her target, the corrupted governor...
We, thank you for your feedback and suggestions!
With the built completed I sculpted some muzzle effects for the scene.
I only did 4 in total - 2 for the Machine Guns, one for a rifle, and one for the Flamethrower
And with this, everything was ready for priming
Disassembled and awaiting the primer...
Back on my desk I re-poured the water effects for the blood.
I'm still not happy with it.
It seems to vanish again...
After 48 hours it was still sticky and I got tired of letting it cure.
The following images are only tests for the light setting.
First I added the light from the fires and muzzle flashes.
Me likes alot
After the light effects from the flames I tried to apply the light effects from the navigation and landing lights.
After these I still had to do the interior light for the passenger bay
Wow, this is just the color, but I think this looks great already!
But two lessons learned:
1. the landing gear lights are too blue - I need to find a better color or at least tone it down
2. The passenger bay looks good, but engineering is useless - may as well close it
So I took the removable side and cut it to cover the engineering section
This will look better.
The blood effects really suck!
Nevertheless, I now started to paint for real - all in toned down colors to fit the nightly scene.
I also painted a first trooper.
As you can see I tried to do a skeleton scheme...
And I completed the first paint phase for the Captain
I like him, and I hope he'll look better once done and in the light effects.
So
What do you think?
I look forward to your feedback and suggestions!
Cheers
The scene looks great! You really nailed the calm VIP assassin look with the lady and her two henchladies.
I can visualize the scene with the ship coming down, troopers storming out to secure the LZ and the ladies just calmly walking out before they start murdering all the evil henchmen in their way, making their way into the palace.
You left me wanting this to be a movie, so I would call that a success as far as story telling in a diorama goes
I want you to know, I bought a bunch of Eisenskern just because of you.
No pressure, eh? Naw seriously, I hope you enjoy these kits as much as I do. They are a bit different to assemble than what we're used to from GW kits. But with a little getting used to great dynamic poses are possible (outside of the intended poses).
Viktor von Domm wrote:i simply love the light show!
Me too Eventhoug Ben seems to disagree at least partially
Illumini wrote:The scene looks great! You really nailed the calm VIP assassin look with the lady and her two henchladies.
I can visualize the scene with the ship coming down, troopers storming out to secure the LZ and the ladies just calmly walking out before they start murdering all the evil henchmen in their way, making their way into the palace.
You left me wanting this to be a movie, so I would call that a success as far as story telling in a diorama goes
WOW!
Thanks Illumni Yes, this is the way I try to create my dioramas - to tell a story - even thoug here (like so often) the story changed during the built Initially it was more to be an airborne assault hitting fast and hard and the intended target were Orks, as they infest Dencara IV - with the support of a vehicle that fits the passenger bay. And then inspired by whalemusic360 I got the idea of an Assassin "infiltration", which led to the Executioner's "clean-up" mission you see now
Wow Klaus! That is just a stunning scene, literally highlighting an already amazing and ambitious scratchbuild. I love how you pre-highlighted everything with the airbrush, then when you go do the detail painting later, you dont have to fuss.
Fantastic on the lighting effects as always, have stolen your method to good effect before. Ben could do with some OSL, that's why the look, it's a "where is mine!" look.
dsteingass wrote:Wow Klaus! That is just a stunning scene, literally highlighting an already amazing and ambitious scratchbuild. I love how you pre-highlighted everything with the airbrush, then when you go do the detail painting later, you dont have to fuss.
Well, since I overpainted everything, I'll only have the photos as reference, but I gues it will do
Camkierhi wrote:Fantastic on the lighting effects as always, have stolen your method to good effect before. Ben could do with some OSL, that's why the look, it's a "where is mine!" look.
Thank you Cam!
I'm not sure if Ben would really appreciate getting painted
Well, this week was a bit slower, but still lots of painting.
My wife and I just bought a house, so lots to organize. Meetings with craftsmen, bank the lot.
We will get the house on October 1st, and then there will be renovations to do.
So I already start packing things away and this will most likely be the last project for this year - lets hope I can get it finished
So here are the first 7 troopers base painted.
It's really just the base colors, a bit of dry-brushing and one dark wash. Once I'm through with all, they get at least one more wash and then some highlighting.
No effects yet.
14 troopers painted!
With most troopers outside done, I did the pilots and the cockpit.
In the background you can see I also painted the gunner, and Commisar Kalteisen - aka Little Lenin.
Thank you guys!
And thank you for your patience.
I was for a week in Portugal - in the Douro Valley and Porto - and had a lot of fun and time to recharge the batteries.
But before I left, I had time to work some more on the troopers.
Here you can see the two soldiers and the officer form the passener bay.
These soldiers wear the standard Dencara Urban Flash pattern.
The turret commander also got his first coat of paint.
He also got the Urban Flash pattern.
As did the machine gunners.
And then it was Ladies Time! As mentioned before this is just the first pass of color.
For the Executioner I took some more time.
And in a second pass the coat already received some details
But it's still a long way from home
And the last girl got her first color pass.
After my vacation I began to prepare the THANATOS itself for painting. But to do so I need to finish some of the interior stuff first.
So I started with the turret.
So, what do you think?
I look forward to your feedback and suggestions.
Cheers
Great work and great progress Klaus! I very much like how all the figures are progressing- those Raging Heroes fems have exactly the right sneer and disdain builtinto their articulation to carry of the whole 'Inquisitorial Bad Day' vibe.
Hi all,
how are you?
The work in the house is coming closer, so I'm trying to get this project done in the little time left.
After the initial light sketch and the base painting for the characters it was time to start with the THANATOS itself.
For this I closed the interior part again.
For the already painted TC I used this children's clay.
The basic urban flash camo pattern.
With details, ready for the first dirt wash.
Oups!
Not clean at all
Some washes later it is ready for first weathering.
As you probably know I prefer the sponge method for weathering.
Based on a product from Greenstuff-World I decided to build my own "sponge-pen"
Really simple, using the foam from a blister pack.
But it works like a charm.
And I feel I have better control of the sponge than before.
And once done (or when the faom is too worn), simply snip it off and continue
Now the THANATOS looks like a tried workhorse.
And it is now ready to go back onto the stage.
The whole scene re-assembled.
And the first light effects in white.
Then the blue for the navigation lights.
The brighter blue for the landing lights.
And the flame effects.
I really like it so far.
What do you think?
Suggestions, improvements?
Anything you'd change?
Please let me know Thanks
Hi Klaus- wonderful work! It is always a pleasure for me when you post, as you provide so much incentive for me to get out and try things. I'm finishing an ammo carrier for a Basilisk (mostly) scratch-built) and want to try the sponge method for weathering- I'm having a great deal of success and fun with washes and want to add the next level of detail. The sponge pen you demonstrate looks like just the ticket.
I was wondering if you still plan to illuminate the interior of the drop ship hold- possibly with red battle lamps (to preserve night vision)? I'm looking back through your description of this project to see if you've already addressed that thought, but ask to see if the concept has evolved.
A really great scene and the lighting effects you paint or absolutely top-notch. One day I'm going to try that- but I think I'd better start out with something a lot smaller to practice up on- like perhaps a searchlight objective marker- to get a feel for it. And I always have your projects to act as a guide.
Don't forget engine discolorations- oil leaks from the engine seams, heat (not necessarily soot) weathering around the exhausts, that sort of stuff. If it's not continuously being cleaned it'll have those sorts of built-up grimy bits on the moving parts.
With the light effects pretty much done I worked on detailing and highlighting the troopers.
Here is the Eisenkern Valkyr Sergeant - just a few little highlights, but I think they make a huge difference.
A little softer on the "darker" side
The other Valkyr with the muzzle effect with brighter and harsher highlight.
And the one in the softer light.
with the change to the colder, blue shine from the landing lights.
Is he looking surprised?
This image emphasized the light and color changes nicely and also it brings out the red lenses of the Scion solder.
Here comes the Flamer
The trooper with the grenade launcher, firing from the hip so to speak.
The character I was looking for the most was the Captain of the assault force.
Again I'm surprised how well the Eisenkern Varkyr and the Scion parts work together.
And the highlights just define him so much better
The transition from warm to cold lights
The flamer side
The front section
With the male troopers done I detailed the lady bodyguard on the left
Those Raging Heroes models are challenging but really fun to work with
The Executioner can't be detailed yet, as she still needs the red background light from the passenger bay.
So I have to finish the interior.
The turret interior I had already completed and masked with this children's clay. And it worked like a charm
So I finally glued the turret together - YAY!
Looks nice on top of the superstructure.
So I took the segments apart again and based the interior in this light blue paint.
Even without details (but with the pre-painted sections) the bridge looks cool already
So I painted the pipes and cables first.
With the chipping and weathering the MG section is done
So this is as far as I got.
What do you think?
I really look forward to your comments, feedback and suggestions.
Meer_Cat wrote:Hi Klaus- wonderful work! It is always a pleasure for me when you post, as you provide so much incentive for me to get out and try things. I'm finishing an ammo carrier for a Basilisk (mostly) scratch-built) and want to try the sponge method for weathering- I'm having a great deal of success and fun with washes and want to add the next level of detail. The sponge pen you demonstrate looks like just the ticket.
I was wondering if you still plan to illuminate the interior of the drop ship hold- possibly with red battle lamps (to preserve night vision)? I'm looking back through your description of this project to see if you've already addressed that thought, but ask to see if the concept has evolved.
A really great scene and the lighting effects you paint or absolutely top-notch. One day I'm going to try that- but I think I'd better start out with something a lot smaller to practice up on- like perhaps a searchlight objective marker- to get a feel for it. And I always have your projects to act as a guide.
Looking forward to the next installment!
Thank you Meer_Cat!
I'm always glad wehen I read that my work helps others or even insipre them to a project.
So this is the greatest compliment you can make Thanks!
Anvildude wrote:Don't forget engine discolorations- oil leaks from the engine seams, heat (not necessarily soot) weathering around the exhausts, that sort of stuff. If it's not continuously being cleaned it'll have those sorts of built-up grimy bits on the moving parts.
Yep!
Even though this area will be much in the dark, I will hve to put a little more love there
Dr H wrote:Good progress, Klaus. Looking good.
Thank you Dr H Well appreciated
Red Harvest wrote:Fantastic.
Can't come up with any critique except maybe the exposed plywood edge. That will be covered somehow, no?
Yes, I will cover it - I'm actually looking at a furniture band (Furnier in German) that you can glue or iron onto the edge.
Thank you Red
I know the edging well, make it hang over the edges and clean the excess off with a file, stroking toward the edge, you will get a cleaner finish.
Not necessarily a good thing, but everything I do recently is inspired by looking through your work Klaus, you are the Master. I "borrow" from others too, but no-one has had more influence on my work. Thank you.
Thank you for the Tipp Cam!
And thank you for the compliment I'm honored
Red Harvest wrote:Iron on veneer? That will look pretty good. I've used it before.
This has certainly re-ignited my desire to build a dropship.
Hey hey, I look forward to your dropship then - nothing like adding a bit of pressure,right?
Dr H wrote:Something in the way you treat lighting just blows my mind every time. I don't know how you do it (I know in theory), it just looks so right.
Thank you!
I hope you'll like todays update too
So, thank you for your feedback and patience
With the first work in the house hobby time becomes sparse.
But I was able to continue with the interior.
First was to complete the bridge and unmask the see-through windows.
The pilots with their HUD
The commander of the ship looking down at his display screen - I just realized he resembles the aged Luke Skywalker from the Force Awakens, doesn't he?
So here's the upper part of the THANATOS seen from the outside.
and from the front.
With this completed I painted the passenger bay.
Lots of weathering and scratches.
Then I took a deep,long breath, gritted my teeth and first sprayed the shadow corners with a black wash, brightened the center area lit by the overhead lights, and finally sprayed the red light effect.
And here we are - mostly done...
As you can see I also brightened the Executioners front, to make her stand out some more.
What do you think?
Still have to do some cleanup.
Still time to do some fixes - any recommendations, feedback, suggestions?
Cheers
Klaus
This is a wonderful vignette Klaus- and I think perhaps the best OSL work you've done (or at least what I've seen from your work in this blog). Three layers of light effects all working together- simply incredible.
God that looks incredible. Overall it seems a bit dark, but I feel like if it was presented in the right light and photographing, it would be perfectly fine. I'm in envy of your work, from the OSL to the great weathering and vehicle detail work.
Wow, thank you all for your kind replies and feedback!
As previously noted I'm in process of moving. The house is coming along nicely with most of the renovation already done. Our target date for the move is still the 16th of December.
So most of my man-cave is already packed.
The "Executioner" diorama is also packed and awaits unpacking and re-evaluation on how to finish it. But I need some time away from it to determine if there's still anything to do or if I call it done.
With everything packed away I thought I wouldn't do any hobby work until the move. I started some computer games, but none really captivated me.
By sheer luck I came across a second hand Boudicca bust.
Most Boudicca's I have seen so far follow the traditional paint scheme of a red haired woman.
There aren't many modifications I have seen so far, except for this really nice Elf version.
The bust I came across was dirt-cheap, and when it arrived I realized why.
It was in bad shape with many small pieces of the hair and braids broken off. There was also a considerable amount of some kind of plaster in some of the deeper recesses.
Apparently the original owner tried to make a mold, was VERY unsuccessful and decided to sell it and cut his losses.
I'm not very upset, as the price already suggested there was something wrong.
However, in the state she was in I'm unable to make a "standard" Boudicca.
So after some back and forth I decided to try a Gothic vampire warrior princess *lol*
Unfortunately I forgot to take an image of her initial condition.
Here you can see her after I shaved most of front tunic and belt off. In addition you can see some of the pencil marks of what I plan.
She will wear some heavy leather armor for the chest and arms, with lighter leather mesh underneath. Most likely in a very dark red.
First she got some longer eye lashes, a gem on her forehead as well as some neck/throat armor.
On her chest I also added some structured material - not really chain mail, but similar.
I used the same structure for her arm.
In addition her main braid got a new ornament as well as the gem on her forehead.
I have never done a bust before and haven't spent much time on a plinth so far. As a working base was planing to use this piece...
But for the time being, I glued her to a metal lid.
Here you can see additional details on her chest line as well as the leather mesh for her lower abdomen.
The lower part of the arm also got the mesh structure.
The following day I started with the lower section of the leather armor.
With some first details at the seams and the hip armor.
The next evening I added the actual beast armor - as you can see I'm aiming for a worn and battered look with marks and scratches.
With the cure time for the GreenStuff of several hours I can only do a small section per evening.
So the next evening I completed most of the chest armor.
Then I closed the last gap on the front with a gem and ornament and mounted her arm.
If I didn't know how hard greenstuff (any two part epoxy putty) can be to work with, I wouldn't truly be able to appreciate what you've achieved here. Very, very nice work. Excelsior- ever upward, ever onward!
She's got a bardiche-style polearm- that's not something used with a shield.
Also, bardiches were usually not so long as, say, halberds (which themselves weren't that long). I'd shrink the shaft down so that the weapon tip is only a little bit above her head. Especially with such a thin shaft.
Hmmm, It could also be a glaive, another weapon that requires 2 hands. Or a faussart. (Thanks to D&D for my odd knowledge of pole-arms. Who knew it would ever prove useful knowledge ~35+ years later. :S )
That is some fantastic work Klaus. You have the mad skillz with the green stuff.
Nah, a Fauchard is more of a fork-looking thing. And it's not any sort of Guissarme, because it doesn't have the back hook on it. It's definitely a Glaive or a Bardiche. Maybe a Glaive-Bardiche.
I think the shield is "on ice" for now.
Eventhough, there seem to be plenty of historical samples where soldiers with spears, hellebards, and glaives are using a shiled
just sayin'
But please kkep the feedback coming.
I especially look for ideas for a plinth, as the current idea won't really work.
Thanks
Klaus
For a plinth, it is impossible to go wrong with the classic cylinder with a black satin finish. Are you looking for something thematic instead?
Klaus, any ideas about adding some sort of raised embroidery on the hem of the cloak?
If you want to experiment with some sort of shield, go right ahead. I would not be too worried about "realism" if you are making a Gothic Vampire Warrior Princess.
The figure herself is wonderfully augmented by your greenstuff work. As for the weapon, I saw an example of what was called a 'Wojeiwieki Chopper' (don't hold me to the spelling) at the Museum of the Infantry at Fort Benning Georgia. This looked something like what you've created here, right down to the heavily leather-wrapped shaft. IIRC, it was a Polish weapon and the card for the display speculated that it might have been used by infantry- one or two handed, or cavalry- one handed. If by a cavalryman, then the weight of the weapon's head would help add force, kinetic energy, in a swing and cut through, punch through or bowl over whatever it hit.
In any event, I think you've created a very believable figure with a believable weapon. I think you could still do the shield if you wanted- although that would obscure some of the beautiful detail work you've added. Certainly a buckler, or small target strapped to the forearm would be in balance- but I like the figure just as she is.
At the end of the day, we fantasy and sci-fi modelers deal in imagination. Our best pieces incorporate elements of reality- they have to, to help us suspend belief for the rest. But those projects do indeed include elements of 'magic', or else we would all just paint Napoleonics and WWII stuff!
Forgive my disjointed maunderings, please. It is always a pleasure to come here and see what new wonder is on your bench. I have a handful of Dakkanauts whose sigils I look for every day when I log in to the P&M blogs, and yours is one of them.
Anvildude wrote:Glad to be pedantic for you. Looking much better, now.
As usual, feedback, suggestions and critques are most welcome THANKS
Meer_Cat wrote:I think this is a terrific sculpt, Klaus!
The figure herself is wonderfully augmented by your greenstuff work. As for the weapon, I saw an example of what was called a 'Wojeiwieki Chopper' (don't hold me to the spelling) at the Museum of the Infantry at Fort Benning Georgia. This looked something like what you've created here, right down to the heavily leather-wrapped shaft. IIRC, it was a Polish weapon and the card for the display speculated that it might have been used by infantry- one or two handed, or cavalry- one handed. If by a cavalryman, then the weight of the weapon's head would help add force, kinetic energy, in a swing and cut through, punch through or bowl over whatever it hit.
In any event, I think you've created a very believable figure with a believable weapon. I think you could still do the shield if you wanted- although that would obscure some of the beautiful detail work you've added. Certainly a buckler, or small target strapped to the forearm would be in balance- but I like the figure just as she is.
At the end of the day, we fantasy and sci-fi modelers deal in imagination. Our best pieces incorporate elements of reality- they have to, to help us suspend belief for the rest. But those projects do indeed include elements of 'magic', or else we would all just paint Napoleonics and WWII stuff!
Forgive my disjointed maunderings, please. It is always a pleasure to come here and see what new wonder is on your bench. I have a handful of Dakkanauts whose sigils I look for every day when I log in to the P&M blogs, and yours is one of them.
Thank you Meer-Cat!
This means soooooooooooooooooooooooooooooooo much to me Thank you
MeatShield wrote:I've been following you for I think 6 years now and your thread is still one of my favorite parts of the internet.
Well, first off: congrats for your patience And thank you for being part of the journey - I hope to have you on board for even longer
Dr H wrote:Lovely sculpting as always, Klaus.
Thank you Doctor!
Again,
thank you for the feedback and suggestions.
Since my last post I was thinking a lot about adding a shield.
I don't know why, but somehow I have the feeling she needs a shield.
So here's the first try.
That was too big!
So I made it smaller and positioned it lower.
Putting this aside for a moment I finished her right arm by sculpting an armored glove.
Based on feedback from Facebook I decided to make the shield smaller once more.
Ah!
That's a lot better now, and I think it balances the figure nicely.
I used Milliput to sculpt a leathery and worn finish.
In position.
I think the original sculpt of the shoulder (red) pretty much suggests the position of the arm and thus the position of the shield, does it not?
So here she is
Finally I added rivets to the shield and completed the brooch for the coat.
Gothica, the Vampire Warrior Princess
I'd like to call her (sculpting) complete. But I'll let her sit a few days before I decide.
In the meantime all the paints and stuff are already packed, so I won't be able to do anything else anyway The move is still scheduled for the 16th of December.
Cheers
stepping in latte to comment this beautiful model...
twofold reason: first...´m lurking...
secondly... i find that model highly disturbing...she is for that size way too hot of a chick...the model was a beauty from the start...mind you...so many brilliant versions of her out there, just as you showed in the beginning...but you stepped even further...she strikes a special chord in me, i always had a thing for hot goth damsels...i love your GS work all around...
if i may add one thing tho...i would add a bucker handle...at least the outside referrence to that...like:
the general look of her suggests in my opinion this type of shield...the flat look there is for me a bit too bland...but i bet you have probably already plans for painting that big space...
But Vik, the Goths are East Germanic and you are West Germanic. It's like the Jets and the Sharks.*
Klaus, it looks like the start of a proper targe to me, although more riveting or other decoration may be needed to look closer to the historical targes.
I'd have to chip in on Red Harvest's side on this latest discussion- the size and shape of the shield as is does remind me of a Scottish targe- you could actually add a small metal plate or boss to the center and a spike (or just the spike) and it would have the added benefit of looking even more 'vampire-y' (everyone knows the bad guys- no matter how hot- always have lots of spikes). Although again, as it is, the weapon and shield combination put me very much in mind of a horsewoman (equine vampyr?) and work together very well just as they are.
I also wanted to take the opportunity to clarify from my earlier comment that Napoleonic and World War modelers also must combine the right amount of 'real' with the right amount of 'imagination' to create a pleasing effect in their miniatures. I paint British Peninsula and WWII US Airborne myself. It's tough painting as realistically as you can, then altering reality so that the right number of figures fit on a 'stand' and still look reasonably good alongside the armor that supports them (or, if you're not a former paratroop like me, that the infantry in turn supports). 'Real War' modelers have to pick their paints carefully or blend them to get accurate, realistic colors that still let you see all the details- even when the real camo patterns were intended to achieve just the opposite effect! The comment was made with tongue firmly in cheek.
Bottom line: I would never disparage _any_ of our brothers and sisters who paint and game, or game then paint. Ours is a great hobby and Dakka is a terrific website for learning and gaining encouragement.
Again- terrific sculpt Klaus. I really like what you've created here.
What a great model! I am very impressed with your greenstuff work it looks great.
I know you are going with the vampire princess vibe but the model really reminds me of Larry Elmore's depiction of Laurana from the Dragonlance novels by Margret Weis and Tracy Hickman. Here is the picture I am thinking of in particular;
I'll "third" the suggestion of adding a boss to the shield, middle looks a bit bare.
However, I'm sure you've found examples of boss-less shields and are probably planning some epic freehand to fill that space?
the first post of this year!
So Happy New Year to you
Hey Reaper Man 2020 - this is amazing! It really looks very close (except for the hair )
The move to the new house is complete and went well.
However my little man-cave is a lot smaller than my original Santa's workshop and I still play Tetris with the existing furniture to make everything fit.
It's complete chaos.
To gain space I decided to build a paint rack for my colors.
So I used a wooden board - 100 x 60 cm - and mounted L-shaped racks.
I thought with this I would have enough room to get all my paints stored...
Aehm, not quite
So I built an additional rack for the smaller Citadel and GW paints, keeping the Vallejo in the main rack
The Scale75 paints are still in a box on the side (but I don't use them often, as I don't really like them).
Despite the racks, the man-cave is till chaos
But hey!
The book shelf looks orderly Kind of
I left off last year with my Gothica being ready to be painted.
Since I want to have a specific light setting, I decided to take some photos of the model with the proper lights.
I printed some of these photos and keep them on my desk as guidance
With this covered I primed her black.
I had a basic idea of the colors she would wear, but wasn't sure if they'd work.
So I gave her a quick lick with these base colors.
I think they work well together.
But these colors would be "daylight" colors and not in the atmosphere I'm looking for.
My first attempt was to paint the desaturated colors and shadows on top of them
However this didn't work the way I wanted.
So I repainted her using a completely new (very limited) palette, based on ONE (dark blue-grey) color.
At first it wasn't quite convincing
But once all colors were done with this palette it came together quite well.
Happy New Year, Klaus! I think the 'limited palette' you've used (which has more subtlety and nuance than I could achieve with every paint I own) is fantastic. I really like the sense of emerging from shadow that you're creating. And of course I've already indicated how much I like the figure you've created.
Glad the move is over- it is surprising the amount of energy it takes to contemplate- let alone undo- the labor of months and years as we build up our modeling spaces one item at a time. I look at my own space and wonder how all that junk got in, _I_ certainly didn't bring it! Very much like your paint rack solution. I'm getting to the point where I can't see all my colors, and it makes it hard to set up a scheme when I have to shuffle them around to see them next to each other, tested on scrap, etc. Your modeling space looks very complete and lived-in already.
I look forward to seeing how you proceed forward with your Gothica- shaping up to be an amazing piece of work.
I'm curious, Klaus, have you considered a career in Fine Art?
I think that your sort of small-scale, highly detailed, finely painted sculpture could sell for decent money, and I could see some of them in galleries.
Meer_Cat wrote:Happy New Year, Klaus! I think the 'limited palette' you've used (which has more subtlety and nuance than I could achieve with every paint I own) is fantastic. I really like the sense of emerging from shadow that you're creating. And of course I've already indicated how much I like the figure you've created.
Glad the move is over- it is surprising the amount of energy it takes to contemplate- let alone undo- the labor of months and years as we build up our modeling spaces one item at a time. I look at my own space and wonder how all that junk got in, _I_ certainly didn't bring it! Very much like your paint rack solution. I'm getting to the point where I can't see all my colors, and it makes it hard to set up a scheme when I have to shuffle them around to see them next to each other, tested on scrap, etc. Your modeling space looks very complete and lived-in already.
I look forward to seeing how you proceed forward with your Gothica- shaping up to be an amazing piece of work.
Thank you Meer_Cat!
I gotta admit it is fun to work with a limited palette - different but fun. And the Boudicca simply is an excellent model that is beggin to be painted - even in my Gothica modification Oh I still struggle with the workshop. But at least the display cabinet now found a good spot in our "office" - which is the "clean" room we both use for home-office - I spent Monday about 6 hours to unpack models and display them...forgot to make images thoug.
But the workshop feels a bit more home every day
CommissarKhaine wrote:Amazing work as usual!
Thank you Mate!
Anvildude wrote:I'm curious, Klaus, have you considered a career in Fine Art?
I think that your sort of small-scale, highly detailed, finely painted sculpture could sell for decent money, and I could see some of them in galleries.
Wow!
Thank you Anvildude - from you, one of my most critical (and honest) followers this means a lot Honestly I swore myself never to combine hobby and job/making-money again. I tried it before and it completely destroyed my hobby for me. Took me years to have fun painting again, and it still isn't the same as before (some of you may know that I made my hobby my job and worked as graphic designer for some years - it took the fun out of painting, airbrushing and all of that).
Now that I have a different job I slowly start to appreciate painting again. But I also learned that I'm never satisfied with my work, and as such I could never really selel it - because I would always know about the flaws. So I could try to sell them full, high priced, despite knowing of the flaws and feel like cheating, or sell them cheap and feel betrayed as the amount of work put into them would be beyond all of it.
Again to put it short, no But thank you!
jabbakahut wrote:Nice workshop, I'm envious.
Thank you jabbakahut!
Well progress is rather slow right now as the wife and house still need some attention But I got some painting done.
After I had my basic colors down I started to add the first shadows.
Oh, and I added a freehand to the shield
I started off with the coat and then did the chest armor.
I'm happy with the chest armor and the gems.
The dark areas of the chest armor already border close to black.
While I was happy with the chest armor and the gems, I was totally not satisfied with the coat.
So I re-painted the coat, smoother shades, less blue, more black.
It now fits better with the armor and everything.
Once pleased with the new coat, I painted the arm.
There are quite a lot of transitions into almost black.
That's a fair answer. I think that, like, 50% of working as an artist is figuring out how much is 'enough'- in price, work, quality... After all, an artist is their own worst critic.
Now, on to the Boudicca.
I might have missed this further back, but are you specifically casting this version of her as a Vampire queen? Or something otherworldly? Because the perfectly smooth skin tone is suggestive of that. If that's not the goal, then a little bit of blush in the cheeks, forehead and nose would go far to bringing some life into her skin.
A beautifully rendered shadowed base, though. I'm looking forwards to seeing it with full lighting and background.
I very much like this next stage in Gothica's emergence, Klaus, very, very, good work. The shield particularly is striking- it puts me almost in mind of Eastern Orthodox iconography, but- of course- with a very vampy twist!
Anvildude wrote:That's a fair answer. I think that, like, 50% of working as an artist is figuring out how much is 'enough'- in price, work, quality... After all, an artist is their own worst critic.
Now, on to the Boudicca.
I might have missed this further back, but are you specifically casting this version of her as a Vampire queen? Or something otherworldly? Because the perfectly smooth skin tone is suggestive of that. If that's not the goal, then a little bit of blush in the cheeks, forehead and nose would go far to bringing some life into her skin.
A beautifully rendered shadowed base, though. I'm looking forwards to seeing it with full lighting and background.
Yeah at this time the skin was only the base Color - I had not started the shading and highlighting yet
Meer_Cat wrote:I very much like this next stage in Gothica's emergence, Klaus, very, very, good work. The shield particularly is striking- it puts me almost in mind of Eastern Orthodox iconography, but- of course- with a very vampy twist!
Hah! You immediately grasped my Inspiration for the shield Yeah I had a "black Madonna" in mind when I started it.
CommissarKhaine wrote:'Added a freehand to the shield'... That's some amazing work, I love the colouring on that shield.
Honestly I swore myself never to combine hobby and job/making-money again. I tried it before and it completely destroyed my hobby for me.
Pyschology has tons of studies on that subject. Smart move not to try it again!
Thank you Mate!
in the last update all that was left was pretty much the face.
I was thinking of adding a kind of a tear-ish black make-up around her eyes.
I thought it could emphasize the vampiric look.
But before the make-up had to come the actual face The first try looked kind of messy
The second try was a bit smoother
the eyes began to glow
But it was really hard to get convincing shadows and smooth transitions
This is where I stopped
I think she looks good
And the light situation is convincing
To get a little distance I looked into plinths.
I ordered 4 different ones from Ulrich "Der Zwerg vom Nettenscheid" - aka www.sockelandbases.de They look really great - even though only 2 will fit the Gothica
The first one is the ordinary cube
and the second is this wonderful piece of wood
It would look well in the display cabinet
Since I felt it was too bright (and distracting) I gave it some black washes
Honestly? That harsh shadow starting after the cheekbones looks not good...it is crisp, but even for a vampire too dramatic and unrealistic...i pe personally liked the tear makeup, but the twelve o'clock shadow needs a conceptional review...in my opinion...sorry mate...
I get Viktor's point about the shadow line, but I think that it really depends on the point of view and the illumination that the piece receives. Seen head on, as in the one picture, and with more-or-less omni-directional lighting the line between chalk-white, death-like face and greyish underlayment _is_ somewhat stark.
But I liked the shot in the display case, seen from the left front quarter and with the light seeming to come in from the left side- this made the dark/light areas really balance out, in my opinion, and enhanced the sense of her coming out from a dark place into an almost-as-dark place. I think the base is perfect, especially after the washes on the lighter colored section and I'm wondering if the figurine was underlit, as with an LED spotlight mounted at the base and trained upward, to illuminate the underside of the face, how that might look.
My observations fall into the 'unskilled general market' category, however, as I haven't anywhere near the skill to create anything close to this kind of work. Your ability to create depth through use of lighting and shading is phenomenal, and I very much like this piece as it is (even with the 'Black Madonna!).
I think the shading is spot on. For what you appear to have been going for. I like it.
It gives a feeling of relatively harsh lighting. Stepping from the shadows as I believe you were going for.
Some of the photo angles and lighting conditions do make it look harsher than it should (from front on). It's one of those pieces that need to be looked at from one angle with very specific lighting (like the side-on shot).
Viktor von Domm wrote:Honestly? That harsh shadow starting after the cheekbones looks not good...it is crisp, but even for a vampire too dramatic and unrealistic...i pe personally liked the tear makeup, but the twelve o'clock shadow needs a conceptional review...in my opinion...sorry mate...
Hi Vik,
no sorry here Yes on the phots provided it looks harsh, but on one hand side it is intentional (with the light situation) and on the other too strong from the photos - as Meer_Car and Dr H write - it will be up to me making a proper photo with the light setting properly. This will take some while though.
Meer_Cat wrote:I get Viktor's point about the shadow line, but I think that it really depends on the point of view and the illumination that the piece receives. Seen head on, as in the one picture, and with more-or-less omni-directional lighting the line between chalk-white, death-like face and greyish underlayment _is_ somewhat stark.
But I liked the shot in the display case, seen from the left front quarter and with the light seeming to come in from the left side- this made the dark/light areas really balance out, in my opinion, and enhanced the sense of her coming out from a dark place into an almost-as-dark place. I think the base is perfect, especially after the washes on the lighter colored section and I'm wondering if the figurine was underlit, as with an LED spotlight mounted at the base and trained upward, to illuminate the underside of the face, how that might look.
My observations fall into the 'unskilled general market' category, however, as I haven't anywhere near the skill to create anything close to this kind of work. Your ability to create depth through use of lighting and shading is phenomenal, and I very much like this piece as it is (even with the 'Black Madonna!).
Wow, just- wow!
Thank you Meer_Cat Yes, getting a good photo done will be just as much work as the actual paint process
b-tone wrote:Just impressed by your overall skills, amazing work!
Thak you b-tone!
Dr H wrote:Great work, Klaus.
Good choice of base. Works really well.
I think the shading is spot on. For what you appear to have been going for. I like it.
It gives a feeling of relatively harsh lighting. Stepping from the shadows as I believe you were going for.
Some of the photo angles and lighting conditions do make it look harsher than it should (from front on). It's one of those pieces that need to be looked at from one angle with very specific lighting (like the side-on shot).
YEah, as written above - just as much work to get the photo done as painting itself But it will be fun
Camkierhi wrote:Beautiful work. Excellent execution. Considering what you started with, you are really becoming a true master.
I think the doc has it. She needs that golden angle to look perfect, but that's like saying you need to see Michelangelo's David from only one spot.
Brilliant work. More please.
Thank you Cam!
I really love your feedback!
Really, thank you for your feedback and support. You guys keep me going!
For now the Gothica is finished - I will leave her alone for about a week and then revisit her and see. I will most likely add another black wash to the plinth - make it look more charcoal - and also decide on the make-up.
I'm sure most of you have by now seen the new Imperial Knight, the Knight Armiger.
I'm quite excited.
So, now that the Gothica is pretty much done I have already started a new (well actually two) project.
This one will be called "Ice Warriors" and is inspired by the wonderful plinth I got from Ulrich "Der Zwerg vom Nettenscheid" - aka www.sockelandbases.de I immediately fell in love with the plinth and was thinking what I could do with it. And quite early I had the image of a female swords warrior launching herself over the "chasm" onto her enemies.
The initial setup was against Tyranids - I still have the 'Nids from Space Hulk - but that didn't work as planned, so I then tried it with Necrons.
This seems to work better.
I also decided to make it a snow/ice base.
with some icy patches made of Greenstuff.
One part of the scene is a bit slasher like - I want her one sword to just have slashed the one Necron. So I cut the basic shape if the slashing motion from Plastic Card.
Gives it a bit of dynamic.
I then covered that basic form with Greenstuff
and formed with the remaining Greenstuff some more ice patches and some icicles.
Unfortunately they reacted to the very dry wood and cured erratic, thus warping quite strongly.
For the landscape itself I used baking soda and PVA glue to create the snow patches, then Greenstuff for the sheets of ice. Everything was then base coated with an icy blue. the non-snow and non-sheets areas were then covered with crackle medium.
Once this was just about cured I gave it a coat of very light blue. During the curing process it then creates nice cracks - with the darker blue beneath showing in the cracks.
Finally everything received a coat to drybrushed white.
Since those bent and warped icicles were very annoying to me, I cut most of them off and re-created them from clear sprue.
Here is the swords knight just before final cleanup.
The sword broke off several times, so I pinned it and added some PVA glue also.
I also realized that the scene was a bit flat - everything on one pane - so I added another pile of snow from which the knight will hurl herself at the second Necron.
This is the first Necron I ever started to paint It's still work in progress, but I like it.
I still need to add a bit of Greenstuff to the "wound" - a bit more splatter
Sorry for the lacking focus...
And I also started the second Necron.
This is as far as I got over the last 5 days.
So what do you think of the new project?
Ideas, suggestions, feedback?
I look forward to your comments.
Hi Vik,
no sorry here
Yes on the phots provided it looks harsh, but on one hand side it is intentional (with the light situation) and on the other too strong from the photos - as Meer_Car and Dr H write - it will be up to me making a proper photo with the light setting properly. This will take some while though.
fair point, guv...but now you´re one pic still short then...eh?
the new project iwas instantly sold on... in fact the slashing effect hooked me up...even without the additional GS effect it was working for me...just the plain plasticcard and this then later on painted in a more manga-esque methode...just a thought
the plinth of the new project looks ace...a very good choice, and the ide and snow looks also already very near perfect... only some small icicles are a bit too pointy at the lowest...
will the necron get lowy eyes? love your light effects!
This vignette is going to be fun to watch develop! As with others, I'm very impressed with the 'motion work' in the sword. That wonderful crevice in the plinth is just begging for something to highlight the dark- a severed necron head prhaps, in which the eyes have not yet lost their glow? Or some other bit of detritus that has fallen down from the fight above?
Honestly, the warped icicles were a lot more realistic. Often, you'll see that sort of strange shape from icicles in nature, especially in chasms like that, due to wind interfering with the dripping water.
the new project iwas instantly sold on... in fact the slashing effect hooked me up...even without the additional GS effect it was working for me...just the plain plasticcard and this then later on painted in a more manga-esque methode...just a thought
the plinth of the new project looks ace...a very good choice, and the ide and snow looks also already very near perfect... only some small icicles are a bit too pointy at the lowest...
will the necron get lowy eyes? love your light effects!
looking forward to more on this and that then!
cheers, vik
Thank you Vik!
Yeah, glowing eyes are just cool - I even expreimented (below) with flourescent colors and black light Thanks Mate
Meer_Cat wrote:This vignette is going to be fun to watch develop! As with others, I'm very impressed with the 'motion work' in the sword. That wonderful crevice in the plinth is just begging for something to highlight the dark- a severed necron head prhaps, in which the eyes have not yet lost their glow? Or some other bit of detritus that has fallen down from the fight above?
Wonderful work as always, Klaus!
Thank you Meer_Cat!
Thank you for the idea - I added another crawler - a bit more inside the chasm, and light (effects) should turn out cool
Thank you!
Camkierhi wrote:Fantastic work. Stunning as always. Clear sprue icicles...brilliant. Really like the concept, can see the inspiration and can't wait to see more.
Thank you Cam!
Anvildude wrote:Honestly, the warped icicles were a lot more realistic. Often, you'll see that sort of strange shape from icicles in nature, especially in chasms like that, due to wind interfering with the dripping water.
Yeah I know...
there are still one or two bent ones - but it was just a bit too much and too distracting. I think the new mix of icicles is better now (hoepfully )
Thanks Anvildude!
Hi all,
thank you for your feedback and suggestions!
Since the last update I completed the body of the second Necron.
The little chasm got several washes with black, giving it some depth.
Now the lights on the little crawlers get a bit more focus.
I even added a third crawler all the way down.
And I experimented some with a fluorescent color and black light
Works on the Gothica too
I admit I got sidetracked with the fluorescent color for two days and had to re-paint the entire shield...
But the result seems to be OK
So the Necrons are now mostly done.
And now it is time for the Knight.
I gave her another spray of white to simulate zenithal light.
and then painted the red armour.
It was a very frustrating experience and I stripped the whole paint once already.
(my camera doesn't like the new room - many of the images out of focus - this didn't happen in the old workroom... )
The lighting effects are terrific- I can't believe how much the Gothica is helped by the low light- this is exactly how I envisioned the end state when you described the effects you were trying for.
Really like how the ice warriors vignette is picked up by the lighting too- conveys a sense of isolation and loneliness for the fighter, and a sense of waiting (crypt-like) for the Necrons.
All looking great, nice progress, coming together really nicely.
Thank you Cam!
I hope todays images make things look better
Meer_Cat wrote:The lighting effects are terrific- I can't believe how much the Gothica is helped by the low light- this is exactly how I envisioned the end state when you described the effects you were trying for.
Really like how the ice warriors vignette is picked up by the lighting too- conveys a sense of isolation and loneliness for the fighter, and a sense of waiting (crypt-like) for the Necrons.
Love it.
Thank you Meer_Cat, now I just hope I can carry this over to the Knight, so that it really comes together
CommissarKhaine wrote:Lovely effect, and I love how you'll always add more layersof detail to bring things to life.
Thank you CommisarKhaine Let's see if we can make some of those details visible today
OK, so I realized the images were not up to par with what I usually deliver. Once reason is the background. In the new work room I'm taking the photographs against the shelf with the color bottles and it seems my good old trusted Canon Ixus 65 doesn't agree with it and has a hard time setting the focus properly.
So I tried to take some shots in front of a different background.
So here is the complete scene as of yesterday evening
and a closer shot of the 2nd Necron
As I mentioned the red was really frustrating to paint
but I think the current status is promising
The dark red areas worked pretty good
the brighter ones will need some more glazing I'm afraid
So last night I cleaned the surroundings to the red a bit and applied the first base color for the gold
It'll be interesting to get all the dark gold areas
like that little shrine on her back
with zenithal lighting pretty much all of the lower gold will be dark
You are being to harsh on yourself with the red, it looks amazing, has a really nice different tone to the usual orange/red we see. The blends are staggeringly good.
All the glow is stunning, and the Necrons are looking fantastic.
The gold is magnificent bud. Really great job on the NMM, whole scene is looking spectacular.
One thing is slightly bothering me. The figures are a bit dark, the base is pristine and white by comparison. I do not know what I am talking about here, so please ignore me, but would there be light reflected from the snow? Maybe the upper highlights need to be taken up just one notch! The problem is the figures are truly spectacular to me, they look so perfect, wonderful contrast, amazing blend and tone. The base is stunning and a true masterpiece. It is just that to my eyes they do not quite match when together. To stark a contrast. But it is only just, it is very small, and I am probably talking through my bum.
Please remember, you are the Master here, we mere mortals are but pupils, you inspire me every day.
Good Monday morning I hope you all had a good weekend.
Despite German Fastnacht (Carnival) season, I did get some painting done - one advantage of cats over kids: they don't want to celebrate Fastnacht
So I was able to finish the freehand on the shoulder
slight 3D effect
just an embossed-like little dragon
I also finished the shrine
and did a bit more on the snow reflection
and then I did the sword
it was a lot of work
but I think it turned out well
and with the slash effect it fits nicely
I may have to add a bit of blue reflection to the snow underneath - or what do you think
Together with the crawlers
I think the scene looks quite well
I still have to do the face and I have to decide on the color of the tabbard - any ideas or suggestions?
Thanks
Klaus
Beautiful work, Klaus- I can feel the power in the sword strokes, the animation is very good.
My thoughts on the color for the tabard are these:
* Can't be metallic, because of the trim on the armor
*Can't be red, because of the armor- should contrast somehow
*Can't be white, because of the terrain
*Can't be blue, because of the Necrons
I think that really leaves either a pattern- something Gothic, but even a paisley, believe it or not I think would work, or some form of imagery- a large figure in the middle and front panels, with some sort of decorative border (Cretan pattern?)- this might let you get away with a white or cream background on the panels, with royal blue as the primary color for the design in the middle. Trim could be black or gold, (or black AND gold).
My two cents, and I'm still the journeyman who should be listening, not talking.
Meer_Cat wrote: Beautiful work, Klaus- I can feel the power in the sword strokes, the animation is very good.
My thoughts on the color for the tabard are these:
* Can't be metallic, because of the trim on the armor
*Can't be red, because of the armor- should contrast somehow
*Can't be white, because of the terrain
*Can't be blue, because of the Necrons
I think that really leaves either a pattern- something Gothic, but even a paisley, believe it or not I think would work, or some form of imagery- a large figure in the middle and front panels, with some sort of decorative border (Cretan pattern?)- this might let you get away with a white or cream background on the panels, with royal blue as the primary color for the design in the middle. Trim could be black or gold, (or black AND gold).
My two cents, and I'm still the journeyman who should be listening, not talking.
I'm really enjoying this piece.
Thank you!
But you know you're way beyond journeyman Just looking at your latest scout car Well, you're right, the tabard can't take away too much of the scene - and even some pattern would distract, besides that from the position, very little would be visible.
So I decided to rather go with a dark grey.
I hope I can post an update later today.
Thanks!
That is truly stunning work, the effects on the swords the gold free hand work the fantastically subtle lighting effects, master class right here.
Agree with the choice of grey, was going to say grey or beige, to add a slight hint of warmth.
This is a wonderful scene, well thought out and brilliantly executed. More , now , please.
*BLUSH*
Thank you Cam!
Well, I call this baby done Here are the 15 final images - I hope you can enjoy them.
Thank you for being part of the ride
I hope you all enjoyed this build and paint as much as I did - I tried new things and learned a lot, maybe it was helpful and inspiring for you too.
Cheers
Klaus
Again, beautiful piece! The grey for the tabard works very well. So much energy and motion in one vignette- truly well done. I want to convey some of the same sense of dynamism in my current project, so you've definitely inspired me. I've been sneaking looks at some of your other builds as well- for tips on OSL, which I'm fixing to try!
Meer_Cat wrote:Again, beautiful piece! The grey for the tabard works very well. So much energy and motion in one vignette- truly well done. I want to convey some of the same sense of dynamism in my current project, so you've definitely inspired me. I've been sneaking looks at some of your other builds as well- for tips on OSL, which I'm fixing to try!
Thank you buddy!
Let me know if I can help
Dr H wrote:Top job, Klaus.
I'm always impressed with your freehand work like these dragon symbols. I can see how it's done, but they are always so nice.
Thank you - I admit I love these little dragons - kind of my personal icon by now
MeatShield wrote:You really nailed those free hand dragons.
Thank you!
It's always nice to hear, and as said above, they did become my presonal icon by now.
Well, it's been a few days since the last update, as my wife and I were struck by the flu - what a succer!
But now that I have risen from the sick bed it's time to start a new project report.
I started this one right as I finished the Ice Warriors and before the flu got me.
For this project I have no name yet, so I will ask for your help later on This will be none of my usual action scenes, but rather an "after the battle".
At the end of a fierce battle between mankind and Orks, with only a few survivors remain standing on the battlefield. The humans will be represented by a mix of uniforms and types - Imperial Guard, Space Marines, Eisenkerns - to show it was a last stand, united effort kind of battle...
For this I selected the central figures to be a Chapter Master/General dead or dying.
He will be held by a Space Marine and a third figure will be a Eisenkern Valkyr standing by them.
This guy needed some extensive cutting and gluing to get the pose I had in mind.
They'll be surrounded by many dead.
For the dead I raided my "cleaning bath" in which a ton of old models were stored. The Detol cleaned the colors pretty well.
And it gave me enough corpses to work with.
After the dead were positioned I also added some dead Orks.
While the dead piles are glued in place, the central figures are removable.
I really love how the Valkyr turned out.
Together with the head from Mad Robot Miniatures this makes a great character.
And just as the flu struck, I had all the actors in place.
On Wednesday I was finally well enough to leave the bed for a few hours and so I immediately set out to work on the scene.
Here is the primed scene.
Then I used the airbrush to create my light-sketch, which will hopefully set the focus on the central characters.
The idea to support the light sketch is to use a very limited palette, based on the dark blue-gray color I used in the sketch.
So I started off with the green of the Ork skin
Then the "Flecktarn" Ork uniforms.
It's quite challenging to mix the uniforms distinctively enough to separate them, yet keep them in the same saturation range...
Here I'm almost done with the base
And this is as far as I got.
I still have to do some markings on several shoulder pads and I need a symbol or ornament for the shield and then I can move on to the real characters.
What do you think?
Oh, and here are some ideas for the project name:
A) To the Last Man
B) No Better Place to Die
C) Requiem
D) The Bitter End
E) A High Price to Pay
F) Other - please leave a comment
Ideas or suggestions? I look forward to your feedback.
Cheers
Klaus
I really like where this one is going. Like a picture taken in the immediate aftermath of an intense battle. As far as a name, I'd suggest "Invictus" based on the poem by Henley. Unless you already used that for something.
Camkierhi wrote:Yet again, knocking it clean out of the park sir. Excellent concept and execution. Love it.
I would go with B, though I might suggest a F) Bugger!
The base itself is wonderful, great texture and feel, almost a shame to cover it up.
Oh and previous Ice Warriors, truly stunning, just too good for words. Got to say, it is very nice to see you about again.
Thank you Cam!
Yeah, it feels as if the new work room has a positive vibe and I DO finish some projects There is one project already built and ready to be painted (but it's not yet "calling" me) and I have several ideas lined up...
I hope I can keep the mojo up The base was actually just a piece of firewood in my garage
whalemusic360 wrote:I really like where this one is going. Like a picture taken in the immediate aftermath of an intense battle. As far as a name, I'd suggest "Invictus" based on the poem by Henley. Unless you already used that for something.
Thank you!
Hmm, Invictus...brilliant idea!
I have "Hill 937", "Bugger", "Damn, where did we park" and "Only in Death"...
keep 'em coming!
Thanks
xXWeaponPrimeXx wrote:Title: Only in death
Thanks buddy!
Title noted
Anvildude wrote:You know, I don't think I've ever seen a marine holding their helmet before? They're either wearing them, or just, don't have one.
Now that you mention it...
The pose itself isn't anything new, but yes, Spacies holding their helmet seems rare
Kid_Kyoto wrote:Looking really good, I vote for the Bitter End!
Thank you!
Ok then Last night I got a few hours of painting done - my wife is still with the flu, so she went to bed early.
Since I didn't want to risk anything with the ornament, I used the tried and true stylized Wyvern
and this is how my wet pallet looked after completing the base and corpses
I thought alot about the color of the Chapter Masters armour...I didn't really want to do an established chapter, but I didn't really want to do another red armour (the Termie may become a Crimson Guardian though).
I never did blue armour - too much Ultramarines - but let's see how blue armour will do
I hope it is visible that the armour is "fading" to the de-saturated color in the dark areas, while the bright areas have simply more saturation
To avoid the Ultramarine resemblance I decided to give him white shoulders
and he'll most likely get a red cape. Blue, white, red ... the colors of my hometown So what do you think?
Cheers
Klaus
Wonderful piece abuilding here, Klaus. I wasn't sure about the light stage at first- I thought you were losing too much detail, but seeing it get 're-lighted' as you add things I see the effect you probably had in mind all along. The center pieces will almost look like hey have a spotlight on them, while there will still be tremendous detail in the carpet of dead around them for the eye to latch onto.
The Chapter Master's armor definitely transitions into the blanket color as you move to the edges, and IMO, will never be mistaken for Ultramarines.
As for titles, the several you started with and the several that others have suggested are all very good ('Where did we park?'- very tongue in cheek, that!). I offer:
Last Post
No Greater Service
Duty is Heavier than a Mountain, Death- lighter than a Feather
Dr H wrote:Nice piece, Klaus. Look forward to how it come to life... death... erm...
I expect each of the bodies to have a story.
Oh yes, each human has his story The story comes first
MeatShield wrote:I'm looking forward to seeing this epic piece after you're done painting.
Well, check out today
Camkierhi wrote:Quite brilliant.
Thank you Cam!
Thank you for the feedback!
After the Chapter Master was mostly done I thought a lot about the colors for the remaining two characters.
I decided to use a kind of purple for the Terminator
Despite the ornaments identifying him as a Blood Angel, I rather like to call him a "Cardinal"
It's an unusual color, but in good contrast to the deep red cape of the Chapter Master
And with the gold it looks even better and less pink.
So this completed the two central figures
With the Terminator supporting the dying Chapter Master
who fought "To the Bitter End"
So now I had to decide on the last character...
I was initially against a golden armour, as there so many wonderful and perfect NMM golden figures are currently on the Internet.
But since I needed a contrasting color to the other two and I didn't want to use green - too close to the Orks - I decided to give gold a try.
I never did a complete golden armour before
and it took me three days to come close to a pleasing result
Especially since I tried to use different light situations on the gold
It was a lot of work
But I think it was worth it.
Though none of the smooth gold seen so often
The tabbard became red
The Inquisitor has very dark skin
and blue eyes
And finally I used some dirt to do a bit of weathering and splashed a lot of blood on the scene
So here we are
"To The Bitter End"
Most likely I will let it sit a few days and then re-visit it and decide if I give it a little airbrush light - redoing the red and orange shine from the sides.
As a final step I will remove the masking tape on the three straight sides and work a bit with the wood - probably just a varnish...
So, what do you think?
Suggestions?
Thank you
First of all- wow! Another vignette knocked out of the park!
So many features I like or identify with, or both:
1) A lot of the science fiction I read as a boy in the 60's and 70's described their professional 'spacefarers' as having been burned nearly black by their service in space- but often with blue eyes or other features in contrast with their heavy 'space tan'. Authors like Andre Norton, Rex King, and the like. Great stuff. The expression suggested by just the eyes is incredible: exhaustion, great sadness and acceptance.
2) The gold armor is perfect- as it would look if someone had just fought the engagement we see the aftermath of in this scene.
3) I note the entrenching tool with blood on it in the lower center of the scene; we were taught how to fight with an e-tool during Improvised Weapons training. Had a real 'no way!' moment when I spotted it.
4) The three central figures light up just as if a spot light had been shone on them- really subtle light effects.
I know you mentioned some follow-on details you want to address Klaus, but the piece itself is marvelous in the pictures here.
dsteingass wrote:Wow Klaus! It looks like an Alternate Dimension 3rd Edition Rulebook cover art!
Thank you!
I'm really glad you like it
Anvildude wrote:Try putting some highlights of the same/similar colors to the two other marines, facing them.
Sort of like OSL, but for NMM reflections. Might help tie him into the scene better.
Thanks for the tip - I hope it fits better now
Meer_Cat wrote:First of all- wow! Another vignette knocked out of the park!
So many features I like or identify with, or both:
1) A lot of the science fiction I read as a boy in the 60's and 70's described their professional 'spacefarers' as having been burned nearly black by their service in space- but often with blue eyes or other features in contrast with their heavy 'space tan'. Authors like Andre Norton, Rex King, and the like. Great stuff. The expression suggested by just the eyes is incredible: exhaustion, great sadness and acceptance.
2) The gold armor is perfect- as it would look if someone had just fought the engagement we see the aftermath of in this scene.
3) I note the entrenching tool with blood on it in the lower center of the scene; we were taught how to fight with an e-tool during Improvised Weapons training. Had a real 'no way!' moment when I spotted it.
4) The three central figures light up just as if a spot light had been shone on them- really subtle light effects.
I know you mentioned some follow-on details you want to address Klaus, but the piece itself is marvelous in the pictures here.
Well done indeed!
Thank you Mate!
Yeah, I really like the Valkyrs expression - too bad the tattoo got covered by the huge blood splatter...
Hah! You did notice the entrenching tool! Yes it is part of the story, where it came down to close quarter and they had to resign to use whatever was at hand - maybe after running out of ammo - Glad I could hide that little "No way! Moment" for you Thank you again for the support!
And thank you all for your feedback and comments!
Last night after work I looked at the piece again and was still pleased so I decided to finish it up.
Just some minor changes and then I removed the masking tape from the straight sides of the plinth and gave it several brown washes.
Once the washes were dry I applied a coat of gloss varnish and let it cure.
After cleaning up my desk and sorting the colors back into the rack I decided to take some first shots in the lightbox.
These are not the high-quality ones yet.
Just some first shots with decent light
and a black background.
I will do some better photos over the next few evenings. And by then I should also have a bit of a narrative to accompany the scene.
But these should do
and provide some detail shots
without the distraction of my cluttered desk.
I hope you like the shots
and the scene
I really like how the Valkyr turned out!
To The Bitter End
I hope you have enjoyed this rather quick project (I started on 14. Feb).
I did learn a few things, I did try a few new tricks, and I had a lot of fun Cheers
Again- very much like this piece. Great theme supported by staging and light effects.
The Valkyr is so good I wonder if there isn't a future diorama/vignette there- a small group with helmets off receiving a mission briefing, maybe from a Fleet Officer, perhaps in front of a light table, so you get some good back lighting?
Fast or not, I got a lot out of watching this one develop- thank you.
Amazing and truly brilliant, I suppose we say that a lot around here. But honestly Klaus, you are such an inspiration, your work is thought provoking, and brilliant. Thank you so much for sharing.
Like a little bee from blossom to blossom, so Santa Klaus jumps from project to project
Currently I'm in a "high" phase and the projects just keep coming - but I have to be aware that I don't start too many at the same time - and I know after such an extended high phase there WILL be a down phase... So I take advantage of the high as much as I can
After the "Bitter End" I started to doodle around with sculpey and BeesPutty, playing with faces, as these leave much desired in my works Some of the doodles were....well judge for yourself
But it didn't matter, they were just for practice.
But then this dude evolved
It immediately reminded me of an image I once saw on DeviantArt called "Fat Tanker" - unfortunately I can't find it anymore to share.
But the basic idea was there and so I had the start of the next project.
After the basic frame from cloth hangers I added a thick layer of masking tape and aluminum foil
On that I added a first layer of (cheap no-name) Sculpey
Slowly I built up the Big Boy
and the pose became visible
First he got some pants
and boots
and there's always need for a undershirt and an eye patch
A helmet is always useful
which got some details
just like Big Boy got a belt, a cross on a chain and some dog tags
The start of the cigar-hand was sculpted with SuperSculpey
but further detailed with GreenStuff
I didn't really like the position of the right arm - so off it came
once re-attached it became evident that the shoulder now looked a bit off
But a cigar-holster is such a useful accessory for a real gentleman - and it hides a screwed up armpit quite nicely
The shirt got a slogan
and the bionic arm some details
Well, this is as far as I got in 2 weeks So, what do you think?
Ideas, feedback, suggestions?
Cheers
Klaus
The biological forearm is a little weedy for the size of the guy- and I'd suggest, if you can, to add some more trapezius to his right shoulder (the one with the cigar holster). Maybe a little bit of side-back-flab hanging towards that side of him. His back, right now, is very not-fat for his neck and front. If it were just a beer belly, that'd be okay, but with the way his chin and upper torso are, you just need some more flesh spilling out over the belt in the back, and pulling that whole upper back over to the side a bit. And love handles, of course.
Impressive work for two weeks Klaus! I'm not sure what amazes me more- the high artistic quality and content of all your work- or the fact that each successive project is so completely different from the ones before. Plastic/styrene work, ork conversions, Tau dioramas, Night Goth busts, now complete sculpture. Very much the Renaissance man!


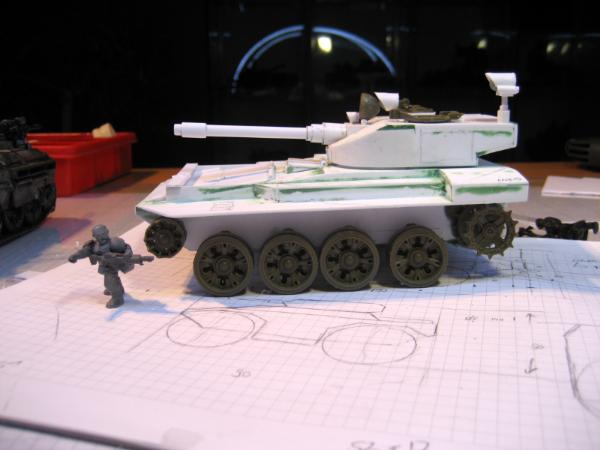
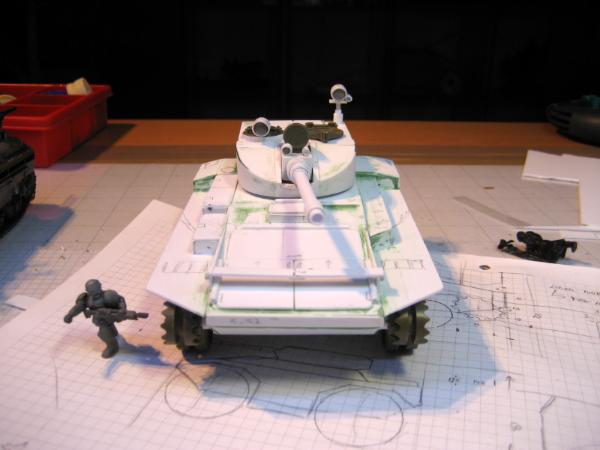

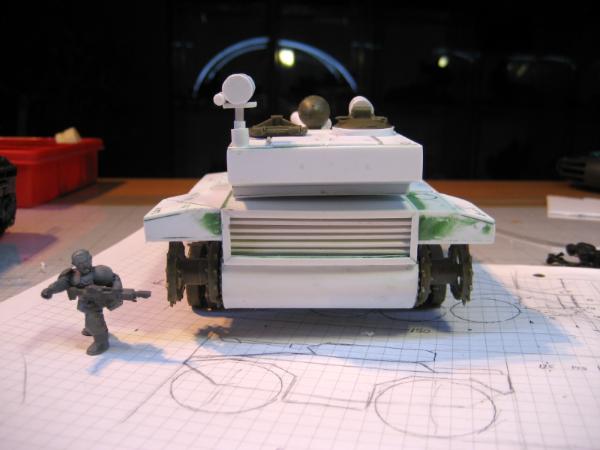


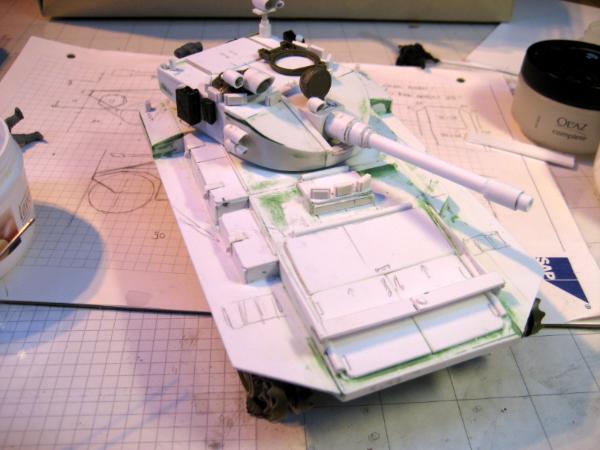
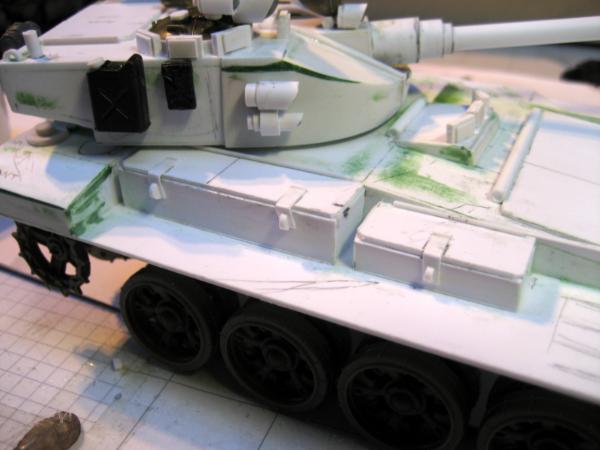
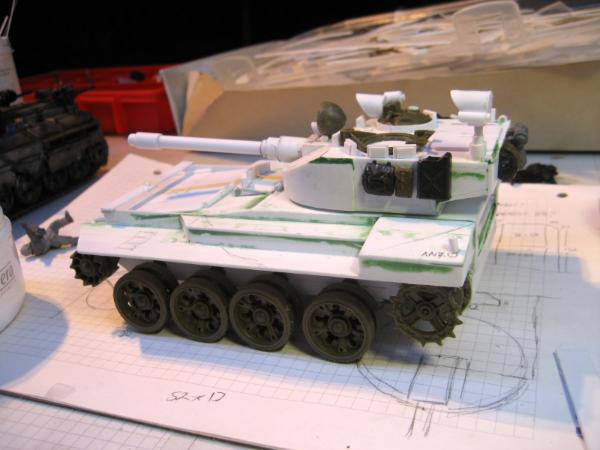
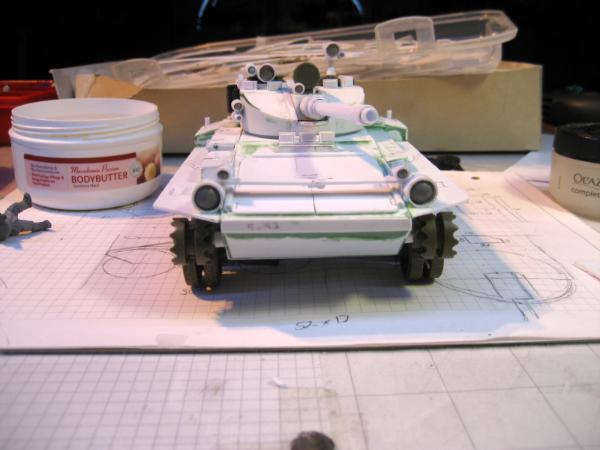
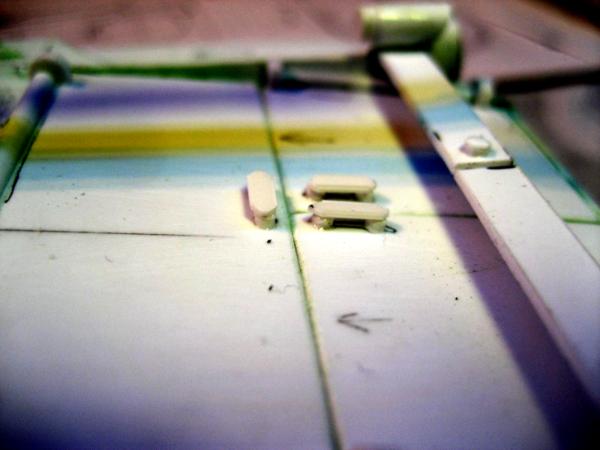
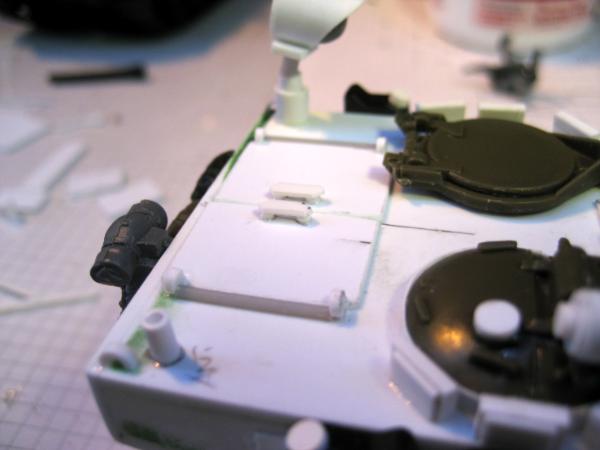
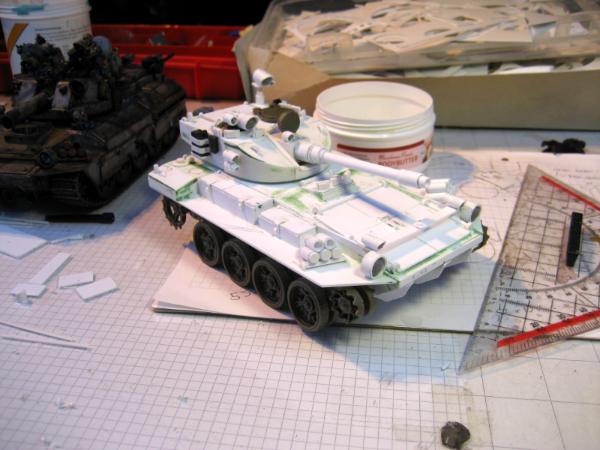
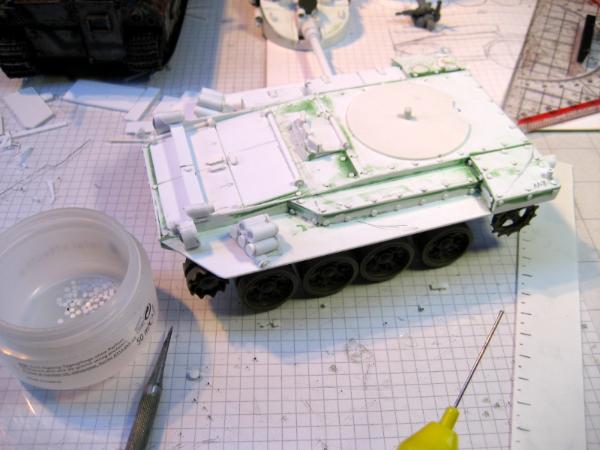
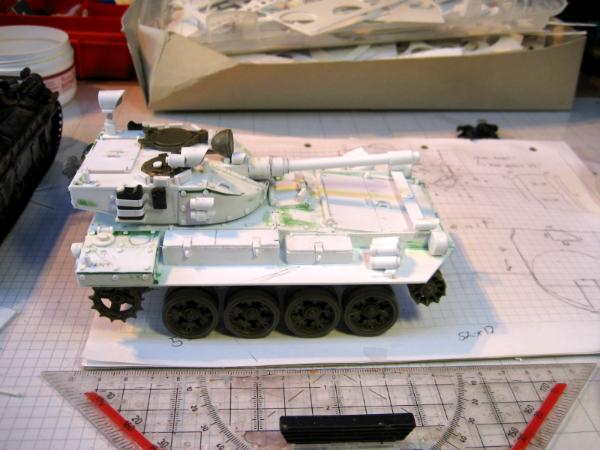
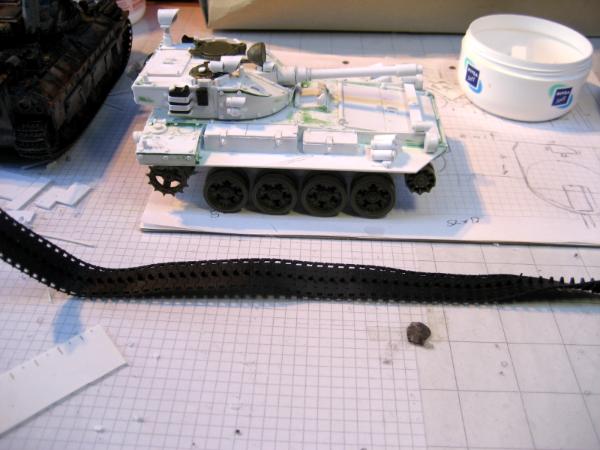
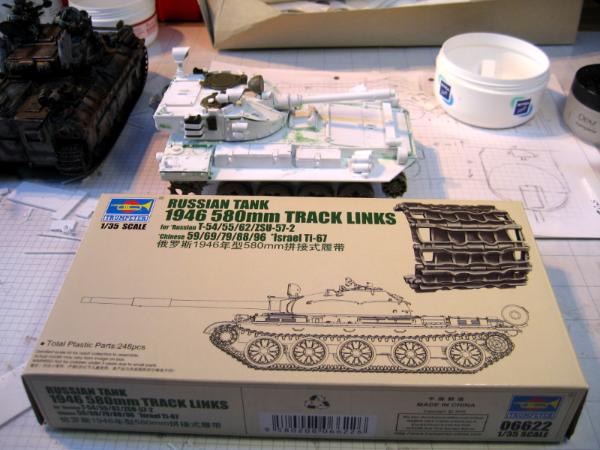
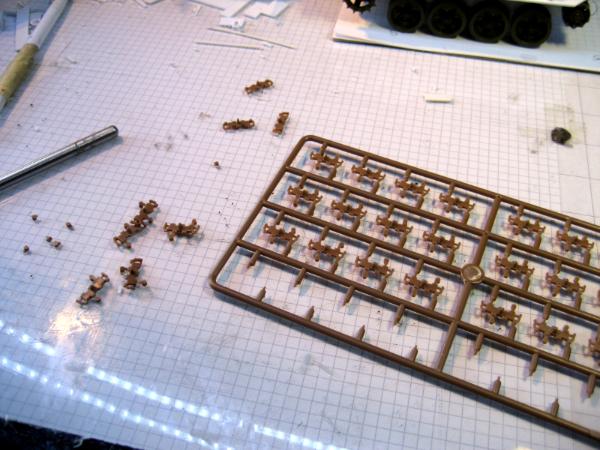
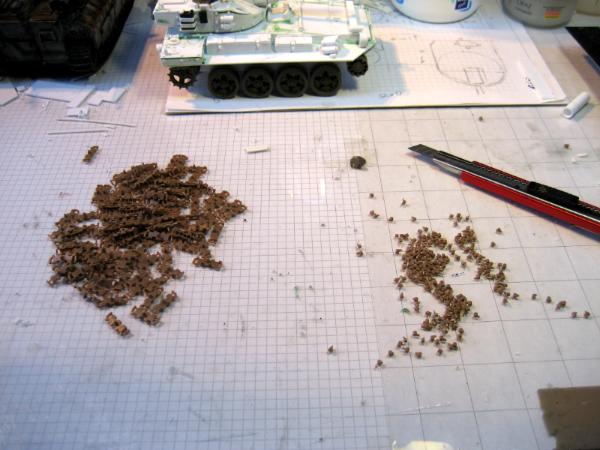
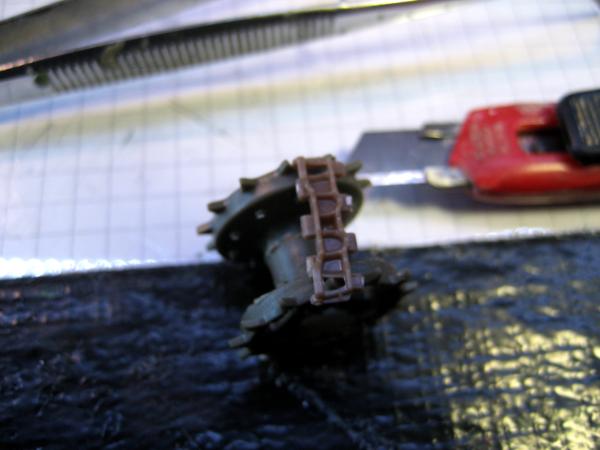
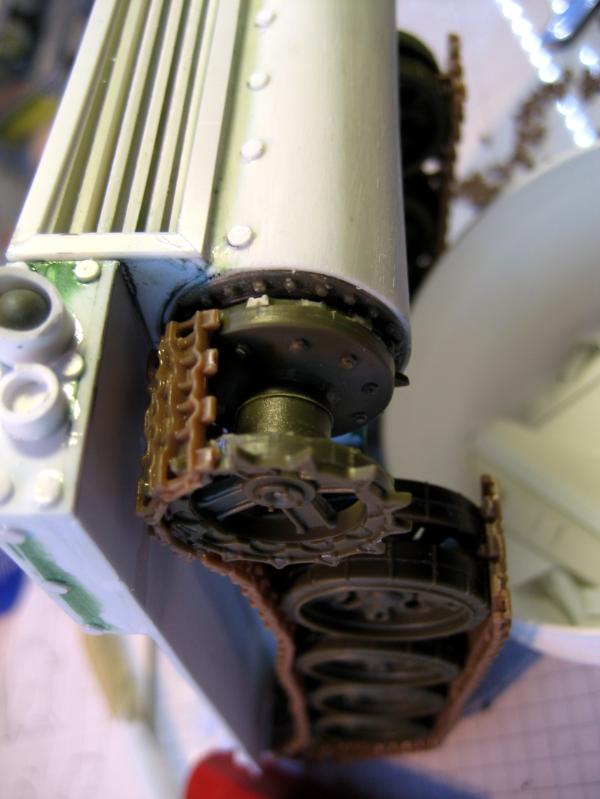
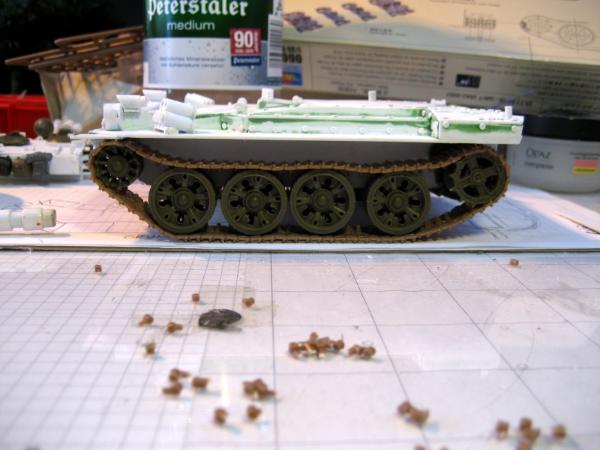
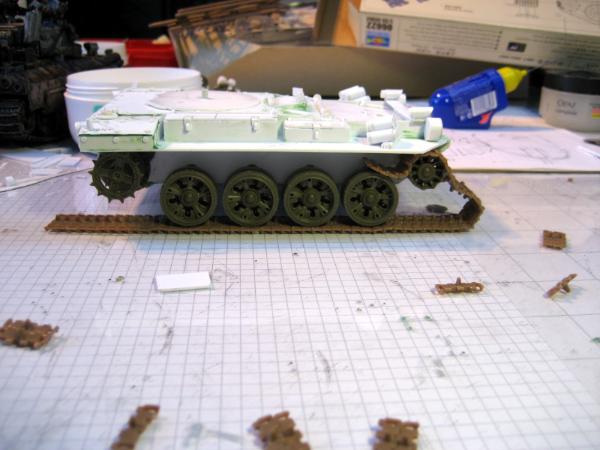
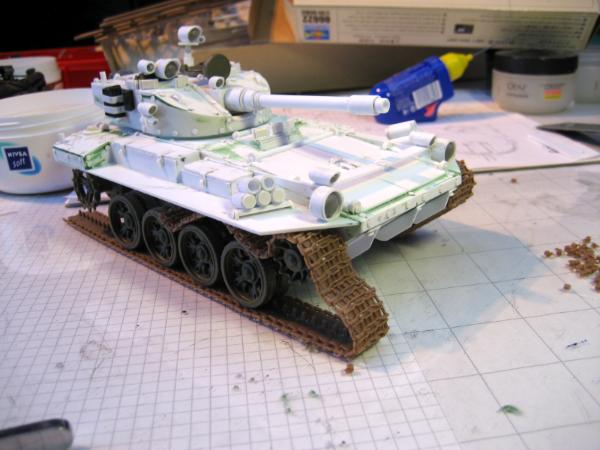
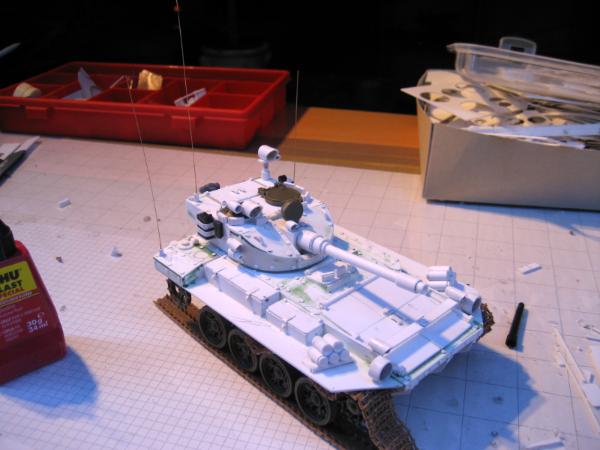

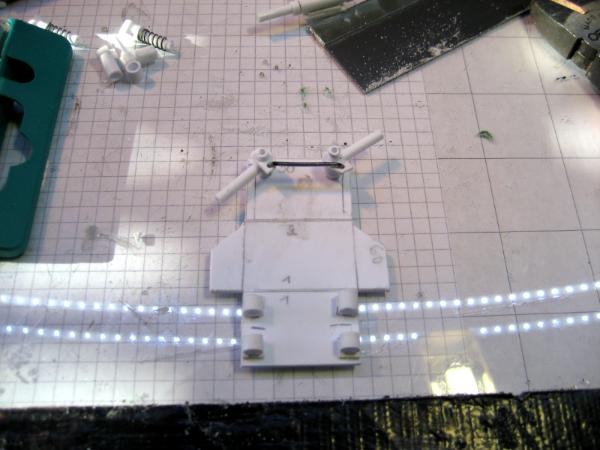
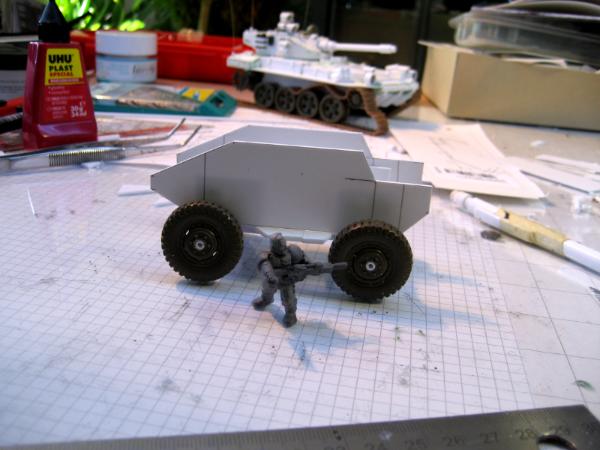
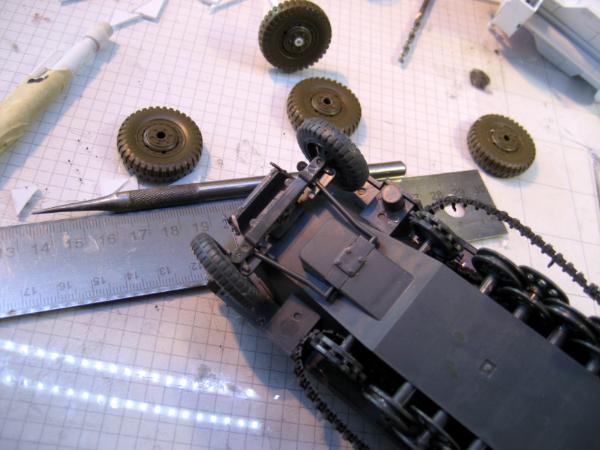
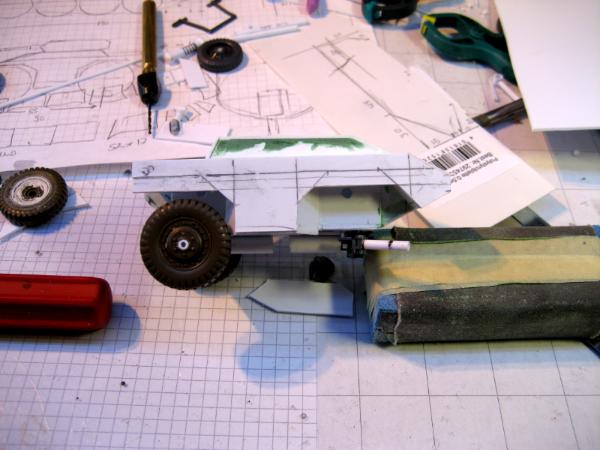
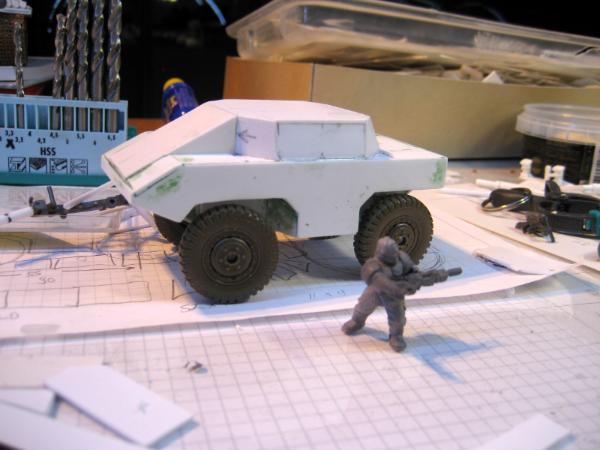


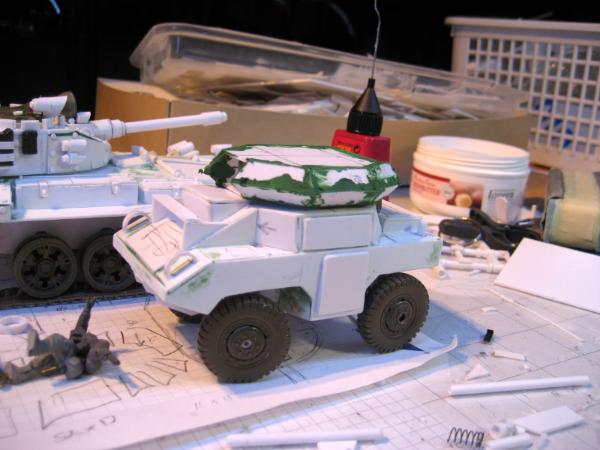
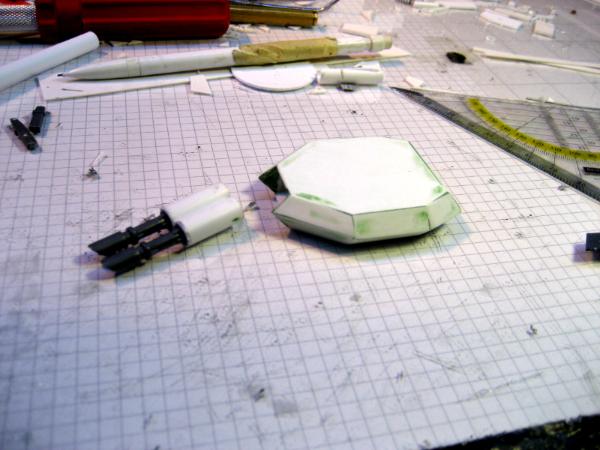
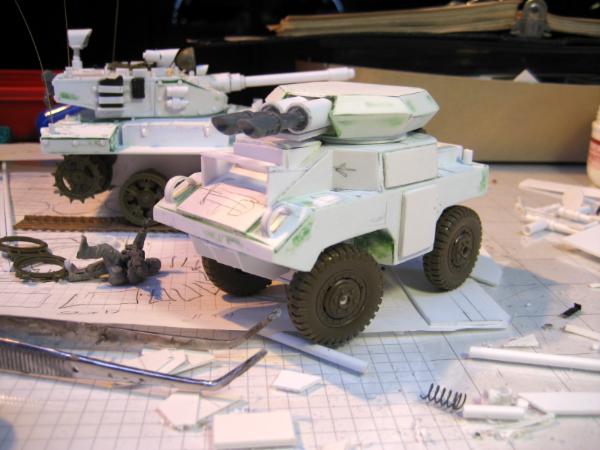
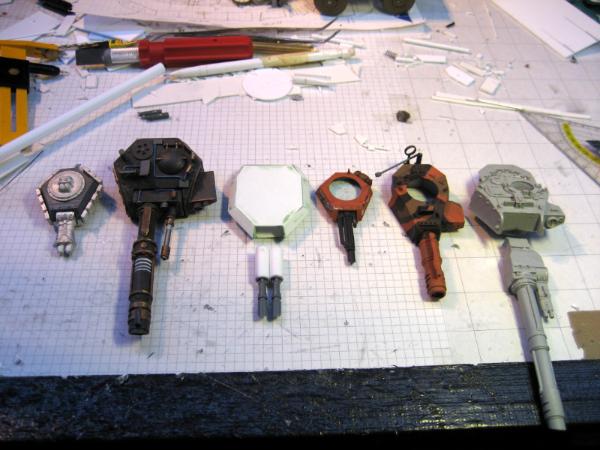
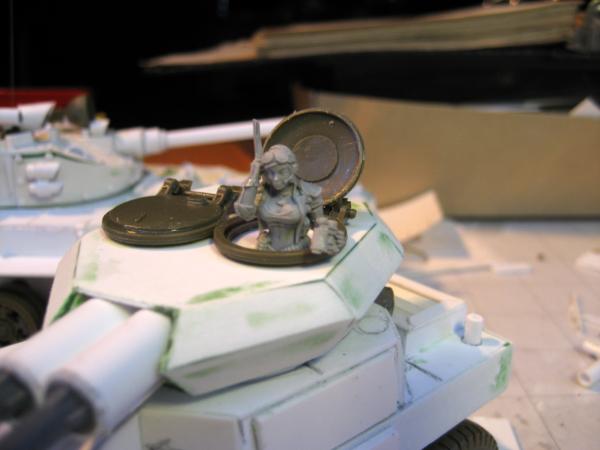
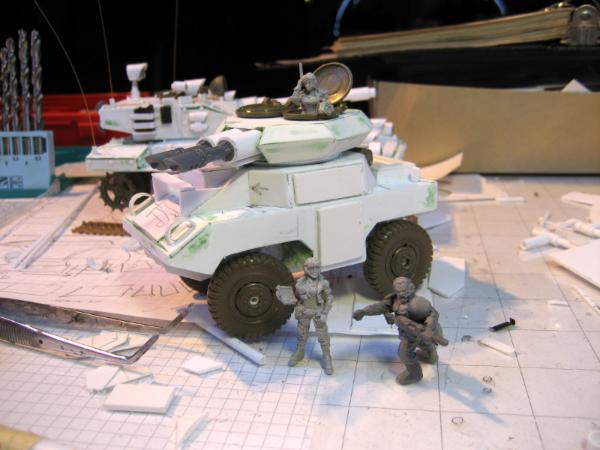
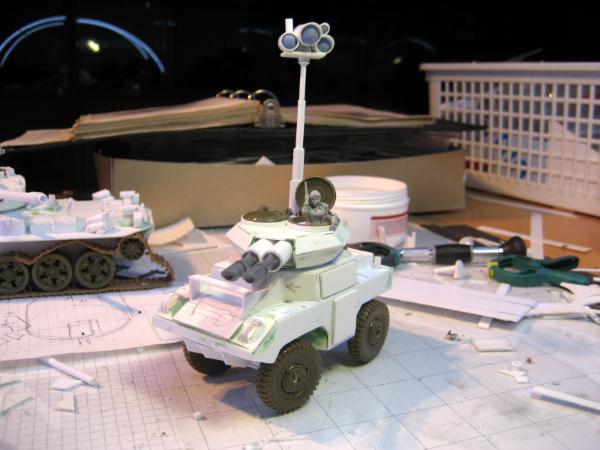
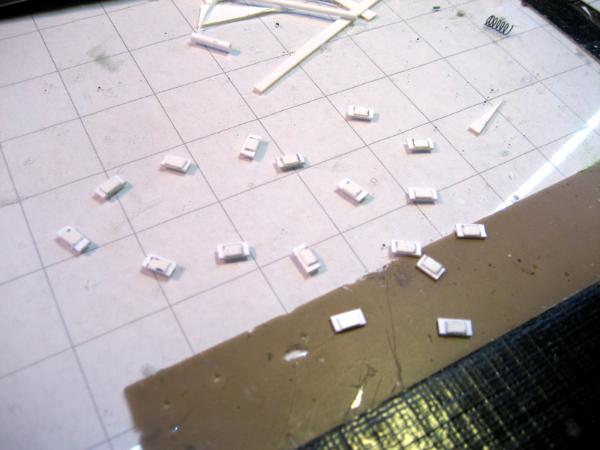
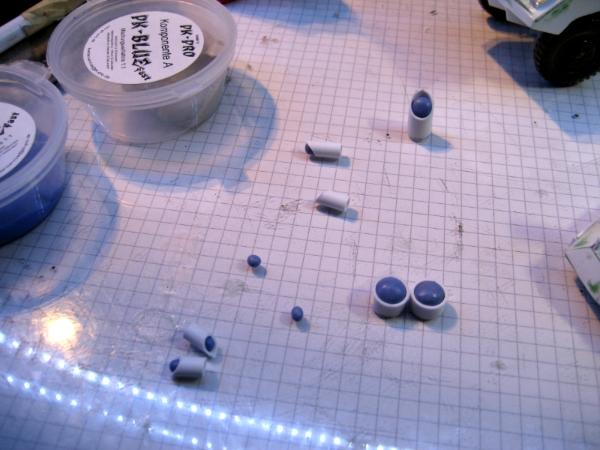
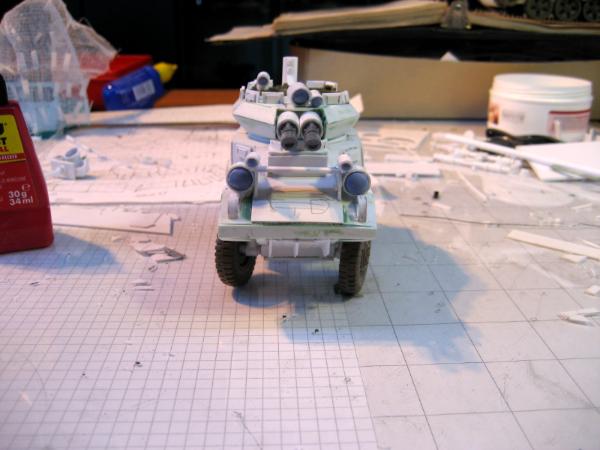
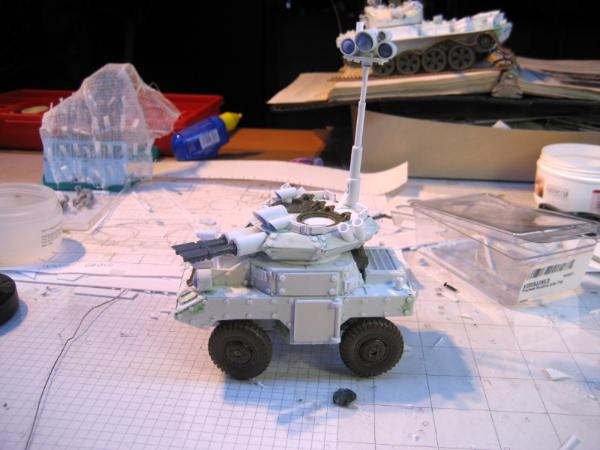
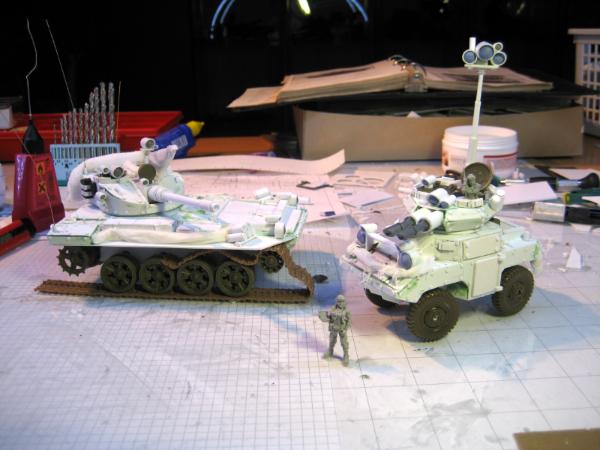
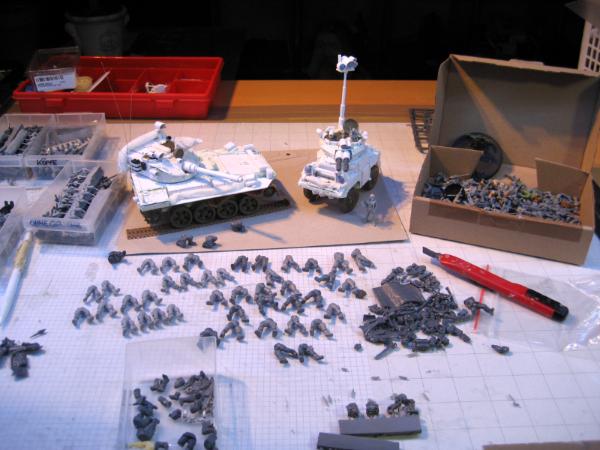
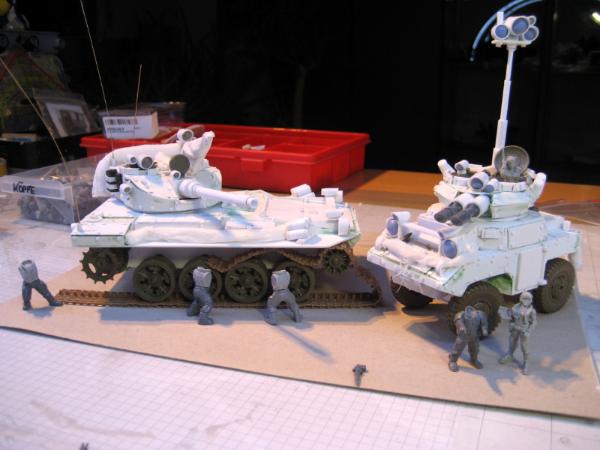
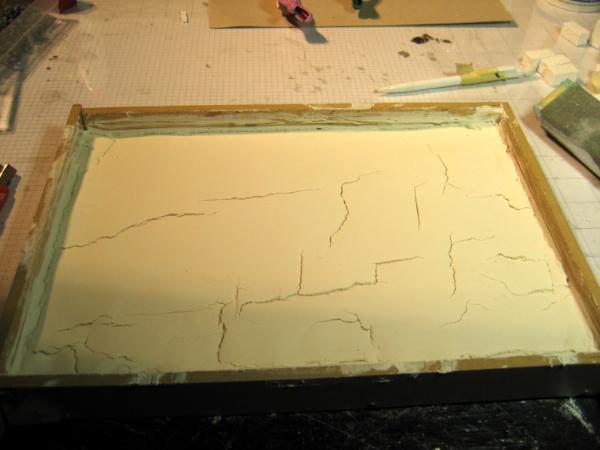
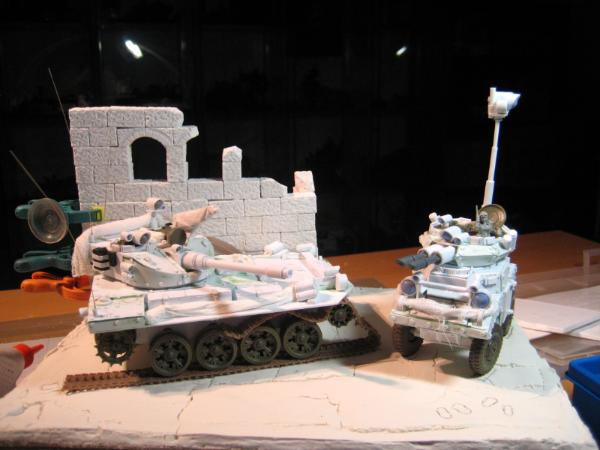
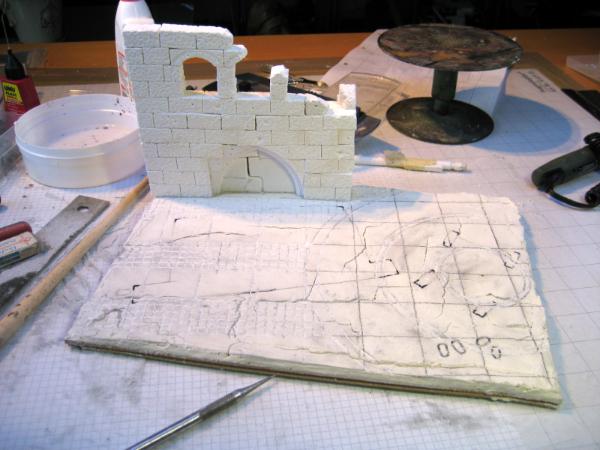
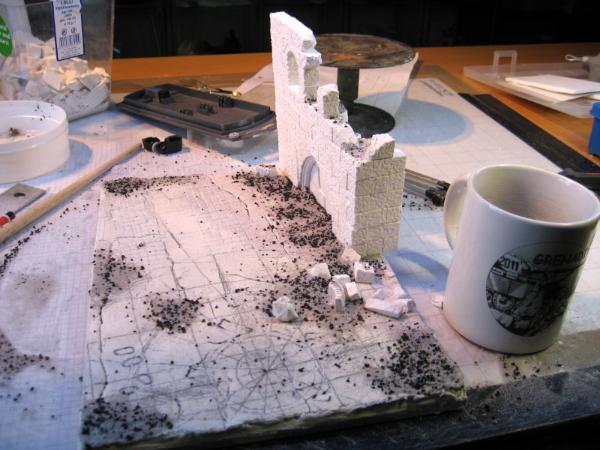
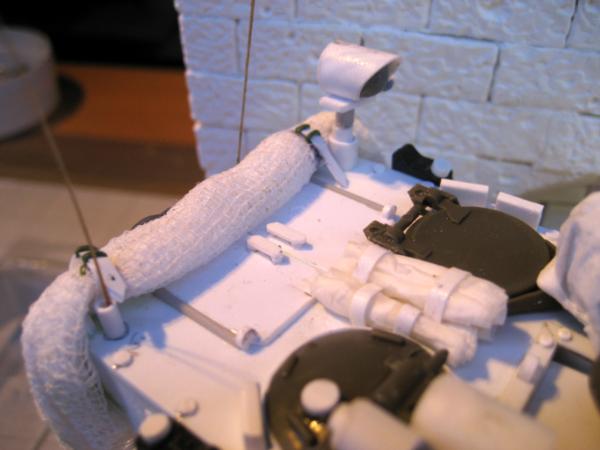
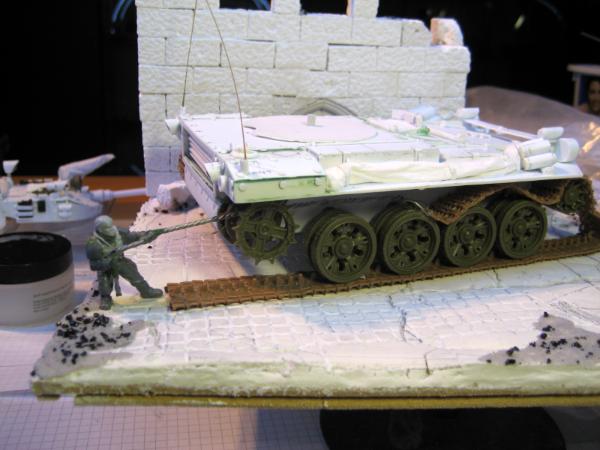
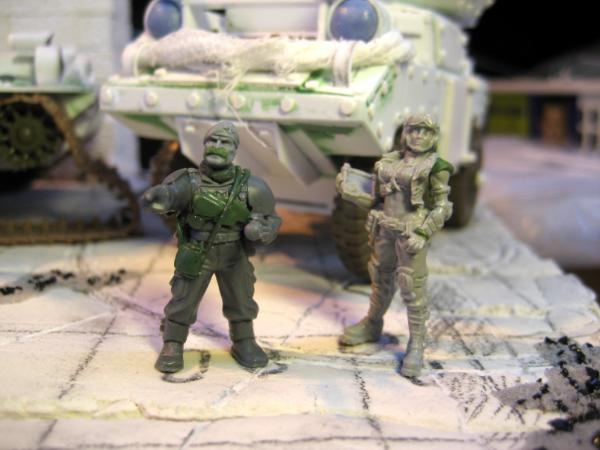
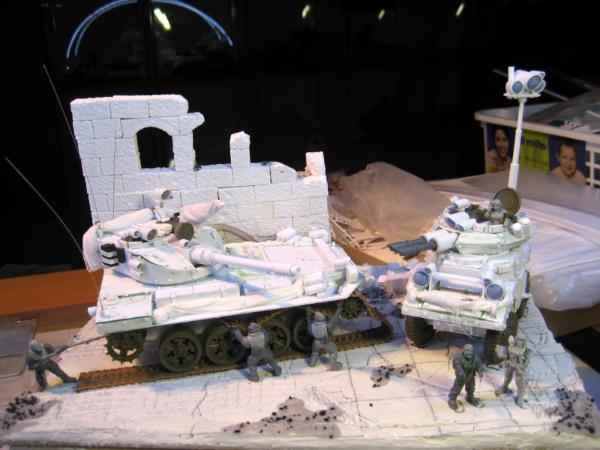
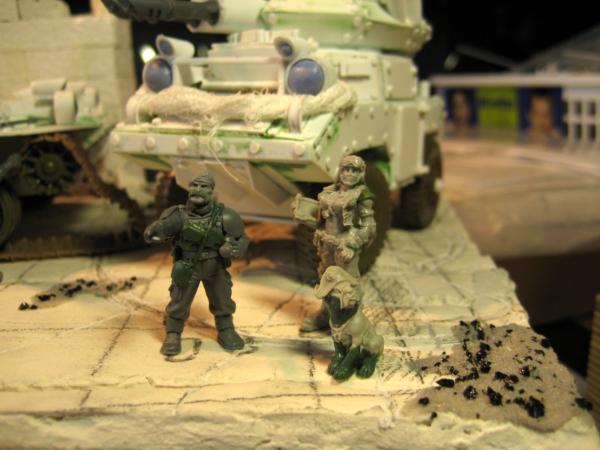
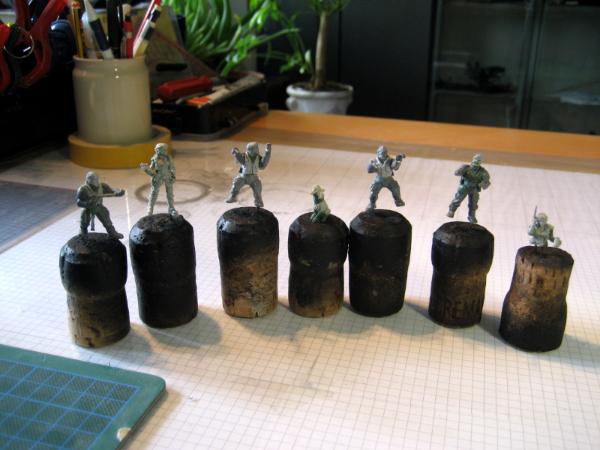
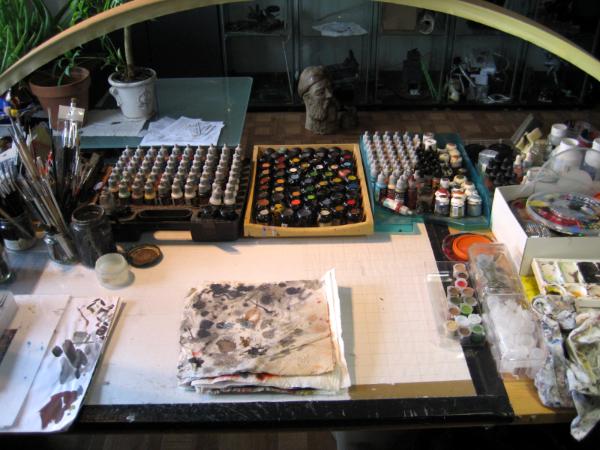
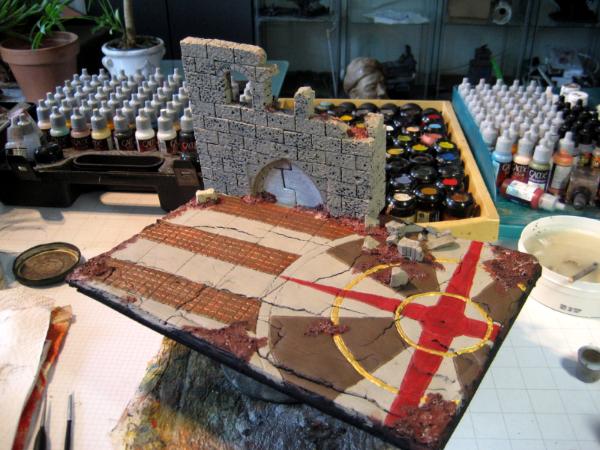
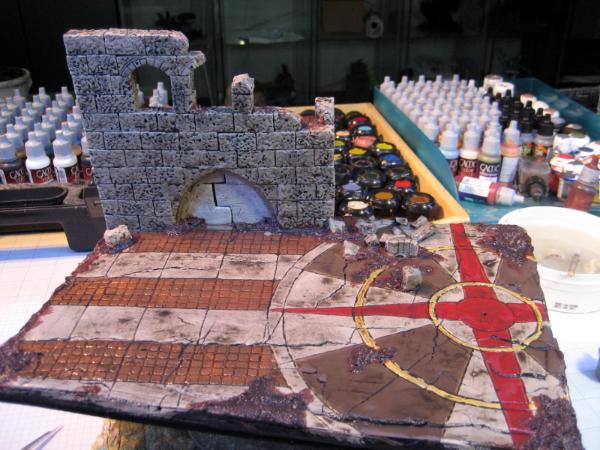
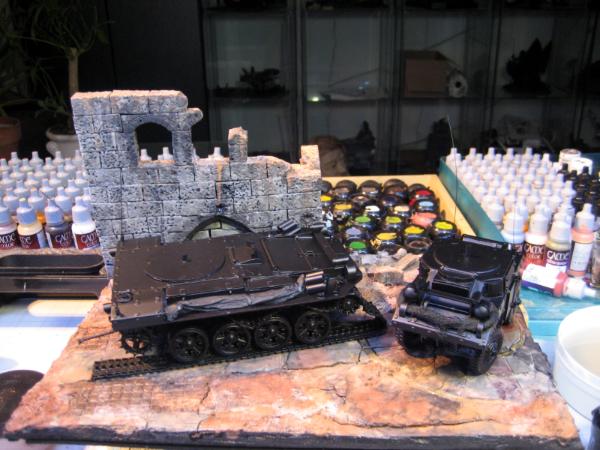
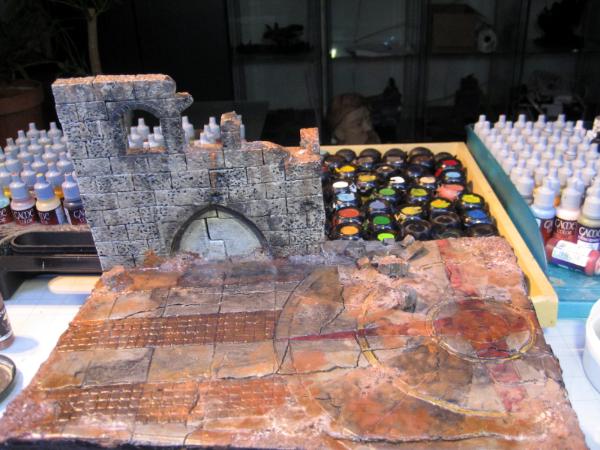
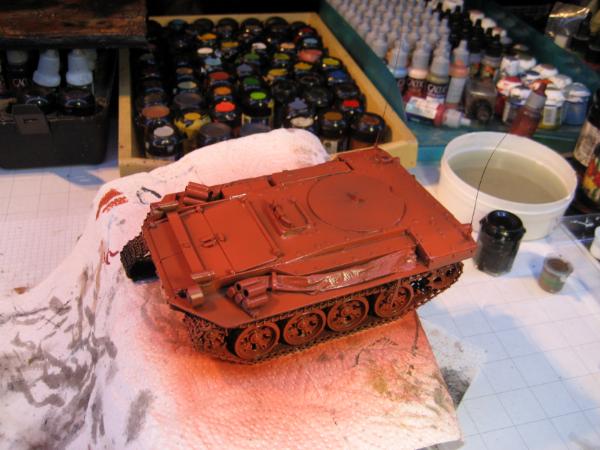
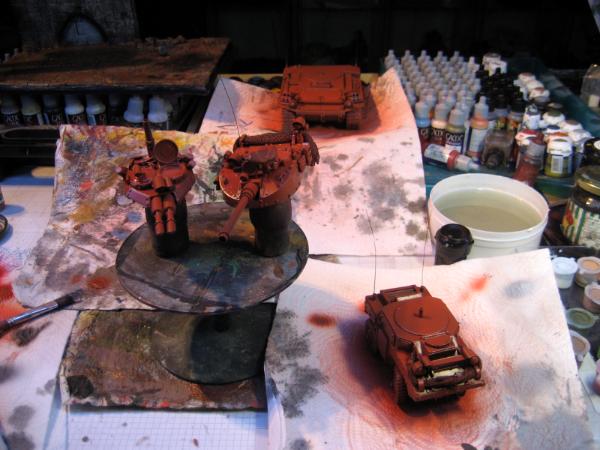
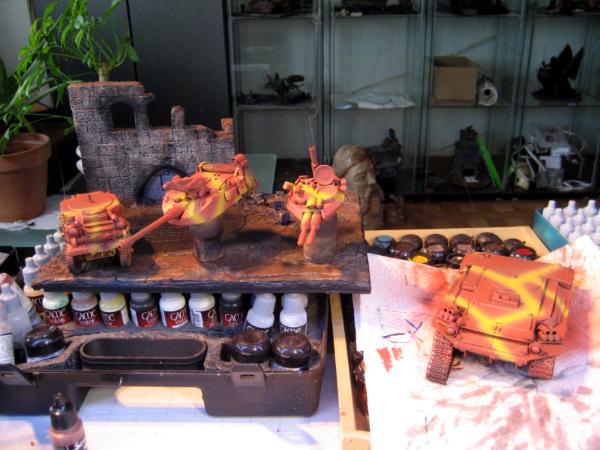
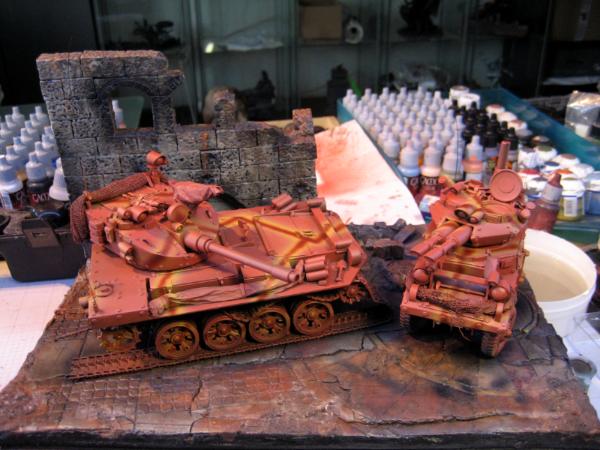


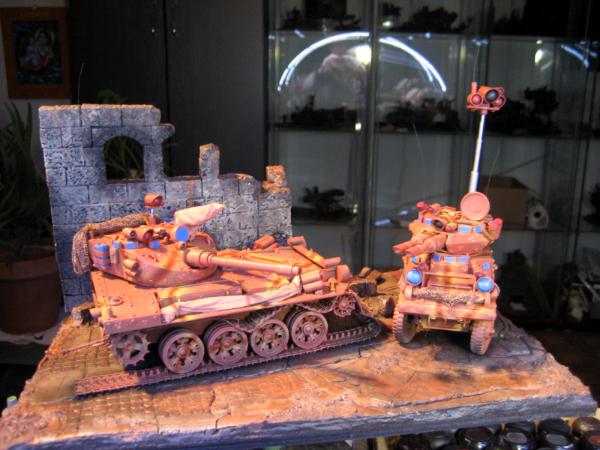
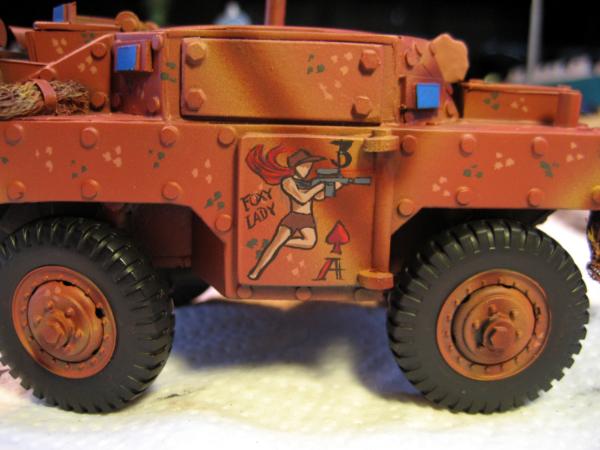
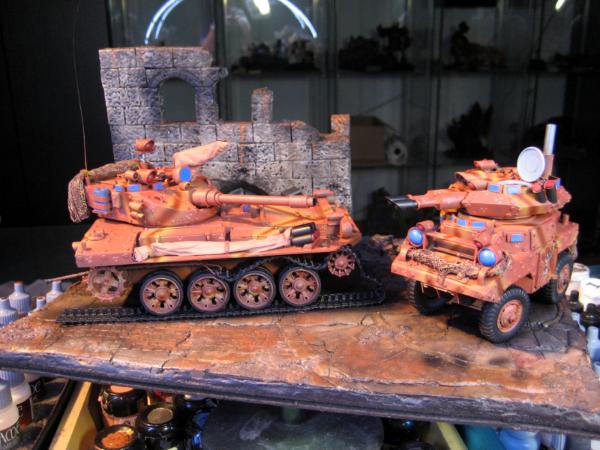
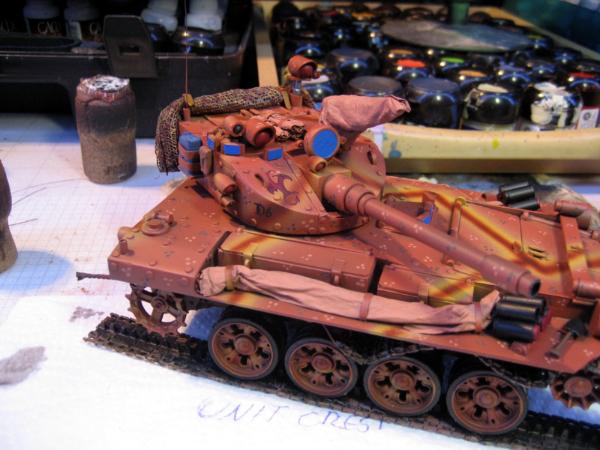
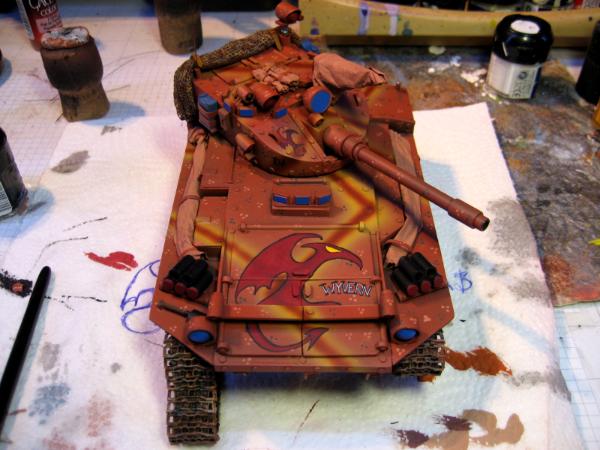
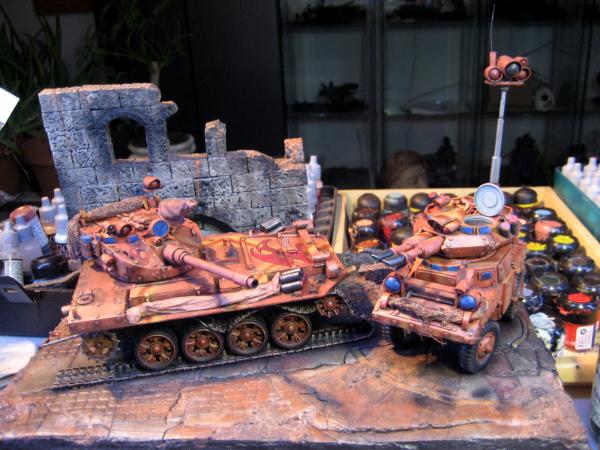

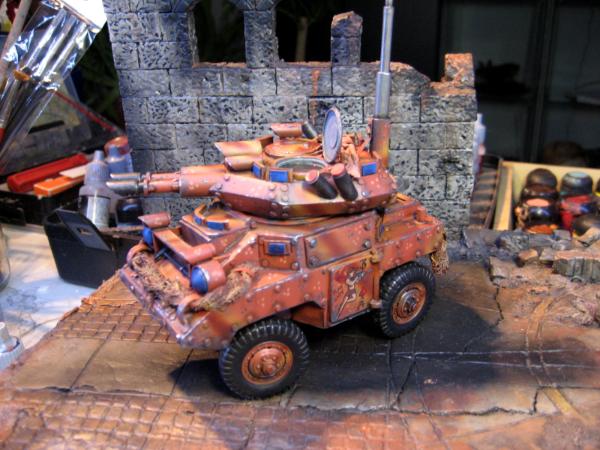
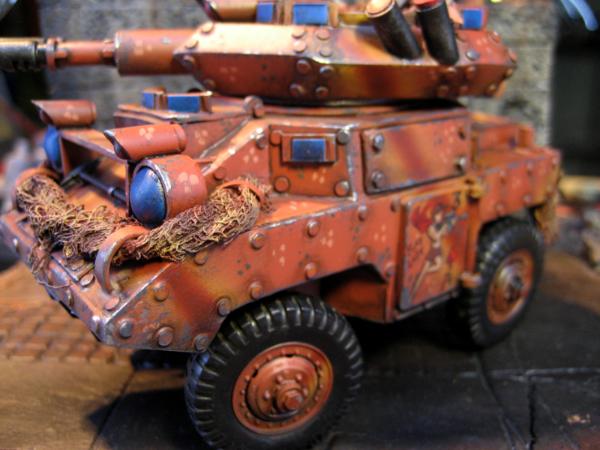
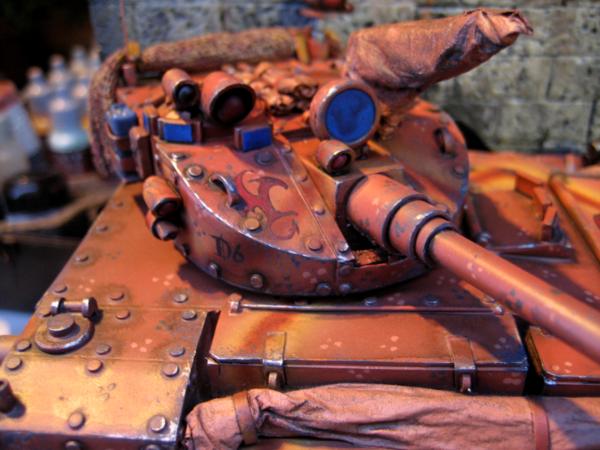
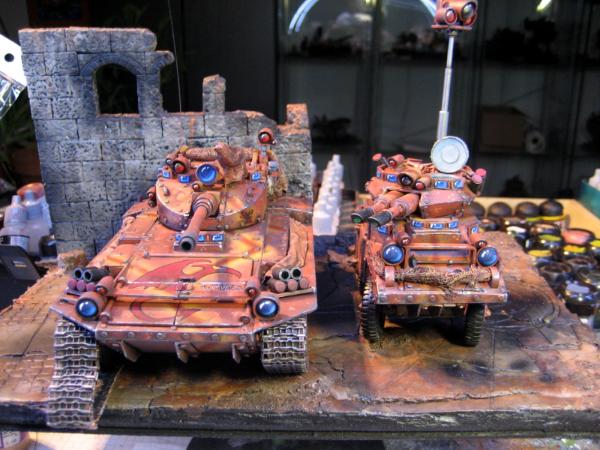

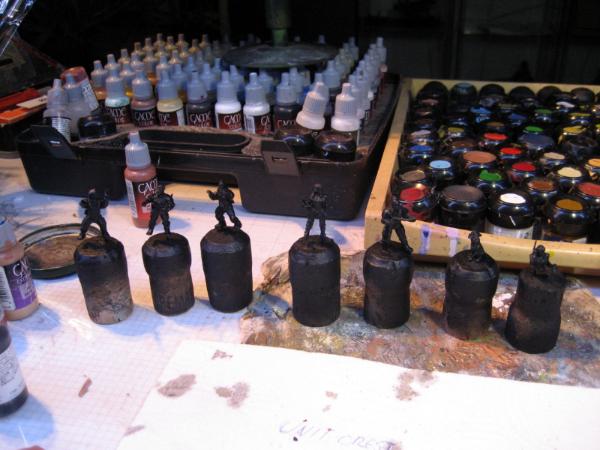
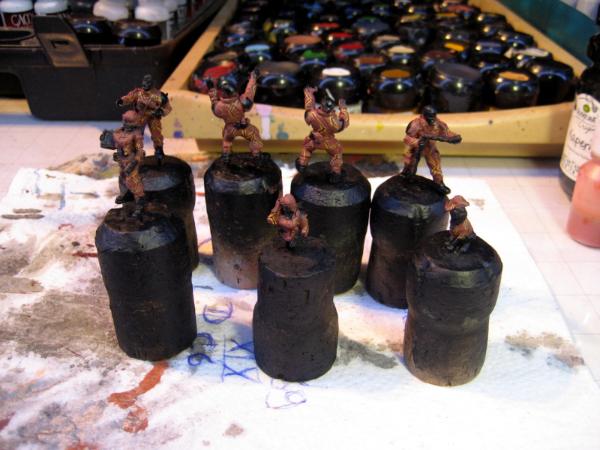
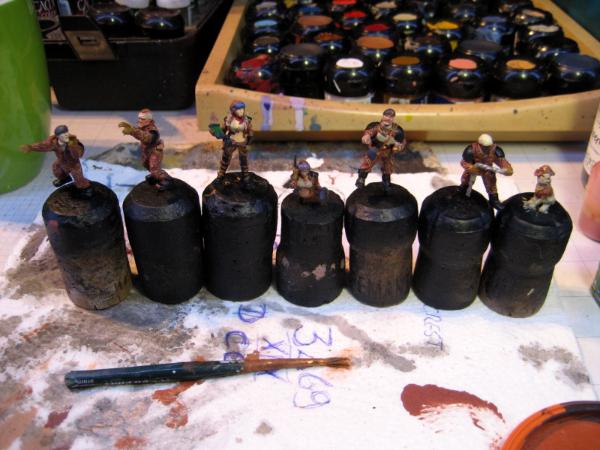
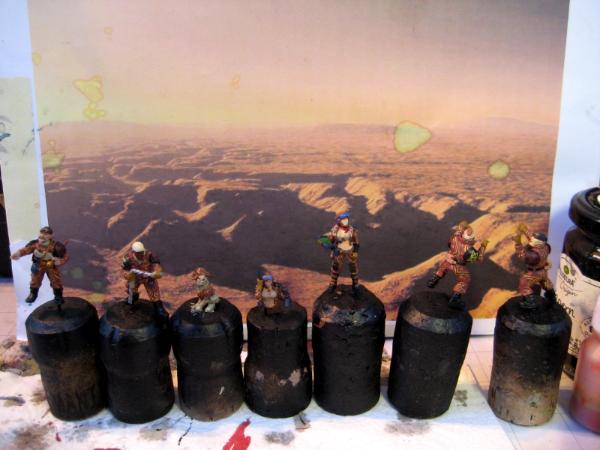
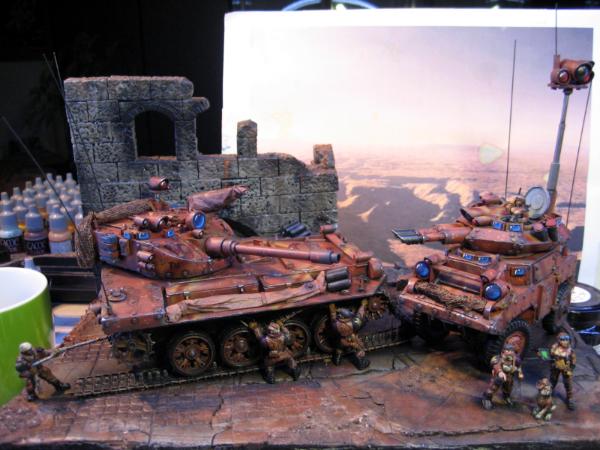
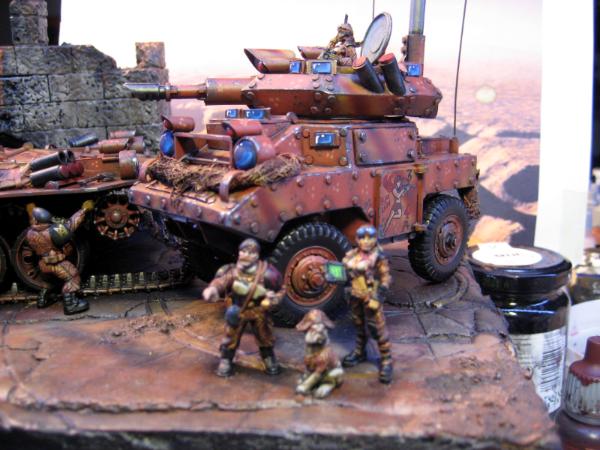
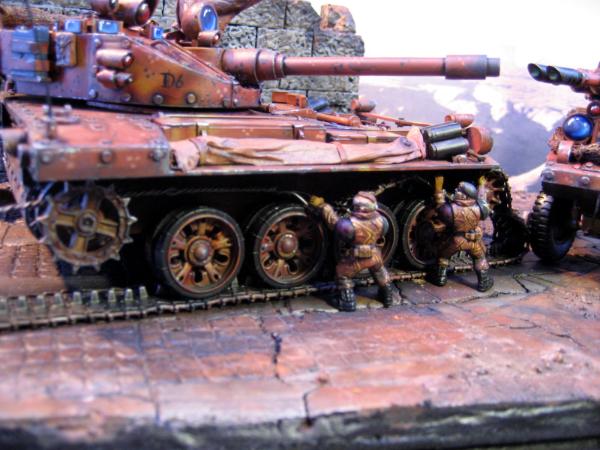
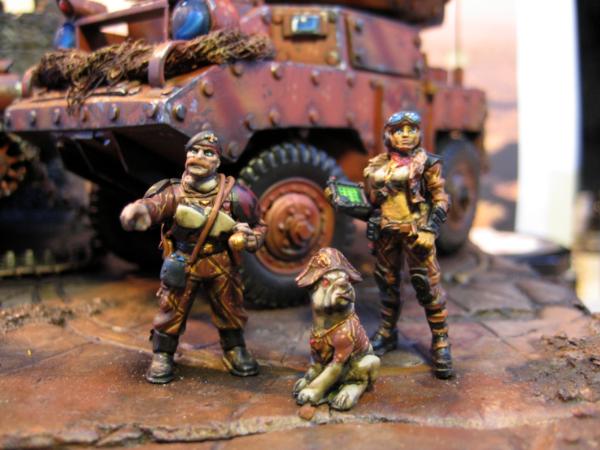
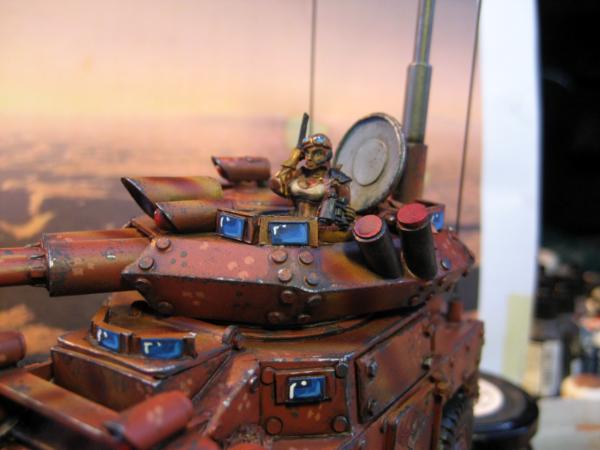
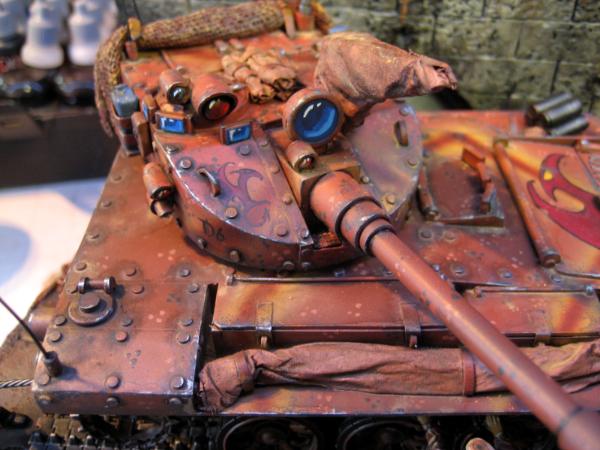
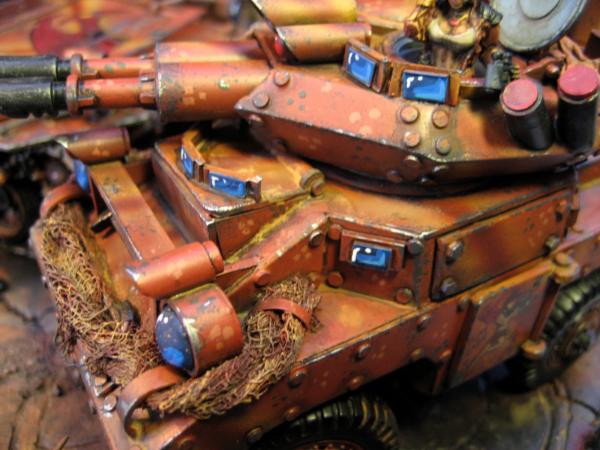
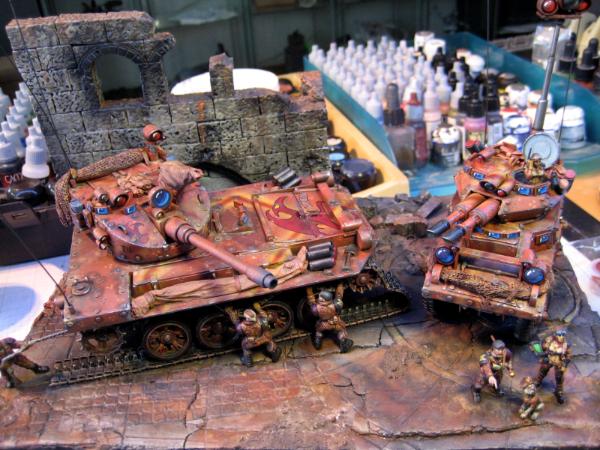
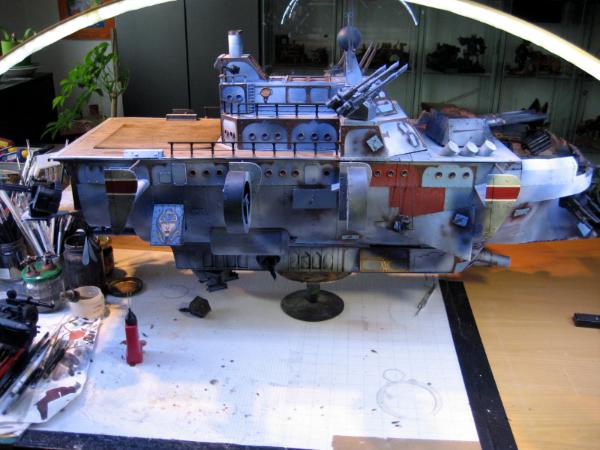
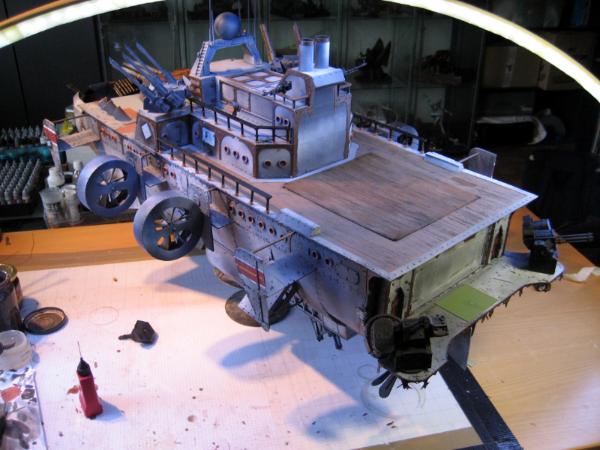
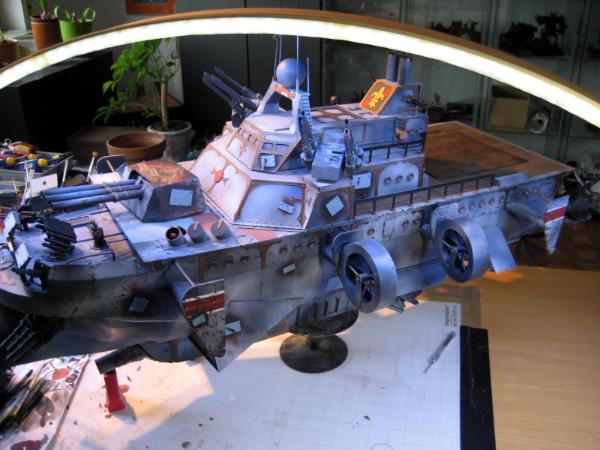
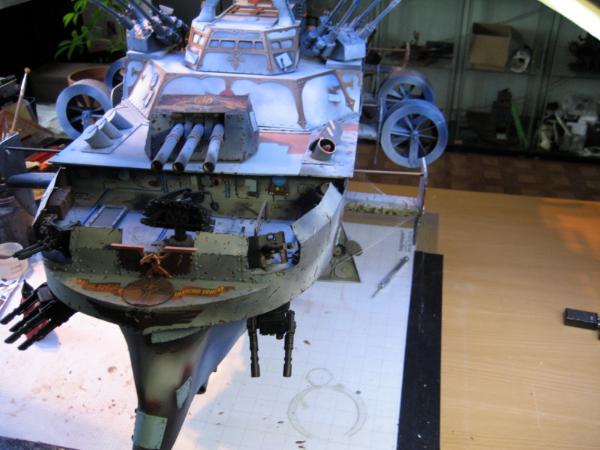
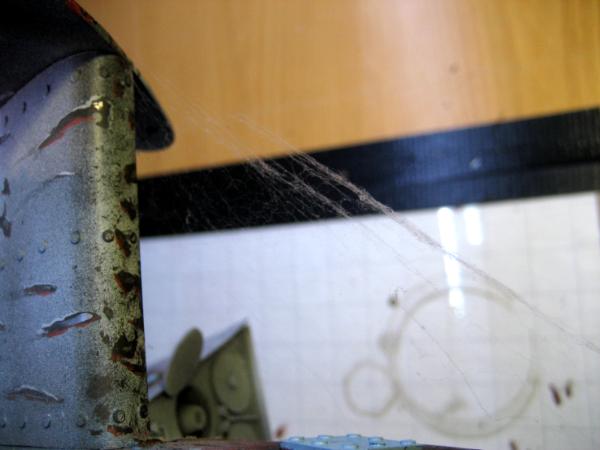
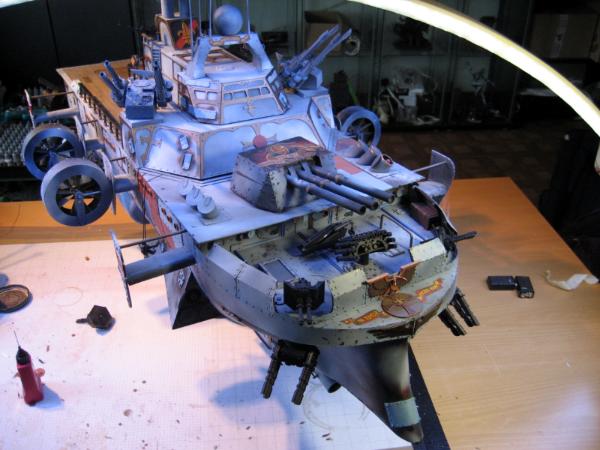
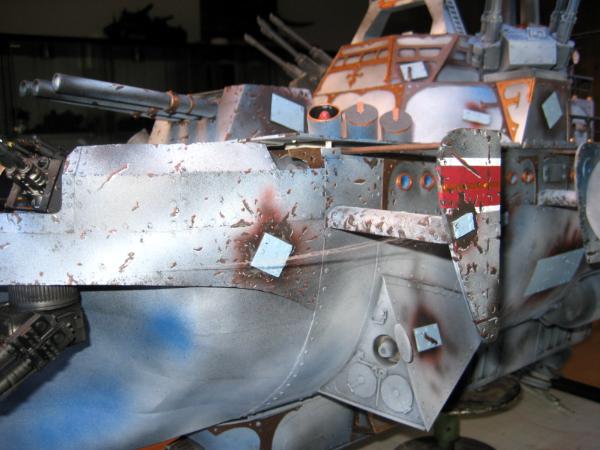
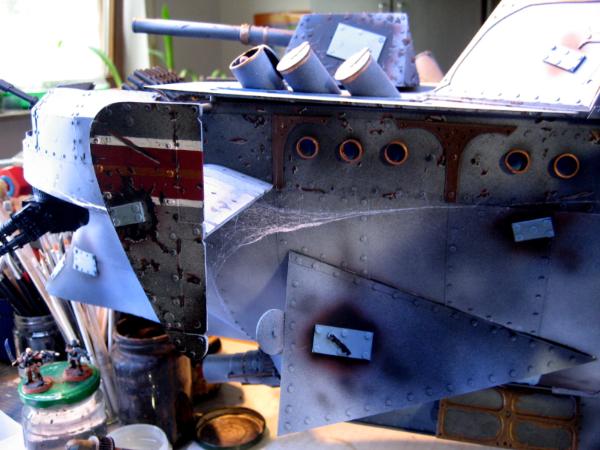
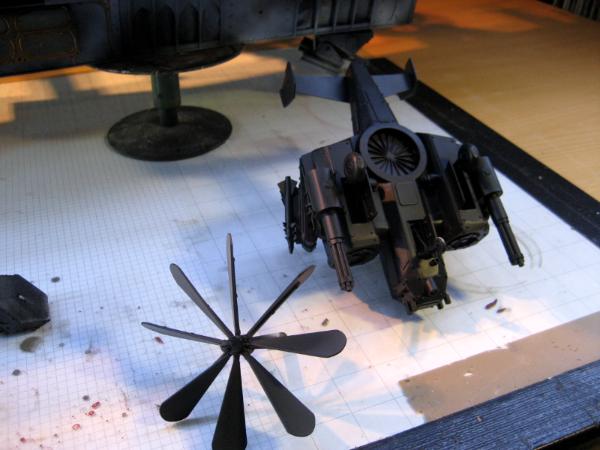
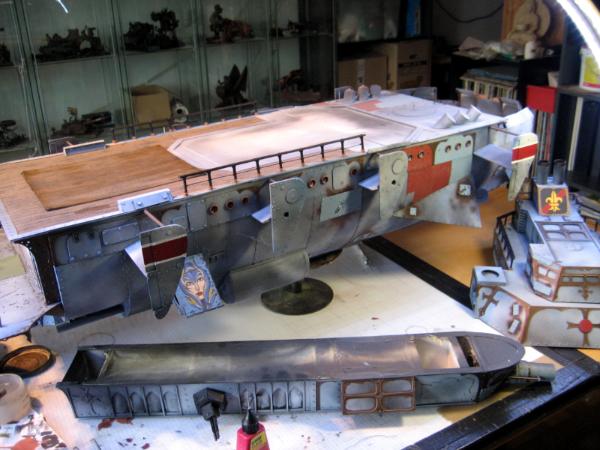
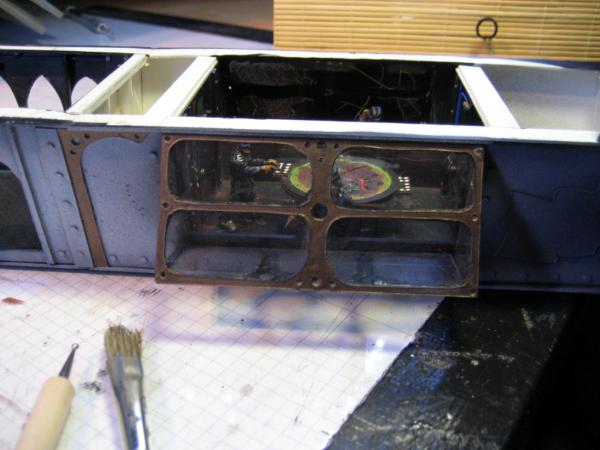
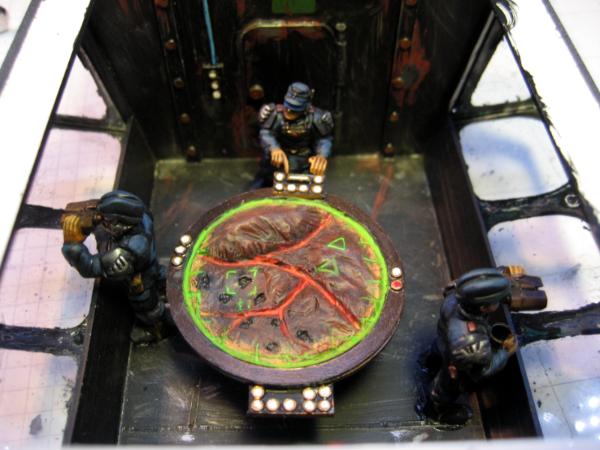
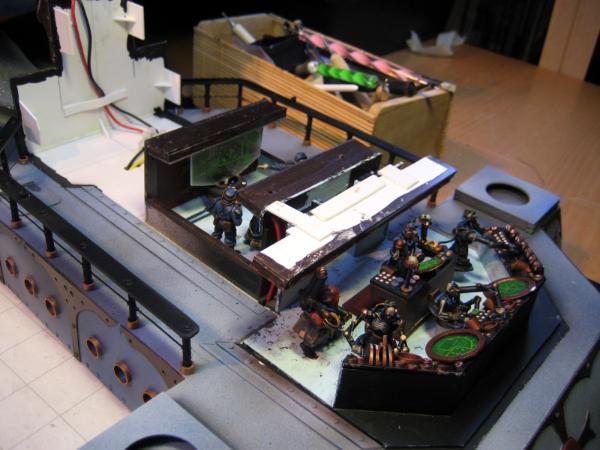
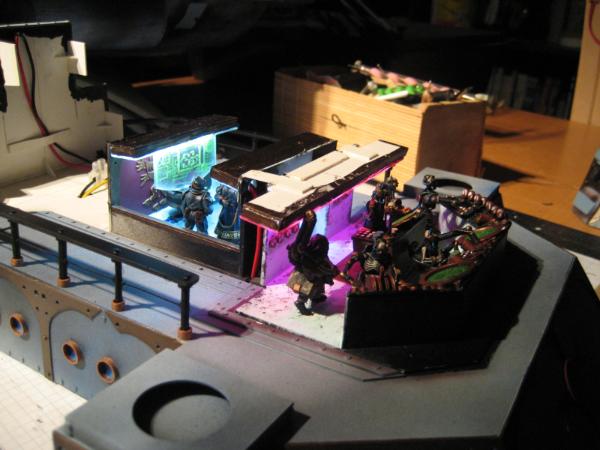
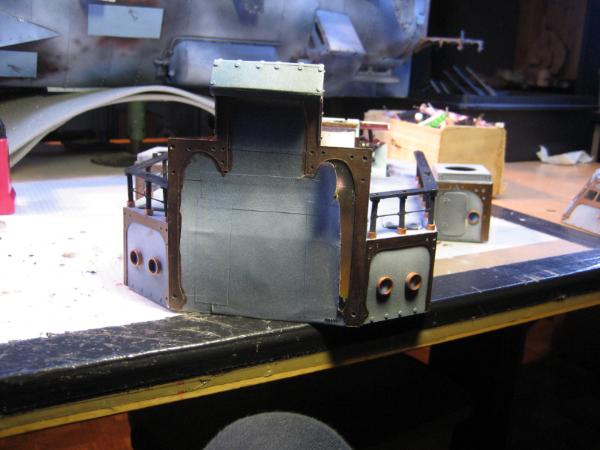
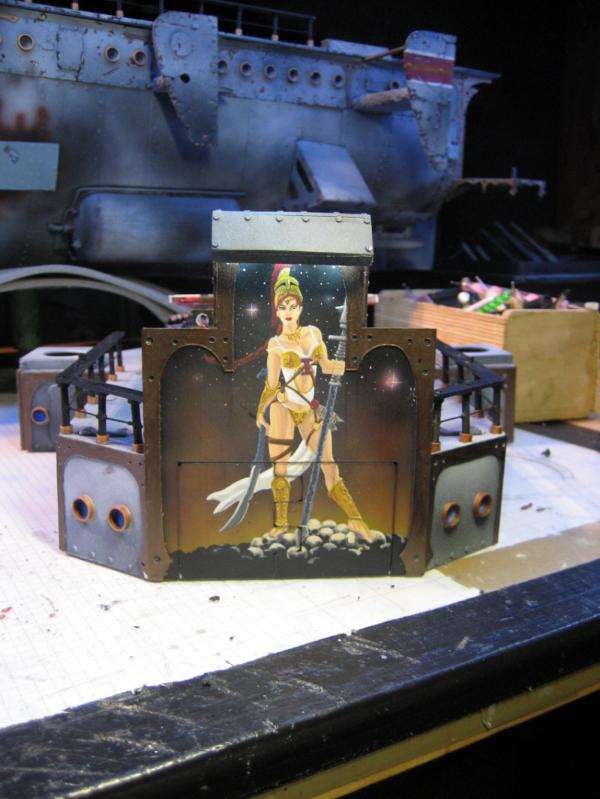
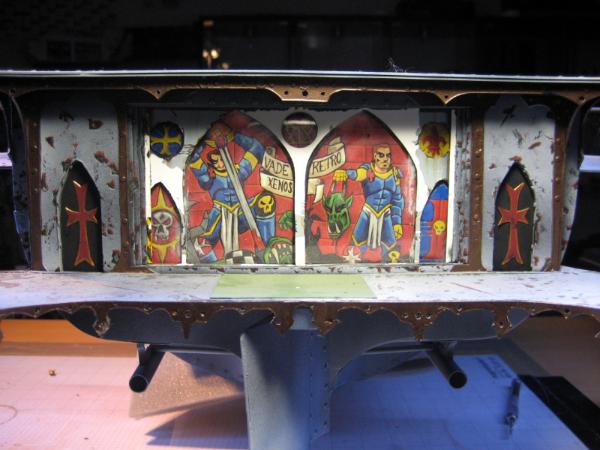
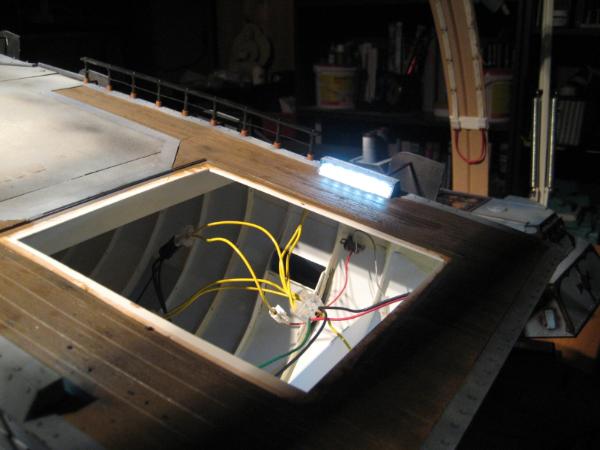
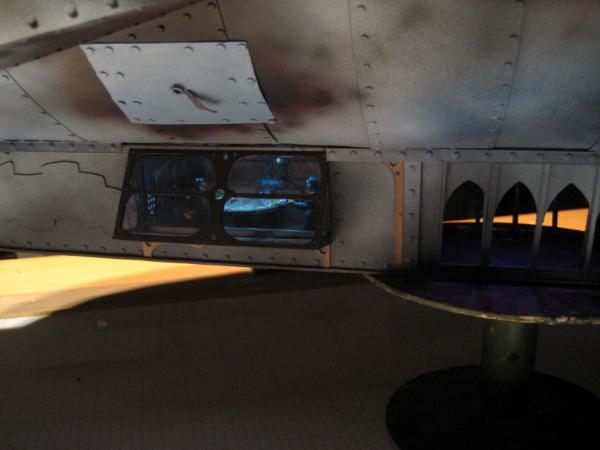
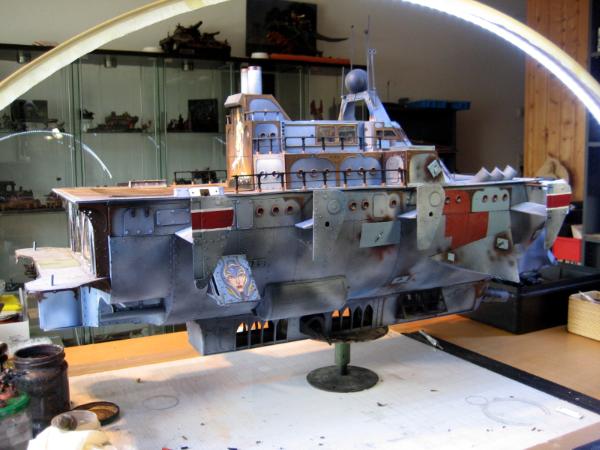
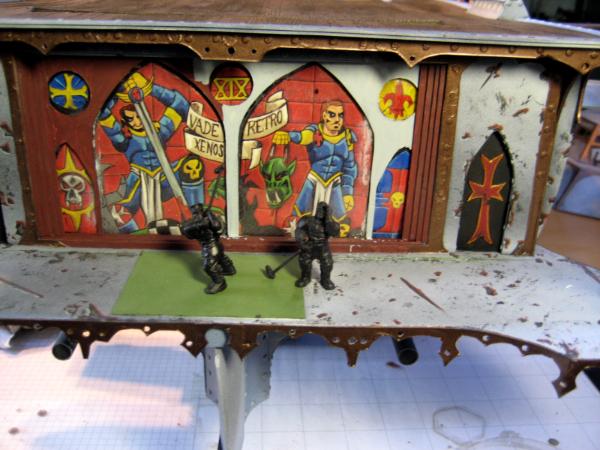
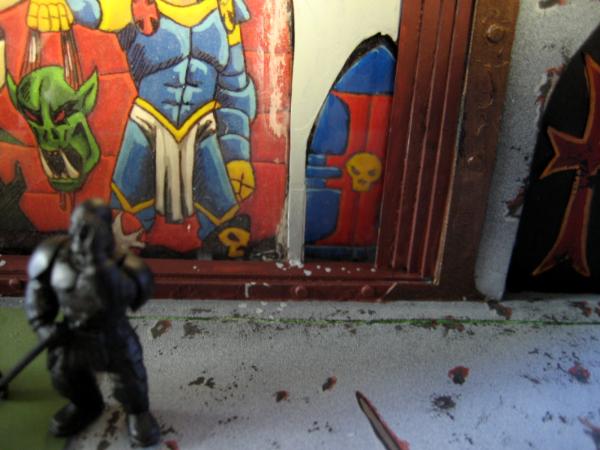
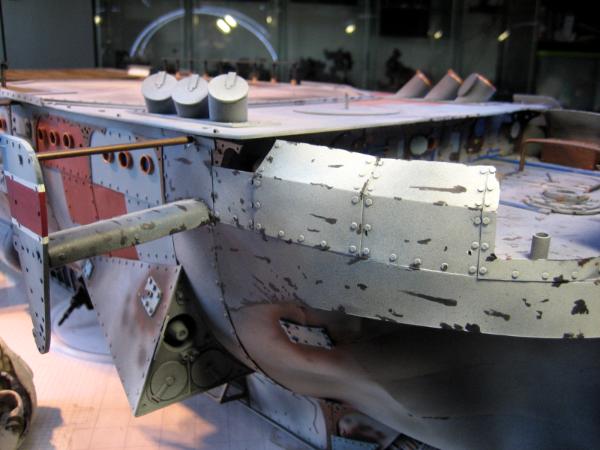
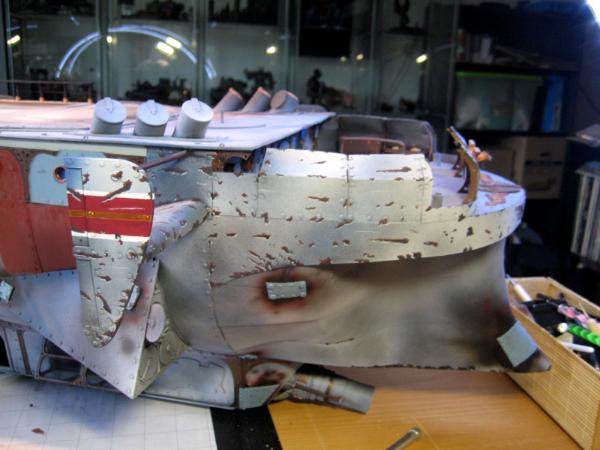
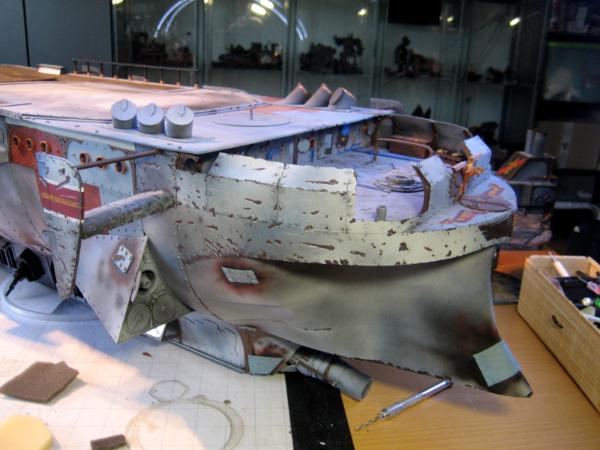
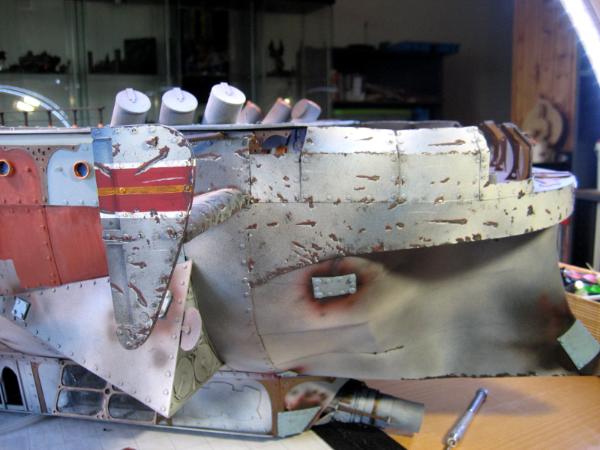
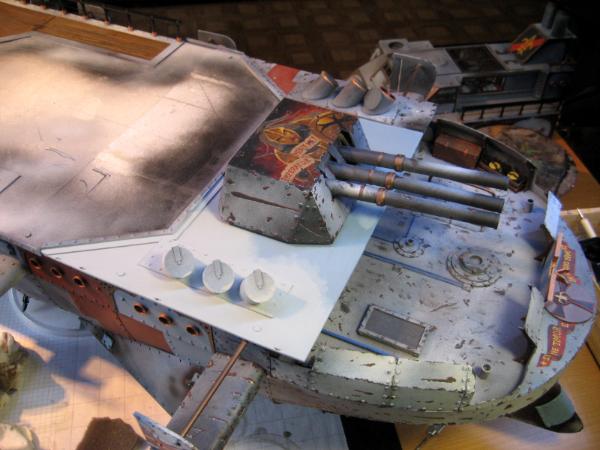

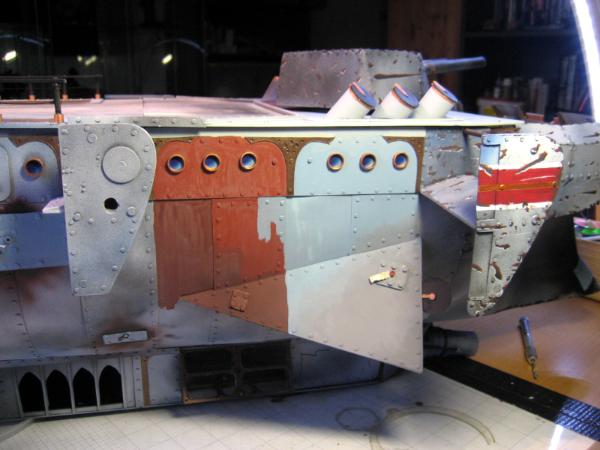
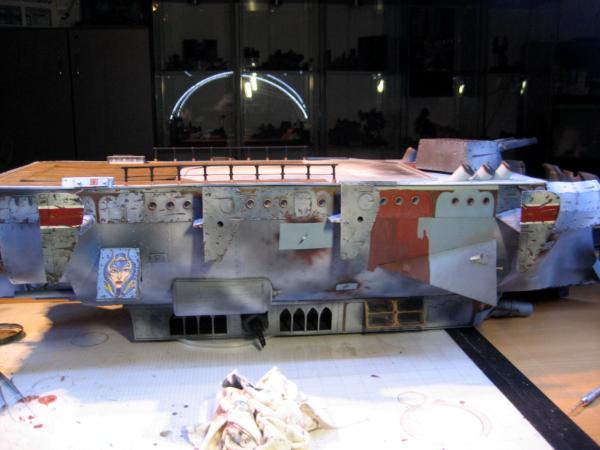
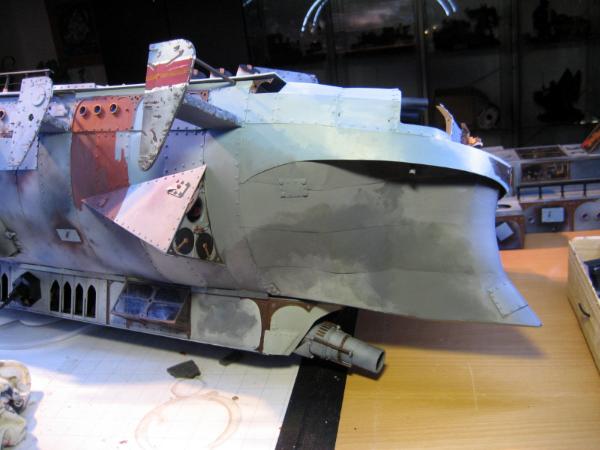
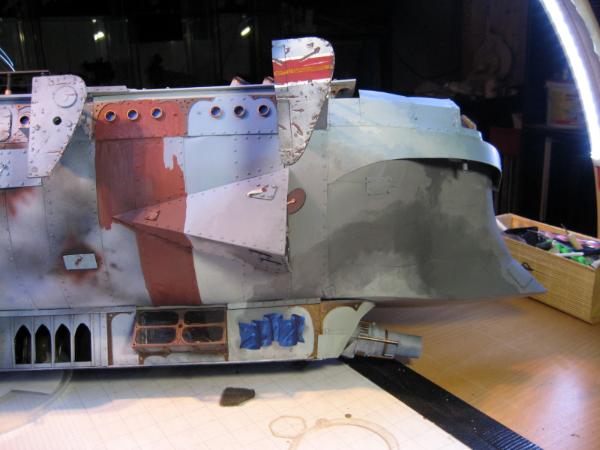
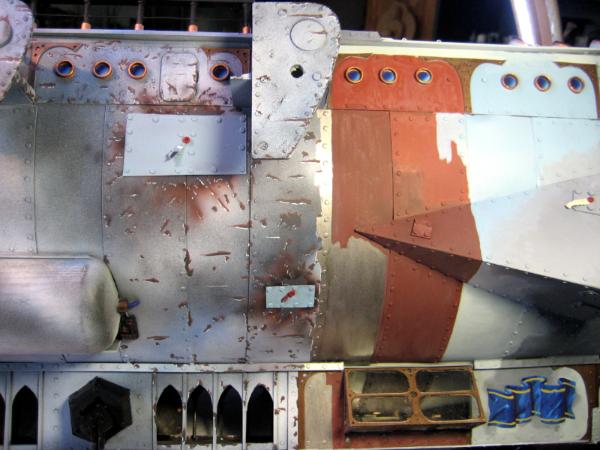
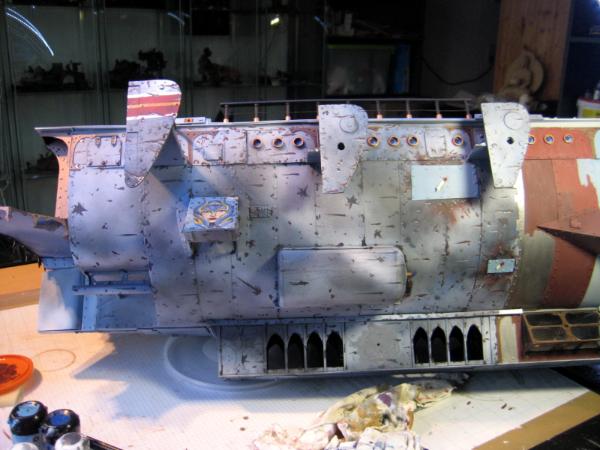
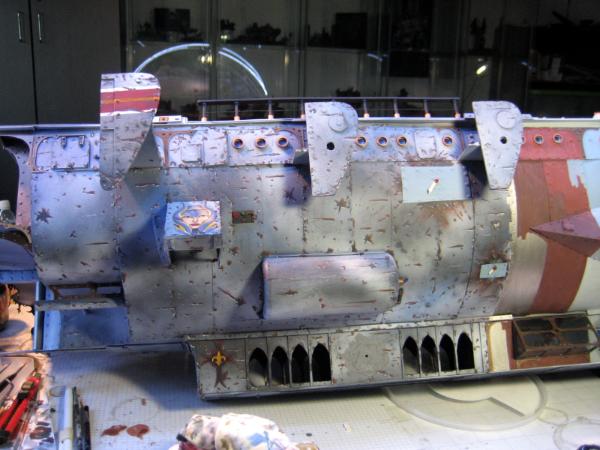
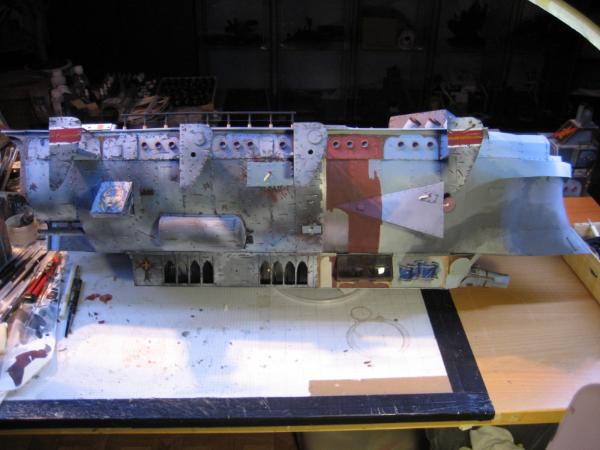
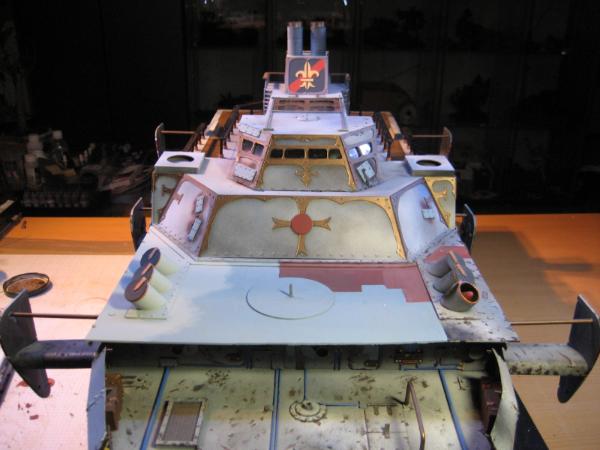
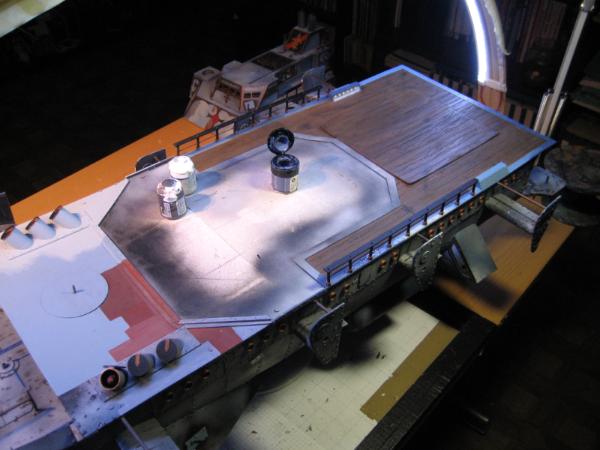
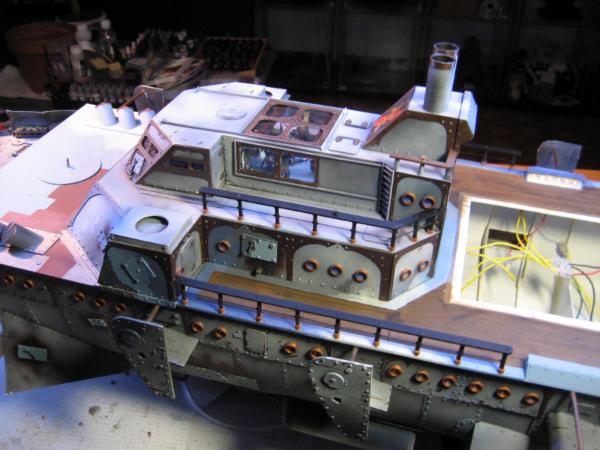

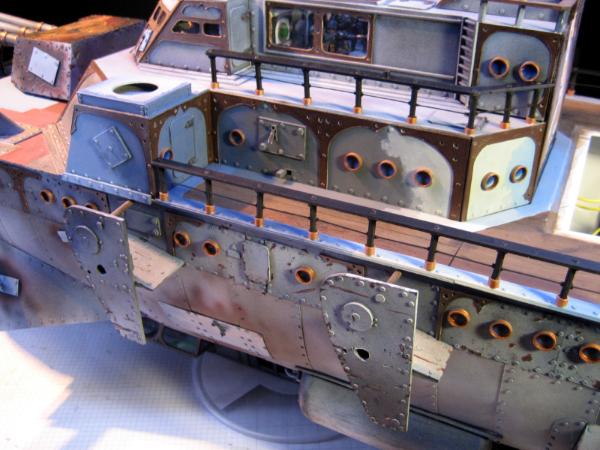
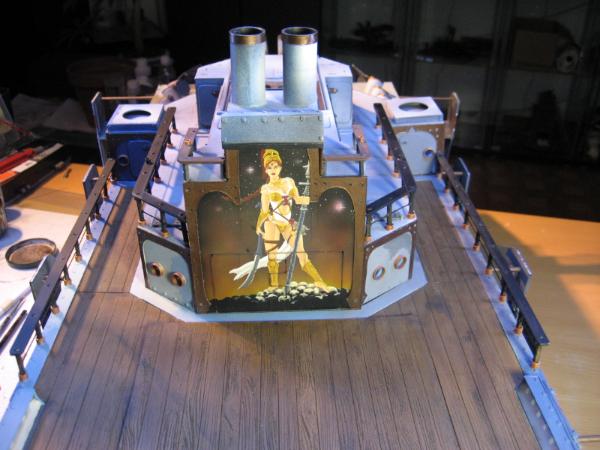
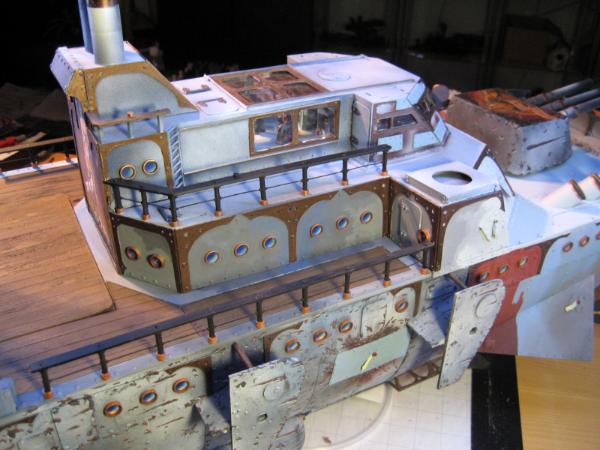
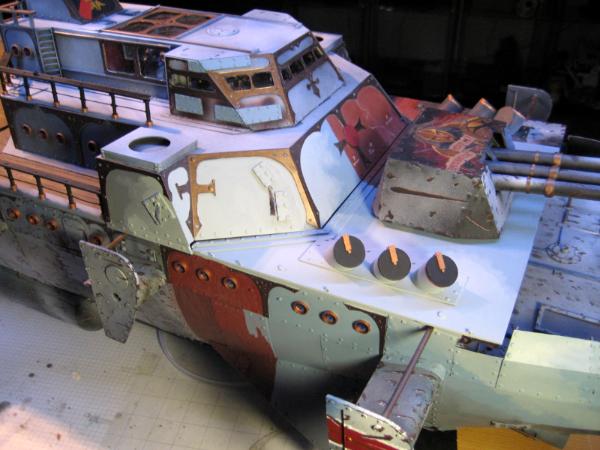
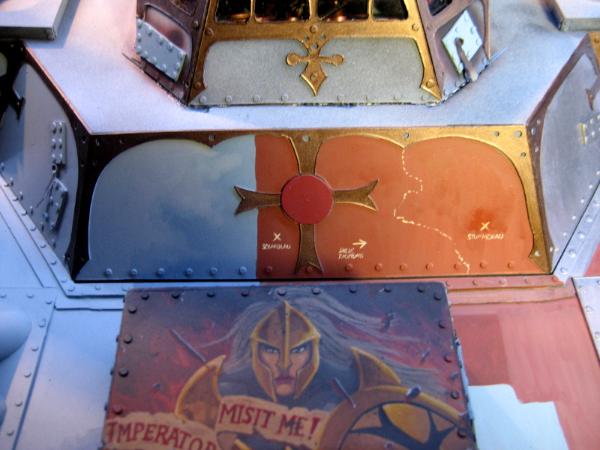
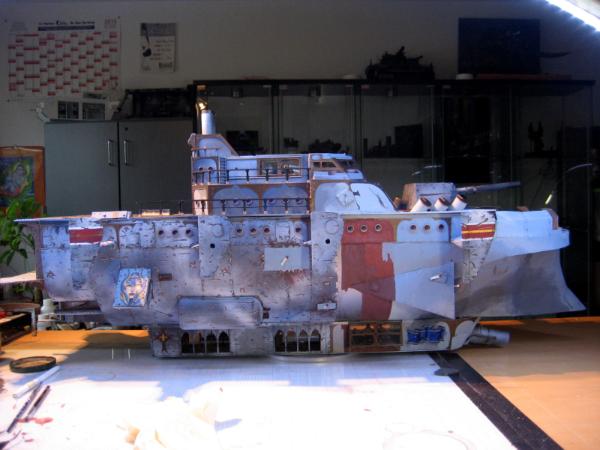
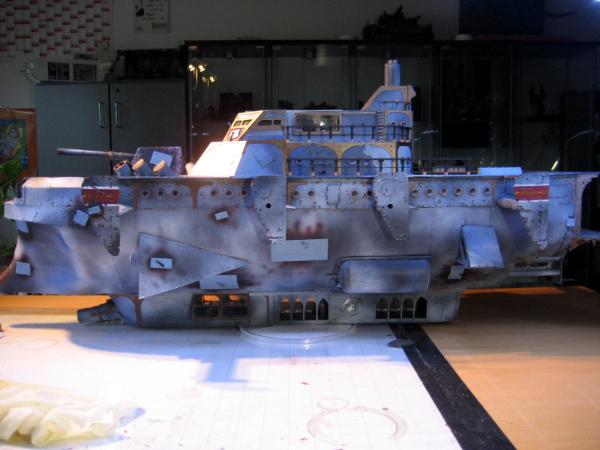
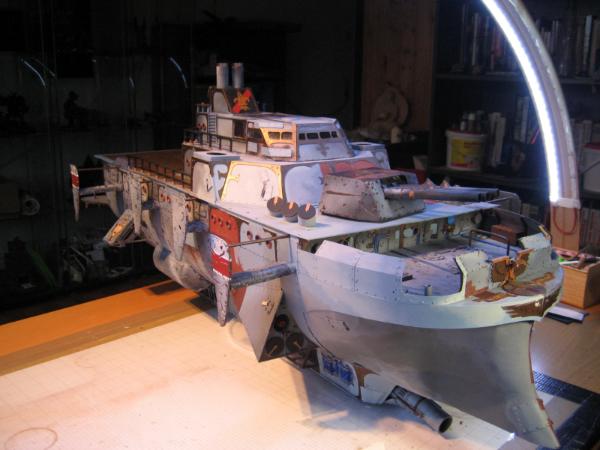


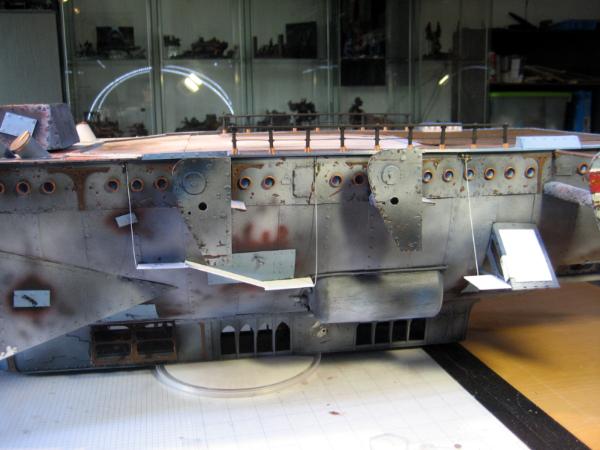
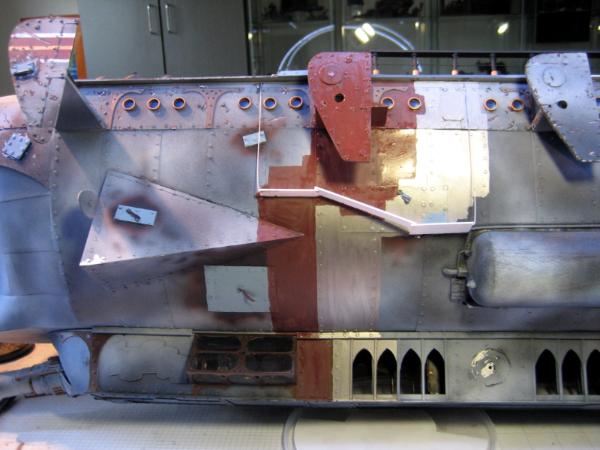
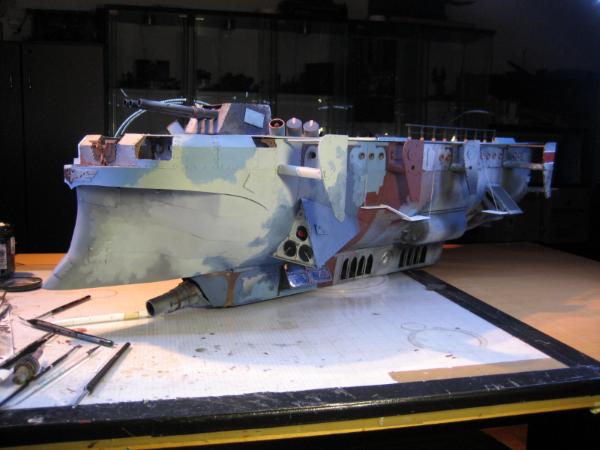
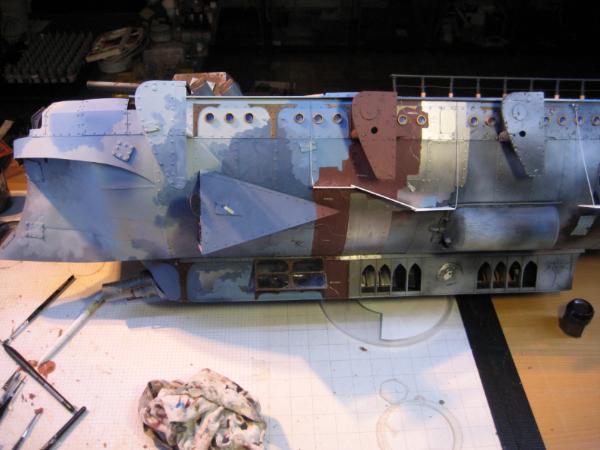
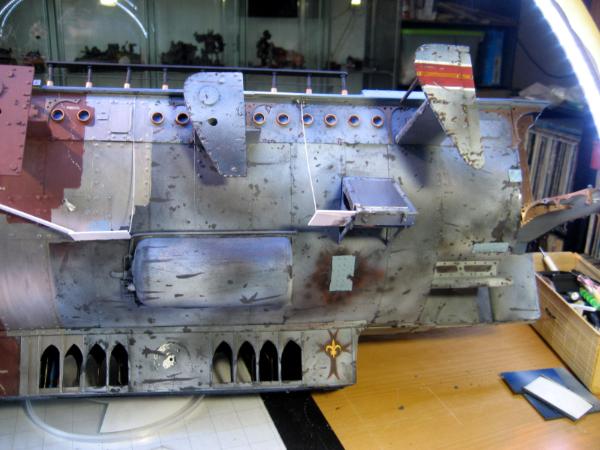
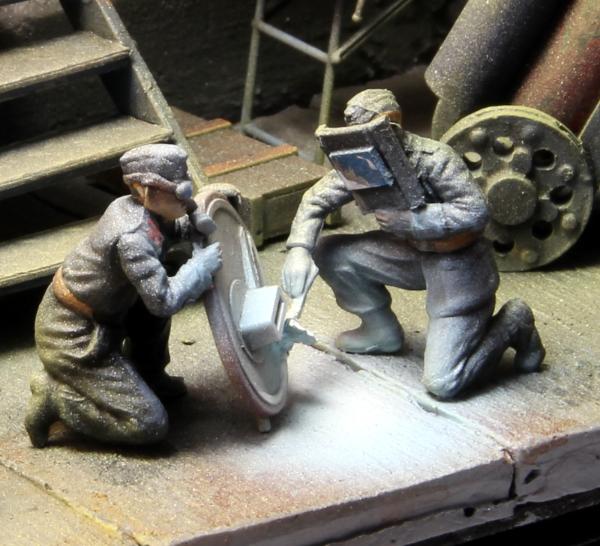
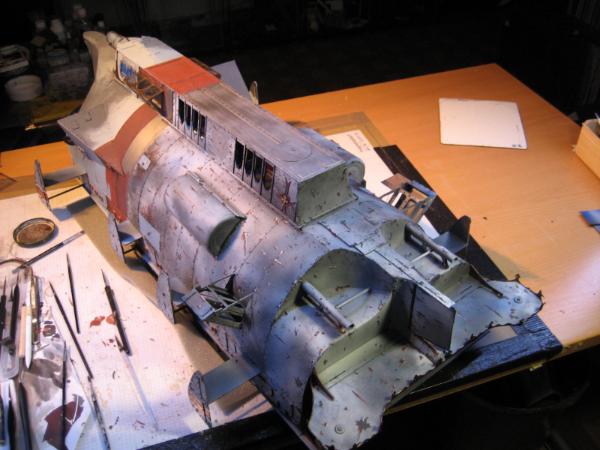
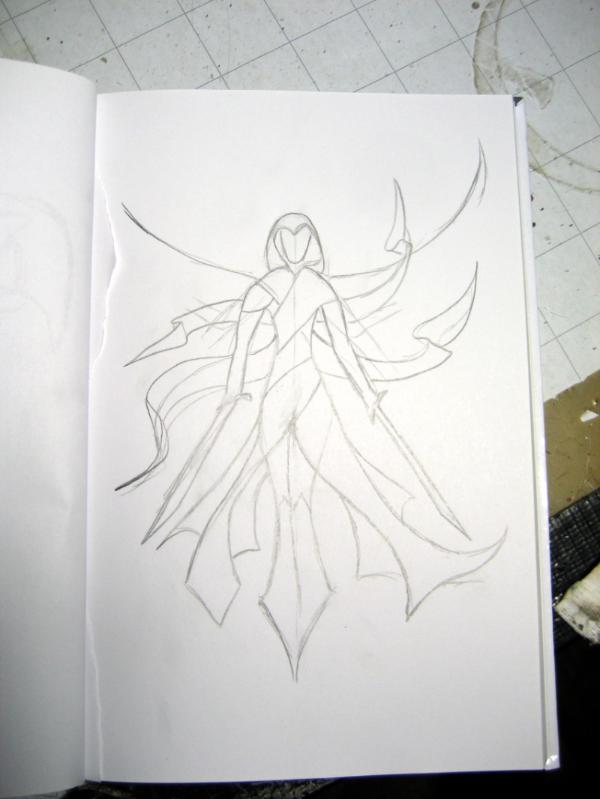
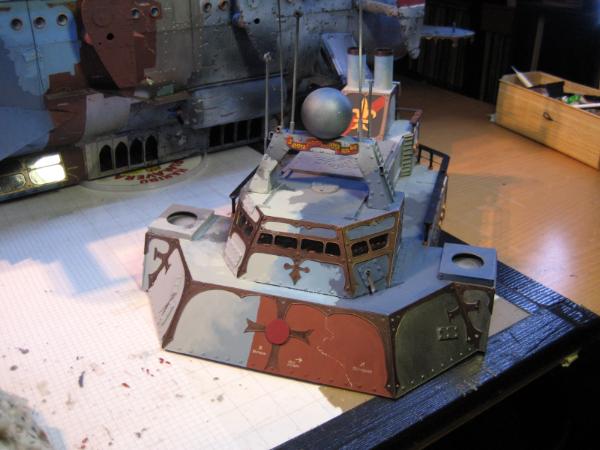
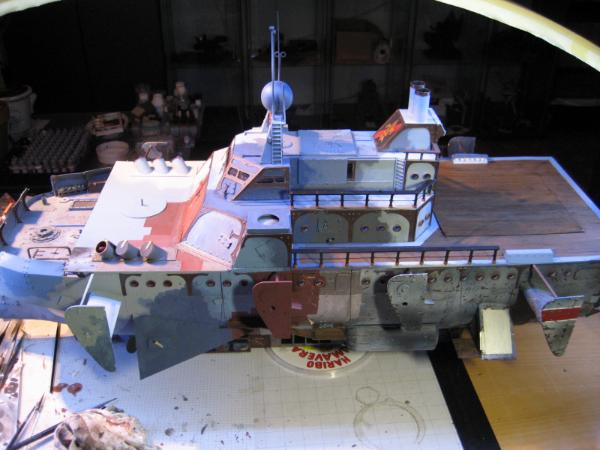
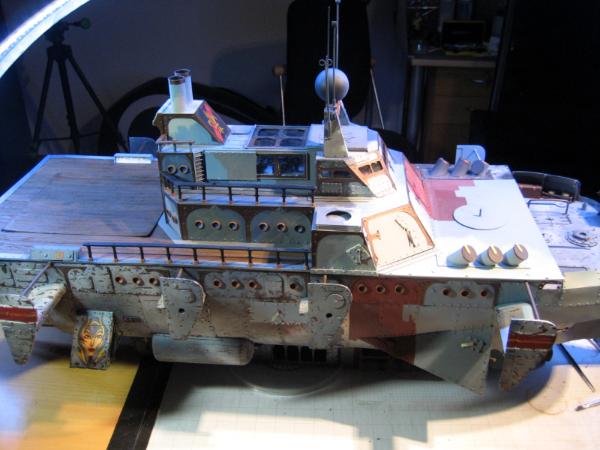
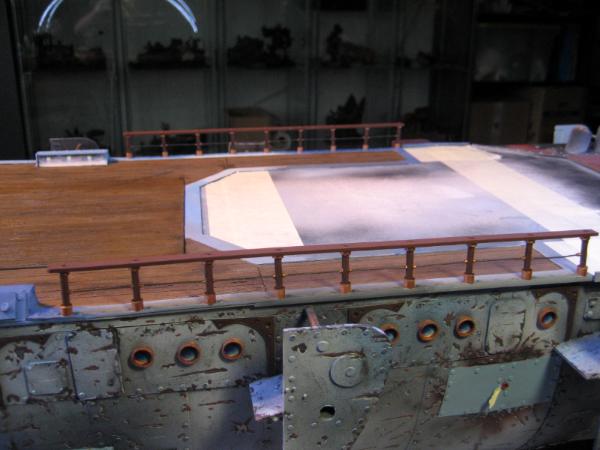
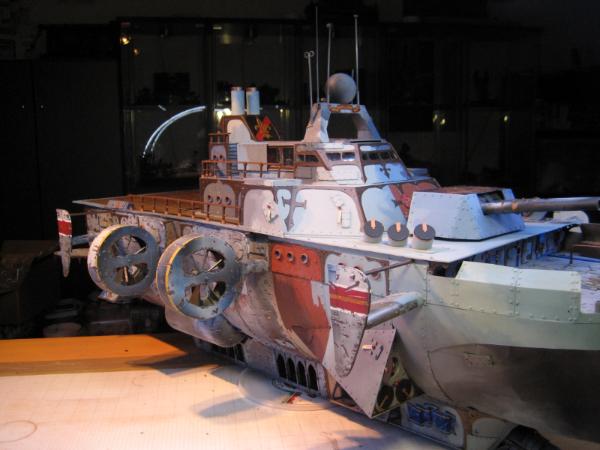
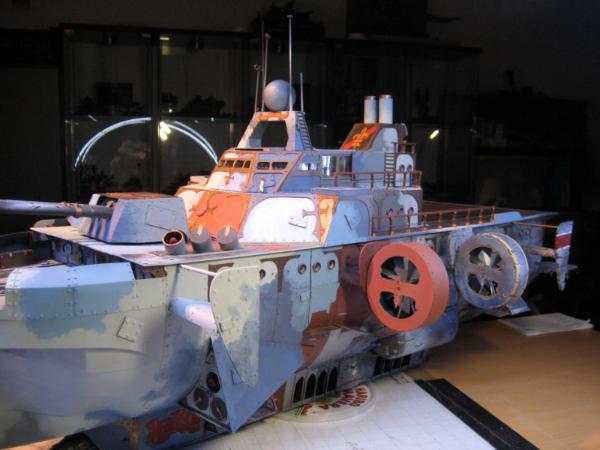
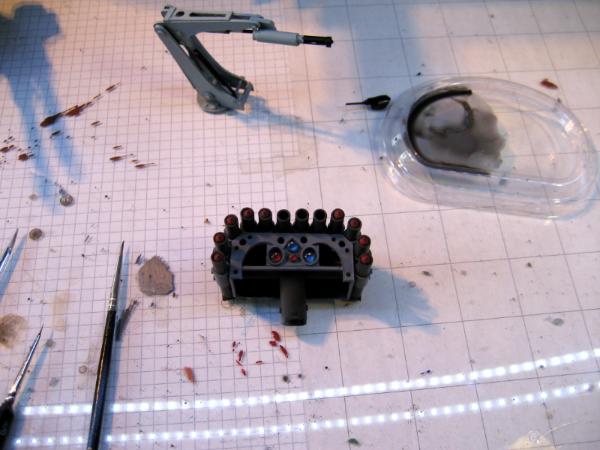
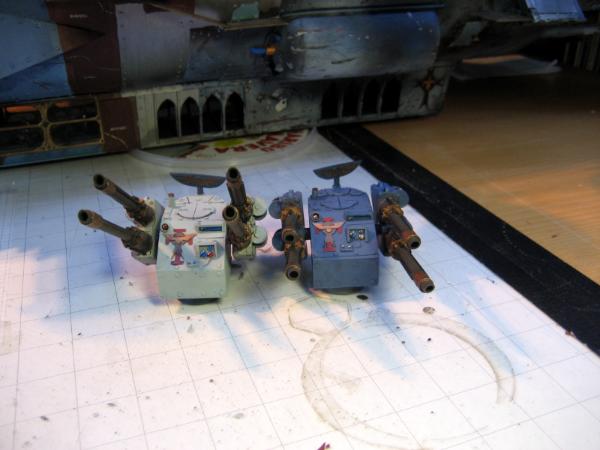
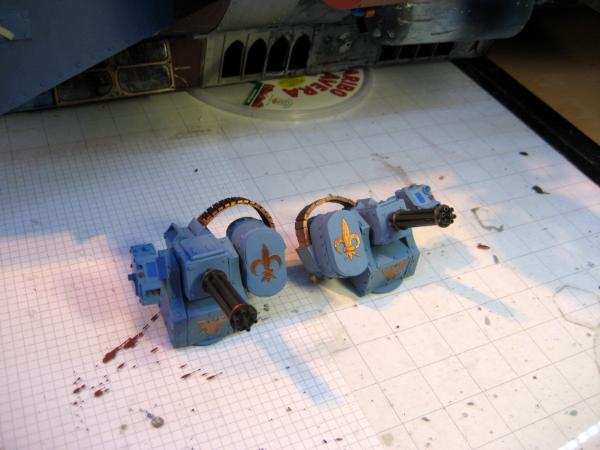
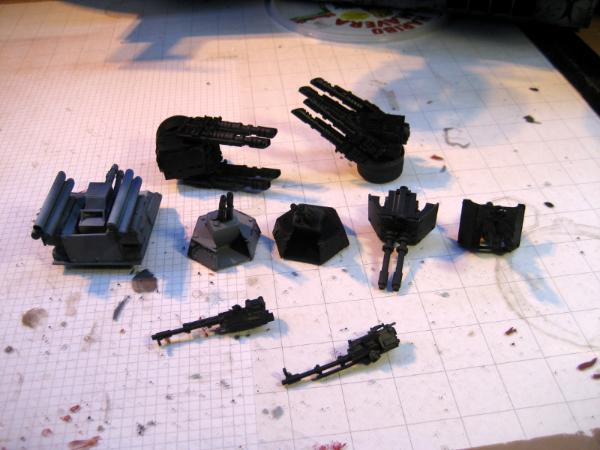
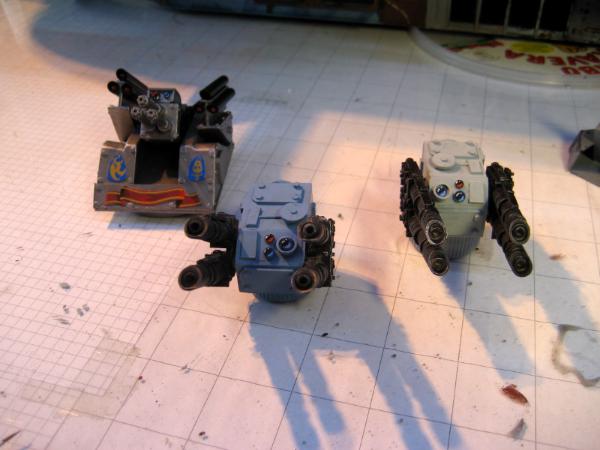
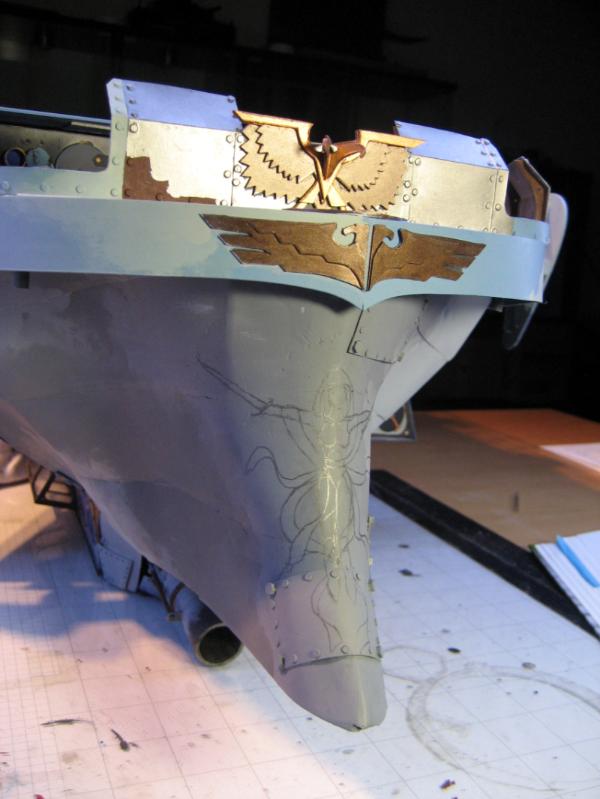
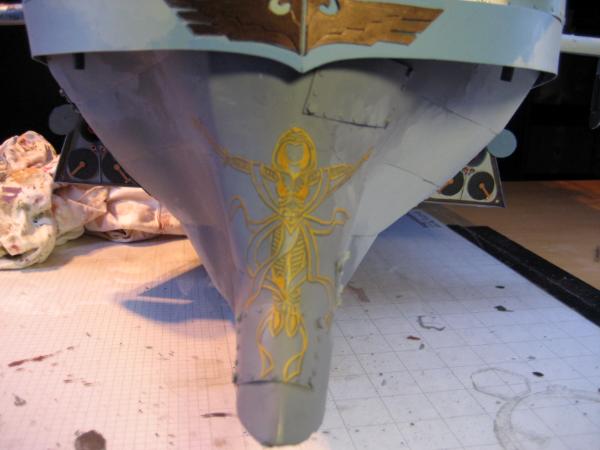

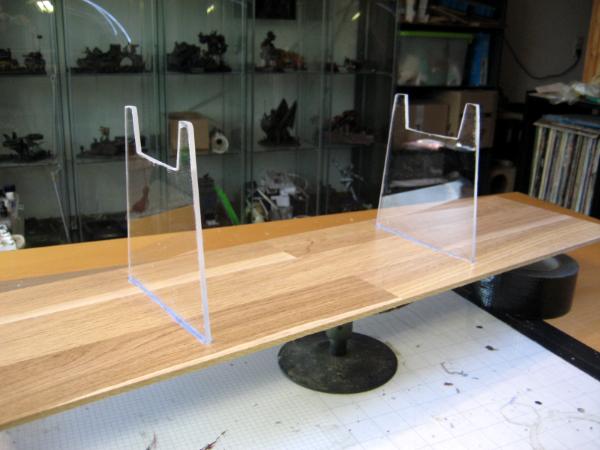
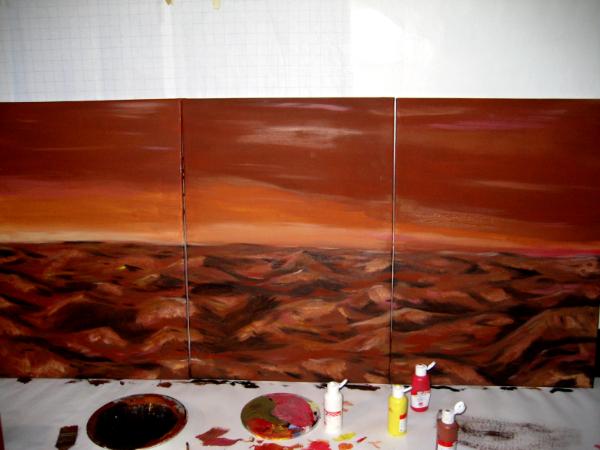
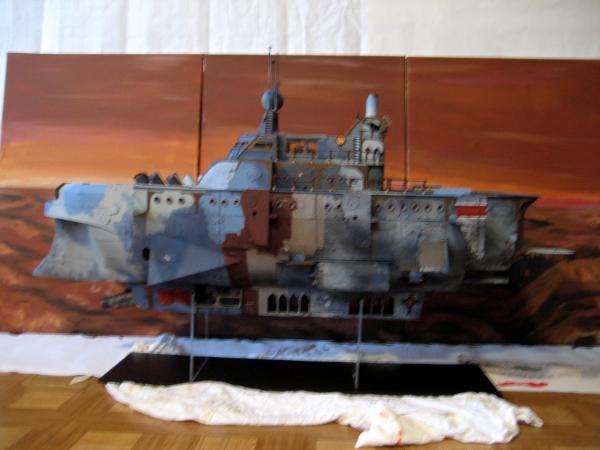
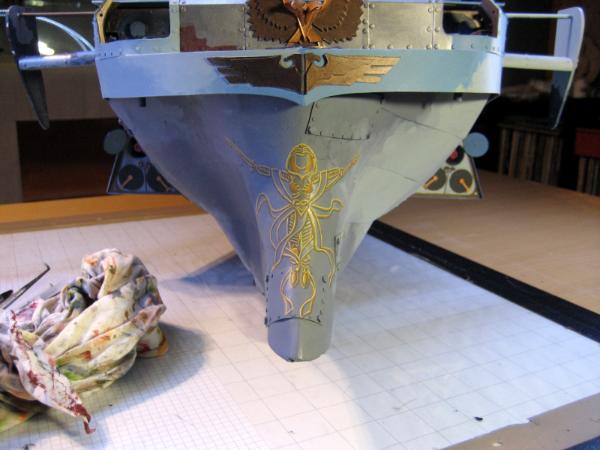
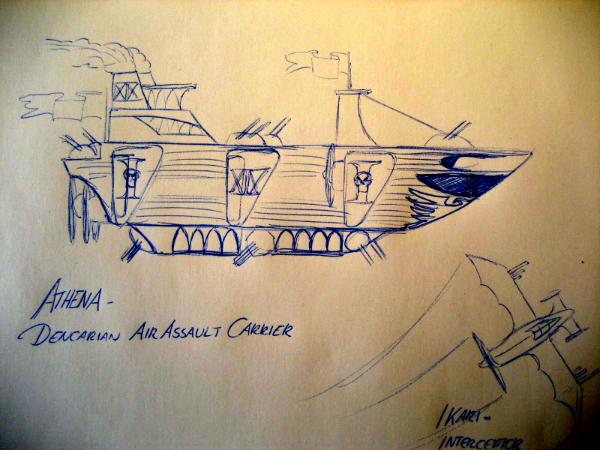
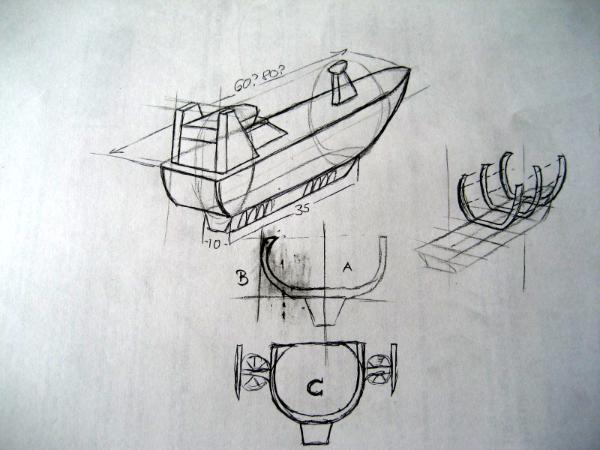
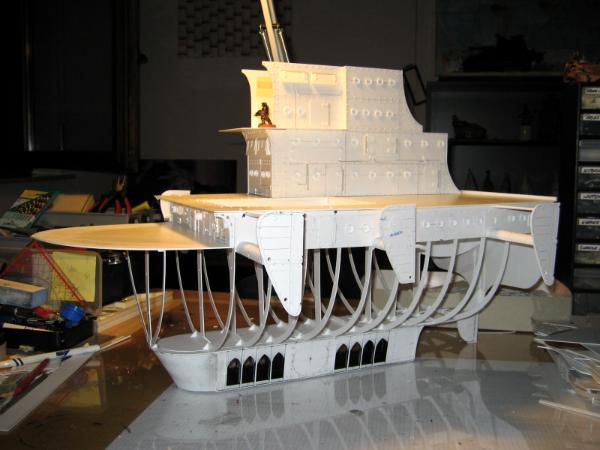
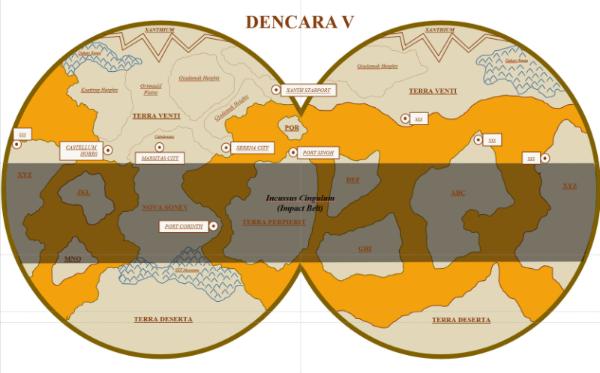
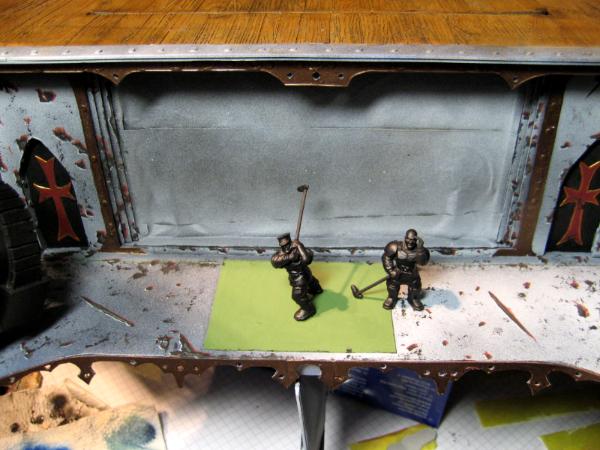

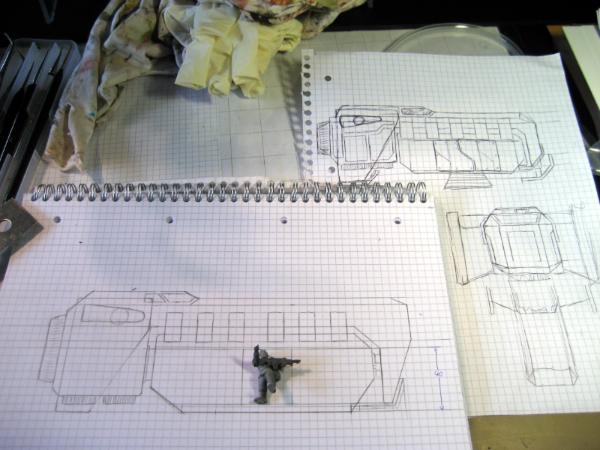
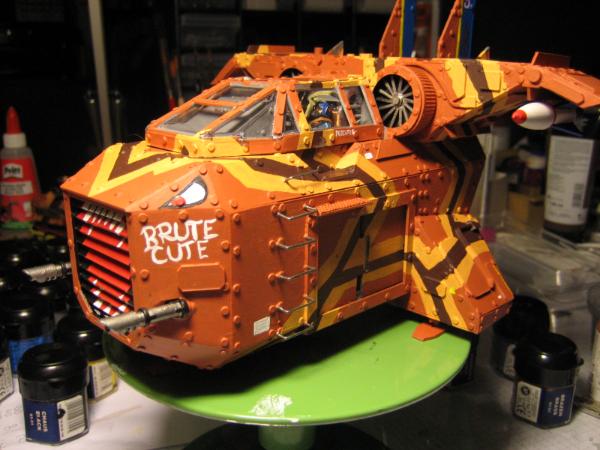
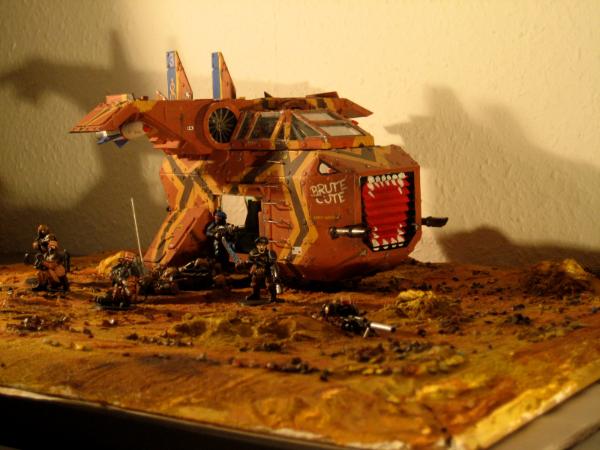
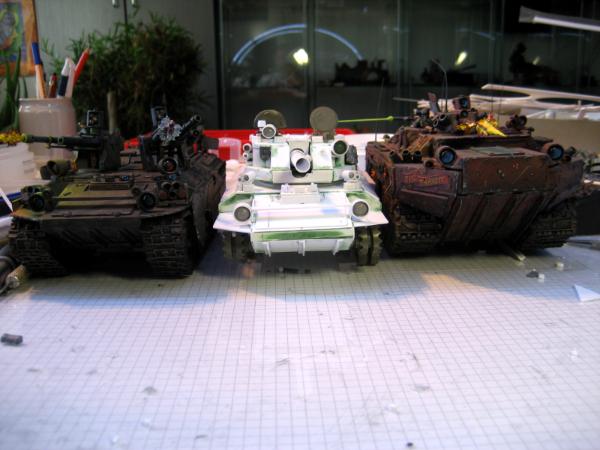
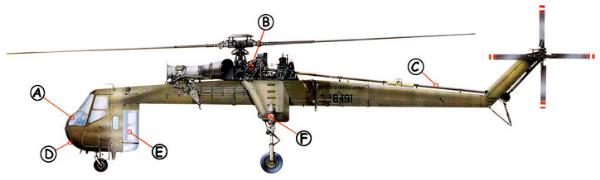
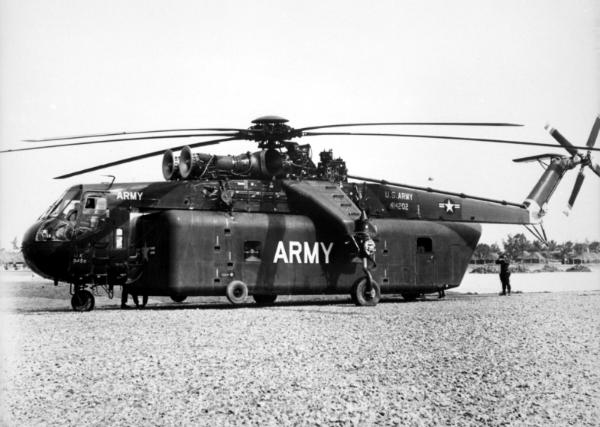
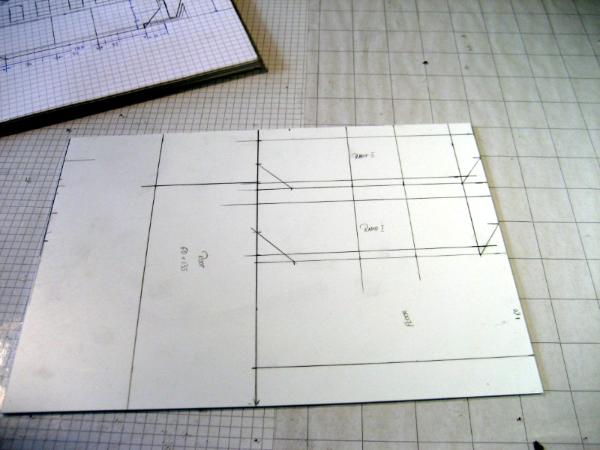
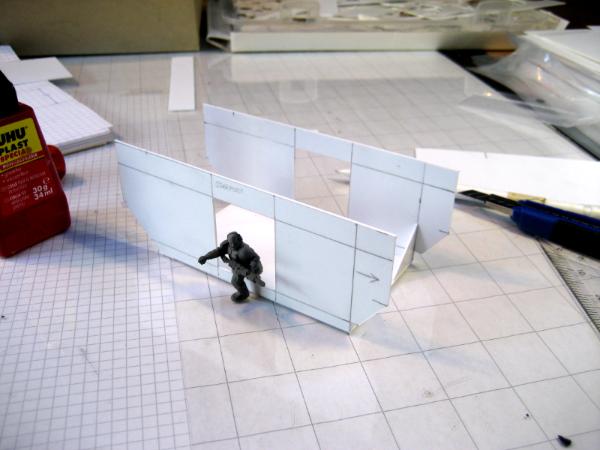
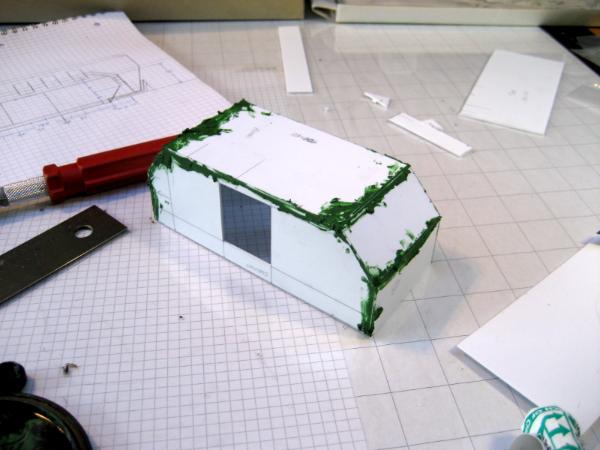
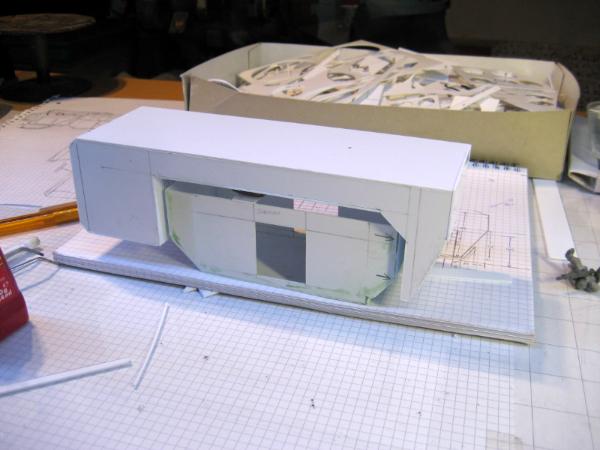
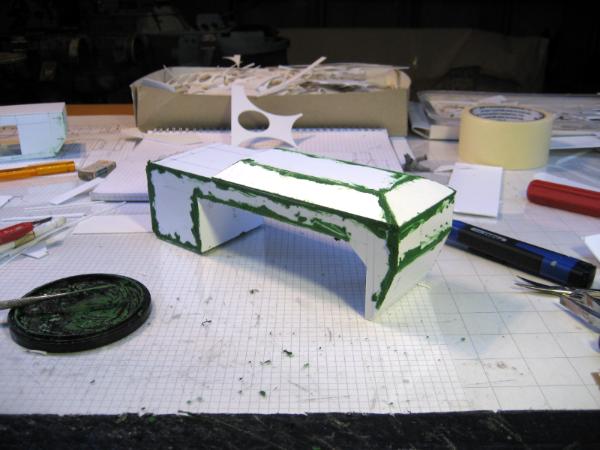
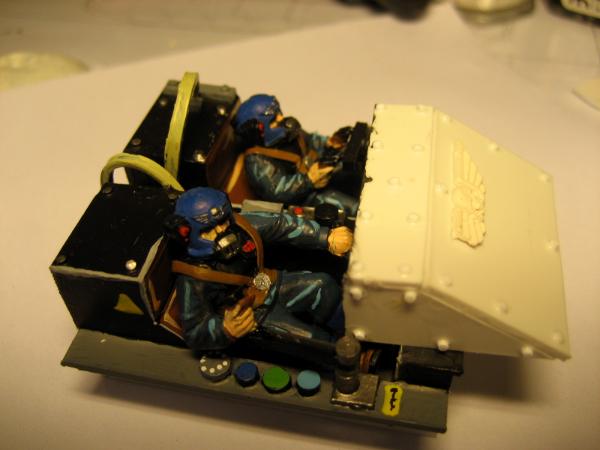
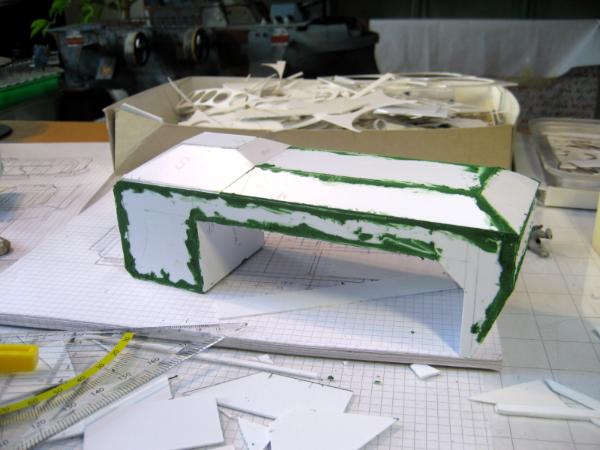
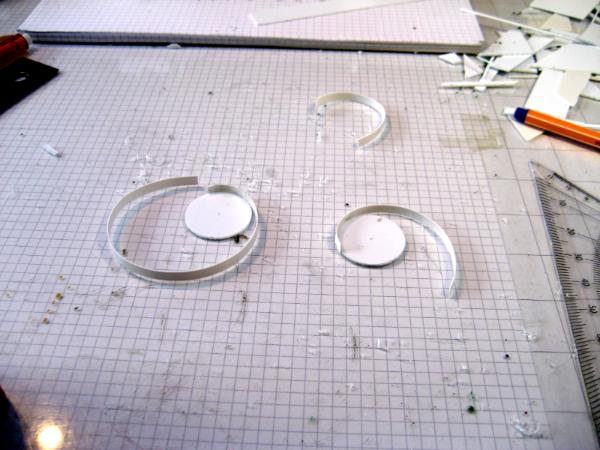
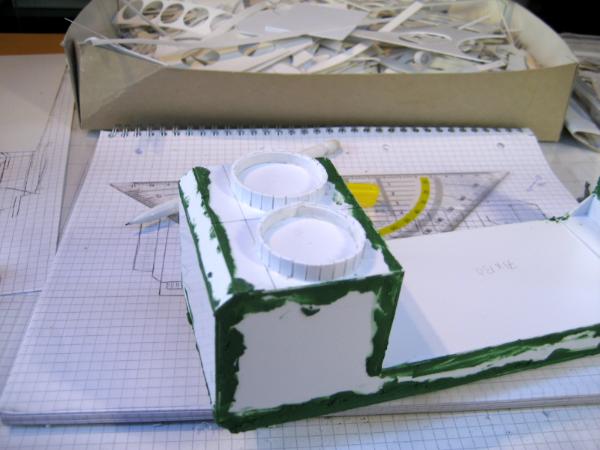
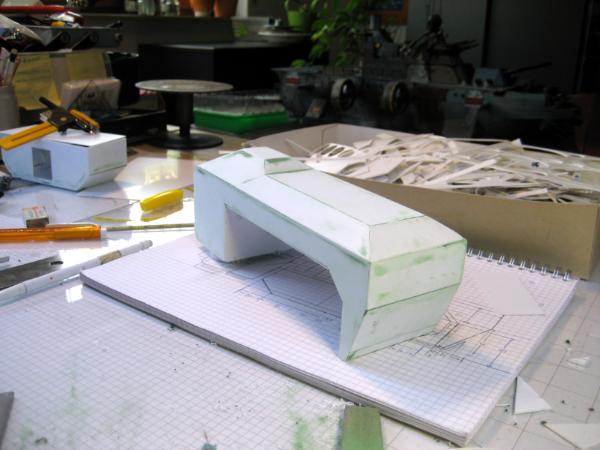
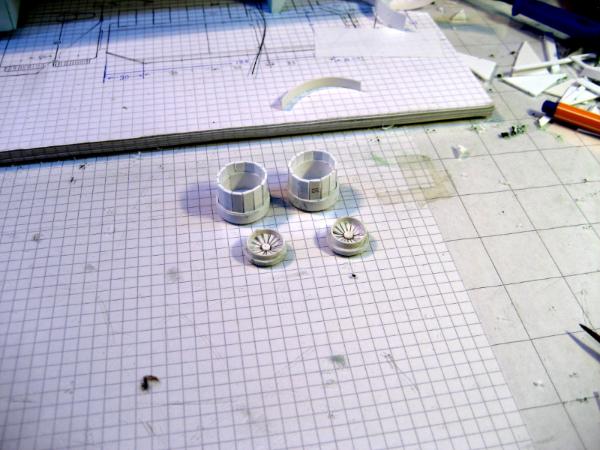
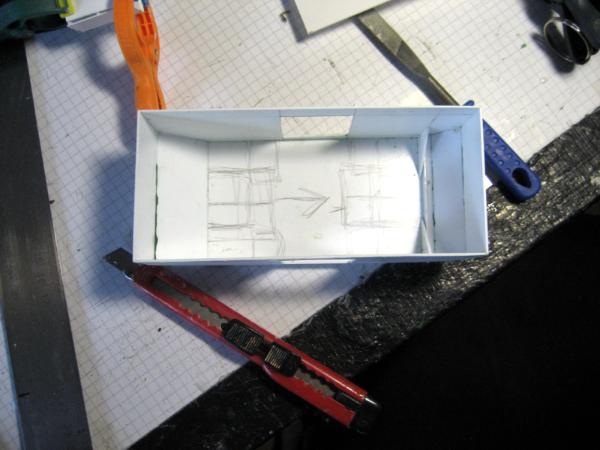

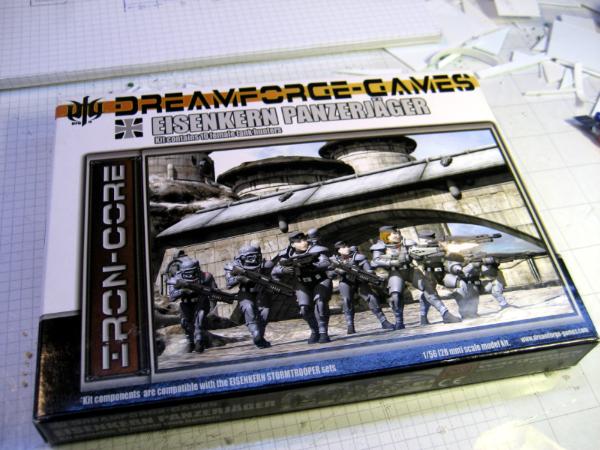
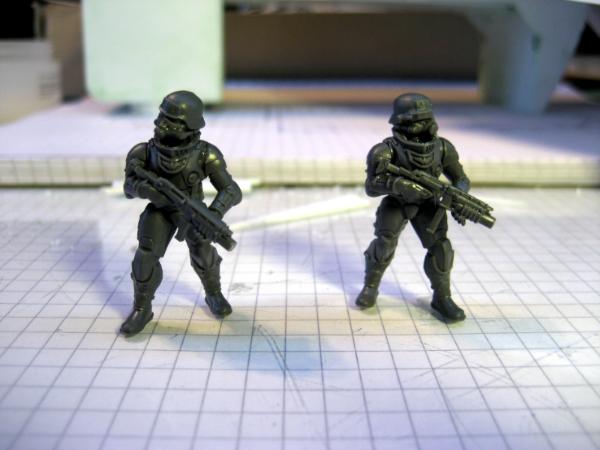
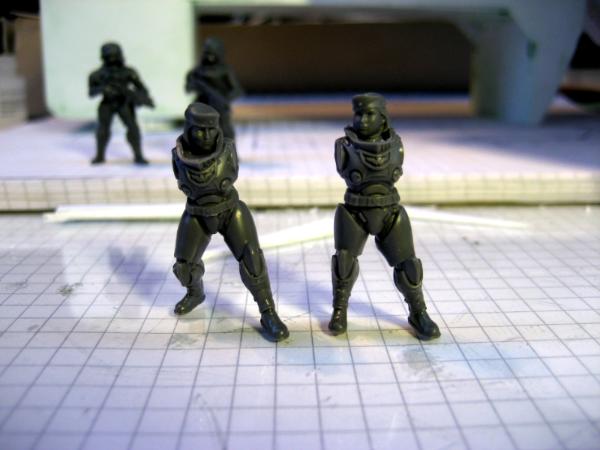
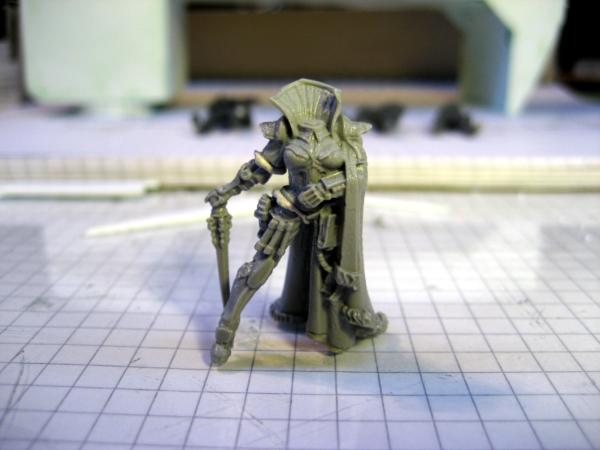
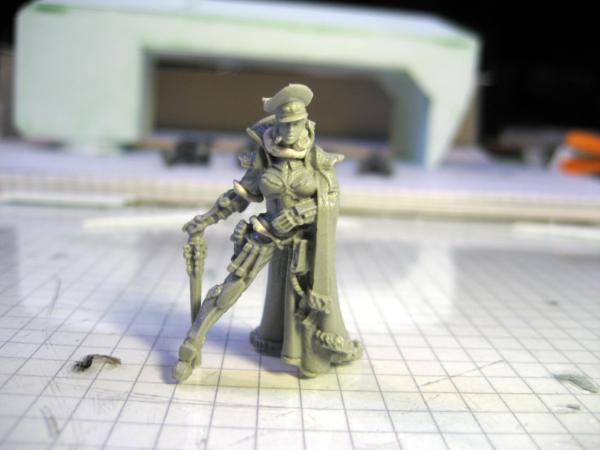
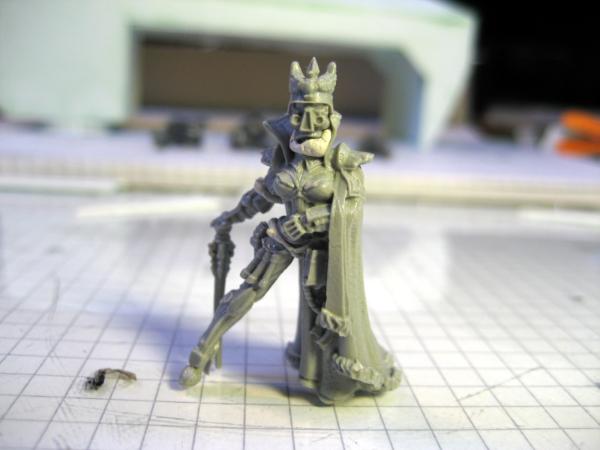
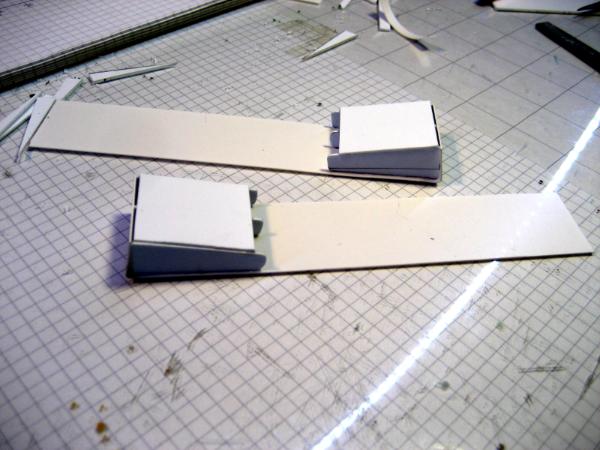
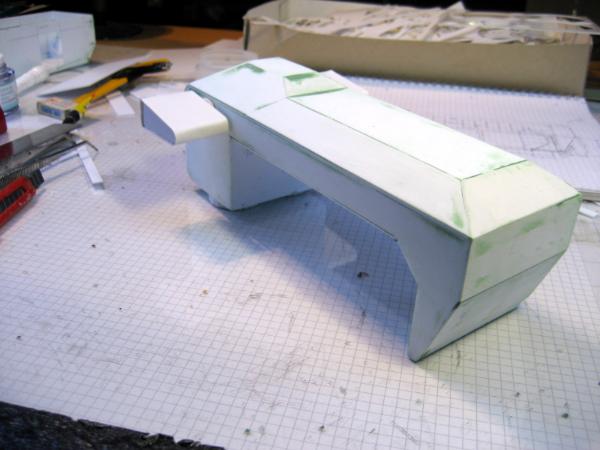
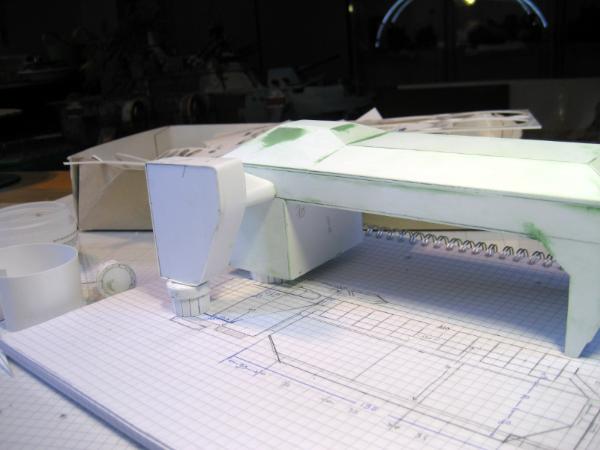
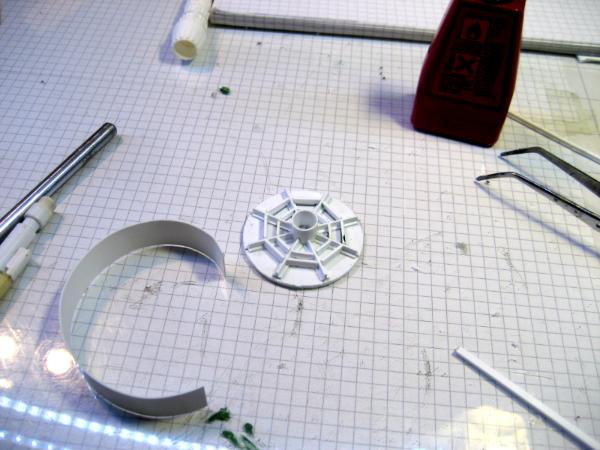
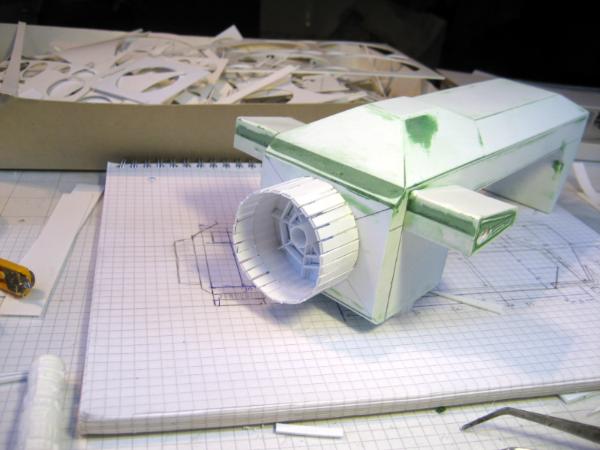

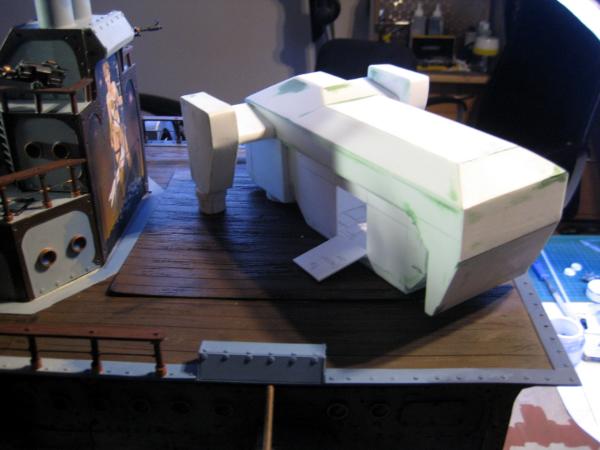
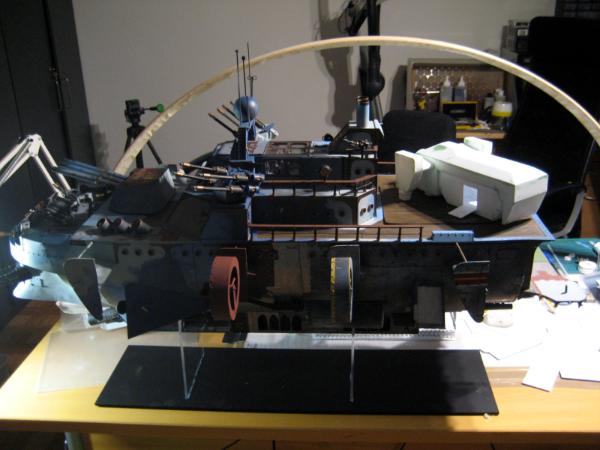

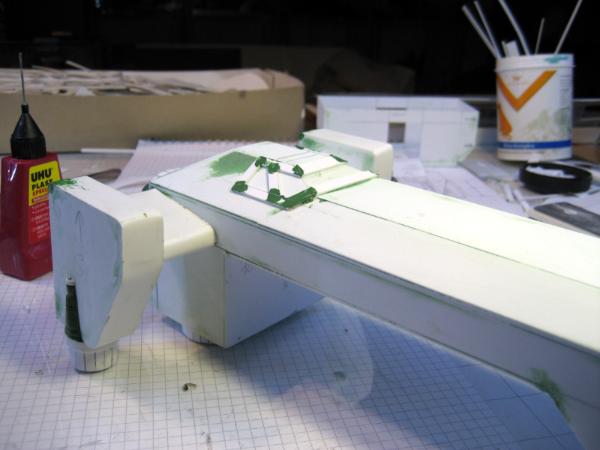
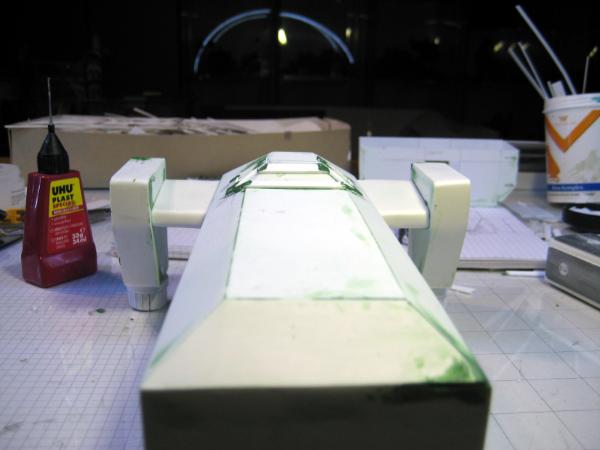
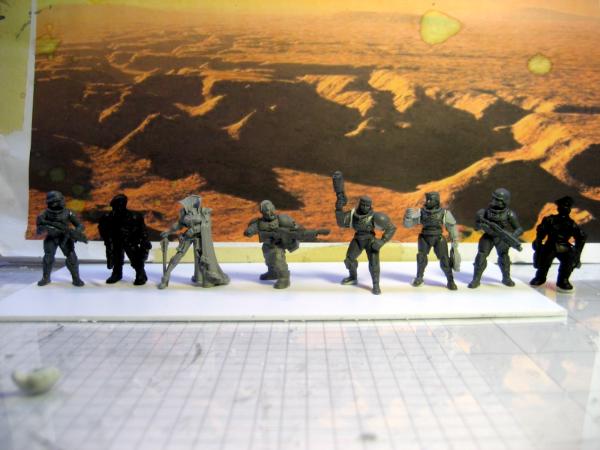
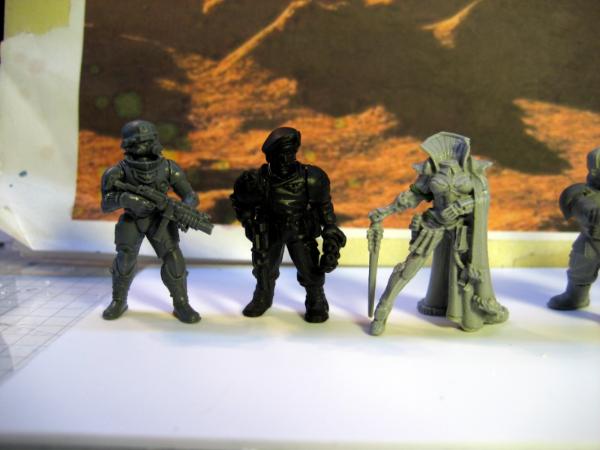
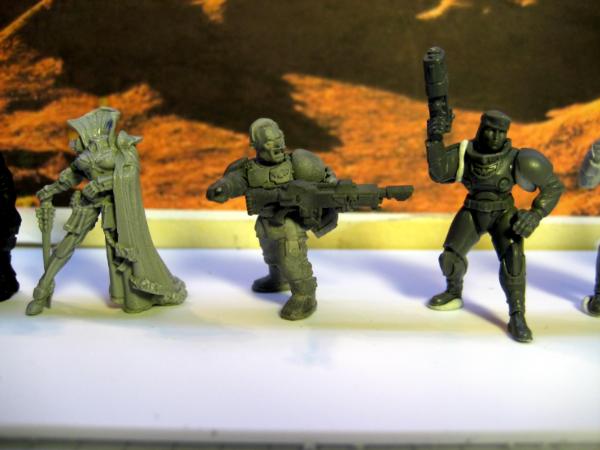
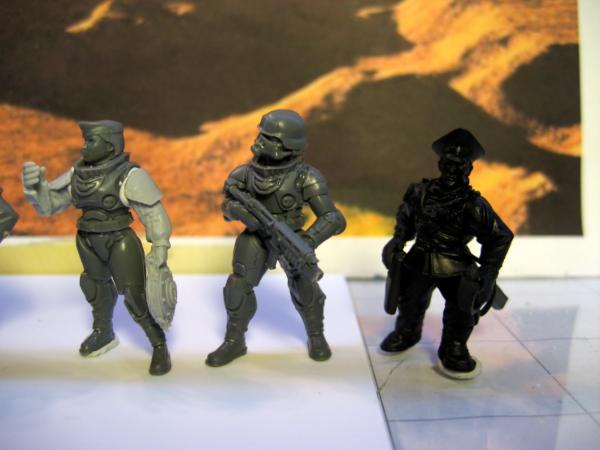
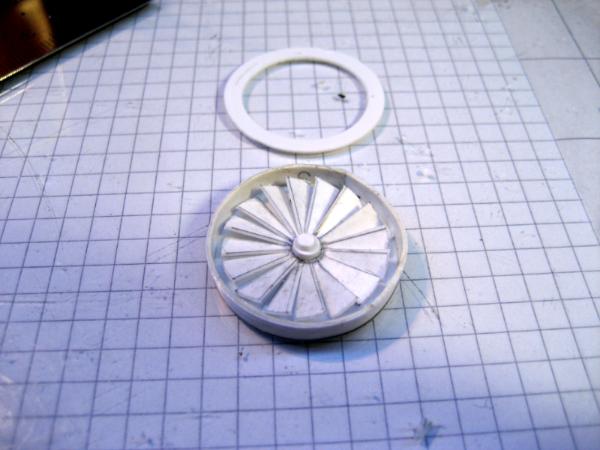
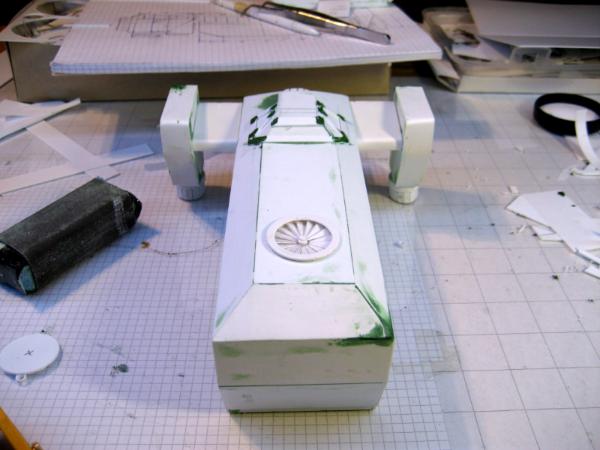
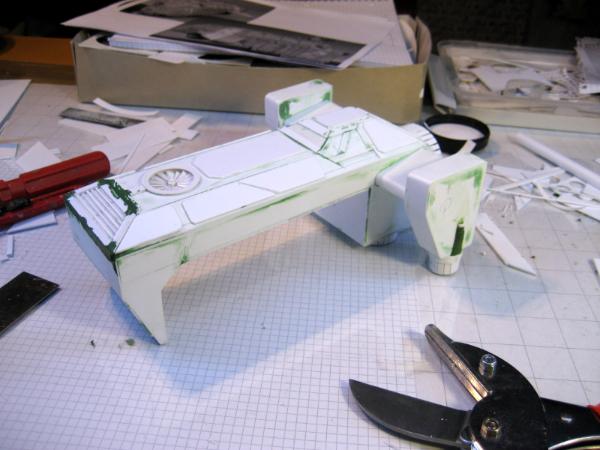
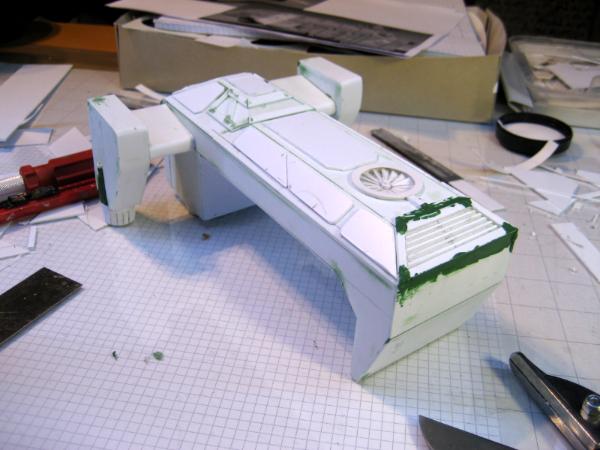
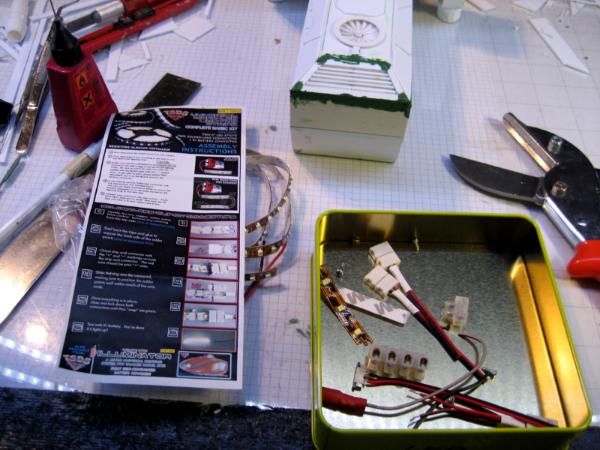
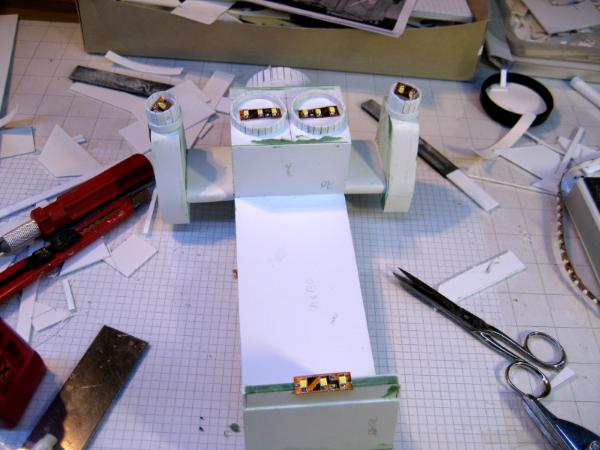
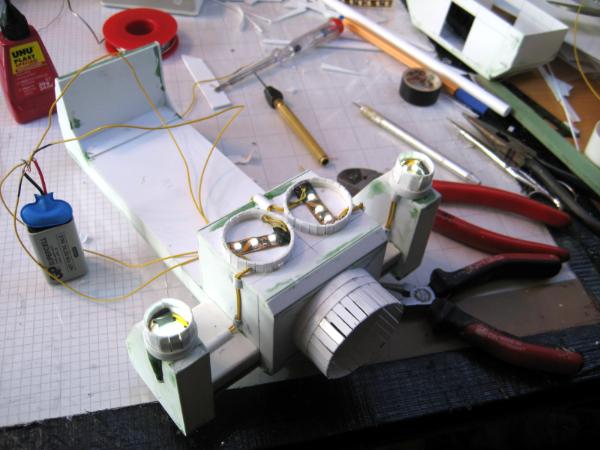
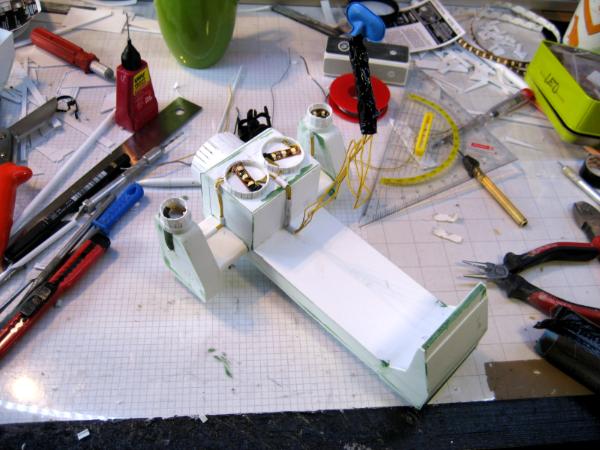
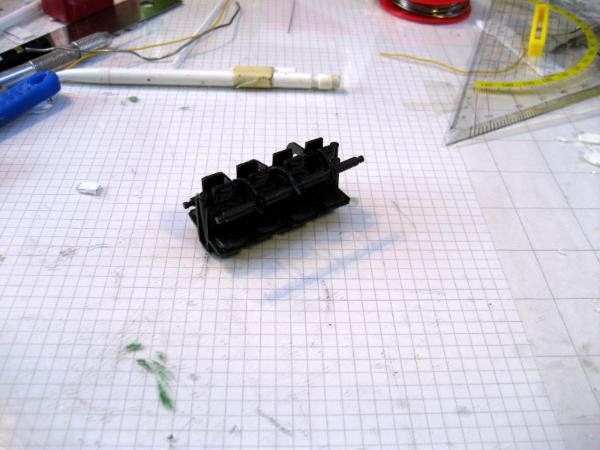
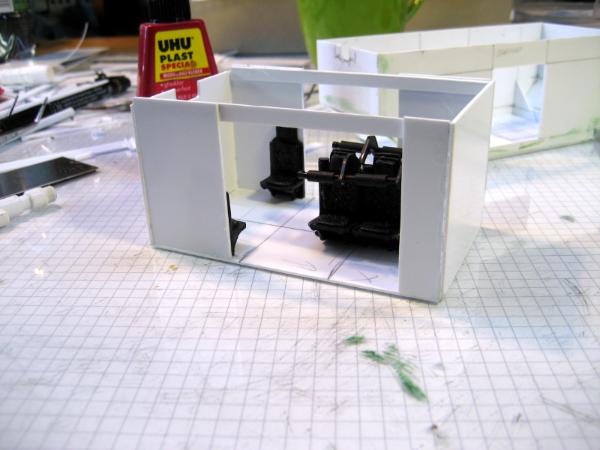
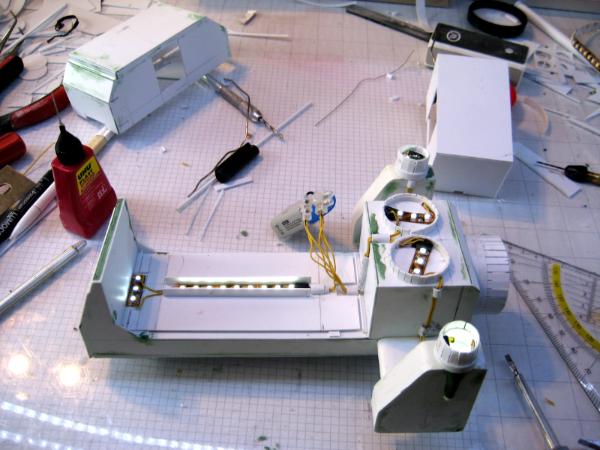
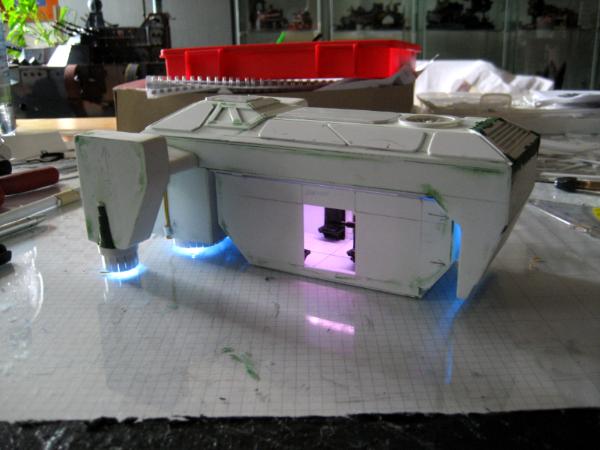

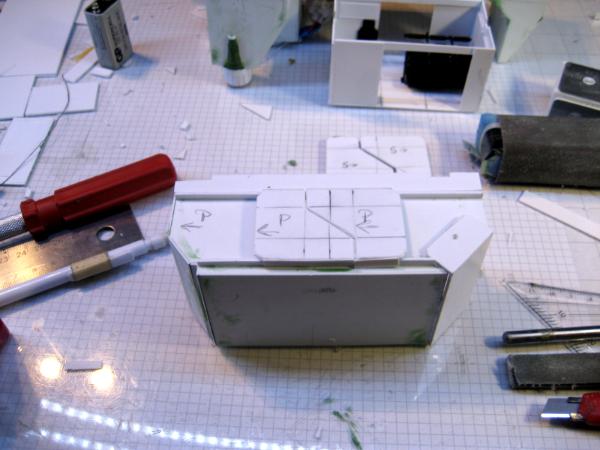
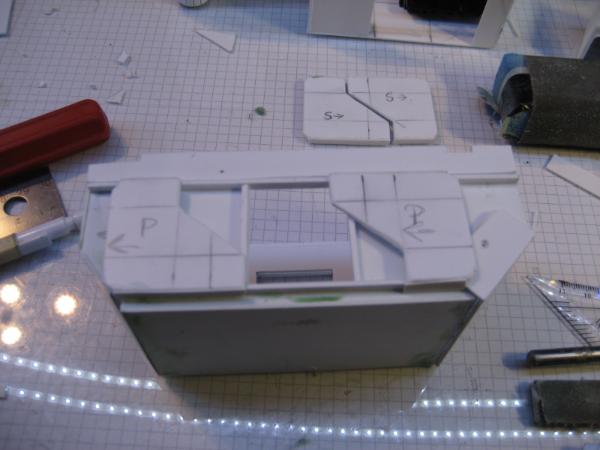
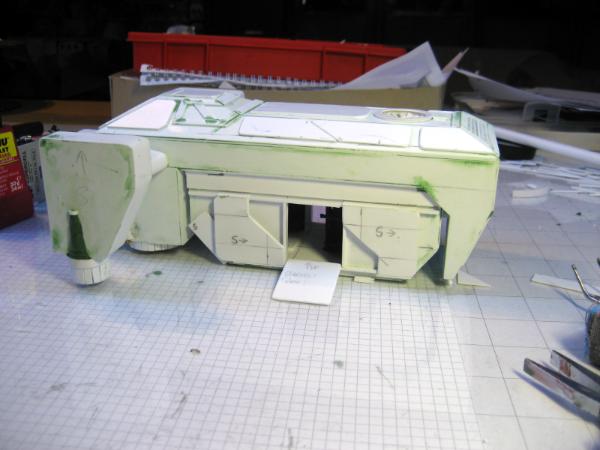
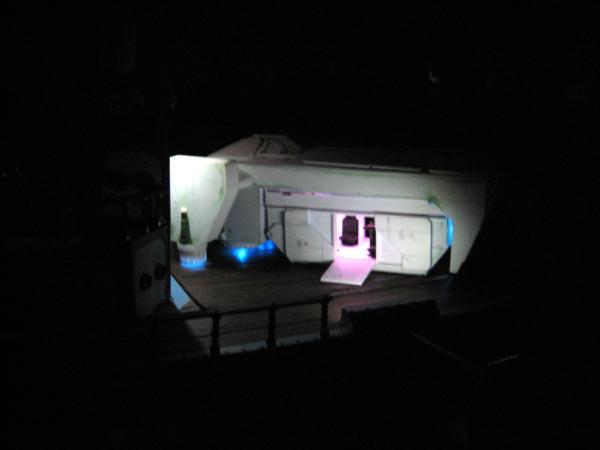
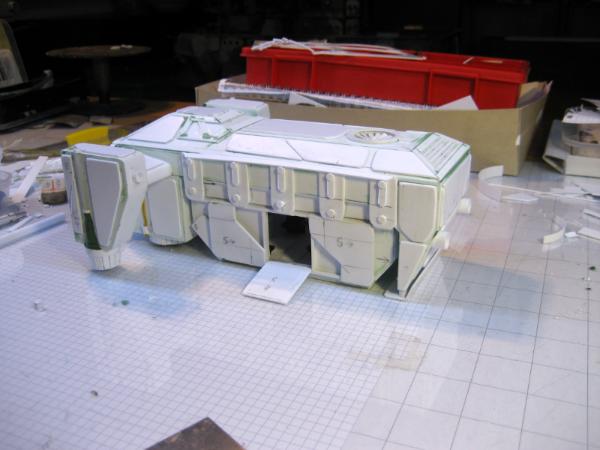
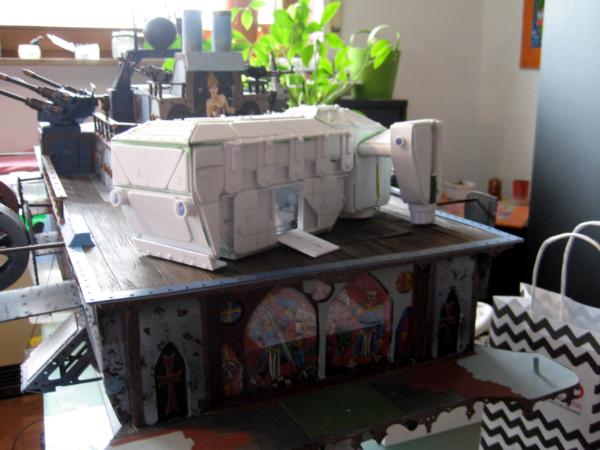
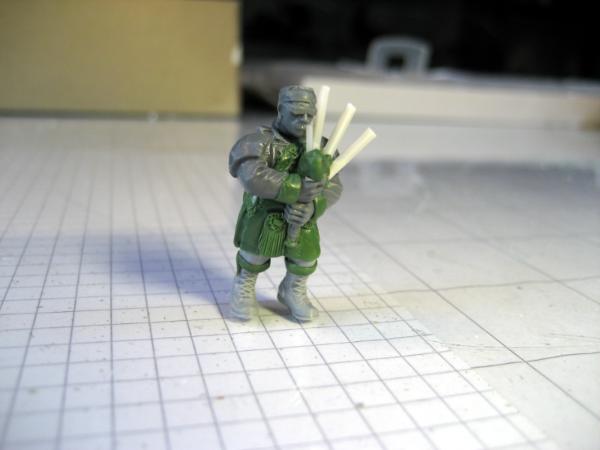
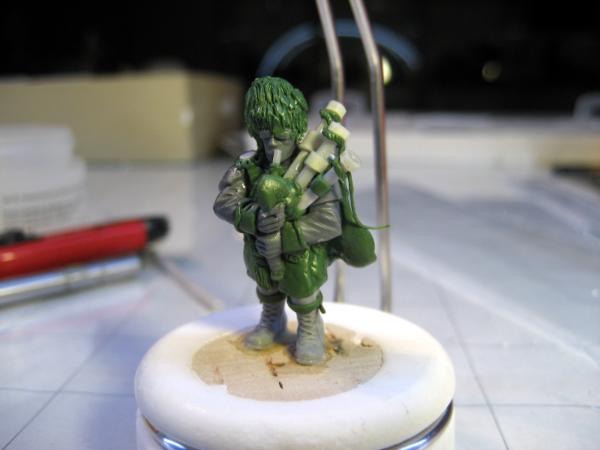

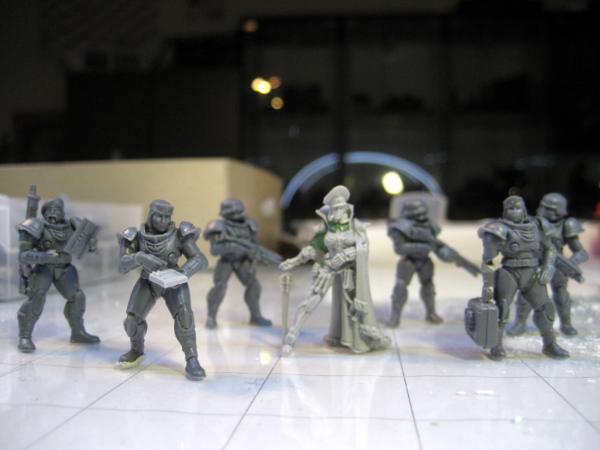
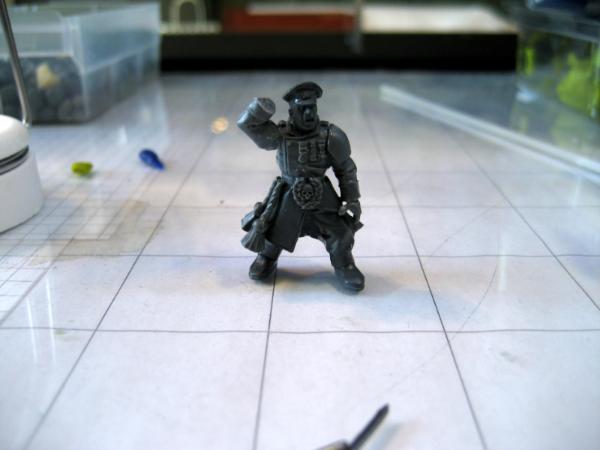
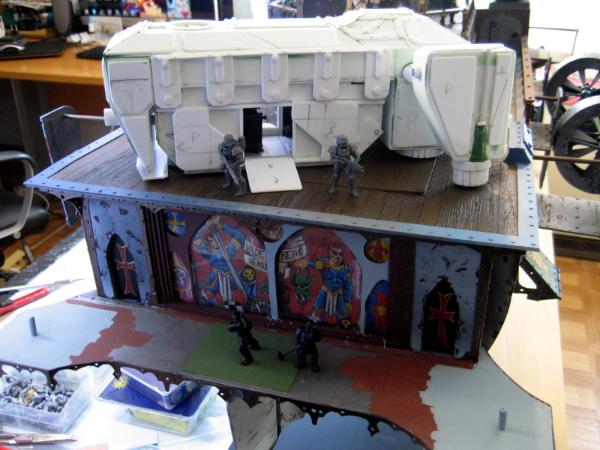
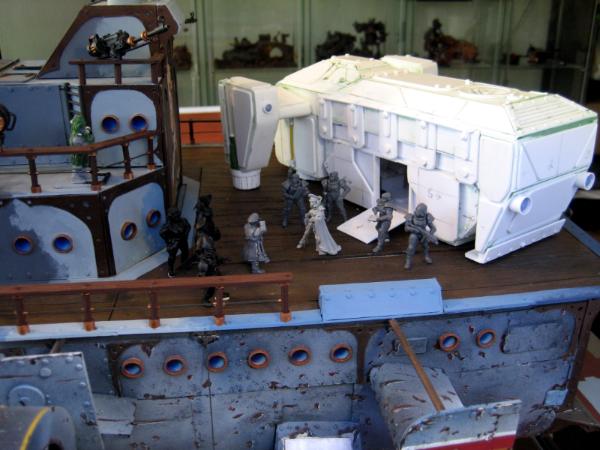
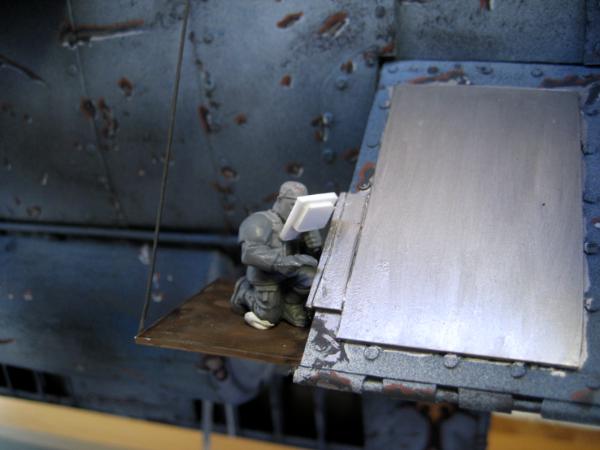
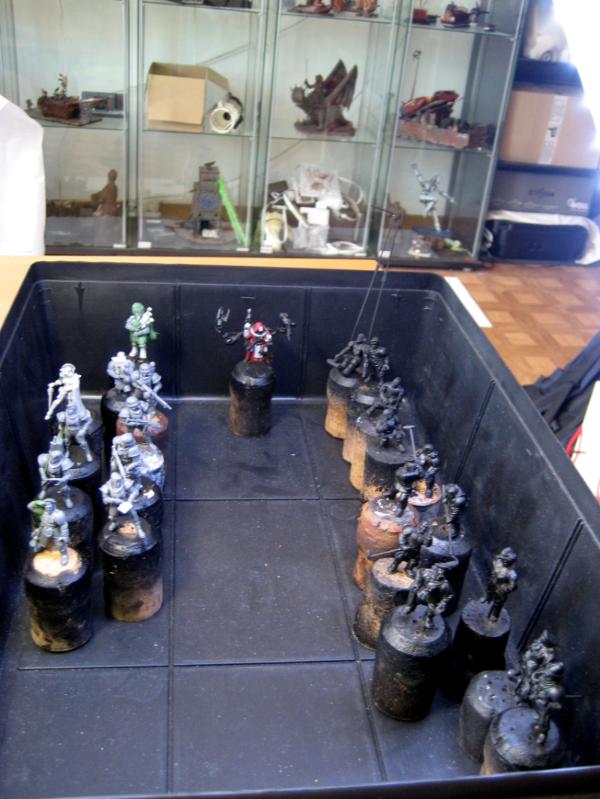
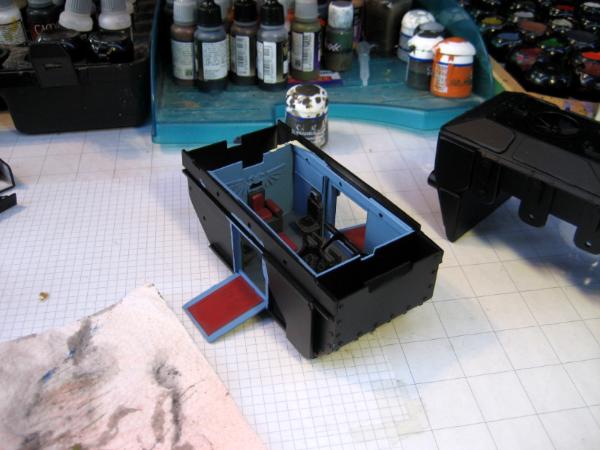
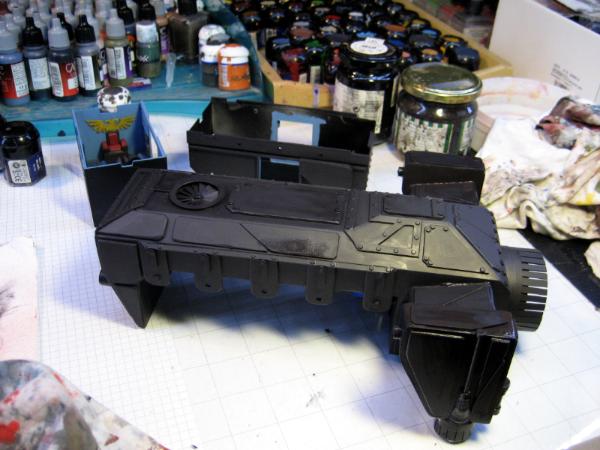
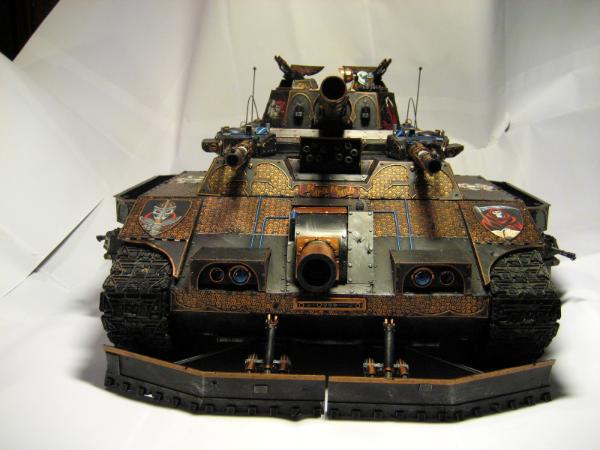
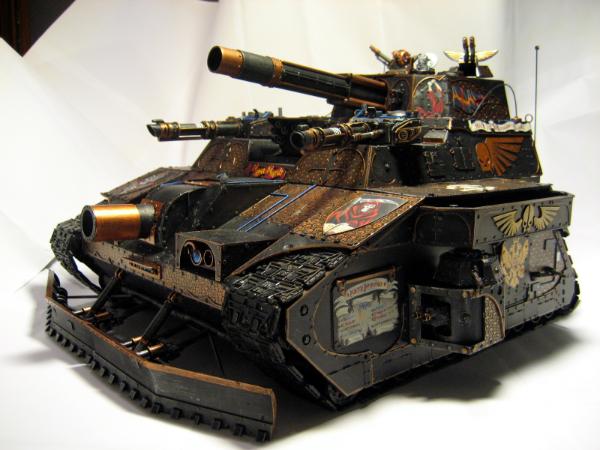
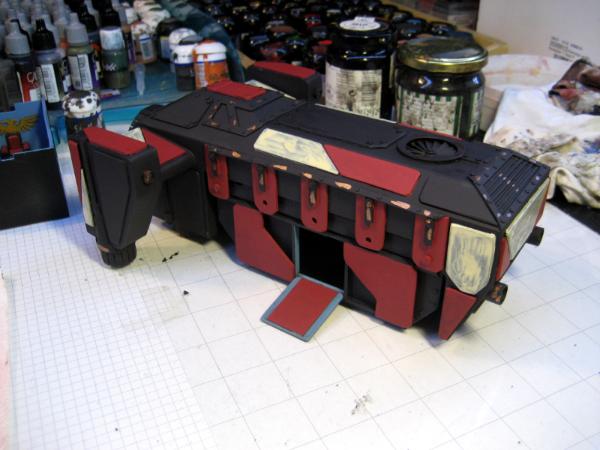
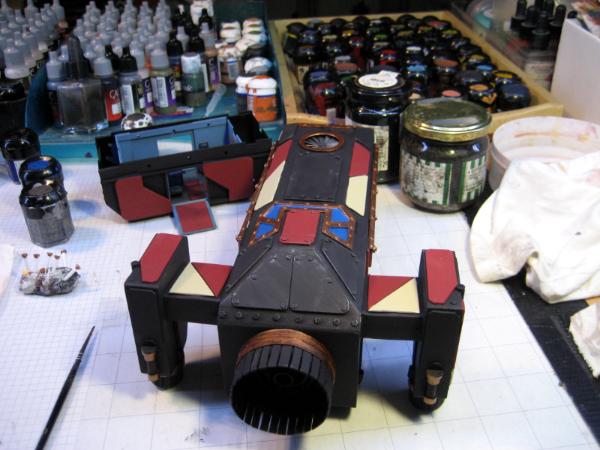
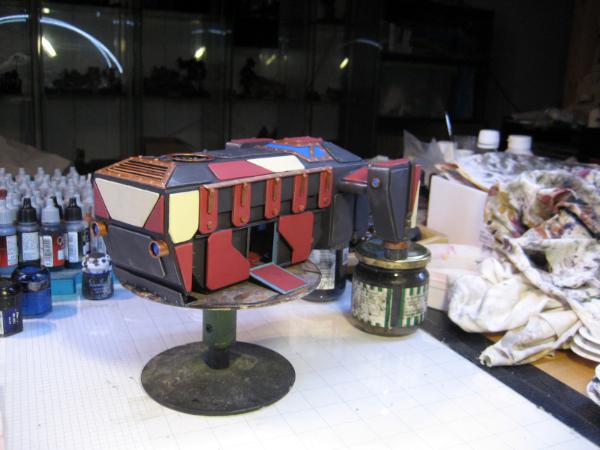
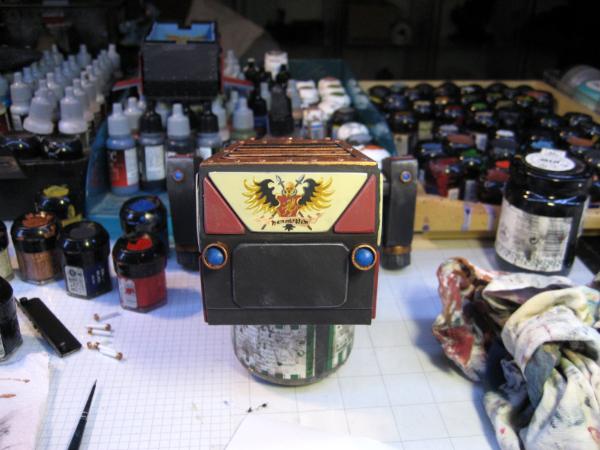
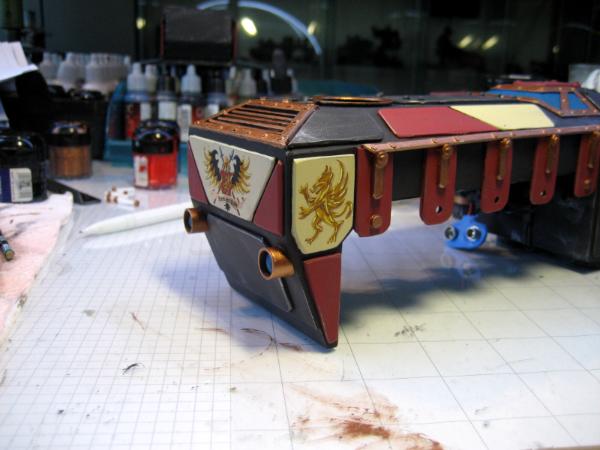

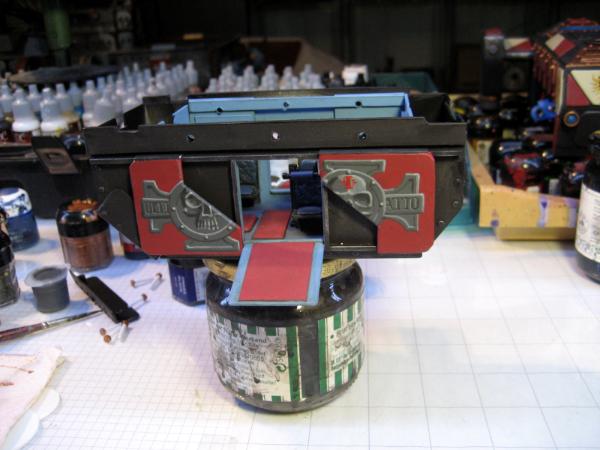
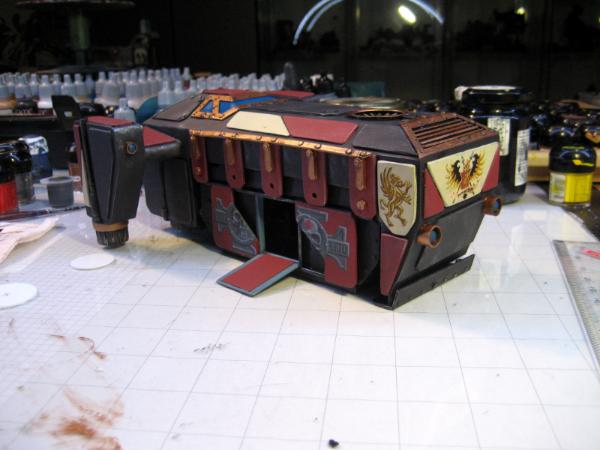

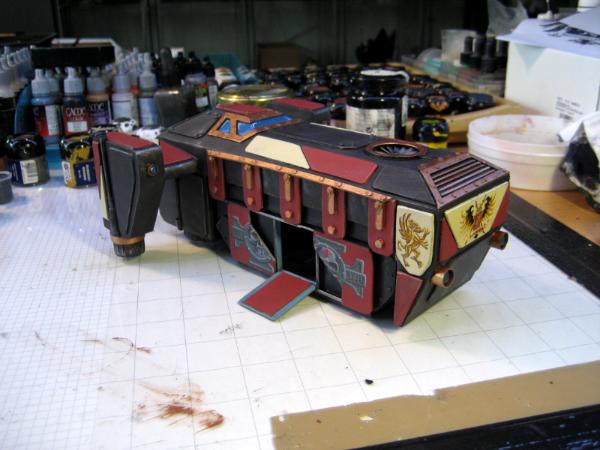
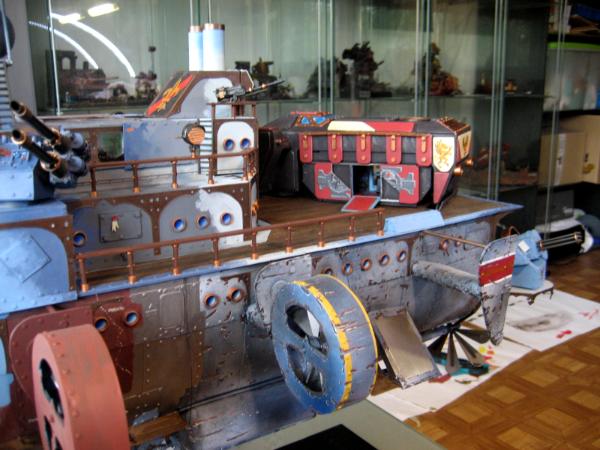
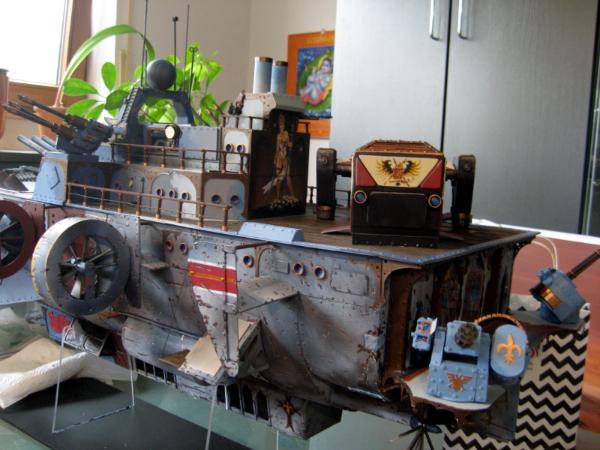
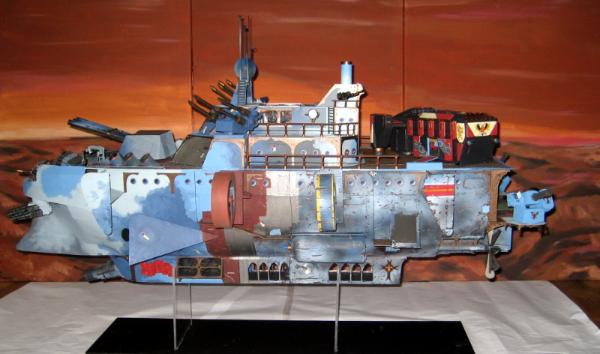
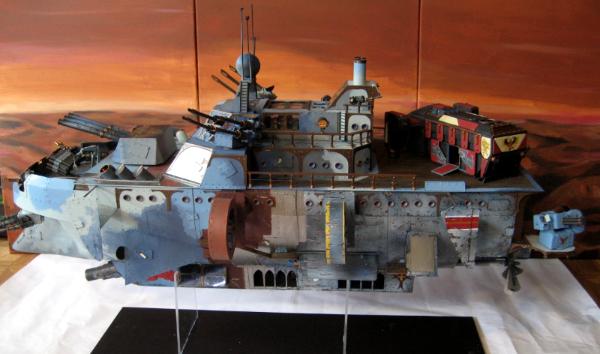
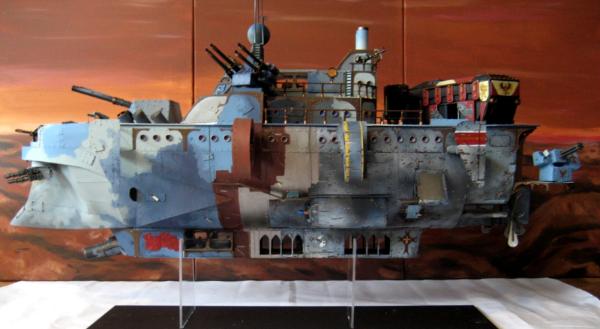
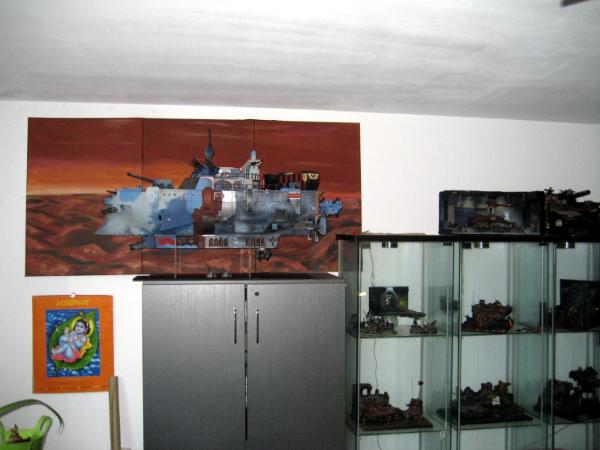

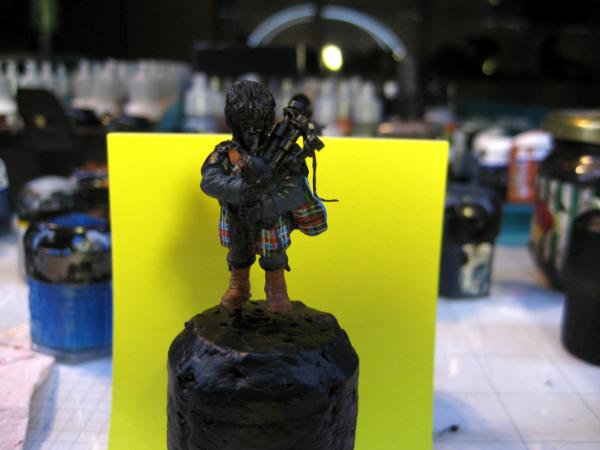
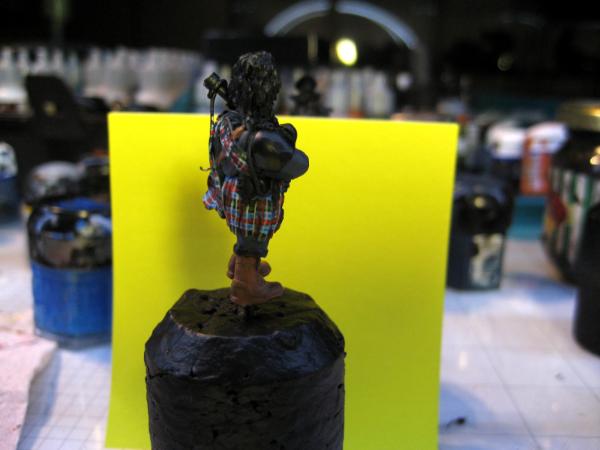
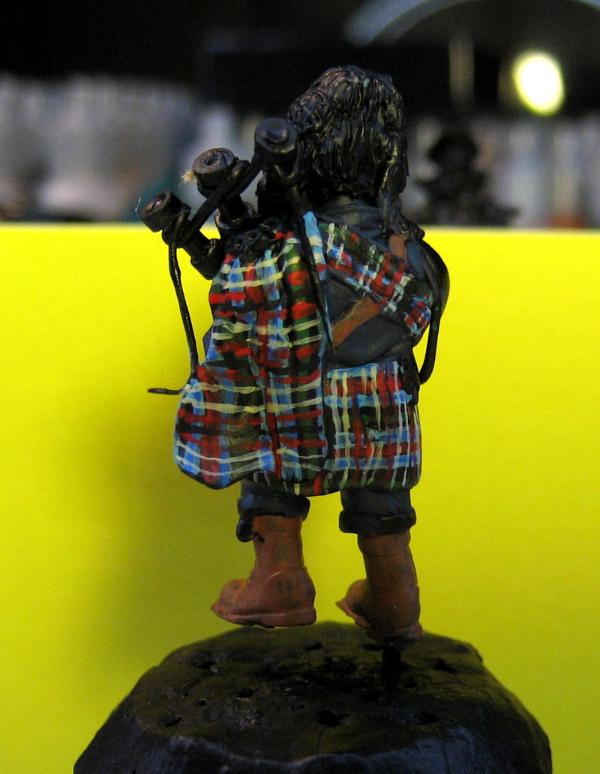

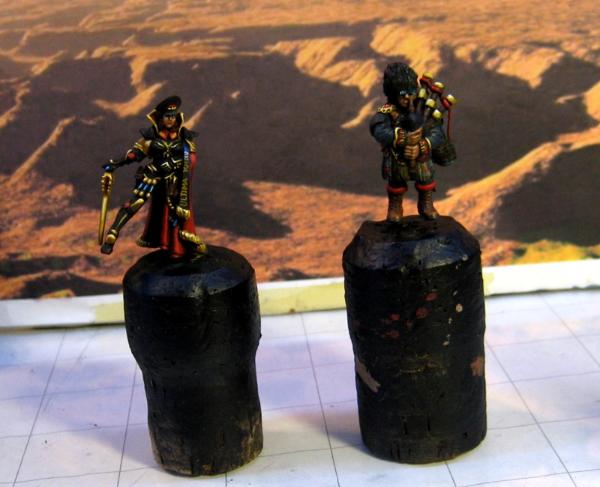
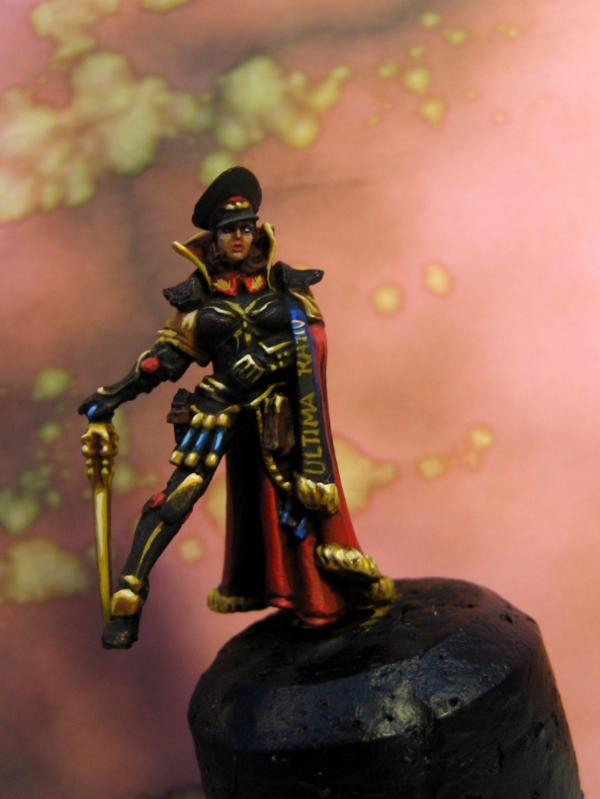
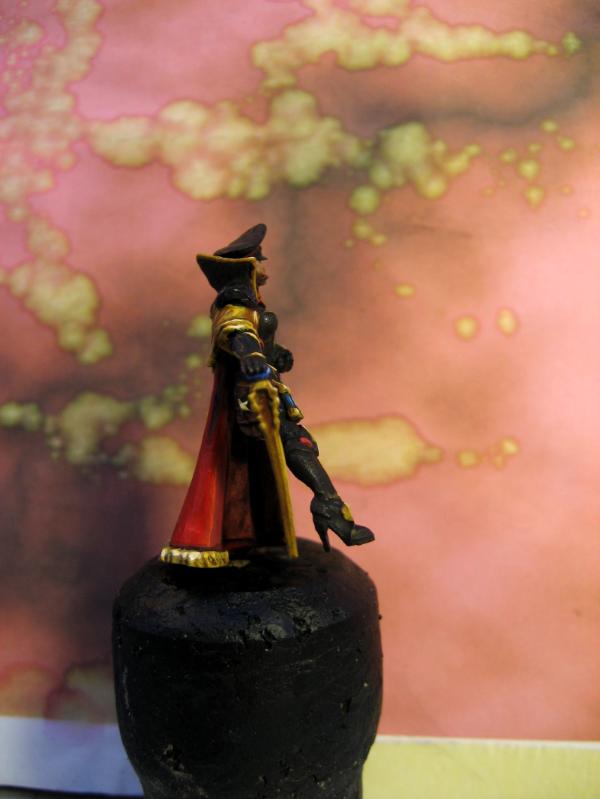
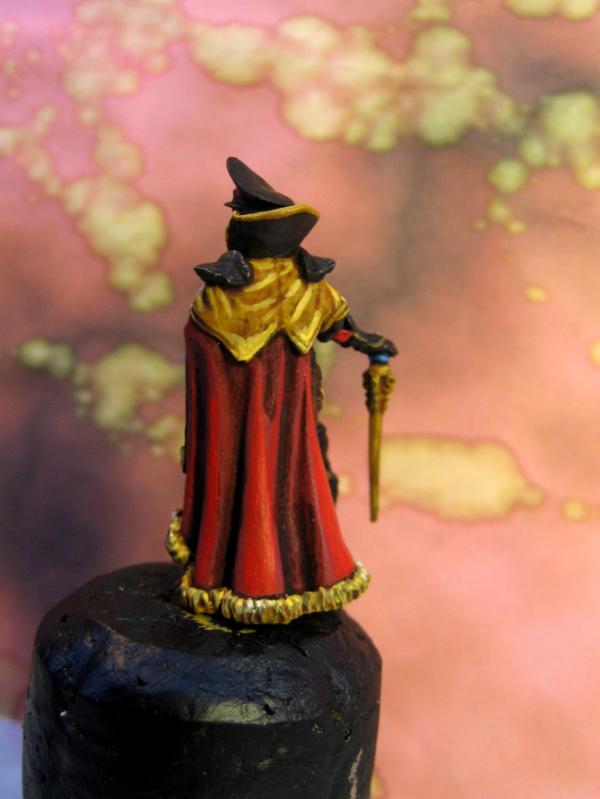
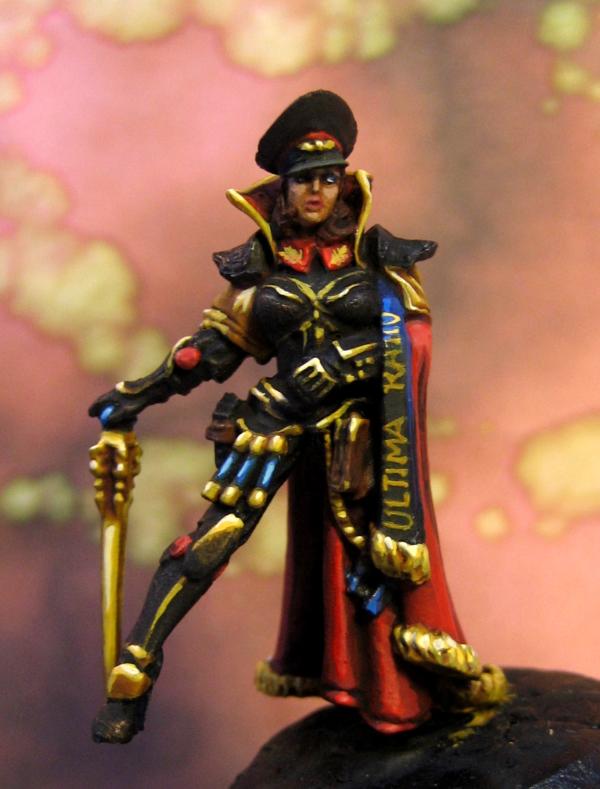
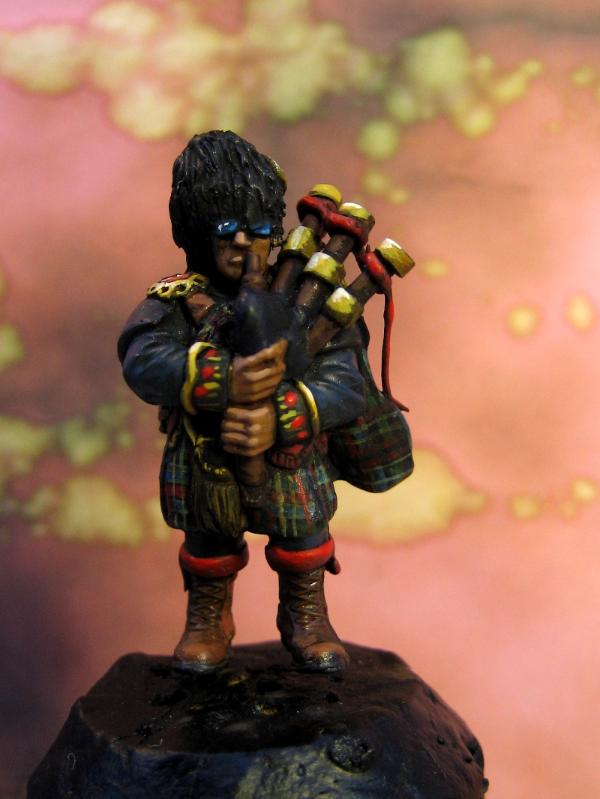
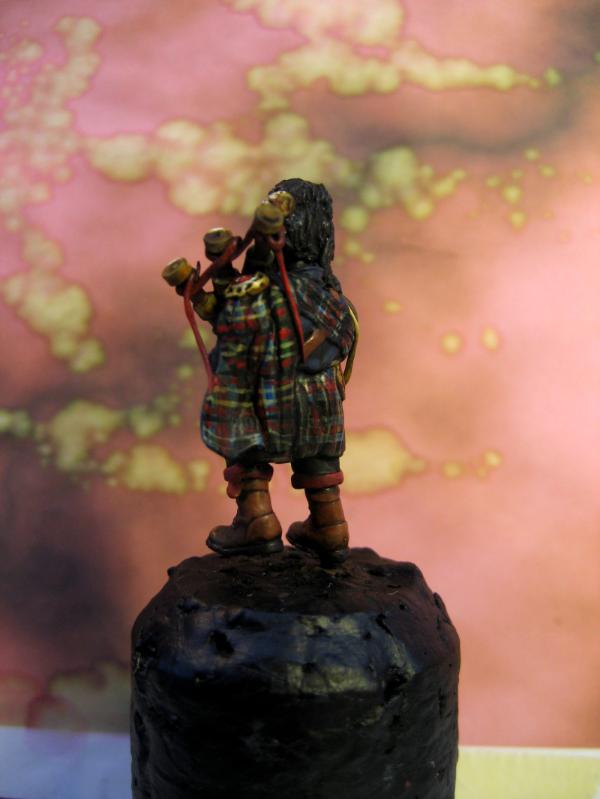
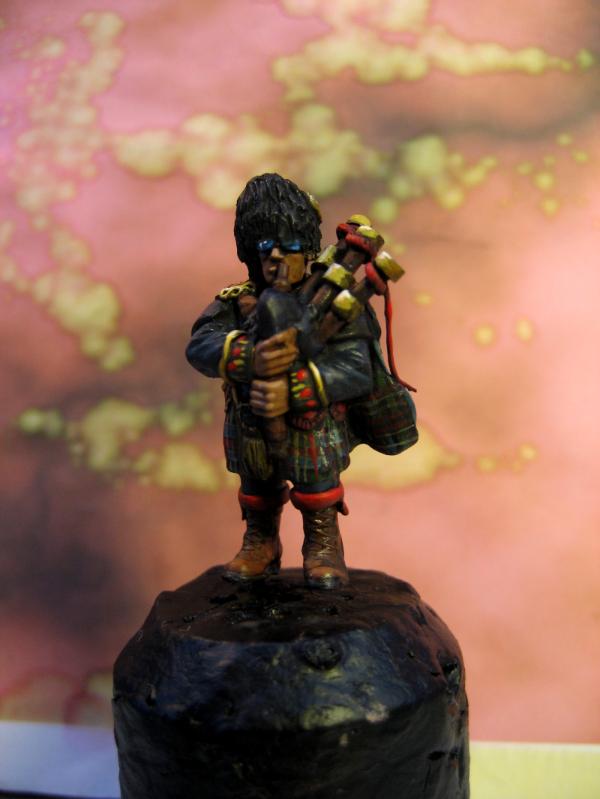
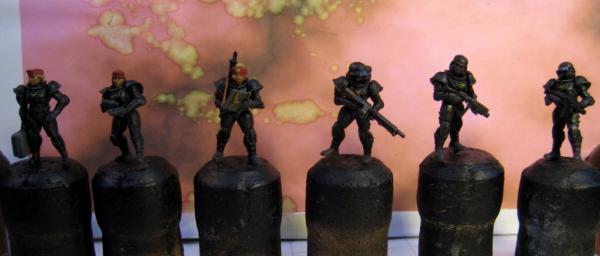
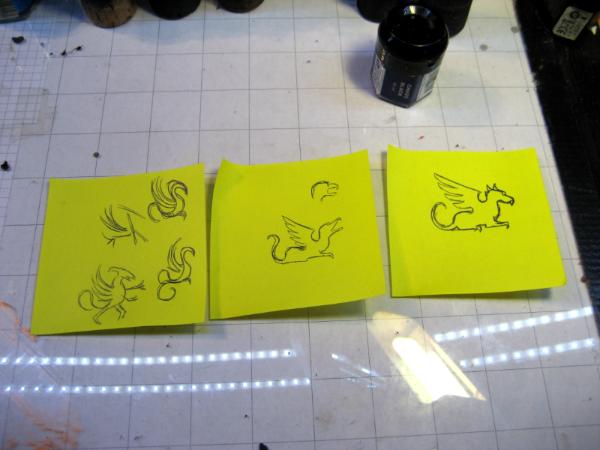
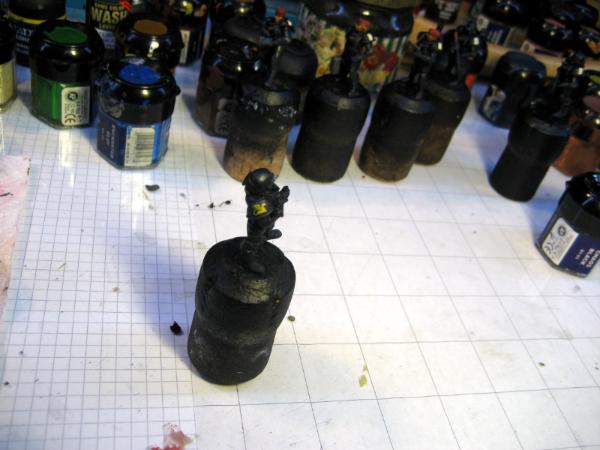
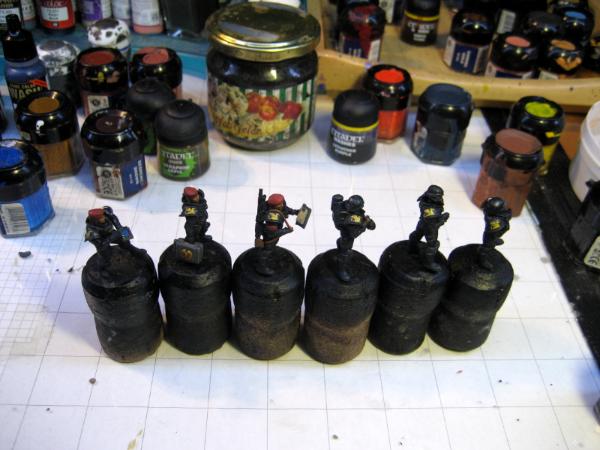
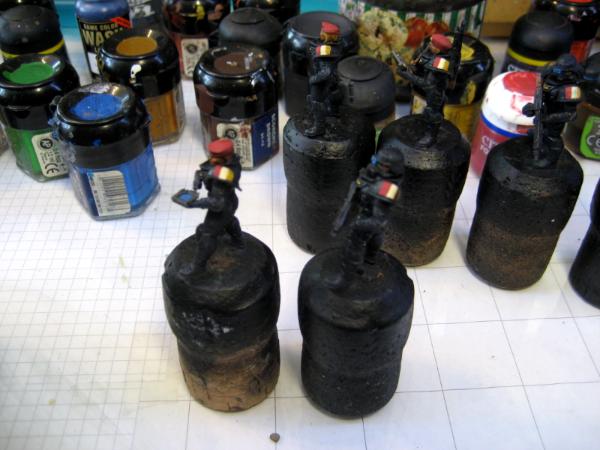
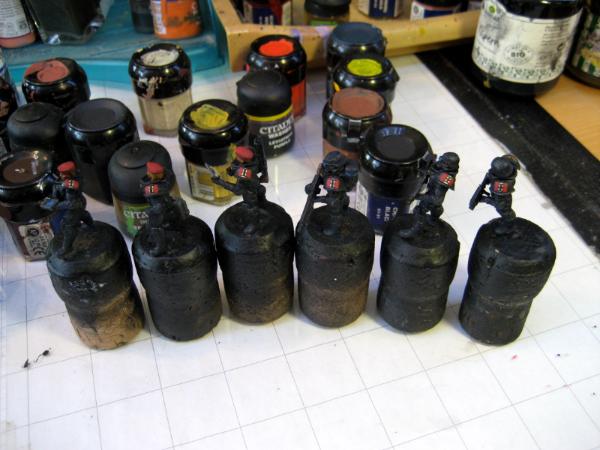
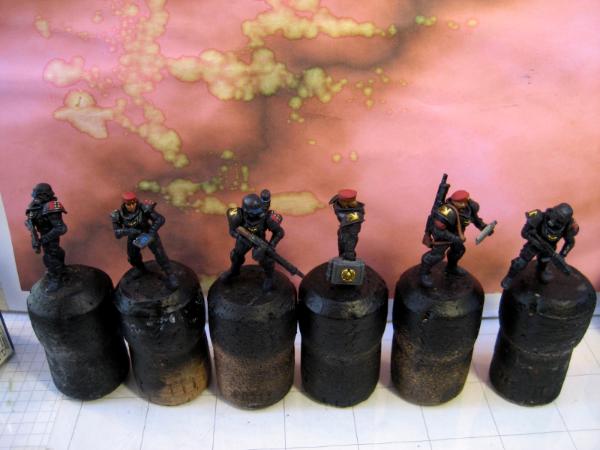

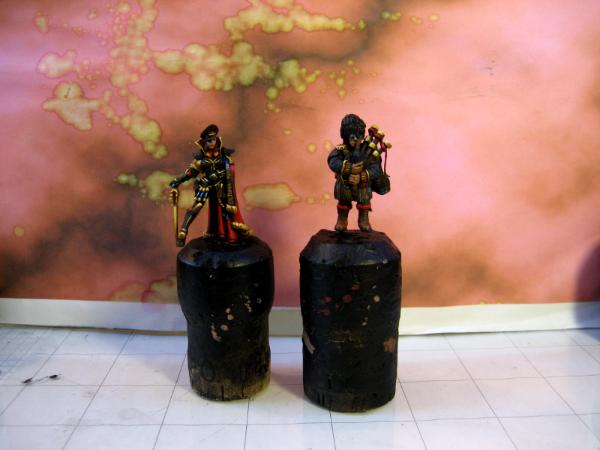
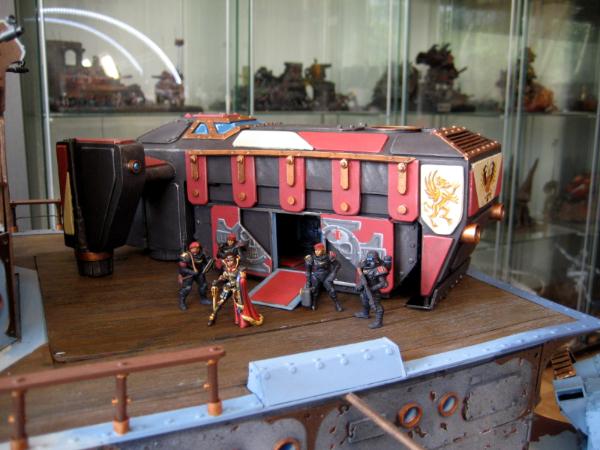
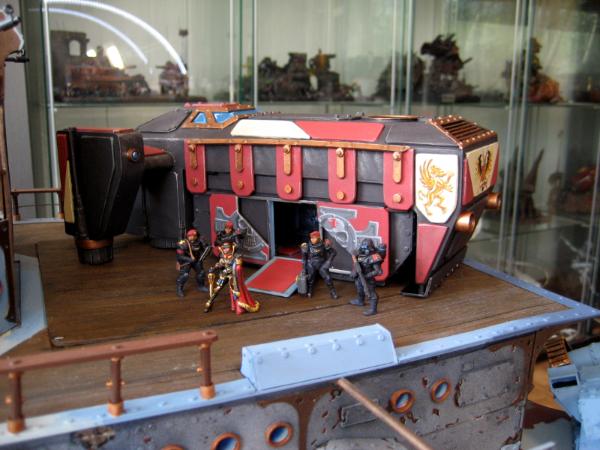
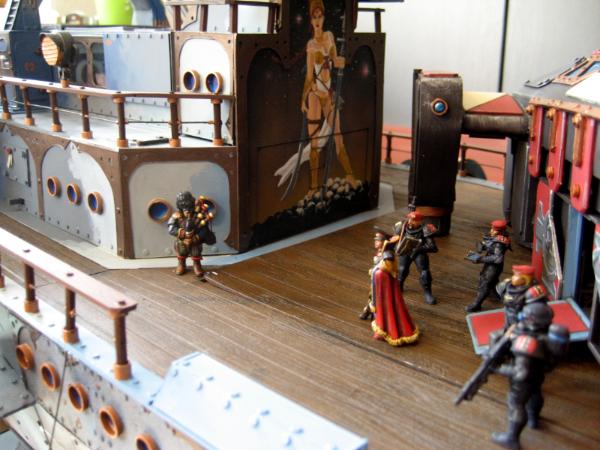
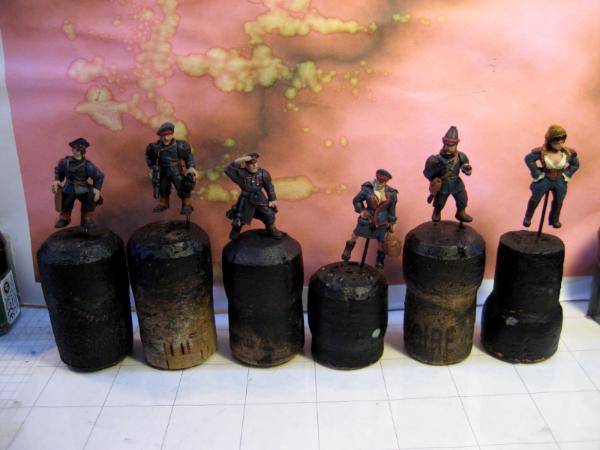
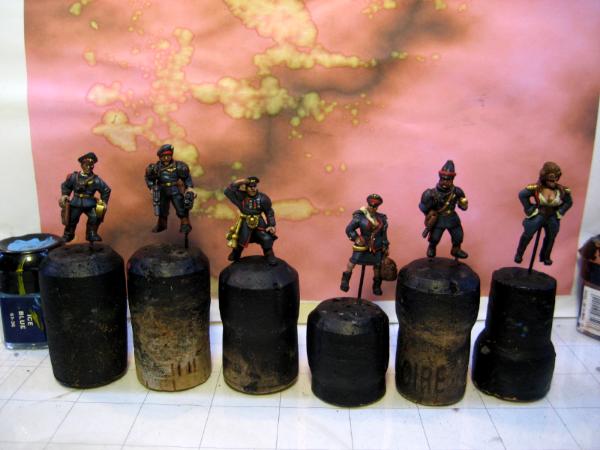
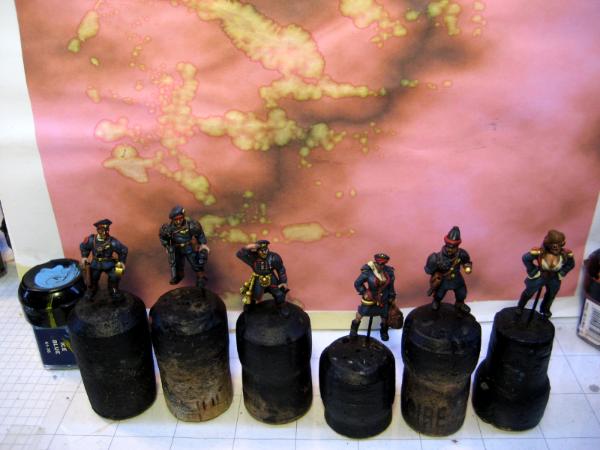
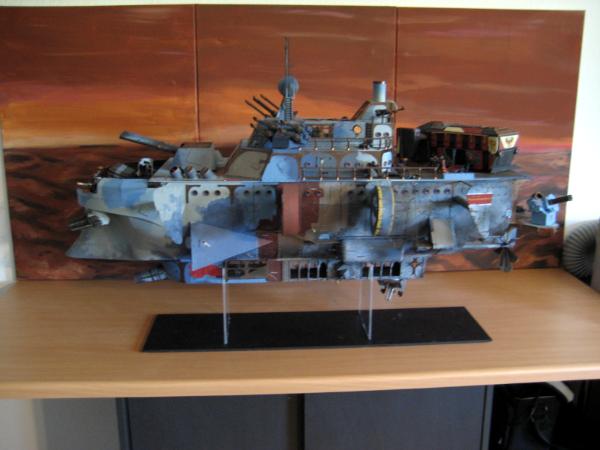
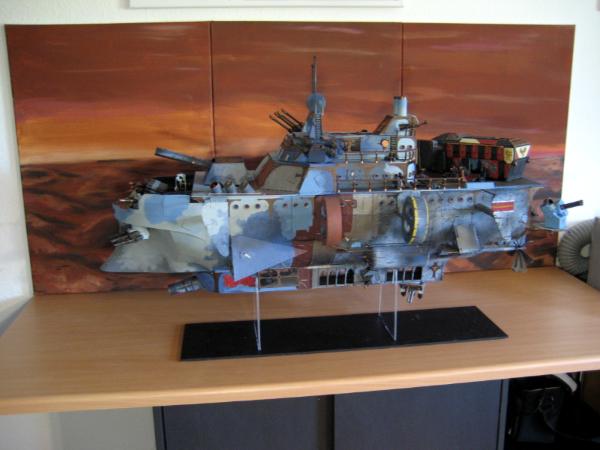
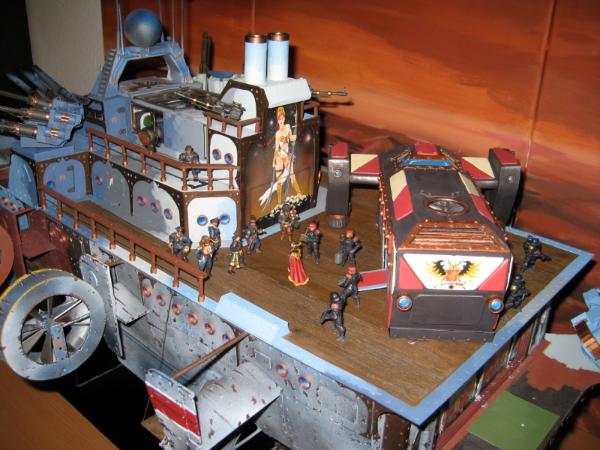
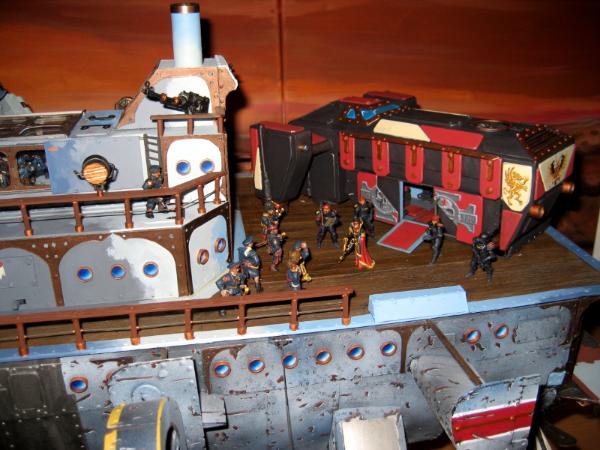
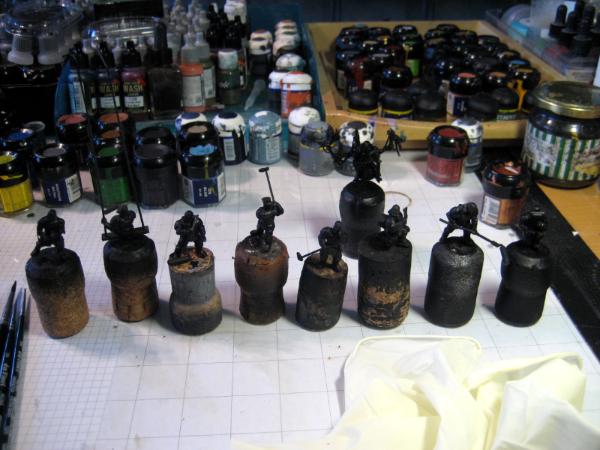
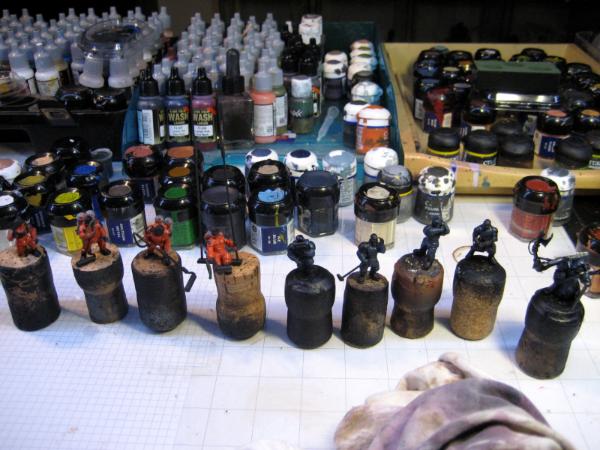
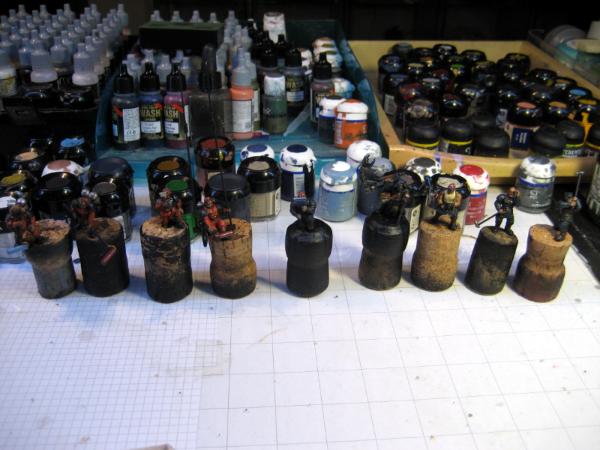

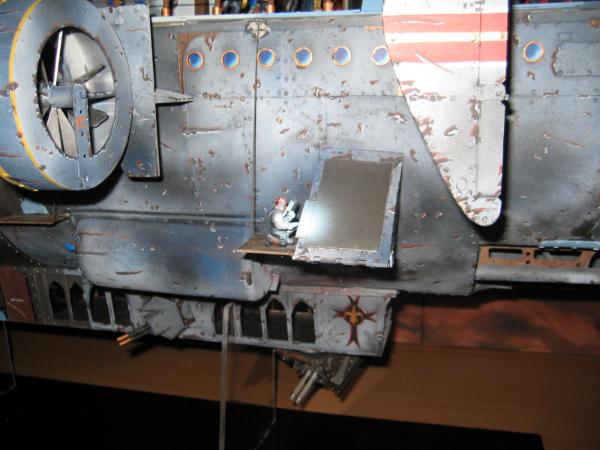
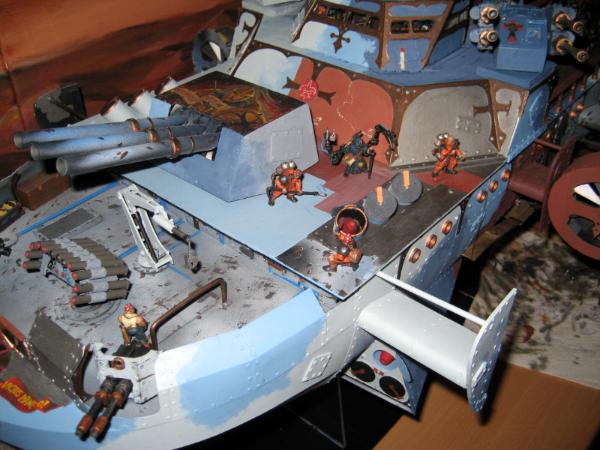
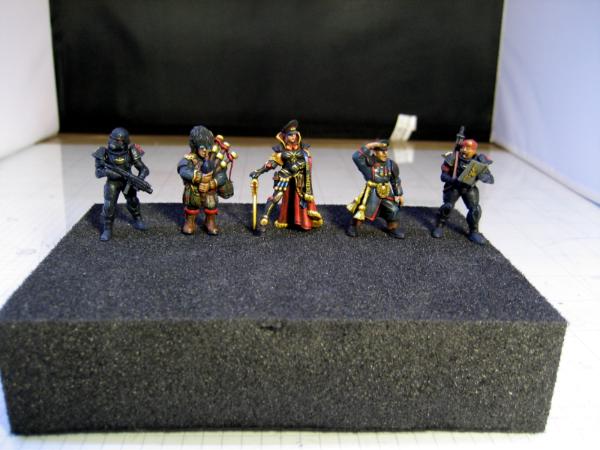
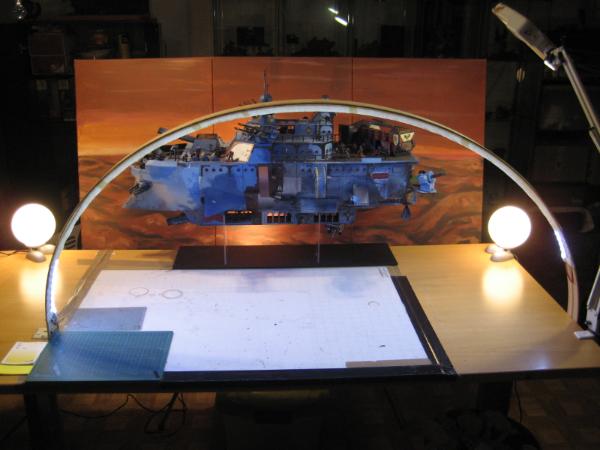
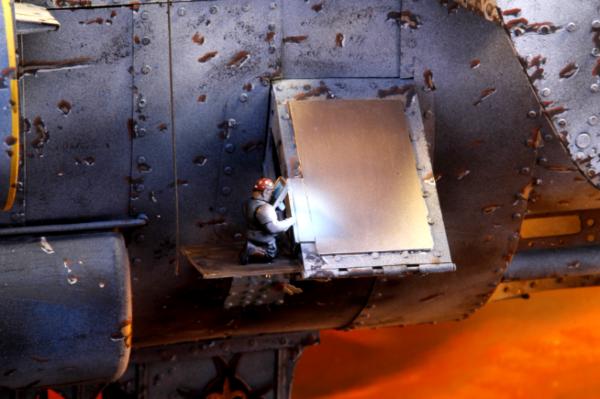
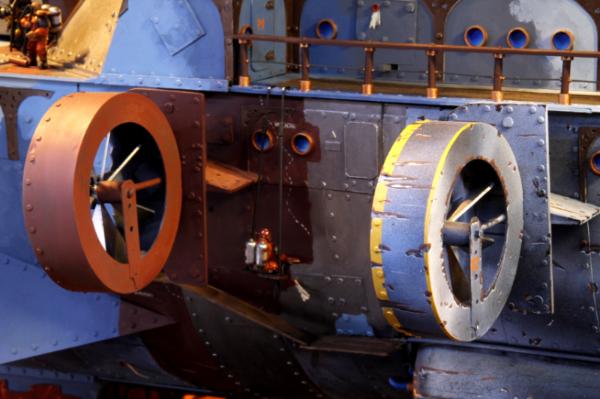
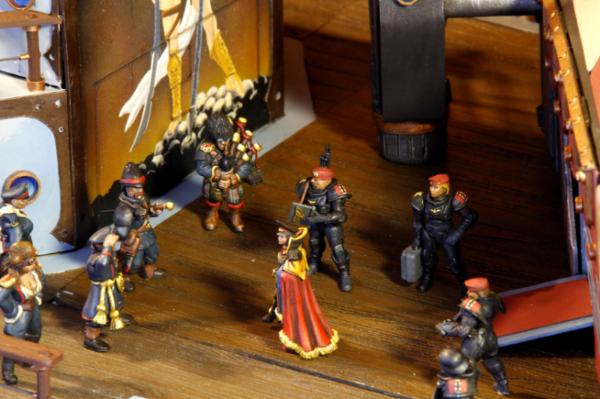
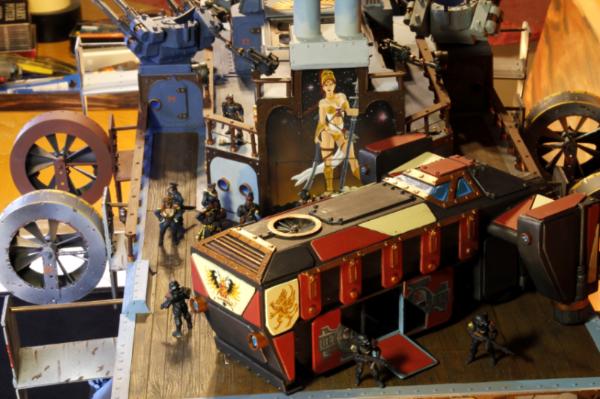
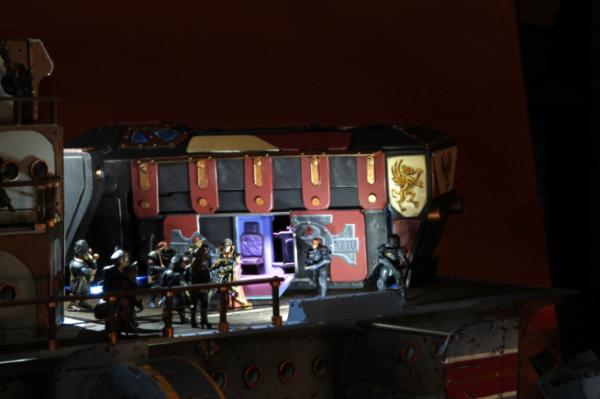
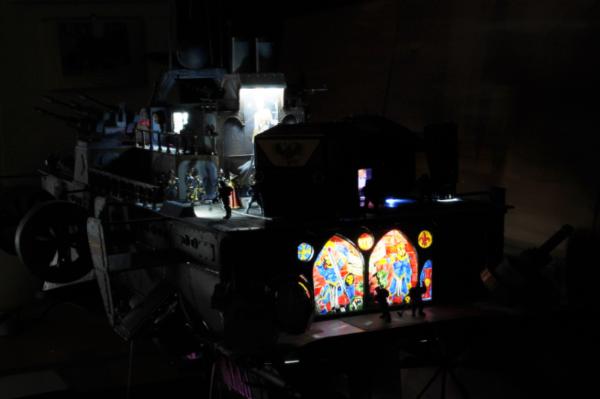
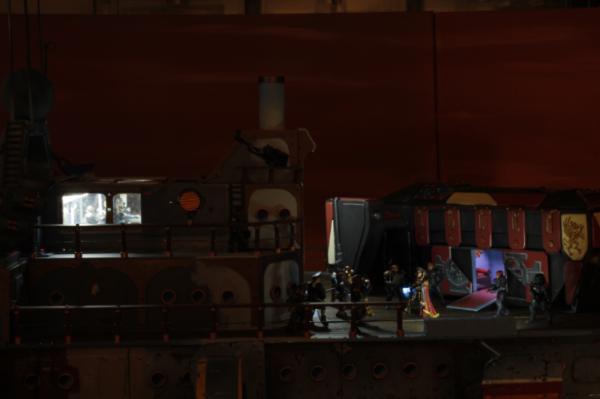
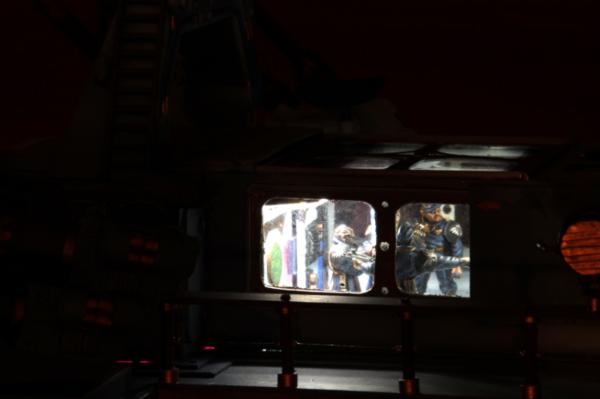
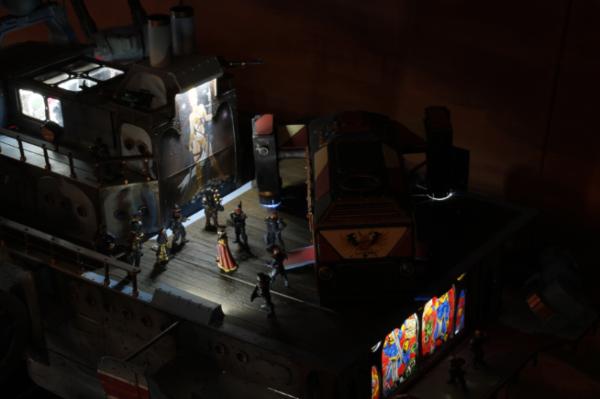
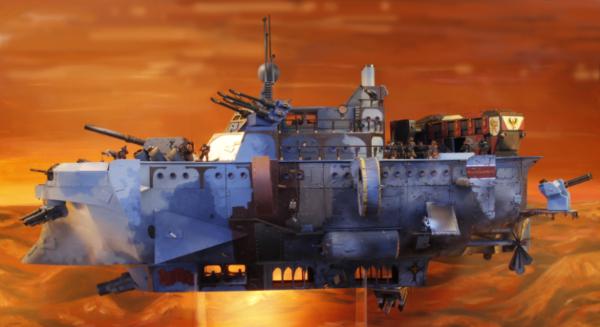
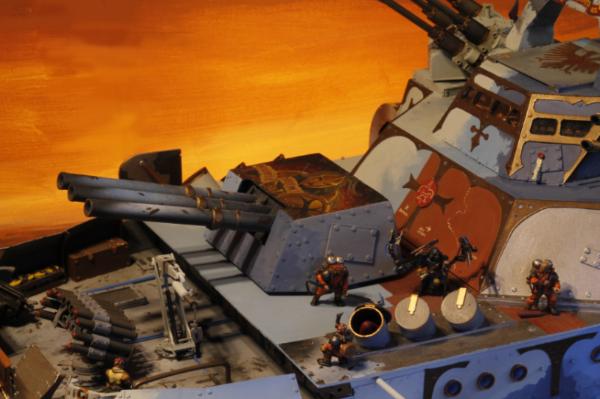

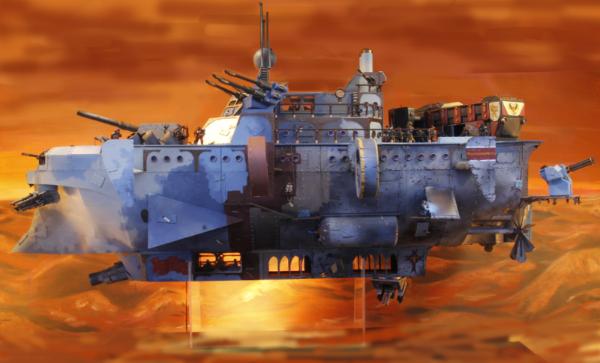
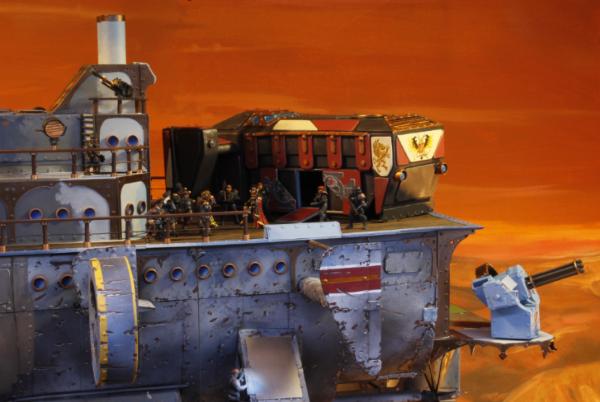
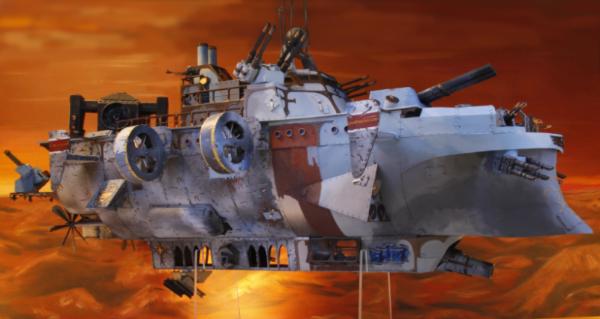
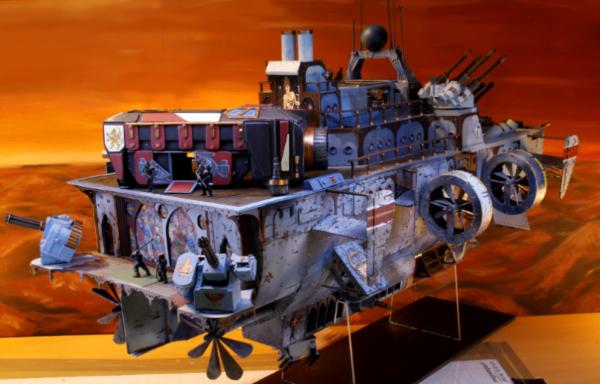
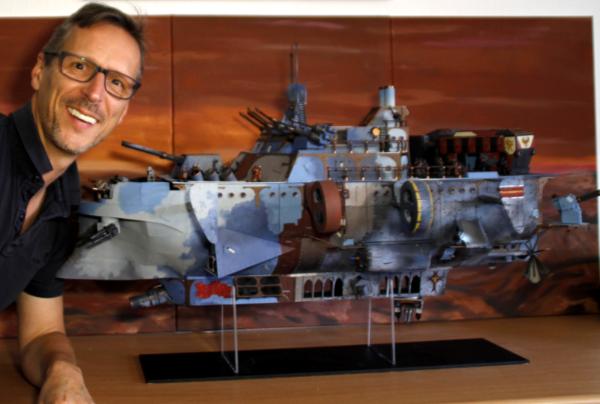
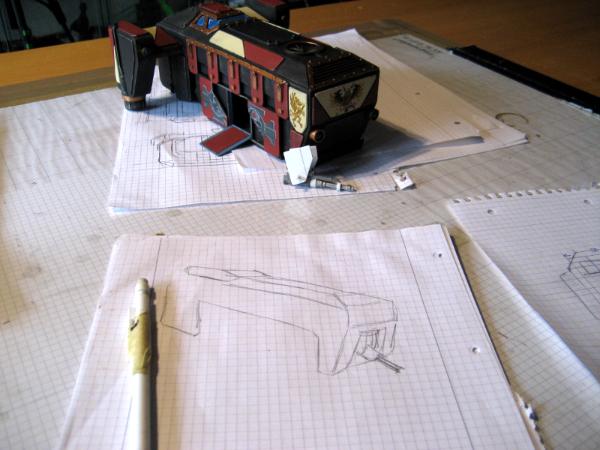
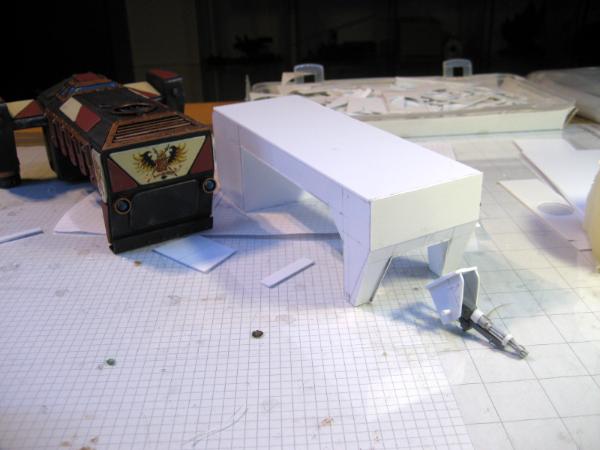
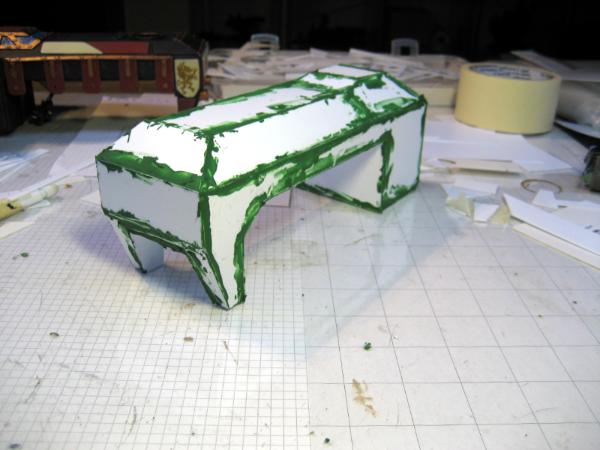
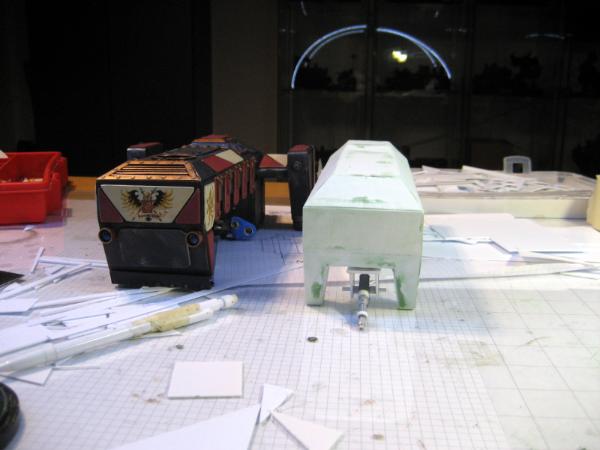
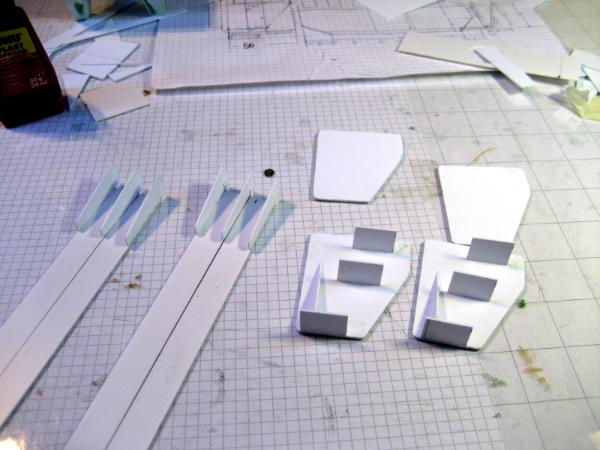
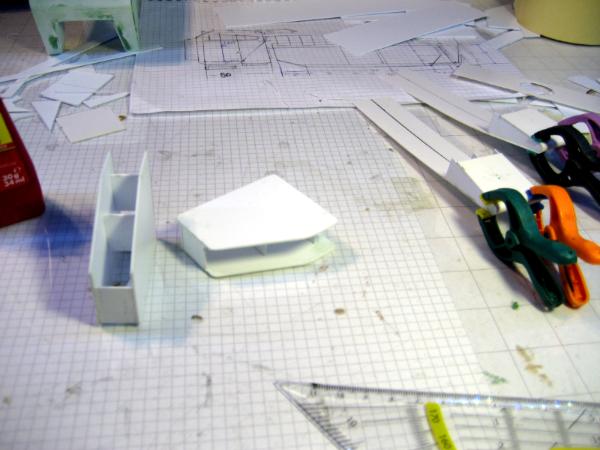
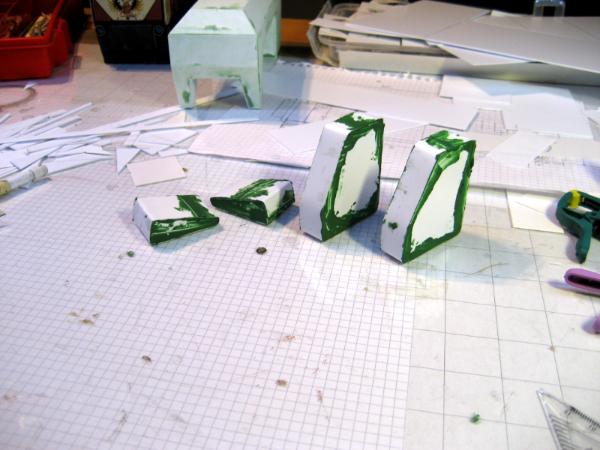
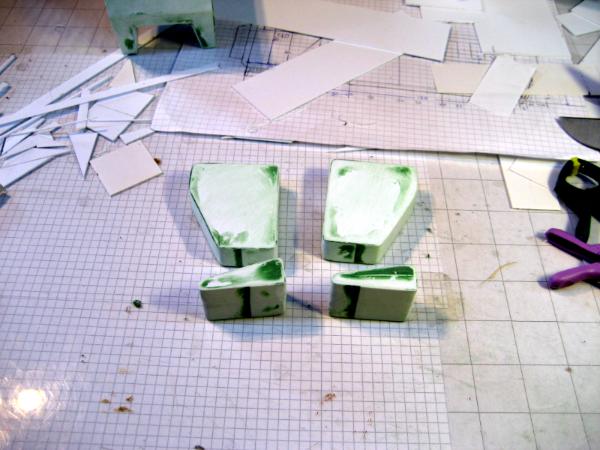
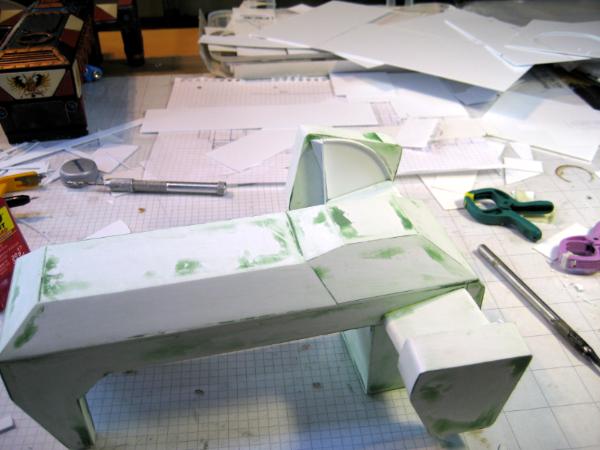
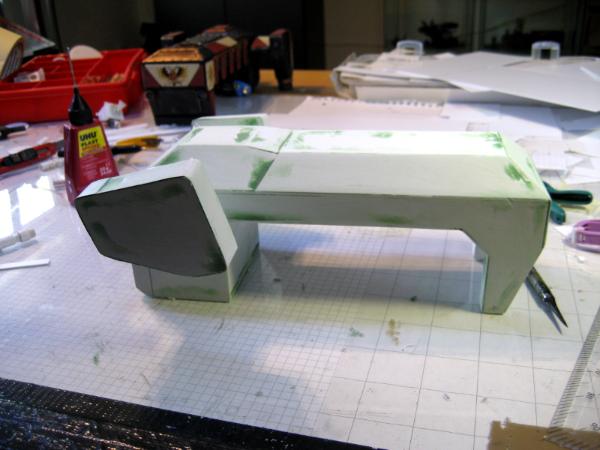
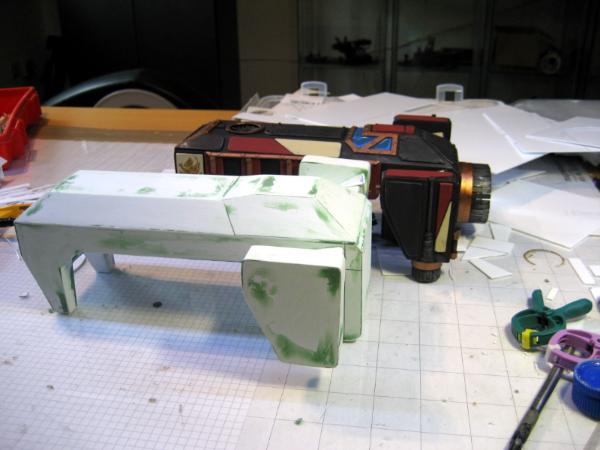
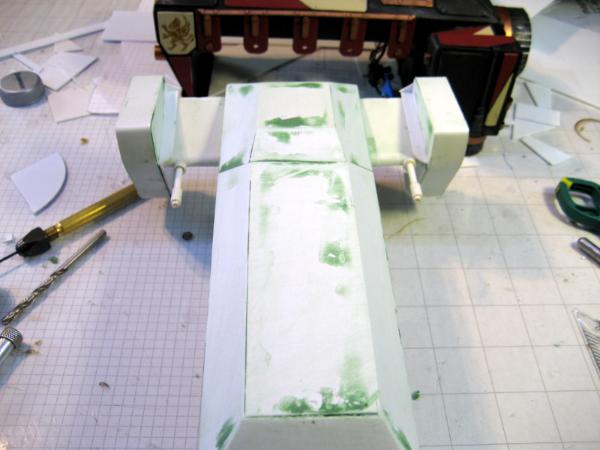
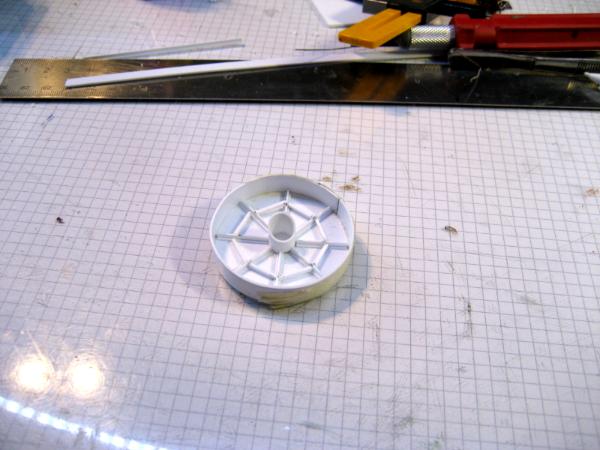
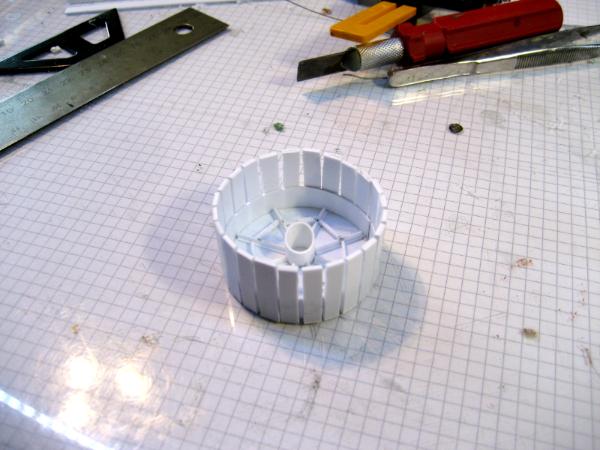
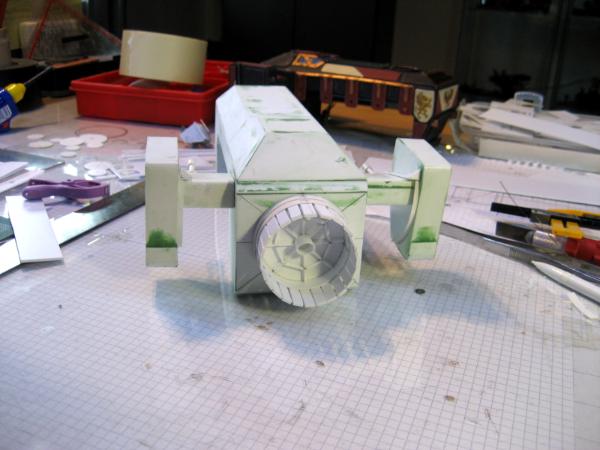


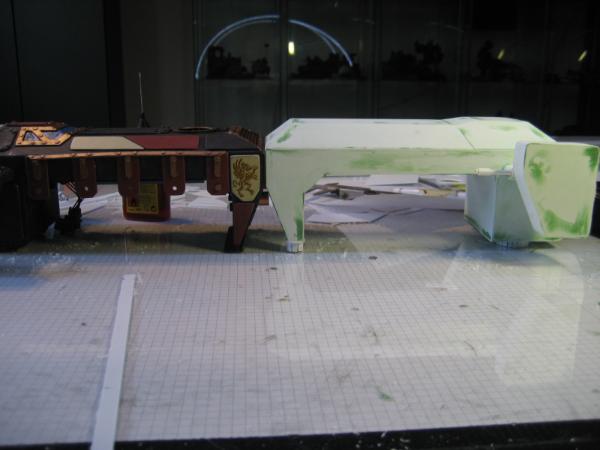
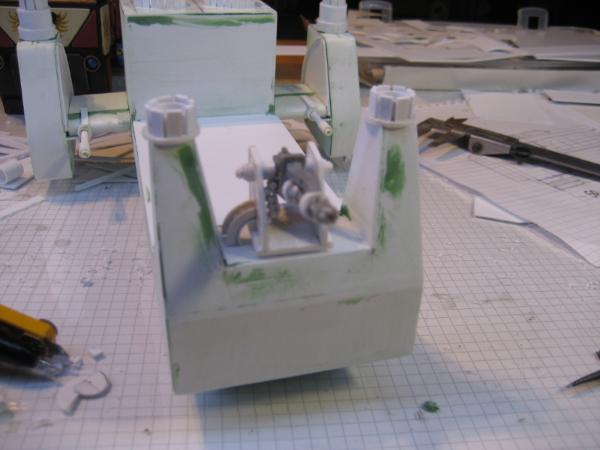
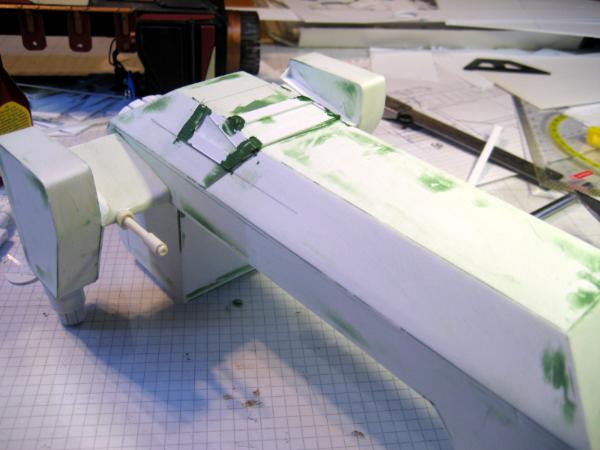
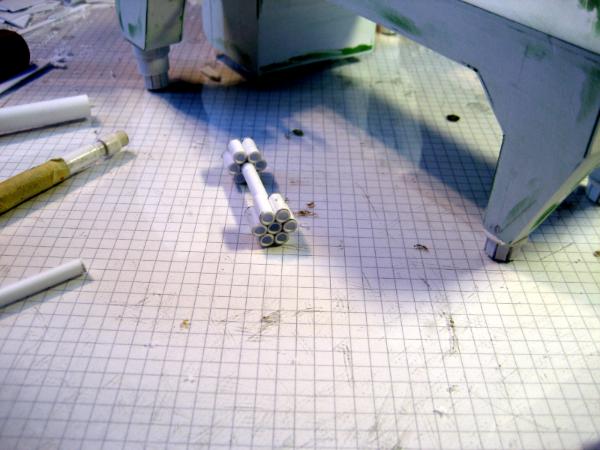
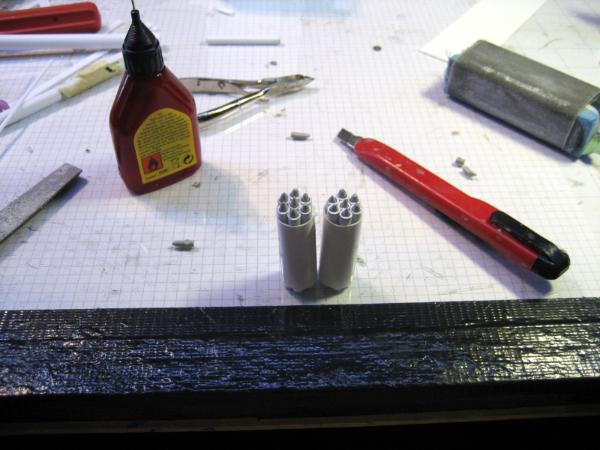
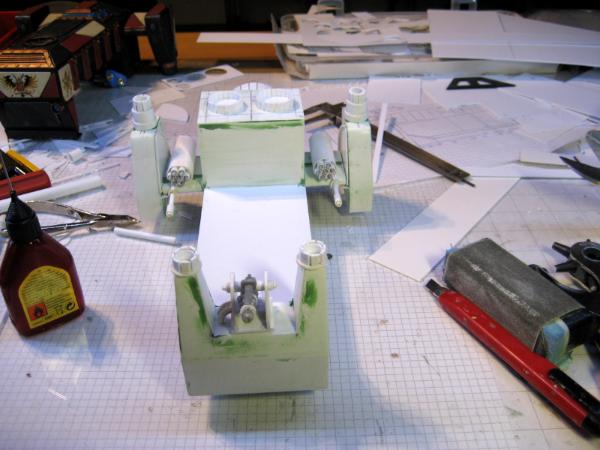
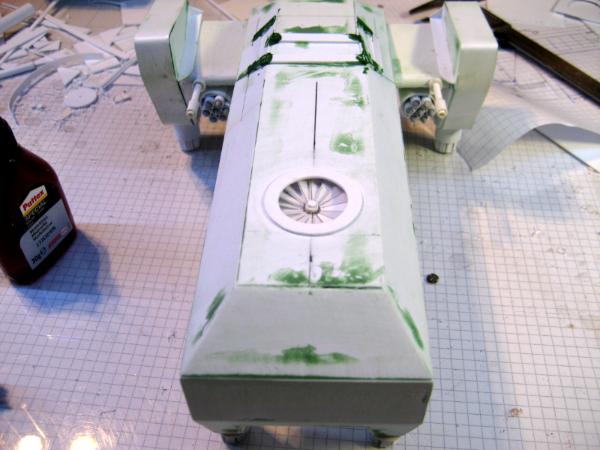
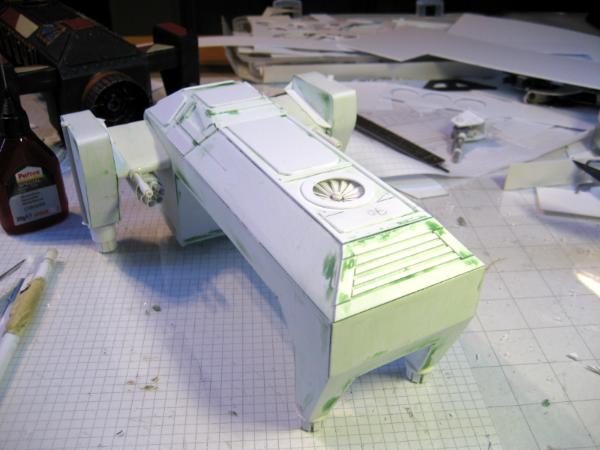
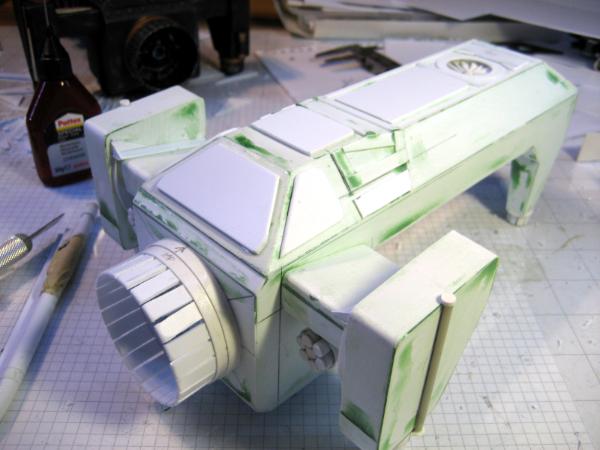
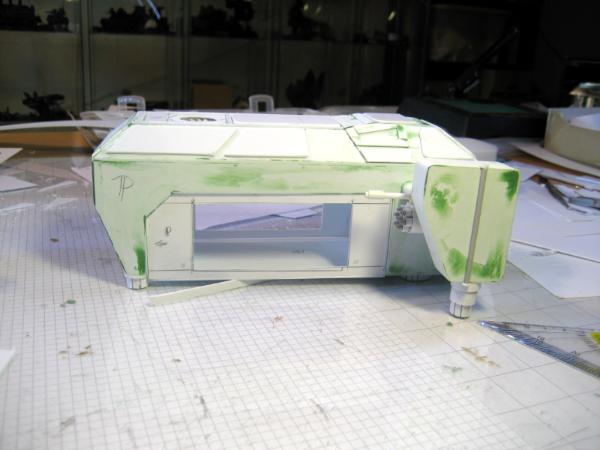
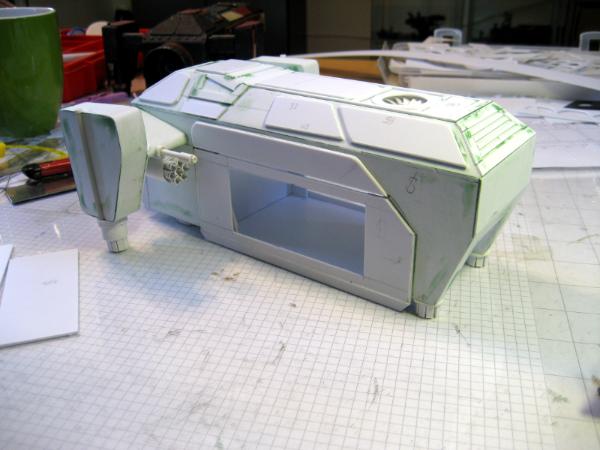
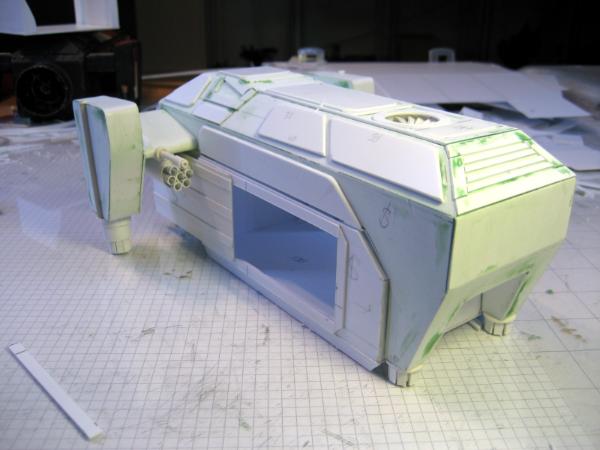
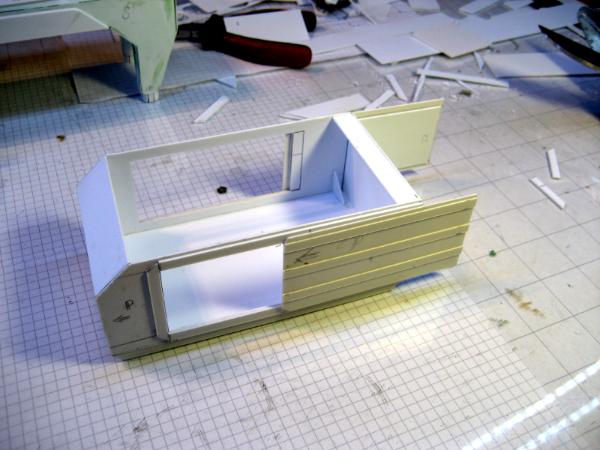
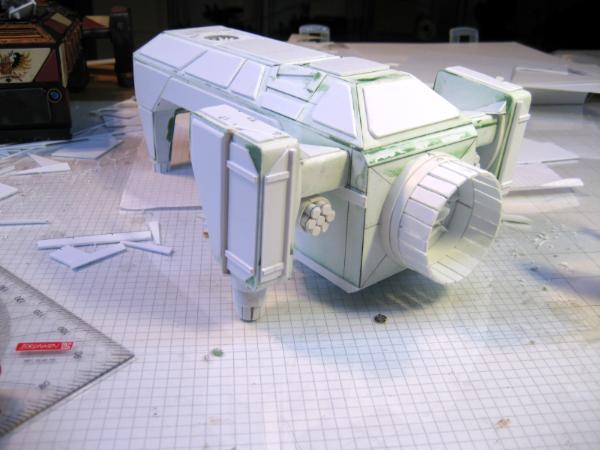
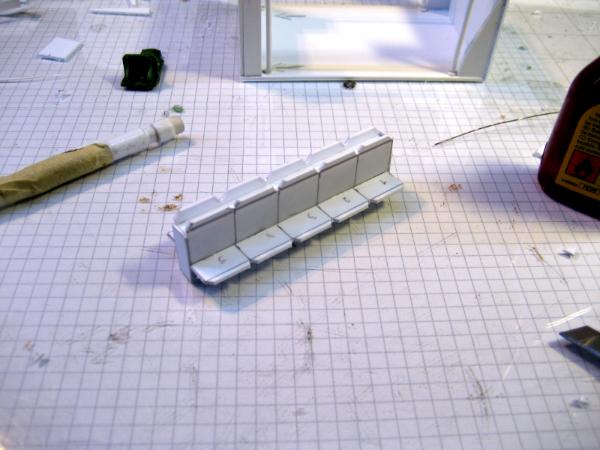
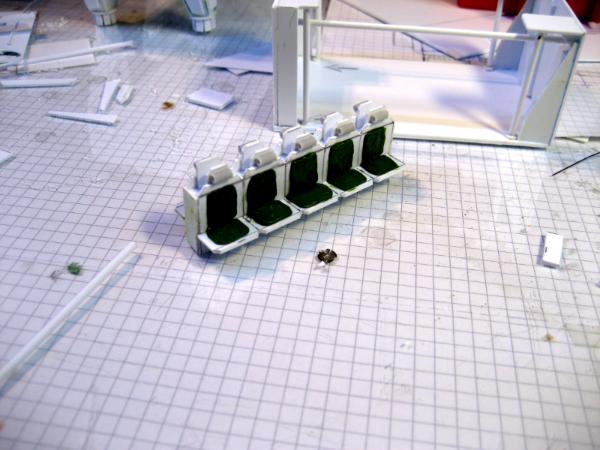
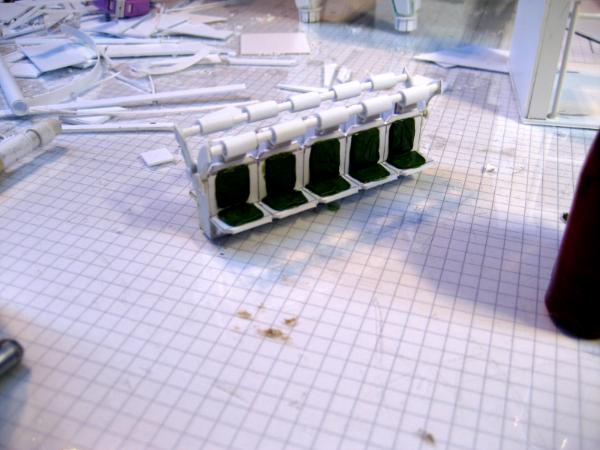


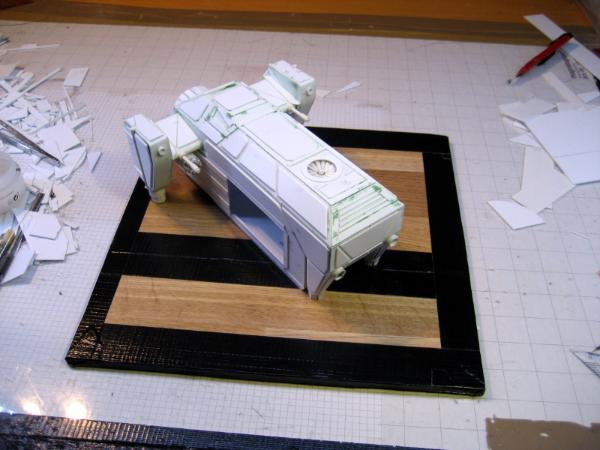
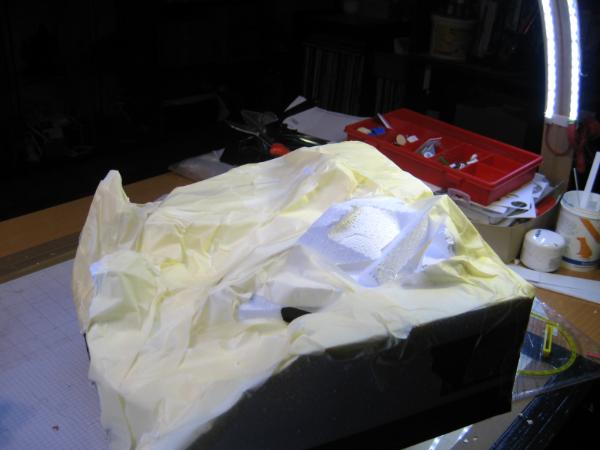
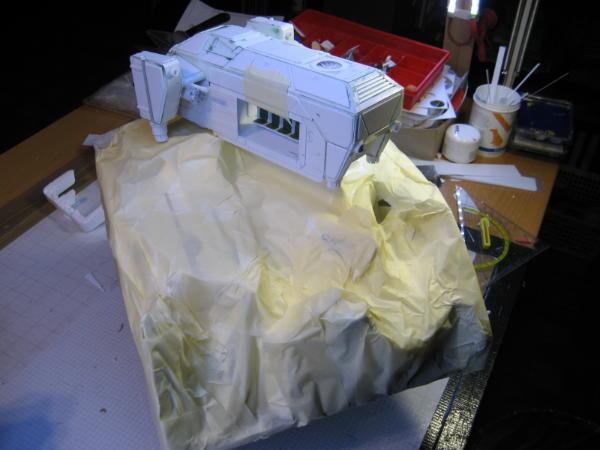
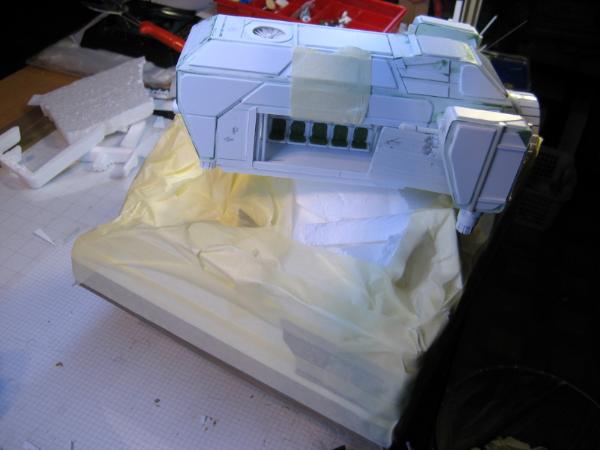
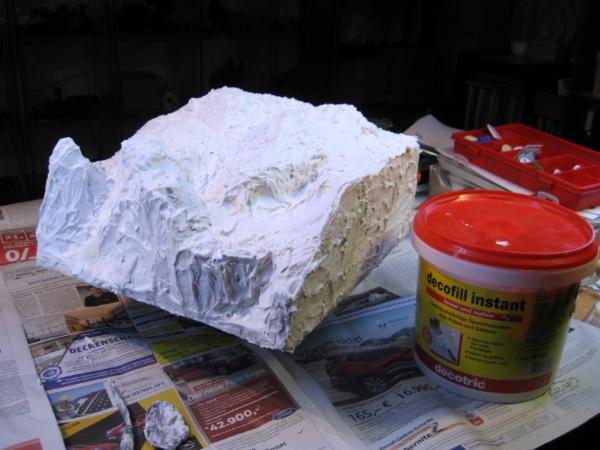
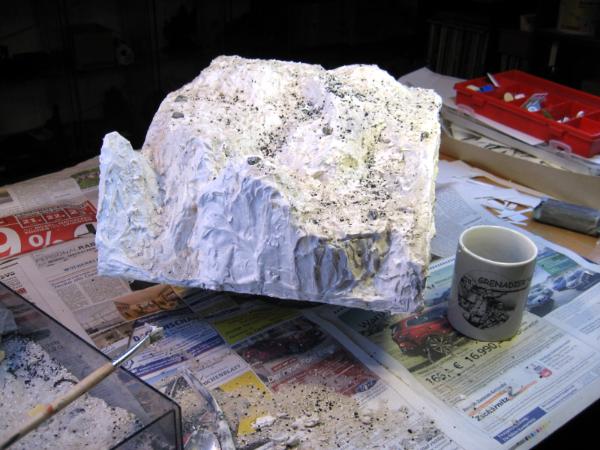
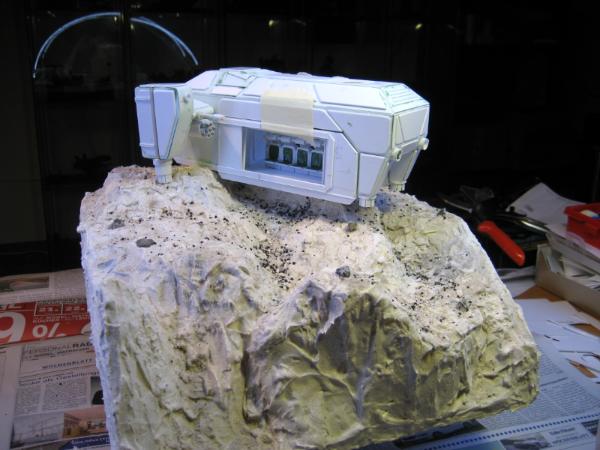
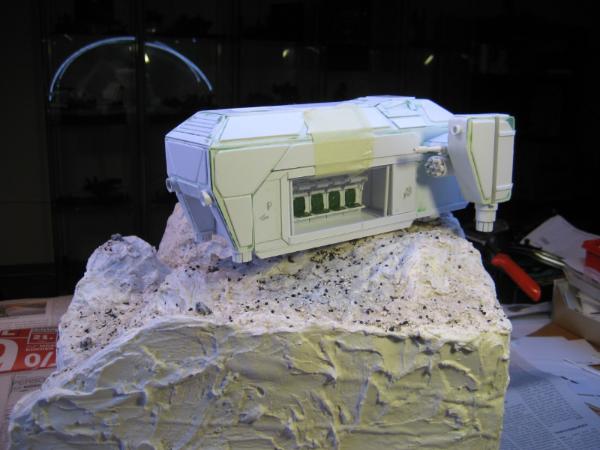
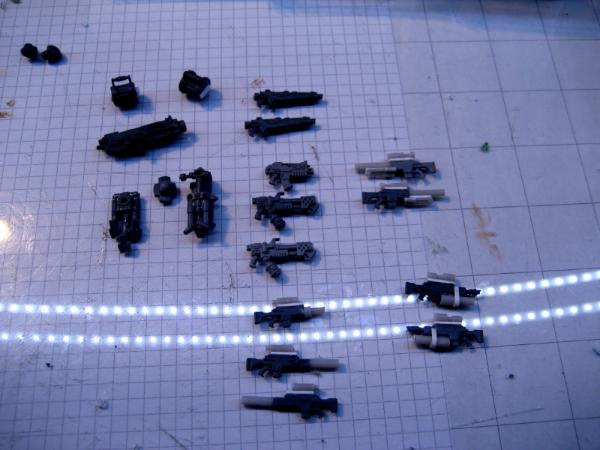

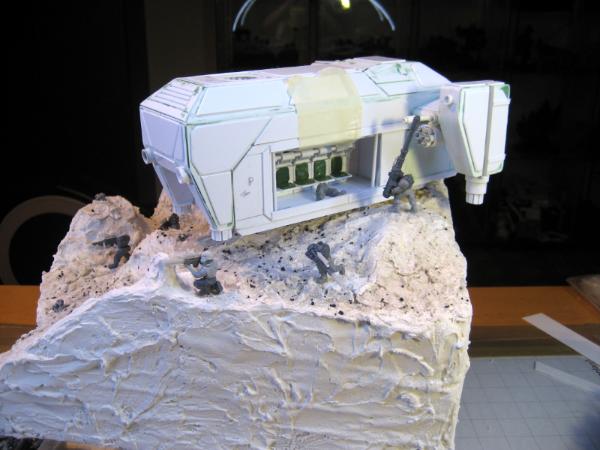
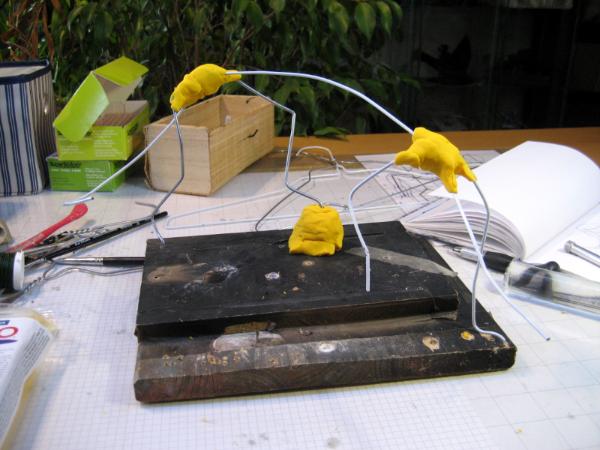
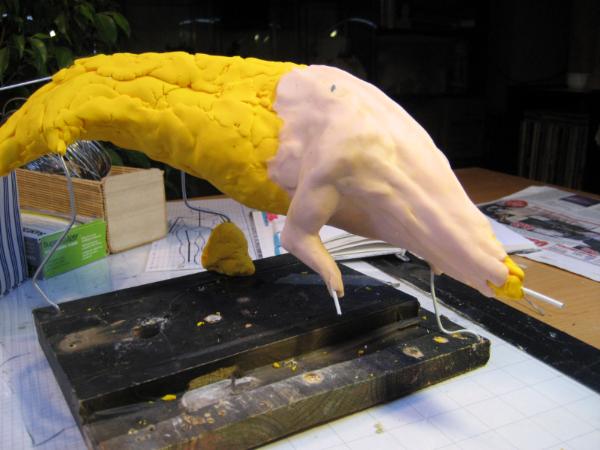
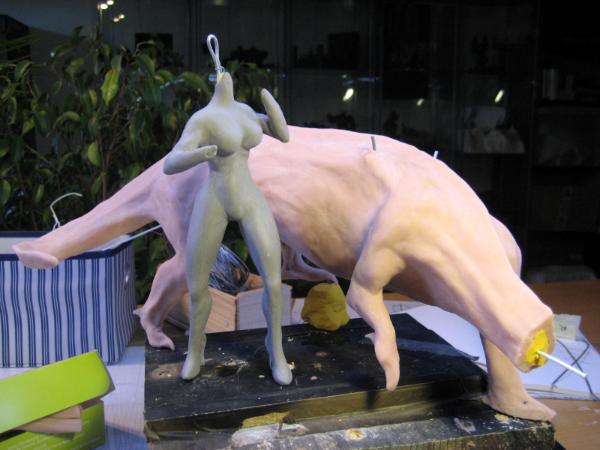
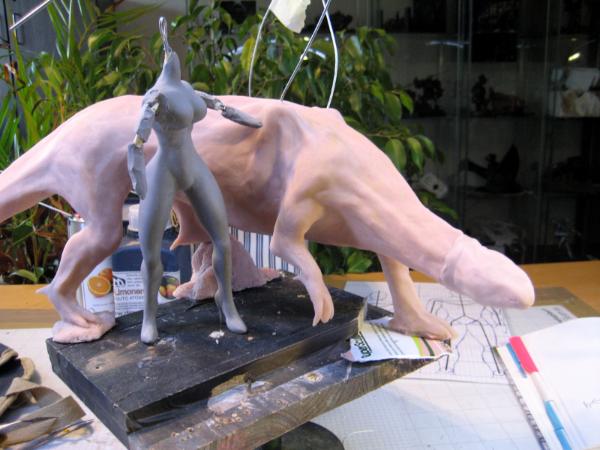
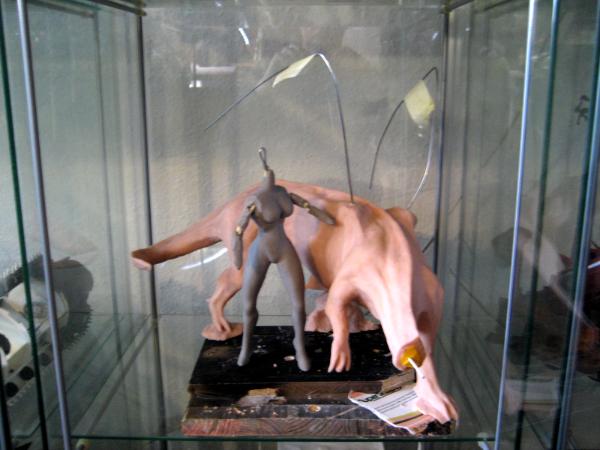
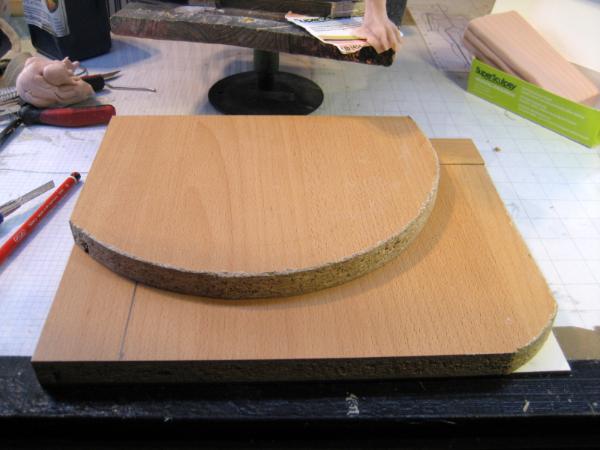
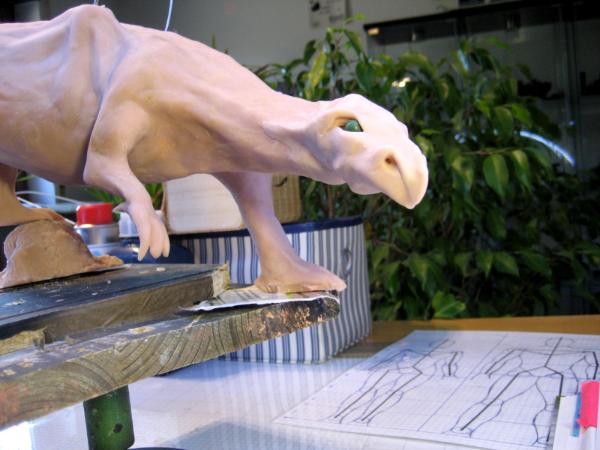
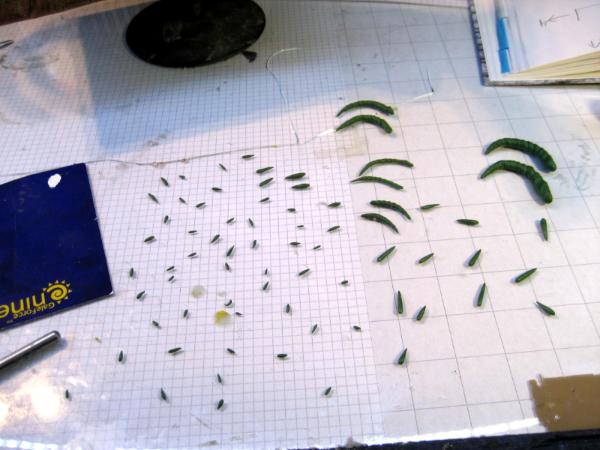
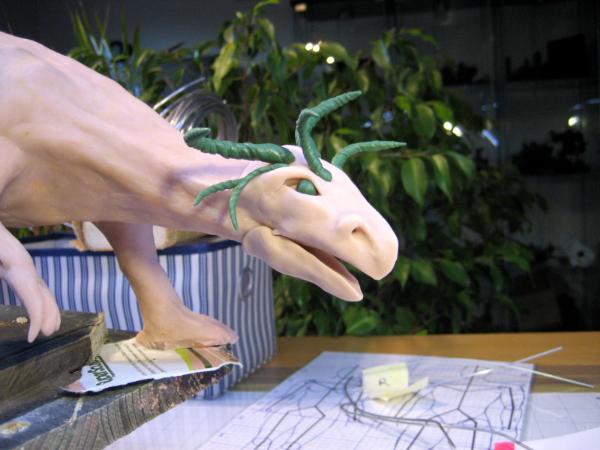
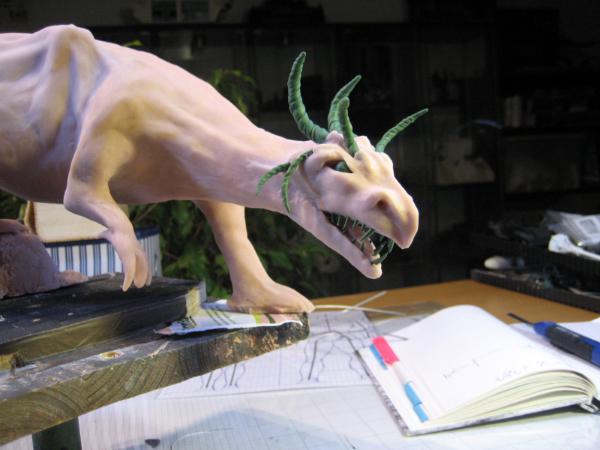
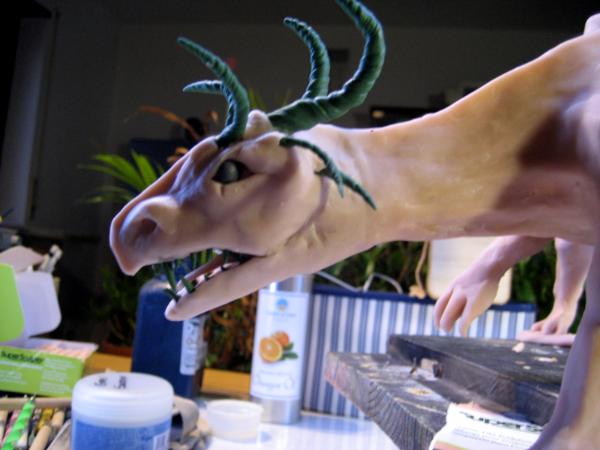
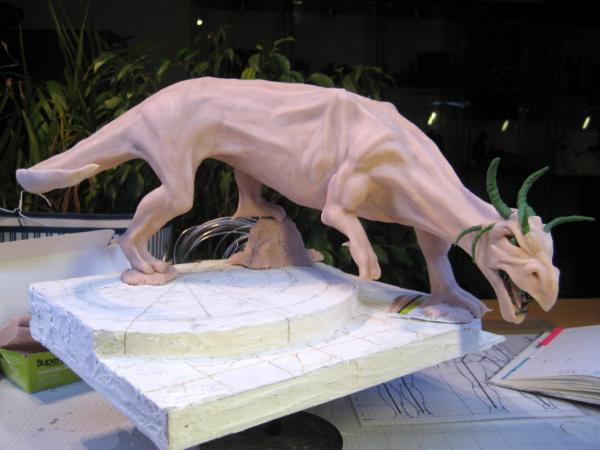
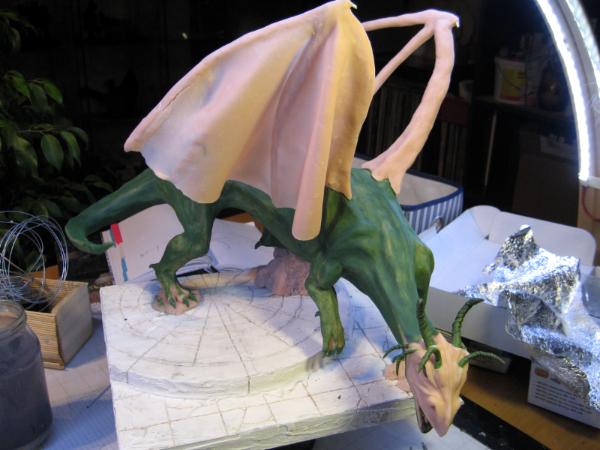

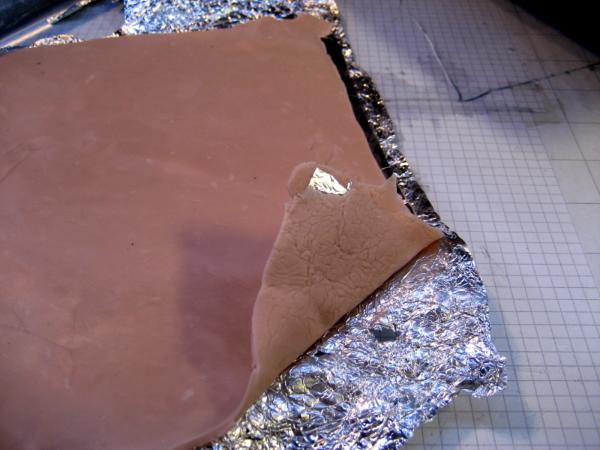
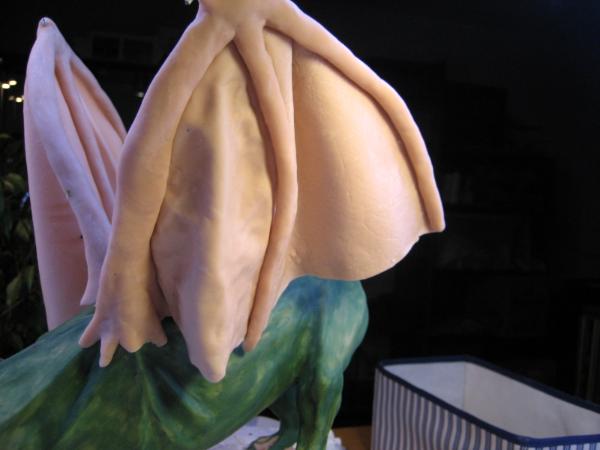
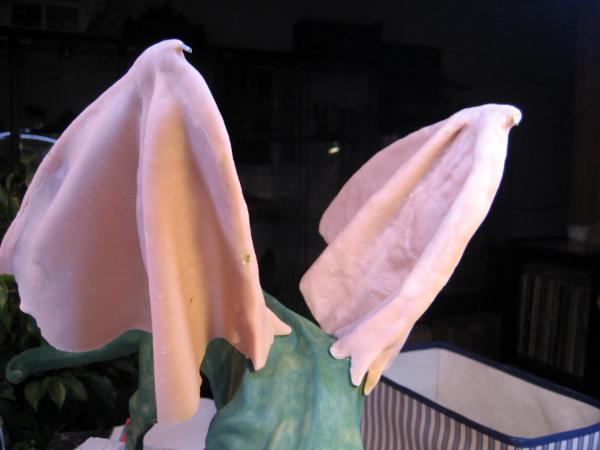
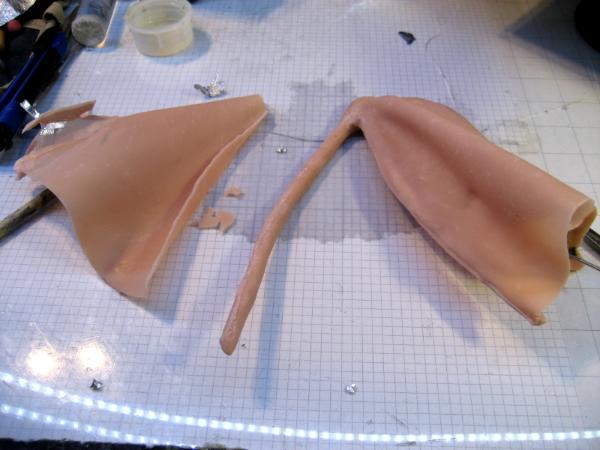
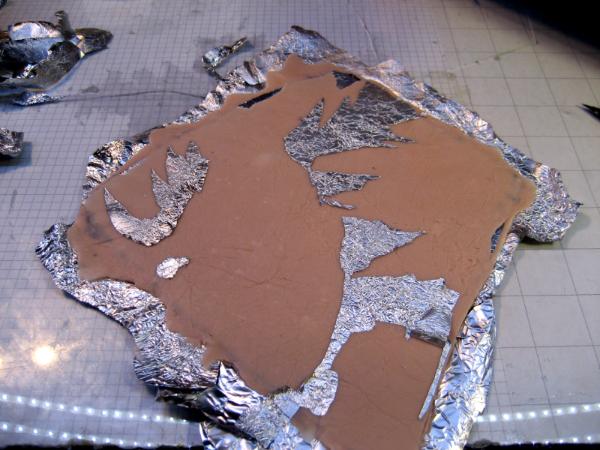
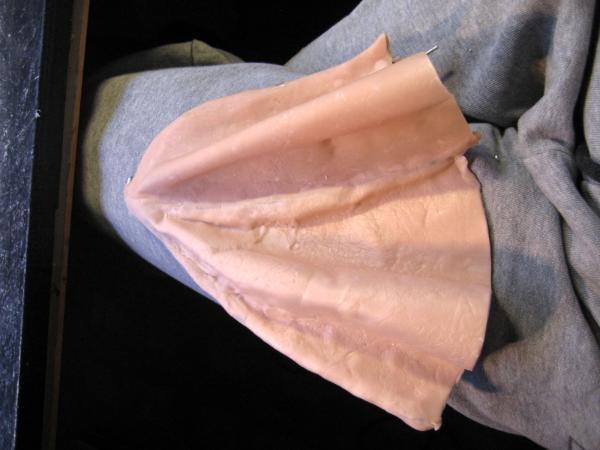
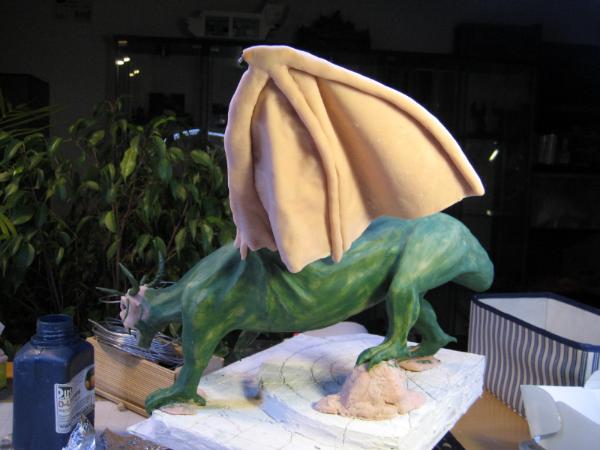
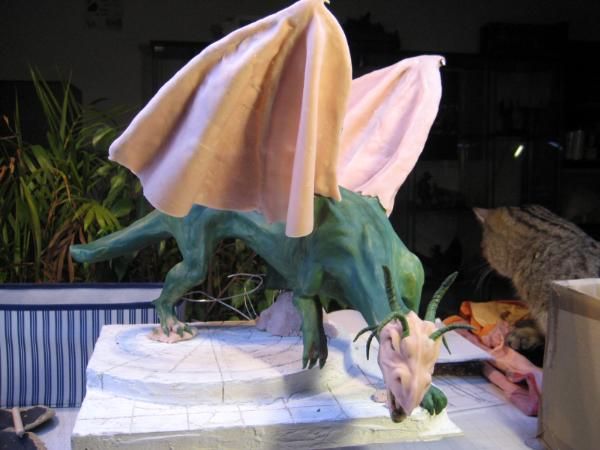

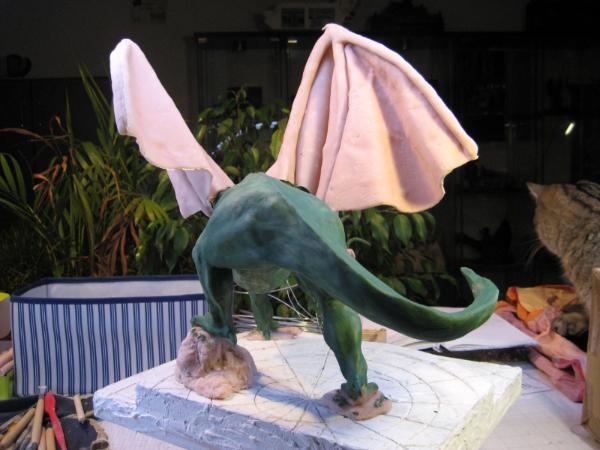
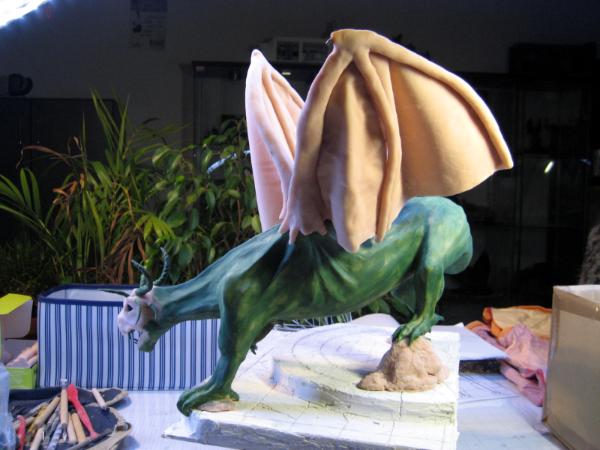
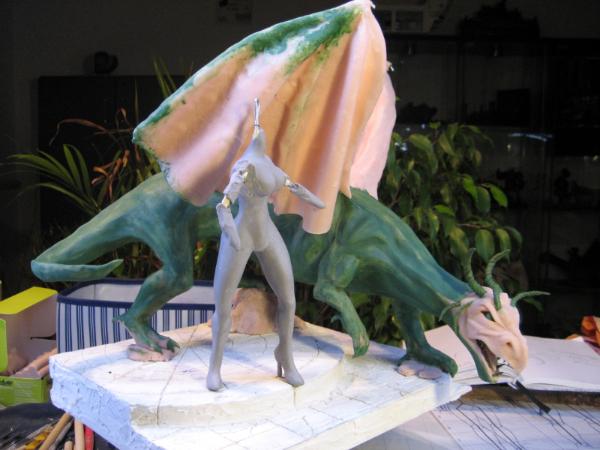
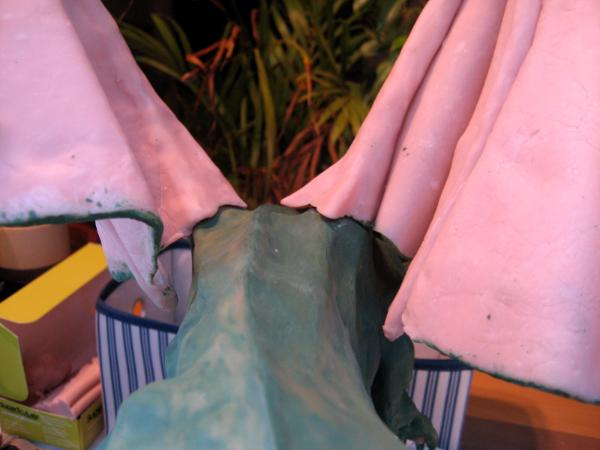
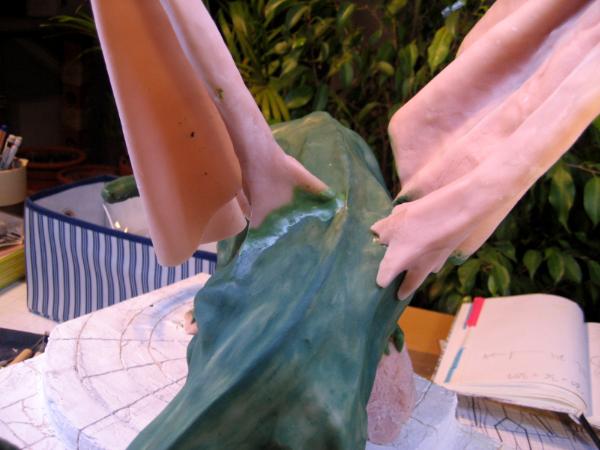
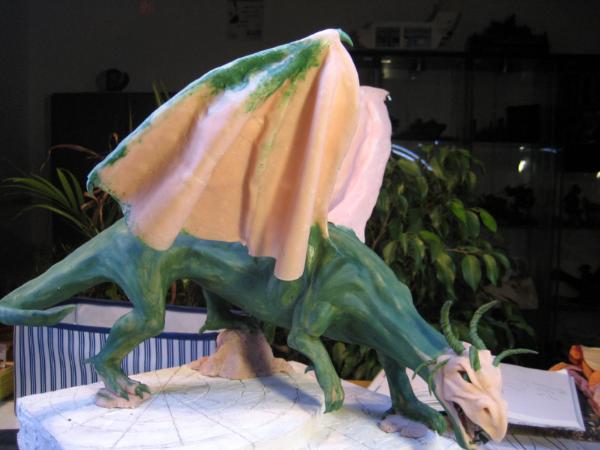
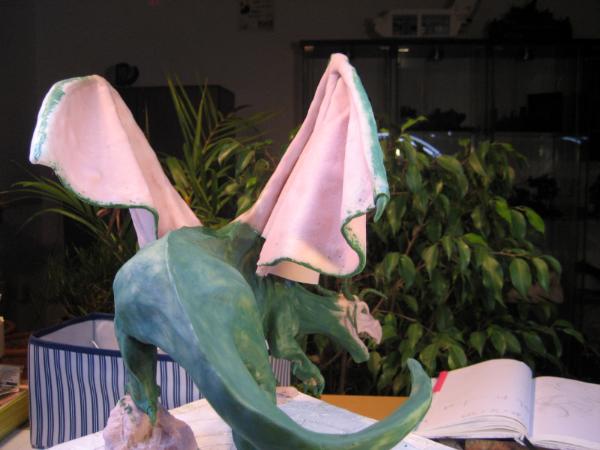
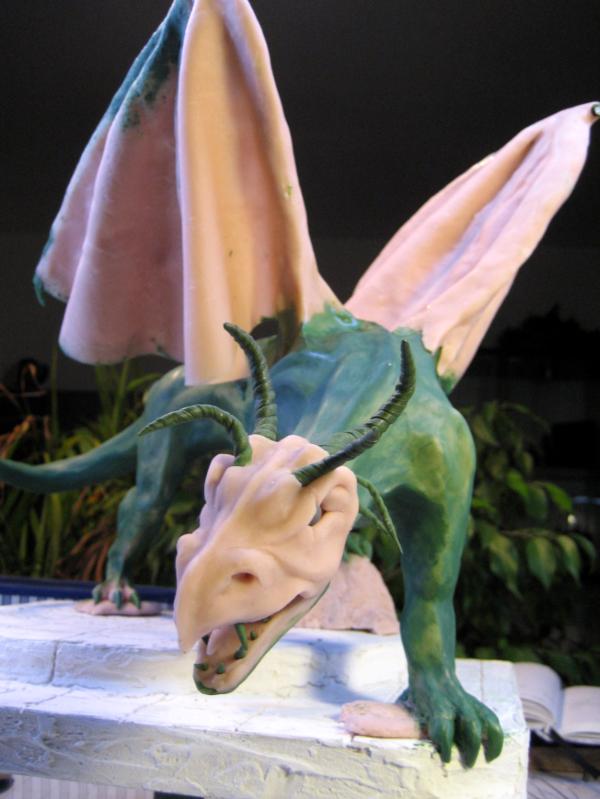
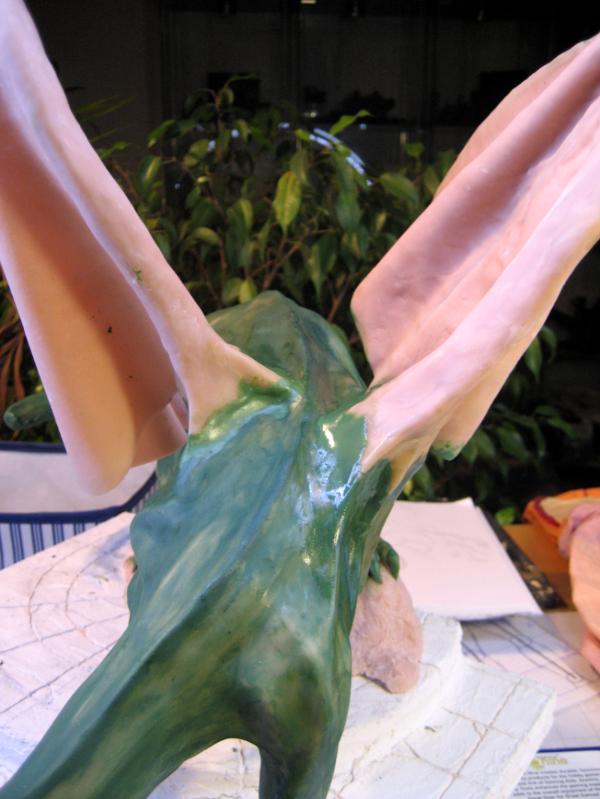
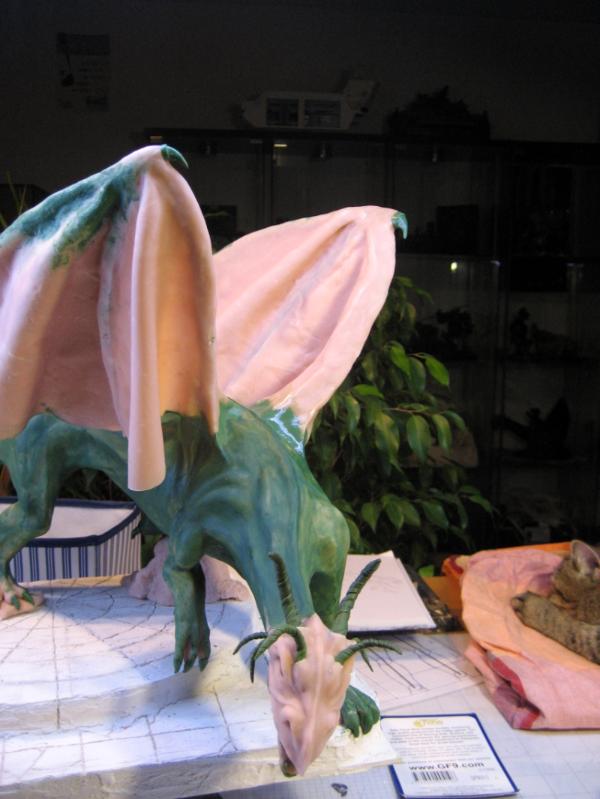
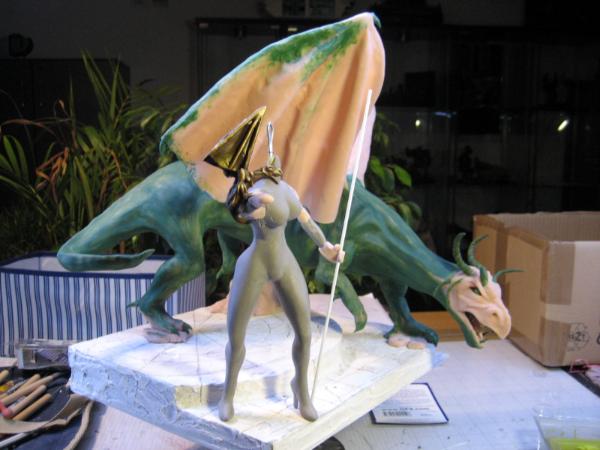


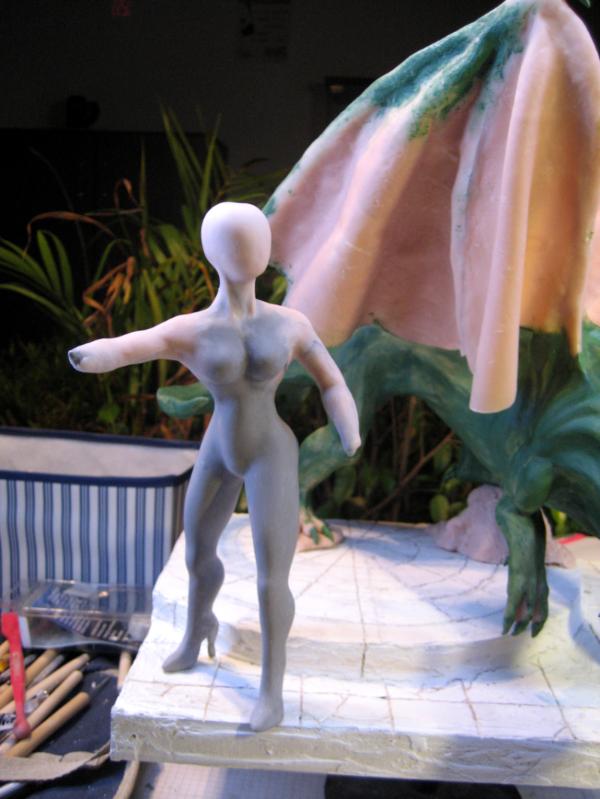


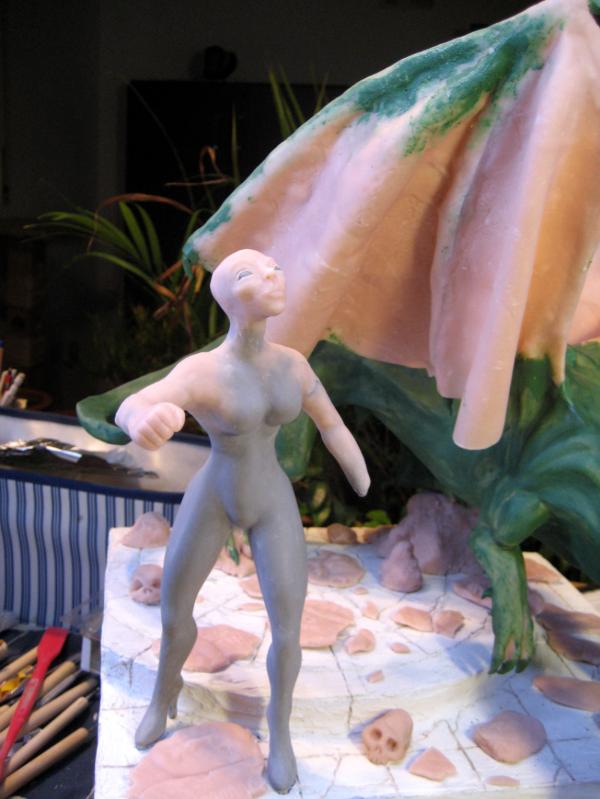
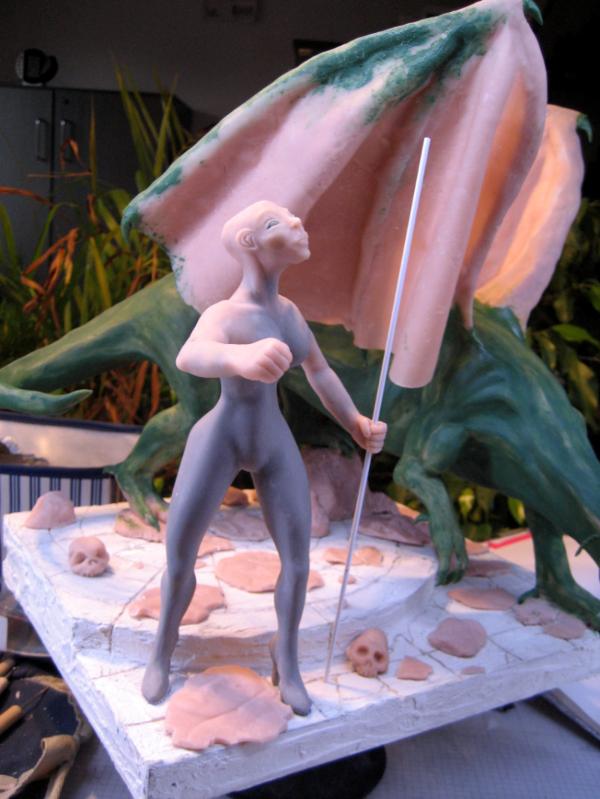
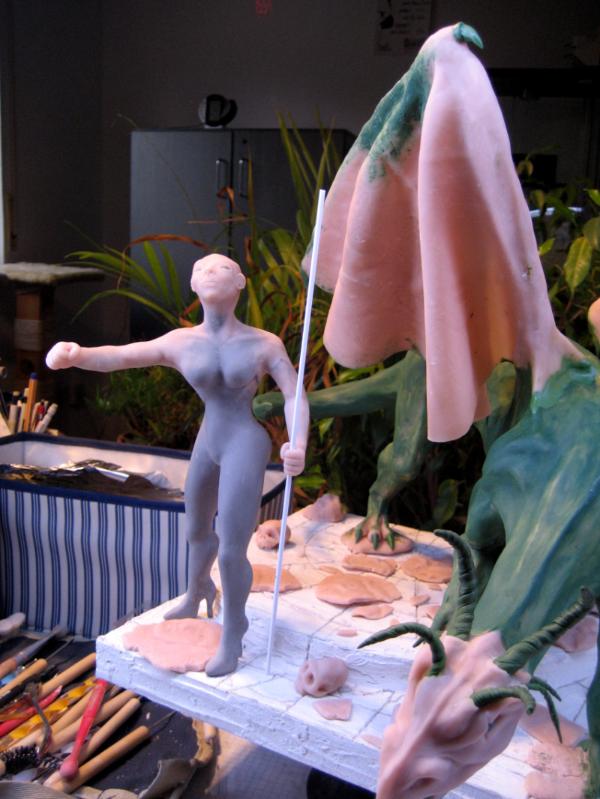

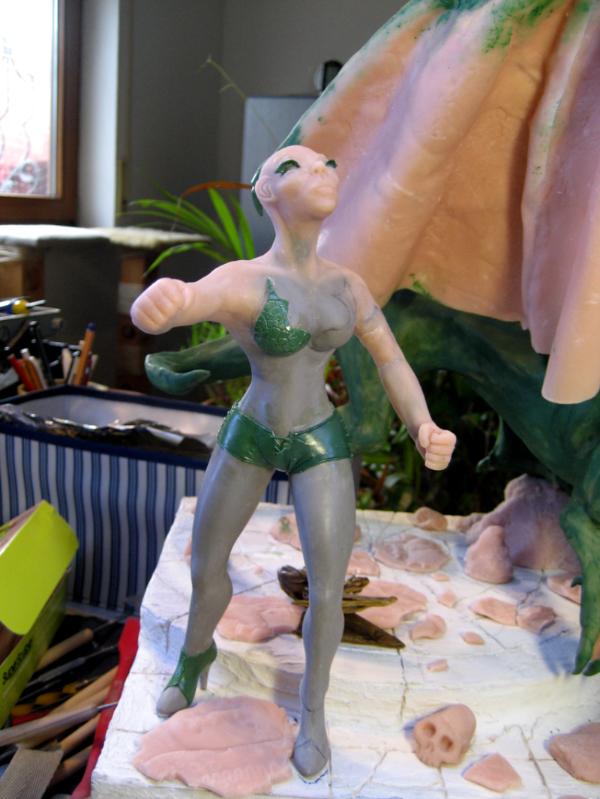

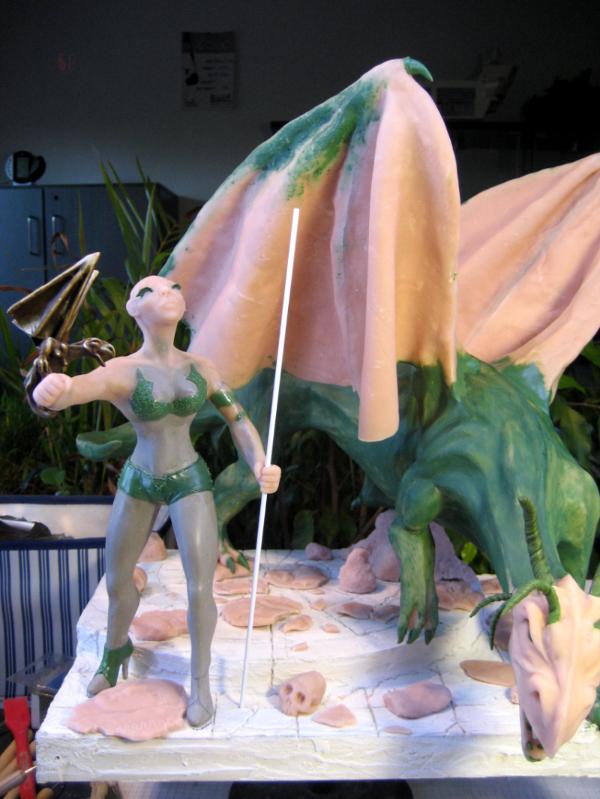
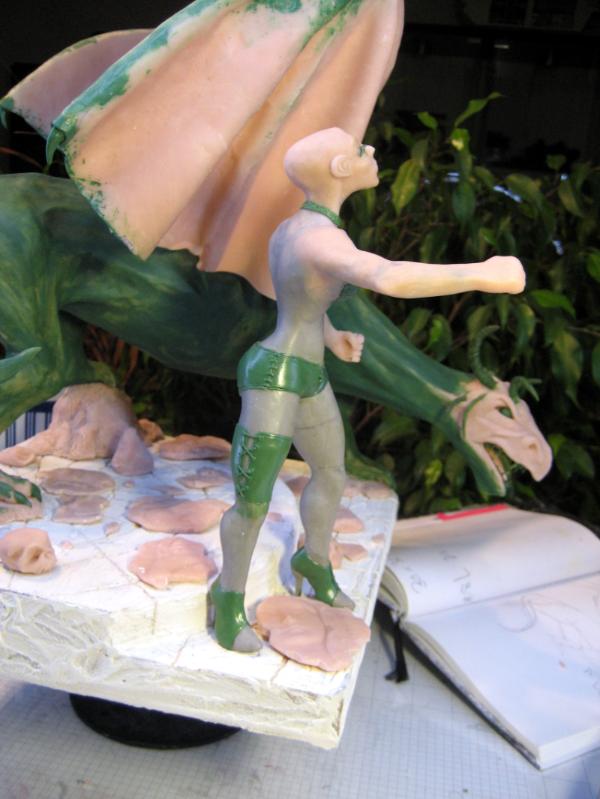

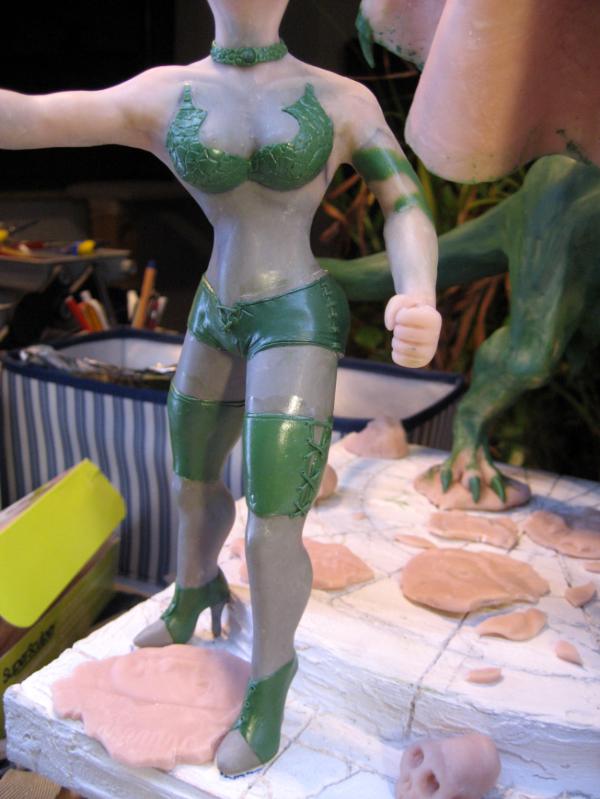
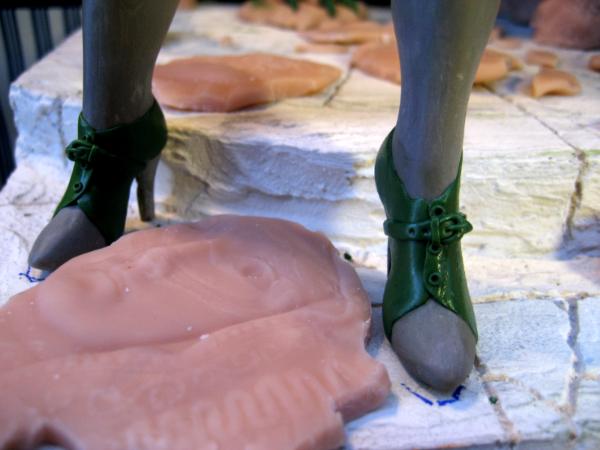
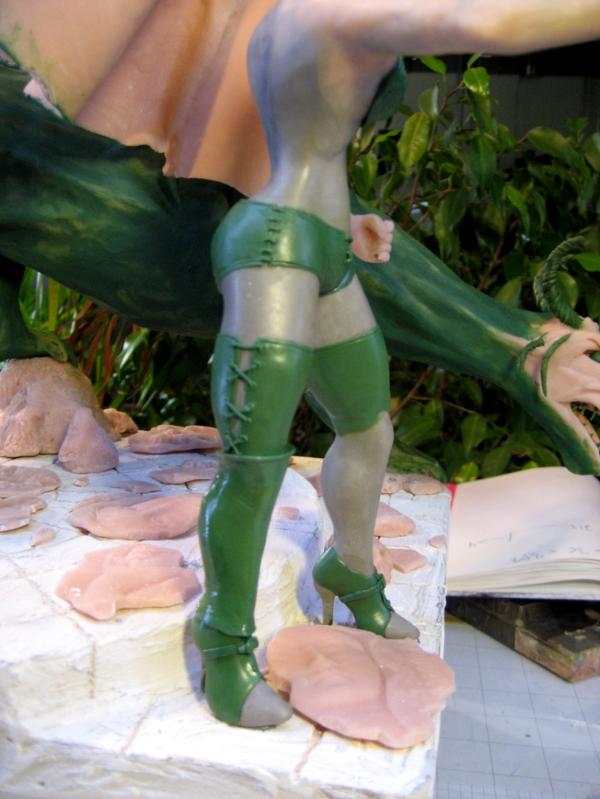
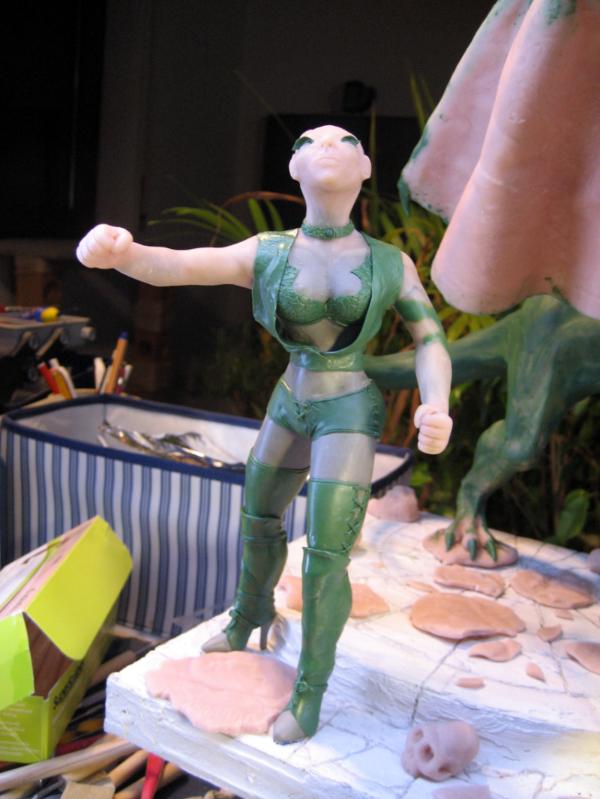


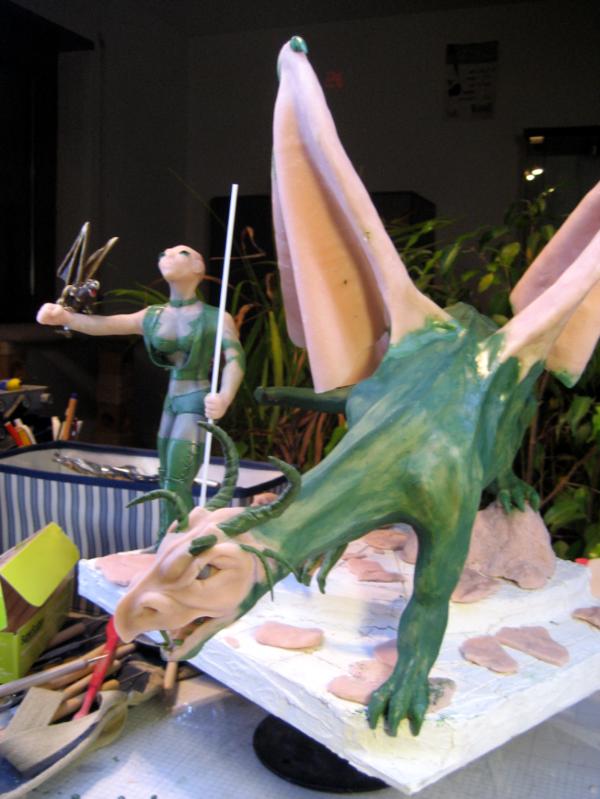


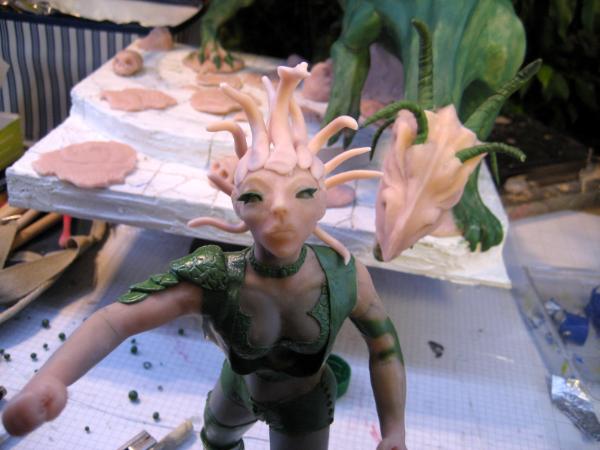
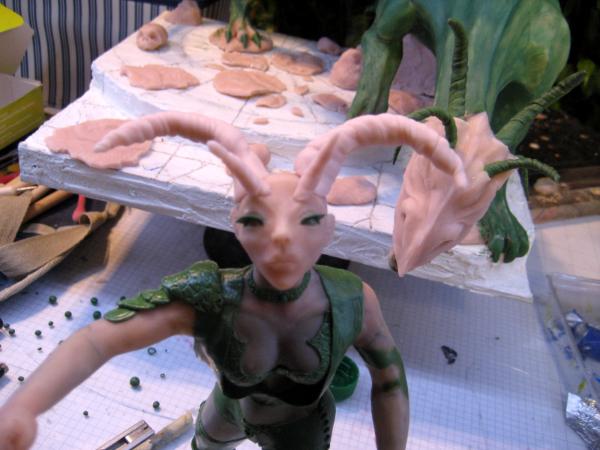
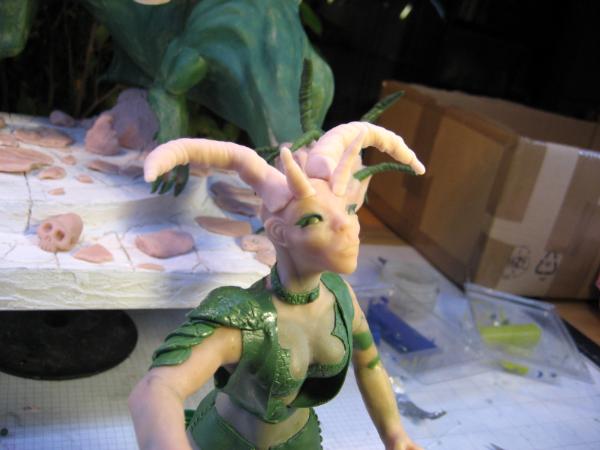
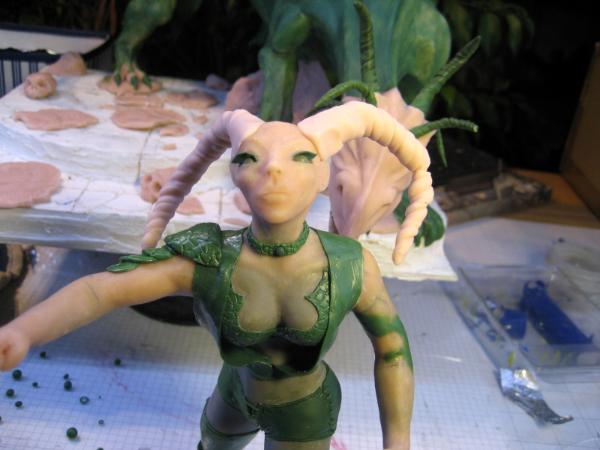

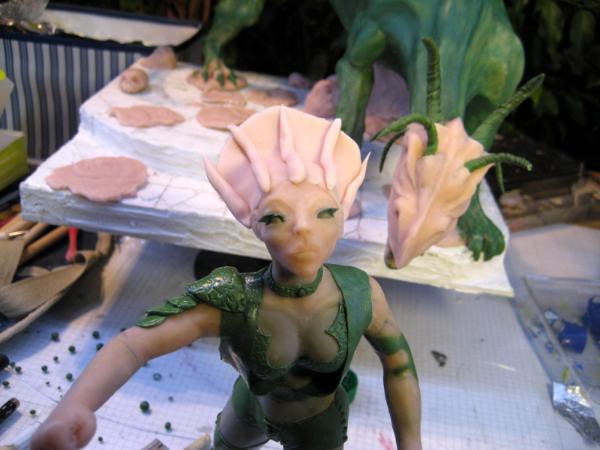
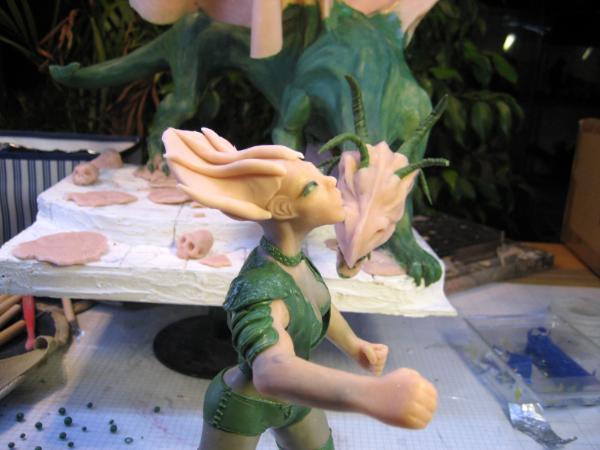


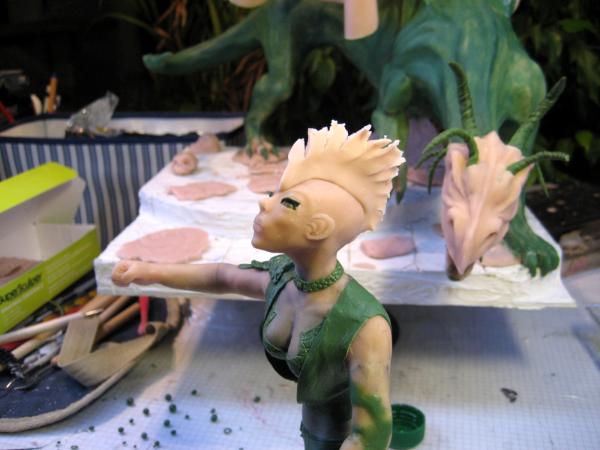
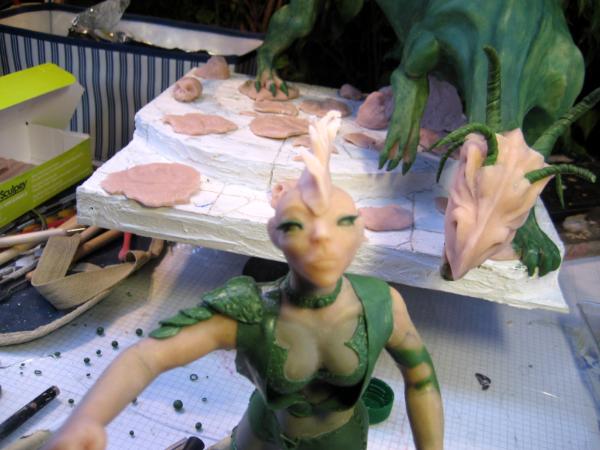

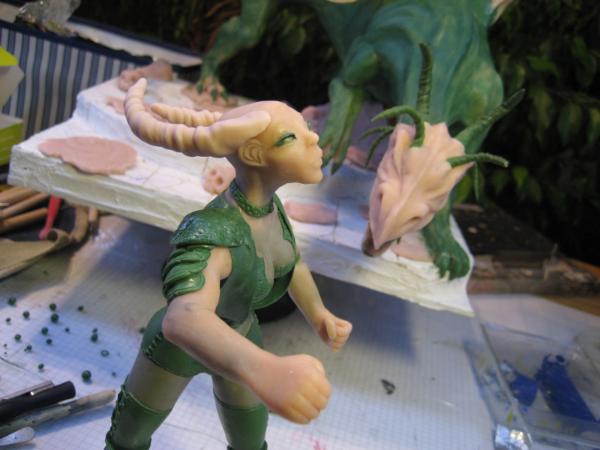
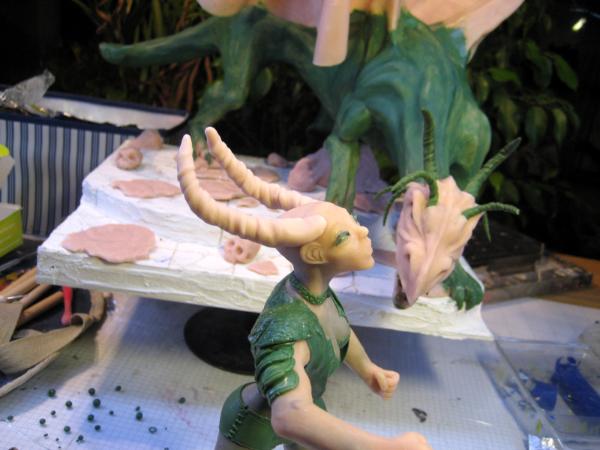
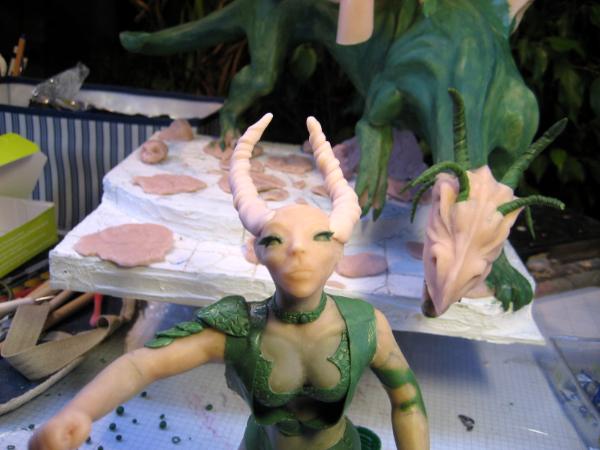
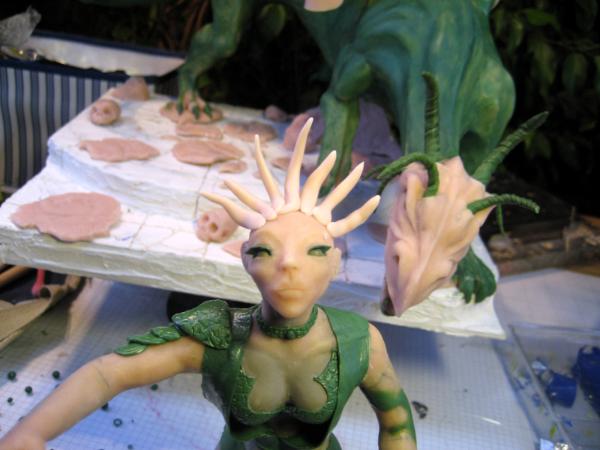


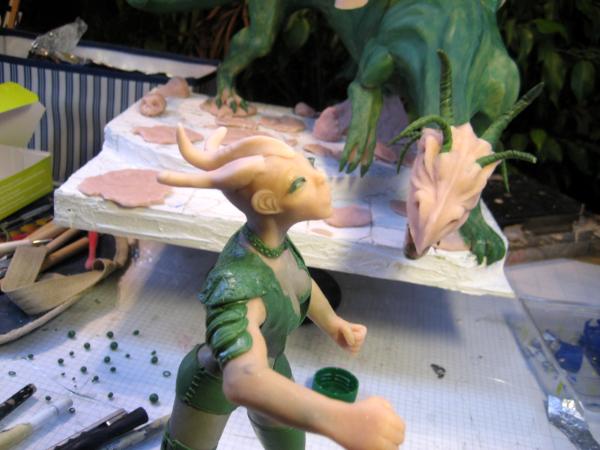


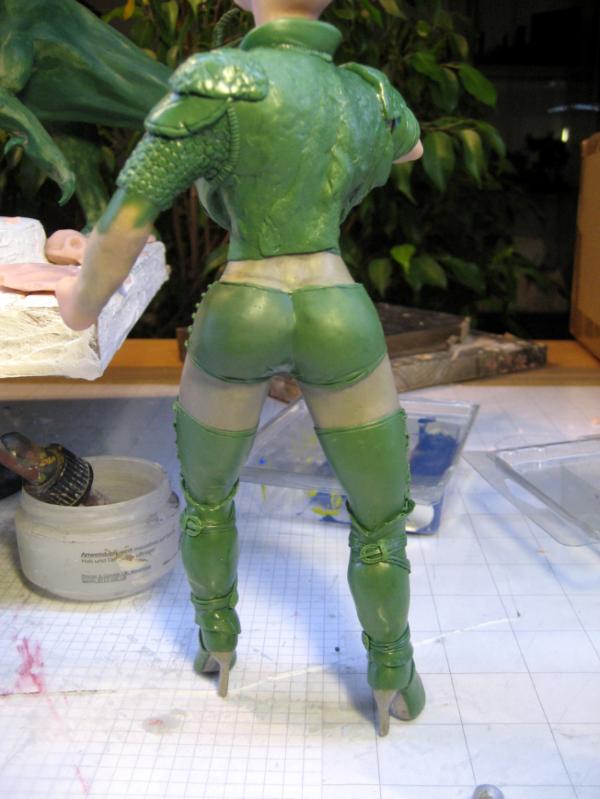


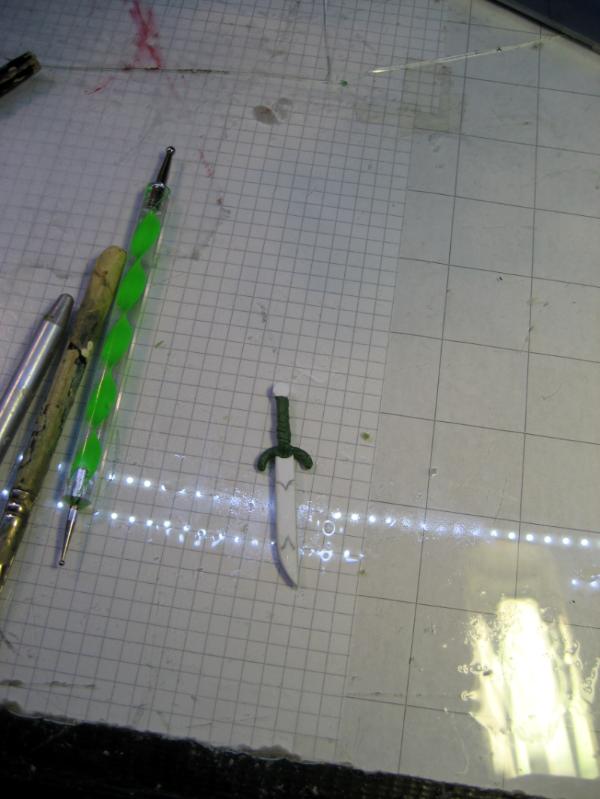


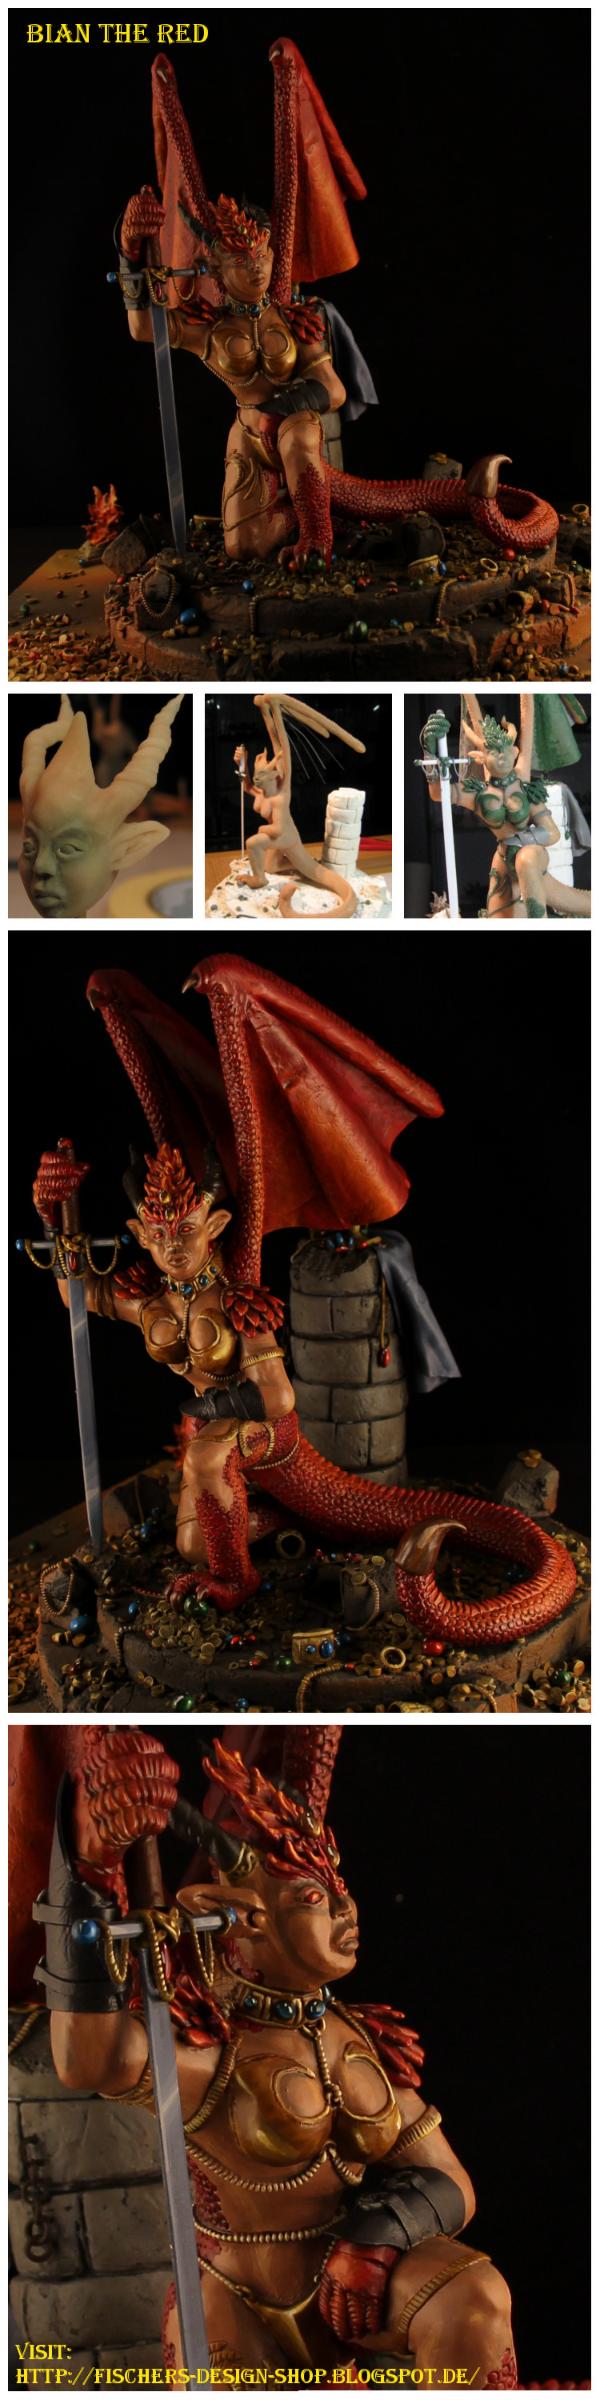
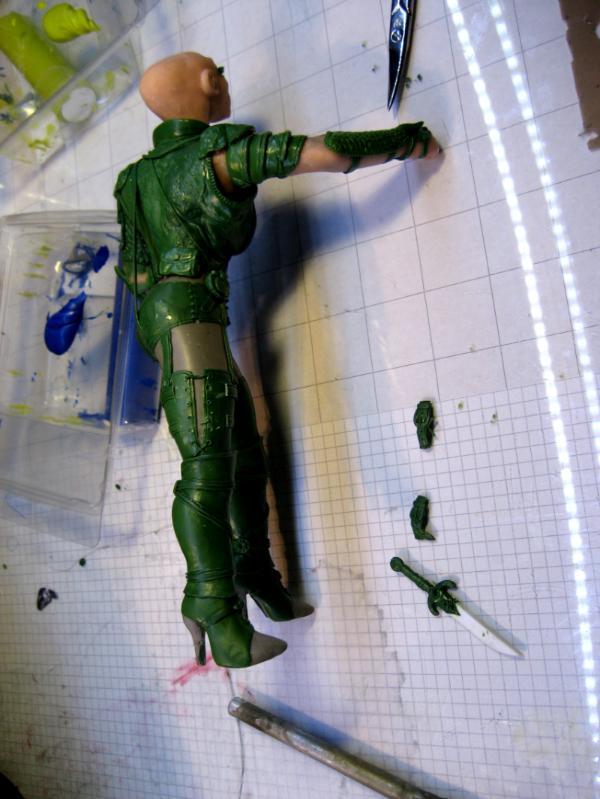
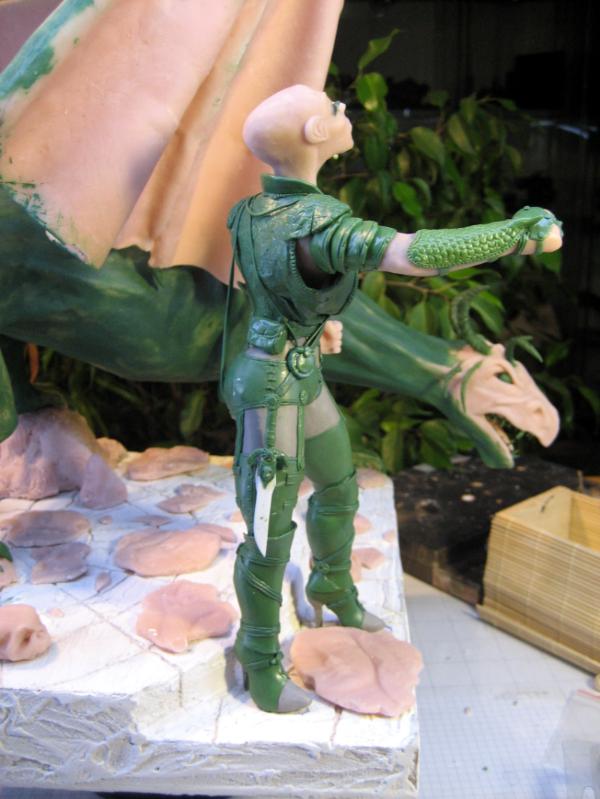
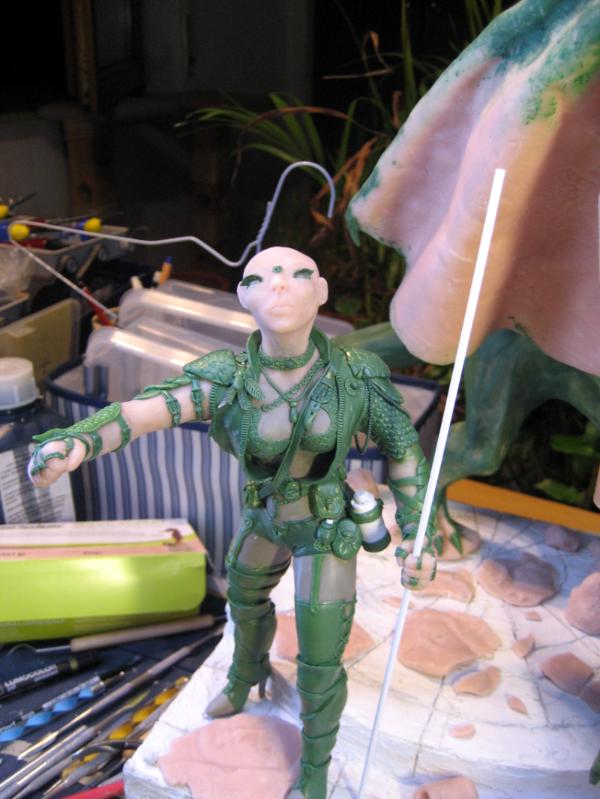


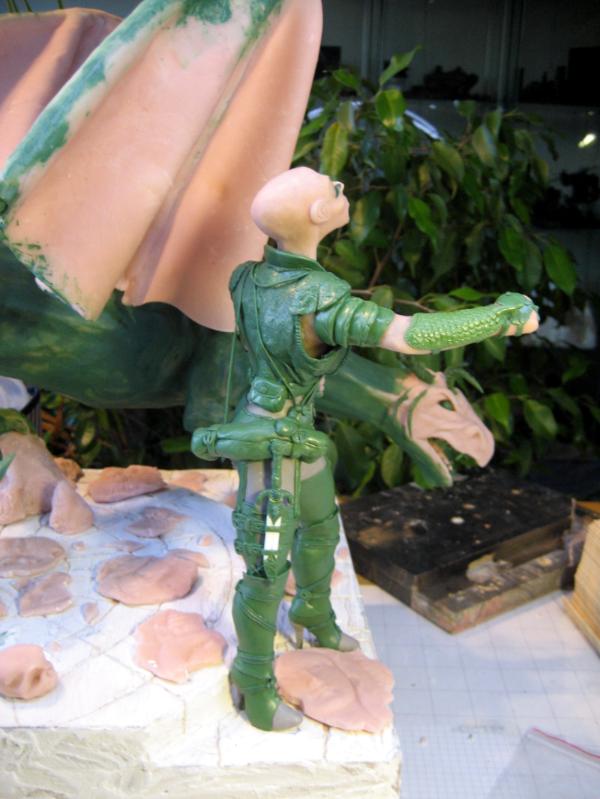
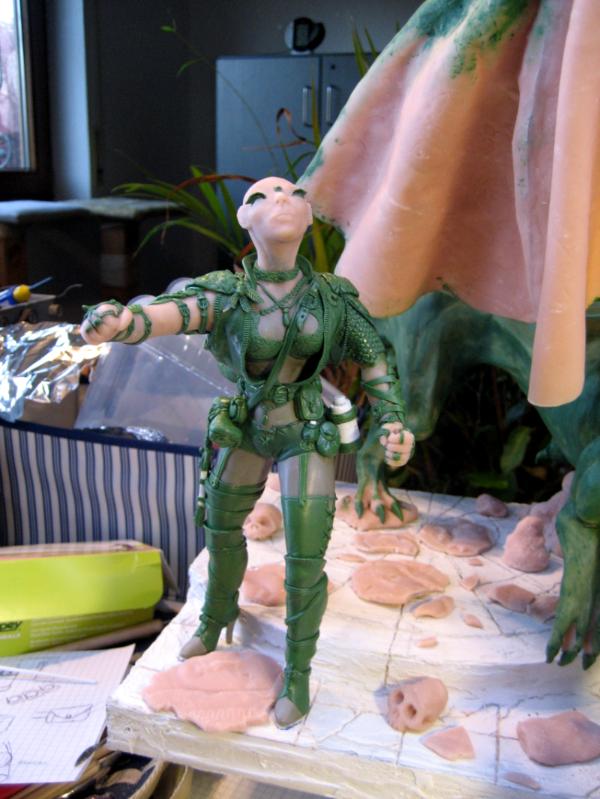

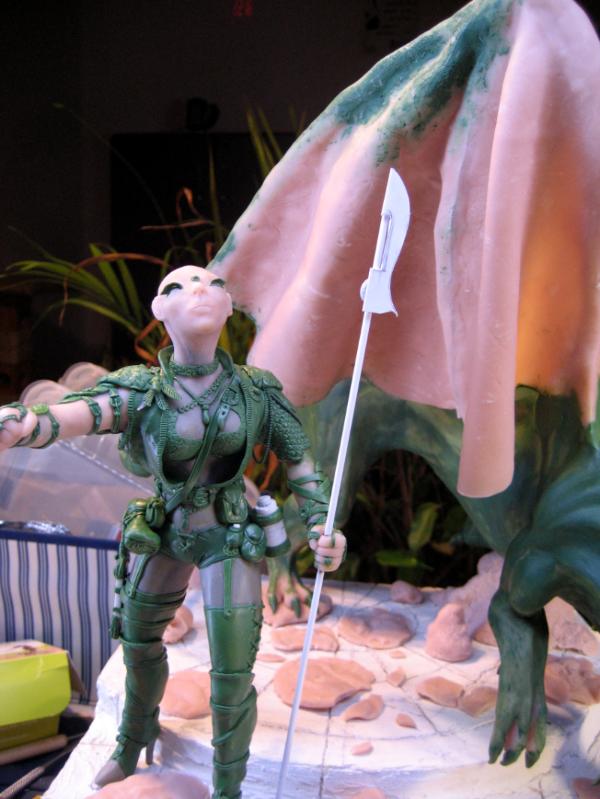
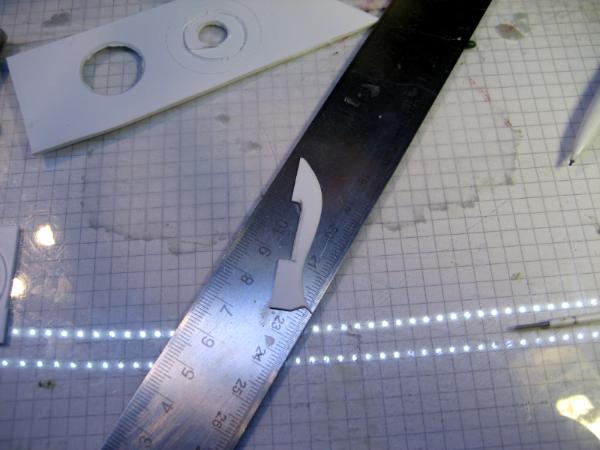

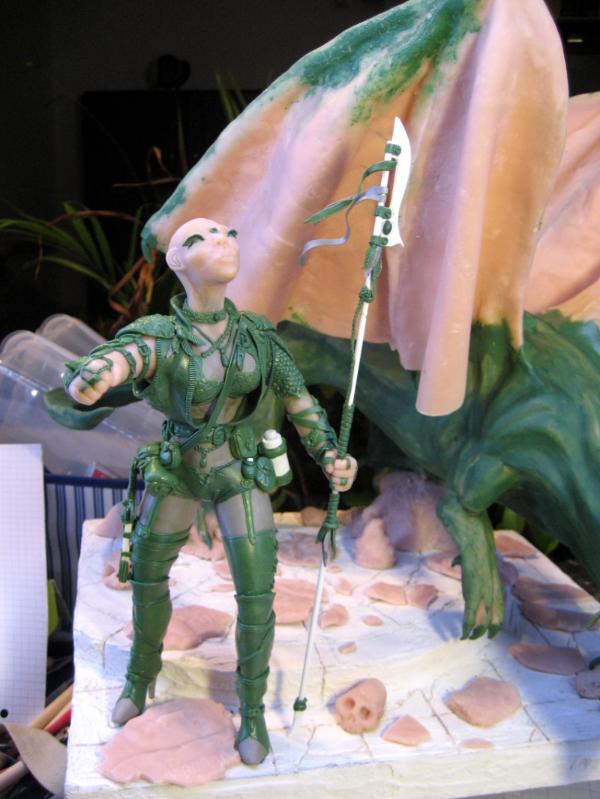
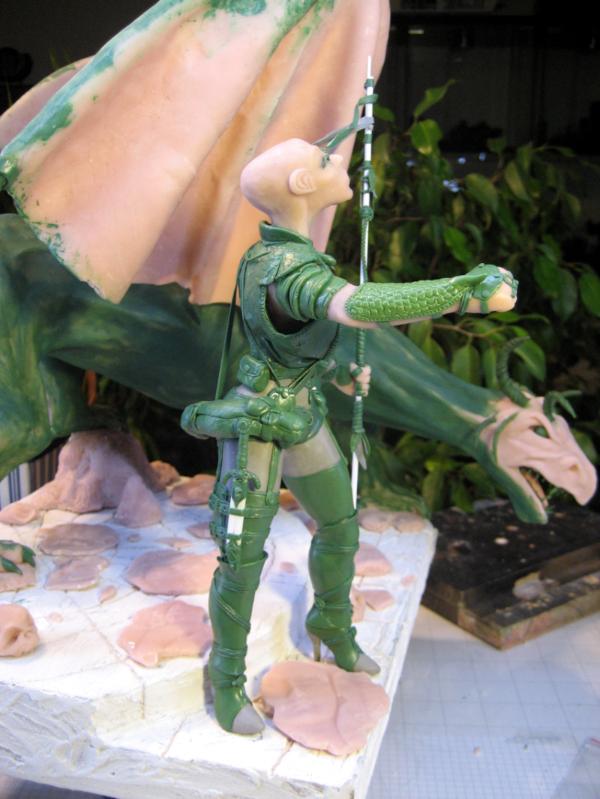
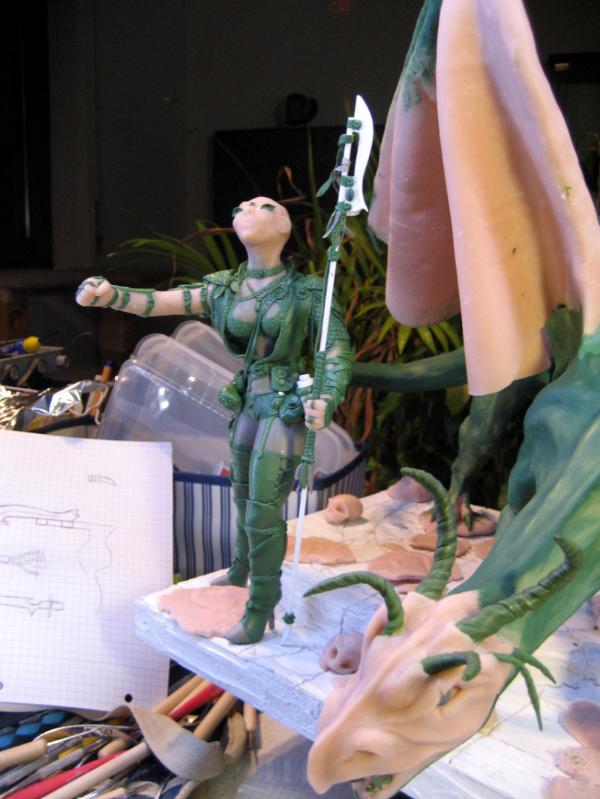


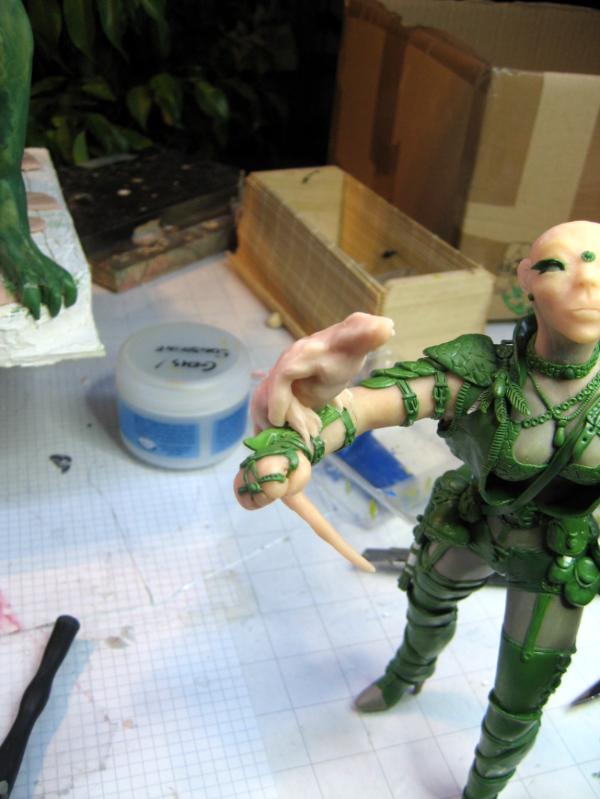
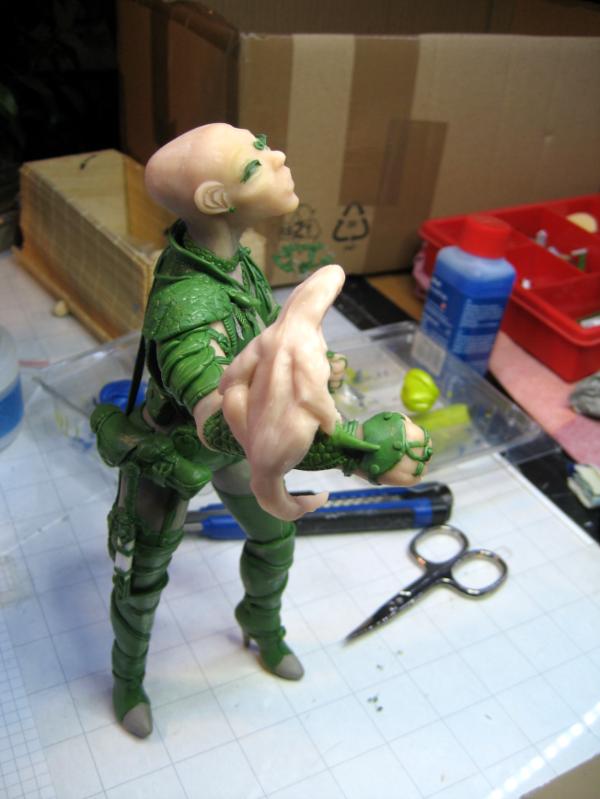
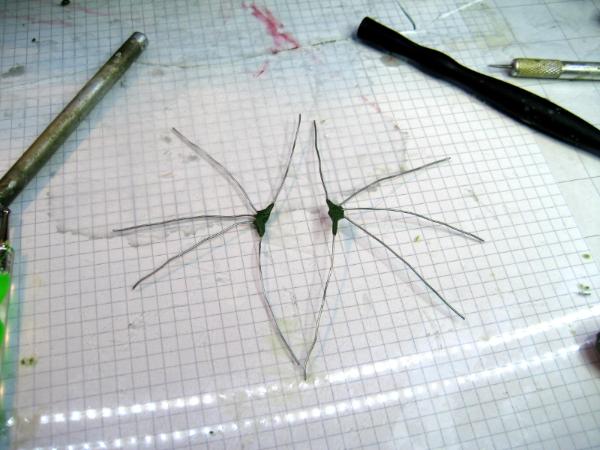
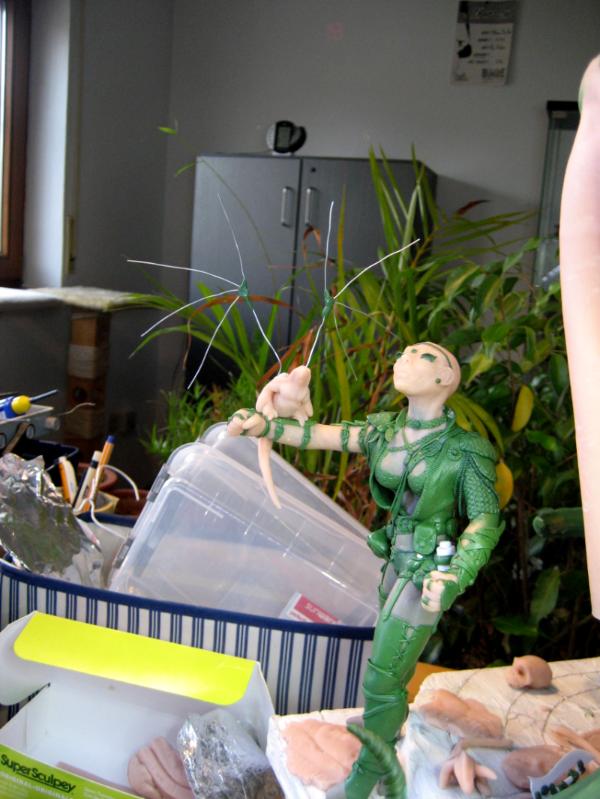
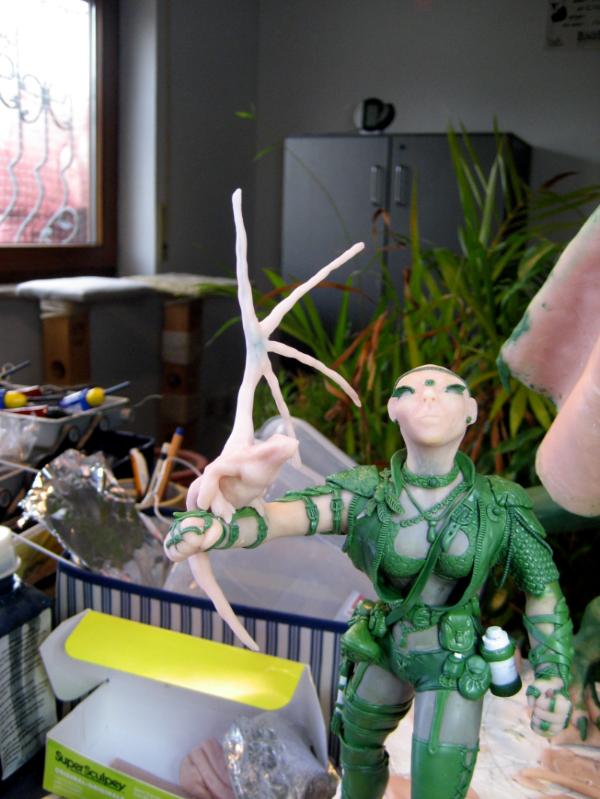
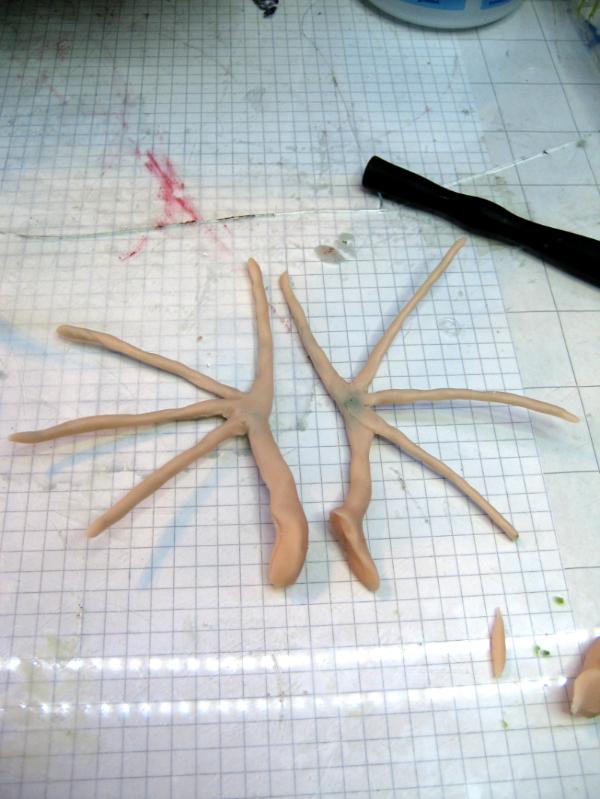
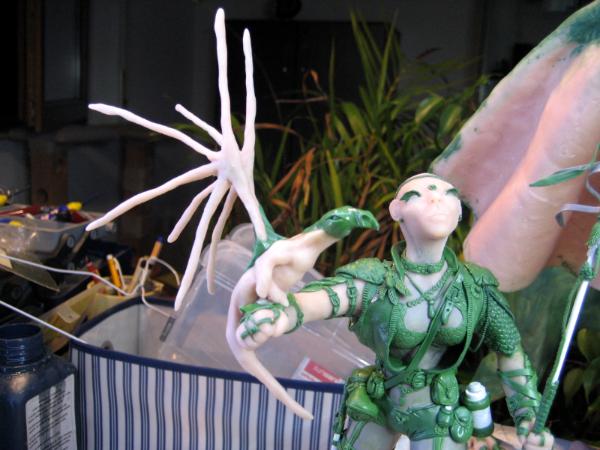
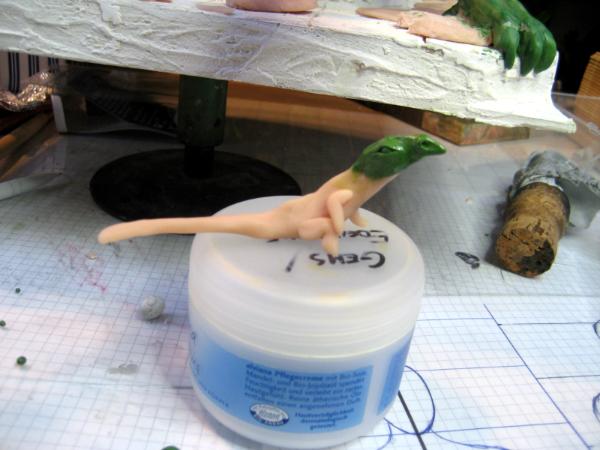
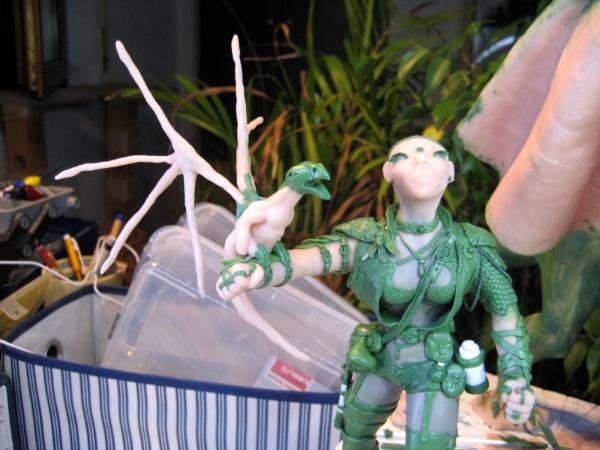


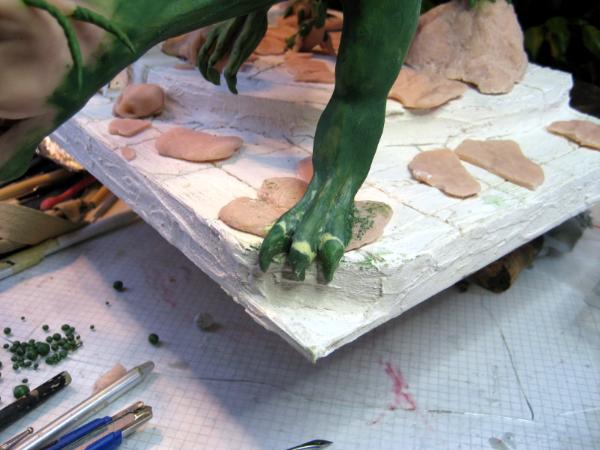

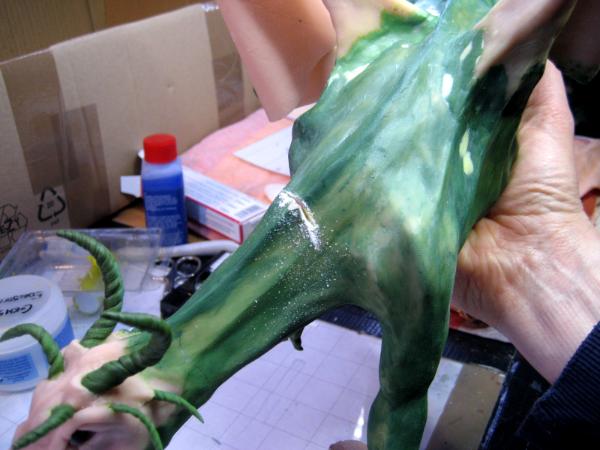

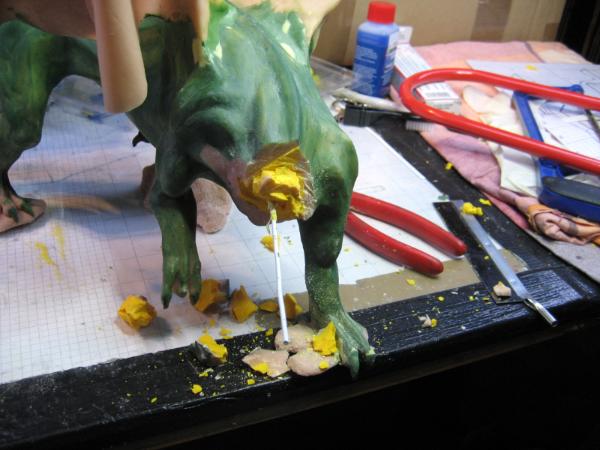
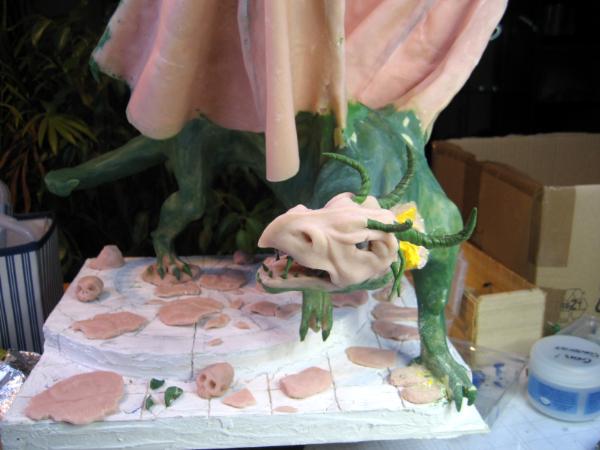

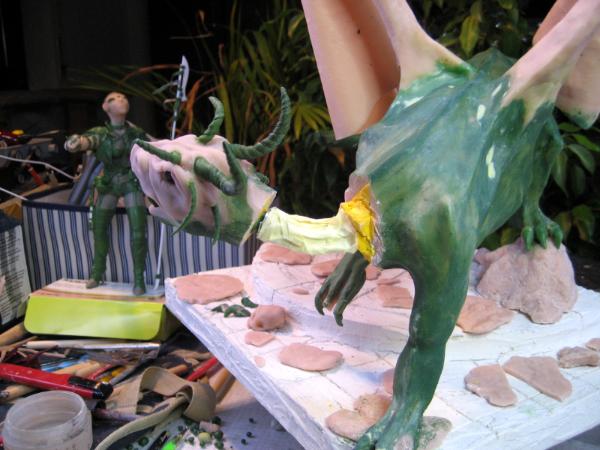


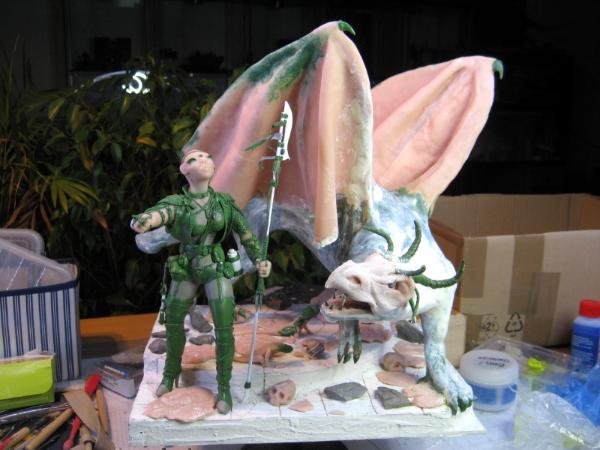
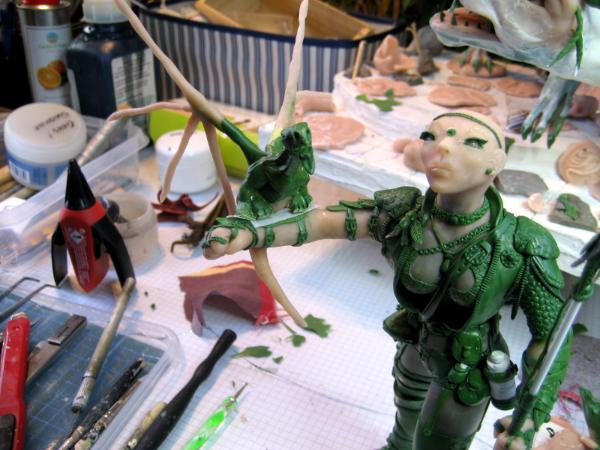
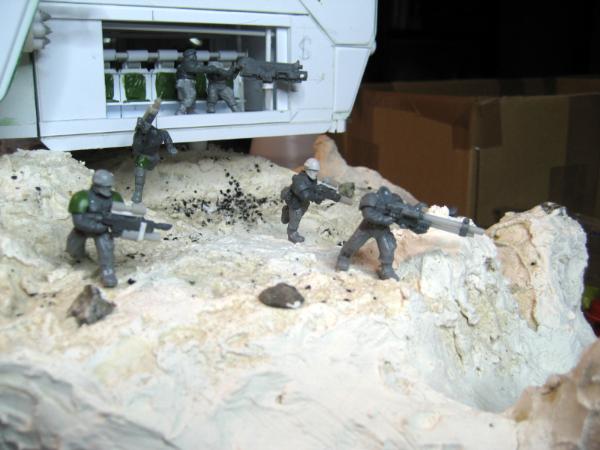
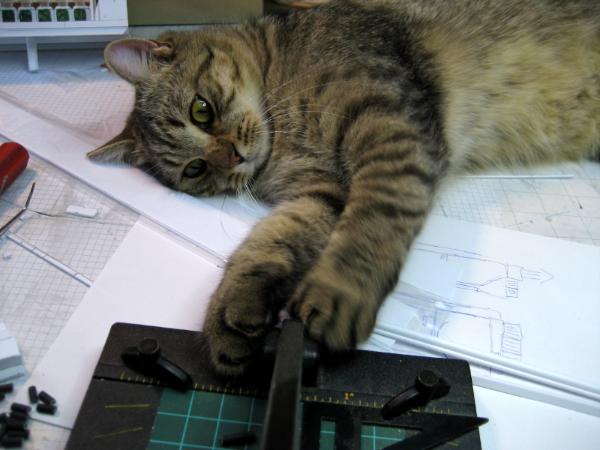
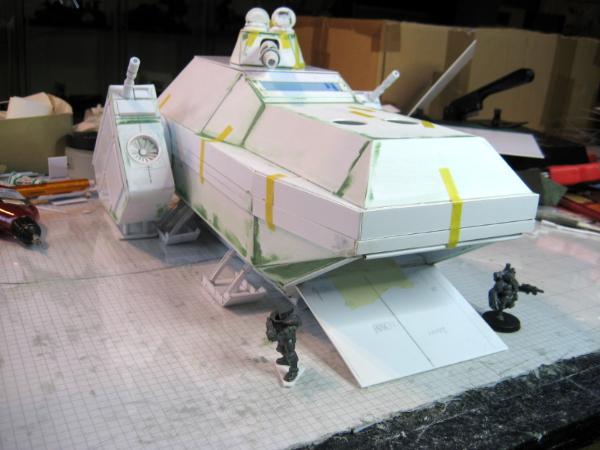
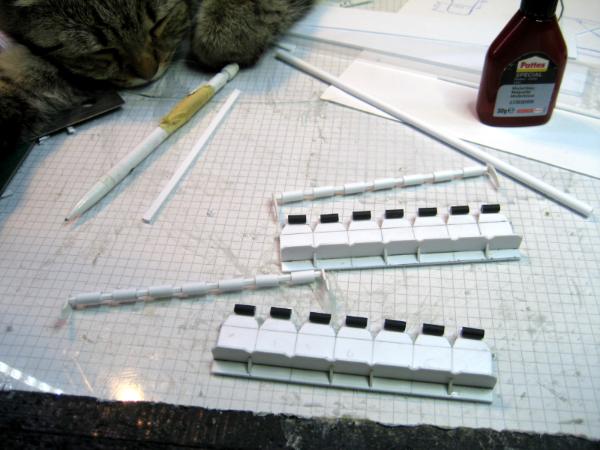
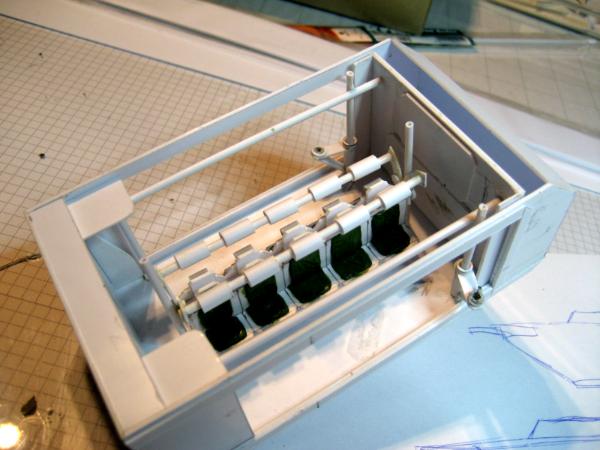
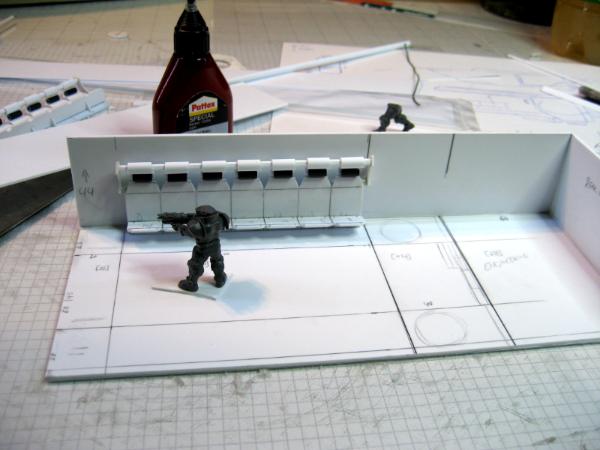
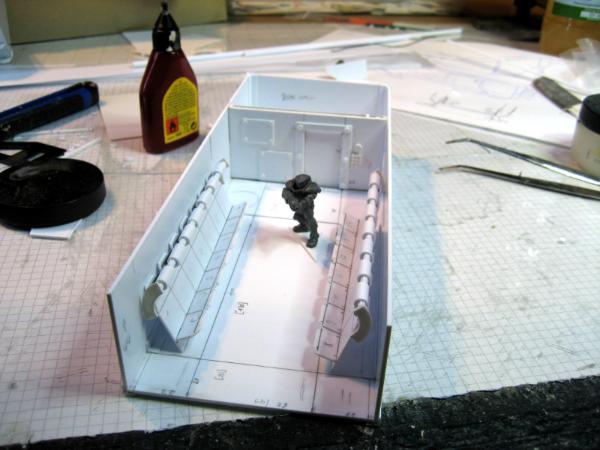
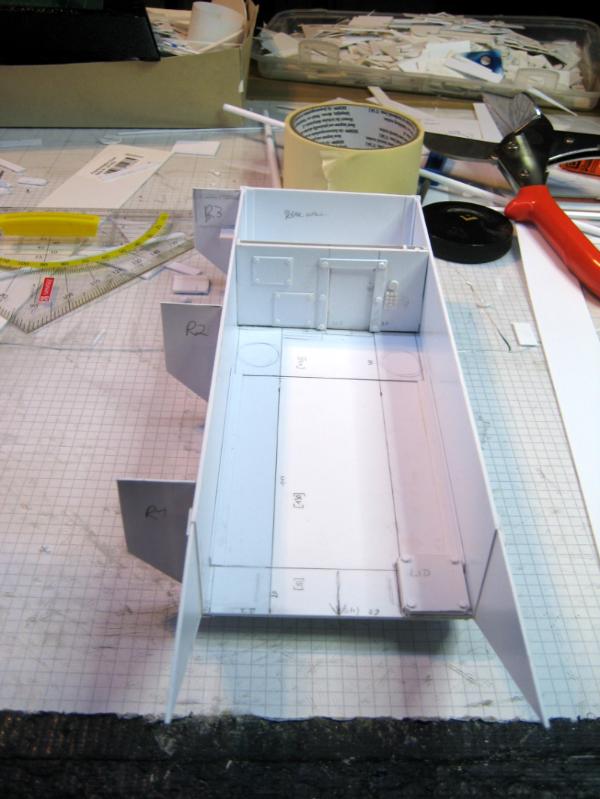
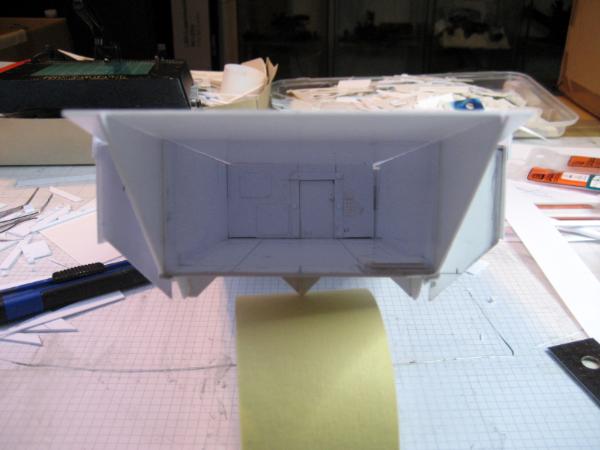
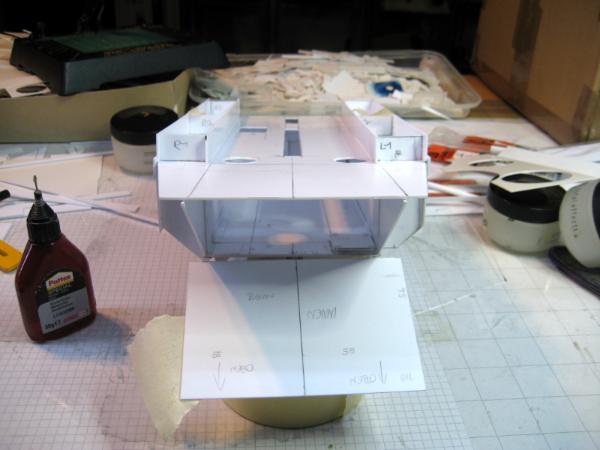
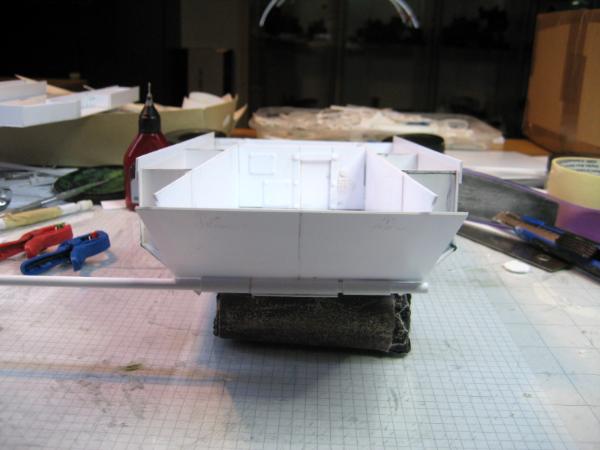
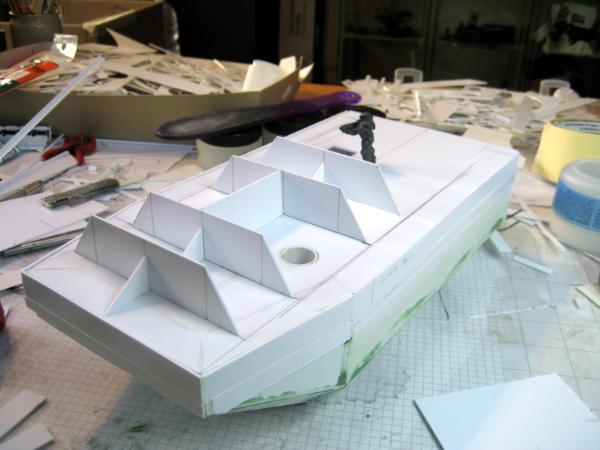
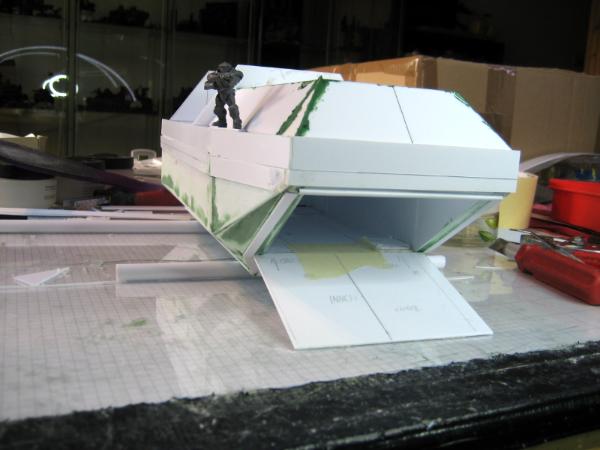
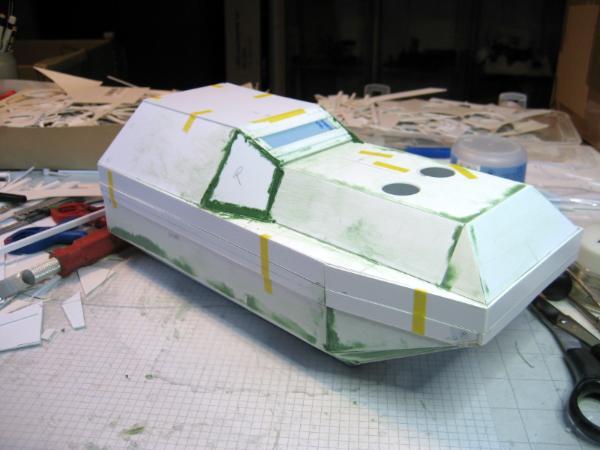
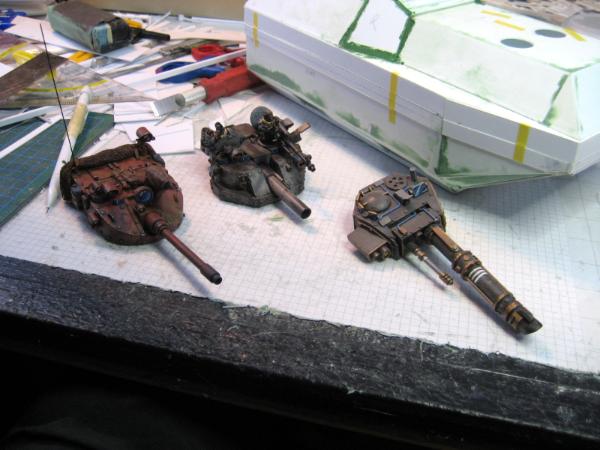
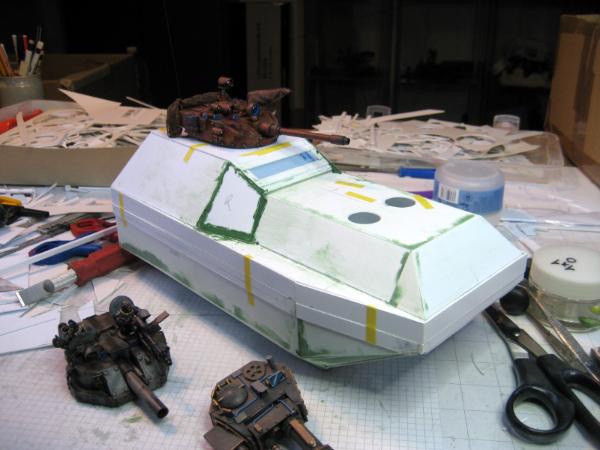
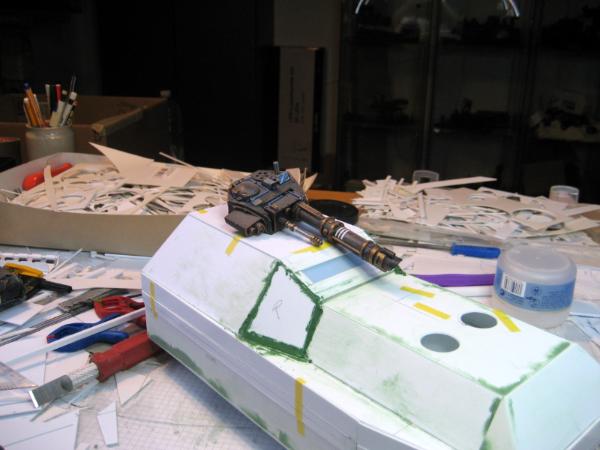
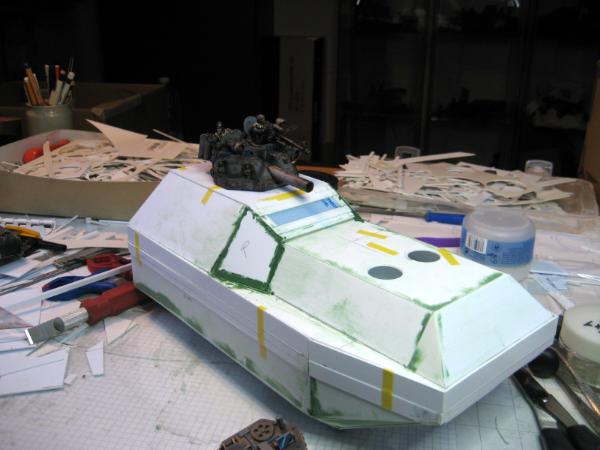
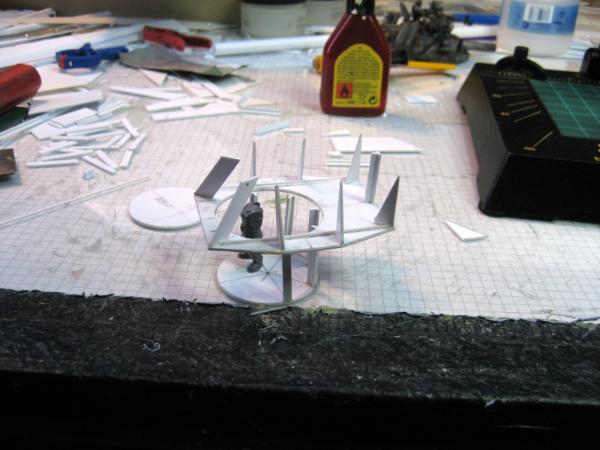
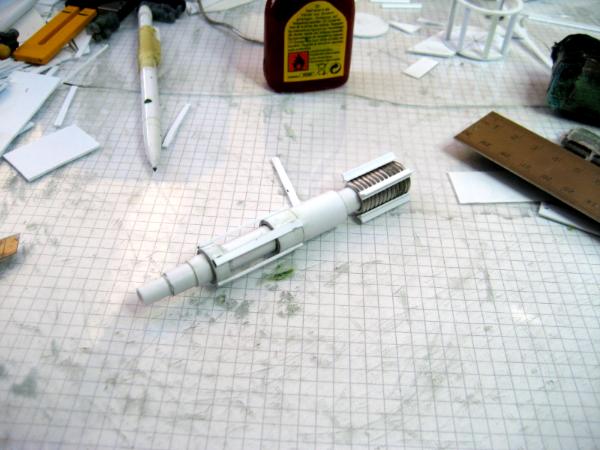
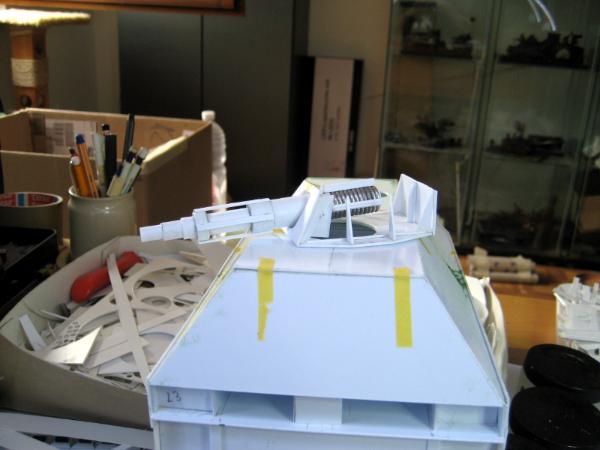
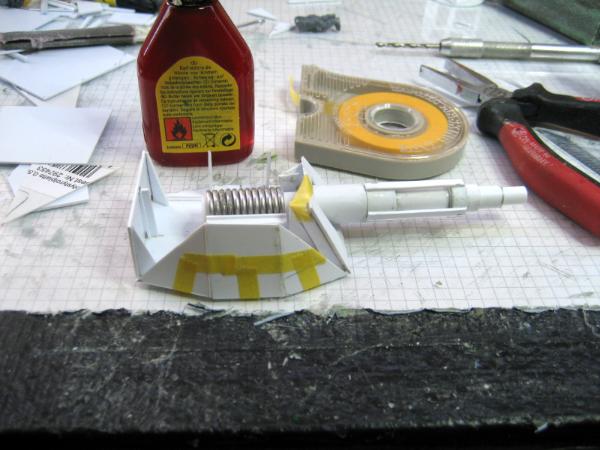
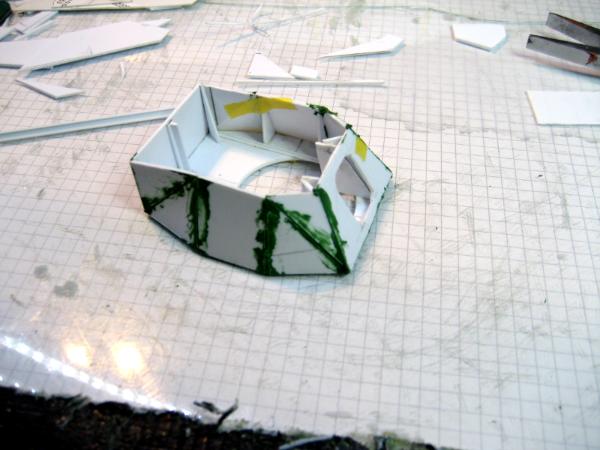
 , though I too am in and out and my latest scheme has already fallen to the curb. Eagerly anticipating your next installment as you and the_Blackadder are two of my favorite scratch builders and you both seem to be active currently