10972
Post by: Ruglud
No. Words.
......
.......

65595
Post by: Camkierhi
And again, awesome. stunning work so far.
62749
Post by: Dr H
I'm always impressed at how clean and sharp you sculpt your details. I have to go back in later and carve away stuff to sharpen up my sculpting. Good work. 
32373
Post by: Klaus, not Santa
Thank you guys!
Well, it is happeing again...my attention span is shrinking and I'm constantly distracted :(
I hope it is not the start of a "low phase"
But something new caught my attention.
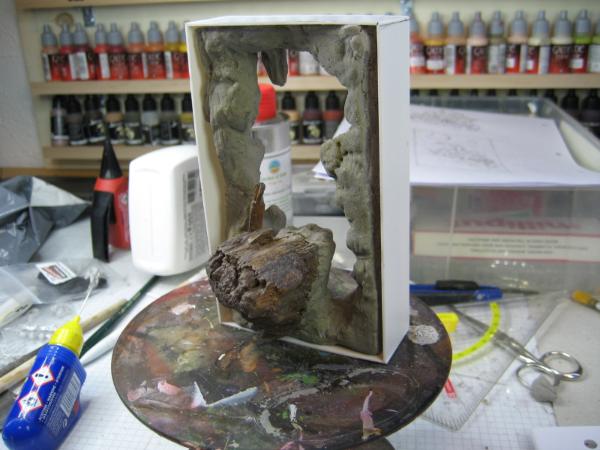
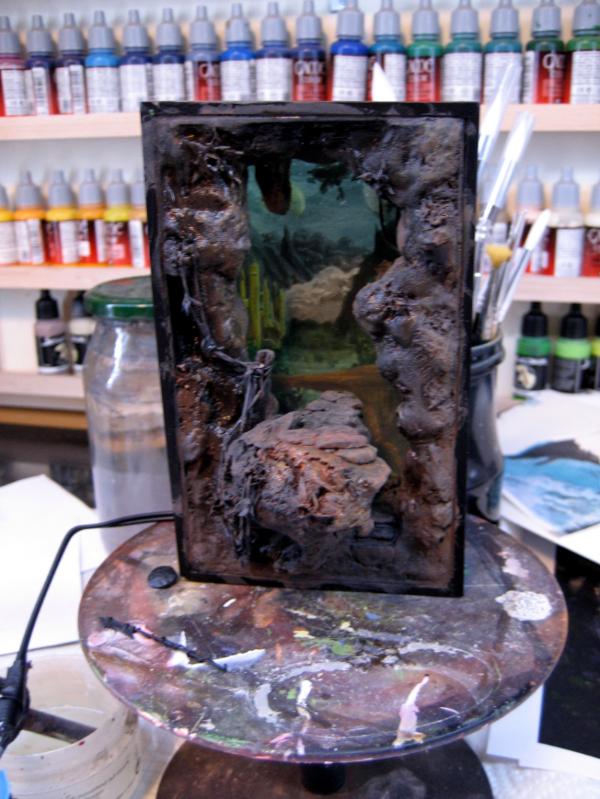
I found a small piece of wood in my shed as I was preparing logs for the wood burner.
It is really small, but it caught my attention and an image of a guardian on watch came to my mind.
Once this idea was in my head, the "Shore Leave" had no chance 
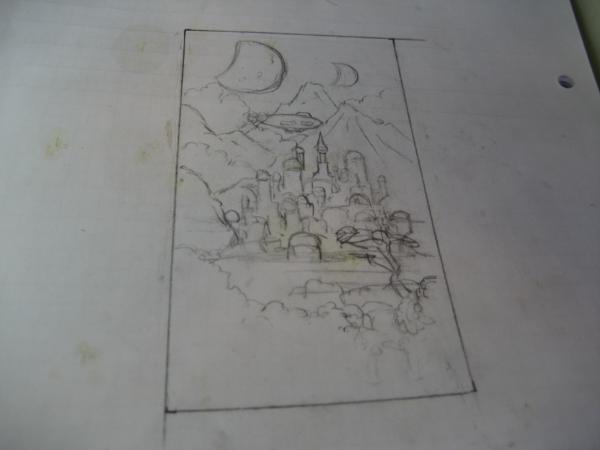
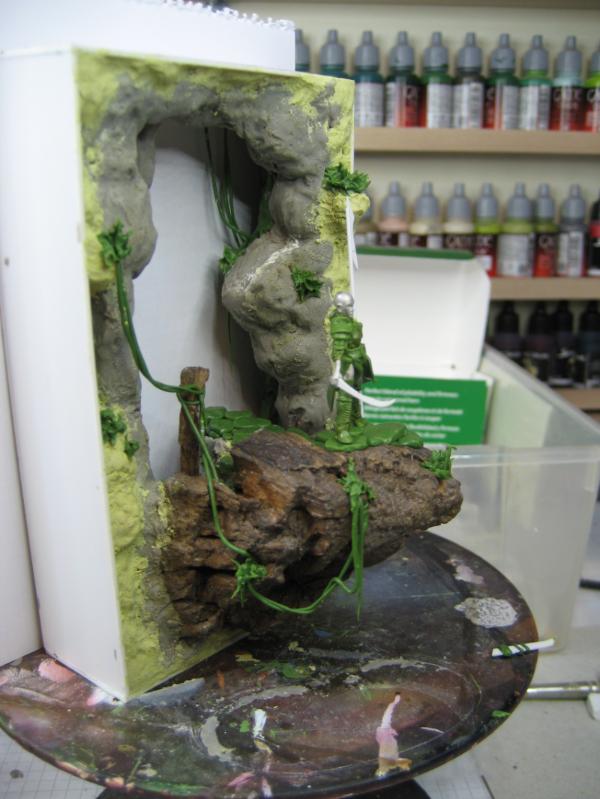
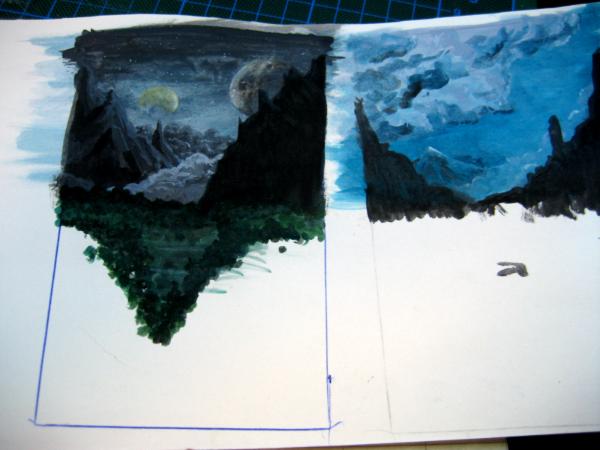
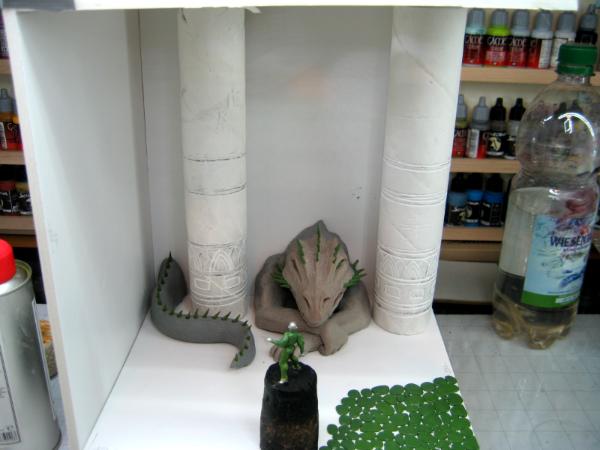
So while I had the basic idea of a guardian standing on an outcrop of rocks, I still had no real idea of any setting or details.
But looking at the little piece of wood I was thinking about how I could realistically use it as a base or plinth.
It would have to positioned that the one flat side was the top and the other was the rear - so that it really looked like an outcrop. With this in mind I started some sketching.
Over the last one or two years it became fashion to build vignettes or dioramas with a painted background integrated - just like these here Crystal Brush entries (NOT mine :
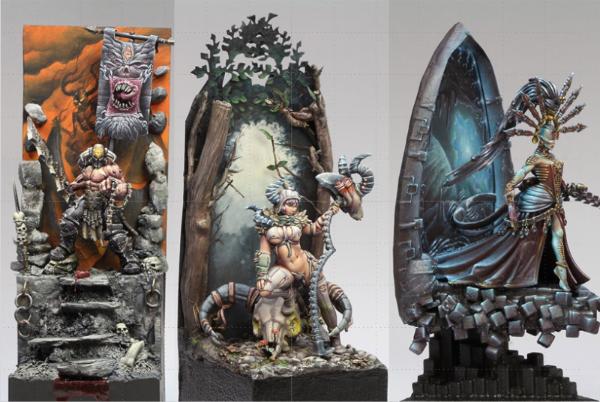
I wanted to try something similar, but also try to give it a bit more "depth".
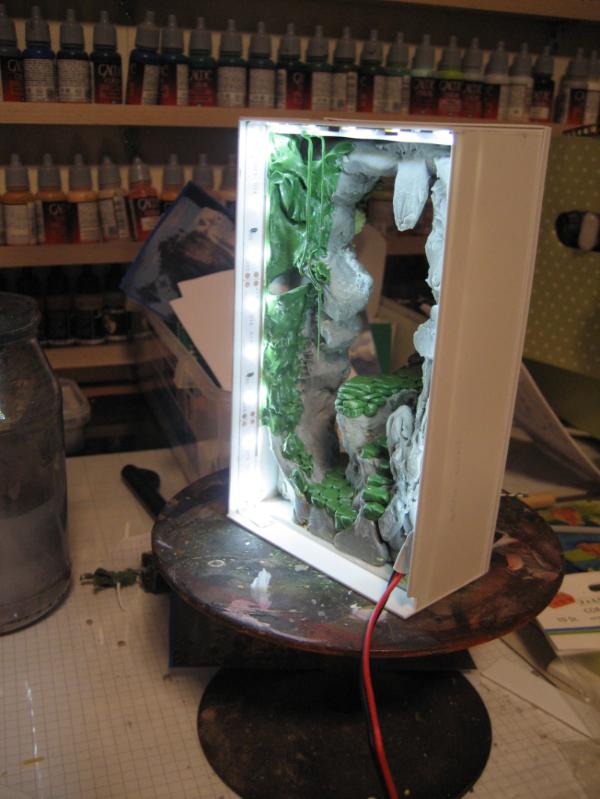
So I sculpted a frame for the little piece of wood
With the idea to draw the landscape then into the background
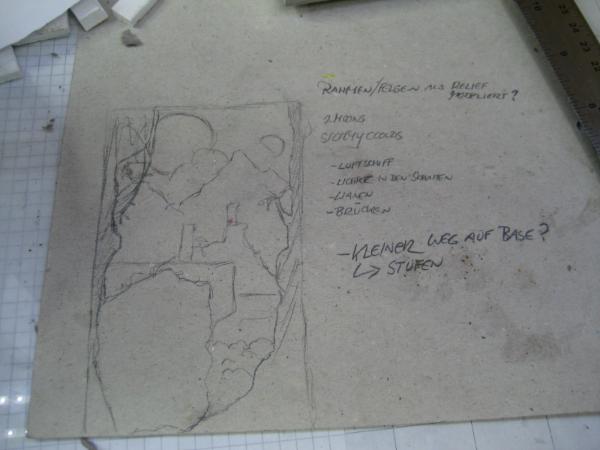
Probably with a city in the background, maybe an airship?
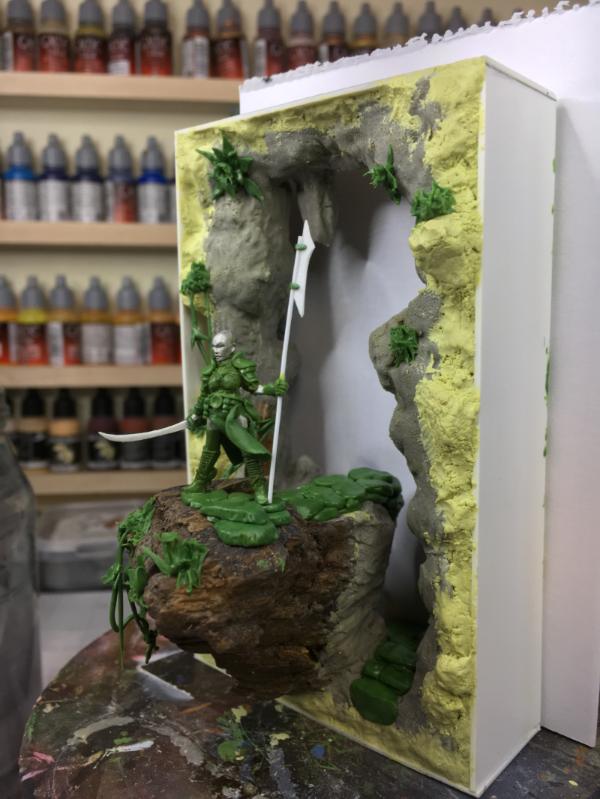
The basic frame was done with SuperSculpey. Once that was baked, I built a frame of plastic card around it and filled (and integrated) everything with Milliput.
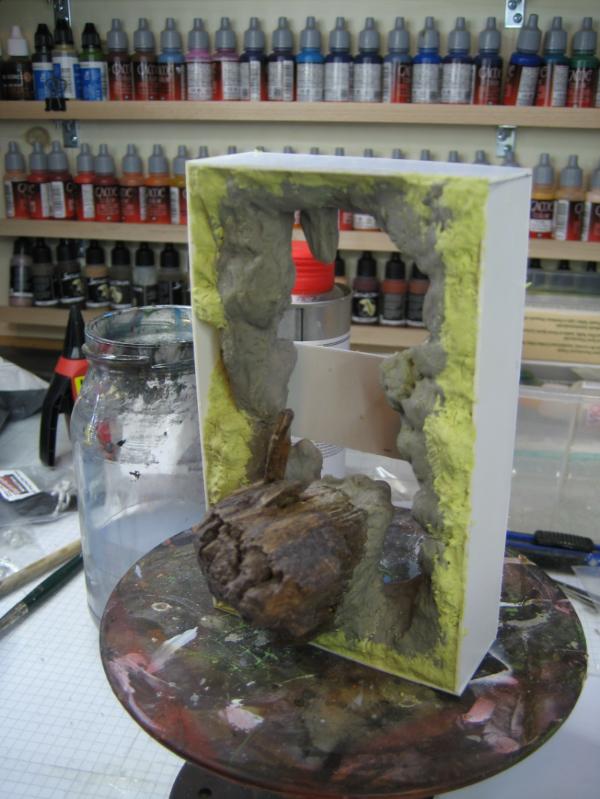
And a first positioning test.
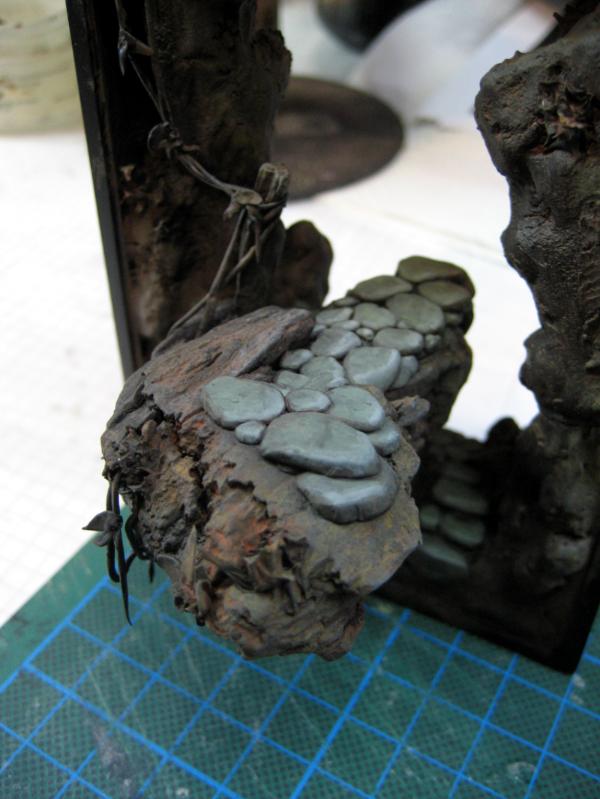
I added some flag stones and other details with GreenStuff
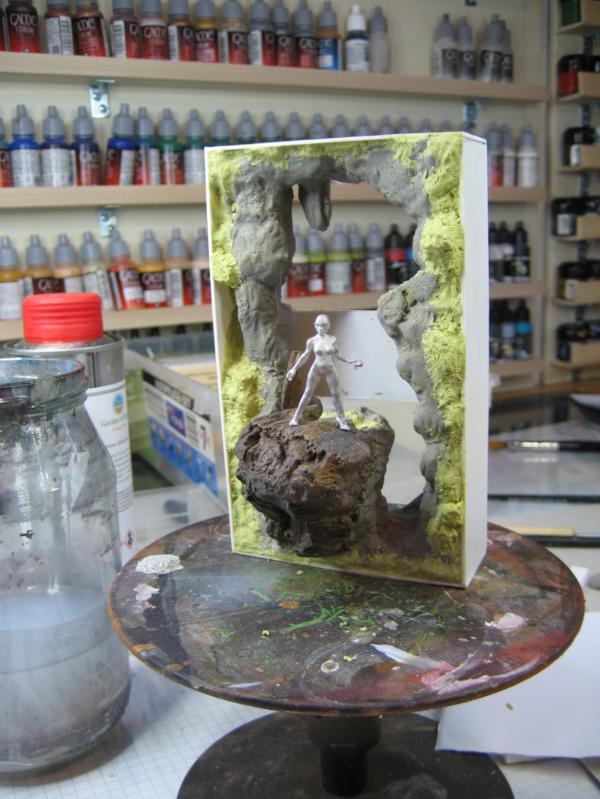
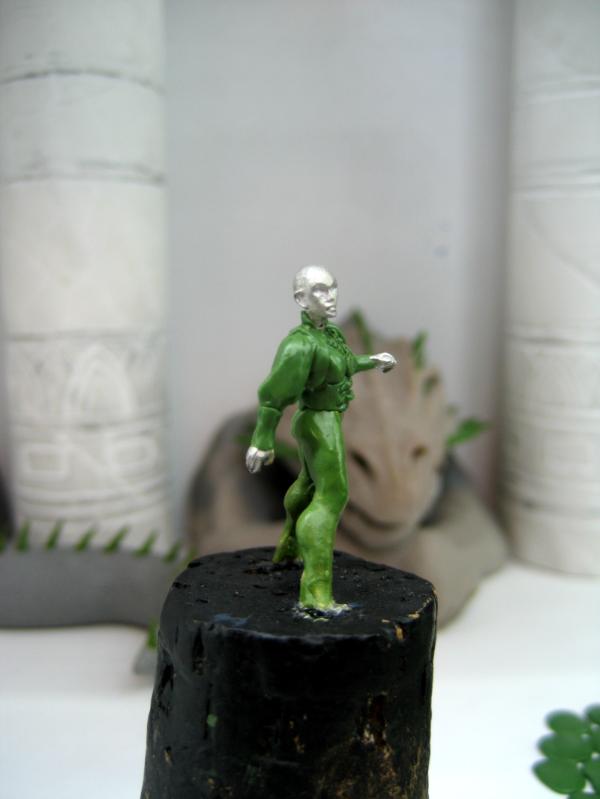
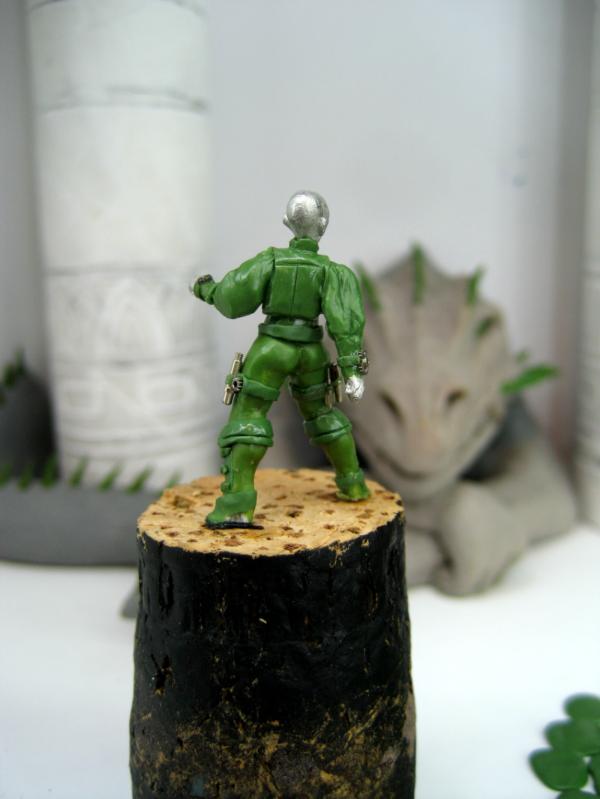
The base model is a "female armature" from HassleFree Miniatures ( http://www.hfminis.co.uk/shop?product=female-armature~hfl503&category=accessories~converting )

With GreenStuff I sculpted a bit of chain mail as well as some armour to the legs
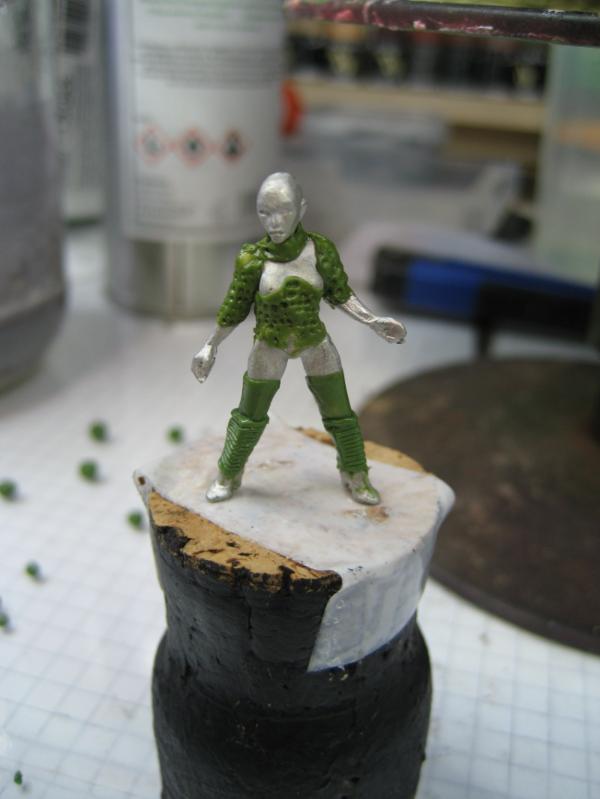
Then I added a bit of a tabard, flowing in the breeze
and some chest armour
The piece in the front flowing a bit stronger
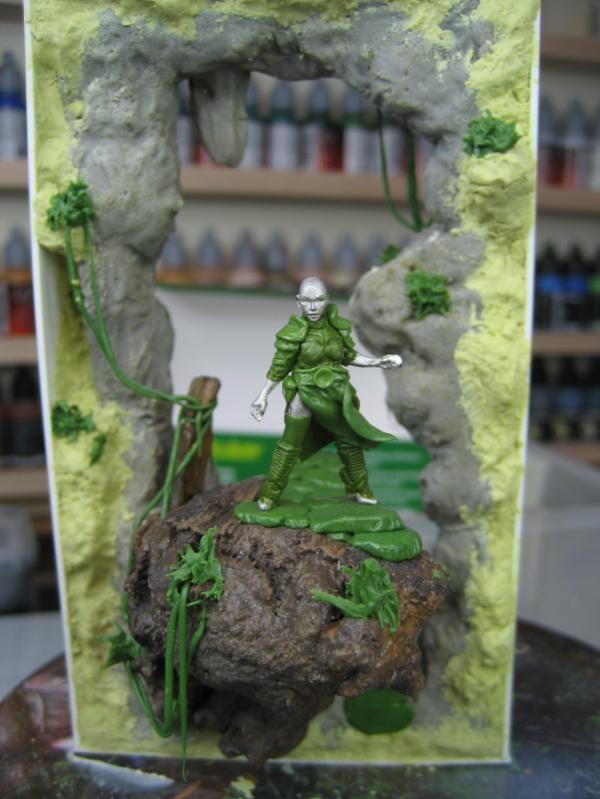
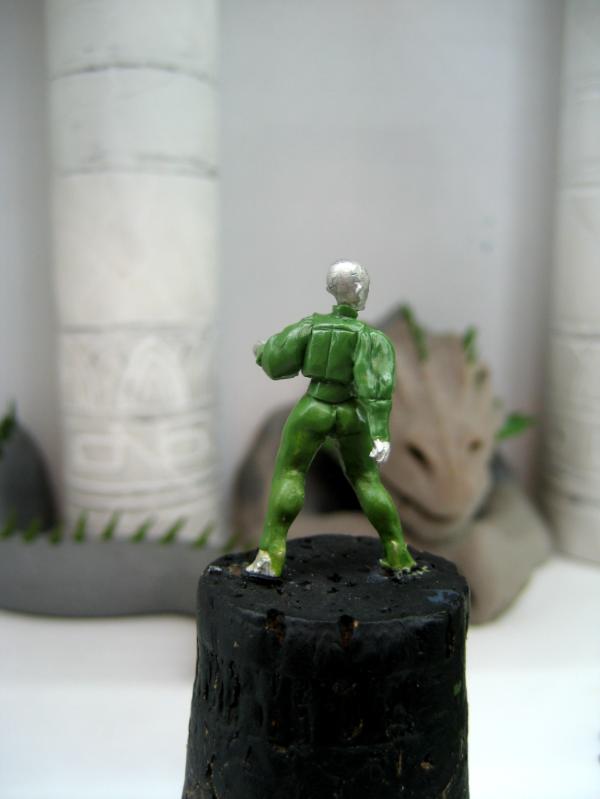
Together with chest and shoulder armour this already looks quite cool
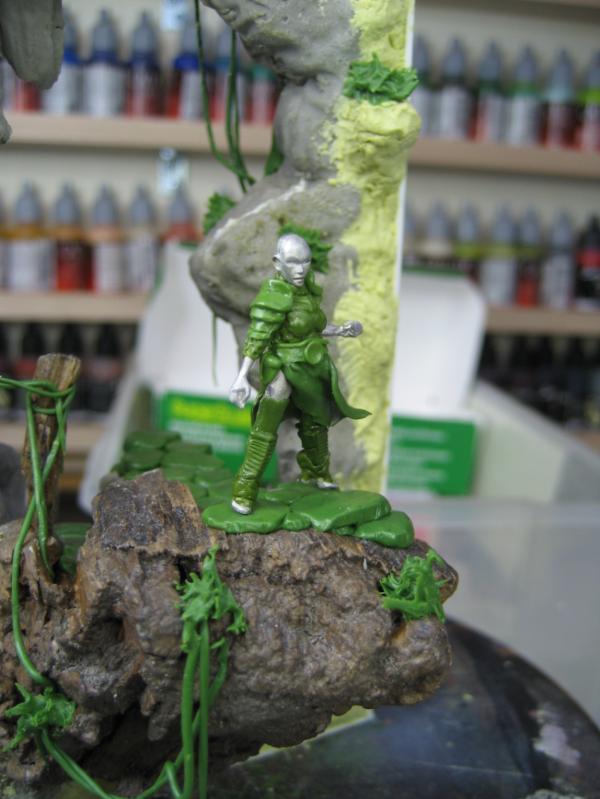
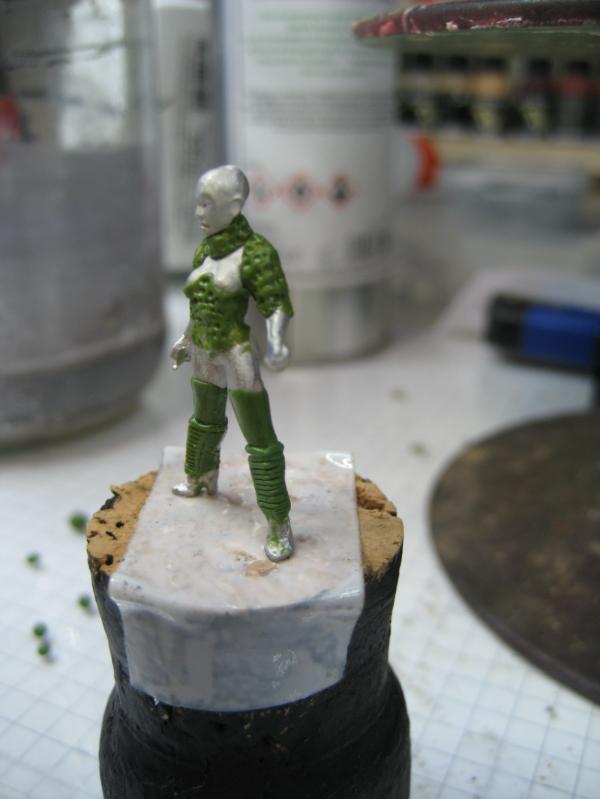
Last night I added the rest of her boots as well as a first draft for the sword and spear
So what do you think?
Anything still missing?
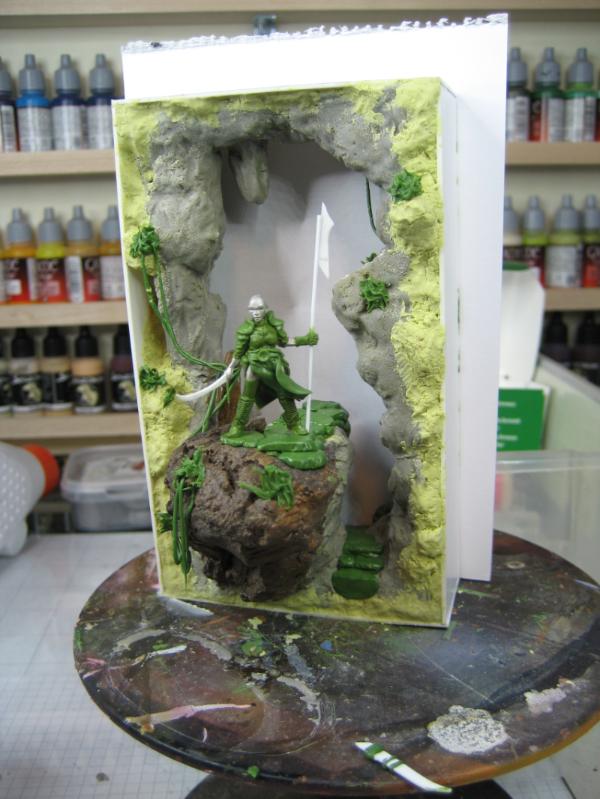
I look forward to your feedback, suggestions and critiques!
Cheers
Klaus
36940
Post by: Anvildude
Honestly, when I first saw it, I thought "That's a cavern entrance"- I was expecting something more dwarfy.
From the more jungly look you've gone for, I'm thinking maybe go with a slightly more jungly character? Maybe see if you can get some leaf-patterns on the armour, and perhaps a leaf-blade spear instead of a voulgy polearm? Straps and even feathers could be good as decorations as well.
106010
Post by: Meer_Cat
I like where this is going- as soon as I saw the frame it put me in mind of an entrance to the world of the Little People, the Faeries of Irish myth, with a Way Watcher. This is wonderful work.
I don't really think anything is missing, per se, but is there a means of indicating that there are two complete worlds, one on each side of the entrance- possibly by having a light source (even a sun) on one side that casts light onto the other? And one side would be in evening phase, whilst the other was in early morning- to emphasize that they are two different places, but something coming through the rift/portal/passage joins them?
Or, could this be like the entrance to Arthur Conan Doyle's "Lost World", and it's all on Earth, but perhaps a flyer (bird, flying reptile, etc) in the air we see on the other side?
Another fantastic fantasy setting coming to life! 
32373
Post by: Klaus, not Santa
Anvildude wrote:Honestly, when I first saw it, I thought "That's a cavern entrance"- I was expecting something more dwarfy.
From the more jungly look you've gone for, I'm thinking maybe go with a slightly more jungly character? Maybe see if you can get some leaf-patterns on the armour, and perhaps a leaf-blade spear instead of a voulgy polearm? Straps and even feathers could be good as decorations as well.
Hehe, glad I could surprise you 
Yeah, I did add a few leaves and plants, but I'm not sure if I want to go all the way to jungly...
We'll see - Thanks Mate
Meer_Cat wrote:I like where this is going- as soon as I saw the frame it put me in mind of an entrance to the world of the Little People, the Faeries of Irish myth, with a Way Watcher. This is wonderful work.
I don't really think anything is missing, per se, but is there a means of indicating that there are two complete worlds, one on each side of the entrance- possibly by having a light source (even a sun) on one side that casts light onto the other? And one side would be in evening phase, whilst the other was in early morning- to emphasize that they are two different places, but something coming through the rift/portal/passage joins them?
Or, could this be like the entrance to Arthur Conan Doyle's "Lost World", and it's all on Earth, but perhaps a flyer (bird, flying reptile, etc) in the air we see on the other side?
Another fantastic fantasy setting coming to life!
Thank you
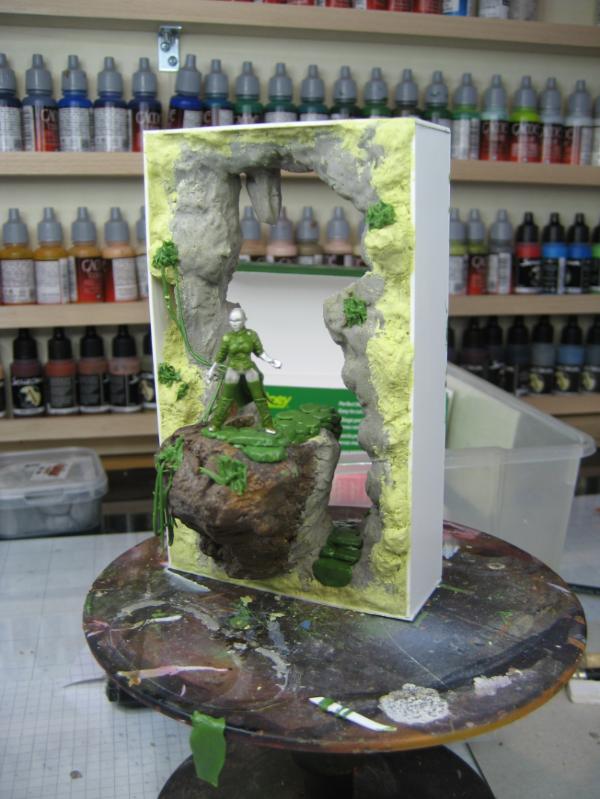
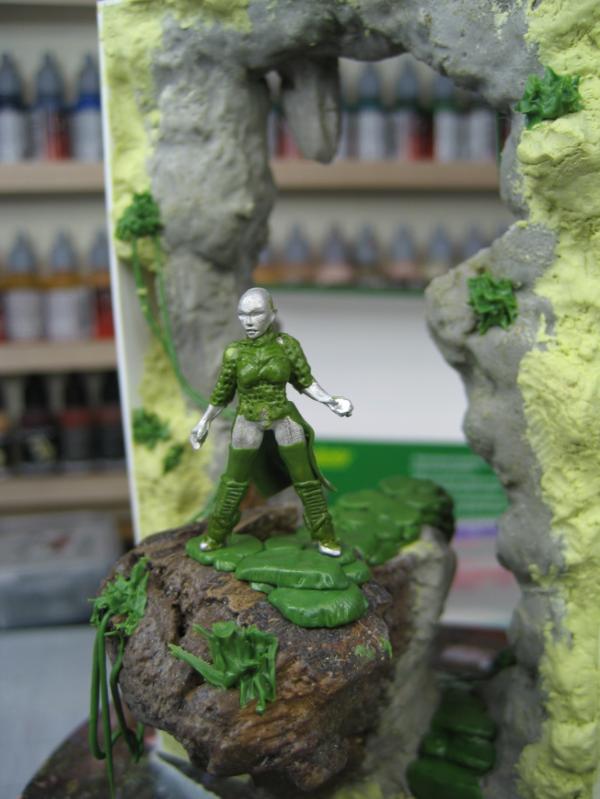
The idea was to have it like a hidden "valley" - think Shangri-La or Shambhala - but I'll see where the actual painting of the background leads me to
If I do it like a portal to a different world, I would have to add some kind of effect too - which I haven't planned.
We'll see
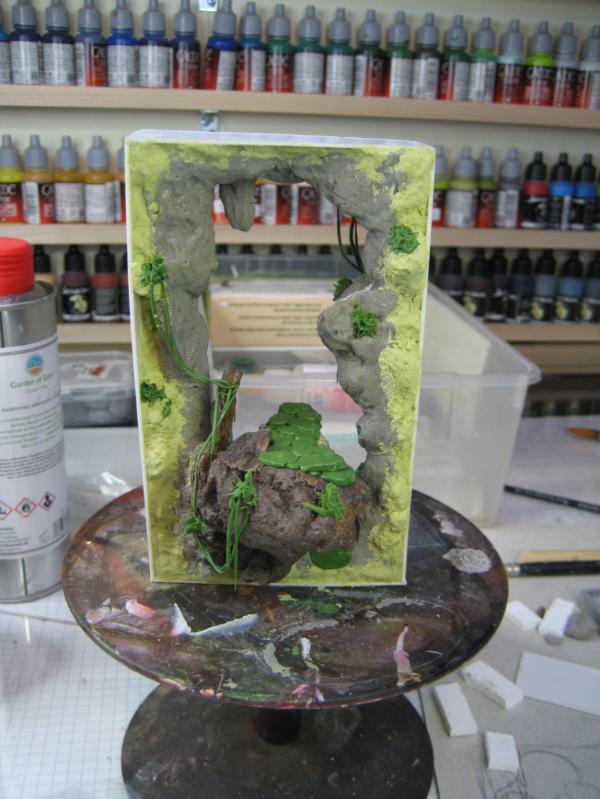
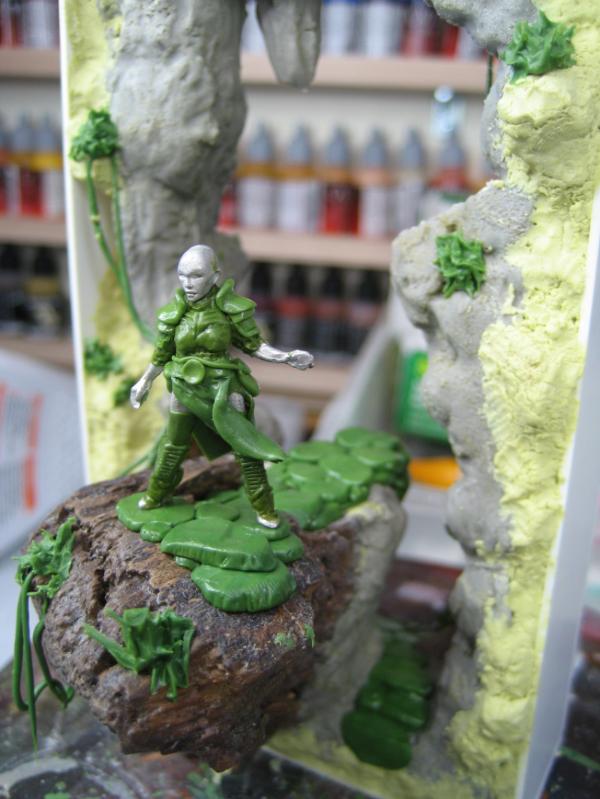
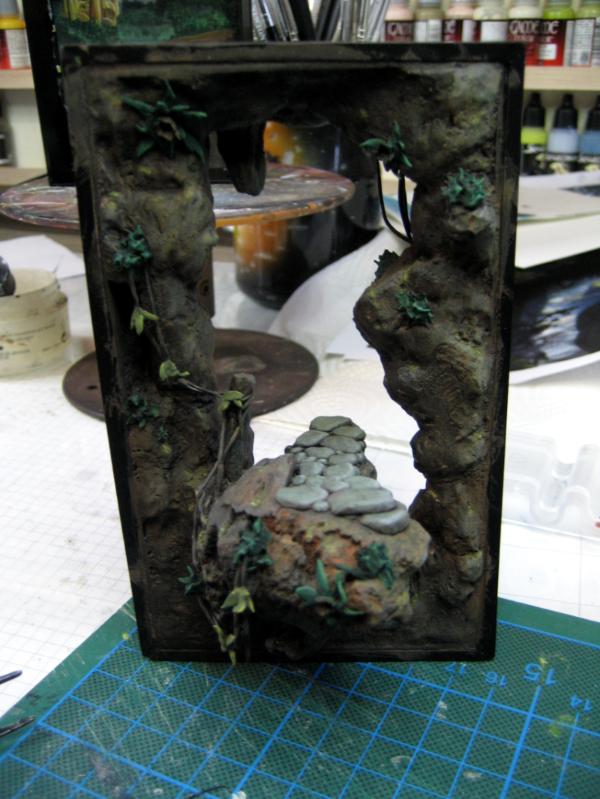
Last night I added a few more leaves
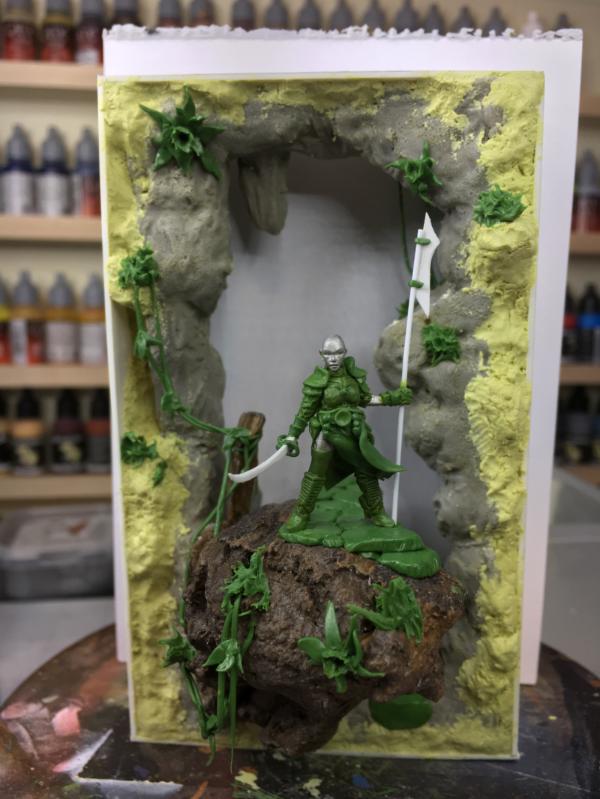
The sword(handle) got some details
And some minor details
I hope the depth and "hidden path" into the valley will be visible in the end
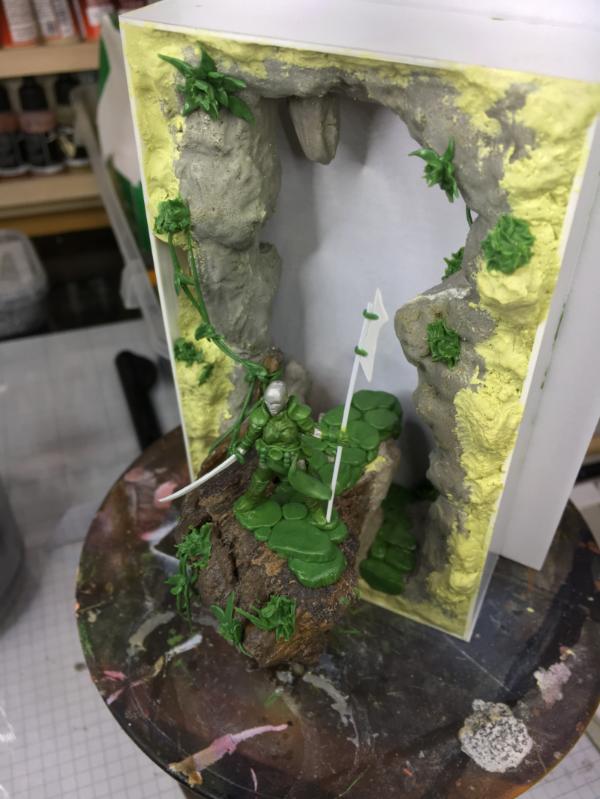
I hope the setup will make a watcher courious to see what's back there, if there's anything else hidden...
Looking at the first image, I see that the frame is casting a considerable shadow onto the background, this could impede the feelingof the background. So I'm considering to add a few LED between the current frame and the background - most likely on top and the two sides.
This would also give it a different atmosphere to the foreground.
I hope you like todays update
Cheers
Klaus
65595
Post by: Camkierhi
And you are at it again. Just raising the bar. Very nice bud.
62749
Post by: Dr H
Hair?  
Great job. Nice looking piece.
As a crazy idea to throw out there, re. the shadow on the backdrop:
How about painting the backdrop on tracing paper, and then lighting it from the rear? That would make the things in the "distance" well lit, independent of the modelling subject. Would also give a glow to the rear opening.
You would have to be very careful with the painting method of that though, underlying layers of paint or pencil marks etc. would show through, I'm sure there's someone out there that would have a method for doing it well; research would be required.
Or, just had the idea... Spacing the backdrop from the frame and lighting it from above, through the gap. That would be simpler.
32373
Post by: Klaus, not Santa
Hi all,
thank you for your comments and suggestions.
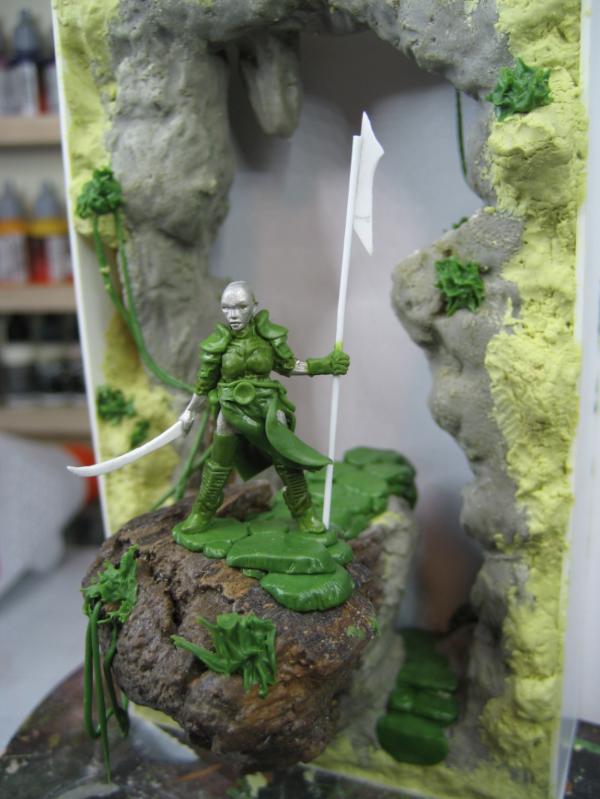
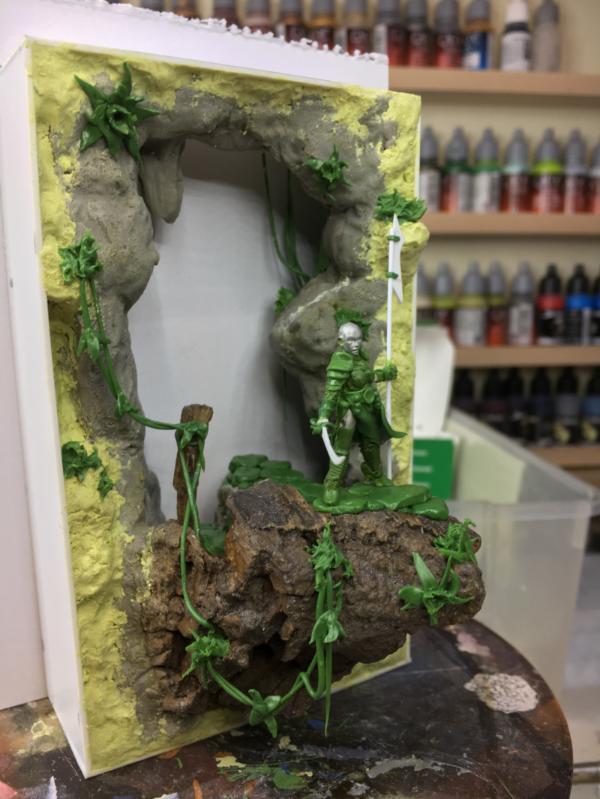
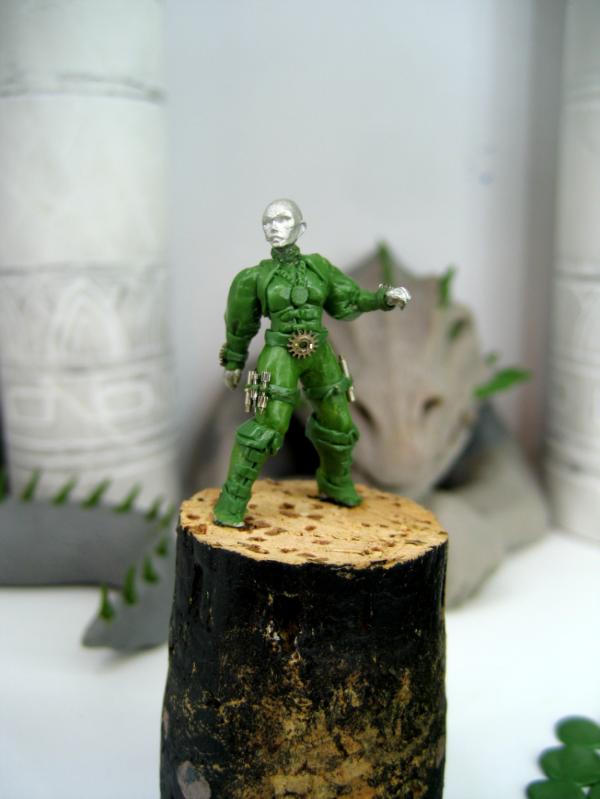
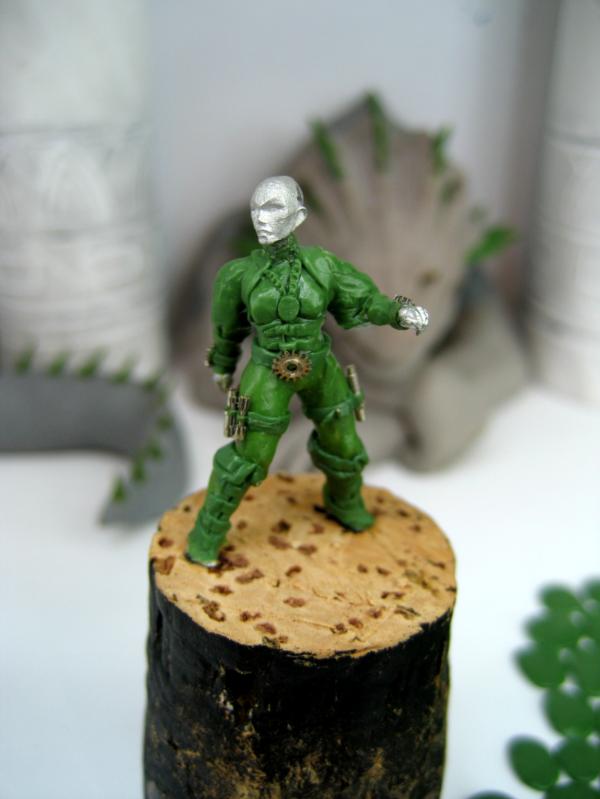
Reacting on the several sword and spear comments I decided to take the spear away.
Right now I simply lowered her arm.
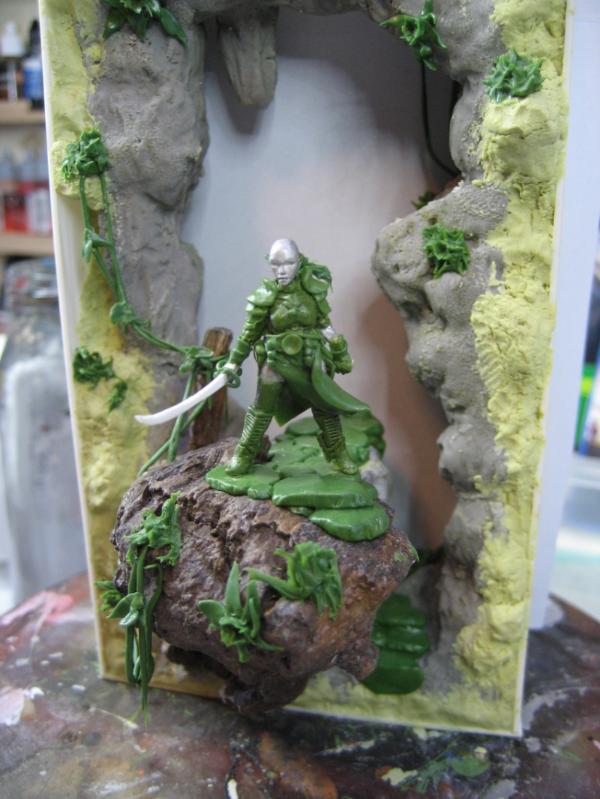
I'm not sure if I keep the pose and what I will place in her hand. I'm considering to give her a signal horn. Let me know what you think!

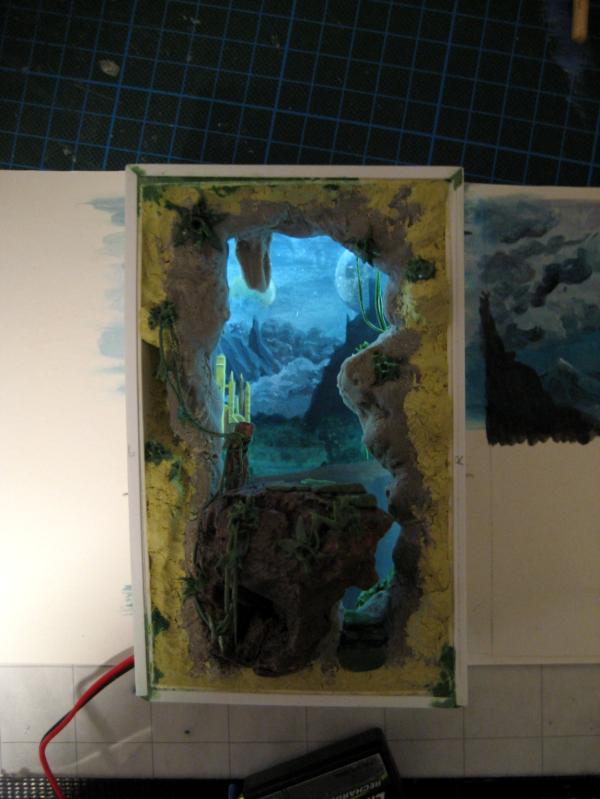
So now it's time to consider the background.
Here I placed a sample background I downloaded and printed - it's not mine!

To counter the shadows and give it a separate atmosphere I will now add lights to the background.
I have some 12V LED that also work with a 9V block - this way they are less bright.
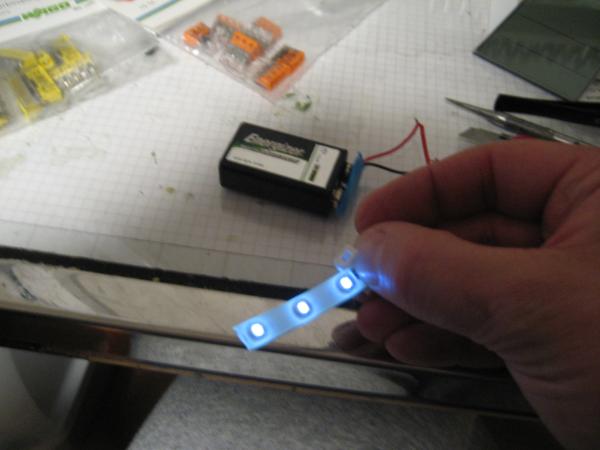
To house the LED I had to build another frame around the existing frame

To provide access to the rear and the LED (as well as protecting them from spray primer later on) the new frame has to be removable (slide-on-slide-off)

Just enough room to hold the LED strip

Voilá
With this the background looks very different - beside it being a different print out *wink*

I think this will be very cool!
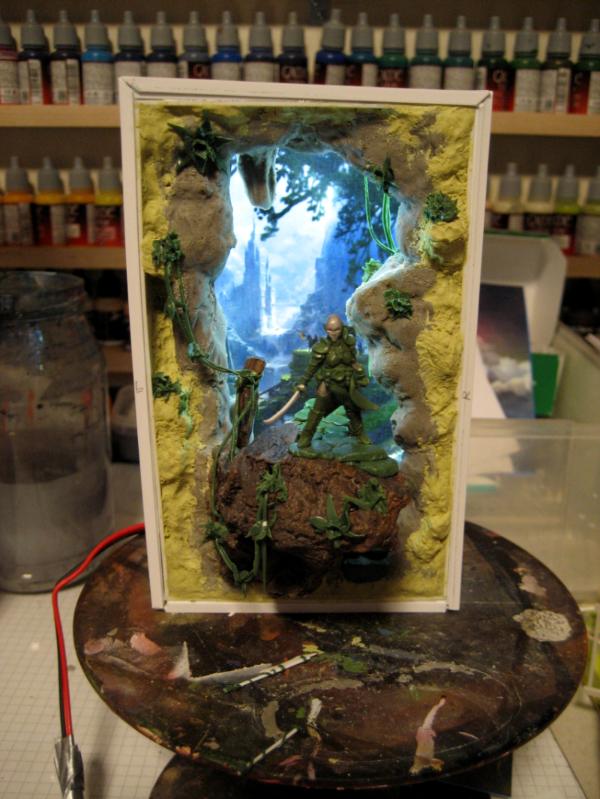
And when adding regular ambient (room) light it balances nicely.
Depending on the angle you may get a glimpse of the actual LED
So maybe I have to add a thin milky glass cover to the LED....
Right now I sit here looking at the images with a smile on my face as my plan seems to work
What do you think?
Any feedback, suggestions, ideas?
Signal horn or something different for the left hand?
Thanks
Klaus
106010
Post by: Meer_Cat
THIS. With the background (I quite like the castle one), the lighting and the sense of distance created by the depth of the back frame and front frame- this is exactly what I was poorly trying to describe earlier: two worlds, joined by the passage between, with a guard/observer. The comparison to Shangri-La you made was quite apt, and I think it is here in this vignette.
As for the sentinel, I was fine with the spear, but could easily see an observer carrying a horn with which to sound the alarm. Or, have the best of all possibilities: sword scabbarded, horn slung and a bow in the left hand.
Awesome piece of work!
62749
Post by: Dr H
Yeah, that also works.
32373
Post by: Klaus, not Santa
Thank you guys!
And a special thanks to those of you checking on me via PM! Thank you for caring and checking
Ouch!
Almost a month since the last post :(
Besides a ton of work in my real-live job, one reason for the lack of update was the frustration I experienced trying to paint a proper background for the Guardian.
The first attempt - directly on the primed plastic card - was...well, not good
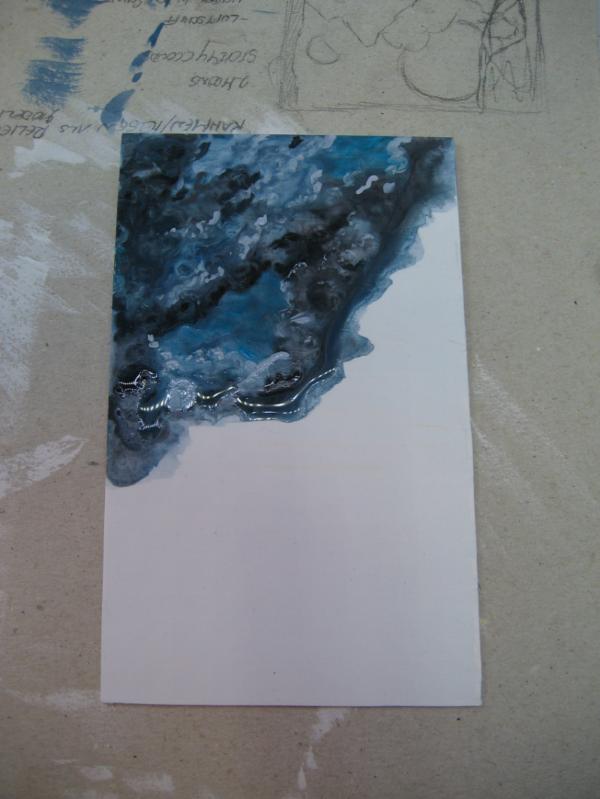
The second attempt didn't fare better.
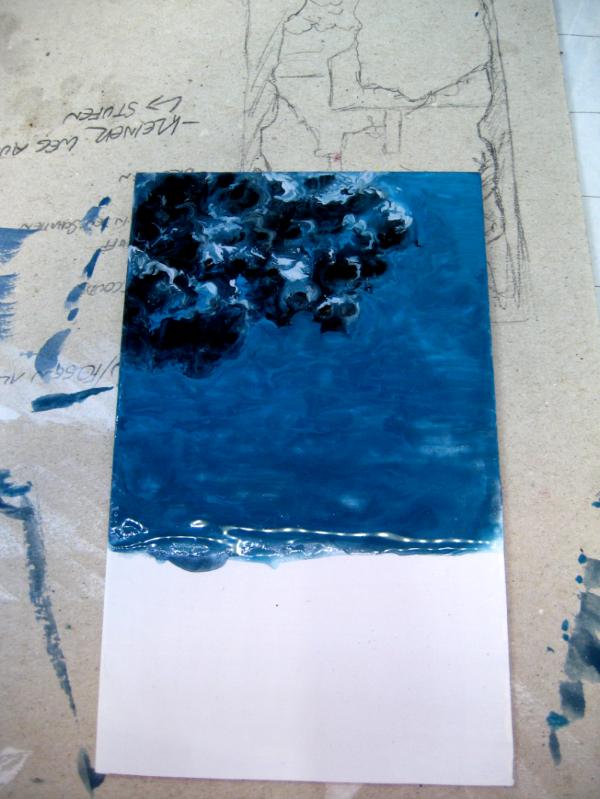
The third attempt - now on cardboard paper - showed promise, but still didn't meet my approval.
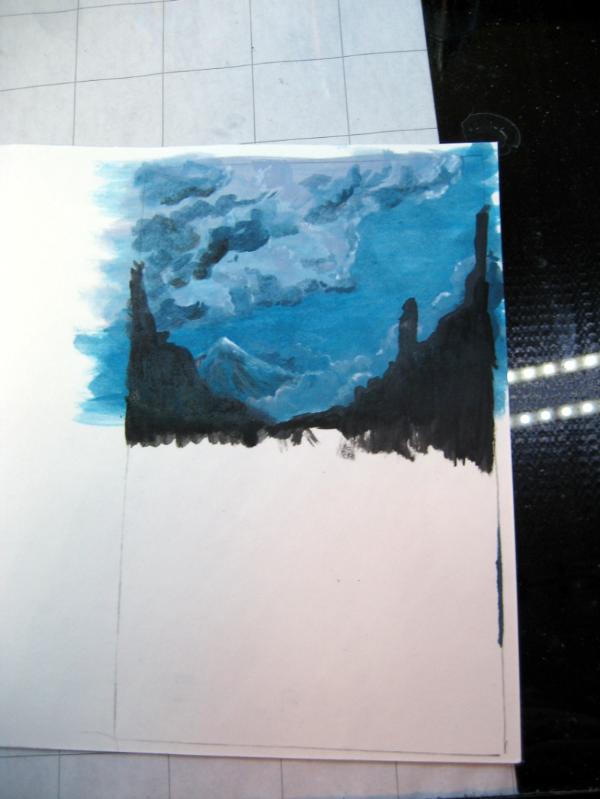
After a frustration break the fourth attempt survived the sketching phase and entered the detailing phase
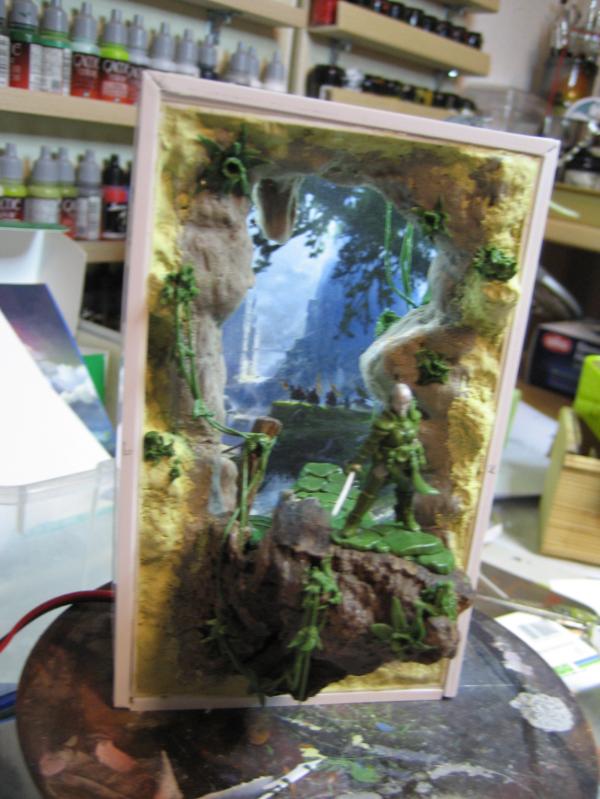
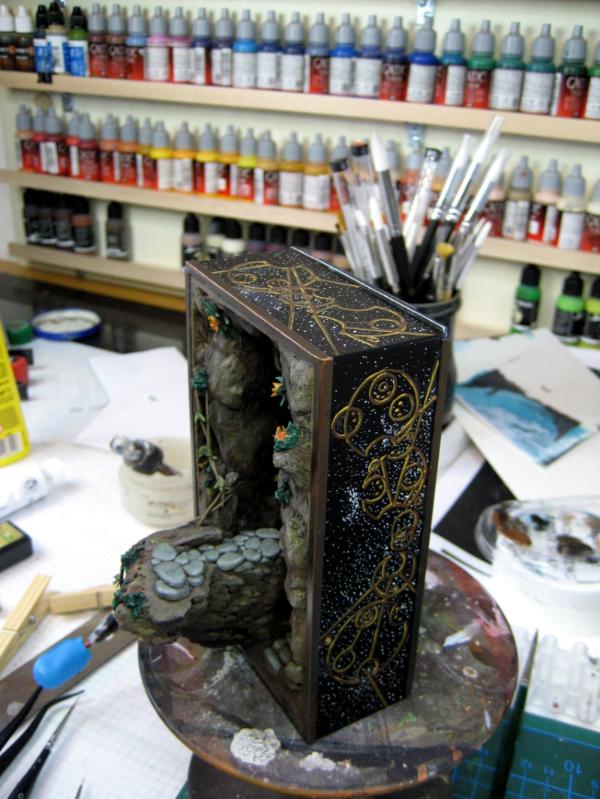
So this is the background that I will use for "The Guardian".
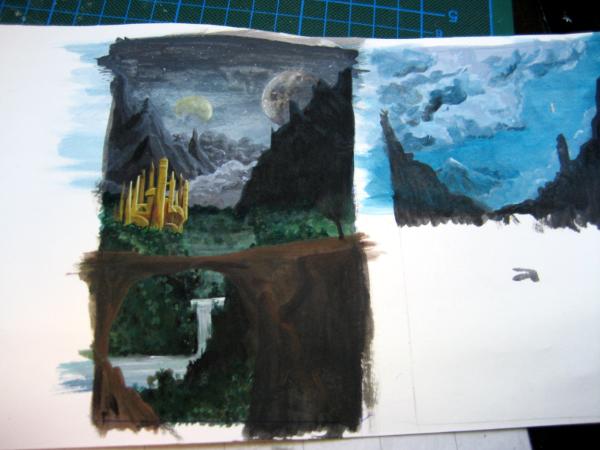
I think it projects the feeling of a sacred valley and a golden city hidden there.

The first positioning test also showed that most of the important sections are visible.

Even better with lights on :-D
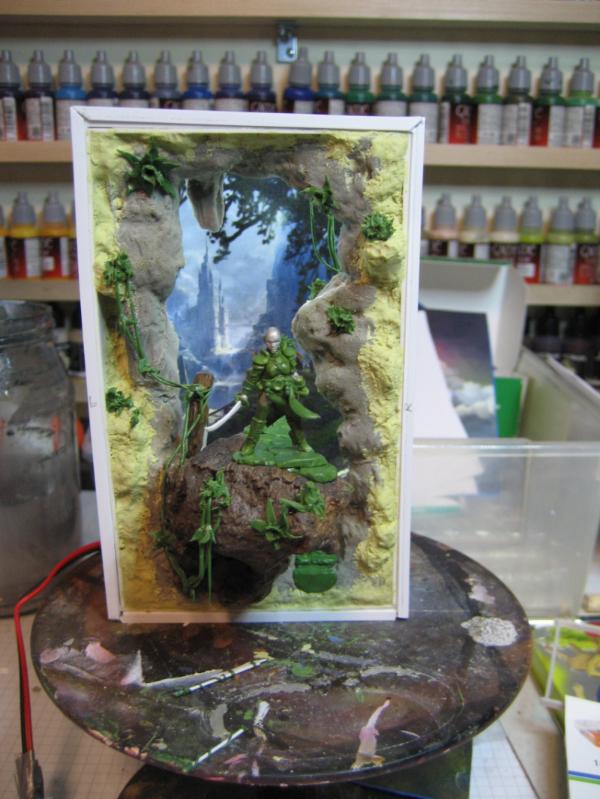
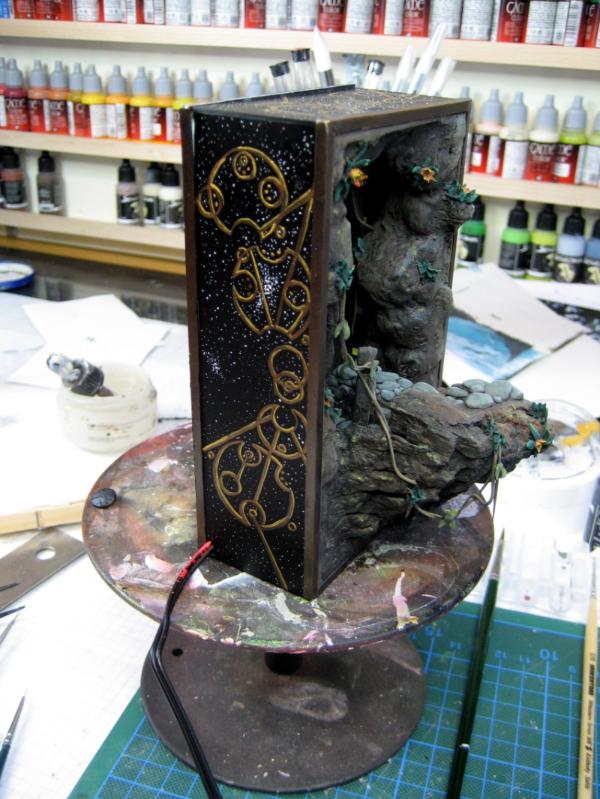
So I made some final adjustments and some clean-up.
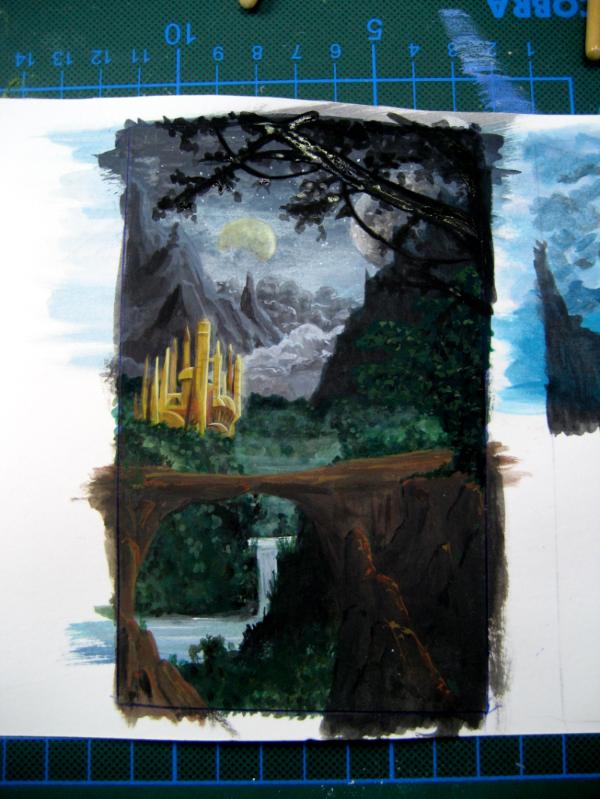
And then I started painting the frame.
With the cobblestone platform.
The steps and path seen form the rear.

The vegetation was next.
So now most of the sculpted frame is painted.
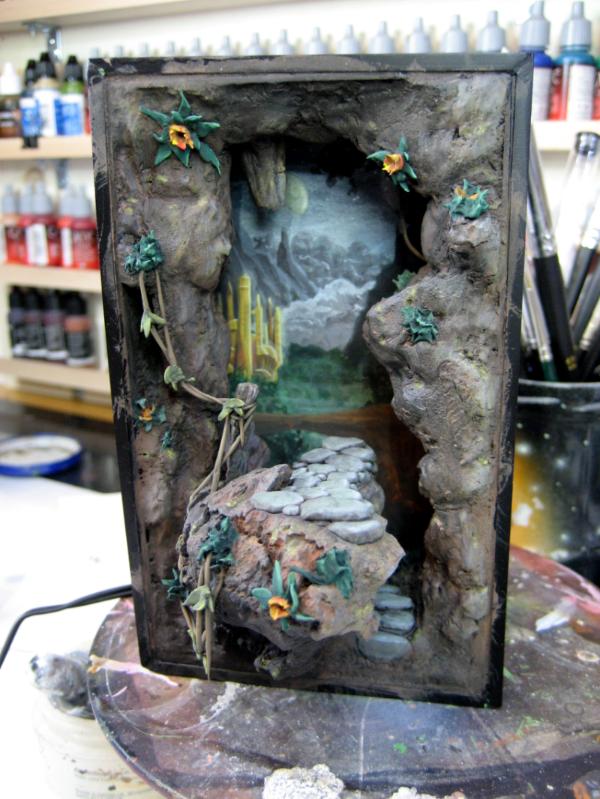
And so I decided to also give the outer box some ornaments.

Even better with stars.
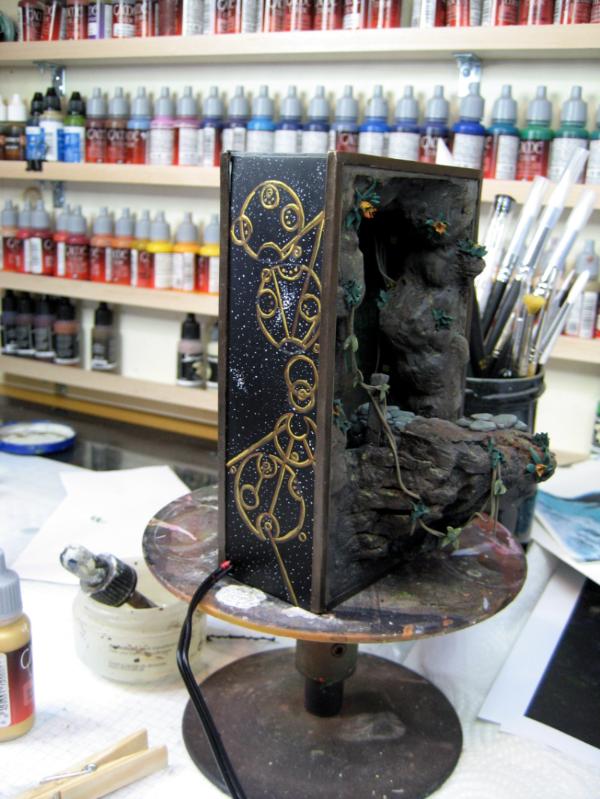
The other side
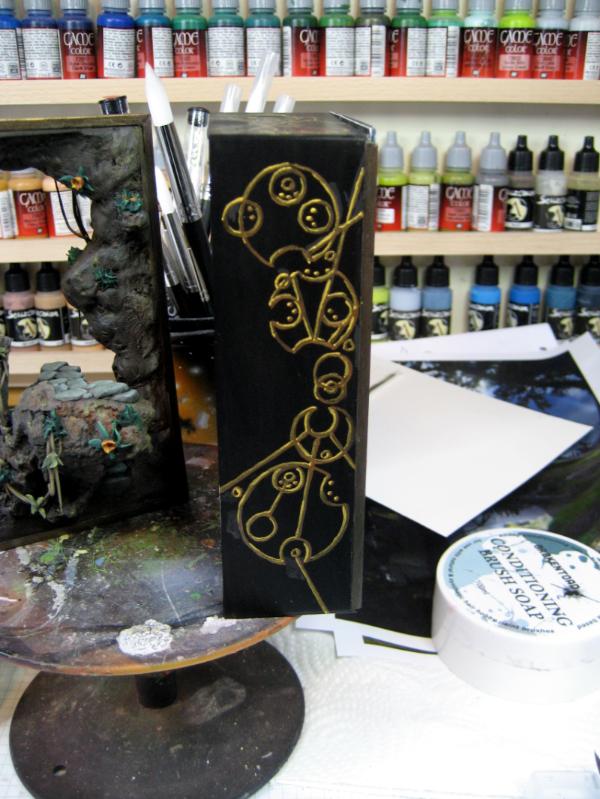
and the top
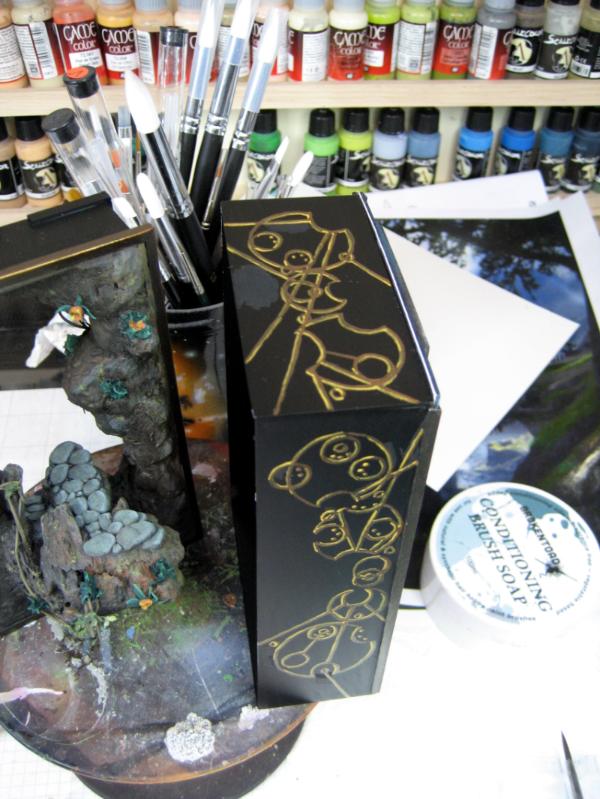
And again with stars

These stars have such a huge effect

And this is where I am right now
I hope you like today's update
What do you think?
Any suggestions, critics, feedback?
I look forward to hearing form you
Cheers
Klaus
68345
Post by: xXWeaponPrimeXx
I... I just...
I wanna cry it looks so good...
106010
Post by: Meer_Cat
It's odd, but it has the same effect on me, it literally makes me catch my breath and my chest to tighten up. It's a beautiful object. It could be the centerpiece of a fantasy movie- you could go anywhere through that portal: Barsoom, and fight alongside John Carter, ancient China and search for Prestor John. Shangri-La is almost too prosaic. Conan the Cimmerian would have felt right at home trudging up that mountain path and Boromir would have met him at the top.
The case is what really makes it sing to me. Especially with the stars, it is the Indian in the Cupboard, the Never-ending Story and Neverland all waiting to be let out. And when the lighting is on? Eldritch is the only word I can think of.
I admire greatly many of the works I see here on DakkaDakka, but this one truly resonates with me.
Klaus, if you ever run out of space in your victory cabinet, I will personally row across the Atlantic, hike across France and meet you in Germany to pick it up.
'Wow', indeed!
3309
Post by: Flinty
That is actually a masterpiece. The lighting in back makes it shine.
I have a minor gripe about how the poor girl's thighs are unnecessarily vulnerable given the armour elsewhere but it is high fantasy after all (And high indeed in all.respects).
30344
Post by: monkeytroll
Hmmm.....yep, that works
10972
Post by: Ruglud
Just, erm...well.... it..... I...... You.......
.....
....
Nope, I got nothing....
62749
Post by: Dr H
Yeah, it's always worth a few attempts at things like that background.
Looks great. Nice one.
65595
Post by: Camkierhi
You are simply the master.
32373
Post by: Klaus, not Santa
xXWeaponPrimeXx wrote:I... I just...
I wanna cry it looks so good...
Thank you Mate!
I hope these are tears of joy
Meer_Cat wrote:It's odd, but it has the same effect on me, it literally makes me catch my breath and my chest to tighten up. It's a beautiful object. It could be the centerpiece of a fantasy movie- you could go anywhere through that portal: Barsoom, and fight alongside John Carter, ancient China and search for Prestor John. Shangri-La is almost too prosaic. Conan the Cimmerian would have felt right at home trudging up that mountain path and Boromir would have met him at the top.
The case is what really makes it sing to me. Especially with the stars, it is the Indian in the Cupboard, the Never-ending Story and Neverland all waiting to be let out. And when the lighting is on? Eldritch is the only word I can think of.
I admire greatly many of the works I see here on DakkaDakka, but this one truly resonates with me.
Klaus, if you ever run out of space in your victory cabinet, I will personally row across the Atlantic, hike across France and meet you in Germany to pick it up.
'Wow', indeed!
Thank you my friend!
Indeed my wife is urging me to "liberate" some of my models...but I'm not there yet
Flinty wrote:That is actually a masterpiece. The lighting in back makes it shine.
I have a minor gripe about how the poor girl's thighs are unnecessarily vulnerable given the armour elsewhere but it is high fantasy after all (And high indeed in all.respects).
Thank you Flinty
Yeah a bit of skin is neccessary to keep your attention
monkeytroll wrote:Hmmm.....yep, that works
THANKS!
Ruglud wrote:Just, erm...well.... it..... I...... You.......
.....
....
Nope, I got nothing....
That's words enough!
Thank you Ruglud!
Dr H wrote:Yeah, it's always worth a few attempts at things like that background.
Looks great. Nice one.
Thank you Doctor!
But now I'll have to tinker around some more ...
Camkierhi wrote:You are simply the master.
Hehe - Thank you Cam!
whoo!
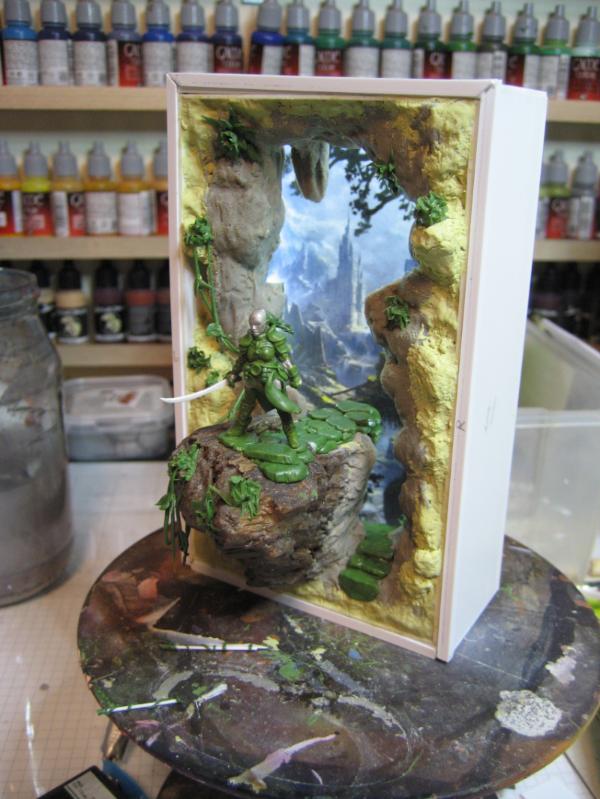
I did continue a bit with "The Guardian" and laid down the foundational colors for her.

But then I got in doubt on how to proceed - especially with the background.
Currently I have the feeling that too much of the background is blocked and that I may have to widen the box and thus the opening far maybe a centimeter or two...
I'm undecided.
So that put a stop to the project and I was doodling around, playing PC games and working in the garden instead.
But the itch is there, just not for "The Guardian" - yeah, been there, done that. I know, I know.
Automatically Appended Next Post: And when I don't know what to do, I do what I usually do
Dragons.
For a while I wanted to do a scene based on Michael Whelan's "Filed Teeth"

So I started to sculpt a dragons head.

I always enjoy working on these creatures.
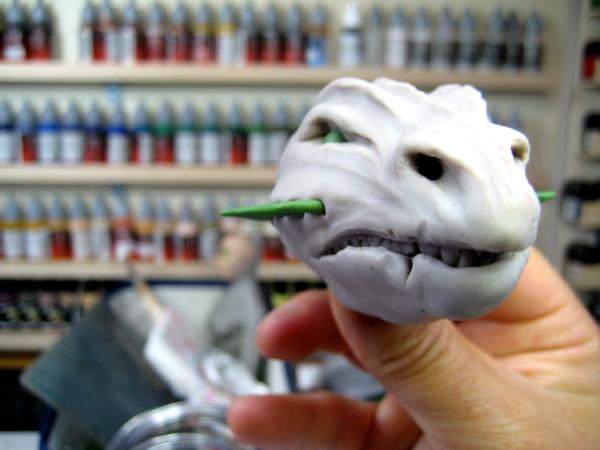
So many options and ways to do a dragon.
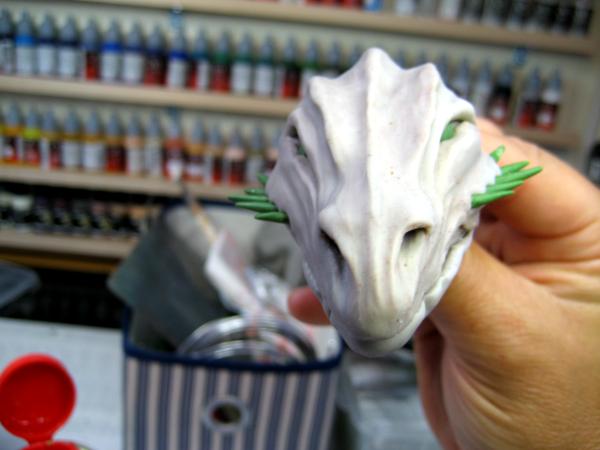
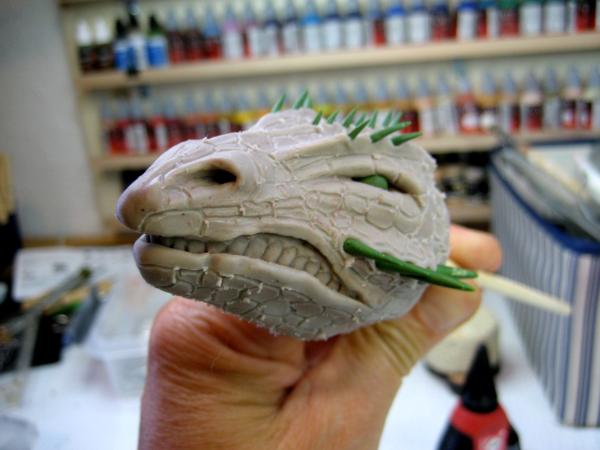
I decided to give him a menacing frown.

At least on one side - Elvis anyone?
And to make things more fun he got some more spikes (made from GreenStuff)

And scales
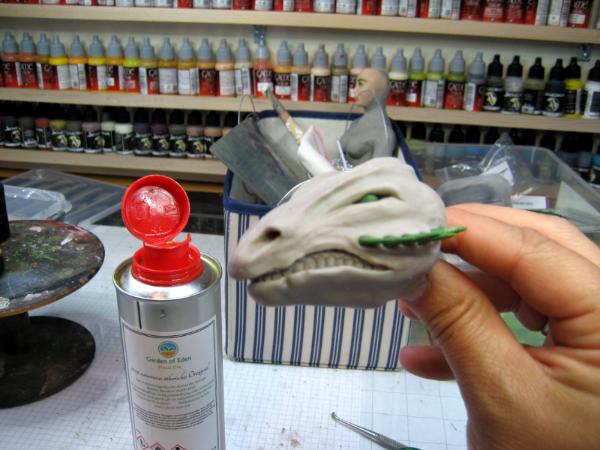
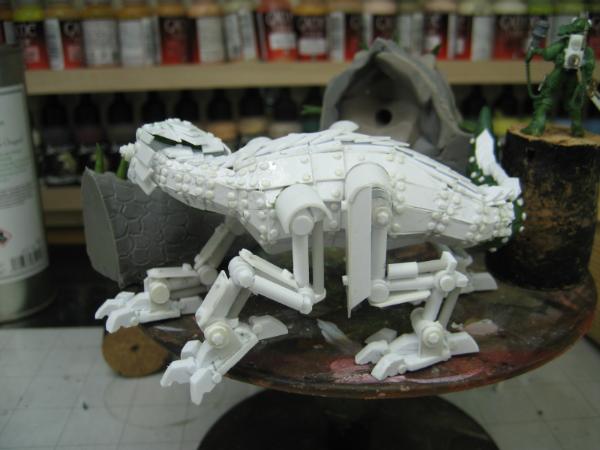
Once he was fired and the rough corners brushed off, I started with the arms

I'm aiming for a similar pose as in Whelan's image

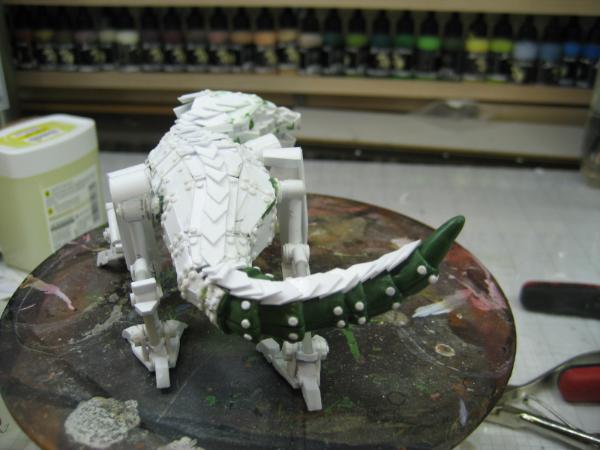
But since I won't have room for the wings I decided to add his tail
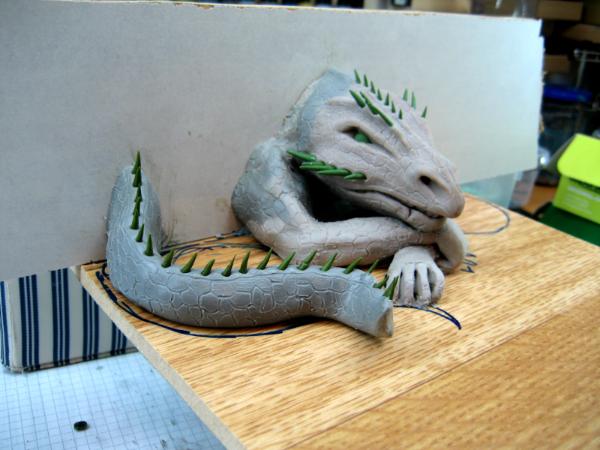
To provide a sense of size for the beast
I still have to detail the paws with GreenStuff

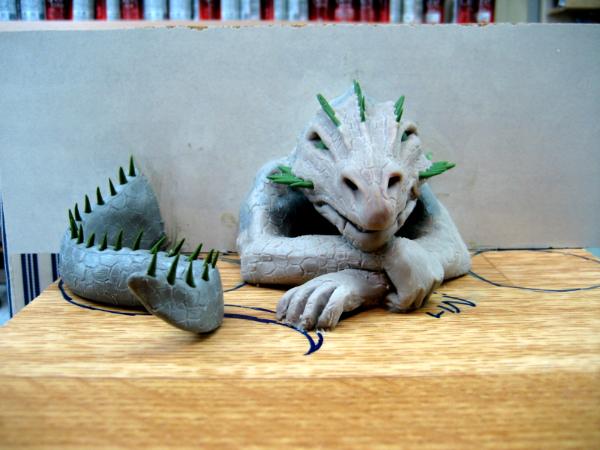
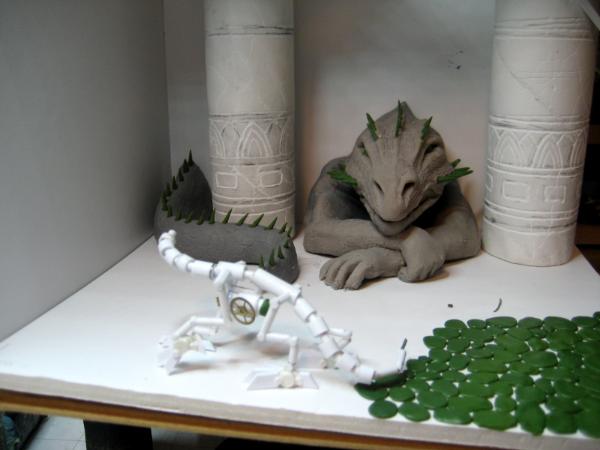
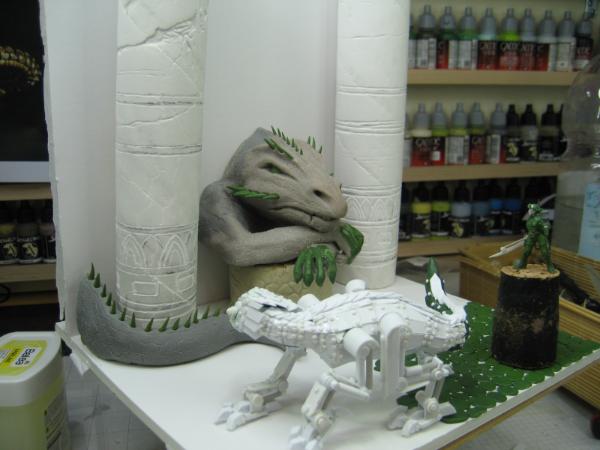
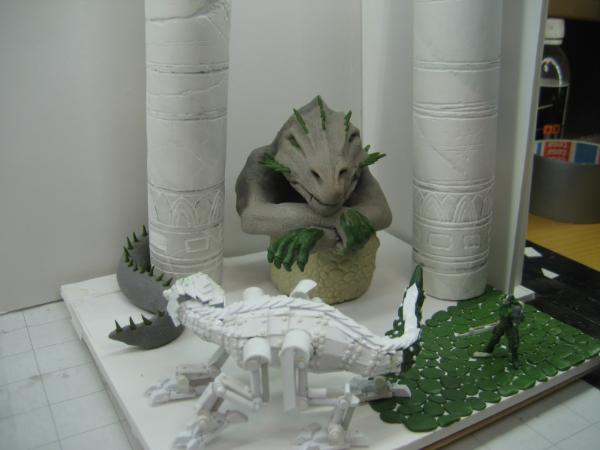
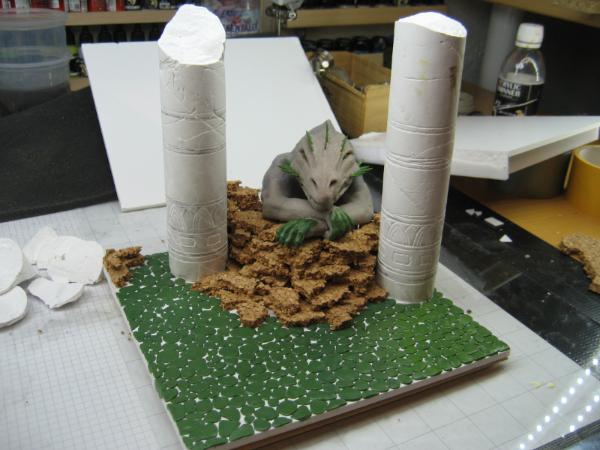
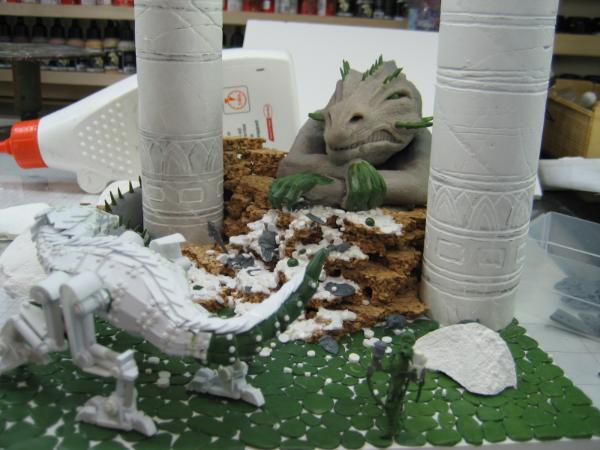
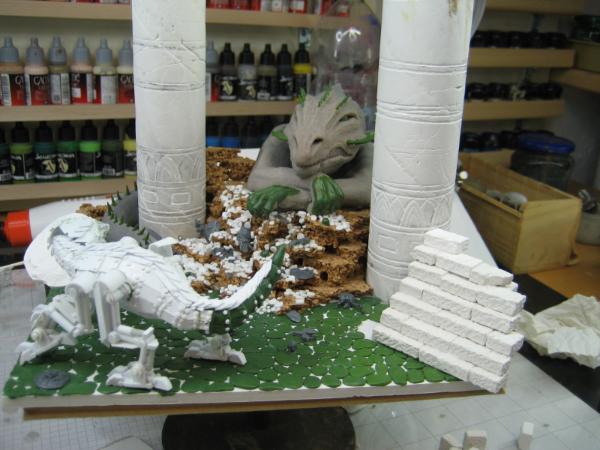
After he was fired I started to work on the den
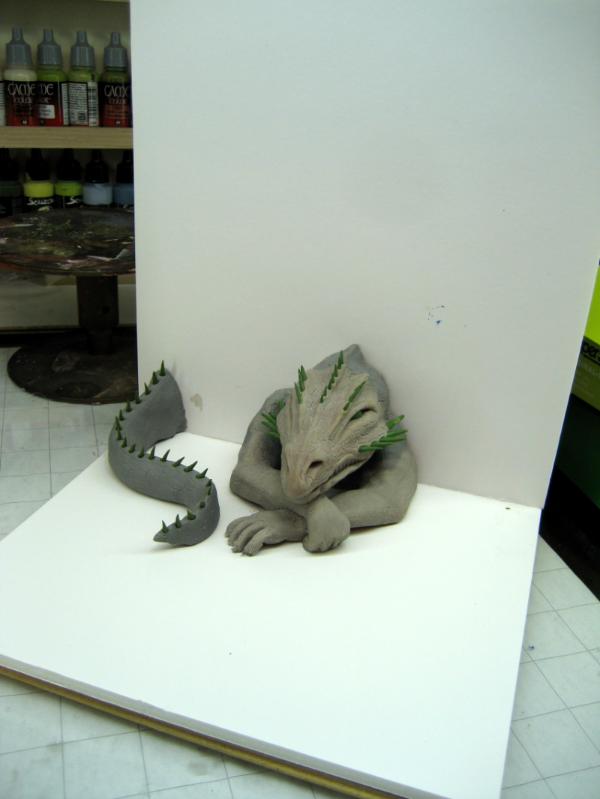
And I created two columns from Stewalin

Again to emphasize his size
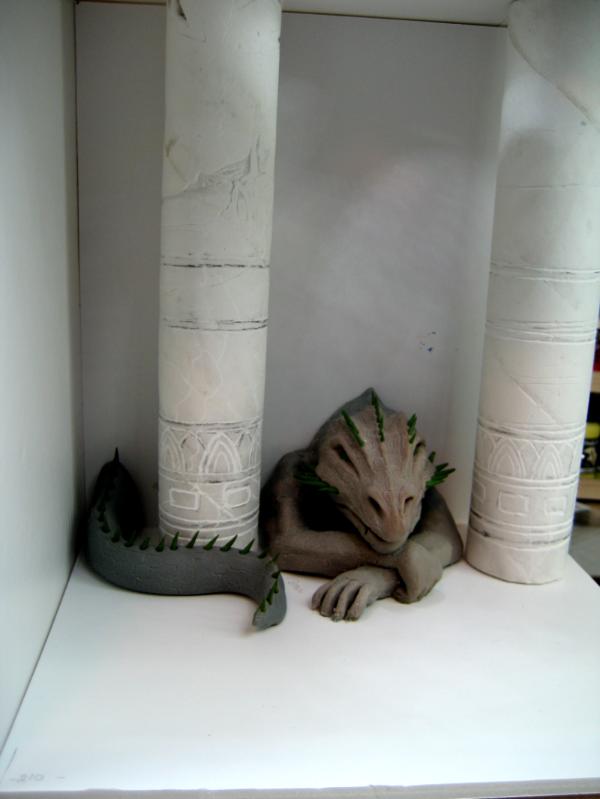
So here he is - BTW, no name yet...any ideas? - sneering at the intruder

Intruder?
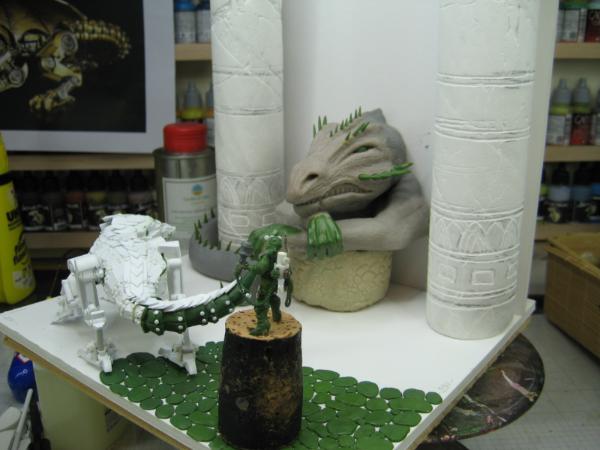
Ah yes. I have another Hasslefree "Female Armature"
https://www.hfminis.co.uk/shop.php?product=female-armature~hfl503&category=accessories~converting
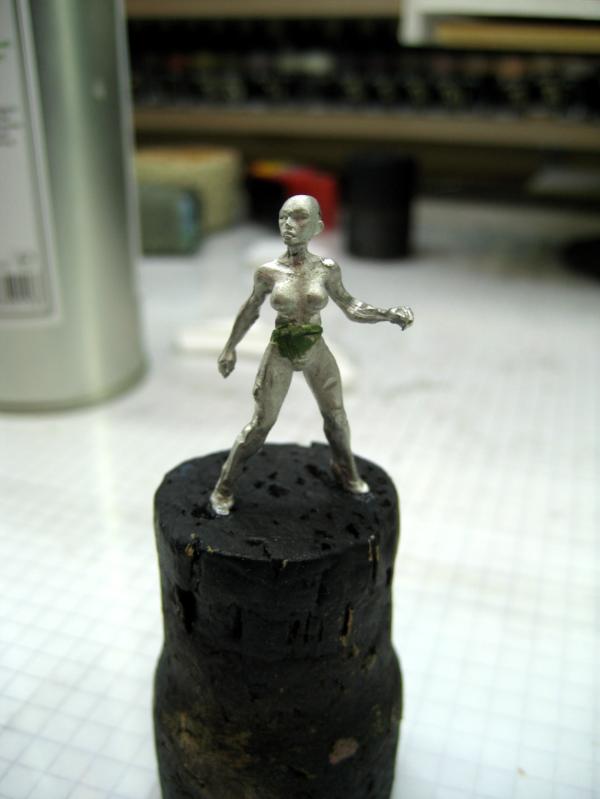
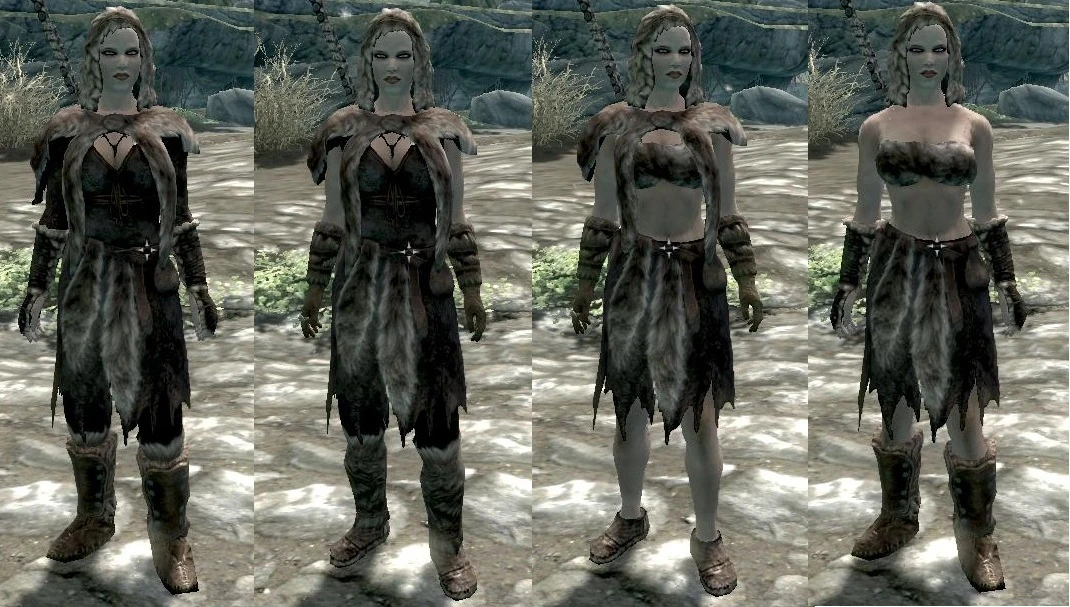
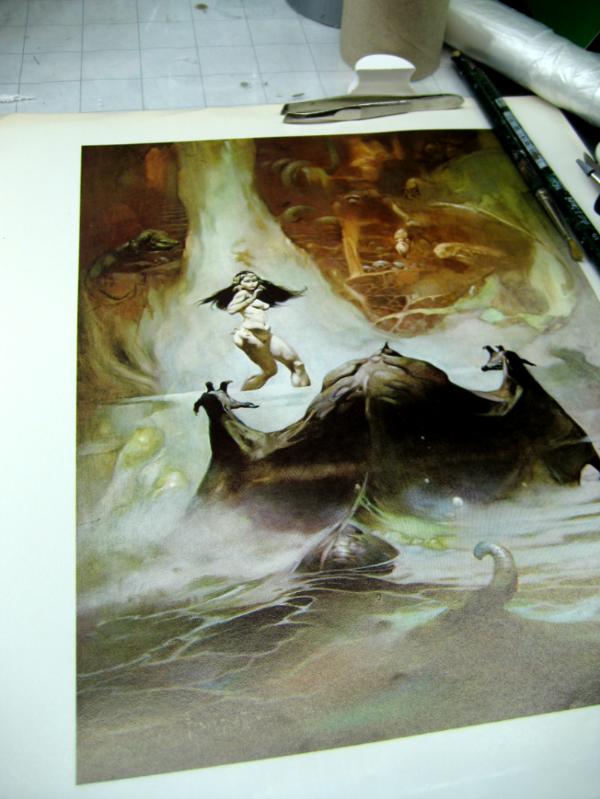
But she's way to skinny for my taste. I'd like her to be more Frazetta-esk, like in this image
So I began to bulk he up with some more GreenStuff
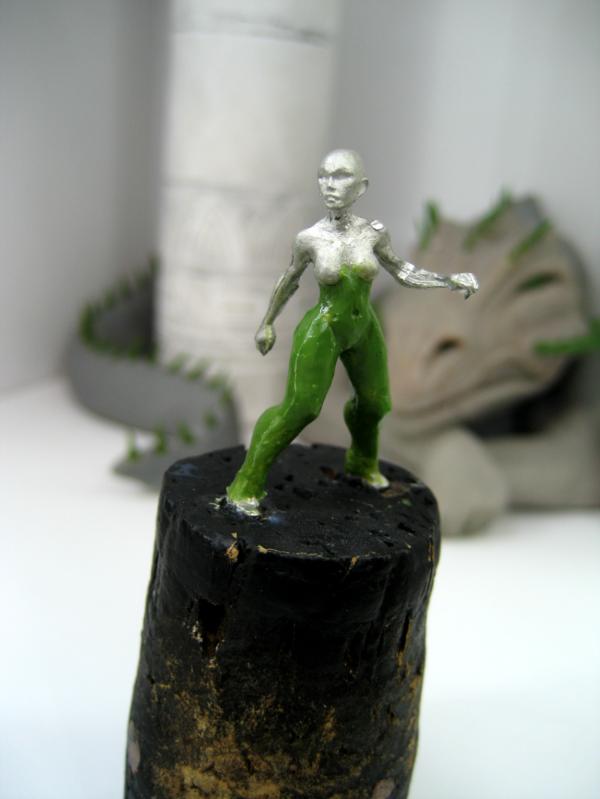
And this is as far as I got over the course of the last two weeks.

So what do you think?
I'm also thinking about her carrying a sword in the right hand - but what about the left? A shield, or rather a torch?
Almost naked like on the Frazetta image or in leathers?
I look forward to your suggestions and feedback.
Thank you!
Cheers
Klaus
44814
Post by: alabamaheretic
Always was a fan of Frazetta prints. I really like the dragon so far he almost looks bemused at his intruder. Another artist for your consideration is Louis Royo. same vein as Frazetta but a little more tame but still. Another artist that is pretty cool is Boris Vellejo, then theres Micheal Hoffman...so theres some more artists to pick from. If memory serves they are all in the style of "chainkini" eye candy if you wanna go that route and kinda have that heavy metal feel witch I think is pretty cool speaking of heavy metal the first heavy metal movie the tarakain?
27140
Post by: ChaoticMind
Personally I’d go for leathers with maybe an odd piece or two of metal plate. If you want to go more pin-up though I think ragged furs would be perfect. For the off hand it depends on the rest of it, will the scene have lighting? If there’s an existing light source (lit candelabras/chandelier/sconces/etc.) I say shield or make her torch and the dragon’s mouth/nostrils/eyes the light sources. I know that’s awfully logical compared to the inspirations but I’m also the kind of weirdo that bought an alternate sculpt of a character without a second thought because they got more clothes. Proper size and anatomy was just a bonus.
Edit: Something like the two on the right was what I was thinking for fur/pin-up style.
30344
Post by: monkeytroll
"So I started to sculpt a dragon's head"
So you did Klaus, so you did.
I like the idea of a torch, with a piece of treasure or something non-combative in the other hand for a barely clothed look.
Leathers if she's carrying a sword, or a halberd type - maybe switching it up a bit, and having a more sci-fi weapon such as a chain-blade polearm to contrast with the expected fantasy trope of the dragon. Or a sword and a tech scanner...
106010
Post by: Meer_Cat
Wonderful start on another great scene, Klaus!
I like the theme that monkeytroll is suggesting- leathers if a sword, metallic if a sci-fi polearm. But the scene also reminds me of the cover of the original Dungeons and Dragons game box back in '79, which in turn reminds me of Andre Norton's novel Quag Keep, which reminds me of the wereboar character Nialle's dragonette Afreeta.
Could your person have a dragonette on her off hand, and maybe that's why the big guy hasn't just eaten her already?
Or a bazooka- those come in handy too.
Oh, for fantasy artists, Julie Bell does a lot of Frazetta-esque work, but uses more realistic models, all body shapers and builders. So, they're heavier-built, but athletic. The shape that is coming through with your greenstuff work so far is very reminiscent of Bell's painting.
32373
Post by: Klaus, not Santa
alabamaheretic wrote:Always was a fan of Frazetta prints. I really like the dragon so far he almost looks bemused at his intruder. Another artist for your consideration is Louis Royo. same vein as Frazetta but a little more tame but still. Another artist that is pretty cool is Boris Vellejo, then theres Micheal Hoffman...so theres some more artists to pick from. If memory serves they are all in the style of "chainkini" eye candy if you wanna go that route and kinda have that heavy metal feel witch I think is pretty cool speaking of heavy metal the first heavy metal movie the tarakain?
Oh yes!
As a 65er I've grown up with Frazetta, Whelan, Boris, and Chris Achilleos - they illustrated the books I devoured in my youth, creating my fantasy world and sparking my creative energy in the first place
On the Heavy Metal side I was always a Corben and Mobius fan - John Difool was my hero
ChaoticMind wrote:Personally I’d go for leathers with maybe an odd piece or two of metal plate. If you want to go more pin-up though I think ragged furs would be perfect. For the off hand it depends on the rest of it, will the scene have lighting? If there’s an existing light source (lit candelabras/chandelier/sconces/etc.) I say shield or make her torch and the dragon’s mouth/nostrils/eyes the light sources. I know that’s awfully logical compared to the inspirations but I’m also the kind of weirdo that bought an alternate sculpt of a character without a second thought because they got more clothes. Proper size and anatomy was just a bonus.
Edit: Something like the two on the right was what I was thinking for fur/pin-up style.
Oh yes, you got the light setting right!
That's pretty much the plan
monkeytroll wrote:"So I started to sculpt a dragon's head"
So you did Klaus, so you did.
I like the idea of a torch, with a piece of treasure or something non-combative in the other hand for a barely clothed look.
Leathers if she's carrying a sword, or a halberd type - maybe switching it up a bit, and having a more sci-fi weapon such as a chain-blade polearm to contrast with the expected fantasy trope of the dragon. Or a sword and a tech scanner...
Ah!
Soooo many ideas...I was literally overwhelmed last night with all these ideas you guys threw at me
Meer_Cat wrote:Wonderful start on another great scene, Klaus!
I like the theme that monkeytroll is suggesting- leathers if a sword, metallic if a sci-fi polearm. But the scene also reminds me of the cover of the original Dungeons and Dragons game box back in '79, which in turn reminds me of Andre Norton's novel Quag Keep, which reminds me of the wereboar character Nialle's dragonette Afreeta.
Could your person have a dragonette on her off hand, and maybe that's why the big guy hasn't just eaten her already?
Or a bazooka- those come in handy too.
Oh, for fantasy artists, Julie Bell does a lot of Frazetta-esque work, but uses more realistic models, all body shapers and builders. So, they're heavier-built, but athletic. The shape that is coming through with your greenstuff work so far is very reminiscent of Bell's painting.
Thank you Meer_Cat!
Though I don't fance the newer Boris works and Julie's work is just too clean and staged for me - the original Boris' are more to my liking. Royo is also not quite my style...but that's all personal taste
As mentioned above, with being a 65er I've grown up with Frazetta, Whelan, Boris, and Chris Achilleos - they illustrated the books I devoured in my youth, creating my fantasy world and sparking my creative energy in the first place
On the Heavy Metal side I was always a Corben and Mobius fan - John Difool was my hero
So, based on all of your feedback I decided to give her some clothes

The sculpting of the clothes happened without a real plan
and she quickly got a pirate-ish look.
I actually like it and can totally see her wearing some high boots.

Right now I think I have several options with her.
I could continue the fantasy Pirate/Rouge/Thief path or head in a more Steampunk-ish direction.

As you can see in this last image I plan to have some (rays of moon) light to come through the holes in the ceiling, but additionally the dragons eyes (and maybe nostrils) will provide a glow in the dark.
The wall on the left could potentially be a painted background again providing the illusion of a longer hall with more columns occasionally lit by rays of moonlight...
So our heroine will have a torch/flashlight/lantern to provide the main OSL light source.
I love the suggestion of a "dragonette" or Fire Lizard on her arm or shoulder, which could be the reason the dragon is not immediately attacking...
But since she'll be pretty much in the position and pose as in the last image, I'm not sure how to incorporate it...
UNLESS she has her sword or rapier sheathed and carries the light in her right hand, balancing the Fire Lizard on her left forearm...
So some ideas to throw around and tinker with.
I look forward to your feedback and ideas
44814
Post by: alabamaheretic
Well I discovered all those artists in my teens an early adolescence so yea they do bring some rather fond memories. searching some of the other names you listed wow I do like like very much so. yea I read all of the deathdealer series it was one of my favorites
digging the aesthetics you are going with on the lady seems to be fitting, again liking the idea of the little lizard as well. watching with interest with on the torch...on the subject of the rapier hmm too bad her arm isn't higher and tilted a bit more to be at more of a drawing type pose that would look kinda neat..
30344
Post by: monkeytroll
An air-pirate perhaps?
Dragonette on a leash pulling towards the dragon, as though she hasn't noticed the big guy yet, and is just turning towards him now that her pet is making a fuss?
106010
Post by: Meer_Cat
I like the idea of an air pirate- sort of an Angelina Jolie vibe from Sky Captain and the World of Tomorrow.
Definitely could see her examining something on the wall, whilst the dragonette is pulling on the leash towards its larger cousin.
I also get a sort of gypsy feeling off the figure at this stage- not sure if that could be worked into the story....
Having fun watching events unfold!
32373
Post by: Klaus, not Santa
alabamaheretic wrote:Well I discovered all those artists in my teens an early adolescence so yea they do bring some rather fond memories. searching some of the other names you listed wow I do like like very much so. yea I read all of the deathdealer series it was one of my favorites
digging the aesthetics you are going with on the lady seems to be fitting, again liking the idea of the little lizard as well. watching with interest with on the torch...on the subject of the rapier hmm too bad her arm isn't higher and tilted a bit more to be at more of a drawing type pose that would look kinda neat..
Thank you! And yes, by now I do kind of regret the pose -especially since I left Frazetta now and am heading down the Steam road...
monkeytroll wrote:An air-pirate perhaps?
Dragonette on a leash pulling towards the dragon, as though she hasn't noticed the big guy yet, and is just turning towards him now that her pet is making a fuss?
Thanks monkeytroll - since hat could suggest other story directions - like a captured or stolen dragon baby - I don't wnat to head there. BUT you gave me an excellent idea - read it at the end of my post
Meer_Cat wrote:I like the idea of an air pirate- sort of an Angelina Jolie vibe from Sky Captain and the World of Tomorrow.
Definitely could see her examining something on the wall, whilst the dragonette is pulling on the leash towards its larger cousin.
I also get a sort of gypsy feeling off the figure at this stage- not sure if that could be worked into the story....
Having fun watching events unfold!
Thank you Meer_Cat
Yes, it's now a totally different story than what I had originally in mind
But I just let it slide and see where it takes me
Hi all,
last night I decided to head down the Steampunk route.
So she got some high boots - note the actual "shoe" is still WIP

Belts and accessories
With cogs and stuff.

Too bad that the front will hardly be visible in the end...
I'm still not 100% sure how this scene will develop. This time I just let it flow, no real plan, just flying be the seat of my pants, following intuition
Since I'm now on the steampunk path, I will give her a lantern/flashlight in the left hand - probably a lantern, as a flashlight doesn't give the ( OSL) required all around light needed for the scene.
She'll most likely get a holstered pistol, and a drawn rapier in her right hand.
I don't want to abandon the idea of a companion or Fire Lizard. But since I can't have it sitting on her arm I'm thinking about adding a mechanical beast.
A mechanical dragon (thus clearly showing it belongs to her) that already lumbered past and is now startled by the growling of the real dragon and whips his head around to look back...
What do you think?
Cheers
Klaus
30344
Post by: monkeytroll
A clockwork dragon? Oh, yes please
36940
Post by: Anvildude
Make the dragon the lantern. Or the lantern the dragon.
Also, I'm getting a little bit of 'puffed and slashed' from those sleeves. Gonna do a little of that?
44814
Post by: alabamaheretic
second the puffed sleeves idea, and a clockwork dragon oo sounds fun.
ah no worries on a going in a different direction you follow the muse man you follow the muse.
since you are doing the steam thing maybe like a half cloak? I'm not too sure how to describe this other than that...hmm I think it would fit what you are trying to do with the figure
well in regards to the frezzetta-esq you could give her really curly long hair of the blonde, red or black variety... you as kinda a nod I know you're not to that stage but it is worth a ponder.
116601
Post by: Syro_
Figures are looking very good, but that dragon is completely blowing my mind. It's amazing, beautifully sculpted, and I really liked the facial expression: the curl of the lip etc. I can't wait to see more!
106010
Post by: Meer_Cat
As with others here, love how the figure is coming on. And in the past I've found your 'go where the inspiration and intuition leads' projects to be some of the most enjoyable to follow.
For a light, what about a light-emitting orb? The covers on the 1950's sci-fi magazine always had a spaceman type running around holding up a sphere that emitted light- and could cast a lot of OSL, maybe.
I like the idea of a clockwork dragon- see a lot of possibilities there.
I also think that a dragonette could be fluttering somewhere over the figure's head. The dragonettes in the Pern stories are always described as having long, flexible tails. Perhaps the tail could 'swirl' away from the drgonette and touch the figure's back or shoulder- which would make for the anchor point of the wire inside to hold the dragonette up?
Too much fun thinking about! 
32373
Post by: Klaus, not Santa
monkeytroll wrote:A clockwork dragon? Oh, yes please
I'll try my best - but admittedly in this size it'll be hard
Anvildude wrote:Make the dragon the lantern. Or the lantern the dragon.
Also, I'm getting a little bit of 'puffed and slashed' from those sleeves. Gonna do a little of that?
Well, the eyes of the clockwork dragon will also act as flashlights, but I added a nice lantern (I think).
Puffed and slashed was the idea, but if it will be visible is a different story
alabamaheretic wrote:second the puffed sleeves idea, and a clockwork dragon oo sounds fun.
ah no worries on a going in a different direction you follow the muse man you follow the muse.
since you are doing the steam thing maybe like a half cloak? I'm not too sure how to describe this other than that...hmm I think it would fit what you are trying to do with the figure
well in regards to the frezzetta-esq you could give her really curly long hair of the blonde, red or black variety... you as kinda a nod I know you're not to that stage but it is worth a ponder.
Thank you Mate!
Unfortunately a half-cloak isn't an option (you'll see below), and yes, hair, hair or rahter "mane" she'll get
Syro_ wrote:Figures are looking very good, but that dragon is completely blowing my mind. It's amazing, beautifully sculpted, and I really liked the facial expression: the curl of the lip etc. I can't wait to see more!
THANK YOU Syro!
Makes me happy!
Meer_Cat wrote:As with others here, love how the figure is coming on. And in the past I've found your 'go where the inspiration and intuition leads' projects to be some of the most enjoyable to follow.
For a light, what about a light-emitting orb? The covers on the 1950's sci-fi magazine always had a spaceman type running around holding up a sphere that emitted light- and could cast a lot of OSL, maybe.
I like the idea of a clockwork dragon- see a lot of possibilities there.
I also think that a dragonette could be fluttering somewhere over the figure's head. The dragonettes in the Pern stories are always described as having long, flexible tails. Perhaps the tail could 'swirl' away from the drgonette and touch the figure's back or shoulder- which would make for the anchor point of the wire inside to hold the dragonette up?
Too much fun thinking about!
Thank you Bruce!
Yes, I had the Pern fire-lizards, drgonettes in mind, but in that scale I won't be able to pull this off :(
So it's really more of a full-sclae clockwork dragon - well, maybe the size of a car
And I think I found a good lantern...let me know what you think
Hi all,
our little heroine - Tomb Raider much? - received the appropriate accesories.
She received a "power-pack" and a lantern.

I think the lantern does meet the Steampunk theme - don't you?

And a special rapier - with cog and power cable...
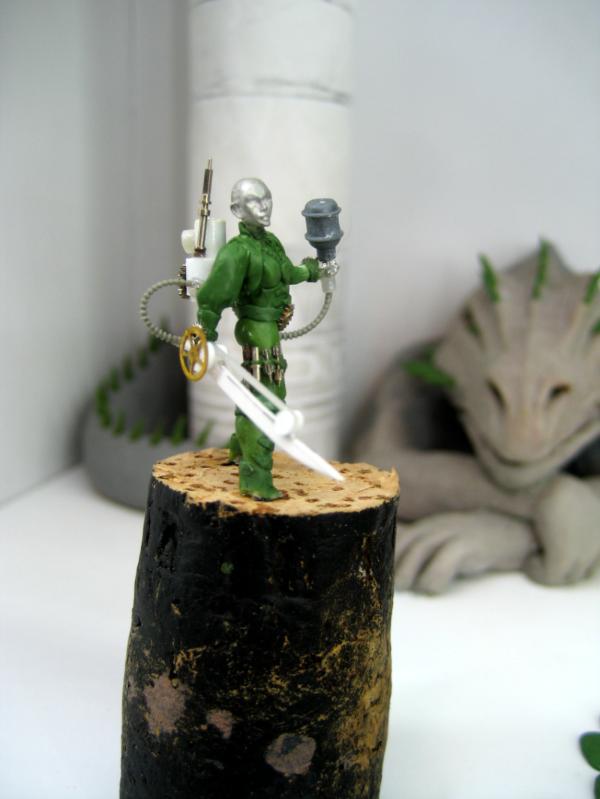
I'm pretty pleased with her - boots still to do...

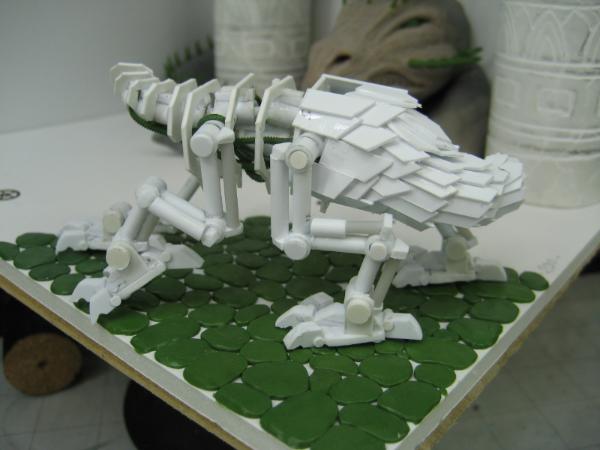
So I decided to give the Steampunk dragon, clockwork dragon a try.
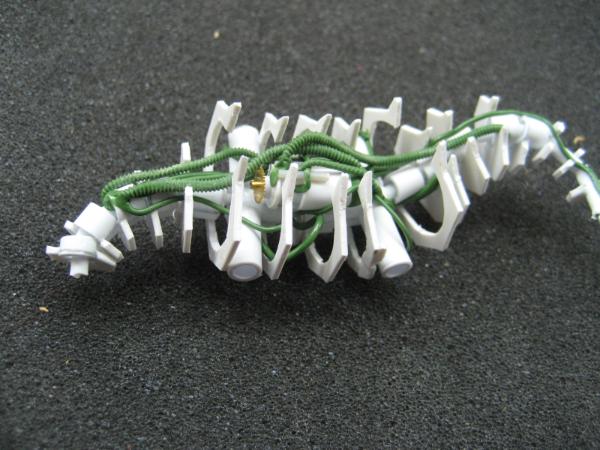
This is the bare skeleton

Here you can see the "heart" of the dragon as well as the feet.
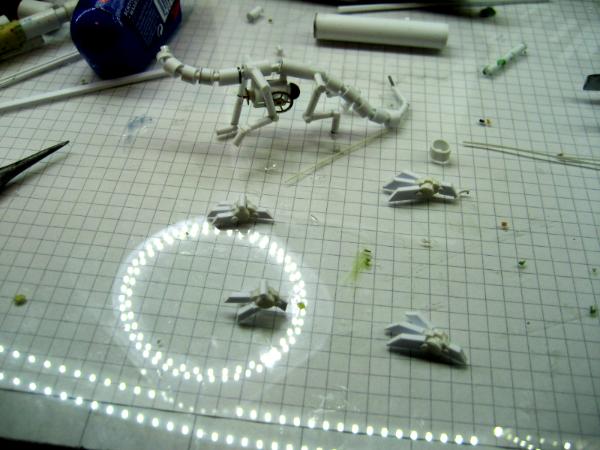
The first feet mounted

And pretty much in the planned position.
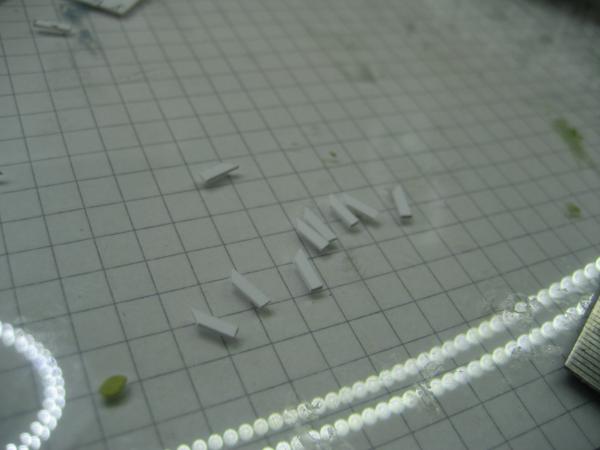
To flesh it out, I cut some "ribs"

And tried to mount metal scales...

Naw, that didn't work...

The scales are too thick and big
So I gave it another try covering it with thin plastic card

But this isn't looking convincing either.
I had an idea last night that I will try tonight. But if you have any ideas or suggestions that you want to share - I'm all open
Thanks
Klaus
89737
Post by: Pneumo
I spent an entire day going through your 72 pages instead of studying for my exams. And if that doesn’t tell you how awesome your work is, then I don’t know what will.
But I’ll say it too, your work in this thread is absolutely outstanding! I especially love all your dioramas as they display the scene so great. You have a great eye for detail and really manage to capture the emotions in your projects.
The steampunk dragon looks great already. Maybe try small spikes on the tail instead of scales?
Keep up the great work!
32373
Post by: Klaus, not Santa
Pneumo wrote:I spent an entire day going through your 72 pages instead of studying for my exams. And if that doesn’t tell you how awesome your work is, then I don’t know what will.
But I’ll say it too, your work in this thread is absolutely outstanding! I especially love all your dioramas as they display the scene so great. You have a great eye for detail and really manage to capture the emotions in your projects.
The steampunk dragon looks great already. Maybe try small spikes on the tail instead of scales?
Keep up the great work!
Holy Smoke! you did?!?!
You worked through all my failed and abandonned projects without throwing a temper tantrum?
RESPECT
Well, I hope I won't be responsible for any negative impact on your exams
but anyhow:
THANK YOU Pneumo!
30344
Post by: monkeytroll
Heroine looks great, fully approve of the lantern-rapier combo.
For the mekadragon I don't think you want a fully enclosed body -maybe a cage of sorts forming the torso, or just a partial plate attached to each rib, with clear space around each p!ate?
89737
Post by: Pneumo
 Klaus, not Santa wrote: Klaus, not Santa wrote:Pneumo wrote:I spent an entire day going through your 72 pages instead of studying for my exams. And if that doesn’t tell you how awesome your work is, then I don’t know what will.
But I’ll say it too, your work in this thread is absolutely outstanding! I especially love all your dioramas as they display the scene so great. You have a great eye for detail and really manage to capture the emotions in your projects.
The steampunk dragon looks great already. Maybe try small spikes on the tail instead of scales?
Keep up the great work!
Holy Smoke! you did?!?!
You worked through all my failed and abandonned projects without throwing a temper tantrum?
RESPECT
Well, I hope I won't be responsible for any negative impact on your exams
but anyhow:
THANK YOU Pneumo!
Sure did!
It’s been lots of fun too and don’t worry all exams went great
Quick question to your plastic and builds though, do you mainly use thinner card for everything that’s round (say tank hull etc.)?
32373
Post by: Klaus, not Santa
Pneumo wrote:
Sure did!
It’s been lots of fun too and don’t worry all exams went great
Quick question to your plastic and builds though, do you mainly use thinner card for everything that’s round (say tank hull etc.)?
Glad to hear!
Well, my standard card is 1mm - sturdy enough and yet good to cut.
As you can see I'm building mostly Imperial Guard - cause its bulky and very little curves
Whenever I do curvy stuff I use .75 or .5mm card - and for really fine stuff .25, but that is like paper and you have to make sure it is either on a strudy frame or hardly used.
I hope this helps
Cheers
klaus
36940
Post by: Anvildude
I think what you'll want to do depends on which way you're going with the 'steampunk'.
If it's chunky, 'realistic' Steamboy style of steampunk, you'll actually want to put in a big ol' boiler for the chest cavity instead of other stuff- then you can build off that, but it'll be the primary fill. Then you go with external structural ribbing on that- pistons on all the joints for locomotion, and maybe some wide/loose canvas tubes and hoses going up the neck, for 'coal intake' and jetting of steam from the nostrils (and maybe coal-gas for the eye lamps).
The more Gaslamp Fantasy style of steampunk, you'd probably want to start with what you have, but then build up the internal body with just a TON of tiny gears, sprockets and escapements. I'm talking just... randomly glue clockwork on from the center out until you've built up a dragon-shape. Then take thin plasticard and cut a ton of tiny plates from it- form those over the main section such that they look like they slide across each other, leaving lots and lots of gaps where you can see the internal clockwork. This is more of a 'I don't know, nor do I care HOW it works, but someone in-universe probably made it while in the Madness Place." rather than a "This is exactly how you'd make a clockwork/steampowered dragon if you didn't have to worry about silly things like Materials Science and Energy Density."
106010
Post by: Meer_Cat
The way you rigged the lamp is perfect, Klaus! It looks like the illustration off one of the old Brian Stableford novels, or even one of E.E. Doc Smith's Lensmen books! And with the clockwork dragon companion- getting a heavy 1930's art deco vibe off this, in a very good way!
Keep on keepin' on!
32373
Post by: Klaus, not Santa
Anvildude wrote:I think what you'll want to do depends on which way you're going with the 'steampunk'.
If it's chunky, 'realistic' Steamboy style of steampunk, you'll actually want to put in a big ol' boiler for the chest cavity instead of other stuff- then you can build off that, but it'll be the primary fill. Then you go with external structural ribbing on that- pistons on all the joints for locomotion, and maybe some wide/loose canvas tubes and hoses going up the neck, for 'coal intake' and jetting of steam from the nostrils (and maybe coal-gas for the eye lamps).
The more Gaslamp Fantasy style of steampunk, you'd probably want to start with what you have, but then build up the internal body with just a TON of tiny gears, sprockets and escapements. I'm talking just... randomly glue clockwork on from the center out until you've built up a dragon-shape. Then take thin plasticard and cut a ton of tiny plates from it- form those over the main section such that they look like they slide across each other, leaving lots and lots of gaps where you can see the internal clockwork. This is more of a 'I don't know, nor do I care HOW it works, but someone in-universe probably made it while in the Madness Place." rather than a "This is exactly how you'd make a clockwork/steampowered dragon if you didn't have to worry about silly things like Materials Science and Energy Density."
Hey, thank you Mate!
These ideas are great and most likely I will do a mix of these - not too many cogs, as you know if I build something like this with visible cogs and gears they would have to at least theoretically function... : LOL:
So let's see what you think of this update - Cheers
Meer_Cat wrote:The way you rigged the lamp is perfect, Klaus! It looks like the illustration off one of the old Brian Stableford novels, or even one of E.E. Doc Smith's Lensmen books! And with the clockwork dragon companion- getting a heavy 1930's art deco vibe off this, in a very good way!
Keep on keepin' on!
Thank you! That's quite a compliment
I really hope the scene will, just like these old illustrations tell a story - but yet leave it to your fantasy to flesh it out
Thanks
Hi all,
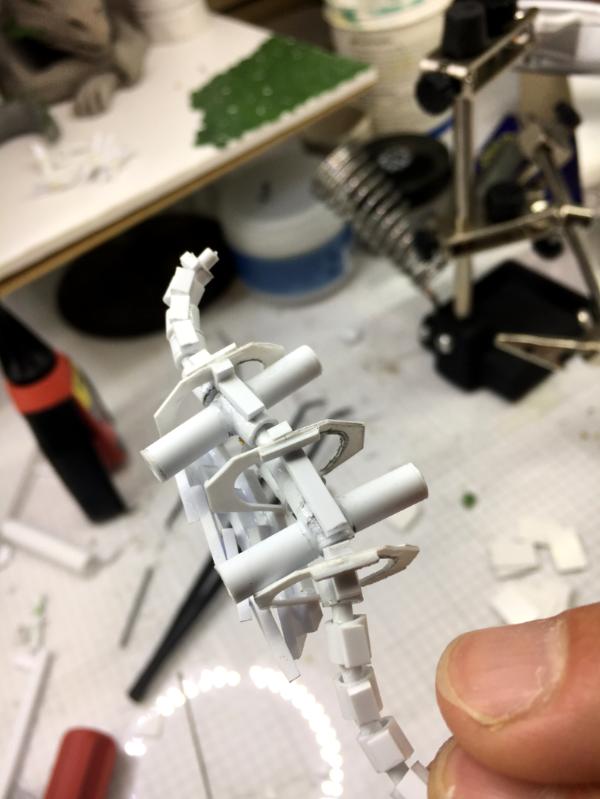
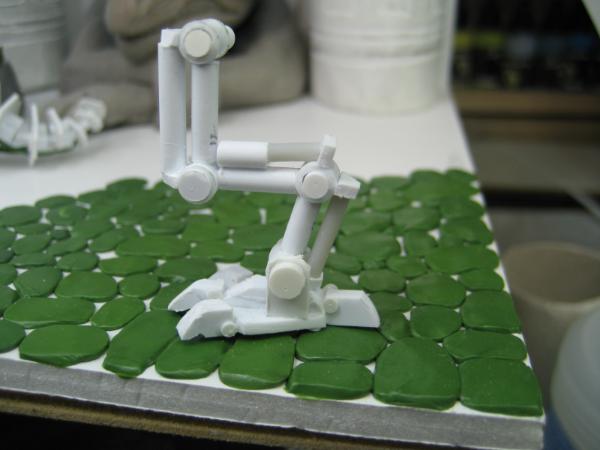
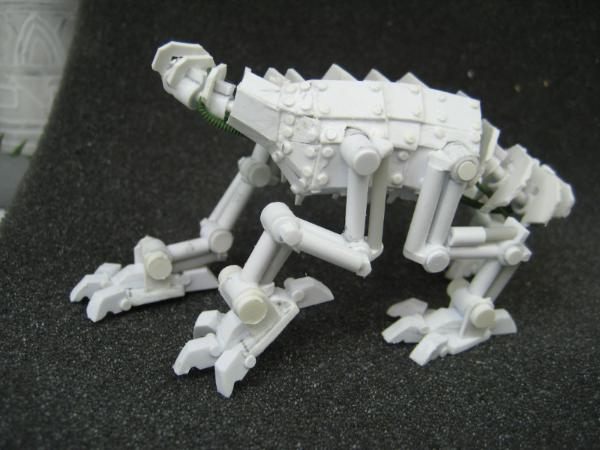
so with the idea of the night before in mind, I created some ribs or vertebrae in PPT and printed them.

I then glued them onto the plastic card with Fix-O-Gum - a temporary glue - and cut them

After cutting them all out I glued them onto the prepared spinal column
While these cured on place I worked on the first leg.
As you can see I did spent some time sketching the function of the joints as well as the scales

It is a cat-like rear leg.

And then I built it from plastic rods and tubes.

I think it looks quite good - currently it reminds me a bit of a T-Rex, doesn't it?

So what do you think?
Any ideas or suggestions?
Thanks
Klaus
24297
Post by: Viktor von Domm
my silence mustn't be confused with lack of interest....rather than awe...when i see these ribs...the minuscule work that i can only assume...
also...you had me hooked when you started talking about steampunk...always
tho...one small quest....don´t attach cogs to stuff that will not need one for movement...decoration cogs are hilarious...and not stylish...(damn...now i feel like an heretic...)
44814
Post by: alabamaheretic
I wouldn't say a t-rex more like a velociraptor.. but very cool none the less. very cool in the build process. I wish I had a tenth of your talent man kudos to you
62749
Post by: Dr H
Nice work.
Good sculpt of the dragon. Like the sneer.
Good detailing to the lady.
Yeah, like the skeletal look, and good to see thought put in to how it works.
32373
Post by: Klaus, not Santa
 Viktor von Domm wrote: Viktor von Domm wrote:my silence mustn't be confused with lack of interest....rather than awe...when i see these ribs...the minuscule work that i can only assume...
also...you had me hooked when you started talking about steampunk...always
tho...one small quest....don´t attach cogs to stuff that will not need one for movement...decoration cogs are hilarious...and not stylish...(damn...now i feel like an heretic...)
A vic!
Thanks for visiting and leaving a comment!
Been mising you - you didn't post in the blogs I subscibe either. Glad to see you're still around...but a bit more 'mundia I suppose.
Thank you! And yes, no unneccessary cogs
Hi all and thanks for the comments!
Happy 4th of July to my American friends - happy quiet working day to the rest of us
despite a digestive virus I have been busy for the last few days
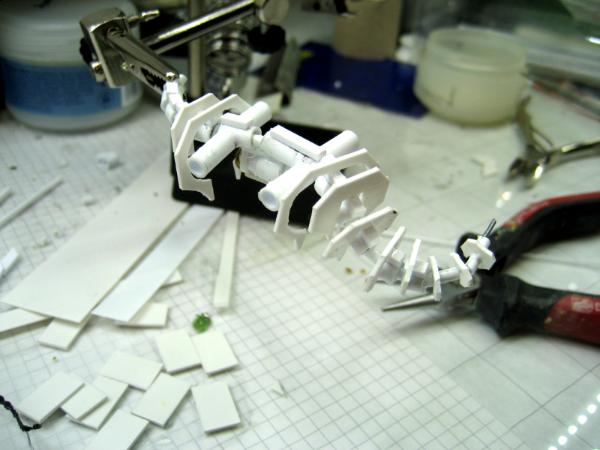
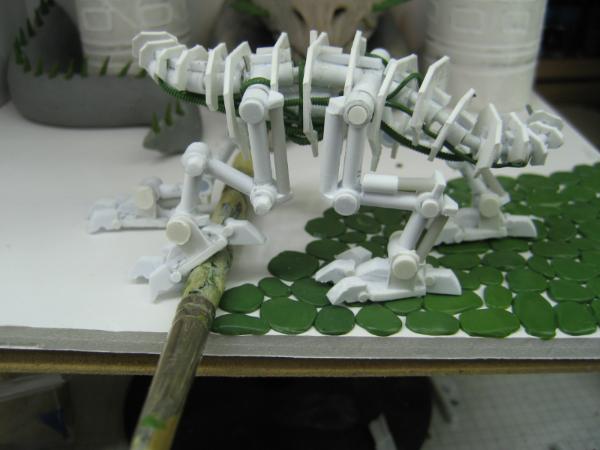
The legs of the Meacha Dragon were a bit troublesome and so I did several sketches before I was pleased with the design.

This is the start of a rear leg

and the corresponding front legs

I also added tubes and cables to the body - they won't be visible in the end, but we all know they are there
A posing test...

And the first completed foot
I want to picture him in mid-stride
Next were scales...
OUCH!!
Looks more like a hedge-hog :(
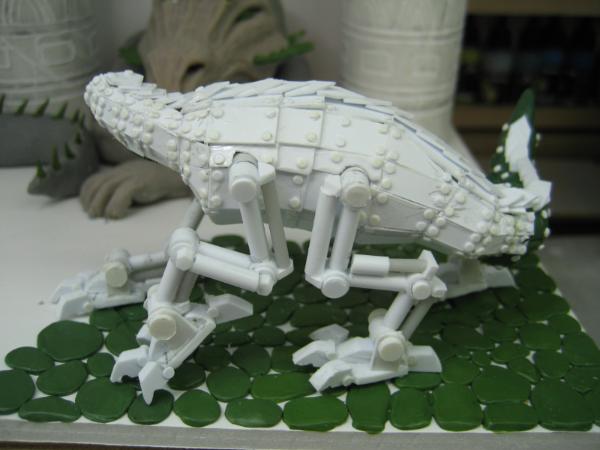
So I rather went for standard steel plating

Lots of angles to cut
But rivets make it look good
And so I continued for several days to build the plating
As you can see here I decided to sculpt the tail rather than cutting tons of tiny pieces

It took me three days to build a decent mechanical head

I was so frustrated in between that I didn't take any process images.
And most of it won't be visible *sigh*

I think he looks sufficiently surprised
Finally I added some small armour plates to the legs
The plates add a bit of volume
And make it look more balanced
A last look at the cables *bye bye*

And so I finalized the big boy - you may notice that I broke off one of the claws and I will have to clean this mess up today.

Yep, pleased with him!

The lady got her equipment completed too, with swinging hair

and the obligatory goggles

And the finished mecha dragon
with a stupid facial expression

So now I have to think about re-arranging and re-designing the scene
Do I have to make the back wall wider?
I want much of the scene itself to be in "pitch dark", so I'm unsure if I have to extend the rear wall in both directions to generate this...
What do you think?
Ideas, suggestions?
I look forward to your C&C
Cheers
Klaus
24297
Post by: Viktor von Domm
LOL....the surprised shot looks truly meme worthy...tho i currently have no tag fitting for it^^...
the steel plating look is very good, very appropriate...tho if i can add a minor suggestion? i think your fragile and delicate plasticcard work deserve a more finer version of riveting... the source i am speaking of is nail art half rounded spheres...i have currently two to three different versions of these...you get them from Chinese retailers...i got mine via ebay even... i am sure a nice package of 1000 pieces a bag will see you through one or two projects... the half spheres are rounded and range down to 1 mm and iirc even 0.5mm...tho i might be fantasizing here a bit^^ (it´s been ages since i last riveted for good...) also...these nail art items take revell glue really well and bond with plasticcard then so strong....!!! really a heart bound suggestion here...
as for postings...well...i really lost track on most of my favourite threads...which i must resume soonish^^
36940
Post by: Anvildude
I'd say you should pry off a couple of the plates on the armoured dragon. Just randomly, both to show some of the inner workings, and also to give it a little bit of that 'used' look that really separates the best steampunk from the mediocre. Not many- just one or two in certain spots. As though they were taken off for maintenance, but got lost or bent or something.
106010
Post by: Meer_Cat
Such a lot of work done since I was able to check in last- fantastic! More and more I get the vibe from a cover of Astounding magazine, circa 1935. A year ago I saw some work that Camkierhi did using pistons and realistic hydraulics and pneumatics made from styrene tube- seeing your mecha-dragon here reminds me that doing something of the sort is still on my to-do list, albeit I think much more limited ins cope, to start off with.
I agree with Anvildude's suggestion to remove some of the plates, so the inner cabling and such is visible. I'm of two minds as to whether it should be random- so as to give a worn, kept in repair look, or deliberate, to suggest 1930's style art deco streamlining and modernistic (for 1930) styling- like the steam locomotive shrouding that was so popular and so distinctive.
I don't think you need to widen or deepen the rear walls to get the pitch dark effect your going for. If you posit that the heroine's (atomic powered, patented, Belfry) lamp is the only source of light in the ruined temple, you have a tremendous opportunity to use the OSL techniques at which you excel. The OSL and contrasting shadow will (I think) give you the sense of depth and darkness you want, while highlighting the important features in what will then become the foreground.
It also explains why the mecha-dragon has gone past the big boy and is looking back in surprise- the real dragon can see into the infra-red, the mecha only in the visible light spectrum. The poor mecha didn't see the real one until the heroine's lamp illuminated it. With this posing, the heroine is in almost exactly the right position in the scene.
The heroine's completed outfit is perfect- with suggestions of (again, 1930's, at least to me) pilot, engineer and general all around adventuress.
Some questions:
* Will the dragon's forearms be folded over a pile of treasure?
* Would it add to the sense of displeasure I get from the expression on the dragon's face if wisps of steam were snorting out of his nostrils?
* Would it be cool to add a half-chewed fedora (a' la Indiana Jones) on the paving in front of, or near, the mecha-dragon?
So much to study and learn here, especially now Im messing about with greenstuff myself.
32373
Post by: Klaus, not Santa
Viktor von Domm wrote:LOL....the surprised shot looks truly meme worthy...tho i currently have no tag fitting for it^^...
the steel plating look is very good, very appropriate...tho if i can add a minor suggestion? i think your fragile and delicate plasticcard work deserve a more finer version of riveting... the source i am speaking of is nail art half rounded spheres...i have currently two to three different versions of these...you get them from Chinese retailers...i got mine via ebay even... i am sure a nice package of 1000 pieces a bag will see you through one or two projects... the half spheres are rounded and range down to 1 mm and iirc even 0.5mm...tho i might be fantasizing here a bit^^ (it´s been ages since i last riveted for good...) also...these nail art items take revell glue really well and bond with plasticcard then so strong....!!! really a heart bound suggestion here...
as for postings...well...i really lost track on most of my favourite threads...which i must resume soonish^^
Thank you Vik!
You wouldn't happen to have a link?
I used 1mm x.5mm rivets, the smallest I currently have...
Thanks for visitng and commenting
Anvildude wrote:I'd say you should pry off a couple of the plates on the armoured dragon. Just randomly, both to show some of the inner workings, and also to give it a little bit of that 'used' look that really separates the best steampunk from the mediocre. Not many- just one or two in certain spots. As though they were taken off for maintenance, but got lost or bent or something.
Well it may not be visible, but there are some gaps between some of the plates...
But removing some...I'm not quite convinced - especially as I wnat most of the dragon to be in the dark - maybe some metal refelctions from the lantern...
AHHHHH so many options
Meer_Cat wrote:Such a lot of work done since I was able to check in last- fantastic! More and more I get the vibe from a cover of Astounding magazine, circa 1935. A year ago I saw some work that Camkierhi did using pistons and realistic hydraulics and pneumatics made from styrene tube- seeing your mecha-dragon here reminds me that doing something of the sort is still on my to-do list, albeit I think much more limited ins cope, to start off with.
I agree with Anvildude's suggestion to remove some of the plates, so the inner cabling and such is visible. I'm of two minds as to whether it should be random- so as to give a worn, kept in repair look, or deliberate, to suggest 1930's style art deco streamlining and modernistic (for 1930) styling- like the steam locomotive shrouding that was so popular and so distinctive.
I don't think you need to widen or deepen the rear walls to get the pitch dark effect your going for. If you posit that the heroine's (atomic powered, patented, Belfry) lamp is the only source of light in the ruined temple, you have a tremendous opportunity to use the OSL techniques at which you excel. The OSL and contrasting shadow will (I think) give you the sense of depth and darkness you want, while highlighting the important features in what will then become the foreground.
It also explains why the mecha-dragon has gone past the big boy and is looking back in surprise- the real dragon can see into the infra-red, the mecha only in the visible light spectrum. The poor mecha didn't see the real one until the heroine's lamp illuminated it. With this posing, the heroine is in almost exactly the right position in the scene.
The heroine's completed outfit is perfect- with suggestions of (again, 1930's, at least to me) pilot, engineer and general all around adventuress.
Some questions:
* Will the dragon's forearms be folded over a pile of treasure?
* Would it add to the sense of displeasure I get from the expression on the dragon's face if wisps of steam were snorting out of his nostrils?
* Would it be cool to add a half-chewed fedora (a' la Indiana Jones) on the paving in front of, or near, the mecha-dragon?
So much to study and learn here, especially now Im messing about with greenstuff myself.
Thank you Mate!
I always love your feedback
Well, I hope today's update answers some of your questions
As said to Anvildude, I'm not sure if "opening" the dragon will be of much use...that will probably happen while painting...I'll have to see
THANKS
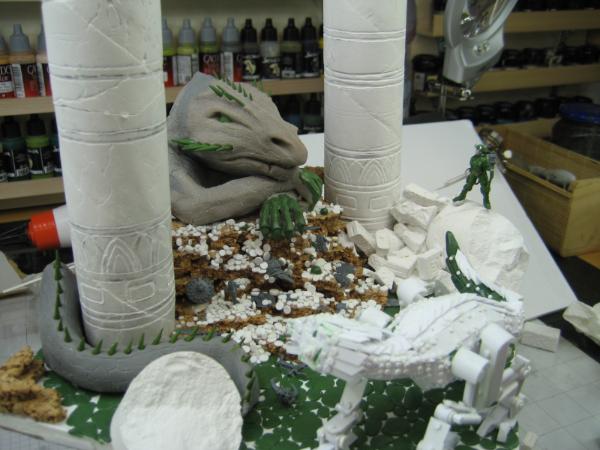
Well, since I wasn't sure of the scene layout, I did some re-arranging.
First I looked at re-positioning on a wider board.

But that didn't improve either, so I rather decided to use the original board, but angle the scene.
With this set-up I have enough space behind the dragon to keep it really in the dark, while casting a bit of light onto the columns.
This looks better now and frees me from simulating depth to the side via painting.
Pleased with the set-up I started to build the dragon's "stash"

And spent an hour of more sculpting the floor plates from GreenStuff...
Once the GreenStuff was cured I began to "flesh out" the stash, adding old swords, armour, shields and a few bones, plus lots of (gold) coins.

This starts to look like a good dragons stash
And depending on the angle of view, one can even see bits of the Lady's front.

I'm pretty pleased how the scene developed
I look forward to your comments and suggestions.
Cheers
Klaus
24297
Post by: Viktor von Domm
seeing how much time you´ve spent with the floor making...have you looked into these rolling pins from green stuff world? they even come in big sizes so that your whole base for this model could have been covered in one go... just saying...
as for a link...i have to look into my subscribed threads to show you a link a friend here on dakka made...quite a while ago...
*gone searching* Automatically Appended Next Post: https://www.ebay.co.uk/itm/1000-HALF-ROUND-RESIN-PEARL-BEADS-FOR-NAIL-ART-CRAFTS-DECORATION-/360708261610?pt=UK_Crafts_Embellishments_SM&var=&hash=item53fbe346ea
that is the ebay link...
and here is the original thread by MagosBiff90...
65595
Post by: Camkierhi
Klaus you are showing off now, too much awesome work.
I can second Vik's suggestion on the rollers they are brilliant.
32373
Post by: Klaus, not Santa
Thanks Vik!
But looking at it (Ebay Link), the smallest size seems to be 2mm - which is twice as big as the rivets I used on the little dragon here...
Oh yes, I do have these rollers...
Camkierhi wrote:Klaus you are showing off now, too much awesome work.
I can second Vik's suggestion on the rollers they are brilliant.
Thanks Cam!
Yes I do have these (all) rollers, but I don't really fancy them much...maybe I'm a bit too oldstyle
Anyhow, the plates started as a way to recycle left-over GS from the sculpting phase, so I didn't want to change.
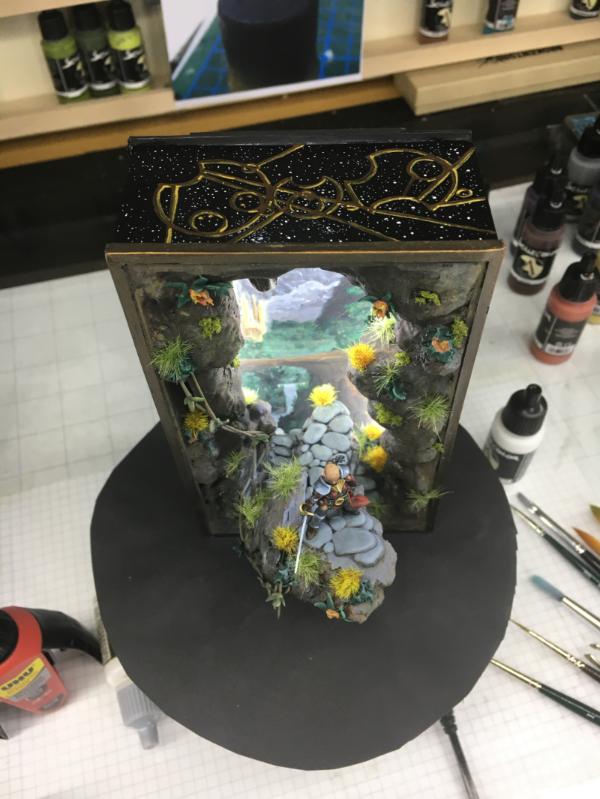
Hi all,
with the last update I positioned Lady Tiber for the first time without the cork.
And compared to the previous shots this made a huge difference and Vahidra at the Bemalforum pointed out that she is now getting almost lost in the scene...
So I was wondering how I could position her higher and more in focus.
My first attempt was a set of stairs - in the same angle as the the columns
But with Lady Tiber on it, that doesn't work (at least not without a major re-sculpting)

Next I tried a piece of column

This looks better, so I added rubble around and now it looks as if she's just climbing over the rubble

Assuming that her companion already crossed the obstacle
and is now surprised by the dragon's growl.

Finally I fixed the backdrop and added some more coins and stuff

This pretty much completes the built
So what do you think? Suggestions or improvements?
I look forward to your feedback
Cheers
Klaus
24297
Post by: Viktor von Domm
looks amazing...but it would make me go insane painting all these details...:ARGH:^^
32373
Post by: Klaus, not Santa
Haha!
Me too - that's why most of it will be in the dark
24297
Post by: Viktor von Domm
cheater...
44814
Post by: alabamaheretic
looking good Klaus, again echoing sentiments, was unsure of the adventurer but she's looking great with the piece now that I seen her with it. that mechanical lizard is looking top notch too, still blown away by your skill man.
36940
Post by: Anvildude
If you can duplicate the mech-dragon's claws, use a set to put scratches and scrapes in the column rubble. Just a little extra detail showing what happened before.
Also, if you haven't glued anything down yet, you ought to grout the floor. Dust or something , mixed with slow-setting adhesive of some sort? Or, heck, even just get a little portland cement and mix it into a paste with water, and actually grout the thing.
Give it that look of having dirt or dust between the stones, maybe be a bit messy with the cleanup so it looks like not much has swept them off for a long time...
32373
Post by: Klaus, not Santa
Viktor von Domm wrote:cheater...
In my age I have to "prioritize"
alabamaheretic wrote:looking good Klaus, again echoing sentiments, was unsure of the adventurer but she's looking great with the piece now that I seen her with it. that mechanical lizard is looking top notch too, still blown away by your skill man.
THANK YOU!
Anvildude wrote:If you can duplicate the mech-dragon's claws, use a set to put scratches and scrapes in the column rubble. Just a little extra detail showing what happened before.
Also, if you haven't glued anything down yet, you ought to grout the floor. Dust or something , mixed with slow-setting adhesive of some sort? Or, heck, even just get a little portland cement and mix it into a paste with water, and actually grout the thing.
Give it that look of having dirt or dust between the stones, maybe be a bit messy with the cleanup so it looks like not much has swept them off for a long time...
That's a great idea man!
I added some dirt to the ground - not too much. I think it now looks good together with the rest and everything primed.
Thanks
So, after some minor changes I primed everything black yesterday

Next I gave it a coat of very dark blue(removing some of the shine)

And then I started on my light sketch

This is mainly to give me a feeling of the scene and atmosphere - even though this time I may try a new technique.

After the initial lights I reworked some areas with black again

And this is as far as I got
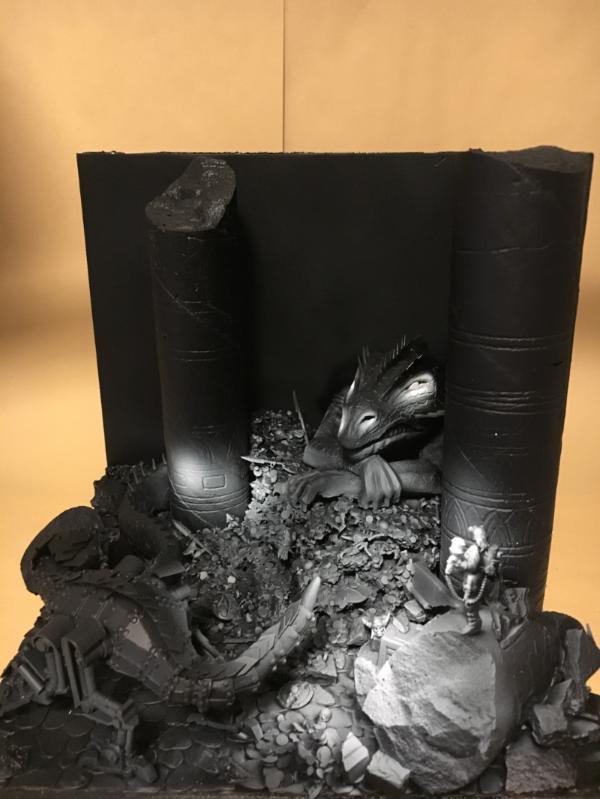
I'm afraid the eyes and nostrils are too strong - what do you think?
As for the "coloring" I'm thinking about using glazes and transparent inks only...this way I would keep the lights as they are, color with transperent colors and then "re-color" some of the light areas depending of the actual lights color - is that making sense?
First I would add manual highlights - depending on the material soaft for the leaterh and cloth, strong and clear for the gold coins and metal.
Anyone ever tried something this way?
Thanks
Klaus
518
Post by: Kid_Kyoto
I'll just head home and set my models on fire now, thank you.
65595
Post by: Camkierhi
^^^^Feel this exact thing every time I visit this blog.
Looking wonderful.
36940
Post by: Anvildude
I'd love to see a semi-transparent wash done. Like old-school Tempura painting in the Renaissance. I had the idea to do that with a Warsphinx once, but I'm not entirely sure what happened to it.
I do think the eyes are a little bright- maybe having the light focused in the direction it's looking, like high-beams, instead of as a diffuse glow? Could allow you to create a focal point between all the lights- maybe do that one bit in full-color before doing the overglazes, even, to get it to pop and contrast with the dark parts more.
106010
Post by: Meer_Cat
The scene is developing wonderfully, Klaus!
I think your scheme of a combination of washes, semi-transparents and deliberate highlights is definitely the way to go.
I think your scene is designed to be viewed by the observer from a specific point of reference, which is over the adventuresses' shoulder (sp?). Given that, I think the far side eye and nostril is too bright and could perhaps use some diffusion as anvildude suggests. But the near side eye and nostril I think could stay as they are. In keeping with how you described how you might do your highlights, you might 'over-represent' bright shiny things in the path of the beam of light leading up to the dragon's face- this would explain the brighter retroreflection.
Or, I could just be mad, mad I tell you!
As always, I very much enjoy seeing the vision come to life.
32373
Post by: Klaus, not Santa
Thank you guys!
A short distraction from the Dragons Den
In preparation to the " PaintPals - Paint Weekend" I decided to give the GOTHICA another chance.
Many were rather unhappy with the final paint job - or rather the color setting I had chosen.
As I wasn't sure how far I would get with my "Dragons Den" till the weekend I looked at miniatures to paint.
I thought I could (hopefully) do better this time, I took the GOTHICA out of the display cabinet.

Since many recommended Isopropanol Alcohol best fro stripping paint, I gave her a thorough bath.
A horrible sight...

Unfortunately Isopropanol isn't as harmless as many said and while leaving the resin unfazed, I softened and partially destroyed the GreenStuff...

Many of you will remember, that much of the GOTHICA was GreenStuff...

Luckily I was able to fix everything before the PaintPal weekend.
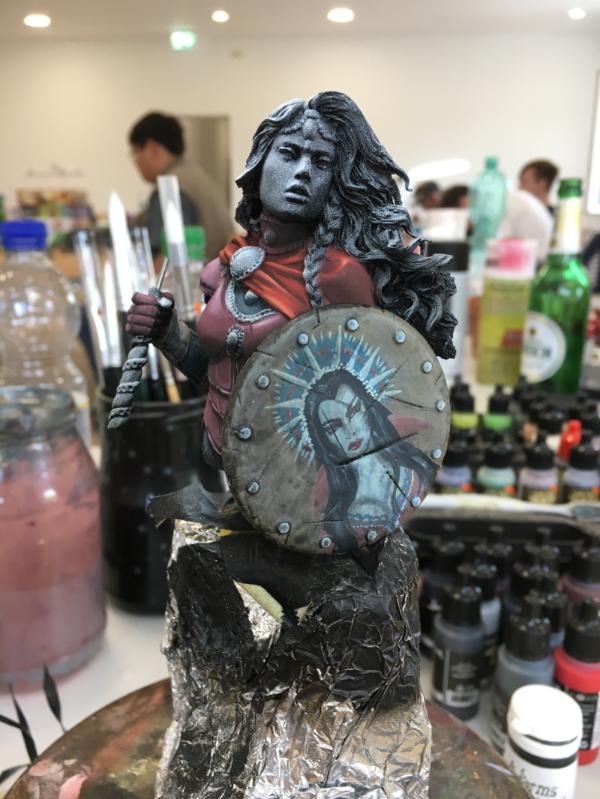
Some new gems and new streamers

Since I didn't want to touch the freehand on the shield, I masked it before priming
After priming I added another spray of white to indicate the light situation I'm looking for

I think this light situation is better balanced, But still has some interesting views to offer

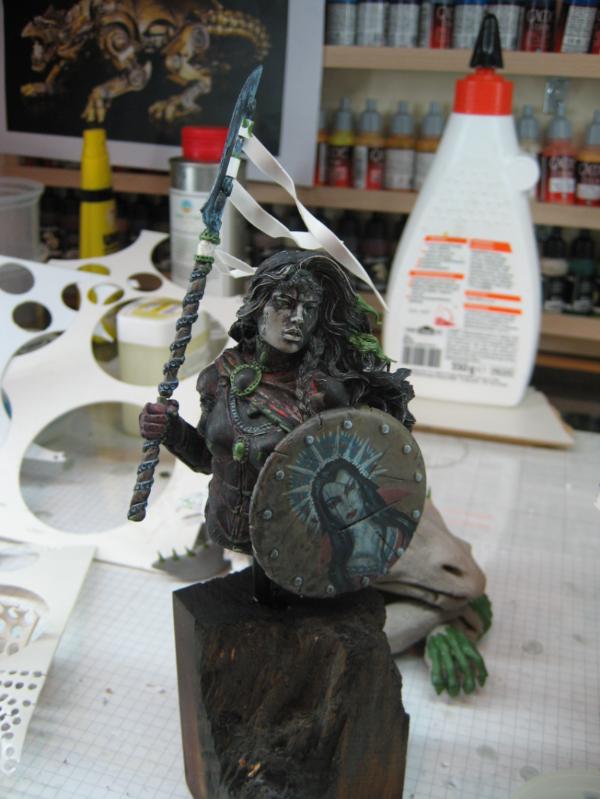
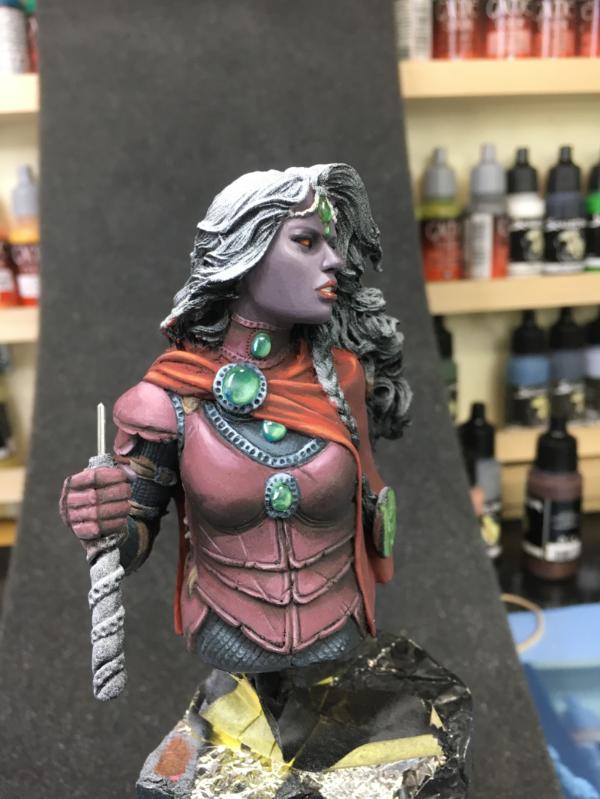
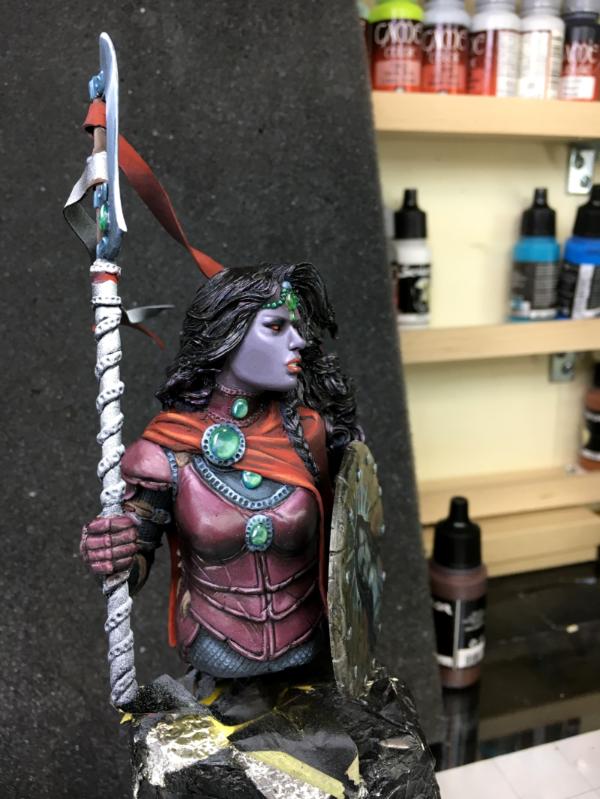
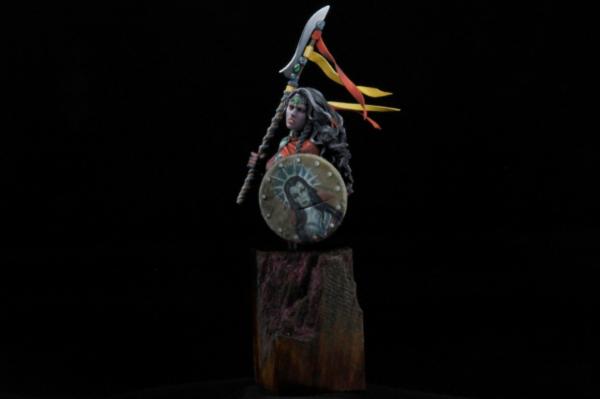
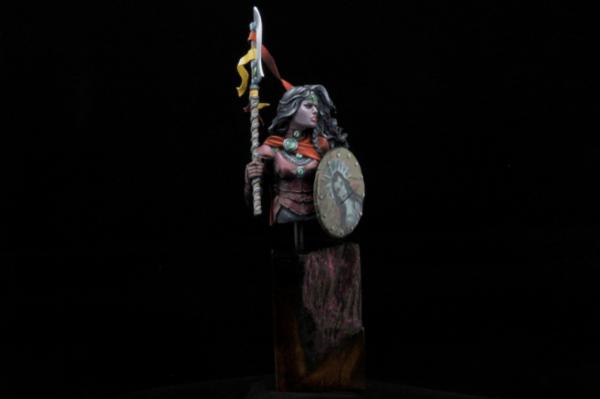
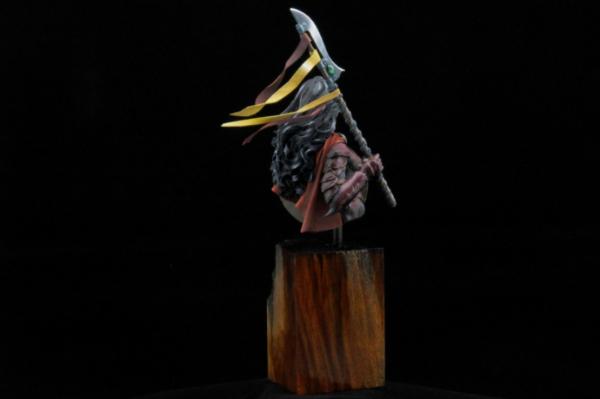
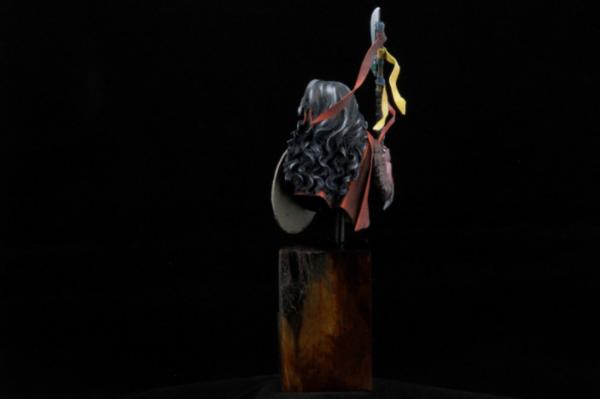
I arrived at the PaintPals Meeting location on Friday afternoon and we immediately began setting up. It was a nice group of 16 with plenty of space - I had a large table for myself - and after some friendly chit chat we began painting.
Since I really liked the leather look on the previous version I decided to go for a dark red leather armour again.

By now I'm really accustomed to my ScaleColor and the transitions went smooth and easy
Instead of the brownish cape I decided to use red this time

with relatively bright highlights.
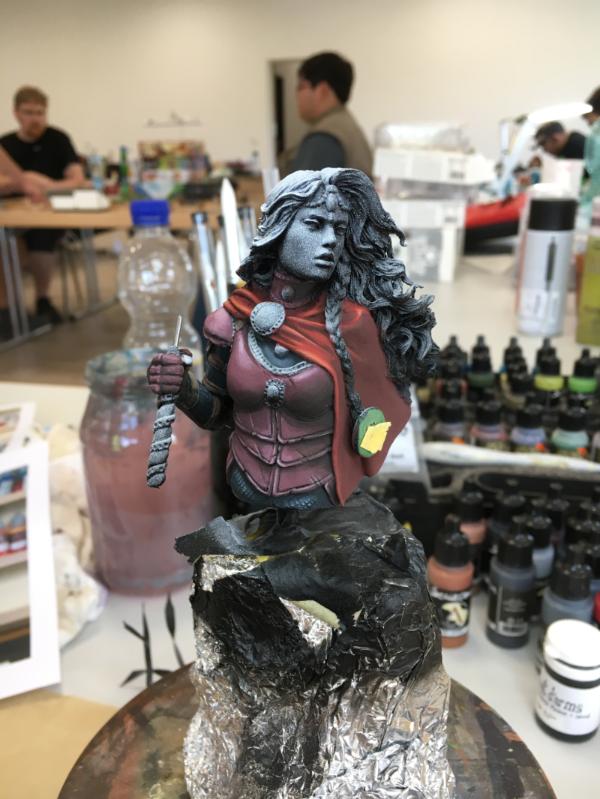
Together with the shield it looks quite nice
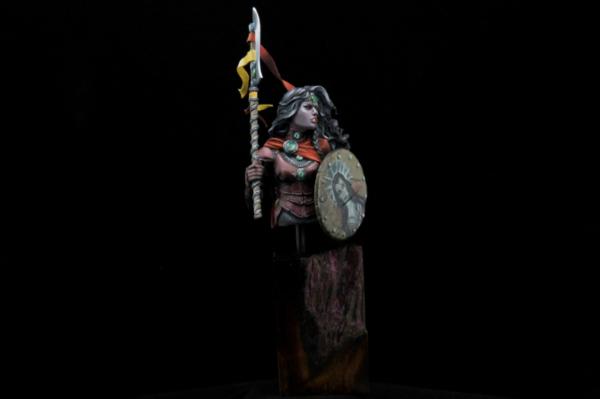
Initially I planned blue gems as a contrast to the reds of the armour and cape

But after some feedback by Hansrainer, aka Apok, I recolored them in a dark green.
At the same time I started the face.

Vampiric is still the goal, so very pale skin to start with.
But shading almost white is really hard...

While the transitions were smooth and I avoided any "dirty" colors or a 5-o'clock shadow I was totally not pleased.

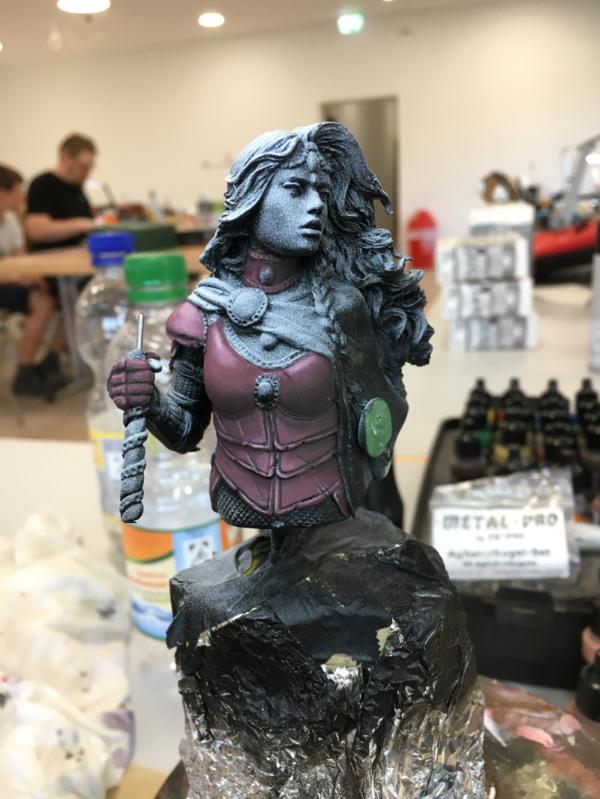
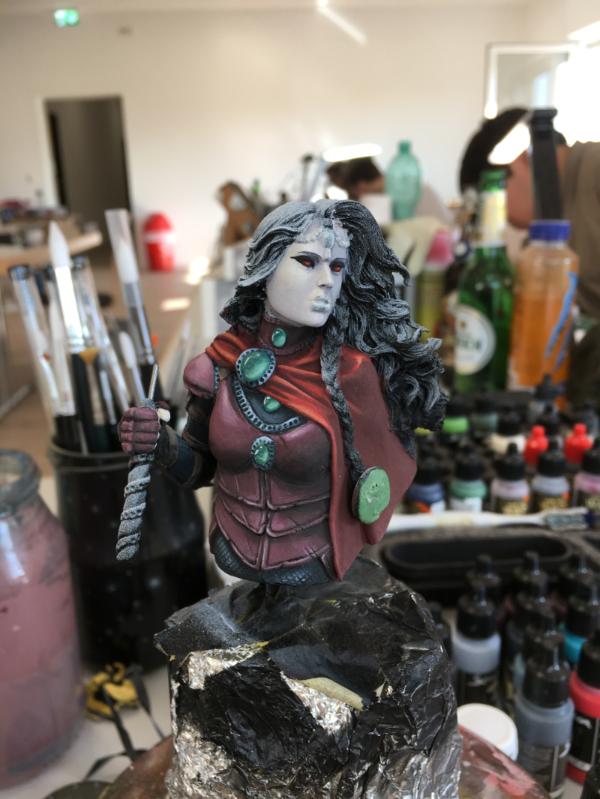
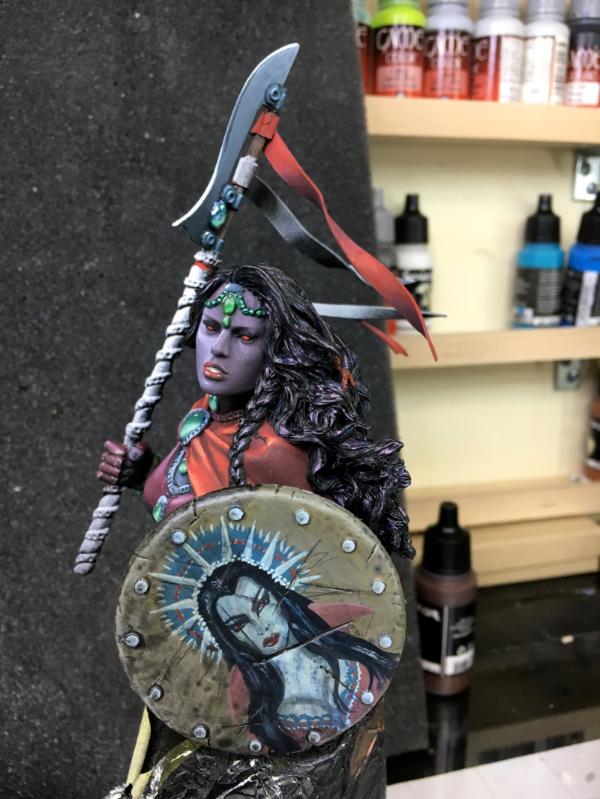
So on Sunday at noon - just before packing up - I decided to go for a totally different approach

Back home on Sunday afternoon I continued with her face.
Again the transition went rather well
With this dark skin the eyes really glow

Though the freehand on the shield is still displaying a very pale skinned vampire, I think this could work.

To get a bit of distance from the skin I played with the metal of her blade for a few hours

Last night had tropical temperatures and I couldn't sleep, so I spent half the night repainting her face again

Together with a first hair-job and the completed jewelry

I'm not 100% sure about the hair, but I do like the face now
So this is as far as got
What do you think?
Cheers
Klaus
106010
Post by: Meer_Cat
Jeez Klaus, so much to see here! I was okay with Gothica I, but really lik ewhat you've done with Gothica II as well. I get a lesson in color coordinating every time you do something- this time, amongst other tips, I want to try the white spray paint/air brush (I don't have an airbrush yet) technique to see where the highlights and shadows fall- that is positively ace!
Some thoughts generally:
* The red leather armor is perfect- the color denotes the vampiric aspect of the figure and leather is very earthy, very 'alive', which is a nice contrast again with the 'undead' figure
* The red cape with the brighter highlights is definitely the way to go- it really makes the figure pop, and will continue to do so no matter how you light it.
* The metal work on the armament is nothing short of astonishing for its realism
* RE: learning color coord- I thought the blue gems were absolutely right for the piece, until I saw the green. Definitely the green ones, much better with the reds in the armor and cloak
* I think the hair looks very good; even without the signature white streak, I'm put in mind of Elsa Lancaster's makeup in 'Bride of Frankenstein'
* I think the difference in skin tone between the figure and the icon on the shield is fine- shield work is going to be highly symbolic and stylized, not true to life realistic, and it looks very good as is
With apologies, I'm not sure about the skin tones. I think (for me) it very much depends on how you imagine the piece being illuminated. I think it is just right if the light comes from low front or low to mid- right (as you look at the figure)- is that sort of what you were aiming for (I'm gauging by the fall of paint from your test spray at the beginning). I'd like to see how you apply light to the piece.
Another terrific bit of work, Klaus- I'm really impressed with the changes (and sorry to see what happened to the greenstuff, but can't believe how much you repaired/replaced in so short a time); Gothica II is significantly different from Gothica I- she's her own person, despite the common origins.
Bravo, Maestro, bravo!
36940
Post by: Anvildude
Hrm... I wonder if you could cool off the skin tone a little more- right now, she's looking more African than Undead- maybe lighten it up just a tad more, as well- 2 or 3 f-stops, perhaps? It's just giving me much more of a 'healthy dark-skinned person' vibe than a 'living corpse' vibe. It's possible that attempting to add a tracery of visible veins or arteries might also help.
Actually, reading up on decomposition, maybe going for a Livor Mortis color (like a dark bruise) or even the classic green tinge (which is apparently caused during the 2nd stage of decomposition by the creation and accumulation of sulfhemoglobin, a non-functioning derivative of hemoglobin).
Just... Corpse stuff, you know?
32373
Post by: Klaus, not Santa
Anvildude wrote:Hrm... I wonder if you could cool off the skin tone a little more- right now, she's looking more African than Undead- maybe lighten it up just a tad more, as well- 2 or 3 f-stops, perhaps? It's just giving me much more of a 'healthy dark-skinned person' vibe than a 'living corpse' vibe. It's possible that attempting to add a tracery of visible veins or arteries might also help.
Actually, reading up on decomposition, maybe going for a Livor Mortis color (like a dark bruise) or even the classic green tinge (which is apparently caused during the 2nd stage of decomposition by the creation and accumulation of sulfhemoglobin, a non-functioning derivative of hemoglobin).
Just... Corpse stuff, you know?
Thank you Anvildude!
Yeah I'm not totally happy with the facial color either...though I'm reluctant to give it another go - yet.
It could be Dark-Elfish... naw, never mind
I will continue with the rest and then see if I really re-visit the face
Thanks!
Meer_Cat wrote:Jeez Klaus, so much to see here! I was okay with Gothica I, but really lik ewhat you've done with Gothica II as well. I get a lesson in color coordinating every time you do something- this time, amongst other tips, I want to try the white spray paint/air brush (I don't have an airbrush yet) technique to see where the highlights and shadows fall- that is positively ace!
Some thoughts generally:
* The red leather armor is perfect- the color denotes the vampiric aspect of the figure and leather is very earthy, very 'alive', which is a nice contrast again with the 'undead' figure
* The red cape with the brighter highlights is definitely the way to go- it really makes the figure pop, and will continue to do so no matter how you light it.
* The metal work on the armament is nothing short of astonishing for its realism
* RE: learning color coord- I thought the blue gems were absolutely right for the piece, until I saw the green. Definitely the green ones, much better with the reds in the armor and cloak
* I think the hair looks very good; even without the signature white streak, I'm put in mind of Elsa Lancaster's makeup in 'Bride of Frankenstein'
* I think the difference in skin tone between the figure and the icon on the shield is fine- shield work is going to be highly symbolic and stylized, not true to life realistic, and it looks very good as is
With apologies, I'm not sure about the skin tones. I think (for me) it very much depends on how you imagine the piece being illuminated. I think it is just right if the light comes from low front or low to mid- right (as you look at the figure)- is that sort of what you were aiming for (I'm gauging by the fall of paint from your test spray at the beginning). I'd like to see how you apply light to the piece.
Another terrific bit of work, Klaus- I'm really impressed with the changes (and sorry to see what happened to the greenstuff, but can't believe how much you repaired/replaced in so short a time); Gothica II is significantly different from Gothica I- she's her own person, despite the common origins.
Bravo, Maestro, bravo!
Thank you Mate!
Well, for the "light sketch" I didn't use an airbrush - I simply used a spray can.
First the black primer (spray can) and then in the direction of the intended light with a white spray paint - it's really easy and totally worth it
Thank you for the very positive comments - as said, I'm not 100% happy with the skin tones either...maybe I'll revisit the face...no promises though
Thanks Meer_Cat
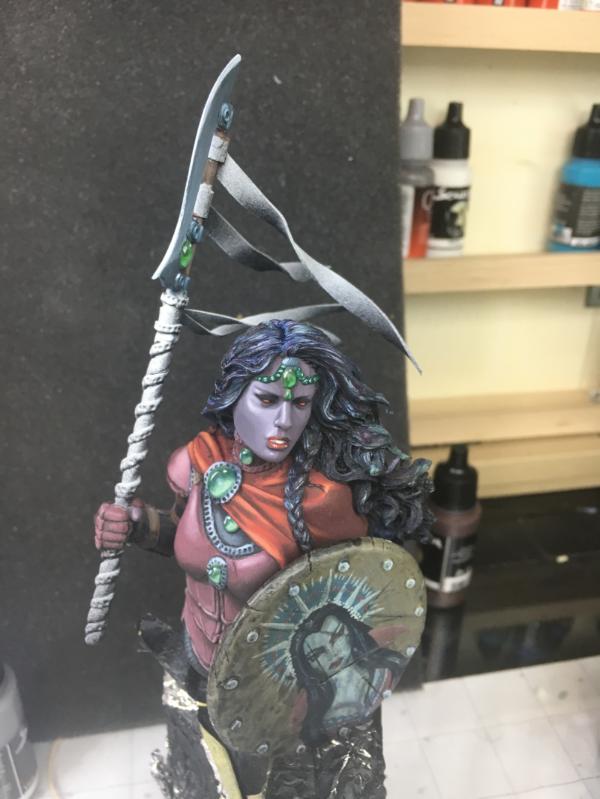
Hi all,
last night was again tropical without much sleep.
I did spend some time on the hair.
And worked a bit more on the leather armour
The first 2 streamers are now red
I'm not quite sure if I should make them brighter or leave them in this intensity

Here she is with just the ambient room light - you can see the skin color has a slightly different temperature
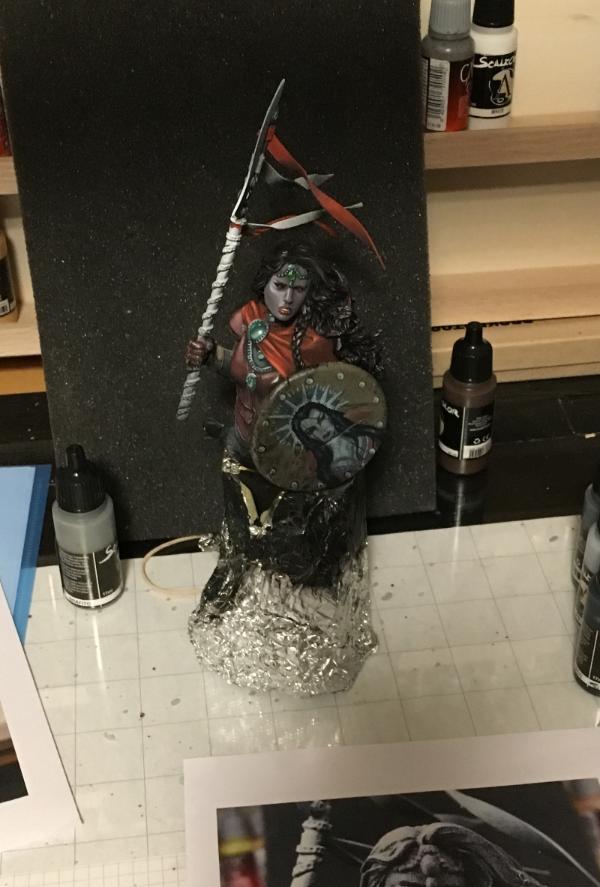
I'm not quite sure what colors the other two streamers will get - maybe green to pick up the color of the gems? Or blue?
So, what do you think?
I look forward to your feedback and comments
Cheers
Klaus
32373
Post by: Klaus, not Santa
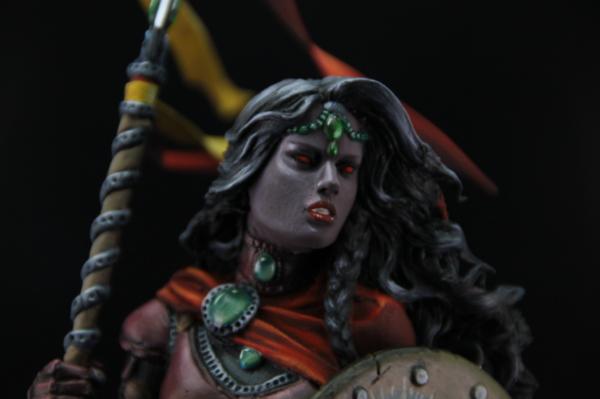
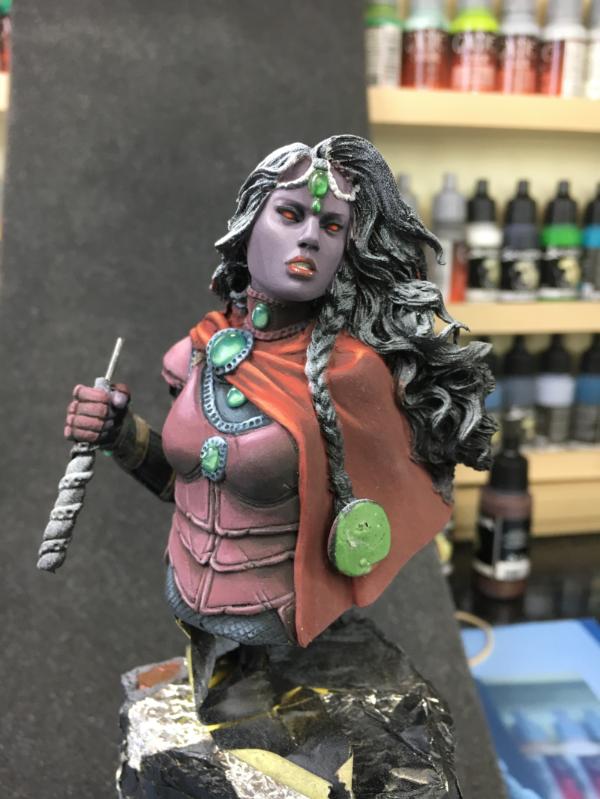
Well, I'm still not sure on how to continue with her skin color.
So I decided to do a quick color test - not on the GOTHICA
I quickly primed Allayah ( http://fischers-design-shop.blogspot.com/2017/02/allayah-barduch-8.html) with a similar light situation
Well, and then I tried "dead Flesh"
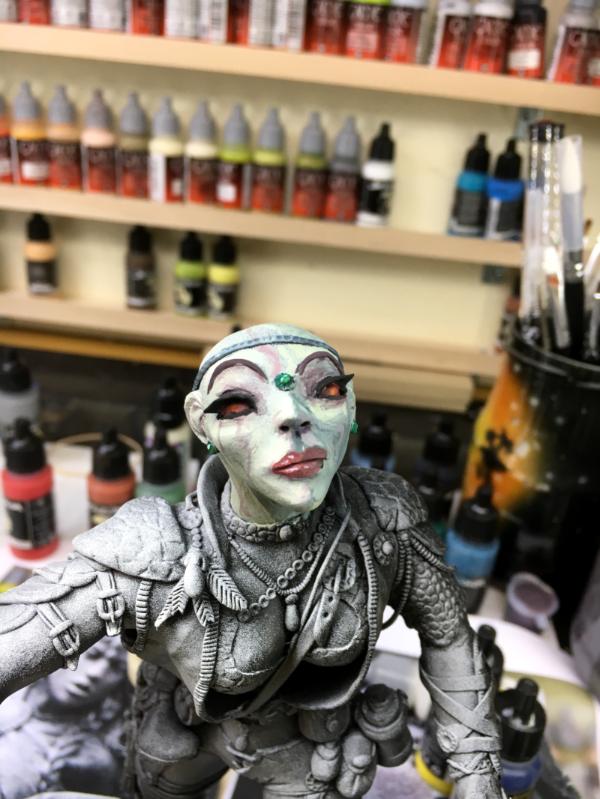
Quick, dirty and not very careful - just to give the idea of how dead flesh could look…

Hmm…
So I tried the colors on the print out on paper

Puh...I don't know
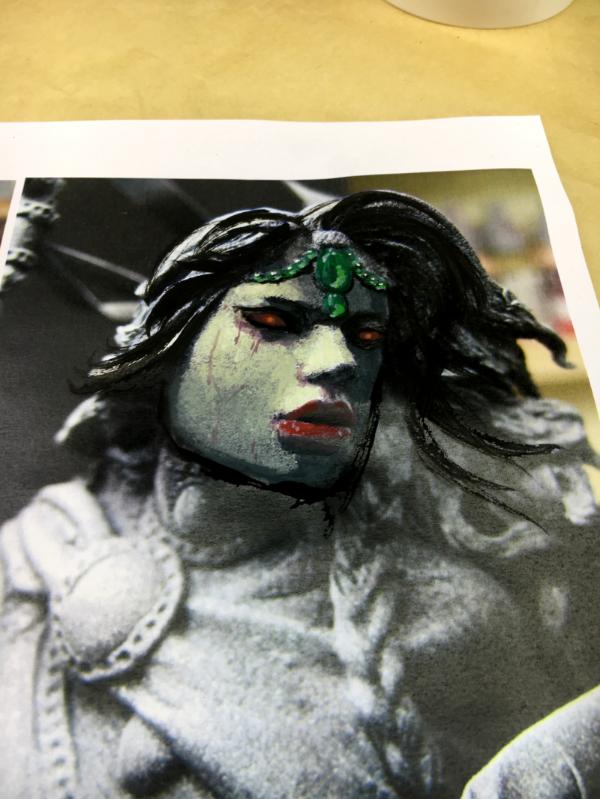
What would you say?
Should I try and make her truly undead?

Or should I look for something different?
36940
Post by: Anvildude
Ooh... I kinda like that. Maybe mottle in a little more purple around the veins...
I think that it'd look better on the model, an here's why.
So Gothicka's meant to be a Vampire, and have ethereal, supernatural beauty, yes? But she's also meant to be a living corpse, and an icon of fear.
What is beautiful? Smooth, clear skin, regardless of color, tends to be considered beautiful. Corpses are generally distinguished by mottled colors and non-living textures, caused by stuff like skin-slippage and maggot colonies and bloat gasses.
So I feel like if you have the colors of death,on perfectly smooth, firm features, you'll get a good combination of both- leaving her both beautiful and horrible to look at.
62749
Post by: Dr H
A work of art is never finished, eh? I liked the original in all it's uniqueness. (just to put it out there) The problem with the first pale attempt was (from the photos) that it lacked depth. I think for a good "vampire pale", I would approach it as I would "normal" skin, but instead of red undertones, I'd use blue. To go into more detail, my usual skin method is: Dark brown (for shading recesses etc. I paint dark to light) Blend to Flesh tone on raised areas. Blend up to bone/cream highlights, possibly white for extremes. Use red (mixed with flesh tone and/or bone) for lips and cheeks to give it some healthy life. For a larger scale, like this bust, you'd need to add some blue for shading and giving the skin some translucency. As well as some more red undertones before the flesh tones. for the vampire look, I'd replace the brown with a purple or dark blue base coat, and not use the red for the "healthy" stage. Mixing some blue into the flesh tones and highlights. Give it a drained of blood look (ironic for something that drinks blood) rather than a Zombie rotting look with the added greens and yellows. But keeping the flesh tones in there should keep it looking like it used to be flesh and is now dead meat, but not rotten. Just some thoughts.
32373
Post by: Klaus, not Santa
Thank you!
Thank you Anvildude - I really like your feedback, and I almost painted her with your suggestion - Thank you Mate!
Thank you Dr H - I will definitely keep that recepie! Thank you!
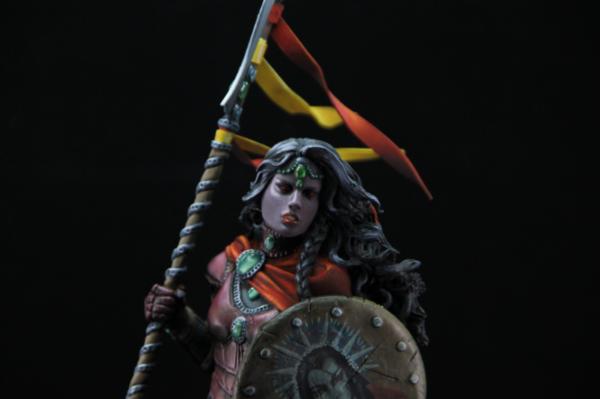
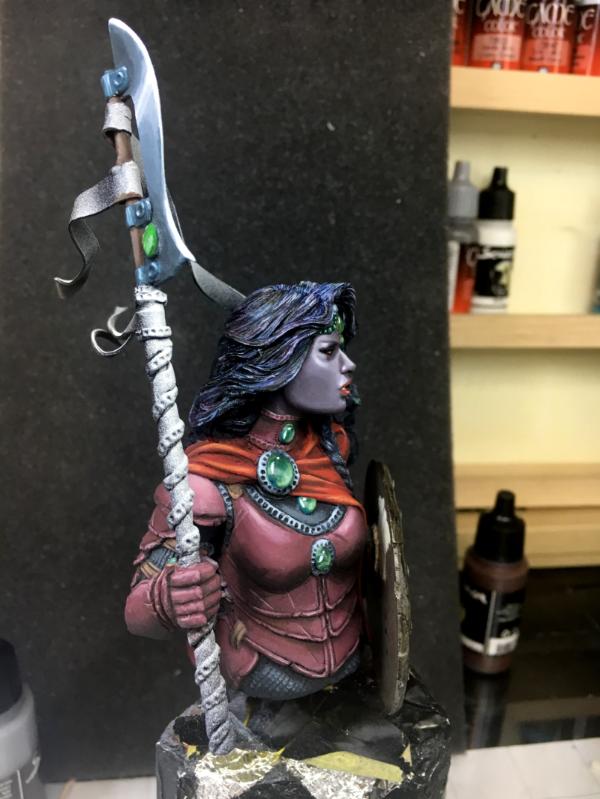
Since it rained a bit and cooled off, I was able to get some sleep - and a bit of come to my senses
I decided not to go for Undead, zombie or any other...I went for the colors I had and just made them smoother (hopefully sucessful).
So here we go:
for some F**ing reason some are blurry
they were absolutely crisp on my camera…


I hope you like the "new" GOTHICA.
Cheers
Klaus
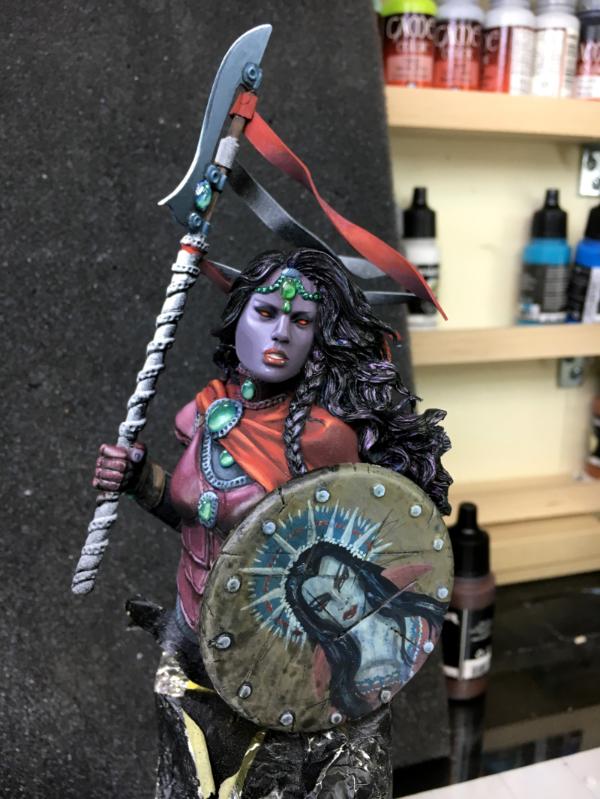
22192
Post by: whalemusic360
Looks good to me. She is just more Drow/Dark Elf looking instead of Vampire looking now. The red armor and cape look better though I think.
36940
Post by: Anvildude
I actually really like the myriad of bright colors on the pennants. That's something people always forget about Medieval stuff- it wasn't drab. In fact, a lot of it was downright GARISH- a sort of rejection of the hard conditions and difficult lives they lived.
44814
Post by: alabamaheretic
Damn Kluas that bust is...wow...that's...wow, the shield is great too...the eyes, that is a piece of art my friend.
62749
Post by: Dr H
Nice job, Klaus. Beautiful work.
32373
Post by: Klaus, not Santa
Hey all!
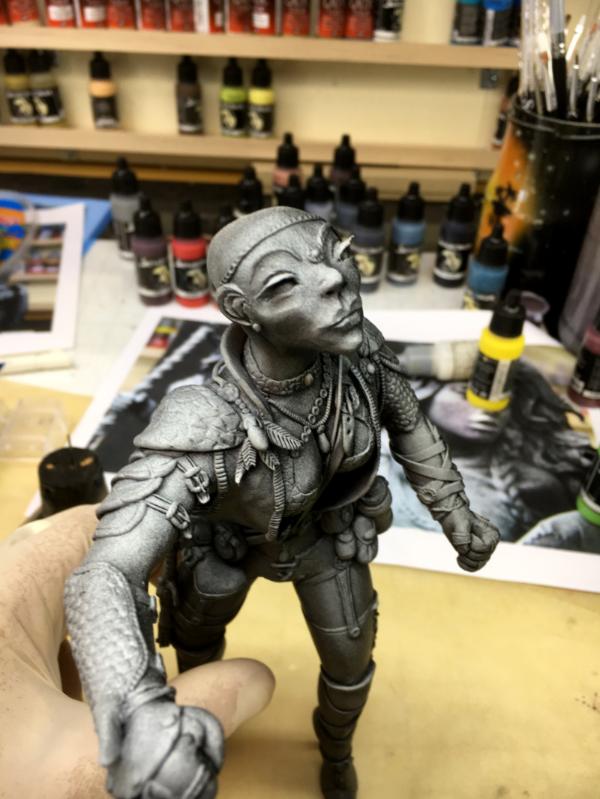
Sorry for the absence, but here it was so hot, the paint dried on the brush und Sculpey cured by itself
Naw, it was just damn warm and I didn't find the mojo to do any real stuff.
BUT, I did use the time to finally experiment with some 3D stuff.
A friend recommended Sculptris - free programm, by the makers of ZBrush - and I find it very intuitive.
This was the first head - say hello to Phantomas (who ever is old and european enough to remember him?)
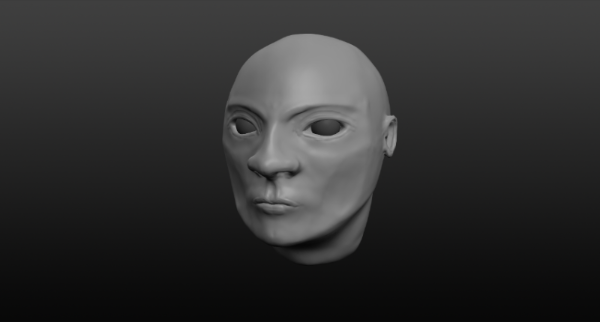
And this the second - each were created in just a few (3 or 4) hours
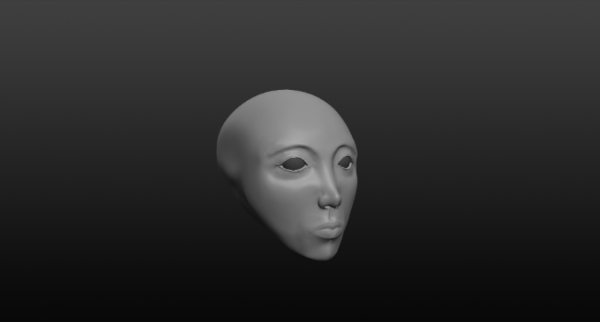
One evening I was just pushing and shoving things around, when I got the idea to try a dragon
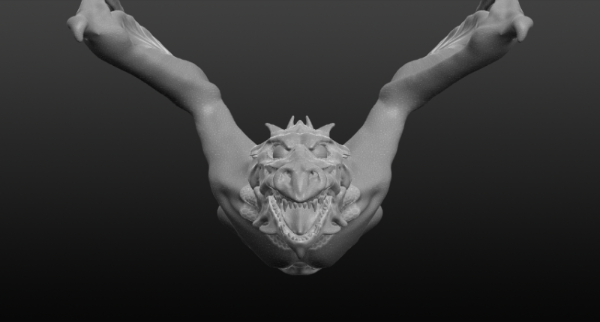
This also shows one of the issues with the program - upon a certain size there are too many polygons and the program crashes
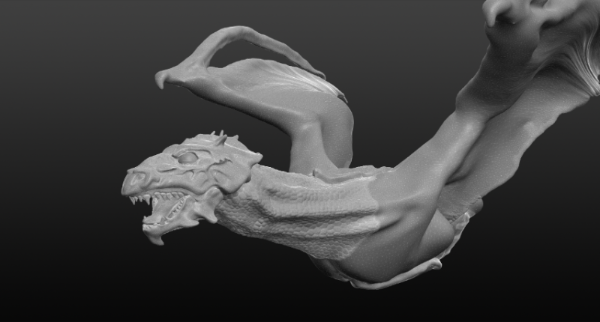
But it is really great for getting a feeling for 3D sculpting and if you want to proceed.
I experimented some more and tried this bust
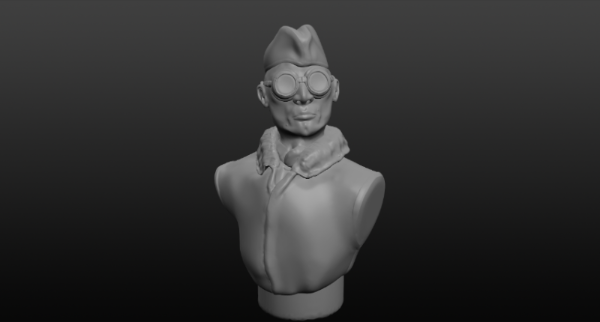
in theory it is now even ready to print - if I get access to a printer...
But by now the painting Mojo seems to be back, and "The Guardian" is back on my desk!
First I improved the background some more, adding more grass and stuff
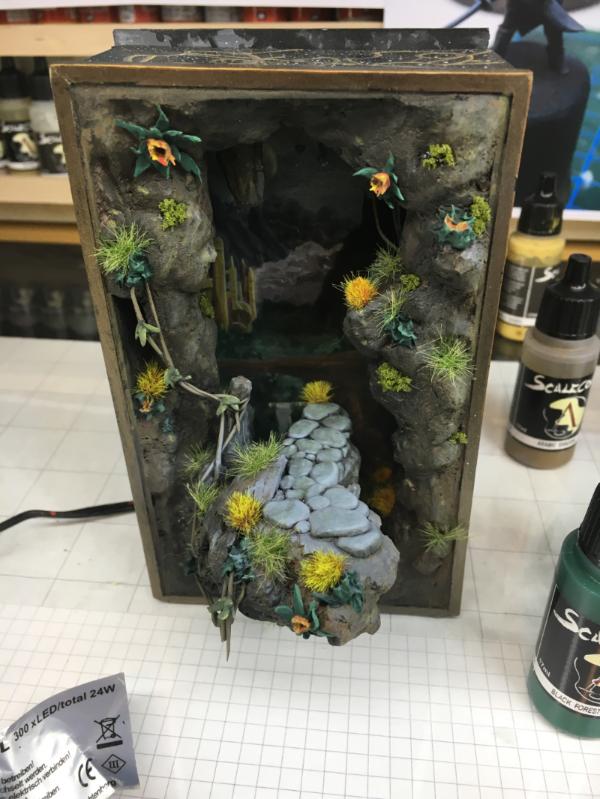
And I connected a better power source to it
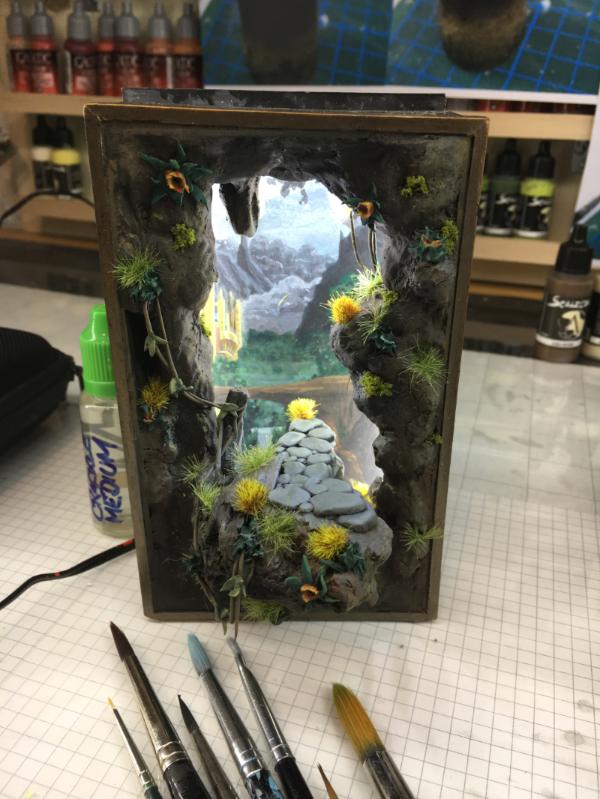
this is now a lot brighter
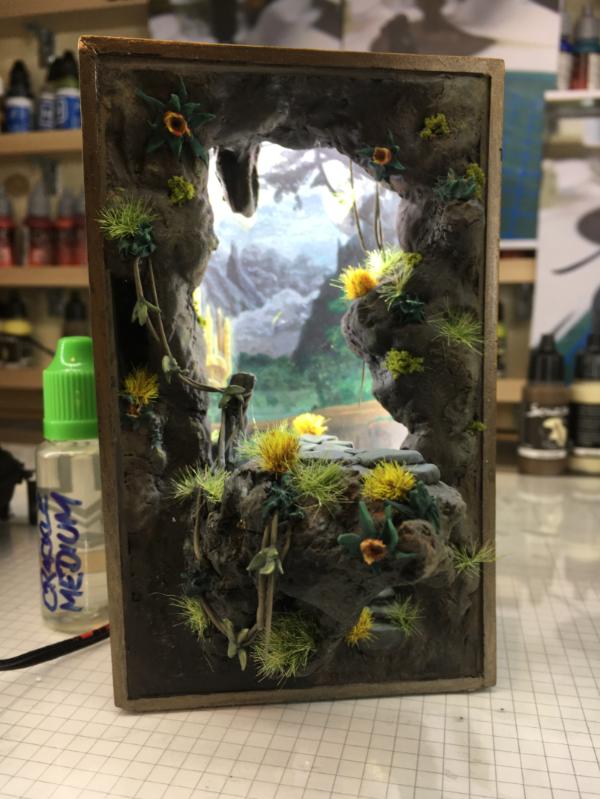
And I started to paint the Guardian itself - sorry these are mobile images
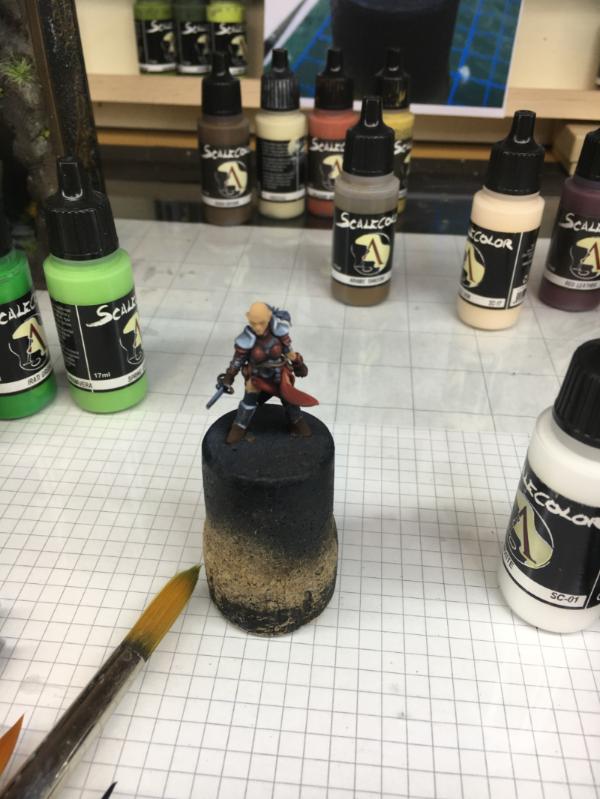
Unfortunately I broke off the sword - so I'll have to fix that
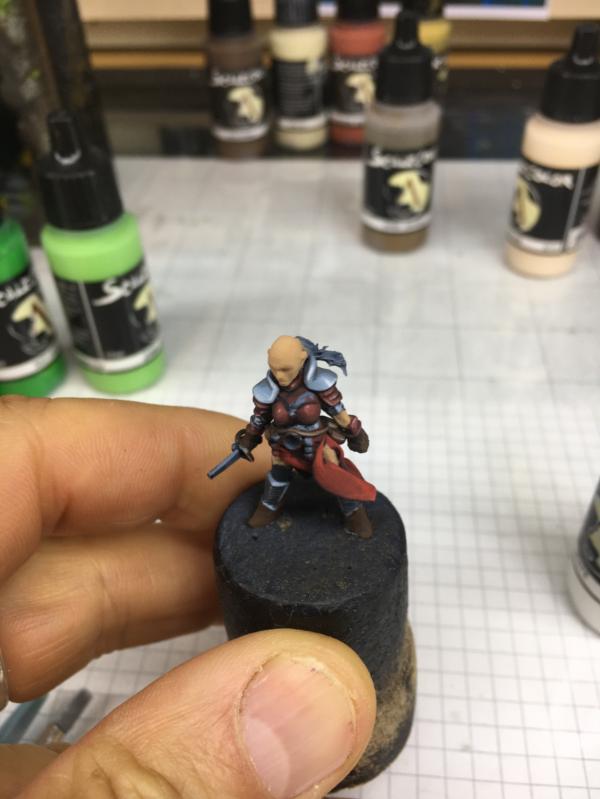
And this is as far as I got over the last few days
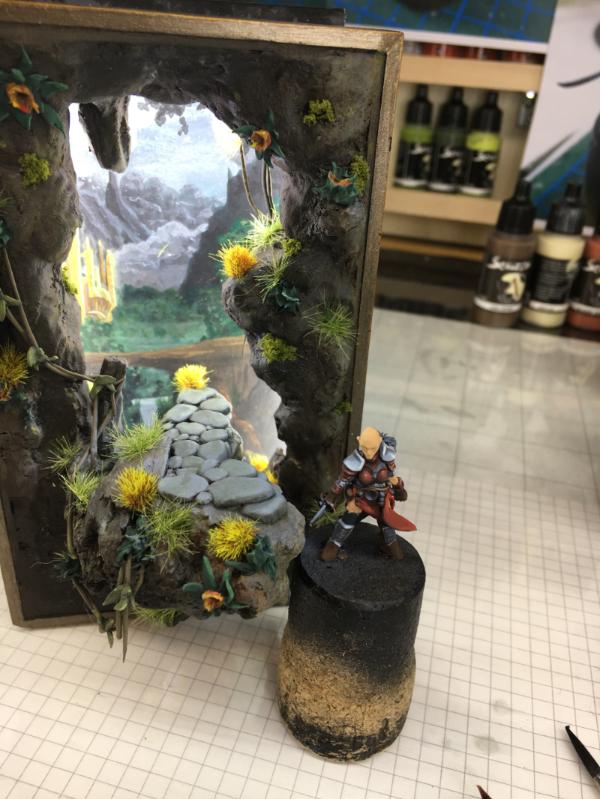
I think it comes together quite nicely.
What do you think?
Cheers
klaus
106010
Post by: Meer_Cat
(In my best Austin Powers voice) Klaus- you've got your mojo back! Groovy, baby! Yeah!
I think it has come together quite nicely as well! What an incredible sense of depth and distance when I look through the rift/portal/cave! Truly amazing.
I like how the Guardian is coming also. This project has always been of great interest to me, I'm glad you're putting some time into it again.
Vorwarts!  
62749
Post by: Dr H
Great work on the frame. Lovely effect.
Good progress on guardian too.
Breaking bits off during progress is always a possibility, I'm always doing it.
62749
Post by: Dr H
Lovely work, Klaus. Well done.
22192
Post by: whalemusic360
That's really cool, like walking out of a story book.
106010
Post by: Meer_Cat
I've had an affinity for this project from the beginning, Klaus- there is some real magic here. Well done.
81303
Post by: Stormwall
That is simply fantastic.
65595
Post by: Camkierhi
Beautiful, taken an idea and perfected it, pretty spot on bud.
116601
Post by: Syro_
That looks amazing!
72556
Post by: Red Harvest
Very nice indeed. Well done.
32373
Post by: Klaus, not Santa
whalemusic360 wrote:That's really cool, like walking out of a story book.
Thank you!
Oh, and your comment sparked an idea....perculating
Thanks!
Meer_Cat wrote:I've had an affinity for this project from the beginning, Klaus- there is some real magic here. Well done.
Thank you!
It was an enjoyable project - thnaks to you
Stormwall wrote:That is simply fantastic.
Thank you Stormwall!
Camkierhi wrote:Beautiful, taken an idea and perfected it, pretty spot on bud.
Thanks Cam!
Syro_ wrote:That looks amazing!
Thank you
Red Harvest wrote:Very nice indeed. Well done.
Thanks Red Harvest!
Thank you all for being part of the journey
And I think it is time for a new journey, for a new story...
Some of you may remember the armed version of my HERMES air transport.

I started this project in July 2016(!) after I completed the ATHENA and the "civilian" version.
But I never completed it.

Last week I was sitting in my office, placing the GOTHICA II and The Guardian in the display cabinets and I spotted the HERMES in its unfinished state in the cabinet.
Not sure what really sparked it, but suddenly I remembered the movie "6 Days" about the kidnapping in the Iranian Embassy in London...
So how would my Dencarian troops free a Governor?
Some may remember a very similar story for the THANATOS ( https://www.dakkadakka.com/dakkaforum/posts/list/1920/310208.page#9517549)
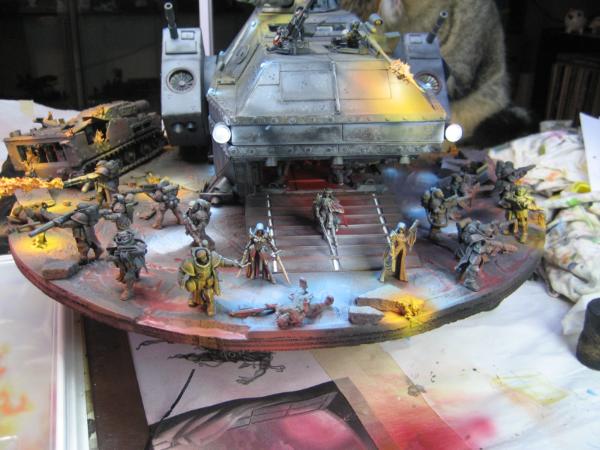
I decided to create a scene where the HERMES delivers a troop of special forces to free a kidnapped Governor...
Maybe in the style of the "Swift, Silent, Deadly"?
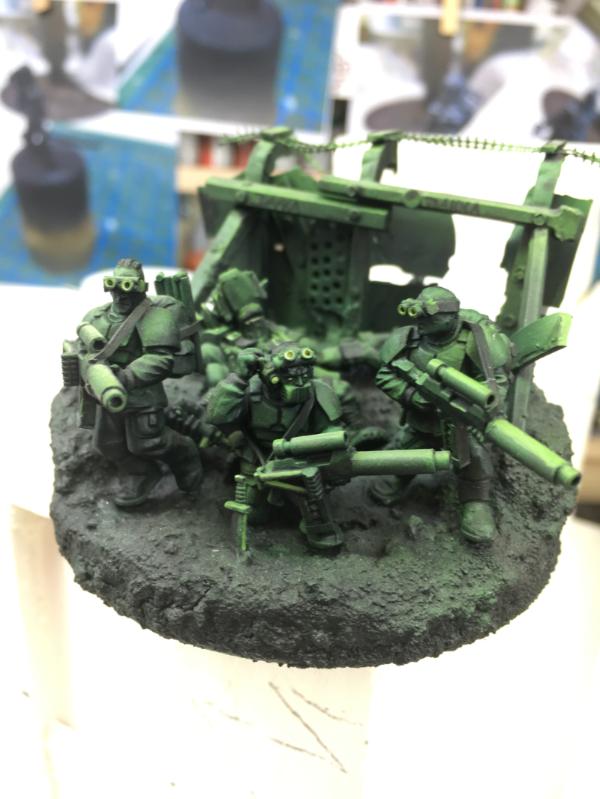
For this I first built the rooftop of the embassy
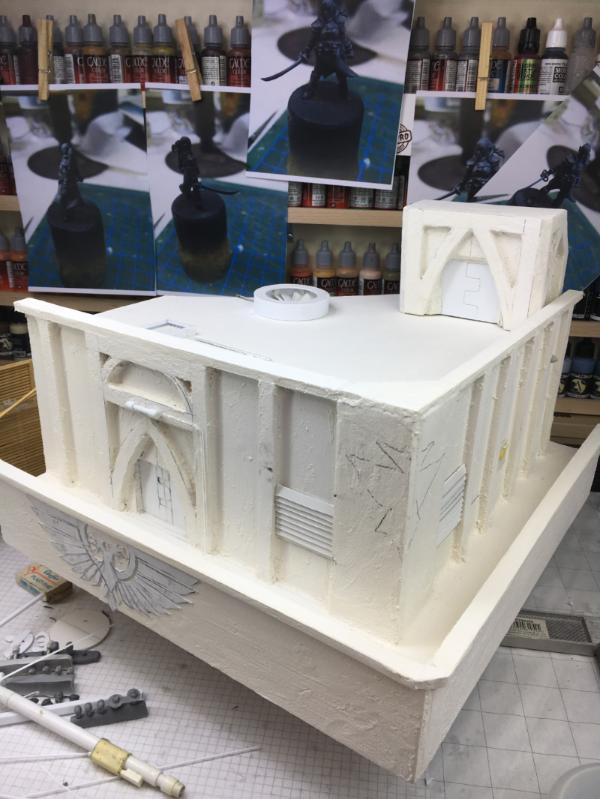
And then I went to model the first trooper.

He will be standing at the roof access door, waiting for another to open the door...

Well, that's as far as I got.
It's a start
Cheers
Klaus
62749
Post by: Dr H
Well done on the guardian piece. Lovely, unique display.
Good start to the new piece too.
22192
Post by: whalemusic360
Klaus, not Santa wrote:whalemusic360 wrote:That's really cool, like walking out of a story book.
Thank you!
Oh, and your comment sparked an idea....perculating
Thanks!
Next time they are walking out of a coffee maker?
Always happy to get an idea going. It's better when it's someone how can execute it so well.
10972
Post by: Ruglud
Too much to comment on, suffice to say - all amazing. Looking forward to the next scene...
32373
Post by: Klaus, not Santa
Hi all,
wow, it's been a long time again and another project abandoned...
The year actually started rather good with 4 completed projects ( Ice Warriors, Bitter End, Gothica II, and the Guardian), but now towards the mid and end of year I lost most of my Mojo and the "Dragons Den" and "Hermes Air Assault" died a slow and quiet death :(
But now I feel the itch again.
I have a vague idea for a diorama, but it may well change during the build process.
To start I will build another tank - based on the same chassis as the EPIALES and POLEMOS below.
Its called EREBUS - the Greek God of Darkness and Shadow.
EPIALES
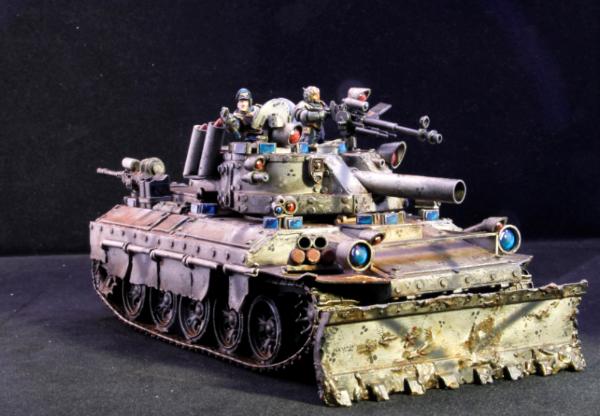
POLEMOS
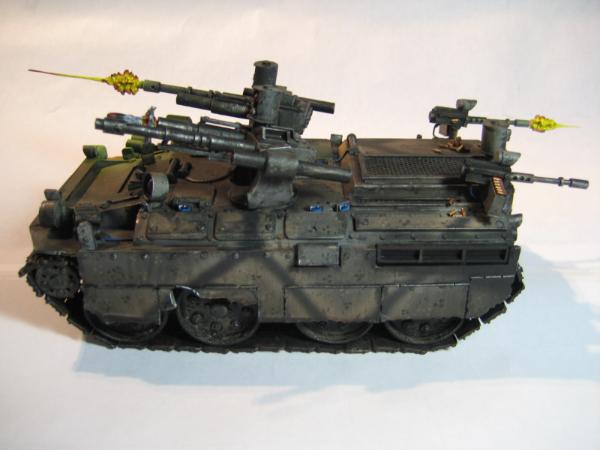
Based on my old notes I've drawn out the outlines for the hull sides,
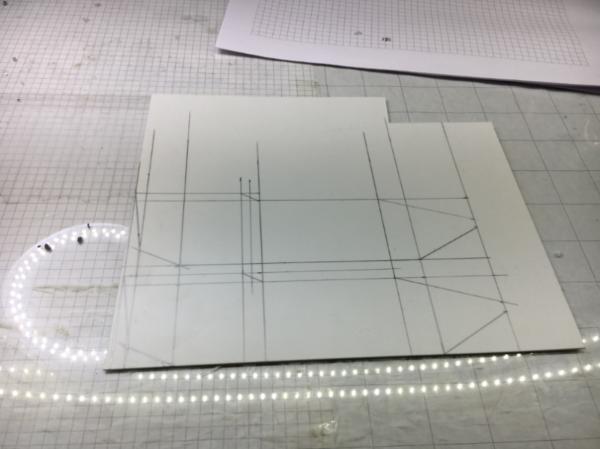
and put the basic hull together.
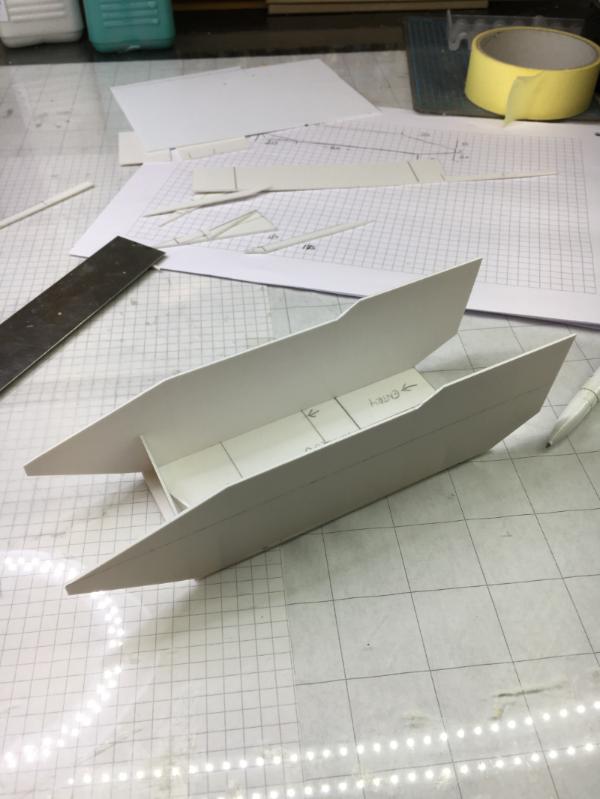
After closing the front (and filling gaps with Green Putty) I assembled the fenders and hull sides.

Once the front was sanded and smooth I mounted the fenders.
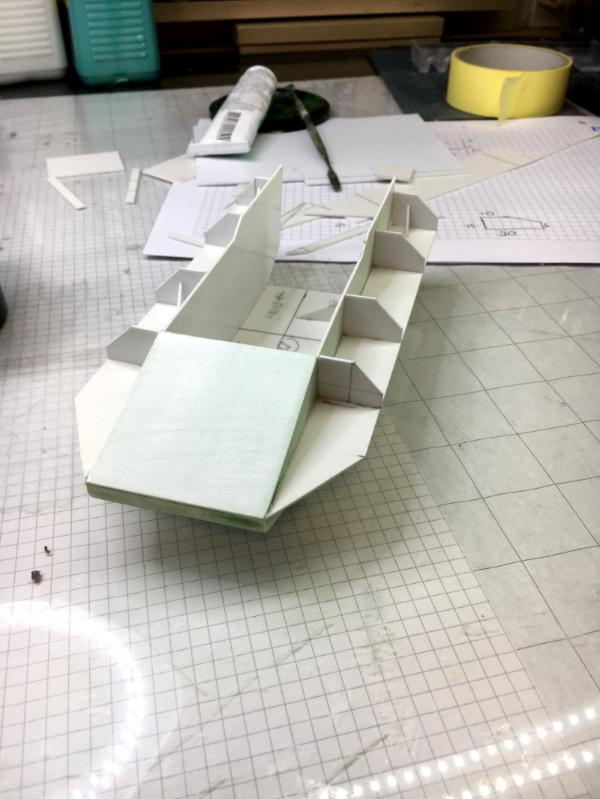
Well, and this is as far as I got.

Maybe you can the the pencil marks for "entry". Here I want to leave the option to have the small ramp open and maybe show some interior.
But no promises - only if I feel like
So here's the new EREBUS besides the EPIALES
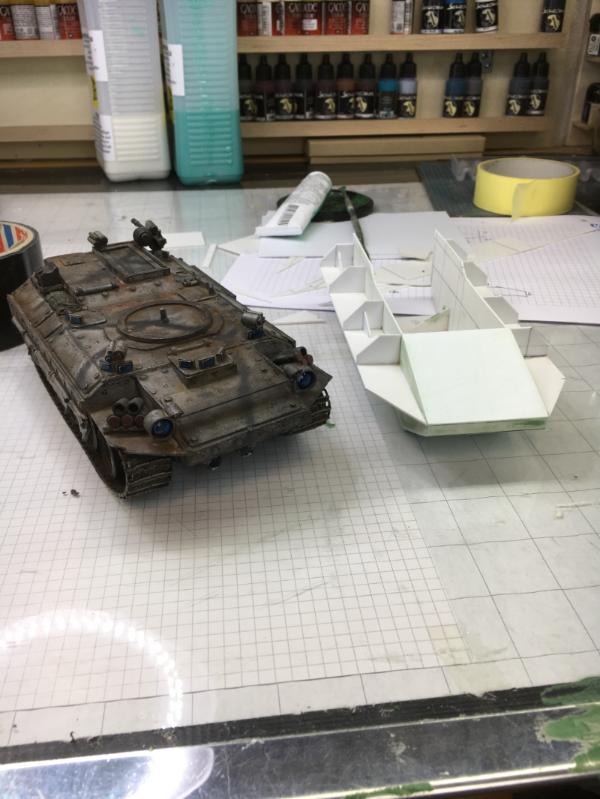
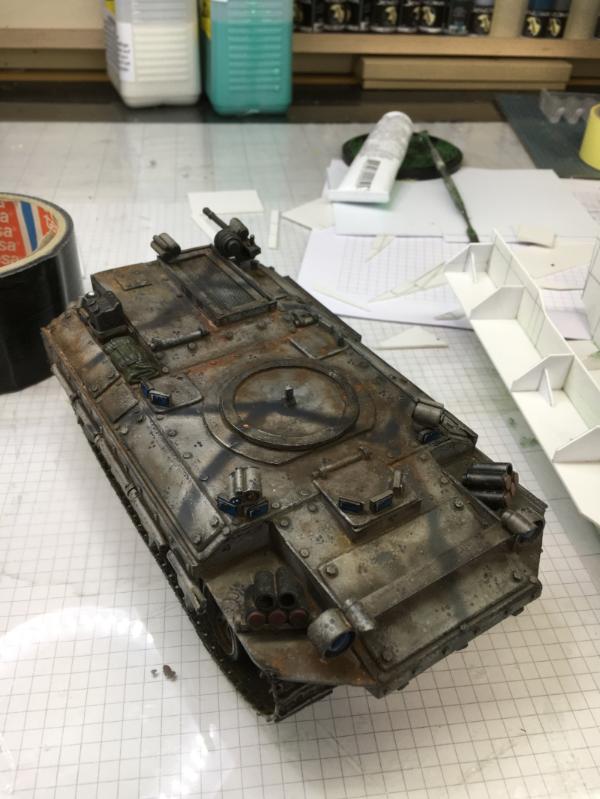
I also have to look for some more T-54 roadwheels and tracks...


I hope I can find some cheap ones - or a good alternative.
If not I would have to think about making it an anti-grav tank...
But that doesn't really fit the fluff used so far.
Oh well...
So this is it for today.
Cheers
Klaus
30344
Post by: monkeytroll
Always excited to see you start something new.
32373
Post by: Klaus, not Santa
I hope you're more excited when I finish one
Thank you for still being around!
24297
Post by: Viktor von Domm
not to sound disrespectful, but this is what content interests me your art in general is pure eyecandy....but i look up at you as inspiration and teacher...and as thus i need such builds...well...
for all of us i wish for a more productive and less mojoless new year, eh?
32373
Post by: Klaus, not Santa
 Viktor von Domm wrote: Viktor von Domm wrote:not to sound disrespectful, but this is what content interests me your art in general is pure eyecandy....but i look up at you as inspiration and teacher...and as thus i need such builds...well...
for all of us i wish for a more productive and less mojoless new year, eh?
no pressure, eh?
Thank you VIK!
I'll do my very best to stick with it this time
22192
Post by: whalemusic360
Always love seeing your imperial 40k builds. It's a massive universe and we only see a small part from GW.
68345
Post by: xXWeaponPrimeXx
Every time this updates I get excited.
"What is he doing this time?"
I am NEVER disappointed coming here. Keep up the awesome work!
32373
Post by: Klaus, not Santa
whalemusic360 wrote:Always love seeing your imperial 40k builds. It's a massive universe and we only see a small part from GW.
Thank you!
I hope the result will be worth your time
xXWeaponPrimeXx wrote:Every time this updates I get excited.
"What is he doing this time?"
I am NEVER disappointed coming here. Keep up the awesome work!
Thanks
No pressure, eh?
I'll try to buikld a good Piece in my Little niche of the universe
106010
Post by: Meer_Cat
Hurrah- Klaus is back! As much as I love watching the builds (darn you people that can cut plastic so straight and neat!) I enjoy the musings on the thought process as much or moreso. I get my ideas from the builds, I get my learnin' from your thoughts.
Would love to see you revisit the Dragon's Den one day- the Muse will settle on your shoulder when it's time.
36940
Post by: Anvildude
If you're feeling the melancholy, have you ever considered doing something Chaos-y? I know it goes against your 'theme', but maybe doing something like a daemonic incursion being repelled by mortals could get your juices flowing.
After the Erebus, of course.
65595
Post by: Camkierhi
Welcome home sir. the master returns. By all means you may take as long as you like, every picture is a lesson.
62749
Post by: Dr H
Welcome back.
Do what makes you happy, that's the point of a hobby.
Look forward to more progress. Looking good so far.
26800
Post by: Commander Cain
Welcome back! Always nice to see you working on a new project
68345
Post by: xXWeaponPrimeXx
Klaus, not Santa wrote:
xXWeaponPrimeXx wrote:Every time this updates I get excited.
"What is he doing this time?"
I am NEVER disappointed coming here. Keep up the awesome work!
Thanks
No pressure, eh?
I'll try to buikld a good Piece in my Little niche of the universe
No pressure at all.
Just build what you wanna build and I will sit here in awe.
32373
Post by: Klaus, not Santa
Meer_Cat wrote:Hurrah- Klaus is back! As much as I love watching the builds (darn you people that can cut plastic so straight and neat!) I enjoy the musings on the thought process as much or moreso. I get my ideas from the builds, I get my learnin' from your thoughts.
Would love to see you revisit the Dragon's Den one day- the Muse will settle on your shoulder when it's time.
Thank you Mate!
Yes, I'm hopeful the Dragons Den will be back on my desk sooner or later
Anvildude wrote:If you're feeling the melancholy, have you ever considered doing something Chaos-y? I know it goes against your 'theme', but maybe doing something like a daemonic incursion being repelled by mortals could get your juices flowing.
After the Erebus, of course.
I dunno, Chaos never tempted me - so far.
I still have a stack of busts that I want to paint… Oh well...let's finish this one first
Camkierhi wrote:Welcome home sir. the master returns. By all means you may take as long as you like, every picture is a lesson.
Thank you Camkierhi!
Hopefully I can share some more wisdom today
Dr H wrote:Welcome back.
Do what makes you happy, that's the point of a hobby.
Look forward to more progress. Looking good so far.
Thank you Dr H!
Commander Cain wrote:Welcome back! Always nice to see you working on a new project
xXWeaponPrimeXx wrote: Klaus, not Santa wrote:
xXWeaponPrimeXx wrote:Every time this updates I get excited.
"What is he doing this time?"
I am NEVER disappointed coming here. Keep up the awesome work!
Thanks
No pressure, eh?
I'll try to buikld a good Piece in my Little niche of the universe
No pressure at all.
Just build what you wanna build and I will sit here in awe.
Will do!
Thank you xX
Strap in! This is a large update today with 40+ images
Continuing from the last update I wanted to close the hull section. But before i could do this, I wanted to have a removable piece that I can use to build out the interior.
So this is currently just 2 simple walls and a floor that I can slide in and out of the hull
With this in place I could finally close the hull and fill gaps and sand it smooth.

With this the basic hull was done.

And the interior does still slide in and out easily
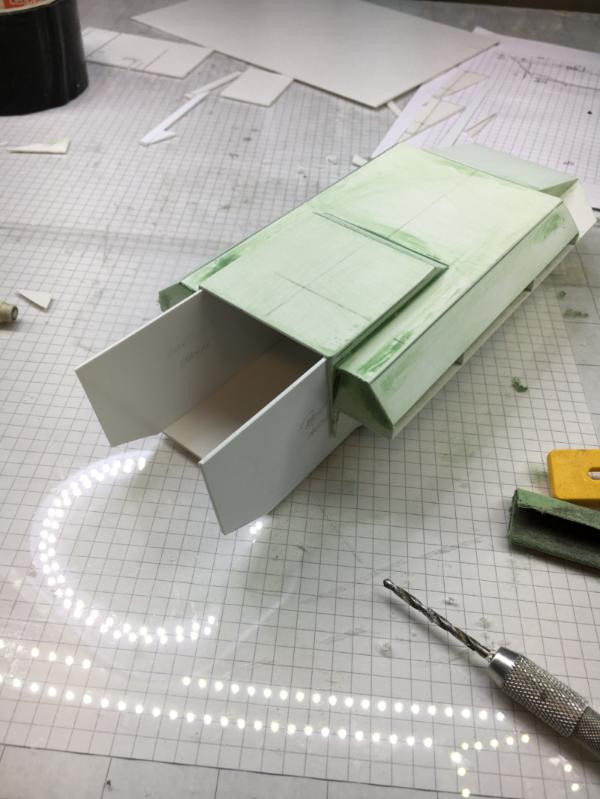
The other vehicles of this family use 1:35 T-55/54 road-wheels and tracks. But as usual I'm trying to do as much as possible from scratch.
For this I glued together a stack of discs of plastic card
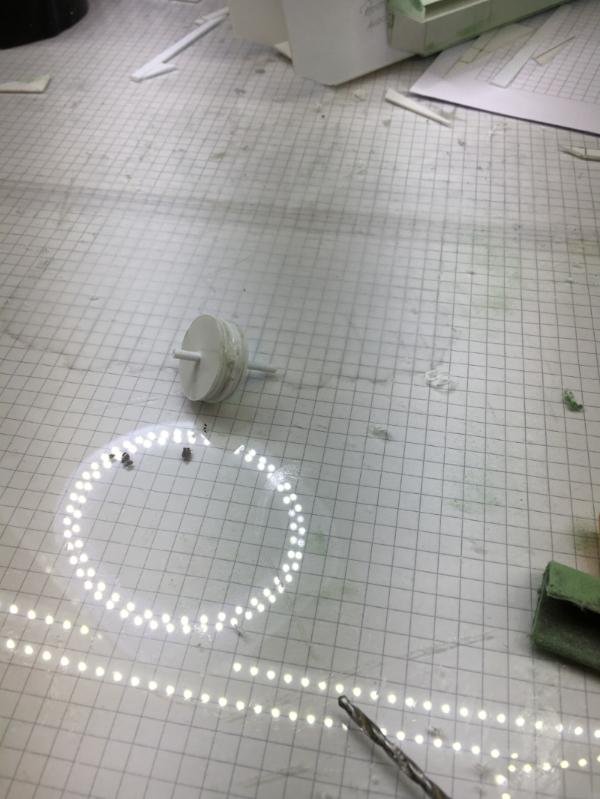
Then I wrapped a strip of .5mm plastic card around it
To make things smooth, I mounted this onto my drill
After running this over the sanding block it looks really nice and smooth
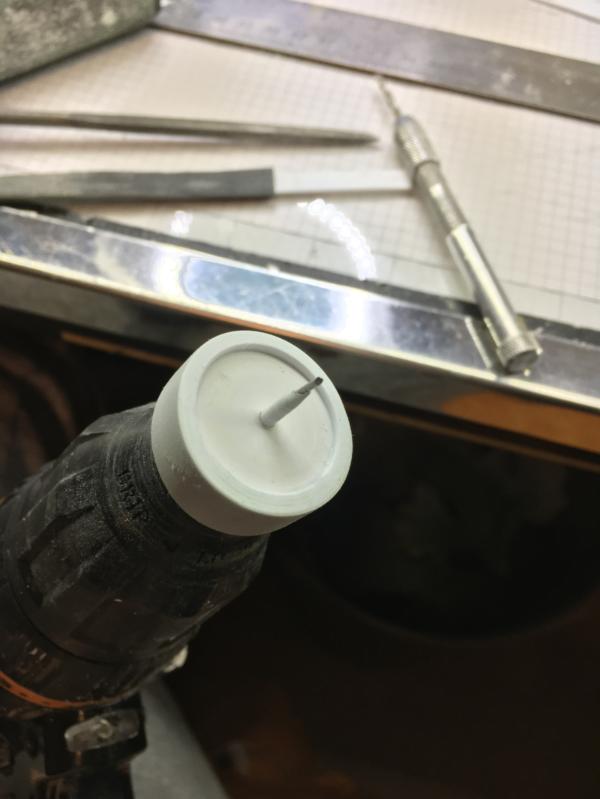
With some nuts and bolts it is done!
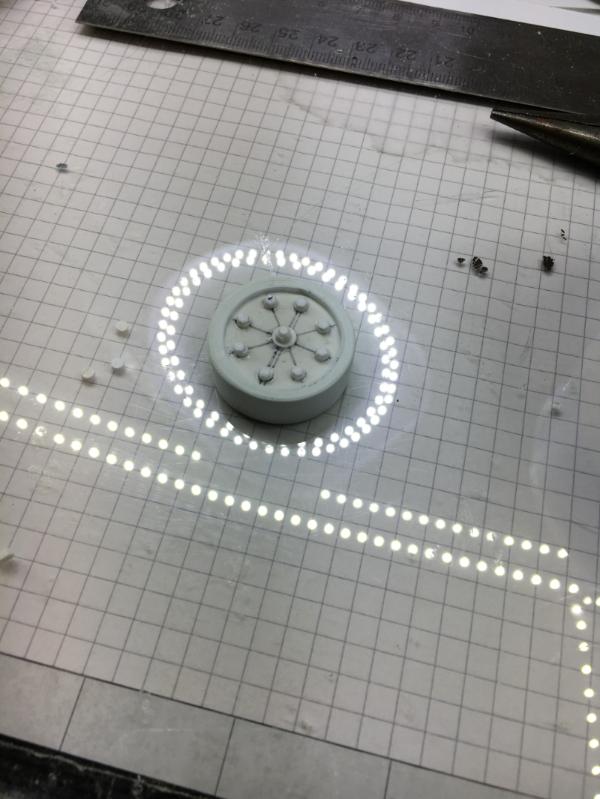
Would be ready for molding and casting
It looks nice, but putting it besides the existing vehicle, it is a bit on the large side...
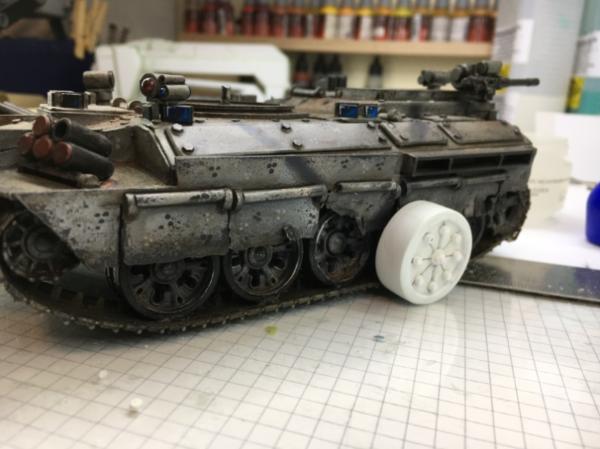
Almost as big as a soda cap...
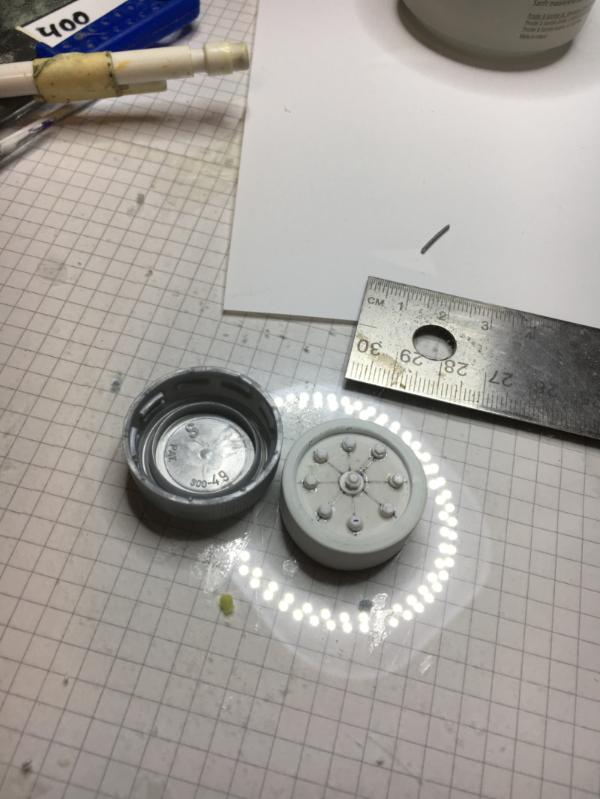
So I gave it another try this time smaller
The end result is also very cool - I think
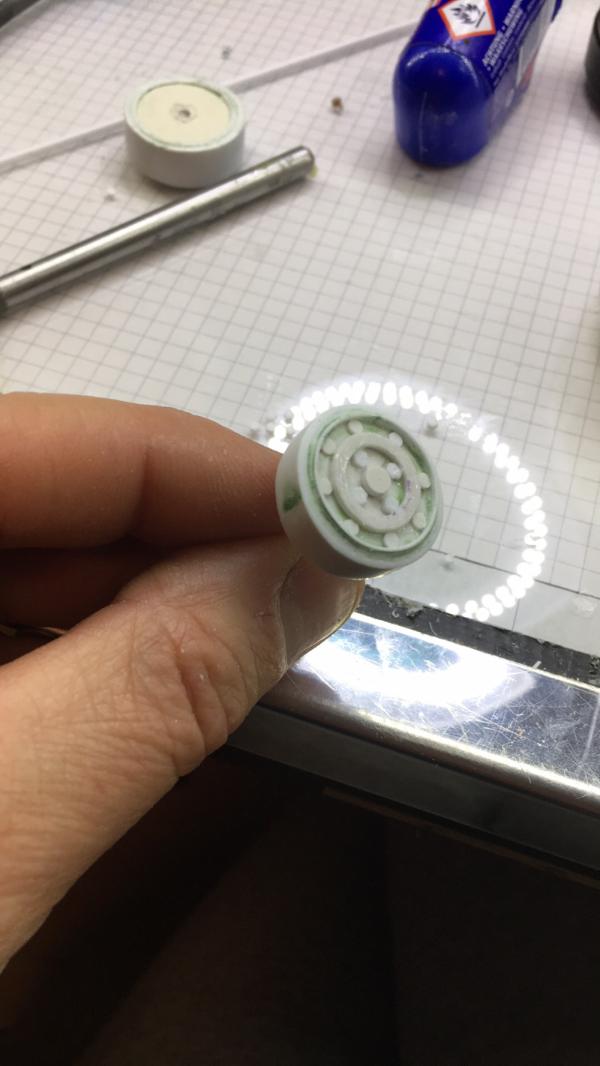
compared to the other
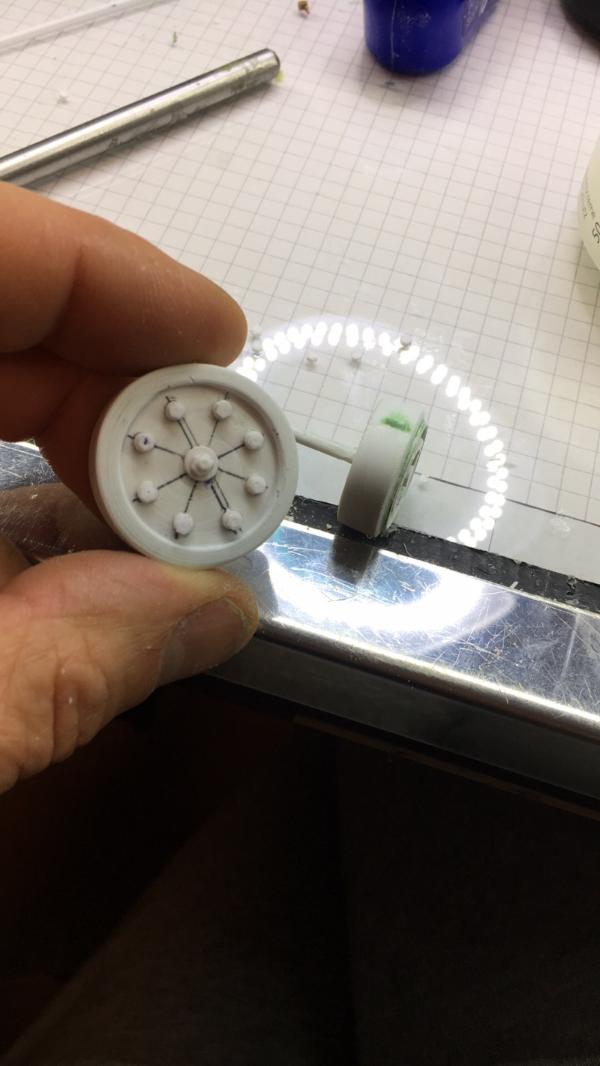
But Ouch!
Now it is too small...
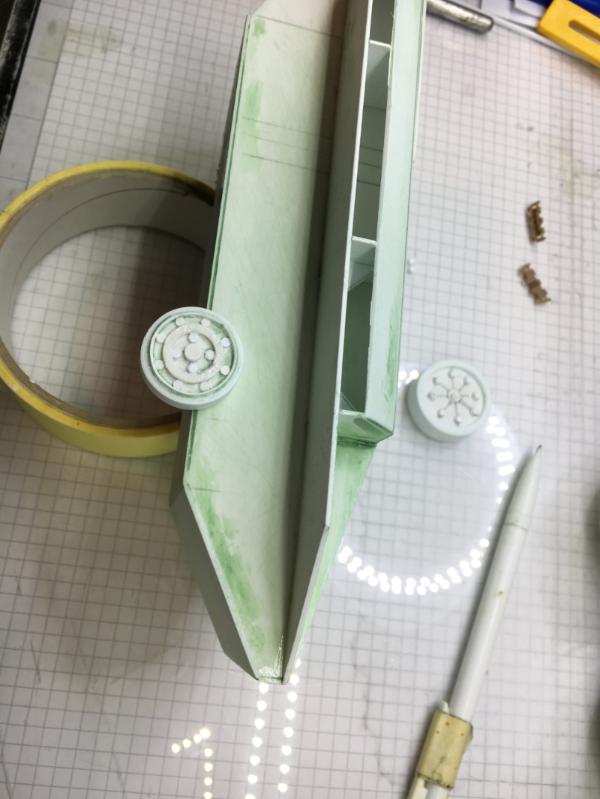
Maybe i should go with the first, bigger one?
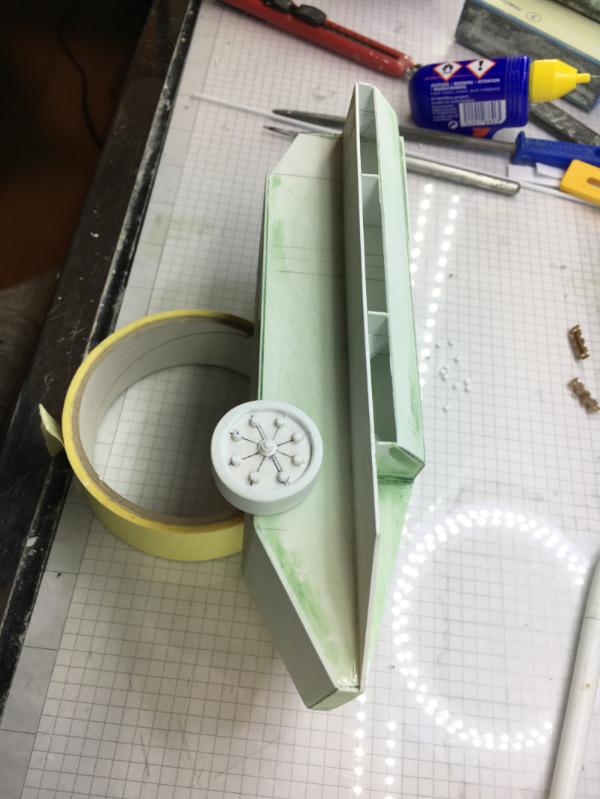
Luckily my friend Massimo from Italy was so generous to send me a brand new set of T-55 wheels and tracks from MiniArt - THANK YOU Massimo!
This tank will proudly carry your name on the turret
With the hull squared away I started to work on the turret.
For this I built two discs and spaced them
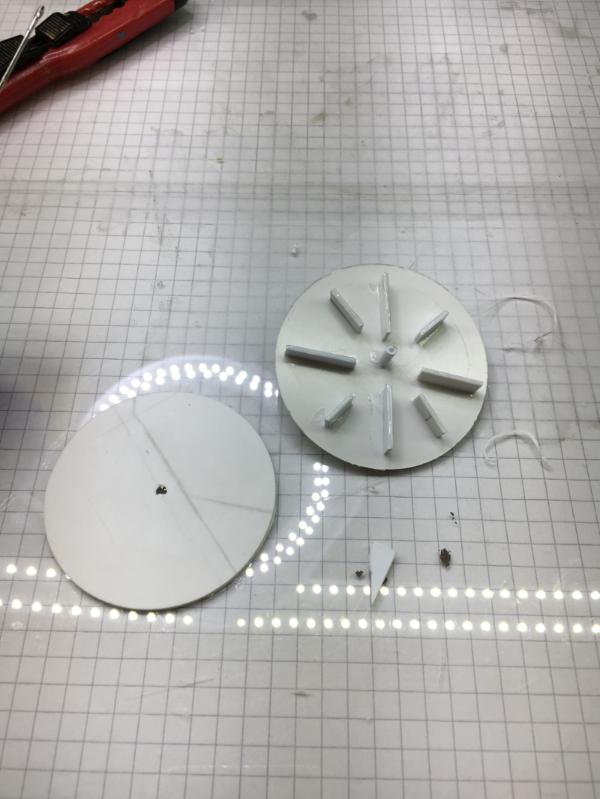
Glued together
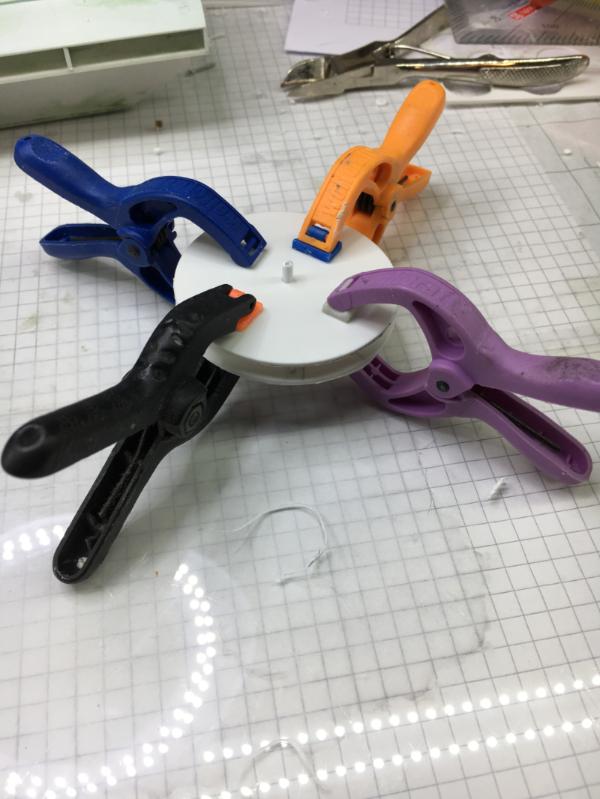
and wrapped a strip of plastic card around it - giving me the base for the turret.
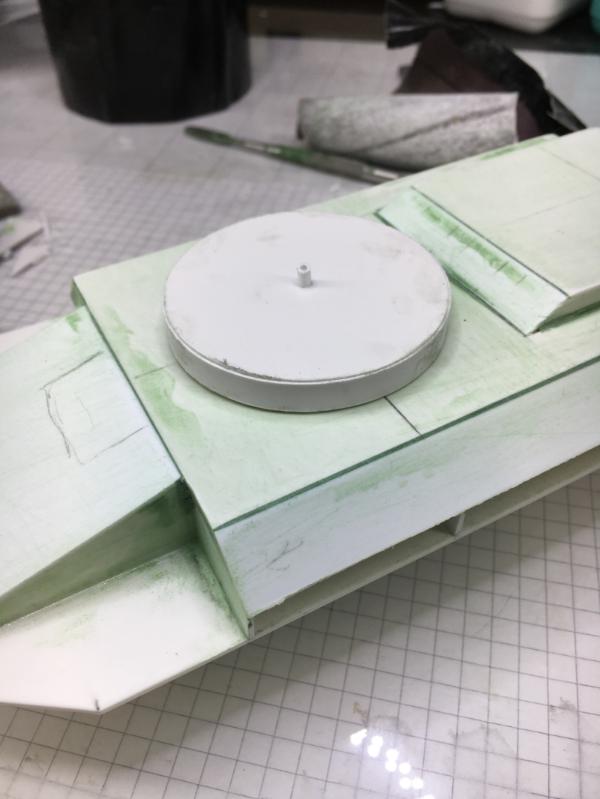
Then i cut the base shape for the turret
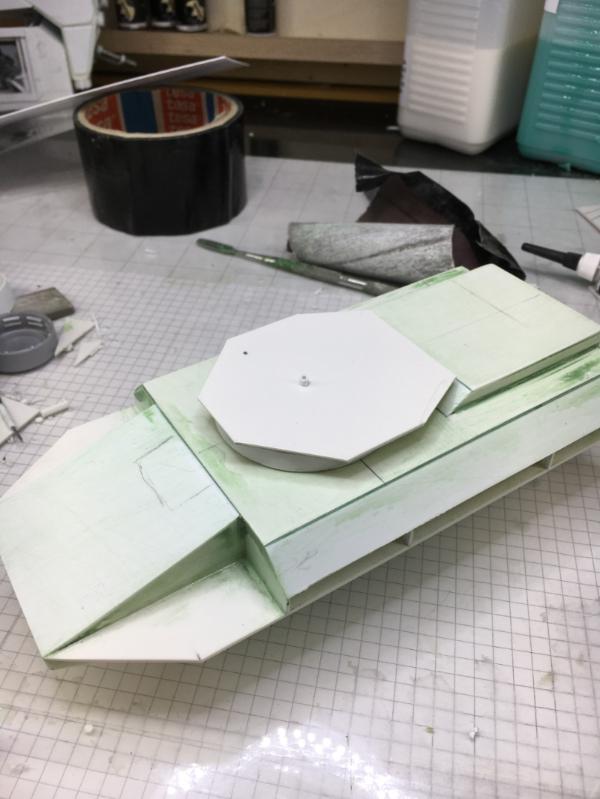
And the first angles.

The turret will not show any interior, so really simple building here.
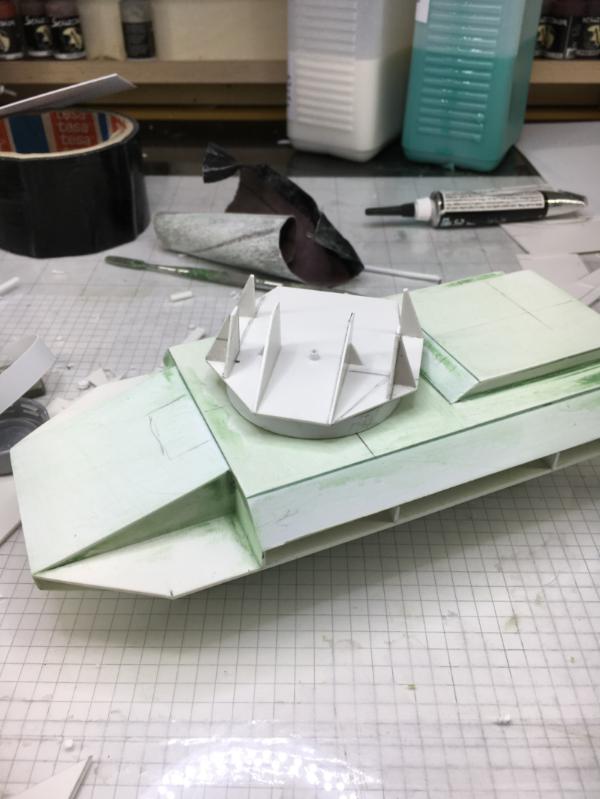
Here i added the shape for the ammo storage and auto-loader
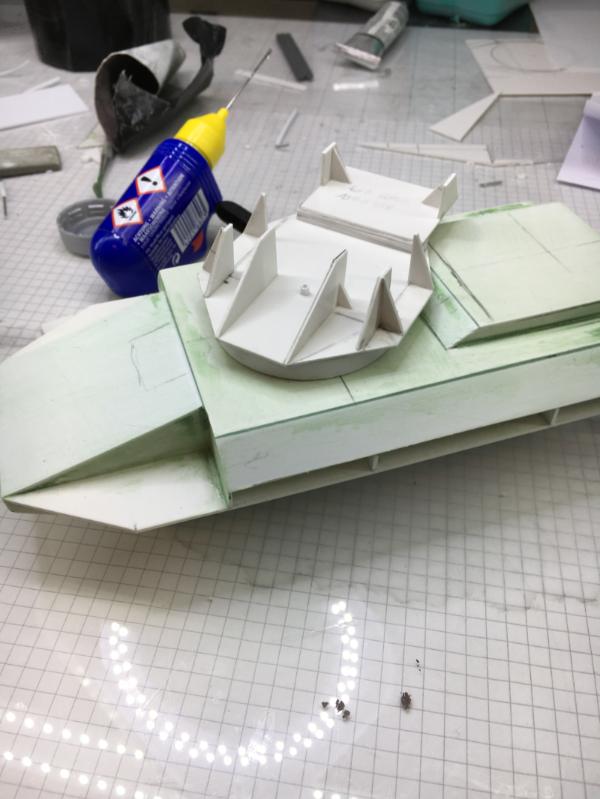
Side view
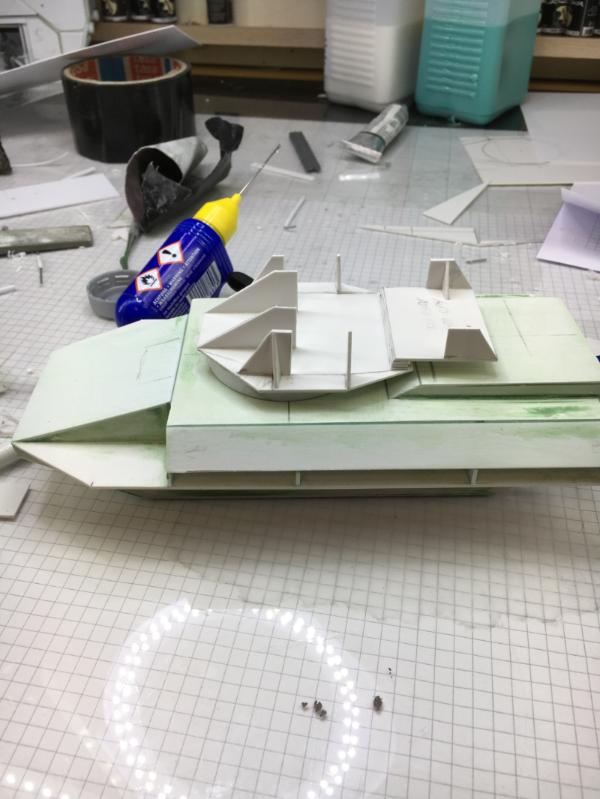
Applying the actual armor sheets was a pain in the butt and I had to sand a lot...
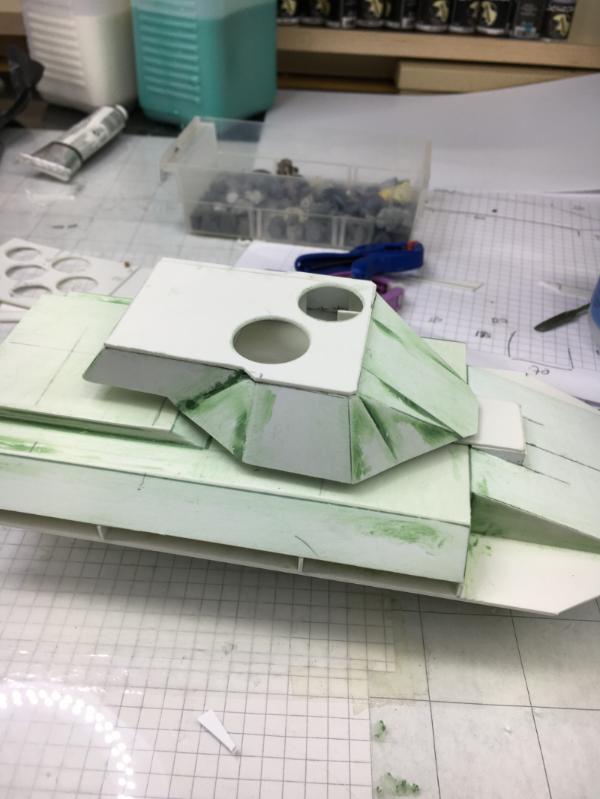
But in the end it looks pretty much the way I had intended
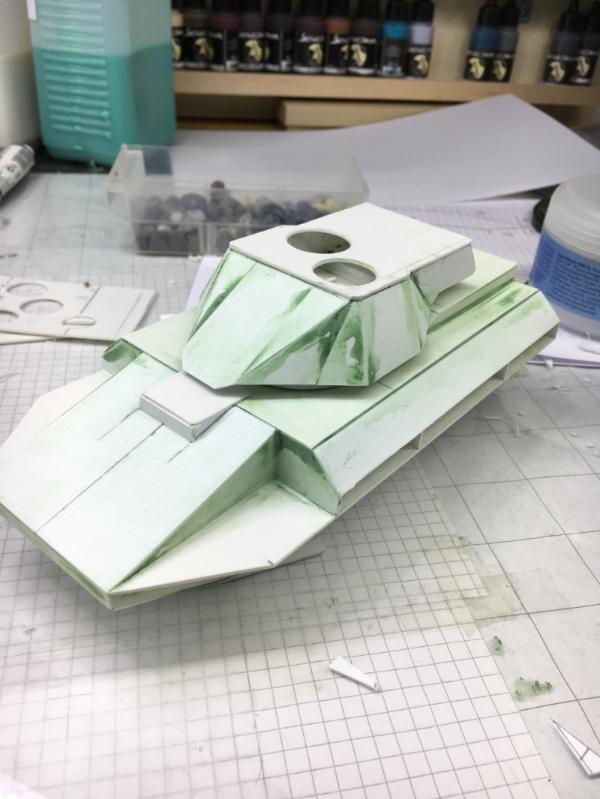
Looking at the hull with the turret on, I realized something was wrong...
I made (again) a measurement mistake and the hull is too high!
So I built another hull (1 evening), this time lower
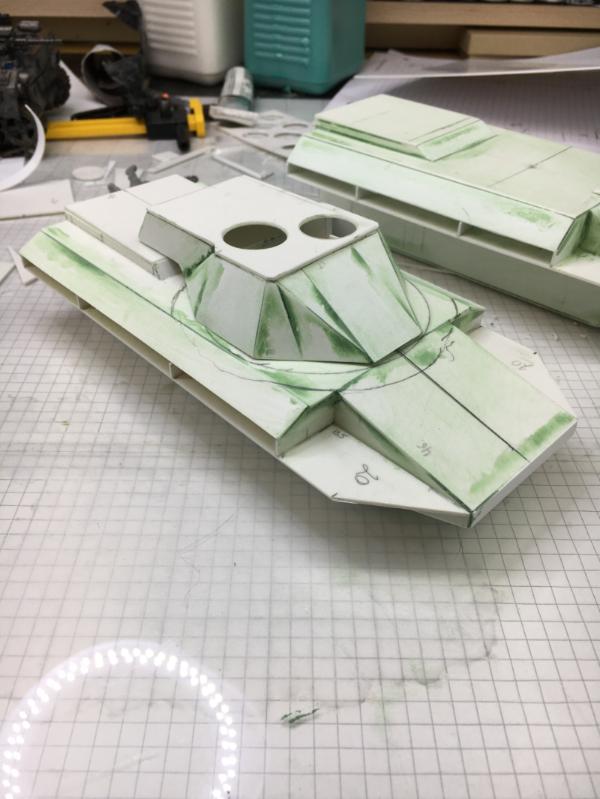
Now it looks sleeker
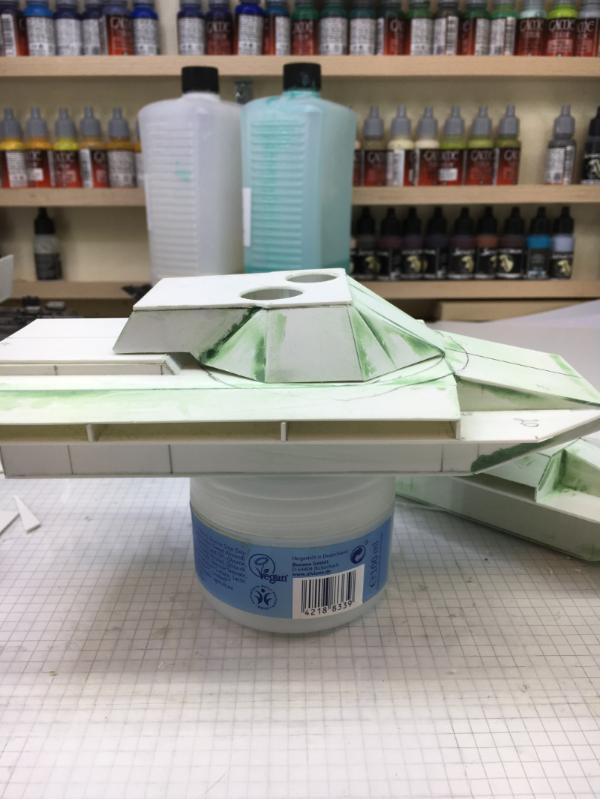
So for this new hull I need the interior option again, so another slide in-out tray
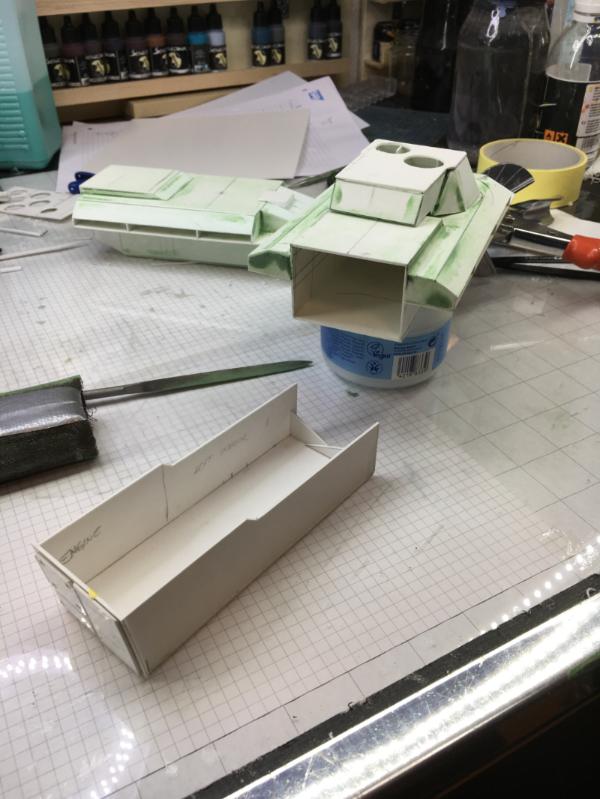
And I added the rear door to that slide in
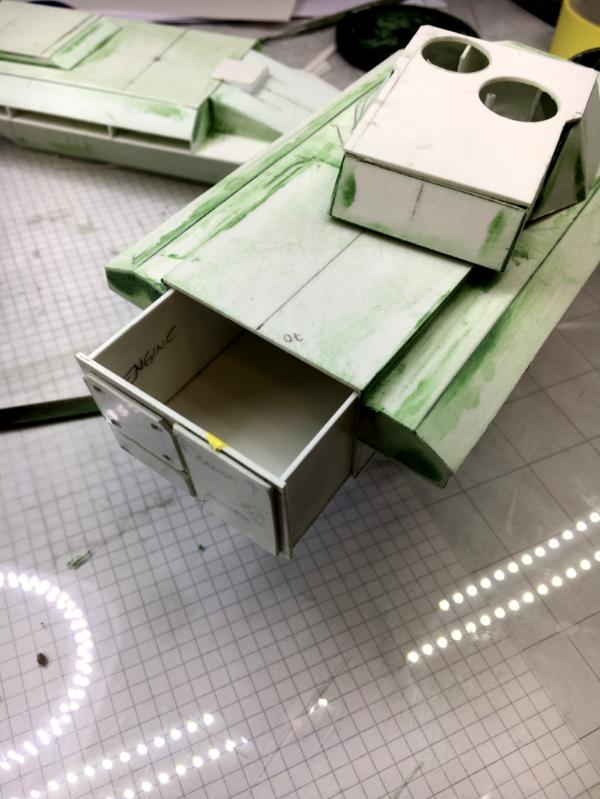
With the closed door
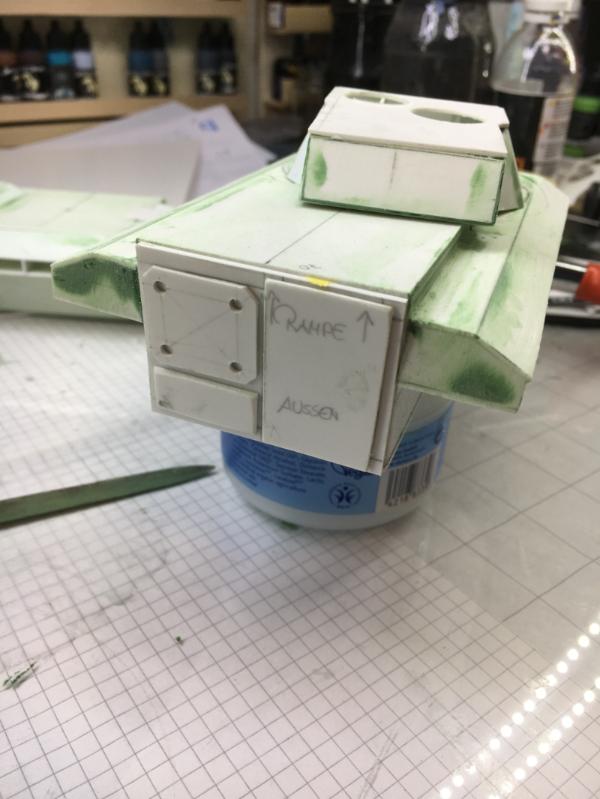
And the door in the open position
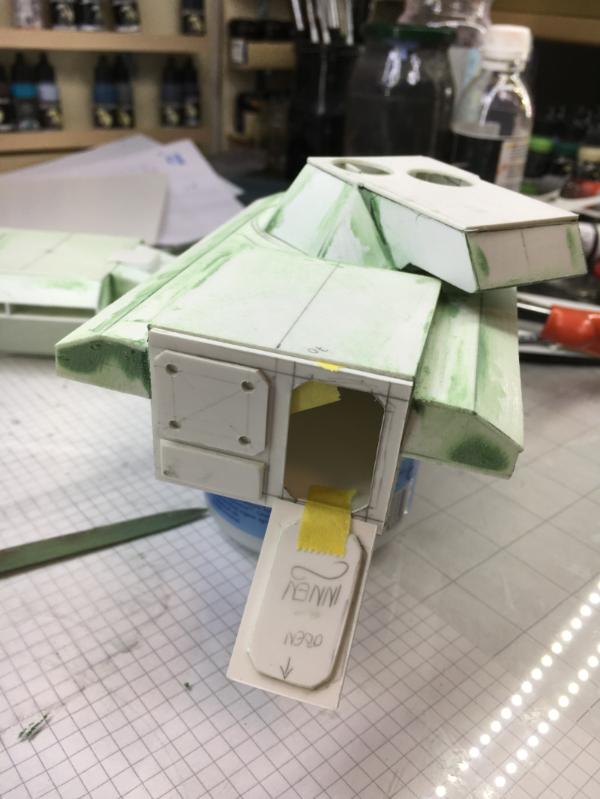
And as a outlook I positioned the new turret on the EPIALES hull
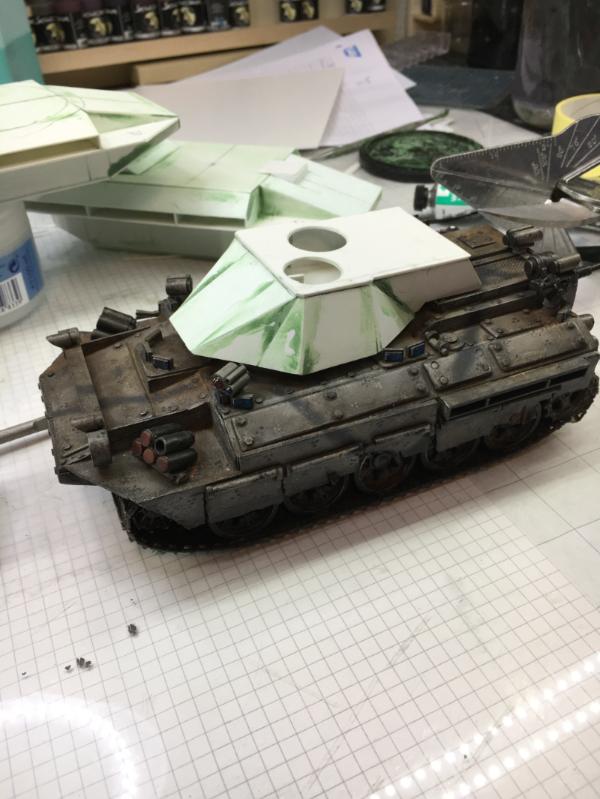
Next up would be the armor sides and skirts.
But since I want to have access to the hull side for mounting the wheels, I designed the basic shape removable again.
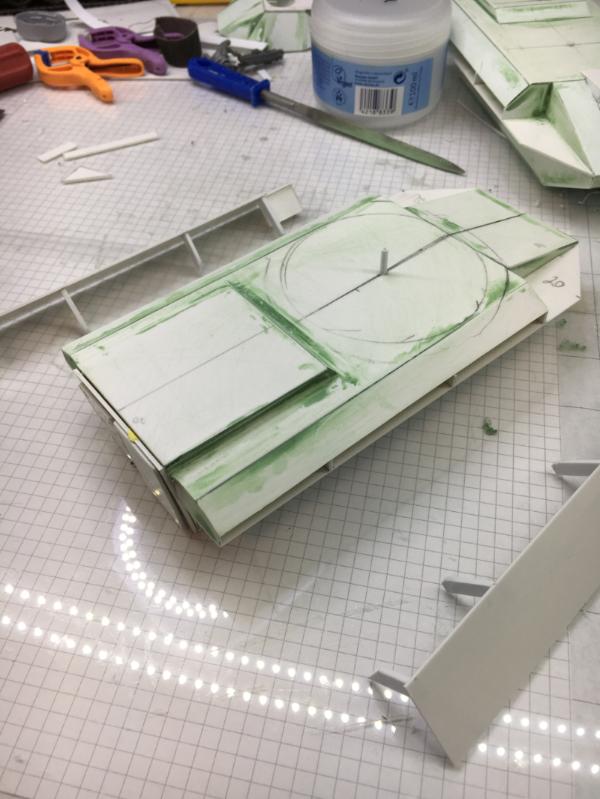
It can easily slide on and off
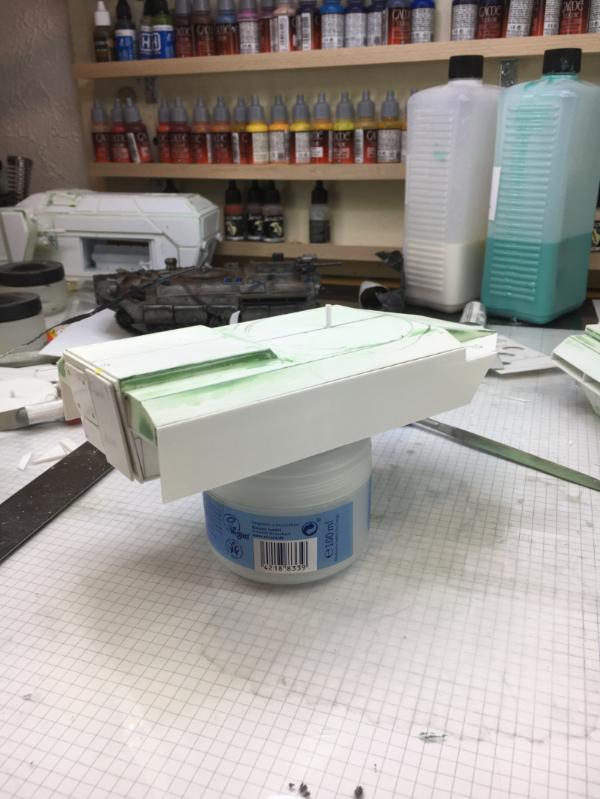
and i can start fleshing out these sides
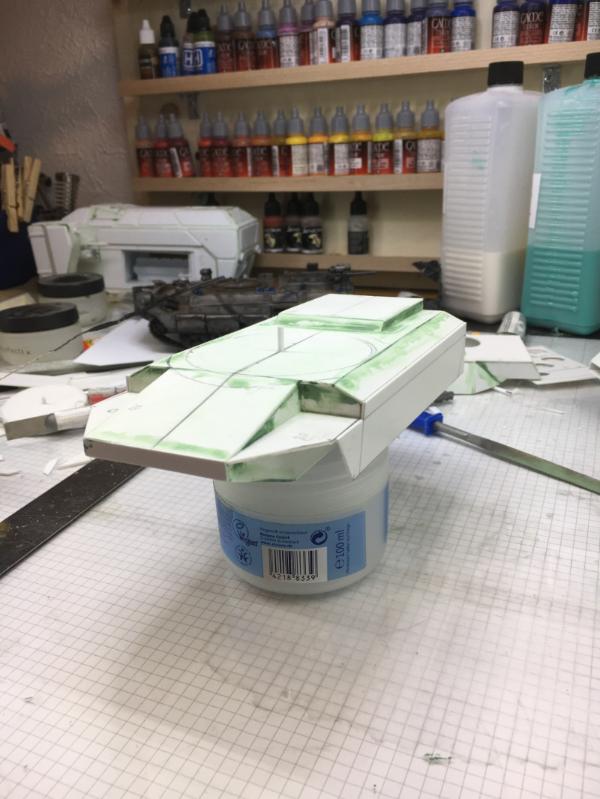
but am still able to remove them and have access to the hull

So this is as far as I got.
Again a HUGE thanks to Massimo for the wheels and tracks
Cheers
Klaus
35419
Post by: Lamby
An amazing scratch building masterclass!
Always a pleasure to watch you work!
65595
Post by: Camkierhi
Amazing work, as usual. Beautiful construction.
Have you tried working in E-PVC or Foamex as it is sometimes called. You can get it in 1mm to 20mm thicknesses, and sheets can be as big as you like. I use it a lot now as it is cheaper than styrene and easier to work with though not quite as hard. I can scribe in details easily and it sands well enough. I am just thinking of the turret shape. I would certainly use styrene sheet for much of the work as you do, but bulkier shapes I form in Foamex. You can glue it with poly cement though super glue is better, but for cheapness I use plumbers pvc pipe solvent, works with styrene as well but requires some care.
It is just you mention struggling a little with the turret and I know that pain well, but now I use this material and I can form shapes much quicker and easier. Here is an example that took me barely an hour from start to painted finished.
Made with 5mm and 3mm sheet material.
Once again I want to thank you for being here and inspiring us so much, I understand how hard it can be at times to get the mojo flowing, but when you do it is amazing to see.
24297
Post by: Viktor von Domm
seems you´ve warmed up quite a bit for serious construction work again...now they just rollin´of your table^^
also...either a man is extra manly for holding and using a drill between his legs that was as shown here...or not for long anymore...
26800
Post by: Commander Cain
Impressive stuff! All those angles must be a nightmare to line up. Having just stared messing around with plasticard I have a newfound respect for your work
30344
Post by: monkeytroll
Lovely work as always Klaus. Especially like the slide out interior for detailing.
106010
Post by: Meer_Cat
The build is very realistic! I've ridden in my share of APCs and IFVs (when we could hitch rides- paras are ground-pounders by nature, not drive by shooters!) and the proportions and especially the angles to the armor are very effective. Having gotten a 'half-scratch build' under my belt with the Phaethon, it might be time to start thinking about a 'whole scratch build'!
Very well done Klaus- the road wheels especially- that trick of mounting things to a drill and moving the item rather than the sanding medium is counter-intuitive (at least to me) and brilliant- I use it all the time now.
More please!
32373
Post by: Klaus, not Santa
Lamby wrote:An amazing scratch building masterclass!
Always a pleasure to watch you work!
Thank you Lamby!
I'm always glad when my ramblings are of some kind of use
Camkierhi wrote:Amazing work, as usual. Beautiful construction.
Have you tried working in E-PVC or Foamex as it is sometimes called. You can get it in 1mm to 20mm thicknesses, and sheets can be as big as you like. I use it a lot now as it is cheaper than styrene and easier to work with though not quite as hard. I can scribe in details easily and it sands well enough. I am just thinking of the turret shape. I would certainly use styrene sheet for much of the work as you do, but bulkier shapes I form in Foamex. You can glue it with poly cement though super glue is better, but for cheapness I use plumbers pvc pipe solvent, works with styrene as well but requires some care.
It is just you mention struggling a little with the turret and I know that pain well, but now I use this material and I can form shapes much quicker and easier. Here is an example that took me barely an hour from start to painted finished.
Made with 5mm and 3mm sheet material.
Once again I want to thank you for being here and inspiring us so much, I understand how hard it can be at times to get the mojo flowing, but when you do it is amazing to see.
Thank you Cam!
I have to admit, I don't really like the Foamex. But that is simply because I can't get any straight lines or angles with it...
probably too stupid
Viktor von Domm wrote:seems you´ve warmed up quite a bit for serious construction work again...now they just rollin´of your table^^
also...either a man is extra manly for holding and using a drill between his legs that was as shown here...or not for long anymore...
Hah! I'm one of these toughies with the drill between my legs.. um...ah... that didn't come out right, did it?
Naw, was just for shows
Commander Cain wrote:Impressive stuff! All those angles must be a nightmare to line up. Having just stared messing around with plasticard I have a newfound respect for your work
Thanks Commander!
Always nice to have you here
monkeytroll wrote:Lovely work as always Klaus. Especially like the slide out interior for detailing.
Thank you! I hope I can really make an interior....and not lose Mojo before
Meer_Cat wrote:The build is very realistic! I've ridden in my share of APCs and IFVs (when we could hitch rides- paras are ground-pounders by nature, not drive by shooters!) and the proportions and especially the angles to the armor are very effective. Having gotten a 'half-scratch build' under my belt with the Phaethon, it might be time to start thinking about a 'whole scratch build'!
Very well done Klaus- the road wheels especially- that trick of mounting things to a drill and moving the item rather than the sanding medium is counter-intuitive (at least to me) and brilliant- I use it all the time now.
More please!
Thanks!
Sure I'll try my best.
I hope there are some take aways for you today!
Hi all,
thanks for the great feedback and messages
Feels good to know you're still here and reading.
Continuing with the build, I fleshed out the track skirts with some additional angled armor.
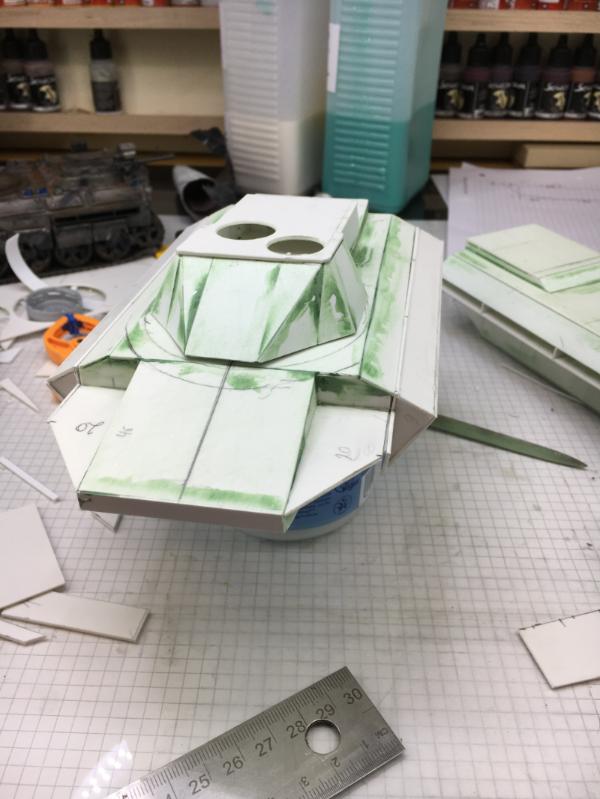
Probably a bit heavier than I had originally envisioned,
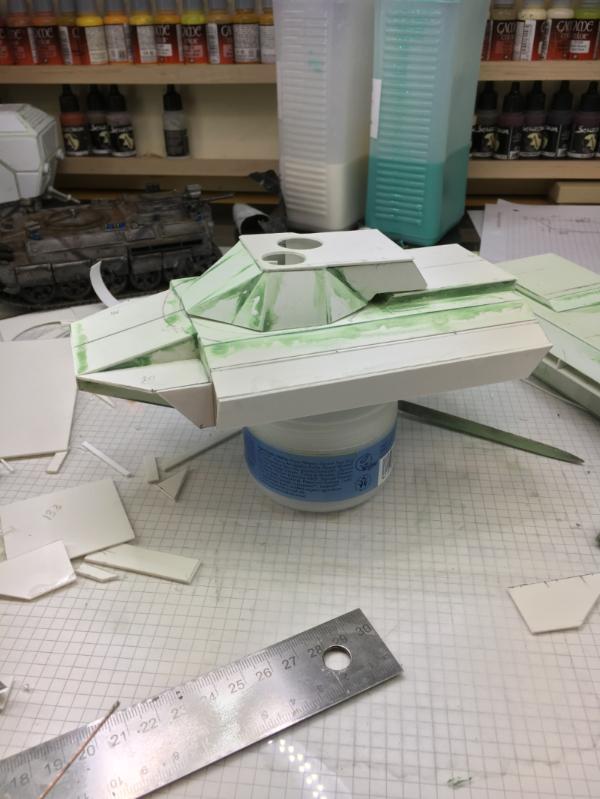
but I think the proportions work.
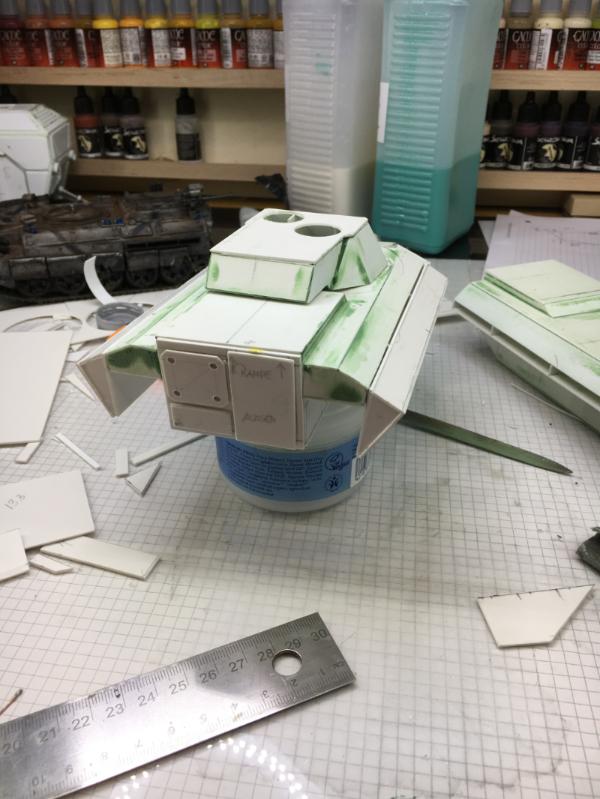
Next I assembled the road-wheels so generously gifted by Massimo.
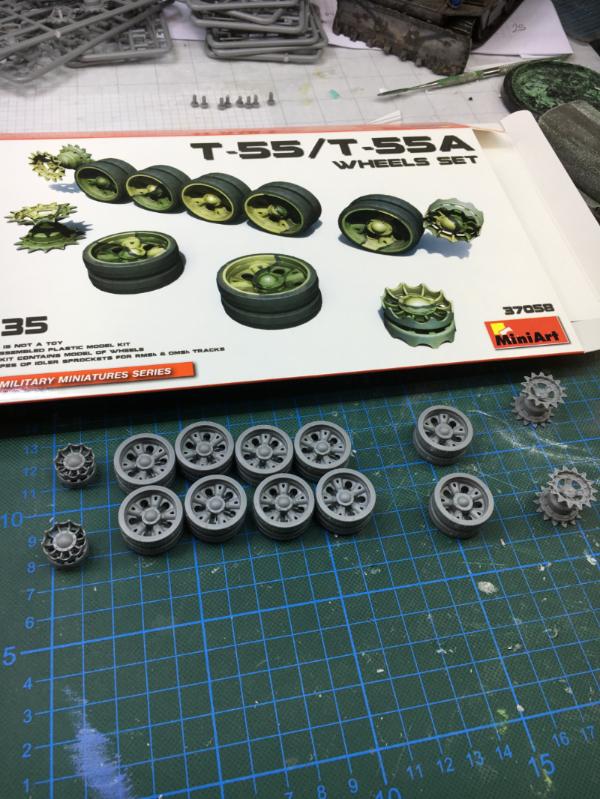
This is how I planned to mount them.
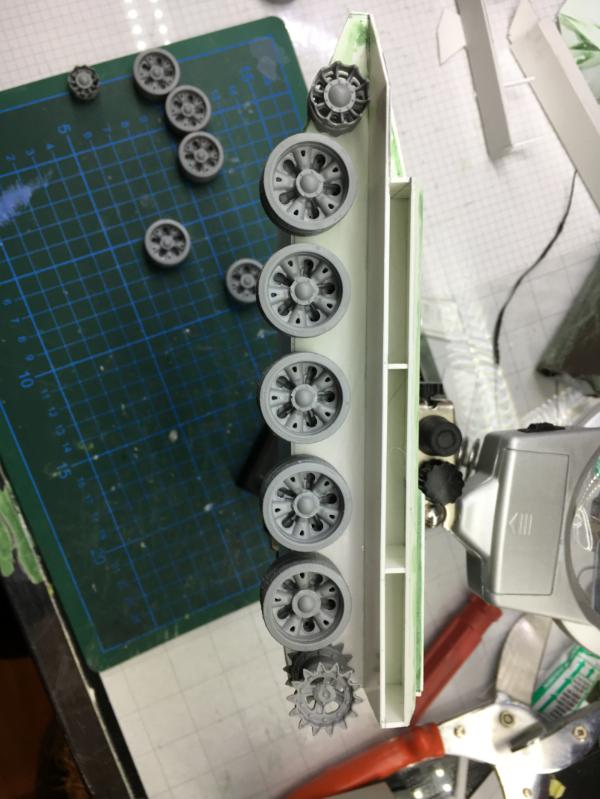
Massimo told me he didn't really like the MiniArt tracks and prefers the Trumpeter tracks, as he had some issues assembling the tracks to be "workable"
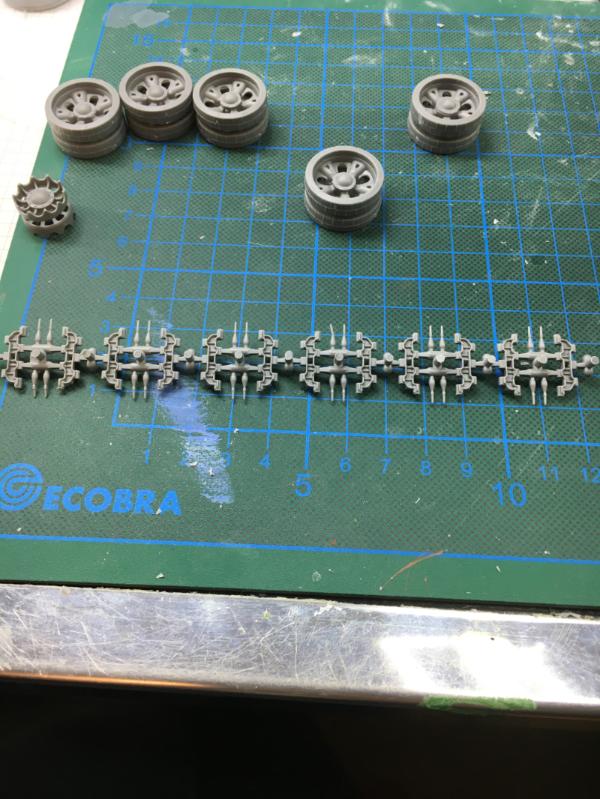
Well, after a few tries I do agree with Massimo.
These tracks are a pain in the A**.
The pins are too soft and have no working catch - they fall out again.
Do you guys have any experience with these tracks?
While pondering the tracks issue I cut the mounts for the wheels with my trusted "Chopper"
To keep the wheels properly aligned and straight I pinned them onto a strip of plastic card.
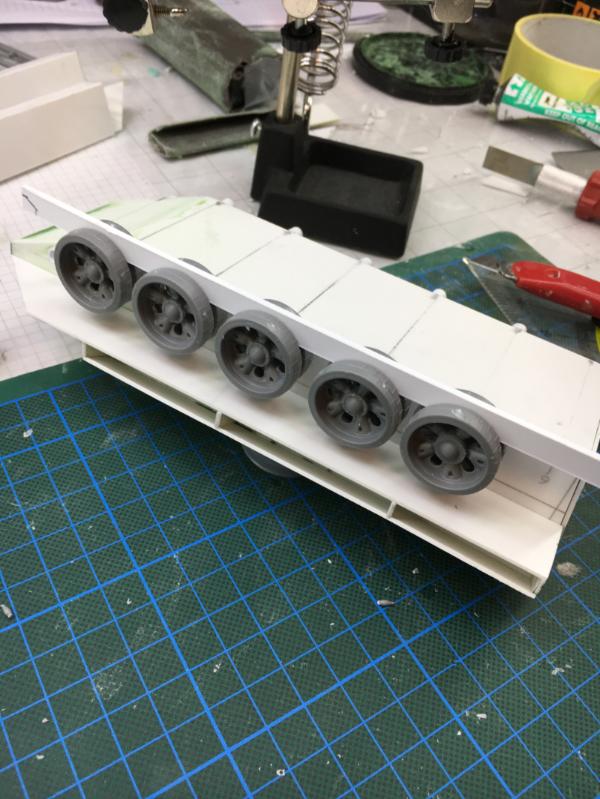
With this I can ensure they are straight and aligned while the glue cures.
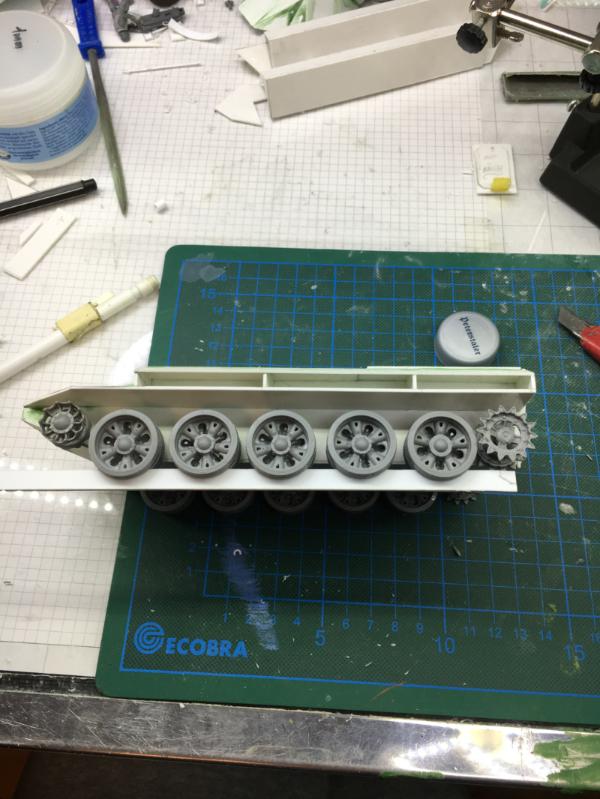
But when mounting the track skirts I realized it was all too low.
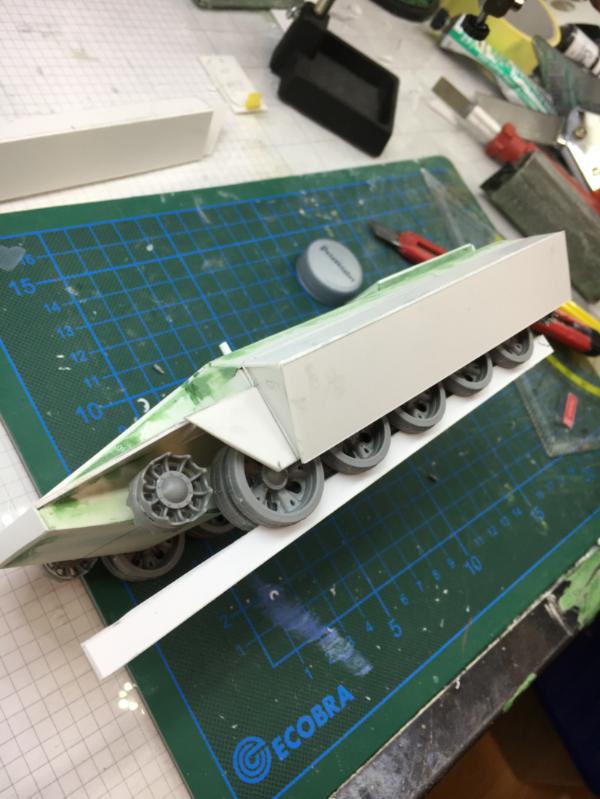
The wheels sit too high on the hull

This isn't looking good.

So I mounted "axles" beneath the hull and cut supports to hold them in place

This looks better now

The wheels now have the proper height ratio to the vehicle and skirts
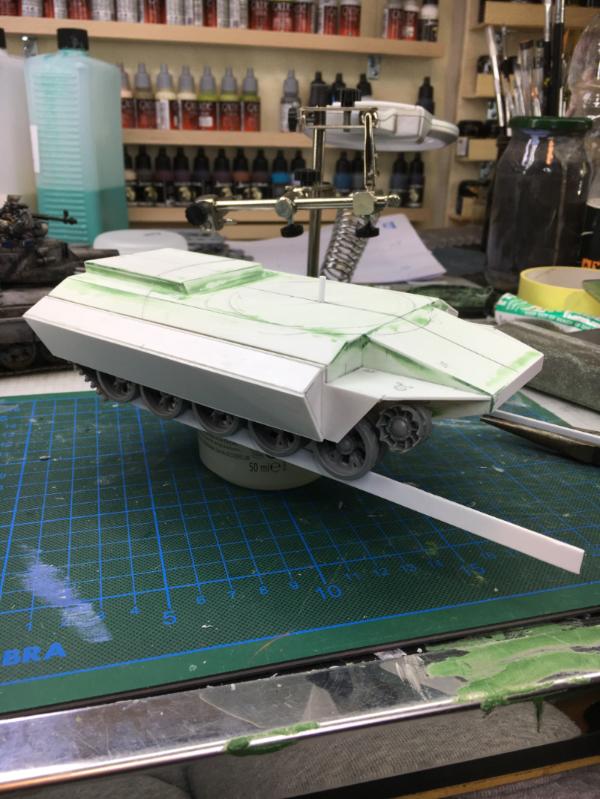
After chatting again with Massimo and realizing that I have glued wheels - which means "workable" tracks are non-sense anyway - I simply glued the tracks together and mounted them.

I really like the way they turned out.
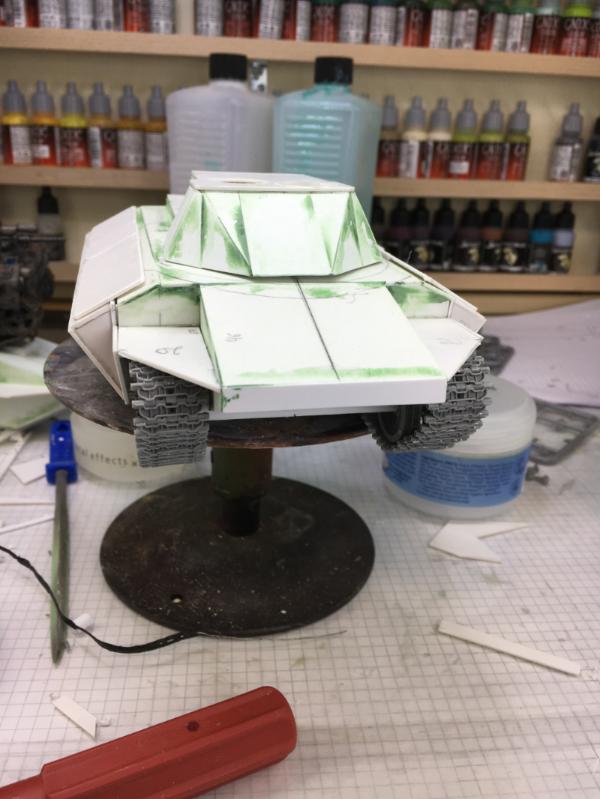
Starts to look like a tank.
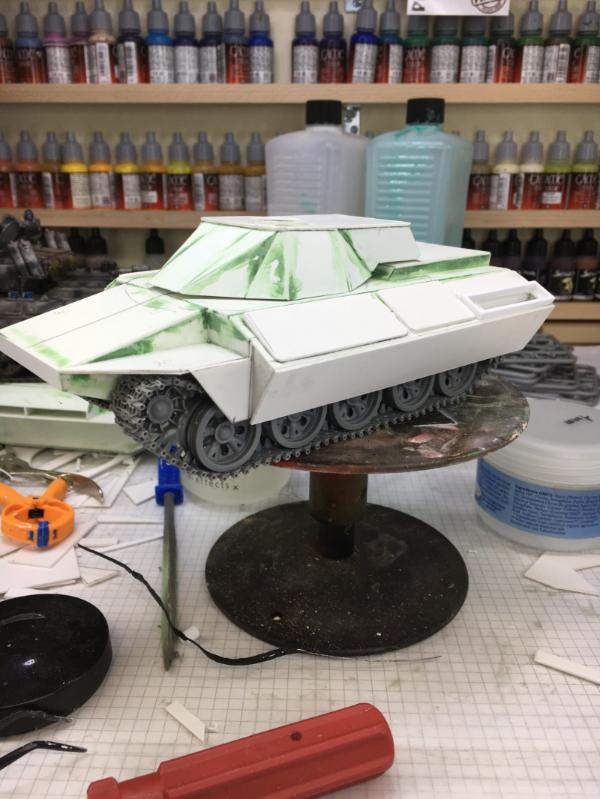
With a nice rear
52425
Post by: Elnibbus
Bloody impressive work there Klaus: looks like a 'proper' tank!
32373
Post by: Klaus, not Santa
somehow the post got truncated.
Here's the rest
With a nice rear
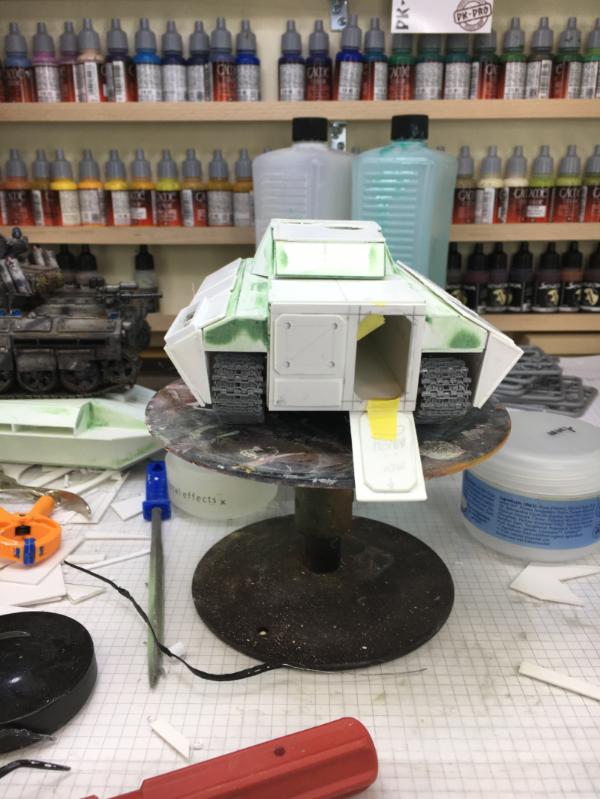
And so it was time to mount the main gun
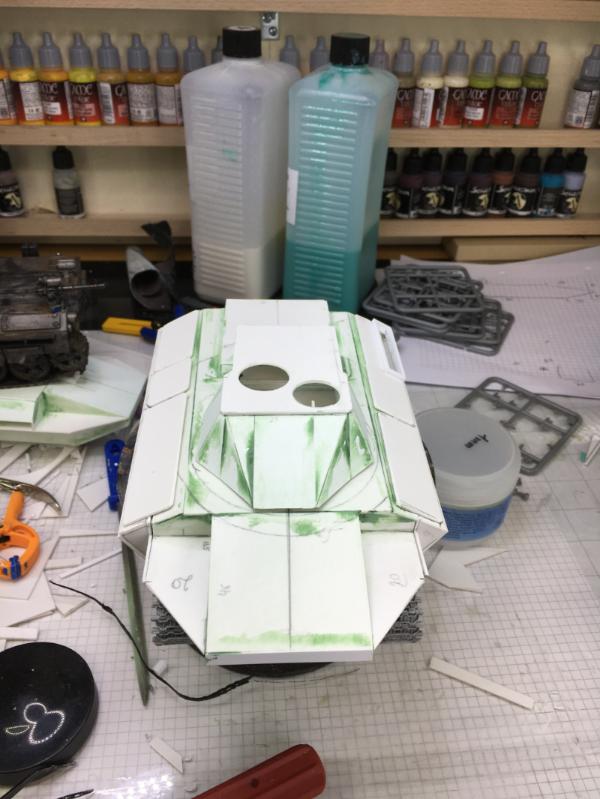
Well, size matters, eh?

What do you think?

When looking at modern tanks, like say the Challenger, I think the ratio of the gun is good.
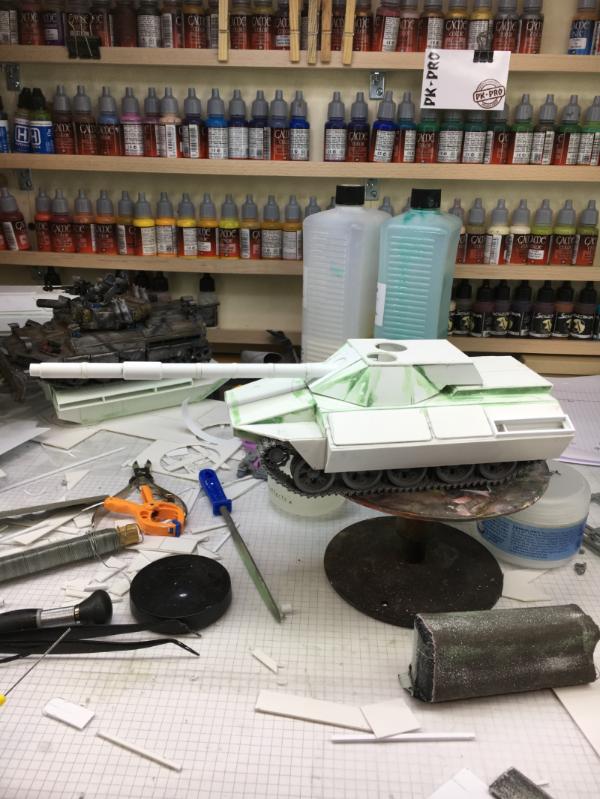
Or what do you say? Too long?
Please let me know what you think.
Cheers
Klaus
22192
Post by: whalemusic360
I think in 40k, tank barrels are generally shorter for the sake of playability. They are actually pretty damn long in the real world. So I think you can't go wrong here. Short, long, whatever floats your boat.
30344
Post by: monkeytroll
Yeah, think it only looks too long in comparison to 40k tanks. Works for me.
And handy trick on mounting the wheels
106010
Post by: Meer_Cat
The longer barrel is very real world, and in good balance with the body of the vehicle. Especially with rifled main gun barrels, the longer the barrel, the more rifling, the more spin on the round- the longer the range and the flatter the trajectory of the round. Or, if engaging enemy armor at closer range, the more kinetic energy delivered through the penetrator core of the armor-piercing round. Boom! Out go the lights!
I like it.
10972
Post by: Ruglud
Yep, I concur. Looks the 'bees-knees' to me
What I most admire though, is your ability to accept when a build is not shaping up as you've envisioned it and starting over from scratch - that's a real skill right there and one I struggle with...
32373
Post by: Klaus, not Santa
whalemusic360 wrote:I think in 40k, tank barrels are generally shorter for the sake of playability. They are actually pretty damn long in the real world. So I think you can't go wrong here. Short, long, whatever floats your boat.
sounds like a plan, eh? Thanks whalemusic
monkeytroll wrote:Yeah, think it only looks too long in comparison to 40k tanks. Works for me.
And handy trick on mounting the wheels
Thanks Mate!
Glad if my tip is a bit of use
Meer_Cat wrote:The longer barrel is very real world, and in good balance with the body of the vehicle. Especially with rifled main gun barrels, the longer the barrel, the more rifling, the more spin on the round- the longer the range and the flatter the trajectory of the round. Or, if engaging enemy armor at closer range, the more kinetic energy delivered through the penetrator core of the armor-piercing round. Boom! Out go the lights!
I like it.
Thank you!
Ruglud wrote:Yep, I concur. Looks the 'bees-knees' to me
What I most admire though, is your ability to accept when a build is not shaping up as you've envisioned it and starting over from scratch - that's a real skill right there and one I struggle with...
Thank you - if I didn't start over, I would later be pissed, that I didn't and regret it - or even through the whole built into the bin
Well, thank you for the positive feedback and comments!
Continuing form the last post I worked with the engine deck.
Instead of the long grill the other vehicles have decide to give it a turbine look.
So I cut a hole into the deck
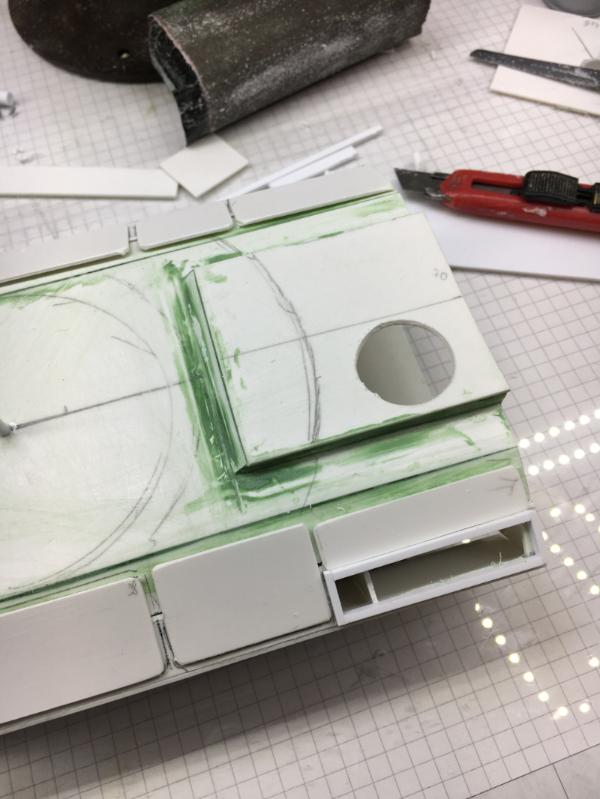
Then I cut a second thinner, but slightly larger disk and drew the fan blades
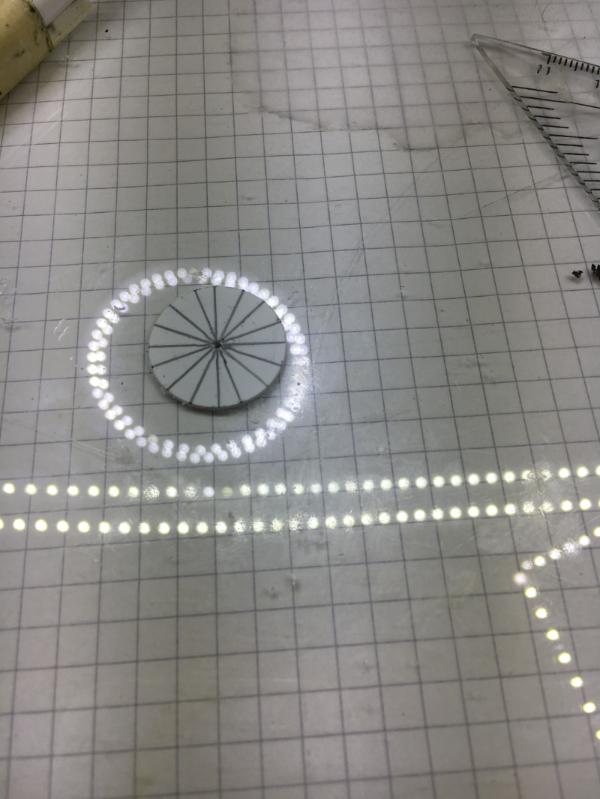
I cut them to about a few millimeters to the center and then carefully twisted them up with a set of tweezers - not careful enough, as one blade broke off
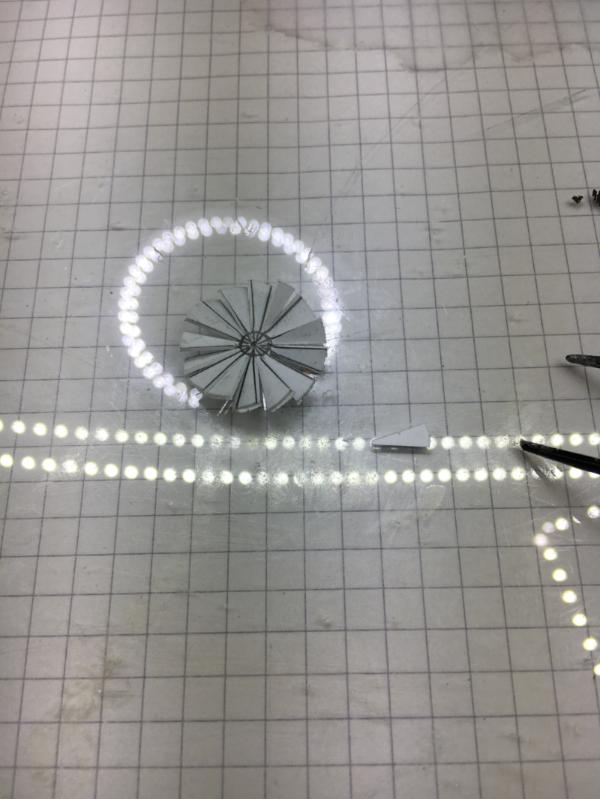
Finally I glued the "fan onto a piece of plastic card, re-aligning the blades in the proper angle.
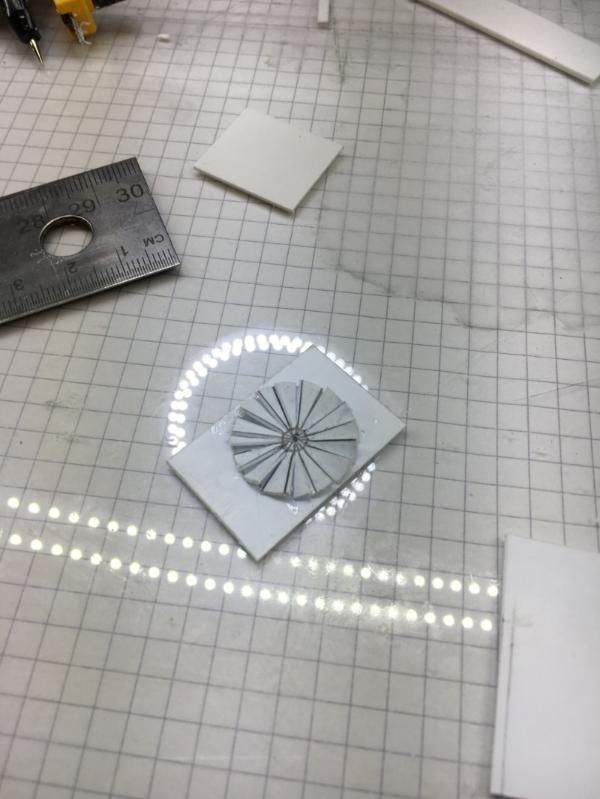
A set of spacers for the proper distance

And then glued in place.

To make things complete, I added a cover ring

I think it will look better, than the original deck - and it is different
Next I added the drivers hatch and the mounts for the lights
Next up was the hatch for the loader with the MG mount

I also added the hatches for the ammo load and cartridge ejection (the little round one) as well as access panels
Last not least I added the front lights and the closed commanders cupola
Still a lot of detailing, hatches, sights and lights to do
Well, that's as far as I got.
Cheers
Klaus
32373
Post by: Klaus, not Santa
Hi all,
thank you for your comments and feedback
Continued from last time I began to create the various lights and sights. For this I have a collection of balls - from left-over GreenStuff - which I then match to the fitting plastic rods, cut to the proper size.
Here are the first lights and sights mounted.
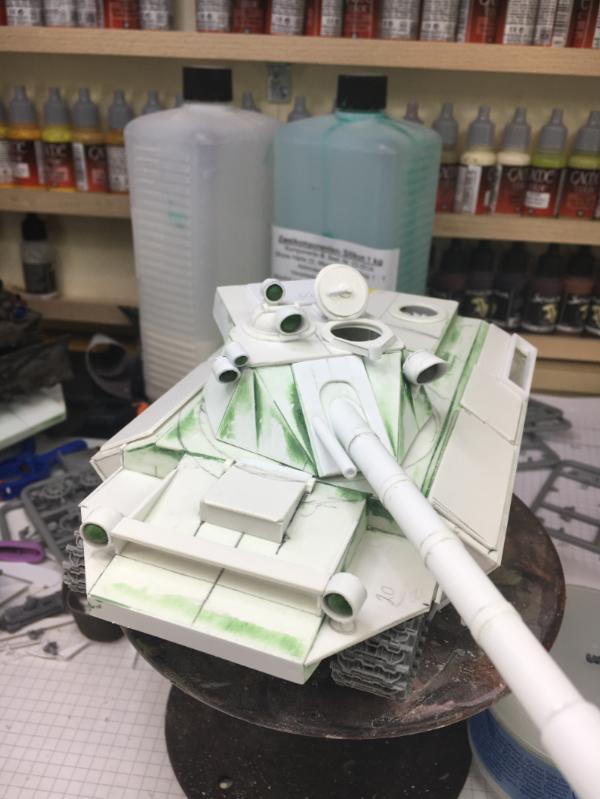
Changes the look quite a lot.

Next I created some " RPG-Grills" to protect the rear tracks.

Again the trick was to keep the sides removable.

Next I created the smoke launchers.
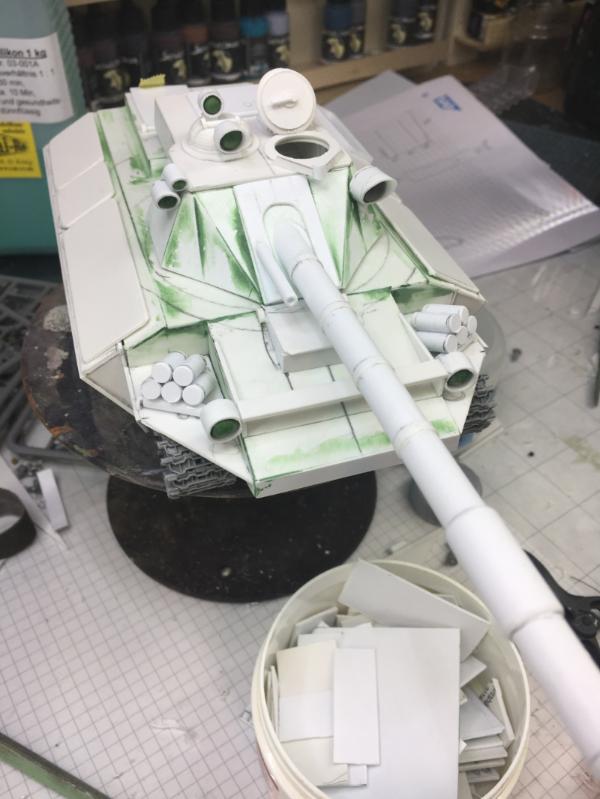
And then I built a machine-gun.
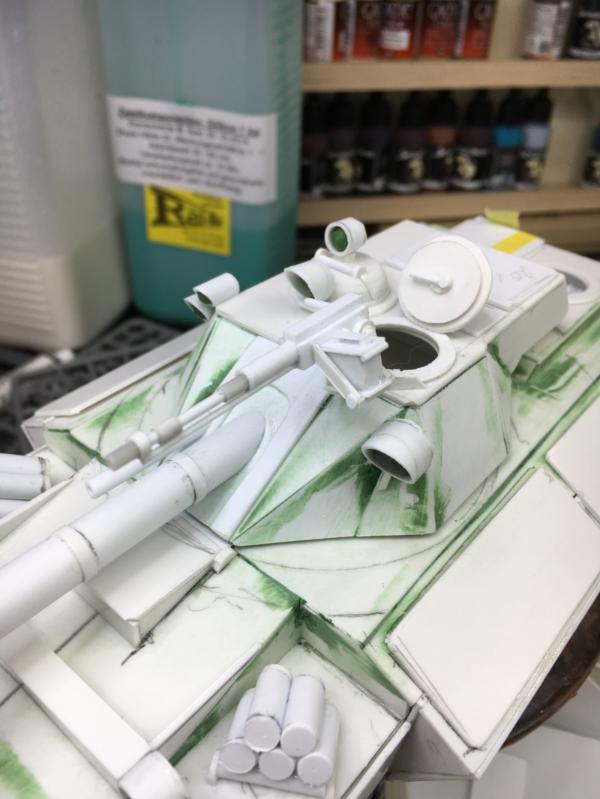
A bit Russian style
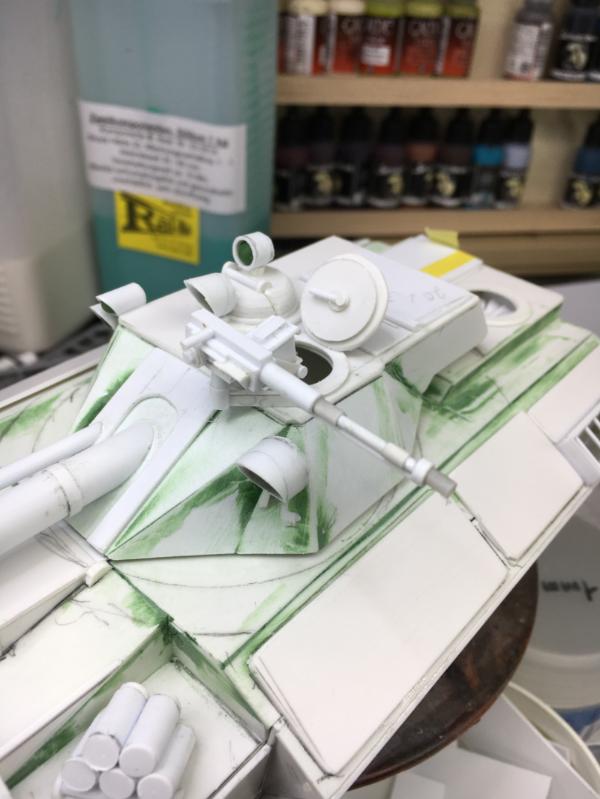
and all scratch-built.
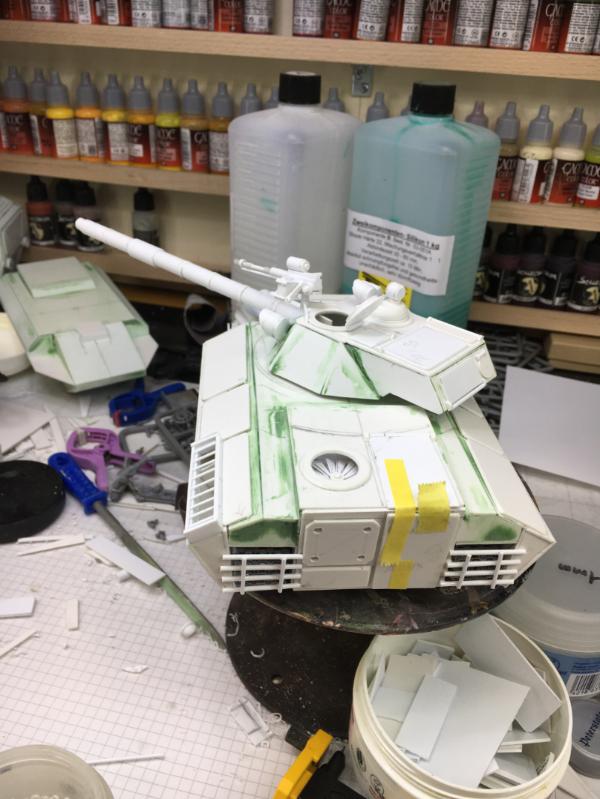
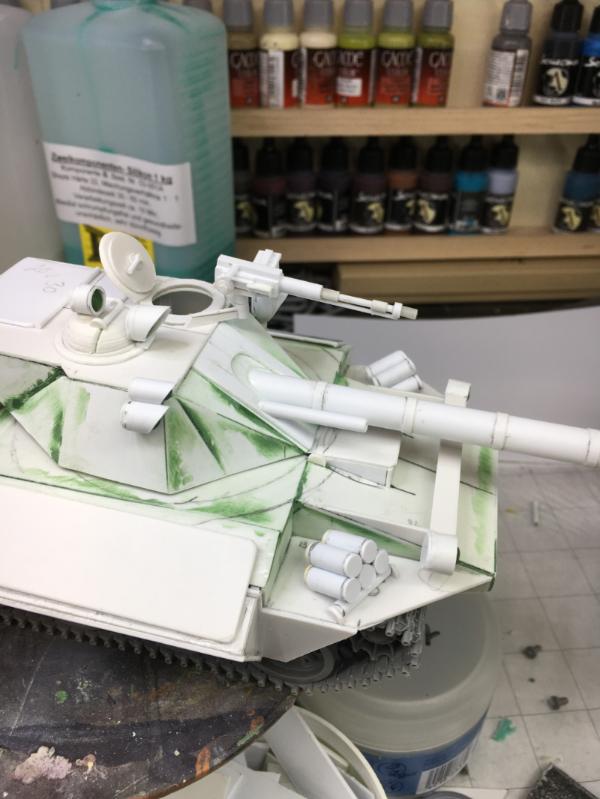
Then I added tie-downs and hooks.
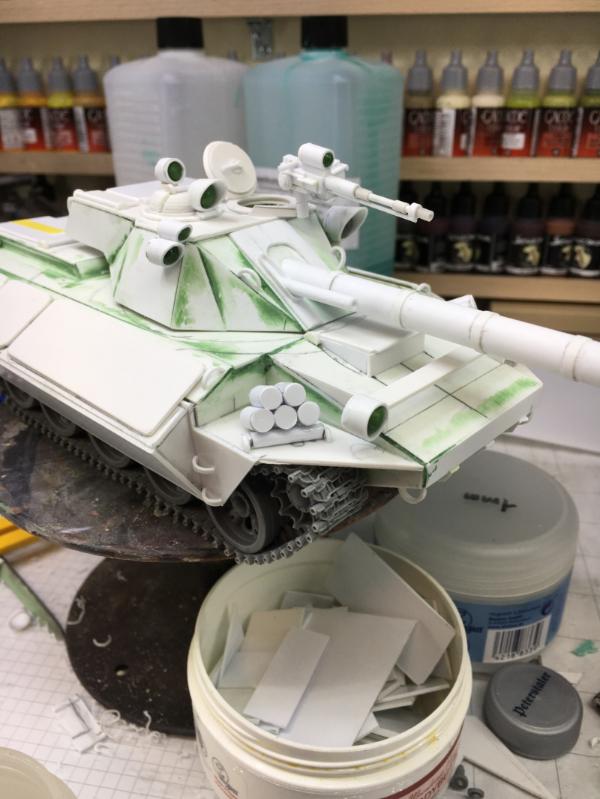
Rear lights

and handle for the rear door
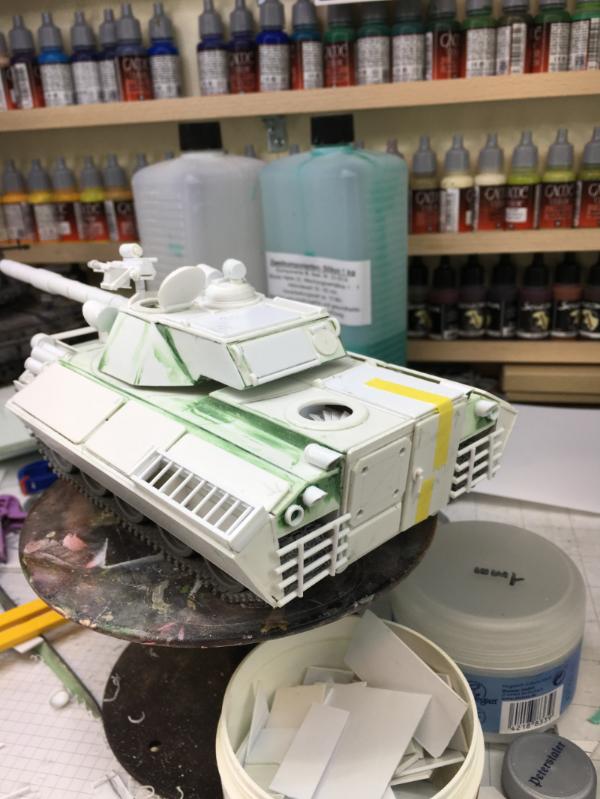
plus steps for the crew
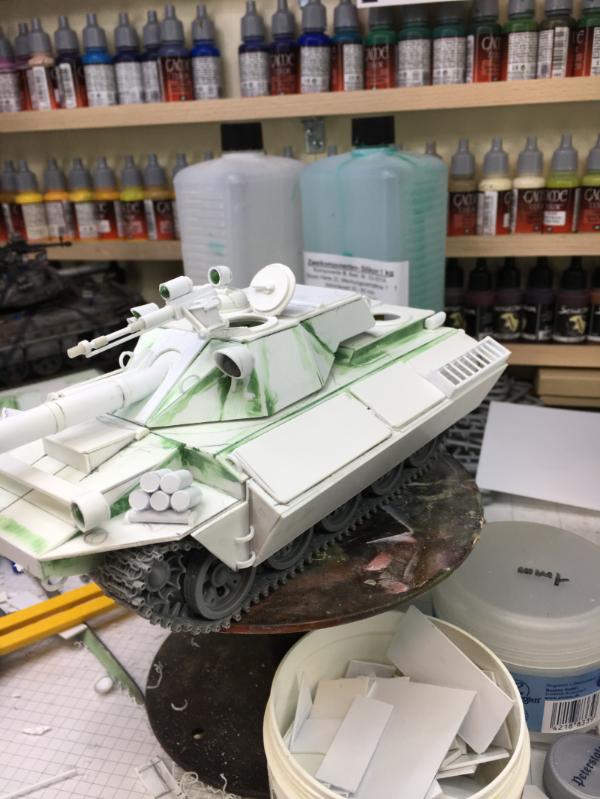
With my trusted Chopper I cut pieces for the vision ports
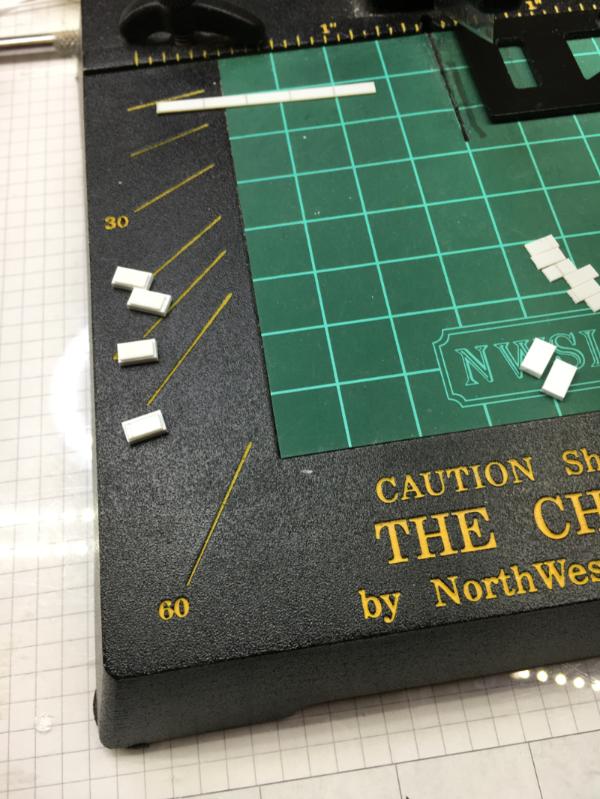
and installed them.

The two vision ports visible here on the rear left are later removed, as this is the engine area - and no one will be using them there
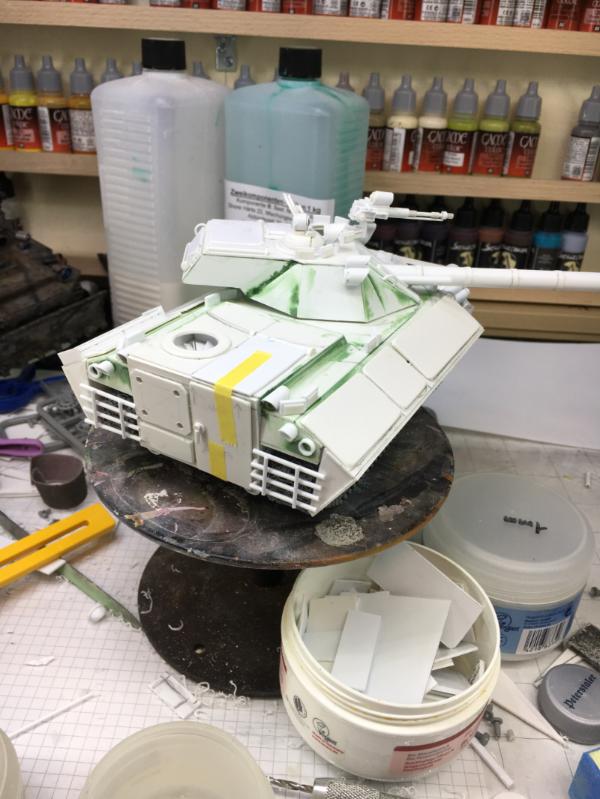
With most of the exterior done (yes, I know, tons of rivets are still missing), I started to build the slide-out interior
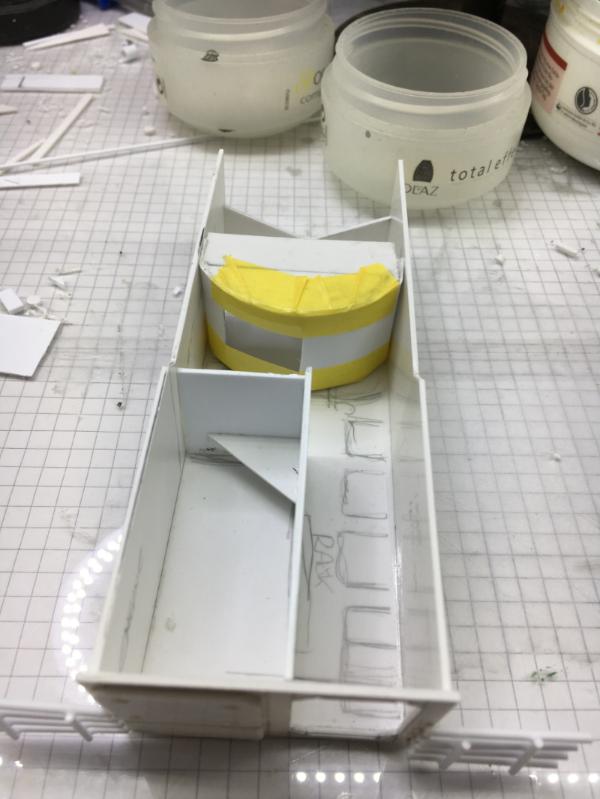
On the left is the engine section and in the center the blast wall and door to the turret basket.
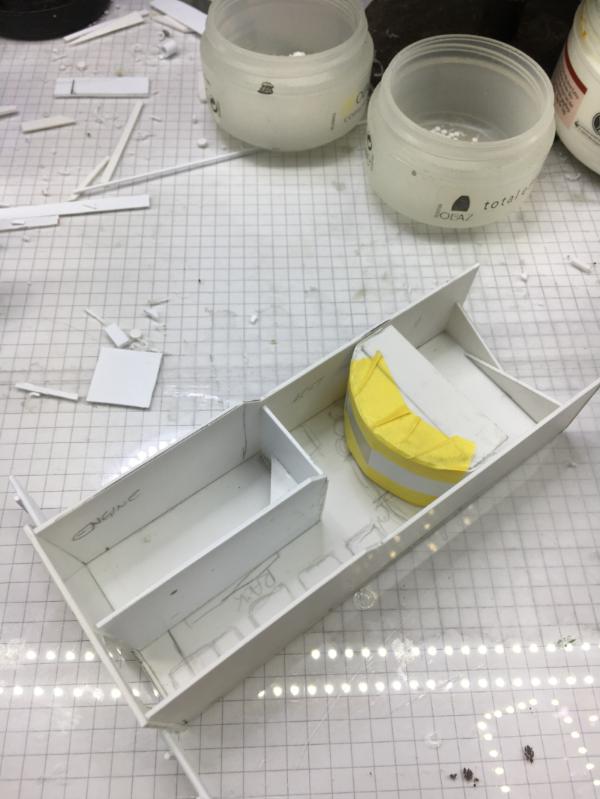
To flesh things out, I added a weapons rack, with a little Flamethrower, two assault rifles and two AT-tubes
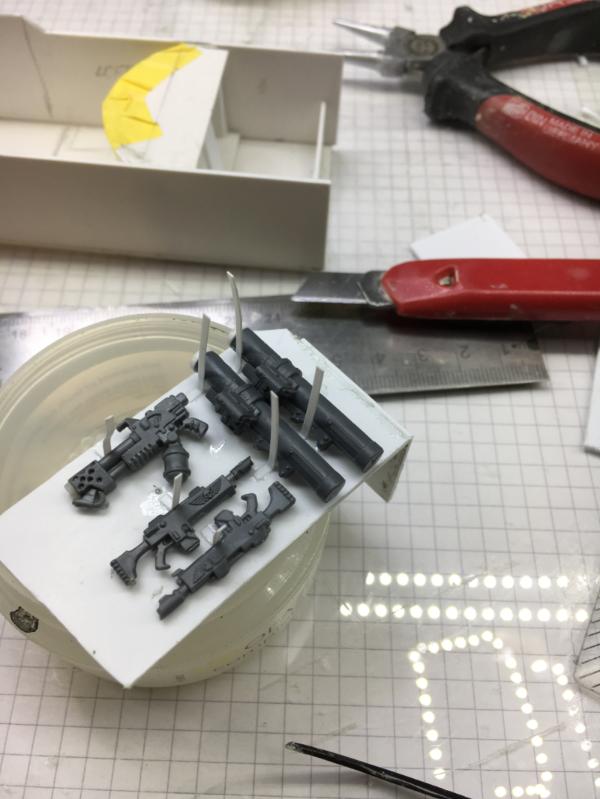
And this is how it would look...
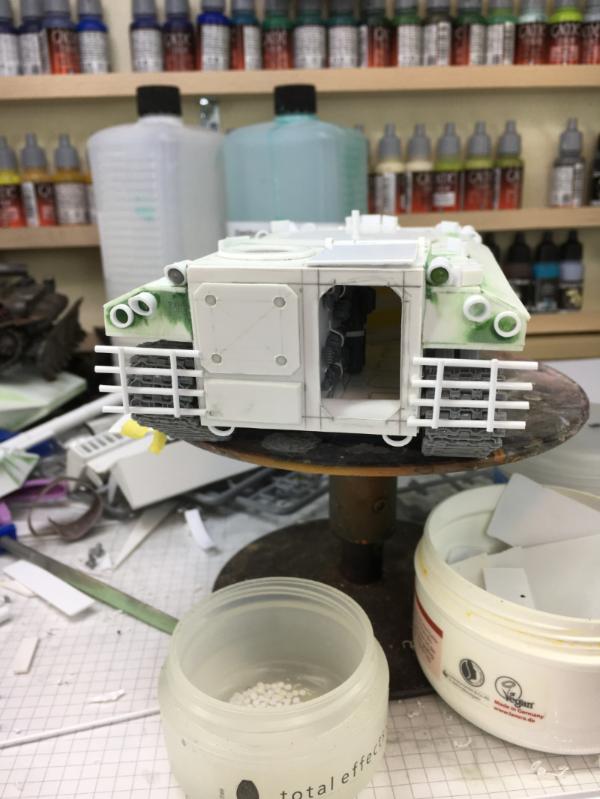
Not much to see...
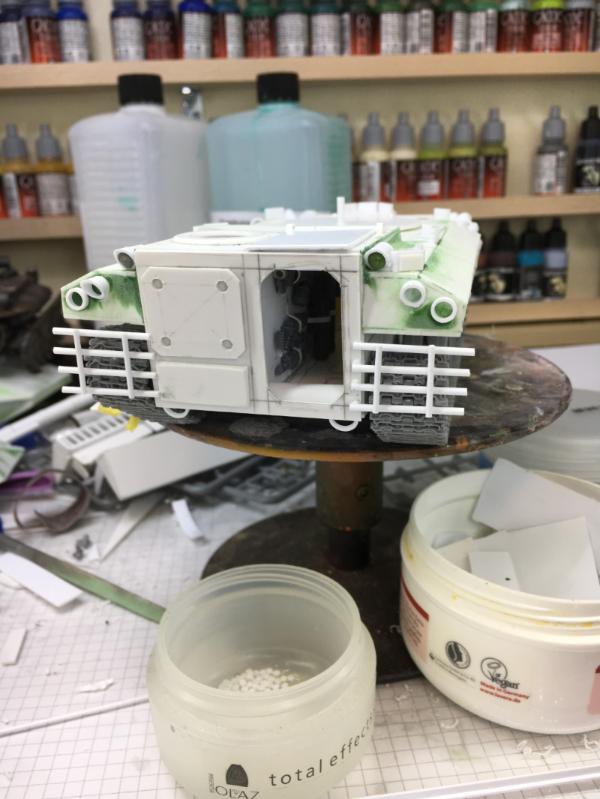
But we all know it is there, right?
Well, I'm not really sure how much time I will spend on the interior, if so little is to see...
Cheers
Klaus
30344
Post by: monkeytroll
Fantastic work as always.
Good work on the turbine, it does indeed help mark it out as a different build.
Nice idea for the lights, always interesting to see what people do with their excess green-stuff (obviously I make tentacles with mine ).
My favourite bit : "And then I built a machine gun."
3309
Post by: Flinty
It's amazing work. I'm just a bit distressed at the idea that you threw away the hull that was not quite right. Could you not have smashed it up in some way as basing material or a wrecked tank scenery piece? (Or given it to me? )
62749
Post by: Dr H
Great work. Lovely detailing.
65595
Post by: Camkierhi
Absolutely stunning, as always, where you lead we follow.
Merry Christmas my friend, hope you have a wonderful day.
32373
Post by: Klaus, not Santa
Merry Christmas and Happy New Year to you all!
I hope you all had a good time with your family and hopefully some time off work.
I had a wonderful time with my wife, family and the cats -despite catching a cold and lots of sniffing :-P
To finish the interior of the EREBUS I still had to build some seats - for this I used the seats from the HERMES as a sample.
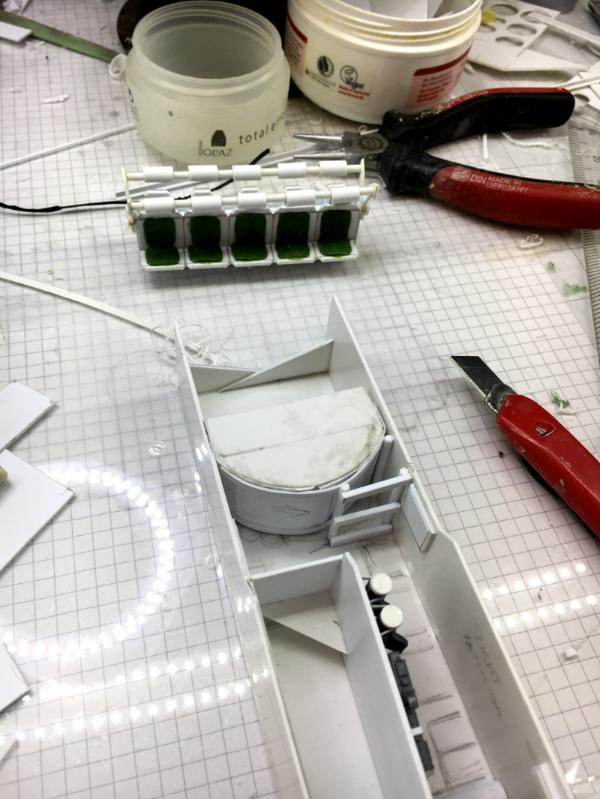
When glued in place I made them look as if some of the seats were flipped up.
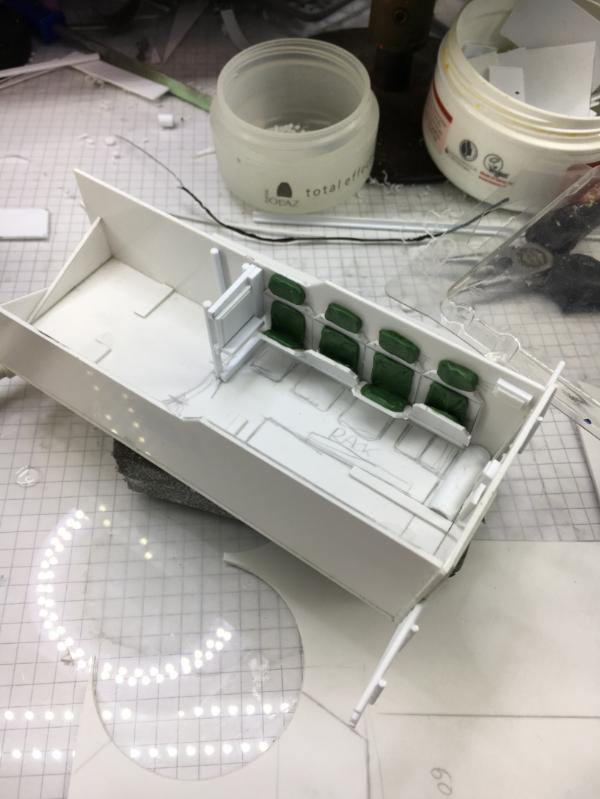
The finished interior
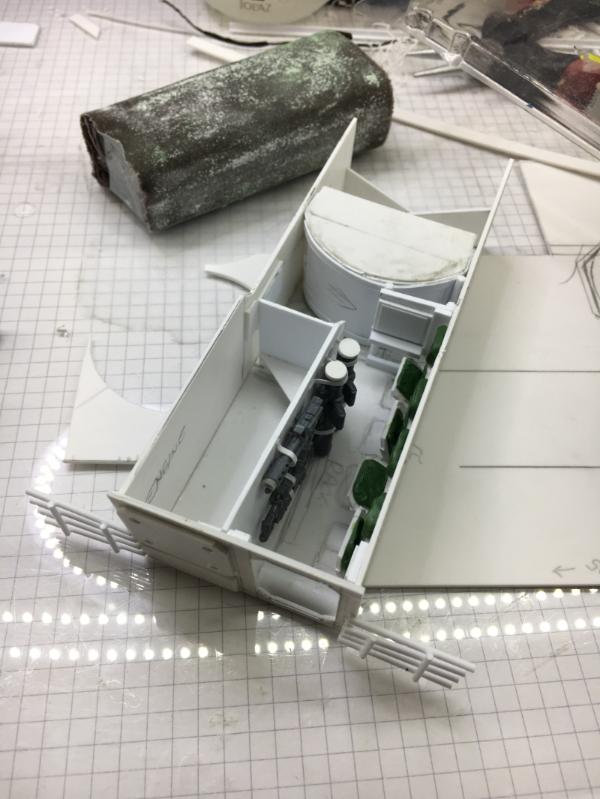
and slid into the tank.
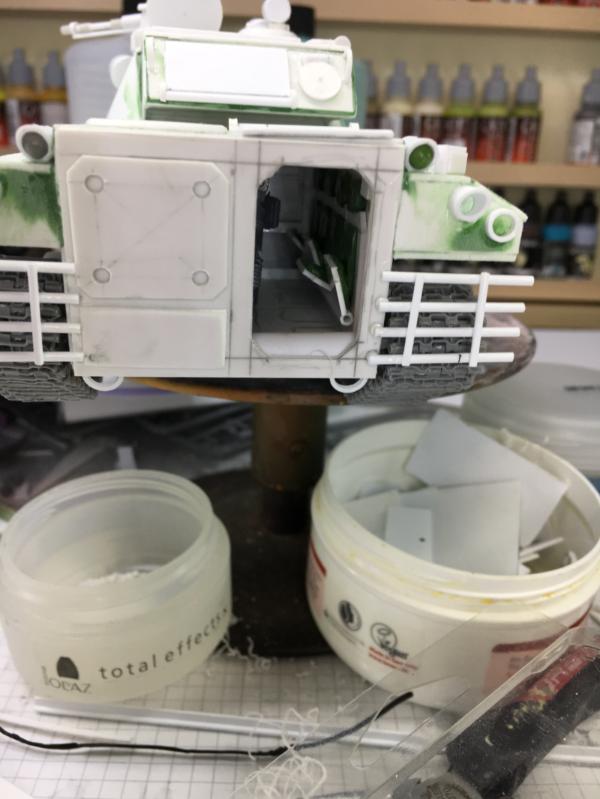
It's actually a pity that hardly anything will be visible.

The final images with the ramp lowered down.

This will most likely be the way it will be positioned in the diorama.
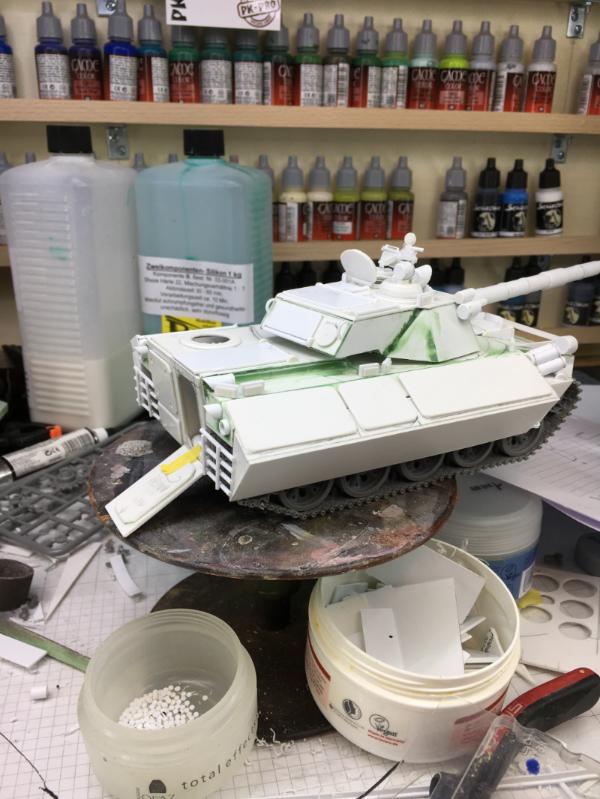
Oh, and BTW, the first hull was not destroyed. It still exists.
I don't know what to do with it, but it's still here on my desk

Well, as mentioned I plan to do a diorama. And some of you may remember the PONOS from " Orkalypse Now" and that I always wanted to do a wheeled version of it.

So I ordered a set of [URL=https://www.dersockelshop. de/zubehoer/1-35-umbausaetze/modern-us-cougar-6x6-mrap-road-wheels-ver.b-6-2pces-for-meng- ss-005-1-35_voyagermodels_pea361.html]Cougar Wheels by Voyager Model from Sockelshop. de
[/url] 
These are 1:35 and I think they fit the role for 40K perfectly
Here I drew a first sketch of the wheeled PONOS - the ALALA, Spirit of the War Cry

Since I was hoping to to have a visible interior I have to build a bit differently than normal
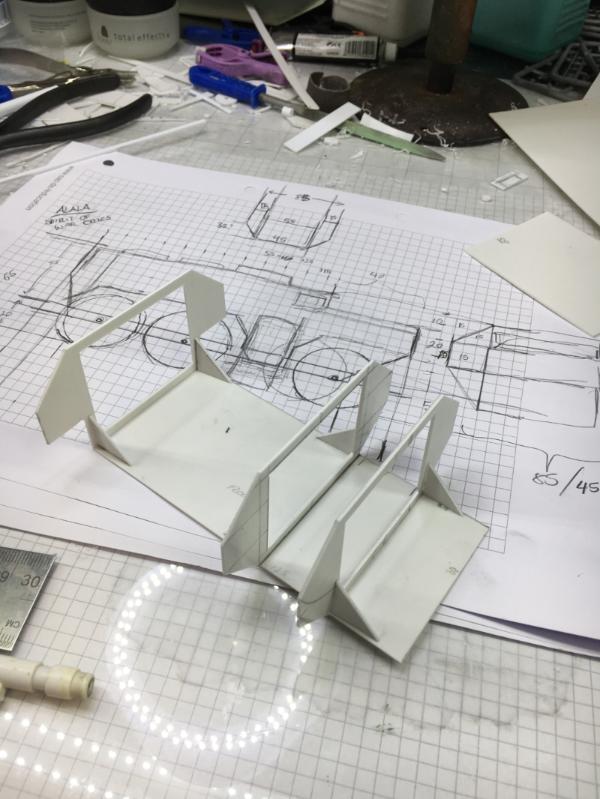
The basic frame was quickly built
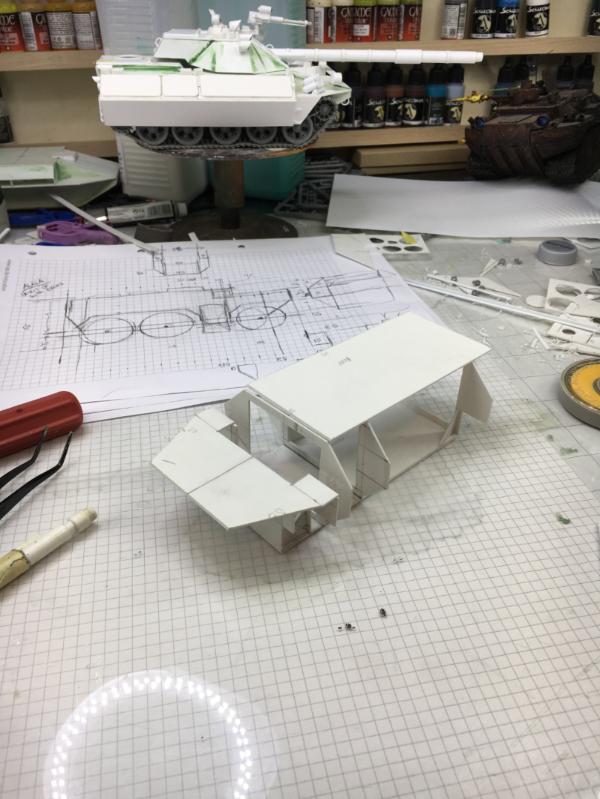

For the interior i started with the drivers cabin.
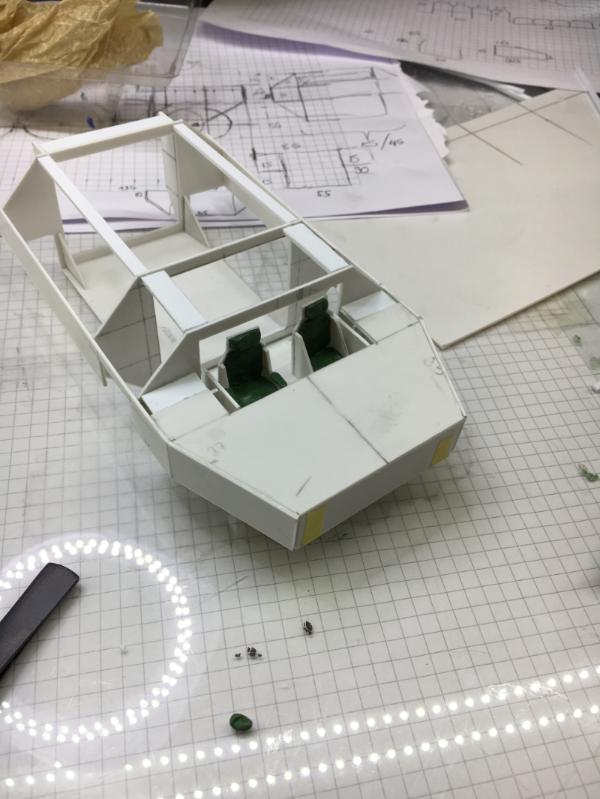
The chairs for the driver and commander - I guess it's visible who will sit where
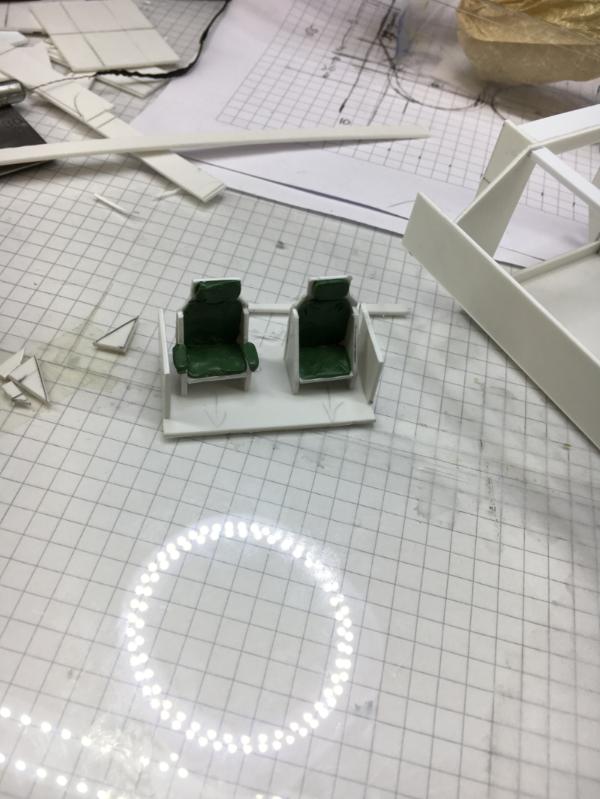
A quick check with the wheels.
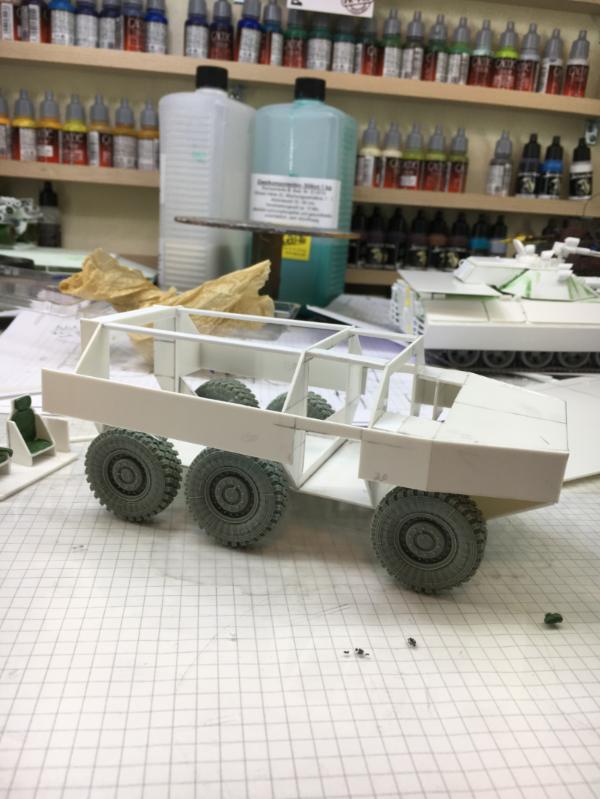
I think this will look pretty neat
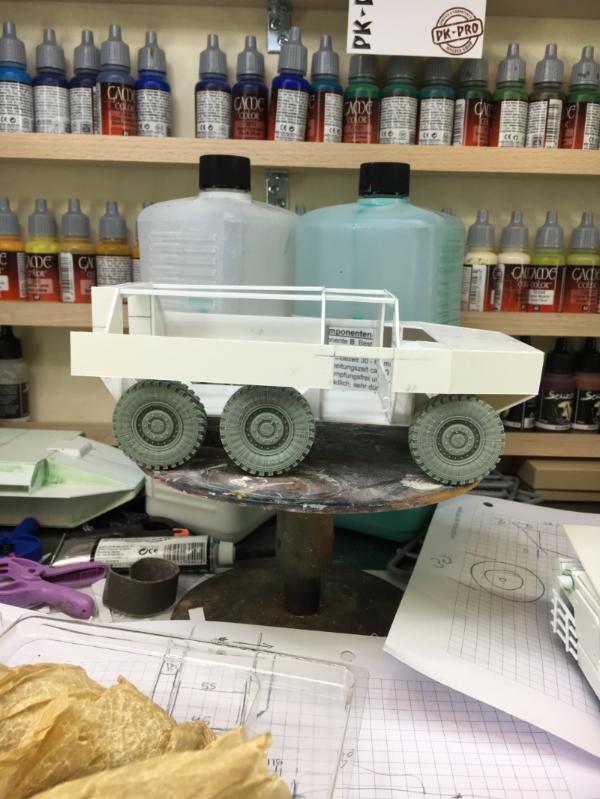
A bit higher than the EREBUS tank.
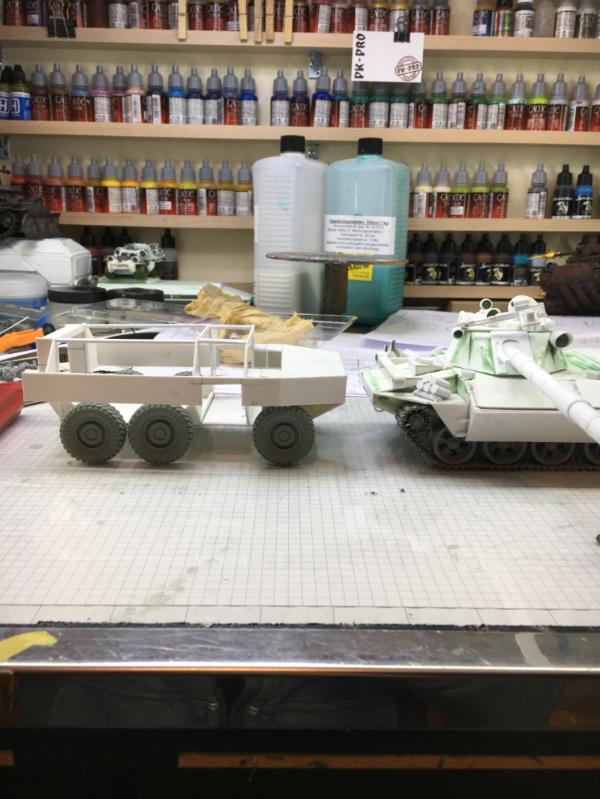
In the meantime Luna did a quality check for the chairs.
They passed

Next I built another slide-in cabin for the passenger compartment
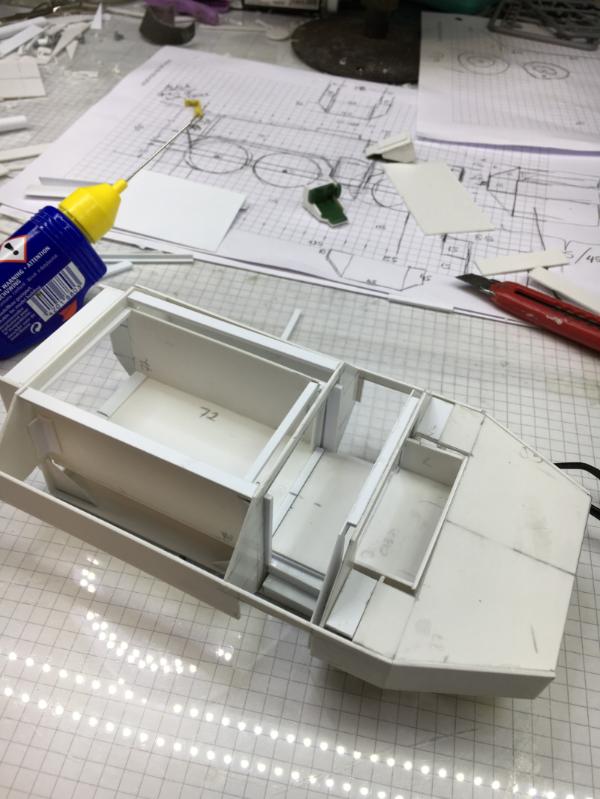
The two sections
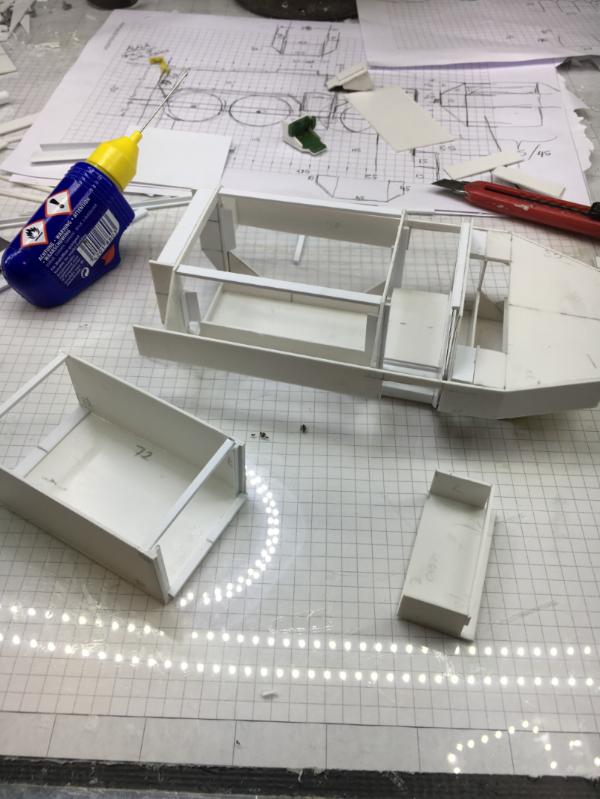
Next I had to build 8 chairs
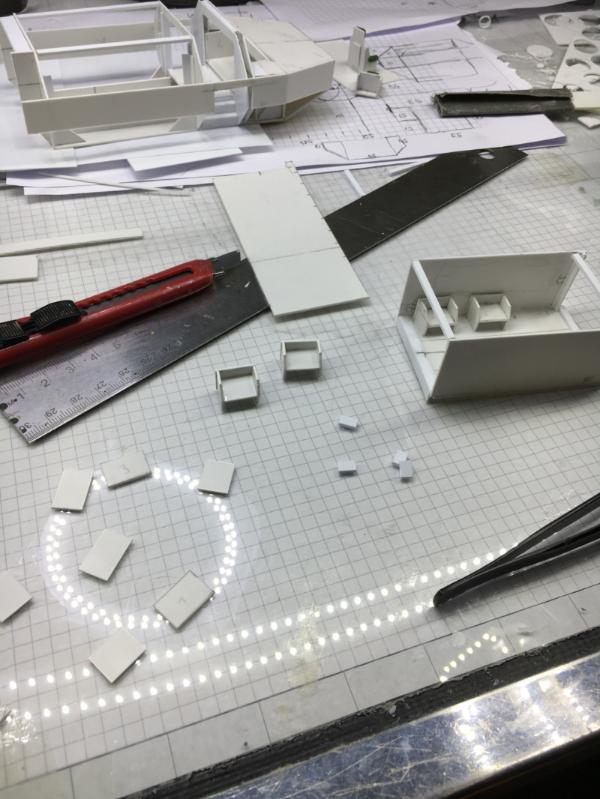
Small scale mass production
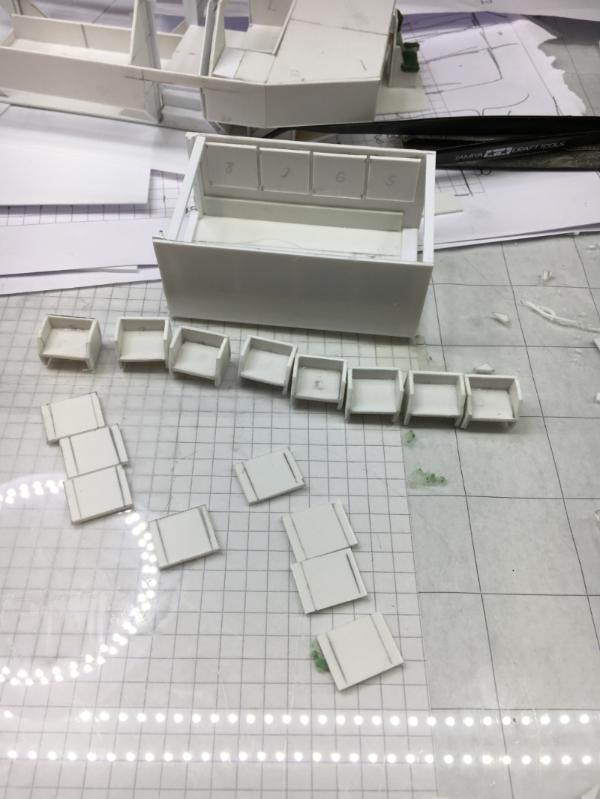
With GreenStuff I sculpted the leather cushions
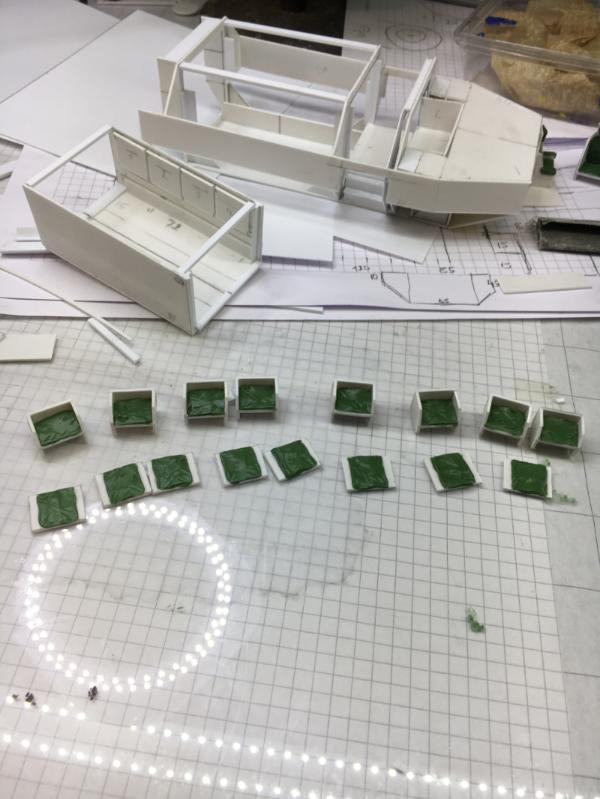
And everything in Position

Maybe it is visible that there are storage compartments on the floor, as well as behind the seats.
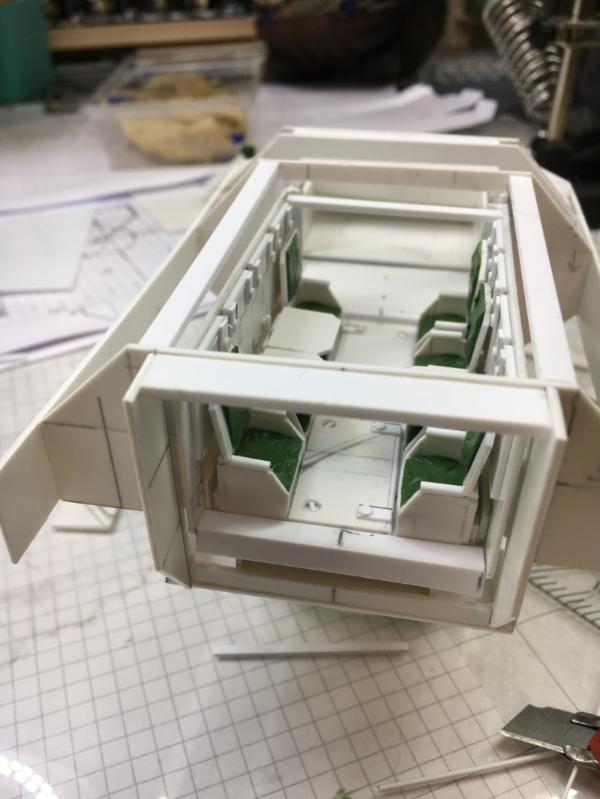
The backrests fold down for access and also create a platform to access the roof hatches - as firing positions.
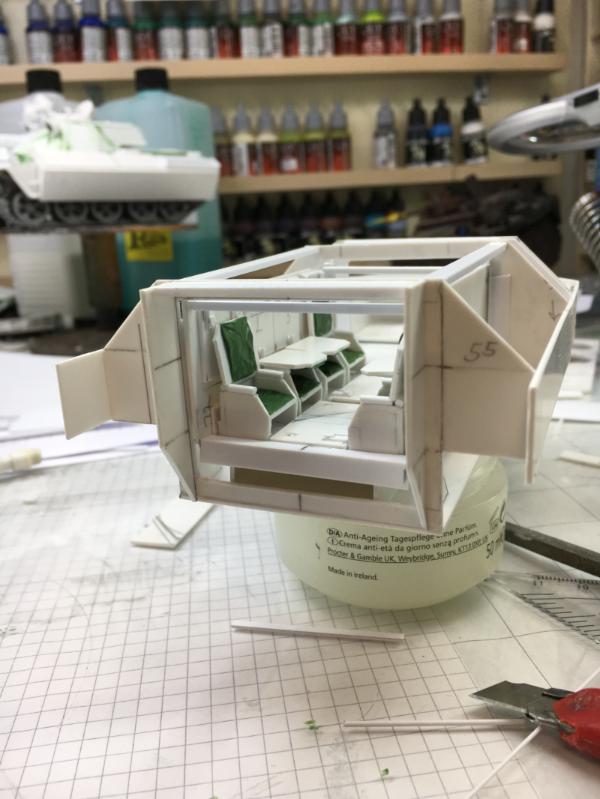
Here you can look through to the drivers dashboard

The drivers compartment
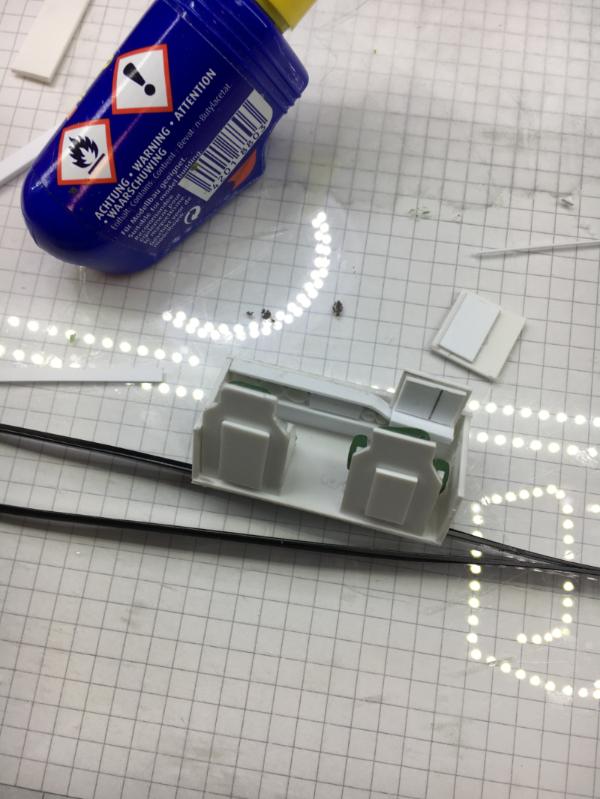
The interior sections (so far) in position


It already has the typical PONOS "face"
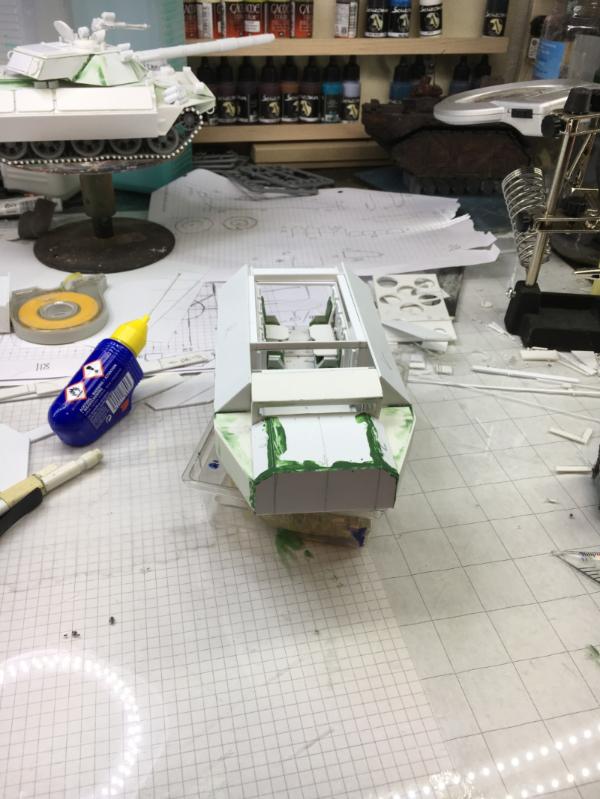
I hope you like the update.
Cheers
Klaus
68345
Post by: xXWeaponPrimeXx
I really love your diorama's. I can't wait to see how this one turns out.
65595
Post by: Camkierhi
Looking great so far. Loving the interior detailing.
30344
Post by: monkeytroll
Lovely work. I like that idea of the chair backs being the folding part, to create a flat surface/platform.
24297
Post by: Viktor von Domm
not even finished with the first one and already halfway into the next tank...
i love the flipped up seats...very lifelike!
32373
Post by: Klaus, not Santa
xXWeaponPrimeXx wrote:I really love your diorama's. I can't wait to see how this one turns out.
Thnaks
I still don't know how this one develops either
I have a vague idea though ... and a plan
Camkierhi wrote:Looking great so far. Loving the interior detailing.
Thank you Cam!
monkeytroll wrote:Lovely work. I like that idea of the chair backs being the folding part, to create a flat surface/platform.
Thanks - yes I kinda love the idea too
Viktor von Domm wrote:not even finished with the first one and already halfway into the next tank...
i love the flipped up seats...very lifelike!
Thanks Vik!
Yes I was thinking a lot on the interior layout and storage - and this came almost natural
Well then
Happy New Year and best wishes to you!
I hope you had a good start into the new year and are now rested and fit, eager to continue running projects or ready to start something new.
Luckily I'm still with this project and so continued from the last update.
After sanding the outer armor I loosely fitted the wheels again for a visual concept check.
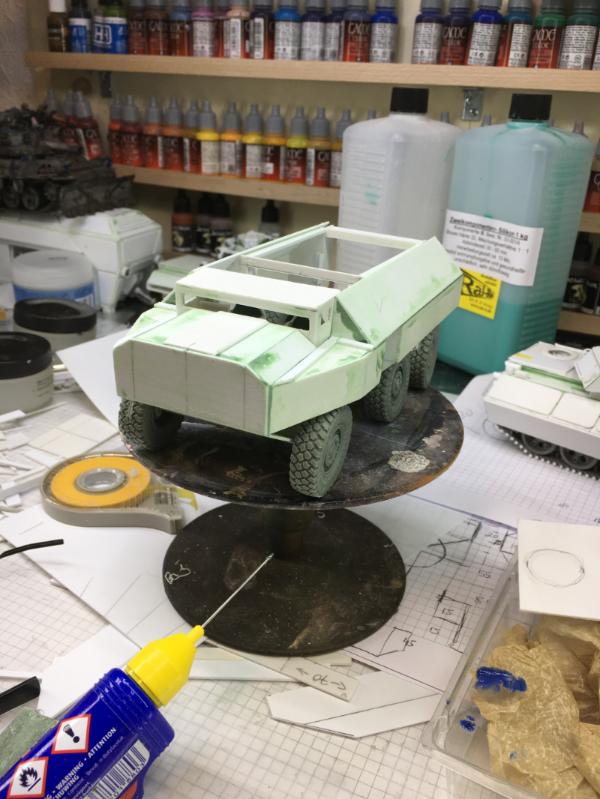
Yes, looks pretty much the way I intended.
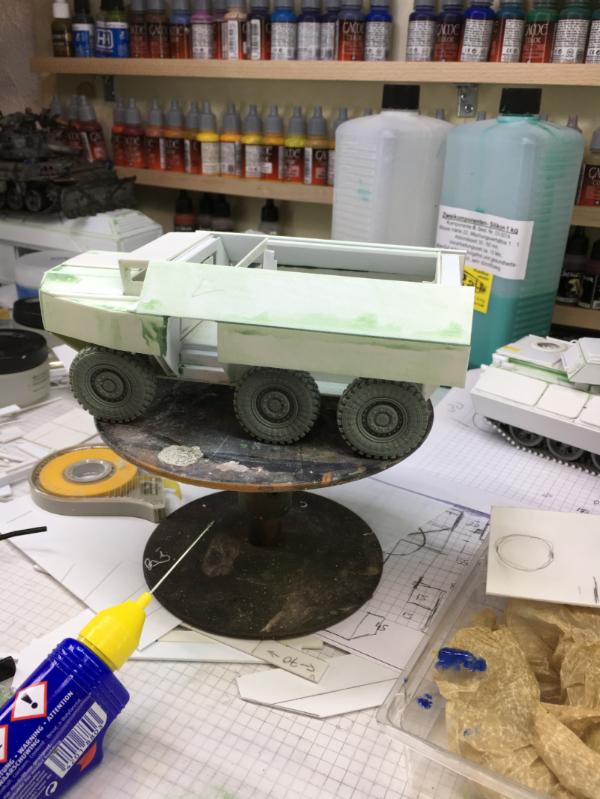
I still have to figure out how to keep the interior visible in the final scene

most likely the rear ramp will be open.

Two comparison shots with the big brother
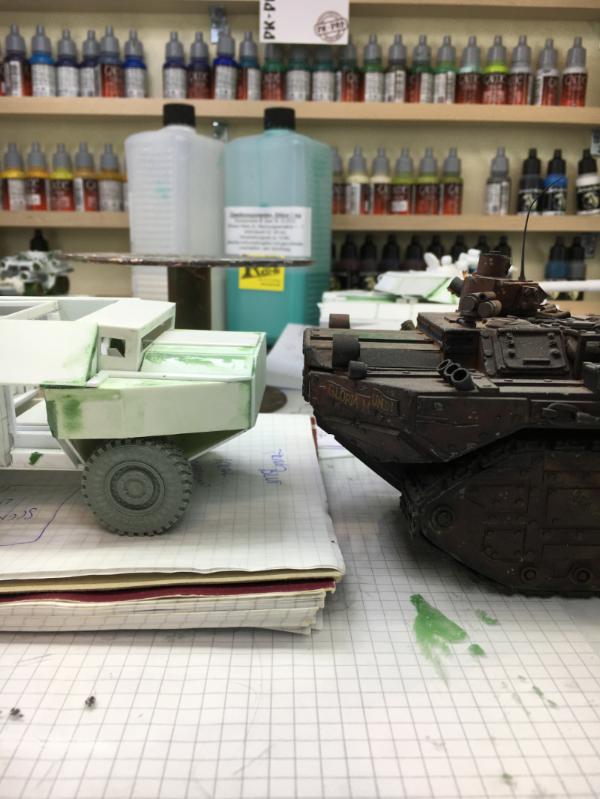

Siblings
One section of the interior that I had not tackled so far was the center
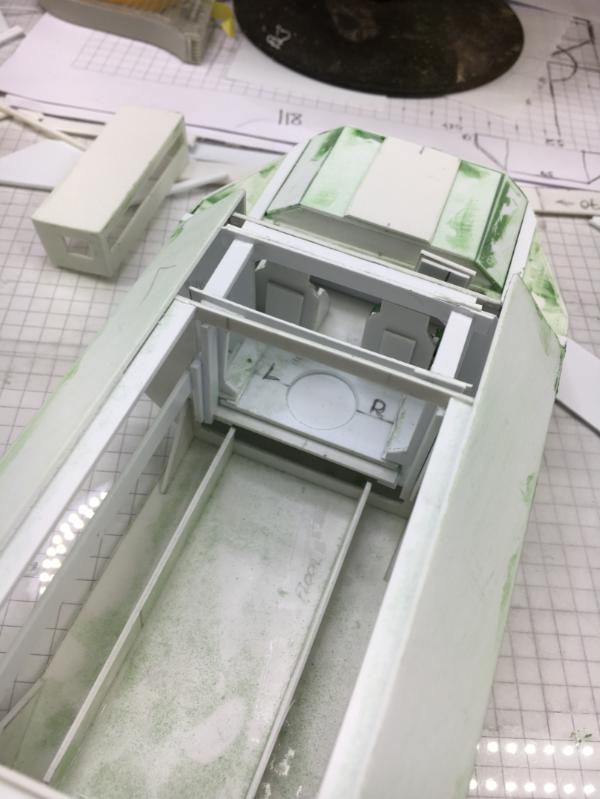
Again slide-in-and-out
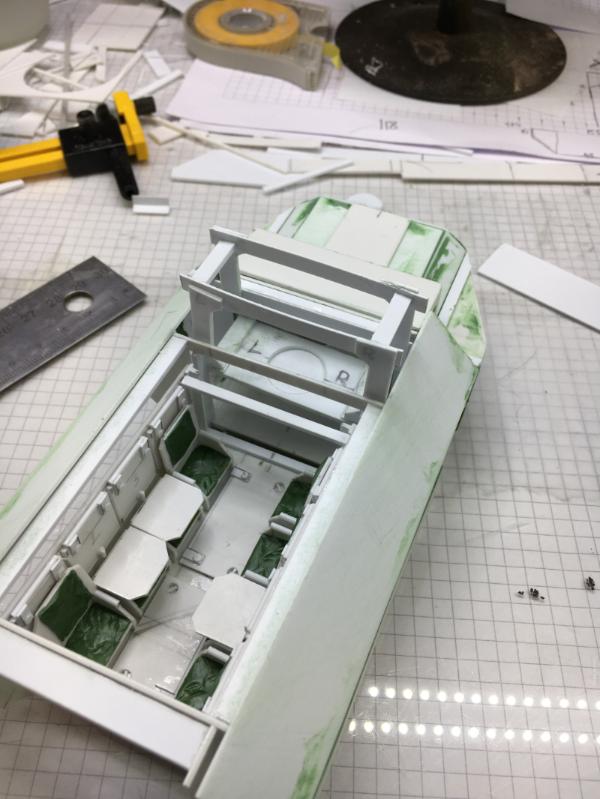
And a raised platform (on hydraulics) for the gunner
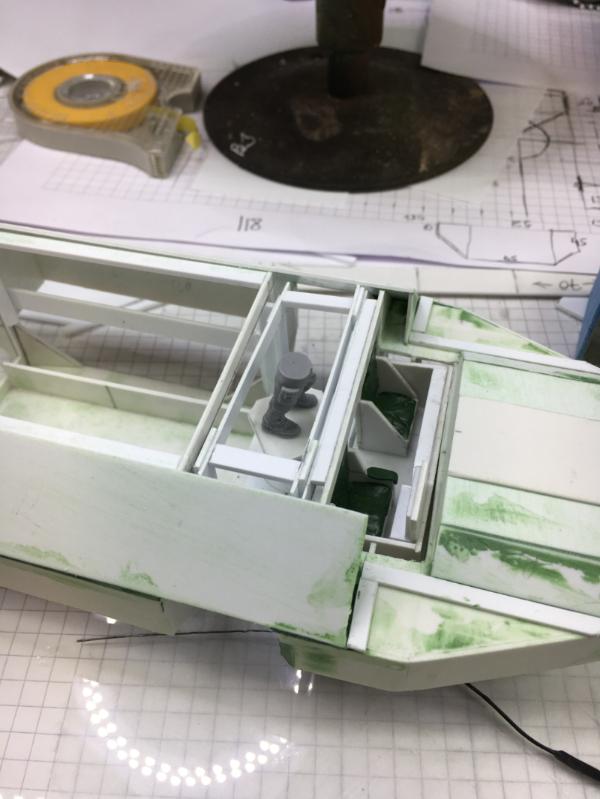
these are standard WH40K legs
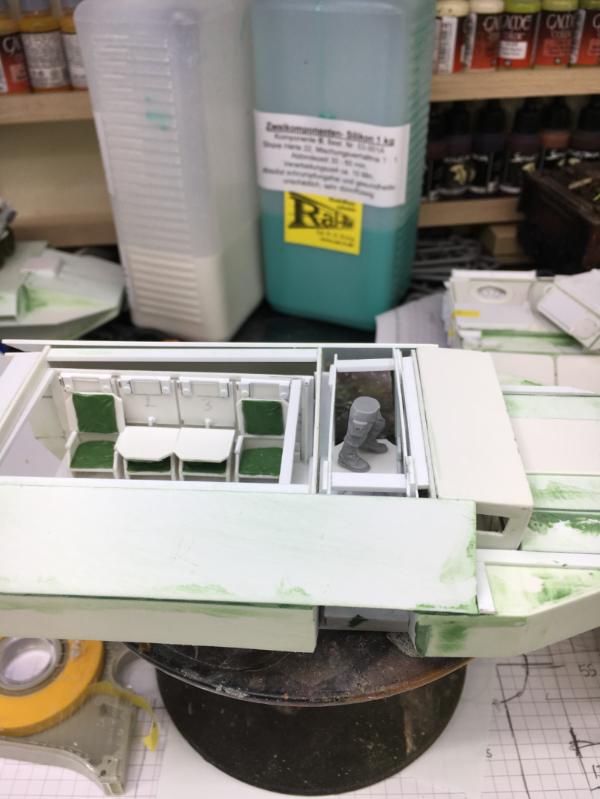
So on the platform the gunner is raised waist high

again, the view through the rear ramp
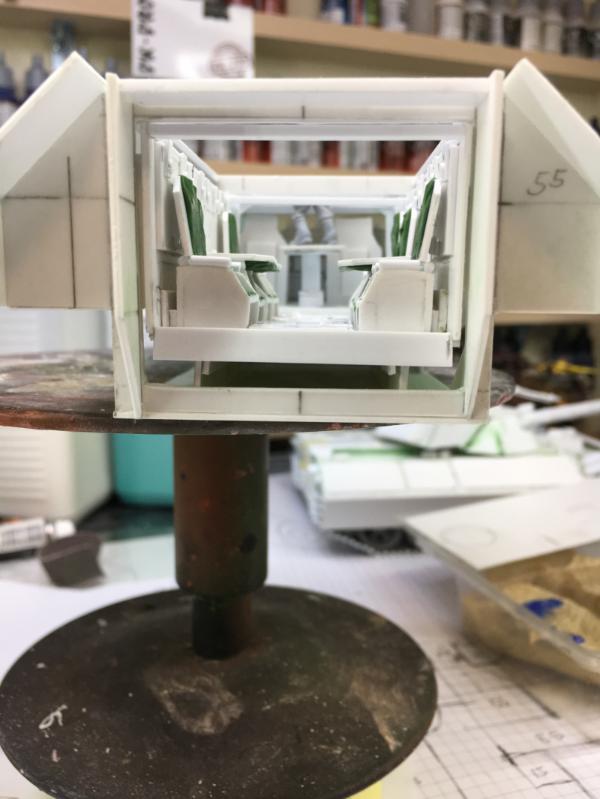
Next I need to adjust the roof accordingly
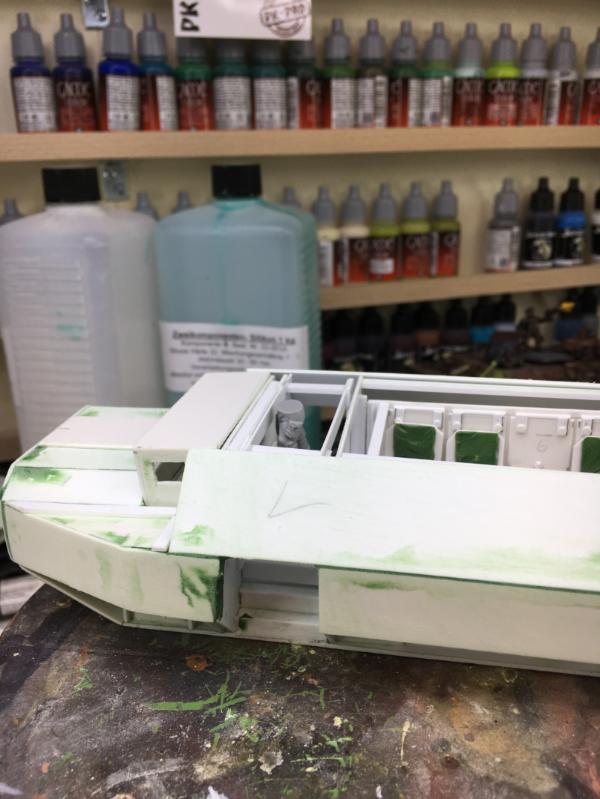
the roof hatch cut out
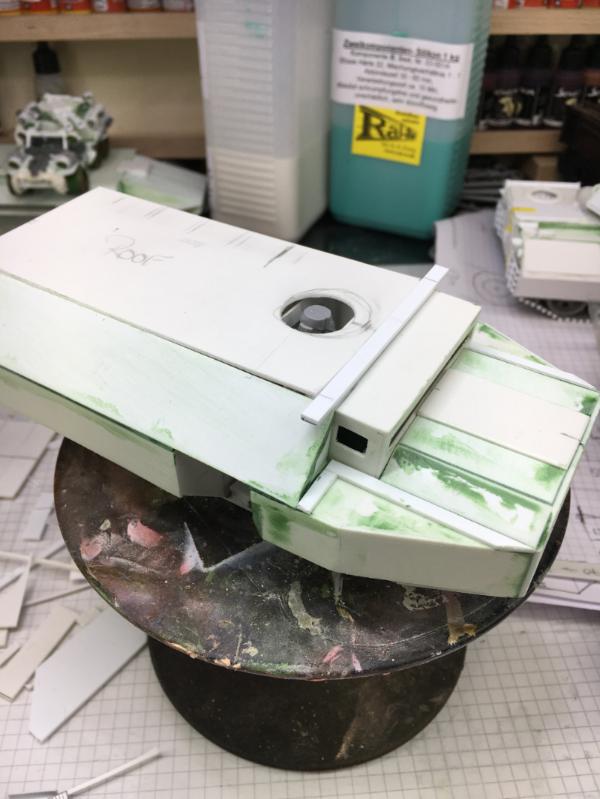
Cool look
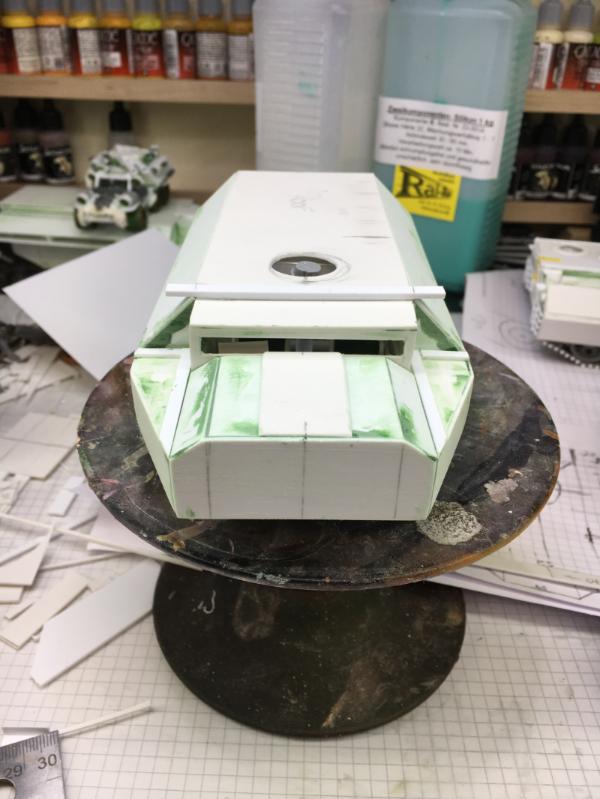
And the pieces spread out
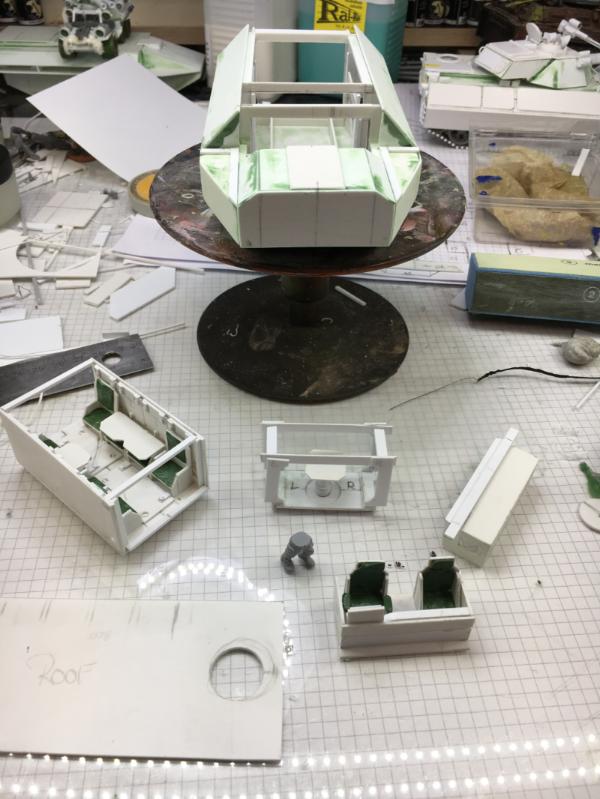
The next evening I cut the opening for the crew hatches and the raised turret ring for the MG.
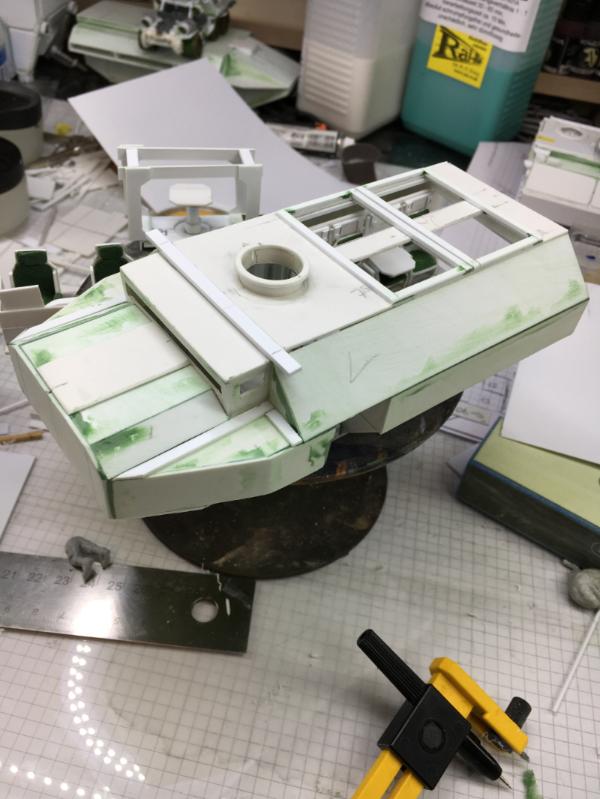
Last night I then worked on the suspension.
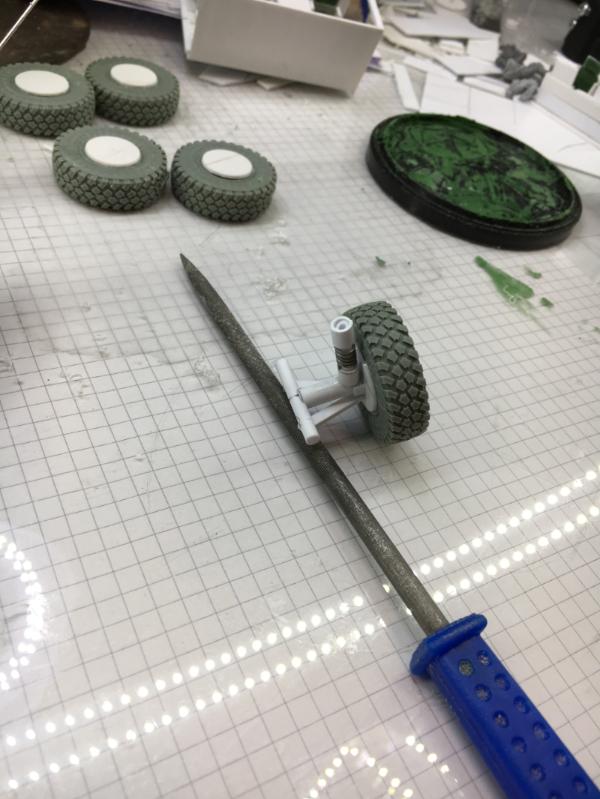
The first test mount

I finished and mounted 3 wheels...
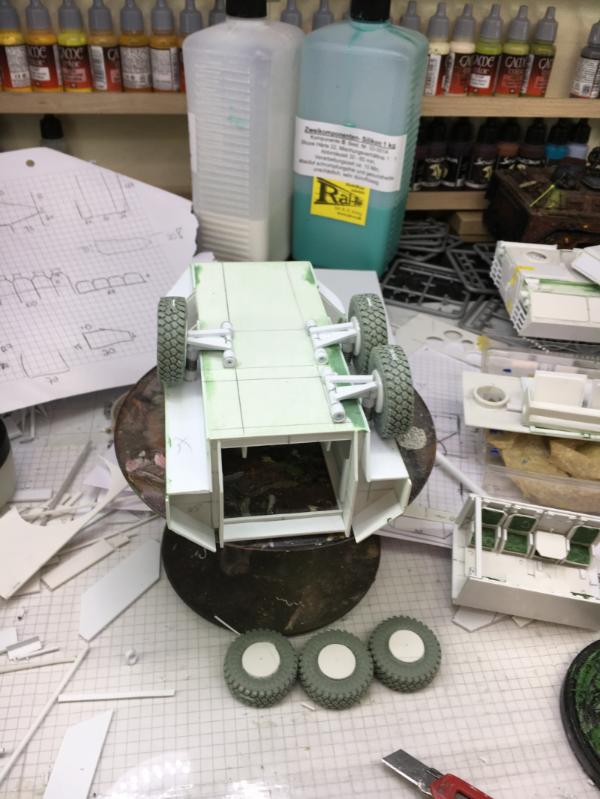
more to come
The front wheels will also need a different set-up
I hope you like today's update.
Cheers
Klaus
65595
Post by: Camkierhi
Genius and brilliance all round as usual, really great stuff yet again.
22192
Post by: whalemusic360
Klaus, not Santa wrote:xXWeaponPrimeXx wrote:I really love your diorama's. I can't wait to see how this one turns out.
Thnaks
I still don't know how this one develops either
I have a vague idea though ... and a plan
Any thoughts to including both the tank and apc on the same diorama? I don't recall seeing a diorama with two vehicles of that size in a shared scene.
32373
Post by: Klaus, not Santa
whalemusic360 wrote: Klaus, not Santa wrote:xXWeaponPrimeXx wrote:I really love your diorama's. I can't wait to see how this one turns out.
Thnaks
I still don't know how this one develops either
I have a vague idea though ... and a plan
Any thoughts to including both the tank and apc on the same diorama? I don't recall seeing a diorama with two vehicles of that size in a shared scene.
Thank you!
Well I did the "Meeting of Scouts" with two vehicles
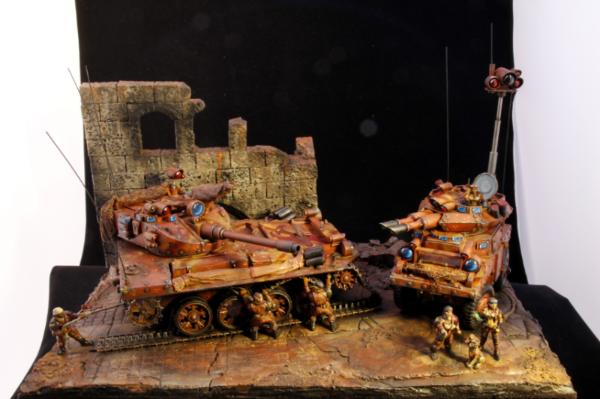
And, yes, it will be a diorama with both vehicles on it. But most likely not an action diorama...well, maybe
Camkierhi wrote:Genius and brilliance all round as usual, really great stuff yet again.
Thank you Cam!
Hi all,
beware of a 40 images update
I hope you are all fine and are now back into a normal working pattern and you're all OK.
I used my last vacation days as much as possible, so this is a rather big update.
Continuing from the last update I mounted the last rear wheel and then started to mount the front wheels
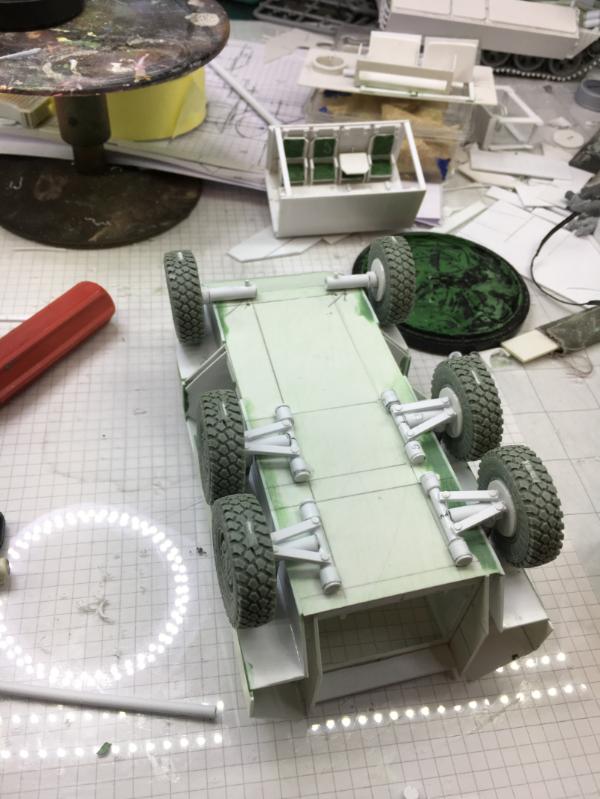
As mentioned I needed to build a different mount to allow steering.

My solution is relatively crude and simple

but it works

And so the ALALA is now wheeled

and ready for completion.

To protect the front axle I added another armor plate

Next was then the first side door
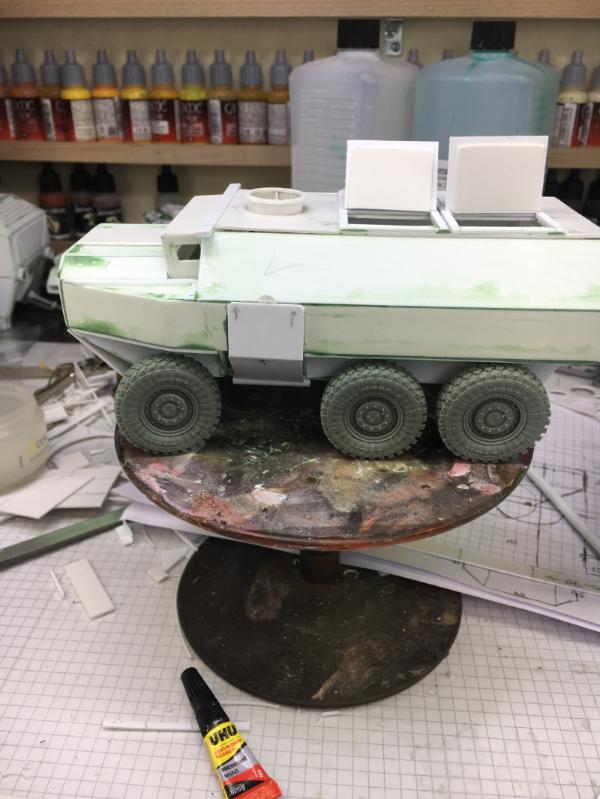
In the diorama it will be open
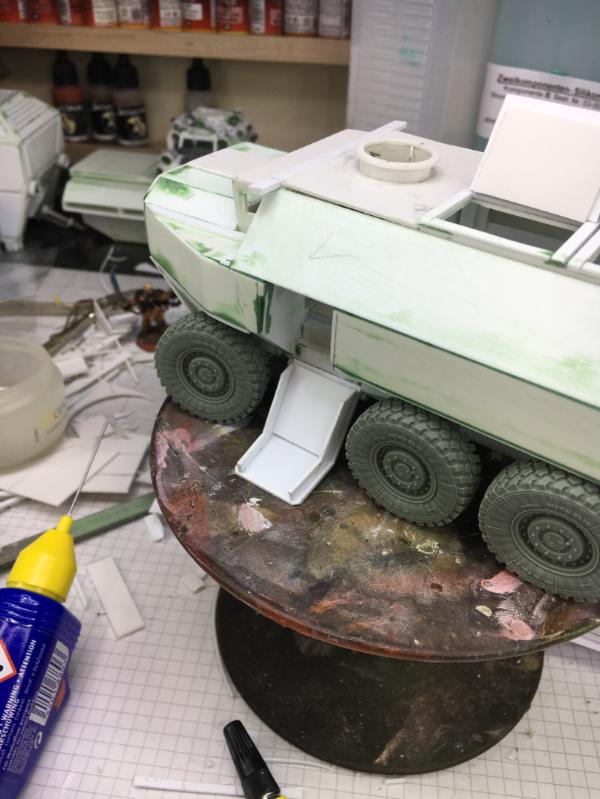
so I added steps to it
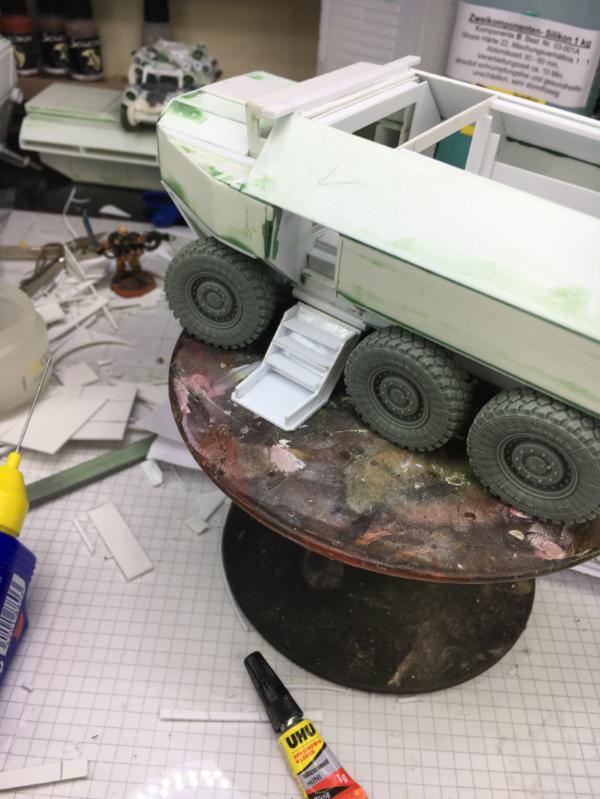
and made sure it can still be closed.

Then I added a frame around it

and repeated everything on the other side.
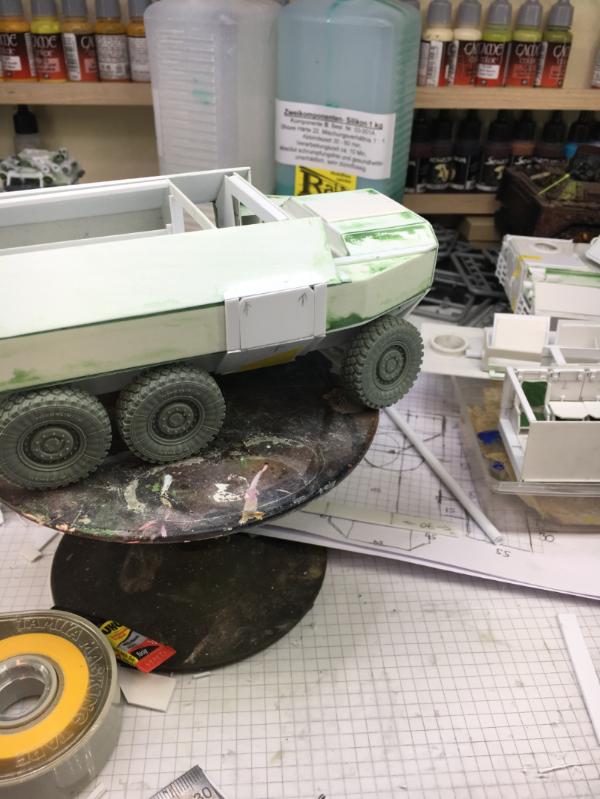
With the side doors completed I started the rear ramp

This will also be open in the diorama.

The following evening I sanded the doors and frames.
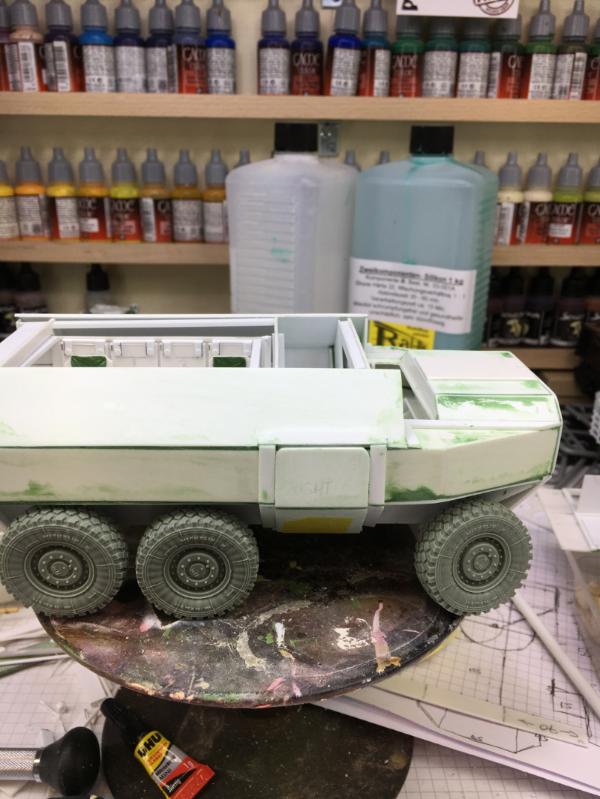
For the drivers cabin I had to include the windows

I'm not sure if it will ever be visible that there is clear plastic...especially after adding the armor shutters.
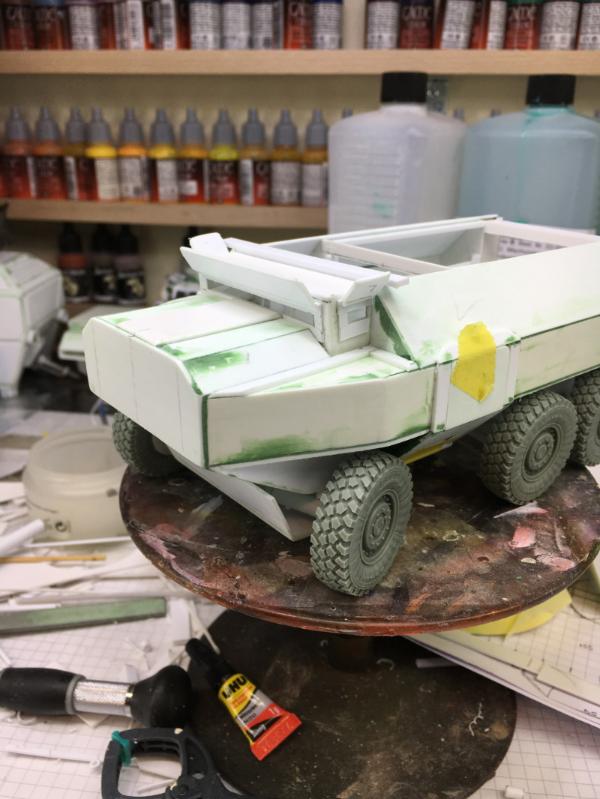
Since I didn't really fancy the large armor plate for the front, I replaced the steering protection with a smaller armor plate

I think this looks better now

Even though the ALALA has large storage compartments on the inside, I still added storage racks to the outside

They just add a bit more flavor - especially once equipment will be stored in them

The following evening I began to build the armament for the ALALA.
Instead of a MG it will be armed with a Automatic Grenade launcher ( AGL), like the US Mk19.
The mount is a bit stronger than for the MG

Since some of you were asking for more build images when I did the MG, here are some images of the AGL build.
First I glued some sheets of plastic card together (5x15mm)
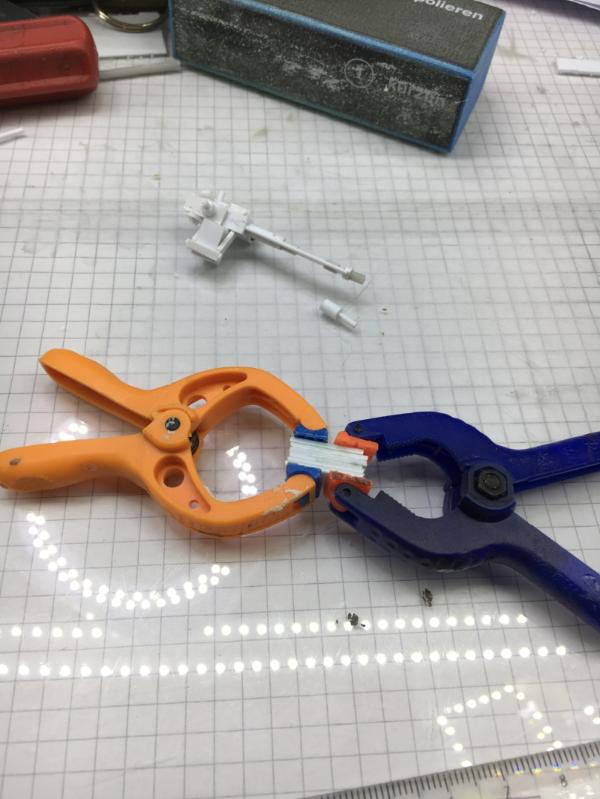
For the barrel I wanted to have a muzzle break, and since the next bigger piece of pipe would be to thick, I wrapped a thin strip of .25mm plastic card around it.

Just 2 or 3 layers are enough

and for decoration another, thinner Strip

Barrel and muzzle break

Once the sheets for the base block were cured I sanded them down to a nice solid block
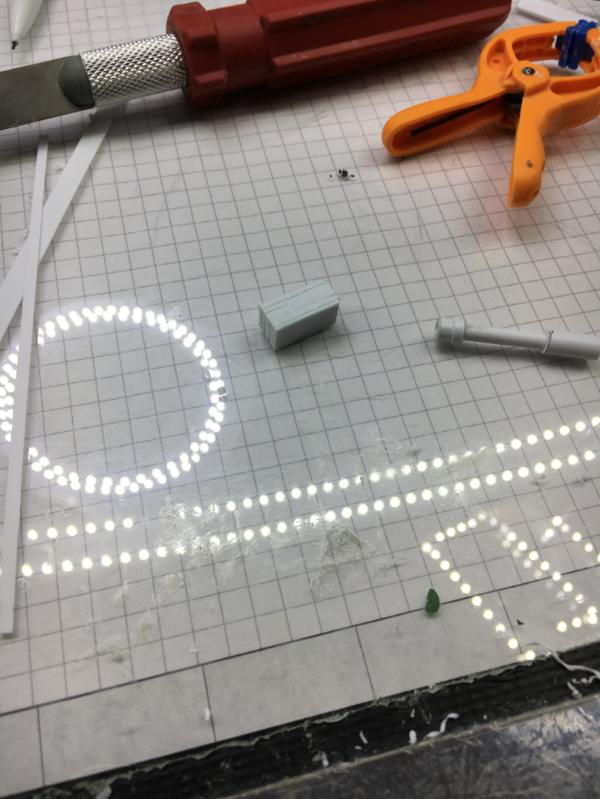
and started to add some details

and built an ammo box for the grenades

together with a mount
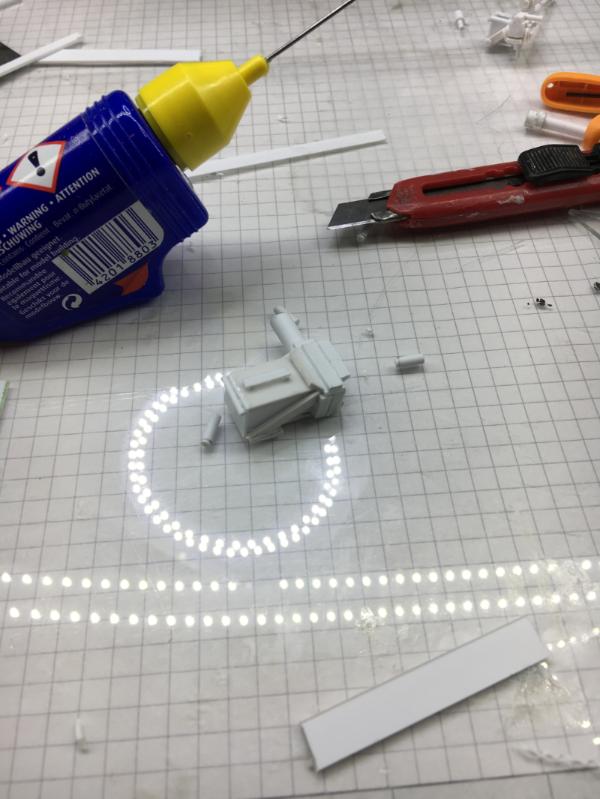
Fits nicely to the ALALA

It still needs the handle/trigger section, but that will most likely come with the gunner/trooper manning it.

Compared to the MG you can see the larger ammo box and thicker barrel

Finally it received a sight.
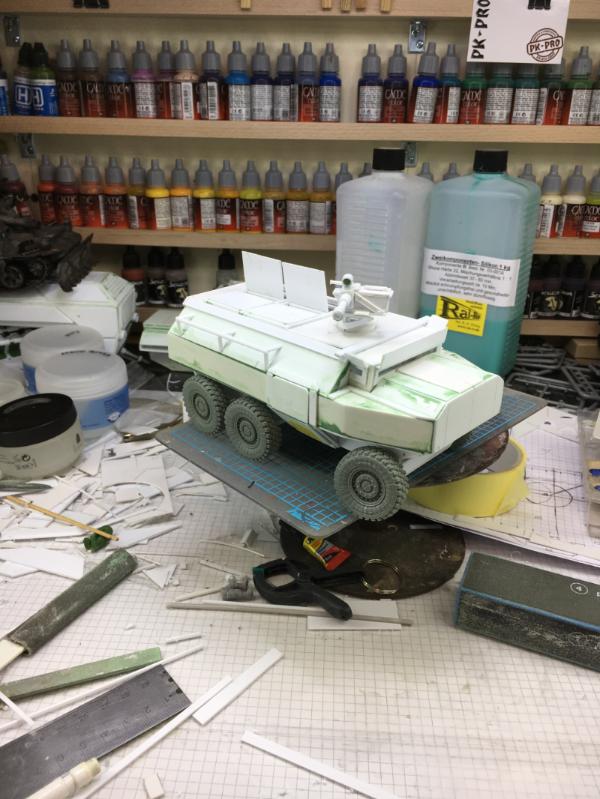
The following evening I added the locks for the troop hatches
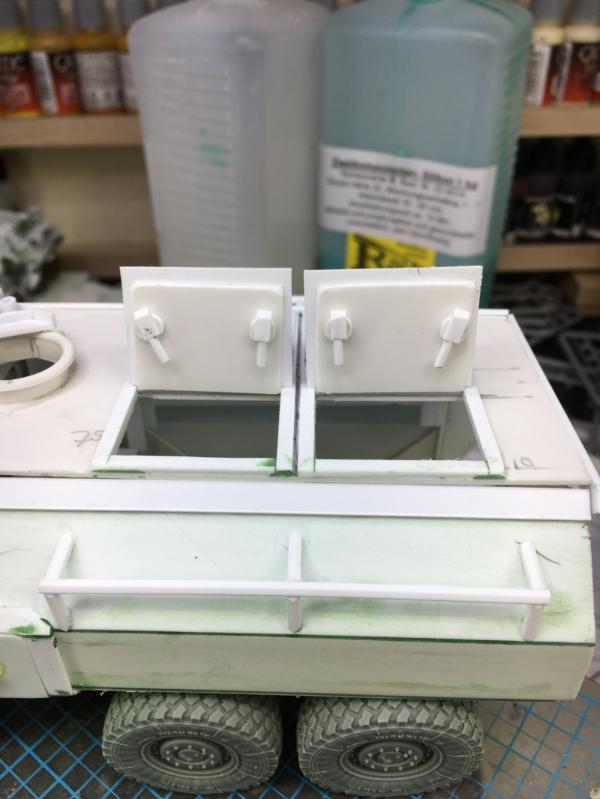
and started to build the headlights
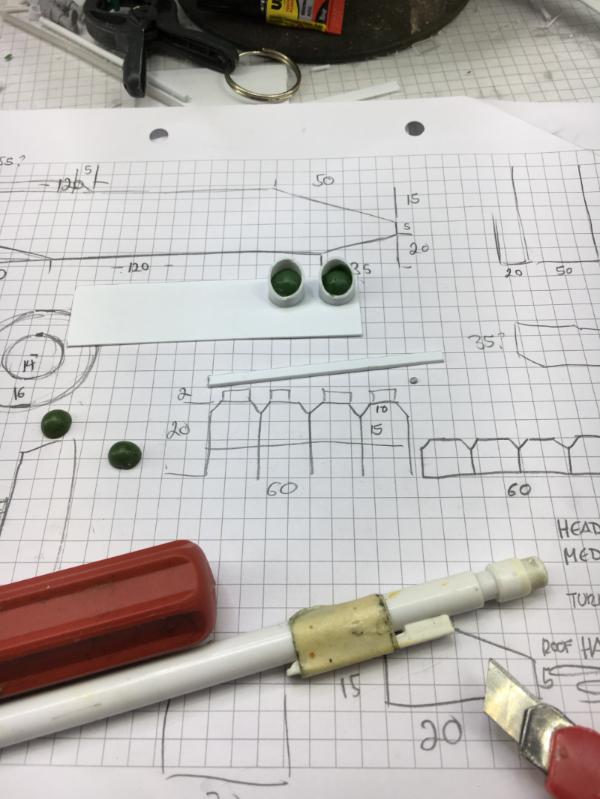
The gunners position got its hatch

and the side doors got handles and openers

And this is as far as I got
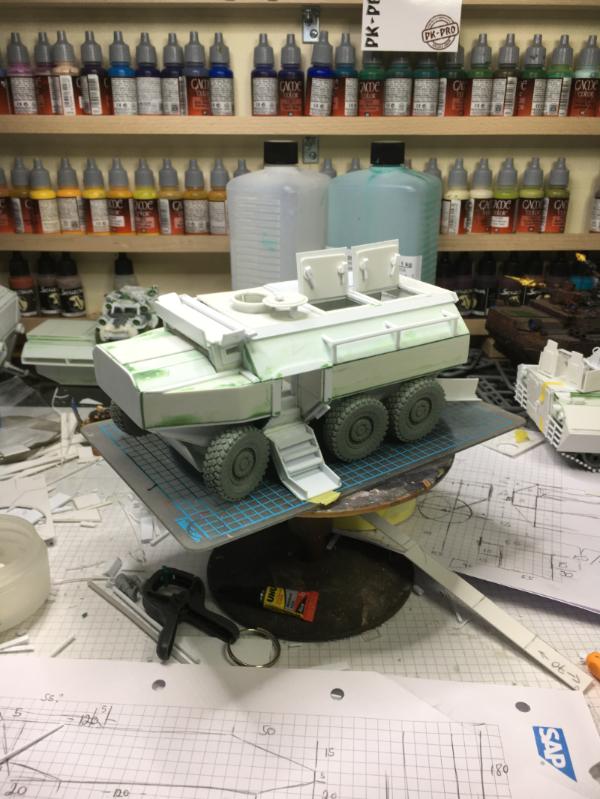
I hope you like the update and look forward to your feedback, comments and suggestions.
Cheers
Klaus
106010
Post by: Meer_Cat
What a marvelous New Year's present- you really got a lot done! The overall shape and arrangement puts me in mind of a South African Buffalo- but yours has so much more real-world functionality. Absolutely _love_ the idea of the side door/exit/ramp that allows crew to un-ass the vehicle from more than one choke point- that little gem surely would have come in handy more than once in my career!
Always a pleasure to come here and learn new things (like layering styrene and then carving it- now I have to try it out!)
65595
Post by: Camkierhi
Really excellent yet again.
With the "visors" up like that it looks like it has bushy eyebrows, kinda russian for some reason.
Loving the detail work, like the handles and locks. For the body of guns I tend to make a box rather than solid blocks, but I should imagine it is a nice solid and sturdy construction this way, might have to think this one over for next time.
32373
Post by: Klaus, not Santa
Thank you Cam and Cat ,
thank you all for the feedback and comments.
Some of you have pointed out, that the low reaching side doors are a hazard - especially in an armored assault, where the ALALA would potentially still be rolling and the doors already open for exiting troops.
Even though from the layout the main troop exit would be the rear ramp and the side doors are more for the gunner, commander and driver I do see the point, so...
"It's only a little cut" the doctor said
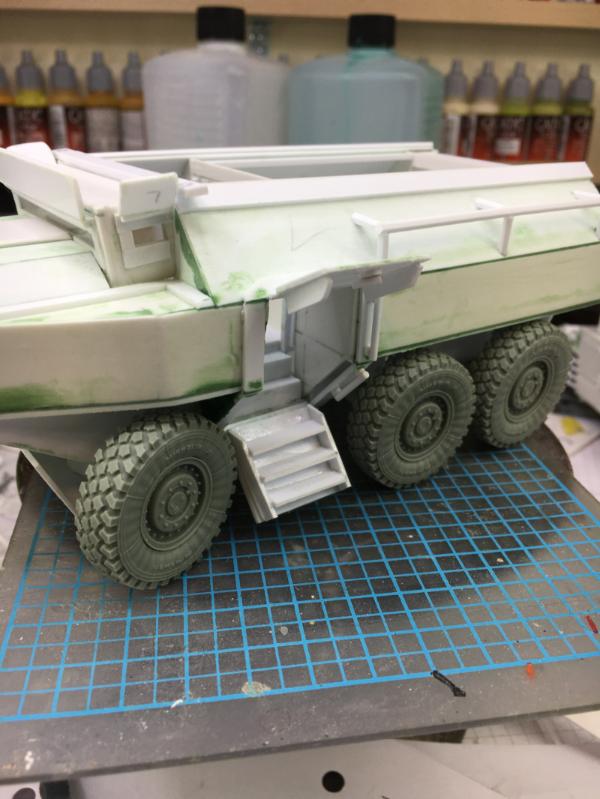
Actually I do like the new look of the door
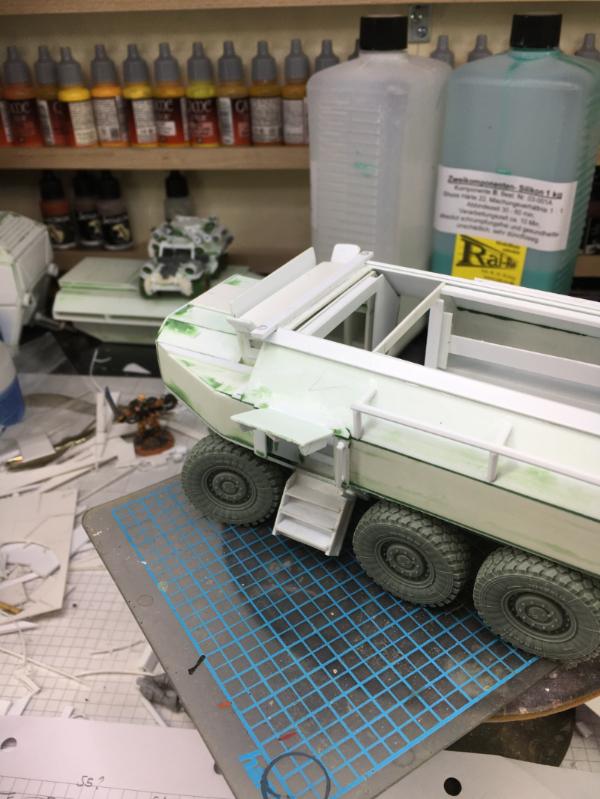
Once the doors were done I added access panels to the storage compartments
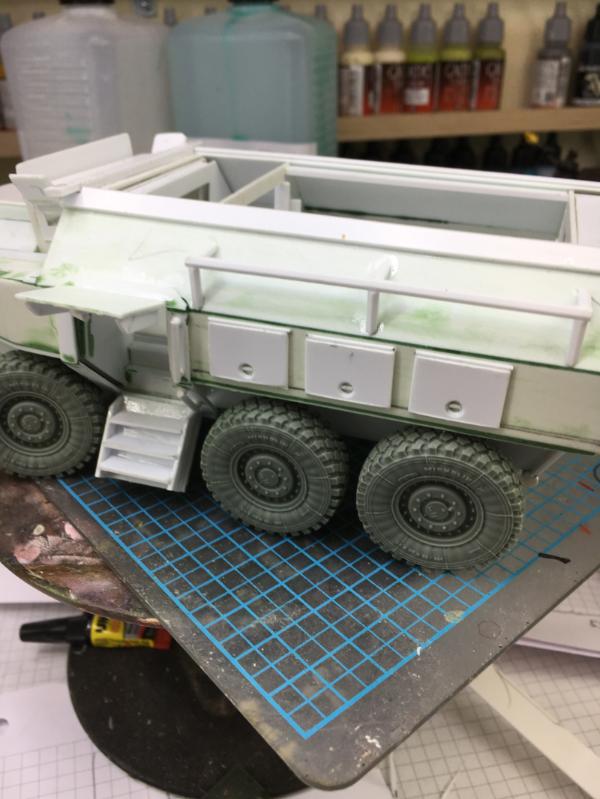
and the headlights.

That evening I also added the rear and secondary lights.
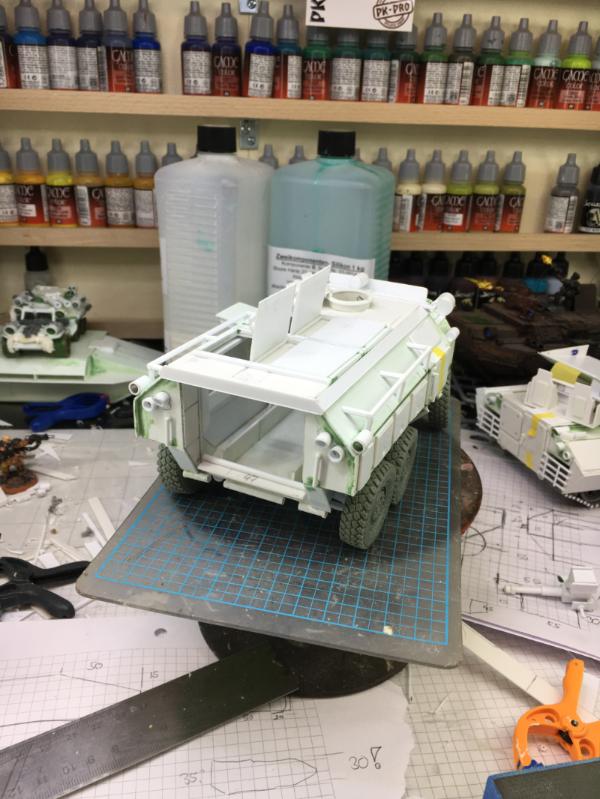
The following evening I added sights and sensors

Including a sight for the driver in case the armor shutters are closed
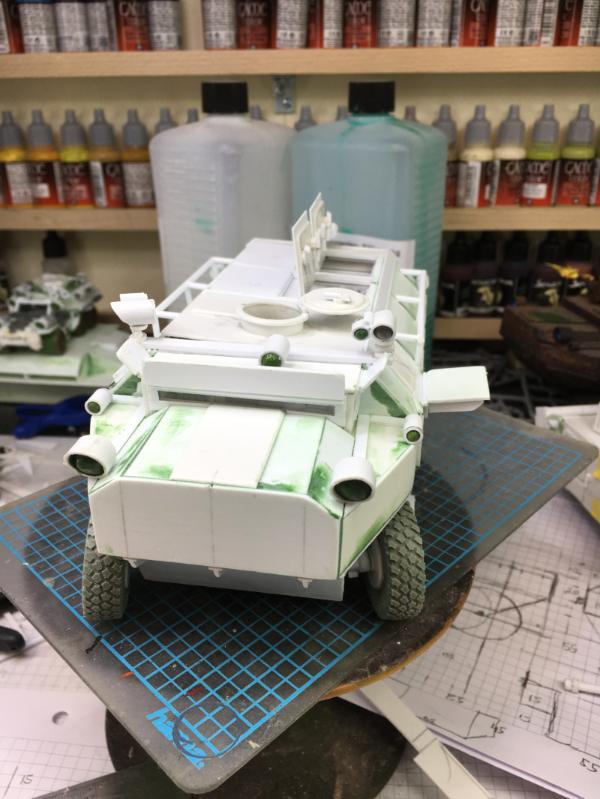
Rear sights
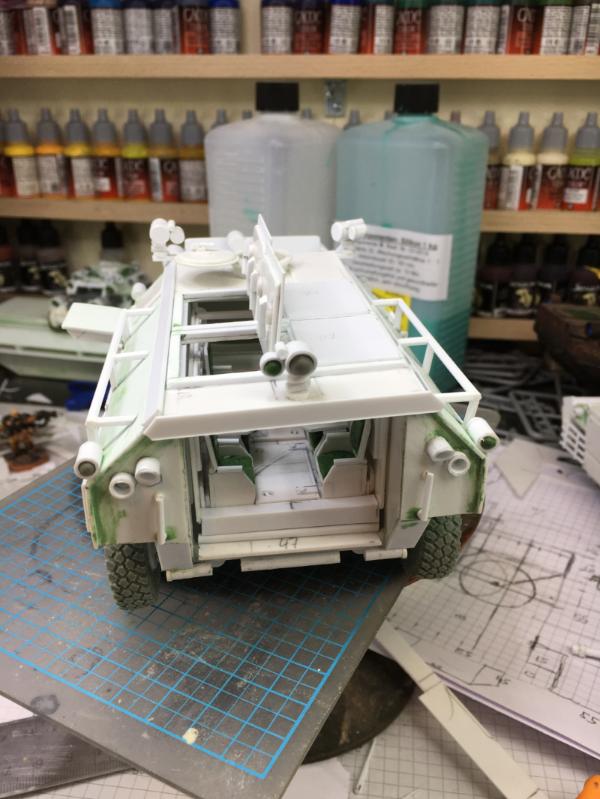
Antennae - they are not glued in place yet, that's why they are a bit wobbly

I also added a bunch of small hooks and tie-downs

The sides of the nose also received ornaments (parchment style)


Ready for rivets!

And the final images with rivets

I like to call it done

Though I will add packs and accessories
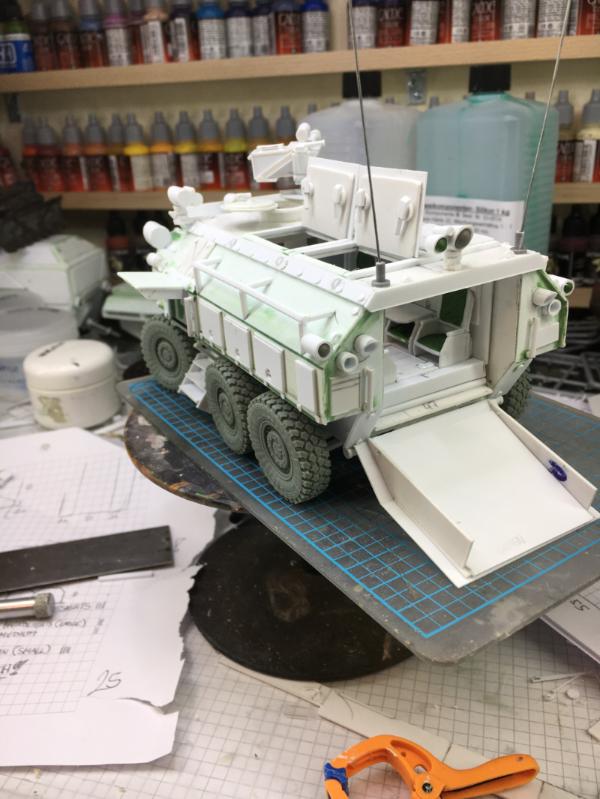
once it is in the scene and the troopers are with it.

Speaking of the scene
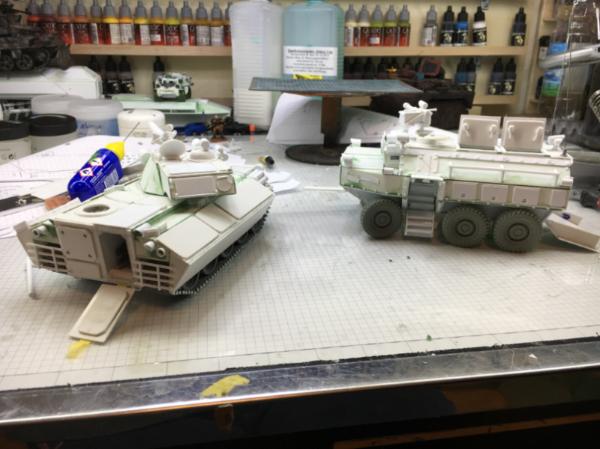
This is pretty much the set up I have in mind for the scene

I think they look good together.
What do you think?
Cheers
Klaus
116546
Post by: War Drone
Ausgezeichnet, Klaus!
You are utterly insane
119607
Post by: Oshii
Man, this is amazing, awesomeness at every point. I was thinking about making my own attack bike for 40k, wanted to go easy, but your works inspired me to make it properly. Thanks for sharing your stuff!
18980
Post by: Arakasi
Awesome work. The back ramp looks a little unfinished though? I was originally thinking maybe adding tread plate - but looking at some reference pictures, bars should do it (unless you want to add an access door too )
32373
Post by: Klaus, not Santa
War Drone wrote:Ausgezeichnet, Klaus!
You are utterly insane
I take this as a compliment
Thank you Mate!
Oshii wrote:Man, this is amazing, awesomeness at every point. I was thinking about making my own attack bike for 40k, wanted to go easy, but your works inspired me to make it properly. Thanks for sharing your stuff!
Thank you! Viel Erfolg with the bike - make sure to share your progress please
Klaus
Arakasi wrote:Awesome work. The back ramp looks a little unfinished though? I was originally thinking maybe adding tread plate - but looking at some reference pictures, bars should do it (unless you want to add an access door too )
Thankj you Arakasi! Thanks for pointing out - I had indeed planned but forgotten the steps.
Thanks!
Hi all,
thank you for the feedback, comments and suggestions!
Since the last update I added metal grilles to the storage compartments.

And as some of you pointed out, I forgot to add footing to the ramp. So I added these plastic strips.
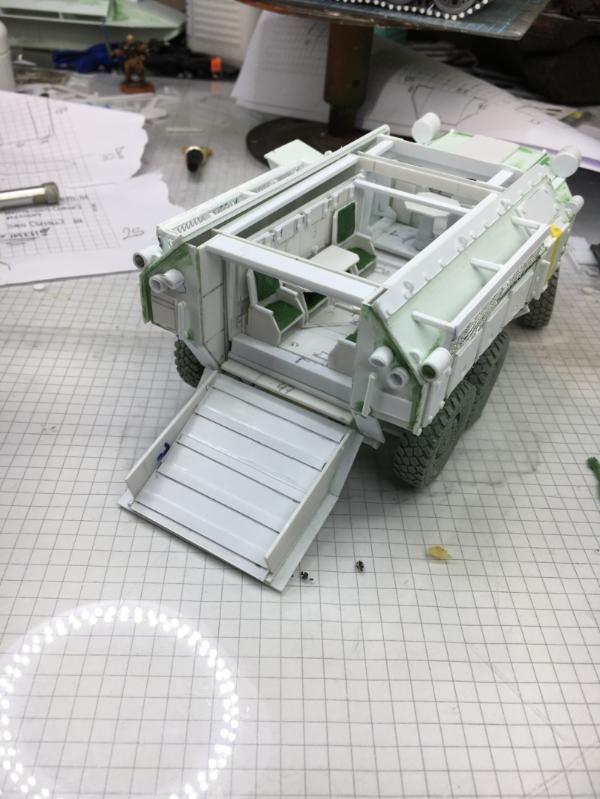
With the updated ramp and storage grilles it is pretty much done
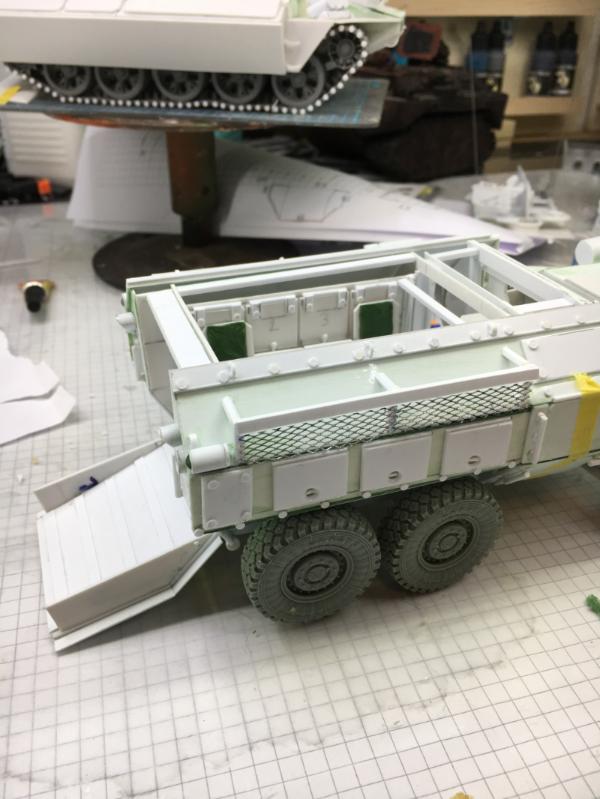
So it was time to look at the actual scene.
My intention is to do another painted background to give the scene more depth

And to make it more interesting I also added some height to it.
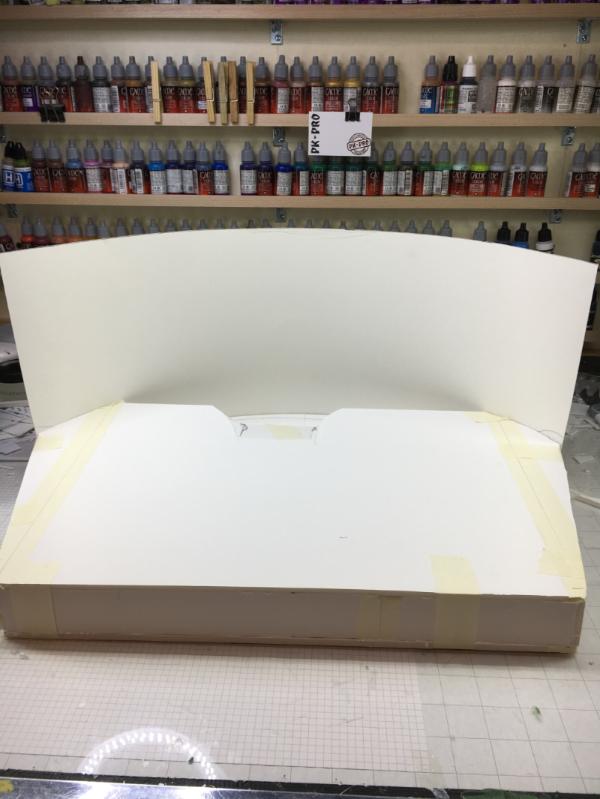
The scene will be an observation post on a ridge line over a valley
I think this will look pretty cool....hopefully
To flesh out the observation post I added two walls - one looking like regular masonry and one like pored concrete
Even though the vehicles will obscure most of the walls

The actual observation post will be a simple two story pillbox with some sensors and stuff on the roof
With a whole load of plaster

I think this gives the scene quite some depth
Here's a quick photoshop preview of what I imagine...
So what do you think?
Cheers
Klaus
17738
Post by: Briancj
Das sieht gut aus!
--Brian
106010
Post by: Meer_Cat
The setting and scene look great Klaus- the vehicles are wonderful builds. I got my handle/nickname in a scenario somewhat like this- although there were only walls, no pillbox structure. I was standing on the hood of my HMMWV scoping with binos and one of platoon sergeants drove up and said "You look like one of those critters that stand up on top of kopjes."
And I asked him "you mean meer cats?" To which he replied in the affirmative.
And I told him "Staff Sergeant, you are undoubtedly the only American I know who knows the word in Afrikaans for a small, stone hillock and can't remember the word 'meer cat'".
And it stuck.
Keep on buildin', brother! This one's gonna be great!
30344
Post by: monkeytroll
Beautiful build on the vehicle, and the scene looks great so far - the painted viewpoint should work really well to build the world.
62749
Post by: Dr H
Great work on the vehicles.
Looks to be a nice set piece too.
34191
Post by: fasterthanlight
Great work, as ever.
FTL
81303
Post by: Stormwall
Fantastic work!
32373
Post by: Klaus, not Santa
Hi all,
sorry for the long silence.
I had to interrupt my work on the EREBUS & ALALA diorama for one of my very rare client commissions. Unfortunately the commission went pair shape and now I have to fight for may reimbursement.
I know why I hate commissions and why I usually don't accept any...
Anyhow, during the break the "Shiflett Brothers' Sculpting Forum" ( https://www.facebook.com/groups/1114208771968434/) announced their new "Monster Rider Challenge" on Facebook.
Well, you know I love monsters and riders
So to vent frustration and to gather Mojo to continue the EREBUS & ALALA dio, I decided to join the fun.
In the WIP post ( https://www.facebook.com/groups/1114208771968434/2067876766601625/) you can see a lot of great ideas already!
The initial idea I had was "why not turn things around and make the human the monster?" and my sketch and first armature reflected this.
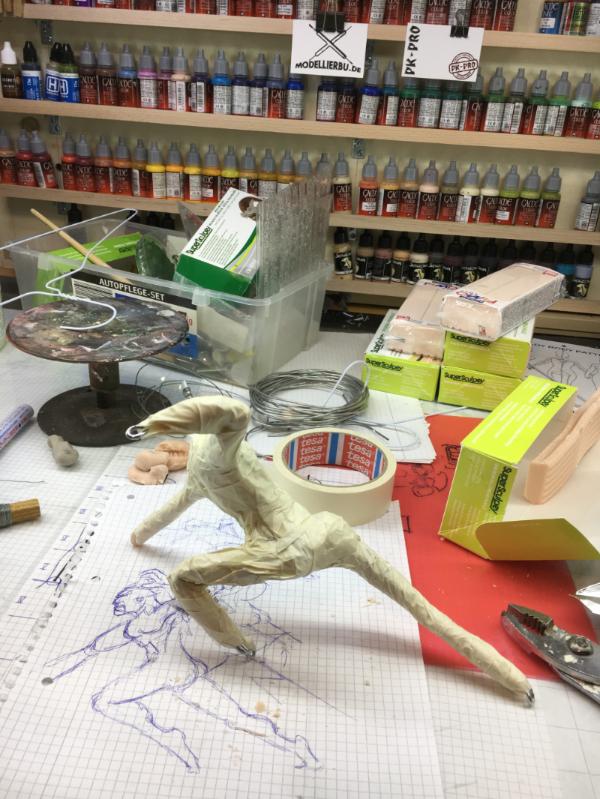
A basic human shape kind of running on all fours.
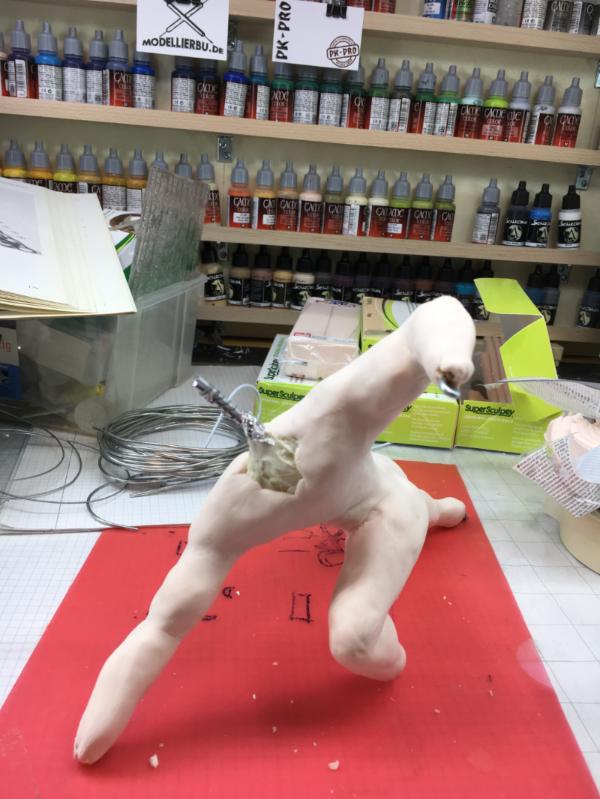
Maybe using the right arm to pound something, or to brace on something
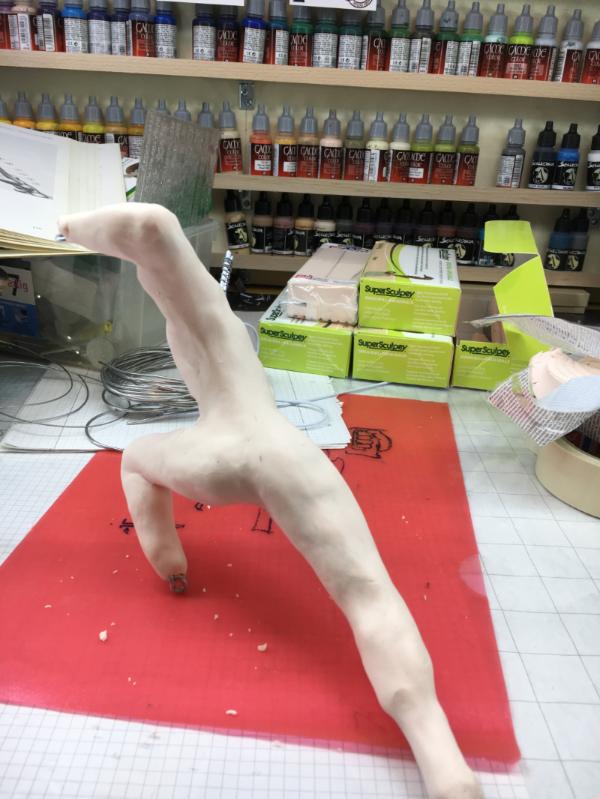
I wanted to have something dynamic
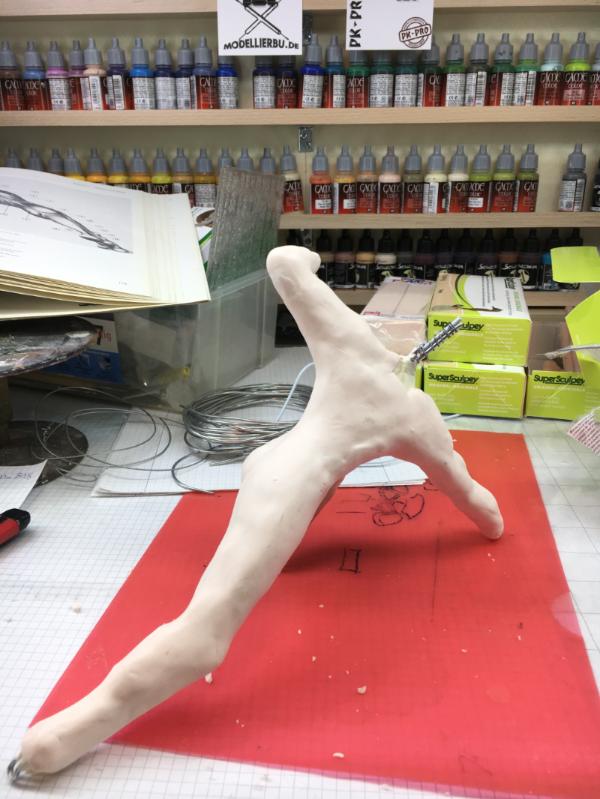
Well, dynamic it looked
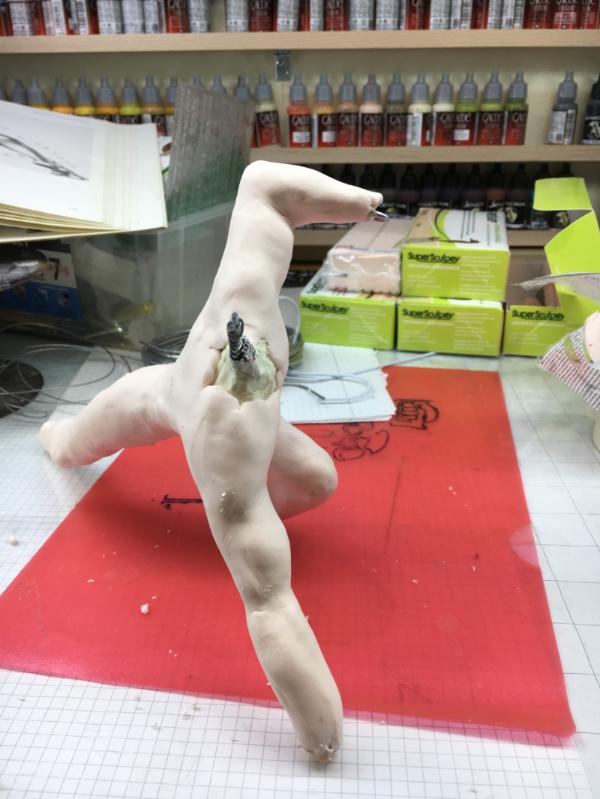
But after a nights sleep I realized that the upper torso was twisted way to much to picture a believable rider situation.
So I twisted the torso back and therefore twisted the right arm further back and up.
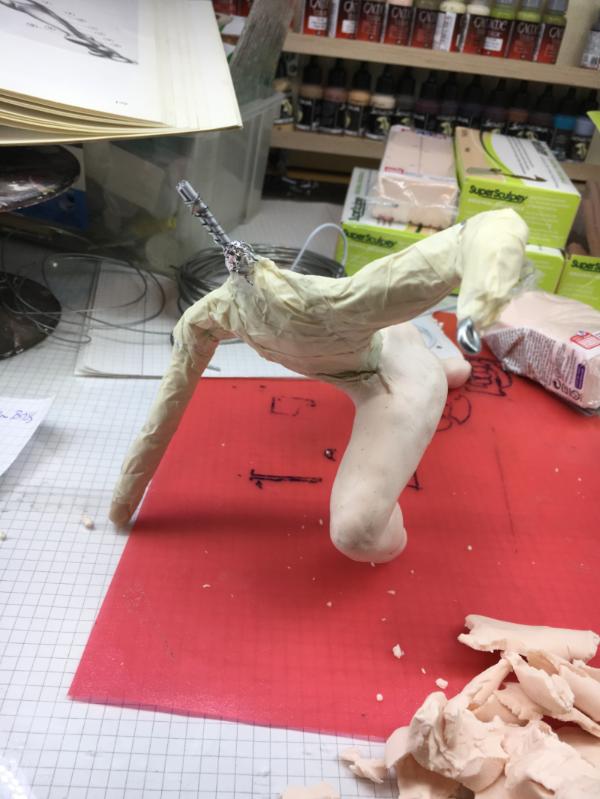
This looked better, but somehow not so convincing to me.
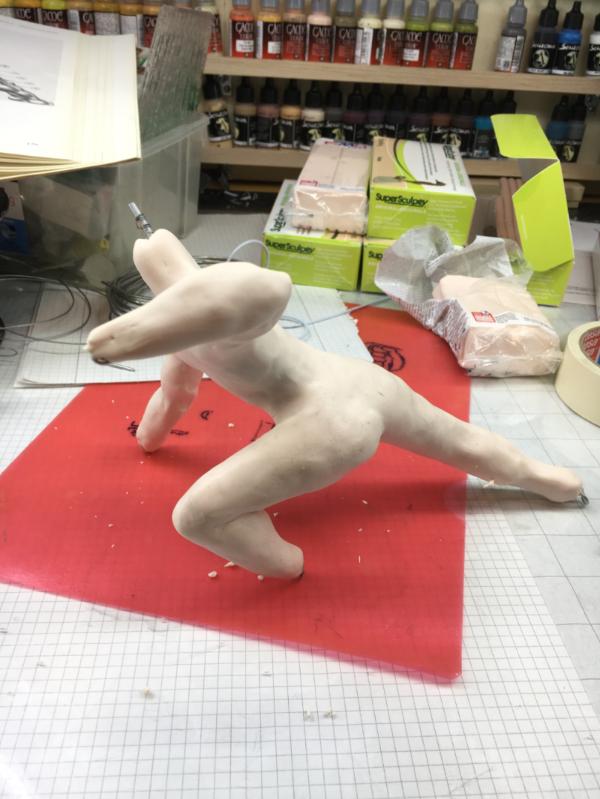
Letting it sit for two days and playing some ideas out, I decided "not a real human".
I had a kind of Frankensteinish idea...
Some more thinking about a nightmare composed of various creatures.
So "it" received some different legs
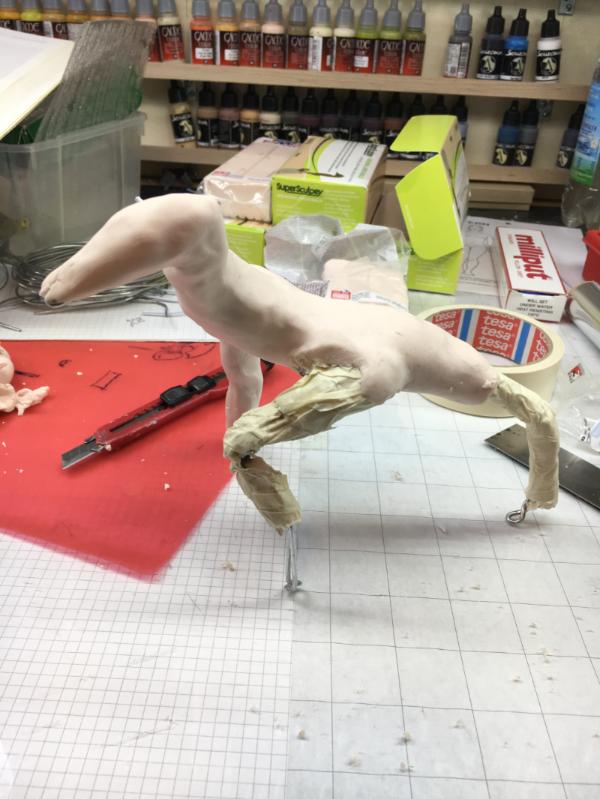
still not convincing - especially since I originally had a chicken leg and a bull leg planned - imagine that walking
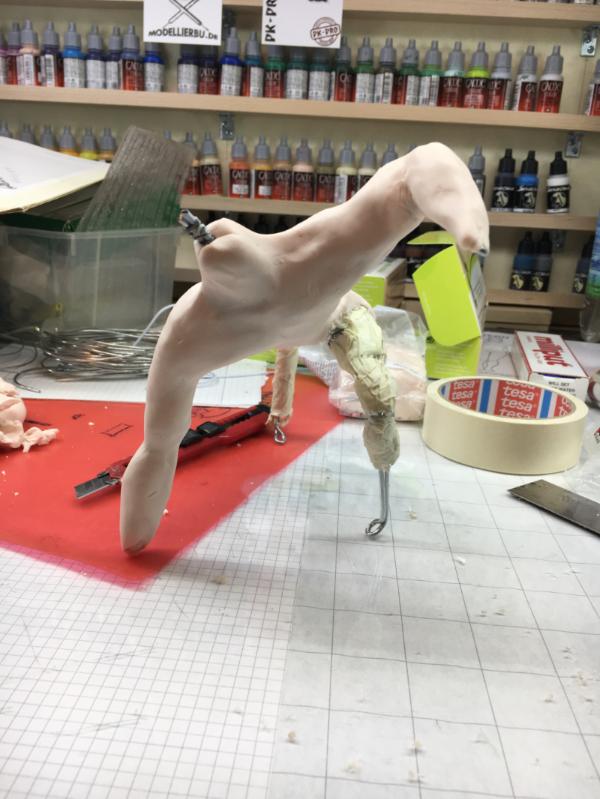
About to give up I left it alone for another two nights and then came up with this approach
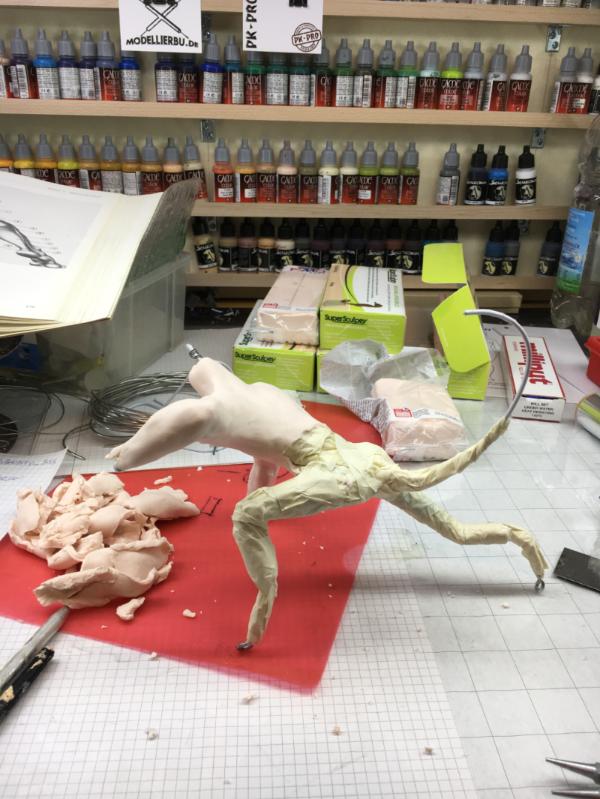
bulls legs and a scorpion tail.

The upper torso remained for the time being
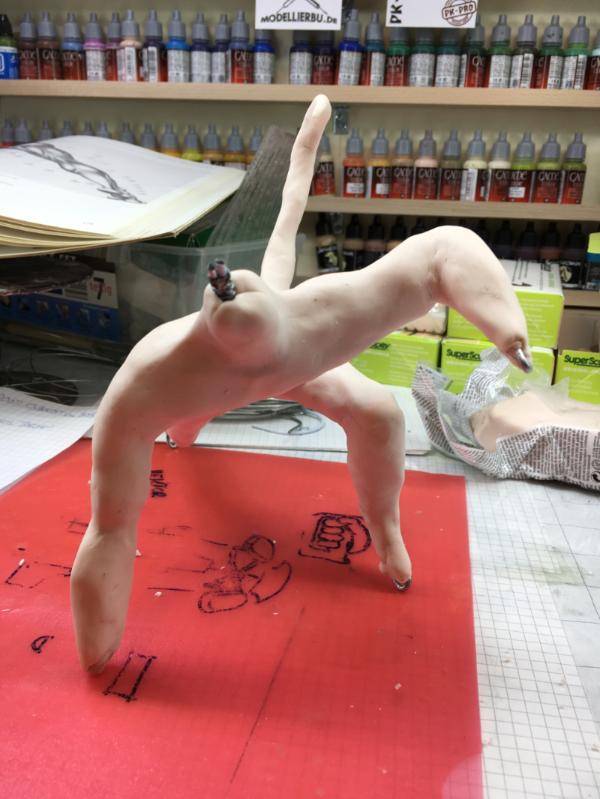
Not as dynamic as the initial concept, but still OK I think.
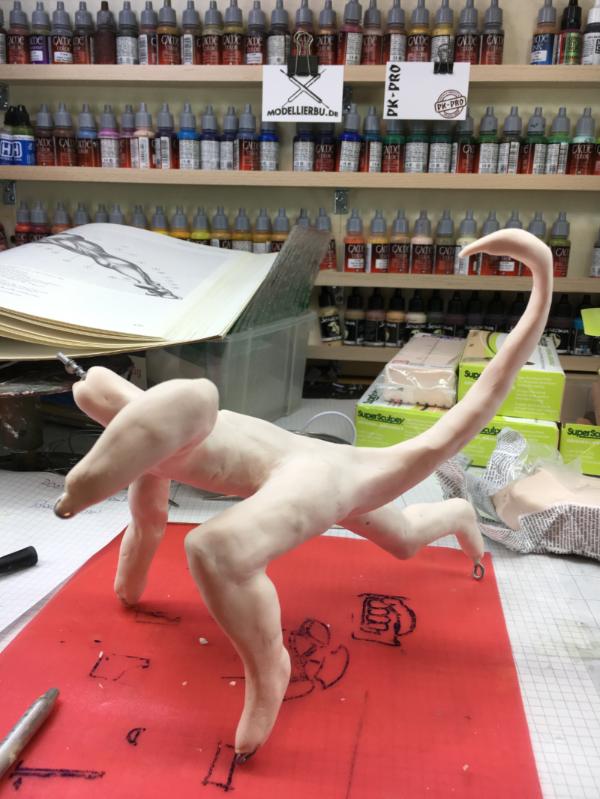
So I settled for that approach and burned the basic shape.
I kept the Frankenstein idea and now I have human-ish thighs and bulls lower legs
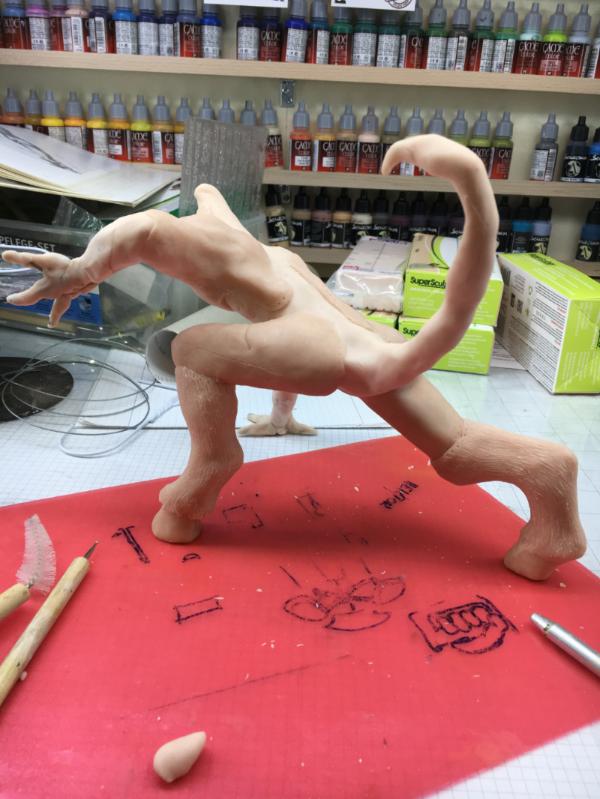
I also added stitching holes and deep wounds
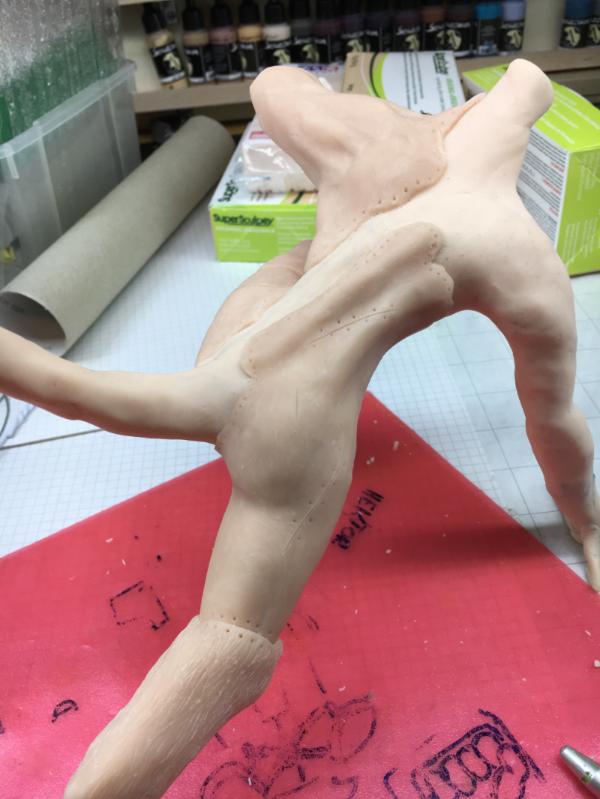
To emphasize the cobbled together nightmare, I exaggerated the upper arm, and it will get birds feet
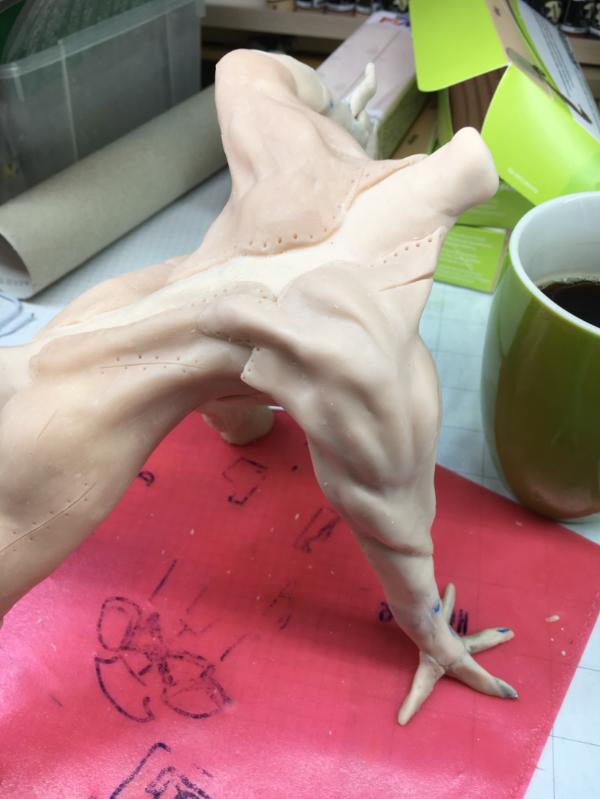
Hmm, could work out...
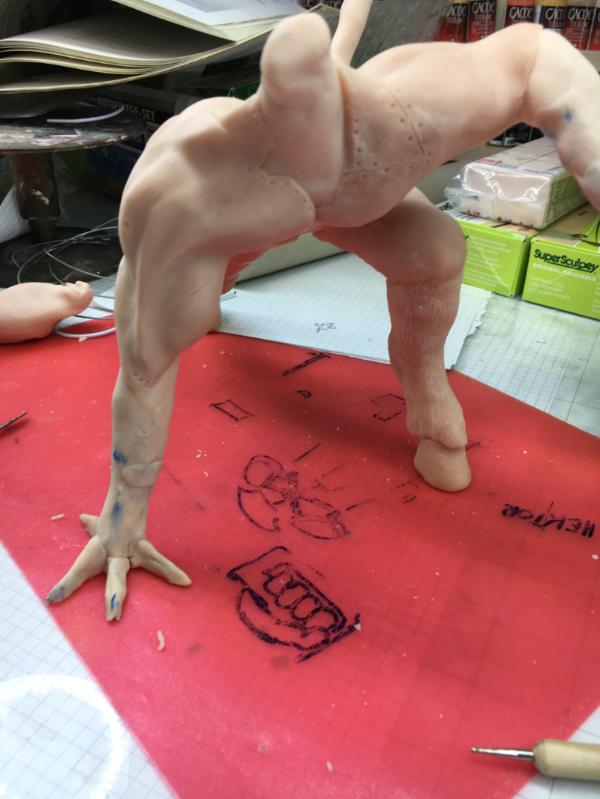
Next I decided to add some dragon-skin on the back
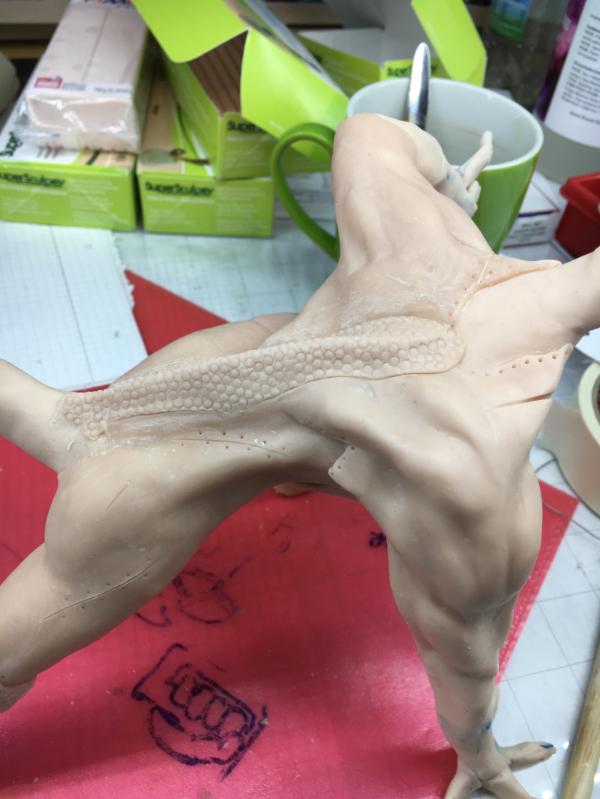
As you can see I'm "flying by the seat of my pants" again and am free-styling the pieces
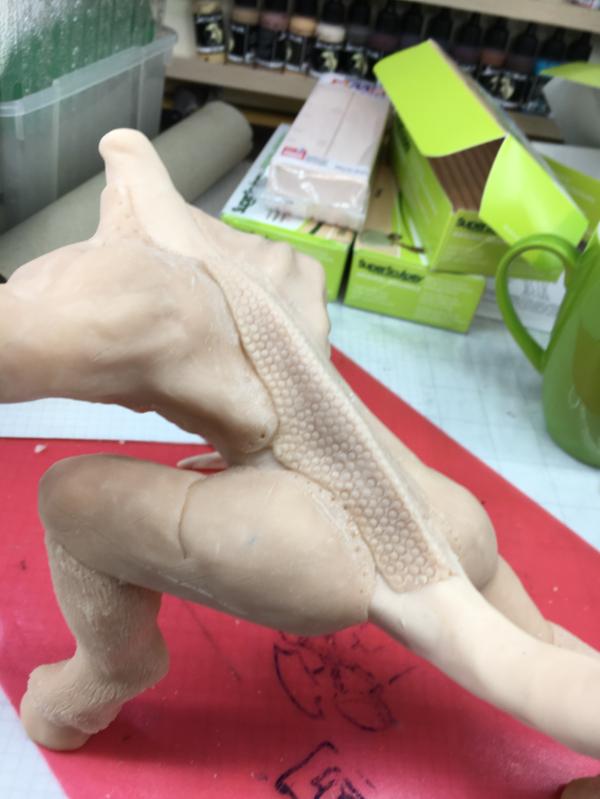
Last night I did the scorpions tail
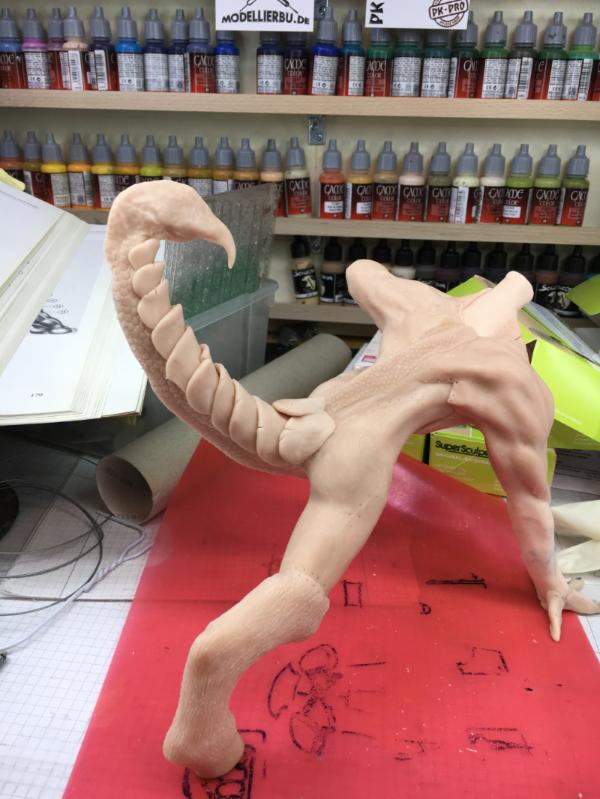
The underside has dragon skin and the upper side armor plates
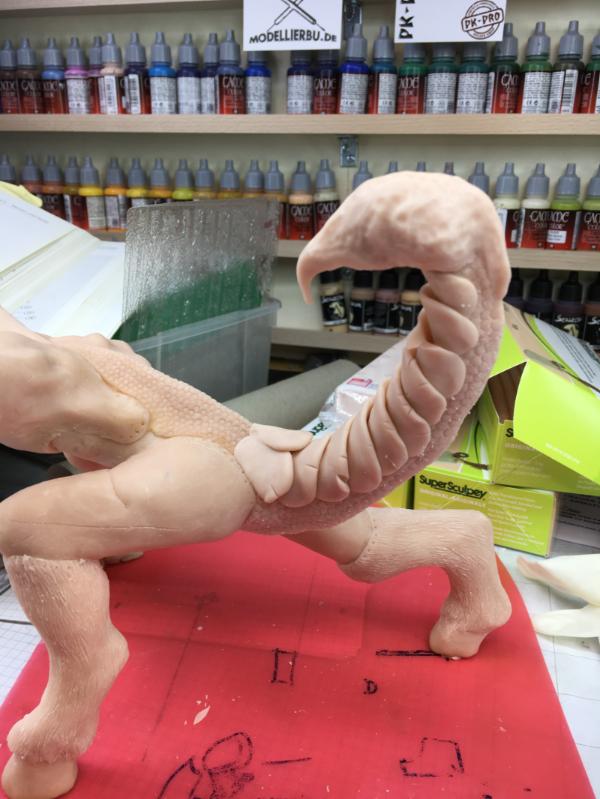
The situation I have now settled for is "it" stamping forward using his left arm to push itself off a pillar and the rider urging it forward.
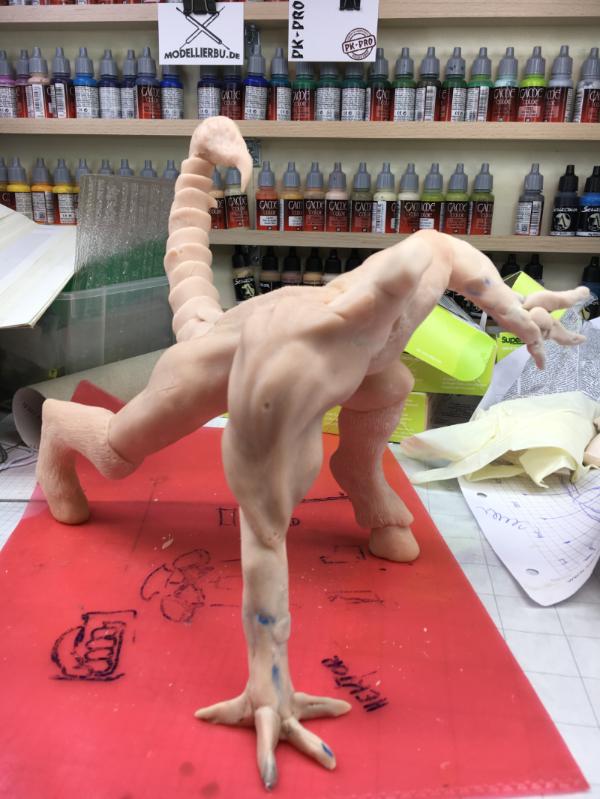
I have to admit that I'm still pulling blanks when I think about the head of the beast....
The lower legs will be birds/dragon feet.
Well, this is as far as I got.
Cheers
Klaus
36940
Post by: Anvildude
Remember that scorpion stingers are recurved, so they thrust forwards instead of down. I mean, fantasy, so not a huge issue, but if you're doing mish-mash of real-ish animals.
When you do the head, maybe add in some crab-style mouthparts.
32373
Post by: Klaus, not Santa
Anvildude wrote:Remember that scorpion stingers are recurved, so they thrust forwards instead of down. I mean, fantasy, so not a huge issue, but if you're doing mish-mash of real-ish animals.
When you do the head, maybe add in some crab-style mouthparts.
CRAP!
You're right :(
Hopefully I can fix the stinger...thanks for pointing it out.
As for the head I'm torn between a human head - maybe wearing a beasts skull (bird or bear or such) - or a Dragon-style head.
We'll see
Anyhow, last night I worked on the front paw and decided to do for Dragon-style, since I had the Impression a bird-style would be to ...spindely...
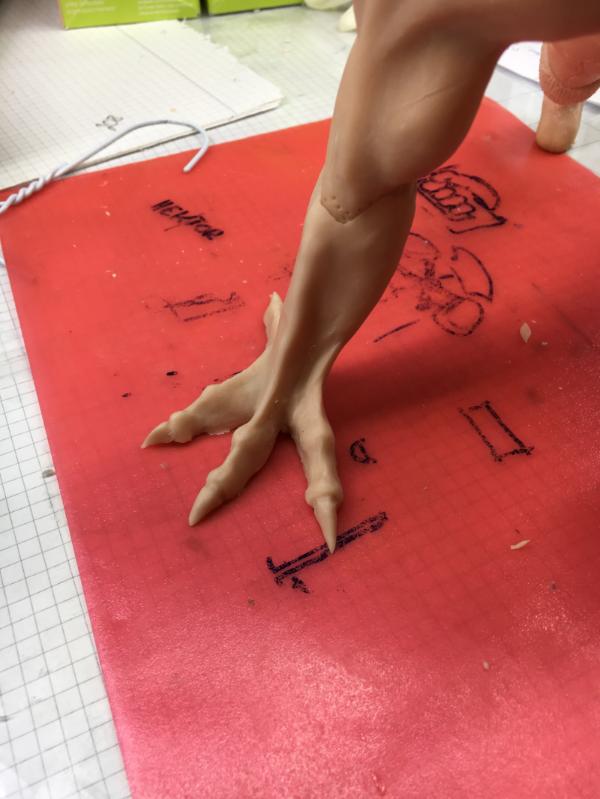
Once pleased with the shape I added the Dragon Skin pattern
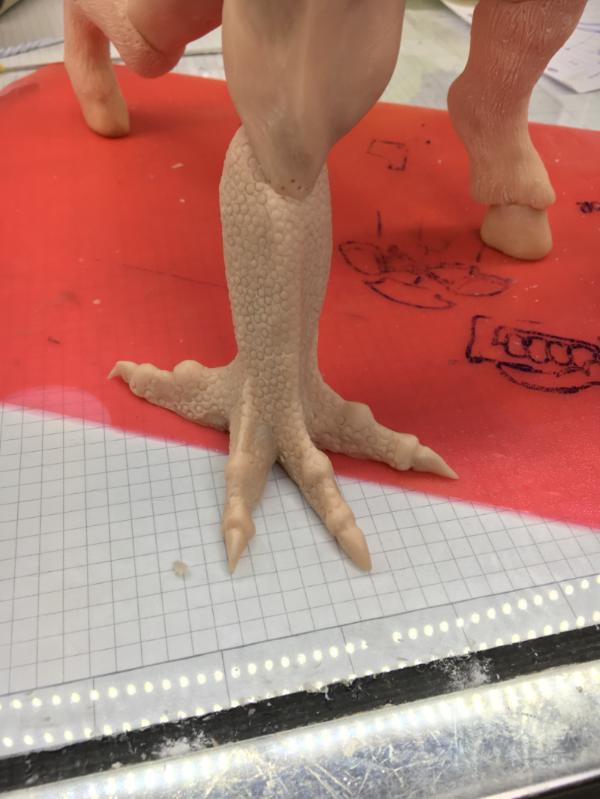
Yeah, I think this will fit well
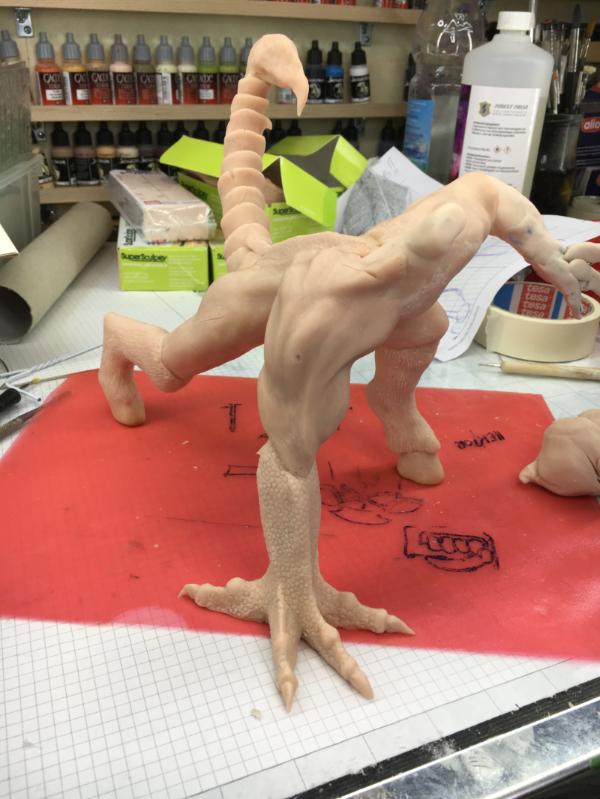
What do you guys think?
Cheers
Klaus
62749
Post by: Dr H
Good work.
How are you doing the scale texture? Looks painstaking to do each individually, do you have a "quick" method?
For head, I was going to suggest a bull's head, or maybe insectoid; something that doesn't show emotion, as many of the scariest monsters don't show emotion (blank staring eyes, neural, emotionless masks, etc...), but I had another idea:
2 heads. as it's stitched together there obviously has to be donors for those parts. Maybe the human wasn't willing. So you can have the human head in pity and pain, and then a dominant monster head...
or...if you want to keep the "human is the real monster" theme, somehow corrupt the average, non-scary, human head/face. Blank of emotion, no eyes, etc. or additional monstrous parts like split-open mouth with extra sharp teeth...
I'm just throwing out ideas now, with no consideration to sculpting, so I'll stop there.
Some things to think about.
18980
Post by: Arakasi
Two heads are better than one Follow DrH's "human is the real monster" looking intently forward, but have the non human head turned to look at the human head, as if to say " WTF are you doing?" / exasperated for not being in control and knowing exactly where the problem lies...
Oh - and sculpt is looking really impressive!
32373
Post by: Klaus, not Santa
Thank you guys!
Cool ideas you have there - Keep 'em coming please!
Last night when I came back to the model I realized it is a rather large front paw
But in the overall appearance it will balance out.
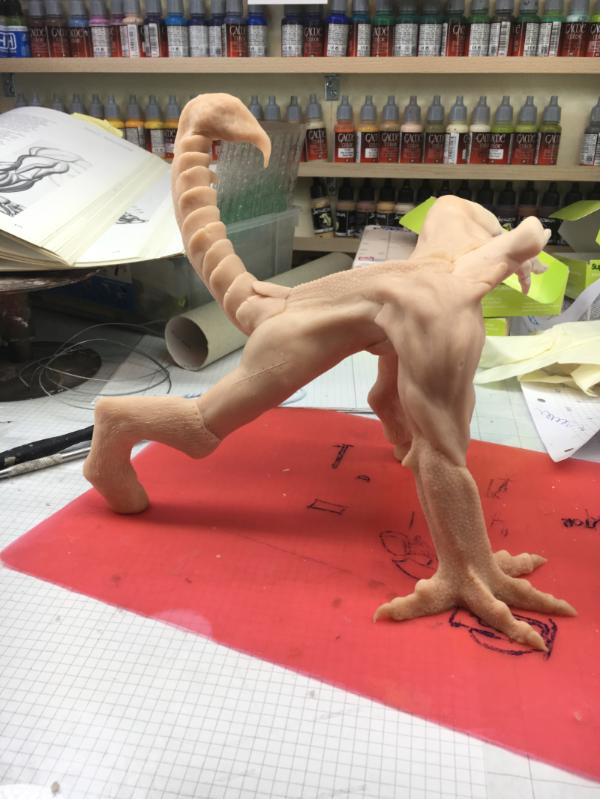
Dr H and others asked what I use for the dragon skin pattern.
I have a set of hexagon rods into which I drilled small indentations with the hand drill. When I press these into the sculpey it creates a nice reptile skin pattern.
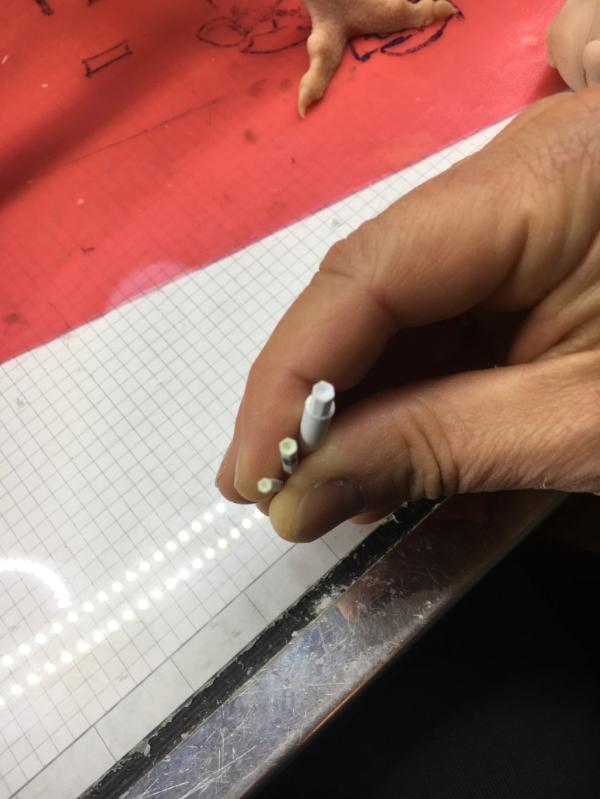
Looking at the overall appearance again, I decided to beef up the right thigh some more and give it a bit more mass
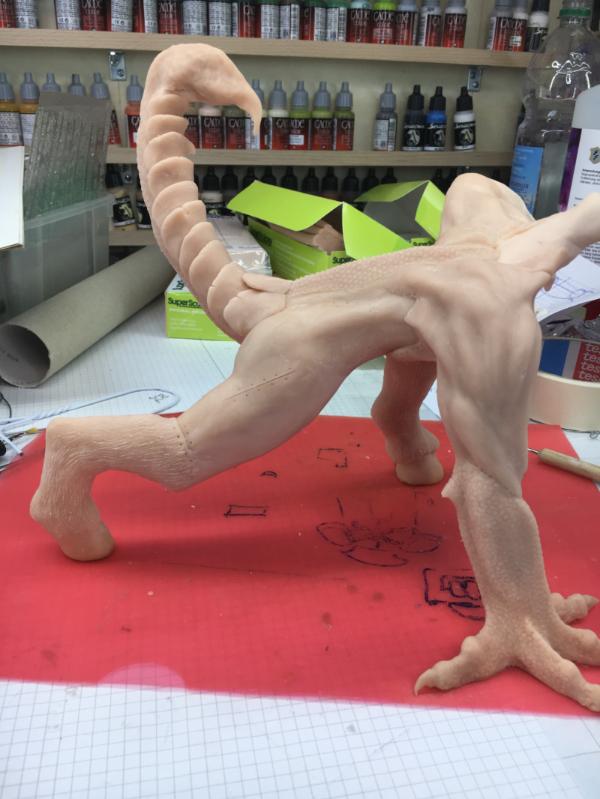
As Anvildude pointed out, the stinger of a scorpion is not pointed down, but rather forward. So I reshaped the stinger.
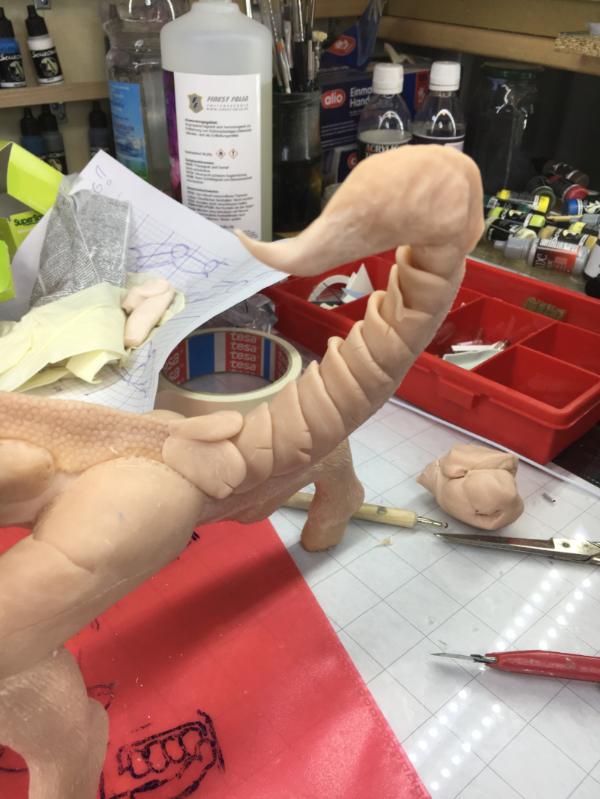
Last night I sculpted the left hand, propped up against a pillar
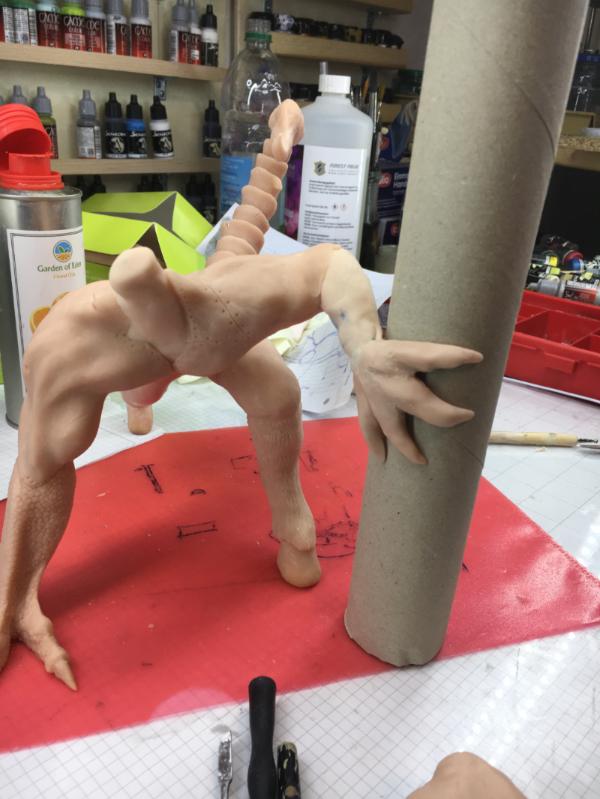
I modeled the appearance to look like sick, wild flesh
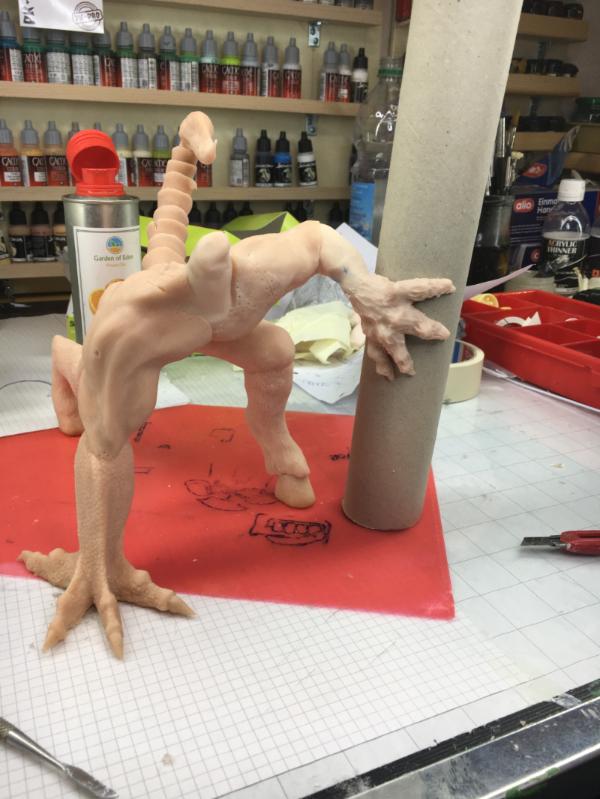
And since I had nothing better to do with the evening (LIE!) I experimented with some extra scales
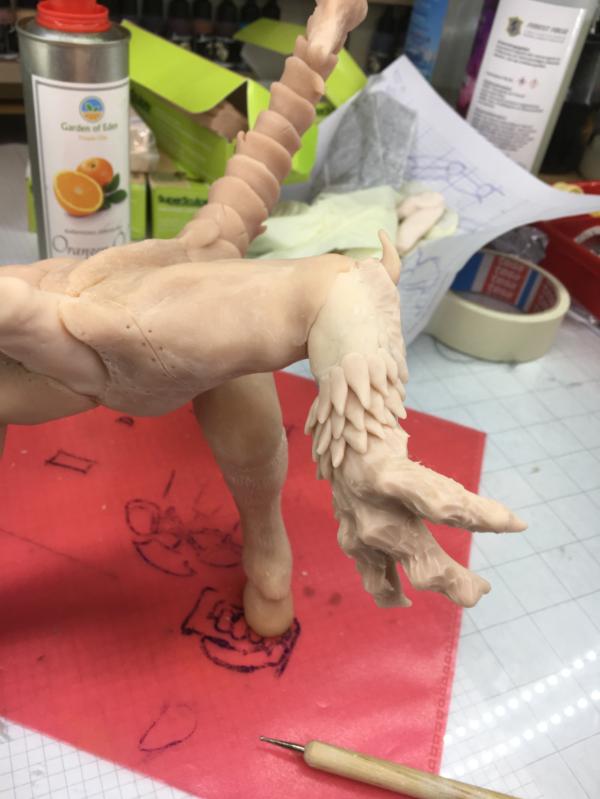
Each is formed individually - but I think this was worth it.

With this most of the creatures body is done
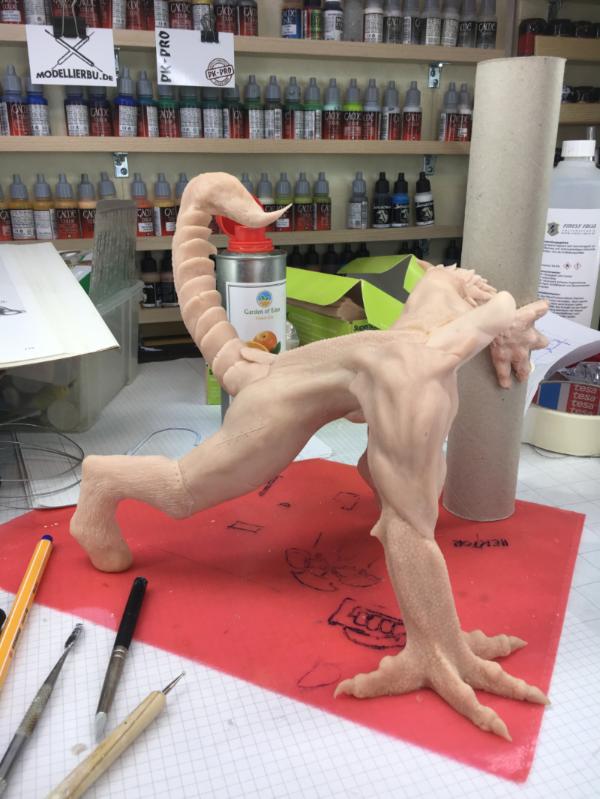
Still have to do the abdomen and neck, and of course the head
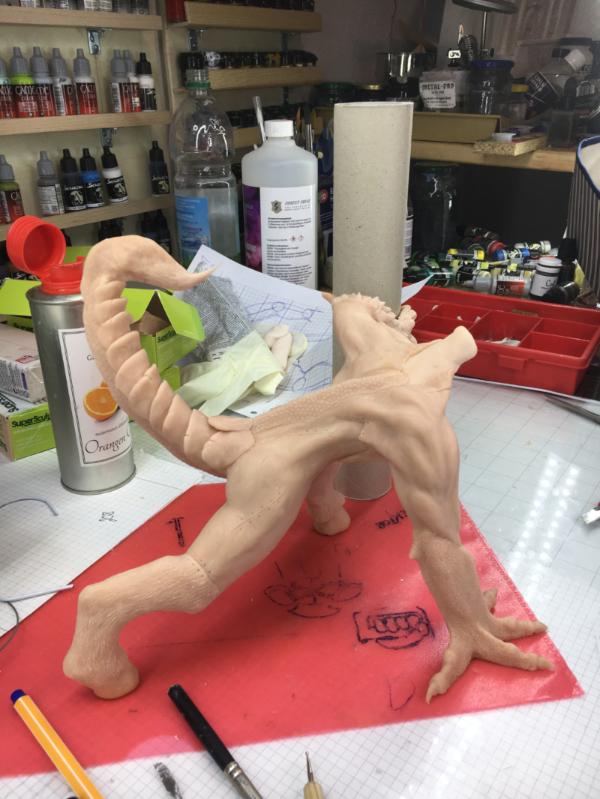
I'm still tempted to try an aggressive looking human head...

Hmm....definately not Santa
Cheers
Klaus
36940
Post by: Anvildude
I think those are feathers, not scales. Fluffy, puffy feathers!
You need some ragged fur, and some sleek fur, and some smooth skin, and rough skin, and scales and jelly-flesh and fish scales and...
17738
Post by: Briancj
This is very Island of Dr. Moreau, and I love it!
--Brian
PS: VERY sorry to hear about the commission going pear-shaped. Would you consider giving us a look at what was finished, maybe someone here would consider buying it?
62749
Post by: Dr H
Yeah, that's a pretty simple technique for scales. Ta.
and well, yeah that's a pretty scary face for a monster...jk
Good work.
32373
Post by: Klaus, not Santa
Thank you guys!
in the last post I stopped at the decision point for the monster's head.
The initial idea for the Wolp'er-Tingah* was something close to human.
*Wolp'er-Tingah - some of my German readers may chuckle, as there is a taxidermist tradition of mixing animals to create a Wolpertinger - https://en.wikipedia.org/wiki/Wolpertinger
As mentioned in the previous post I was thinking about a human head for the beast.
So I quickly sketched some ideas.
First something wage and ghostly
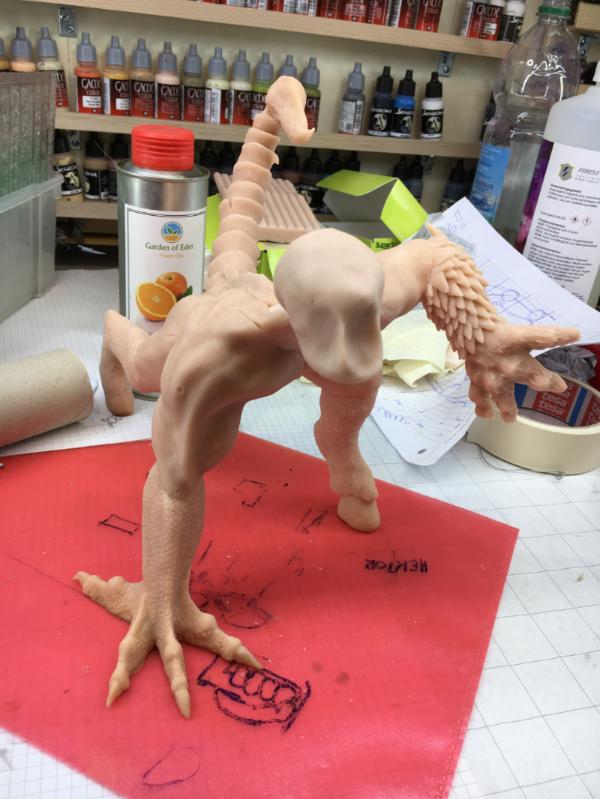
Then a bit more human
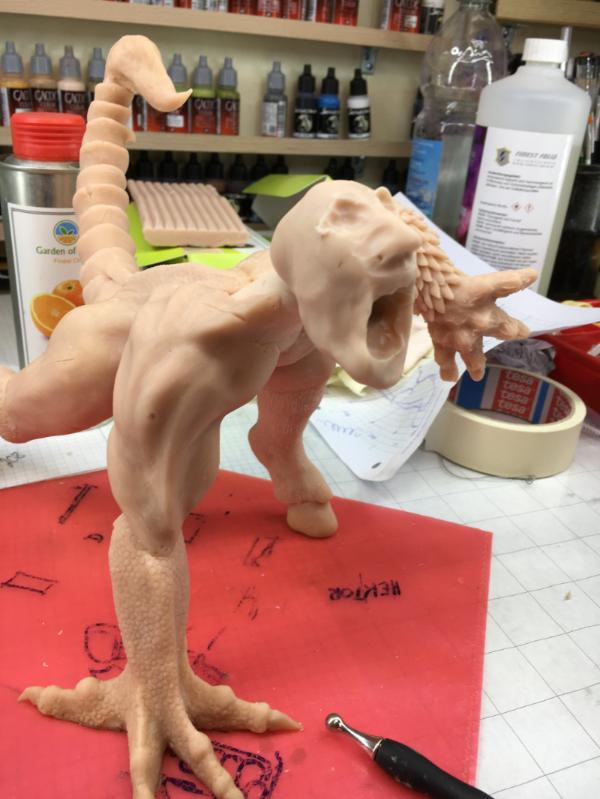
but even this human version didn't really convince me.

So I quickly sketched a dragon-style head and left it at that for the night.
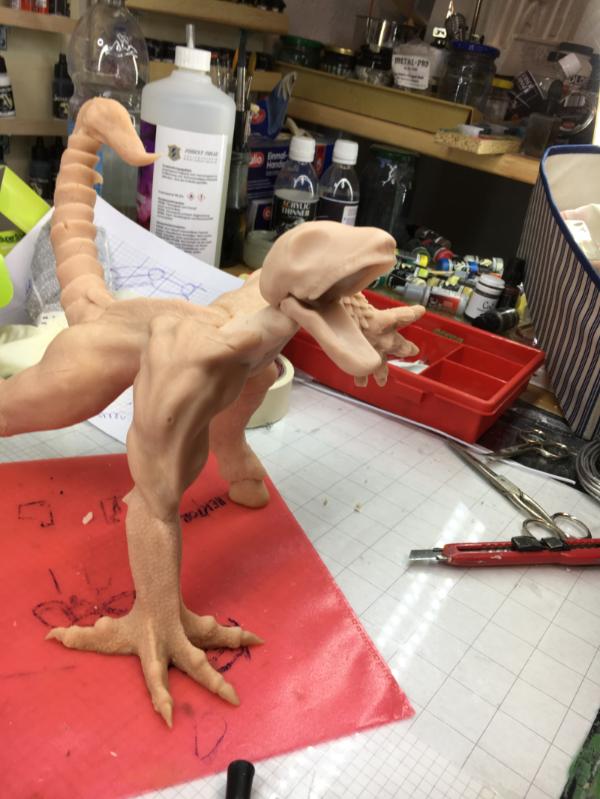
The next day I looked at the options again and decided to take the dragon route.
So I added some basic eyes and a gums for the upper jaw
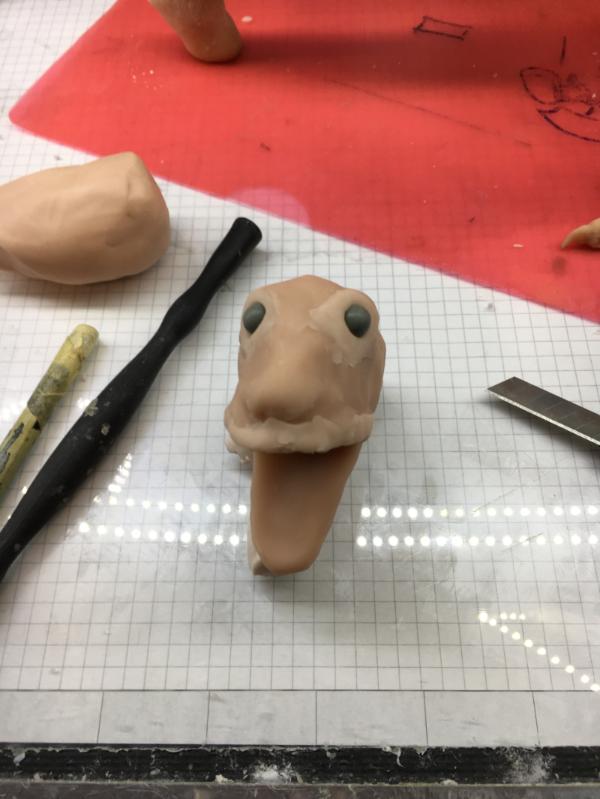
Then I started to block out the nose and lips
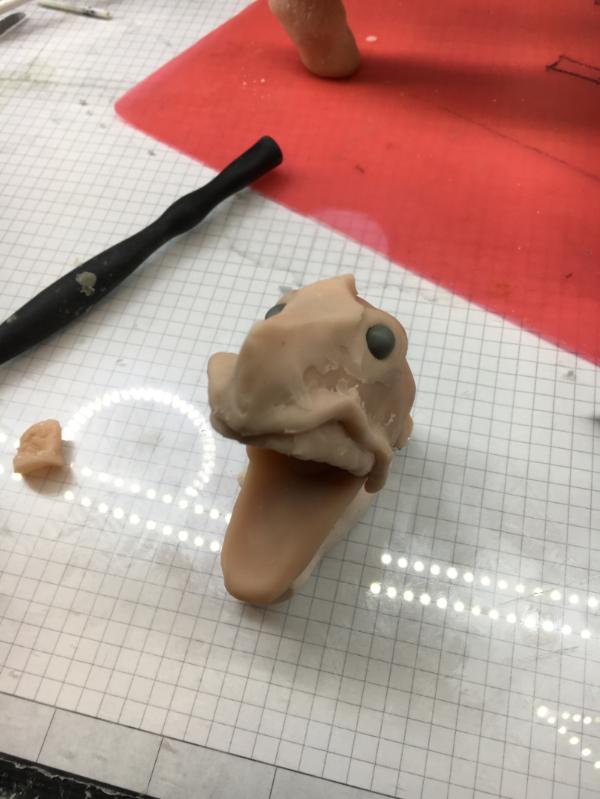
some of the cheek lines
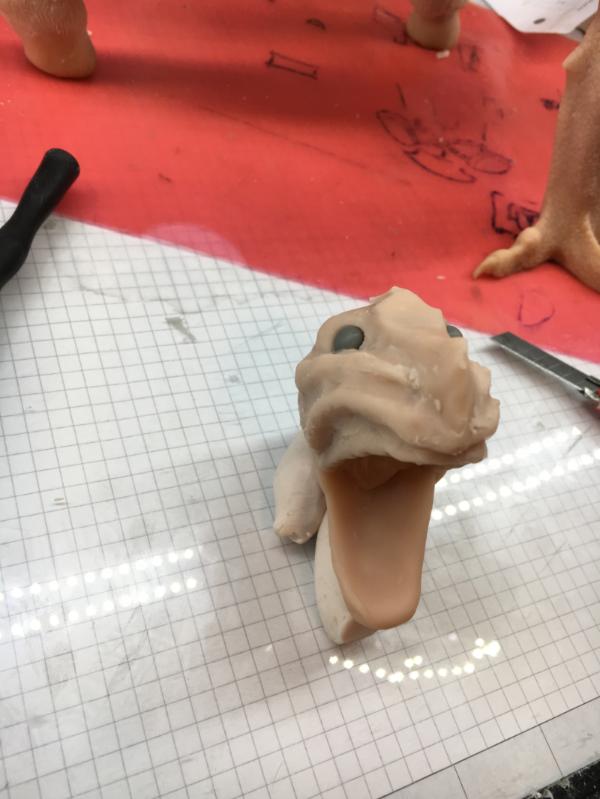
Eyelids
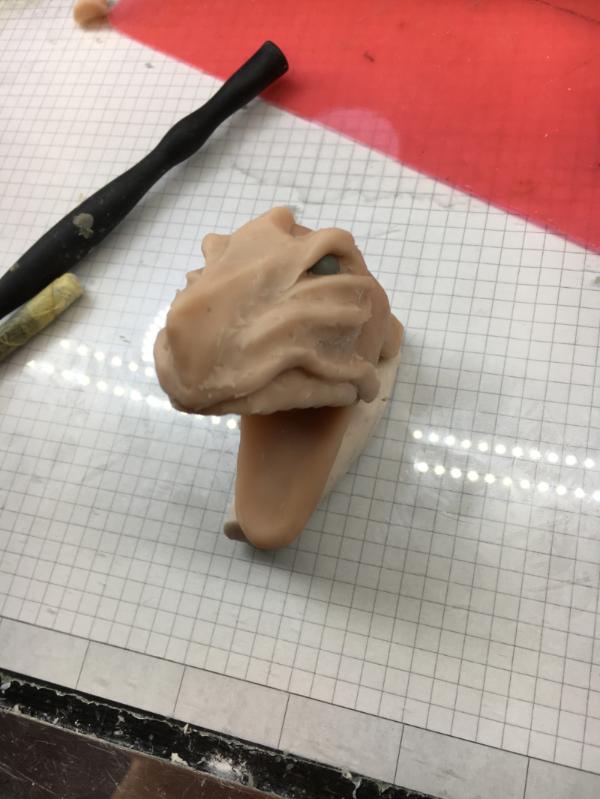
More facial details
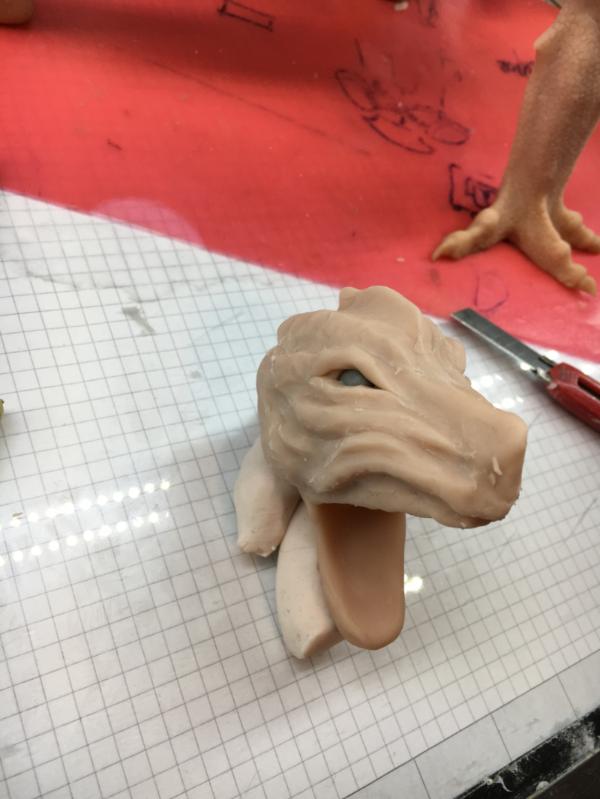
Eyebrows and wrinkles
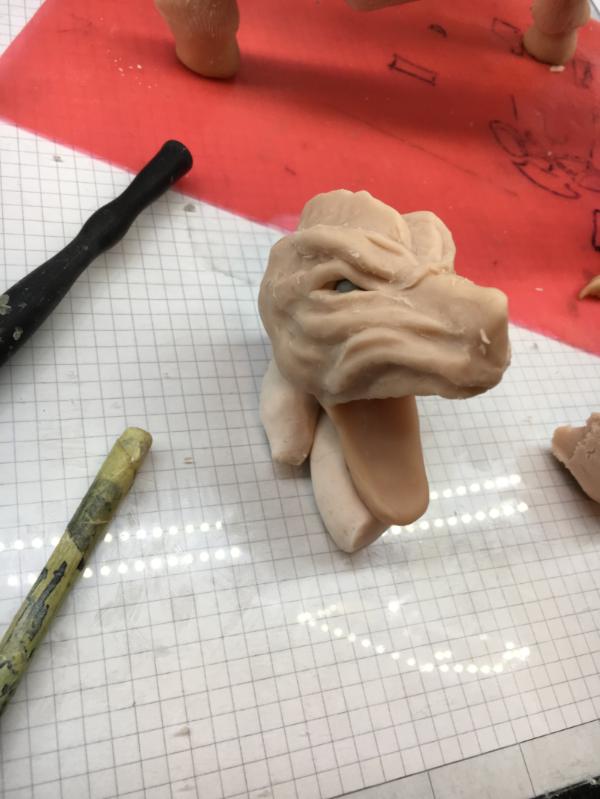
Nostrils
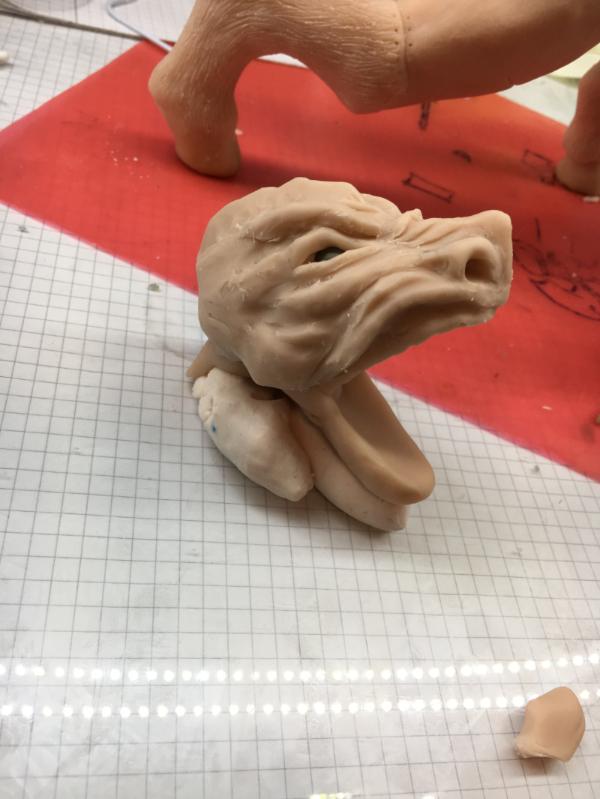
Starts to look properly angry
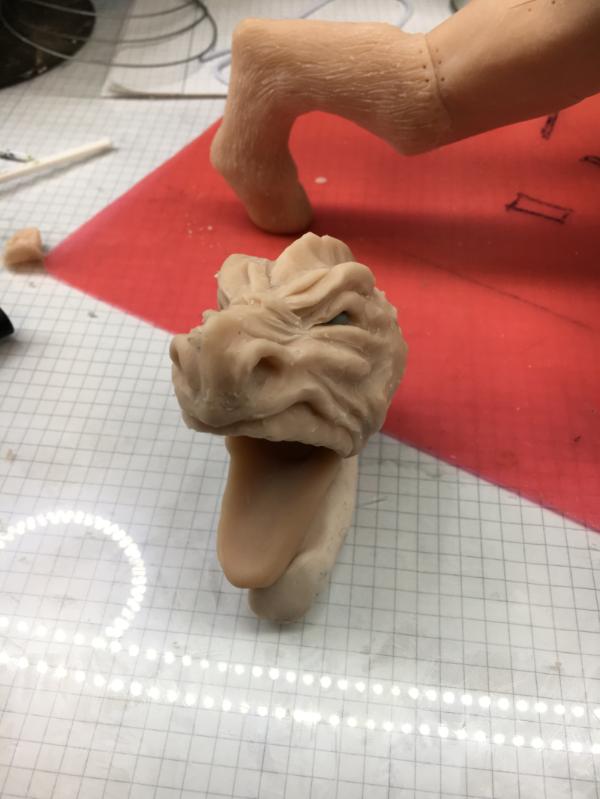
With dragon skin
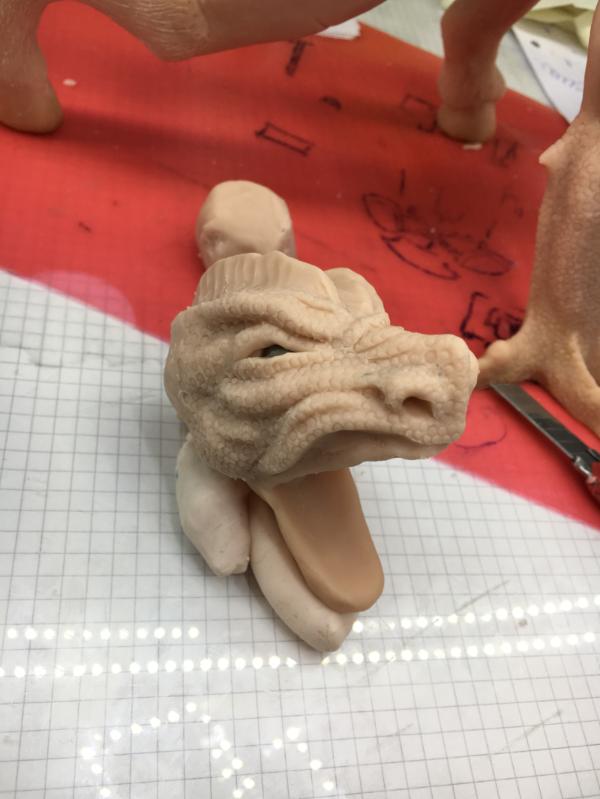
The next evening I started with the lower jaw
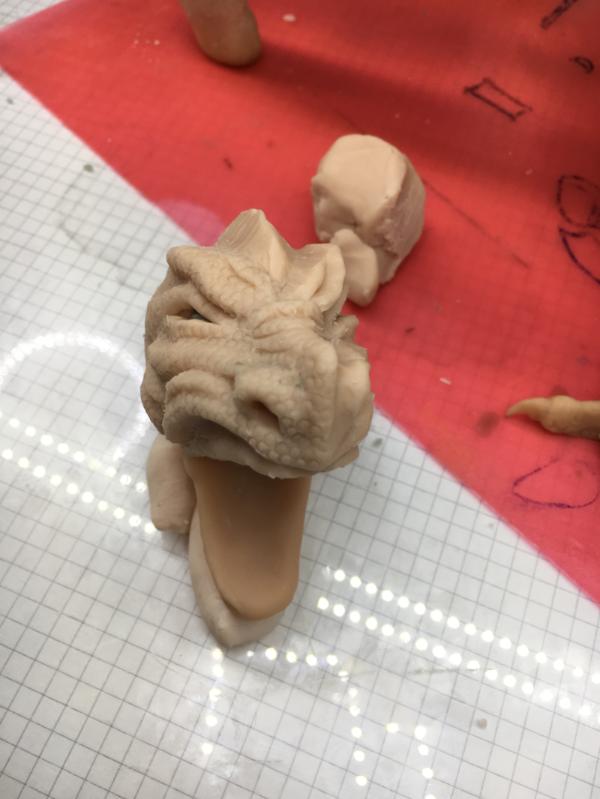
Basic jaw line
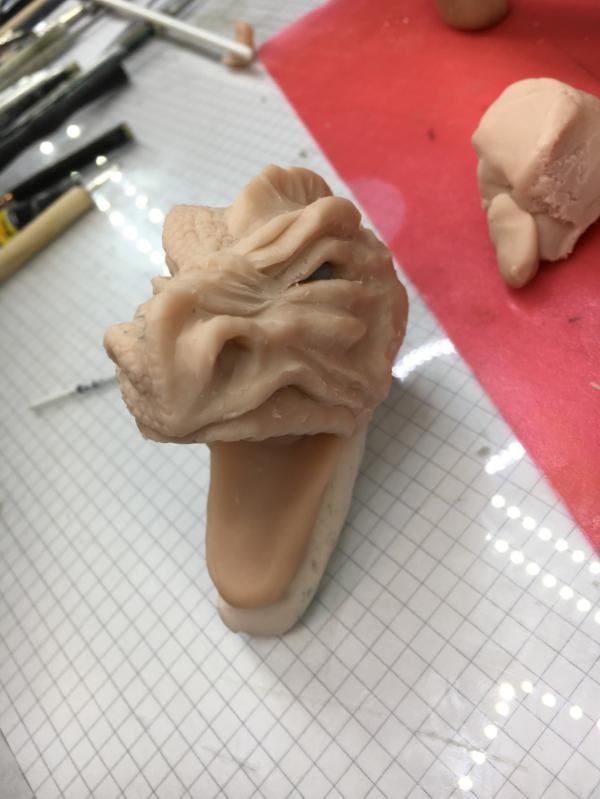
At this state I did a pose check
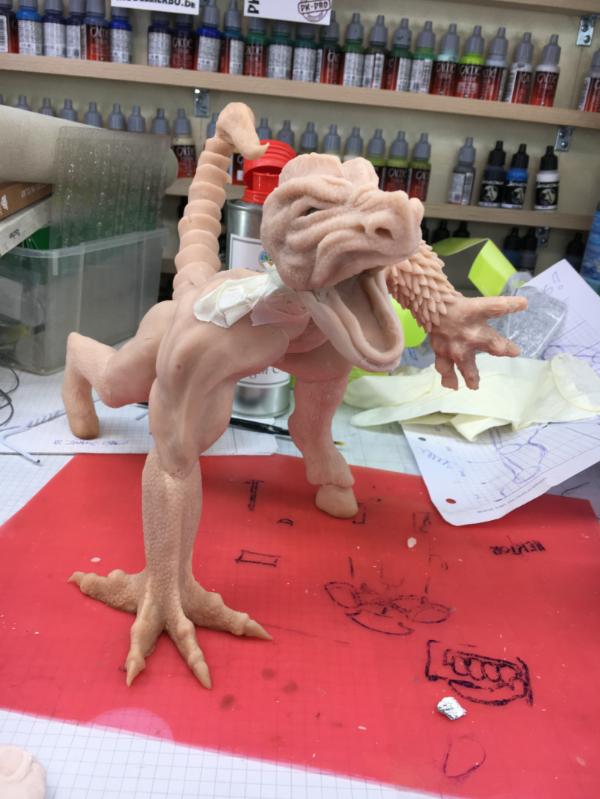
Relatively big, I probably have to beef up some sections of the body...
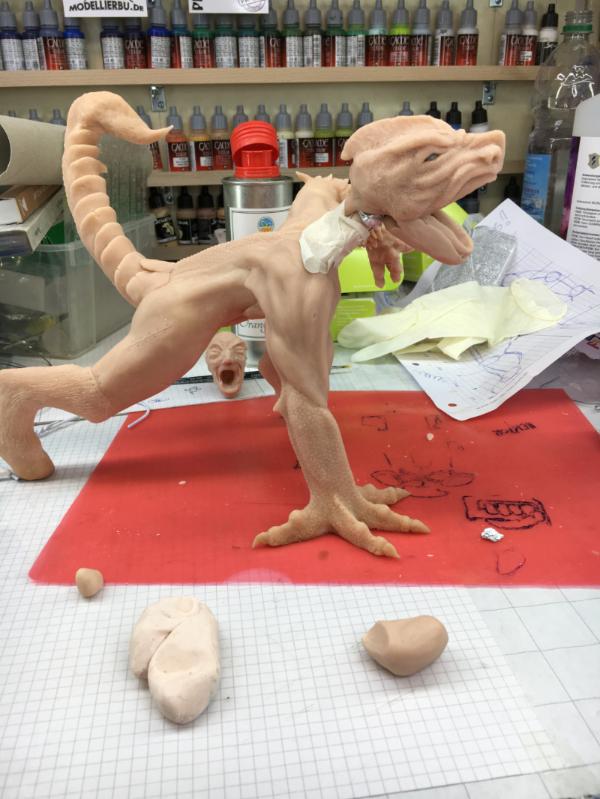
But continuing with the dragon-style I started to flesh out the neck
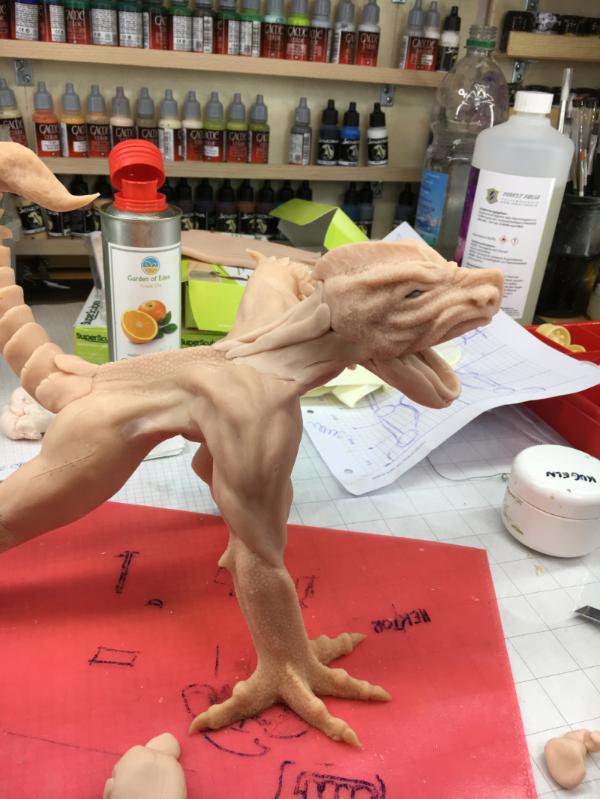
With the neck-muscles
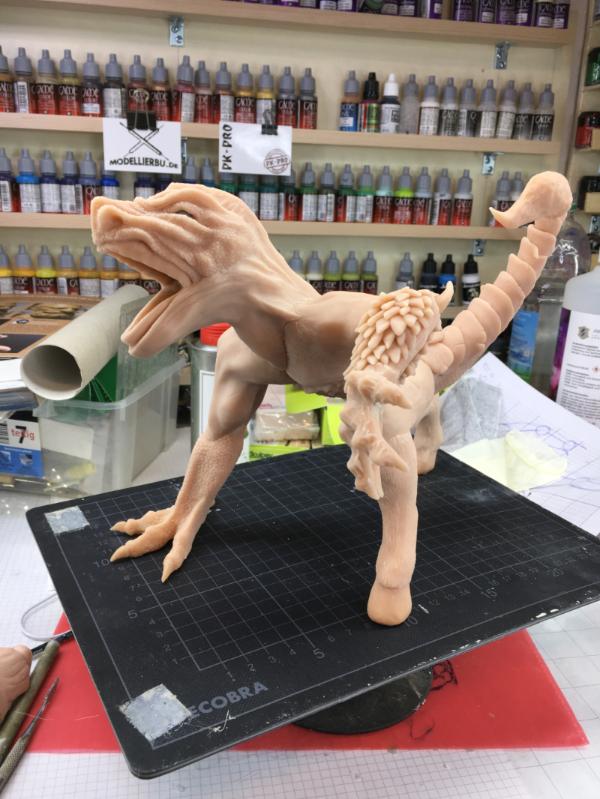
Still toothless
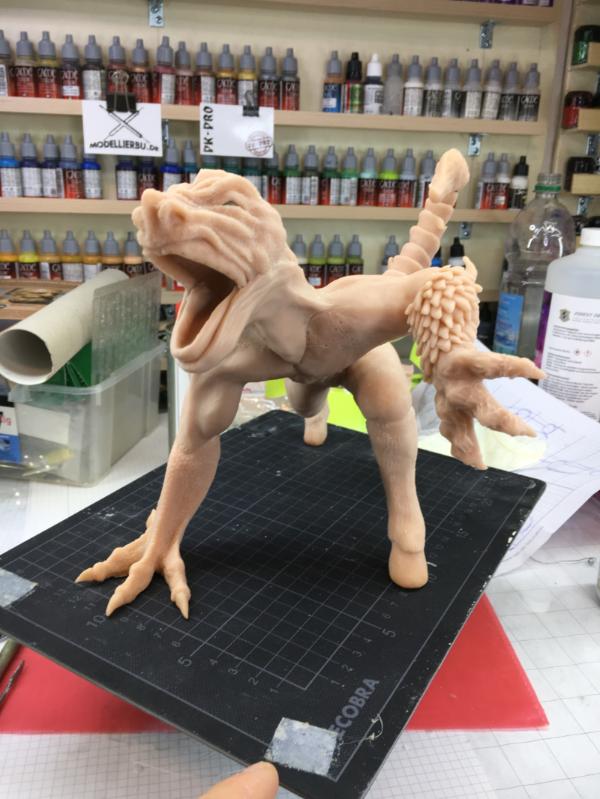
but already cool looking
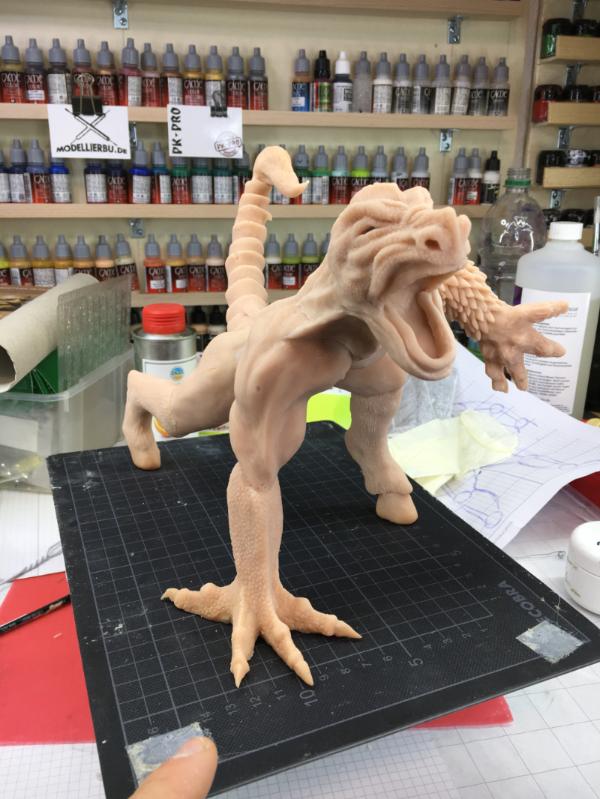
At that time I did another all-around check and left it for the night.
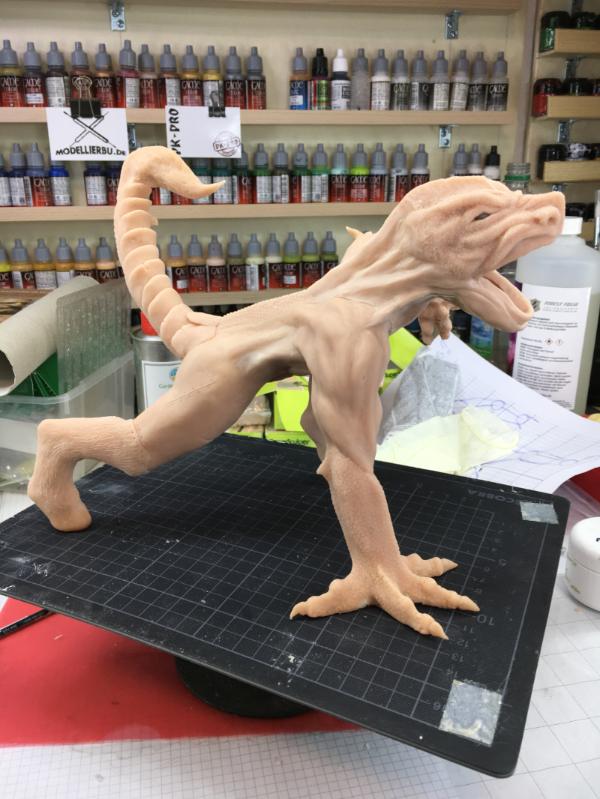
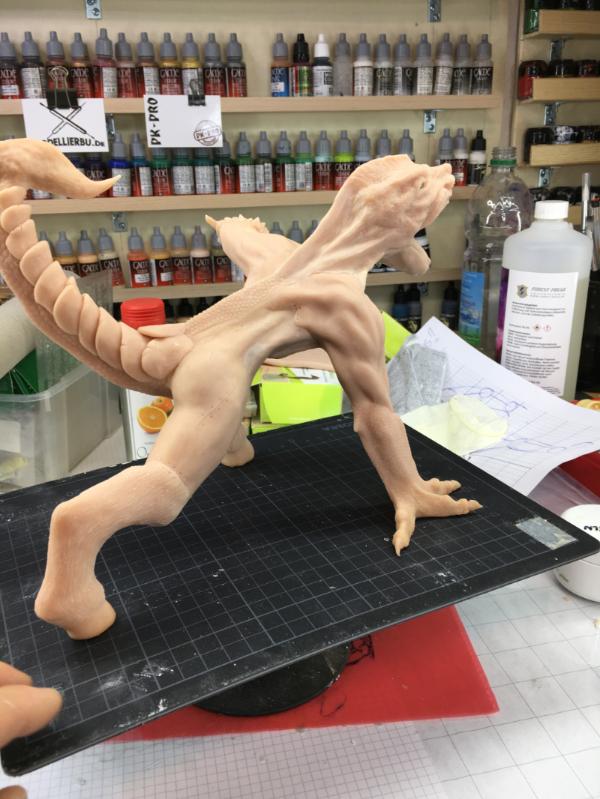
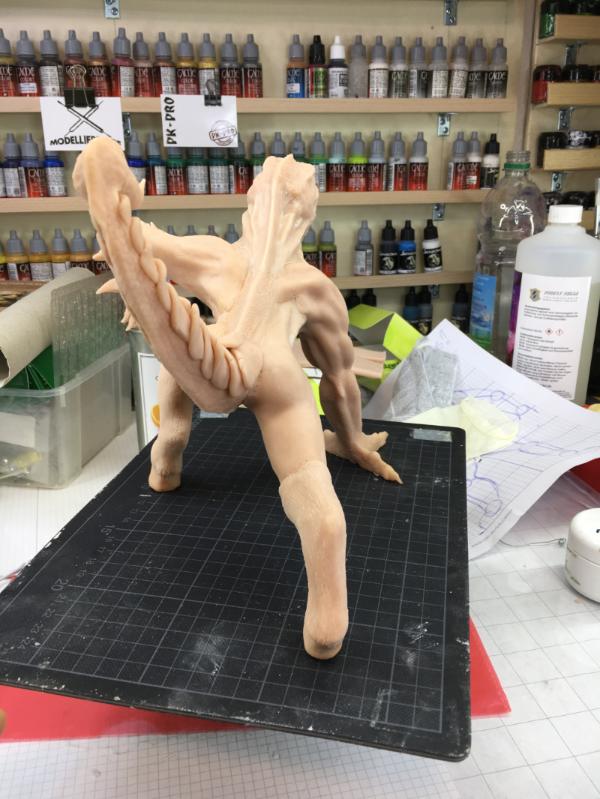
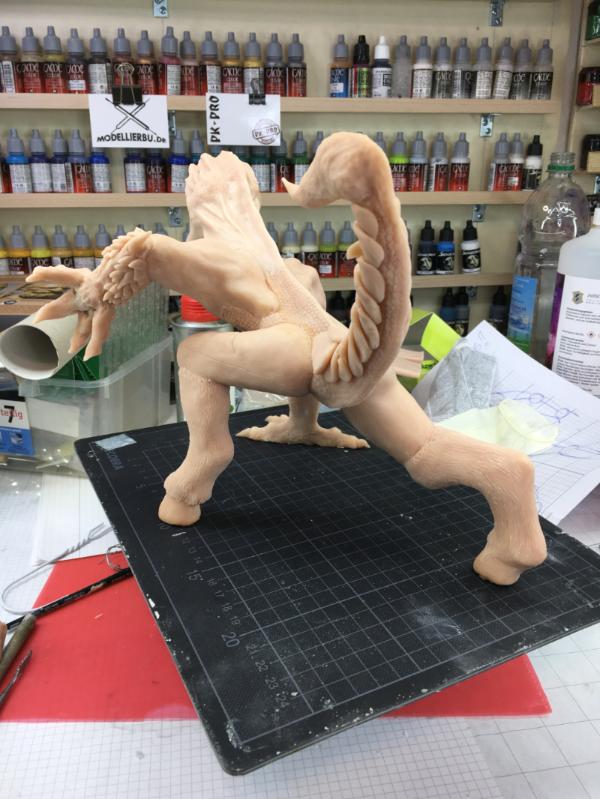
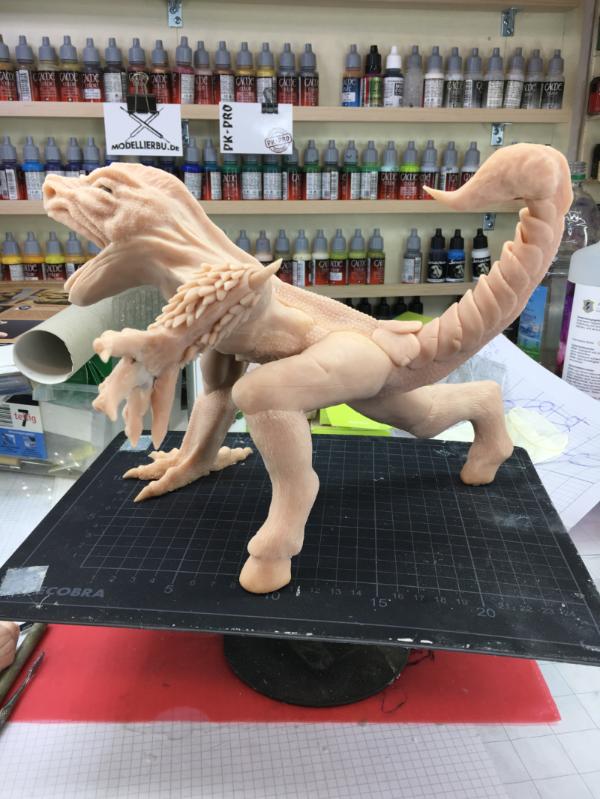
The next evening I continued with the dragon skin for the lower jaw and neck
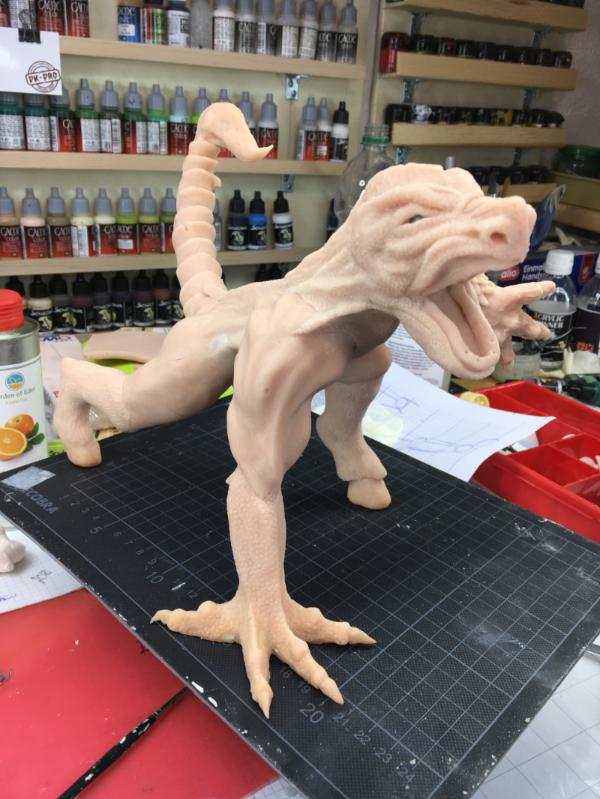
And I sculpted the tongue
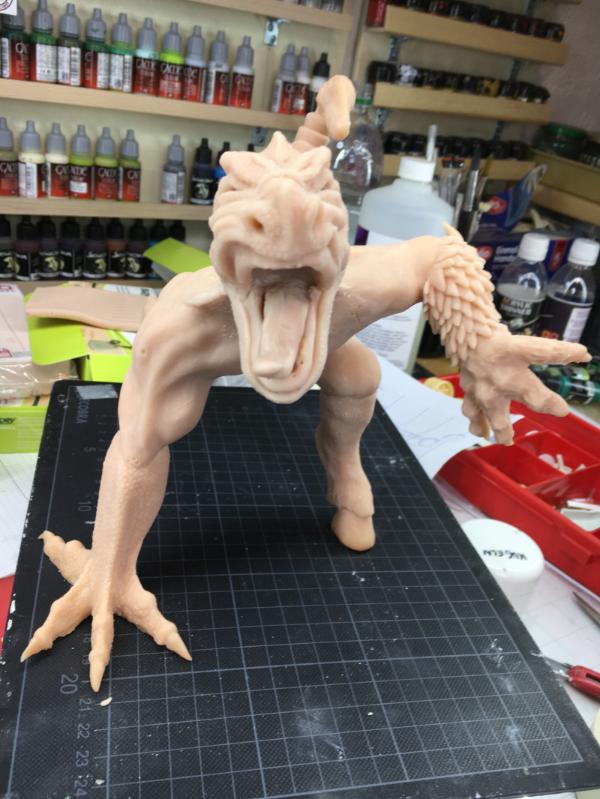
Ready for some dental work
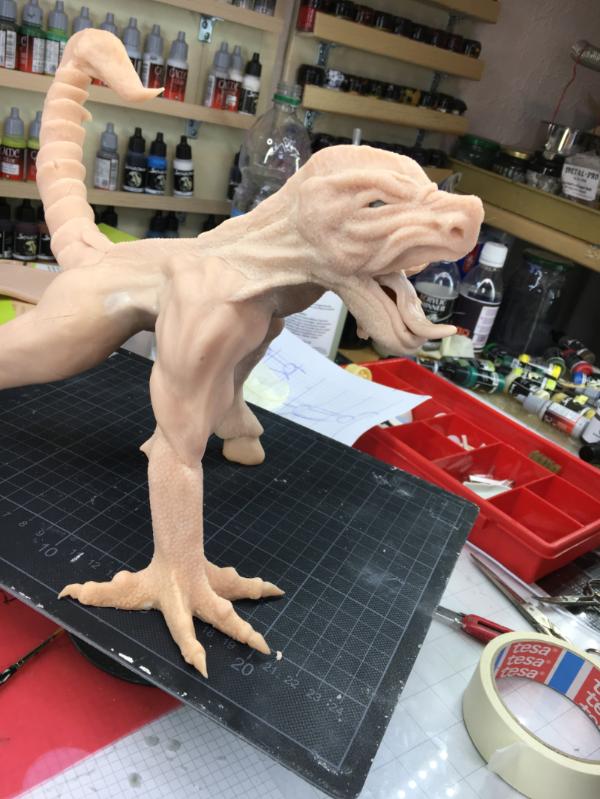
So I created a bunch of teeth from GreenStuff
The next evening I inserted the teeth and sculpted the teeth ridge
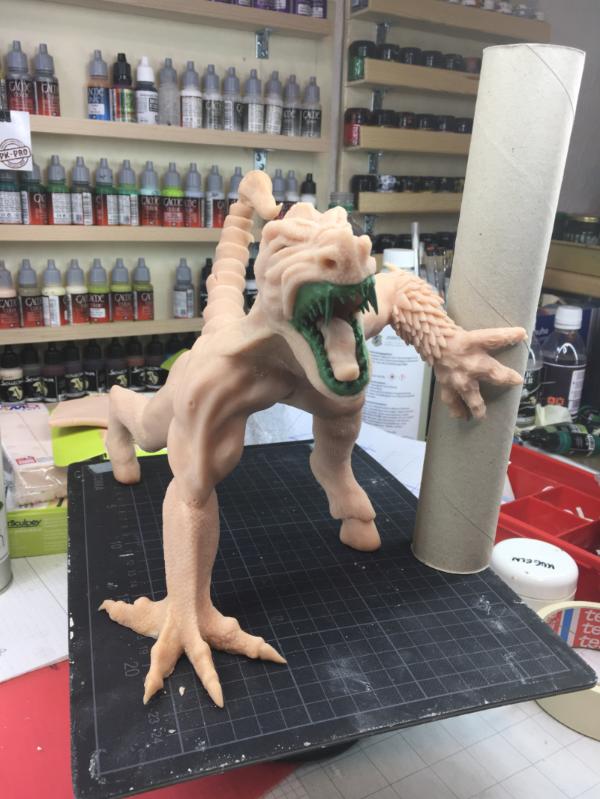
Now that's a proper smile
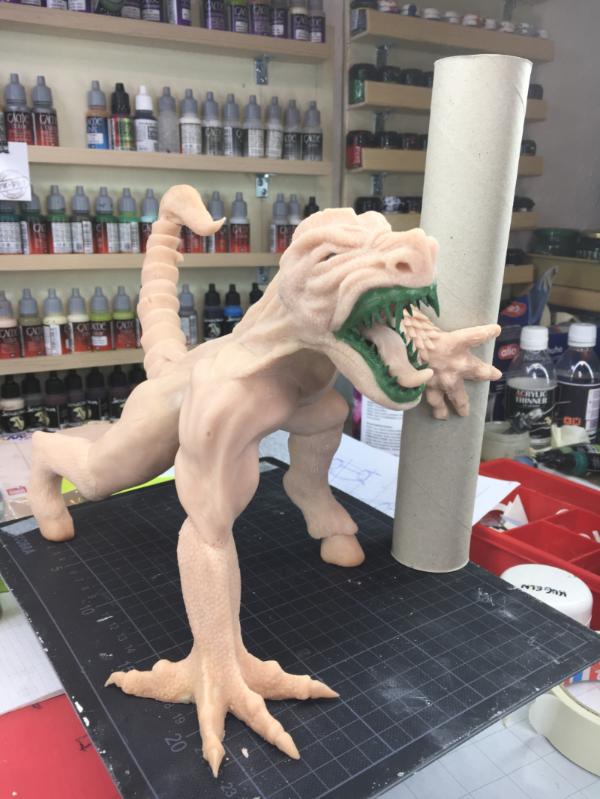
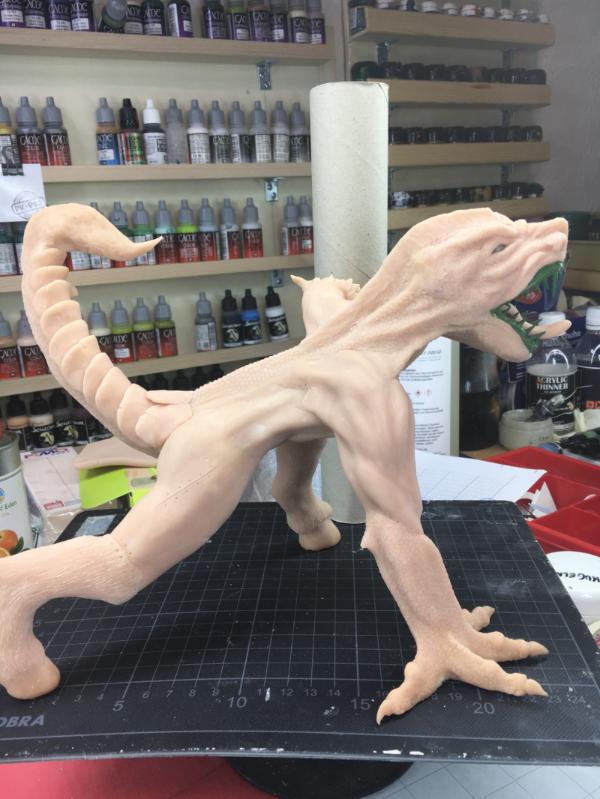
With the left over GreenStuff I sculpted the mounting points for the reins as well as some horns
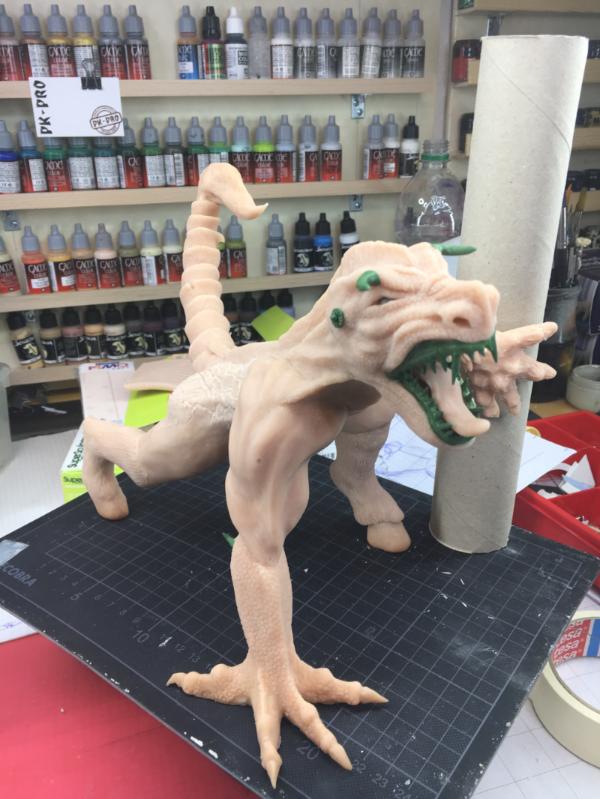
Since I always wanted to repeat a fiery-skin effect as I did with the Tar'Akoona dragon
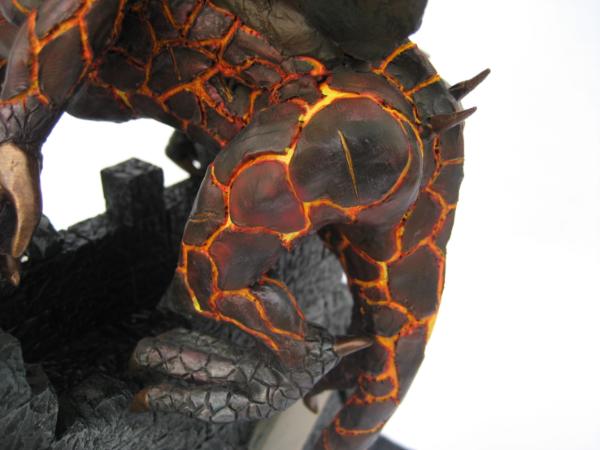
I added a patch of this skin to the right side - at the same time beefing up the mass back there
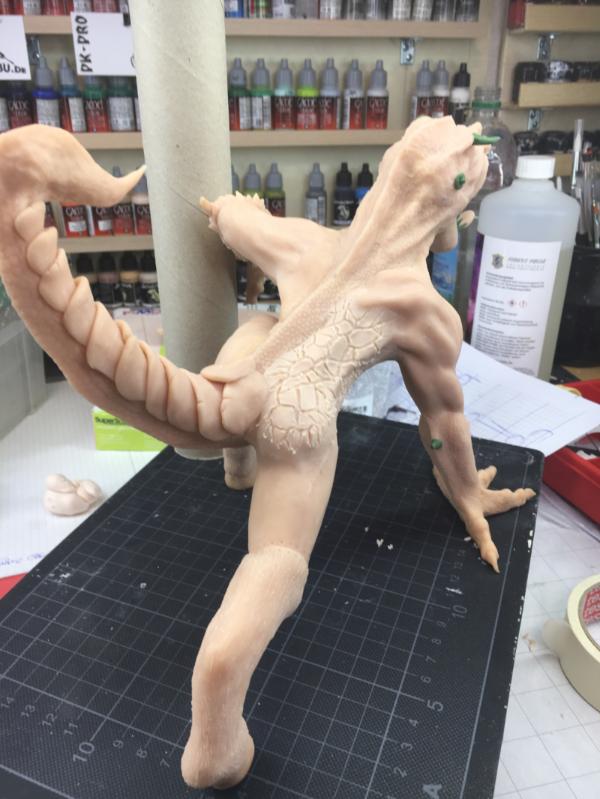
And the thigh on the left also got some extra mass
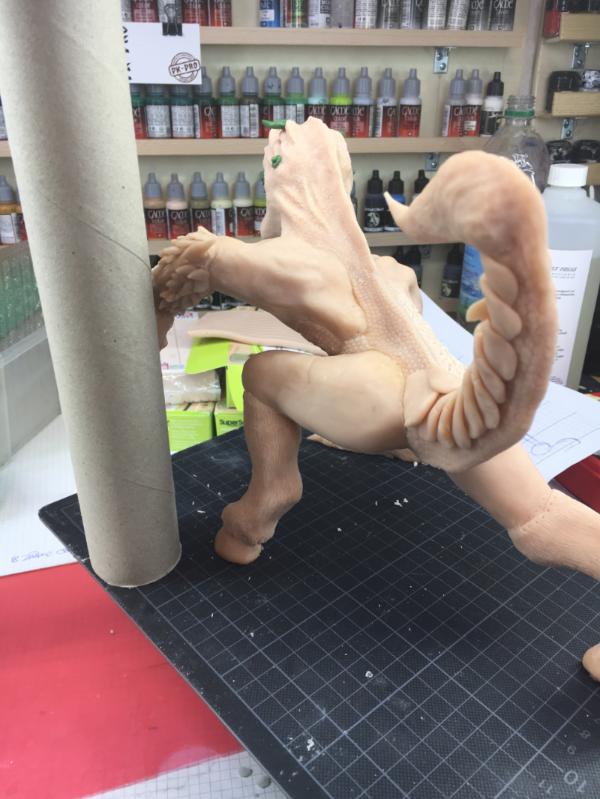
With this the basic build for the Wolp'er-Tingah is completed
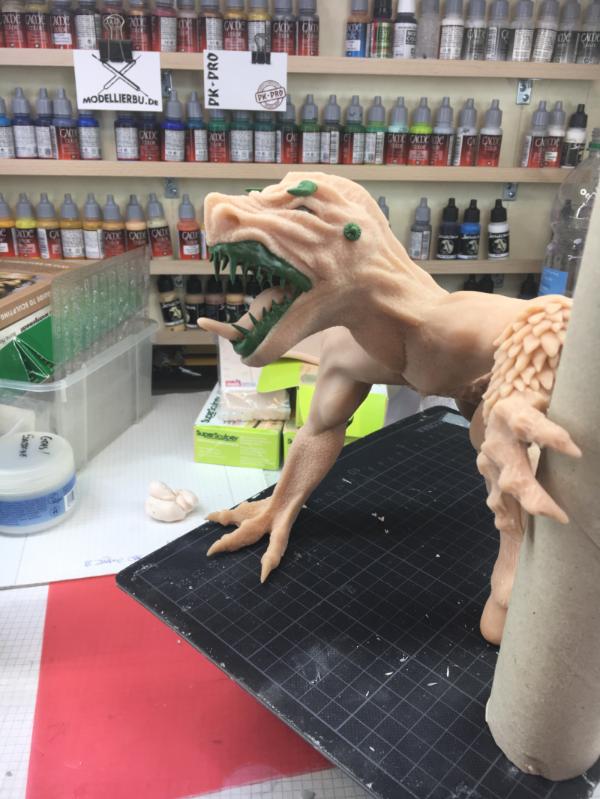
I'm quite pleased so far
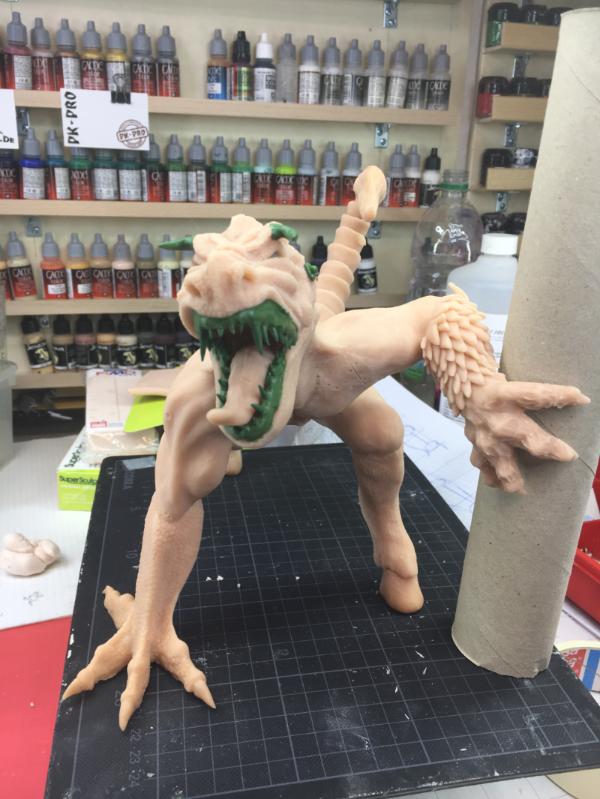
Last night I finally began the rider
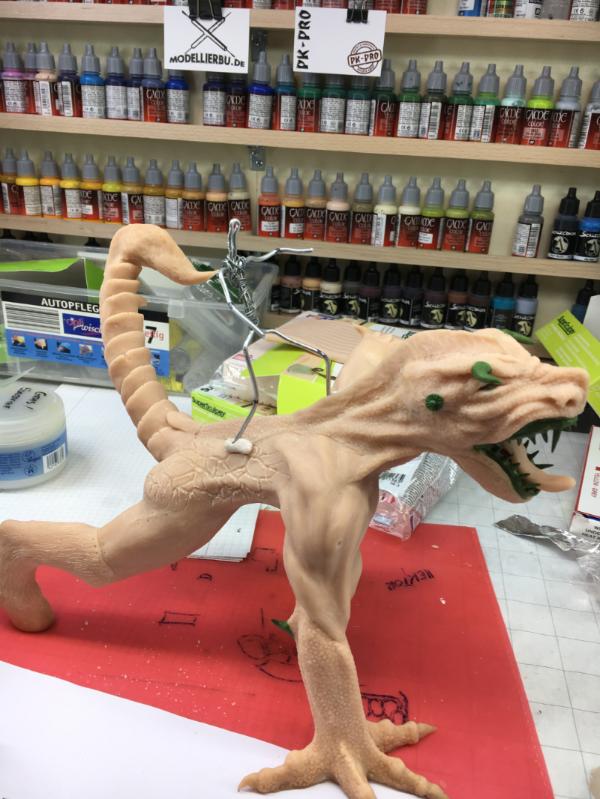
Though my cat wasn't quite pleased with the stinger...
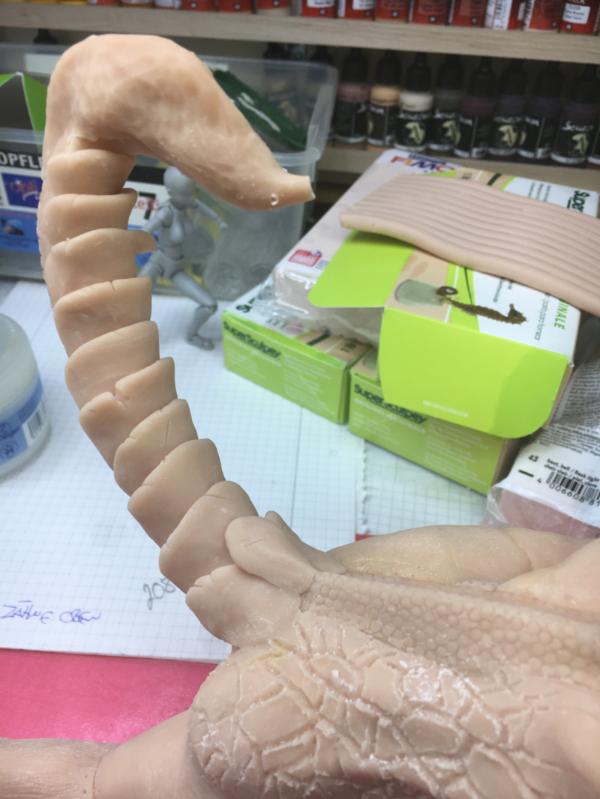
...I was able to fix it - with some battle damage
32373
Post by: Klaus, not Santa
sorry, for some reason the post got truncated.
So here's the rest
...the re-attached stinger - with battle damage
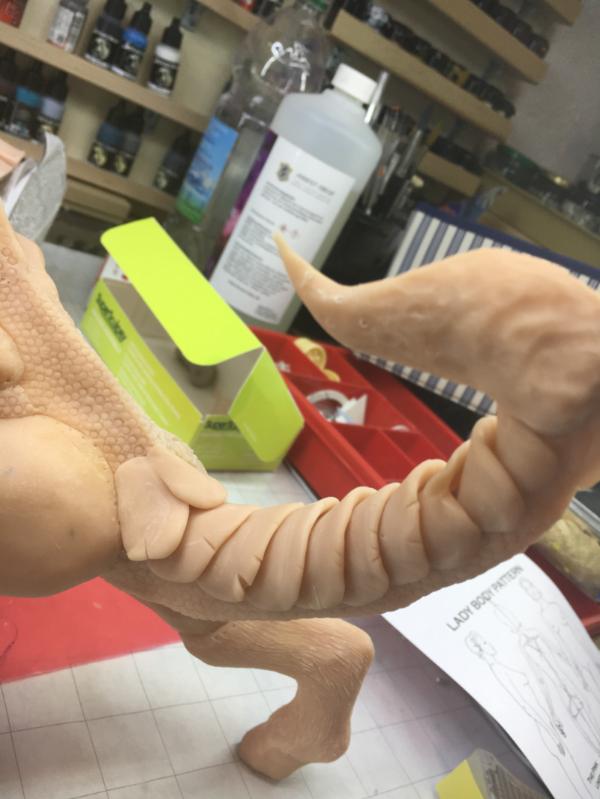
This is the first raw shape of the rider
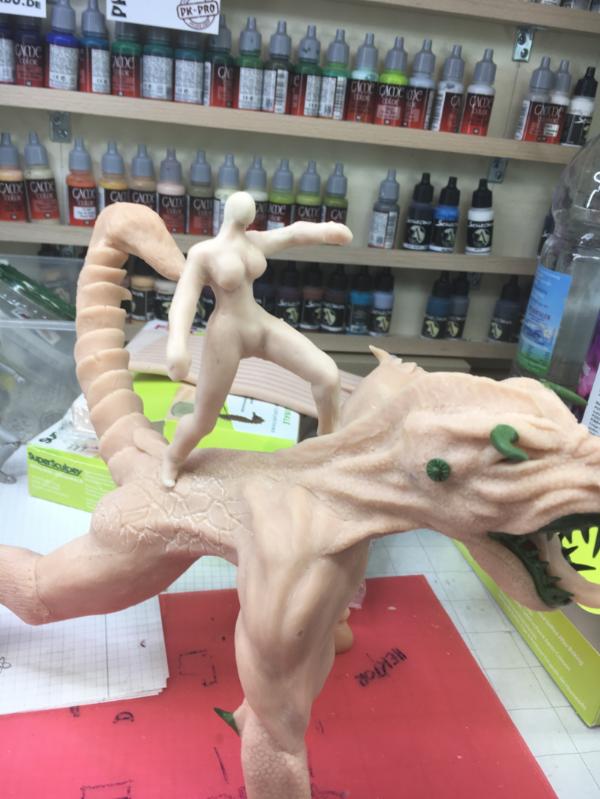
Hmm...
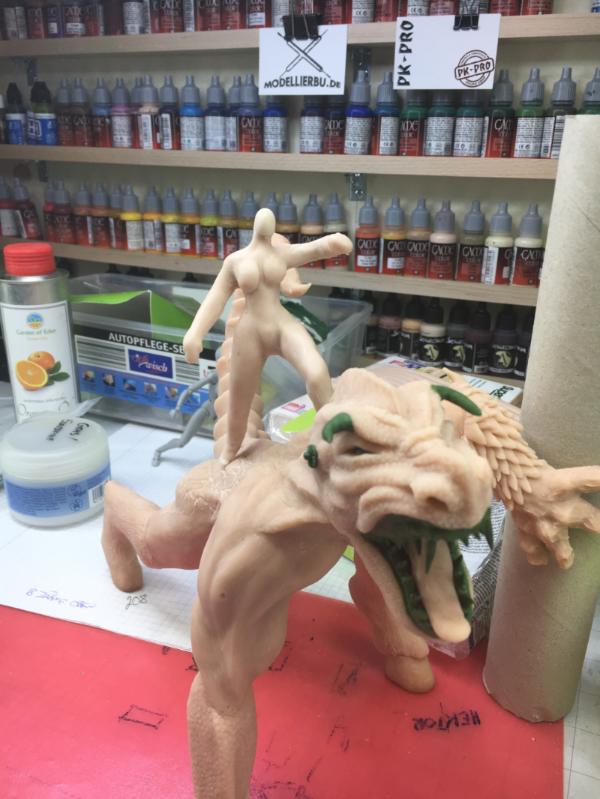
Ah, with the reigns it looks better
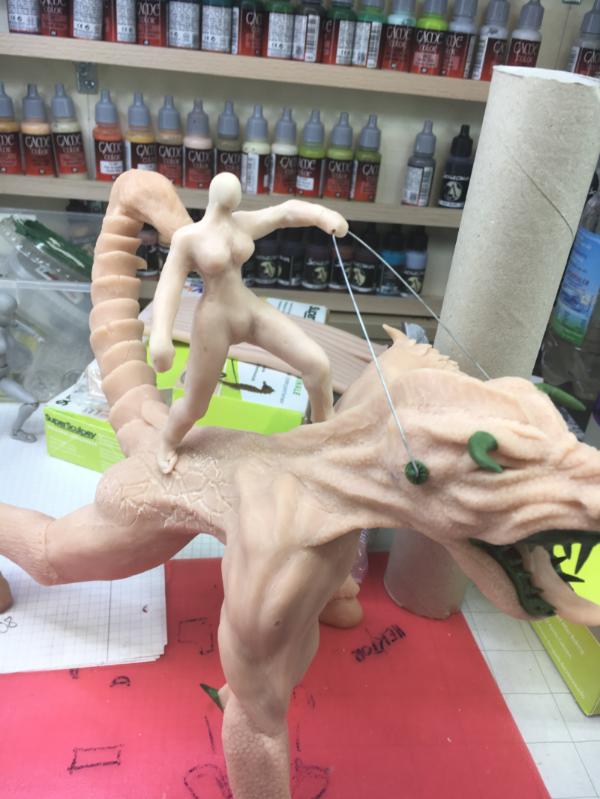
Well, that's as far as I got.
What do you think?
Feedback, suggestions, critics?
Cheers
Klaus
17738
Post by: Briancj
I guess my only issue is the stinger can't really strike with a rider.
62749
Post by: Dr H
Good work, Klaus.
I feel like the abdomen and/or chest area could do with some bulking up; it now looks a bit weedy compared to the thickness of the limbs and the size of the head.
Keep at it.
32373
Post by: Klaus, not Santa
Thank you guys!
It's been some time (AGAIN!)
But finally an update!
I was blocked by some health issues and then catching back up with real-life work.
But now I finally have some time at hand.
unfortunately the deadline for the contest (April 8th) is now approaching fast.
I'm sure I won't be able to enter it painted... :(
Since my last update I did a first test with the hand and staff.
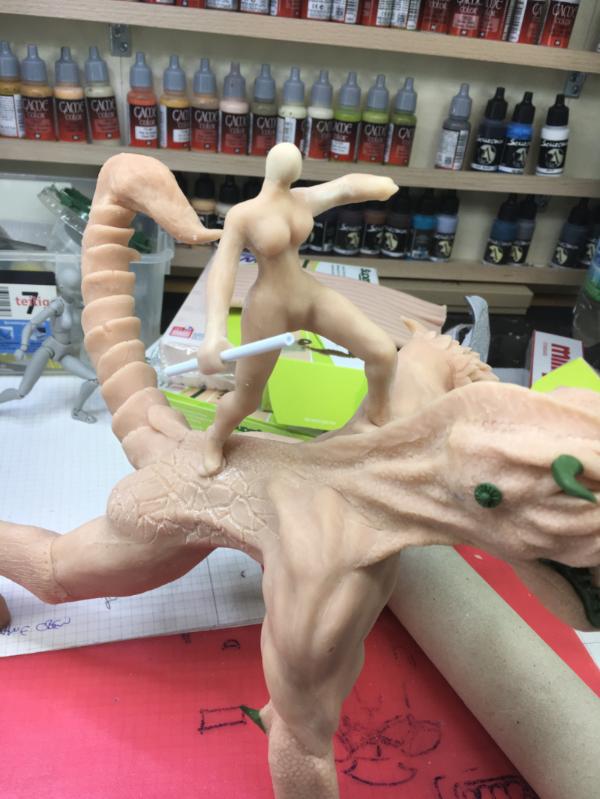
I wasn't convinced by the hand, so I took it back off
But I started with the rider's turban.
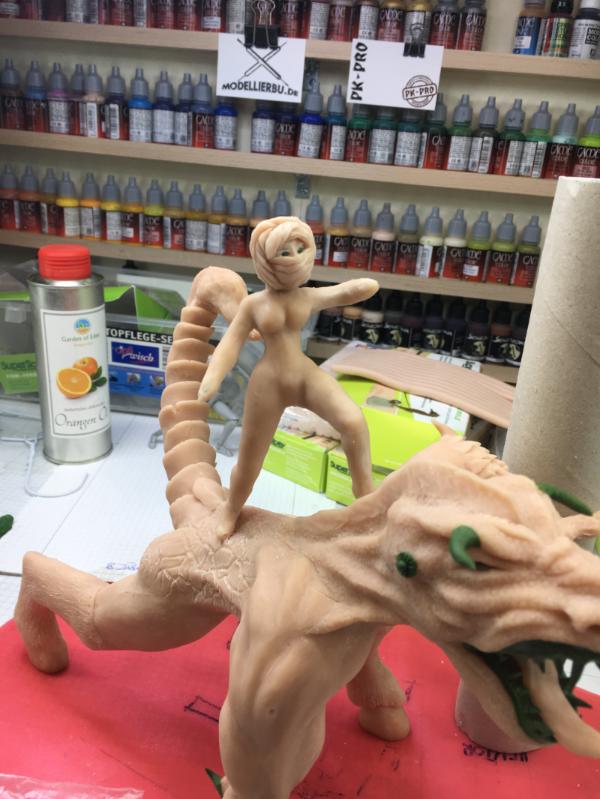
Some of you older ones my know Chris Achilleos' "Harem Guard"

Which is an illustration I always loved. So I will try to build my rider in her spirit.
Here you can see the initial version of her staff - which I killed quite quickly
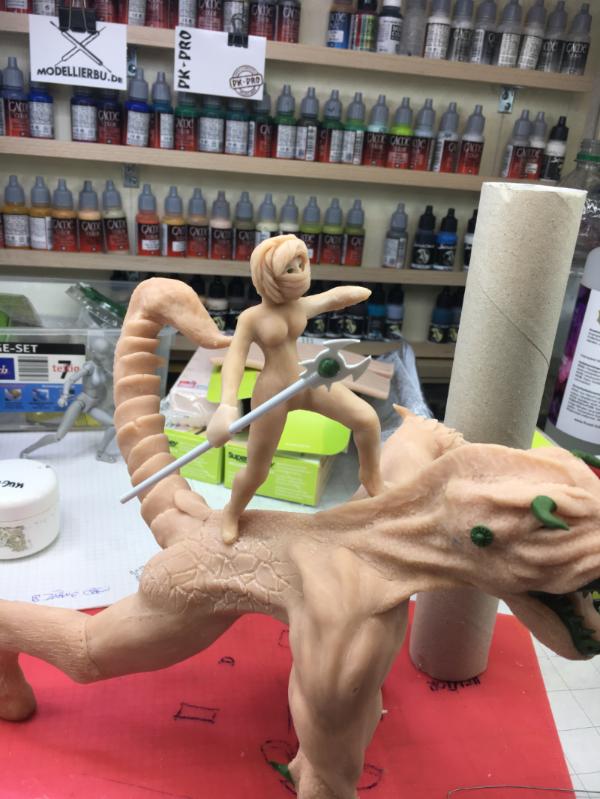
The start of her tunic

The Wolp'er-Tingah got some details, like the stitches,
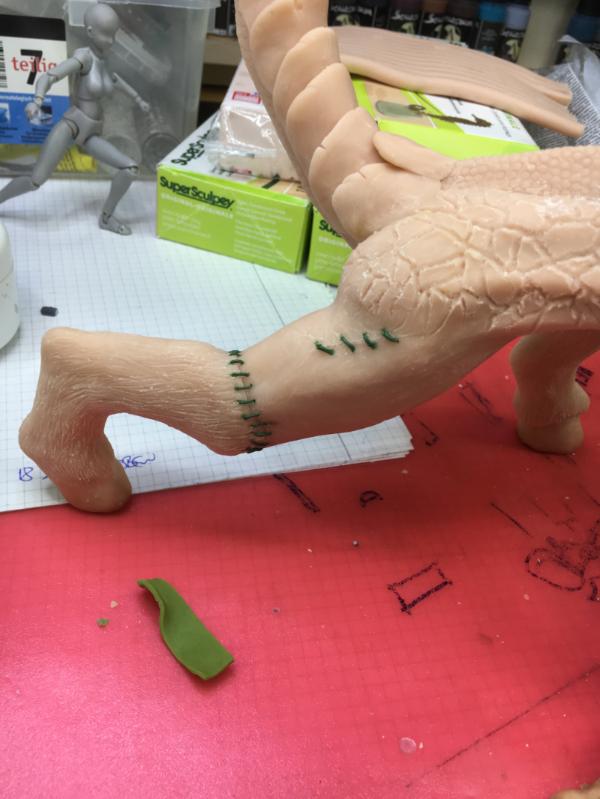
some tubes,
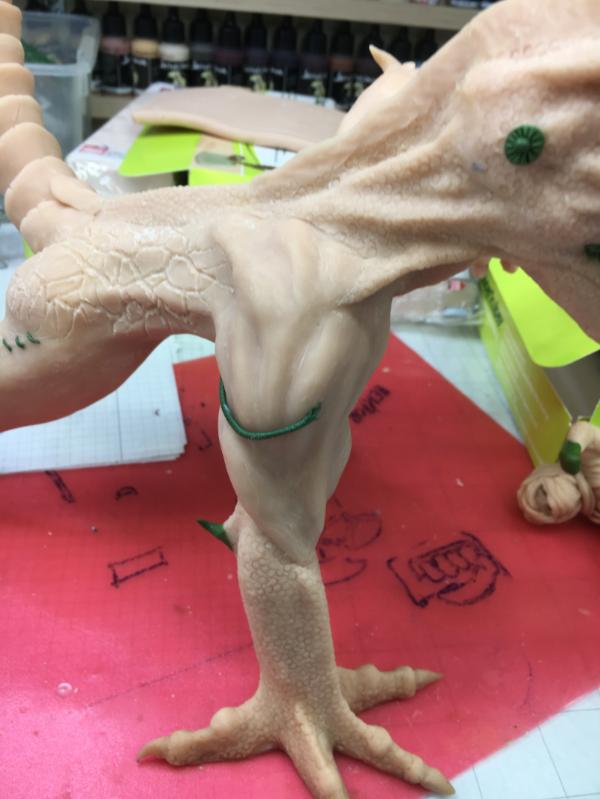
more tubes,

and more stitches.

Then I started with her boots and the "skirt"
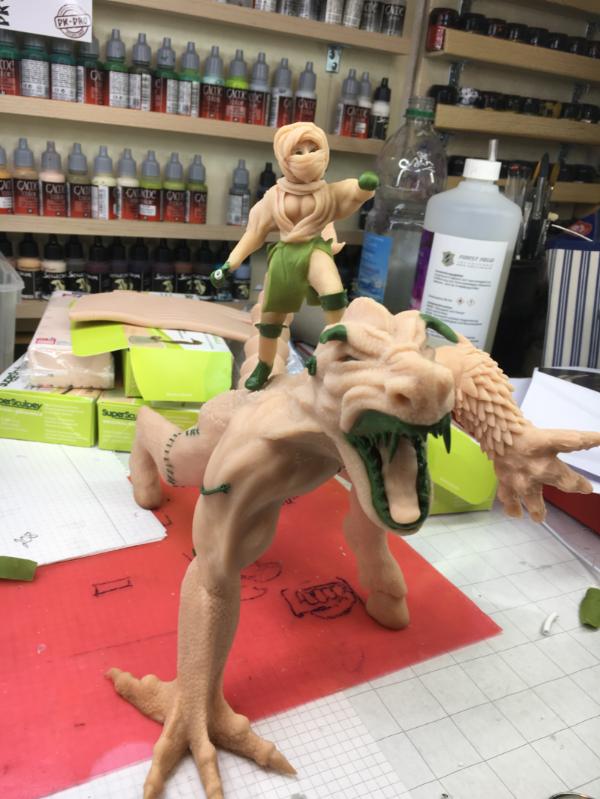
I also worked on the base for the temple

Not very well visible...a bit better in b/w and high contrast

I also sculpted a column (unfortunately I can't remove the supporting roll without breaking the column...)
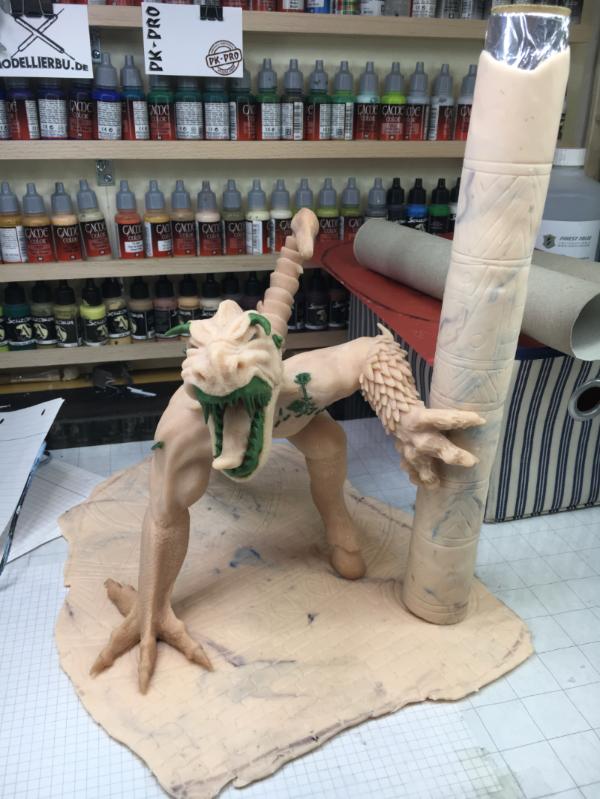
While her skirt broke off (it was a mix of SuperSculpey and Greenstuff) I finished the boots, made a new staff and began to sculpt her hand.
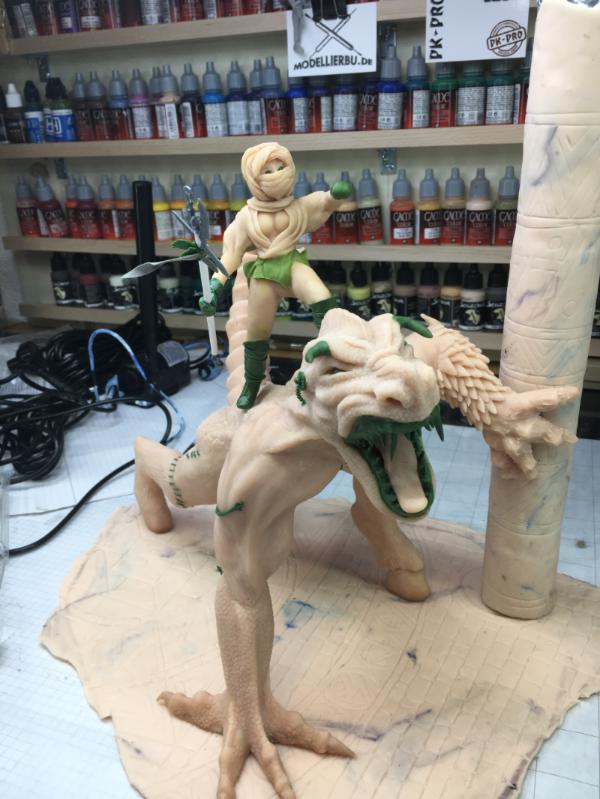
I know this isn't the best of updates (Image wise), but I'm glad I was able to post anything and I hope to have some more images soon.
Cheers
klaus
24297
Post by: Viktor von Domm
while i am old fashioned enough to love cheesecake , i think the boobies could use some gravity...
65595
Post by: Camkierhi
Just great to see you bud. Hope you are feeling better bud.
Whole thing is looking brilliant.
32373
Post by: Klaus, not Santa
Viktor von Domm wrote:while i am old fashioned enough to love cheesecake , i think the boobies could use some gravity...
Haha!
Hey Vik I'm simply sticking to Achilleos' original concept
Camkierhi wrote:Just great to see you bud. Hope you are feeling better bud.
Whole thing is looking brilliant.
Thank you!
Well I was able to finish the piece just in time for the contest, but wasn't able to post updates so far.
So here we go.
Since the last update I added more GreenStuff Details, like some raggedy fur

And chain links, from where the Monster was chained
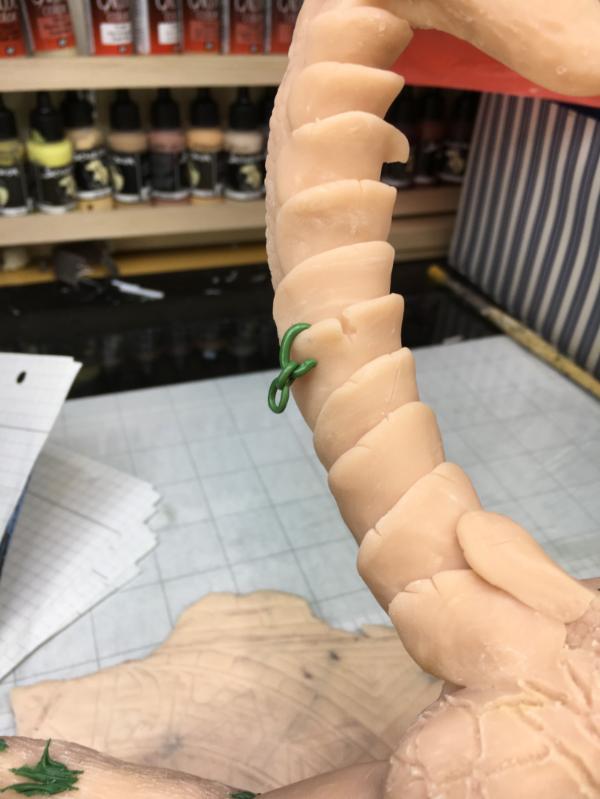
As you can see the mighty Monster was chained at many spots

it even had some shackles
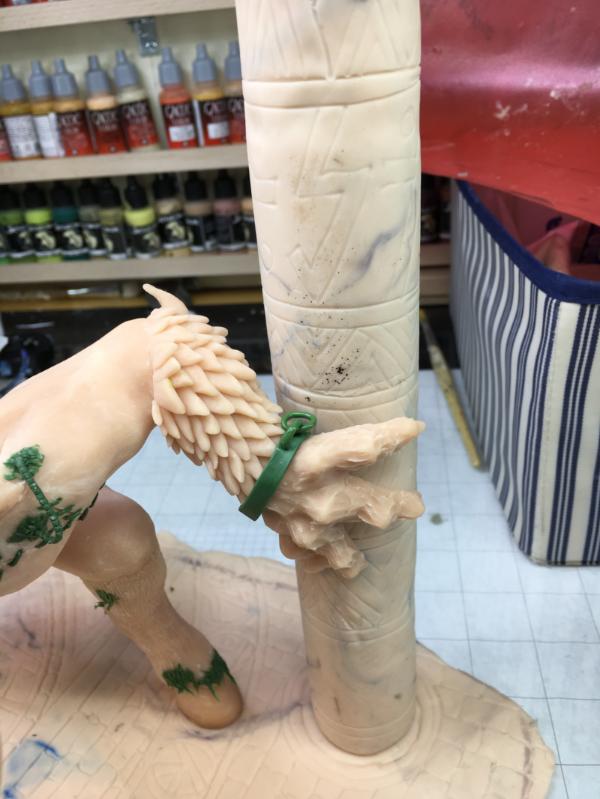
Of Course the rider needed some armor too

Starting the left Hand and a necklace

Straps for the knife
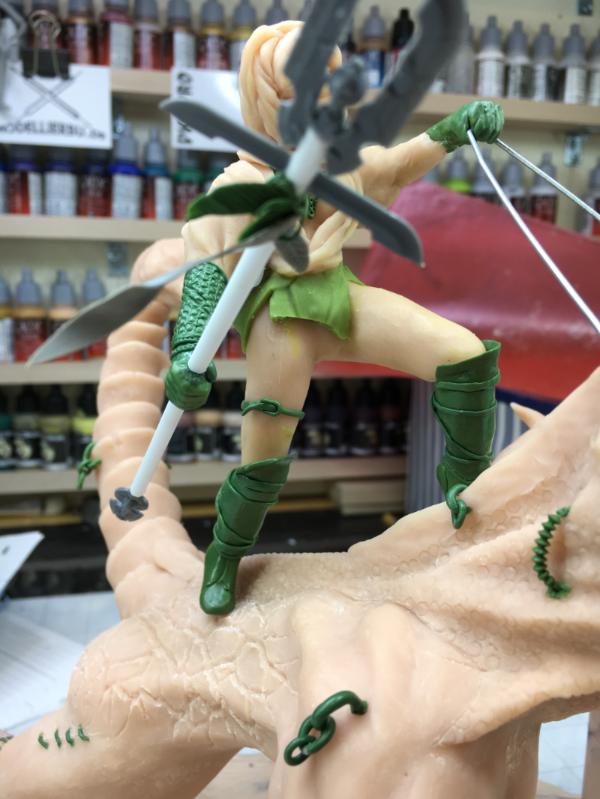
She started to come together
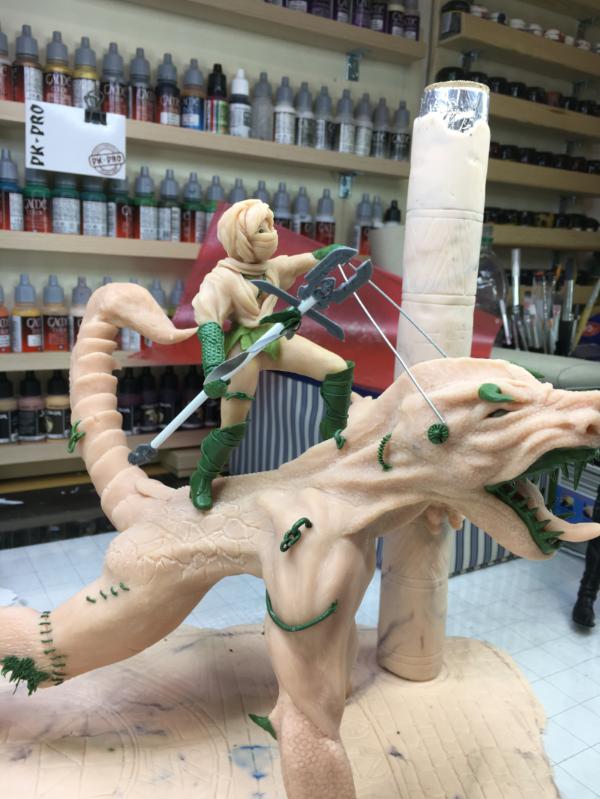
and the Position more plausible

armor for the other side and some jewlery under the Turban
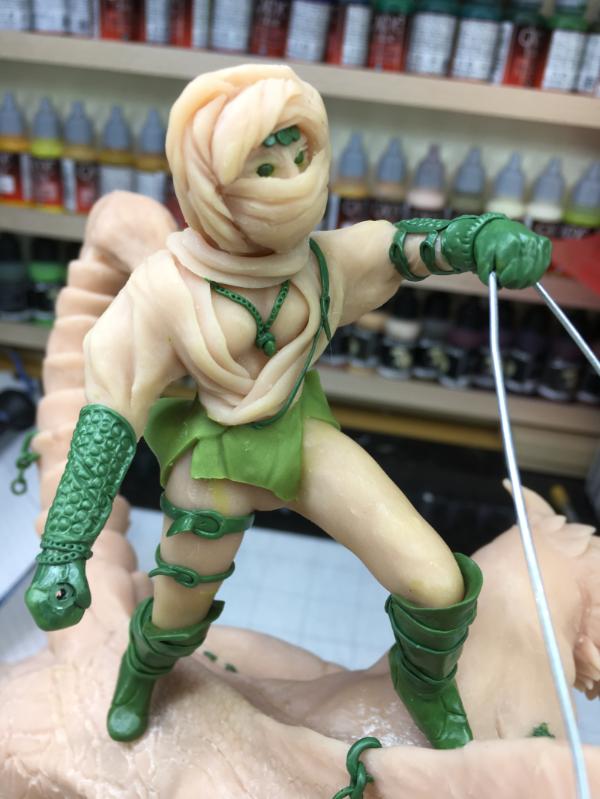
Some armor for the left

Since normal reigns wouldn't have worked and I lacked the time for chaines, I decided to sculpt some "Magic" raigns
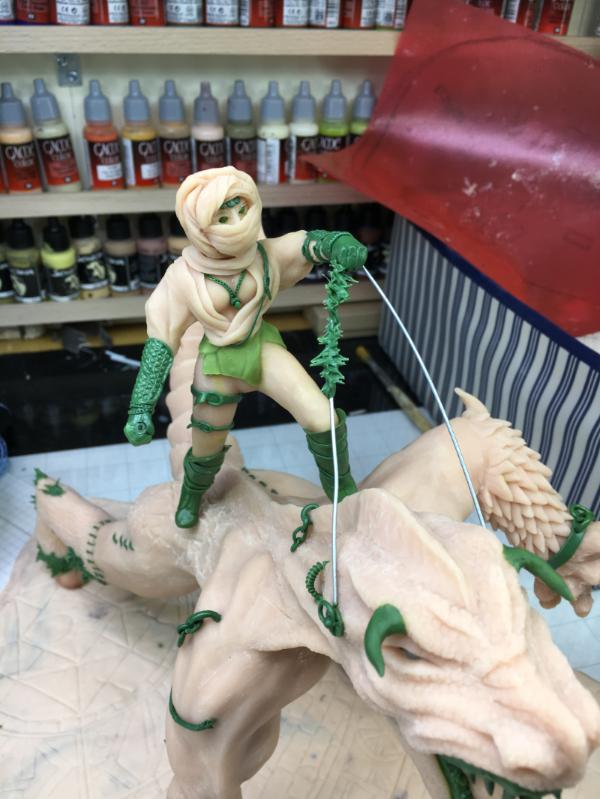
magical reigns and accessories

A knife for her thigh

and a scratchbuild book or tome
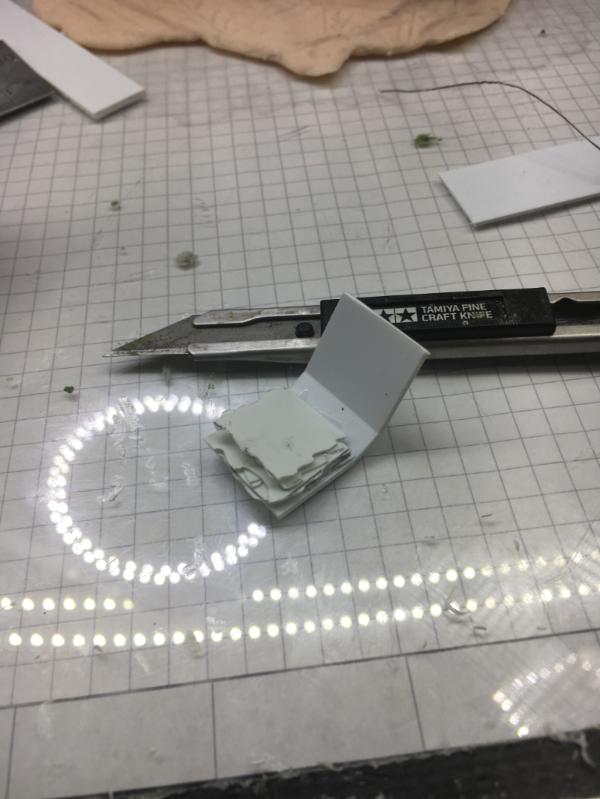
A good magican or priest needs a book or two
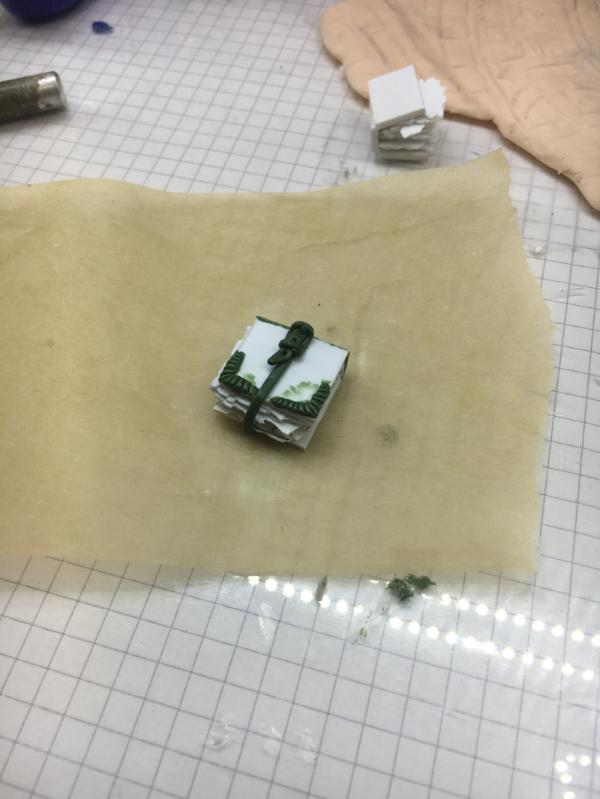
So here she is with her staff and the books


And that is it

Unleashing the Beast
As the barbaric horsemen from the north drew closer to the sacred temple of Kar’su-Mah with every passing day the faithful
priestess Dali’ah concluded that dire situations asked for drastic measures.
With a trembling heart she descended the steps to the inner sanctum of the temple. Her hands were shaking violently as
she opened her Tome of the Faithful and started the forbidden ritual to unleash the horror of the Wopl’er-Tingah!
The mighty beast of nightmares created by the mighty Kar’su-Mah himself had been chained and bound for centuries in
the deepest hall of the temple. Never to be released, never to roam the deserts of the setting sun, as it would bring unspeakable
horrors to the world if it ever got free.
But tonight Dali’ah would ride the Wolp’er-Tingah out of the temple and meet the enemy on the battlefield. The beast would
crush the ravaging invaders with its unrivaled fury and cleanse the desert sands of this festering wound.
The Wolp’er-Tingah is unleashed!


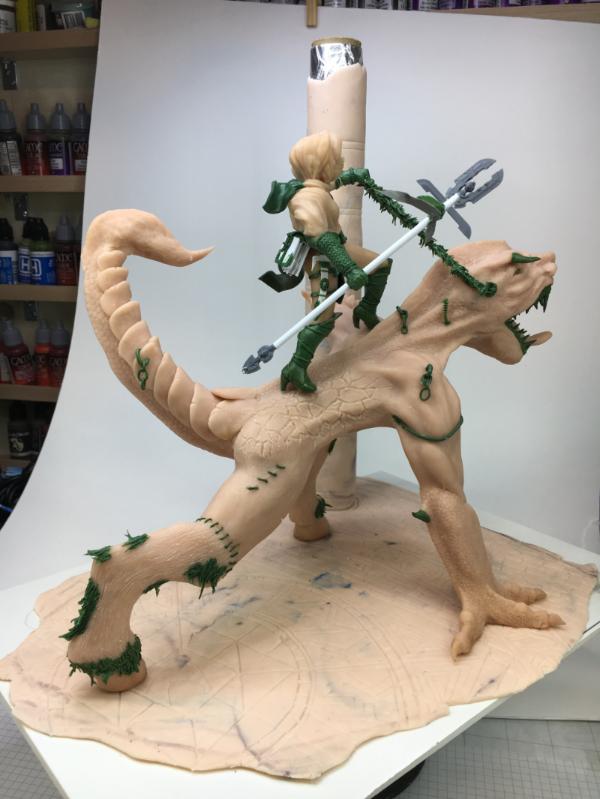
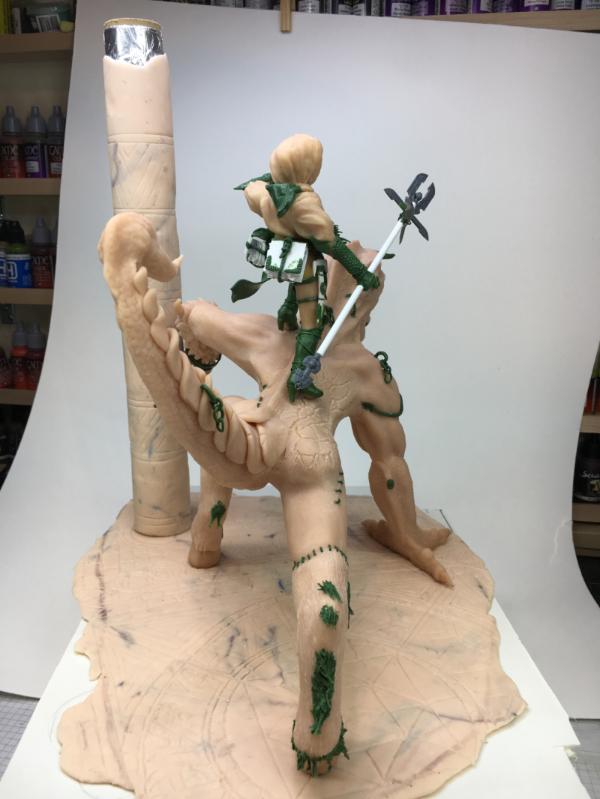

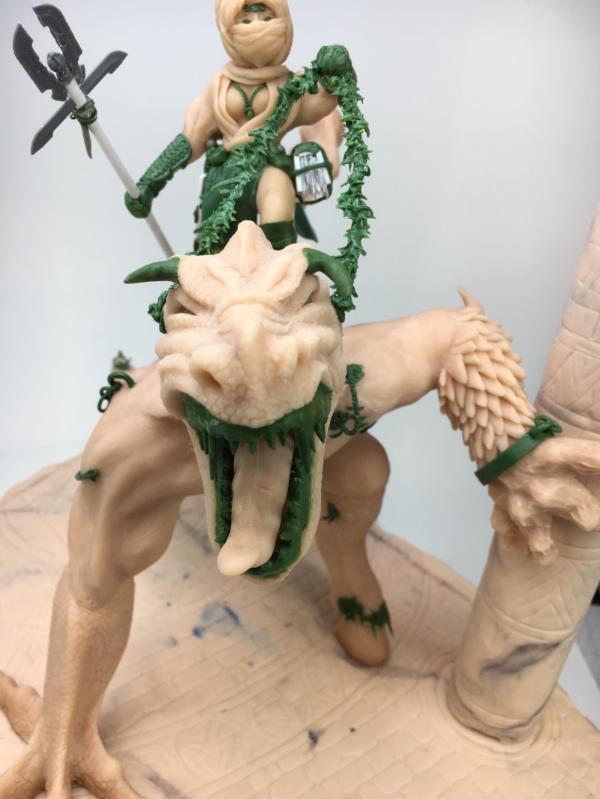


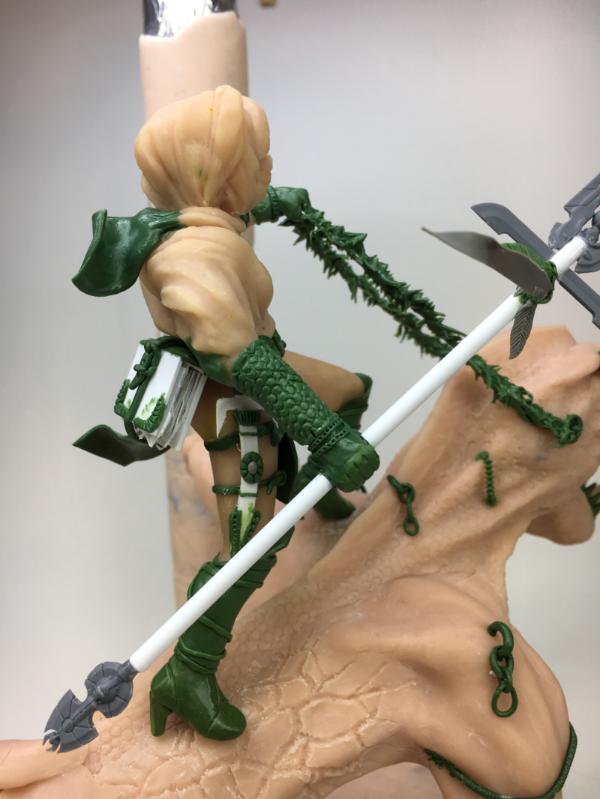
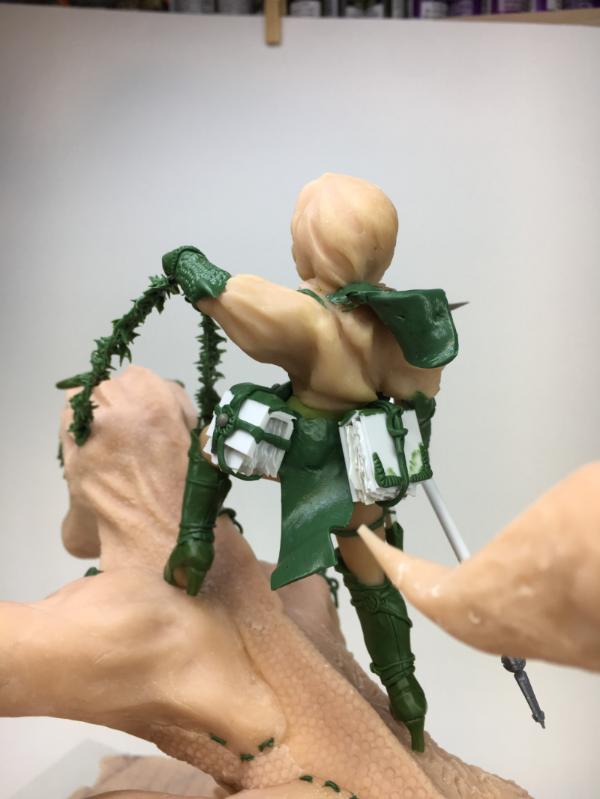
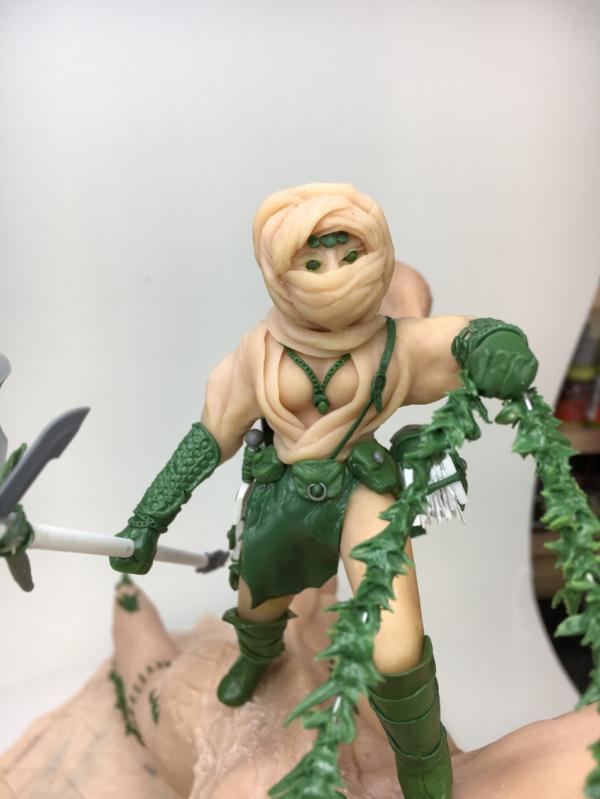
And a little YouTube Video:
https://www.youtube.com/watch?v=-aRPkak94qI&t=6s
I hope you like it
Cheers
Klaus
17738
Post by: Briancj
That's all really coming together!
62749
Post by: Dr H
Lovely detail work. Well done.
32373
Post by: Klaus, not Santa
Thank you guys!
Unfortunately I didn't score -the competition was very strong and my piece was designed with its painted status in mind, so I submitted a second rate piece anyway.
Nevertheless, it will be painted - just not now
In the meantime I finally got around to work on Banshee's Anonymous 2.0 bust - which I originally purchased for his competition - here you can see the 16 best entries (Facebook):
16 Best
At the time of that contest i did lack the motivation, but now I have my mojo back and decided to finally give it a try.
This is the the original bust
I call my project STARGAZER, and I have a kind of steampunkish eternal astronaut in mind.
So I used a lot of GreenStuff to sculpt his suit
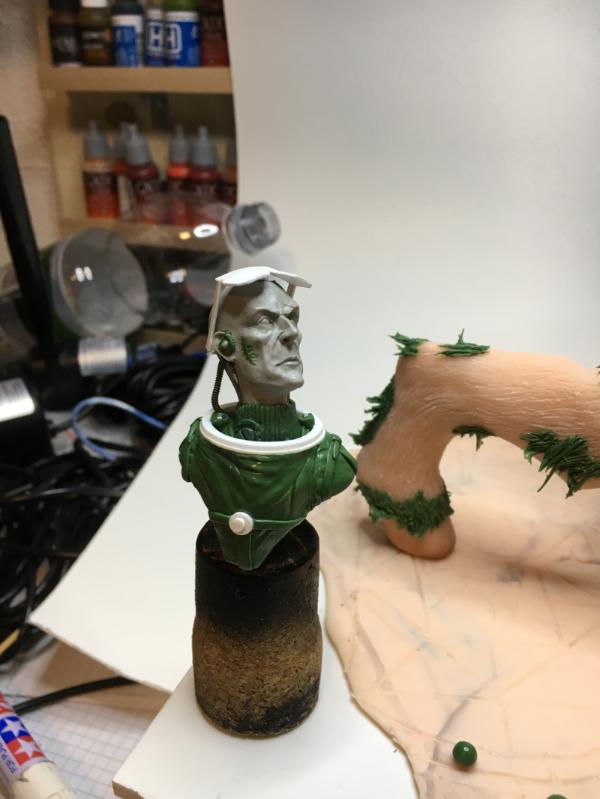

I then added more pieces
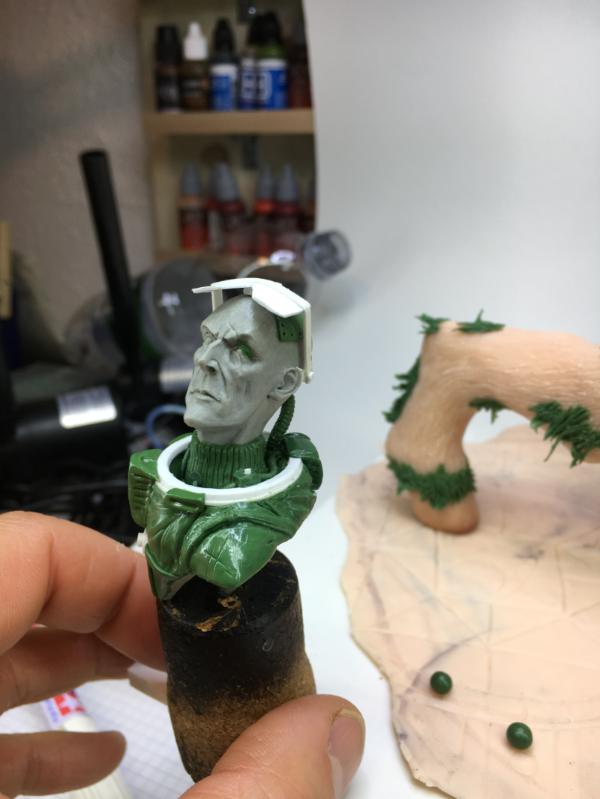
Including a visor and some cyborg-accesories

For the scene I planned to position him in front of a steampunk (spaceship) window with a view of a space scene
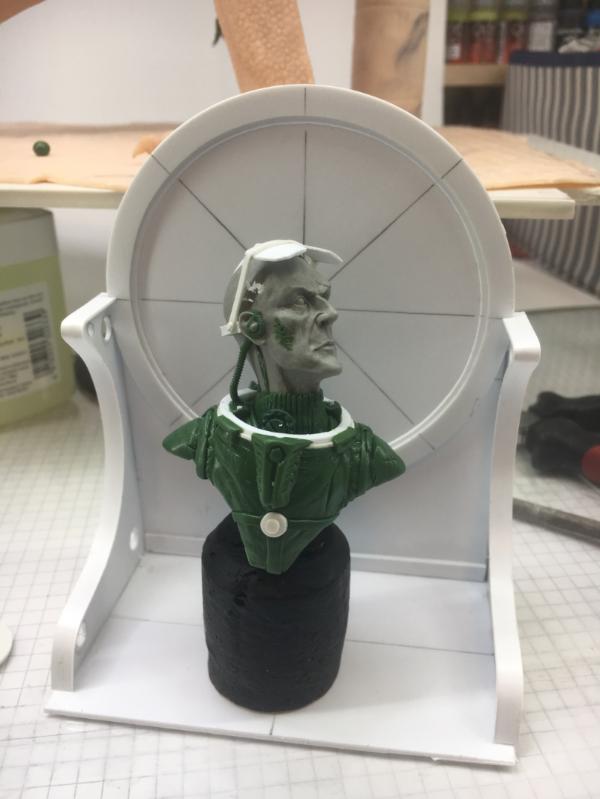
I'm not sure if this will really work out as I have envisioned
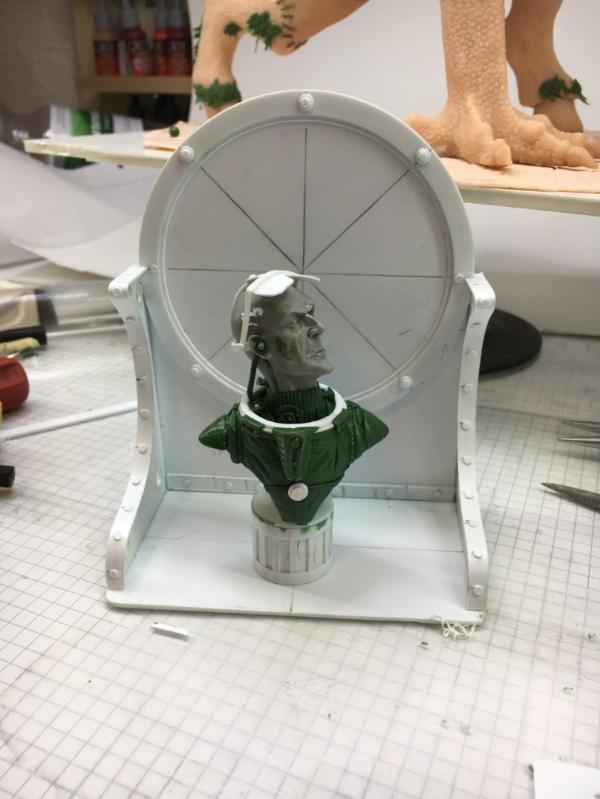
So I primed it with the planned light situation
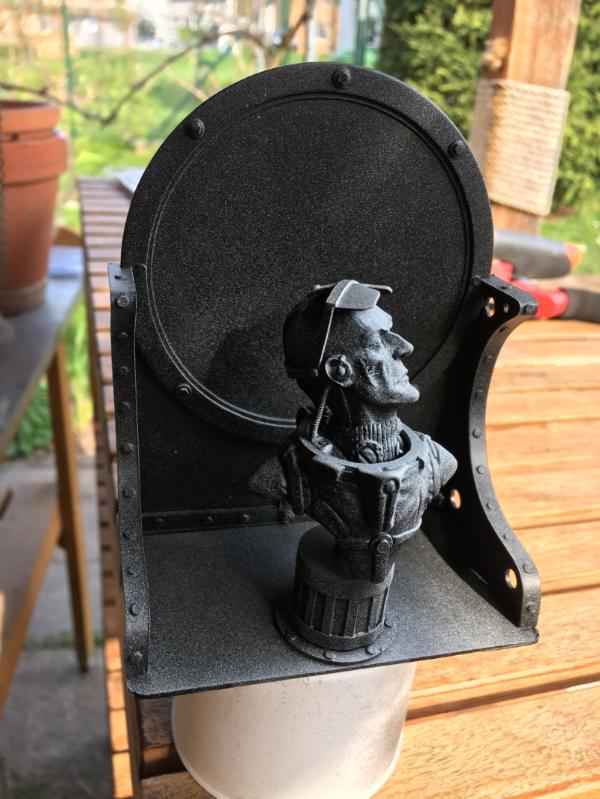
Steampunk colors for the background
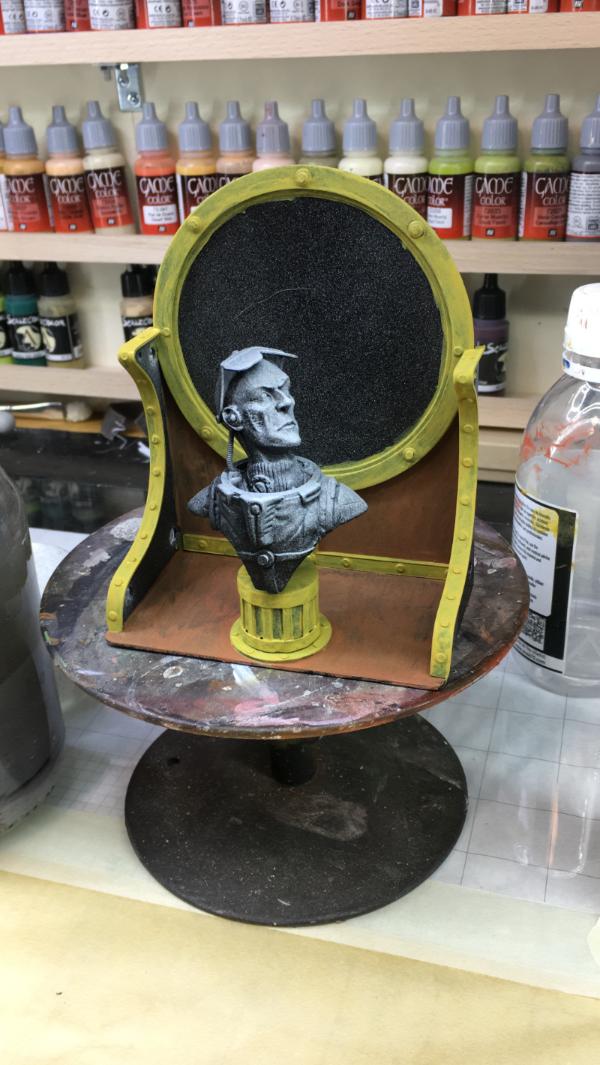
Here i established the base colors, and used green as a base for the skin tones
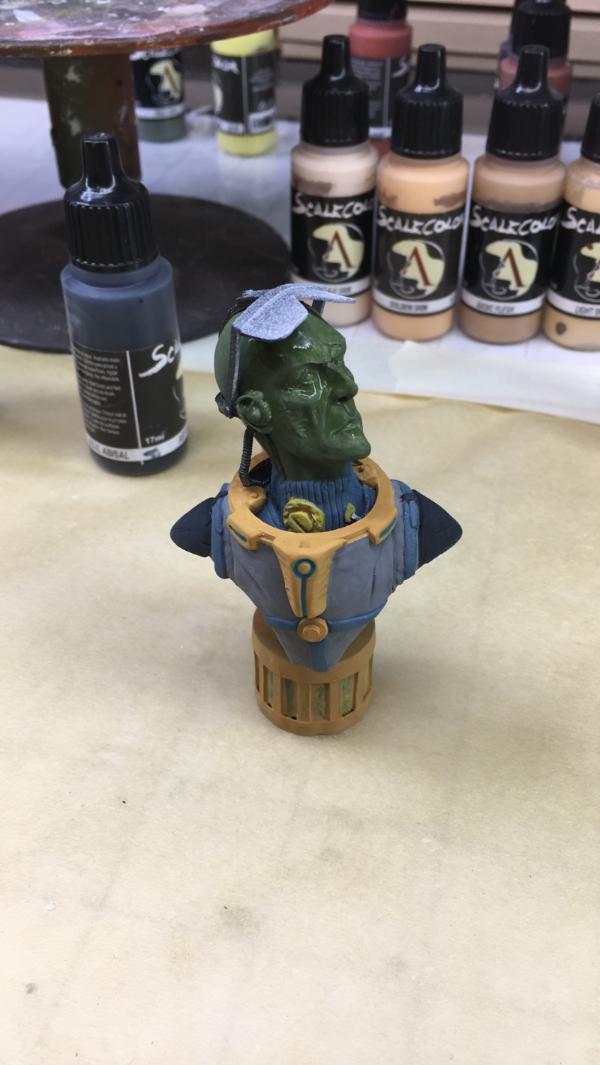
Looked kinda cool too
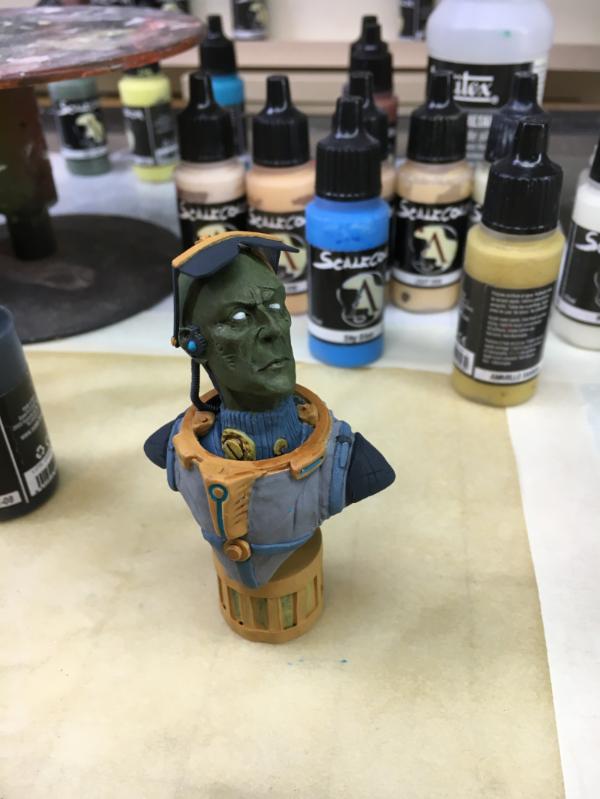
The skin color on the green base
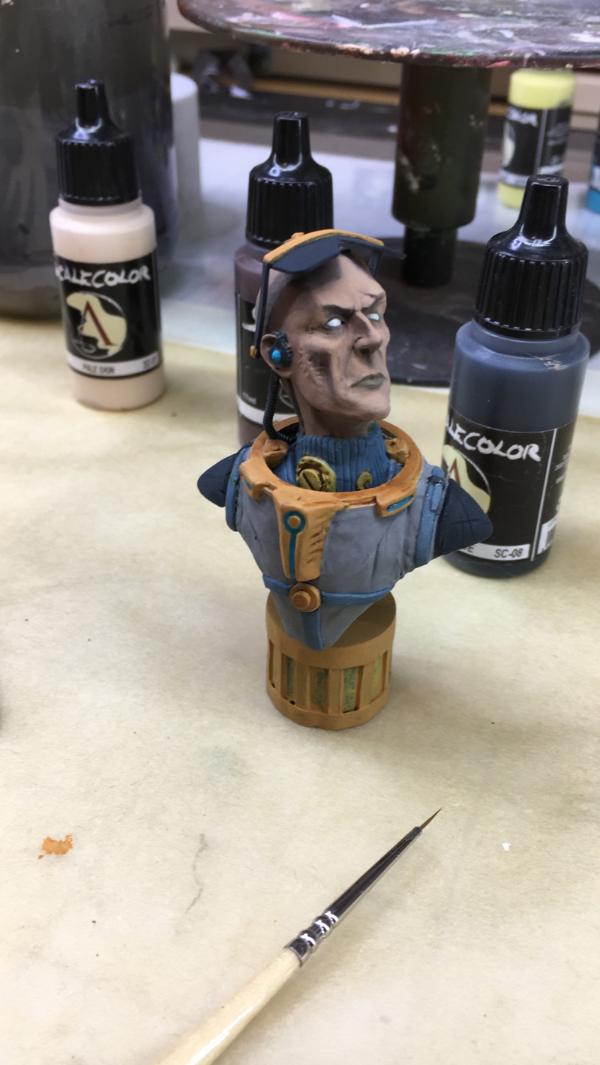

The face almost done

Including a first version of the space reflection on his visor

With the background scene

Some light effects
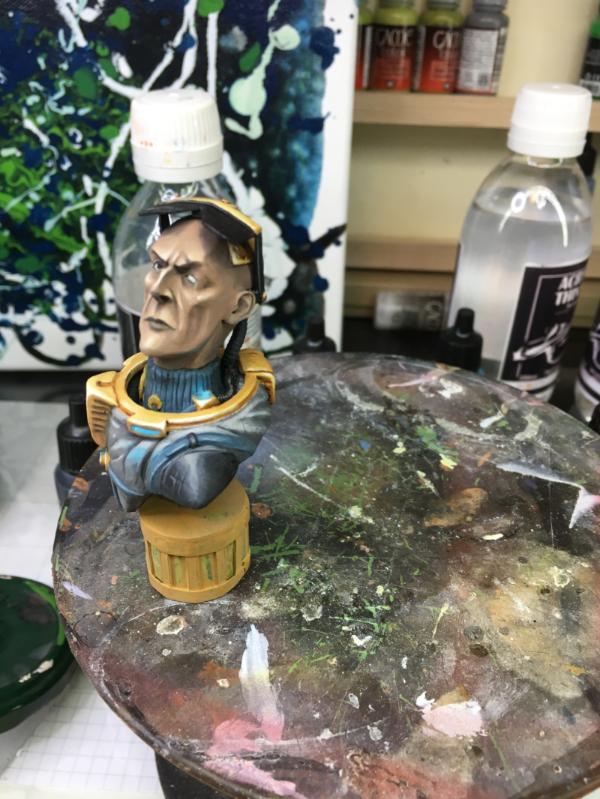
Then I reworked the background space image
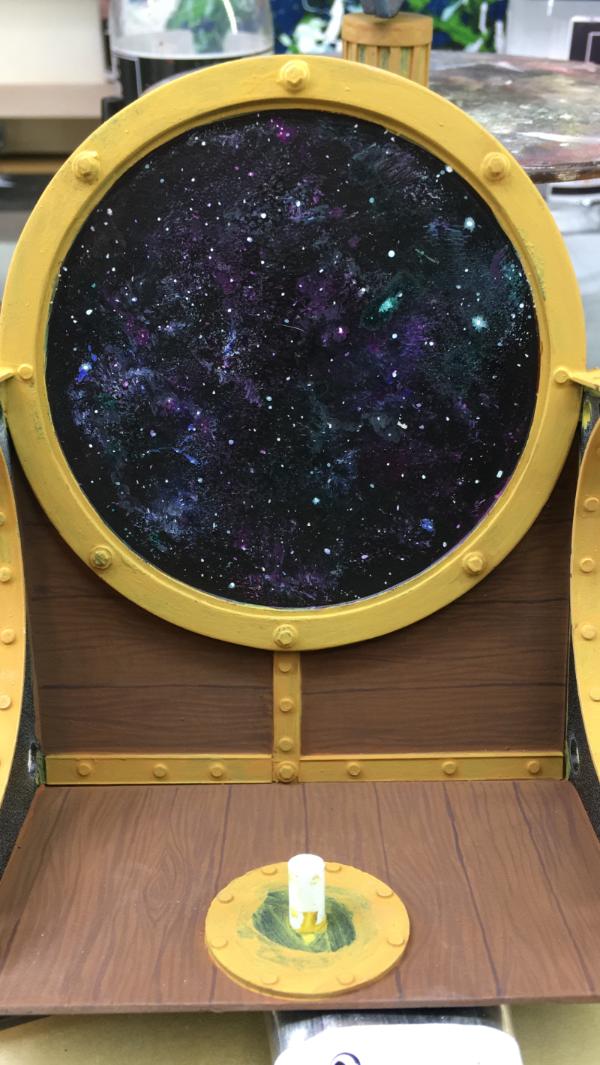
And this is as far as i got
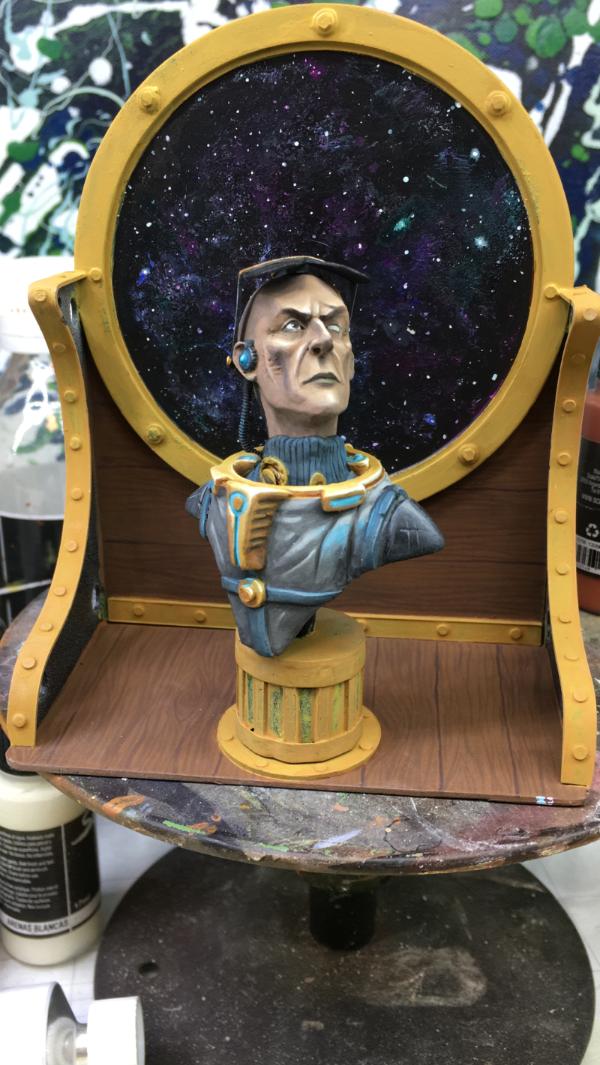
106010
Post by: Meer_Cat
Good to have you back, Klaus!
Wonderful work, very definitely a 'Space, 1899' feel to it. I'm a big fan of the Girl Genius comic, and I think you've captured the steampunk elements very nicely. I like your process for determining how the light will lie on the subject and amongst all the other things I've been sampling lately, will give that a try in the near future.
In noticing how you've been working on the eyes, I wonder, is the Stargazer blind in one eye?
I think you've brought all your elements together splendidly!
30672
Post by: Theophony
Nice vibe coming from him.
I like the star field backdrop you have going there. Was worried you were just going to let the primer coat stay (I should know you better by now).
Colors are also a really nice choice on the suit.
32373
Post by: Klaus, not Santa
Meer_Cat wrote:Good to have you back, Klaus!
Wonderful work, very definitely a 'Space, 1899' feel to it. I'm a big fan of the Girl Genius comic, and I think you've captured the steampunk elements very nicely. I like your process for determining how the light will lie on the subject and amongst all the other things I've been sampling lately, will give that a try in the near future.
In noticing how you've been working on the eyes, I wonder, is the Stargazer blind in one eye?
I think you've brought all your elements together splendidly!
Thank you Meer_Cat!
Yes, the idea is to have him blind on one eye - with a scar going across the eybrow down to the cheek
Thank you!
Theophony wrote:Nice vibe coming from him.
I like the star field backdrop you have going there. Was worried you were just going to let the primer coat stay (I should know you better by now).
Colors are also a really nice choice on the suit.
Thank you Theophony!
Yeah the starfield backdrop was a lot of fun - though a whole evening of work
Well actually it is rather going slow right now, so it's just a mini-update today.
I decided to make the backdrop metal darker than the metal on the suit, giving a bit of contrast between backdrop and figure. So it will be more bronze or dark copper
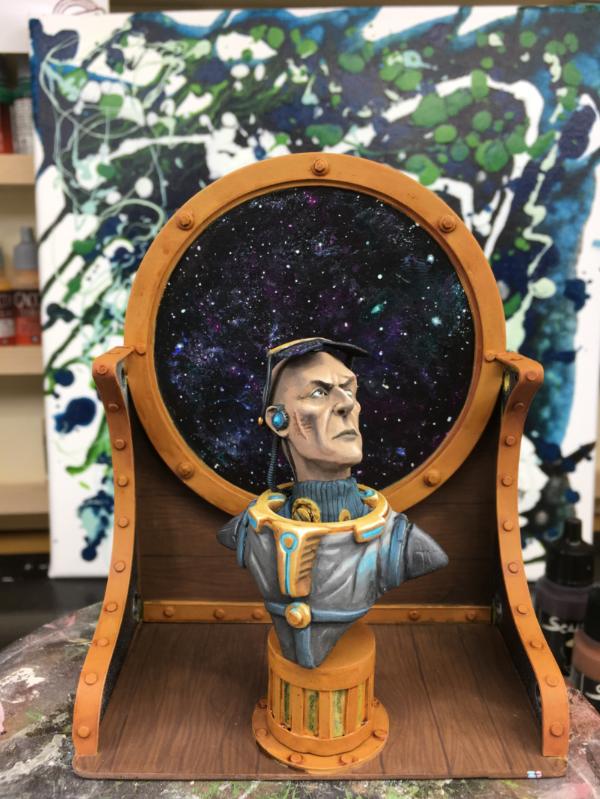
then I refined some stuff, like the blue-ish light on the base, light and shadow on the backdrop

So this is as far as I got.
Cheers
Klaus
32373
Post by: Klaus, not Santa
Last night I attempted to add a bit of patina in the form of Greenspan, using AK pigments

It left a very strong and visible smear all over - most likely my fault, but quite different from pigments I’m used to.
After the initial frustration I recovered and reworked the metal and wood

Then I did some more weathering, this time using my own paint mix for the Greenspan

As that was also a tad to strong, I toned it down some

With this I’m close to calling it done

Some cleanup and a tiny bit of OSL for the light in the plinth.
What do you think? Anything else?
Cheers
Klaus
30672
Post by: Theophony
Amazing work . He looks just like my fifth grade teacher mr. Morning.
120215
Post by: StormX
WOW, thats absolutely incredible, nice!!
17738
Post by: Briancj
Verdigris (basically, rusting/oxydizing copper/brass/bronze) is HARD. You've done great work with it!
--Brian
62749
Post by: Dr H
Nice progress, Klaus. Looking good.
94668
Post by: Strohkopf
Fantastic works!
Excuse me, myabe somebody already has asked this question, but what is that white material, and why you mix it and green stuff?
32373
Post by: Klaus, not Santa
Theophony wrote:Amazing work . He looks just like my fifth grade teacher mr. Morning.
Thank you!
My wife said that he lookls a lot like me with the brown eye....oh well
Stormatious wrote:WOW, thats absolutely incredible, nice!!
Thank you Mate!
Briancj wrote:Verdigris (basically, rusting/oxydizing copper/brass/bronze) is HARD. You've done great work with it!
--Brian
Thanks!
I always wnated to try it, but never had the opportunuity. I had an ink already prepared for it for years and noiw I was finally able to use it
Dr H wrote:Nice progress, Klaus. Looking good.
Thanks
Strohkopf wrote:Fantastic works!
Excuse me, myabe somebody already has asked this question, but what is that white material, and why you mix it and green stuff?
Sorry for the late reply...
Well the white stuff is plastic card (which I usually use to build my tanks and stuff) and I use it for less organic forms with clean lines and sharp angles - I wouldn't be able to sculpt these with GreenStuff - and it's less sticky
Don't hesitate to ask if you want to know more
So, I did some final clean-up and accented some of the lines.

I really like the way he turned out in the end

The images are a bit on the dark side though...

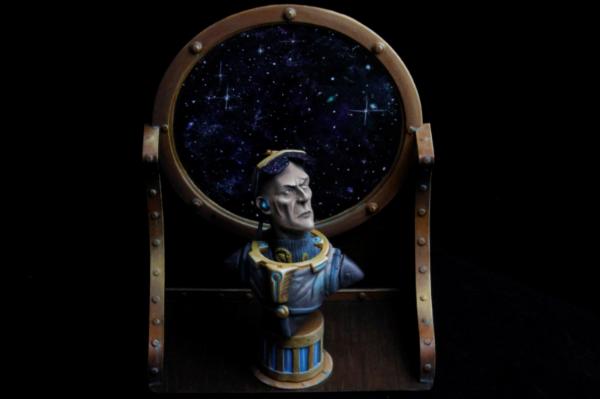
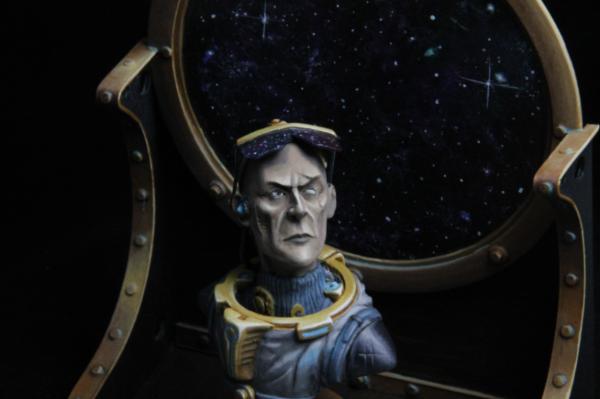
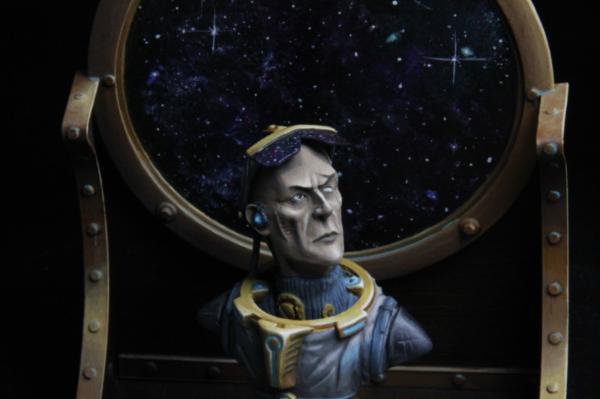
And now he's in good company
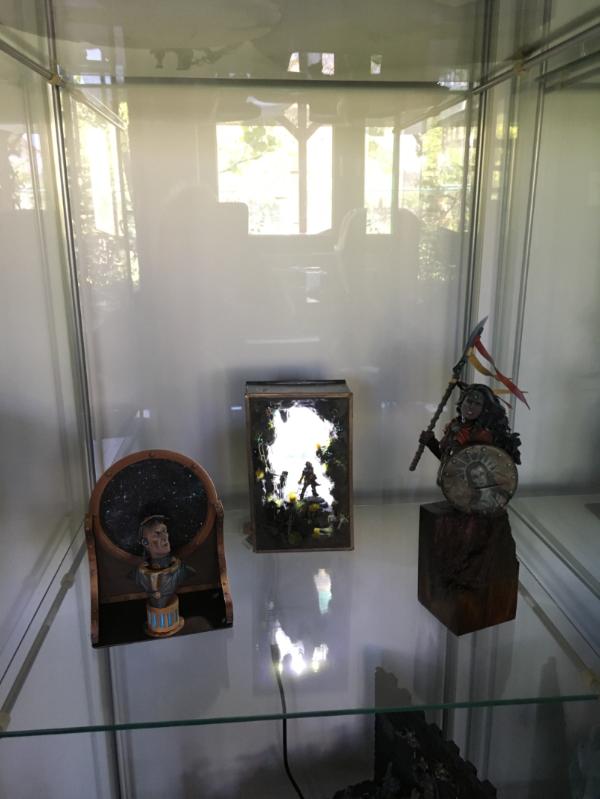
Sharing the shelf with the Guardian and Gothica

Thak you for riding with me on this one
Cheers
klaus
32373
Post by: Klaus, not Santa
And on we go!
A new idea that needs venting...
And if I mess this one up, I'll burn quite some bucks :/
In a phase of overconfidence I odered two Kits from kimeramodels.com
One being ABEL ( https://kimeramodels.com/product/abel-phoenix-chosen/)
and the other
ARES ( https://kimeramodels.com/product/ares/ )
Both are 1/24 scale and 75mm tall - they are awesome and superbly sculpted and detailed, but you know me, eh?
So I have the megalomanic idea of a duel scene between the two
This is my first rough sketch, with some initial thoughts scribbled on it

As you can see, the current poses in the kits are nowhere close to my vision
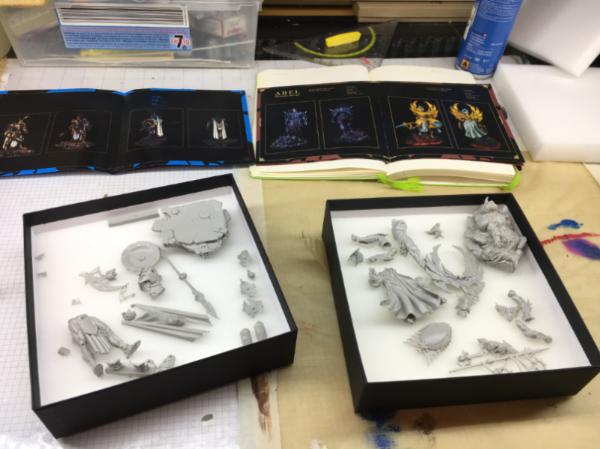
So let the chopping begin!
This is the left arm seperated
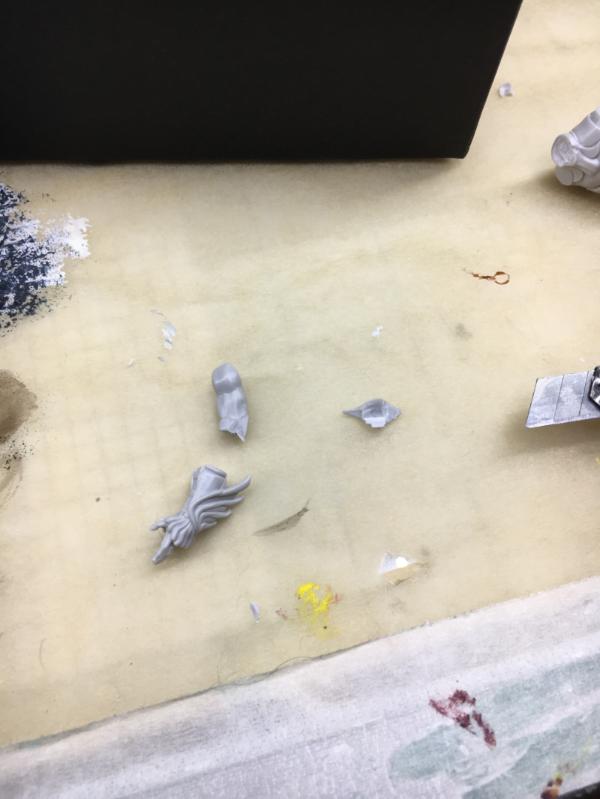
for the leg I'll make a backup copy of the knee-armour as I'm afraid it will break when I cut the leg

The other leg is already in a close posture, but the foot needs to be repositioned
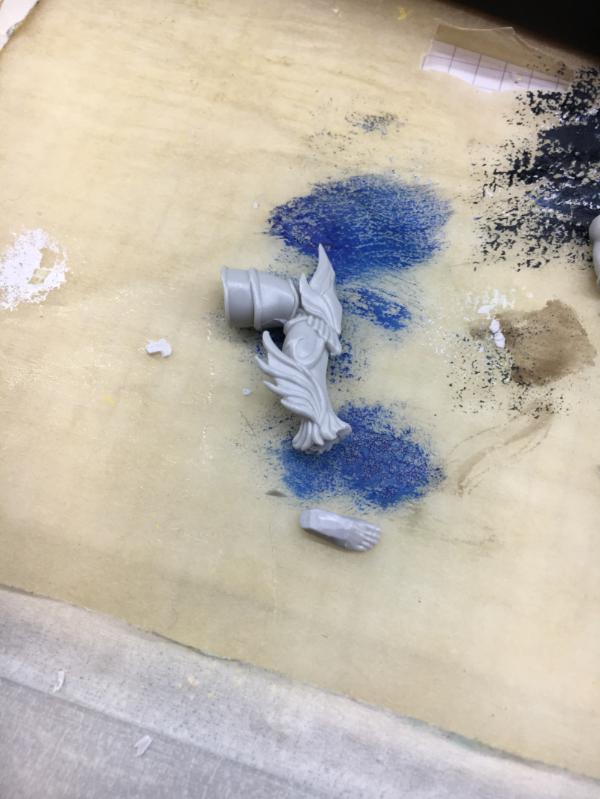
I inserted a small splint
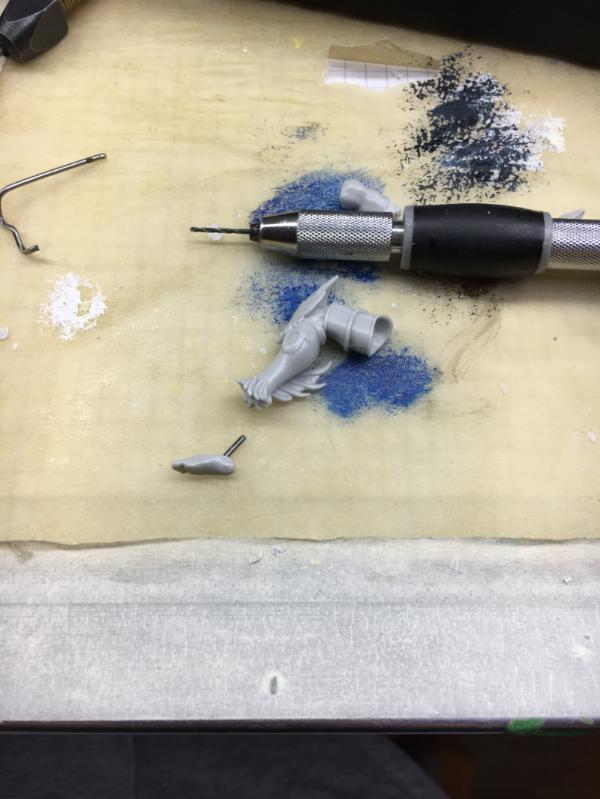
and then sculpted the new back of the foot
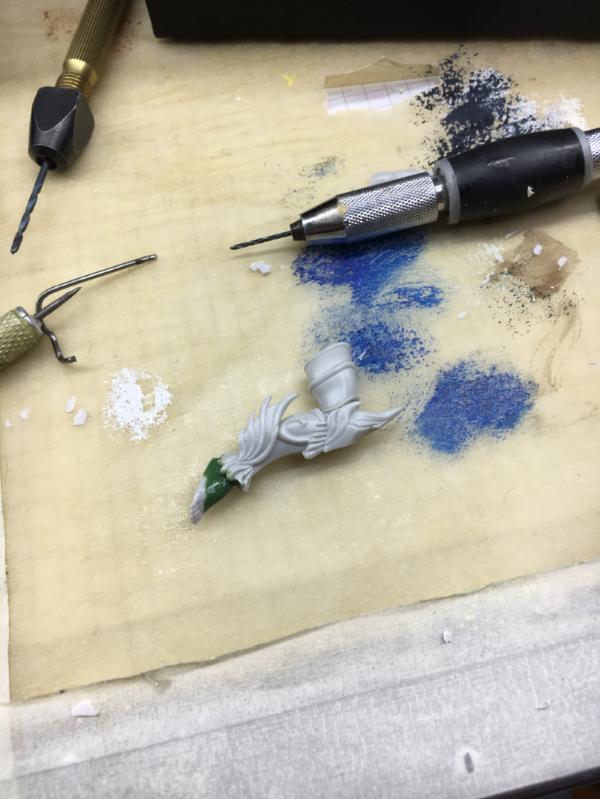
Well, this is as far as I got on the first day
So, am I insane?
What do you think?
Cheers
Klaus
65595
Post by: Camkierhi
Stargazer is amazing, stunning work. Really like the piece as a whole.
The new one, well not insane, with your skills and ability you will do an amazing job. I would be locked up, but you no, just sitting back with a cuppa waiting to see the amazing appear before my eyes.
17738
Post by: Briancj
Yes, you are insane, but that's why we follow your thread, so we can watch an expert at work.
106010
Post by: Meer_Cat
I like when you shift gears and do something bland and mundane for a change!
NOT! These are amazing kits- really looking forward to watching the vignette develop.
32373
Post by: Klaus, not Santa
Hi guys,
sorry for the delay, but today is ging to be a good update
I've been busy
So after the initial left leg, I started work on the right leg

This will be the "jump" position
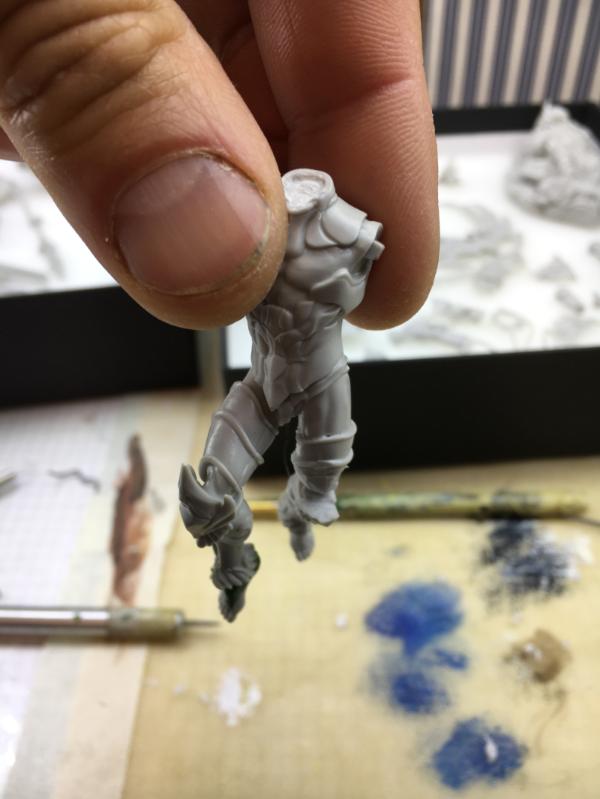
with GreenStuff

With the basic for the "good guy" in place I started with the bad boy
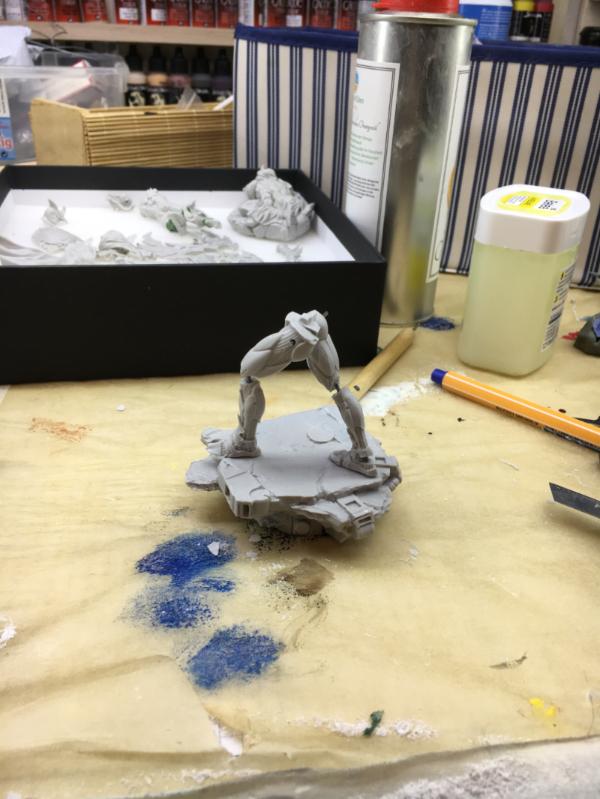
As the sketch showed I want him to be in a kind of defensive posture
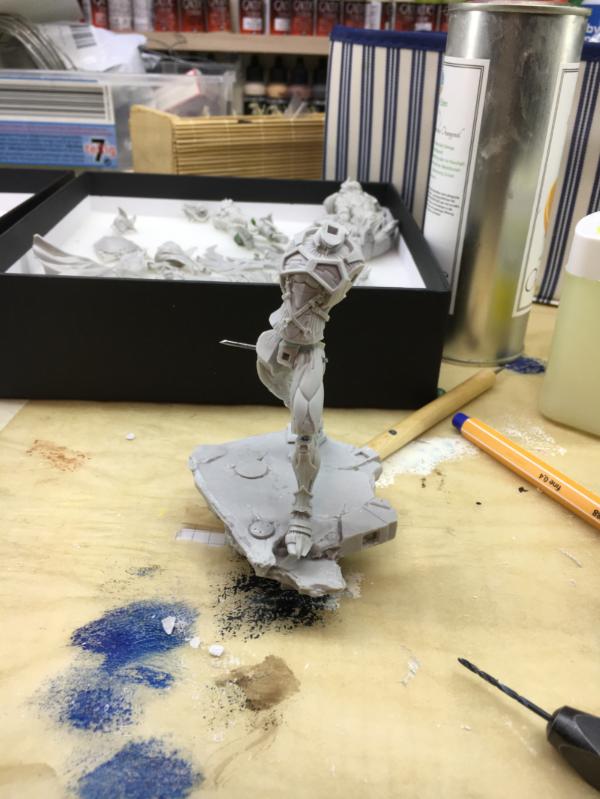
A quick check for the head
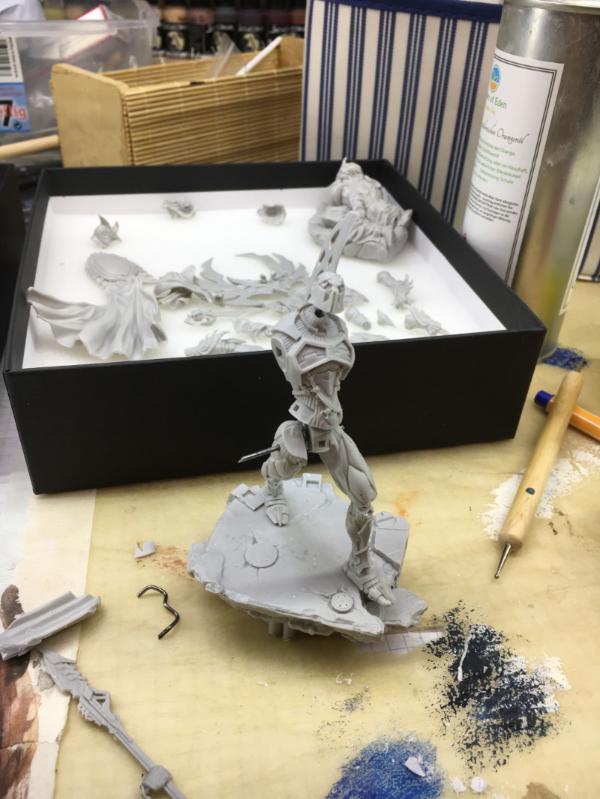
Leg and hip area filled with GreenStuff and left (shield) arm attached
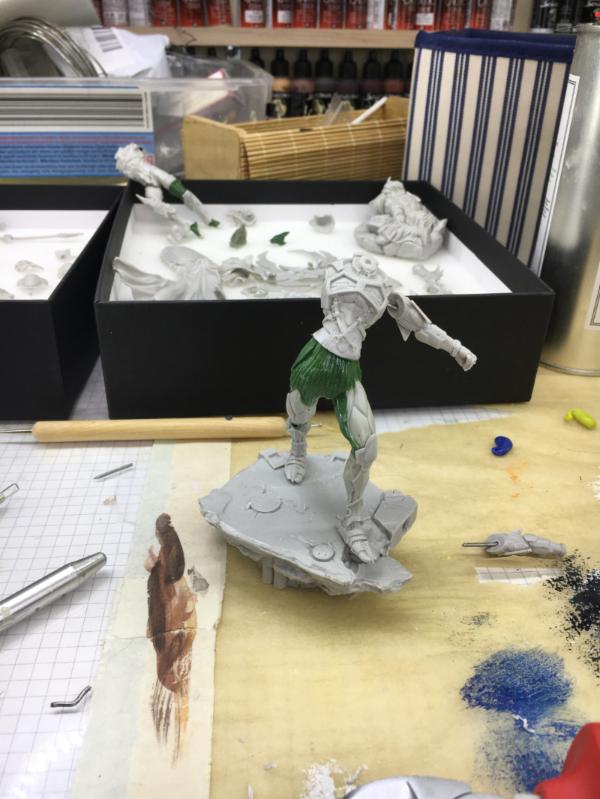
With spear arm and head
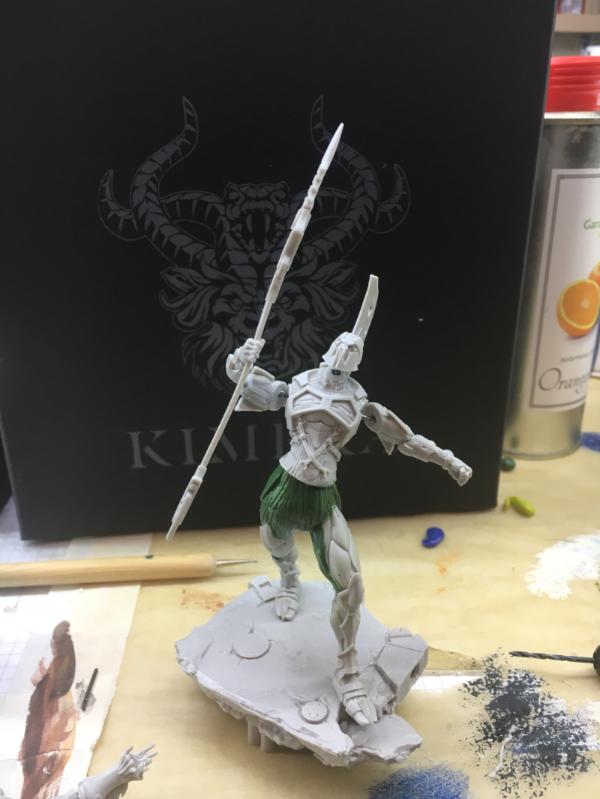
And a first matching of the two

The rest went rather quickly

It is pretty much the dynamic pose I had in mind
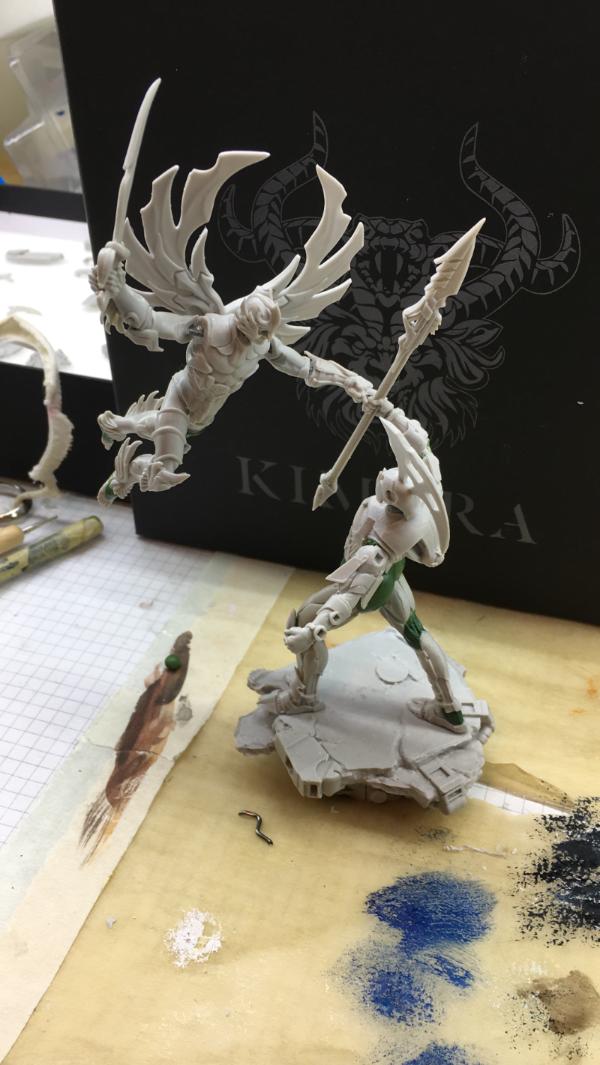
My desk was really a mess
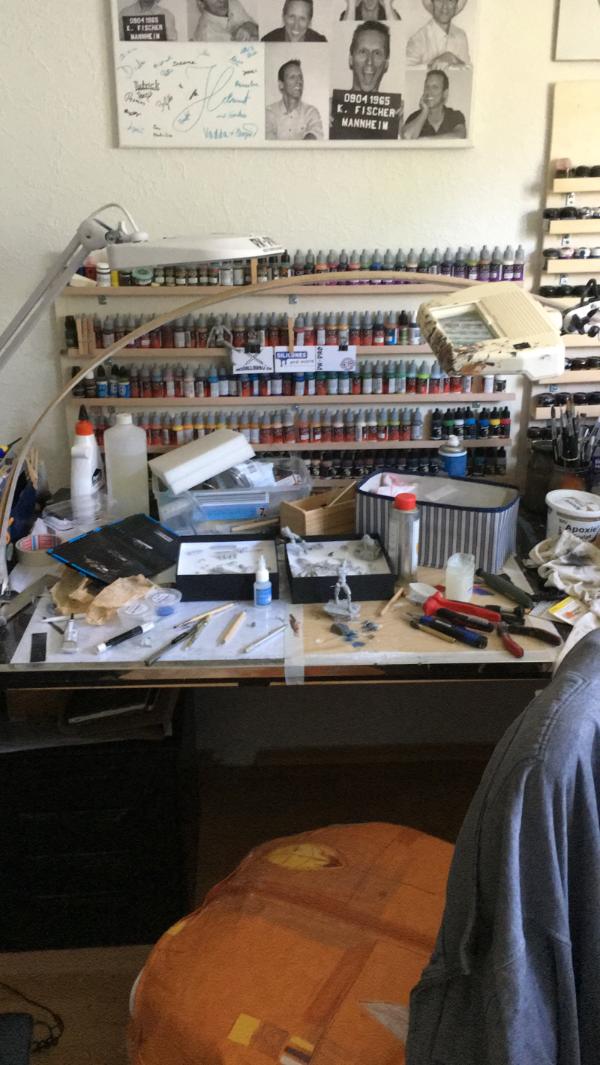
Here I did a first test with the cape - that originally belonged to Abel, but really fits Ares in this pose

A final decission point was on weather to go with horns to the helmet (yes) and maybe exchange the spear for a sword (no)

So I finished the bad boy with horns, cape and spear
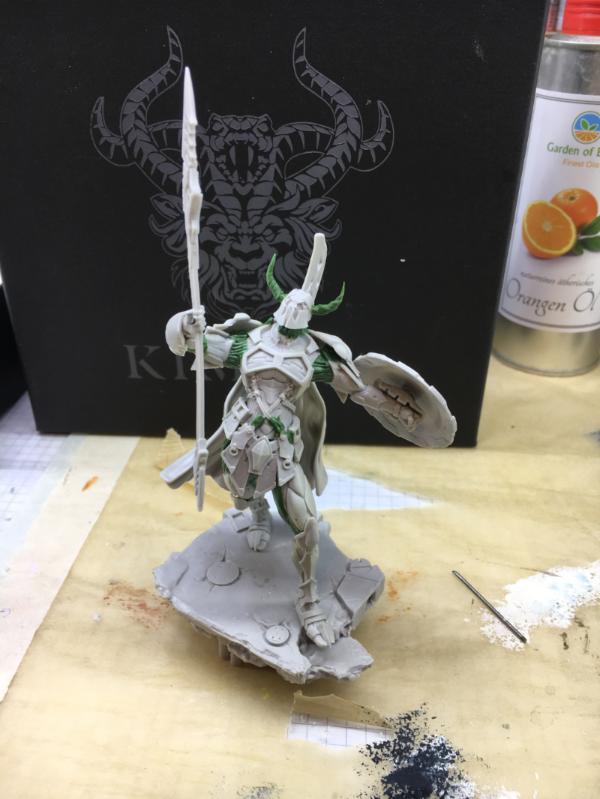
and the good guy with a "flaming" sword

And so I conclude the built
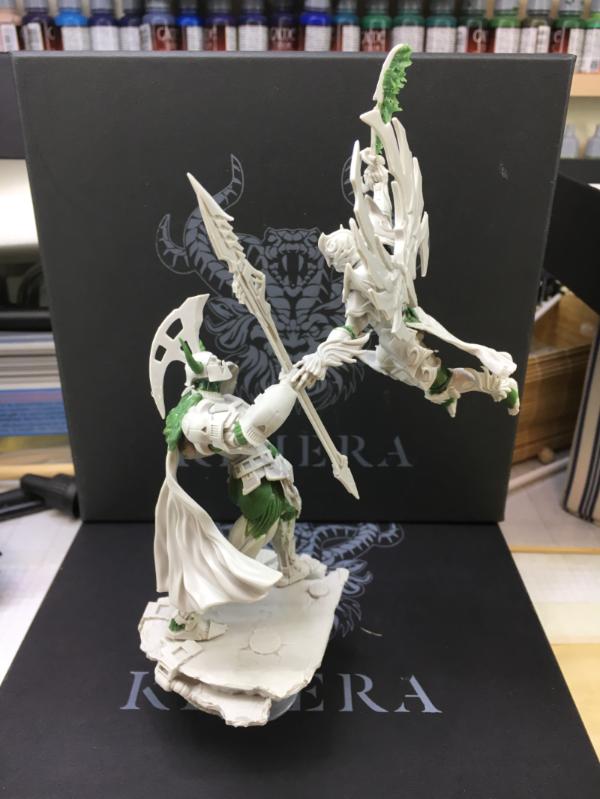

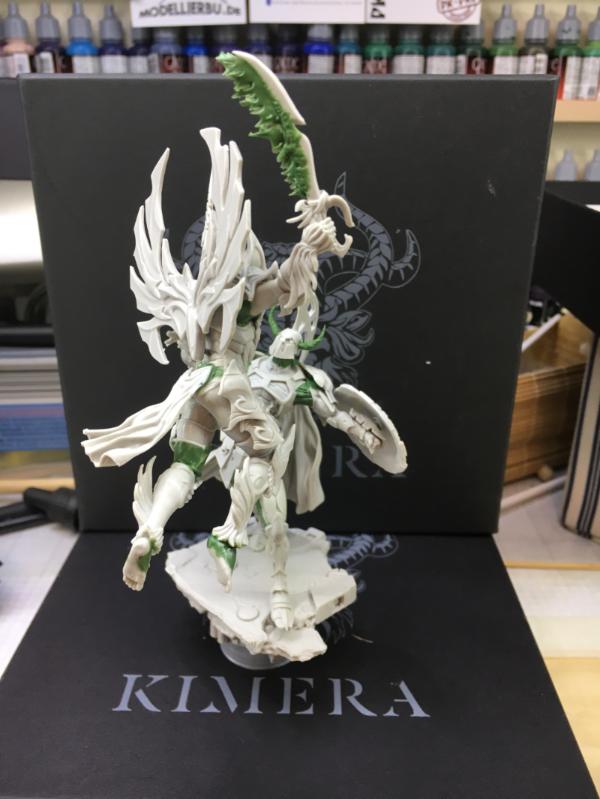
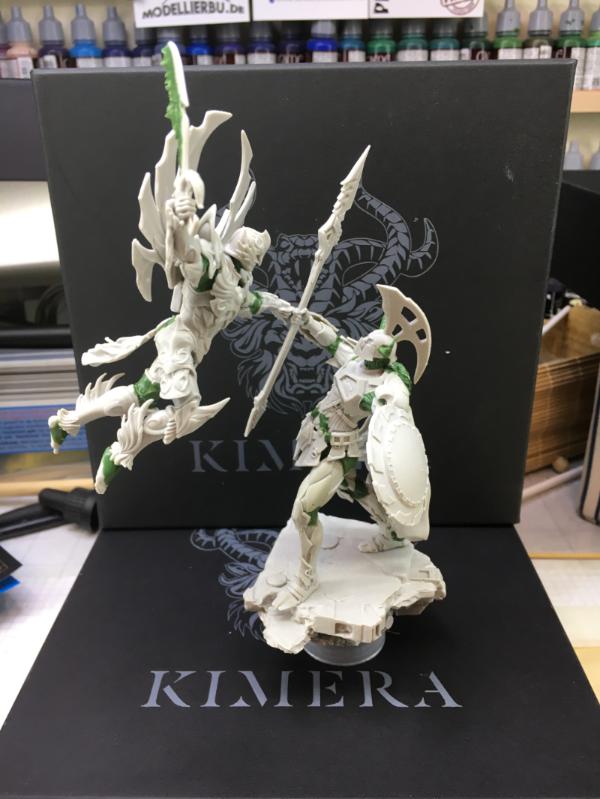

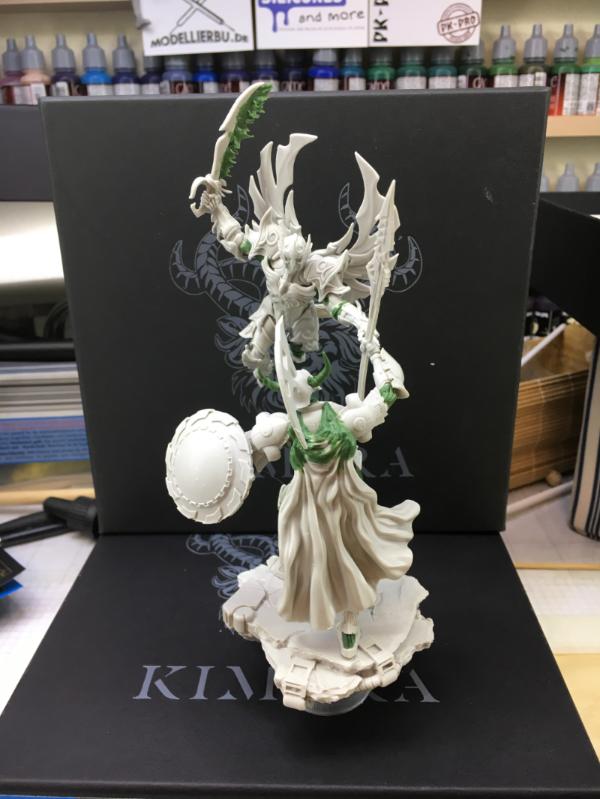
So, what do you think?
Cheers
Klaus
17738
Post by: Briancj
Get that statue balanced like that is amazing.
32373
Post by: Klaus, not Santa
Thank you Brian!
Yeah, I was thinking a lot about the balance issue, but luckily it worked out nicely - these models are very light in weight
So, with the built complete, it was time to prime them and clean up the desk

Here you can see the pin that is used to connect the two models
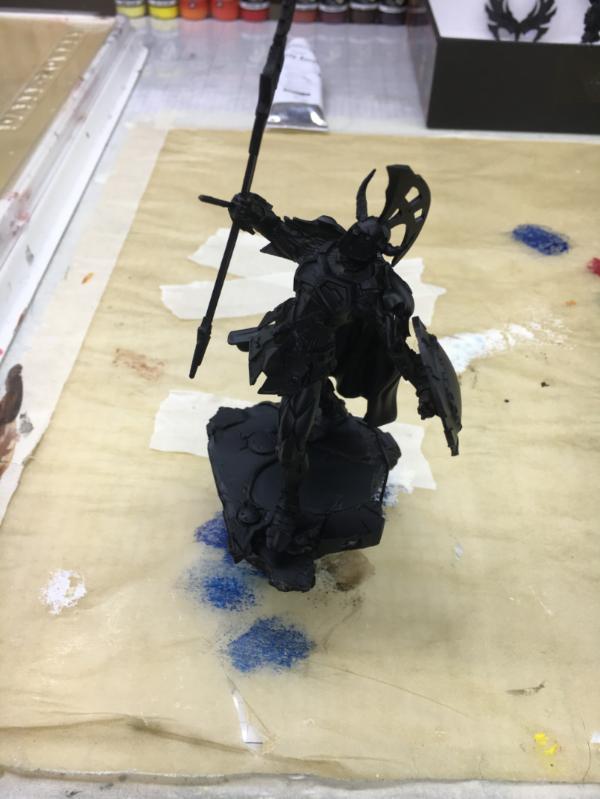
With the diorama depicting the eternal fight between good and bad, light and dark, fire and ice I initially had the idea to use some molten metal armor for the bad guy - the one out of hell
For this I tried some different designs

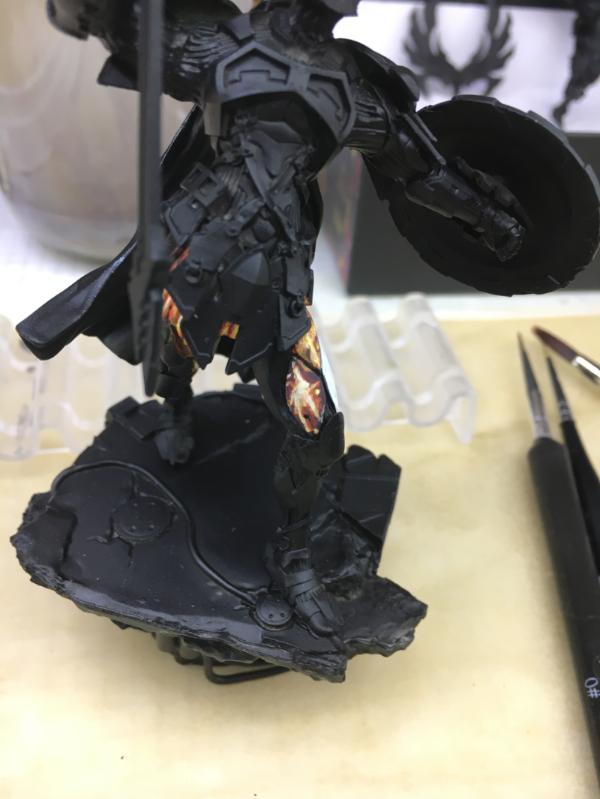
but so far none was really convincing
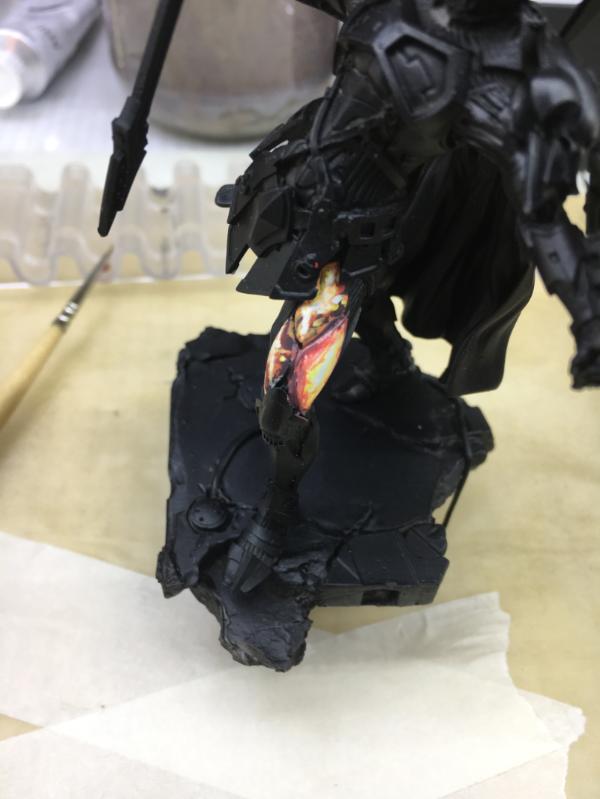
Especially for the cape I realized quickly that this would absolutely NOT work
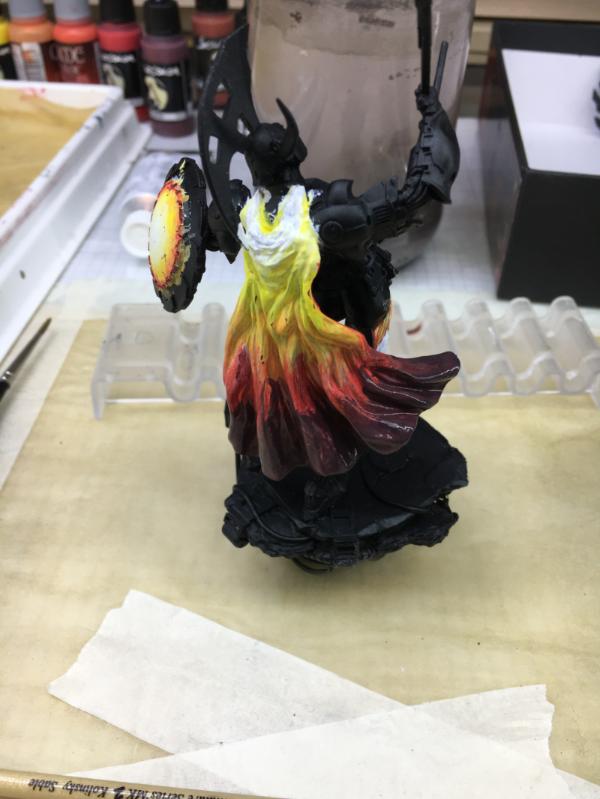
On the legs ... hmm, it COULD work
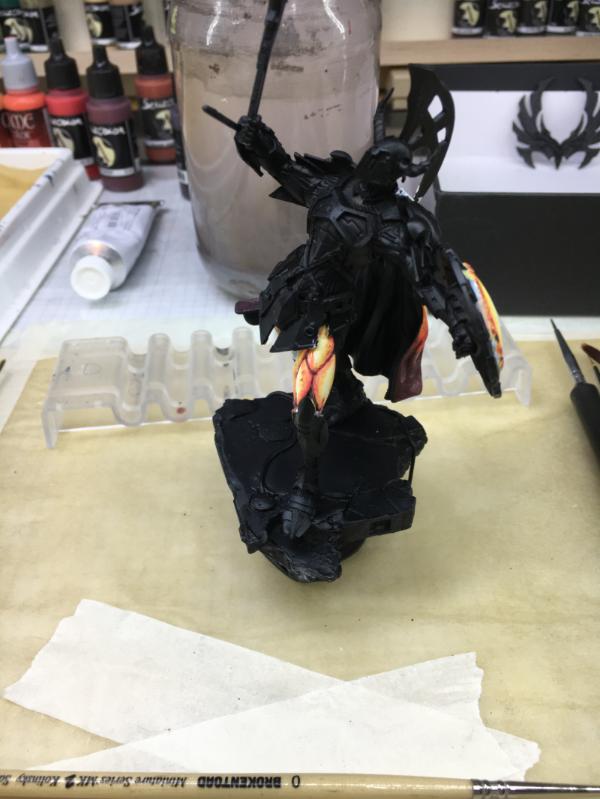
So I concentrated on the shield for a while

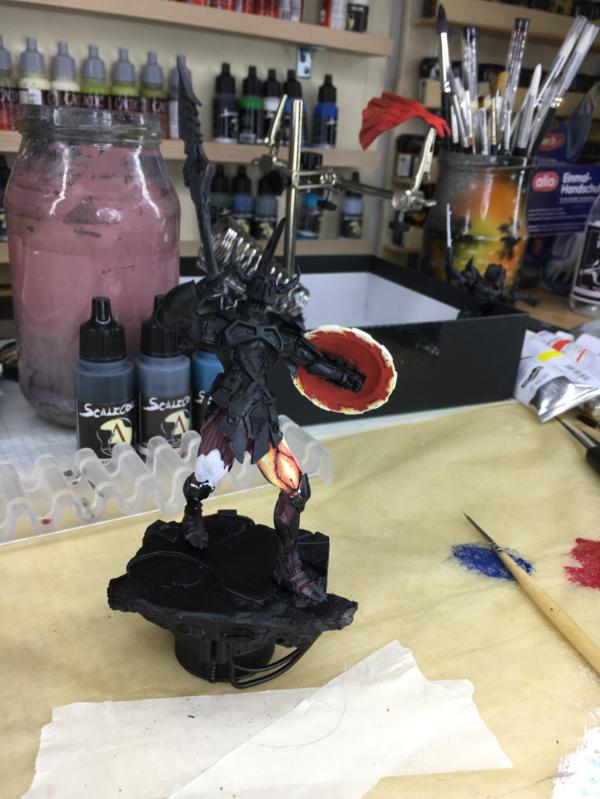
and decided to continue with the legs to see how it would work together

I'm semi-pleased

while Ben totally lacks enthusiasm

and Luna is all but conviced
So what do you think?
Start again?
I'm really not sure....
Klaus
89168
Post by: youwashock
Woah.
That's astounding. The progression makes it all look smooth and effortless. This will be an amazing piece when it is done.
32373
Post by: Klaus, not Santa
Thank you youwashock!
Well, I was struggling for the last few days, but then last night my Kimera Kolor Set arrived

So I immediately went to try them out
Their pigment level, hue and saturation is simply astonishing!

Blending and glazing takes some getting used to
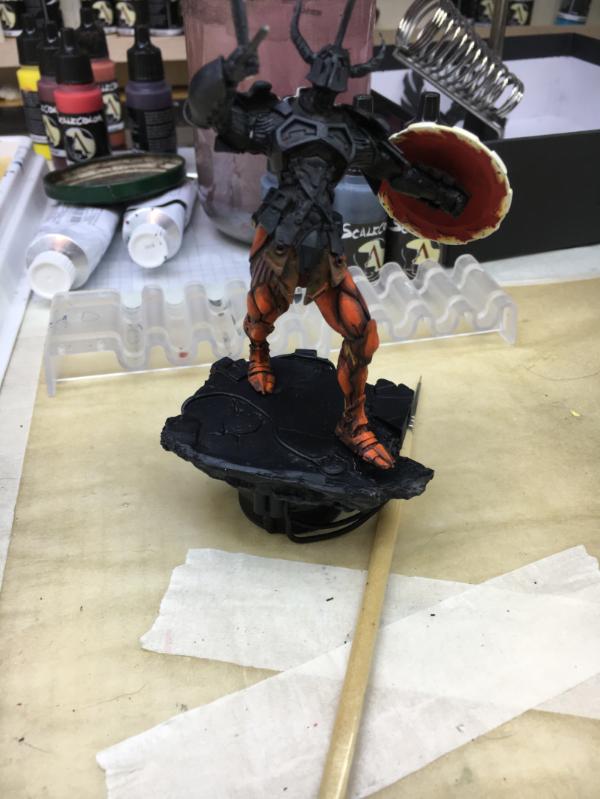
But it is fun painting with them
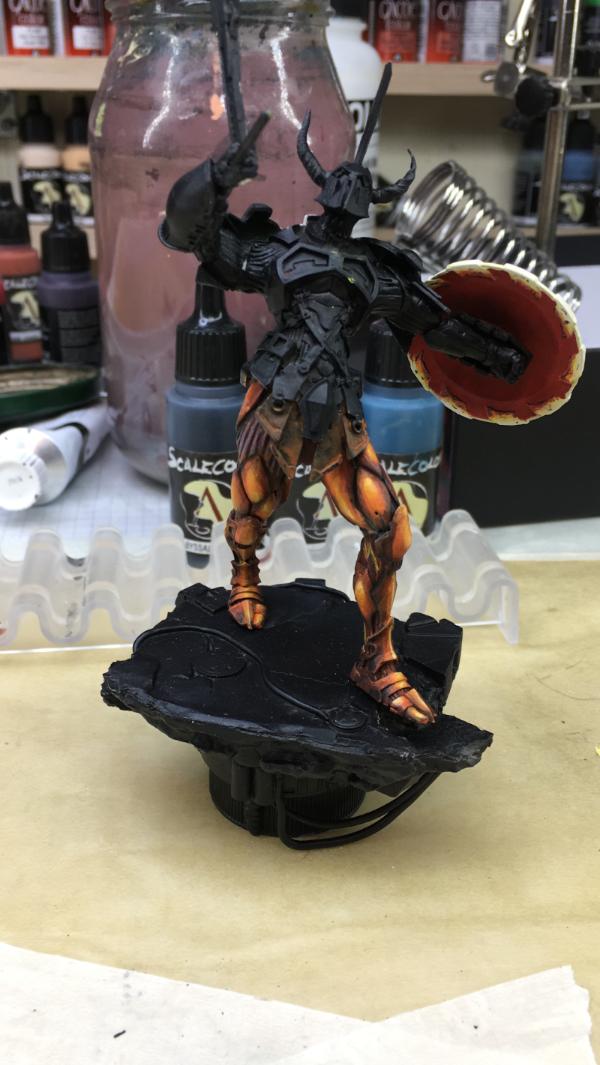
And so for the first paint session I'm mighty pleased
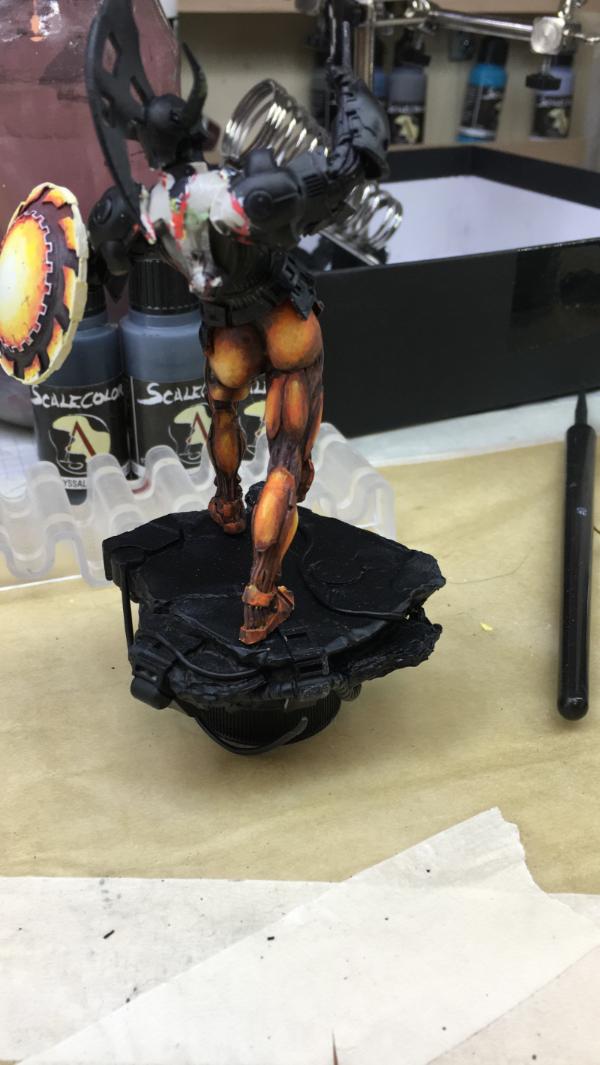
What do you think of the change of color scheme?
Cheers
Klaus
17738
Post by: Briancj
I think the darker scheme is better, I feel it it more suitable to the figure.
30672
Post by: Theophony
Is it really strange that I like that blazing rear end shot  .
62749
Post by: Dr H
Cool posing, Klaus.
I like the shield bright, but the armour pieces darker. They are kind of more brassy, which suits armour more.
The shield may work in dark too, but maybe a mixture of the two tones will give him some contrast (depending on what you have planned for between the armour), maybe with the chest and shoulders in the lighter tone to match the shield.
I just feel that if he's all one tone it may be too much. But that depends on what else you are doing with his scheme.
36940
Post by: Anvildude
You've got the right idea here- consider if you will the various colors of hot metal- it starts at a dark 'cherry' red, then goes to bright red, then straw yellow, then bright yellow, then white. Orange isn't actually often seen, except maybe right between red and yellow (but that's really the Straw yellow part, which is not quite orange, but more of a dull yellow).
Also considering heating patterns- you've got it pretty well done here, but the edges are going to be either the hottest part, if the heat is coming from outside. The hottest bit would be in the middle, if they're in the process of cooling down. If the heat is coming from the body of the demon, maybe the bottom and center of the plates are hottest, and the top edges cooler.
Right now, it's mostly at the Straw Yellow color- I'd say get some more highlights in there, for the greater contrast. I'm sure I don't have to tell you about this, but I've found that contrast is the best way to show something 'glowing'. And just little spots of an ivory white did a lot to make the molten metal in my own Crucible terrain piece pop.
Alternately, you could go with actual MOLTEN metal, with slag islands floating along on it- I think you were starting to do that a little, but you have to think more 'plate tectonics' when doing it- reference is your friend here.
68345
Post by: xXWeaponPrimeXx
Wow Klaus, definitely liking this one. I can almost see these at gods or titans fighting.
I can't wait to see how it all turns out!
32373
Post by: Klaus, not Santa
OMG 5 months!
I'm really sorry for the long silence.
I had a pretty bad encounter with a "tennis arm" which incpacipated me for a long time. It still feels bad and I'm often in pain, but by now th evibe is back and I was able to pick up my brushes again.
Since the last update
I did change quite a lot.
I didn't really like the way it had turned out - especially since I couldn't get the "temperature" across. So I repainted the metal armor parts in a kind of burnt-out metal and added the glowing lava feeling to the sections between the armor

From here it was mainly increasing the lava effects
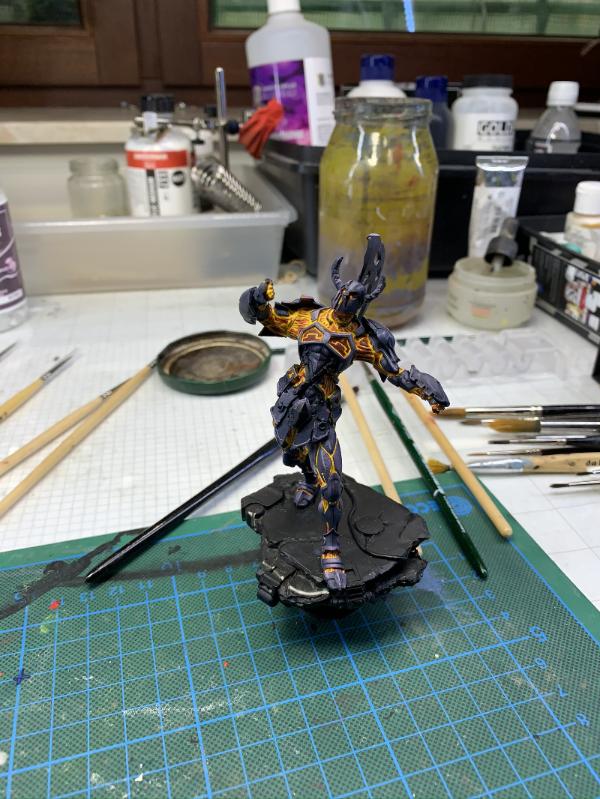
A first posing check with the new color scheme

I also added some glow effects back onto the armor
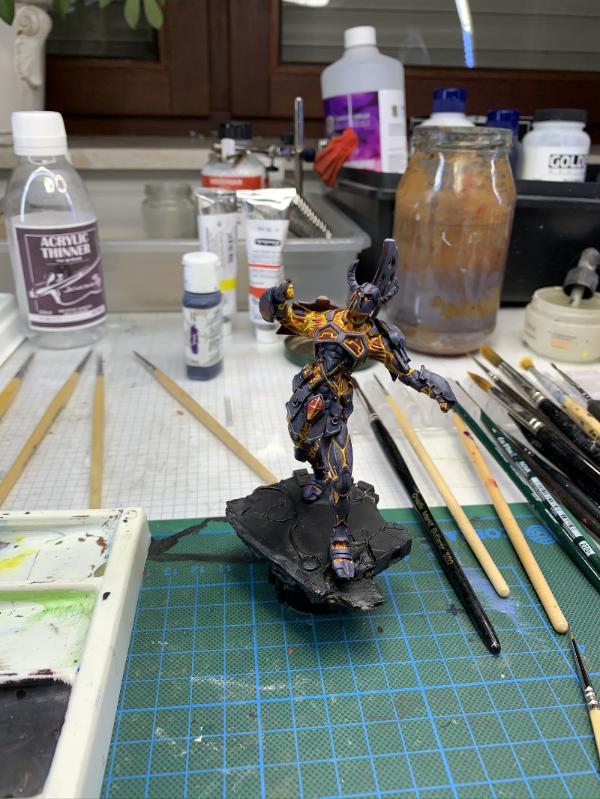
Still needs plenty of clean-up
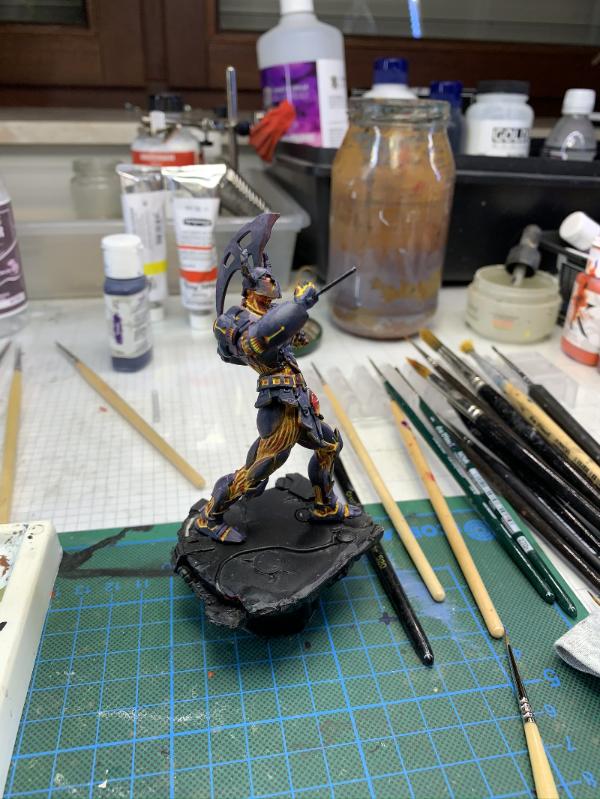
But I think the burning feeling is now visible

With the cloak (base color only)
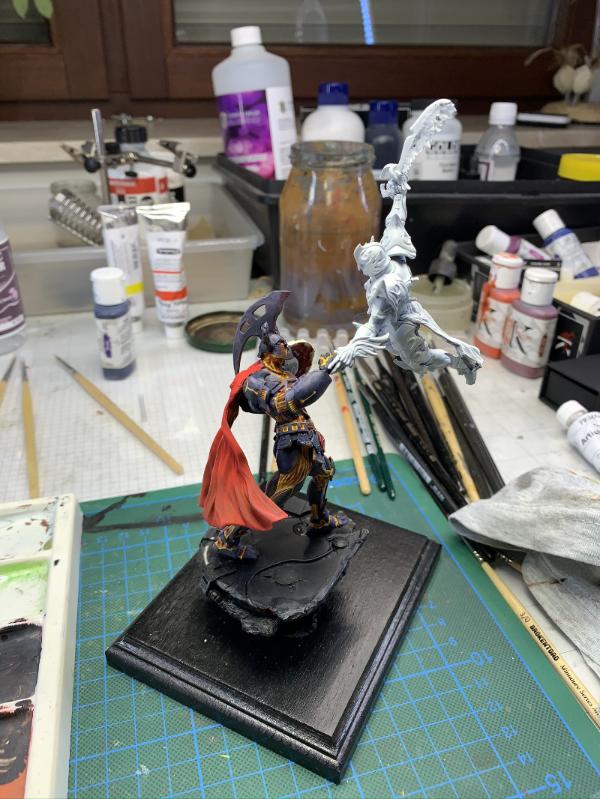
I was afraid I'd had to repaint the shield too, but I think it still fits
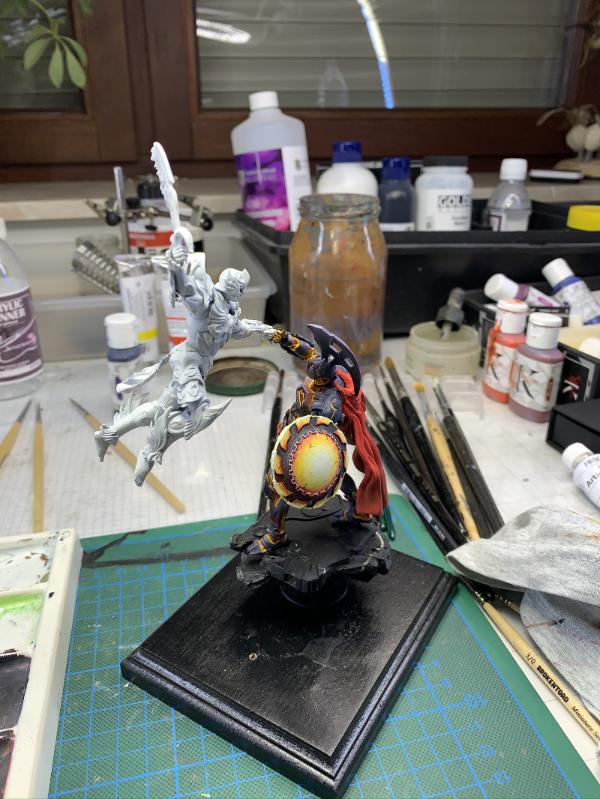
Eye to eye

Still a long way to go, but I really like it
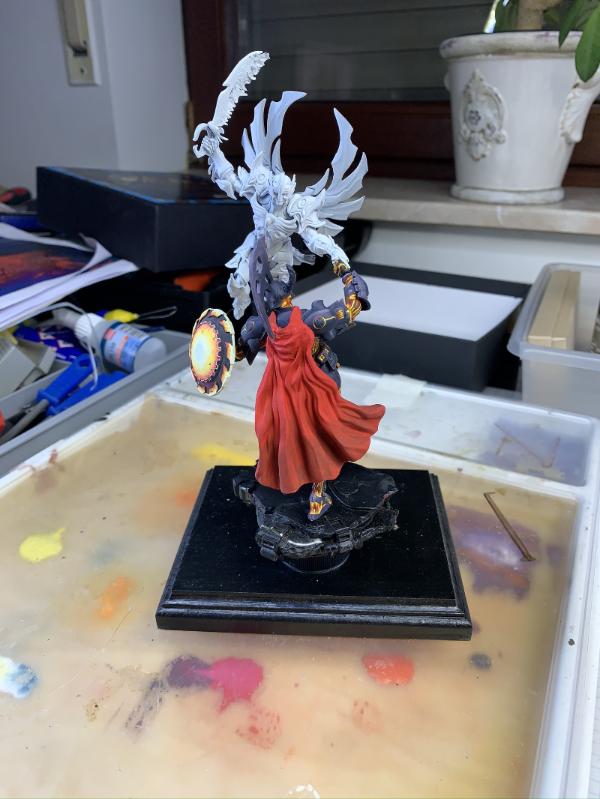
What do you think? Is it worth continuing?
Cheers
Klaus
17738
Post by: Briancj
Yes, I'd like to see this finished! Sorry to hear about your injury, don't over-stress things!
--Brian
106010
Post by: Meer_Cat
Definitely worth continuing- rock on!
93473
Post by: Vejut
I was a little iffy in the first pic, the armor and the glow kinda were fighting...and then you added the cloak and sheild and it snapped in to "looking good!" Kinda shocked the second model stays supported, going to be impressive if you keep going, and I hope you do.
518
Post by: Kid_Kyoto
WOW!
Those two would be challenging enough without reposing and re purposing. Love the colors on them!
32373
Post by: Klaus, not Santa
Geez guys!
I'm really sorry for the long absence.
First I was plagued with a tennis arm that took forever to cure and I fell inevitable into a really deep motivation hole.
It took forever to recover and just a few weeks before the Corona outbreak I finally got back to some hobby time - on a side note, since the outbreak and being officially confined to home office by the company I have actually a lot LESS time, sa the wife and cats demand time and attention kinda contiously :-P
I didn't want to post anything unless I was really sure I could keep it up and finish it. So here is now a rather long update with images, but I was able to really finish this piece :-D
So last time I posted the situation looked like this - and many pointing out that it didn't look firy enough and was too yellow.
So I reworked most of the colors and gave him a sword instead of the spear

I also applied some glow effects
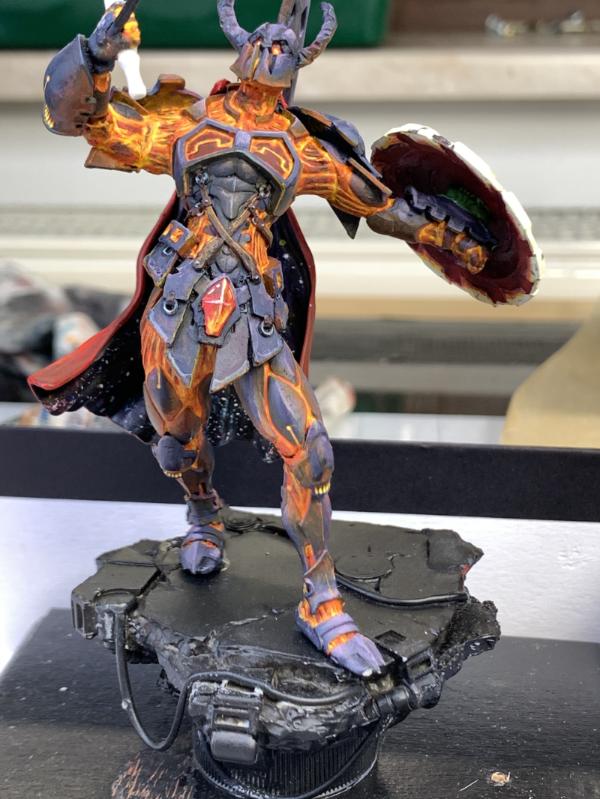
I like the blade
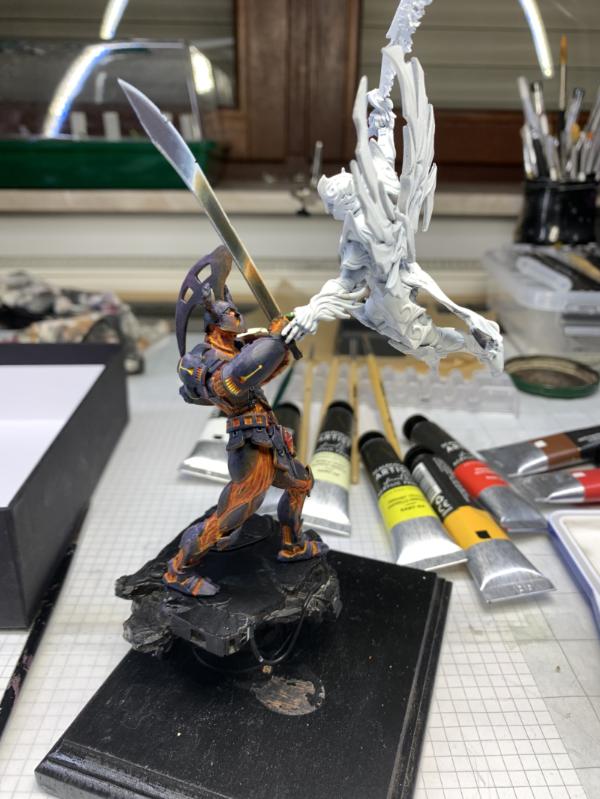
Next I worked on the base in an attempt to create some lava landscape
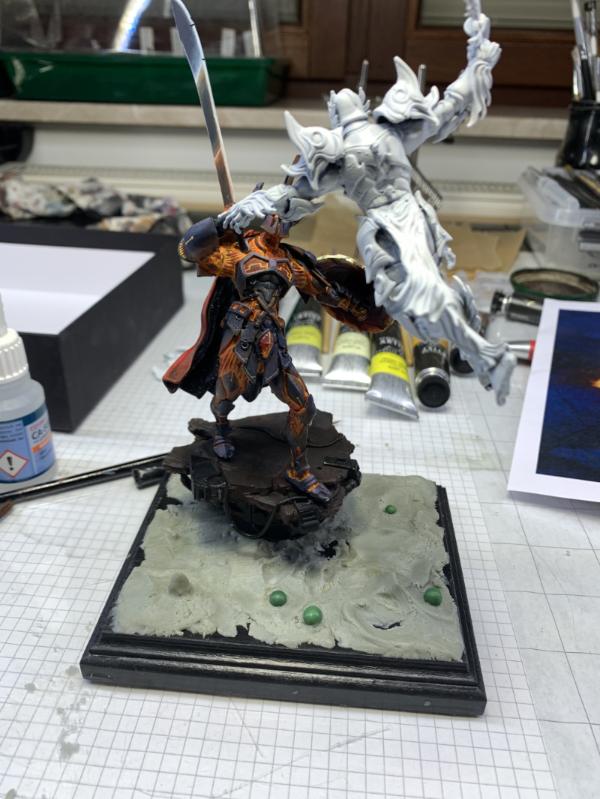
I think I achieved the lava feeling
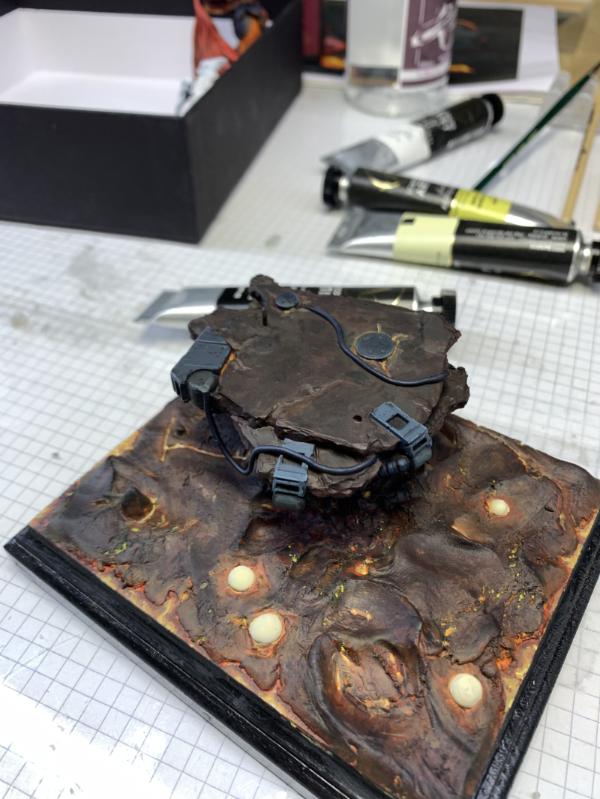
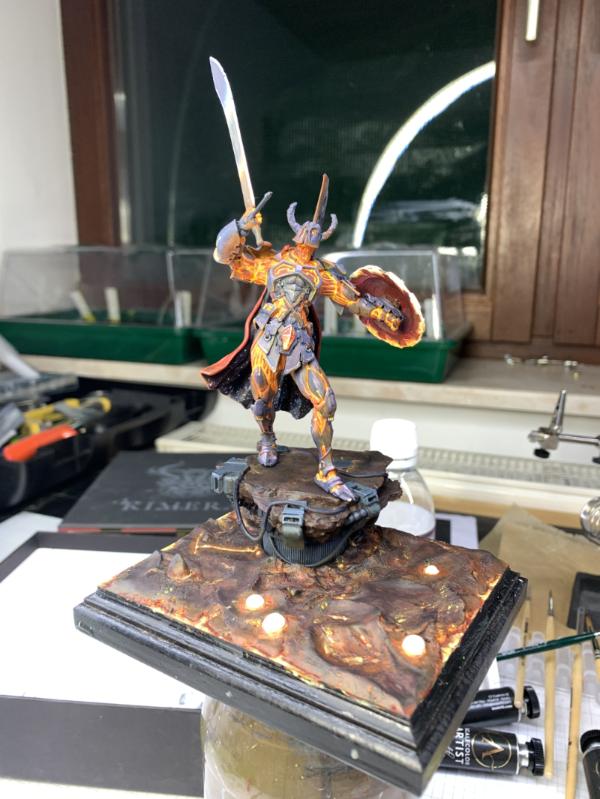
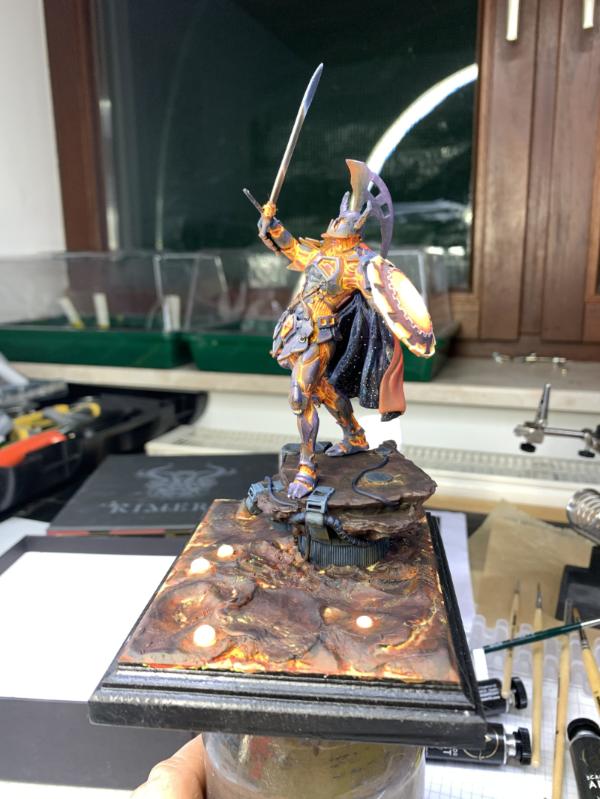
For the angel I envisioned some white/Ice/cold armor as a contrast to the hot/firy/lava of the hellspawn
Working in sections I started with a light blue, added dark blue shadows and then slowly worked up to almost white
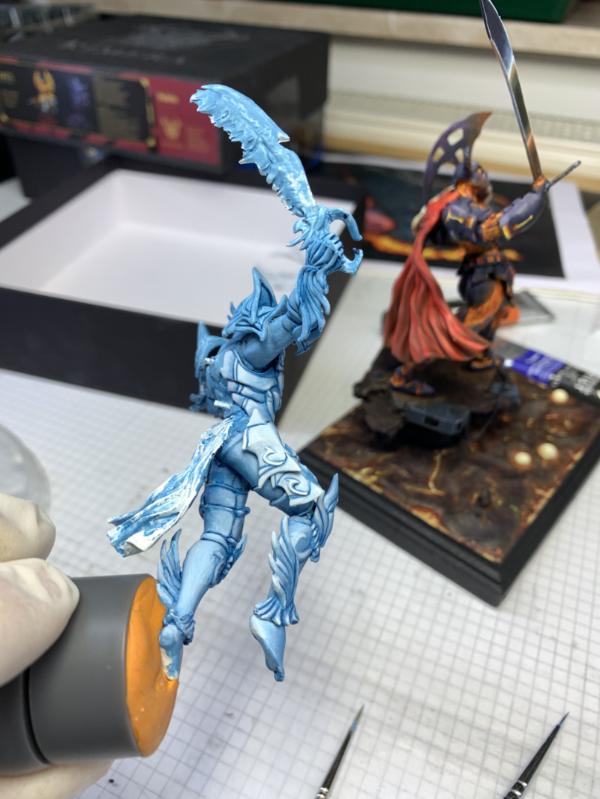
I didn't stricklty follow the light situation, but rahter went from dark to light on all pieces - just with a darker base color in the shadowy sections (if that makes any sense)
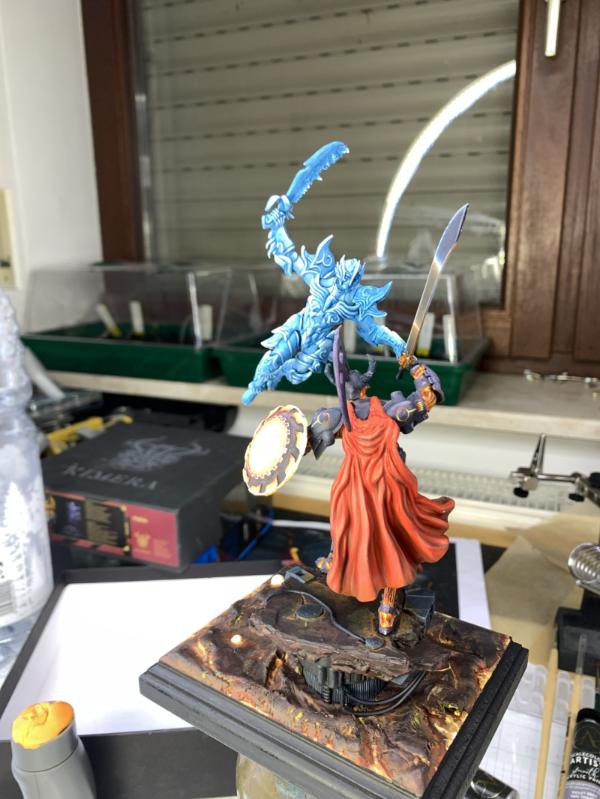
Depending on the light the armor looks totally white, or light blue

Next was the underside of the "wings"
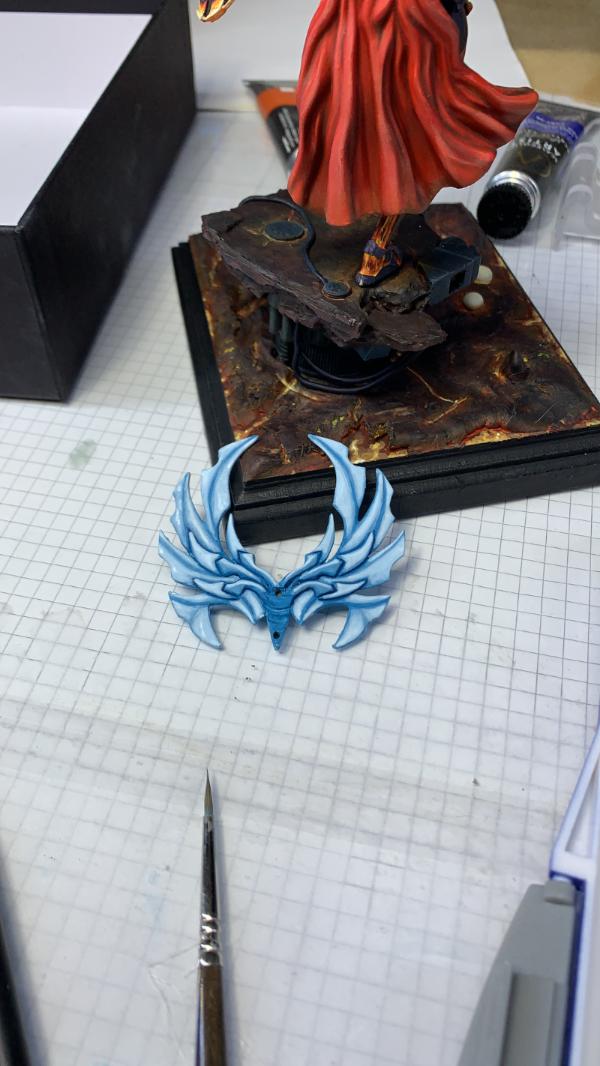
While the top side looks much brighter
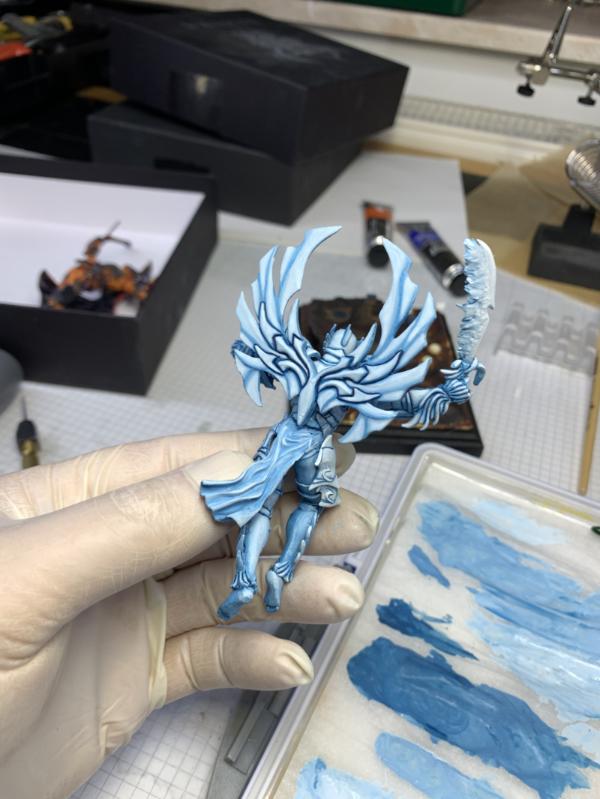
Slwoly, section by section

Then I added some first OSL effects form the lava base and the hellspawn
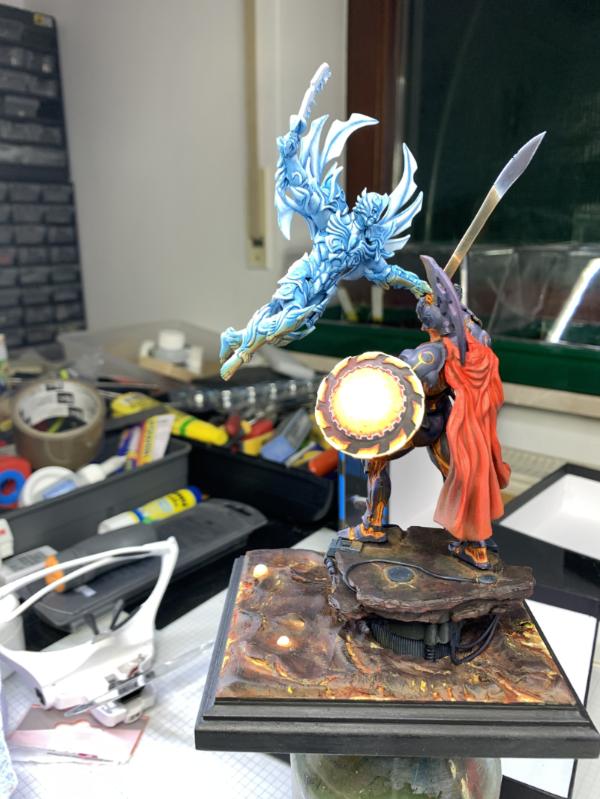
Initially it was only the areas facing the base and directly in contact with the hellspawn
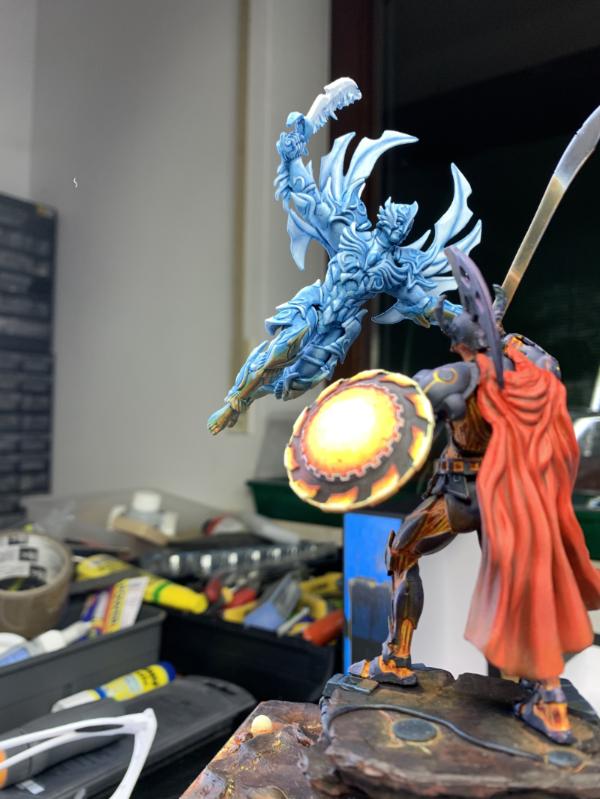
Unfortunately I have no images for the last steps...
But here is the finished scene of the Ethernal Struggle
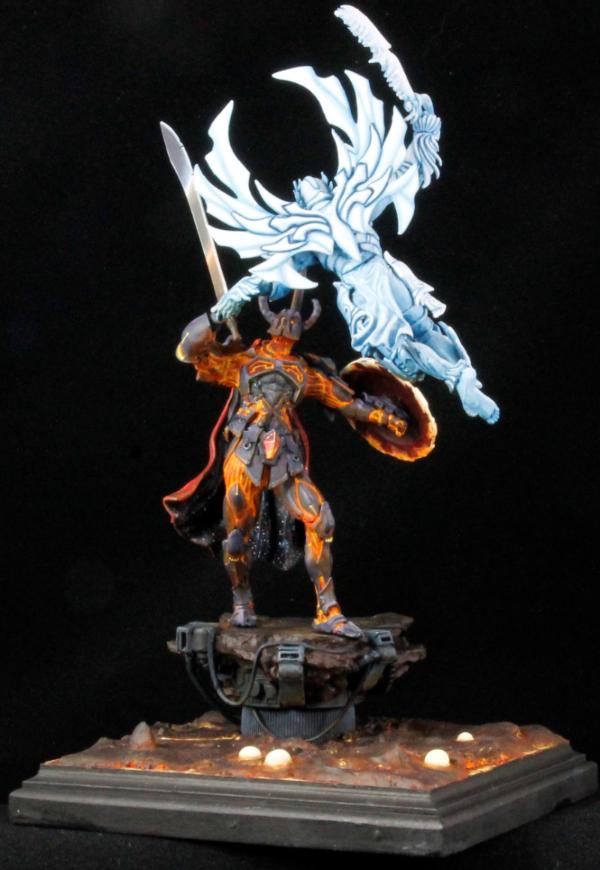
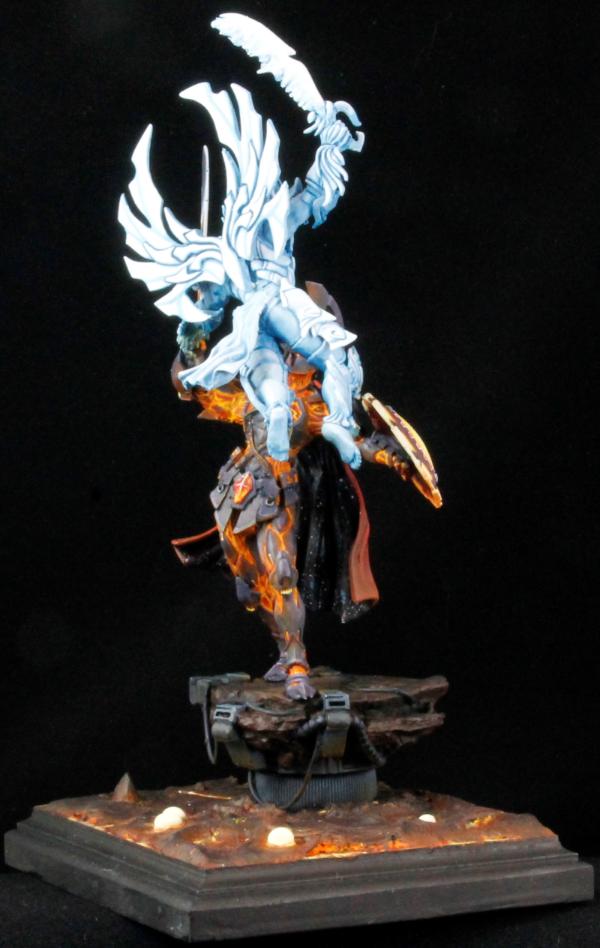

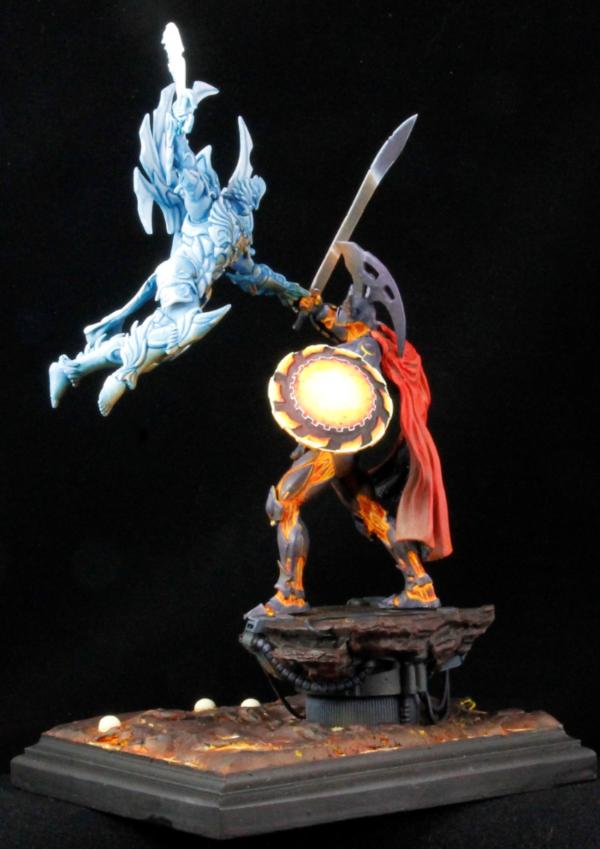
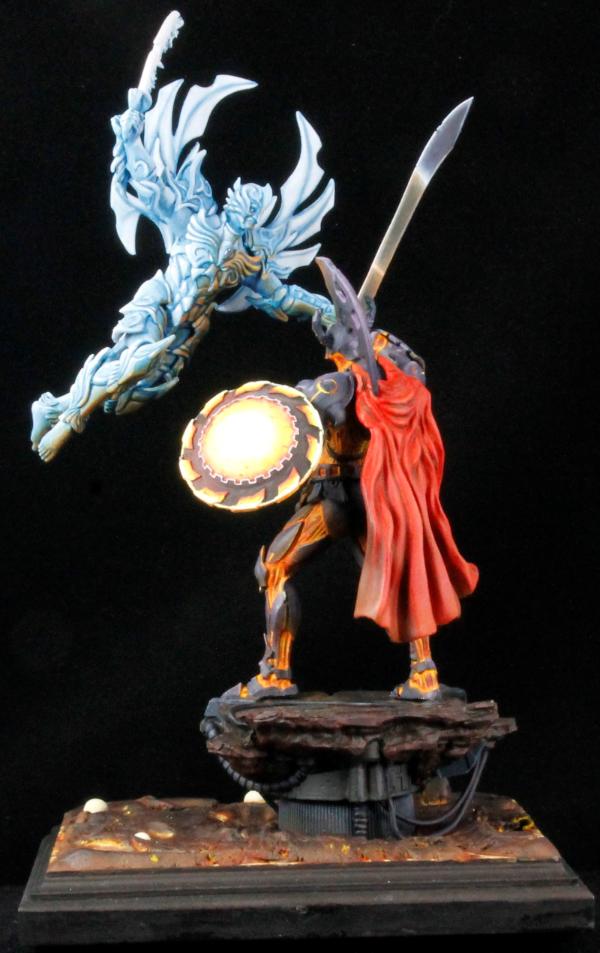
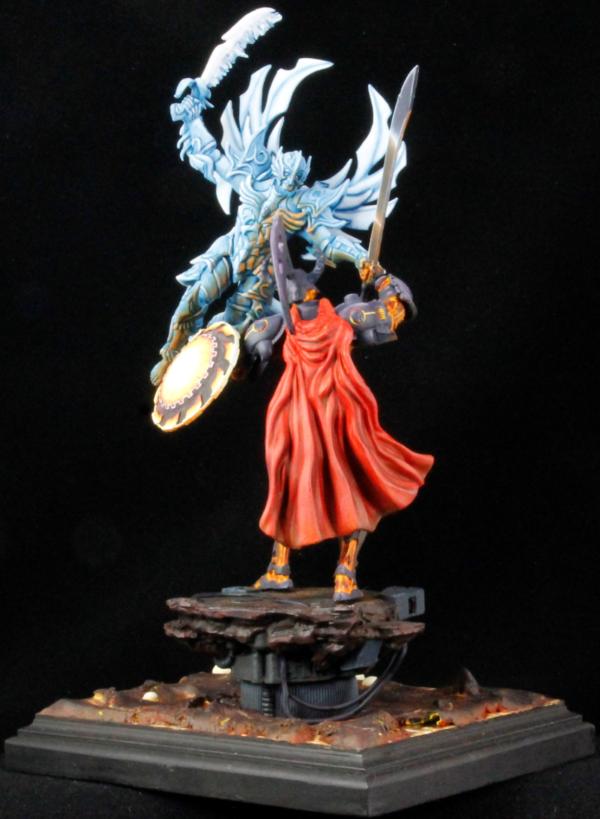


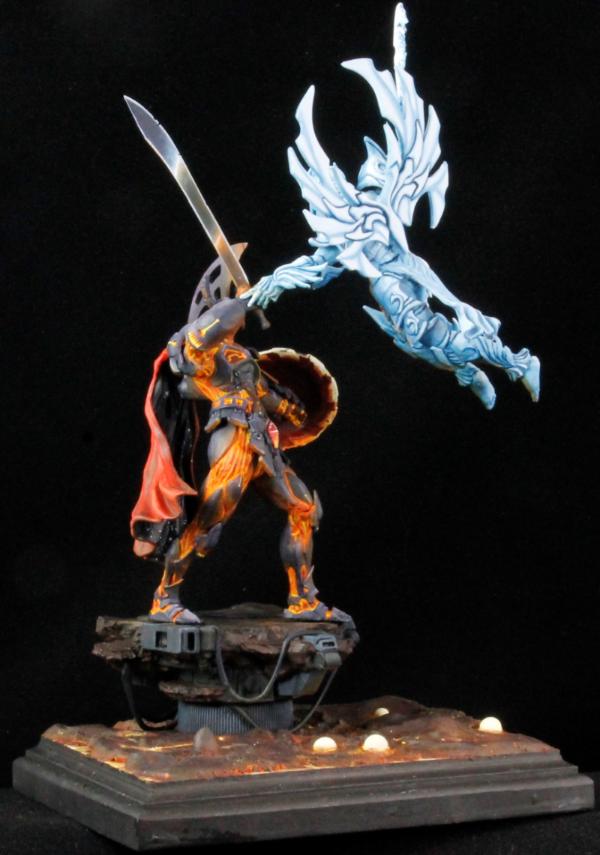
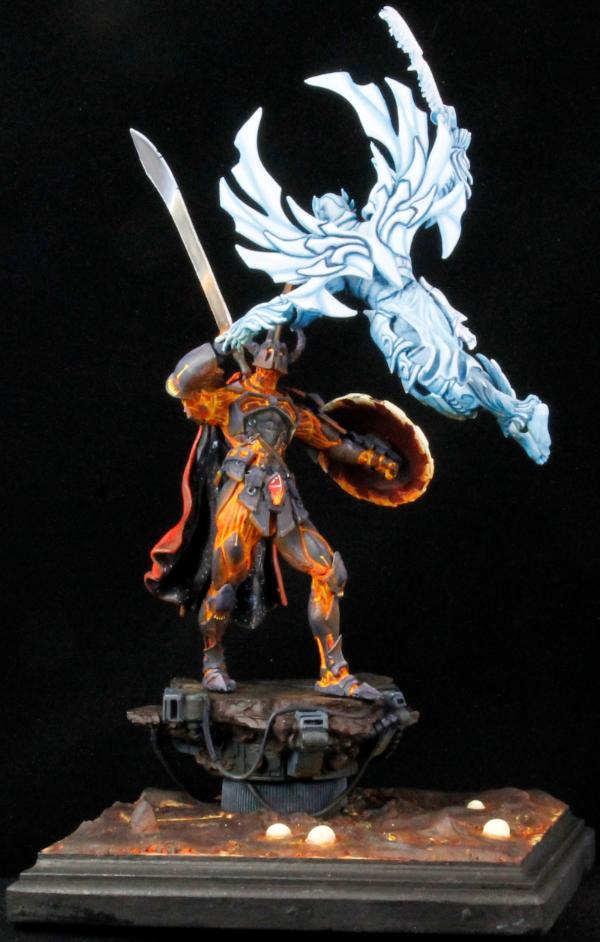
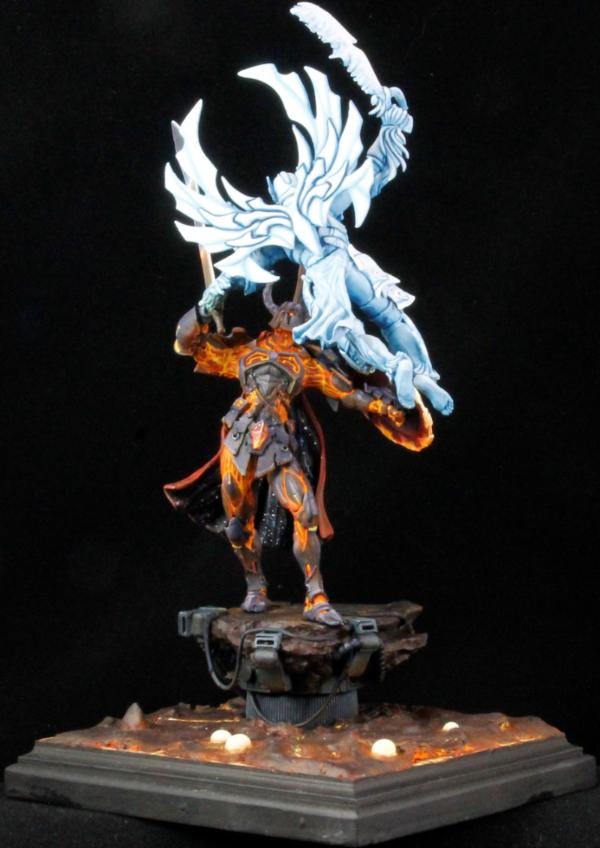
And from a slightly different angle
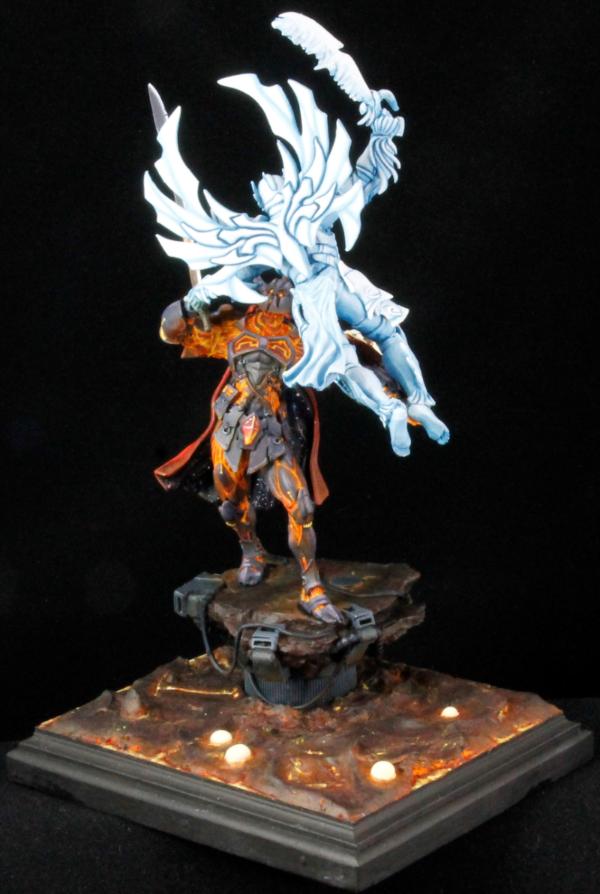
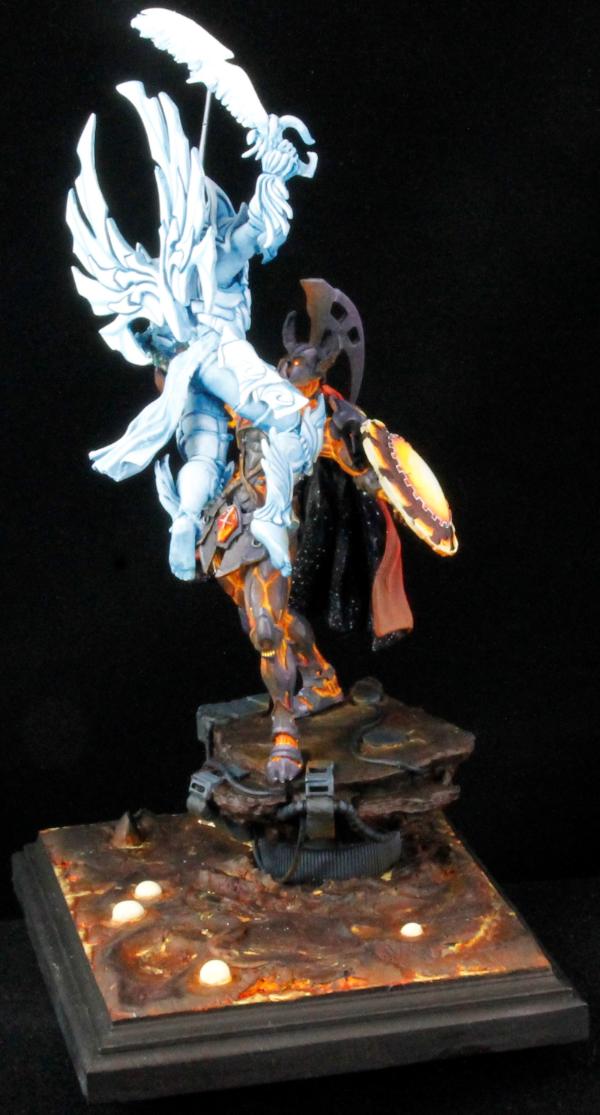

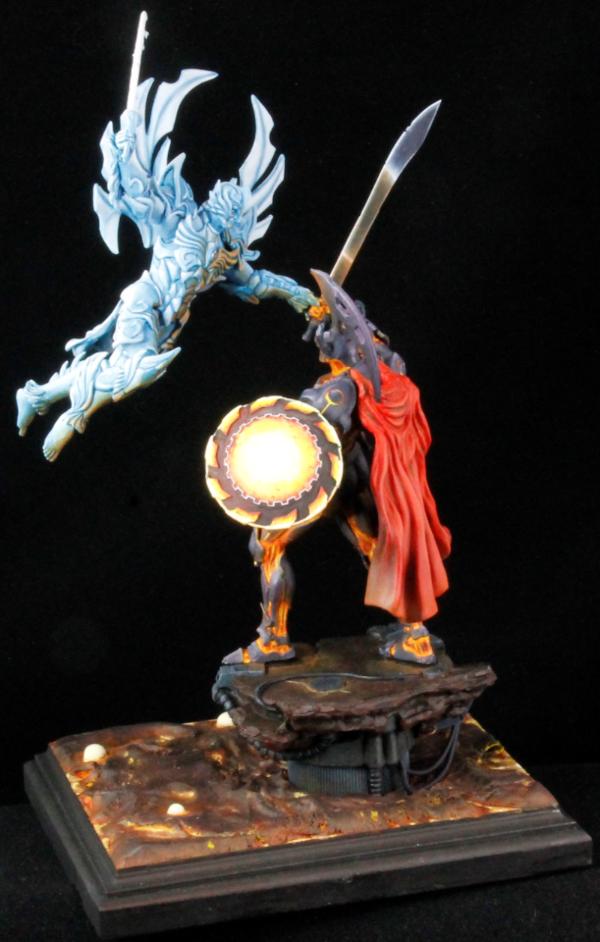
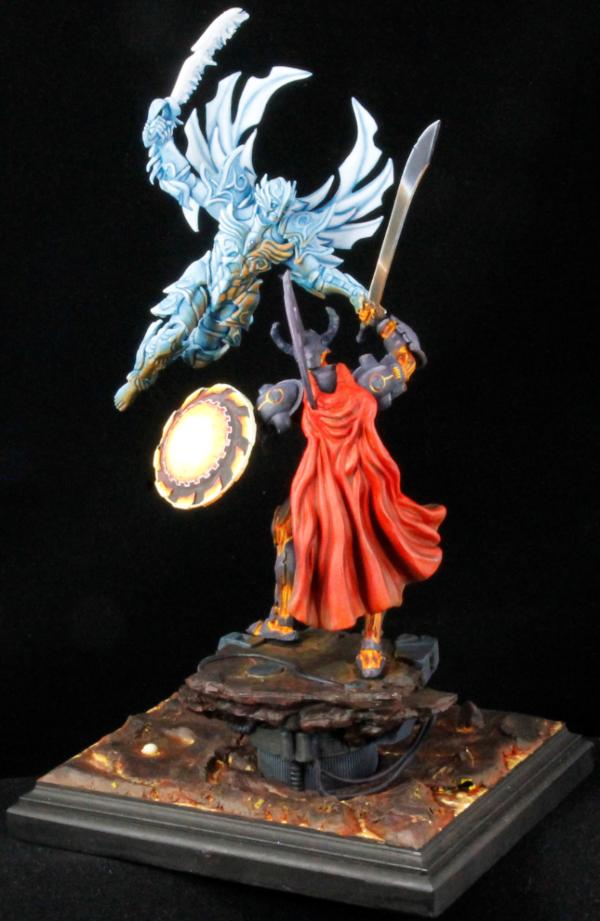


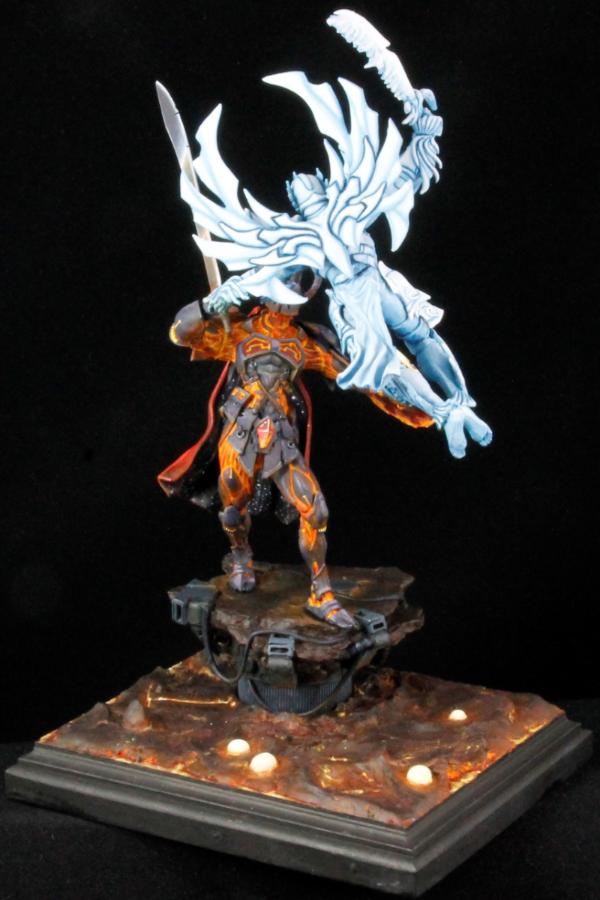
And the finaly two

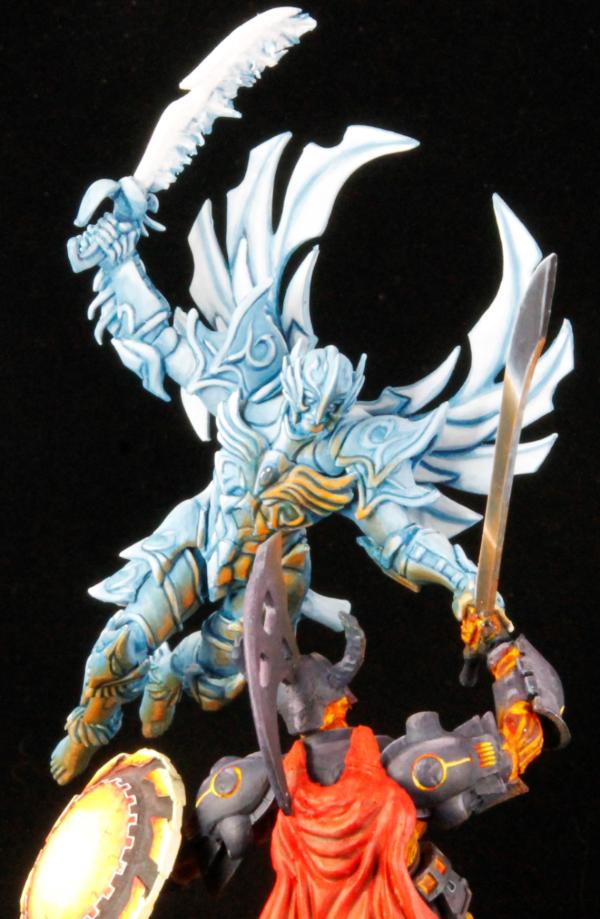
So I really wanted to thank you for checking in here and looking for updates, thank you for your support and patience
Thank you for caring and acompanying me on this journey
Please stay safe in these wierd times!
Cheers
Klaus, not Santa
30344
Post by: monkeytroll
Glad your arm healed up okay.
Gorgeous work as always, loving that sword, beautiful effect.
62749
Post by: Dr H
Good job, Klaus. Always a pleasure to see your work.
32373
Post by: Klaus, not Santa
Wow, it's been quite a while huh?
Sorry, but I lost my Mojo for a while (again) and did a lot of other stuff.
But thanks to the Massive Voodoo Challenge ( https://photos.google.com/share/AF1QipOk7jc4WuqHOFzfAAMGSWEysc-d5o-mg6NzgiQxQwICC9oQ7bBTvONnsDYFyPLaMw?key=eDdKZmFkaEFKVmM0TzJiQXZ0T2xhbkhrbENkY2JB ) I did get some stuff done
Here is what I've done for the MV-Challenge:
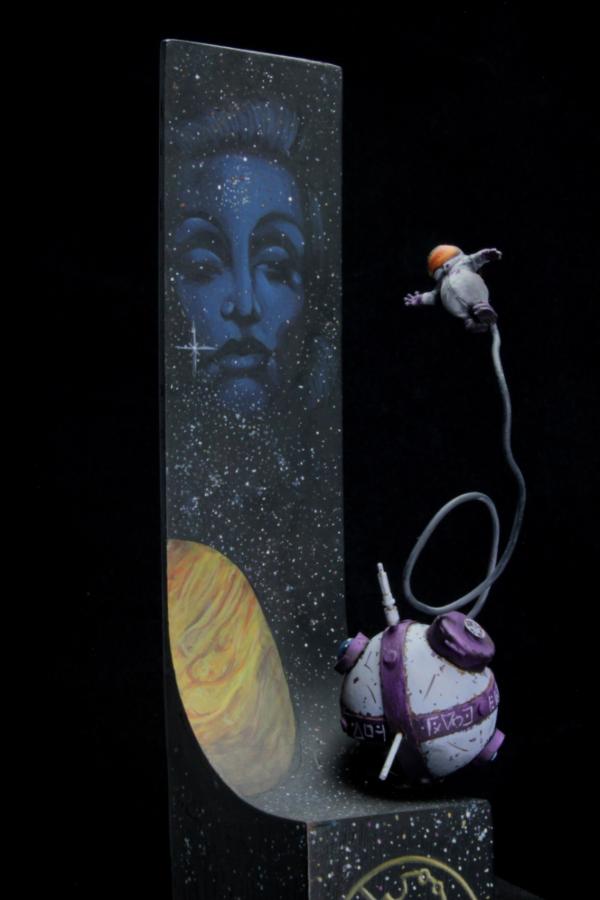
01 – HELLO SWEETIE
Vladimir’s first assignment after Space Academy took him to the Dietrich Sector where he conducted several free-space experiments far above the Marlene gas giant. But regardless how challenging his experiments were he could only think of his great love – Wilma.
She was his first and last though and he imagined her face wherever he looked – and in his heart she always spoke to him, greeting him in her usual way “Hello Sweetie”.
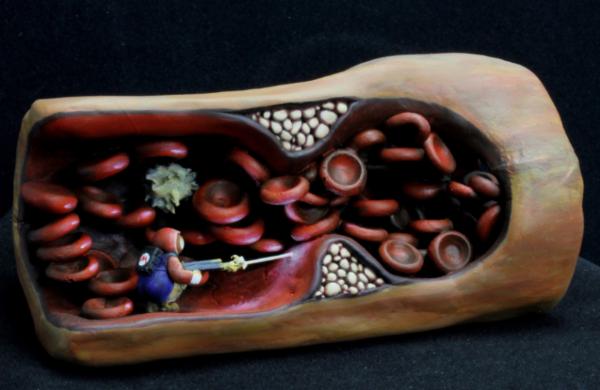
02 – PLUMMING
While her husband Vladimir was on a space assignment Wilma was drafted for a special experiment in nano exploration. The experiment called for an experimental craft and its crew to be shrunk to nano size and injected into the body of a VIP human. Once in the bloodstream the crew was to find and remove arterial clogging in several spots.
Wilma’s task was to use the special build nano laser and remove the thrombosis in the arteria pulmonalis.
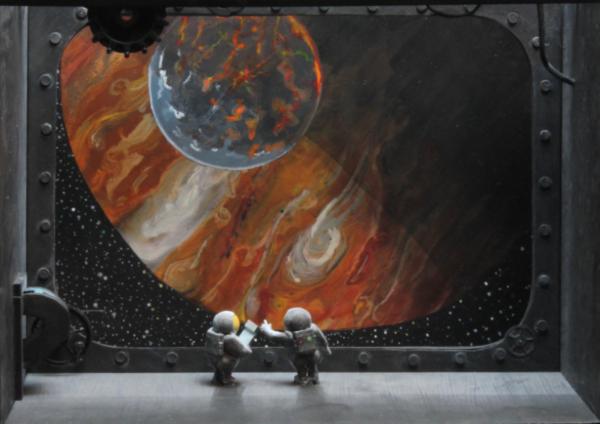
03 – CLOSE ENCOUNTER
In their 50th year of space travel Wilma and Vladimir were assigned to the research vessel Simul Viator to observe the tidal impact of the moon Caracho’s passage in close proximity to the planet Crushemal.
Parking the Simul Viator in a very close orbit Wilma and Vladimir could closely observe the tectonic forces which frequently ripped the upper crust of Caracho apart keeping the surface in a constant turmoil. Their research led to further successful expeditions to Crushemal and Caracho and quite lucrative mining enterprises.
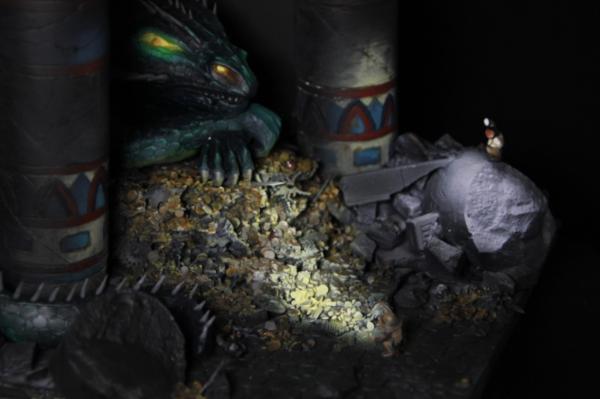
04 – DRAGONS DEN
Having earned their reputation as successful researchers Wilma and Vladimir could cherry pick any assignment or expedition they wanted. And highest on their bucket list was to find the sunken city of Osiris on Kerbal.
After several week of painstaking inspection of the Kerbal jungles they finally stumbled into the remains of an ancient Osiris temple. But just as they were examining the relics and treasures golden eyes and glowing nostrils flared to live!
They stumbled on the dragon Cymoril and her den – and no dragon takes it lightly when its stash is disturbed! The following frantic escape was a close shave and left both wounded and deeply shaken.
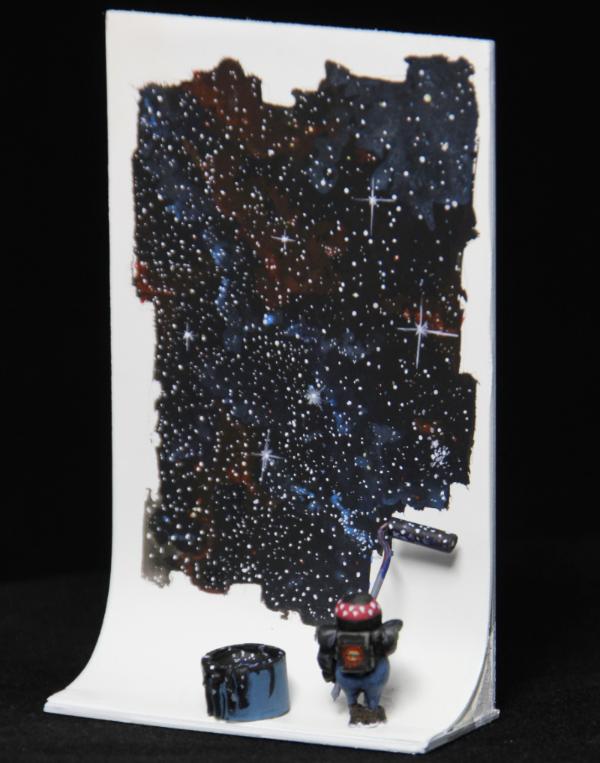
05 – STAR PAINTER
Following their narrow escape on Kerbal Vladimir fell into a deep depression. He felt responsible for their almost deadly encounter with Cymoril the dragon and the wounds Wilma and he suffered that day.
To free Vladimir from his stupor Wilma tried many things – most unsuccessful. But one day she dressed up as Vladimirs favorite singer Axl Rose playing November Rain at full power and painting the stars for him and he finally woke.
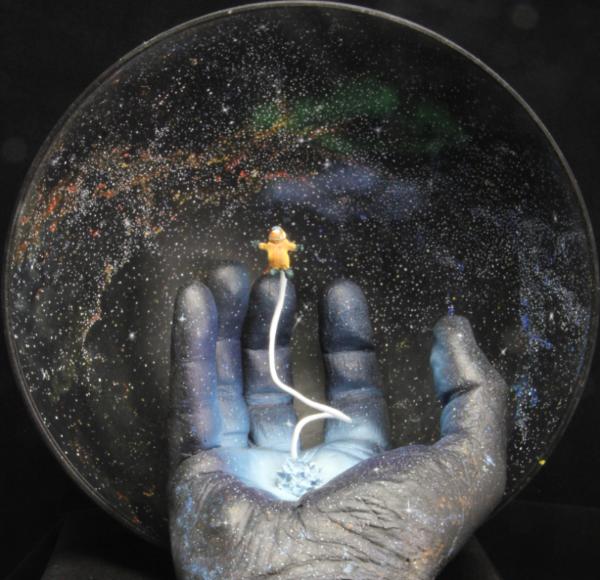
06 – WHERE ASTRONAUTS ARE BORN
With the song November Rain still blasting in his ears Vladimir finally rose from his depression feeling elated and newborn.
He felt so great he could take on the world … no the universe!
He was ready to rock the universe together with Wilma.
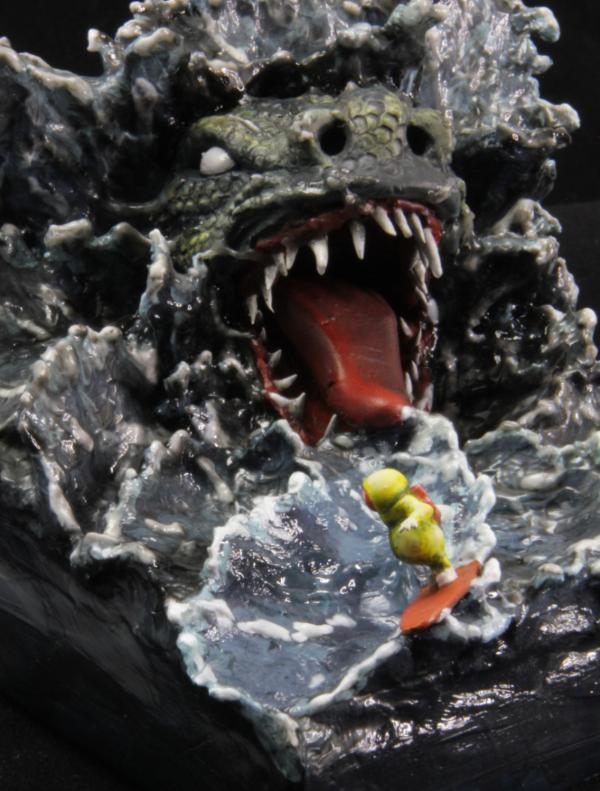
07 – DANGER SURF
Following a long recuperation time on Alto with rather low key expeditions Wilma and Vladimir deiced to have a bit more fun and to check off their bucket list.
So in their 75th year of space travel the next item on Wilma’s list was to surf in the dramatic waves of Northgard. While the waves were quite famous it was quite less known that huge predators roamed the Northgard ocean.
An just was Wilma was surfing one of the best waves she ever experienced a giant Cultösaurus broek the surface attempting to snatch her for a light breakfast.
But Wilma would not have any of it. She out surfed the beast easily and after a prolonged chase the creature broke off the hunt with a frustrated snort.
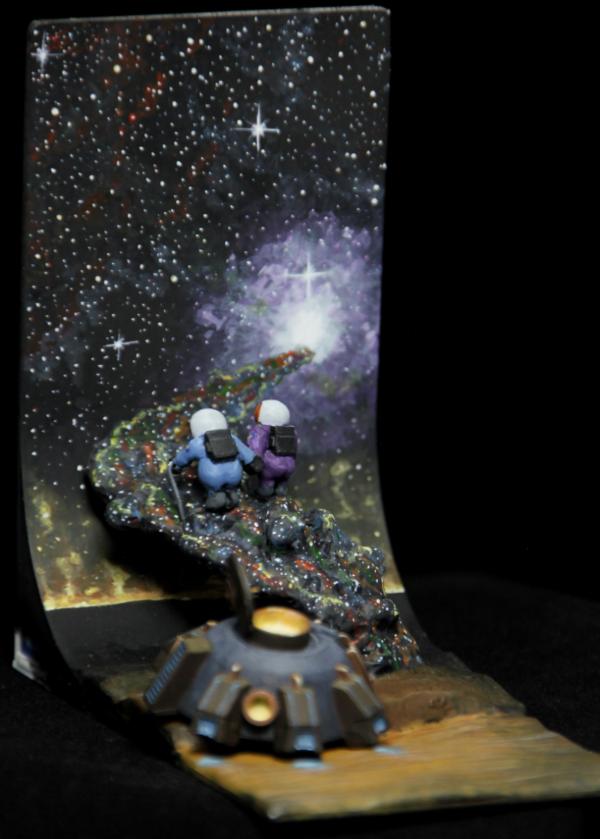
08 - INTO THE LIGHT
After 150 years of constant space travel, at age 180, Wilma and Vladimir embark on their final journey. Ever since they met at Space Academy they went together on almost all assignments, and now as one nano bot after the other in their body failed and could no longer keep up with the repairs their bodies needed, Wilma and Vladimir became frail and old.
But one small step after the other the two shuffled their way forward, on to their final destination, the last big secret of live.
I hope you like them
Well, and I went a bit deeper into 3D modelling (with 55 it's getting harder to learn something new, but it's still fun)
And so to honor my astronauts I wanted to give Wilma a face, and this is my first serious digital sculpting attempt - I started it in (the free) Sculptris, but after several crashes I leapt deep into my bank account and switched to ZBrush
I hope I can print her soon, but ATM the basement is to cold for printing.
And some of you MAY remember my POLLUX and CASTOR walkers ( https://www.dakkadakka.com/gallery/images-32373-39181_Thalos%20Walker.html)
which I really liked, but never completed and then gave away (regrettably)
and so I started to give them a try in ZBrush
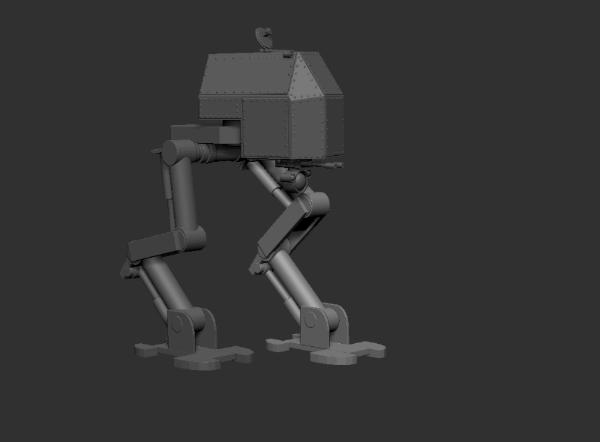
Still a long way to go and even more to learn
Cheers and a merry Christmas season
Ho Ho Ho
18980
Post by: Arakasi
Wow indeed! Welcome back.
30672
Post by: Theophony
Always great to see your work
Love the Star Painter. Don't know why but I get a Red Dwarf intro vibe as well as feeling like a coyote is about to fly by on rocket powered roller skates .
Nice work on all the projects.
9910
Post by: CommissarKhaine
"Wow" kinda sums it up. Welcome back!
106010
Post by: Meer_Cat
Welcome back Klaus- missed seeing you here and gaining inspiration (and sheer Wow! Factor, as others have noted) from your work.
Glad you've got your mojo back- it looks very much like you've put it to very good use.
_Love_ the story arc vignette! If you are still adding episodes, there is always your spacefaring duo coming upon the rift into another world (I believe you titled that one 'The Guardian' when you completed it).
Big or small, can't wait to see what comes next.
36940
Post by: Anvildude
Zbrush? ZBRUSH!?
Dude! BLENDER! Free, open-source, does Sculpting, Modeling, Animation, Painting, Drawing, Texturing, Video Editing... You could probably do your _taxes_ in Blender!
Zbrush isn't even supposed to be a sculpting software! It was started as a fancy paint-program system!
Automatically Appended Next Post:
I will admit, though, that I'm impressed you managed to get as much detail as you did in your mech. Zbrush is notoriously weird when trying to do multi-part sculpts.
32373
Post by: Klaus, not Santa
Wow, glad to see so many still visiting here
Feels like coming home 
Anvildude wrote:Zbrush? ZBRUSH!?
Dude! BLENDER! Free, open-source, does Sculpting, Modeling, Animation, Painting, Drawing, Texturing, Video Editing... You could probably do your _taxes_ in Blender!
Zbrush isn't even supposed to be a sculpting software! It was started as a fancy paint-program system!
Automatically Appended Next Post:
I will admit, though, that I'm impressed you managed to get as much detail as you did in your mech. Zbrush is notoriously weird when trying to do multi-part sculpts.
I have to admit, I never got the hang of Blender. With ZBrush I had the start with Sculptris (free) and it felt natural to me - almost like real clay sculpting, and so the switch came easy. The hard-surface stuff now is ... different ... but I'm slowly getting a hang of it.
So here's an update with the first armor plates:
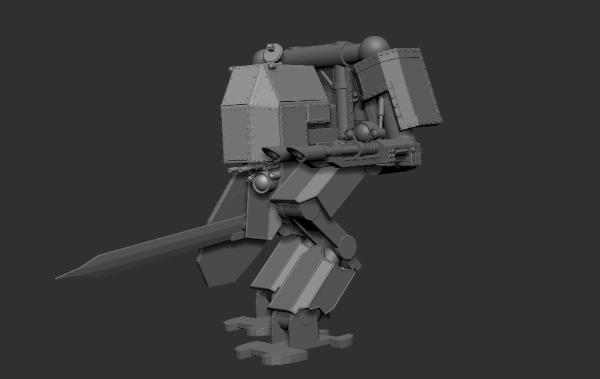
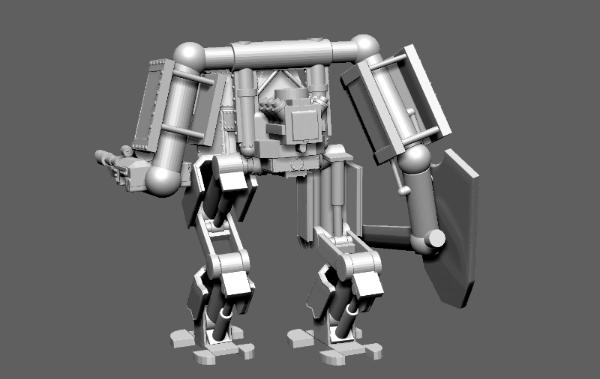
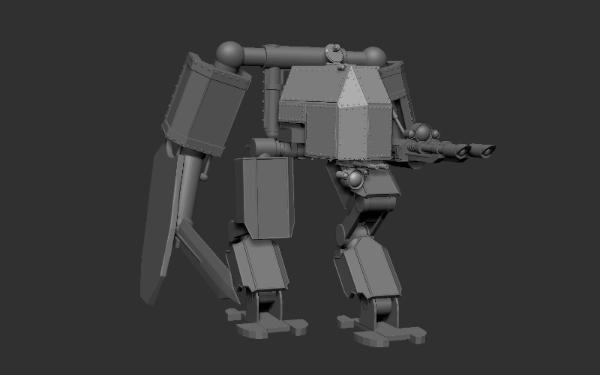
Cheers
Klaus
36940
Post by: Anvildude
Yeah, fair. The 2.9 update to Blender has fixed/changed a lot of stuff- it defaults to Maya controls, and they did a LOT to fix the sculpting. But if you're figuring Zbrush out, more power to ya. Very neat looking walker. Did you make those lascannons, or was that a pre-exsting model someone uploadd?
32373
Post by: Klaus, not Santa
Anvildude wrote:Yeah, fair. The 2.9 update to Blender has fixed/changed a lot of stuff- it defaults to Maya controls, and they did a LOT to fix the sculpting. But if you're figuring Zbrush out, more power to ya. Very neat looking walker. Did you make those lascannons, or was that a pre-exsting model someone uploadd?
Thank you Mate!
Yes I did the Auto-Cannon and Las-Cannon myself
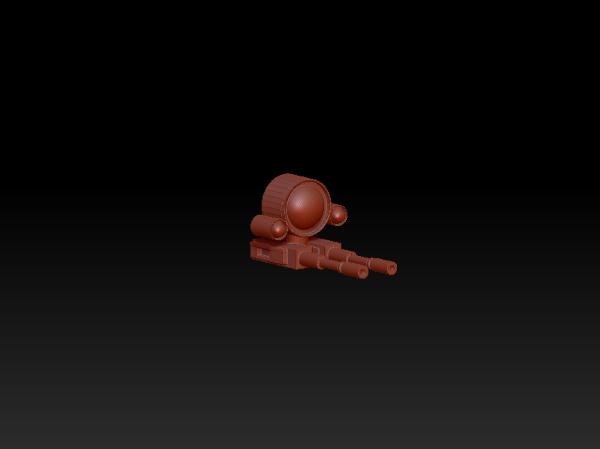
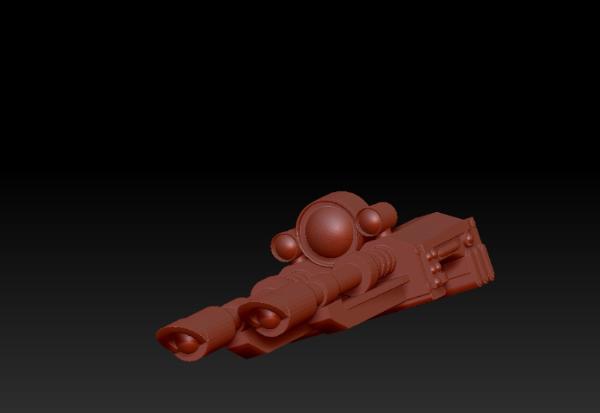
Last night I spent a hell of a lot of time struggling with the "body" of the POLLUX
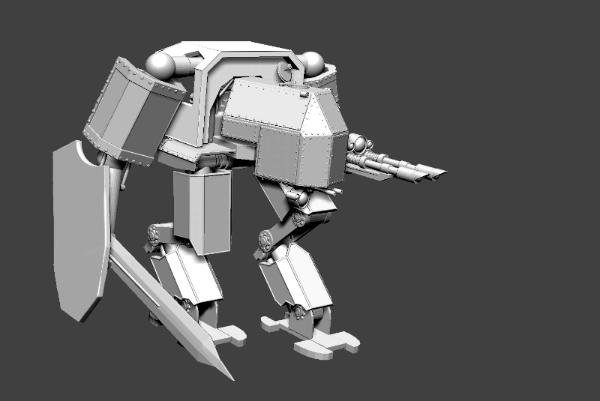
And I have to admit I'm NOT very pleased with it :(

Maybe I'll do the other pieces first and then come back to the body...
not sure
Cheers and thanks for commenting and suggesting!
Cheers
Klaus
32373
Post by: Klaus, not Santa
I finally reworked the body armor and engine
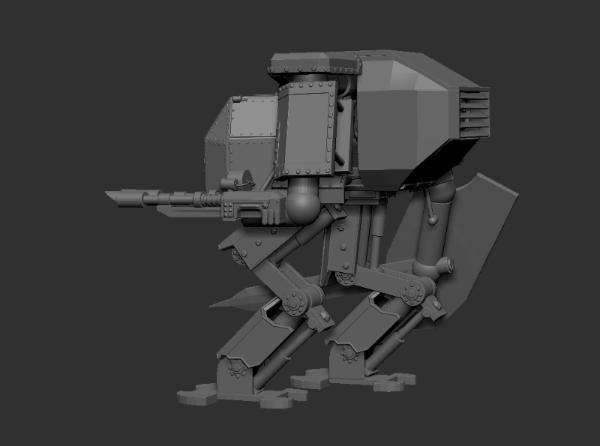
I think this looks better now
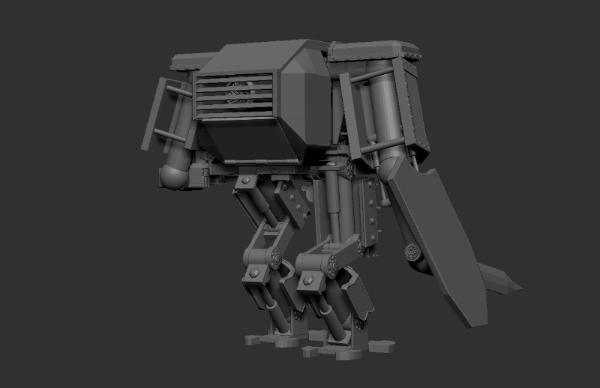
That's pretty much it I guess
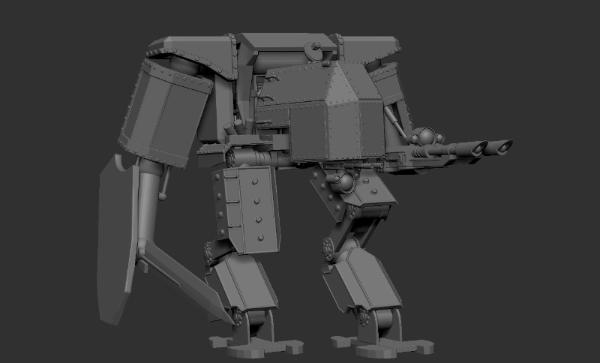
What do you think?
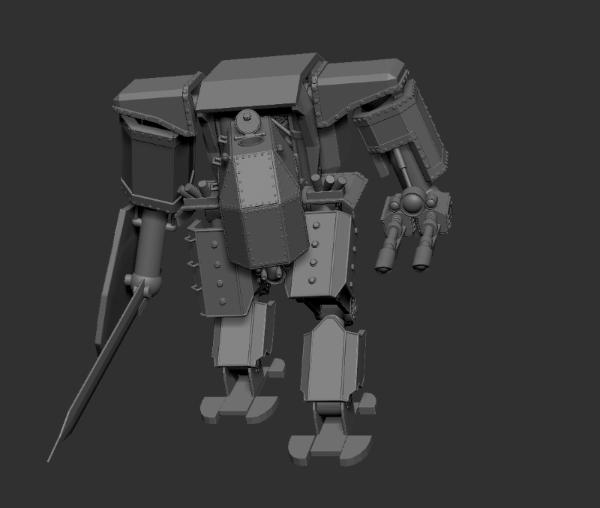
I'm pretty pleased and maybe I'll try to print him in the next few days.
Cheers
Klaus
36940
Post by: Anvildude
You got it in ZBrush, you might as well go in there with some texturing brushes and stuff. Dents, scratches, just sort of... slightly askewify things to make it more 'alive'. I like to take a very light randomizing brush over my stuff like that, just to take it away from 'machine perfect'.
15294
Post by: MeatShield
If you attach the shield to the gun arm it will seem more tactically viable. the shield and gun would face down the enemy while you set the sword arm in an epic pose.
62835
Post by: IGtR=
This has come along very nicely - looking fab and you should definitely print and then paint!
I like the idea of weathering one. Have you thought about making a 'clean' and 'damaged' version?
Thanks for sharing
32373
Post by: Klaus, not Santa
Thank you guys!
Unfortunately the basement is still too f**ing cold to print - will have to wait a few weeks :(
But I did manage to print a copy of Wilma and started painting her:
But painting time is limited and I have more options to work on the PC.
So in the meantime I decided to try something else.
Some of you may remember my "Princess"
So I'm currently trying to rework her in ZBrush
Here the posing is still off, and also the throne is not quite right
This is better now
But still a very long way to go
Cheers
Klaus
32373
Post by: Klaus, not Santa
Mea culpa, mea culpa!
Look who the cat dragged in
Last post January 2021.
I have to admit I did lose my Mojo big time!
I did some 3D stuff and 3D printing - actually I'm still doing that - but I have hardly finished anything and am losing interest quicker than a bee in a flowerbed.
After talking to some hobby friends I realized the slightest itching and slow uprise in interest.
Especially after talking about modular building. I immediately remembered the "Erebus and Alala" diorama I had worked on in 2019 (page 74 - https://www.dakkadakka.com/dakkaforum/posts/list/2190/310208.page#10247699).
But I also recalled that after it sitting on the shelf for a while abandoned, my cat had a good time with it and it landed on the floor. After which I packed it away and stored it in the attic.
So yesterday I went up there, sifted though all the dust and debris and carried the box into my office.
This is how it looked when I opened the box
Quite a mess
So I started to sort things out. First the ALALA
Which is in a realtively good shape - except for the barrel
The ALALA tank is designed similar to a Merkava and has a small passenger compartment - with plenty of details.
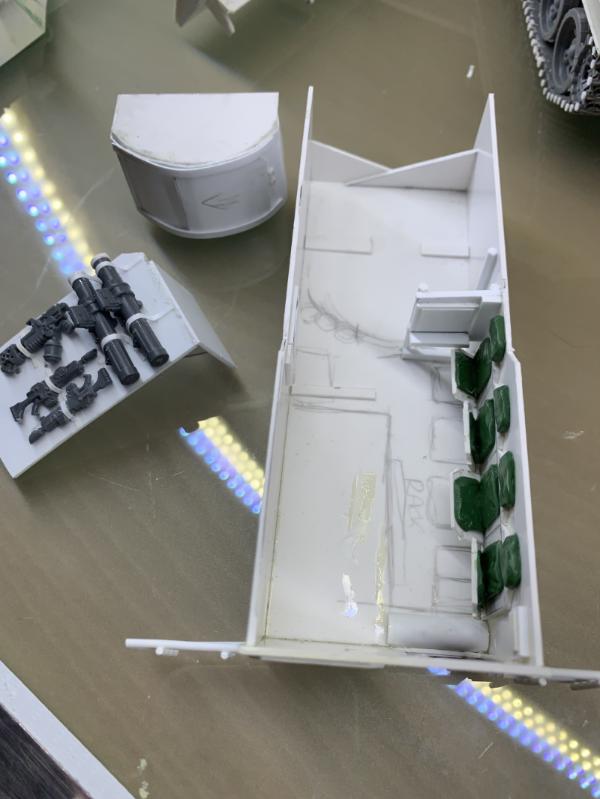
So back together the ALALA is in pretty good shape
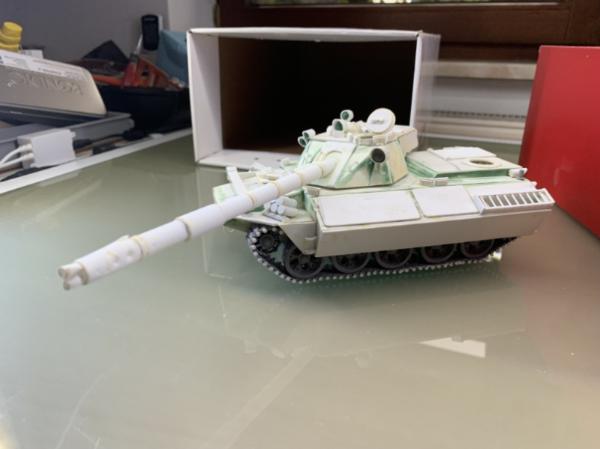
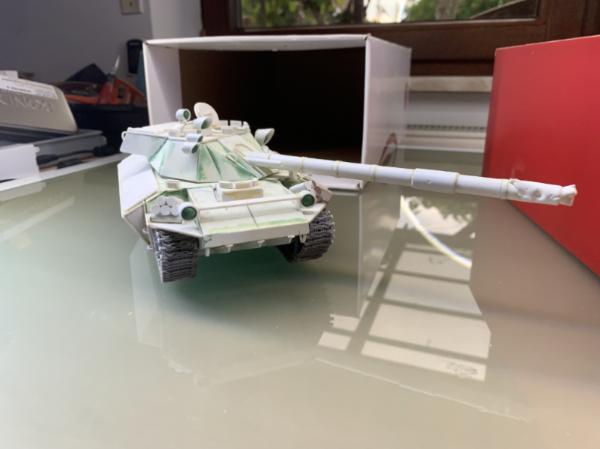
Just the RPG grill on the right and the ramp broken off
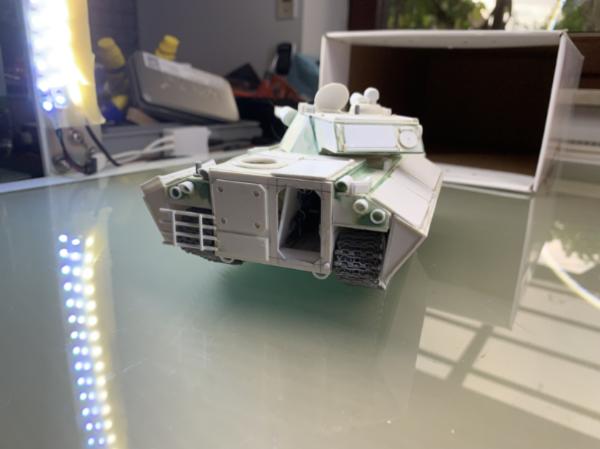

The EREBUS is a different stroy
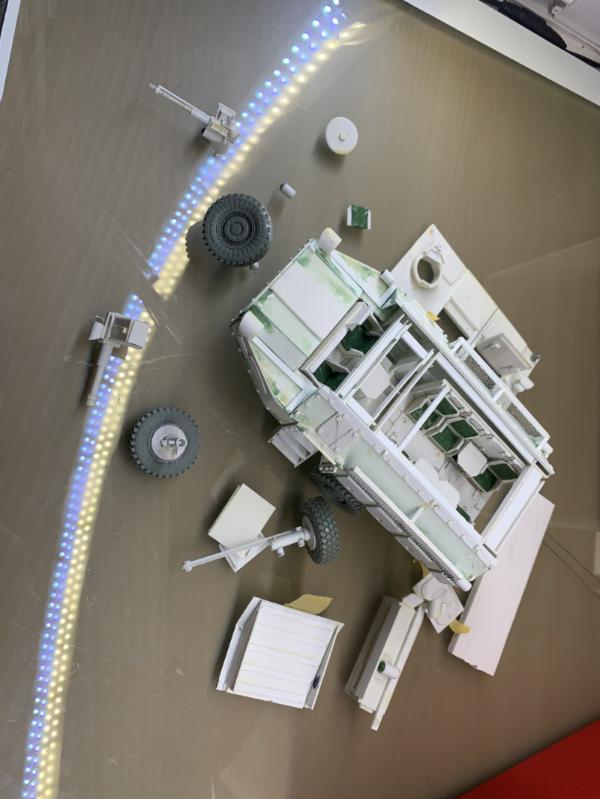

Setting things back together there is still a lot broken
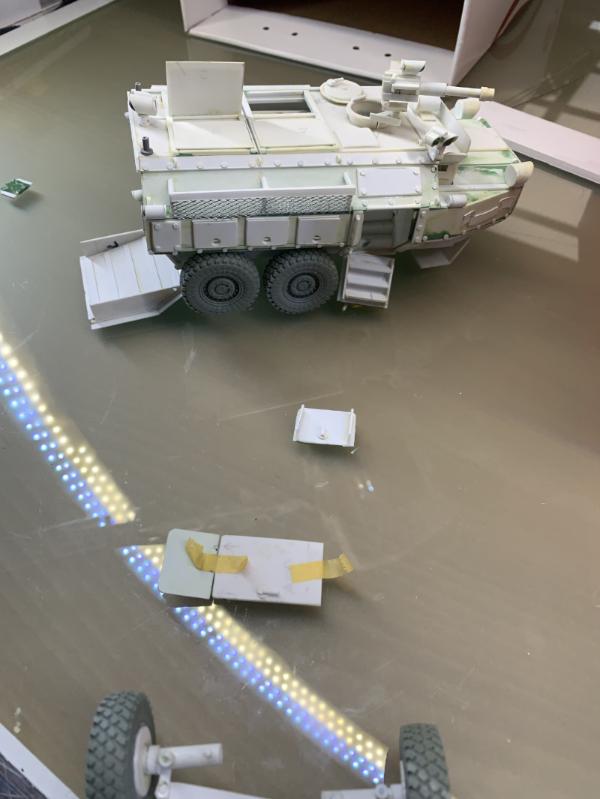
Originally the suspension and steering was working, but now I had to glue averything in a fixed position
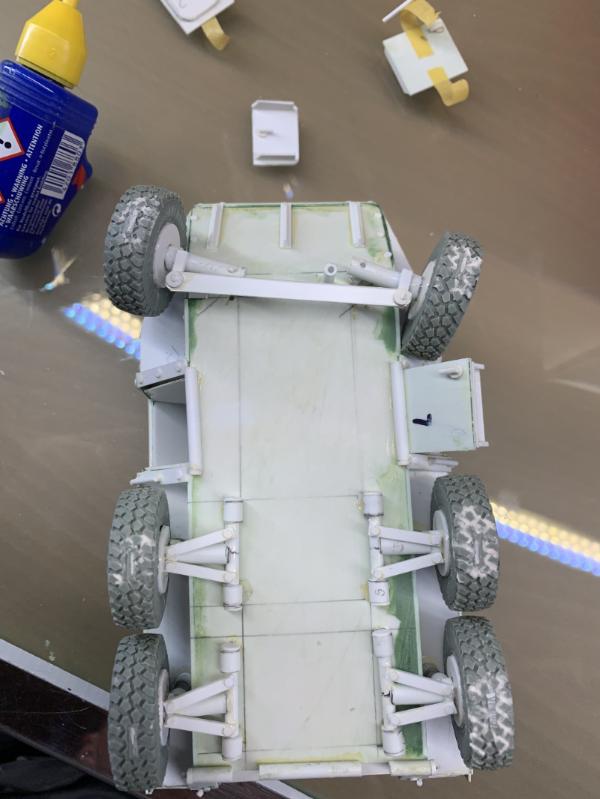
With the wheels back on it looks a lot better

The passenger bay is quite detailed
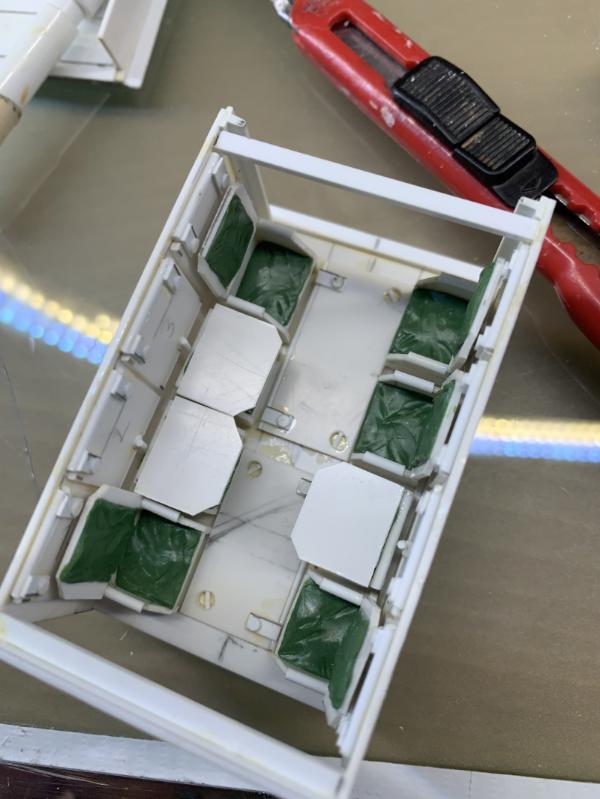
Looking through the rear door
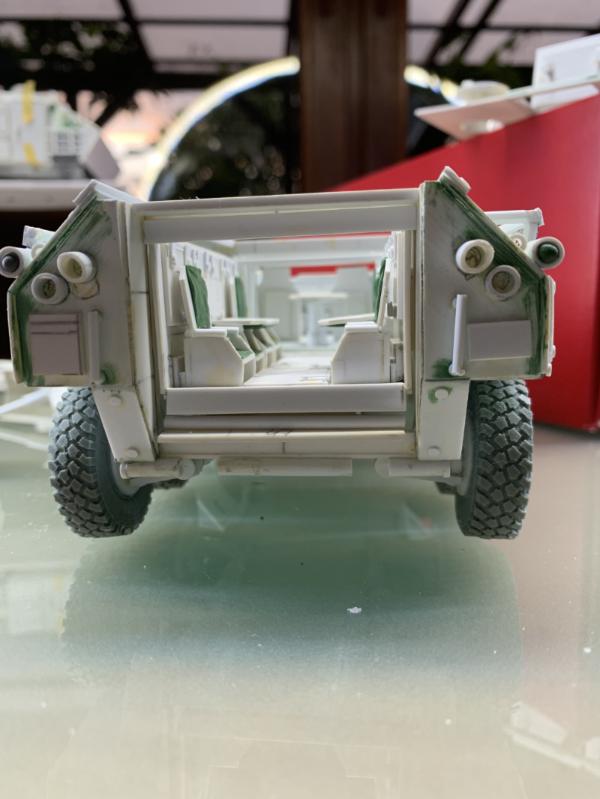
Most of the hatches re-attached and positioned
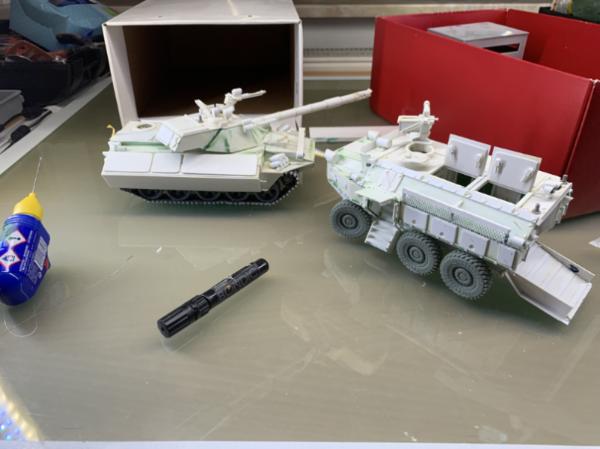
Finally I cut off the chewed section of the barrel
And replaced the end piece
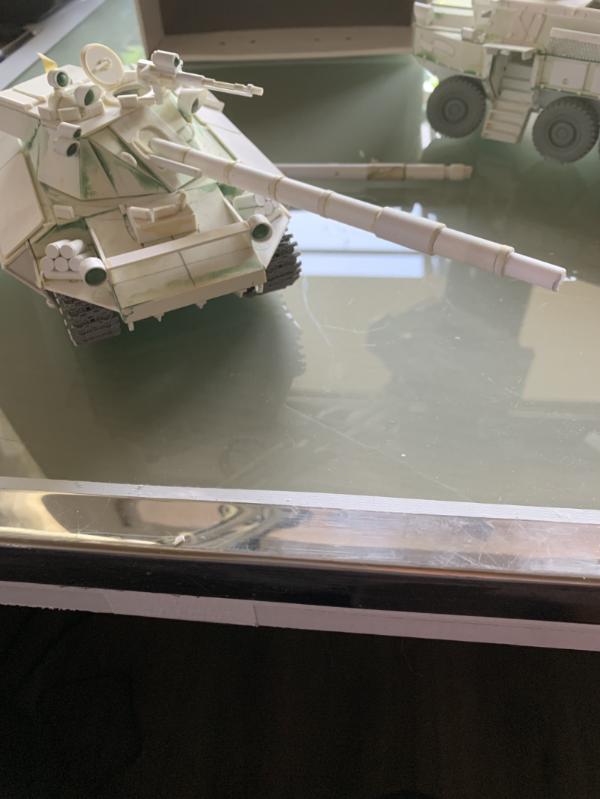
So now the two vehicles are repaired and today I'll look at the dorama base and see what shape this is in - besides being dusty as hell
One idea I had in the meantime was to have an (maybe scaled down) Ork plane come out of the backgound on an attack run on the Imperial position.
So this is the direction I'm trying to guide this scene to now.
Please let me know what you think.
Cheers
Klaus
18980
Post by: Arakasi
Welcome back!
68345
Post by: xXWeaponPrimeXx
Welcome back Klaus
I'm really feeling the loss of mojo myself.
106010
Post by: Meer_Cat
Welcome back Klaus- it is good to see you!
Nice job repairing the damages from Legion Felus Domesticus- for the Emperor! I believe that an Ork plane coming in for an attack run (guns blazing) or exiting from an attack run (fuselage/engines smoking) would be a good addition to the diorama. Hopefully the base doesn't require as much reconditioning as the vehicle did.
I dig the whole 'lack of mojo' vibe myself- went through a period of zero production as well and had to get myself back on track to get something done just this past February. But I find that I simply can't 3d print things and work at the hobby bench at the same time.
I thought it would be perfect- set up a print, let the machine do all the thinking whilst I kept an eye on it, but meanwhile painting/kitbashing/modifying something whilst it did so and this is not the case. I find that I can't focus (it isn't the noise, just knowing the thing is running), I'm constantly running over to check the print and/or I'm slicing more files to get ready for the next print. I just can't get much or any benchwork done.
When I rebooted myself (with a real boot) I set as February's theme 'Finish Something'- just sit and start on any of the many half-begun, half-finished, half-painted projects cluttering up the shelves and do it. And it worked well and has continued to work well, giving a different theme to work to for each month.
I'll build a month to just do 3d printing into my calendar, but I've gotten some good work done (I think) and want to keep knocking out some projects for fun.
Maybe my extreme penchant for attention to detail just can't handle soemthign that works in fractions of a millemetre!
Welcome back.
61018
Post by: Guardling
Nice to see you active again, I've always enjoyed your dioramas!
65595
Post by: Camkierhi
Welcome home sir.
22192
Post by: whalemusic360
3d printing has been a big boon in my hobby interest. Turning grey goop into something is just fascinating. What kind of modeling did you get in to?
90662
Post by: Colonel Jacka
Klaus,
If you ever come back mate. Here is a photo or two of an old friend.
7
|
|