So about a year and a half ago I started into the hobby with
IG. My first army grew massive and then I decided to see what else
40k had to offer and I sold and traded them off for several other armies. Everyone used to commented how much they looked like police with the paint scheme I used and I wanted to revisit them with my improved (not perfected) modeling and paint skills. When a local player sold me 50 primed
IG for an assault squad I had laying around and $7 I was hooked.
Heres a little bit about the army I am going to create. I want a swat style army with pleanty of 40 flare. I am not going to try to match current swat models, rather use them for inspiration while trying to create "Cadian Swat: Xeno Task Force". The army will be made using concepts from the all to popular loved/hated leafblower scaled down to 1500 points. The army will be based on the current
40k range with the idea of keeping the army tournament legal becuase I am sure I will sell it one day.
I will first start with the vehicles as they are the bread and butter of this list, but fear not as I have some great ideas for the troops as well.
The project:
4x Swat APCs with .50 cal guns
1x Swat APC with .50 cal and a LRAD. (For psyker battle squad aka:LRAD team)The fluff is the squad uses the LRAD to make units run. Google: Long range acustic device for more info.
1x Manticore, Chimera with large sattelite dish and lots of radars. The fluff is its used to call in air strikes on the target.
2x Medusa, Chimera with swive rocket launcher mounts.
1x Valkyire converted to helicopter with apache style wing weapon mounts.
Project #1
Develop a Swat Inspired APC Chimera. x 4
Here is the picture that I used for inspiration, keep in mind I am not going to copy it, rather borrow ideas. (It was embedded until it was removed from my dakka gallery.)
http://www.joebrower.com/PHILE_PILE/PIX/JBTS/Charleston_APC.jpg
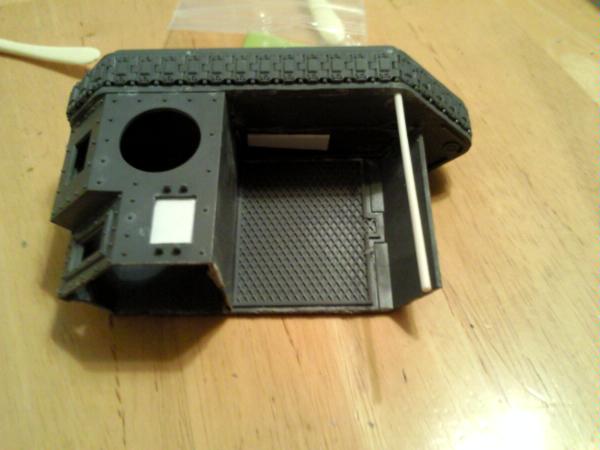
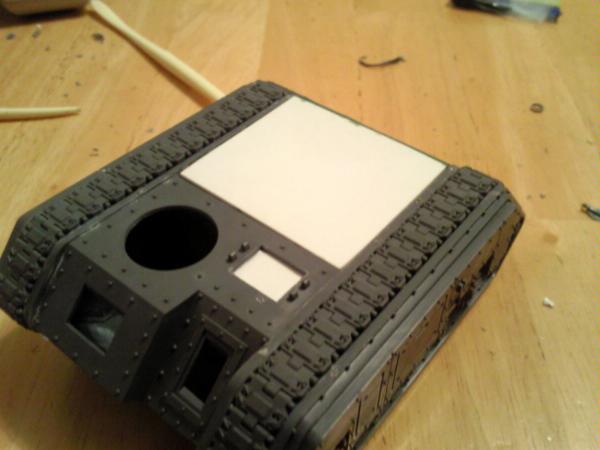
The first part of this project would require me to remove the raised areas at the top of the chimera kit. At first I tryed using a file. I was left with a very rough surface. Deciding this wasn't going to work I pulled out the Black and Decker mouse sander. Using 180 grit paper I quickly sanded away the turrent mount, back hatch and lasgun sponsons. I was left with this.
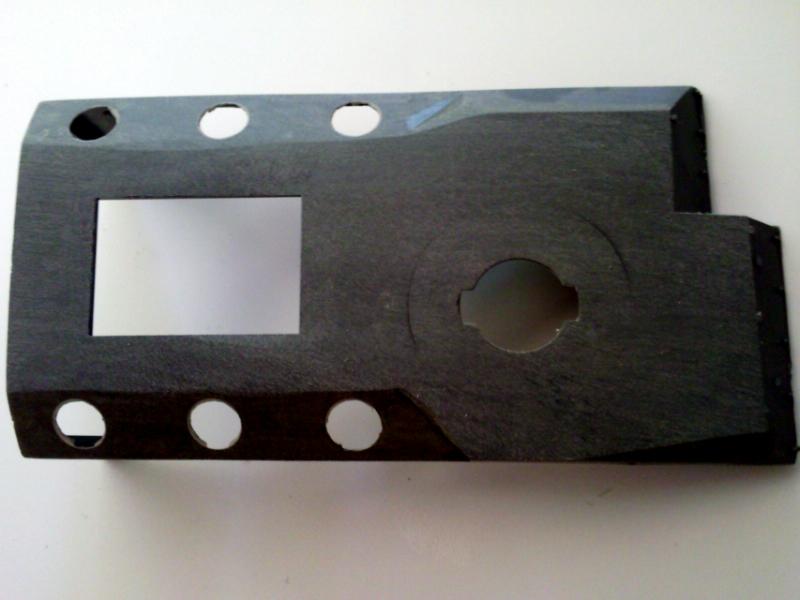
As you can see its a bit rough but I will worry about that on the final sand. Next step was to place some card so that I could fill the gaps with green stuff.

I filled in the gaps with green stuff (first time gap filling) and left it to dry for the final sanding.
Next it was time for the final sand. I again used the mouse sander this time loaded out with 240 grit paper to get a nice smooth surface.
 Update 4/18/2010
Alright I put some more work into these chimeras with a deadline (self set) for completion by Wednesday.
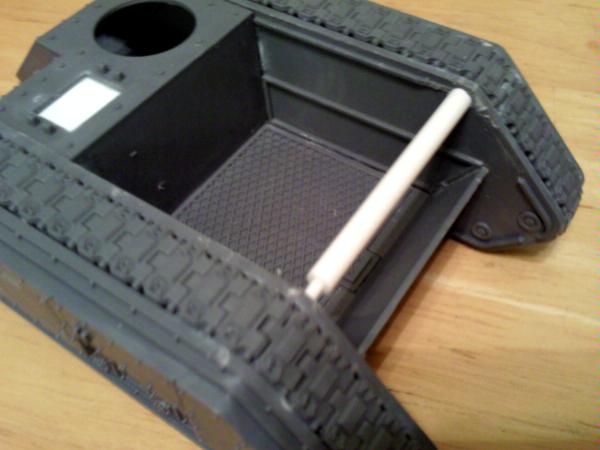
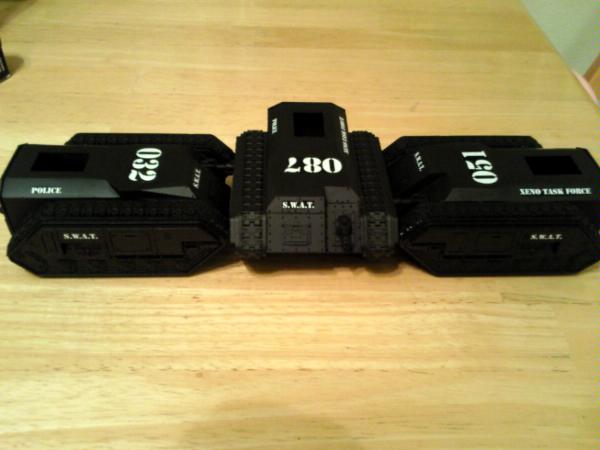
First up, I have assembled and primed the hull of the chimera. Taking three of these things off the sprue, assembling them, running out of glue and giving them a bath before priming took some time. In the end the results are already starting to show. You should notice it has a nice smooth profile where the turret mount and lasgun sponsons used to be.
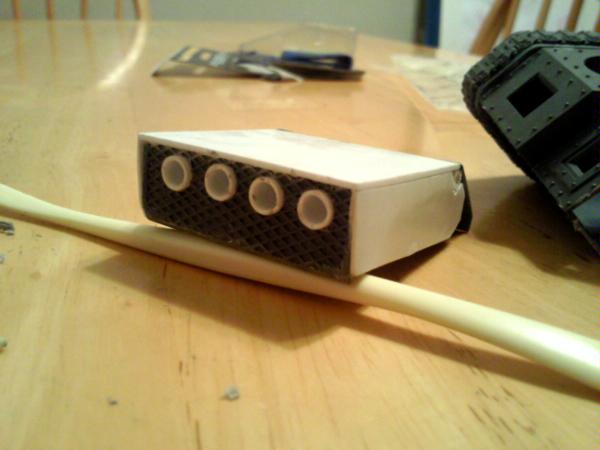
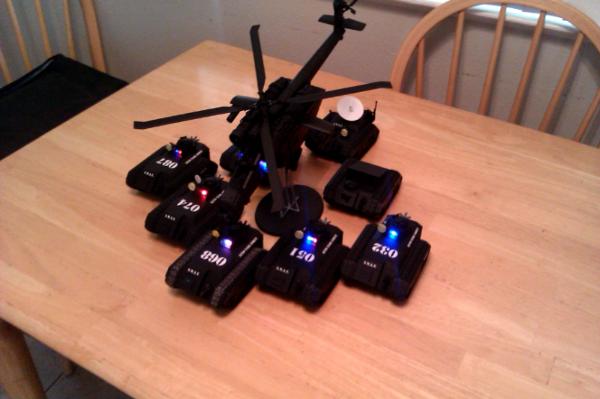
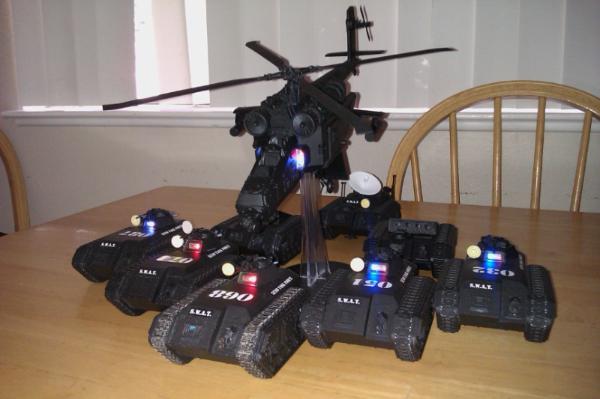
After that I got busy assembling the lights that should add that extra "bling" to the table. You can see a picture of them in action here at
http://www.policecarmodels.com/miliflsyforp.html The video hardely does them justice. I picked two packs of lights (6 lightbars) and 4 battery clips. I will have to pick up a few more before this project is done.
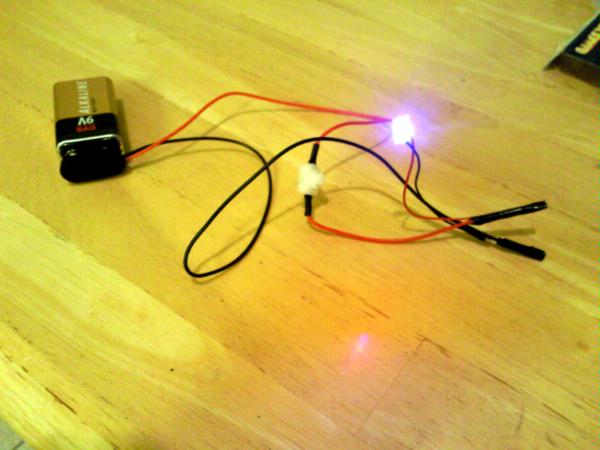
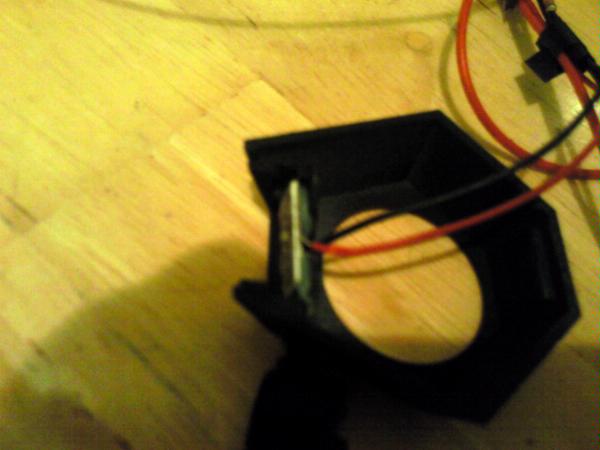
I had to make a mounting plate for the lightbar using plasticard. It was simple to attach to the inside of the turret however; I did cut my hand when a piece of plastic came loose. Nothing serious but its the second cut so far on this project...
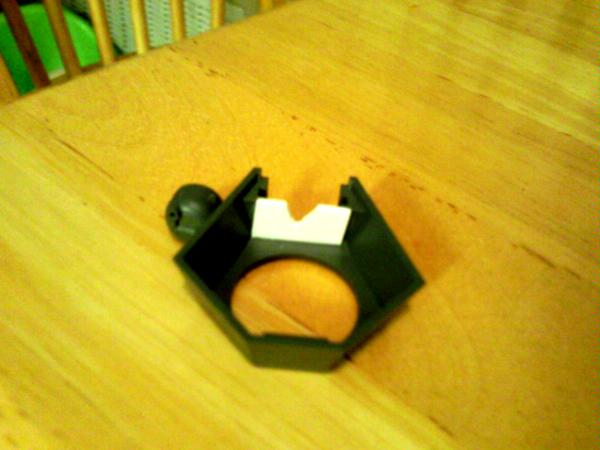
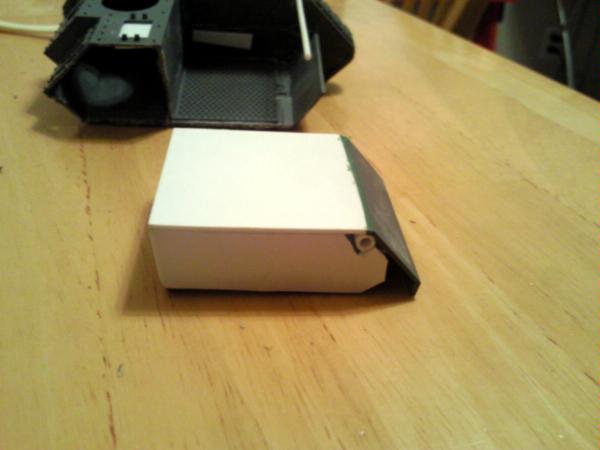
Last step for today was using greenstuff to attach the lightbar to the mounting plate. All in all test fit looks good and the lights are amazing.
 Update 4/19/2010
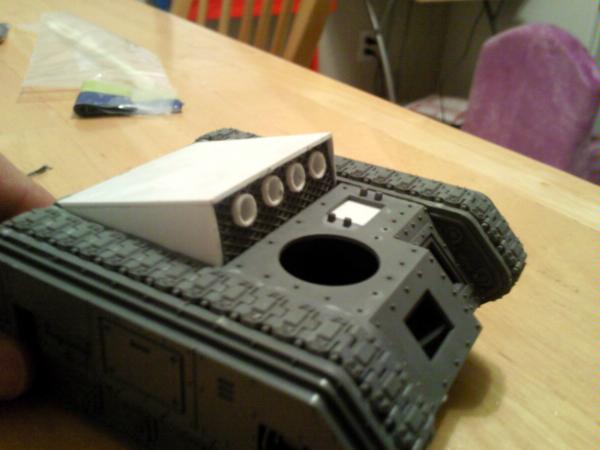
Alright, to continue with my timeline I put in some more work. I am one pictures short as I added a clear window over the turret that I mounted the light bar. I would have posted a picture but its clear and not worth the extra work.
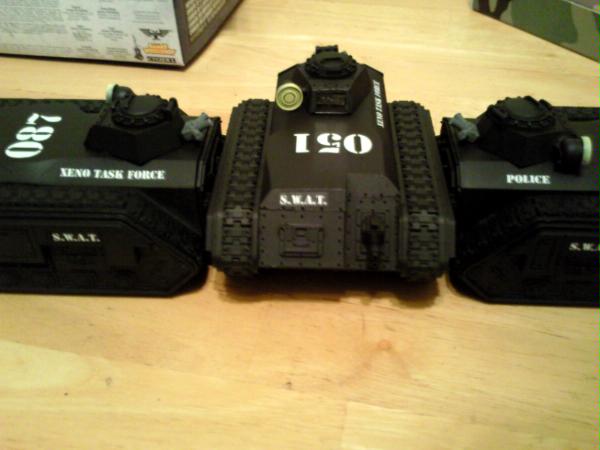
I added some decals using the testors decal system. It basically consists of printing your graphics on waterside paper then sealing it to prevent the ink from running off. Sounds easy right? I'll share a bit of my experience. First I bought Supercal decal system. The box was short on paper, the spray can had zero propellent and the ink still had not dried after a week. What a waste. So next up was testor. It was about 10 dollars less so a good deal over all. Since I would be putting white letters over black I picked up the white paper and filled in the background with black. Next up was trying to get it to print. I just got a new printer and it was having some major set backs. Once I finally tuned it in the black ink was low and I ended up with white lines running through the black. Not a big deal as I can just fill them in with some paint but over all it was a pain. The good news though, I have it dialed in and can easly make decals now and the results are well worth it as you will see below.
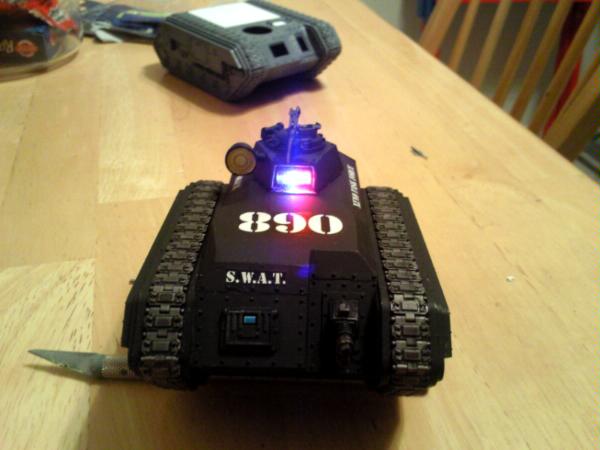
Ok so here is the picture. Its rough now as I have just added the decals. Once they are dry I will do my best to blend them and the matte finish should take the gloss right out of them.
 Update 4/20/2010
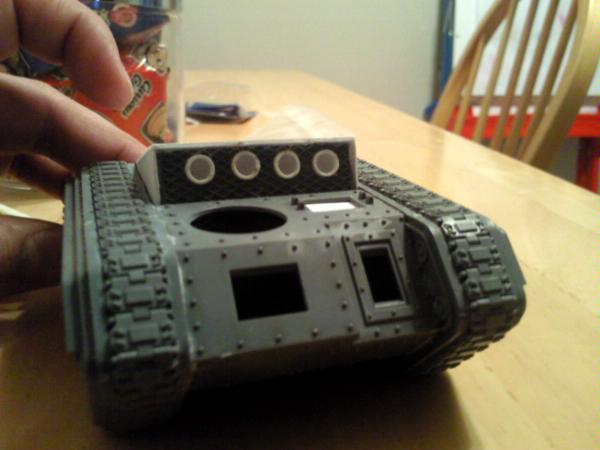
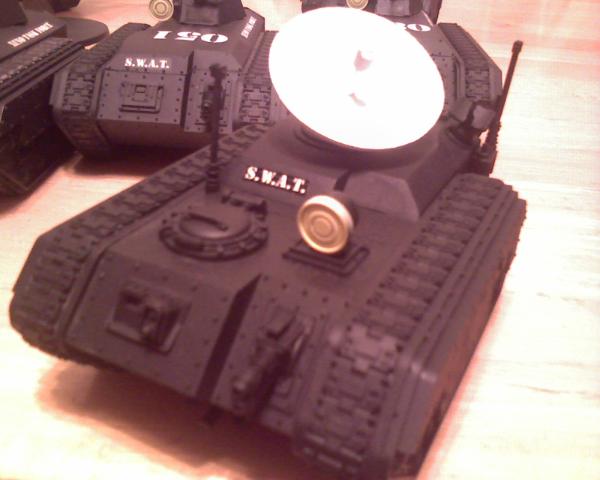
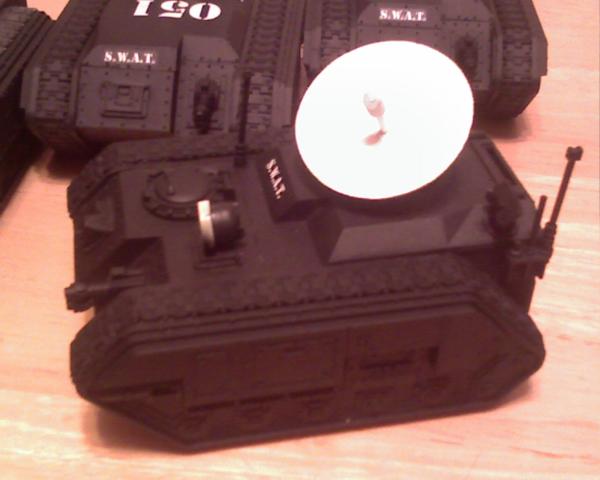
Today I managed to get the turrets mounted and a few bits glued on. Everything is primed out and ready for some paint. I want to keep the SWAT feel so painting will be limited. The turret guns will be mounted once I decide on which one I am going to use. I have a .50 cal but its 1/43 scale and a little on the small side but I love the look. My other option is the pintel mounted heavy stubba with the end clipped and replaced with the multilaser tip on it. Its a bit larger then I like and it doesn't fit my weapon upgrades theme. I think I am going to stick to the .50 but we'll see.
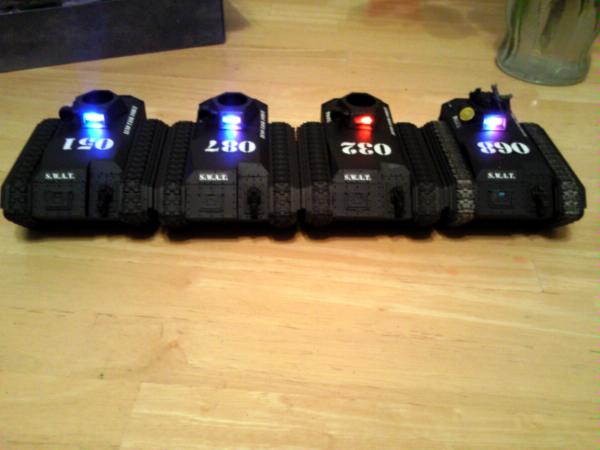
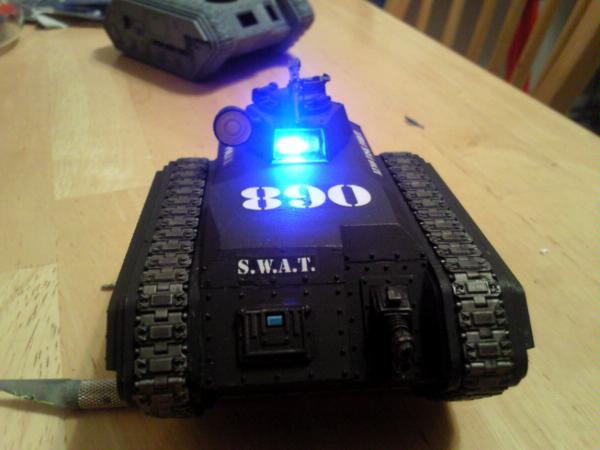
Here is a picture of them all lit up. Its even better in person. This picture gives a good mix of blue, red and one transition shot. I have to have a video of them up soon with the lights going. (Not the best quality though)
 Updated 4/26/2010
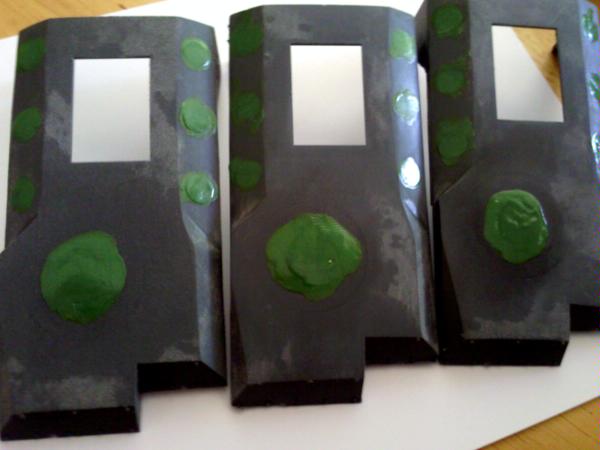
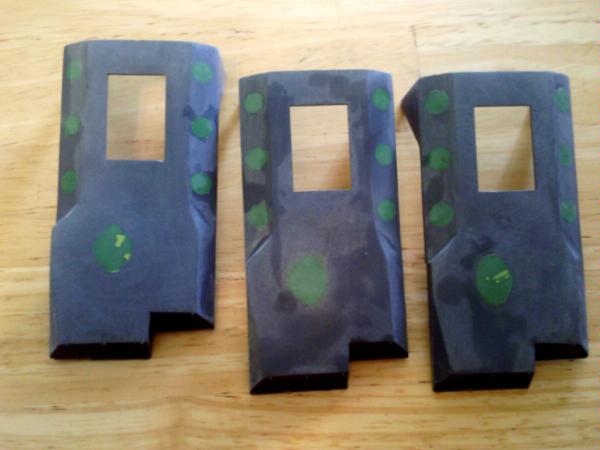
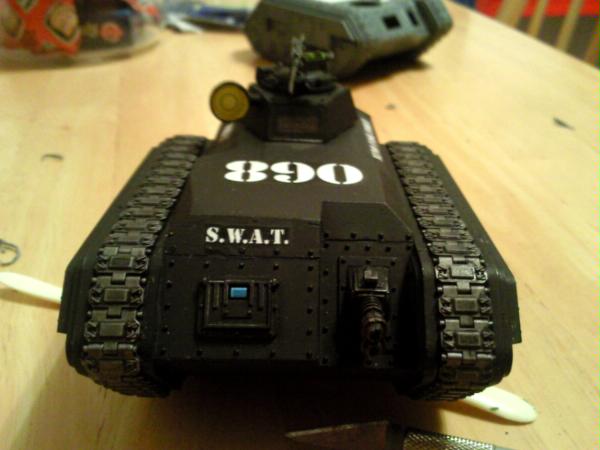
Ok so here is the final painted version. The paint is not complex nor detailed. The goal was to keep it simple. The metal is boltgun metal with black wash. The flamer got some additonal tin bitz as it adds a slightly burned look to it. The ammo box got a green paintjob.

Alright, there it is. Thoughts? Comments?
The Medusa project has begun, check page 2 for the first glimpse.


 It was nothing as ambitious as this though.