If this works half as well as it seems to, it's an amazing, amazing product! The fact that it is both re-usable AND doesn't stick to any known putty at all means it could be a one purchase, permanent solution for press molding techniques...
Ordered... will let you all know how it turns out!
The following products have been discussed both in comparison to Instamold, and in some cases (less helpfully) that Instamold is actually repackaged from and price hiked. In any case, feel free to search the names in the thread to read up on the ground already covered so we don't have to constantly repeat ourselves!
*PLEASE DO NOT POST SIMPLY TO SAY YOU ARE 100% SURE IT IS REPACKAGED SOMETHING ELSE. YOU MAY BE RIGHT, BUT UNLESS YOU HAVE BEEN TO THE LAB, OR AT THE VERY LEAST HAVE DONE A SIDE BY SIDE SAME TIME COMPARISON WITH BOTH PRODUCTS, YOU ARE ONLY STARTING AN ARGUEMENT NO ONE CAN WIN. NO ONE HAS PROOF IT IS, NO ONE HAS PROOF IT ISN'T.
LET'S KEEP THE THREAD TO DISCUSSING PRESSMOLDING PRODUCTS AND TECHNIQUES WITH DIRECT COMPARISONS, NOT SUPPOSITION.
KNOWING THERE ARE ALTERNATIVES TO INSTAMOLD, WHERE THEY ARE, HOW MUCH THEY COST, WHAT MATERIALS ARE BEST TO USE, APOXIE, GS, MILLIPUT IS AWESOME. ARGUING ABOUT WHETHER OR NOT IT IS A SCAM, OR CALLING CMON THIEVES IS NOT AWESOME (UNLESS YOU HAVE PROOF).
That's... pretty impressive. He was doing a pretty rough job, but it was a quick demo so that's fine. What he made in the end is a perfectly serviceable scenic 'cap' for a base.
Yup, and for the press molds, the ability to instantly create a 2 part mold, without have to do one side at a time, and on top of it, no release agent (!) is nuts.
He could have drilled 2 guide holes into it before he cut it out, and then used those to ensure he would have a perfect lineup on the sword, or, alternately, just stuck a toothpick in each side, and left them in and cut around them to use as pegs to the same effect....
This product could be a game changer in my view... IF it works as advertised...
Having not watched the video, can you cast resin in it? If so I'll likely buy for quick duplications where a silicone mold would be a waste of money and time.
hmm that looks pretty cool. I wonder if it would be good for making molds to make custom resin bases? I was thinking about doing a stone / bricky floor kinda bases for my skaven, like they're in the sewers.. was thinking of making like 10 different bases and then casting the 5000 or so that I'll need for all those rats
You can't do resin that heats up when curing, it'll destroy the mold since it's heat activated to return to putty.
There's another tutorial coming up for two part molds and also flattening a curved detail with a brush handle. The great thing about this Instant Mold is that "hot" IM doesn't stick to "cold/set" IM, which makes two part molding super simple. Mold one side, set, trim it a bit with the part still inside, then press more IM on top of it.
I think I've seen that kind of material before. Think it was called friendly plastic and was moldable by dipping in hot water. It's availability, though, is rare. I've heard of it about 5 years ago but have yet to track it down.
The fact you don't have to waste hours or days waiting for the mold to cure is also huge... not to mention the waste of expensive putties if it turns out bad too...
well i think have play with similer stuff like that .. few month ago. is a japanese product that have the same property. its just not made to use as a mold in the fist place. goit it from http://www.daiso-sangyo.co.jp/english/ i bet its the same thing. just one thing to remabwe is that make your mold fast its have a short work time and if you try to heat it up a bit more be very careful not to burn your self
Agamemnon2 wrote:That kind of stuff is probably too complex for press-moulding, really. I doubt this stuff will work with resin, since it's heat-activated itself.
If there is the cold activated IM as mentioned above, you could use that to cast resin parts perhaps?
nice find Major! i am totally going to try this out. i do a good bit of press moulding, for little decorative bits like skull, but using GS is such a time-consuming pain in the butt sometimes... if this works as advertised, problems solved!
Insta Mold does work with dental plaster (Ultra hard Plaster) It is great for one sided molds. Remember to follow the directions. It is a lot like cooking. If you rush it and don't follow procedure, your results will not be the best. I still prefer Smooth-On products but they are a lot more expensive and the setting times are a longer. The results are excellent however.
Hmm, that does look pretty nifty. Ordered a batch, see if it'll let me have more than one set of razorflails per ten wyches (and indeed if I can get myself an agoniser for my archon).
I have a question in regards to this, maybe someone has an answer. I'd like to remake my ice bases, and I think something translucent with a blue tint would be great. I know that I can get resin tint, but apparently resin won't be useable in this case. Is there any other clear casting materials that could be used?
If this stuff has actually been around a while under another name, it would be good to track that down. Just as Kneadatite is cheaper under its own name from the original manufacturer rather than repackaged from GW or GF9, etc., this Instant Mold is probably a better buy if you can find it under its original name packaged by the manufacturer. If anyone can find that info, please share!
Wait, IS this stuff just friendly plastic? We used to use Ffriendly Plastic to make vampire fangs when I was a kid, but I'm not sure about its detail-grabbing ability. Very useful stuff overall.
yeah,
interesting stuff, although it's kinda crappy if coolmini are repacking stuff with a x3 price tag instead of just highlighting it's dual use, to the community...
interesting stuff, although it's kinda crappy if coolmini are repacking stuff with a x3 price tag instead of just highlighting it's dual use, to the community...
Everyone does it, GW, GF9, etc., so no surprise there. I didn't really think they invented the stuff or had the patent on it, but since I hadn't seen it anywhere else I was thinking of buying it from them. Alternatives, especially cheaper ones, would be great. I don't buy my Kneadatite, white glue or Woodland Scenics products repackaged with high prices from third parties. If "Instant Mold" is available at a local store without having to mail order it that would really be nice.
As said, I've ordered them both. I'll test them both out, and see if one is superior to the other. Then I'll post a review, and you guys can all find out for yourselves which you want to order.
MajorTom11 wrote:MMA guys at work said this stuff looks like the same material mouthguards are made from!
Now that you mention it, there are mouth guards you can buy that you heat up in hot water before molding them to your mouth. This stuff has been around for a while.
Fallen668 wrote:I never press mold at all because it is such a pain. This has seriously piqued my interest.
^ what he said. ^
I've never done press-molding because, frankly, I can't be bothered and it's too expensive. This? Quick, easy and cheap? I'm getting one.
Listing off all the things I want to duplicate...
plasma guns...
meltaguns...
hey- In effect, if you got a big enough bowl, and enough of these things, would you be able to make, say, a baneblade? You'll probably need lots of these, about 5, but if you cast a couple...heh heh heh...nah I won't do that...maybe cast some land raider sponsons and weapons...
But yeah. If it works as well as in that video, I'll get it.
Holy gak, exactly what I have been looking for my Sisters of Battle since there are pretty much no support for them. I can finally get some more bits really fast if this stuff really works.
Ordering 2 sets right now. Will be really interesting to see if you can really mold superglue with this stuff. It's something im going to try just for a laugh. Superglue cures really brittle though in my experience but if their claim is true Im going to find out for sure.
One thing Im wondering about though is about the other products people have linked to, they dont seem none stick and others seems to require higher temperatures to soften up. Are they as good as this is advertised to be? Some of them are allot cheaper.
You can get Polymorph (Which seems to be the UK brand of Friendly Plastic) from Maplins, or http://www.mutr.co.uk/product_info.php?products_id=550 is quite a lot cheaper. I've not order from MUTR, but I've seen it recommended a few times in tutorials. No idea about Instant Mold, though.
After I mentioned this product to my wife she produced something for me out of her craft project bin that is another promising product that might do the same job as "Instant Mold". Check this out:
Fantastic Plastic pellets melt in hot water and can then be molded, modeled like clay, shaped, and so much more.
This plastic is very easy to handle, too. Just soften it in a frying pan (or electric skillet) filled with water heated to not quite boiling. The plastic pellets will stick together as they soften.
Then use a fork, spoon, or other favorite utensil to lift the "melted pile" of plastic from the pan/skillet, and dab the water off with a scrap of fabric. The plastic does not hold a lot of heat -- it will be warm and pliable when removed from the water, but not too warm to handle "bare-handed"!
Now the fun really begins! You can mix colors -- blending them, marbelizing them, or go for a more "inlaid" look. You can also mold, model like clay, shape freehand....the possibilities are limited only by your imagination! And if it cools off too fast, just put it back in the hot water and re-soften it.
Making jewelry? Just press the findings into the warm plastic and let them harden into place. When your project is completed, use a hair dryer to give the plastic a shiny finish -- no need for sealant.
Well... at worst it showed a lot of us there was a product like this out there, at best, it will be a superior product. Either way I am glad it came along in my case!
It won't stick to any of the common 'stuffs', green, grey, white, brown etc. It won't even stick to itself if one half is hot and the other is cold/set... no release agent needed!
Ketara wrote:If all this wonder-plastic stuff is is overpriced polymorph, I'll be disappointed.
Wikipedia's entry on Friendly Plastic redirects to Polycaprolactone, which it says is Polymorph.
I've never done press-molding before, but out of curiosity I picked up a box of Katatori-kun (型取くん) last night for 840 yen at my local Tokyu Hands and it looks like the same stuff in the video. I haven't had a chance to try it out yet.
Automatically Appended Next Post: [Time Passes]
Well, I can at least confirm that for Katatori-kun, hot indeed does not stick to cold. I just took a mold of a funny looking pen end in one piece and then after that cooled, plugged another piece into the gap. When both cooled, I could pop the two apart with a little tug. Now they're both back in my teacup waiting to be melted together.
I was surprised by how firm my hot Katatori-kun was though (that sounds vaguely naughty). I'd be a bit afraid to mold anything fragile with it. [strikethrough]It's not even as pliable as green stuff.[/strikethrough] It turns out I didn't get it hot enough. I used boiling water out of my tea kettle, but I'm also in a Japanese apartment in winter so nothing stays warm for long. Also, my pen-mold duplicate ended up quite deformed, but that may be because I took the pen out of the first piece of plastic before it had completely cooled. I'm not totally convinced this stuff will take fine details well, but that said I also don't really know what I'm doing.
I wonder what happens when you put this stuff in the freezer.
I've used Friendly Plastic. Back when I waas a kid in the early 90's I used it to make heavy armor and weapons for my Battle Beasts (Anyone remmember those?) If I wasn't careful the Friendly Plastic could and did stick to the Battle Beasts (they were made of vinyl I think). A couple of them still have bits of plastic stck to them to this day that I couldn't get off. This product is probably similar but not identical to Instant Mold.
As mentioned earlier, it appears to be the same material mouthguards are made of. If this is the case it is most definitely not friendly plastic and will be a more rubbery substance.
I know they sell those mouthguards at cvs and wallgreens for $25-35 US for people that grind their teeth in their sleep, so the price is not outrageous compared to other retail applications of the material.
I would love to see if It really is the same material and what kind of detail one can attain with it.
I can't wait to see some of you guy's reviews before pulling the trigger on this. I love the idea of no longer needing to make silicone molds, and then waiting 24 hours to find out I have an air bubble in an awkward spot, etc.
Ouze wrote:I can't wait to see some of you guy's reviews before pulling the trigger on this. I love the idea of no longer needing to make silicone molds, and then waiting 24 hours to find out I have an air bubble in an awkward spot, etc.
Dais wrote:As mentioned earlier, it appears to be the same material mouthguards are made of. If this is the case it is most definitely not friendly plastic and will be a more rubbery substance.
I know they sell those mouthguards at cvs and wallgreens for $25-35 US for people that grind their teeth in their sleep, so the price is not outrageous compared to other retail applications of the material.
I would love to see if It really is the same material and what kind of detail one can attain with it.
Definitely not the same as mouth guards. This stuff gets soft and pliable with heat. The mouthguards just barely get soft enough to take an impression of your teeth. They don't get nearly as soft as this stuff.
They are beads, but hell, its the same stuff. Im thinking CMON has a bunch of chinese kids pressing hot beads into block molds and reselling it
how would you rate the detail obtained from using this stuff compared with other techniques out of curiosity?
Ill let you know as soon as it comes in. Ill try press molding something simple, like one of our shoulder pads.
If it works well, and I like it, I may see about carrying the non-specialty stuff is there is a demand.
I can't believe that Chapterhouse press mold stuff!
[controversial but sorry I couldn't help myself ]
I dont think any of our sculptors actually press mold at this moment, but I wont poopoo on a process that lets us reproduce some of our sculptures without going through the cost of mass production. Yeah I bet Scibor owns stock in the company that makes the stuff Hah
Grobrotz wrote:@Notprop:
I bet Scibor ordered a ton of it
Why would he do that? He uses a CNC machine to cut custom press molds out of aluminum and other materials using his own digitally sculpted designs. Simply put he's beyond this material.
Grobrotz wrote:@Notprop:
I bet Scibor ordered a ton of it
Why would he do that? He uses a CNC machine to cut custom press molds out of aluminum and other materials using his own digitally sculpted designs. Simply put he's beyond this material.
They are crying because the endmill on his CNC tends to lend itself to large but intricate details instead of fancily sculpted ones.
They are beads, but hell, its the same stuff. Im thinking CMON has a bunch of chinese kids pressing hot beads into block molds and reselling it
how would you rate the detail obtained from using this stuff compared with other techniques out of curiosity?
Ill let you know as soon as it comes in. Ill try press molding something simple, like one of our shoulder pads.
If it works well, and I like it, I may see about carrying the non-specialty stuff is there is a demand.
I can't believe that Chapterhouse press mold stuff!
[controversial but sorry I couldn't help myself ]
I dont think any of our sculptors actually press mold at this moment, but I wont poopoo on a process that lets us reproduce some of our sculptures without going through the cost of mass production. Yeah I bet Scibor owns stock in the company that makes the stuff Hah
My friendly plastic has just arrived. I now need to mosey on down to the local GW tomorrow to grab some Greenstuff, and we can see what this stuff is good for....
Using this product, can someone enlighten me to how I would go about making a mold of a marine/terminator shoulder pad? any help would be great as this looks like it will open up some creative doors for some of us!
An entire shoulder pad would be tricky. This sort of thing is best used for one sided detail, or fairly flat two sided detail (like the sword in the example, or a gun). A chapter symbol to put _on_ a shoulder pad would be a good application of this stuff for example.
They have a video explaing that sort of thing. You're pretty much going to wrap the bit completely in this stuff, then cut the mold open into halves to remove the bit... then you just press green stuff in. If you're just doing a symbol, it may be easier to just use plastic terminator shoulder pads and press mold the symols you want to add.
Got it in last night. I got ambitious and made a two part mold. It seems to have worked. I have it filled up with green stuff and vised to apply pressure. Will De-mold it once I get off work tonight.
Hey folks, could you please remember to define "it"? There's been a lot of different products talked about on this thread and while I'm assuming it's the product discussed in the OP, it would be handy to know that for certain.
Fallen668 wrote:Got it in last night. I got ambitious and made a two part mold. It seems to have worked. I have it filled up with green stuff and vised to apply pressure. Will De-mold it once I get off work tonight.
I'm looking at a pile of rubbery block molds (and thinking of the ones tossed because of an air bubble or miscast) along with having to shoo the kids out of the room every time I mix resins for casting (the fumes can't be good for a 4 year old).
I am so hoping i can toss all of those out, the space. The chemicals. The time in setting everything up for casting, The wait for everything to cure. The recast. Getting distracted by the babies dirty diaper and having a batch go solid in your mixing cup. Putting everything away.
Having to remake a new mold because you absolutely MUST have 2 of a unique item to match sides.
First pressing did not turn out well at all. I got some detail but it was very deformed. I think I put too much pressure on it and stretched the mold. Not even worth dragging my camera out to take a photo. Will try again in the morning.
And to answer the question of which product it is... it is the insta mold from CMoN.
@Fallen- you probably dont need ot actually clamp this stuff. Maybe just light rubber bands at the most.
Its not like cassting resin where the mold has to seal to keep the resin from running out. Just have to press it once to get the putty into the details.
Very eager to see the results on this one so also subscribed. there's alot of press moulding i'd like to do and even some two part stuff.
let us know the results chaps!
Had some play with the Omurayu the weekend. Made a simple architectural piece with styrene and cast a mould in air drying clay. Cast some resin masters and then did the weird plastic stuff.
The reason was I was unsure how the styrene would take to having hot plastic shoved onto it. Need not of worried and redid the moulds from the original styrene in the end.
Tried casting from the Omuyaru moulds with air drying clay- waste of time Cast in resin from the car repairs shop worked better. Lots of pin holes as I was not concentrating but overall quite pleased. Need to get sharper for any work on minis but that will come. Maybe proper modelling resin is worth the investment for such projects but at the moment will be happy with terrain detailing with this stuff. Will try and get some pics in my blog soon now the studio no longer resembles a landfill site.
(That's cos all the crap has been transferred to the bedroom! )
fwiw Here's what I have so far
now to cast a bucket load more!
The piece is 3" long and even with the tidying up I think will be easier than scratching them all individually.
Automatically Appended Next Post: ps I had enough to make three moulds.
The resin sets enough to be removed by 30mins so I can keep knocking them out.
I love the fact that this stuff is reusuable.
Still have the styrene master in case I do need to make more after I reuse the Omuyaru for making other moulds for more detailing.
Have just pulled a couple more casts out.
They are a lot better. Combo of using the moulds taken directly from the styrene master and some new hardener.
They are much cleaner now.
As for more complex forms, I am not sure about a full figure but a torsi may be possible. There is an indication on my castings that some undercutting at least will be possible. The hollow square section used on the frieze has created a positive shape in the plastic mould. There is no problem pulling the cast out, but I would be wary of excessive undercutting.
Will be quite a while before I get around to casting such sculpts Shrike (my own before the accusations start flying)
Sorry can't addres the issue myself just yet, but am excited by the possibilty of sculpting and casting my own minis.
Don't have any spare stuff at the moment to experiment with but can't see why it would not work tbh There seems sufficient flexibility after the stuff has cooled.
It would probabvly be used by you anyway at some point given it is reusable. Would be worth giving it a go.
I've not used Instant Mold, but it certainly looks very different to both Polymorph and Friendly Plastic, which I have used both of. And, yes, Polymorph and FP are similar to each other, but I don't think they're absolutely the same -- Polymorph is stronger, IME.
I haven't gotten 2-part molds to work yet but since this is the first time I've ever molded anything I'd chock it up to inexperience and poor technique for now.
I have had success press-molding my Crisis Suit weapon.
It requires some cleaning since it isn't a 2-part mold but it picks up the detail nicely and works perfectly for me since only one side of my weapons has detail to begin with (second side will be covered with stuff like drum magazines and carry handles so it needs to be flat). I'm going to try 2-part molding the custom head for my XV8s today and I'll be sure to report back how it goes.
Again, there is a demo of two-part molding and lots of other good stuff on the video at the Instant Mold website. If you're interested in the product, it's worth 3 minutes to take a look at it.
BrassScorpion wrote:Again, there is a demo of two-part molding and lots of other good stuff on the video at the Instant Mold website. If you're interested in the product, it's worth 3 minutes to take a look at it.
Yeah I watched it...but I'm more interested in a Dakka user experience.
Still waiting on mine, but just had an interesting idea.
As color shapers are so pricey, I may try to use this material to make some sculpting tools (similar to color shapers) that won't stick to putty. The stuff seems pretty firm once cool/cold, so I have hopes for it..
I got my sets off of eBay. They weren't cheap, as you say, they are not ever cheap, but the price for a full set was at least reasonable. Instead of paying $7-$10 for one I got a set of five for between $20 and $25. I actually bought two sets, one small and one about two sizes up. They should last a long time as I don't do that much sculpting, so it seemed like a pretty good one-time purchase as they are most helpful at getting the final shape of a sculpt smooth without deforming it.
Color shapers are worth every single cent and more. Even if they were double the cost I would still recommend them, honestly indispensable tools when working at this scale IMO!
MajorTom11 wrote:Color shapers are worth every single cent and more. Even if they were double the cost I would still recommend them, honestly indispensable tools when working at this scale IMO!
Hrm, having never used them and only read about them, maybe I just havent been thoroughly impressed enough yet and should try them.
Here's an OTT question: when I look at them I sometimes see firmness descriptions (hard/soft)...which is better/more appropriate for GS work?
Hrm, having never used them and only read about them, maybe I just havent been thoroughly impressed enough yet and should try them.
Both of the professional hobbyists I used to sit with at our Bunker HQ when we had it used them on their sculpts. The first time I tried them I was amazed at the results. As someone else said, they are worth every penny as they are invaluable tools that will help greatly improve the quality of work.
Seriously, the demo video, which clearly has been shot without trickery, is quite impressive, which is one reason so many people are excited about the product. I'll look forward to seeing more people try it out here too.
I have all three, usually end up on firm or super-firm. But soft have their uses too... I usually use the round cup head, very rarely the other ones. If you could just buy a set with all 3 rounds, that would be a perfect place to start -
Thanks Chibi, I'm sure I speak for everyone when I say we appreciate your time and effort!
Also, back to the color shapers briefly, BEWARE EBAY. Lots of people sell color shapers that are not Sovereign brand color shapers, and I accidentally bought 2 of them, and let me tell you, they are not the same quality at all.
Just bite the bullet and head to blick to get them, again, cannot stress how useful and comfortable these things are to work with!
MajorTom11 wrote:Thanks Chibi, I'm sure I speak for everyone when I say we appreciate your time and effort!
Also, back to the color shapers briefly, BEWARE EBAY. Lots of people sell color shapers that are not Sovereign brand color shapers, and I accidentally bought 2 of them, and let me tell you, they are not the same quality at all.
Just bite the bullet and head to blick to get them, again, cannot stress how useful and comfortable these things are to work with!
I did a Google on those...still really don't get the gist of it. Basically a soft paint brush like end for sculpting GS?
The Color Shaper tips are made of silicone. And you're unlikely to "get it" unless you've seen a good sculptor use one. I bought two sets after watching some pros use them. Talk about "right tool for the job".
I never saw anyone using them, but read they were good... honestly, there isn't much to get in terms of the immediate benefit - They are forgiving in that you would have great difficulty pushing a ton of GS in one stroke, they force you to gently do things and take your time, and they automatically smooth your work in way metal or would never would. Anyone who used a metal sculpting tool and accidentally scraped off 20 mins of hard work due to a shakey hand will immediately appreciate them lol! Just IMO and experience though...
ps just looked at the pics closer to actual size and they are not too shabby even if I say so myself
Have to agree about the clayshapers Major Tom Have made my own tools from cocktail sticks Used wooden clay tools Metal wax sculpting tools and none of them are close to the silicon shapers for finesse of touch.
The other tools have their uses but for the final finish the silicon ones are ace. Also I find it easier to apply GS with them as it doesn't seem to stick to the silicon. Always used to have a problem getting just enough moisture. Not enough and it sticks to your fingers/tools. Too much and it won't stay put. The clayshapers seem to work just right for me.
Chibi Bodge-Battle wrote:I probably had too much GS and rushed the cutting of the mould, and the GS was still a bit soft when I pulled the first half of the mould.
I had these problems with my earlier attempts too. I'm quickly discovering that to do an effective 2-part mold with this stuff its all about three things:
- Appropriate amount of Green Stuff - A continuous and clean cut of the initial mold - At least two guide rods, each in a corner opposite the other. I used bits from the GW finger drill
Was thinking that the GS is not the best sculpting medium to use and was thinking of trying Magic Sculpt next.
Even when cured it has a slightly rubbery quality.
Some of the other mediums may produce crisper results.
Was wondering about some soft Fimo polymer clay also.
Might try some fine grade Milliput.
Not got so much grey and brown stuff so need to keep that back for actual sculpts.
If you guys find something better then GS to use with Instant Mold then please be sure to post it up. GS seems to work but like you said, it ends up being a bit rubbery. I've also found that struggles with sharp angles, meaning you mostly get rounded edges.
okay i think i'm going to have to order a fair amount of this! obviously gs/milliput mix is the way forward for sculpts but has anyone considered that modelling clay you bake in the oven? its light and should hold shape well (pop the mould in the fridge) and then trim and bake? just thinking for sharp results.
Yup as mentioned earlier Fimo Soft is on the things to try list. Not heard of mixing Milliput and GS before. Why noy not straight Milliput? Is the regular too hard? Have some Fine Milliput as used by the porcelin restorers so will try that.
The Magic Sculpt looks promising but I made a pooch of the job so have recast the part and trying again.
Have used an ice tray and if I understand Sonic Para correctly, I grabbed a couple of spare drill bits to use as locator pegs. I misaligned the halves when trying the MS as noted above so the "pegs" will hopefuly prevent it happening again.
Stop teasing me you fiends, still waiting on mine to arrive.
I'll do a trial with GS, BS, pro create, miliput and modelling clay with comparison pics etc, but I fear by the time it arrives, someone else will beat me to it
Has anyone sourced a cold cast liquid resin.... I've been doing some research, and some articles refer to cold casting resins which harden up at room temp.... A liquid one of these would be great with polymorph!
been looking at stuff like that, system3 clearcoat for example, waterlike viscosity, so will pour with no bubbles, hardens over a few hours, so low exothermic out put. For home hobby work, your not really stressing about how quickly you can demold, hell worst case you have several molds, cast at the start of the evening, then get some painting done and demold the next day!
I've done a ton of white metal in the past, but this is seriously interesting me! For the odd dozen copies of something you have sculpted, this looks VERY interesting!
On the gs/milliput, seriously, try it! Hardest part is only mixing small amounts!
Automatically Appended Next Post: Few mails and research later, I can get a regular clear rigid epoxy resin from cheshire with an 18 hour slow cure which should not exotherm above 45 degrees C....
If I want 50 of something I can white metal cast, if I just need the odd few, this looks like a cheap and workable solution for replicating my own work!
Been reading with great interest. Found some other stuff that might be of interest. I should be getting home in a couple days, will buy and try then if anyone expresses interestin my results. I am looking for 2 part molds, and resin is a plus so the fact that this stuff heats to set is a plus.
Outstnading work to you all! Hope i have something worthwhile form this as well. Bought the only thing I dont particularly like is having to cut molds apart, but since it's clear that might change that a bit. I believe John Greer sells a similar stuff: http://www.aeromarineproducts.com/silicone-mold-making.htm
I can find white polymorph in the Uk for £15 a kilo, but not clear! Would make ensuring the mold has filled properly much easier in clear, any one got suggestions for uk suppliers or trade names?
When making 2-part molds with Instant Mold, has anyone found a trick for making sure the mold sits properly around the bit and fills in any gaps? I'm trying to make a 2-part mold of my custom XV8 head and while I've had success getting the general shape, I've had a lot of trouble getting the mold to be perfect with the really small details. It is still usable but just requires some cleaning and touch-ups with more green stuff.
SonicPara wrote:When making 2-part molds with Instant Mold, has anyone found a trick for making sure the mold sits properly around the bit and fills in any gaps? I'm trying to make a 2-part mold of my custom XV8 head and while I've had success getting the general shape, I've had a lot of trouble getting the mold to be perfect with the really small details. It is still usable but just requires some cleaning and touch-ups with more green stuff.
I would think using a traditional RTV approach to two-part molding might help that. Google "Two part RTV mold"
The Superfine Milliput worked well as did the Magic Sculpt.
The latter suffered from a poor mould though. Must have become distorted when I inserted the pin
Some crisper detail on the last effort which will be the last effort as I have tried all the mediums at my disposal.
Will pop up some pics later.
Hope the observations have been of use. The experience has been very encouraging for me and I feel more confident about some future figure projects I have lined up. So thanks to everyone for prompting the casting.
Chibi Bodge-Battle wrote:The latter suffered from a poor mould though. Must have become distorted when I inserted the pin
About using the drill bits, put them in after the mold solidifies. The material is soft enough to drill through with your fingers (don't even need the drill) so don't worry about it. The added bonus of using the drill bits is that the teeth on them help keep the mold together when you are casting.
I've been using regular Sculpey for my mold making needs. If time allows, I'm going to check this other stuff out on a later date to make a comparison.
My Milliput effort had a slight misalignment! But have had a little play with it and is looking alright.
Will most likely use earlier efforts for objective markers or conversions.
A note about the Superfine Milliput.
Have changed my mind because now it is fully cured it is hard, slightly waxy but I feel a tad brittle. Will be okay but for gaming.
I take it back Druidic! GS in the mix it is!
Just a note on paint shapers: Dick Blick will send you 40% off coupons periodically if you sign up for their mailing list. They are also having a back to school sale I think until the end of the month if you are looking to get stuff. This week I am going to pick up stuff for Les' wash recipe and a wet palette at 40% +10% student discount
Anyone tried casting using air dry clay in these moulds?
Have to say this looks so much easier than making more traditional moulds for resin casting (I've made a few and we don't really get on ).
I think based on what people are saying here I will look into getting some of this stuff, as I have a bunch of custom sculpted bits I want to reproduce and don't feel like sculpting a million times.
Tried it as mentioned earlier.
Not overly impressed (pun intended).
May have been my fault as it was the first medium I tried, but the results were too inconsistent.
I could try again with the mould I subsequently made. Guess for simple moulds it will be fine but it didn't seem to take the detail that well.
Chibi Bodge-Battle wrote:Tried it as mentioned earlier.
Not overly impressed (pun intended).
May have been my fault as it was the first medium I tried, but the results were too inconsistent.
What was the original made of, and what medium did you use?
Styrene master Oyumaru mould Das air drying clay medium
I may have pulled the cast before the last bits had dried. The problem is the air drying so of course the clay in the recesses is going to take longer.
Two part resins and putties harden by chemical reaction afaik so this is not a problem
I don't know how i missed this thread until now but this stuff looks great!! Luckily i still have my receipt for some "Amazing mold putty" time to return it and order some insta mold. I have plenty of green stuff laying around and some easy cast, casting epoxy. Does anyone know if "EasyCast" heats up when it hardens? (havent got around to using it yet.) Also thank you for showing us this fantastic product!
I don't know not too impressed to be honest. I get better results with my RTV molds. Sure it takes 24 hours to cure but the results look much better (and of course it is more expensive).
Since I am still new to this site, how do you post your picts to this topic? I have had some success using a scupley product and simple epoxy putty. I would like to share on what I have done.
Brettz
You are probably correct. But it depends what you are doing. This is my first real attempt at casting and my first ever 2 part cast.
It is a simple method so for much of what I need this will be adequate.
If necessary I may have to try RTV casting.
With some spare Oyumaru in between the last two mediums I cast a piece for a base. No effort required.
Love the flexibility of this stuff.
Adam
You need to register with an image hosting site like photobucket. Upload the pics from your computer then copy and paste the img code. hth let us know if you have any probs
Chibi Bodge-Battle wrote:Brettz
You are probably correct. But it depends what you are doing. This is my first real attempt at casting and my first ever 2 part cast.
It is a simple method so for much of what I need this will be adequate.
If necessary I may have to try RTV casting.
With some spare Oyumaru in between the last two mediums I cast a piece for a base. No effort required.
Love the flexibility of this stuff.
Adam
You need to register with an image hosting site like photobucket. Upload the pics from your computer then copy and paste the img code. hth let us know if you have any probs
Ohh I'm with you on the simplicity of it all. When I first started casting my own bits it was a little overwhelming. It is always good to get your feet wet first. Anyway I would suggest the following for mold making:
So what is the final word is this Friendly plastic or no? it would not seem so, FP seems rather cristaline and that it would snap unlike this which looks kind of flexible.
Question, can you heat this to a melting point and still use it? does it become toxic or ruins the material?. If you can it looks quite promising.
Chibi: Can you please let us know where you got your Oyumaru?
Also, has anyone else had any success with any products that are available to be ordered off the internet? I've never seen anything like these products in NZ .
Cool. at that price I didn't bother to look any further, ordered it right away. Hopefully I'll have some good luck with it as well (need to make som custom bits for my 'nids)
Quick question for anyone who has made a 2 piece mold:
Have you tried making the "bottom" of a mold and then let it cool/harden before making the "top"? Do the two sides of instant mold stick to each other or do they remain separate?
It might not be a bad idea Scotty, as it would probably help in seperating the halves as they won't fuse together as they would if you make the two halves simultaneously.
I sort of did it by accident and there was a natural seperation along the "fault line"
Would be interesting if someone would try that. Sorry am using all mine at the moment
Scottywan82 wrote:Quick question for anyone who has made a 2 piece mold:
Have you tried making the "bottom" of a mold and then let it cool/harden before making the "top"? Do the two sides of instant mold stick to each other or do they remain separate?
That's damn good thinking there. Will have to try it as soon as i get mine.
Scottywan82 wrote:Quick question for anyone who has made a 2 piece mold:
Have you tried making the "bottom" of a mold and then let it cool/harden before making the "top"? Do the two sides of instant mold stick to each other or do they remain separate?
Yeah, I was thinking about something like this too. I found i am horrible at cutting the 2 molds apart when they are fused. i will try it out tomorrow.
I did a quick test letting the first cool and the second peeled off nicely. This will possibly mean there is more likelihood of error if you are not careful.
Would be a good idea to peg it, as discussed above, to help with aligning the halves for casting.
When I say peg it, don't mean pop off this mortal coil btw!
Scottywan82 wrote:Quick question for anyone who has made a 2 piece mold:
Have you tried making the "bottom" of a mold and then let it cool/harden before making the "top"? Do the two sides of instant mold stick to each other or do they remain separate?
I just thought of that on my way home tonite, great minds!
I gave my idea a try, but no success yet. It's not sticking, but I need to heat the material more before I try it again. I also may try hitting it with a blow-dryer to soften it directly without water. We'll see. My concern is getting the "halves" to line up right before I keep moving.
I'll try the pegging. sounds like that may be my issue.
Scottywan82 wrote:Quick question for anyone who has made a 2 piece mold:
Have you tried making the "bottom" of a mold and then let it cool/harden before making the "top"? Do the two sides of instant mold stick to each other or do they remain separate?
I kinda thought everyone was doing that already....but, if you guys arent- heres another tip.
Powder. Make the first half, add a light dusting of talc or baby powder before doing the second half.
This also wouldnt be a bad idea for the parts if you're demolding them while still soft- it will help them come out easier.
Has some great success this morning with the two part mold. I'm going to press mold it now and leave it until this evening. I'll see how it turns out then and snap some more pictures, let you all know what I find.
That would be fantastic. I was wondering the same thing about the 2 part. I have to say, the outcome so far isnt as good as if it were poured, but for simply press molding parts they actually look pretty good. Im sure with some more practice one could get pretty nice results
KingCracker wrote:That would be fantastic. I was wondering the same thing about the 2 part. I have to say, the outcome so far isnt as good as if it were poured, but for simply press molding parts they actually look pretty good. Im sure with some more practice one could get pretty nice results
That's my bet too. I've only been press-molding or ANY KIND of molding since... oh. Yesterday. And it's doing pretty well.
I'm also going to try it with something better than kneadtite. I've got some Milliput on the way and I may try procreate as well. I want a putty that is nice and soft during the press molding process, but hardens well.
Also, it seems that the ideal way to set this up is with a frame. Make the frame open on the top and the bottom, and place the bit in first. If there is any curve to it (I'm doing a CSM lightning claw for a unit of terminators) place the concave side down. Then press in the Instant-mold. Make sure there's more than you need. The put a flat surface on top, essentially "boxing in" the bit and the mold.
Once that dries, I'm going to flip it all over, try that talcum powder trick on the dried mold, and press the second half in on top. now, when I press mold, I'll have a flat-bottomed surface to press against and leave it to dry.
After that, I think I'll get some better results. We'll have to see and keep trying.
Got mine today, gonna have to give it a go, but not before I finish painting the last 4 termies in my neverending SH set... which, coincidentally, is close to actually ending lol!
That and I'm waiting for a combi melta bit i ordered as my test subject...
For what it is worth, when you are heating the InstantMold with the water, don't use a plastic bowl. Unless I am doing something wrong (HOW IS BABBY FORMED?) it likes to stick to the sides of warm plastic(or at least that particular plastic). That was good for a few moments of skidmark-inducing terror. Fortunately, it peels off once it cools.
Right now I am trying Apoxie Sculpt which seems to work fine, but I got to thinking that CA glue might have been a better choice for the particular moulds I made. It would have been a more precise amount for each cast and self-leveling in that I don't think liquid CA would have much of an meniscus. And since I am impatient, it would have cured faster.
Robert Facepalmer wrote:For what it is worth, when you are heating the InstantMold with the water, don't use a plastic bowl. Unless I am doing something wrong (HOW IS BABBY FORMED?) it likes to stick to the sides of warm plastic(or at least that particular plastic). That was good for a few moments of skidmark-inducing terror. Fortunately, it peels off once it cools.
Right now I am trying Apoxie Sculpt which seems to work fine, but I got to thinking that CA glue might have been a better choice for the particular moulds I made. It would have been a more precise amount for each cast and self-leveling in that I don't think liquid CA would have much of an meniscus. And since I am impatient, it would have cured faster.
tell us how that goes. the video IIRC says the stuff doesn't even stick to CA glue and i'd like to double check that claim as it seems the most dubious. i'm thinking about buying the stuff to make small icons (like inquisitorial =I= symbols) and CA would be a good medium for it (green stuff doesn't do well with those tiny protrusions in the middle of the =I=).
Have plenty of normal casting experience, I've ordered some generic polymorphic plastic to play with, but being the engineering type I've worked out plenty of stuff in my head already.
From experience the more care you take in prep, the better the finished product, and I seriously doubt this will be any different.
I have plans for a mould blank for shoulder pads, which will take any shoulder pad I've already sculpted and allow me to make a mold in an hour and push mold copies while watching TV.
If I get it through this week I'll take shots and try to post a little 'how I did it' thingy.
I have been increasingly impressed with peoples efforts however, damn I wish I'd know about this stuff a year or so ago!
I just got my Apoxie sculpt in, and I gotta say the stuff should work perfectl for pressmolding. Its much, much softer than green stuff. So if youre patient and let it set up before removing from the mold- there shouldnt be any problems.
Very nice. What material did you cast in? I am guessing Procreate (but that is only because I don't recognize it) or is it just Greenstuff with a lighter colour than I usually see it?
Thanks! It's Kneadtite, the green stuff. It's just that my camera sucks, lol.
two part mould wise, i'd prolly try green stuff but when the flash pushes out i'd be inclined to open the mould and remove it with a scalpel then close the mould and press again, that should remove the need for clamping etc. just waiting on my batch to arrive and i'll give this a go
I now need something like instant mold (or equivalent) on another project.
Thank you.
Did you read the first post? I believe it is now out of stock, but if you read through some of the pages people have mentioned other products they deem similar.
Hi LordAki
If you checkout the discussion not too far back, it was suggested leavinf the first half of the mould to cool and Mistress of Minis iirc added the idea of using a bit of talcum powder.
This should make the of parting the halves a lot easier.
That finial looks like it will clean up okay.
I have made some melta guns, first time at 2 part casting and can already see the potential. Even if a little work is required.
Did you read the first post? I believe it is now out of stock, but if you read through some of the pages people have mentioned other products they deem similar.
Yes I did, but there are others including myself are using different products achieving similar results. I use Spulpey Bake and Bend to make some of my molds for replacement parts.
I'll clarify a bit.
Right now there are people using Oyamaru, IntantMold, and some sort of other Polymorph Plastic.
So far there have been more successes with Oyamaru.
I am also waiting to hear about the other, maybe cheaper polymorph plastics and how they are performing
And pricing. Pricing is important. I've already been looking on the internet for items but I know that there are places that I do not know about that people might share to pick up things at a reasonable price.
There are certain things I'll use Silicon and Urethane molds to make things (not necessarly for model work mind you), but I can see now how good these products can be used in making molds for obsolete pieces, such as a missing Mk1 Rhino light. I can make a press mold on the remaining light that is attached on my Rhino with one of these products without damaging the model.
I just got my Instant Mold yesterday and got to play with it today. I did one half, let it cool, then second half with pins. Very happy with the first go around. I didn't get the first piece quit hot enough so ended up with sloppy edges on that half but just chalking that up to learning. The other side came out beautifully defined.
Now just need to get in some more practice with it.
Ordered 250g of polymorphic plastic from Tomps (www.tomps.com) cost £8.55 inc postage. The 1kg bag should be about £21 with vat and postage.
Should have it tomorrow through post then will test.
I think I agree with the comment above, it's not going to ever be a cheap alternative to cast existing available parts, but if you have sculpted something and want a dozen copies, the extra time to make a careful mold and cast would be worth it, but for melta guns for example, I'd buy them, its cheaper and easier.
I need a replacement smoke stack for a mark 1 rhino, can't buy them anywhere... But casting it could be the solution!
The warp trick with hot water is interesting to note. Will try same with the Magic sculpt ( jars are nearly empty, time to order some more by the sounds of it)
This product is pretty cool but has been around for awhile, at least in the UK. Ive had a tub of this for a couple of years now - its called polymorph and comes in little beads. Its easy to heat them up and form them into strips like in the video.
I vaguely remember I got the tub from Maplins, but this was years ago...
Mistress of minis wrote:Oyamaru + Apoxie sculpt=success. Pics later tonight of the shield I replicated and the base I did up.
Terrain Putty might be an even better choice. Its designed for press molding - the grain is very dry and very fine. When cured, Terrain Putty is very much like Apoxie sculpt.
http://www.kraftmark.biz/kraftmark.terrain.html
Where it fails is that it costs almost twice as much as Apoxie sculpt. And if you look at the pic I posted, the results are acceptable, especially as it was the first set of items I did up.
The products are hard to price compare. Terrain Putty is rather light weight and sold by volume (480ml for $27). Apoxie Sculpt is sold by weight (4lb for $35). With the contains side by side, the Terrain Putty is about 2/3 the size of the Apoxie Sculpt - which about matches the price difference. Unless your buying Apoxie sculpt in the 1 lb size ($15) - then I think the Terrain Putty would be the better purchase.
The 1 lb kit of Apoxie sculpt jars are the same size as the terrain putty ones. Ergo- cheaper regardless of weight- 27 vs 15 is simple math. Comparing the 4 lb size makes it even cheaper- like 8.75$ per pound. So- its still cheaper and the best product thats actually been used with the Instamold/Oyamaru(and theres been several others on Dakka that have had succes with it as well). If you want to buy some Terrainputty and some Apoxie Sculpt, and compare them for use in press molding I'd be interested in hearing about it.
Mistress of minis wrote:
The 1 lb kit of Apoxie sculpt jars are the same size as the terrain putty ones. Ergo- cheaper regardless of weight- 27 vs 15 is simple math. Comparing the 4 lb size makes it even cheaper- like 8.75$ per pound. So- its still cheaper and the best product thats actually been used with the Instamold/Oyamaru(and theres been several others on Dakka that have had succes with it as well). If you want to buy some Terrainputty and some Apoxie Sculpt, and compare them for use in press molding I'd be interested in hearing about it.
I already own both. Which is where my observations on the size of the containers comes from.
I've used Terrain Putty in a Hirst Mold with some success. I have not tried Apoxie sculpt, but I can't see it working very well. Have you ever see the kids product 'Moon Dough'? Terrain Putty is a lot like that - it takes compression very well without stretching. At some point I'll buy Instamold/Oyamaru and give it a try.
For the people that did a traditional style 2-part mold (make one side, let dry, make other side) are there any tips to working with instant mold as opposed to a typical liquid mold? Would making a box help? I know when I've made 2-part molds with this stuff I have a problem with the instant mold actually fitting around the item properly, maybe a box would help this as the material has nowhere to go?
That is what I have been doing Sonic.
Not sure exactly if it does help but intuitively it seems having the soft plastic contained is the right thing to do,
Here is part one of my review of the stuff, I ran out of battery in my camera so will complete it tomorrow when the greenstuff etc has cured.
I know it kinda sucks for a review and I go offtopic allot but I will fix that tomorrow.
http://www.youtube.com/watch?v=pGCgaqLWr7A
Druidic wrote:ok, so my first experiments went disasterously wrong and I've ruined two of my masters....
So is instant mold or oyamaru flexible at all when cold?
The stuff I got was far too ridged!
The thinner you make your Instant mold mold the more flexible it is. If it's the thickness of the bars your VERY rigid indeed as can be seen in my video. When you make your molds however and push it out you can make it as thin as you like and it actually resembles silicone allot.
So it comes down to how thick your mold is, I would suggest a max thickness of about 5mm, more than that and you might as well be working with metal molds.
And get the same, or better, results for much cheaper.
I'm not trying to pick a fight here, but how do you know that???
Have you actually tried all of the above including Instamold? If not, similar look and function does not = same thing. There could be subtle differences in rigidity, temperature tolerances, setting times etc that make a big difference to people wanting to be expert with press-molding.
A lot of people have come on here to poo-poo this product saying it's the exact same stuff as this or that. What amuses me is some of them are pointing to opaque materials, which to me should say hey, there is a chance this isn't 100% identical lol. Vallejo, children's finger paint, same thing right? Well no, if you start exploring nuances and applications lol...
Now, let me make clear I am not saying anyone is right or wrong, or that Instamold is better/worse than anything else, however, I would like to know what actual info quotes like the above are based on, because I don't think it is good practice to just blindly mislead people with comments like 'It's all the same' based on no actual facts. Hopefully the above gentleman tried all of the above and won't be taking offense to my comments...
Robert Facepalmer wrote:Right now I am trying Apoxie Sculpt which seems to work fine, but I got to thinking that CA glue might have been a better choice for the particular moulds I made.
tell us how that goes. the video IIRC says the stuff doesn't even stick to CA glue and i'd like to double check that claim as it seems the most dubious.
Yeah, that didn't work out. At all. it took for-ev-er to finally dry (don't have any zip kicker, so I don't know if that would make a difference) and the casts still ended up rubbery. Bonus: the CA made the InstantMold cloudy, not unlike the effect you see on clear plastics, as well as there now being little hard nuggets in the InstantMold. You might be able to do a mix of CA and talc or baking soda like the old modelling gap-filler trick, but I would be leery of using CA except to maybe save a cast that broke in the mold or something.
After trying green stuff, brown stuff, P3 putty, ProCreate, and ApoxieSculpt, I would have to say Apoxie is the best of all of them. It mixes fairly soft, so it does the best job at getting fine detail. It also cures in a reasonable amount of time, and it is drillable and sandable, so if you do need to clean your cast or pin it, it won't rip like green stuff does. I am thinking Milliput would be good as well as you can control its firmness easily. Both Apoxie and Milliput are water-soluble as well, so you might be able to thin or soften them if you are really concerned with getting fine detail.
All in all, I am still not 100% sure what I will use InstantMold for. It is certainly handy, but it seems to fill an odd gap in the hobby repertoire. If I just need one-of, I'd rather deal with plastic or metal than having to make a mold, cast it, and then do whatever needs to be done. If I need a massive amount of duplicate parts, I think it would be easier to use resin that sets in fifteen minutes and just crank through the entire run in an afternoon. What I envision it doing is casting one-ofs that are impossible to find (i.e. Centurius or Confrontation Brat heads), or as an intermediate in setting up a resin run (i.e. I would only need to make one master custom tank tread, cast that 5-20 times using InstantMold and Apoxie, then use those casts to make a master sprue to cast from).
I think the most intriguing thing to me is the fact that it is (theoretically, I would be interested to see how long it takes to lose its properties) reusable on a non-industrial scale. If there was a way to liquefy it and use the InstantMold as a casting medium, it would be ideal for that intermediate step in the resin production I described above. I am afraid that pushing it past the transitional state it enters when heated might fundamentally change its properties ('sweet, now it is ultra-sticky, never hardens... and on the floor-carpet is for chumps anyway').
Certainly an interesting product. I am sure as time goes on and people get more experience, the days of freaking out about a purity seal press mold in White Dwarf will seem quaint.
I guess my rtv101 experiences actually sold me a dummy!
Will experiment with thinner moulds!
Actually it all went really well... Untill I came to demould and everything went wrong! It stuck ferouciously to the plastic board I was using, to the extent I had to melt the mold to get the remains off.. So next time I'll use a tile as the base...
Must point out, I'm not using instant mold, I'm trying some other plastic as I'm in the uk....
It's all learning however, and I like to experiment with these things! :-)
BloodQuest wrote:Mostly aimed at Mistress of Minis, but other responses welcome!
Where do you buy the Oyamaru in the US?
I got mine via google shopping search, but it was the last the seller had. So you'll have to hunt around
If anyone has freinds in Japan they can probly get it rather easily/cheaply and could fit an awful lot of it in a flat rate mail box if it goes through the post office on one of the bases. A year or two ago I had some freinds in the service over there, but theyre all state side now
MajorTom11 wrote:
I'm not trying to pick a fight here, but how do you know that???
I'm gonna go with "There's no way in hell that CMON is making its own, unique, chemical compound. So it's gotta be repackaged existing material."
Right, that would hold up in court lol. You are probably right, but until someone actually tries them or has evidence directly linking product a with product b... Well, you know what they say about assumptions right?
gannam wrote:Please don't de-rail what has been a very helpful thread with stupid crap like this. Let's keep it focused on what we are here to talk about.
Easy guy I started this thread, don't you think that I would care it stay on topic lol???
That is in fact precisely why I don't think anyone should be stating Instamold is 'exactly the same' as other products without testing or proof. As stated previously, tiny differences in the chemical composition and process could make one product quite superior to the another in terms of being more ideal for mini press molding by having an edge in temperature tolerance, malleability, setting times etc. It could be the difference between dollar store paint and Vallejo when it comes to specific hobbying applications.
Is it not clear why someone reading this thread, who is serious about pressmolding and wants the best, should only be getting tested facts, and not peoples assumptions or suppositions stated as 100% rock solid fact??? It derails the entire thread and the discussions generated thus far, and also minimizes the kind work certain members have done going through a nearly scientific testing process to try and ascertain the products quality vs the other options.
Let's just stick to the facts people, we don't need people popping to say it's a repackaged rip-off every 10 posts while being too lazy to actually verify it. Could be right, could be wrong, it's not the point, let's just stick to what we know ok?
Thanks, glad you can see it now. Yeah, I probably should've cleaned it up before making the mould, but I was more concerned with getting it done than getting it done right
You know what, oddly enough used exactly the same piece to test with!
Try this...
Put the flat side of the piece on a cold tile, press the polymorph onto the piece, let cool, the press green stuff into your mould, and use the tile again as a solid base to press against for pressure.
Worked really well for flat backed pieces.
Will next experiment with 3d piece on the tile with plastalen upto thr mould line....
Did you ever try reheating that piece you used the superglue on? I'd love to know if it came back.
It loses it's non stick properties somewhat, it just turns bad. You seriously do NOT want to mix it with your good stuff as it will probably ruin that as well.
So using superglue as a type of resin or whatever is a baaaaad idea, it does work but it will most likely ruin your InstantMold, at least the type of superglue I used.
Since there are endless forumlas of superglue I'm sure some might work well enough but I'd call it a waste of time mainly because what you get is a very brittle cast.
The superglue I have turns into a resin/glass/plastic type material, it's extremely strong but can't take much stress before it breaks.
Wow thats awesome Ketara! Big props to you for having the initiative to actually check that out... Fact checking is a neglected art, so good on ya!
Ironically enough, I was watching that new syfy reality show about sfx makeup artists (think it was called 'face off') yesterday and at one point they used friendly plastic, which after watching it in action I can also confirm is not the same. 1 it changes transparency if heated (opaque white when cool, transparent when hot) and 2 it became far more liquid when hot.
Are there more differences than just that now that you've tried them? Lol I debated posting that, but without actually trying both myself didn't want to seem like a hypocrite lol!
Got the product and made a dozen molds so far - verdict is it does what it says.
But it still requires molding skill - you need to know ho to form / make the original mold around the piece being molded, know how to press your casting material into it (used green stuff, grey stuff, and tamiya putty), and get it out.
The mold material is durable and is user friendly. However, I found it is better to heat the molds for use in boiling water rather than 170. Not direct heat but boil water, remove from stove, drop material into it. How malleable the material is makes or breaks the initial mold. You have about 2 minutes, IMO, after removal from water until it gets to 'hard' to get a good mold. It had to dwell in the post-boiling water for about 5 minutes to get soft enough for a good initial mold. It was NOT hot when i used it after bing in the water. Found best molds are about a quarter inch thick - you'll experiment creating a 'best' mold by molding the part several times (normally a PIB with green stuff/instamold, but this is just pop back in hot water to make malleable an mold again in minutes!). 3D casting is difficult as you need to understand how to do this (gas release hole,, not too much material (enough to fill cavity but not overflow cavity and seperate molds), alignment holes/markers, etc. Again having an easy to use and quick material does not eliminate the know-how to cast properly.
Advantages versus Green Stuff casting: Instantly create a mold, more durable, material re-usable, no stick (no more vaseline!), can be reformed into large or small pieces, super-re-usable
Advantages oversus Instamold: no mixing of materials for molds, useable instantly, long lasting (no keeping the molds wrapped in water towels in frig to save for a few molds), durable - been pulling soem molds out with metal tools that did NOT damage the Instantmolds, super-re-usable
No issues would recommend for folks who cast their own stuff.
In order to further accentuate your point, I purchased some friendly plastic as well as Insta-mould, as people were saying it was the same material.
Alas, they were wrong, its completely different.
I bought some friendly plastic after CMON ran out of insta mold. It hasn't arrived yet but how different is it? Like I just screwed myself different or have to put more effort in to get it working right?
All in all, I am still not 100% sure what I will use InstantMold for
well i'm hoping to replicate a bunch of tyranid spires I sculpted for my Tervigon that I don't have the heart to duplicate by hand for the 2 tyranofexes and other Tervigon i'm building, so small scale duplication. Agreed that with the difference in cost between resin and green stuff, if you were to crank these out, you'd end up losing money for an inferior product.
Tried a few molds this weekend, mostly of gaming bits for a long out of print game my wife loves (Downfall) and so far the results aren't bad, but not where they need to be. Using Oyumaru and Milliput, I cast a few of the tokens but they when I de-molded them they weren't quite the same size. The cast was slightly bigger than the original (which means it's unusable)
A couple of questions:
Do you use a frame (lego or otherwise) to put the instamold in first? Would this help?
What materials require a vent to be added for the release of gases?
Are you "keying" the mould so that you get perfect lineup?
I've found that the force required to get milliput into all the details deforms the rubbery mould quite substantially. I'm wondering if there's any "pourable" material we could use in this stuff.
Try a mix of gs and milliput, bit softer, but a bit harder when set.
I tried using a box, but I've found thinner molds are better, so no box needed, just make sure you press onto your master carefully and get all the detail.
I think this is going to be best for small amounts of odd copies. Basing stuff, scenics, stuff like that. I plan to do a unit of Deathwatch, and want a piece with the Deathwatch symbol on for a Rhino and drop pod, I'll make a plastic and gs master, then a flat push mold and chuck half a dozen or so copies out... Exactly the solution I've been looking at for this sort of thing!
The fact I can make a mold and a copy in less then an hour plus curing time is in my mind absolutly brilliant for a hobbiest, but you could never make a business out of it!
Automatically Appended Next Post: Oh and as a side note, being able to sit with the wife in the front room chucking out copies rather then needing to heat white metal on the stove has its own value!
I'm betting that is 'friendly plastic', not instamold, which has very different qualities and is less suited to press molding according to Ketara.
People, please stay on target as to what this thread is covering specifically, do not post any old pressmolding material unless it is for a direct comparisson to instmold. Do not come on to write 'it's all the same stuff, it's repackaged and expensive' unless you can back that up. You thinking the descriptions are similar does not a fact make.
No one has particularly been aggressive or argumentative in the thread so far, and I don't mean to make it sound as if chaos is happening lol, but I personally think getting accurate info on this specific product (especially in comparison to the other ones) is really important for the hobbying community. This kinda stuff is all about precision, technique and the right materials, let's not muddy the waters with idle supposition is all I'm saying.
I'm sure the mods will agree with me on that point.
Dunno, Major Tom, the detail on that last shoulder pad looks pretty good. The quality of the pic isn't so great but it looks like the detail people have been getting out of InstaMold (General shape, large details, and smaller details such as the venting around the skull). Also looks like everything is in proportion, which I guess instamold has been doing too (except for toblerimelta).
I've said a few times it's a generic polymorphic plastic. I got on line from a plastics supplier I know for a good price to start some experimenting with. It's not Friendly Plastic either.. But would not be shocked to discover it is, but without the label. I paid £9 for 250g inc tax and postage, 1kg works out about £21, but I've used so little, I may not bother getting more unless I start using for DIY uses round the home like copying coving or corbles!
It's VERY solid when cold, harder and less flexible then figures plastic, but works and was cheap, and can be cut.
I kind of want to get some intant mold, but as I'm in the UK don't have a local suppliers... Suggestions please!
Is instant mold flexible when cold? I like the idea of being able to see if your mold is full with out demolding!
MajorTom11 wrote:I'm betting that is 'friendly plastic', not instamold, which has very different qualities and is less suited to press molding according to Ketara.
You've got me there, you are right he didn't, my bad! I assume though that if they are 'very, very different' that one is better than the other? Ketara can you clear that up?
Druidic, my post wasn't particularly meant talk to you in specific, no offense was meant at all, especially if you mentioned it was polymorphic plastic. Just want to keep the thread on topic for direct comparisons you know? Frankly I would love to see you try Instamold, as the person does play a factor in the results as much as the material, so I really like the idea of a side by side by the same gentleman (like yourself ).
I've been casting in white metal for about ten years, but really, unless you want 50 or more, its just a pain to make the mold.
I made the below master some years ago, but lost the mold, in about a half hour chucked this mold together and made a cast... Left it to cure for a few hours and just poped it.
Not perfect, but not shabby! The very few dings are because the gs/milliput mix probably formed a bubble with the release agent (olive oil) and a clear product like instant mold could give you an edge.
Automatically Appended Next Post: Oh, and absolutly no offence taken what so ever! :-)
Apoxie seems the same as Magic Sculpt, though bear in mind what Major Tom said about similar products not necessarily being the same.
But in the UK it may be easier to get hold of than Apoxie
I have just run out and about to order some more from Restoration supplies.
They are on ebay as well as having an online shop.
100gms = £4.99
500gms = £19.99
need to add postage iirc £2.98 and £6.99 respectively
Thinking of ordering the 500gm this time as it will last a while and work out cheaper in the long run
I don't think I would worry about the shoulder pads coming out perfect; if nothing else it lends them a feeling of use rather than "Gee that marine's armor just stepped off the assembly line". You would expect some wear and tear after a couple hundred years of fighting...
Scottywan82 wrote:How hard does it dry though? Is it brittle like Milliput seems to be?
It drys hard as rock, but still retains a degree of give and flexibility. It is shatter resistant, so it can take a fair bit of a abuse. I've sculpted everything from 40mm to 1/4 scale figures in the stuff its absolutely brilliant.
With any molding material that cures hard, you must be wary of undercuts! How you lay out the part to be molded is often more important that what material you mold with. Any mold medium material can fail if used wrong. Honestly the best way to proceed is to draw the placement and venting of the mold out on paper. A little pre-planning can save a ton of heartache.
Do you mean actual vents, like all the way to the "surface" outside the mold? Or just vents for flash where it gives an easier path for the mold material to follow? If the SECOND option, does it make more sense to create press molds with bits of the sprue left on there?
Lastly, for putting the putty in the mold:
Do you get better results by "prepacking" the areas of the mold? ie, Pushing putty into the mold in the rough shape it will need for the final product?
Or is it better to put the putty down the middle of the mold and press it into shape?
Well, I can't speak to GS casting...but in resin, when you pour into a mold you aren't pouring into a truly empty mold. It's full of air that must be displaced to allow the resin to flow to each corner....so you usually have a straw/piece of plastic that goes to the surface of the mold. As you pour into the main entry of the mold, the air is displaced into the vent exit to allow resin flow.
You could likely do something similar here but I would think given how viscous GS is...I can't imagine air being so much a problem. It's likely just the nature of the GS, in which case, prepacking a mold section before slapping them together would likely be the way to go.
Agree with the last post, gs push mold can be nicely prepacked which you cant do with resin. You can even pack the mold, press it, seperate it, scrap off some excess or add more if needed, then press again for the final time.
Undercuts are bits where the mold undercuts part of the finished cast, with a flexible mold it will pull out around small undercuts and survive, the plastic is solid so the cast will need to smoothly slide out of the mold with no undercuts.
One solution would be multi part molds, usually 2 parts as in 3d casts, but you could theoretically make more parts to a push mold to eliminate any undercuts at all, 3, 4 or even more complex interlocking parts if you wanted too!
Hmm, Thinking about it, that has some really interesting possibilities I've not considered at all before....
For example, why drill out a barrel, have a wire insert which is removed as part of the demolding process... You could come up with quite a complex multipart mold for very complex 3d shapes not achievable any other way....
It would seem to be an opportune time to remind everyone that for legal reasons DakkaDakka does not endorse the copying of parts that you don't own the IP to. While we're happy for you to discuss how to cast your own creations posting about (particularly with pictorial tutorials) copying parts made by GW is to be avoided. As such, the thread has been 'pruned' a little, to keep it in line with this policy.
So, please do not post walk-throughs or pics of pressmoulding with GW parts. Any further posts of this nature will be removed.


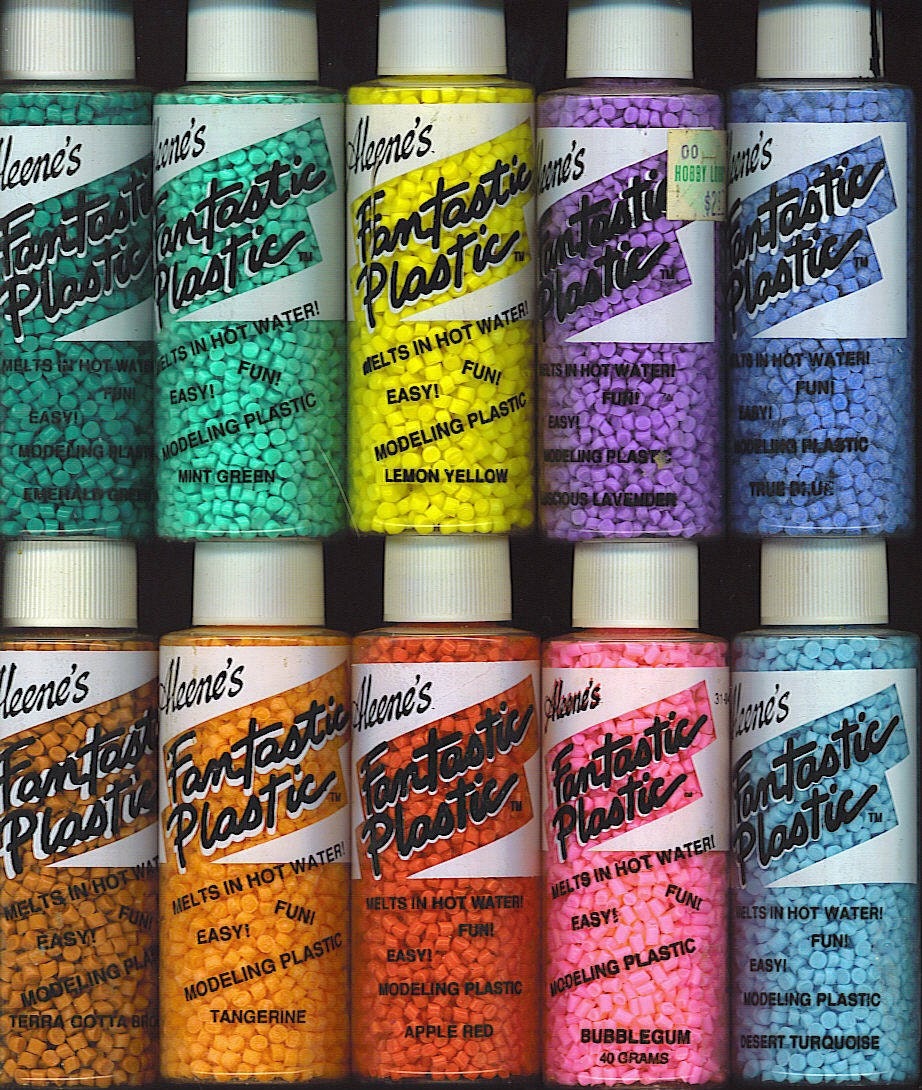
 )
)


