For this year, we discussed the idea of doing a big fortress raid, attackers vs defenders. Sounds cool, but we don't have a fortress, and certainly none of us want to spend GW prices for a wall of martyrs. Gotta make a fortress then. And, on a deadline - game is Nov. 16th, so it's got to be fully functioning by then.
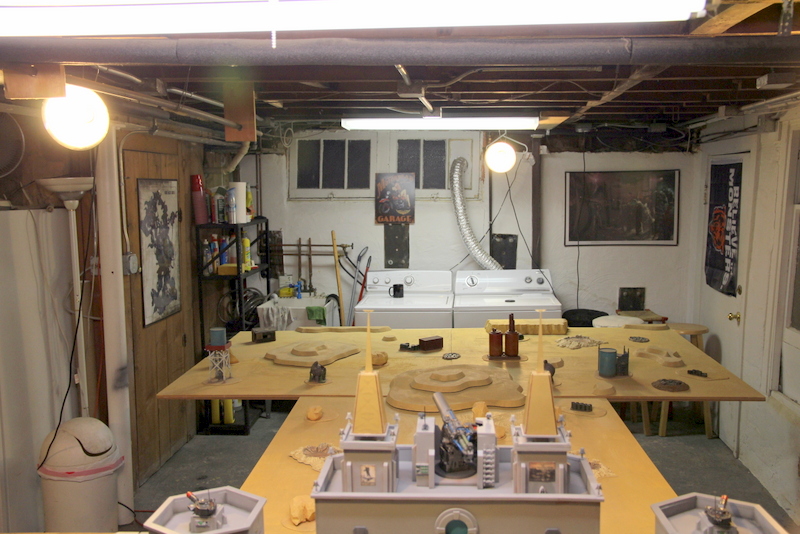
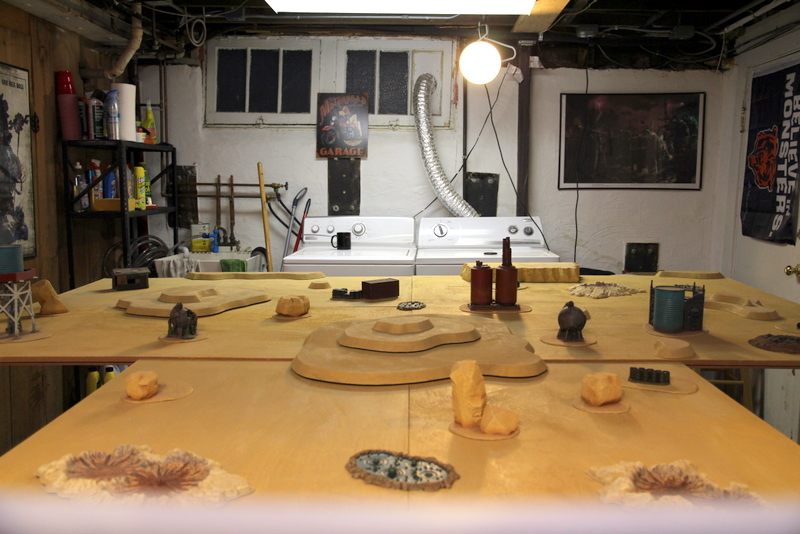
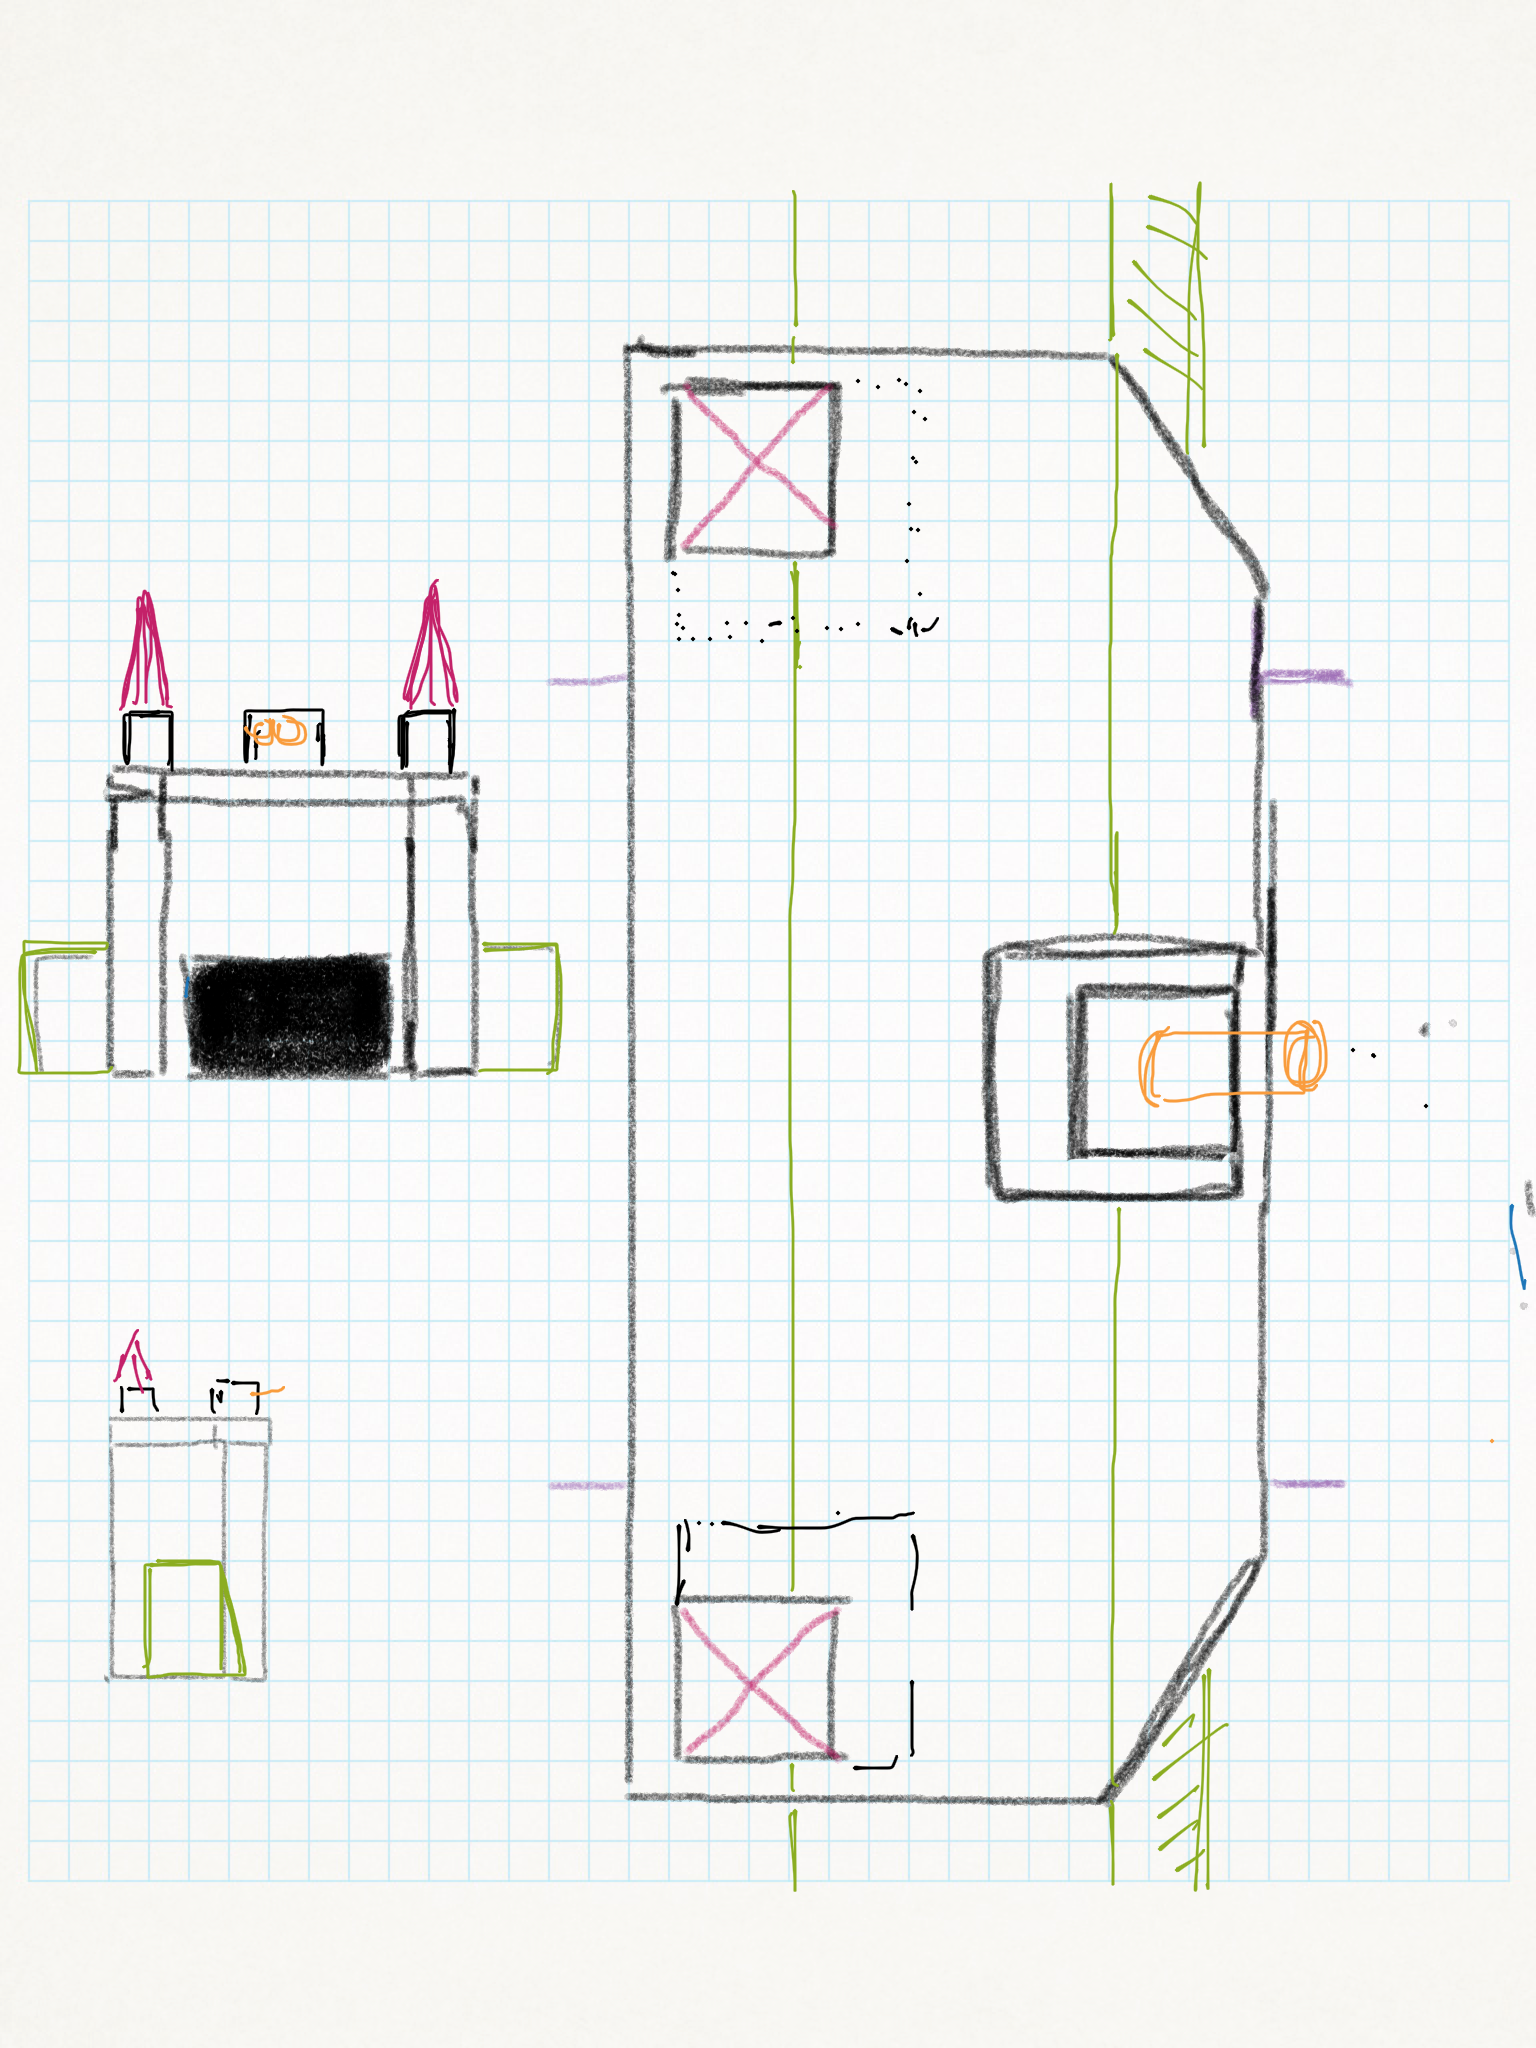
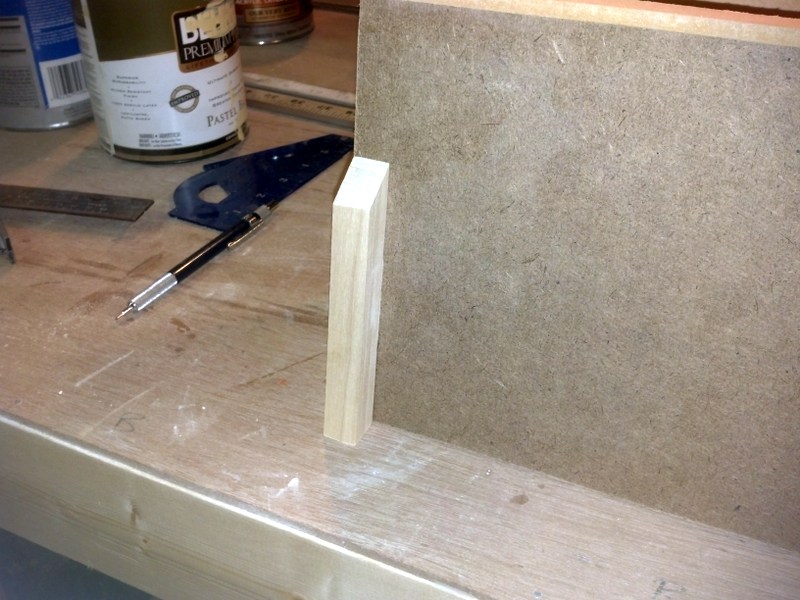
First, I speced out a plan for how big it should be, based on the size of table we have available;
Spoiler:
Yeah, look at me, all using Comic Sans in MS Paint. 1995 called and wanted its technology back...
For reference, the white spaces are where there is no table, we treat this as lethal terrain that can be seen over, think acid lakes. Each grid reference is a 1'x1' table square.
I decided to make the walls modular, so that we can use it in a variety of ways, including for normal-sized games.
Looking at the plan, I'm making;
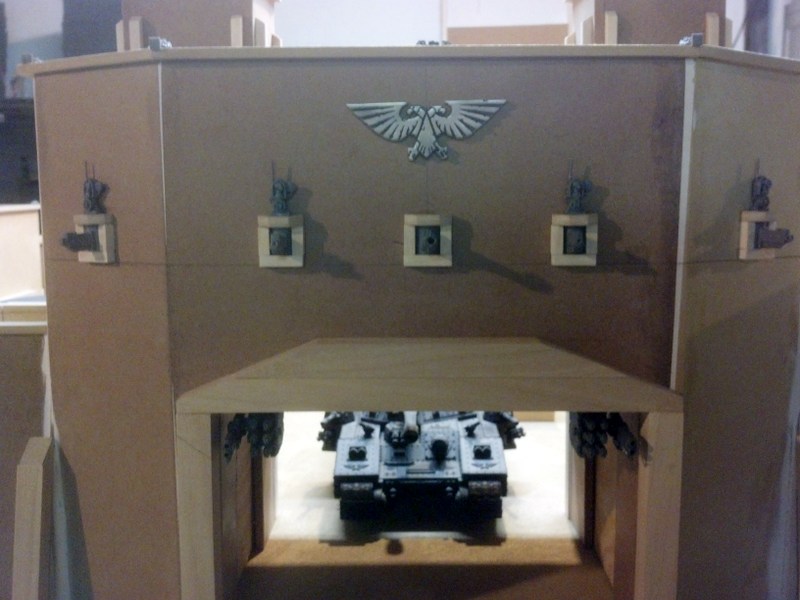
1 large gate - sized big enough to drive a baneblade through, so the doorway is about 8" wide by 6" high. This will be a 2-foot long section.
2 smaller gates - sized so you can drive a chimera through, so about 5" wide by 4" high. These will be 1-foot long sections.
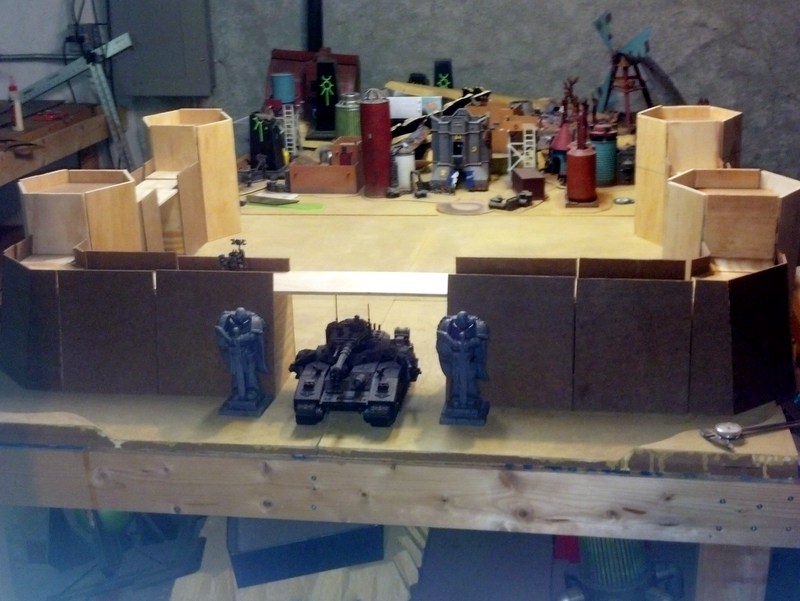
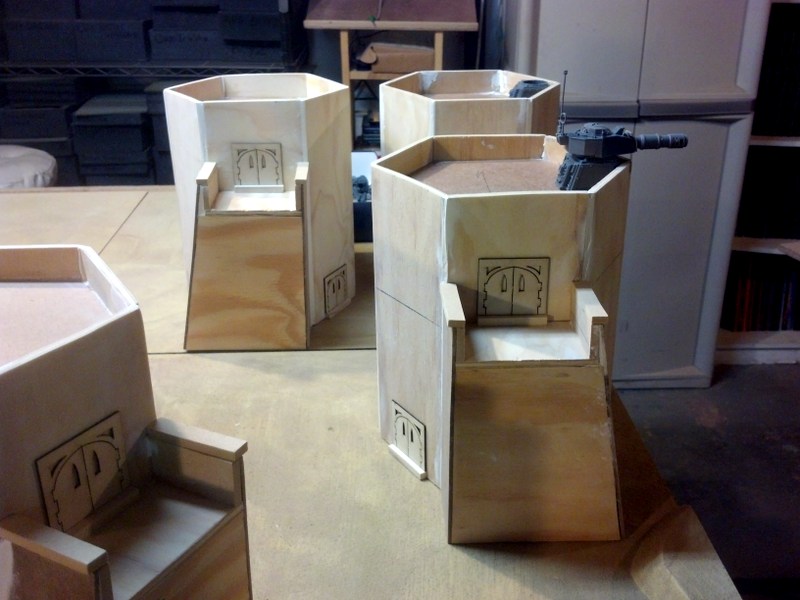
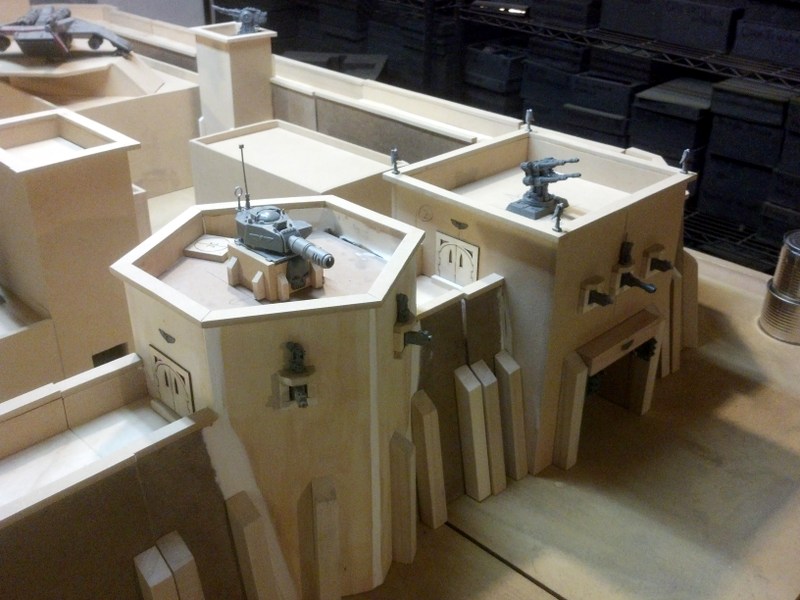
3 large walls with defense towers - 1 foot long sections.
2 small walls - 6 inch long sections
2 corners - 6 inch long sections.
The walls will all be 4" deep along the walkways, 5" deep at the bottom, with the sloping side being the front of the walls.
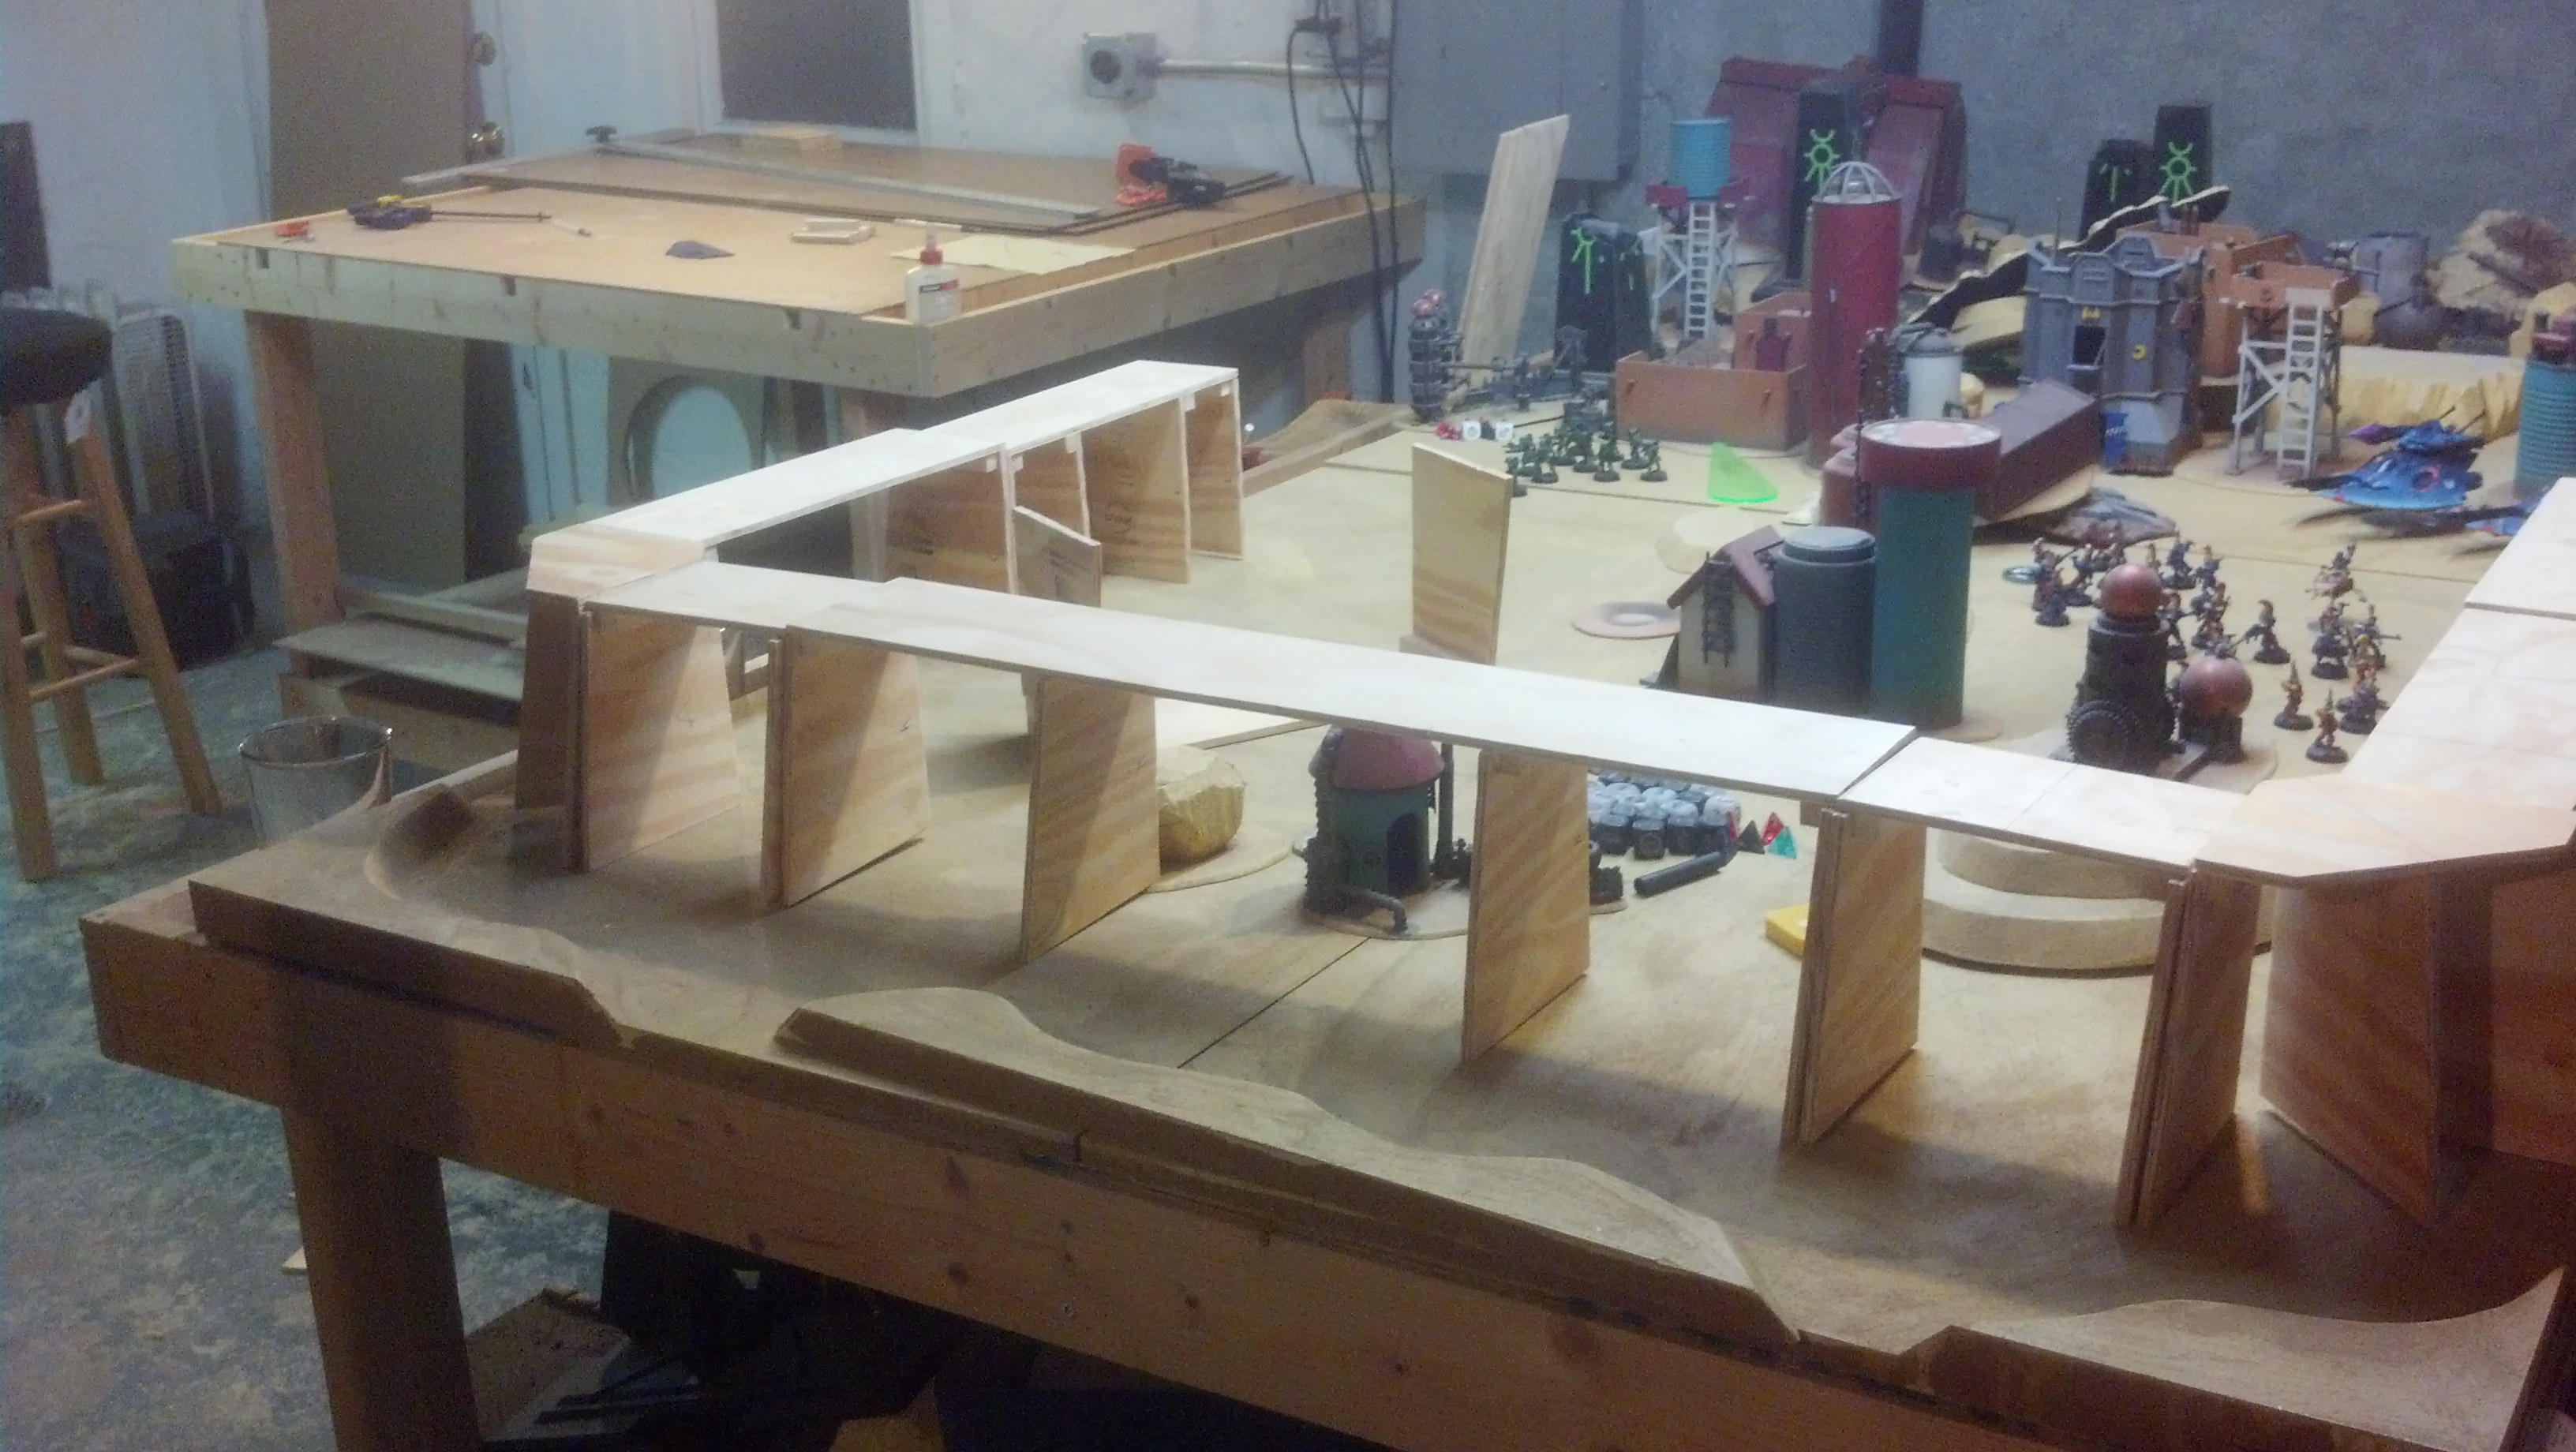
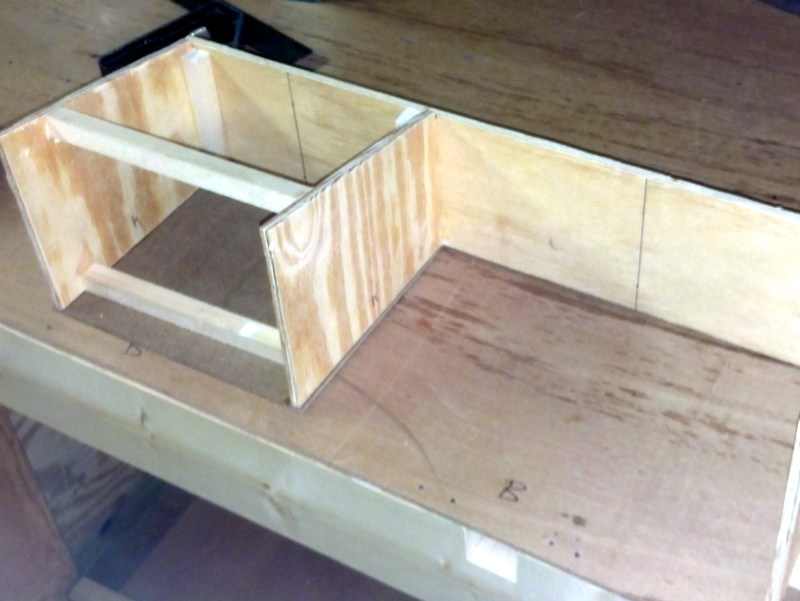
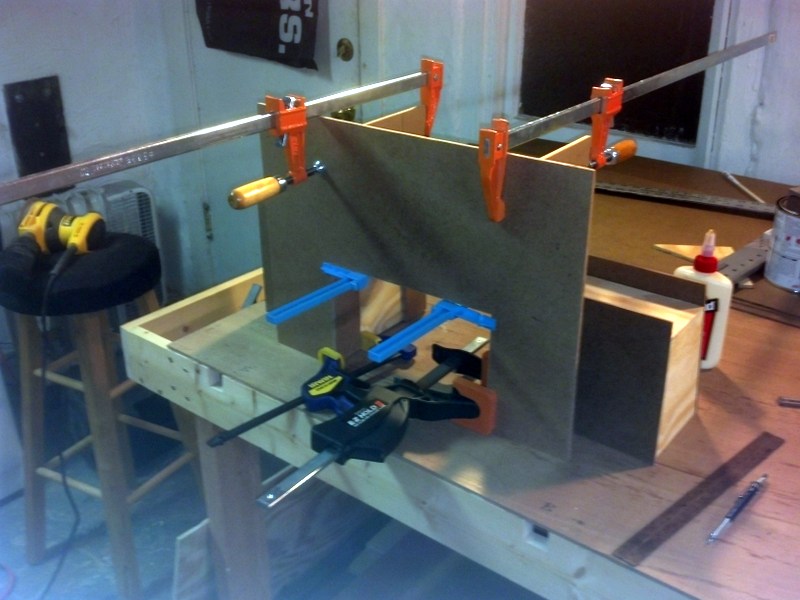
Step one is building the frames for the sections. This entailed cutting out the walkways (tops of the sections), and sides of each section. The interior sides of the gates are the same dimensions as the exterior sides and are done at the same time.
I didn't start taking pics of this until I wrapped up tonight, because I hadn't thought about blogging the project, so the only pic I have from tonight's work is the final picture of all the sections, set up for scale.
Spoiler:
The sides are attached to the top with wood glue, and 1/2" square dowels used to give stability (you can just about see them in the pic).
Tomorrow: I have a few hours to work in the morning and I'll get started on adding the fronts and backs to these walls. Not sure how much I'll get done, as I've got plans in the afternoon, evening, and Sunday.
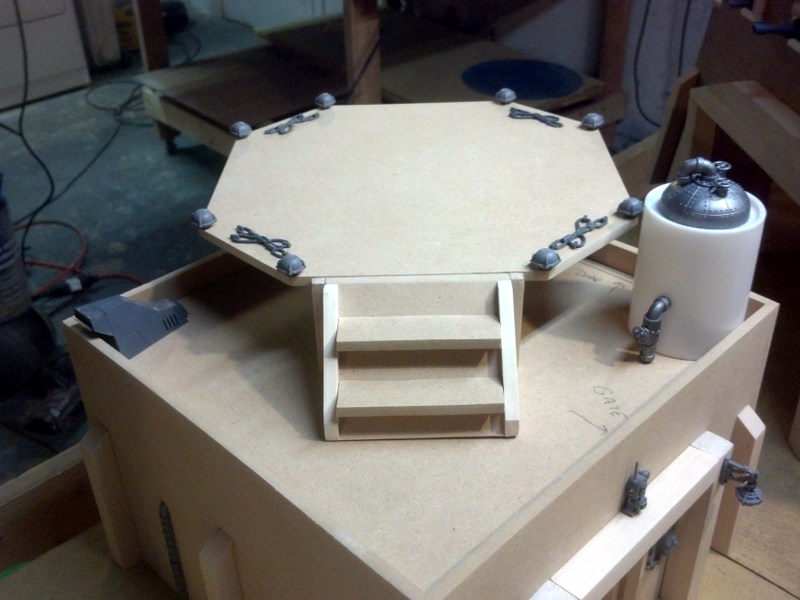
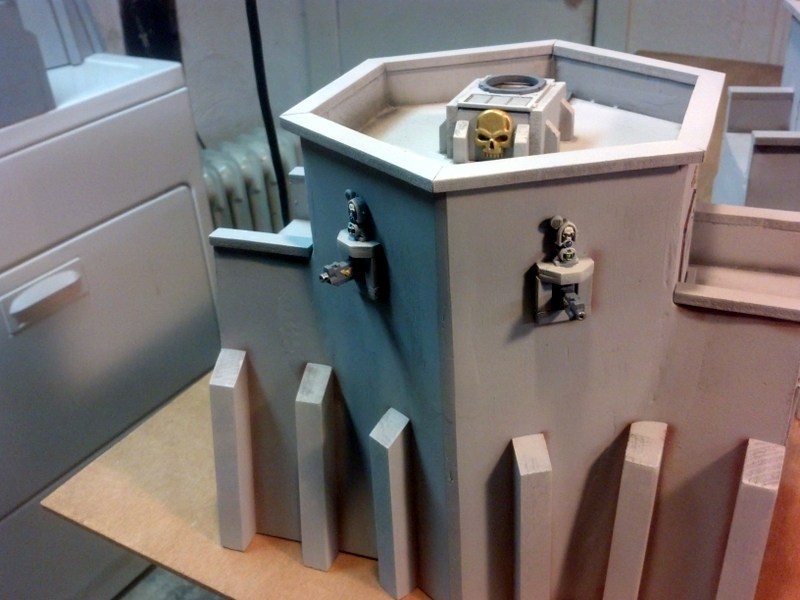
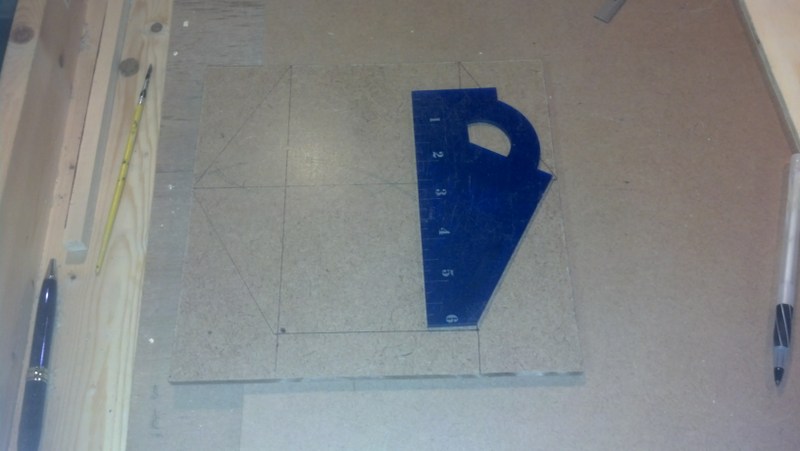
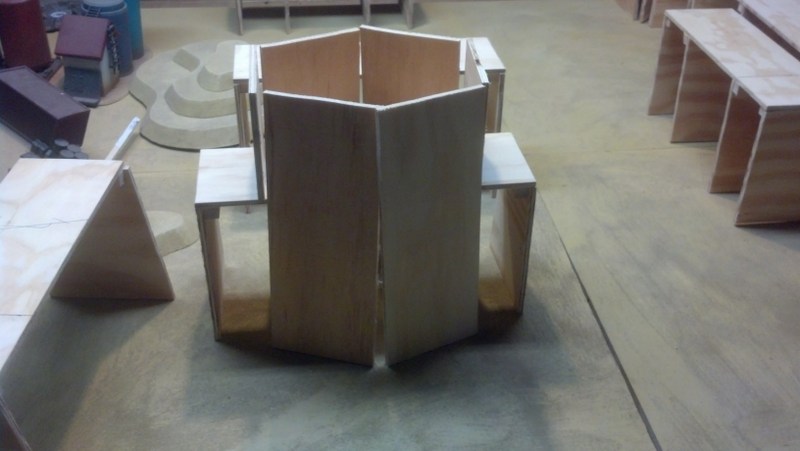
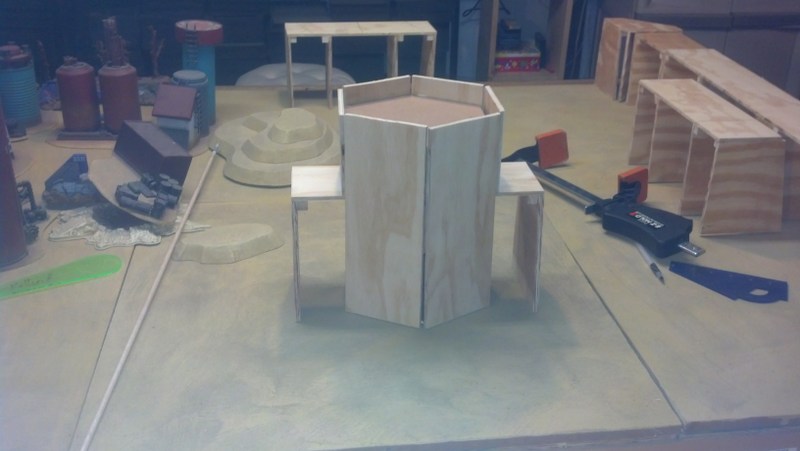
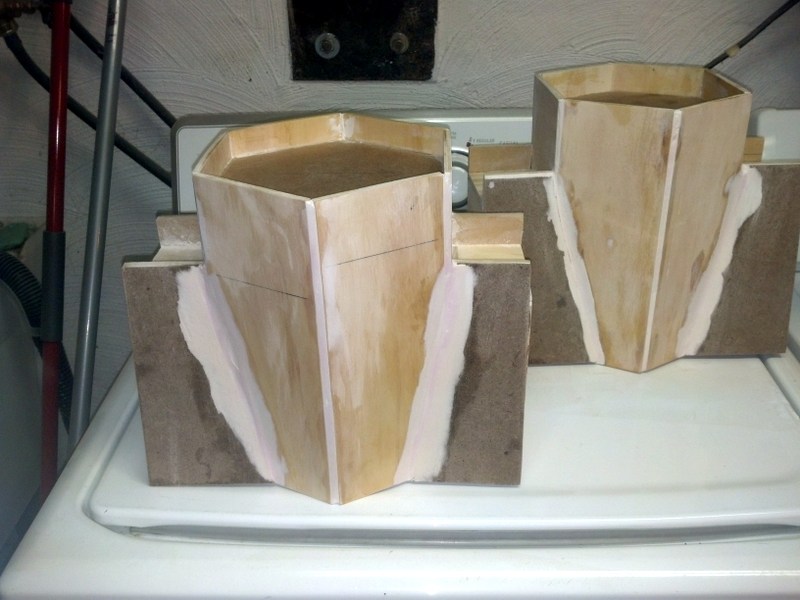
Didn't sleep much last night, as for some reason, my brain decided it wanted to recall all of my high school geometry. As a result, I woke up with a detailed plan for building the defense towers.
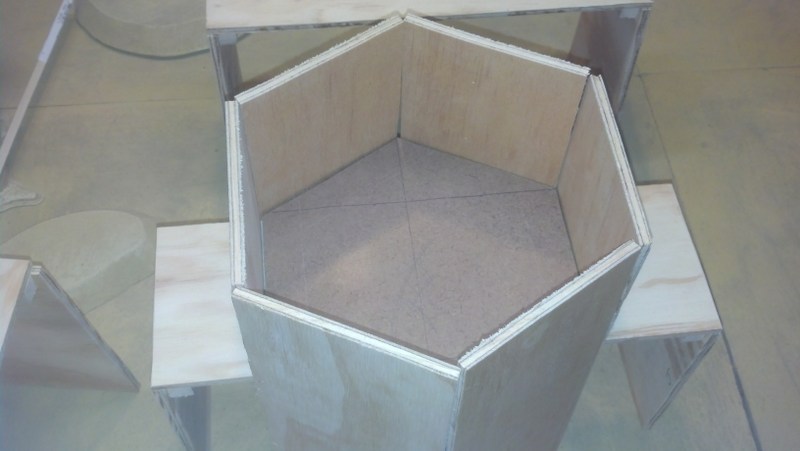
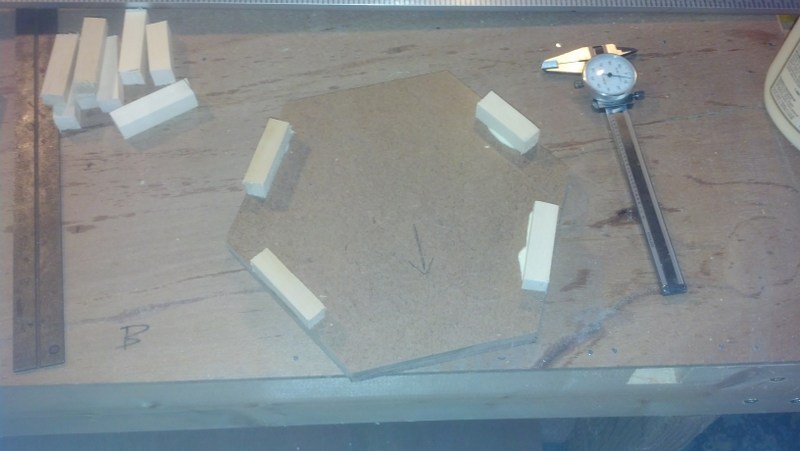
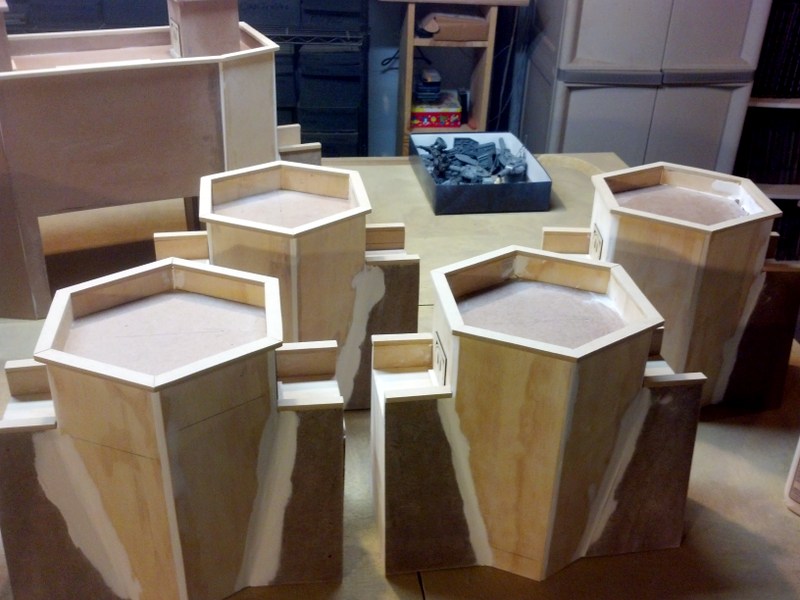
I decided to make the towers hexagons, using leftover 4" strips that were cut to be wall tops as walls. This worked out nicely, with enough to do all three towers without needing to cut more walls. The floors would be a bit trickier, as I'd need to cut out hexagons, three per tower, and they'd need to be fairly accurate.
Spoiler:
I set about starting to do the math involved, but as I was using my handy 6" movement template as a straight-edge, I realized that the angle between it's two main sides was the 30% angle I needed for the hexagons. Score! This part suddenly went much faster.
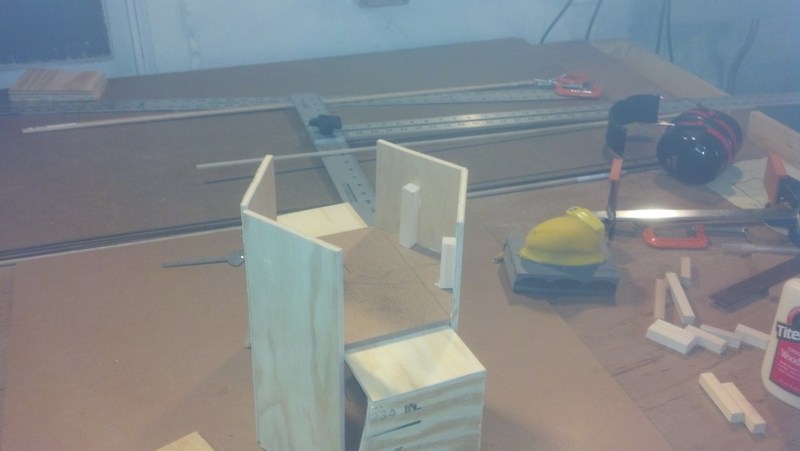
Mocked up the sides and floors to make sure they fit, needed a little trimming.
Spoiler:
I got this saw for $70 on sale at Home Depot, and it's great for projects like this, a real time saver over the hand jigsaw I had been using before.
Spoiler:
All floors and things are ready to go, mock it up one more time.
Spoiler:
Start assembly. These are the square dowels I mentioned in the last post, which have multiple uses. Here, they're holding the walls straight up and adding a gluing surface.
Spoiler:
And as I progress, they are used to get the right spacing for the upper floor of the tower.
Spoiler:
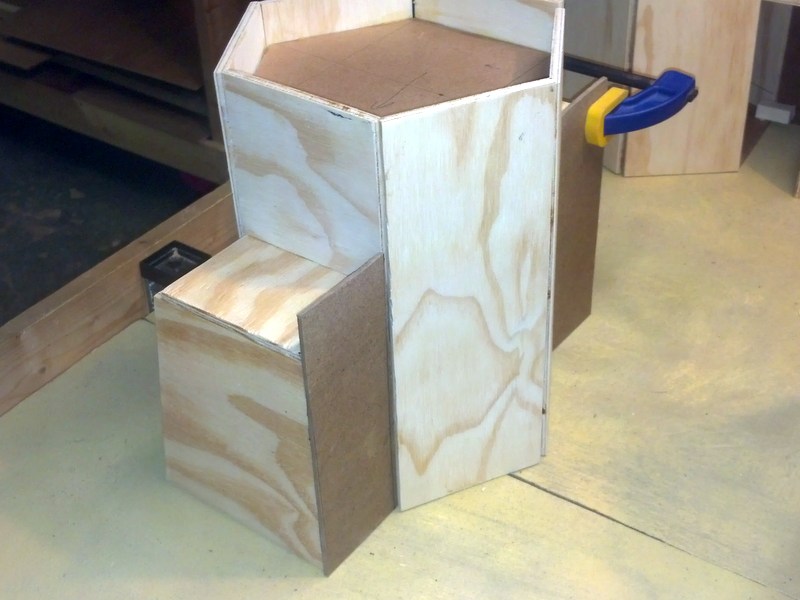
Finished one...
Spoiler:
Finished all three...
Spoiler:
Well, not completely finished. I'm going to use some round dowels to fill in the gaps between the walls, and then some spackle to smooth that out, and I need to bust out the dremel to do some minor trimming on the top of the towers so they're all the same height, but that needs to wait for the glue to dry.
Hmm, seems dusty down there, looking at the pics...
Added the front and rear wall plates yesterday and tonight.
I used a cheaper almost card material for these parts as they're not structural, and it was cheaper. I figured I'd use quite a bit of it, and at $5 for a 2'x4' sheet, it's not breaking the bank. It's not quite MDF, but it's something like that, I'm not really sure what.
First, added the backs. These were much easier because there was no angle to worry about, just glue them on.
Spoiler:
Then the front; Note the use of more 1/2" square dowels for bracing supports. They're a very useful building material.
Spoiler:
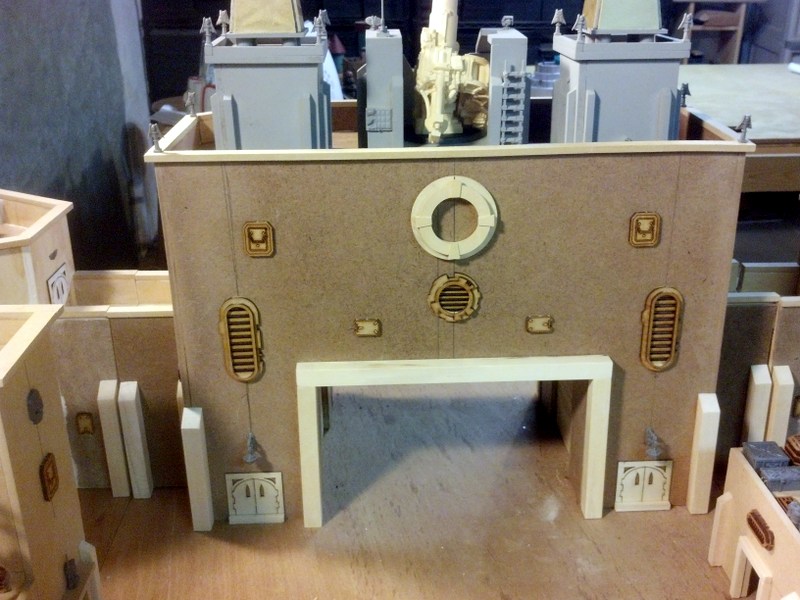
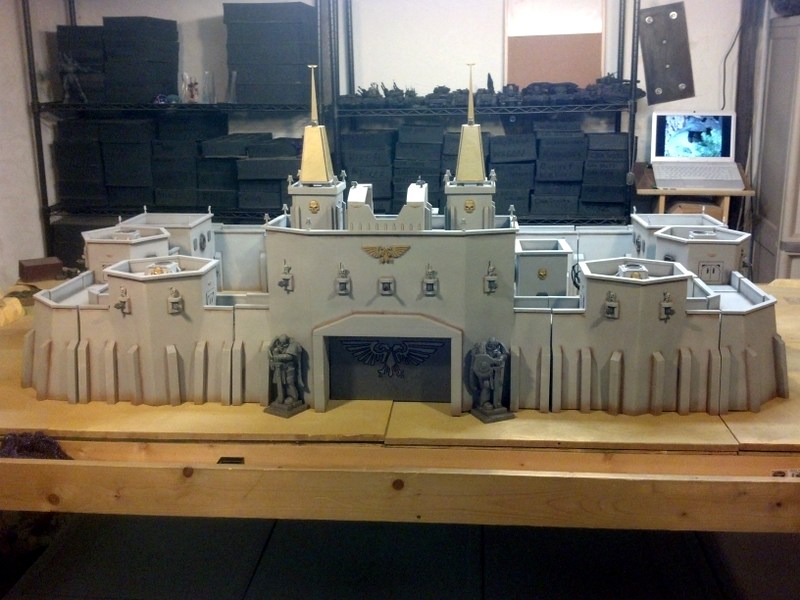
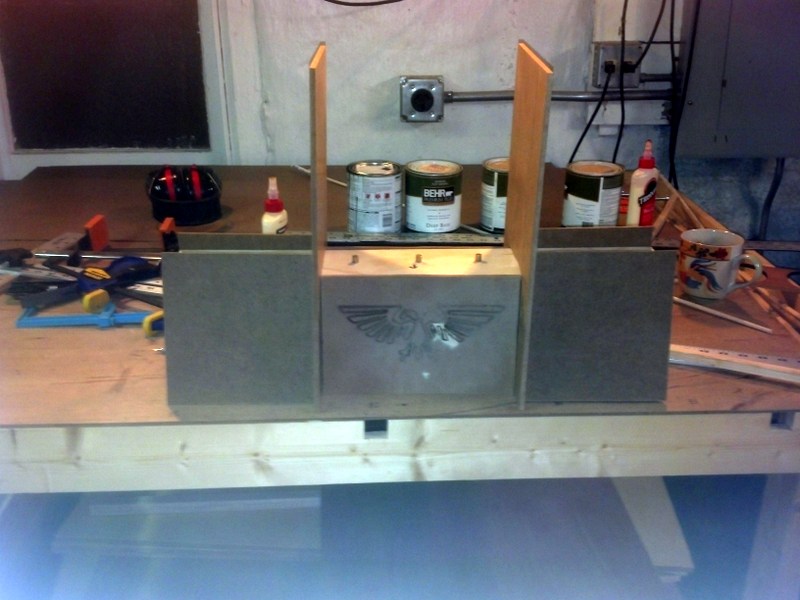
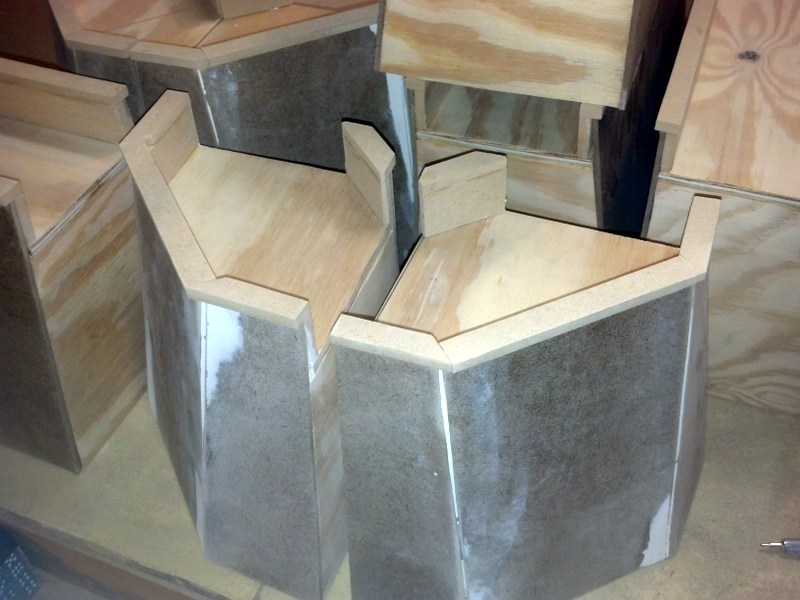
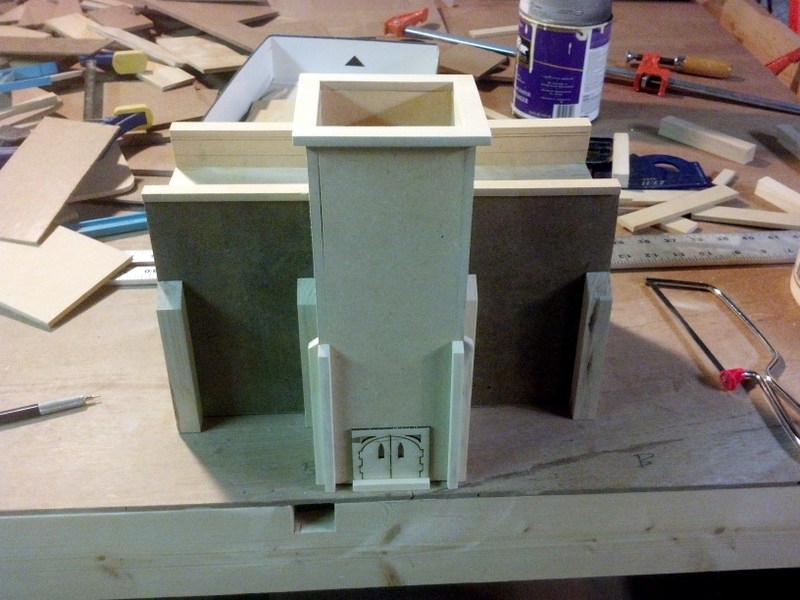
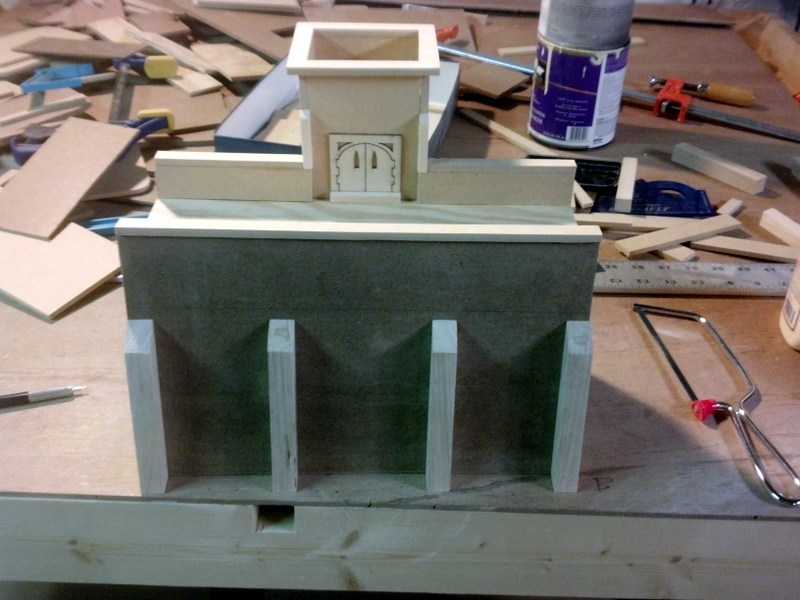
Had to do some tricky angle work to make the corners work, and to add the wall plates around the towers.
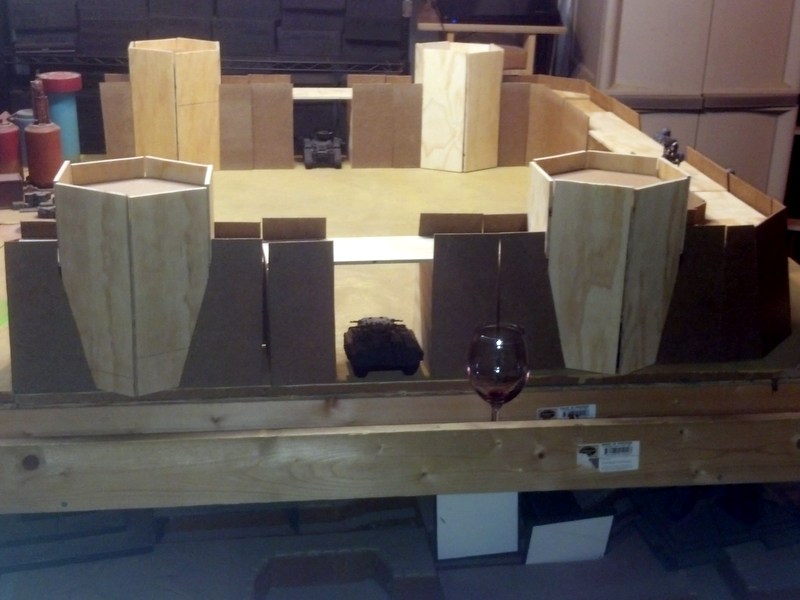
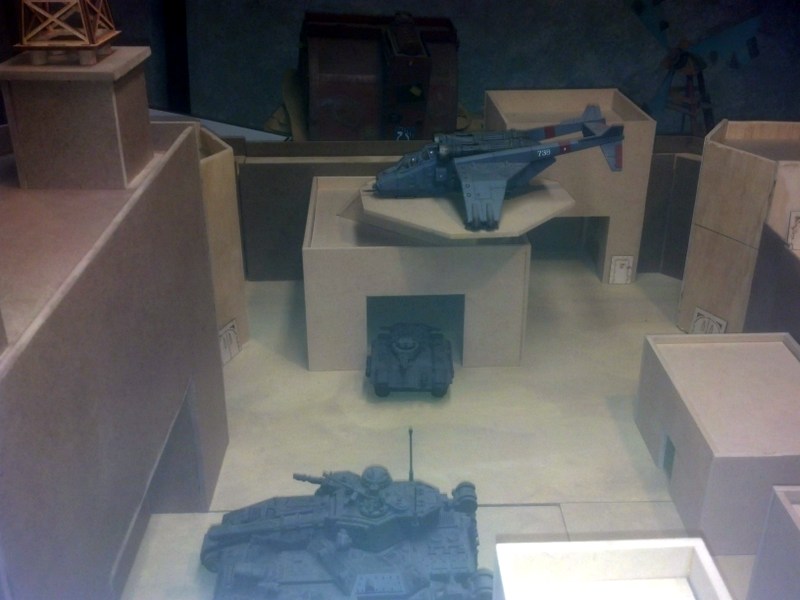
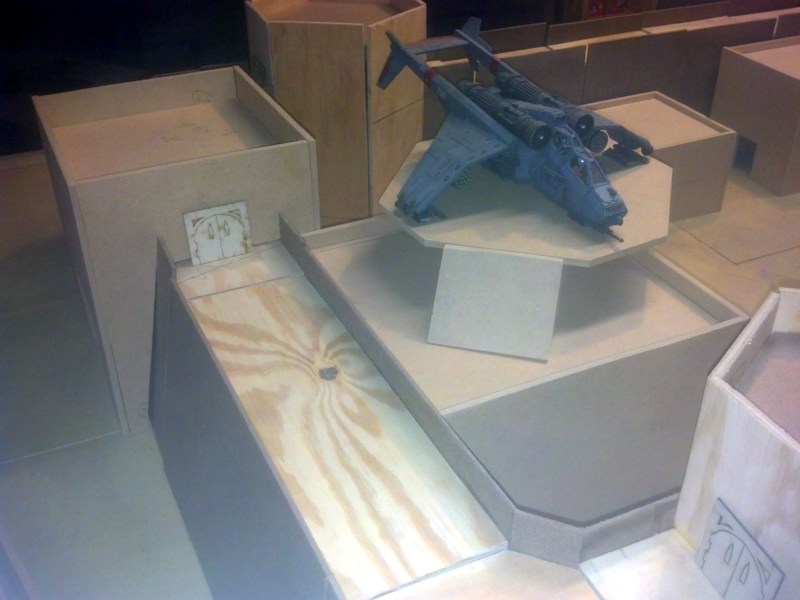
Here's where I'm at. It's starting to look like a fort.
Spoiler:
Front:
Side:
After seeing these together, I'm contemplating adding two more corners and 3 plain wall sections, just to be able to finish it off. The walls would be easy, but the corners are a bit of a pain.
What's next:
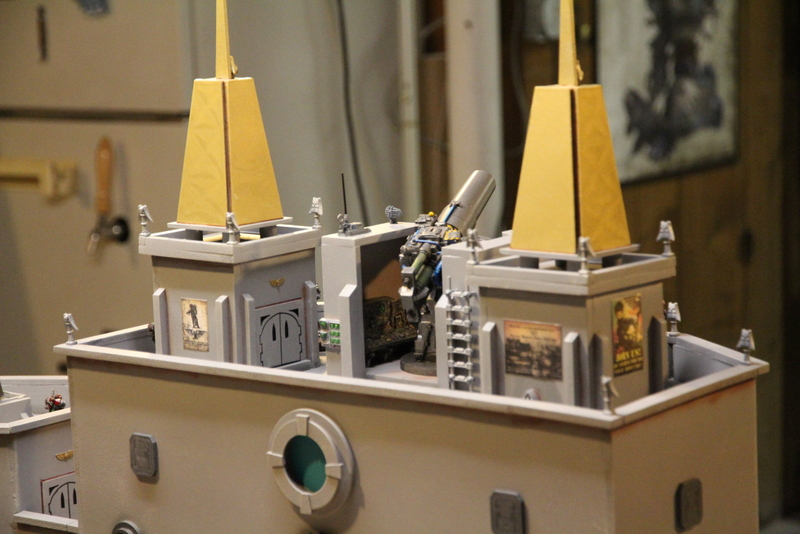
I need to fabricate the two side gate houses and large main gate. I did a sketch on my iPad for some main gate ideas:
Spoiler:
And that doesn't scale well... I'll have to see if I can resize from that app next time.
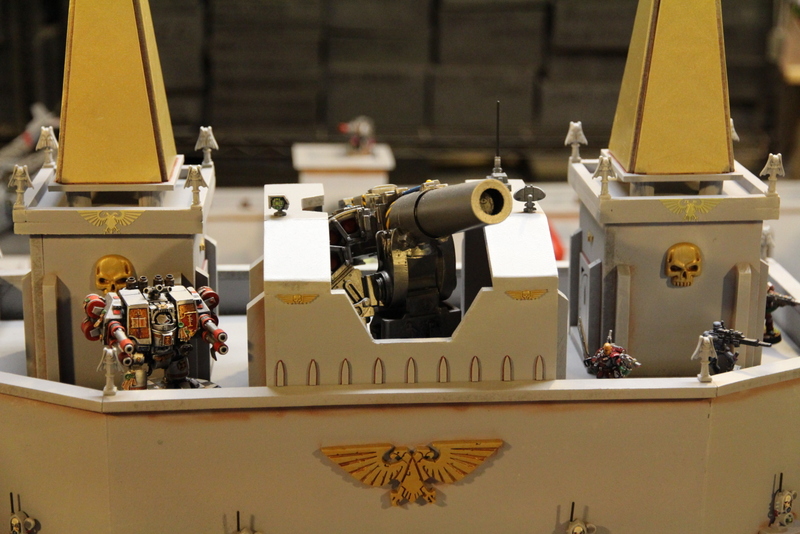
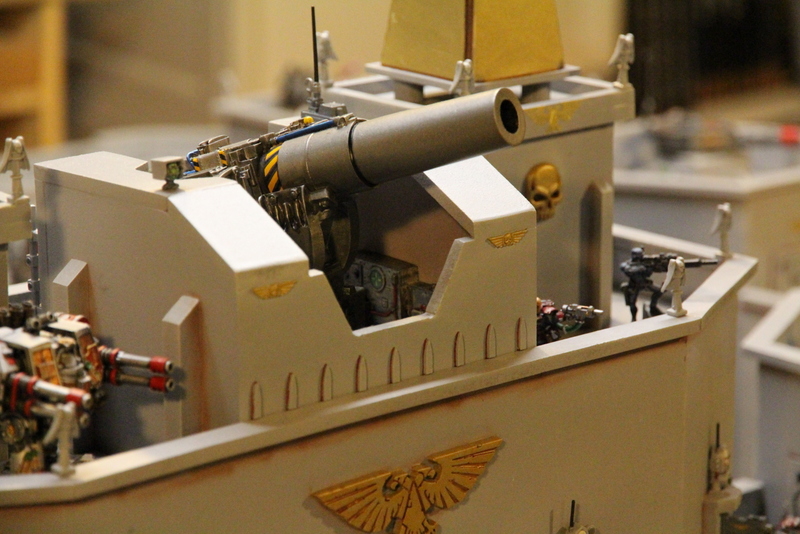
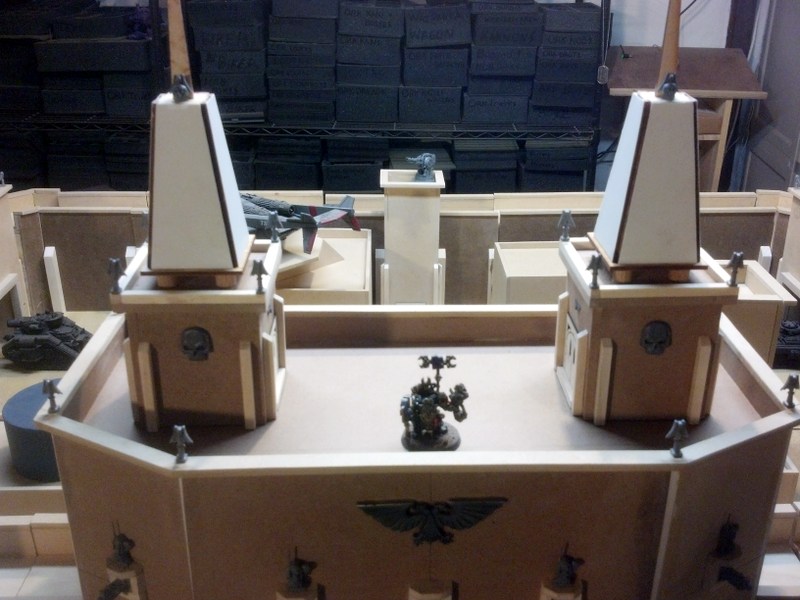
I'm totally stealing the dual spire look from the forgeworld imperial gates, cause it just screams 40k-fortress-must-be-a-church. The front gate battlement is going to be 16" wide by 8" deep, so there's lots of room to play with. I'm thinking of putting a big mega-cannon thing up there and counting it like the Aquilla Macro Cannon. We had another player ask to join the apoc game, so the fortress is aiming for between 2-3k pointwise. So far, it's going to be the new mega-fortress (AV 15, hard to kill). Each main defense turret will have a battle cannon on the room, probably some other guns on the sides, and maybe also an anti-air weapon on the roof as well. The small gates will have heavy bolters, and the main gate will also have several lascannons and probably another set of heavy bolters, or maybe a pair of hurricane bolters I found lying in a box.
I'm now thinking of adding the same slope to the front and sides of it, so it matches the walls a bit more. It's a bit more effort, but I think the look would be worth it.
I'm also working out how to make the gate sections have working gates. I'm thinking (game-wise), you can declare opening or closing the gate if you're in the gatehouse, declare it during your movement phase. At the beginning of your next turn, it changes state. If it was open, and is closing, anything in the way is crushed to death! (Mwhahaha)
Question for people reading:
Are you more interested in seeing process, or results? Would anyone like a breakdown of what sorts of tools I use for this?
I'm totally digging it. I'm more into building Atlantic Wall like stuff but I'm a sucker for all types of threads about forts so please do post many photos.
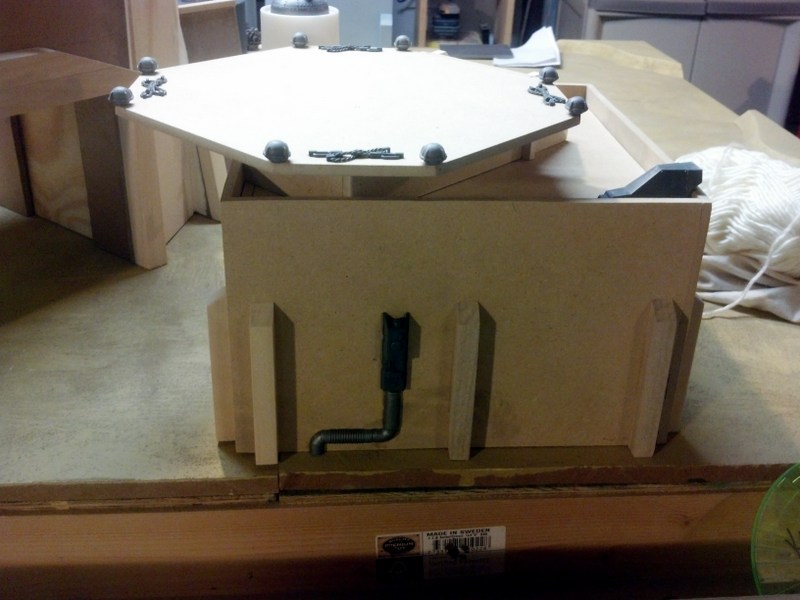
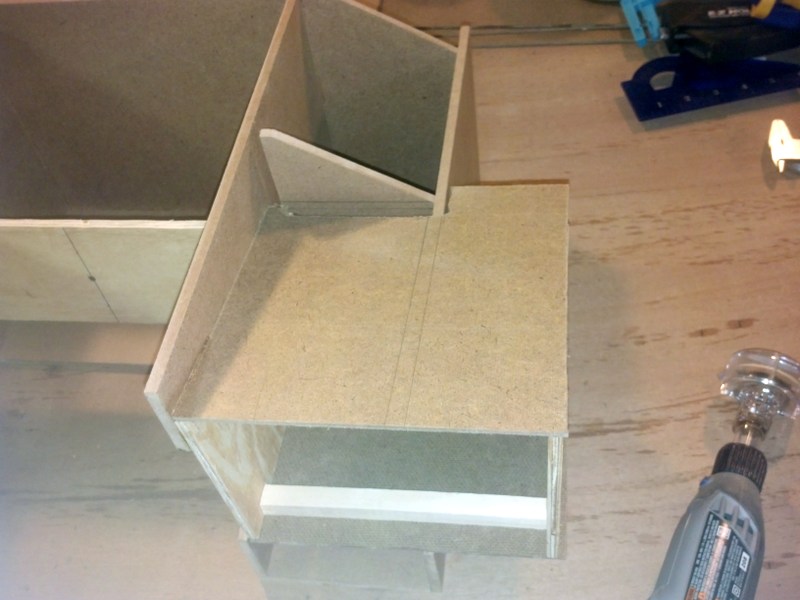
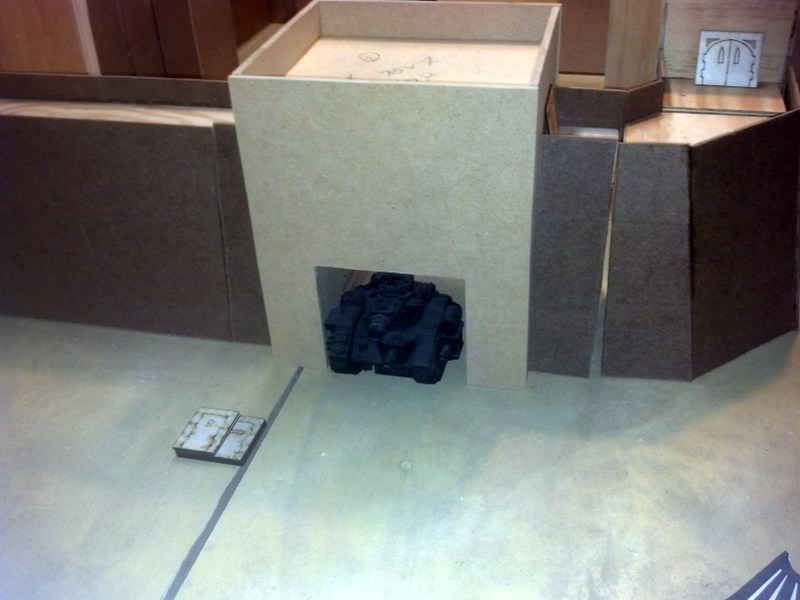
Last couple of nights work was mostly structural, working on the main gate house.
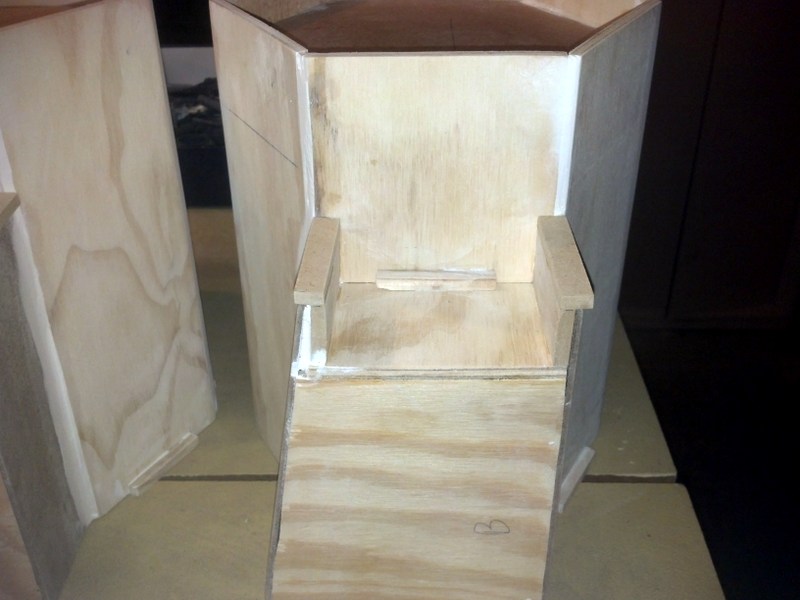
Working on buildings like this, you need to start from the inside out, and this one is going to be tricky because of angles around existing walls, as well as making a functioning gate.
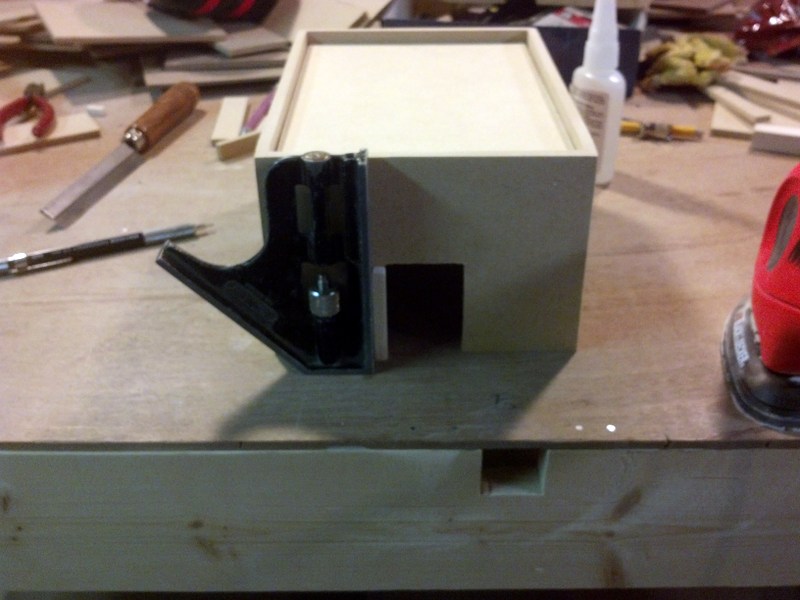
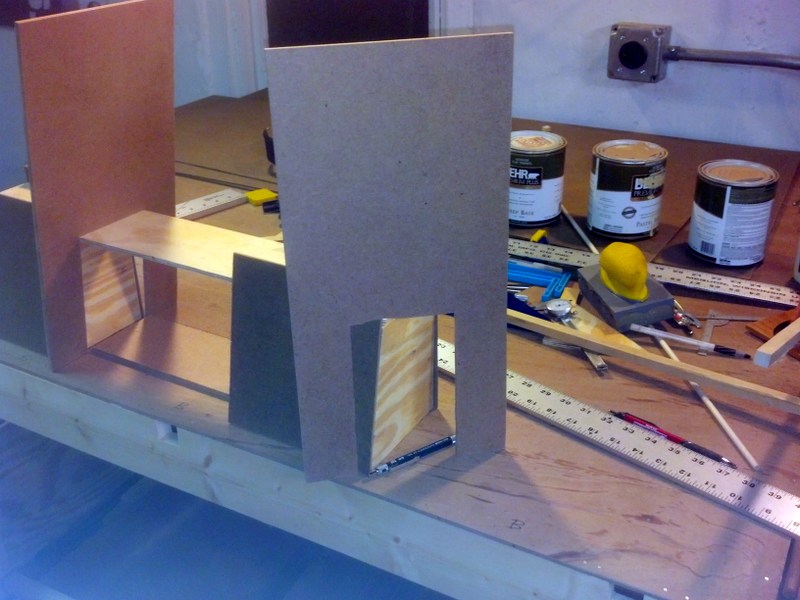
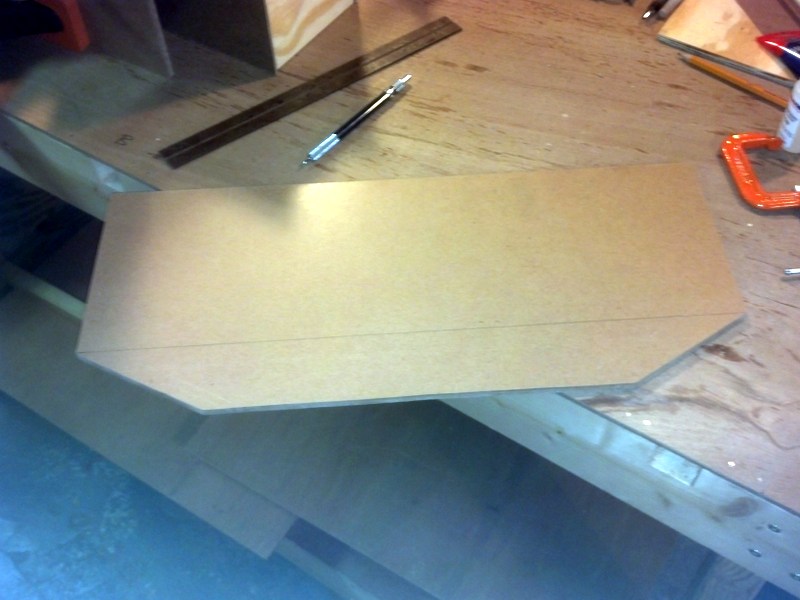
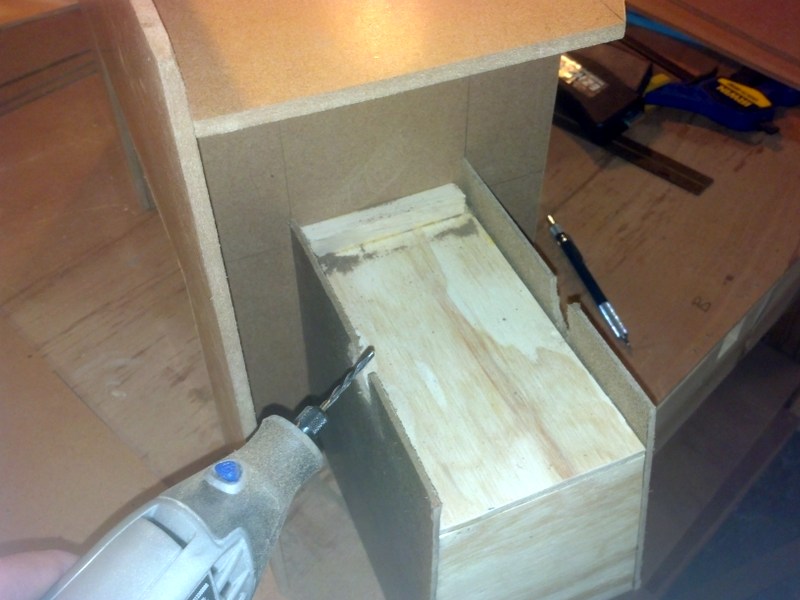
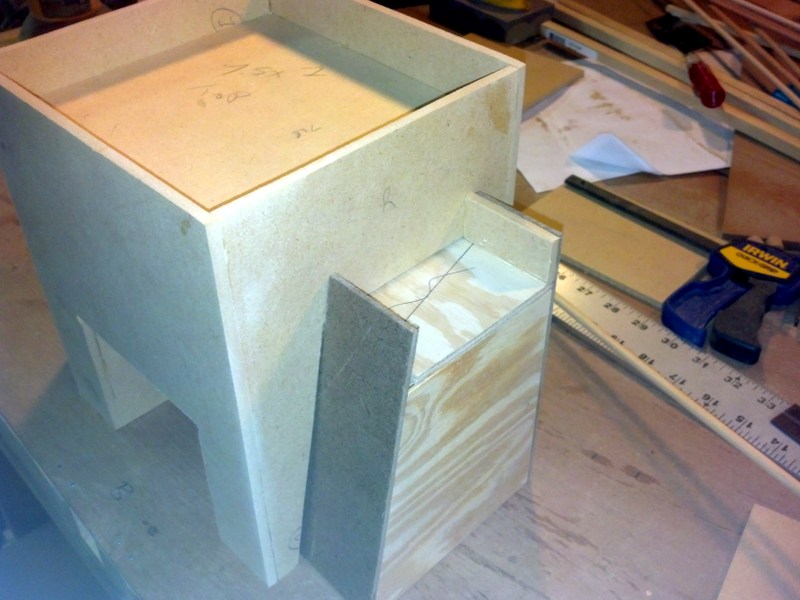
The first step is to measure out how large the gate needs to be, and how big the main internal support braces need to be. This needed to be done in steps though. First, I got the depth of the supports cut out, and made the cuts that allow it to sit over the walkway piece.
I also cut out the pieces for the gate. I can't cut the tops of the supports to size yet, because I need to know how high the gate will reach in its up position.
Spoiler:
The supports
The front gate
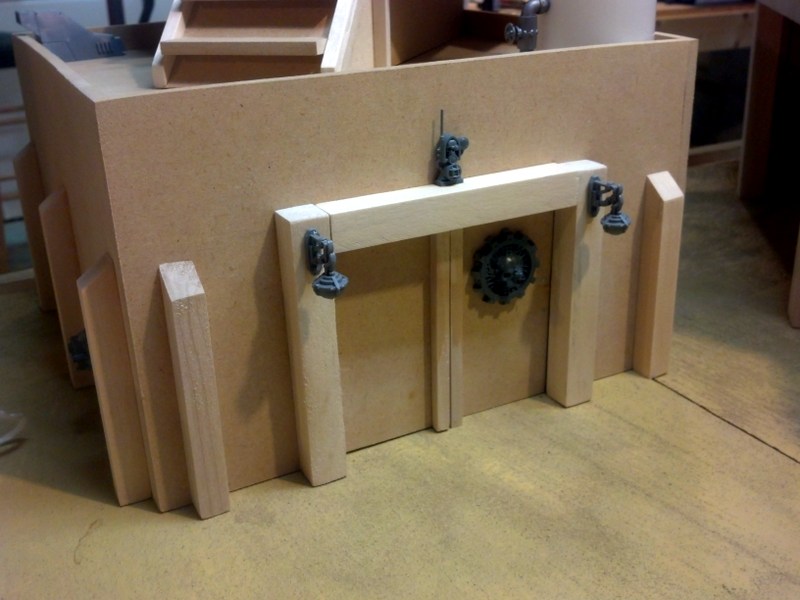
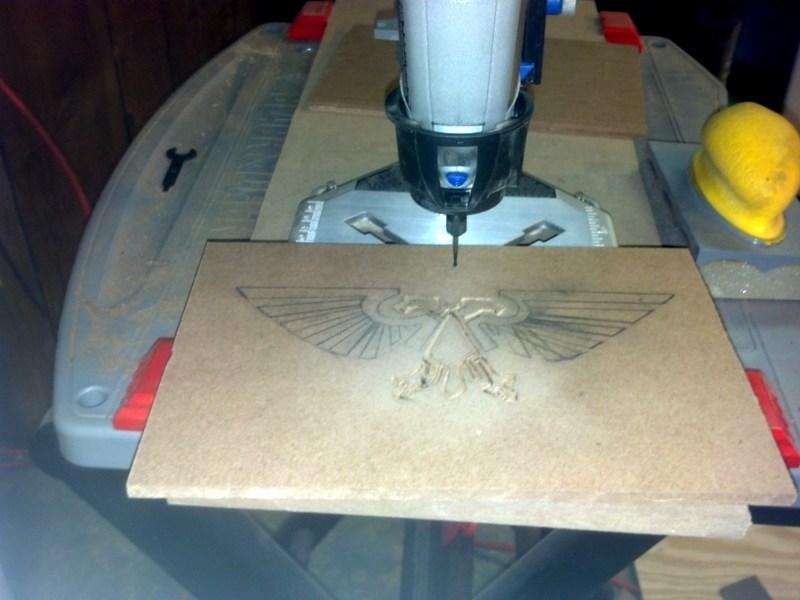
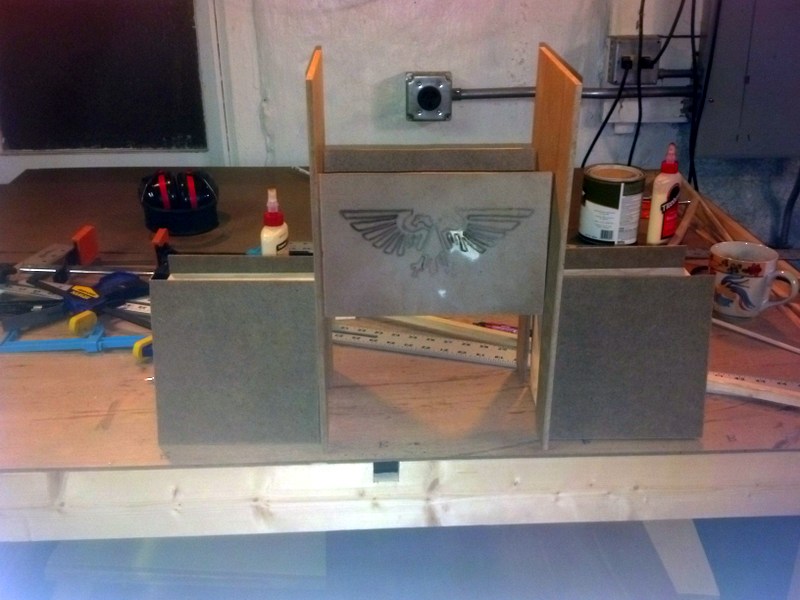
Then, I got the idea that the front gate should have an engraved aquilla on it. That took the most of last night.
Spoiler:
First, I traced a picture of the aquilla onto the gate.
Then, using a dremel, I went over those lines with an engraving bit.
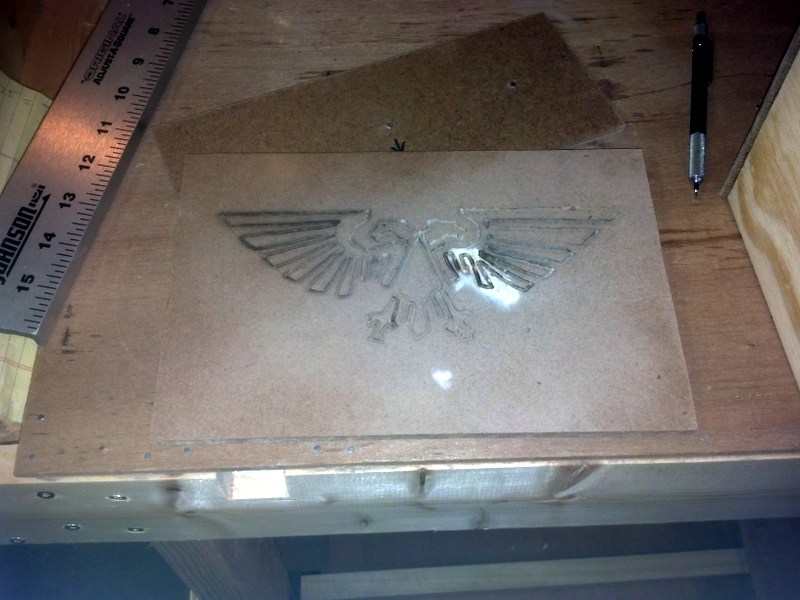
I use the Dremel workstation to maintain the depth of the engraving. Even still, I didn't like how the right wing looks, I must have screwed up the angle. So, using wood filler, I patched back over the part I didn't like and let it dry overnight.
Finished it up tonight, doesn't look too bad.
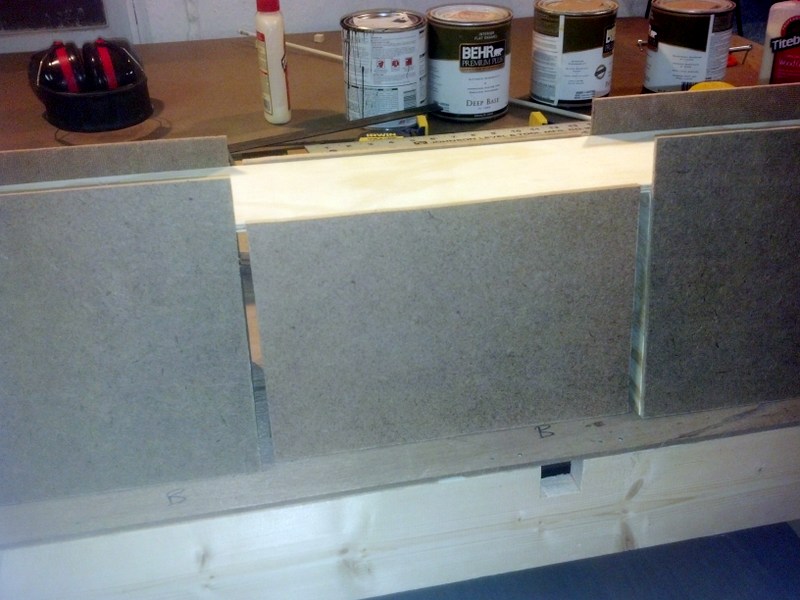
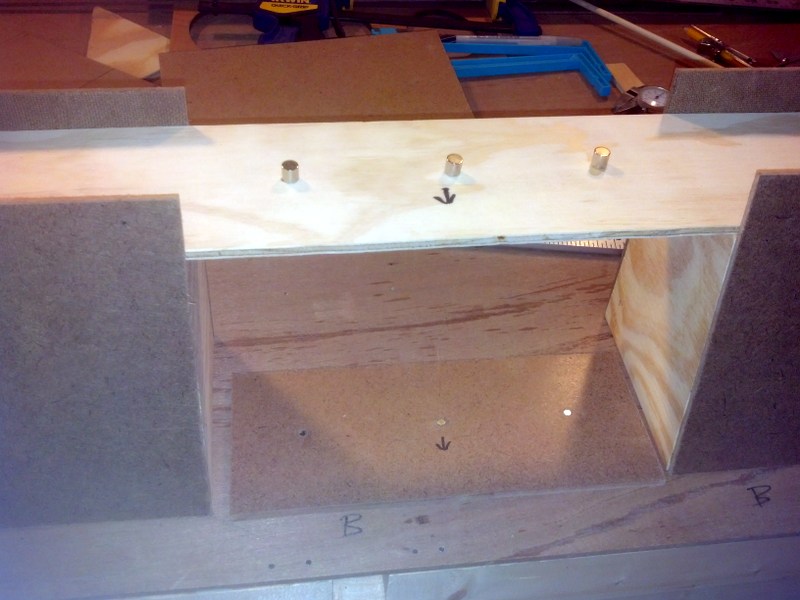
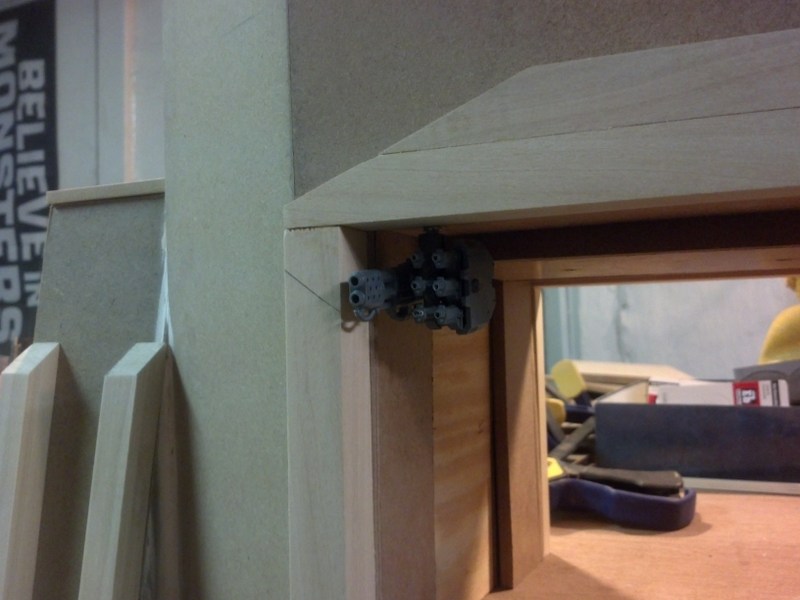
Meanwhile, I installed magnets into the walkway over the gate area, and into the bottom of the gate. These will hold the gate when it is in the up position. Need really big magnets on the top, to hold the weight of the gate which is substantial.
Spoiler:
Glued the front and back of the gate together, and here it is.
Spoiler:
Up:
Down:
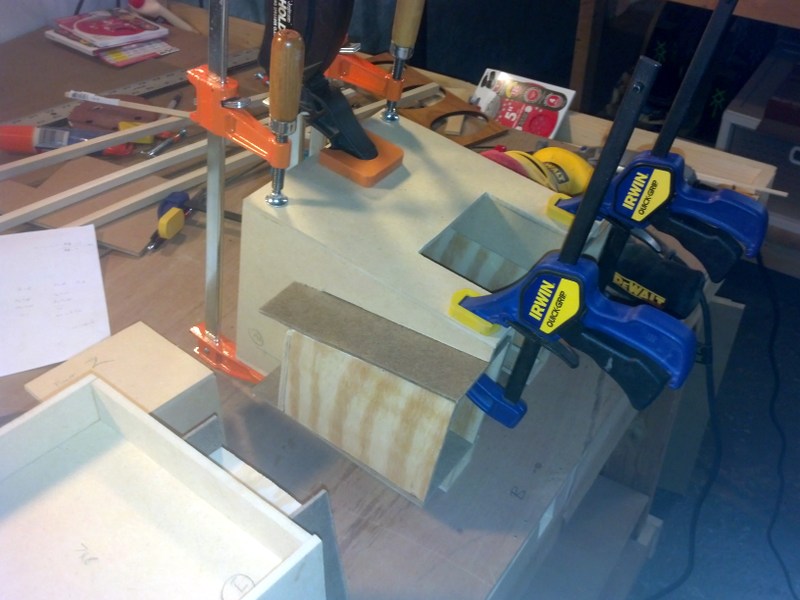
After verifying the gate worked as planned, I glued the support walls in place, and then added the rear of the gatehouse. This needs to sit drying overnight.
Spoiler:
You can never have too many clamps.
Last thing tonight was then cutting out the roof of the gatehouse. I'm using the same angle as the defense turrets, which should help visually pulling the project together.
Spoiler:
Nothing tomorrow, going to the Bears game. But, I've got Friday off work, so with luck, I can finish the main gate, and get a start on the small gate houses.
So, picking up with a whole day's worth of work, which started with a trip to home depot to get more wood - I used up a bit more than planned so far. I also got another couple of clamps, because you can never have too many clamps.
Apologies, again, for the picture quality. My basement is quite dusty and that seems to play havoc with the flash.
After getting the top of the gatehouse done, it's time to get the walls done. To do that, I had to remove some of the battlements, using my trusty dremel cutting bit.
Spoiler:
Once that was done, it was easy enough to get the sides in place. The angled front sections proved more of a challenge though. I had to work in a couple of support floors at the mid-level, and remove a chunk of the front wall in order for this to work.
Spoiler:
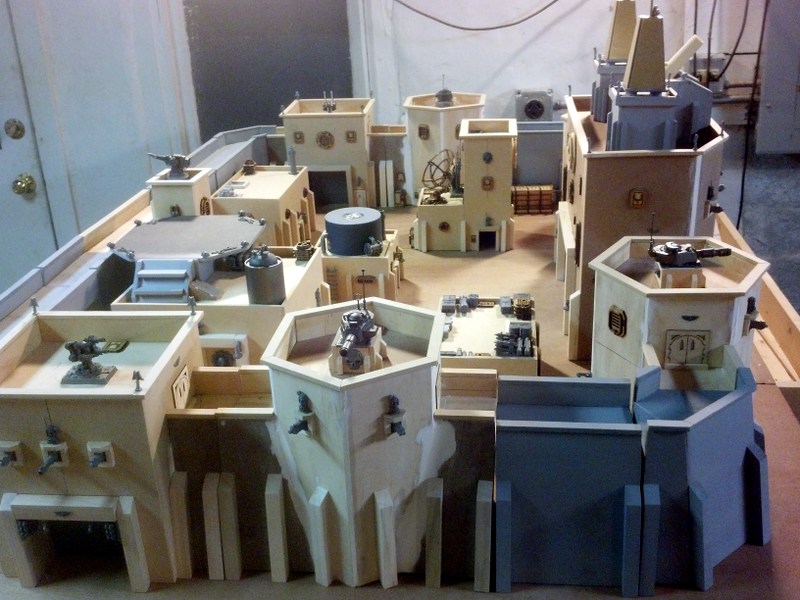
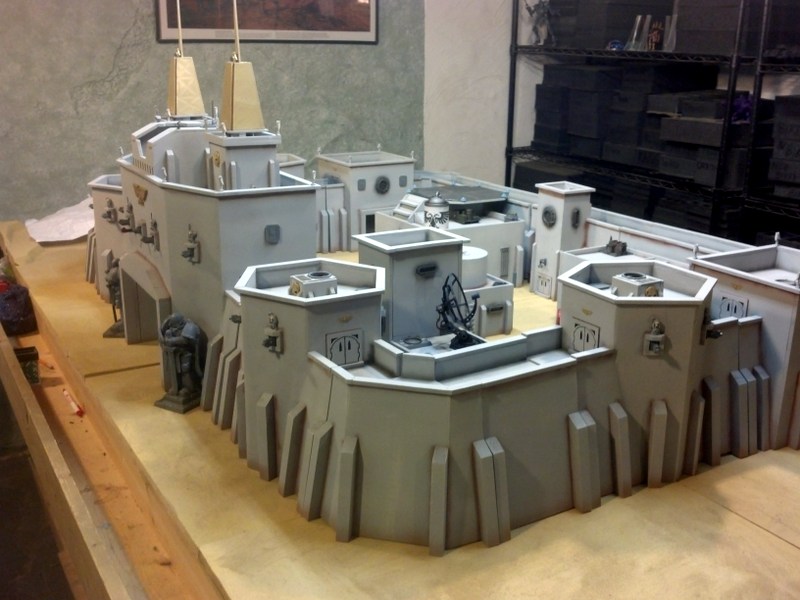
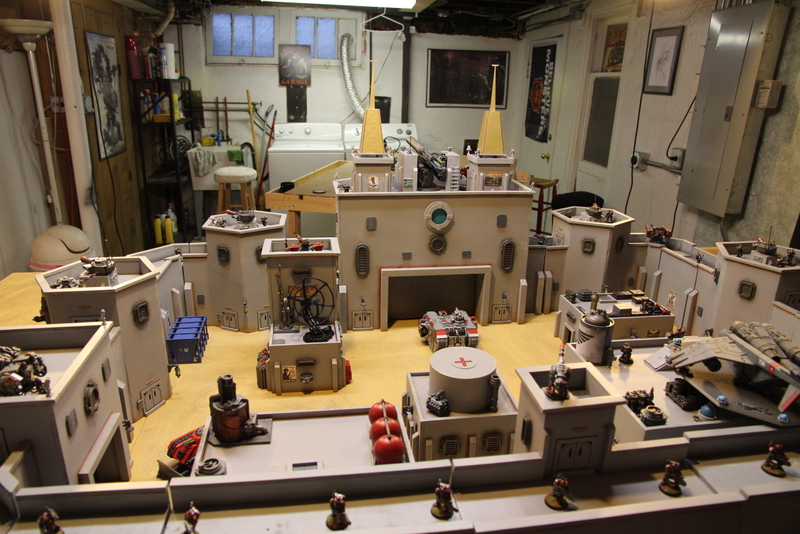
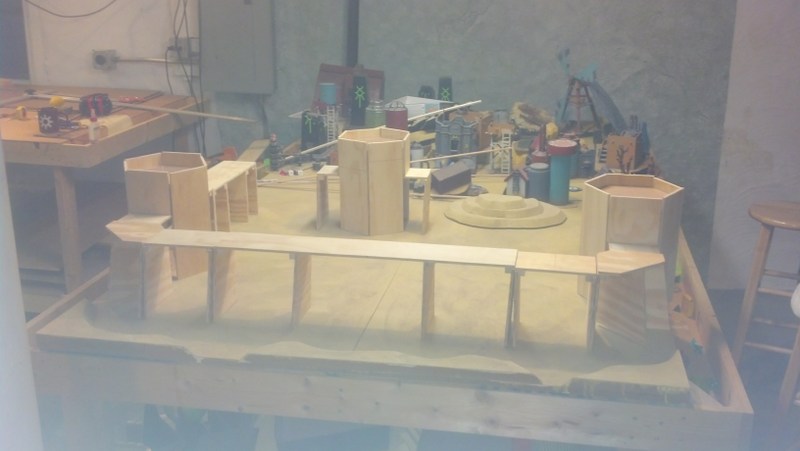
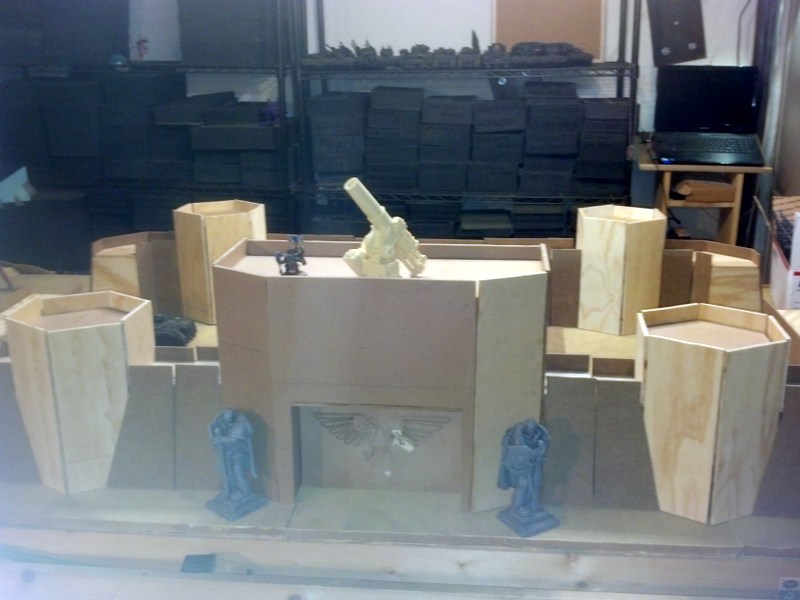
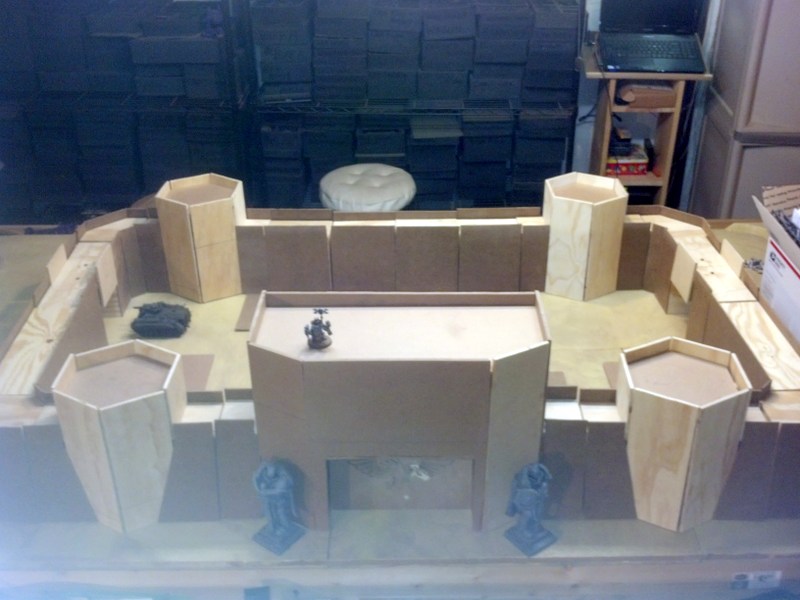
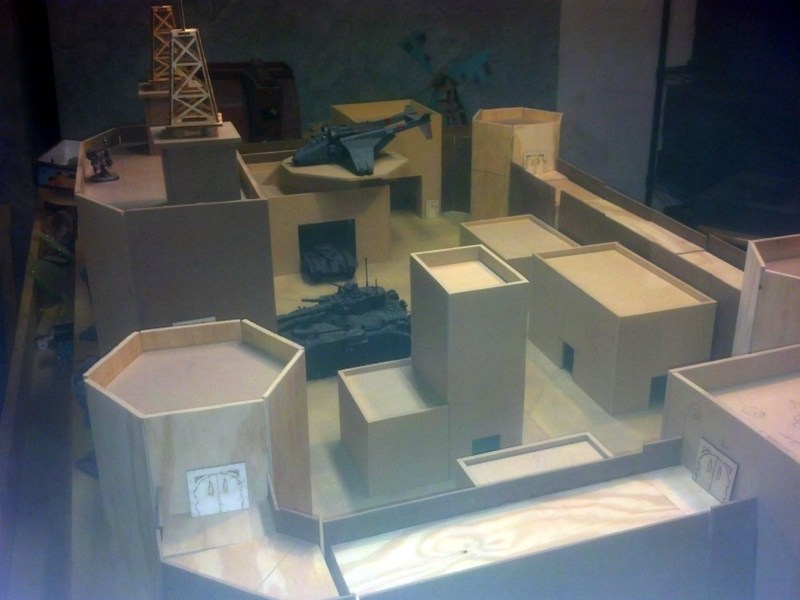
With that out of the way, I went and build four more feet of basic wall, two corners and some straights without gates or towers, in order to be able to make a fully enclosed fort. Nothing too exciting in terms of pictures, but here's a shot of the full layout, to give some idea of the scope of this project.
Spoiler:
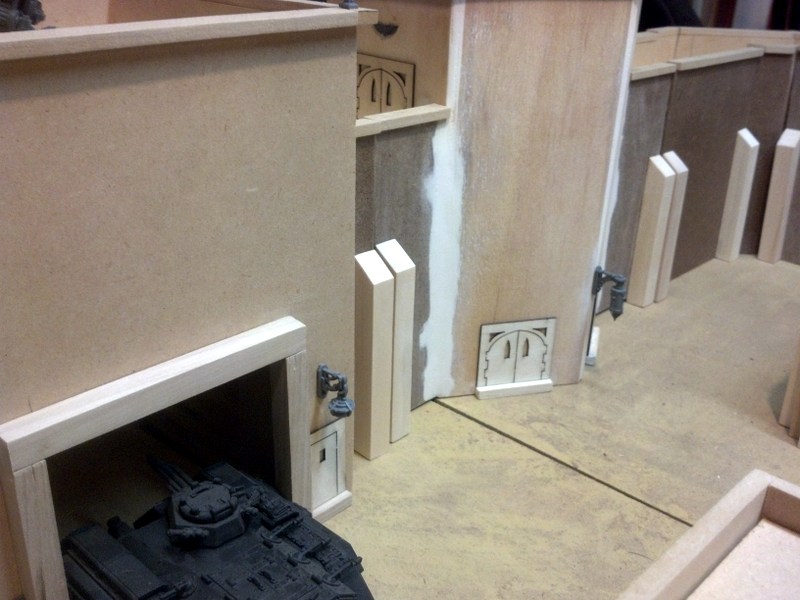
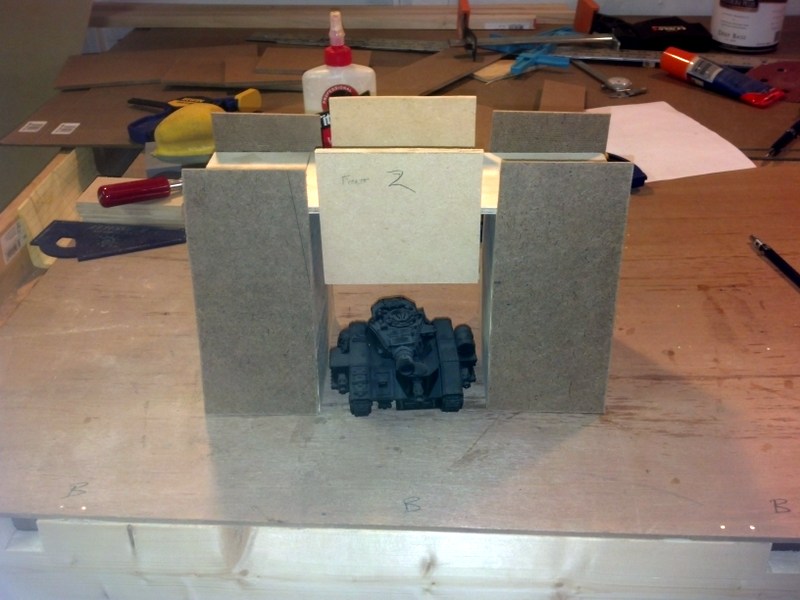
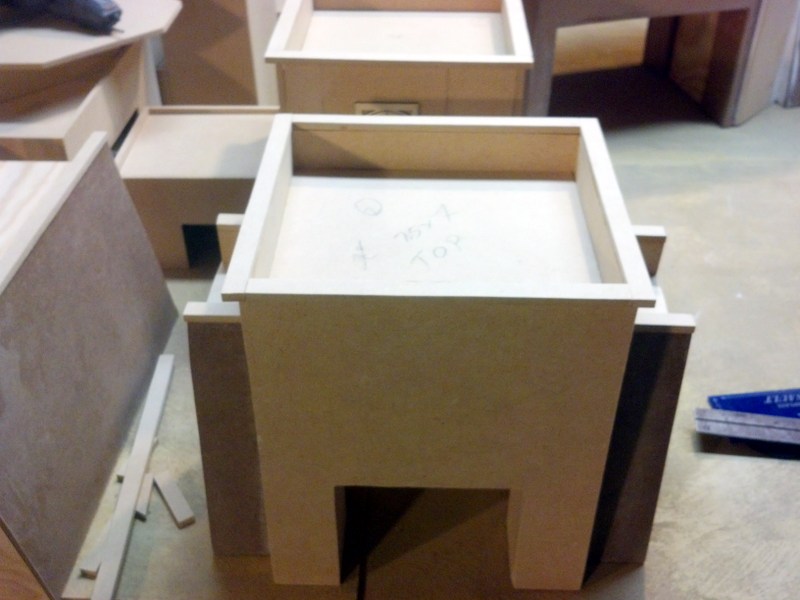
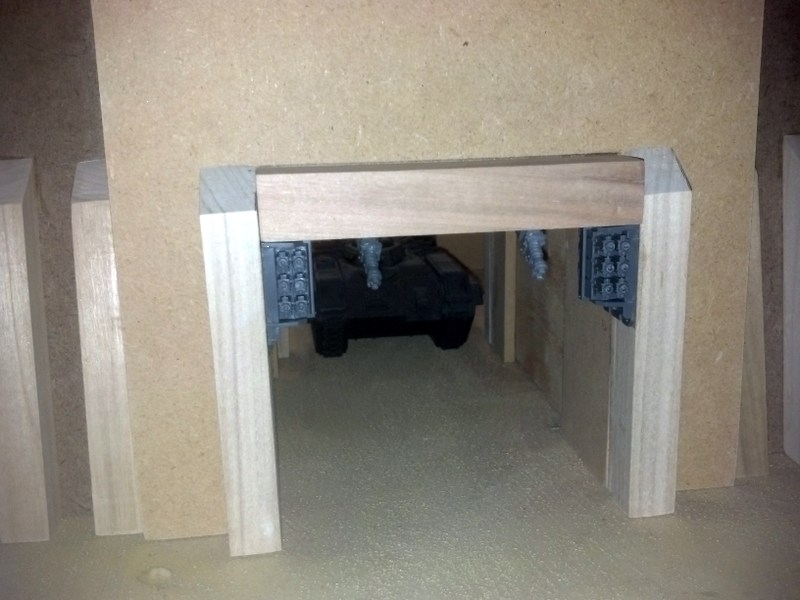
Next up, it's time to work on the small gates. I did these like the big gate, but with an extra crossbar, which controls the height that the gate will rise to. These will be big enough to drive a Russ through, but I don't need, or want, to make these gates 12" tall, so this will allow me to make much shorter houses.
Spoiler:
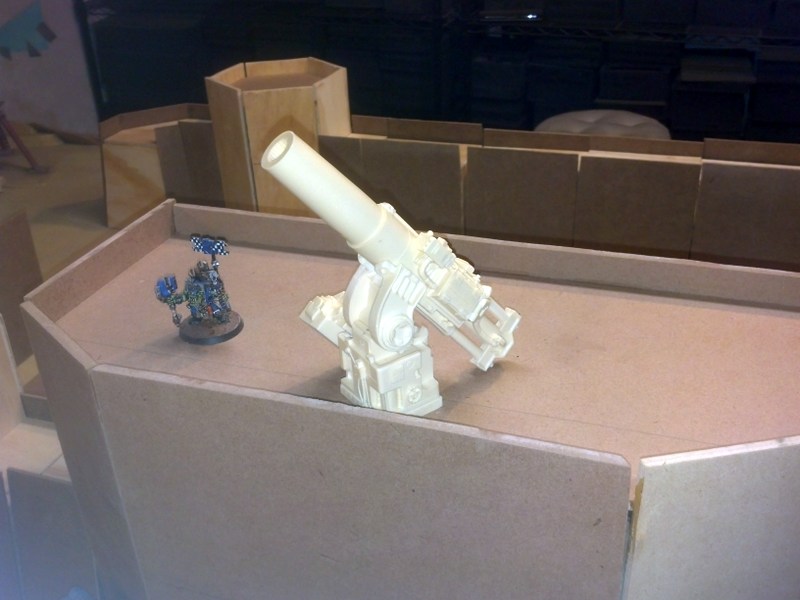
We have decided that the main gun over the gatehouse will be counted as one of the new apocaypse gun things. But those are expensive. My friend Art happened to have an armorcast gun, and it looks like it will do the trick. He worked on putting that together while I was doing the gates.
Spoiler:
At the end of the day, here's where things stand.
Spoiler:
Other thoughts:
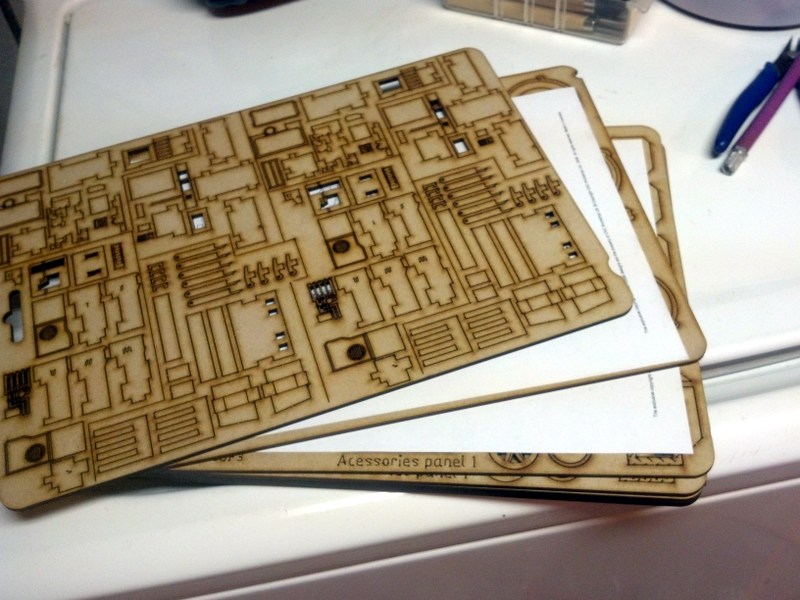
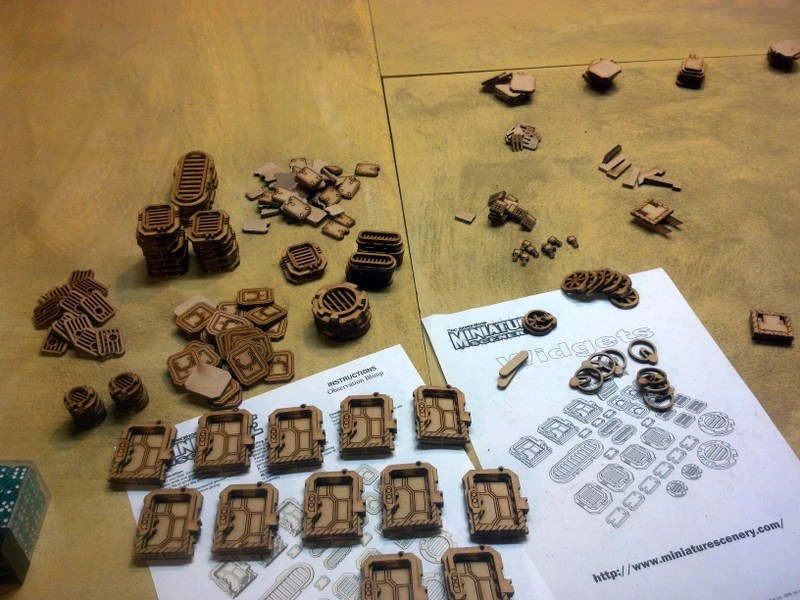
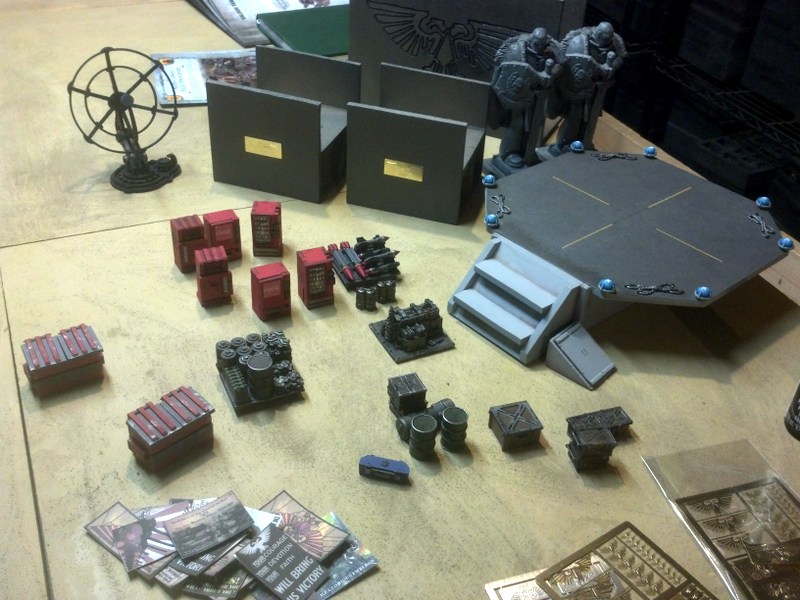
I bought some laser-cut doors from Demo's Laser Cut designs. They seem reasonably priced, and should get here tomorrow. I've mostly got the arched gothic doors, which will be used for all the wall buildings. I've also ordered some sci-fi widgets from Miniature Scenery, which look to provide some nice surface textures.
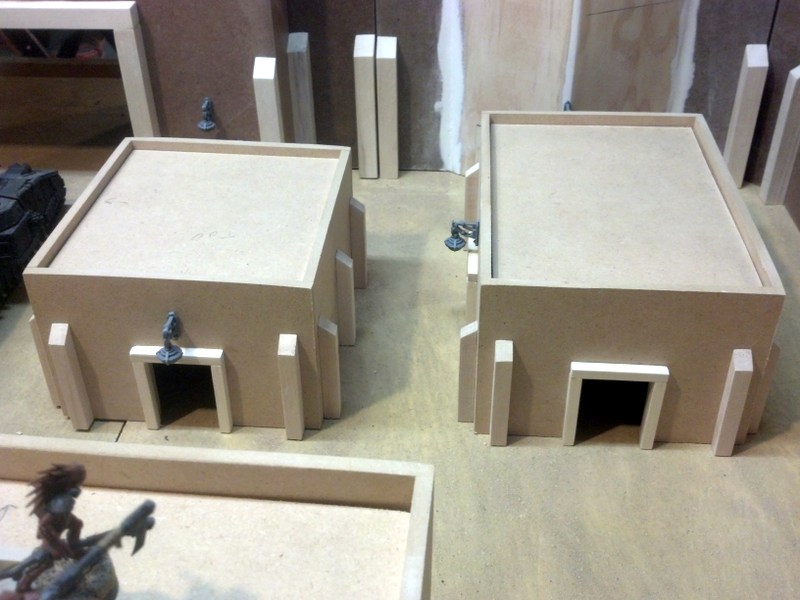
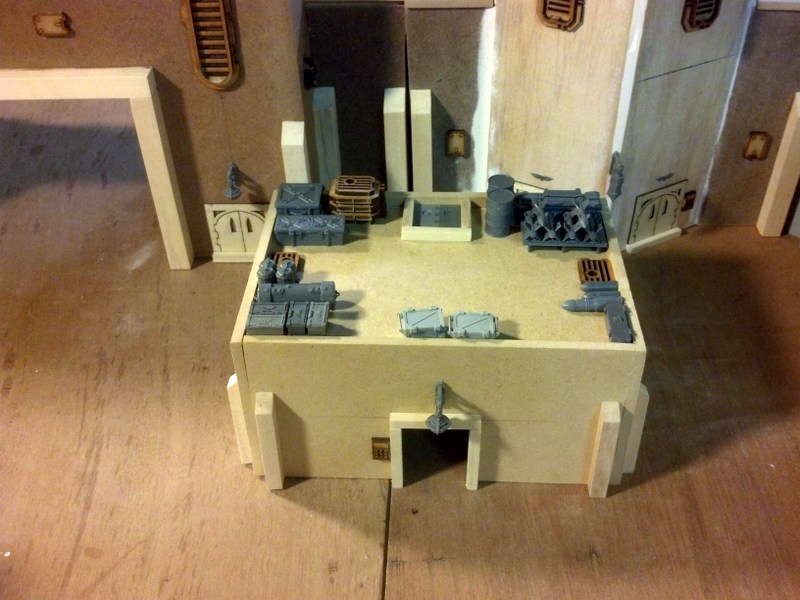
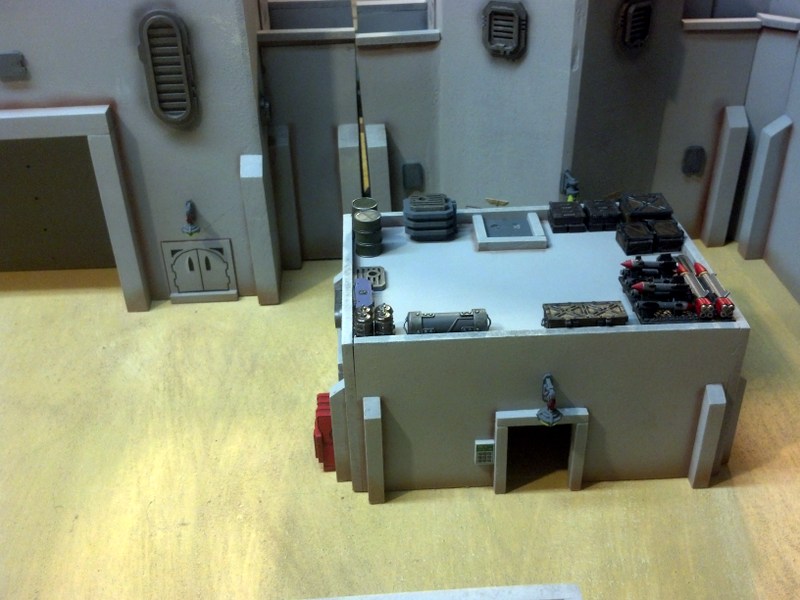
I've also decided to make interior buildings. Last year, my wife and I took a vacation, and we visited a couple of 18th century forts - Fort Ticonderoga in upstate New York, and the Citadel in Halifax, Nova Scotia. Visiting these, you realize that a fort isn't just walls, it's protecting something, and that something is generally troops and equipment.
I'm going to be making the following buildings to be in the fort:
Barracks (maybe 2)
Doc station/Medicae
Command station and communication center
Magazine
Garage
Mess hall
If I do this right, we'll be able to utilize the buildings, and their layout within the walls, as a kind of Zone Mortalis setup, and should add some interest to the idea of having some elite troops deep strike into the fortress during the battle. (Something them at Fort Ticonderoga never had to worry about...)
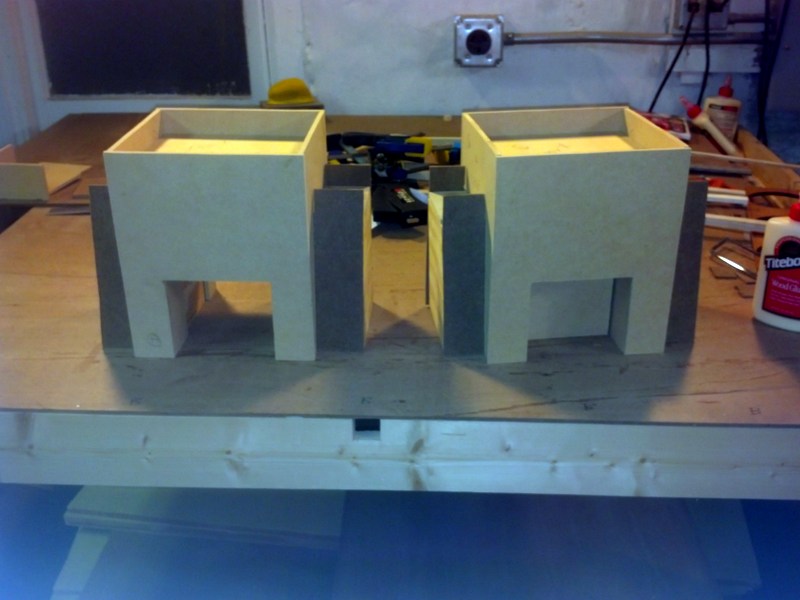
Other than the size, it was pretty much the same plan as the big one, except I made these square to save on their footprint, and so I didn't have to muck about with getting the side angles right. I did have to do some creative cuts to get the side of the gatehouse over the angled wall though, but nothing a little measuring couldn't solve.
Spoiler:
More clamps.
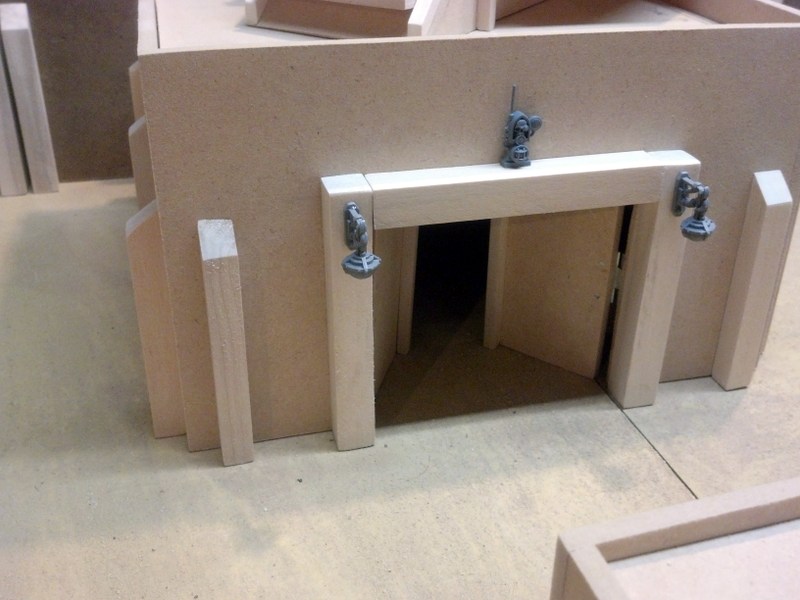
Two small gates:
I got my doors in the mail. They're a touch short, but I will mask that by putting a 1/4" square dowel underneath each, and it will look like an entry step.
Here, you can see some, along with the gate in place, and demo tank proving it can fit through, even with sponsons.
Spoiler:
Along with the door, I got some antenna towers, that I will probably add a skin to, to make them solid. I made a couple of small towers to support these as well.
Spoiler:
Nope, I'm not stealing ideas from the FW gates at all...
Tomorrow, I hope to build my interior buildings, and then that's it for the major assembly, after that, it's all refinement and embellishment.
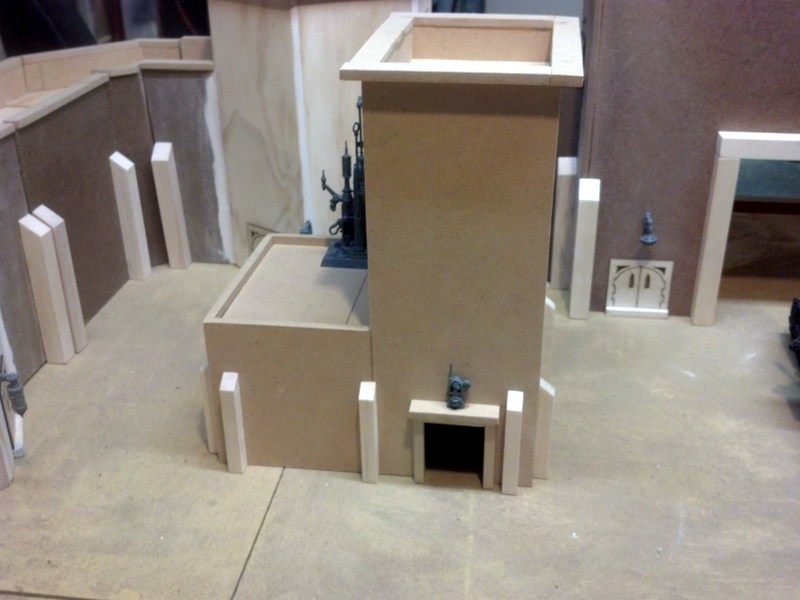
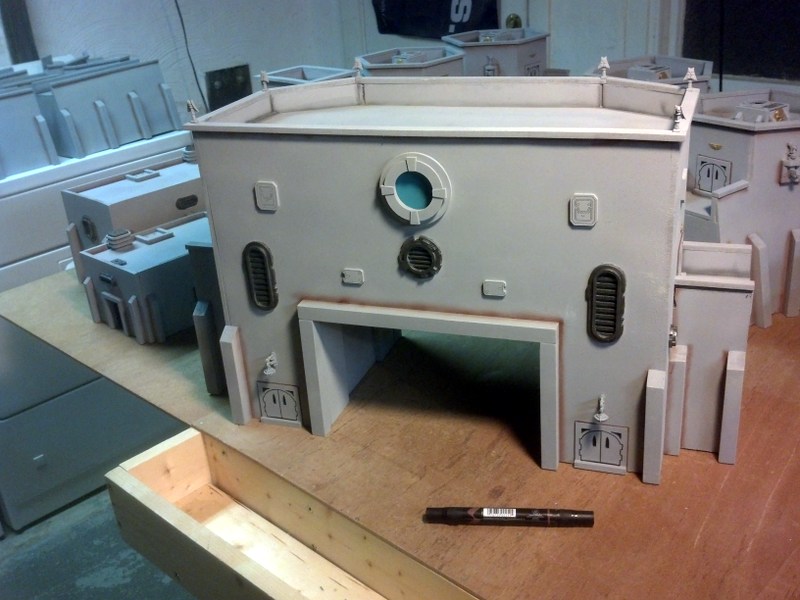
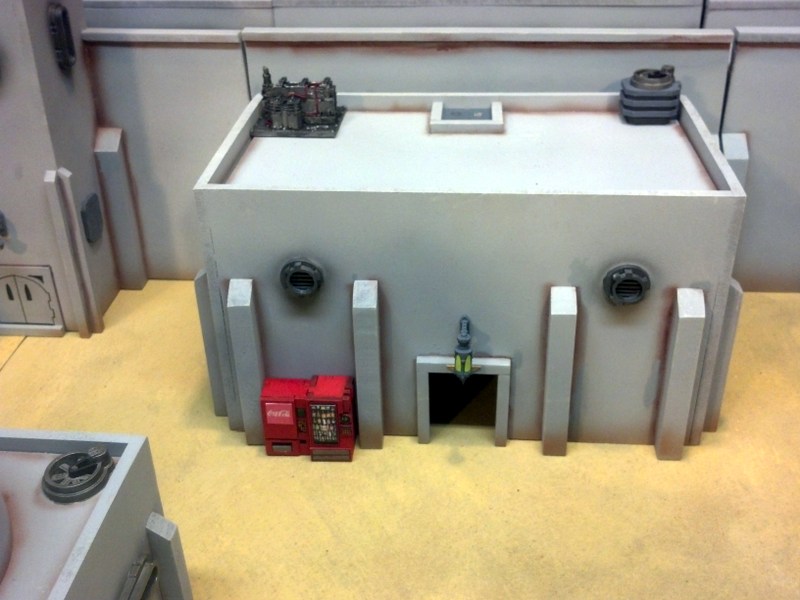
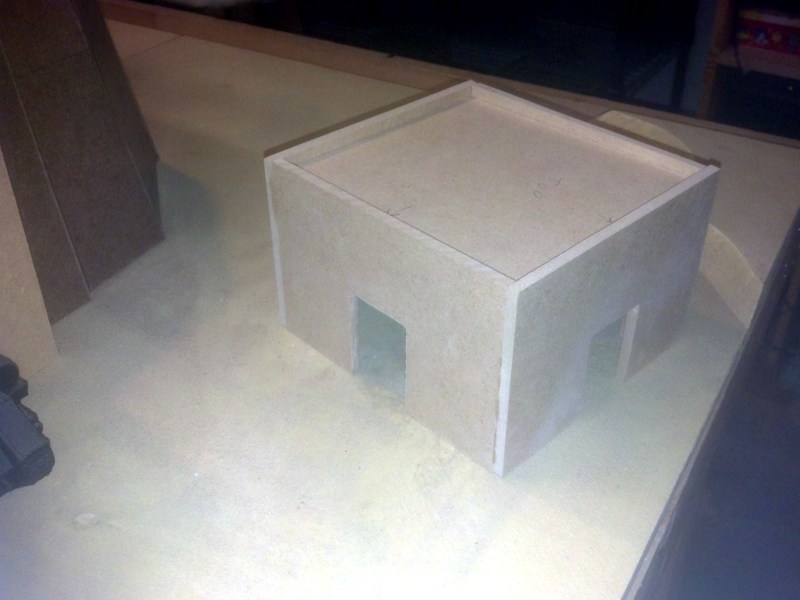
Sunday, I built the buildings for the inner courtyard. Most of them are fairly simple - 4 walls and a roof. I've left the roofs removable, so that guys can be moved inside them easily, and cut out door spaces.
Spoiler:
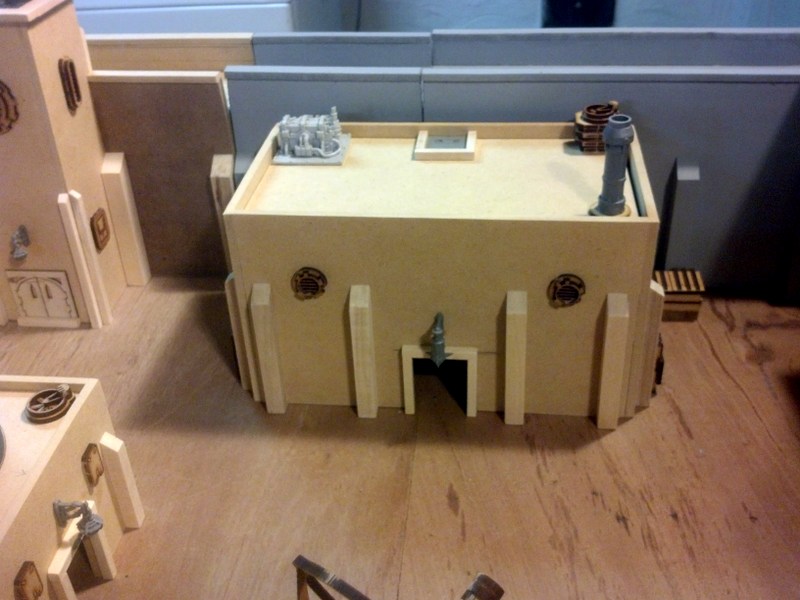
There's one command building that has a high enough roof to see over the fortress walls, I figured a commander type might want to get a first-hand look. So that one gets battlements.
Spoiler:
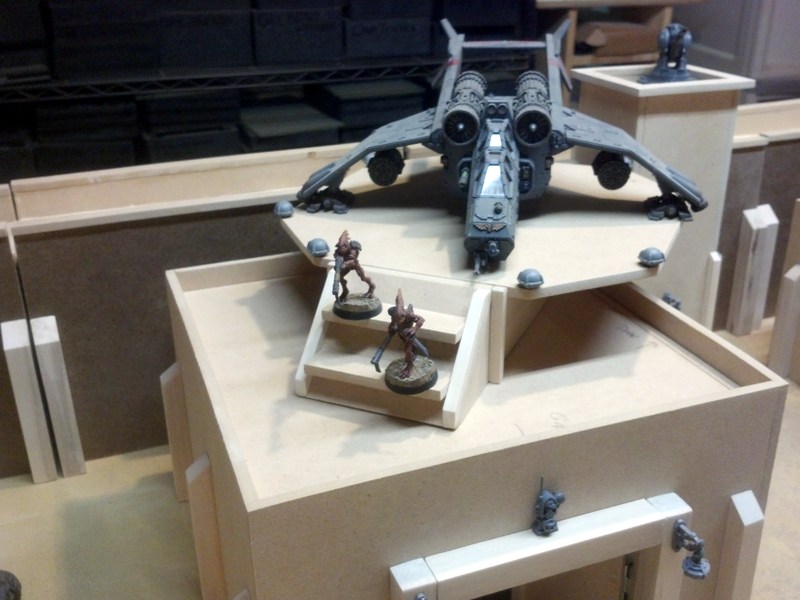
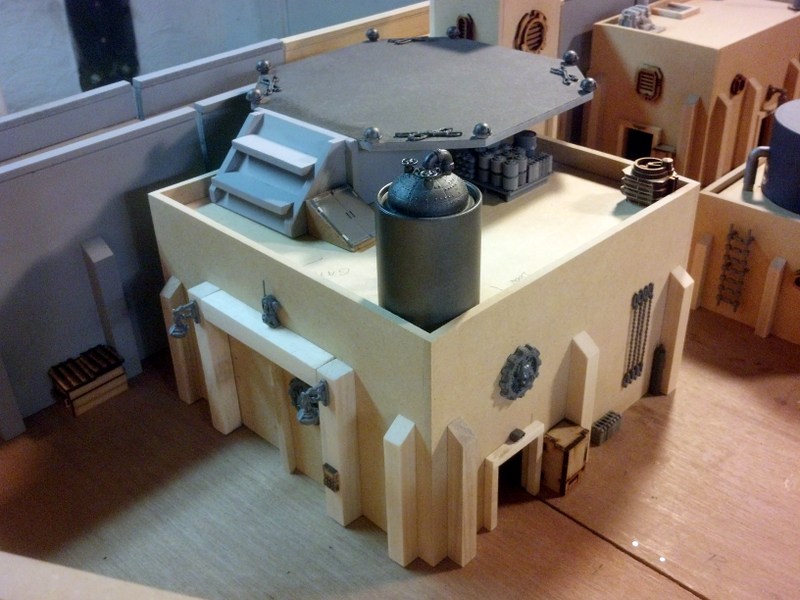
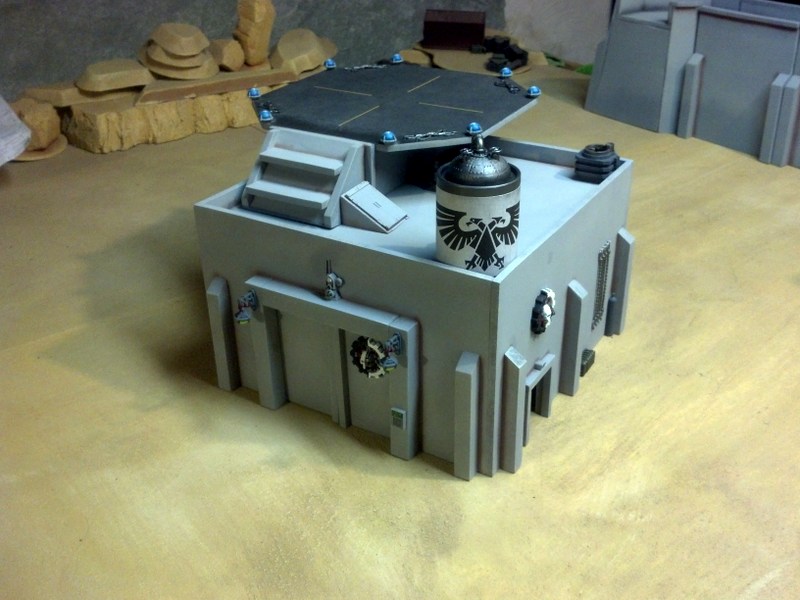
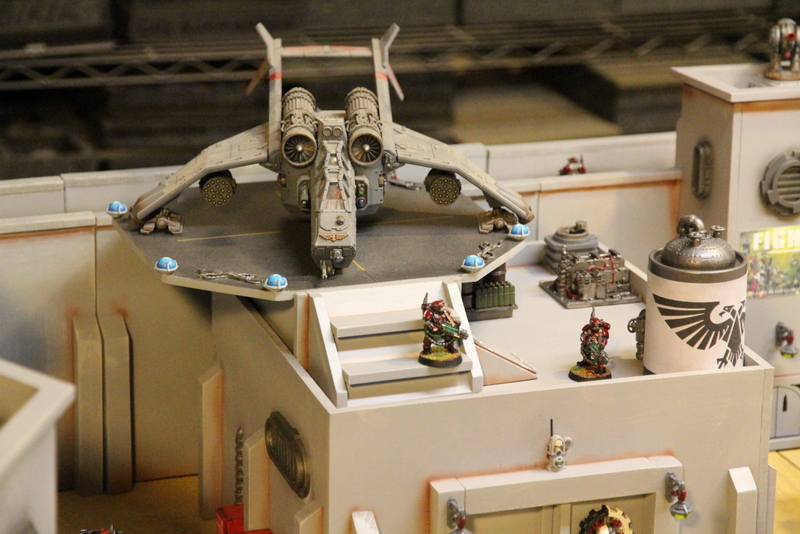
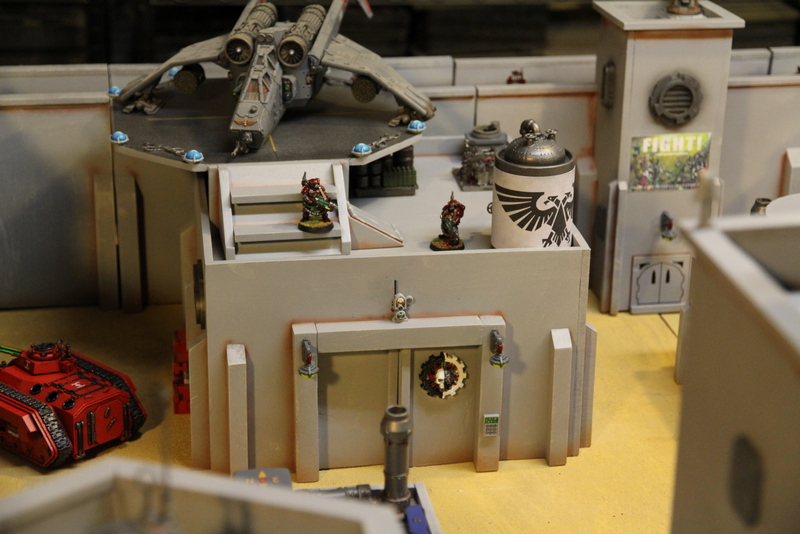
The largest is a garage, with a doorway wide enough to drive most imperial tanks through. And, I decided that it should also have a landing pad on the roof, just cause.
Spoiler:
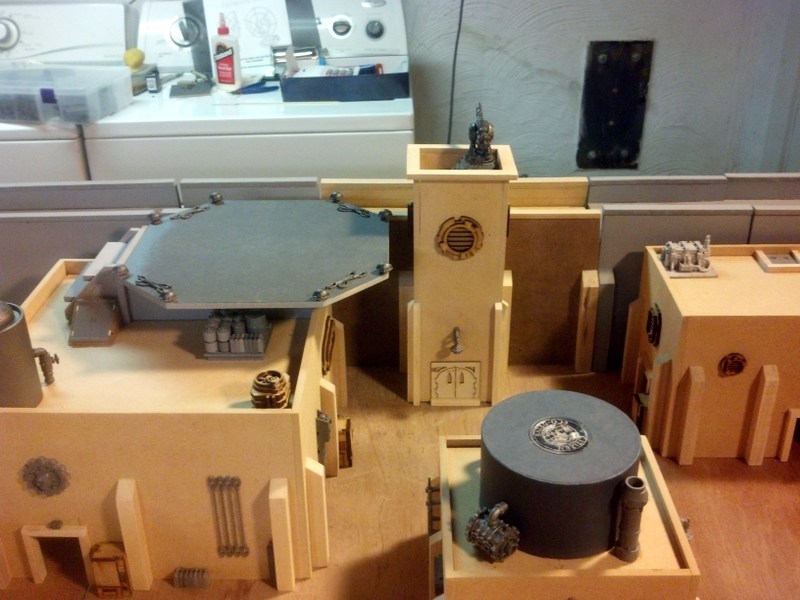
So, here's the overview of the courtyard buildings:
Spoiler:
So, that's all of the structural work done. I started refining things by taking an orbital sander to all of the main panel seams, so they're all flush now. I also sanded down all the uneven battlements to get rid of the jagged look. Next step, getting messy with the spackle.
Yesterday and today after work, I did some work on finishing off the main construction.
First, I cut out pieces to reinforce all the parapets, getting a fixed size for them all, and glued them in place. Can't sand for 24 hours after doing this, so I went and played my online bloodbowl game, although I also cut out some 1/4 dowels to serve as door jambs and got them glued in place.
Spoiler:
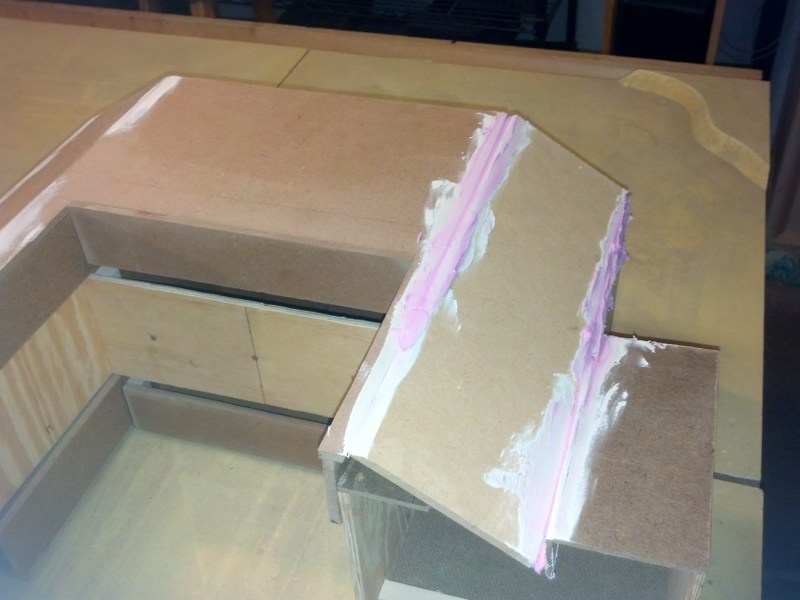
After that glue was dry, I sanded all the parapets down so they were all identical height and the edges were flush. Then, it was time to start spackling.
The spackle is this horrible pink goo that's the color of peptobismol and smells vaguely like starwberry(?) As it dries, it turns white, so you know when it's ready to do another layer, or sand it. It says apply with a spackle knife, but unfortunately, some of the angles I need to fill require me to work it in with my fingers, and... well, let's just say this is my least favourite step of the project.
Spoiler:
Well, this takes 5 hours to dry to the point where I can do the next coat, and I need to work tomorrow, so second coat tomorrow night, and then sanding it all down on Thursday, by the looks of things.
That's incredible so far! Looks like an absolute blast to play on! Thanks for sharing your progress, and I'm very impressed at the speed with which you're getting this done.
Last night, I added the second layer of spackle. Today, I got my dust mask out and sanded all the excess off. I've got chalky-dust all over the basement now :( Still, there's no other good way to do this.
Spoiler:
Then I had the bright idea to give the parapets a more finished look by putting caps on them. So, I cut a whole lot of 1/2" strips and went about applying them over all the walls.
Spoiler:
On the straights and angles...
And on the turret and gate sections...
I need to finish off the tops of the gates and turrets still, and it does do a good job of hiding any slightly-off joins at the wall edges, as well as adding a little bit of surface texturing to the wall fronts.
Finally, I glued on all the doors for the turrets and gates. (And, for fun, mocked up the main armaments for the turrets. )
Spoiler:
Tomorrow: cutting more 1/2" strips and doing the angle math for the tops of the turrets. And figuring out what to add to the front of the walls to give them a more finished look.
Miguelsan wrote:Are you going to add small arms or just the big guns?
I've got a ton of heavy bolter sponson pieces from old leman russ tanks that I'm going to mount on the buildings, but I need to cut some stuff that looks like housing for them. Current plans are to have 2 heavy bolters on each tower (1 per exterior side), 2 on the front of each gate, with an additional lascannon on the front of each gate too. I've also got a set of hurricane bolters that I'm going to try any mount as extra small-arms defense for the main gate, and possibly work in some flamers to cover each gatehouse as well.
the_valeyard6 wrote:that is briliant!, i will be watching this thread, the only suggestion is the turrents should be in the middle of the tower
I'm not sure about that. Aesthetically, possibly. But from a gaming perspective, putting the turret in the center really reduces the footprint available to deploy models in, and these are gaming pieces.
Finished the tops of the buildings. They look a lot more finished now, it's starting to look like something.
Spoiler:
Small gates (easiest)
Main gate
And towers
By the way, if anyone ever needs to know when you're going to use algebra, geometry, or trig after high school, it's on projects like these...
Here's what I'm planning to do tomorrow:
Spoiler:
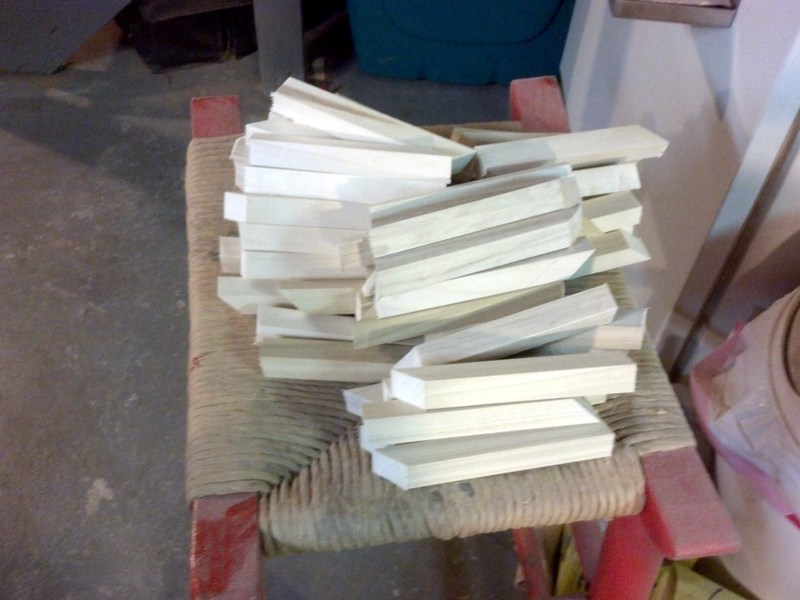
I reckon I need about 40 of these, and they'll go at the edges of the walls to add support. I'll probably use a little thinner ones on the back side - those are 5/8", and I'll probably use 1/2" on the back.
Looking at this as a newly-started painter, I'm speechless. Let me put it like this: you're able to not make me give this hobby up in fear of never being good enough, simply by completely knocking me off my chair with the sheer magnificence of the project. And it should be the other way around. Exalted.
Not much progress today - after breakfast, I watched the Bears game, which was disappointing, before heading downstairs for a little work.
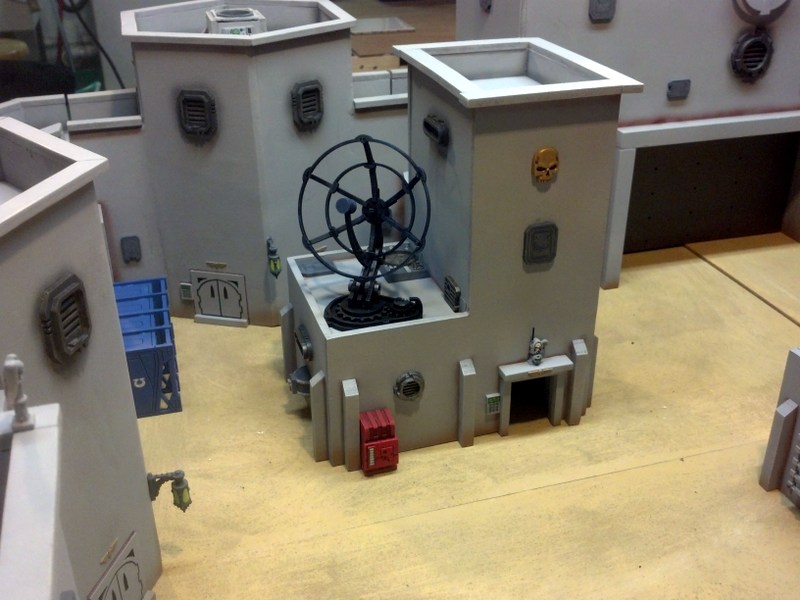
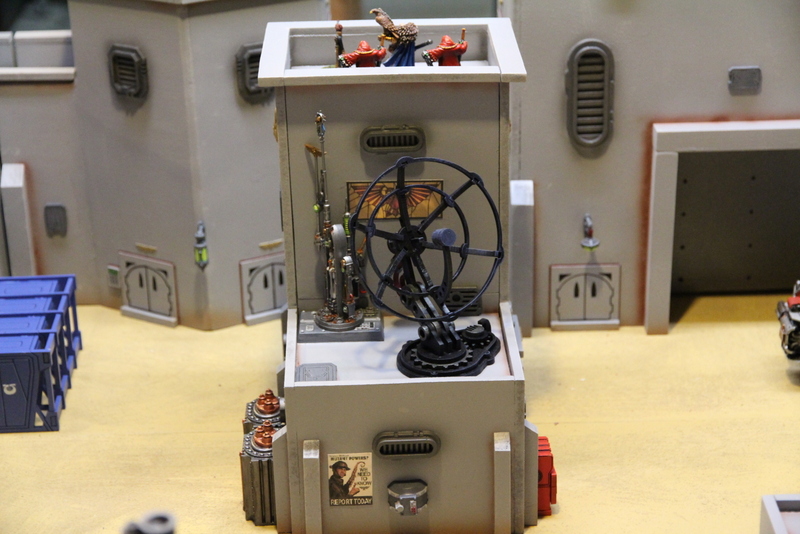
I had a 1-foot gap in the back wall, and decided I wanted to add a skinny tower to hold an anti-aircraft gun, as well as another means to get up to the battlements.
After getting most of the measurements for all the different parts down with the other pieces, this one went together in about three hours.
Spoiler:
It's got just about enough space to put one of the anti-air bases, as an automatic turret.
Automatically Appended Next Post: Whoa, looks like one of my updates disappeared. (I probably previewed it without saving it).
So, yesterday....
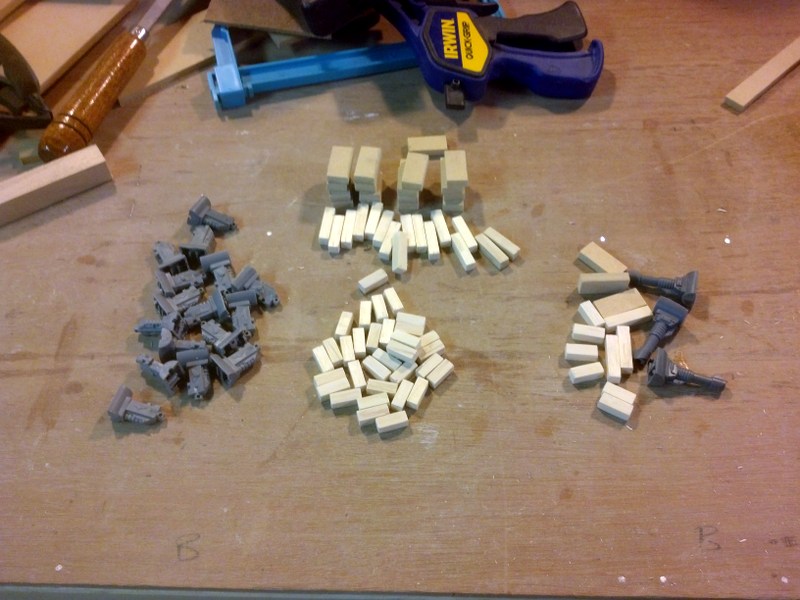
It turns out that I needed about 140 of those butresses pieces, not 40... Headed over to Home Despot, bought them out of 5/8th inch dowels, marked and cut for an hour.
Spoiler:
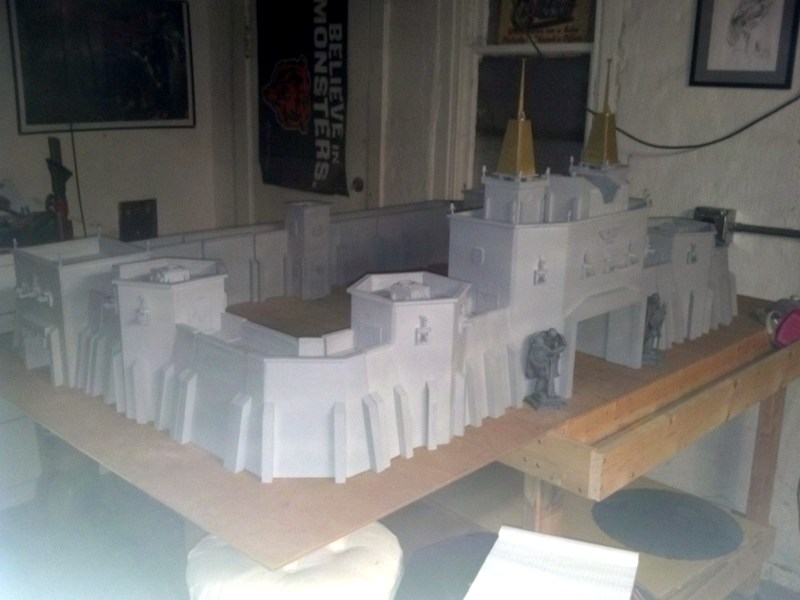
Once I glued them all on, I re-setup the fortress walls to get a feel for where it was at.
Spoiler:
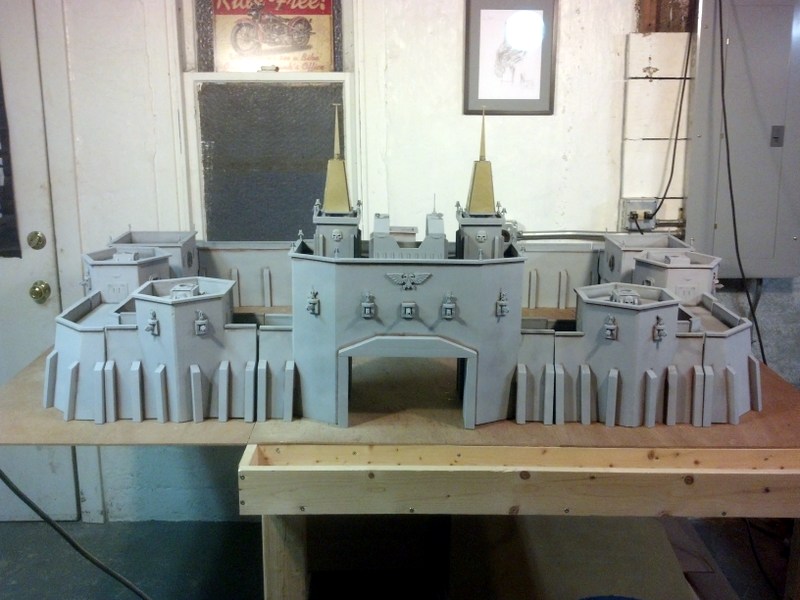
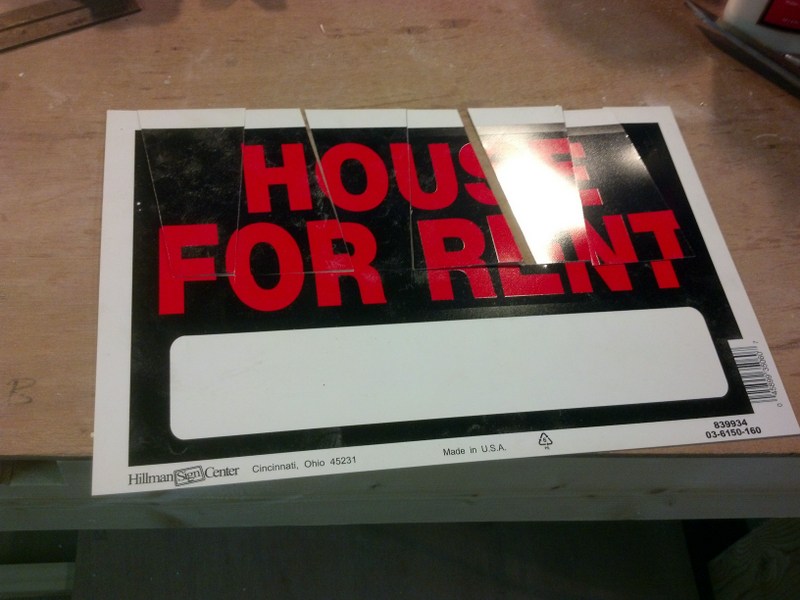
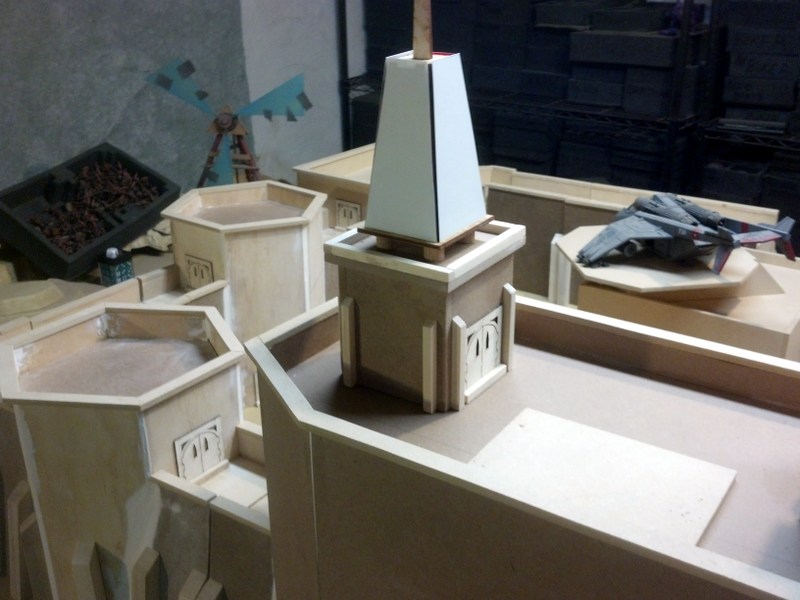
Next, I cut out some thin plasticard coverings for the spire tops. Note - For Rent signs are an excellent source of cheap materials. I also added some mini-butresses for the spire bases to tie them into the walls.
Spoiler:
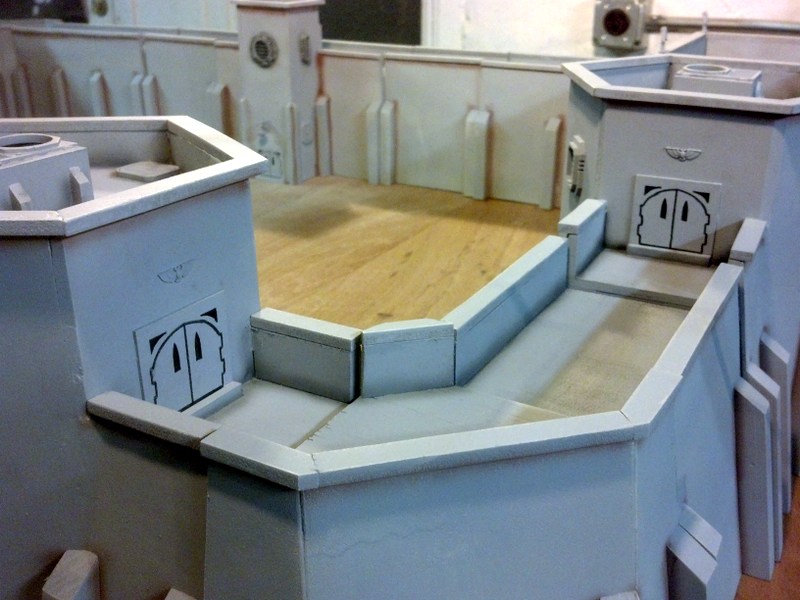
I then built up the gate openings, so they looked a bit more finished off. Tried to make these fit stylistically with the butresses. I have an Aquilla pin (I think from the 6th ed release gamer bag), that I'm going to put over the front gate, so I made that twice as thick. The insides were done as simple rectangles.
Spoiler:
Finally, I spent time cleaning up all the scrap cuttings and sawdust, so that the workshop was usable again.
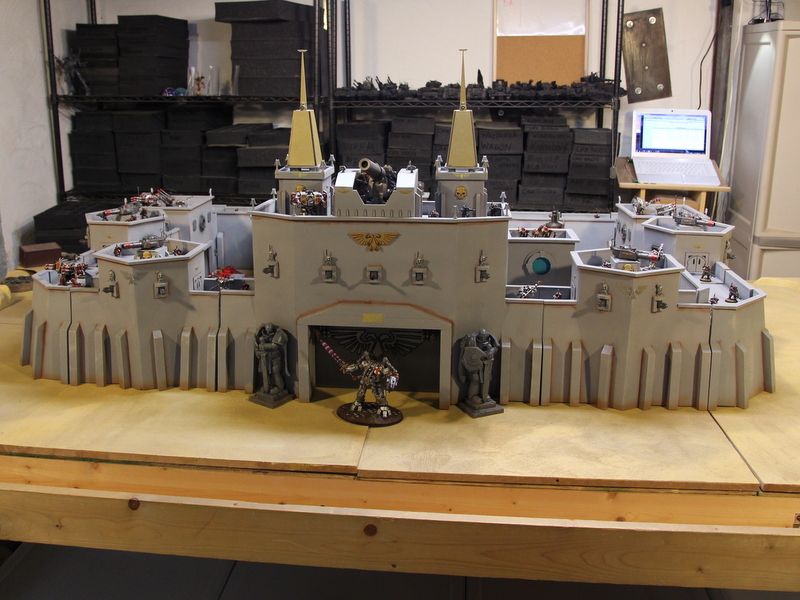
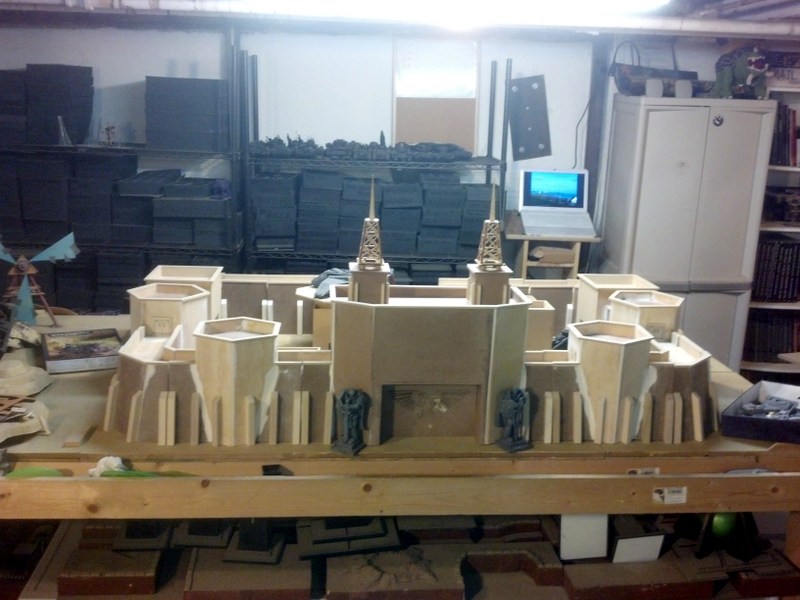
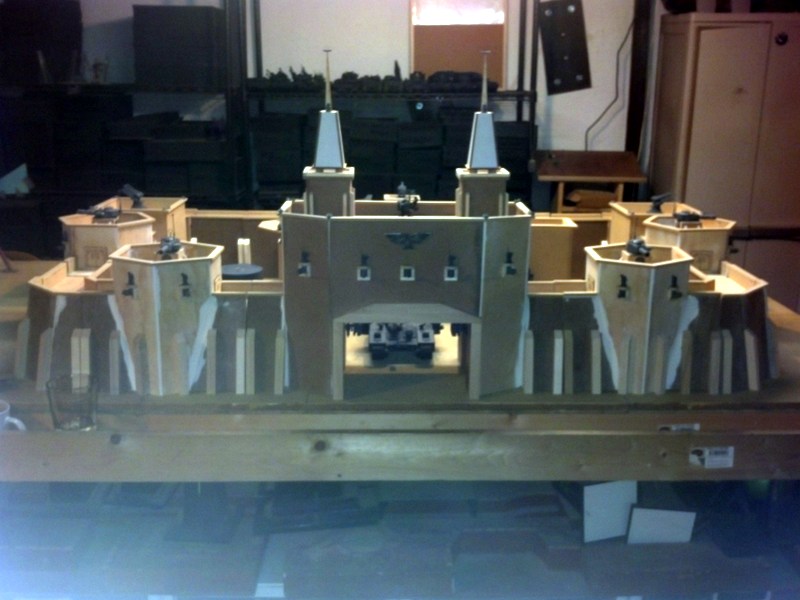
After two weeks work, this is the current state of the project:
Spoiler:
To-Do list:
Make weapon mountings
Build canon shields for the main gun
Make some hatches for the towers
Do the details on the courtyard buildings
(and...?)
Paint
Started simply enough, adding a few guns inside the gates.
The two smaller gates each have a pair of hurricane bolters and a pair of heavy flamers defending them.
Spoiler:
The main gate gets a pair of hurricane bolters and a pair of flamestorm cannons.
Spoiler:
I figure, if you needed to open the gate to let your vehicles out, you'd want some defent anti-infantry weapons covering that.
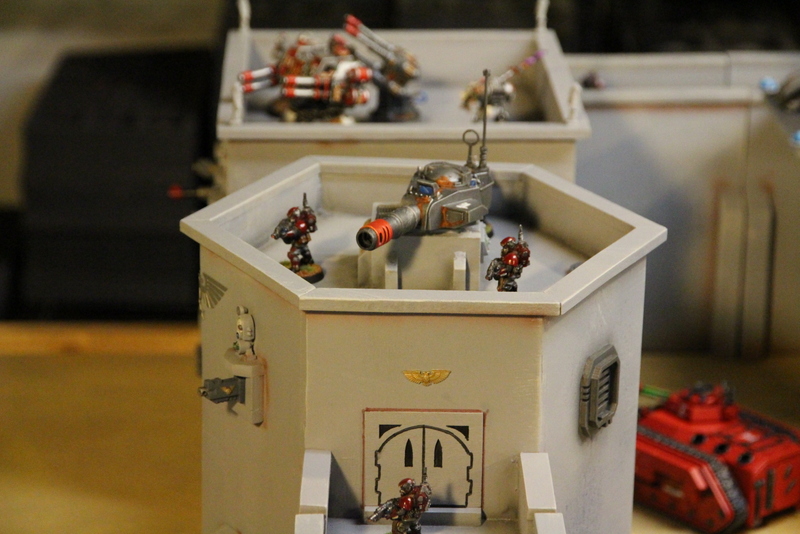
Next up is arming the walls. This is a lot of heavy bolters, and required cutting a lot of housing for them.
Spoiler:
But the results look good. I started adding some decorative elements too.
Spoiler:
Close-up:
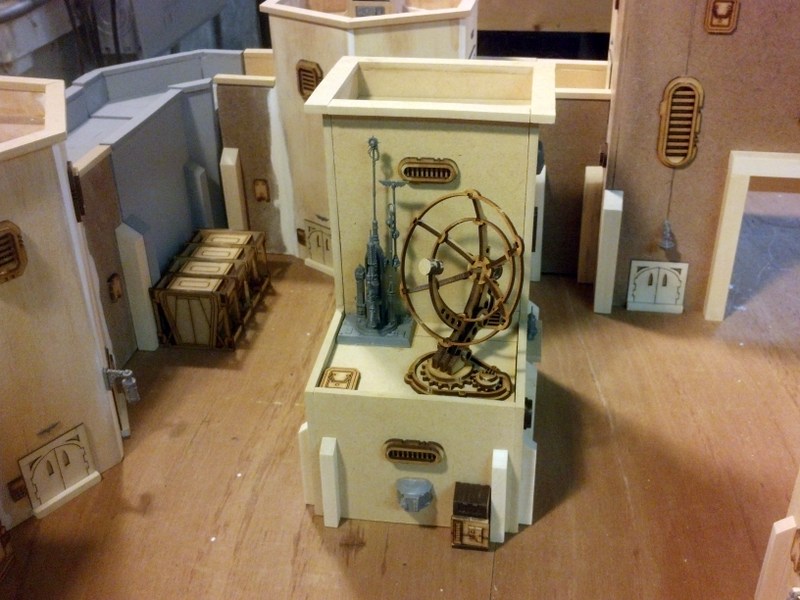
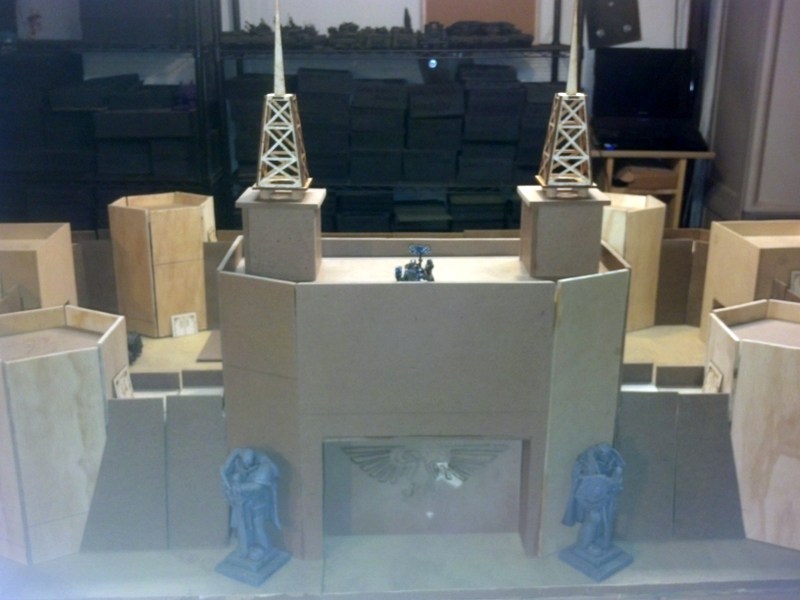
Added some decorations to the spires.
Spoiler:
Next, I made some nice chunky turret bases to mount the battle cannons on. Note the mini-butresses again, it's an easy way to tie things together.
Spoiler:
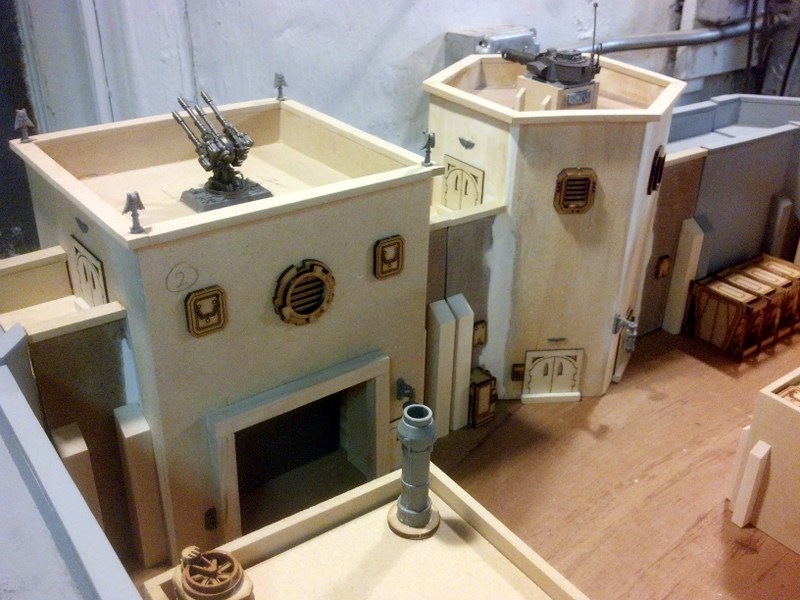
And attached mounts for anti-aircraft guns for the small gates.
Spoiler:
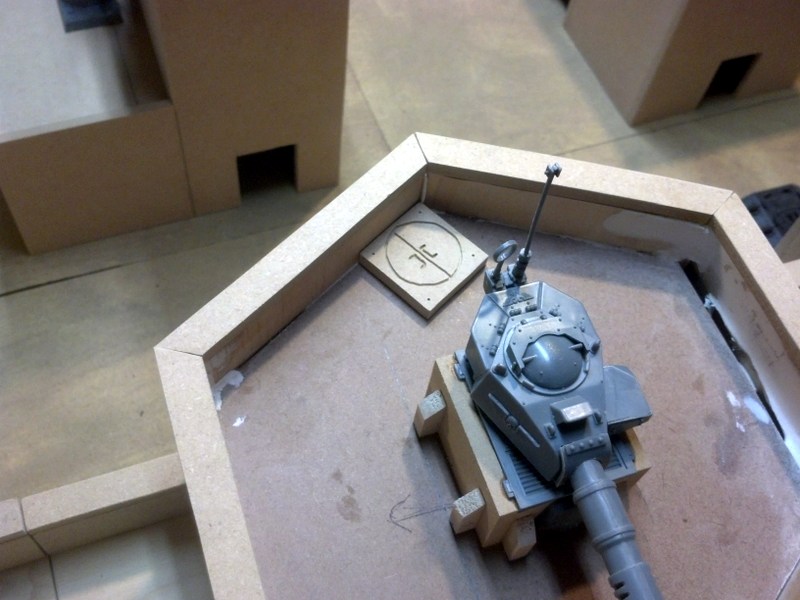
I made some hatches - this is just some engraving work with the dremel. Would be nice to have a CNC machine or a laser cutter and get straighter lines, but this is certainly less expensive.
Spoiler:
And, finally, the view from the back.
Spoiler:
Man, the back of the main gate is a lot of surface area with no details. But I don't have that many bits to work with. Maybe I'll add some exposed piping or something.
Well, they're glued now, I could knock them off, but I'm not really sure which ones would be best to remove. By keeping them on all the edges, it gives a bit of flexibility to alternate layouts (such as a smaller fort for non-apoc games).
Redbeard wrote: Well, they're glued now, I could knock them off, but I'm not really sure which ones would be best to remove. By keeping them on all the edges, it gives a bit of flexibility to alternate layouts (such as a smaller fort for non-apoc games).
Basically there are two ways you could redo it, either you keep the two buttresses an even distance from the edge (say, 1" from the edge on each side), or you leave one next to the edge and just have no buttress on the other side... sort of like this.. You'd still have to make sure it's the same distance between each buttress though, so I don't think it's worth the effort knocking them off! As I said I think the contrasting colours on the photo makes it stand out a bit, once primed and painted it probably won't be an issue. The fortress looks great!
Has it really been 20 days? Time flies when you're doing nothing but making a fort.
So, the last two days were focused on the interior buildings and the courtyard area.
Started out by framing all the doors. Just like in your house, having a big open space between two walls just doesn't look right, so you add a frame to make it look finished. More uses for square dowels. Note the use of a square edge to get everything plumb. (Also seen is my mouse sander, which is really good for finish sanding).
Spoiler:
I got the bright idea to make the garage doors functional. This took more time than it was probably worth, but I got working hinges for these doors.
Spoiler:
Added steps to the ramp for the landing pad, and some landing lights around the edge.
Spoiler:
Invading kroot like stairs.
And added buttresses and lights to all the buildings.
The barracks:
Spoiler:
The comm center / command tower:
Spoiler:
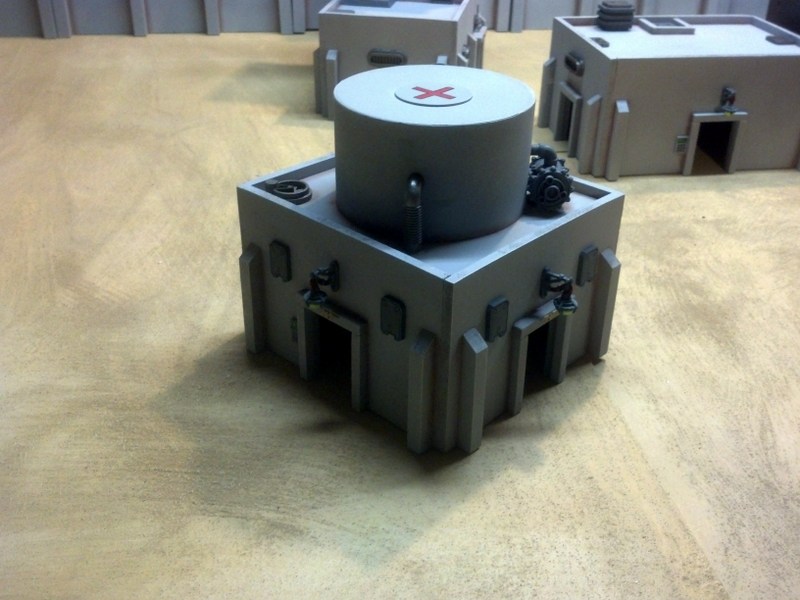
And the medicae and magazine: (not sure which will be which yet)
Spoiler:
And added lights to all the ground-floor doors for towers and gates.
Spoiler:
I'm at a point now where I really need my Miniature Scenery order to come in. I've done all the bulk architectural woodworking, and used up most of my building bits. I've still gone a stack of parts that I will work in, but I need to get the larger components placed first, and they're the ones from that order.
Been watching your progress for some time - good pace! And an interesting project! We don't normally see wooden terrain around this parts =) I really wish to see it painted. Good luck with this!
wow! It's amazing to see you starting from some wooden planks and turn a rough skeleton into something amazing! I wouldn't have the patience to do it ^^ I mean adding those little things such as lamps or finishing the tops of the buildings :p keep it up!
Ozymandias wrote:This is really coming along! When are we gonna see some paint on it?
Well, the must-be-done by date is Nov 16th. Between now and then, I've got the following major time to work on it:
Sat Oct 26th
Sat Nov 2
Sun Nov 3
Sat Nov 9
Maybe a day or two during that last week, if I take it off work.
That's not a lot to get this large of a project painted, but I think a lot of it will go fast, large sections will just be primed & dry brushed.
But, figuring I'll need at least two full days, that pretty much means painting has to start Nov 2 or 3. If I get the parts I'm waiting on sooner, I can get them attached and start earlier. If they don't show up by then, I'll have to paint it and add them after the fact (if at all).
storag wrote:Been watching your progress for some time - good pace! And an interesting project! We don't normally see wooden terrain around this parts =) I really wish to see it painted. Good luck with this!
Thanks. I really prefer working with wood versus foamcore. I find it easier to get good edges and measurements, as well as having several different base materials to work with (like all the square dowels used throughout the project). Plus, it has an added durability that's nice when you spend this sort of time on a project.
Automatically Appended Next Post: No package today :(
Being on a deadline is great, I've just scheduled an apoc game for myself and some friends, and it really inspired me to work on my own table. I can see it's the same here! Awesome work, keep it up!
Still no package, but I got some stuff done today anyway.
Lots of stuff that took a lot of time but didn't seem to warrant a lot of pics.
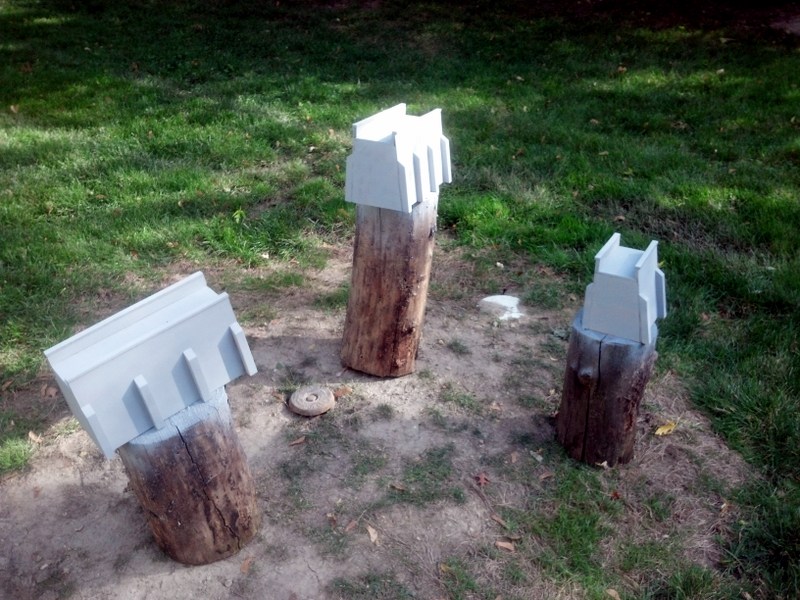
Started painting - primed the wall sections that won't be getting any more details.
Spoiler:
A few years ago I needed to have a dead tree removed from my yard, and I still have a load of firewood logs that proved useful as priming stands.
Realized I'd need a lot more primer, took a trip to Home Despot and bought a case of spray cans.
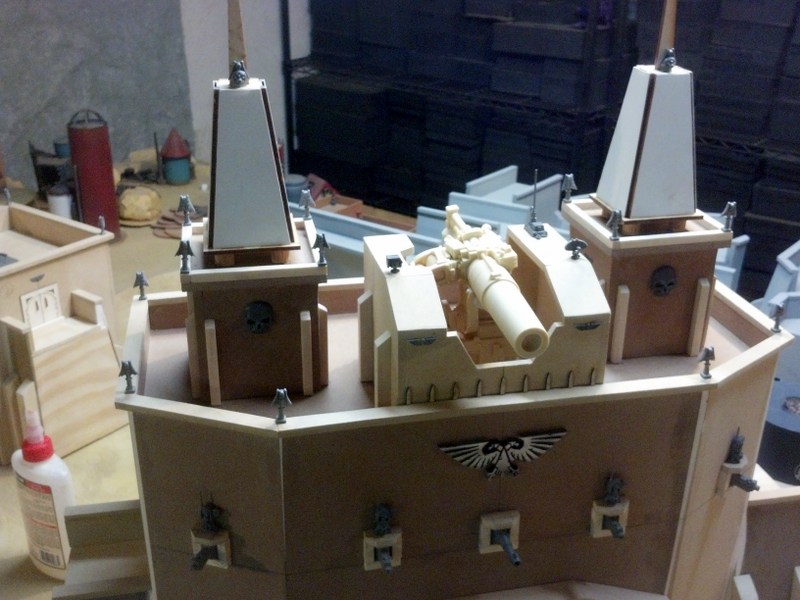
Once I got home, I fabricated a housing for the main gun, with a swivel mount.
Spoiler:
After that, I started adding more detail to some of the buildings. I started with the garage. I had a couple of cities of death building parts with mechanicus symbols on them, so I cut the symbols off of those (tedious...), but ended up with two usable pieces from it, one on the garage door, one for over the pedestrian entrance.
Added some tie-downs to the landing pad, and some rooftop structures. The fuel tank is made from a fish food canister with some pegasus hobbies piping and tops. The AC unit is from a storm raven kit, I think.
Spoiler:
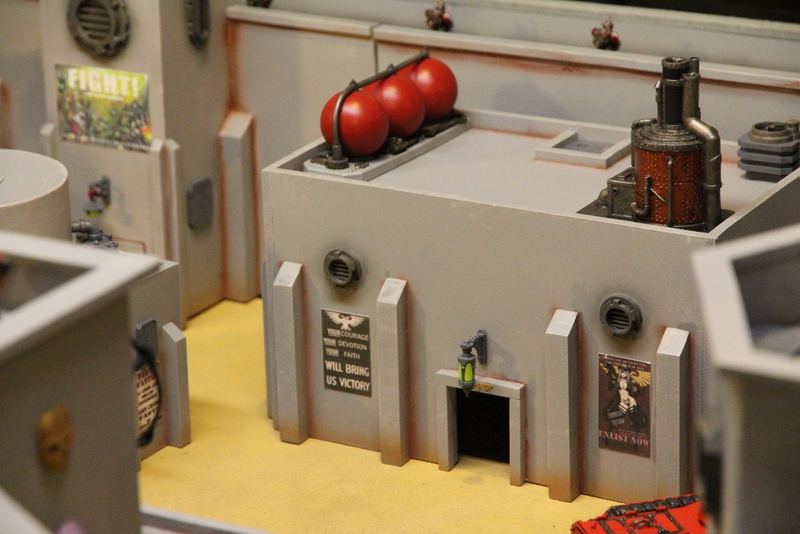
Then added some detail to the top of the medicae facility. I have a big storage container in the basement that I use to store interestingly shaped containers and cans, because they're always useful for terrain. This was the box to a watch I was given for 15 years at my company - now it's part of a medical center.
Spoiler:
I also did some paint tests. I'm thinking about doing the two spire tops in gold, and found a gold spray that looks pretty good. Also got a 'soft iron' prime+paint that looks like it will work great for the gates and metal surfaces, allowing for easy drybrushing over it.
This is some amazing work. It's really motivating me to start work on my own terrain. I don't get many games in while at uni, and building something like this would be so much fun.
Keep up the good work
CNC Miniature Scenery parts arrived yesterday. Today will consist of cutting and mounting these, and possibly priming everything!
Spoiler:
Automatically Appended Next Post: Popped out all the parts and assembled the multi-part stuff.
Spoiler:
Then started putting the parts on the buildings. Not much to say here, so I'll just leave the pics.
Spoiler:
The back of the main gate no longer looks quite so bare.
And the comm tower now actually has comms equipment.
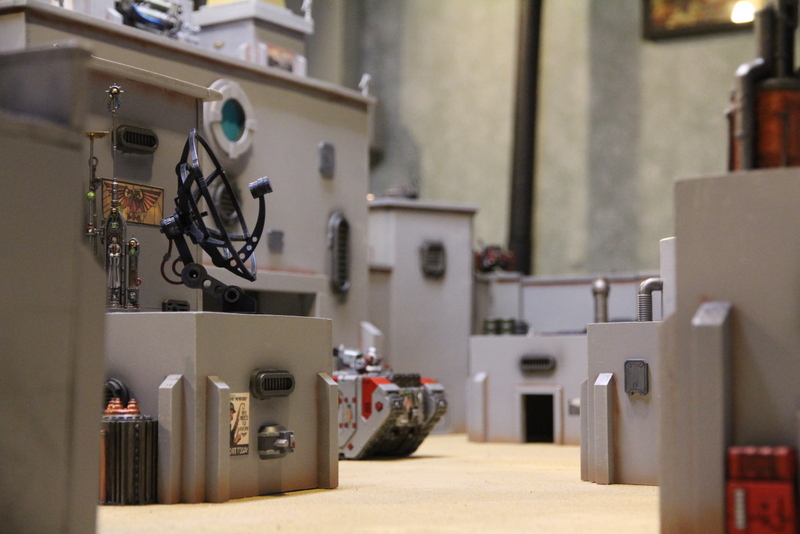
There's a lot of vents on the backs of towers and gates. You can also see some vending machines around, because people live in fortresses, and probably want a soda when off duty.
The armoury - with lots of extra stuff on the roof.
The garage/landing pad now has some spare parts stored on the roof, and a gas supply.
Barracks
A little back street in the fort.
And the whole thing taken from the side:
I'm now priming everything! Got a vent fan running and a respirator, as I'm through two cans already.
This looks awesome!
Just a quick question - in this pic:
Could you use a hole-saw without the centre drill bit to get a much ceaner round for the hatch? you'd need to mount the hatch piece in a vice and then use a drill press so the hole-saw doesn't skip around, or alternatively you could use the center drill bit and just fill the hole afterwards.
That way you only have to worry about putting a straight line in - and straight lines are much easier than a circle!
Extremely impressive. Really good planning, execution. Most of all I'm just impressed by the scale. You've got a proper workshop going on there! Very jealous.
ebola_one wrote: This looks awesome!
Just a quick question - in this pic:
Could you use a hole-saw without the centre drill bit to get a much ceaner round for the hatch? you'd need to mount the hatch piece in a vice and then use a drill press so the hole-saw doesn't skip around, or alternatively you could use the center drill bit and just fill the hole afterwards.
That way you only have to worry about putting a straight line in - and straight lines are much easier than a circle!
I guess I could have, though I don't actually have a drill press. As it is, I discarded those hatches and went with the pieces from Miniature Scenery instead, as they're laser-cut and very precise.
Automatically Appended Next Post: Just a quick morning update - here's the fortress all primed and ready for work
Automatically Appended Next Post: So today, I airbrushed some shading around all the buttresses and battlements, and then drybrushed some highlights over the whole thing.
Spoiler:
Then, while watching football, I did a bit of detailing, filling in windows and outlining doors.
Simply an amazing project, sir. I'm wondering how you are planning on playing the battlefield itself with a fully surrounded fort like this. Most 'forts' I see built for themed Apoc games are quartered on a side of the table with only a part of a single wall side represented on the tabletop(which with the rules makes it quite odd IMO, as flanking units can get inside the fortification without house rules).
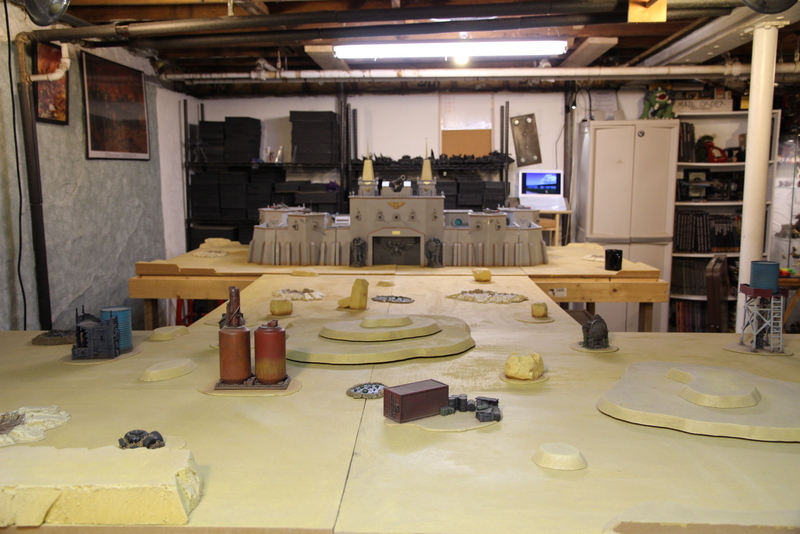
I had a rough sketch of where it will fit back in the first post in the thread. It's going to be occupying a strategic location at the foot of a passage between two land masses.
I've got the vending machines done (printed out a photo of actual vending machine contents and pasted it on to the one), the ultramarine shipping container, some trash cans, crates of ammo, vehicle repair parts, the landing pad, radar dish, and a bunch of propaganda posters ready to apply to walls.
Spoiler:
And big huge fortress parts.
Spoiler:
So far, I've done all the Aquillas, in gold, all the vents, in gunmetal, and a bunch of shading. Next up is the lights (dark grey and green light), the weapons (dark grey and gunmetal), and the hatches (dark grey). You can see the marker I'm using for a lot of the thin shading lines, because it's fast and easy.
The different between painting a miniature and a macroature (I think I made up a new word) is that the macroatures are heavy and hard to manipulate. Other than that, you just use a larger brush and follow the same basic concepts.
In retrospect, making a couple of ruined sections is a great idea. I won't have time to do it before our game though, so maybe after.
As for enemies in the courtyard - well, that's what the opponent's troops are for.
When I visited real forts last summer, none of them had cannons facing into the fort. The goal is to keep the bad guys on the outside, so most of your budget gets spent doing that. You have to figure that anyone who gets in will be taken care of by the guys in the fort.
Decided to push through after getting home form the game today. Got the last piece's details done, then went over the bottom of all the parts with some airbrush shading with a sand color, and the around the vents with some dark shade.
Spoiler:
The whole thing!
Side gate and tower
Comm center
Armoury
Barracks
One of the other guys who will be playing on Saturday took the battle cannons and anti-air guns to help out. Other than those, all I need to do is attach some aquillas and posters, and then apply a matte finish protective coat.
Absolutely incredible! It was awesome to read through the entire blog, from beginning to end, and watch this take shape from an unadorned ("plain" would be the wrong word, given all the high school math and carpentry skill that you had to employ...) wooden structure to this monument of the Imperium!
We finished the game up early this evening. In the end we had
Forces of Evil (Attackers) led by the Tau Sept: Tau Detachment #1 3,000 Points
Tau Detachment #2 3,000 Points
Daemons Detachment #1 3,000 Points
Daemons Detachment #2 2,000 Points
Necrons 3,000 Points
Forces of Good (Defenders) Led by Hive Fleet Gjallarhorn Tyranids: 3,000 Points
Ultramarines Detachment #1 3,000 Points
Ultramarines Detachment #2 3,000 Points
Dark Eldar 2,000 Points
Fortress 3,0000 Points
I won't spoil much but it was a good game overall with epic encounters, dice rolls, and fun. It came down to a single melee combat on the last turn..... and I won't ruin it here...


 Uhmmm.... YES!!!!