Forum adverts like this one are shown to any user who is not logged in. Join us by filling out a tiny 3 field form and you will get your own, free, dakka user account which gives a good range of benefits to you:
No adverts like this in the forums anymore.
Times and dates in your local timezone.
Full tracking of what you have read so you can skip to your first unread post, easily see what has changed since you last logged in, and easily see what is new at a glance.
Email notifications for threads you want to watch closely.
Being a part of the oldest wargaming community on the net.
If you are already a member then feel free to login now.
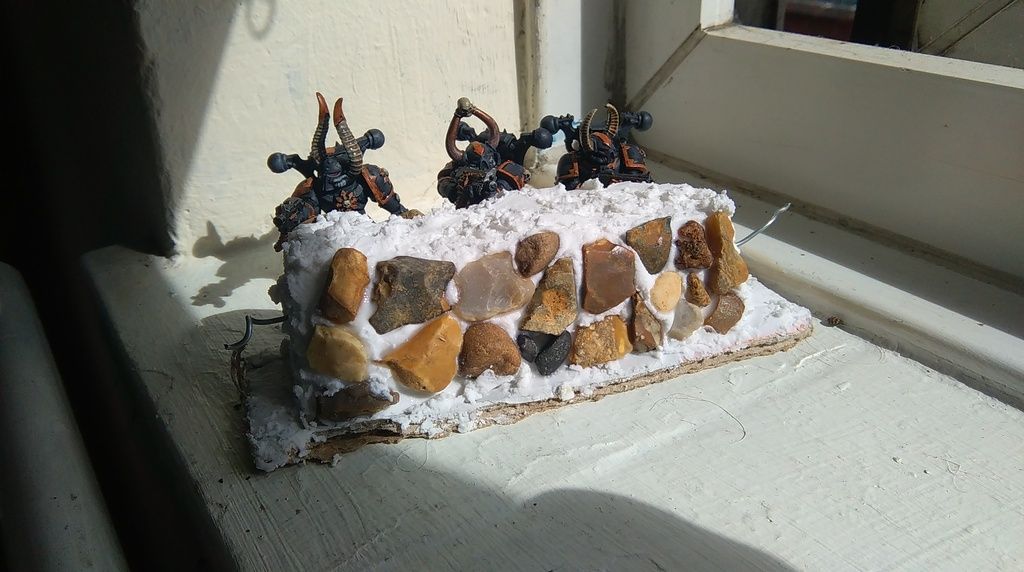
Here's a rough workup of the base to my piece. I decided to go with a bug mechanical pump sucking slime from the bowels of the earth..I guess that sounds vaguely colonic...regardless, that's my plan and I'm sticking to it! haha
I went ahead and roughed out the shapes with foam, then changed my mind and decided to use bark for the rocky edges to save time. I also went ahead and shaped the pit and put in a few wooden supports to brace it during the dredging. I imagine I'll have to paint that area completely before putting in the pipe. Which i suppose will also need to be painted...I was thinking of pouring in some green slime at the bottom of the pit.
Still debating whether to paint green and pour clear or to pour green...Probably the former. Maybe add a drop of radioactive ink to it if I can find some haha
That's all for a while. I have other stuff to wrap up first! Just wanted to make sure I started something
Yeah... I'm having a bit of trouble with the car =/ How to do dents? The weathering turned out fine imo, I also pulled off the bumper some, so it's hanging by a thread and a front tire. With the tire I'm thinking about trying to leave that side of the car on a cinder block, both to hide the ugly attachment point, and to show it's been there for a while. Otherwise, since this is a really cheap model, I'm not sure what else to do. The whole top is one piece, there's no engine (sadly) and nothing really opens, it just has lines.
Anyone got a thought lemme know!
Otherwise I'm starting work on the flora around the portal, and other filler type things (yet to be determined!). I expect to need quite a lot of more time to get the paint the way I want it.
Guildenstern, you're just looking for a way to dent the car? At risk of sounding like a smartass, why not just dent it with a ball peen hammer or something :p? If you mean add texture or weathering or some sort, you could resort to the old, "throw it in a box of rocks and shake it for a while till you like the look" trick.
Edit: just looked at your pictures again and realized that you've already painted it you still may be able to get away with precise hammering. maybe use a nail punch? Or just use next-level shading to make 2d dents that look 3d. But that's beyond my ability to advise on, so I'll leave that to my betters haha.
This message was edited 2 times. Last update was at 2016/04/10 02:42:16
Looking great gang. @TerrainWalker sounds gross and interesting just make sure it's cleat how it's a Portal also (also check out new blog post with prize goodness!
TerrainWalker wrote: Guildenstern, you're just looking for a way to dent the car? At risk of sounding like a smartass, why not just dent it with a ball peen hammer or something :p? If you mean add texture or weathering or some sort, you could resort to the old, "throw it in a box of rocks and shake it for a while till you like the look" trick.
Edit: just looked at your pictures again and realized that you've already painted it you still may be able to get away with precise hammering. maybe use a nail punch? Or just use next-level shading to make 2d dents that look 3d. But that's beyond my ability to advise on, so I'll leave that to my betters haha.
I don't mind it's painted, I really only did the one coat so far so it's not as far along as it might appear, mostly the undercoat is the rust I was trying out and I a can always fake that again later with weathering. But honestly it's a plastic model and I don't see how to dent it/make it broken without making it obvious it's, well, plastic =/ and yeah, painting of dents may be beyond me.
Oh well, I'm going to keep looking through various youtube videos maybe I'll find a technique that'll help, model railroaders always have a lot of good tricks up their sleeve!
thanks for the help anyway, I'll keep you all posted how it goes ^_^
well...if hammering wont work for you...then you could "hack" small lumps of plastic out of the body of the car...in areas where bumps would be most likely... just with your trusty knife...since these then would be mostly square, flat surfaces then after cutting where the former shape was probably round, this would be a way to get that bumped feeling/ look to that spot... gosh... describing something like that is a feat...
Heat is the answer. you dont have to go as extreme as me and my blowtorch, a couple seconds over a candle or even a match will soften the plastic enough to give under a bit of pressure say from something angular, that would give the impression of dents and creases. Try it on a spare bit of plastic. WARNING! Fumes. DO NOT BURN THE PLASTIC.
2016/04/10 16:44:46
Subject: The -=]_=- Terrain Competition Thread -=]_=- LoER Terrain Contest #18: The Portal
Huh. I have a bigger soldering iron... Think I'll have to hold it in close proximity to my plastic cars and see if that will do . idea factory, you folks.
Camkierhi wrote: Heat is the answer. you dont have to go as extreme as me and my blowtorch, a couple seconds over a candle or even a match will soften the plastic enough to give under a bit of pressure say from something angular, that would give the impression of dents and creases. Try it on a spare bit of plastic. WARNING! Fumes. DO NOT BURN THE PLASTIC.
man... i always forget about heat...
how hot does any medium need to be to make plastic bendy? would hot water ...around 100°c be enough?...i´ve never tried that....hmmmmm
best part is, I really need these techniques because I'm planning a junkyard themed board for my malifaux stuffs soon! Which is why I was collecting model cars again in the first place lol
best part is, I really need these techniques because I'm planning a junkyard themed board for my malifaux stuffs soon! Which is why I was collecting model cars again in the first place lol
The potential epicness in this idea is astounding. Pics when it happens?
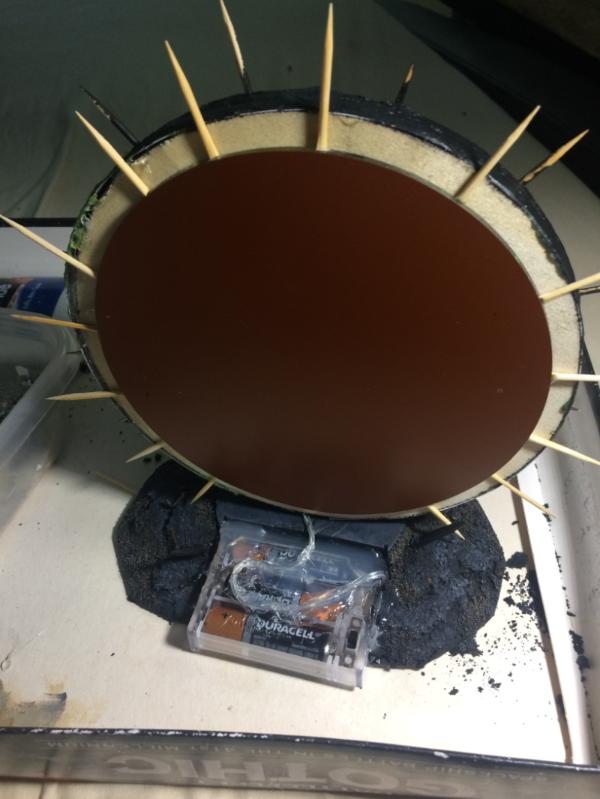
Automatically Appended Next Post: Okay, got the whole fething thing finally assembled, and the epoxy is drying now. I think it's important that it still look good even with the flashy LED mirrors off, so the detail work will take some time. But, since we don't post finished pics, this'll probably be the last WIP I submit.
Spoiler:
This message was edited 1 time. Last update was at 2016/04/11 00:27:29
War Kitten- Nothing evens the odds like a reaper chainsword to the naughty bits
Sgt. Vanden- And now I'm a whale with panties. Can't see how this day can get any better.
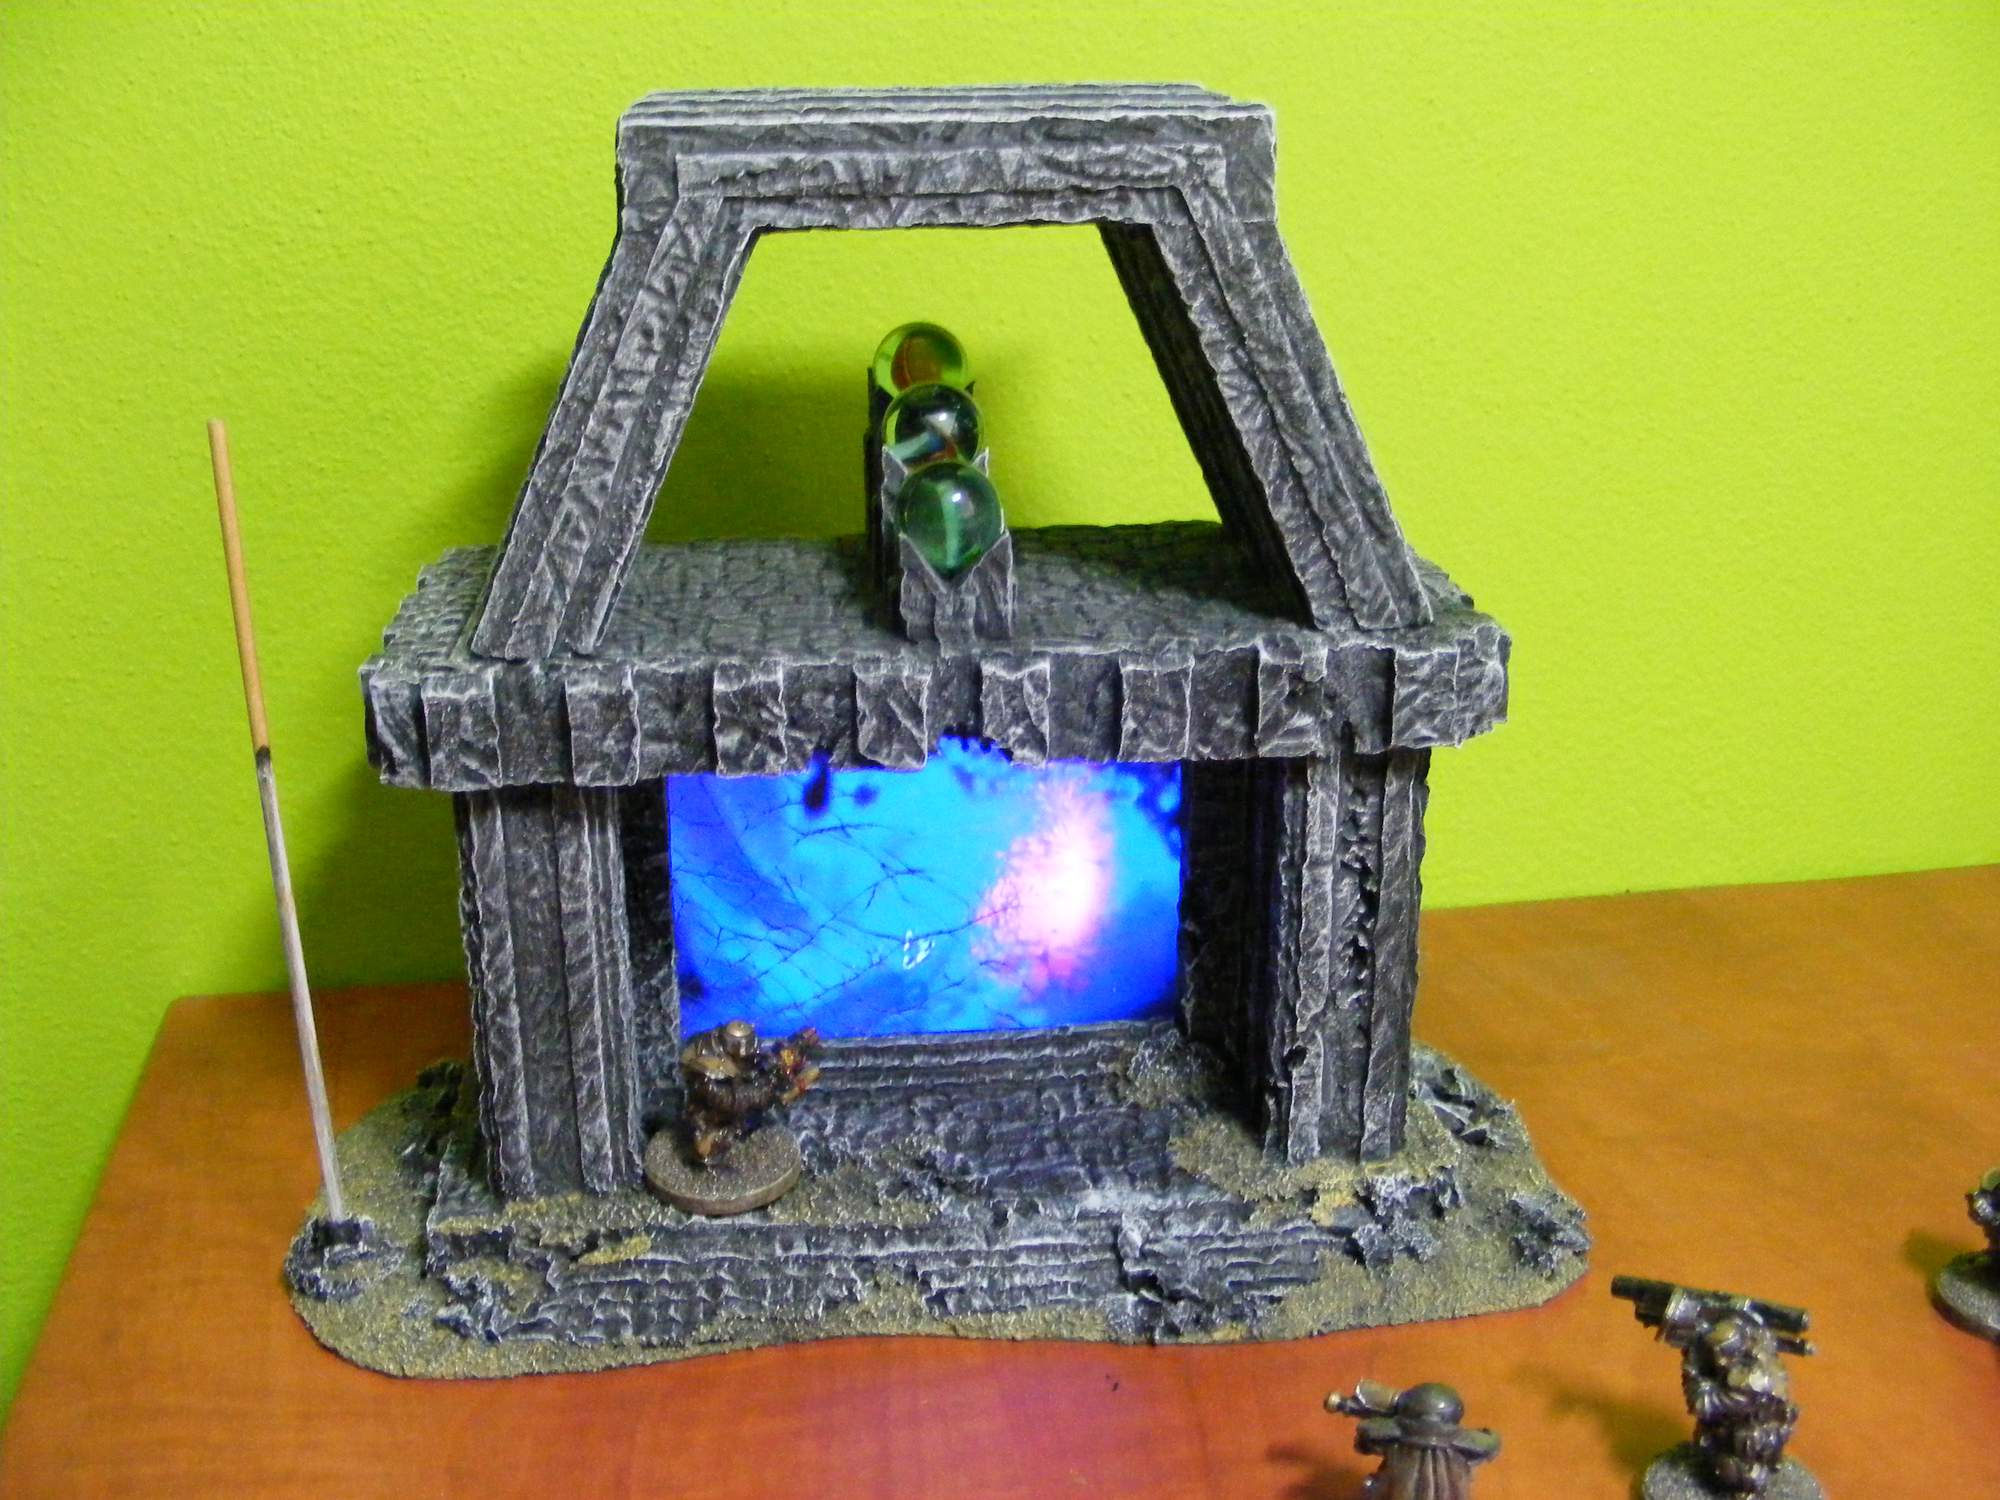
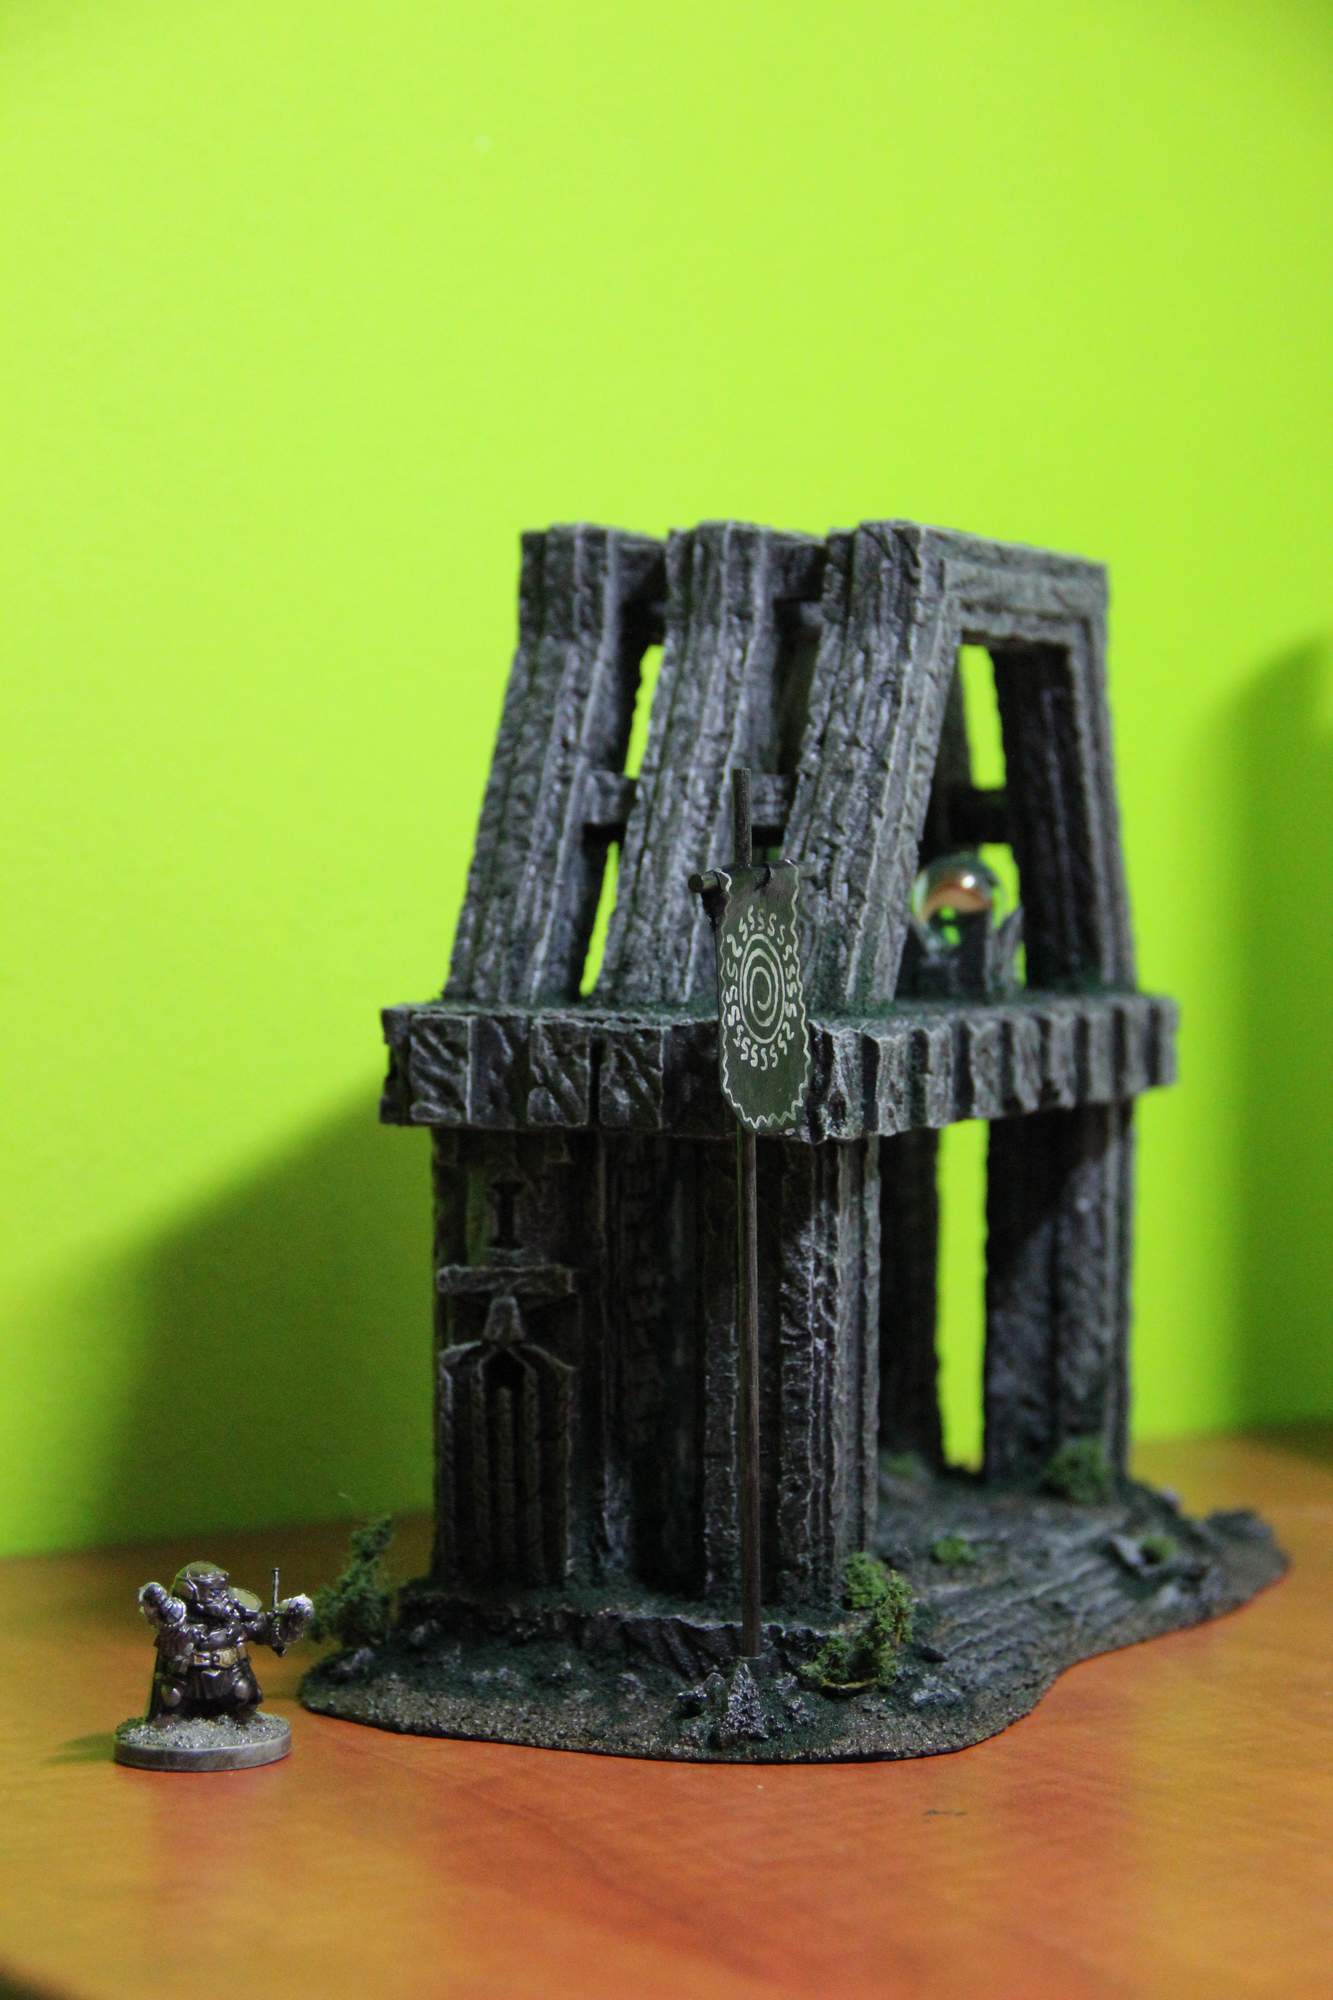
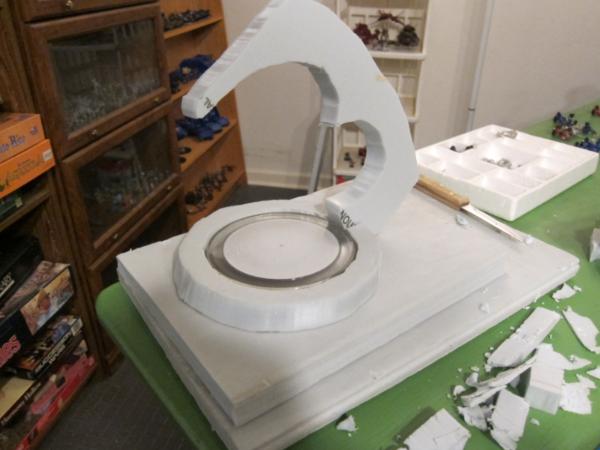
Carved out a slot in the hill potion for the light feature:
That was just a hack job with a knife, it should all be hidden. I took the hot wire to the top layer to make the ring base for the webway. Here is where I’m at:
I need to lower the arch, so the base meshes with the ring, and then a lot of smoothing. Plus carve the hill. Not sure if I want to do a gentle slope, cliffs, or some combination. Was also thinking about a path to the portal from table level.
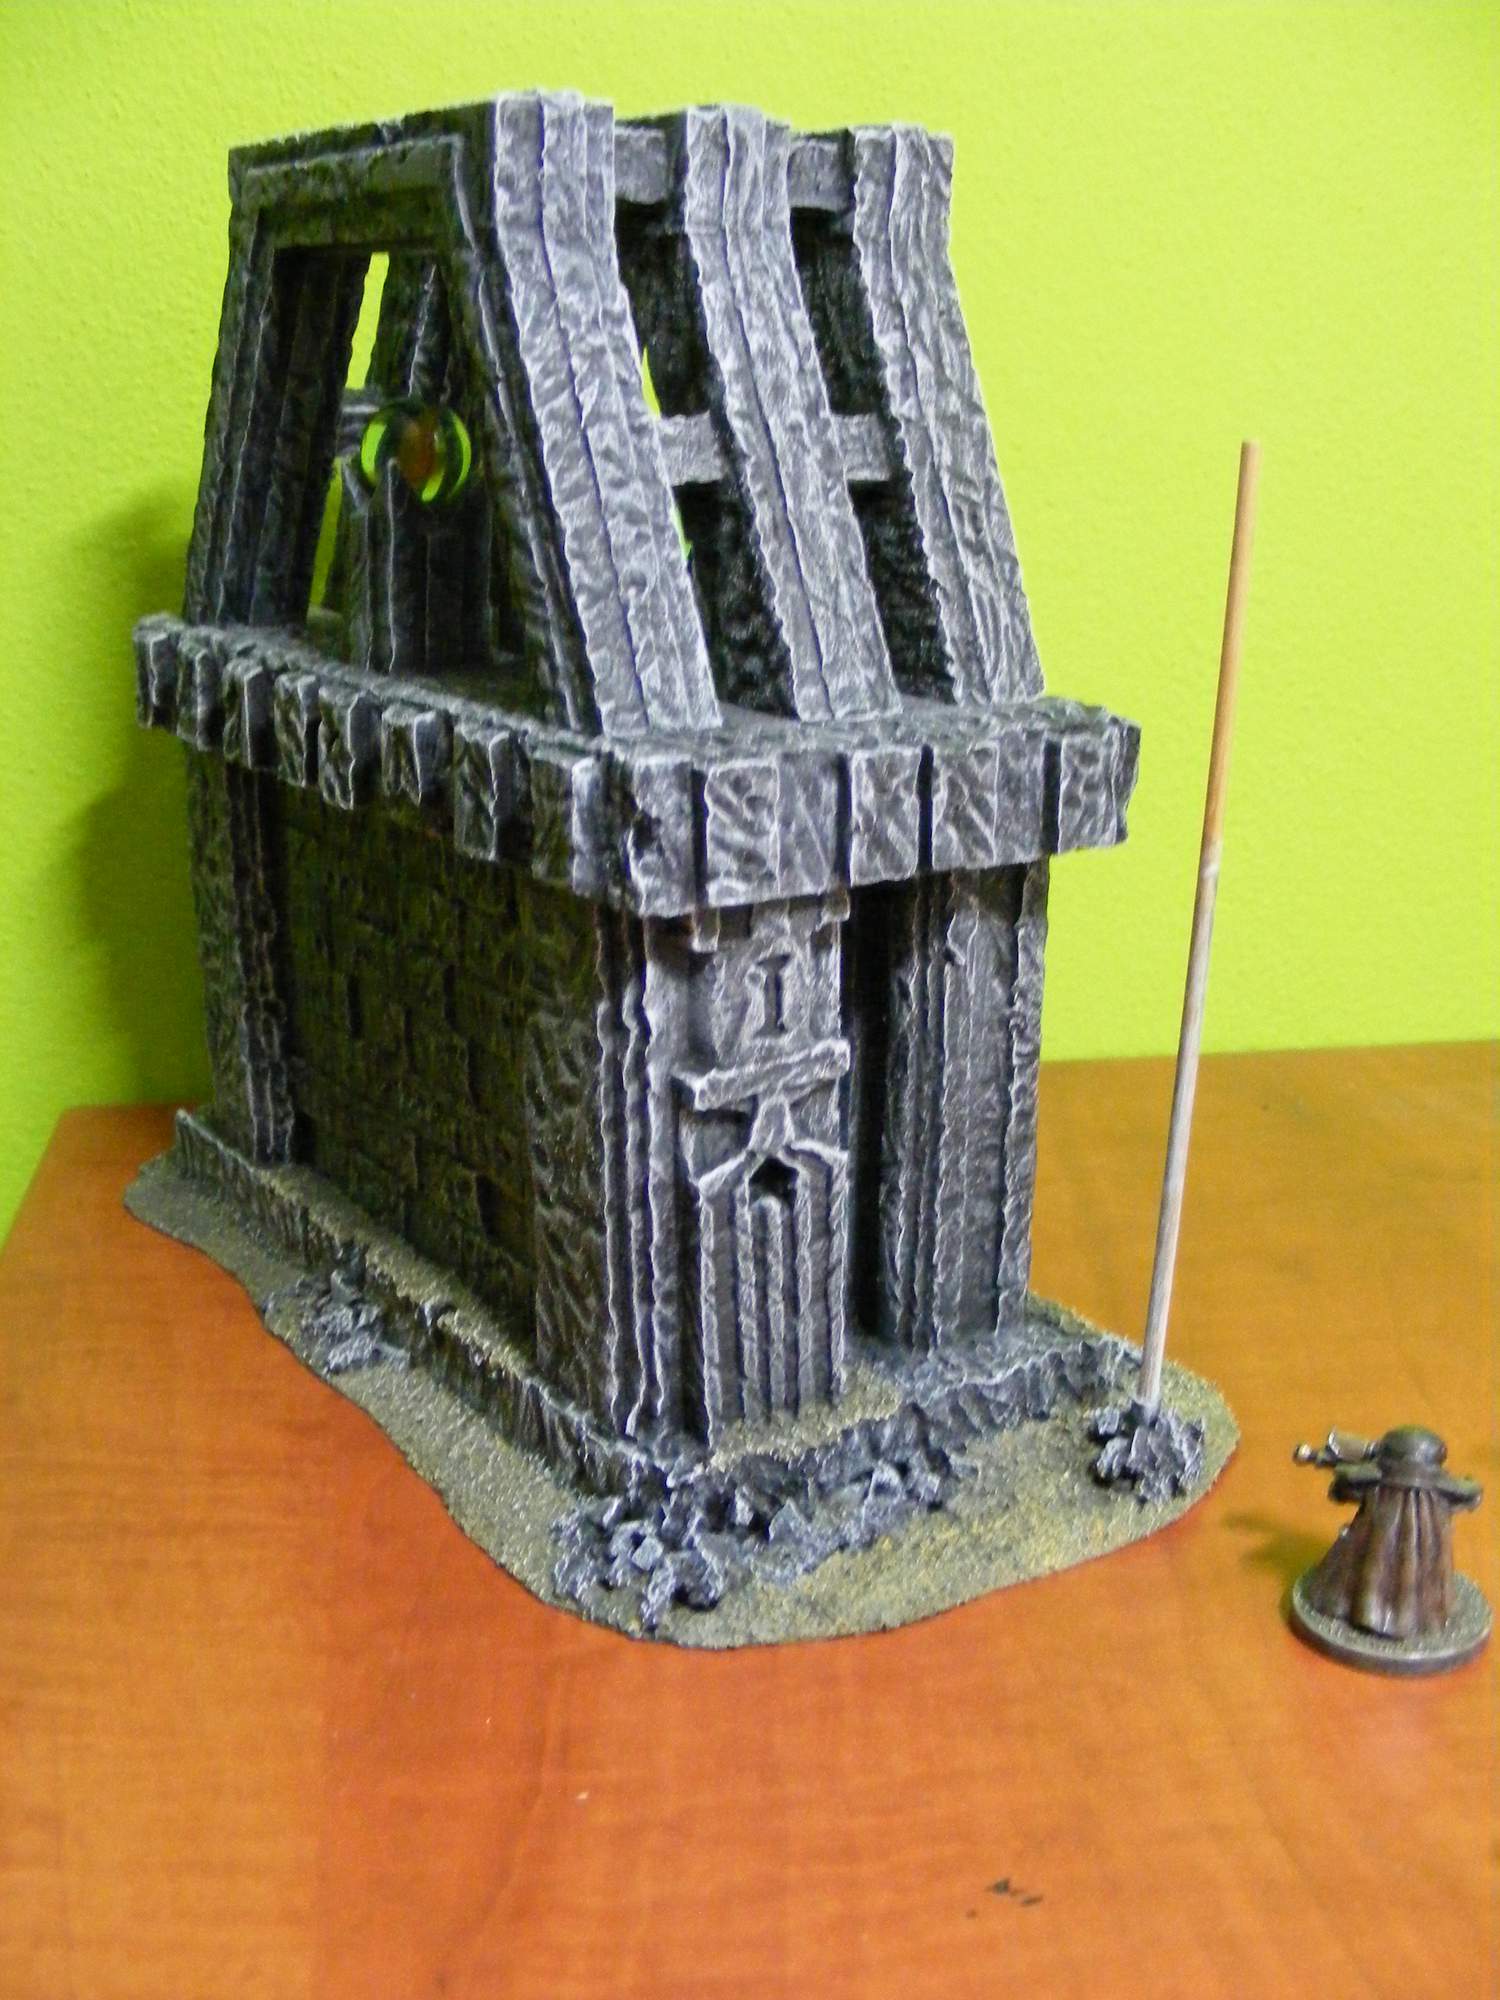
Picked up some 150 grit medium sandpaper at the store yesterday. My experiments with the 100 grit corse I had on hand were a little to rough for finished work.
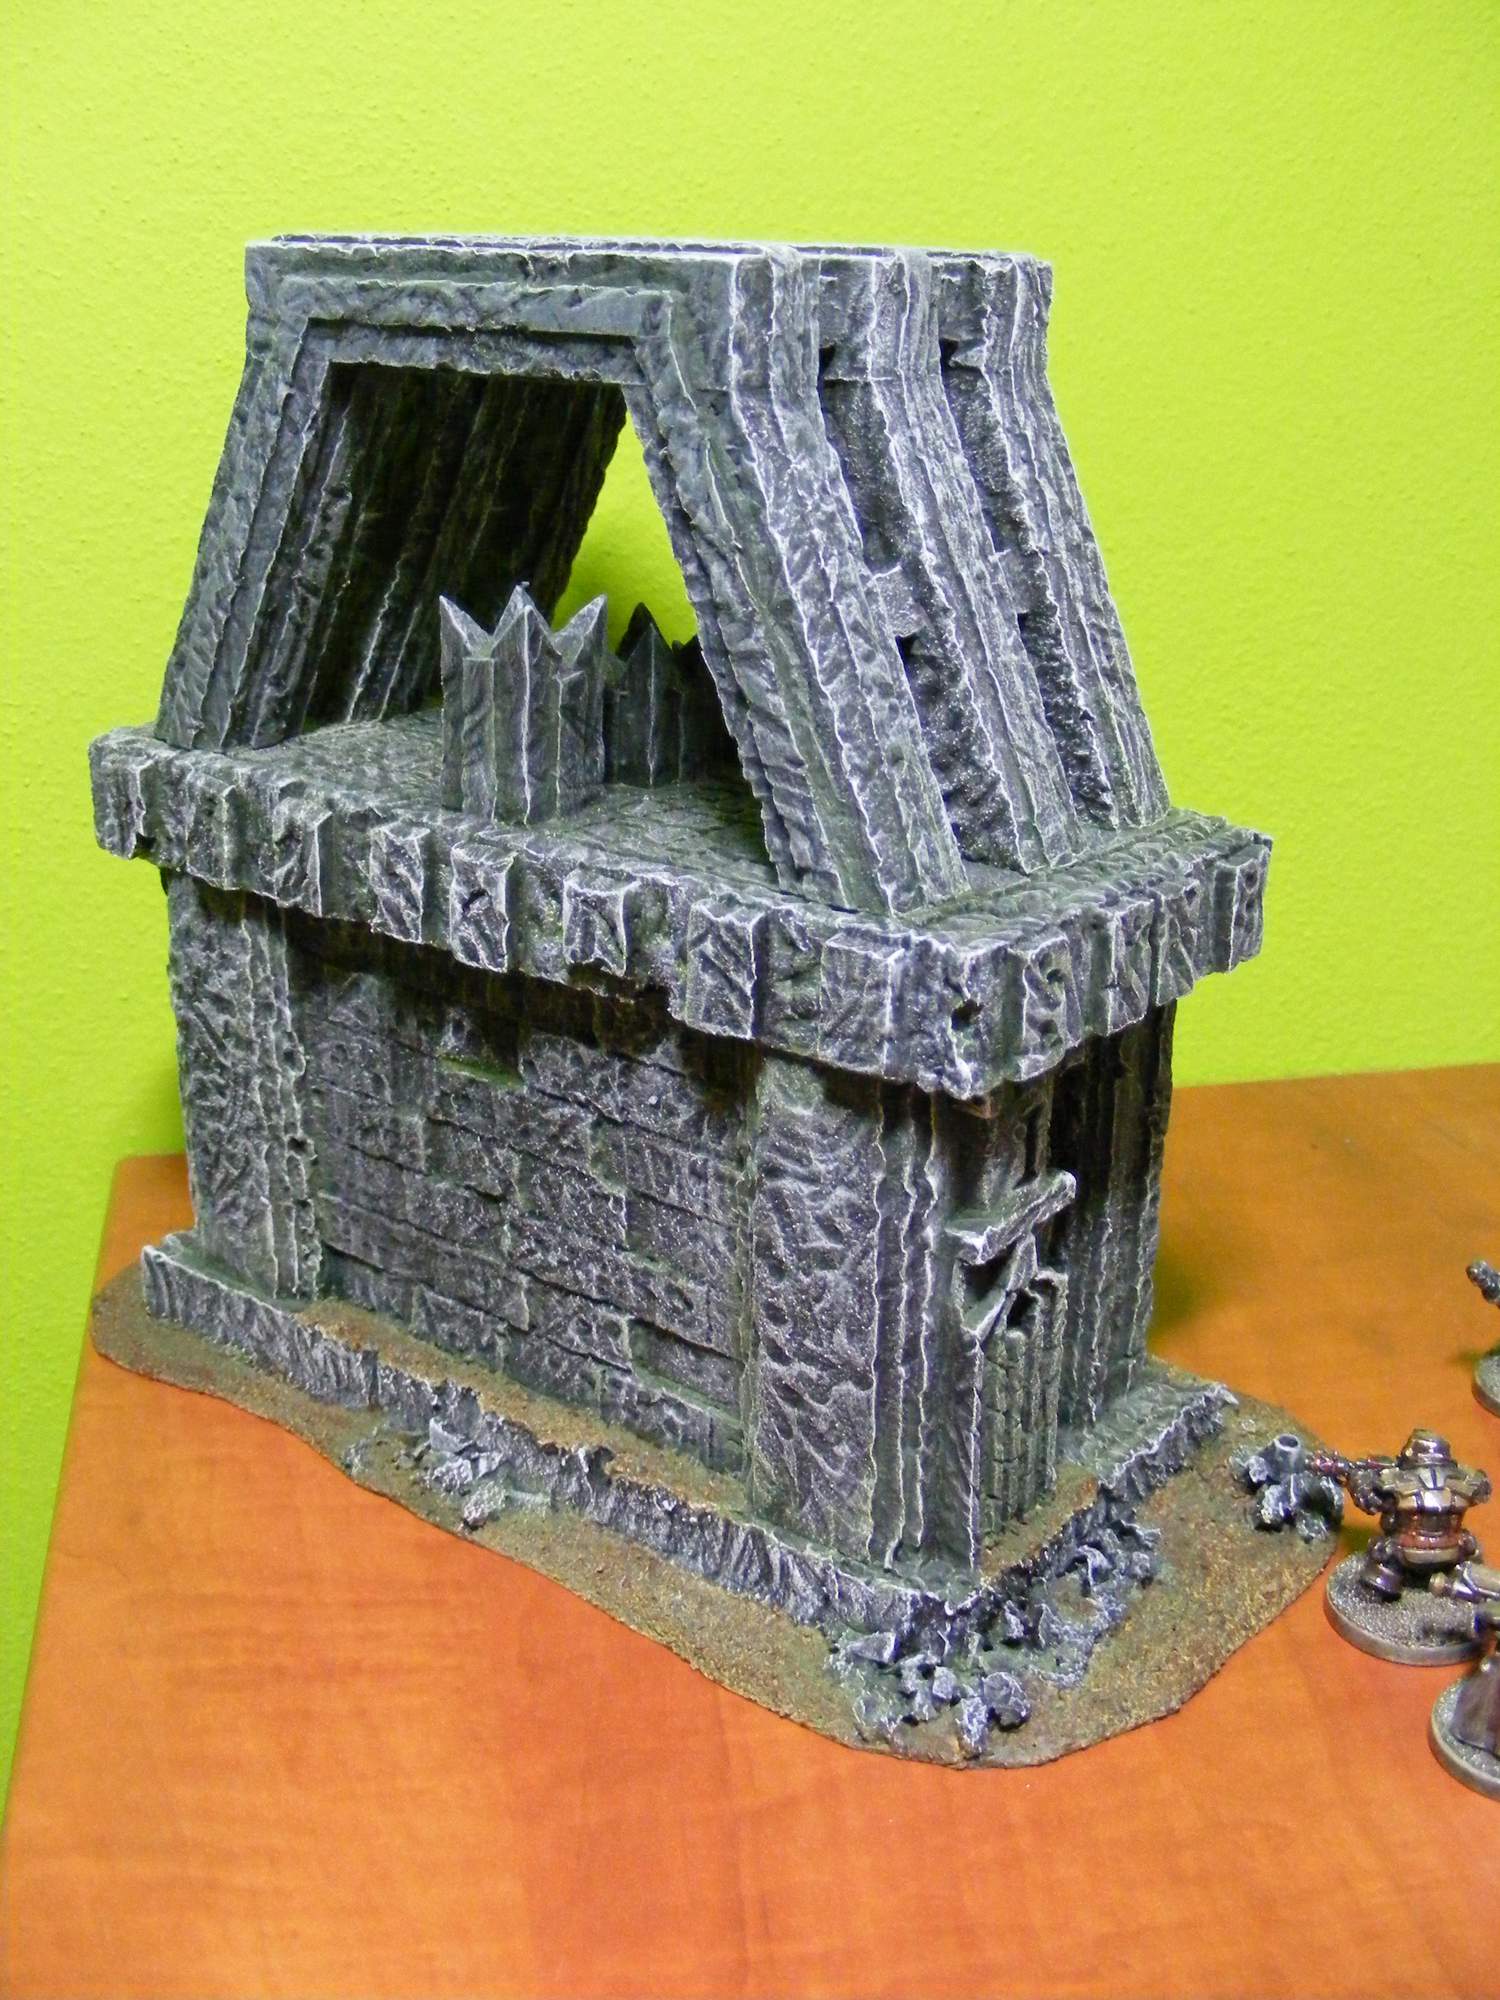
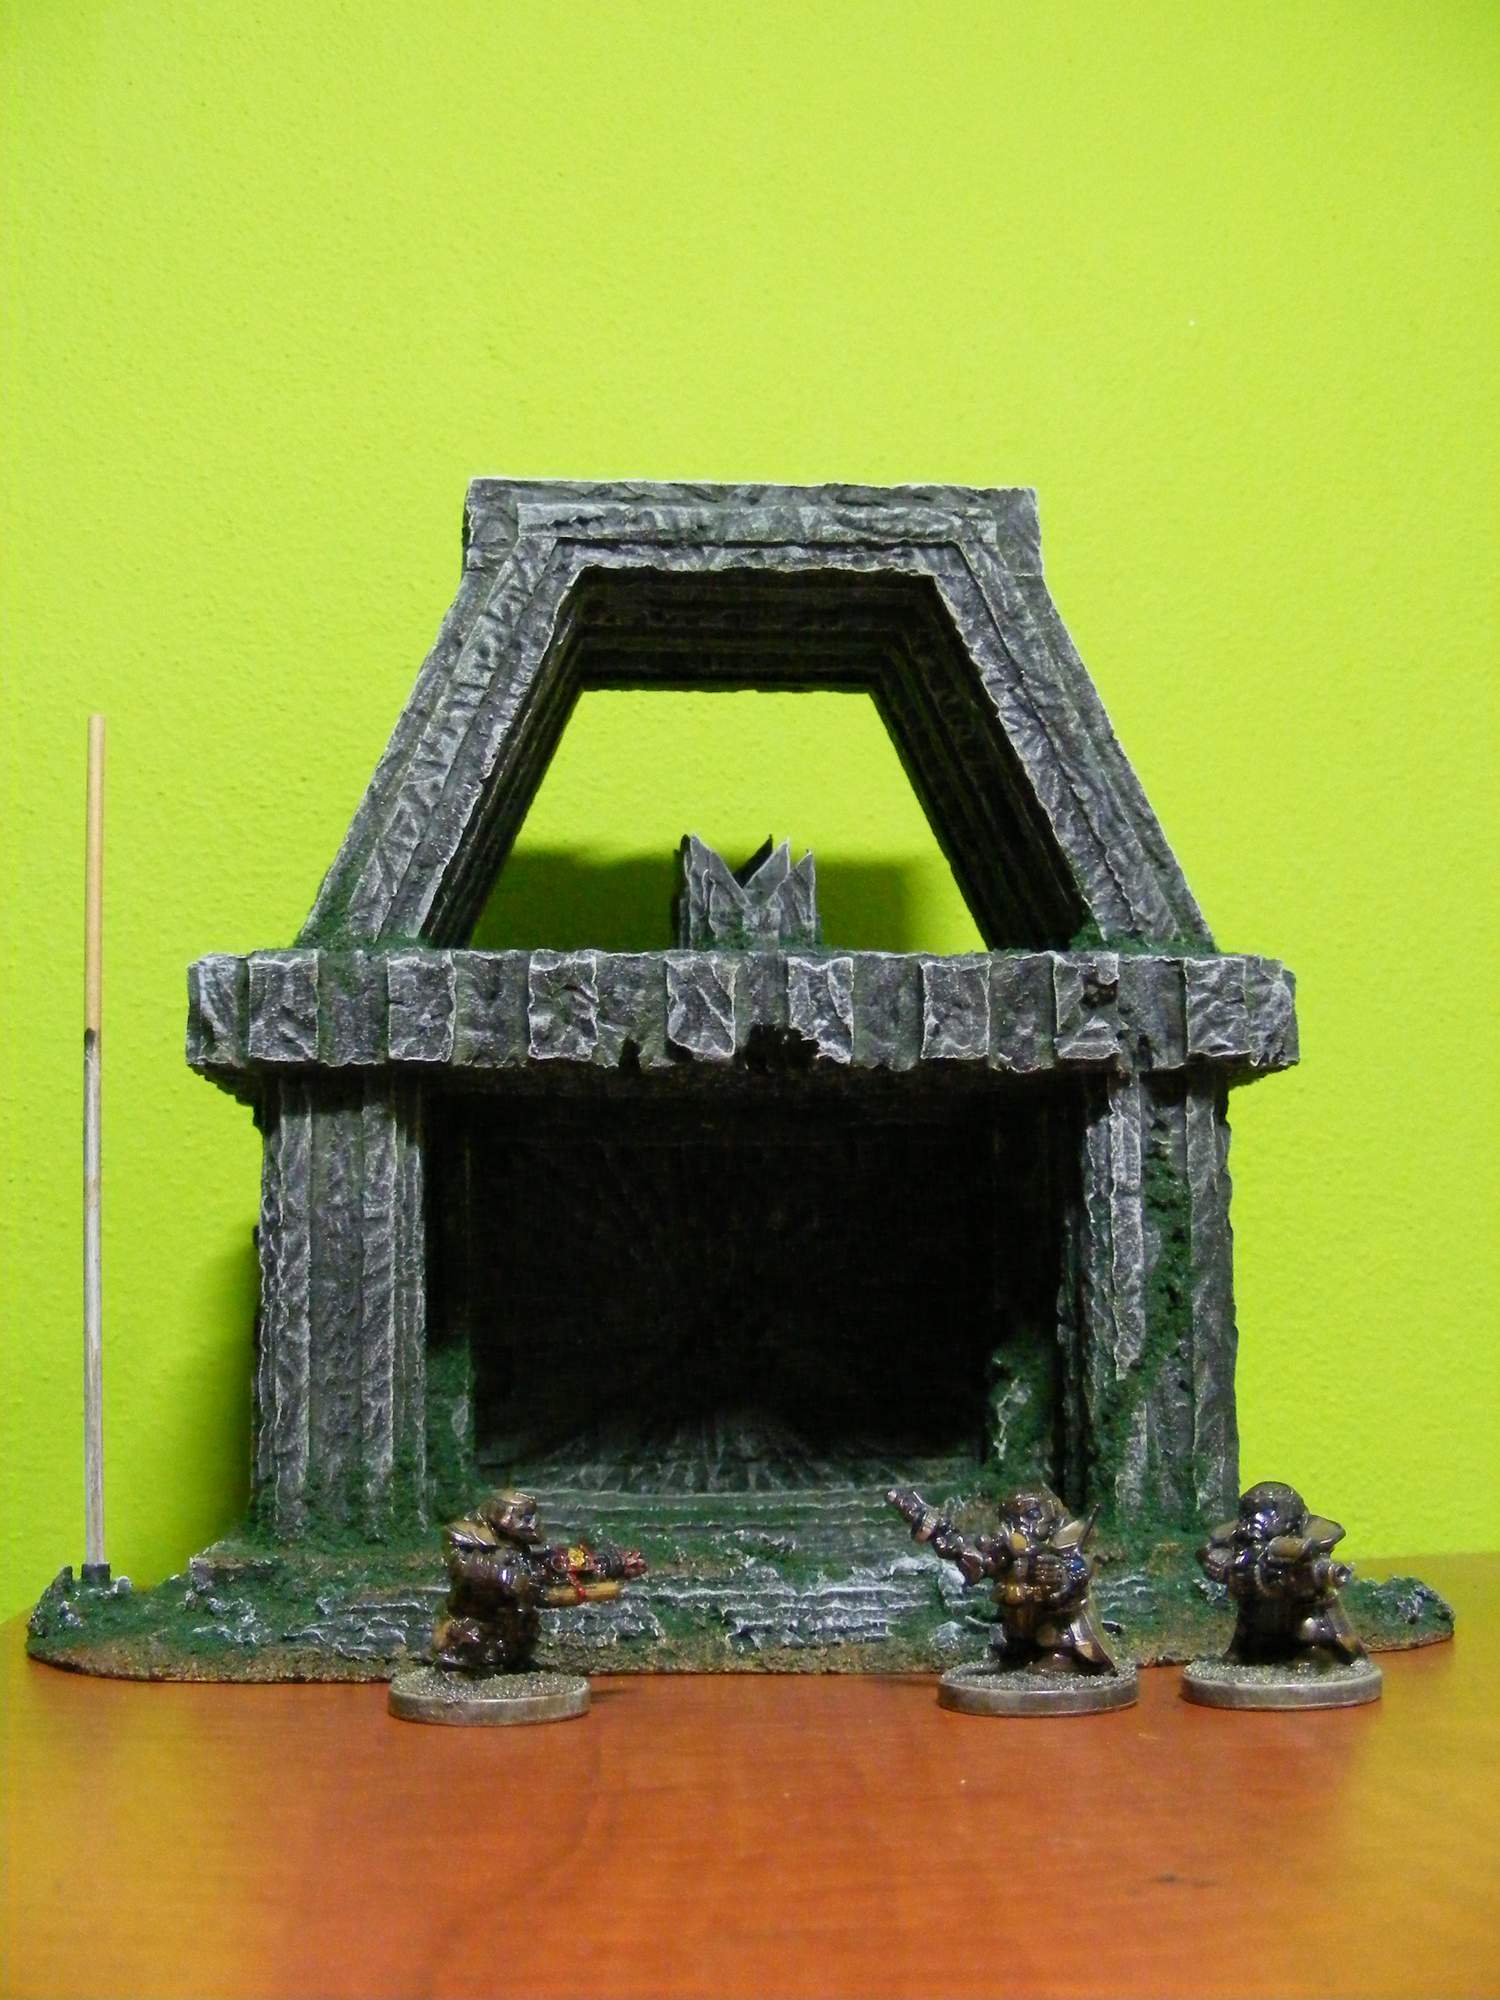
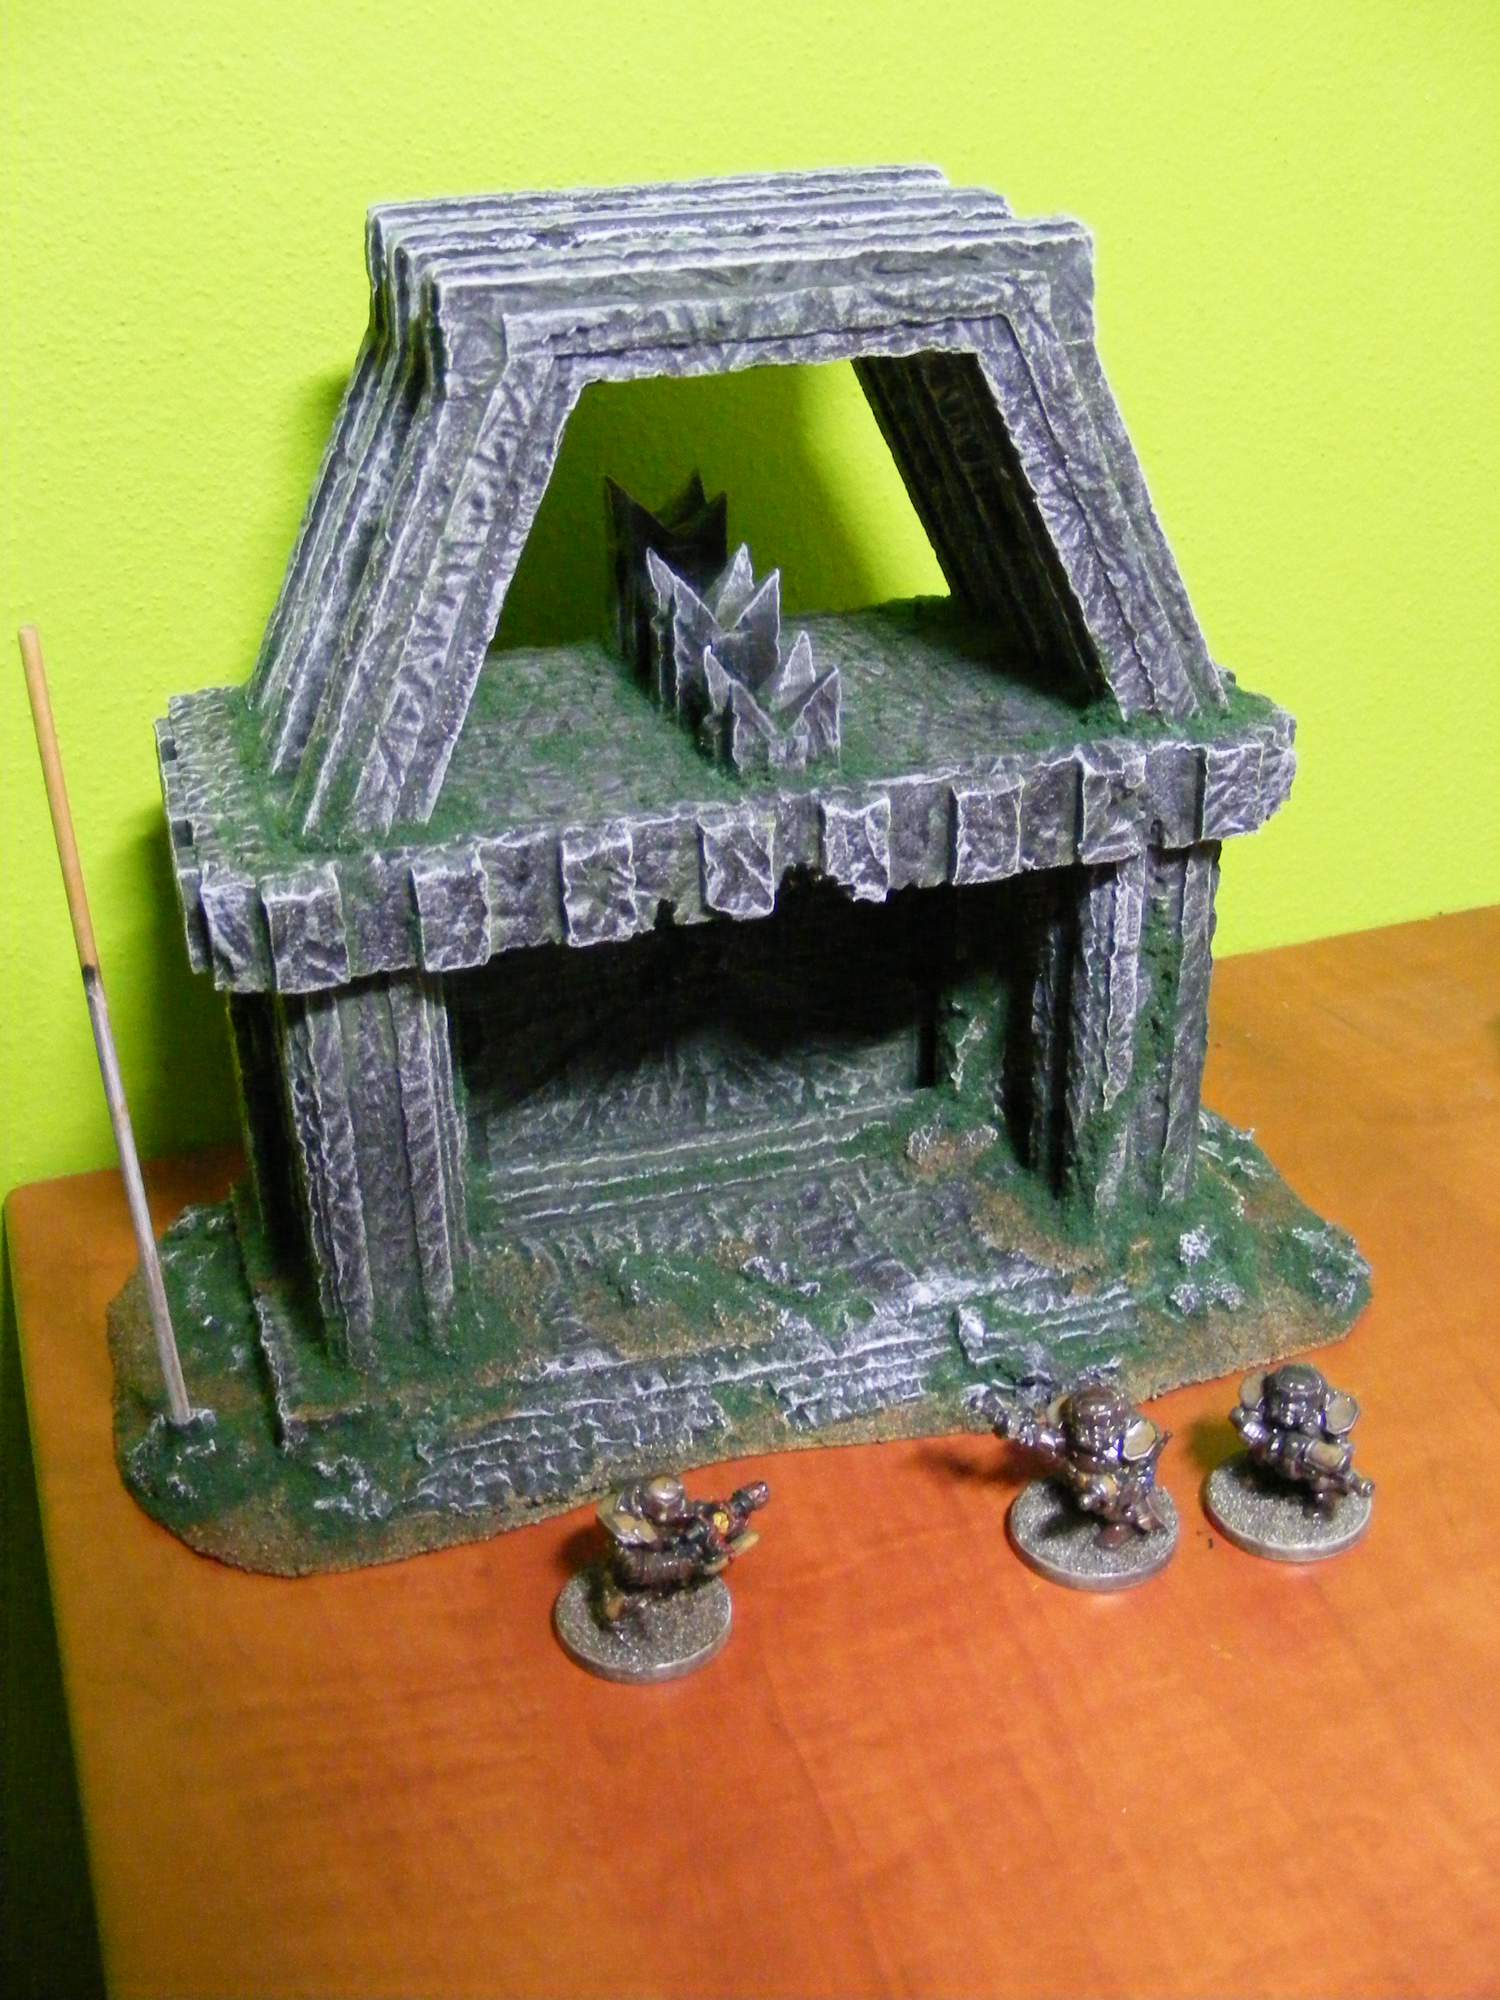
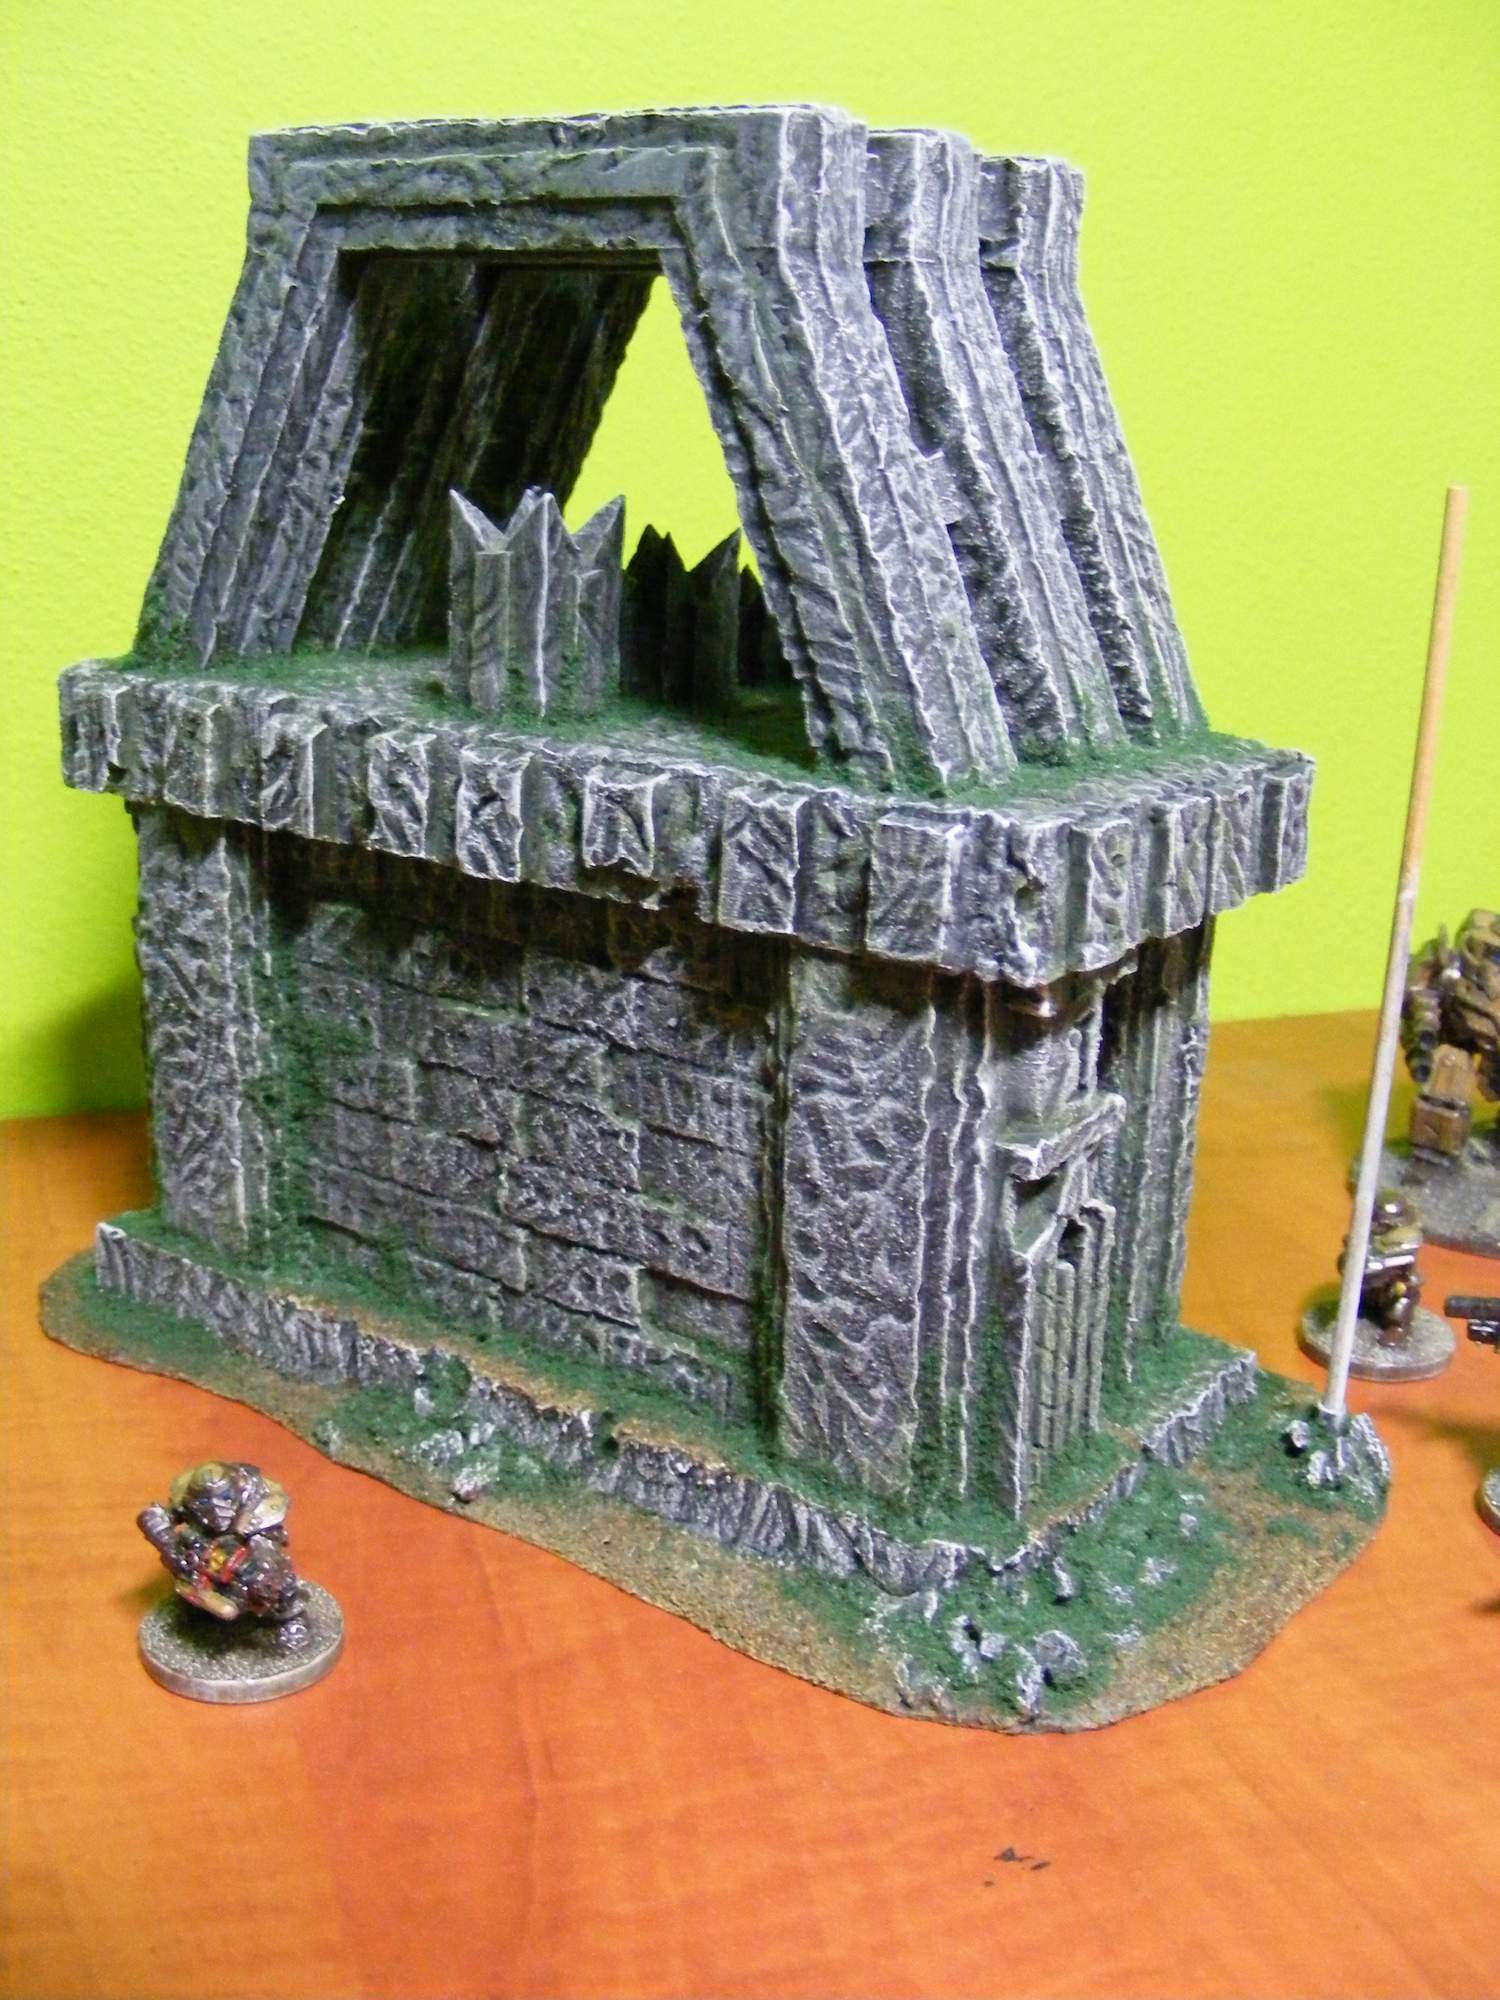
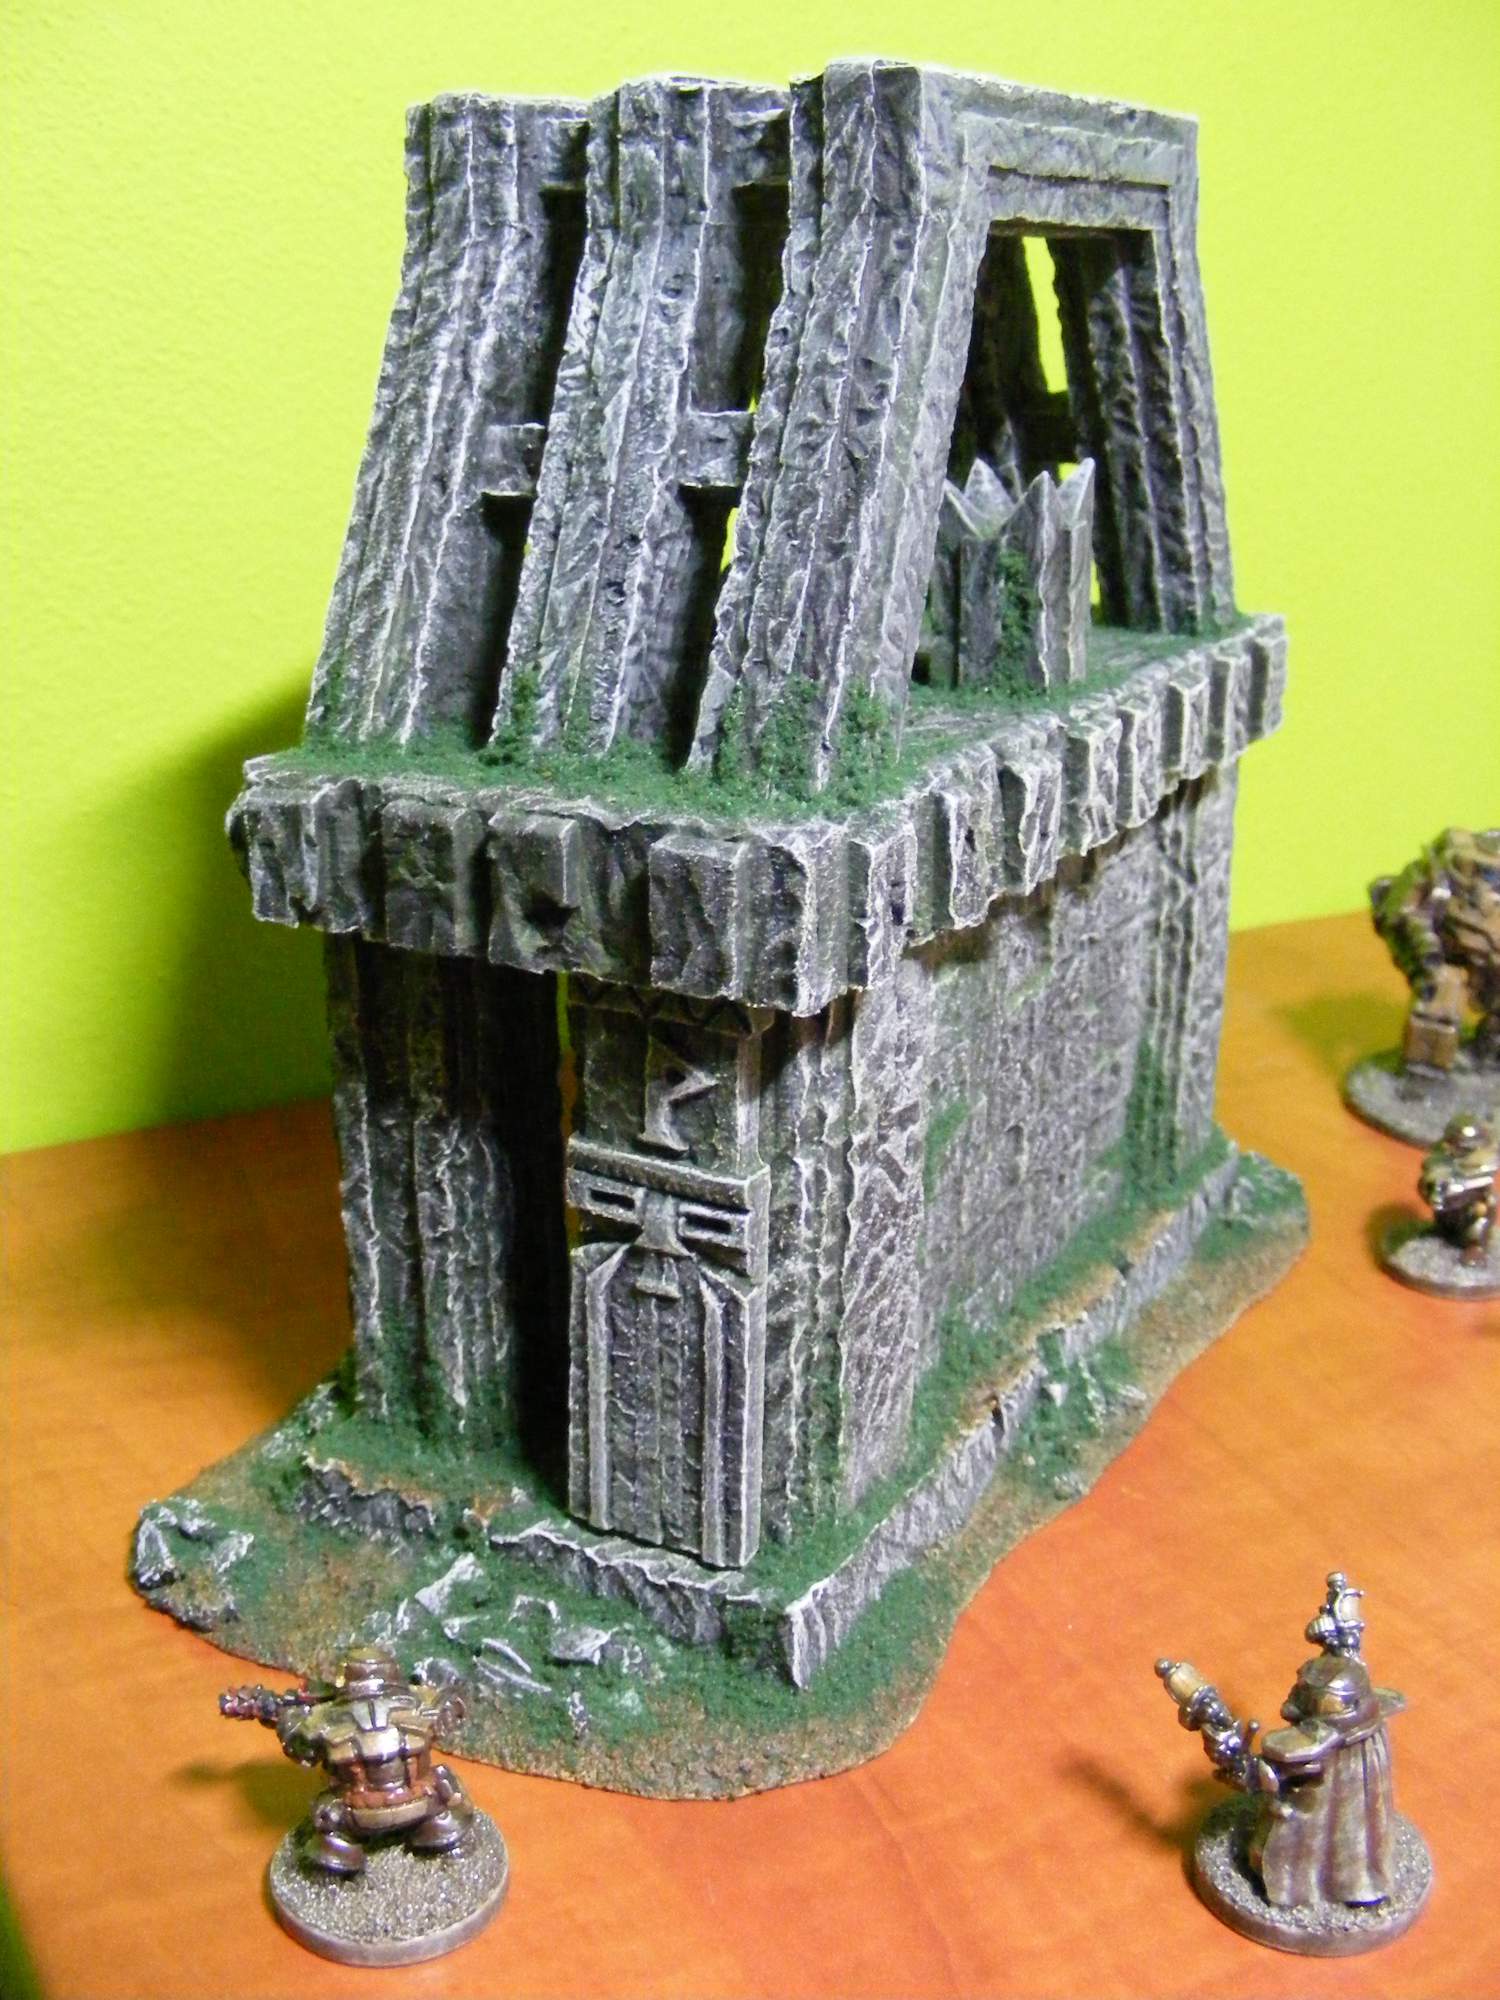
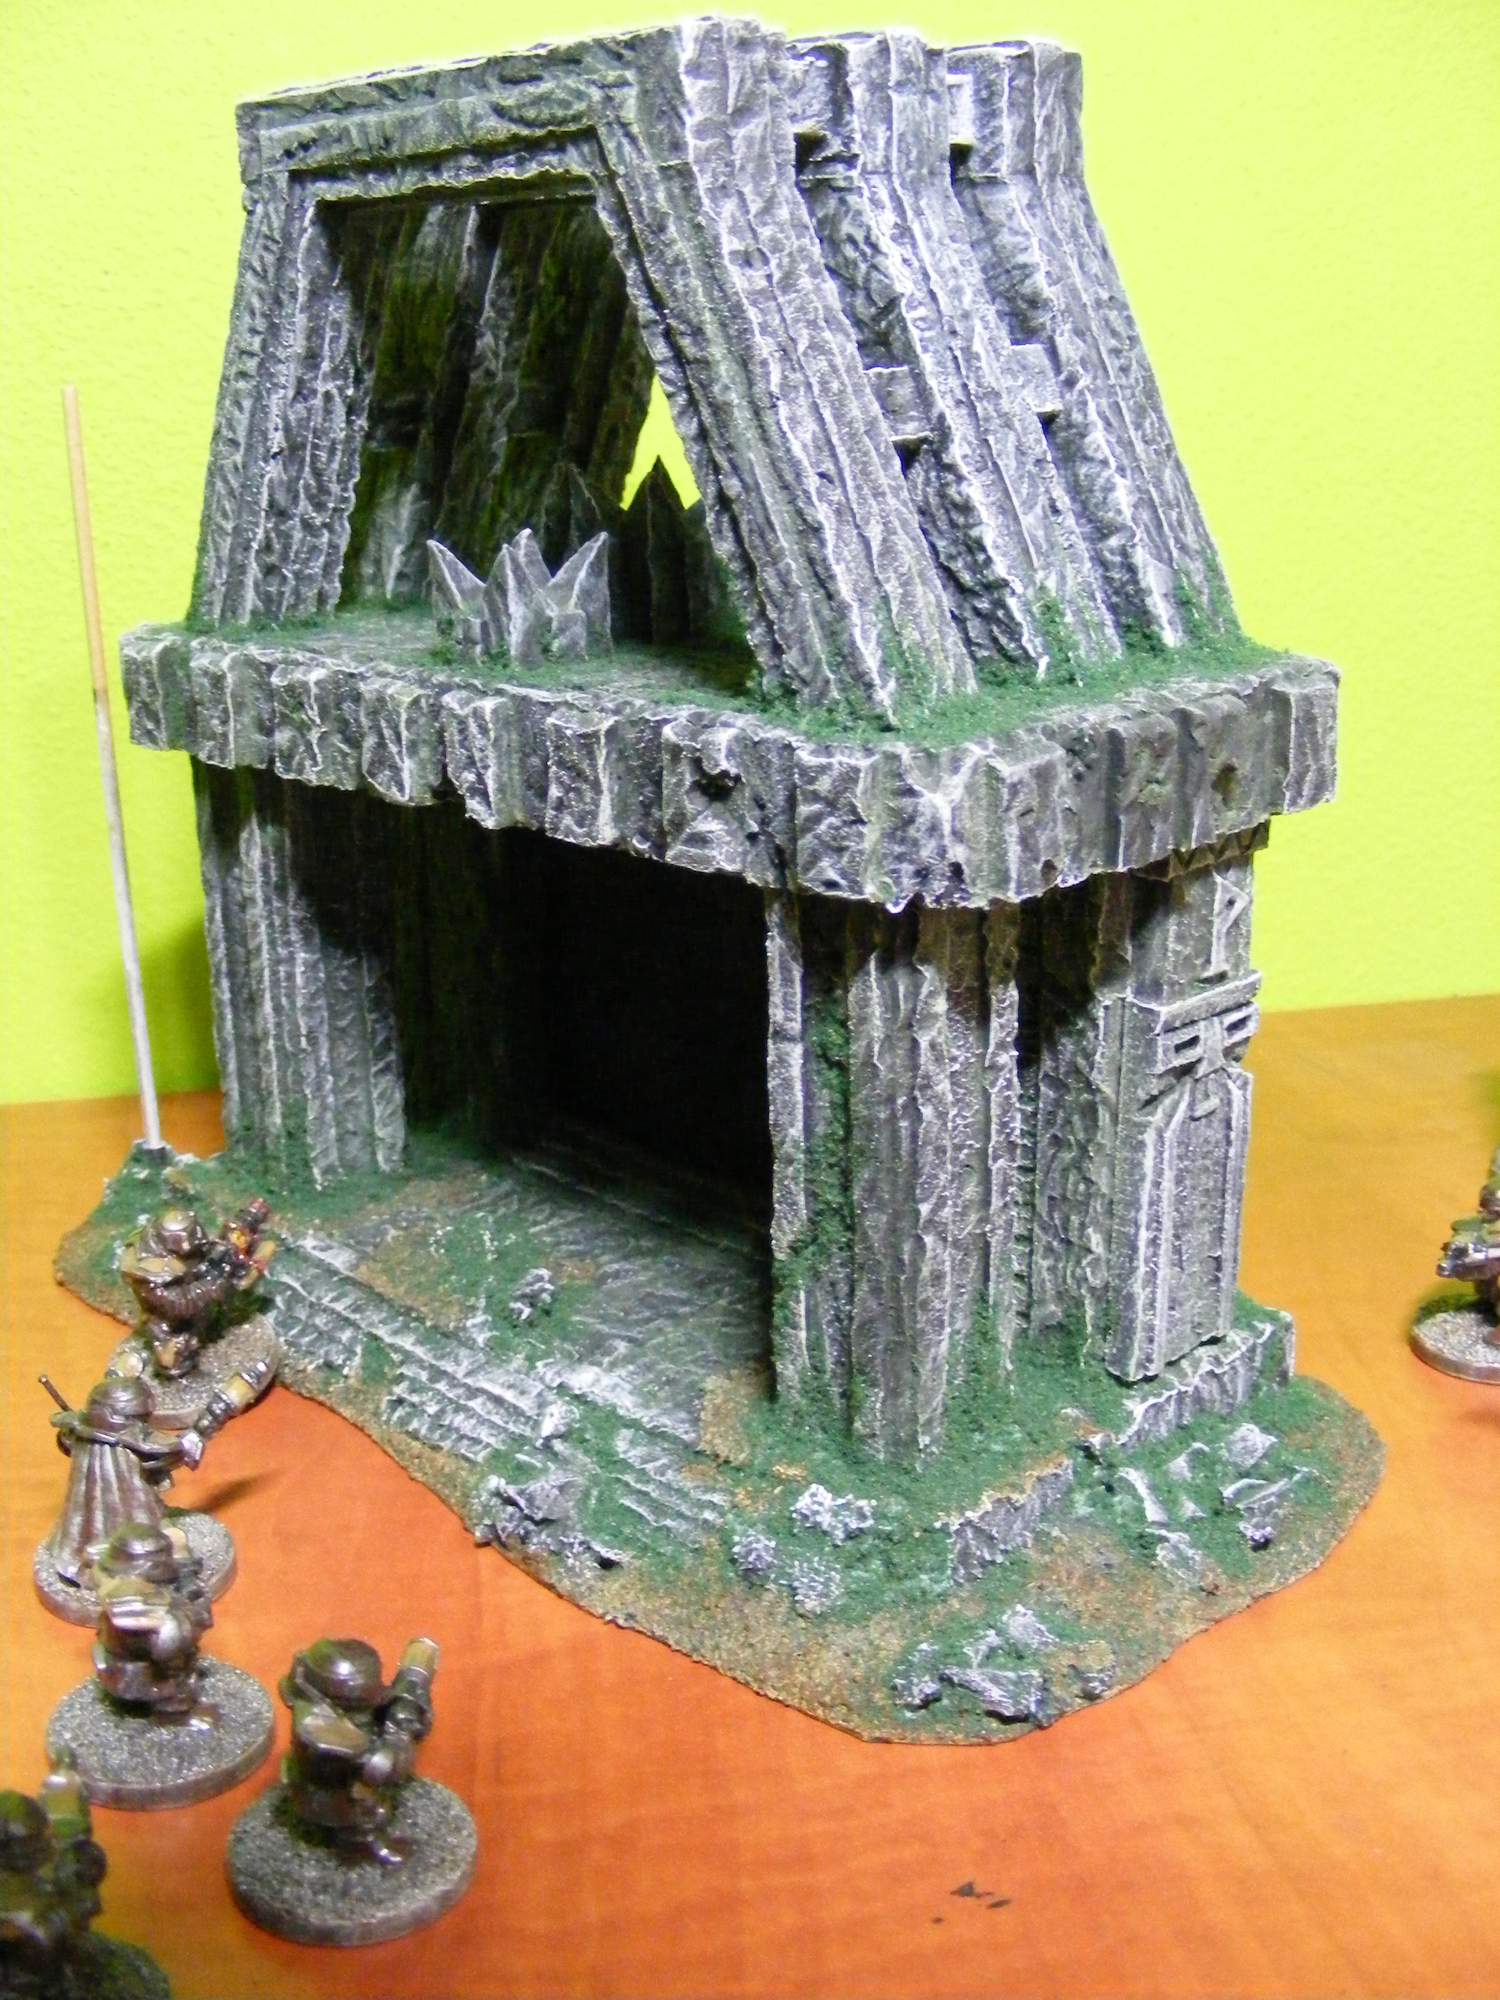
Only have a small update today. I've made a small wall section to test the method I'd like to use on the outside of my ruins. Assuming everything stays secure once it's all dried, I'll apply this technique to the outside wall of my ruins. Then it'll finally be time to add some nice detail and paint it up.
As a bonus, I think I've found a cheap and easy way of making a bunch of wall sections with some nice weight to them that I think will play really nicely in a game of 40k.
Spoiler:
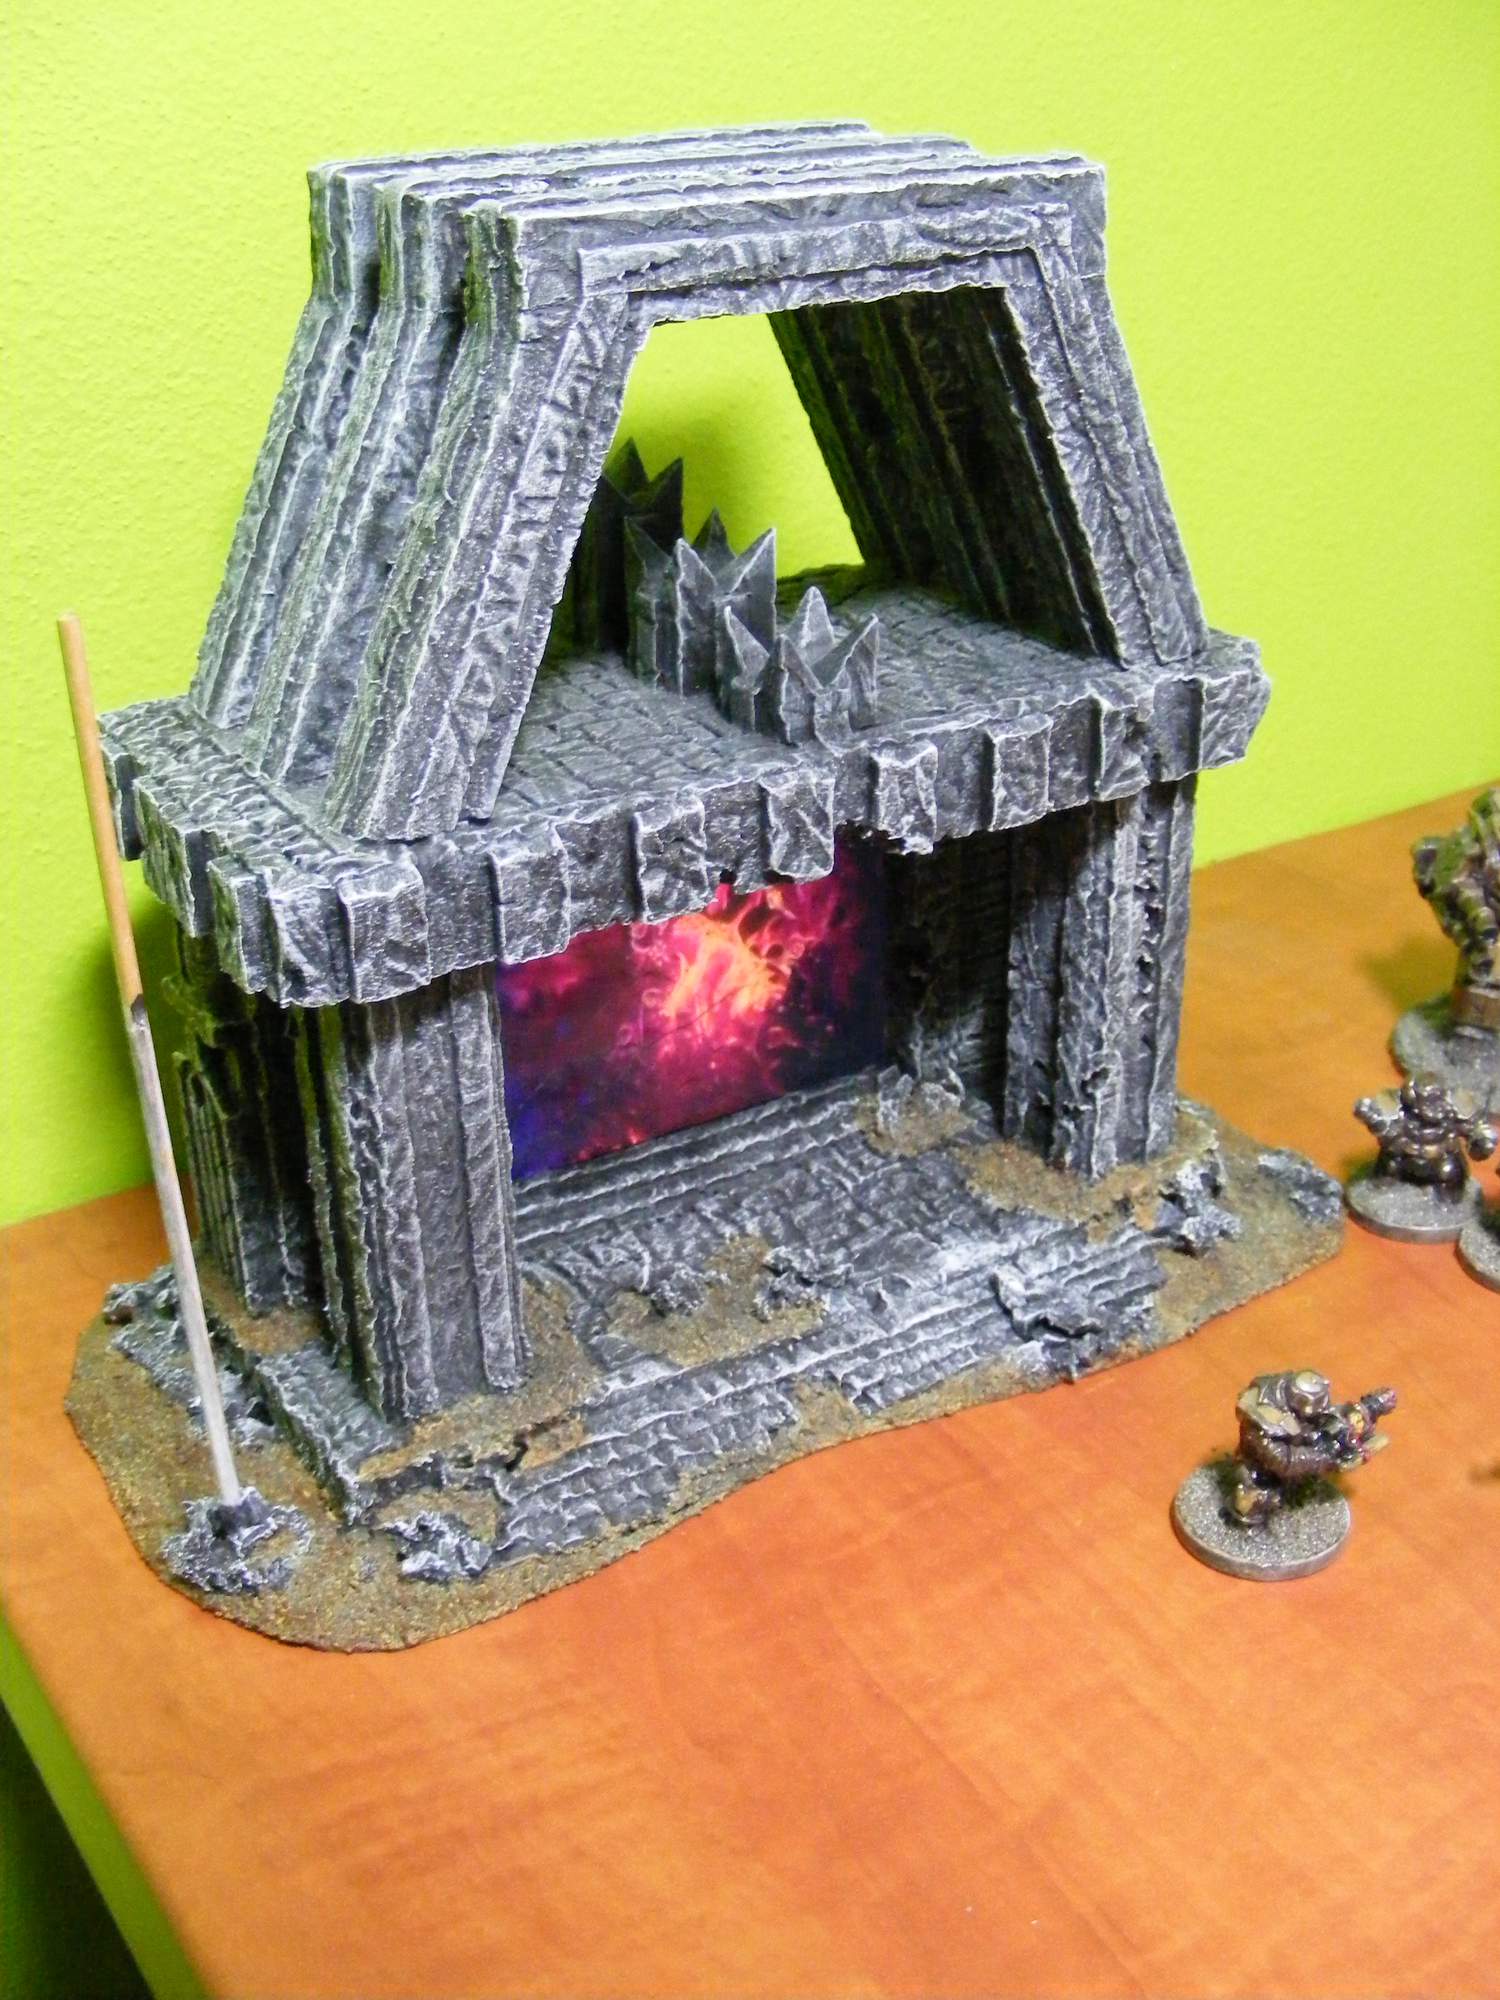
Here's hoping those stones don't fall out too easily
2016/04/13 10:37:03
Subject: The -=]_=- Terrain Competition Thread -=]_=- LoER Terrain Contest #18: The Portal
Viktor von Domm wrote: You could always add a tad of curd to the plaster...makes a very strong natural bond...unlikely to have the stones ever fall out afterwards...
curd of ....?
I'm thinking just like cottage cheese here.
Also, got some stuff tonight to cast my portal! attempt #2, we'll see how it goes (tm)
well...cottage cheese is nearly the same...curd...or quark...well it is the "earl" cheese... thing is it bonds the stones with a calcite structure...basically it is like cement...a crystalline structure...can be tough enough to hold quite a mass of weight...
>: D
(we need a better evil grin. Just sayin.)
Now I'm thinking up all kinds of interesting experiments in the name of science terrain, I mean, terrain.
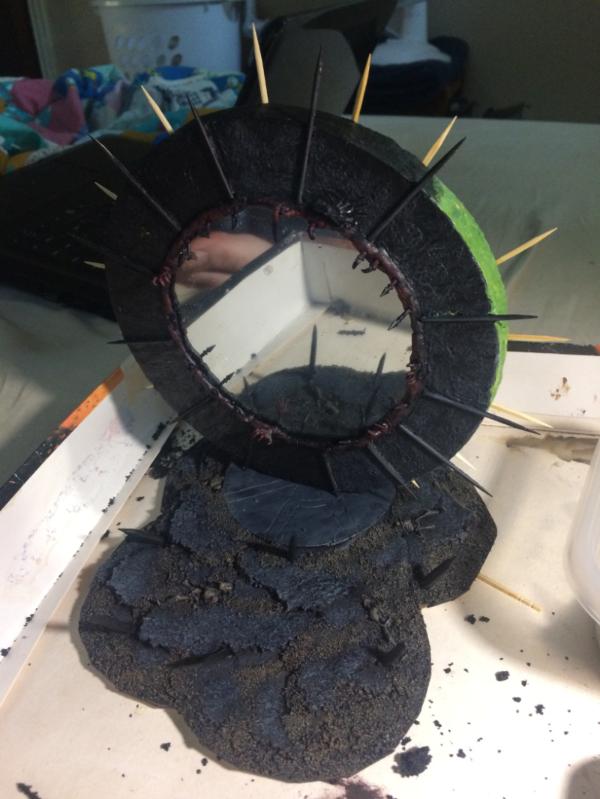
Got some work done. Decided to change the pump up a bit to help with theme. Now the pump hose has disconnected from the assembly and fallen oer oozing out slime and some of these little critters I'm scratch building. That should help. Also adding on a ton of bits and spikes and whatnot to the main body of the machinery.
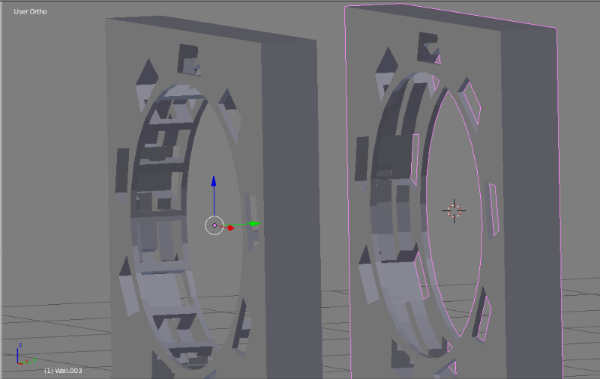
Another WIP picture- I'm making further progress on the stuff that's more decorative, but this is more of the nitty-gritty- On the Left is the 'meshed to the spokes' version, on the right the 'spins "freely"' version. I was originally going to do the first, so that I'd be able to keep things locked in place better, but then I realized that was silly when it'd be easier to fit things in the second version.
GENERATION 8: The first time you see this, copy and paste it into your sig and add 1 to the number after generation. Consider it a social experiment.
If yer an Ork, why dont ya WAAAGH!!
M.A.V.- if you liked ChromeHounds, drop by the site and give it a go. Or check out my M.A.V. Oneshots videos on YouTube!


 you still may be able to get away with precise hammering. maybe use a nail punch? Or just use next-level shading to make 2d dents that look 3d. But that's beyond my ability to advise on, so I'll leave that to my betters haha.


 just make sure it's cleat how it's a Portal also
  (also check out new blog post with prize goodness!


 Ultramarines, 3rd Co. and friends, 16k+
  4k
4k  4k Points
 Competition Index
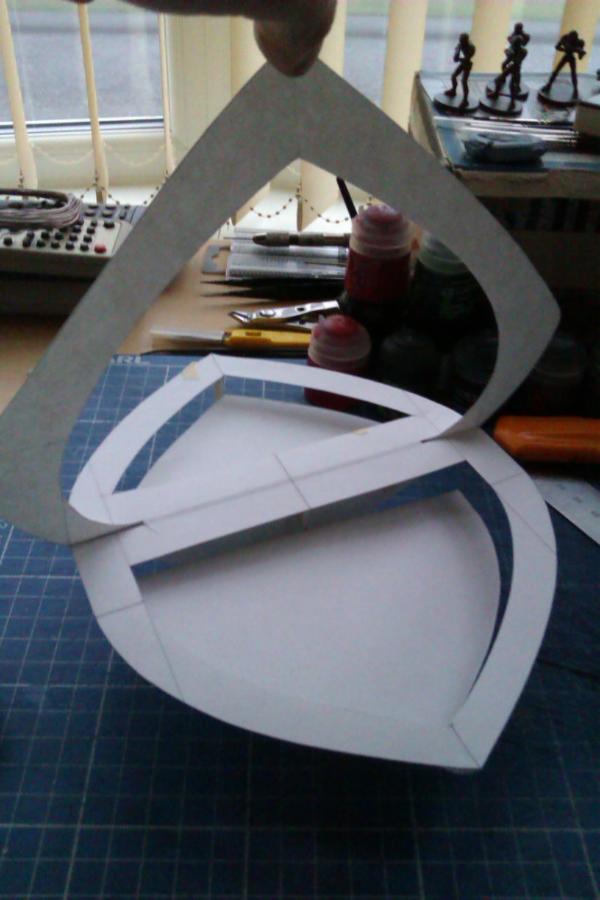
 1500
1500

 1500
1500