Forum adverts like this one are shown to any user who is not logged in. Join us by filling out a tiny 3 field form and you will get your own, free, dakka user account which gives a good range of benefits to you:
No adverts like this in the forums anymore.
Times and dates in your local timezone.
Full tracking of what you have read so you can skip to your first unread post, easily see what has changed since you last logged in, and easily see what is new at a glance.
Email notifications for threads you want to watch closely.
Being a part of the oldest wargaming community on the net.
If you are already a member then feel free to login now.
2009/05/18 09:45:41
Subject: my new army. - update: 28.10.12: some progress on the warlords legs.
as you can see in my rc-tank-thread i started with a new army, including new color scheme.
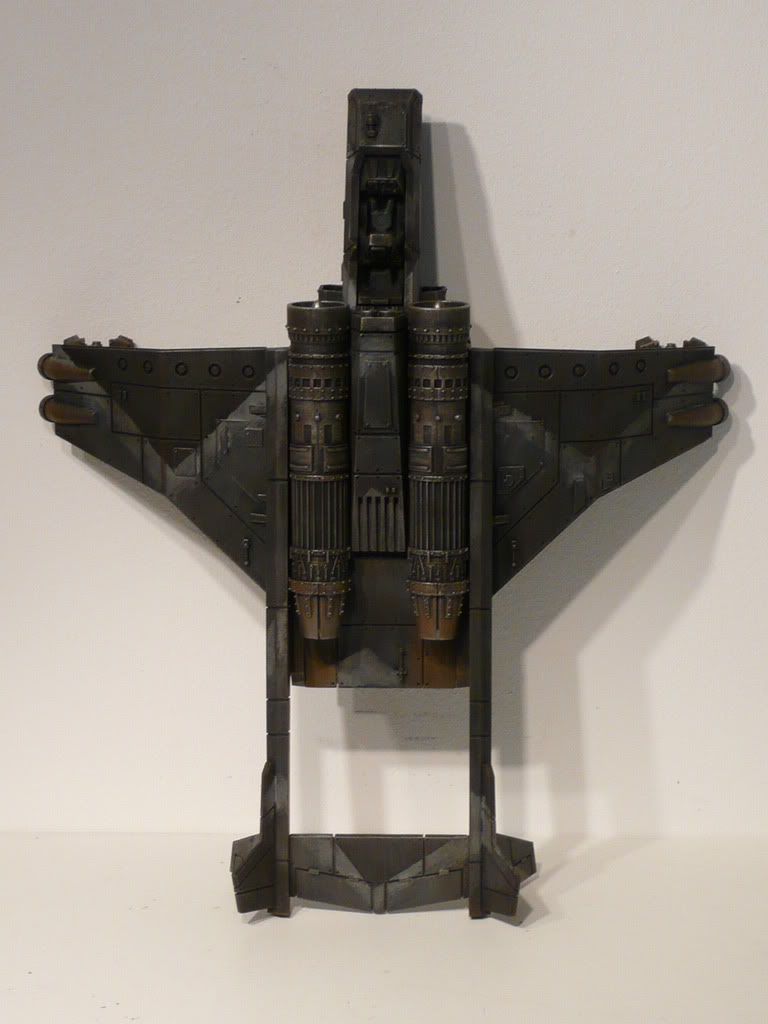
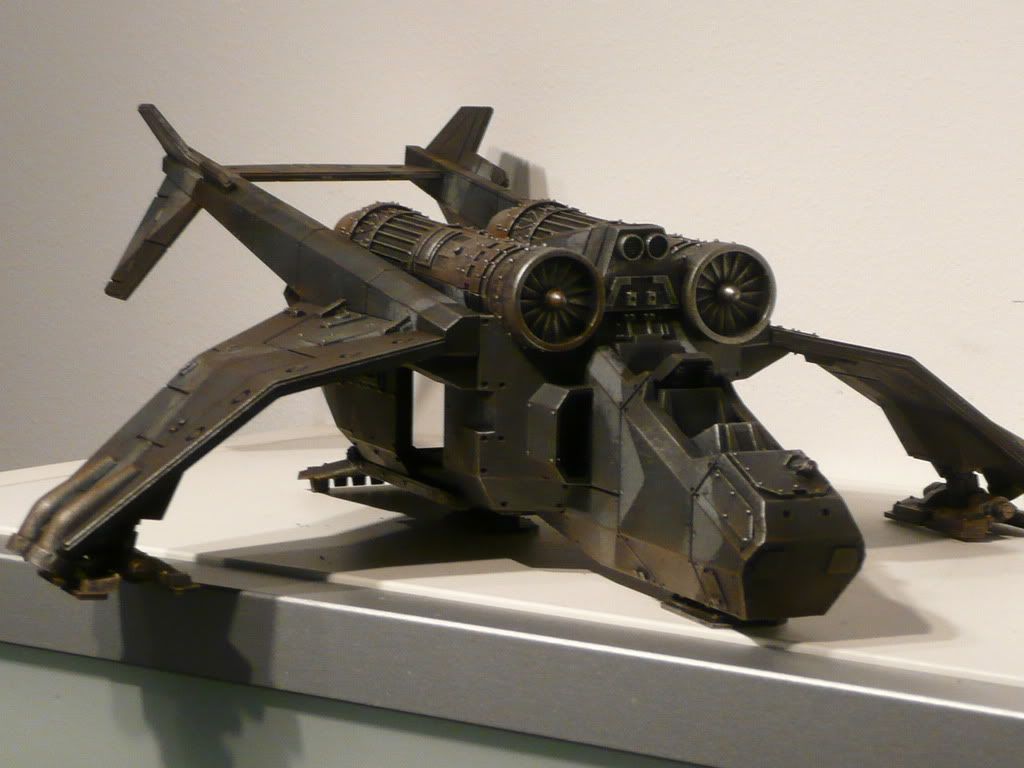
with the new valkyres released i also wanted to have those geing part of it right from the beginning.
my plan for this army was to apply the same scheme to all vehicles, no matter which type they are. with tanks it already turned out pretty well.
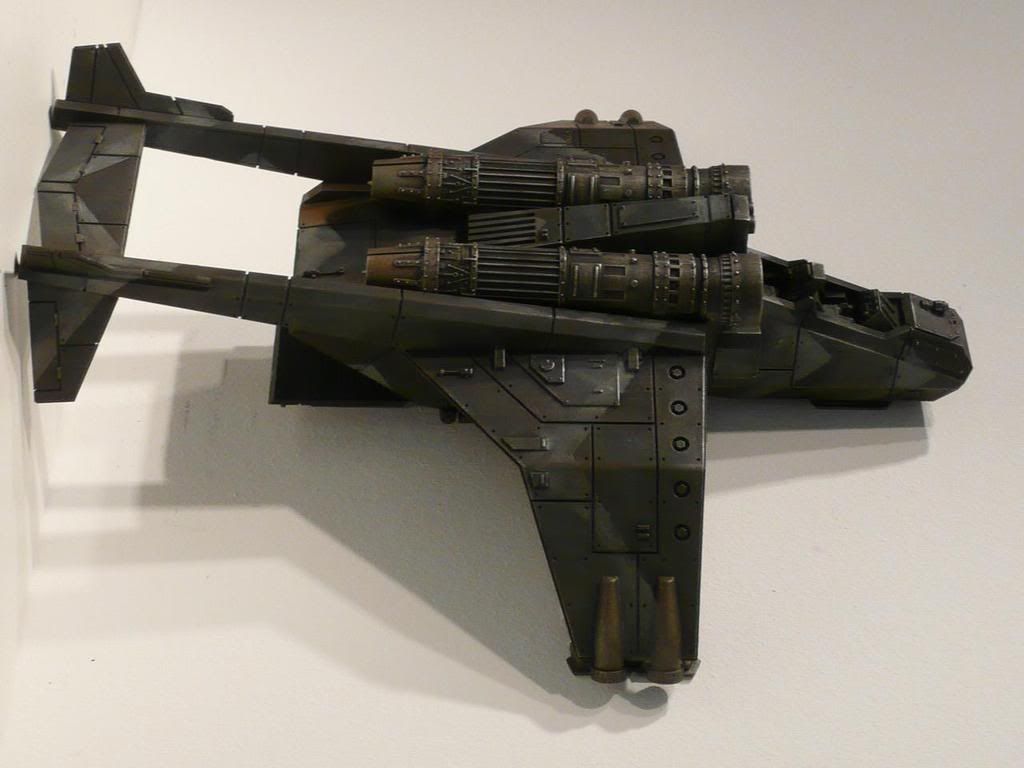
now here's my attempt with flyers ... - what do you think?! ... of course it is still wip, but the camo-scheme itself is almost finished.
.
This message was edited 5 times. Last update was at 2012/10/28 14:16:03
Looking great so far. Really clean mask for the grey dusting. I'd love to see the tanks or a link where I can see how they turned out.
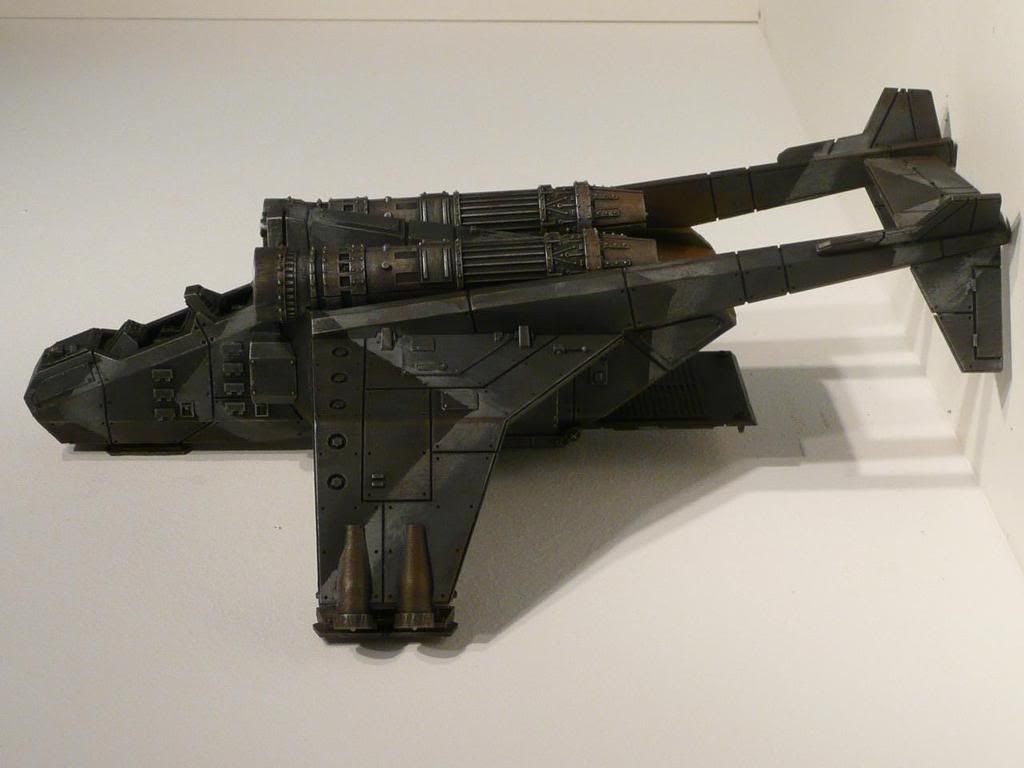
As this is WIP still I'll throw some things out that I see, you probably already know or thinking of. First, is the pattern on the nose points to the front and the rest point back. It kinda breaks the flow of the pattern imo. Second is something you'll do while finishing the model I'm sure, but before you put the airbrush away don't forget exhaust burns (burnt oil marks) on the horizontal stabilizer and just below the lip of the deflectors. I see you did something with brown but oil will always be black at this scale.
2009/05/18 11:39:54
Subject: 3 valkyres for my new army.- a short paintlog.
Looking great so far. Really clean mask for the grey dusting. I'd love to see the tanks or a link where I can see how they turned out.
As this is WIP still I'll throw some things out that I see, you probably already know or thinking of. First, is the pattern on the nose points to the front and the rest point back. It kinda breaks the flow of the pattern imo. Second is something you'll do while finishing the model I'm sure, but before you put the airbrush away don't forget exhaust burns (burnt oil marks) on the horizontal stabilizer and just below the lip of the deflectors. I see you did something with brown but oil will always be black at this scale.
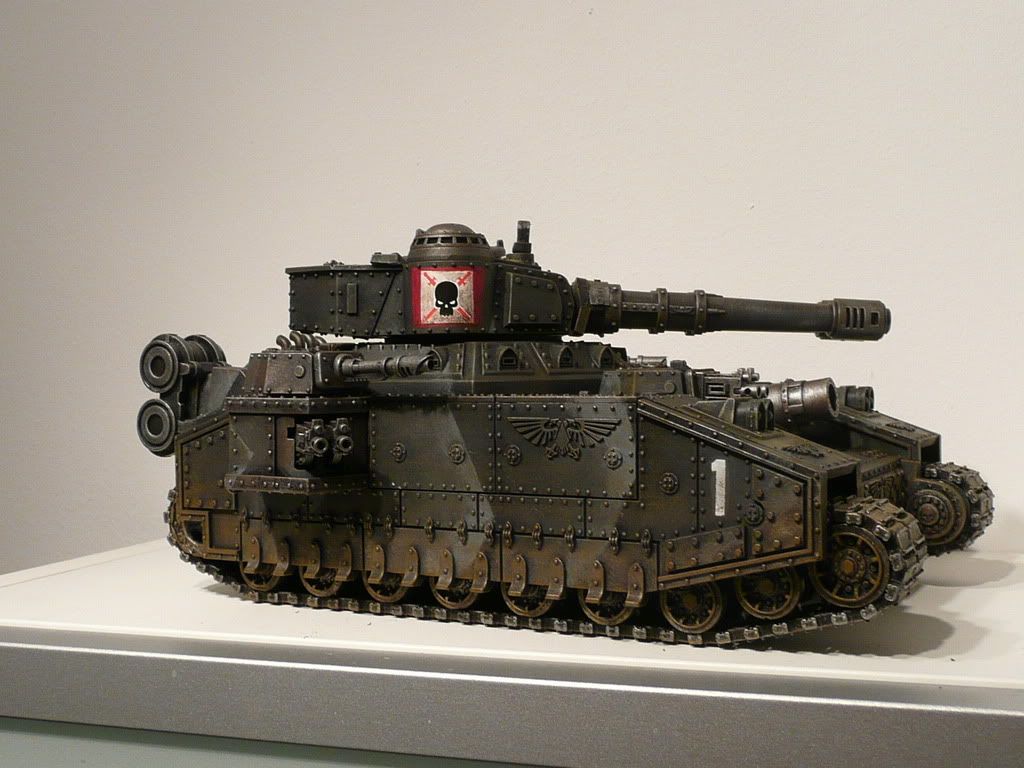
hi lbursley and thanks for all your feedback. i'll attach 2 pacs of the baneblade to this post.
regarding the pattern you are totally right, when you say that it is not fluent, because the direction changes. the reason for this is, that in the beginning i wanted to have much smaller triangles to make it more look like a kind of zickzack, if you know what i mean. than this scheme would not have had any direction at all, just some zickzacklines crossing the model. but when i started fixing the tape on the model i found it hard to realize and got some doubts if i should not better stay with bigger edges ....
hmmm --- let's see waht i can do with the 2nd and 3rd one ... the exhaustburns are a great idea. i think i could make the brown areas a little bit brighter to apply some black within the brighter area afterwards. this should provide a good contrastline between the grey armor and the black exhaust burns. .. - i think i'll try that.
further you mentioned the "airbrush" in your comment. - to be honest, i might have to say, that up to here the complete paintjob was done using a single size 8 brush only, because i don't own a airbrush on the one hand and also have no experience how to use it. so i had to apply this scheme using a ordinary brush, only.
-
Did you put LED lights on that bane blade? or are my eyes playing tricks on me!
i can't give much better C&C then LBursley, but other than that - love it!
*Ex Username: Gutteridge*
2009/05/18 12:09:23
Subject: 3 valkyres for my new army.- a short paintlog.
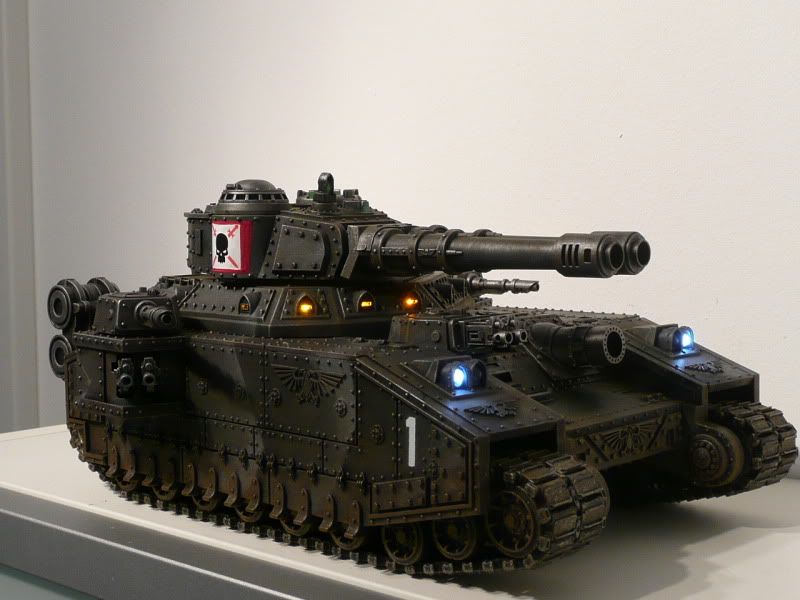
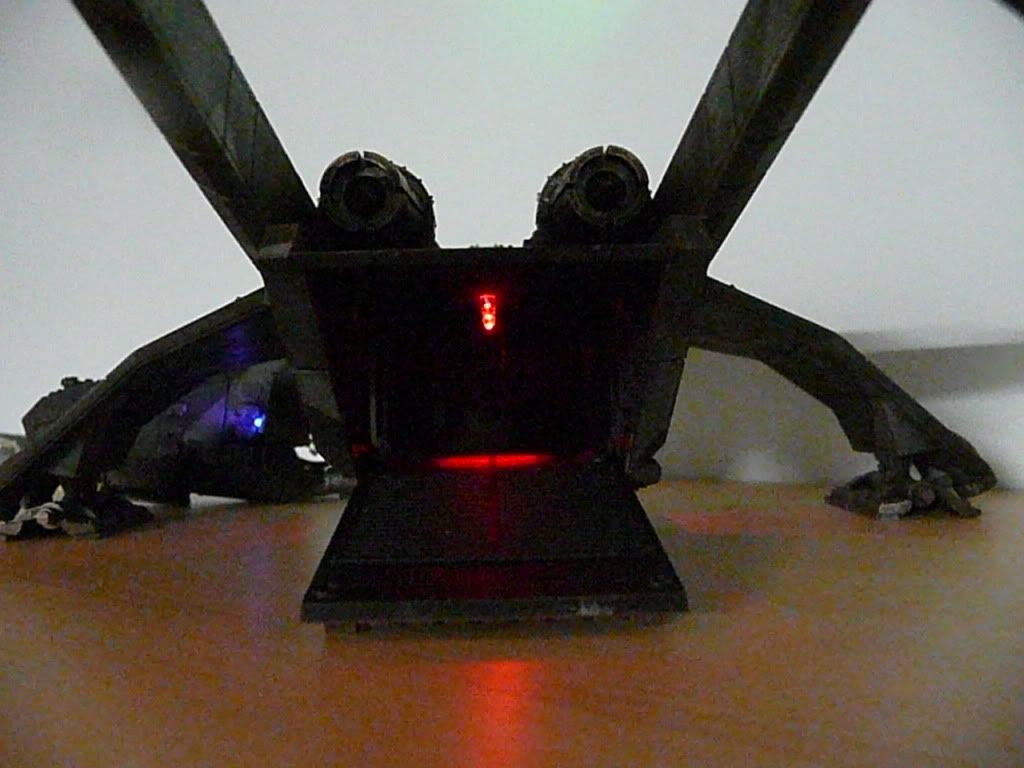
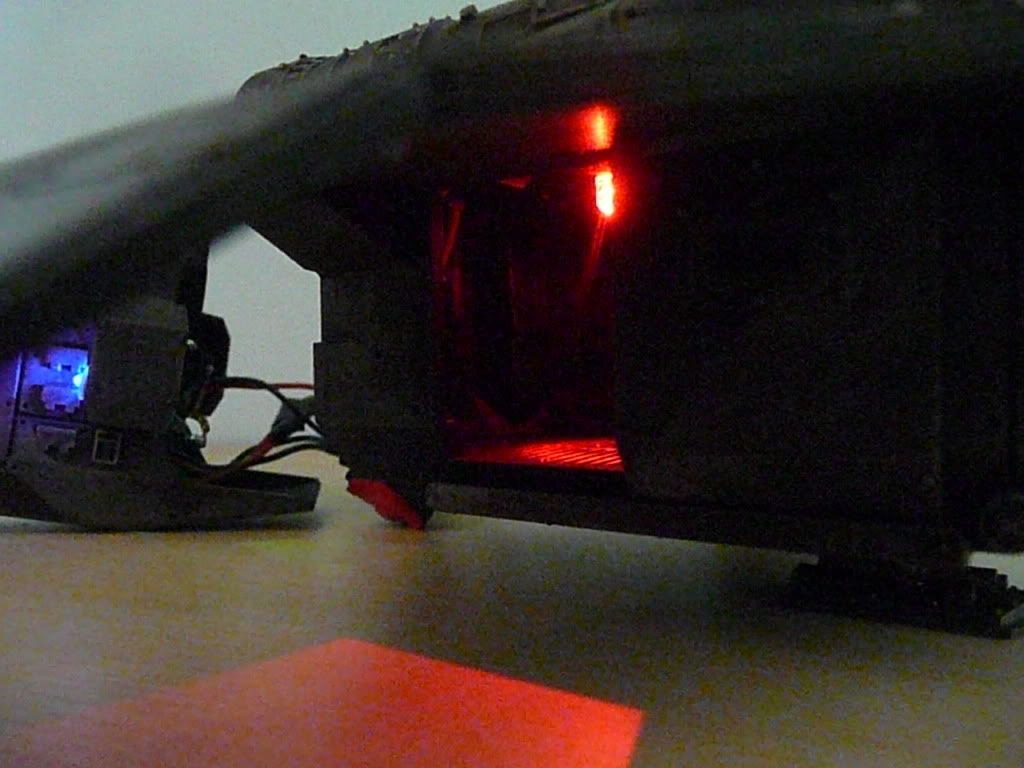
Gutteridge wrote:Did you put LED lights on that bane blade? or are my eyes playing tricks on me!
i can't give much better C&C then LBursley, but other than that - love it!
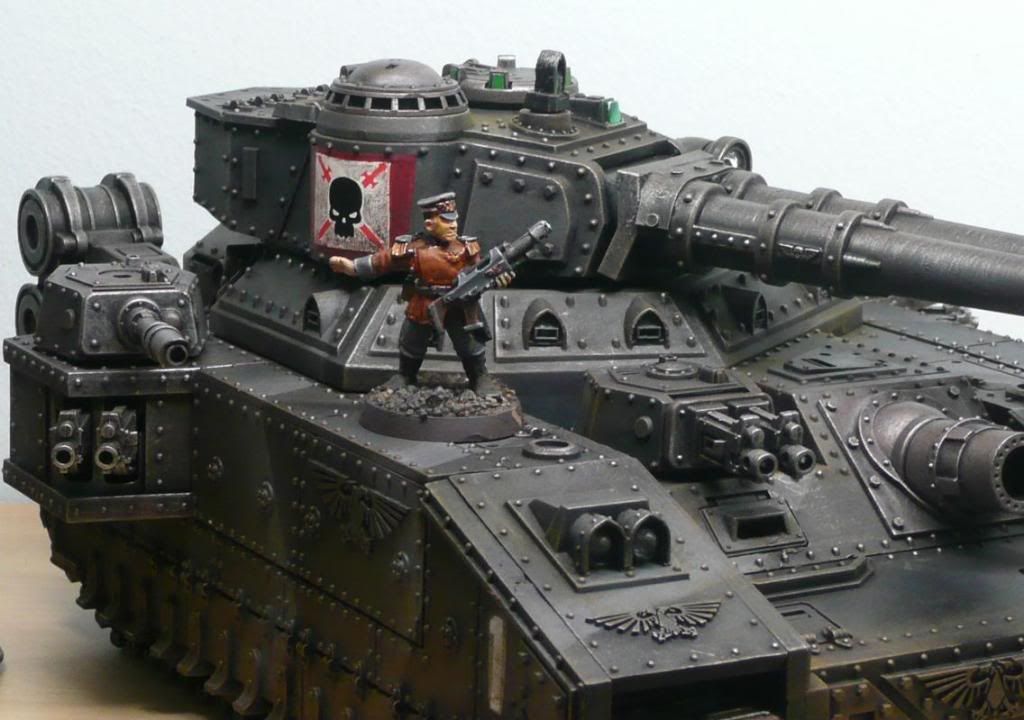
yes i did ... here's a better pic ... :
.
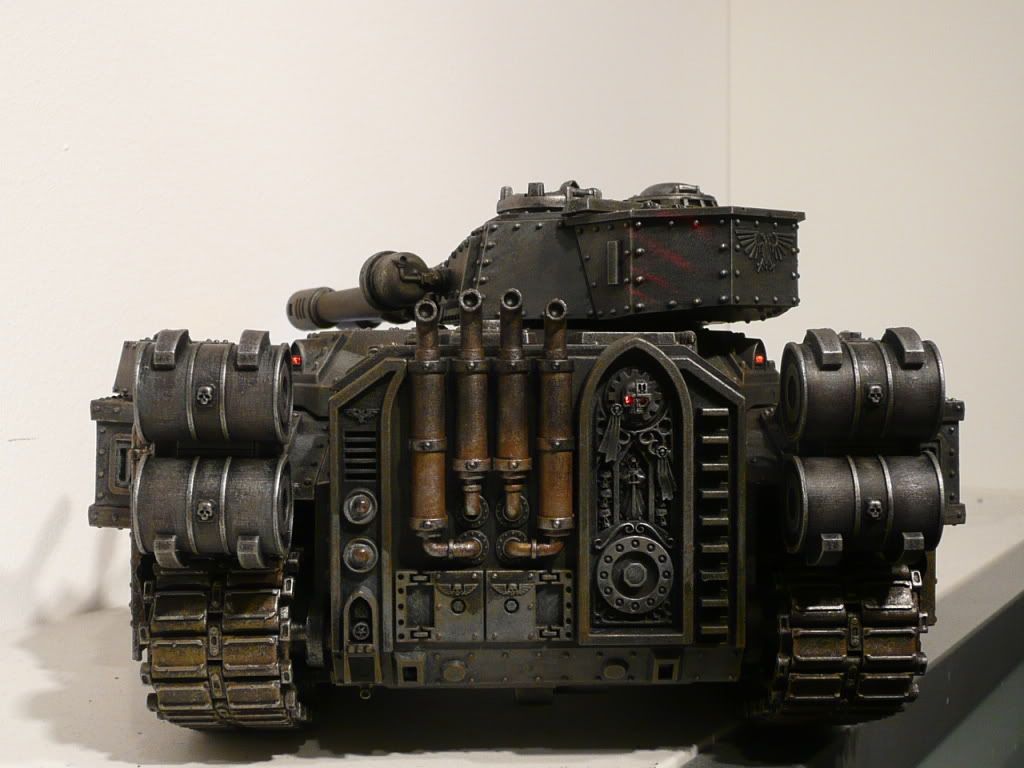
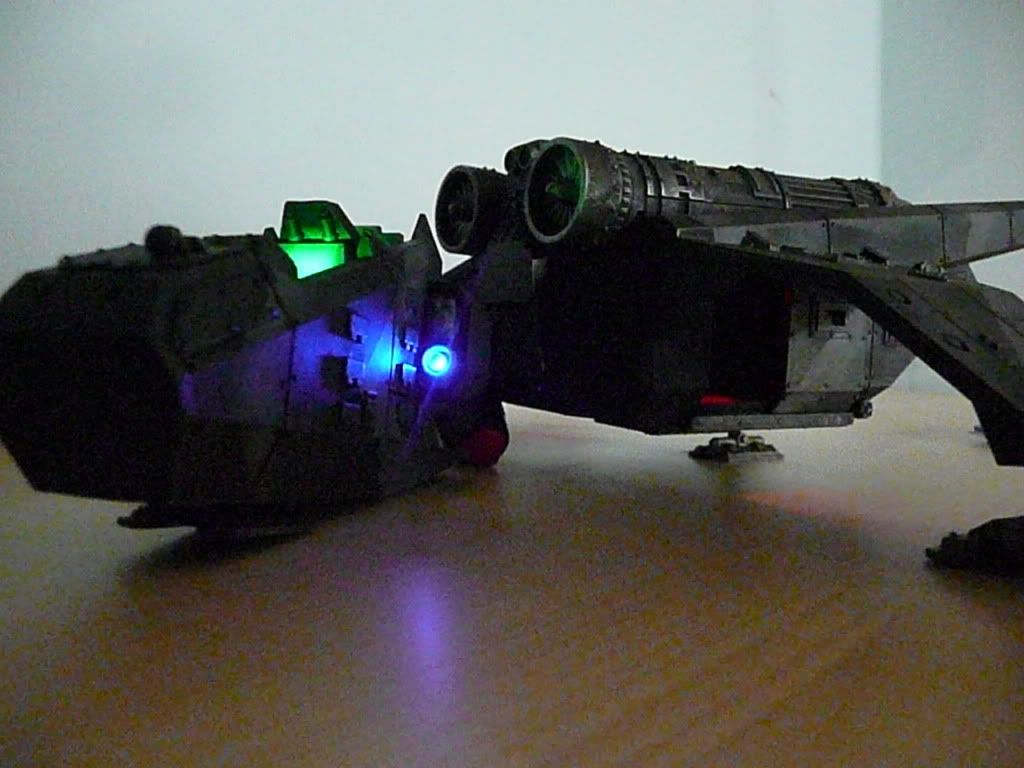
additional to that i also installed a motor, and some other functions ... - here's a wip of the not painted tank:
.
Excellent work there, BobPanda. I was wondering though, as I am putting my own Vendetta together I find that if everything is constructed then there is serious access limitations for paint brushes around the engine assamblies. Did you fully construct, then paint or did you stage the painting to allow access to the engines?
Please excuse any spelling errors. I use a tablet frequently and software keyboards are a pain!
Flinty wrote:Excellent work there, BobPanda. I was wondering though, as I am putting my own Vendetta together I find that if everything is constructed then there is serious access limitations for paint brushes around the engine assamblies. Did you fully construct, then paint or did you stage the painting to allow access to the engines?
yes you are right.
i also foudn myself challenged by the fact that i wanted to use a relatively rough painttechnique based on hard drybrushing but still wanted to be able to reach all the details afterwards without problems. additional to that also my valkyres will be equipped with some leds.
so i did not glue the roof, the engines on top, the cockpit to the mainbody. if you'll work precisely those parts should stay in place even without glue.
...
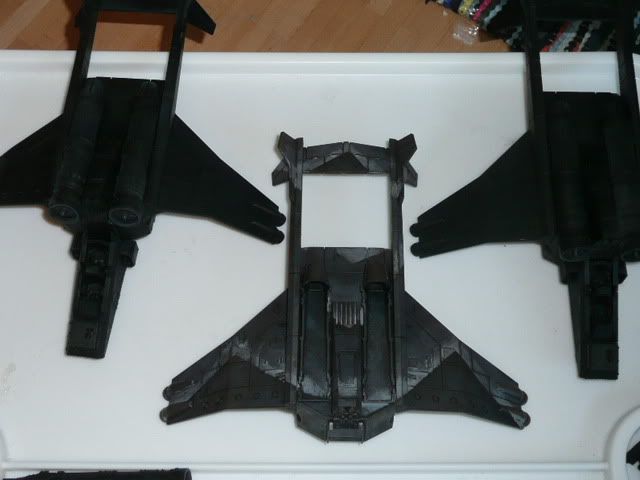
here are some 2 pics showing earlier wip states and another one from before i started painting, where you can see how far i assembled them before priming.
.
- for painting the interiior, i'll simply remove the whole roof.
- i'm planing to install the battereis on the engines in top.
- it will get red leds in the transportsection and maybe blue ones in the cockpit. further i'll install a relatively birght one in the searchlight.
@BobPanda: Thanks for the tip. I'm lazy and therefore will not be painting the interior, so I've glued the main fuselage together. the engines are on there already but I haven't yet attached the tail or the central air intake (or even started constructing the cockpit )... I think I will leave them off until after painting.
Please excuse any spelling errors. I use a tablet frequently and software keyboards are a pain!
It's better to simply be an idiot, as no one can call you on it here. -H.B.M.C.
Cap'n Gordino's instant grammar guide:
"This is TOO expensive." "I'm going TO the store, TO get some stuff."
"That is THEIR stuff." "THEY'RE crappy converters."
"I put it over THERE." "I'll go to the store THEN."
"He knows better THAN that." "This is NEW." "Most players KNEW that."
2009/05/18 15:56:27
Subject: 3 valkyres for my new army.- a short paintlog.
If only my tanks could do that. Could just imagine it at a game. 'The hvy Bolters on your Basilisk are out of range.' (point behind other guy) 'Whats that over there?' (Drive Baneblade forward. 'I'll think you'll find I'm in range!' 'Your just bad at measuring!' LOL
"Model collector why are you wearing friday socks, its thursday today."
"We live in hope."
2009/05/18 22:19:08
Subject: 3 valkyres for my new army.- a short paintlog.
Whoever appeals to the law against his fellow man is either a fool or a coward. Whoever cannot take care of himself without that law is both. For a wounded man shall say to his assailant, "If I Die, You are forgiven. If I Live, I will kill you." Such is the Rule of Honor.
2009/05/18 23:53:27
Subject: my new army. - i'm starting with the valkyres.
Man, if you ever need inspired, go watch the first 30 mins of predator and if you tell me you dont want a whole flying squad of storm troppers, then i have failed
2009/05/19 02:02:38
Subject: my new army. - i'm starting with the valkyres.
Absolutely awesome. Great paintjobs, super LED work, and brilliant RC job. Just have to install a funtion to move forward in 6 inch increments
We all love getting gallery votes...
City Terrain! Greensteela Kult! "If God fought Satan in real life, people would still switch channels twenty minutes in, even if God attacked with sharp rainbows and the Devil with exploding porn."
-Sam Strange
2009/05/21 18:22:03
Subject: Re:my new army. - i'm starting with the valkyres.
ShadowRocket wrote:Either in a seperate topic, or here later on, please post how you do the LED lights on Tanks and these Valks, and how you motorized the baneblade.
I am especially interested in the LED lights, since it looks fething awesome!
Great work, will keep an eye on you
i'm planing to post a kind of tut, when i start to build the other two rc-superheavies. mybe next week or something ...
.
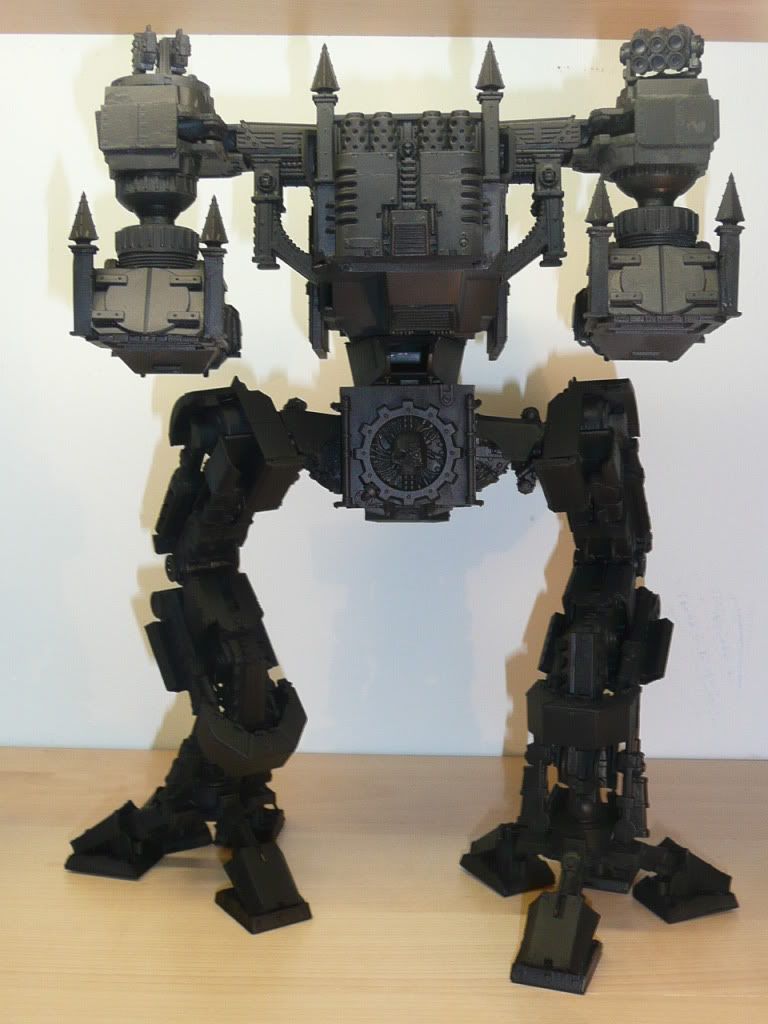
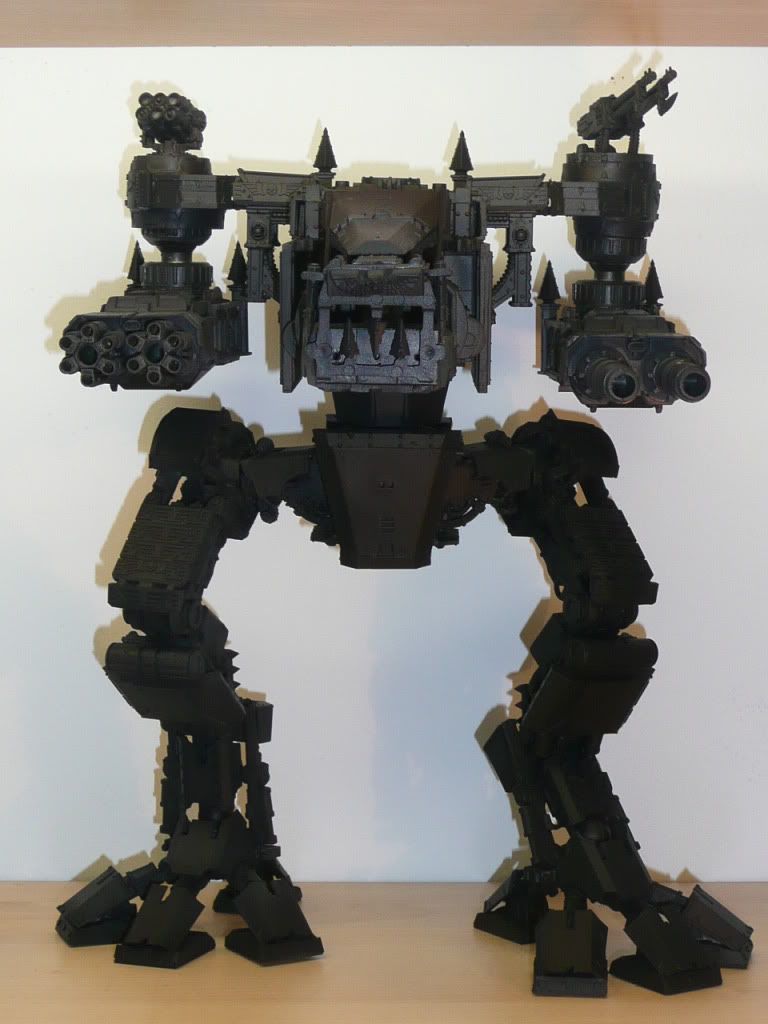
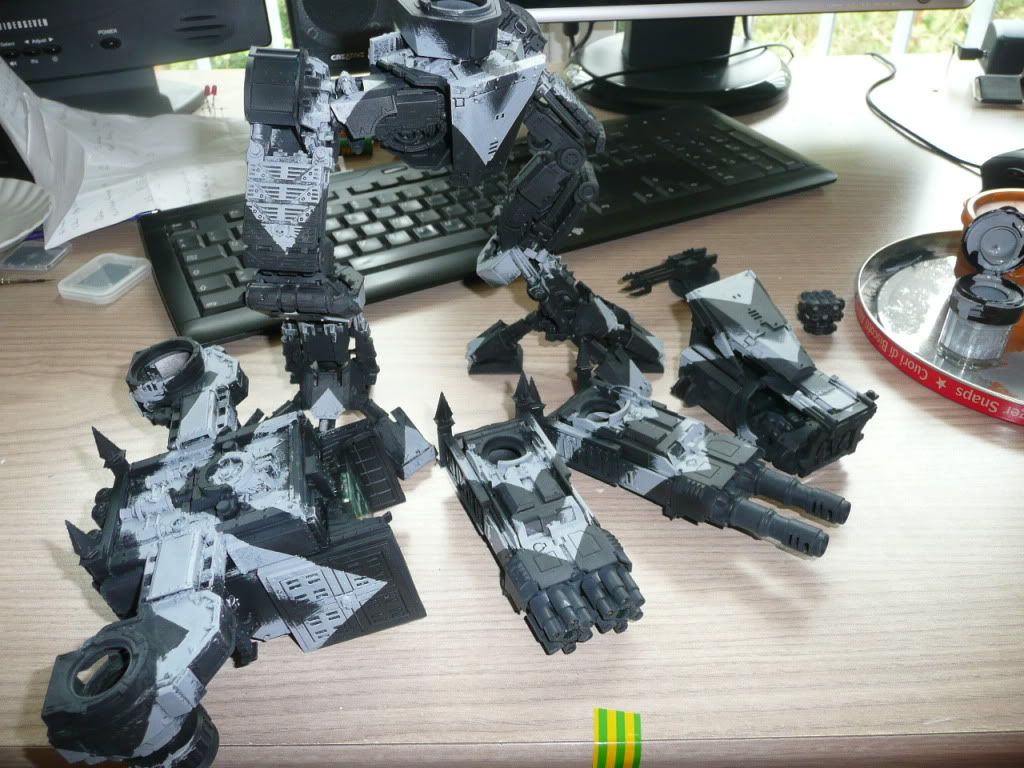
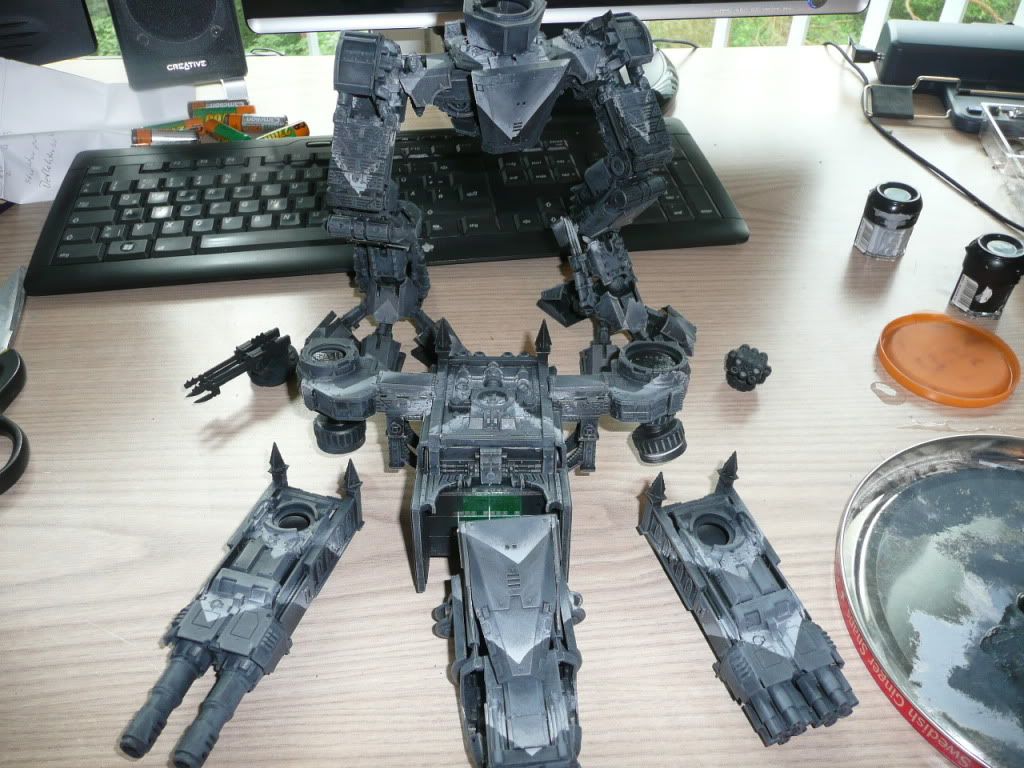
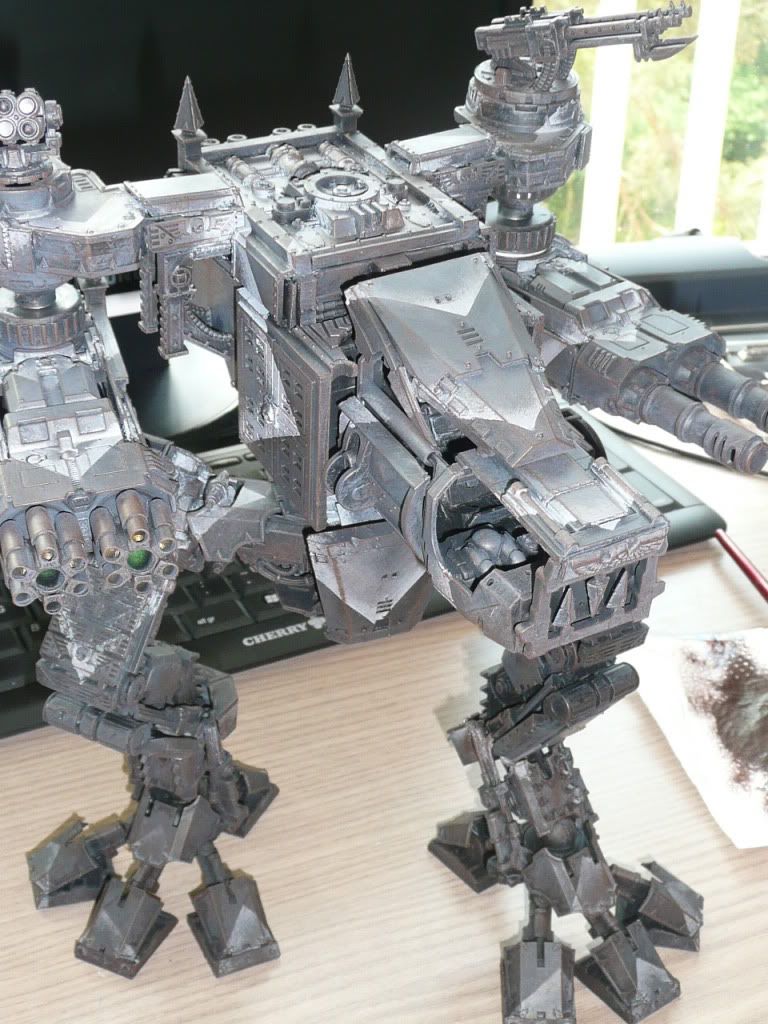
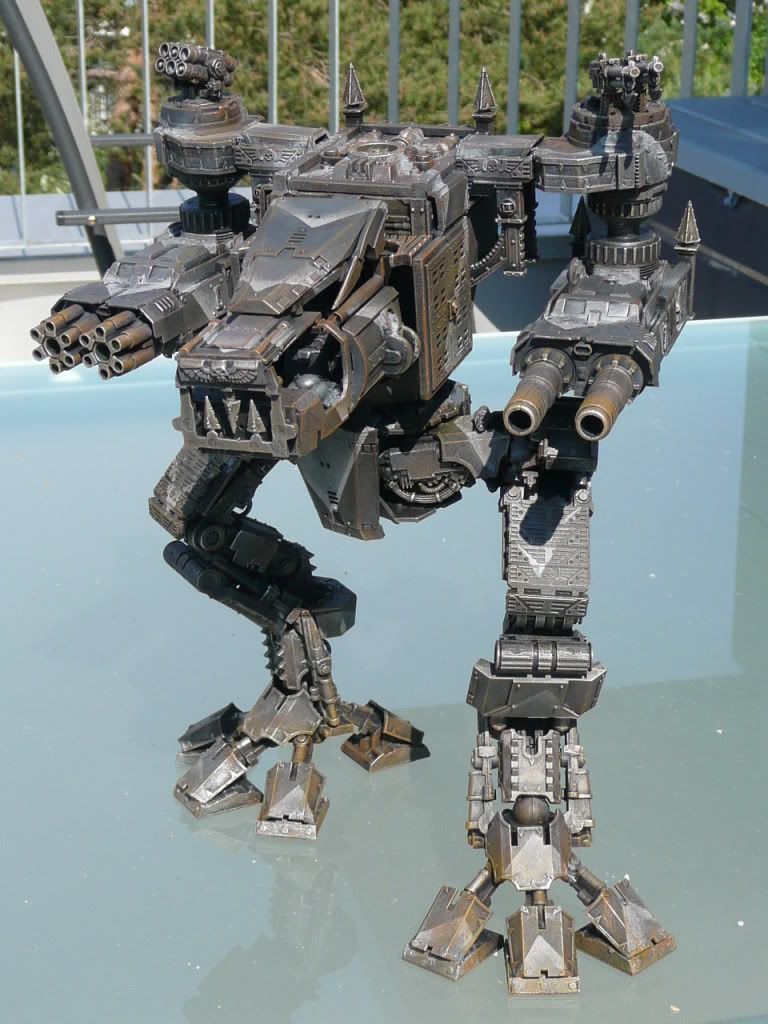
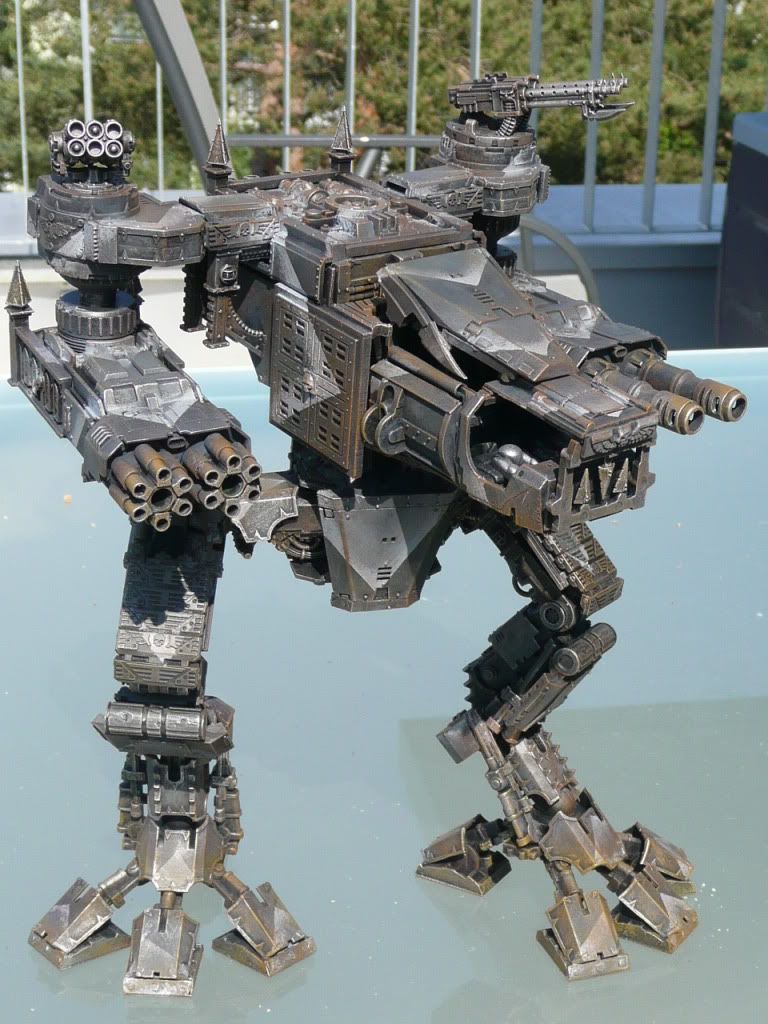
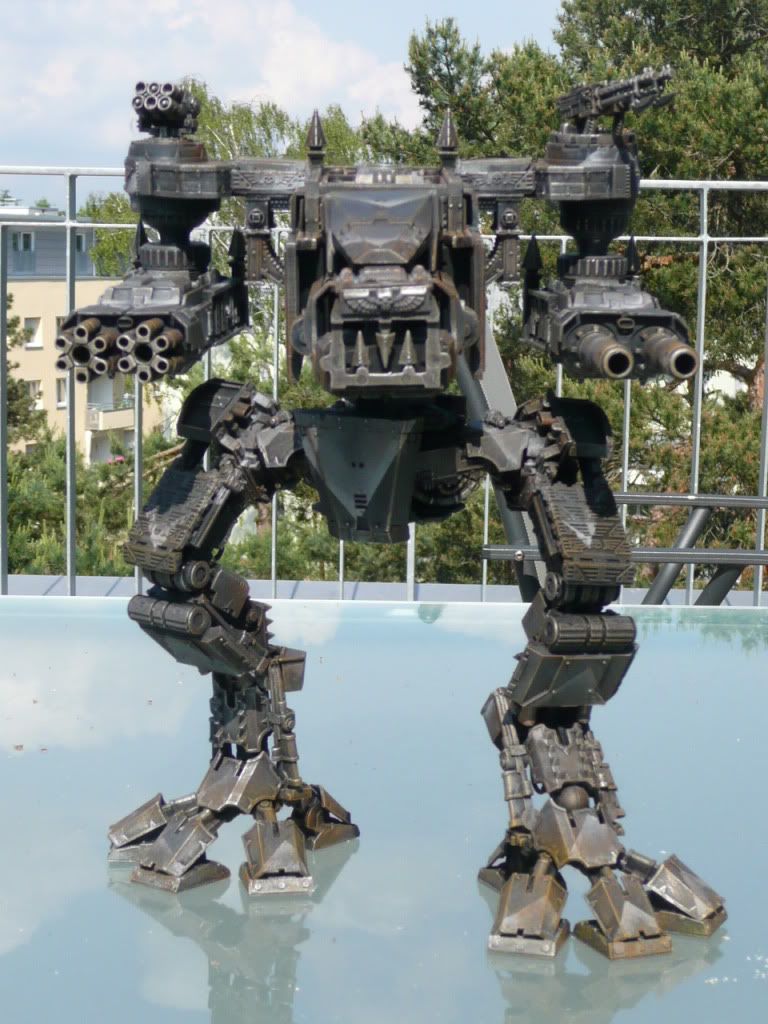
today i finished my kitbashed warhound up to the state where the undercoat had to be applied. at the moment i'm still in the testphase for the colorscheme. for the first BB and the valkyre it already turned out to work pretty well. this weekend we'll see how it will look like on a titan. next i'll apply it to a small tank and some infantrymodels. if group looks good than, i'll define the colors for the details before i'll start with building and painting the rest of the army ...
.
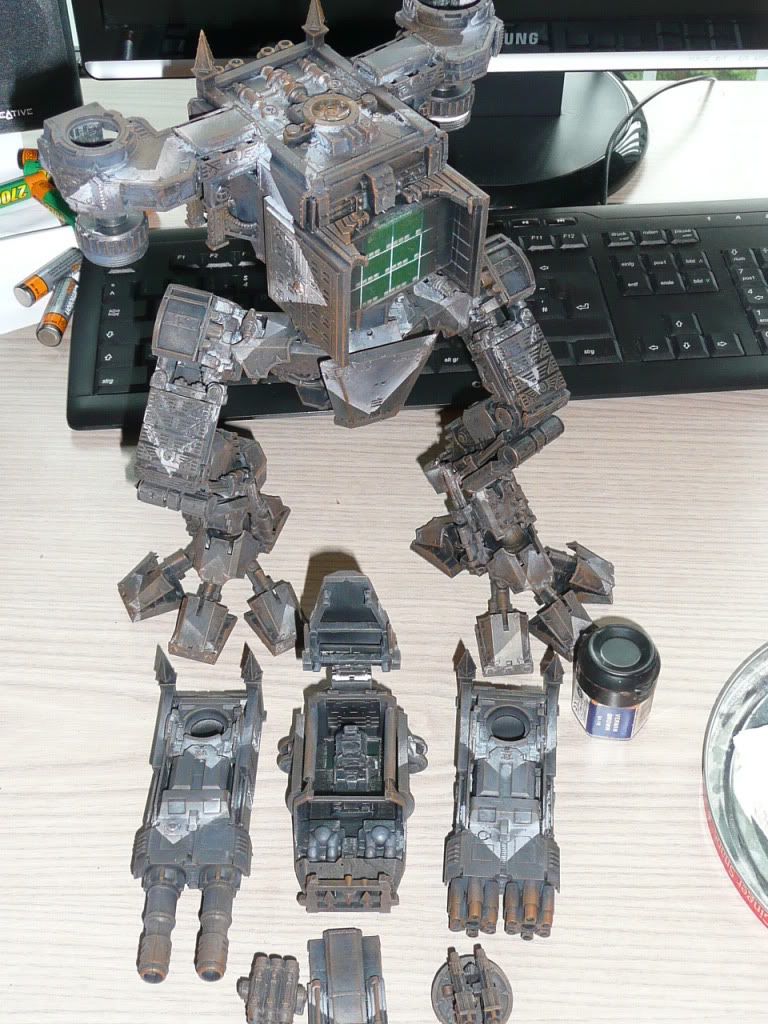
Automatically Appended Next Post: as promised ...: primed black....
.
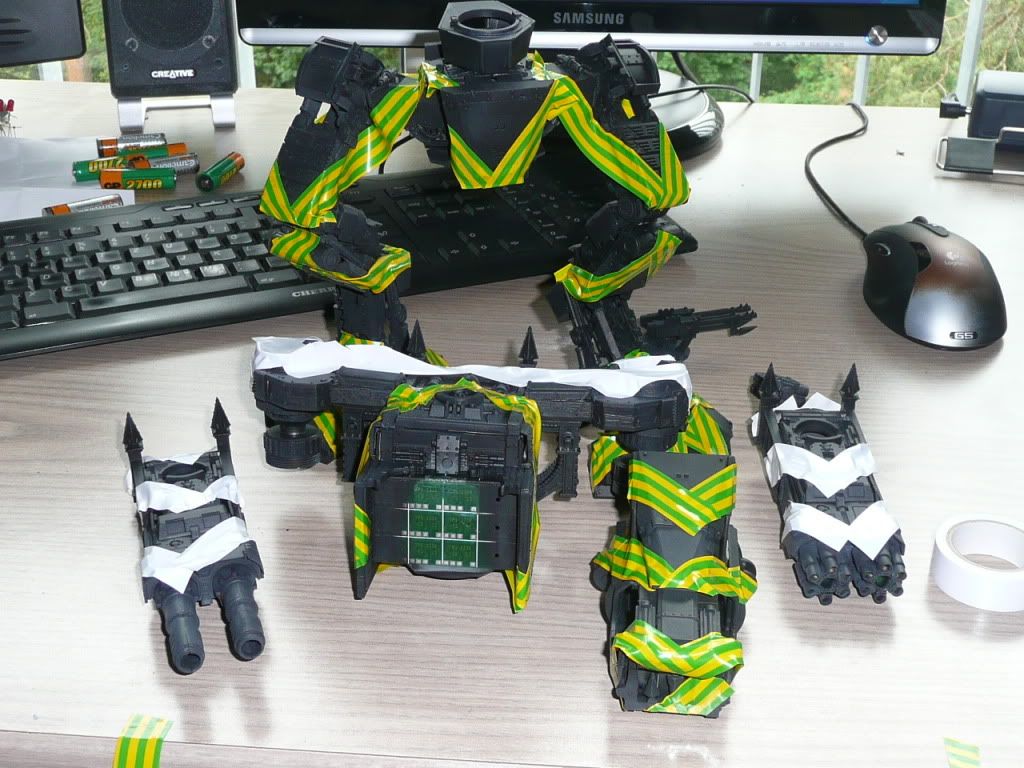
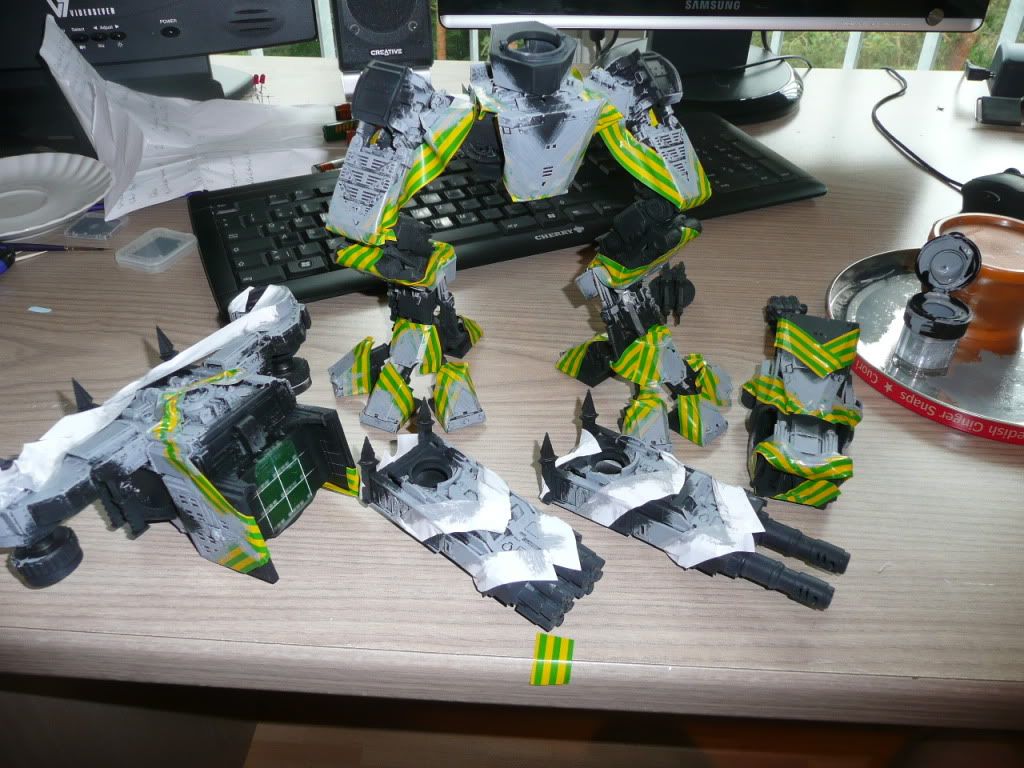
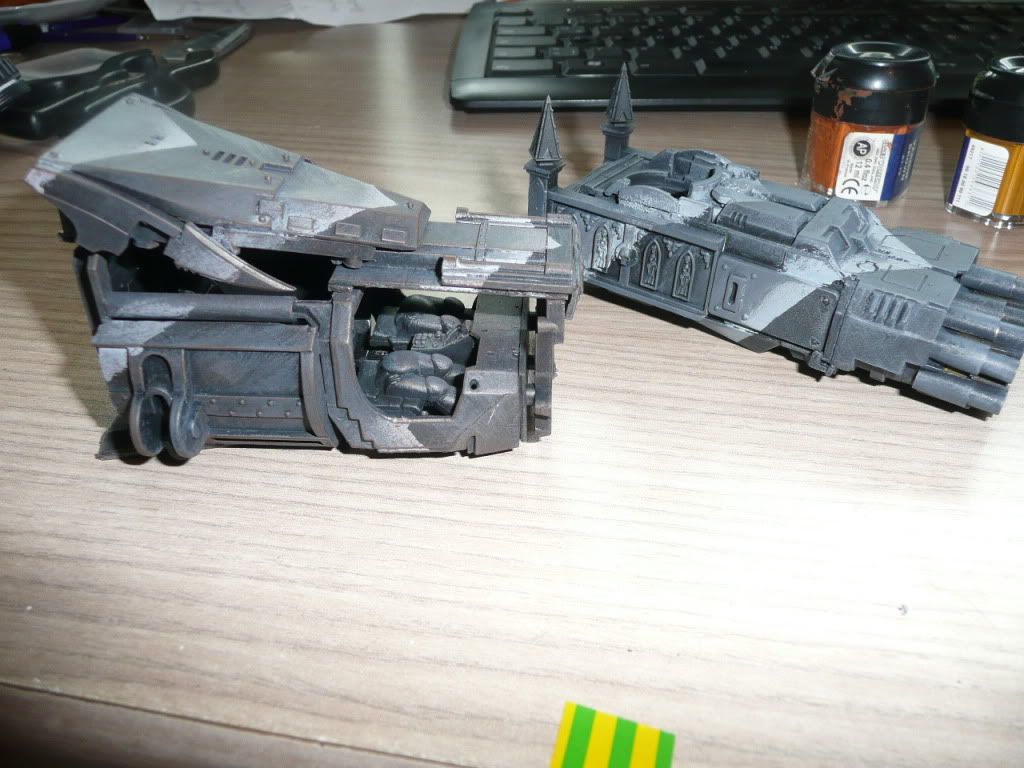
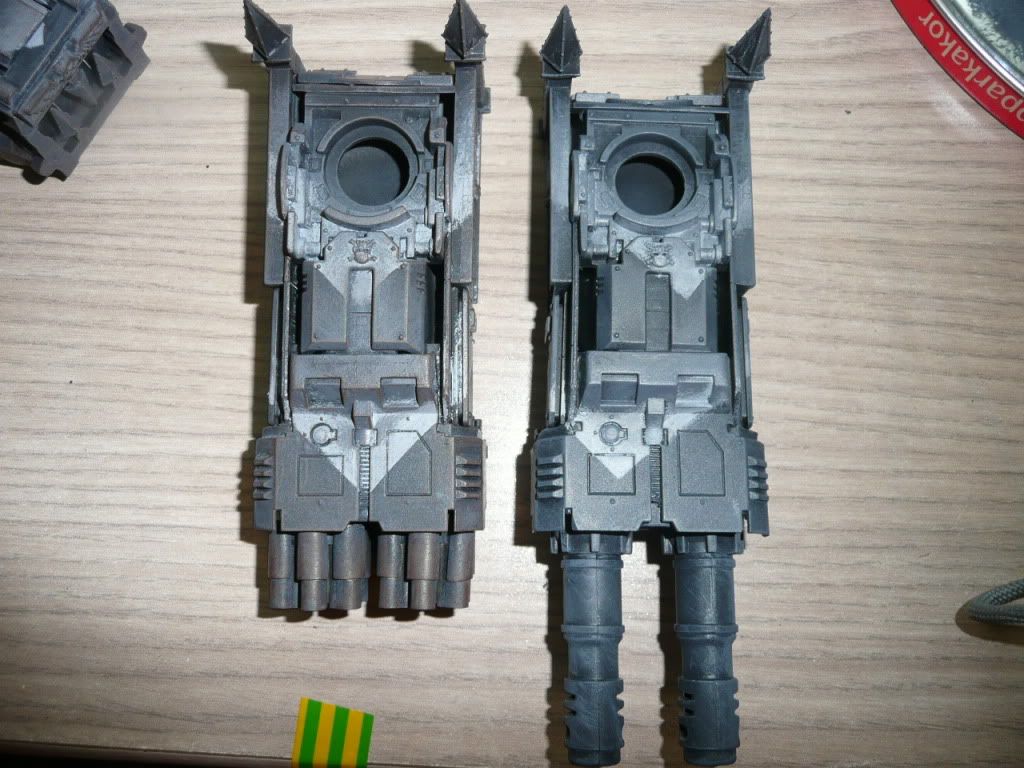
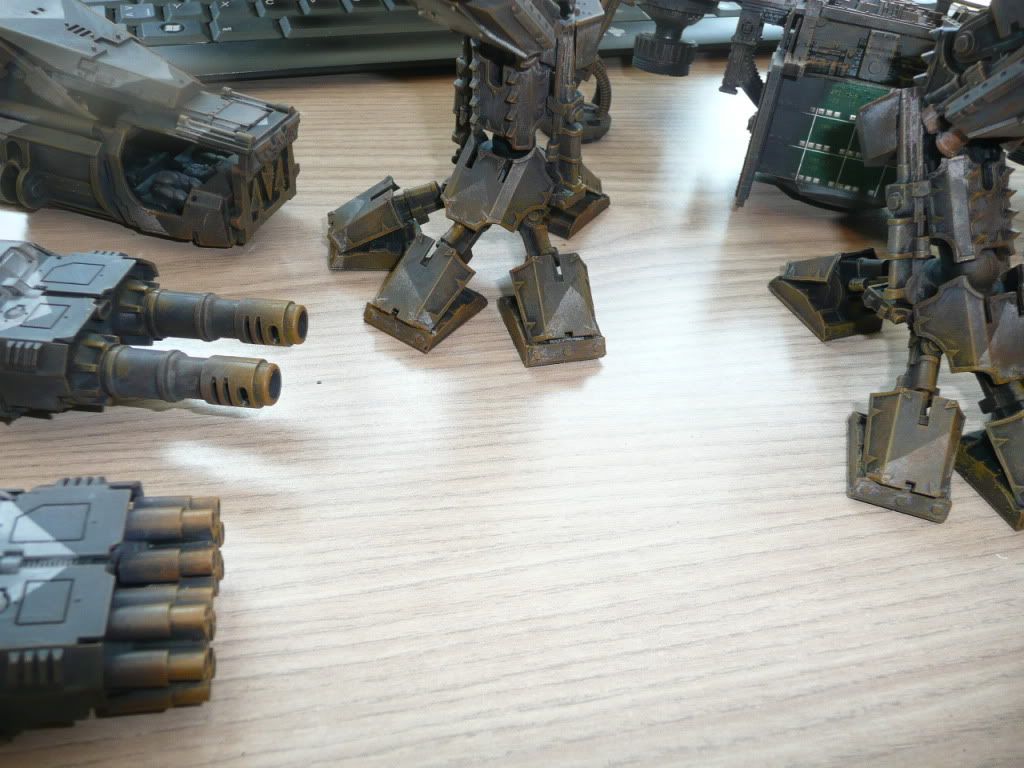
Automatically Appended Next Post: first step: tape-ing ...
-
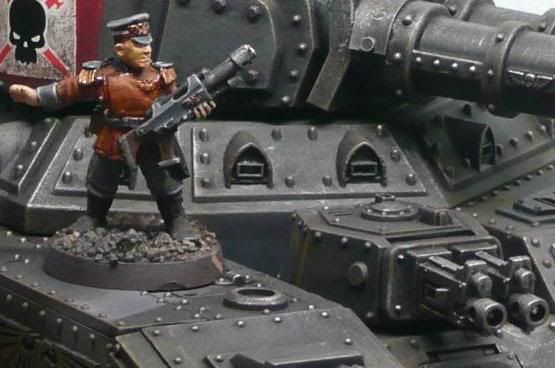
today i treid to find a scheme for the infantry paitnign soem testminis. in the end imho this oe was fitting best.:
.
-
some of you might wonder why i colored the jacket brown. the reason is, that i wanted to distance a bit from the idea that mordians are always bright and shiny in their uniforms and therefore decided to give the jackets the appearence of old, brown, rough and rubust leather. i think this firs quite well, because there are almist no crinkles in the minis jackets. the rest i kept grey as the tanks are. ...
what do you think?.
"I.. I know my time has come" Tethesis said with a gasp, a torrent of blood flowing from his lips.
"No! Hang on brother!!" Altharius could feel the warmth slip away from his dear sibling's hands
Tethesis's reached out his bloodied arm to Altharius's face.
"I..I have one final request"
Altharius leaned close to listen, tears welling in his once bright eyes.
"make sure th..they put my soulstone in a tank... it'll be... real fethin' cool"
"Yes, you're gonna be the most fethin' cool tank!!" burning hot tears streaked down Altharius's face, as he held his brother's soul in his grasp.
2009/05/24 19:49:50
Subject: Re:my new army. - update: 22.5.9: painting the titan.
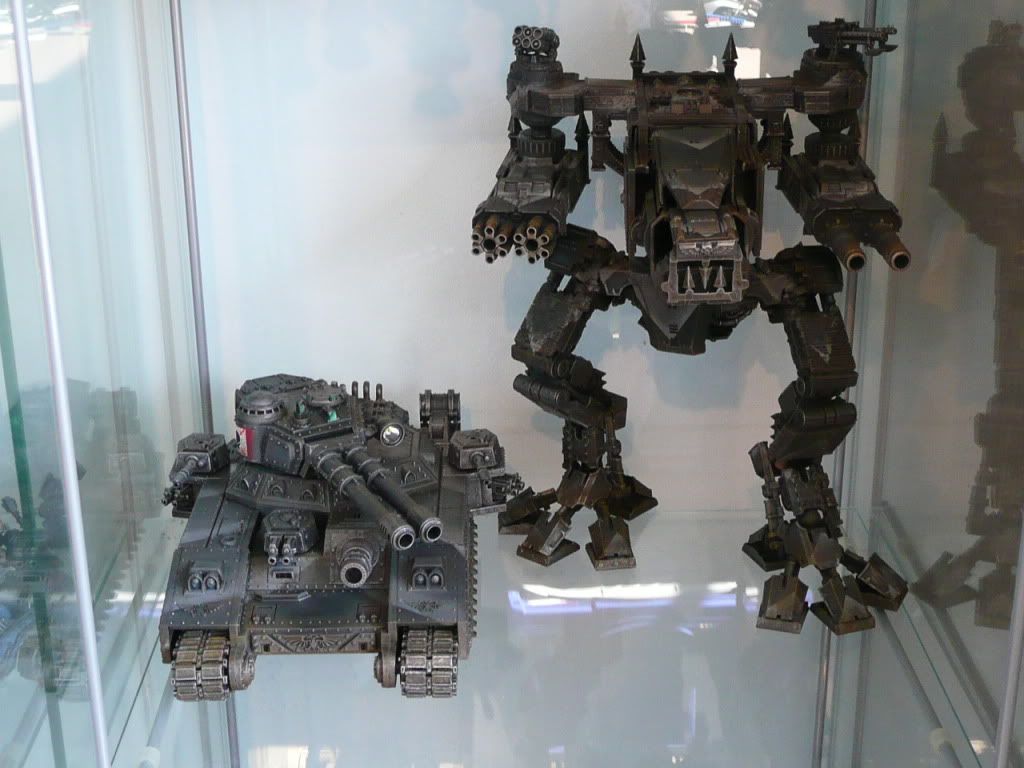
wow that RC baneblade is amazing!!!
but that warhound....(guys i think the emperor came back to life)
95% of teens would go into a panic attack if the jonas brothers were about to jump off the empire state building, copy and paste this if you are the 5% who would pull up a lawn chair & grab some popcorn and yell JUMP
BITCHES!!!!!
_▲
▲ ▲ noobs cant make tri-force
2009/05/24 22:16:18
Subject: my new army. - update: 22.5.9: painting the titan.


 Cadre Coronal Afterglow w1;d0;l0
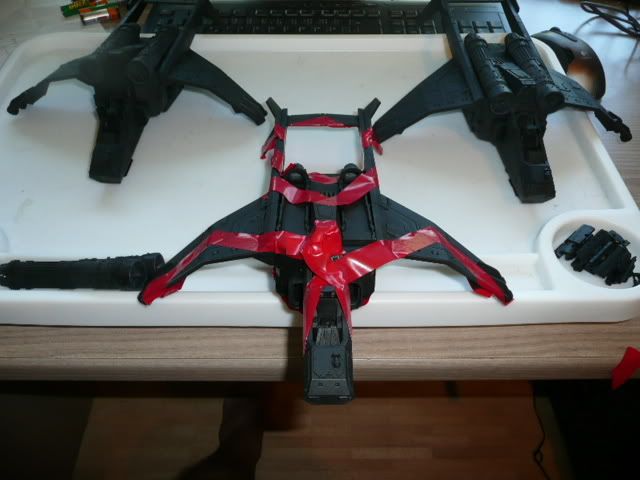


 )... I think I will leave them off until after painting.


 ... because that totally makes sense.


 1500 (Work In Progress)