Free Handing for Dummies!
Before I jump right into the painting there are some things that are very crucial to making freehand work on your model. Some things to consider first off are Placement, Size, Color, and Subject.
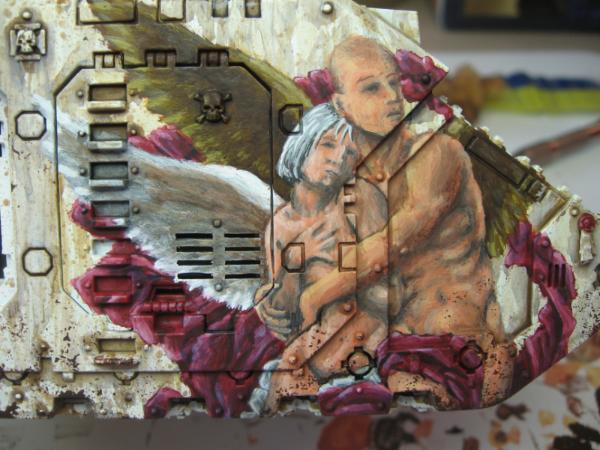
The Canvas: Otherwise known as the model I’ll be working with through this tutorial. Simply put, a land raider.
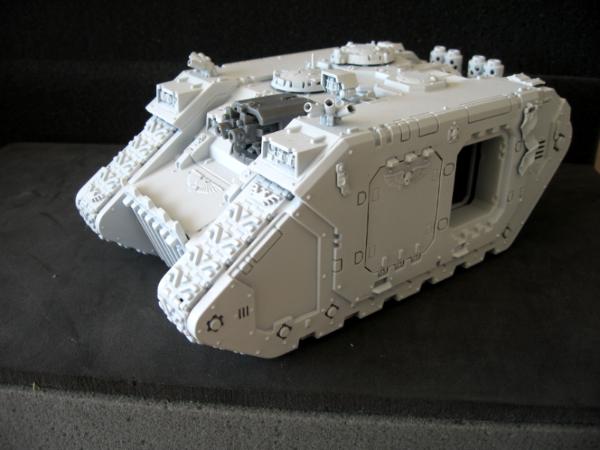
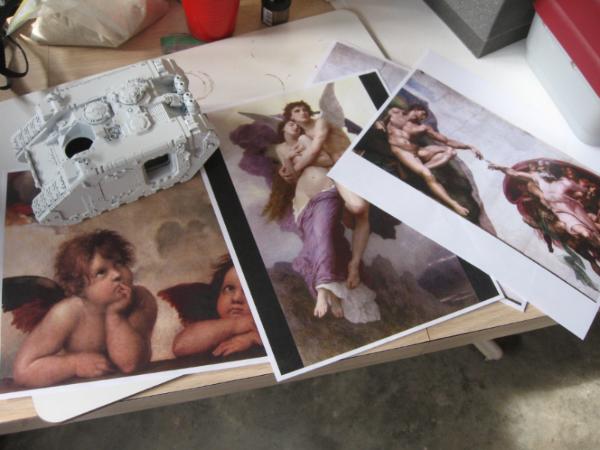
Subject: A loose topic as everyone has different opinions of what is aesthetically pleasing. Basically make sure the freehand you want to do won’t feel out of place. For my land raider I chose to do a
40k fluff based mural based on existing artwork. (I changed Adam into a Marine and God into the Emperor) My chapter’s paint scheme is Cracked marble with deep red accents. The chapter has a renaissance art/cathedral theme, thus the subject matter fits.
Size: Pretty simple really. If the artwork is too small it will not get noticed and if too large it will draw too much attention to the mural and not add to the model as a whole.
Placement: Like other art you generally don’t want it placed right in the middle of the surface area. For instance, you wouldn’t want the free hand piece to be placed right in the middle of the land raider wall, as it will not create interest or motion. Find a good placement that makes your eyes move around to see different aspects of the model.
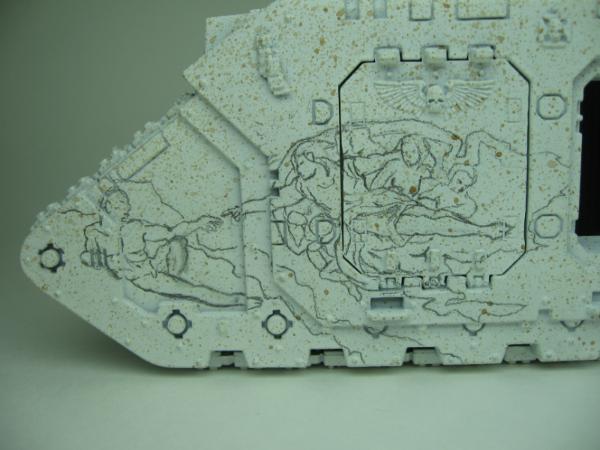
Transfer: First paint your vehicle in its base coat or how ever you plan to paint it. Leave the weathering step out as dirt and bullets are indiscriminant against your mural and will get on your fancy freehand without a care. This makes the over all piece feel more realistic. For transferring your idea onto the surface there are two good ways to accomplish this. 1) Simply use a number 2 pencil and draw it on there as I did below. (Use a chalk pencil if it’s a dark base coat.) 2) For the less artistically inclined you can print off your mural or freehand to scale on a printer and take carbon paper or “coffee paper” and place it in between the printed copy and the surface and trace the shape onto the surface.
Color: This is a rather large subject. I would suggest looking up tutorials or theory on the color wheel and light sources and how to pick colors and so on and so forth. It will easily pay off if you can pick great colors that accent the piece you are working with.
Painting: Now that you have your idea sitting there on the canvas starring at you it can look like a daunting, sometimes impossible task. In the Following I will show you how I deal with this problem by taking the “big picture” and breaking it into small bite size pieces at a time.
Starting to Paint: Wheeeee!!!!....... sigh….
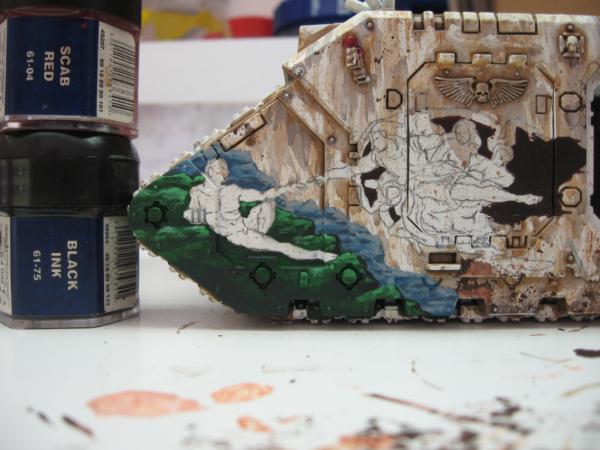
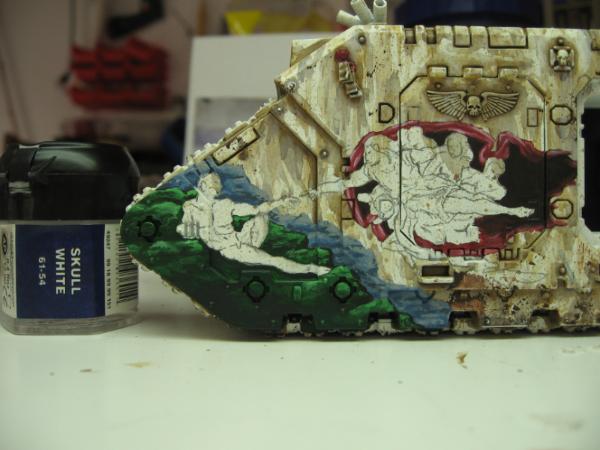
First bite size task I decided to start with the grassy hill the marine will be sitting on. It’s generally a good idea to start with the back of the piece and start making your way to the top layer. I painted the hill dark angels green. Done!
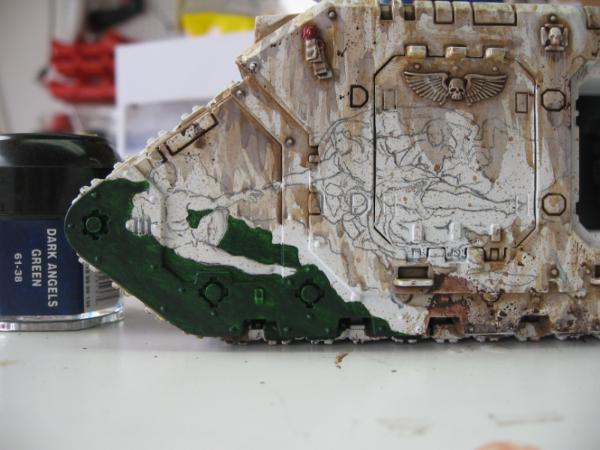
In this step I used snot green to cover almost all the dark angel green layer only allowing certain really dark spots to remain untouched. You should always have your reference picture or inspiration near by to know where to add the highlights or shadows.
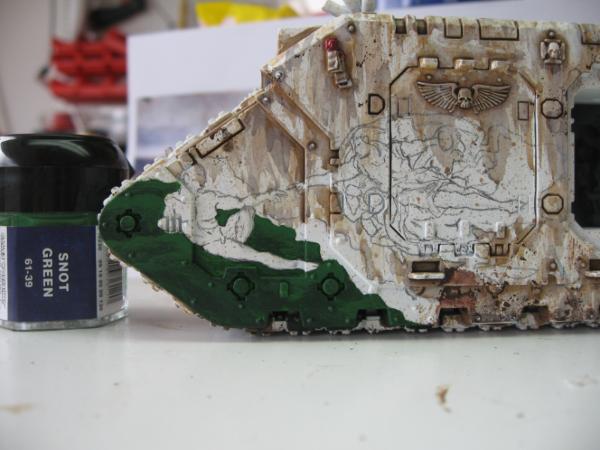
Next I blended skull white and snot green 50/50 and added a highlight to the existing layer just as you would do to an infantry model picking up on the high points.

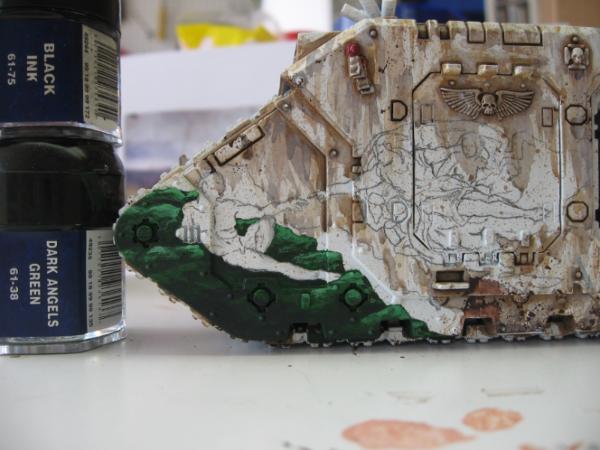
I added a 50/50 mix of black ink and dark angels green to the bottom part of the hill as it goes out of focus. I also added some under the marine for a shadow.
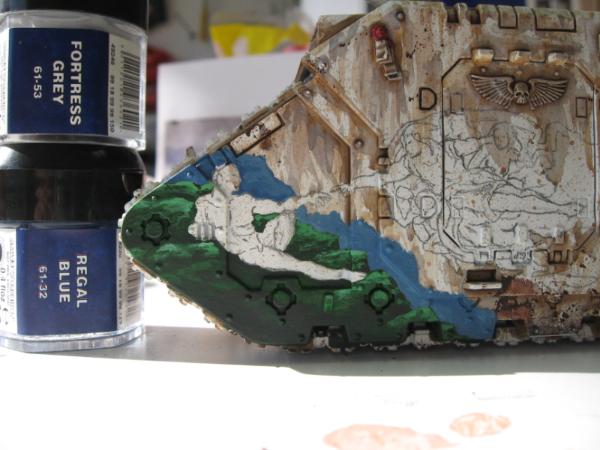
On the hill in the distance I made a 50/50 mix of regal blue and fortress gray and laid down the base coat.
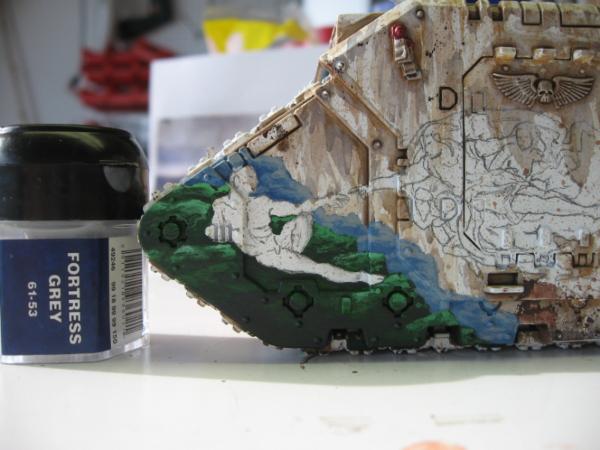
I added pure fortress gray highlights to the background hill in a similar fashion as the green hill.
And back to the shading step I made my 50/50 mix of regal blue and fortress gray and added a touch of black ink to it and filled in the shadows of the distant hill.

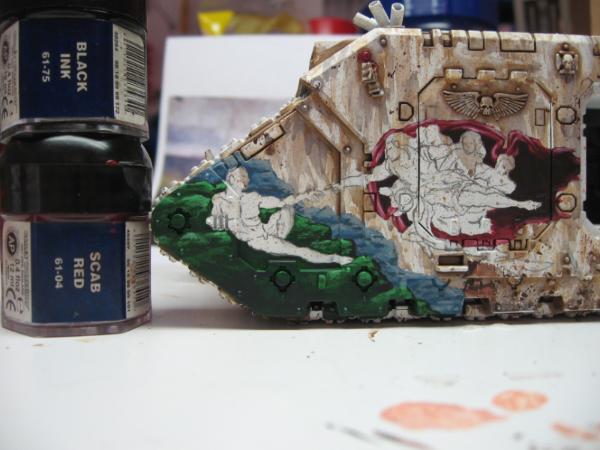
Keeping in my earlier philosophy of painting from the back up, I went to the darkest part of the fabrics surrounding the Emperor and company and painted it a scab red and black ink mixture.
The edge of the fabric rolling up I painted pure scab red.
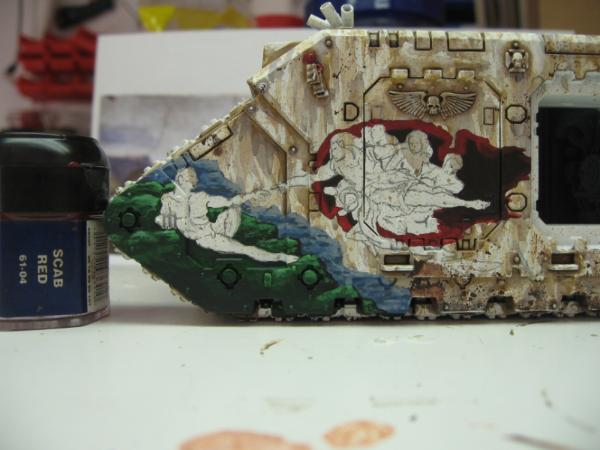
I now added a mix of 1/3 skull white to scab red to add highlights while referencing the original picture to see where the folds were.
I now use 50/50 skull white and scab red mix to further highlight the folds constantly checking my reference picture.
I now use a pure skull white with a very fine tip brush to pick the brightest points in the fabric.
Next I apply a 50/50 mix of scab red and black ink to the deep part of the folds that light can not get too.
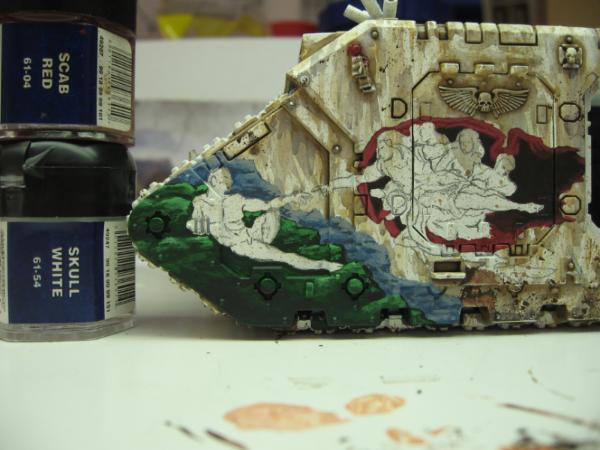
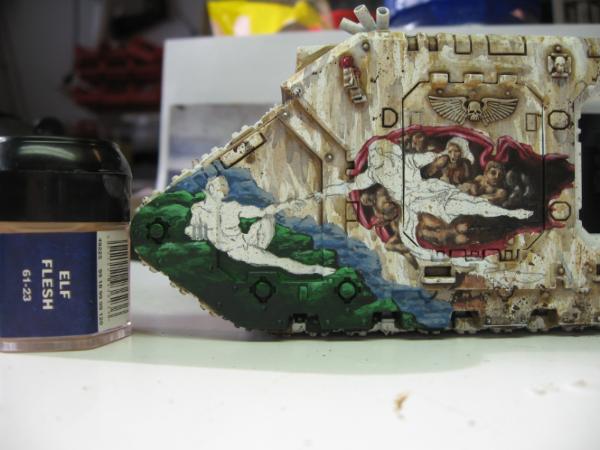
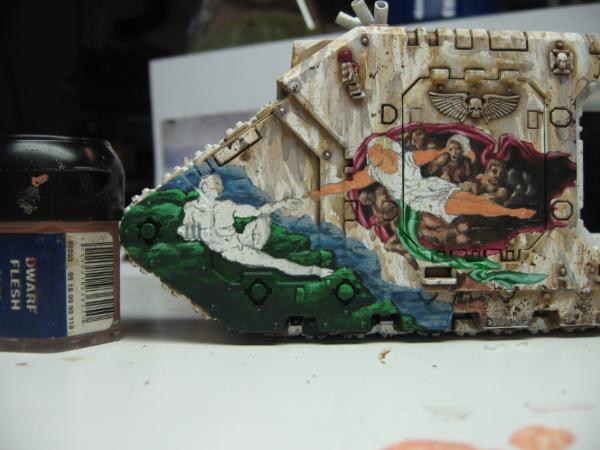
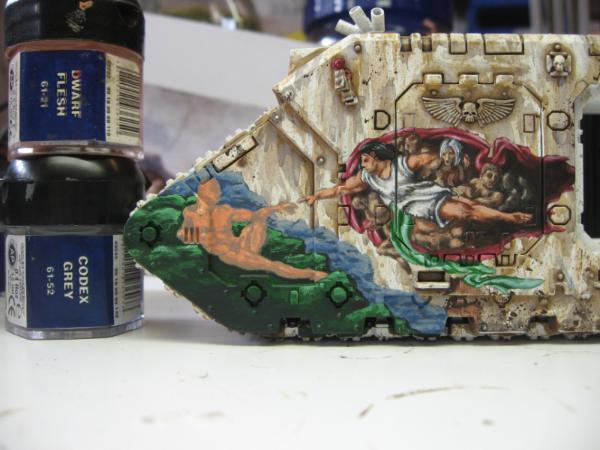
Now to start on the “Retinue” of followers hanging out behind the Emperor. I want their skin tones to be darker and more muted than that of the Emperor not to steal the focus away from his holiness. I start with their base coat, a 50/50 mix of dwarf flesh and codex gray.
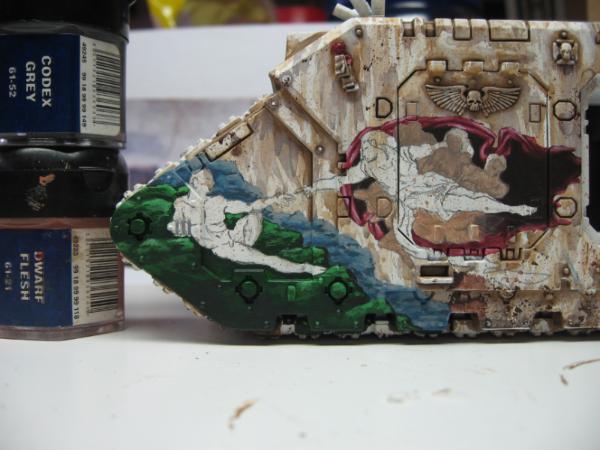
I added the first shadow to the “Retinue” by adding more codex gray to the previous mix. Then I added black ink to this mix and added fine lines to separate arms and heads and such to add definition.
Now I apply scorched brown to blend the skins in with the dark back ground of the fabric their fading into.
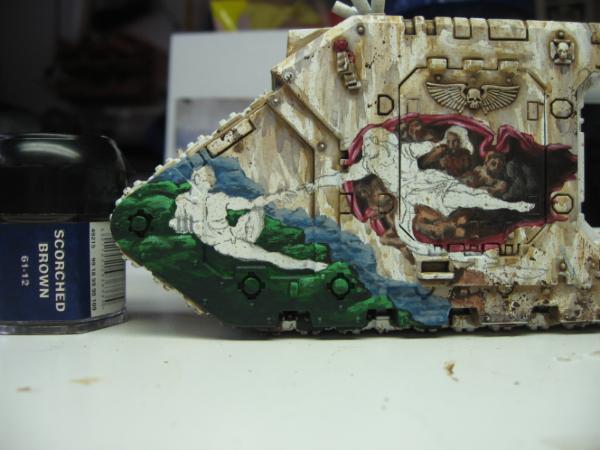
The only highlight I add is elf flesh and only pick up on the highest part of their muscle to keep them mostly faded and muted in the background. Notice how I don’t paint the sister of battles hair. This is because it will be hanging over the Emperors arm so it will technically be the closest color set.
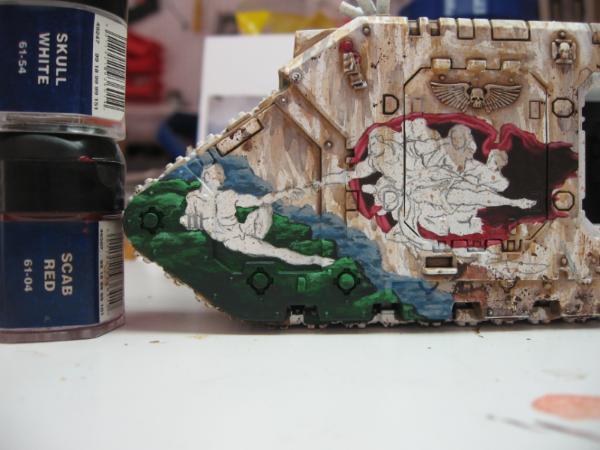
Next I start on the silk banner hanging down from the Emperor. I set the base with a 50/50 mix of goblin green and ice blue making a jade color.
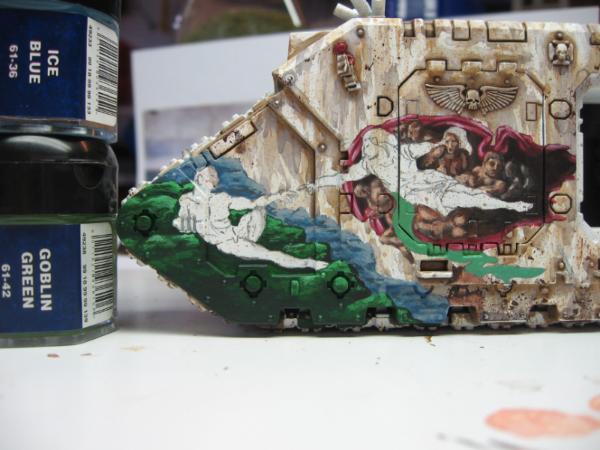
I add the highlights using the same jade color with white mixed in and the shadows with the previously used jade color and adding dark angels green using the technique used on the out rim of the red fabric.
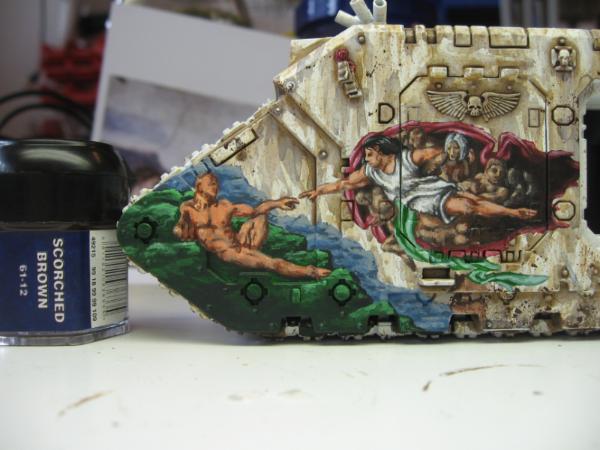
The Emperor! Base coat in dwarf flesh! Grrrrr!
Using the picture as a reference I find and pick out the first layer of shading with 50/50 codex gray and dwarf flesh.

I now use scorched brown to pick out the darker shadows in the skin.
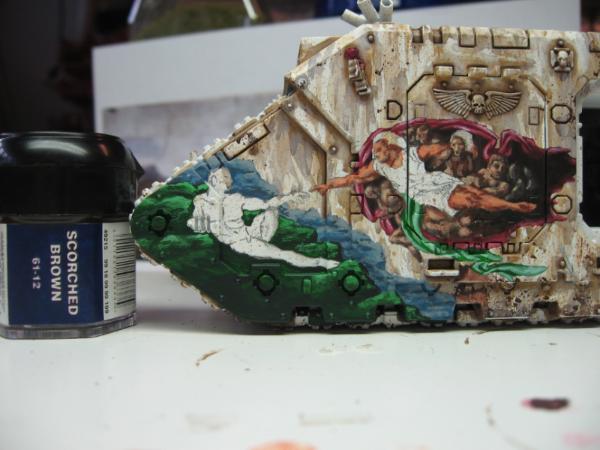
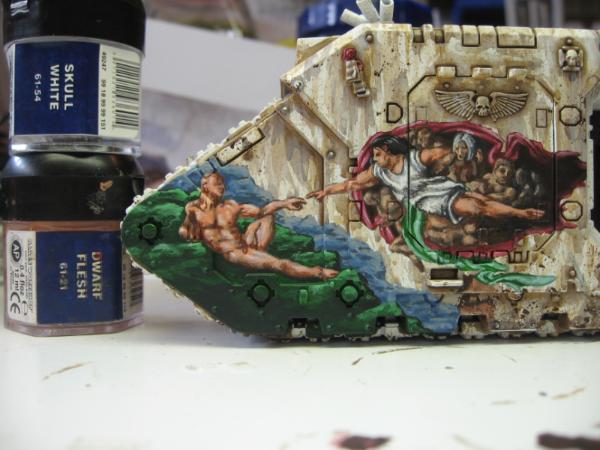
Now I pick out the highlights by again referencing to my picture and applying a 50/50 mix of dwarf flesh and skull white.
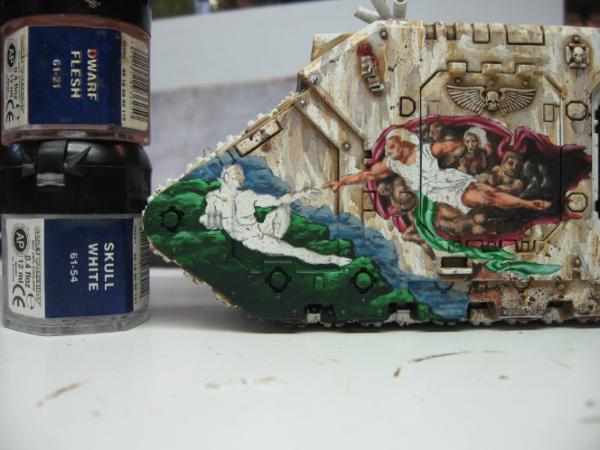
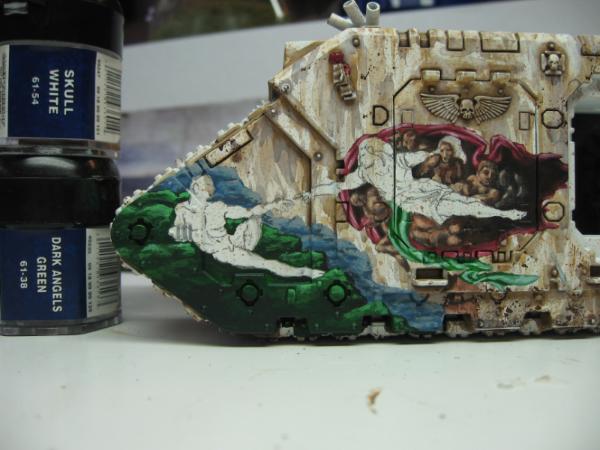
Next the robe and sisters hair will both be done using the same techniques as the Emperors skin. (Only with gray’s instead of flesh.) Basing fortress gray, shadowing codex gray, deep shadow, black ink/fortress gray, highlight with skull white/fortress gray and final highlight with skull white.
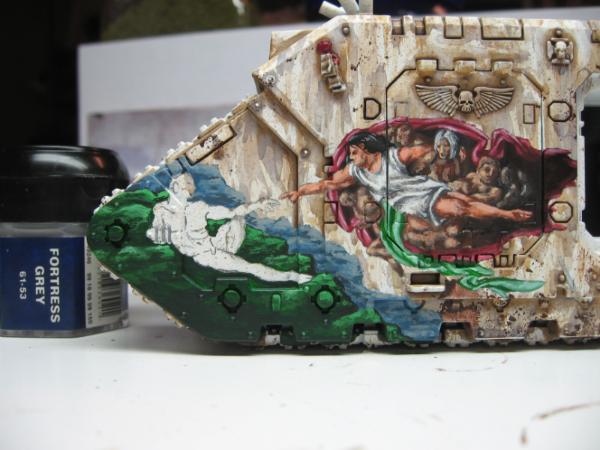
I will now work on the Marine using the same technique as the Emperors skin
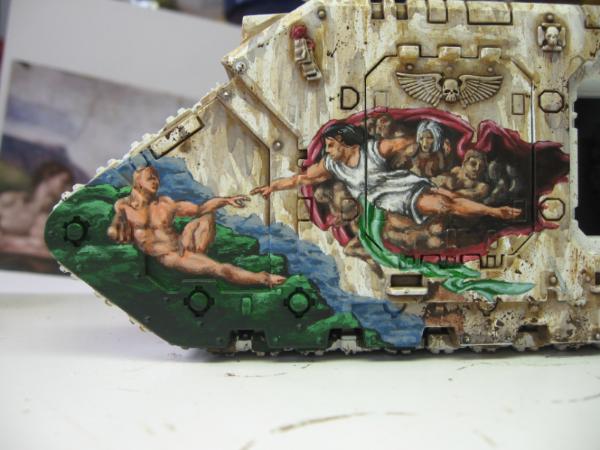
Now to an unusual step I enjoy. I apply washes to the freehand to add extra detail the model will bring out. (Like around rivets, creases, and textures.) I mostly stuck to washing a color over the color used in each “bite” or color step. Thrakka green over the hill and so on. I then mix it up a bit by adding earth tone washes like devlun mud, ogryn flesh, badab black, and gryphon sepia to areas to tone down the individual colors to look more earthy or natural to blend it all into one cohesive piece instead of 7 different colored sections. I also used gryphon sepia to turn the robes of the Emperor into a gold color.

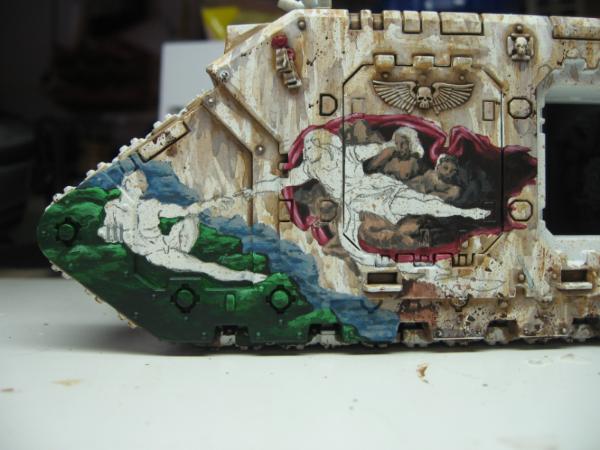
I’ve yet to add the weathering to this mural because I’m not done with this section of the model. However here is another example of how a finished freehand/mural looks with the weathering on top to bring it into the rest of the piece as a whole.
To Summarize
First get an idea, place it where it is aesthetically pleasing and transfer it onto your based model.
Pick the freehand apart into bite size chunks comprised of different colors or levels of depth.
Start from the back of the piece and work forward.
Once into a one color section, simply paint the whole section with the base color allowing the pencil lines to show through, add your first shadow with a modified version of the base color, add deep shadow using a darker color or an even further modified version of the base paint, apply the first highlight using a brighter version of the base, add the brightest highlight by using a lighter color or modifying your first highlight.
After all sections are painted apply colored washes where needed and earth tones on anything that you fancy. This will change your “sections” from being bland and expanding the hues of the color and making it less flat.
Add weathering on top of the freehand to bring it all into coherency.
Finally, clear coat it in a flat or lusterless paint.
And that is how to paint freehand murals… the littleboyblues way!
(Hope that is helpful... that took me 3.5 hours to do! haha!)


 1500 vs
  1500 -40k
 2500 vs
  2500 -fantasy


 Suffused with the dying memories of Sanguinus, the warriors of the Death Company seek only one thing: death in battle fighting against the enemies of the Emperor.
  Iron Warriors
 Farsight Enclave
 Da' Bluest Boyz Der' Ar'


 2500pt
 2000-3000pt
 2000pt
 new amy


