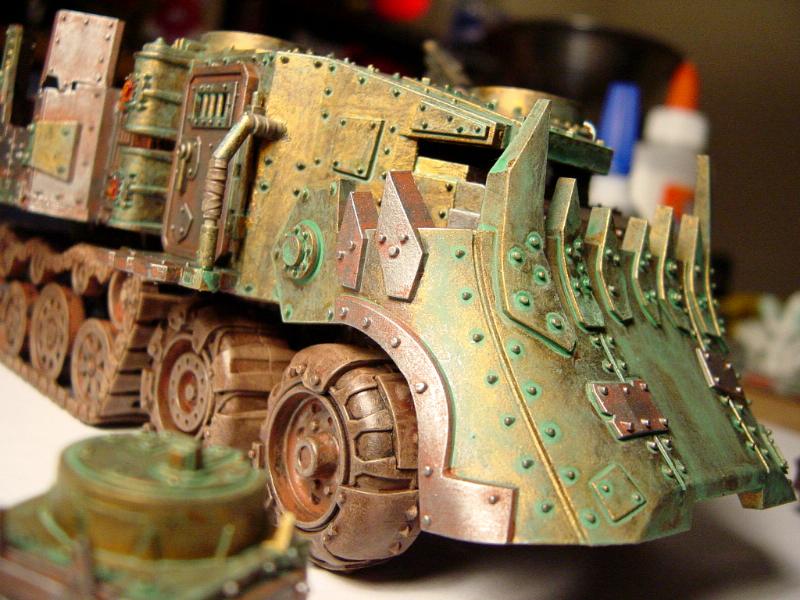
Hello, I have just recently finished the main painting work on my battlewagon, it consists of a combination of corroded steel and bronze leaving a very rusty and deeply patinated look. I adapted my methods from other people's methods of weathering metal, including LBursley who can be mostly credited to my inspiration for the bronze sections of the vehicle. This is one of my first attempts at painting any miniatures, right after a paint job I did on a trukk and a group of bikers from the battle force. This is also my first tutorial here on Dakka.
Several people have asked me how I got the look, but I had finished the majority of my wagon before people asked. So I figured that I would use the prow and the turret bits to demonstrate my painting techniques. A few things though, before starting: I don't exactly have the best camera in the world, and I'm not an expert on lighting, but I'm working on getting better with angles and whatnot. Also, this particular tribe of Orks has very heavily corroded vehicles that haven't been maintained very well. For the most part, if you want a lesser or greater effect, add more or less of whichever secondary coat you want.
To start, one will need several different colors of paint to mix or whatever. I'm not using the full lines of
GW, Vallejo, or Reaper paints, but it would probably still be pretty easy to make the mixes, as most of the colors I used were mid tones of the color stated unless otherwise specified. All colors mentioned are paints and Games Workshop washes. No inks or paint additives were used, however that is due to not having any, not that they wouldn't work well.
For the rust basecoat that I used, I mixed a 1:1:1:1 ratio of red, orange, brown, and a dark metallic bronze color. It had to be mixed up a few times, so the ratios differ, but for the most part, rust is a very reddish brown and can be mixed to taste.
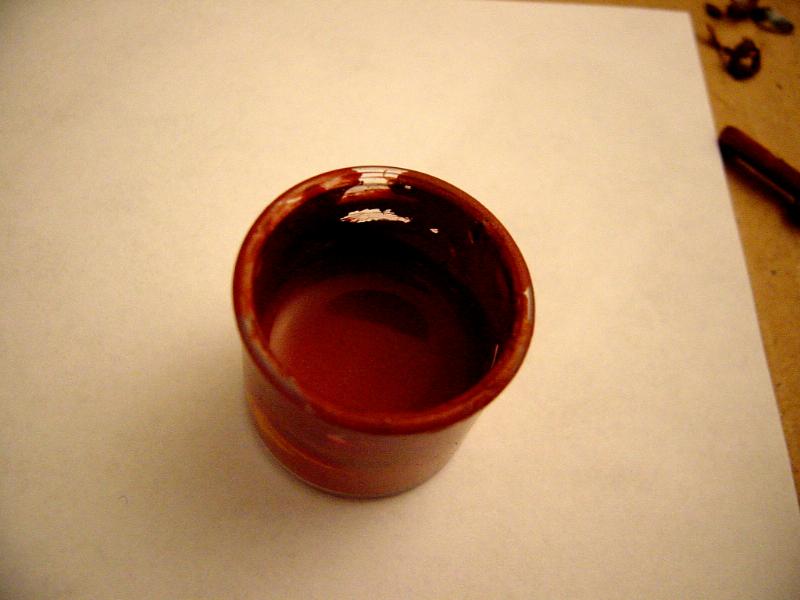
This is what my "rust red" looked like after the mixing was done. It was slightly metallic due to the bronze I added, but mostly a reddish brown. It was somewhat thin, but could be applied evenly with just one brush stroke. It shouldn't be thick enough to cover completely in one pass, but shouldn't be thin enough to not cover well until several strokes. This allows the paint to thicker or thinner in some places than others to give it a slightly more randomized appearance depending on how you painted.
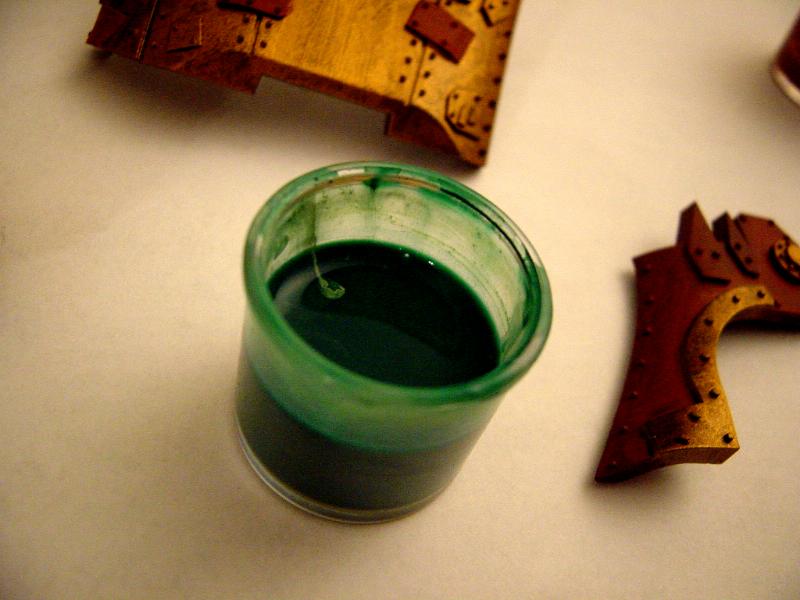
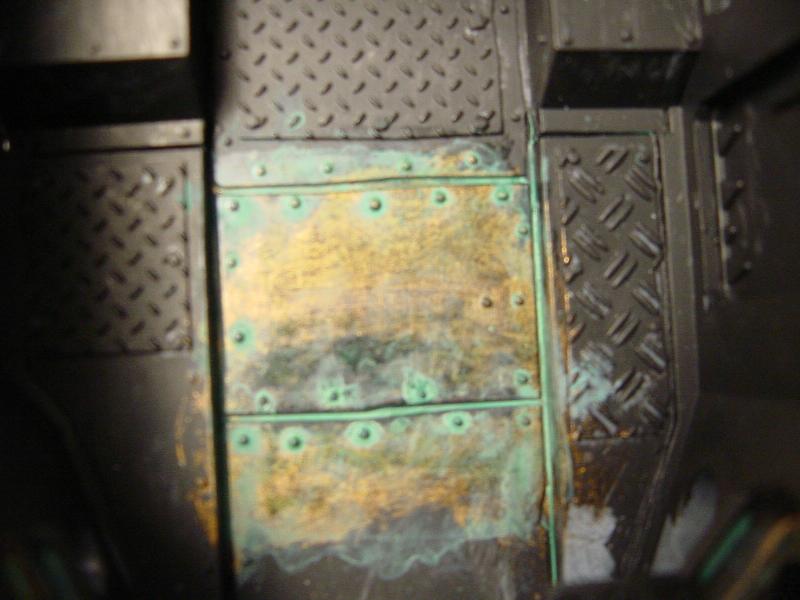
The patina mix was a 2:2:1 mix of aquamarine, green, and a baby blue color. A drop of dish soap was added, and then several drops of water to make it a washy consistency. It should look more green than blue, as copper based alloys turn green, like the Statue of Liberty, for example.
After the mixes are painted up, you will need your a bronze color that is lighter than what you used to mix into the rust. LBursley used Dwarf Bronze in his video. You will also need a color similar to or darker than Boltgun Metal. BGM works well because it darkens to a good worn color with the application of Badab Black, more on this later.
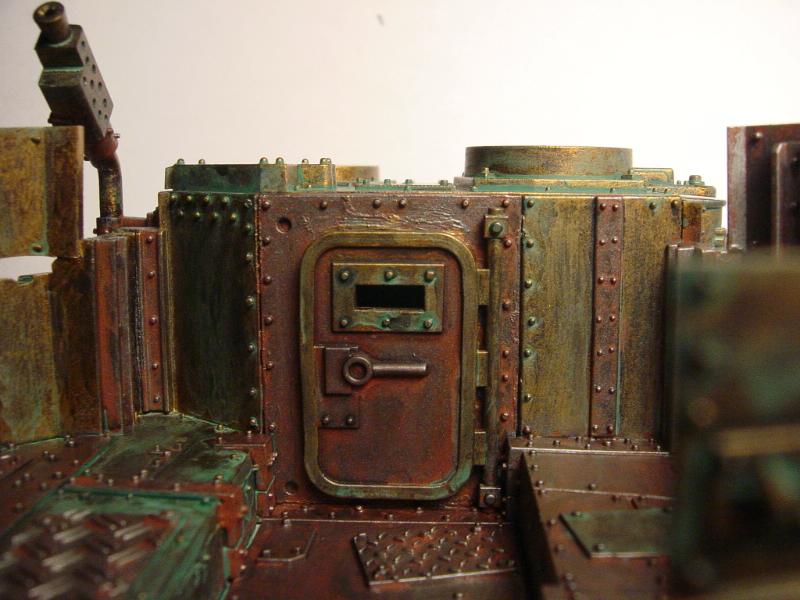
You should plan ahead which parts of the model you want to be rusted and block them in with the appropriate base color, which would be either bronze or rust red, depending on your choice of corrosion. In the case of my battlewagon, I used both somewhat evenly across the entire model. Here is a few pictures of the pieces I basecoated.


After the basecoating is done, you do one of two things. For the bronze parts you will want to liberally wash the metal with the patina wash you prepared, making sure that it gets into crevices and adheres to rivets and armor plates. You will also want to make sure it covers the open, flat parts so as to show that everything is slowly fading instead of just the crevices and edges. You should end up with something like this before it completely dries:
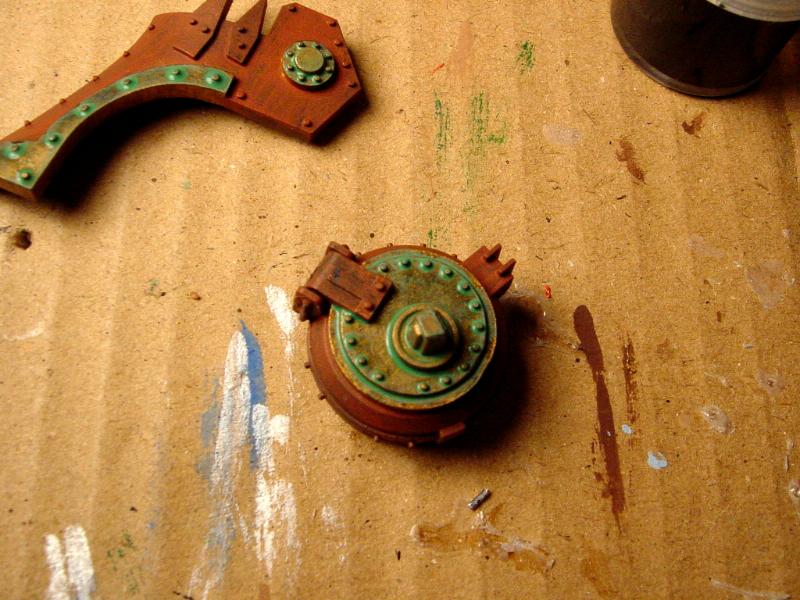
Keep a paper towel handy in case you put too much on, or just use your brush to soak up anything you don't want on the model. A paper towel was used along with several coats of the wash to get this effect when I was first practicing how to do it on the inside of the cab.
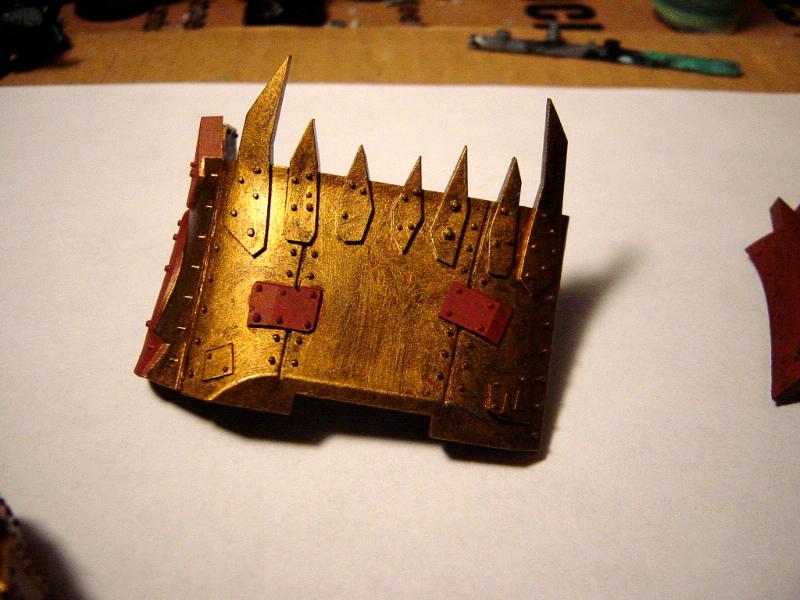
The rust is simply drybrushed over the rust red basecoat everywhere that you see fit to be "unrusty." Any rust red underneath that shows through a quick and sloppy drybrush will look like randomly corroded metal. You can drybrush more or less onto the rust red in order to achieve whichever effect you were aiming for.
Here is an example from the side of the wagon, one from the back door, and another from the bed of my trukk.

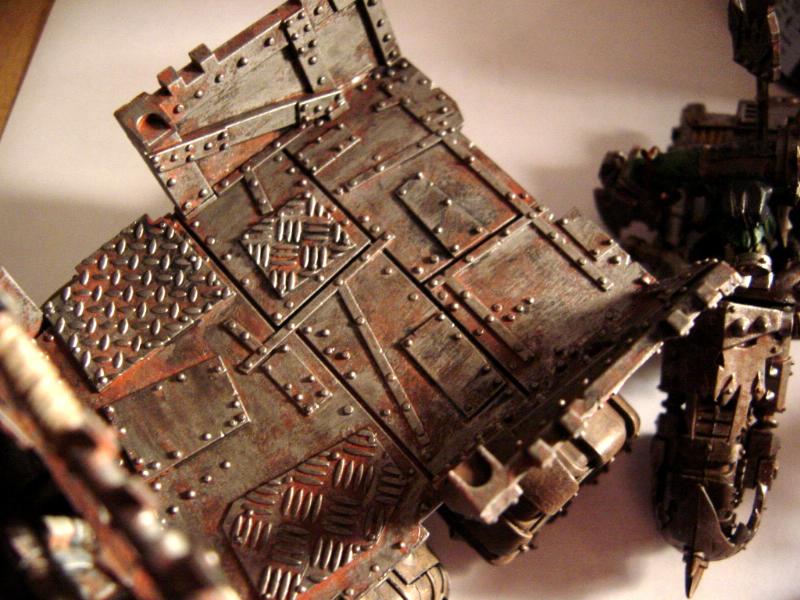
The rust should be running either toward the pull of gravity or in the direction things might be dragged across the surface of the metal to show the clean metal underneath the rust if it gets scraped off. A side note regarding the rust red on my trukk and wagon: the trukk's rust red was brighter and redder than the wagon's which happened to turn out darker and more brown. After the drybrushing, take a little of the rust red and touch up anywhere that may have been drybrushed too much, so that you might be able to show dripping rust or corrode an edge that got too heavily painted over.
After all that work is done, wash the bronze with Thraka Green or leave it as it and wash the rust with Badab Black or Devlan Mud. Most of my bronze was not washed with green, some of it was, other parts were washed with black. All of the rust, however, was washed once with a layer of black with brush strokes moving in the direction of gravity or movement on the surface.
That should be about it. Simple and quick weathering techniques that can be adjusted to fit whatever degree of corrosion you want for your army. I have a feeling I've left something out, but can't think of it now, questions, comments, etc, all encouraged. If I figure out what's missing, I won't hesitate to toss it in. Thanks for reading
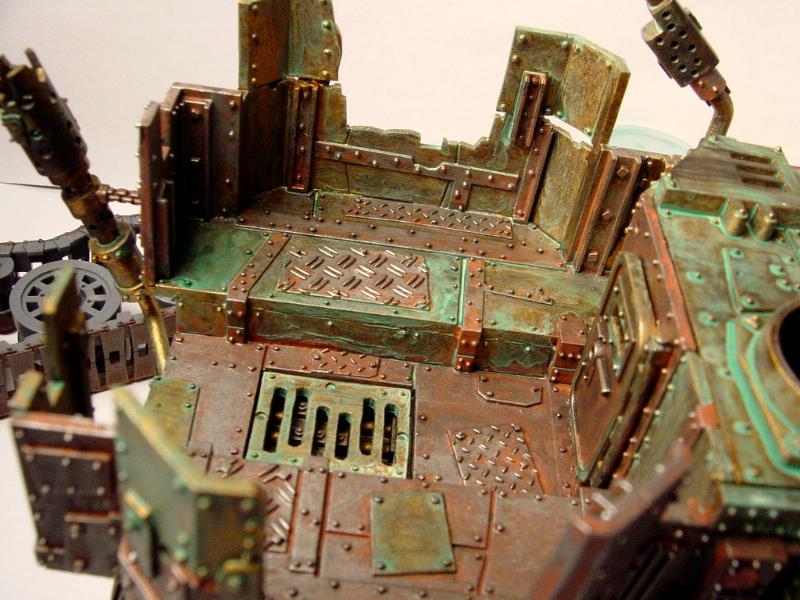
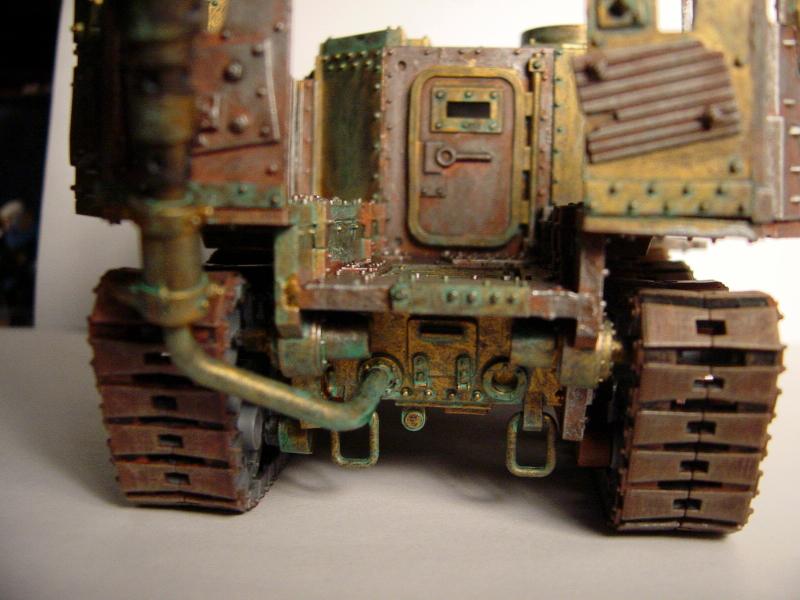
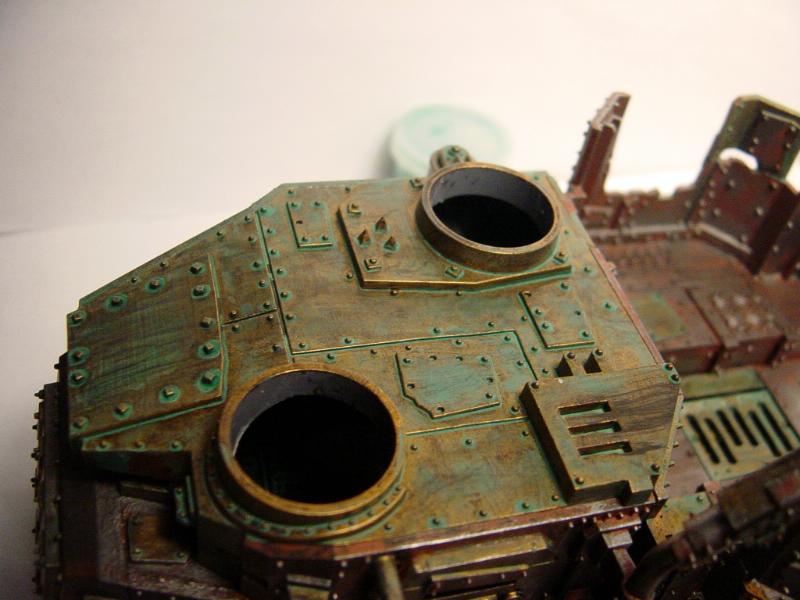
The (mostly) finished battlewagon:


 Deff Gearz 2,000+pts. (50% painted),
  Retribution 57pt.(70% painted),
  FOW
FOW 
 My blog

 Dark Angels 10k+ pts