| Author |
Message |
 |
|
|
|
|
Advert
|
Forum adverts like this one are shown to any user who is not logged in. Join us by filling out a tiny 3 field form and you will get your own, free, dakka user account which gives a good range of benefits to you:
- No adverts like this in the forums anymore.
- Times and dates in your local timezone.
- Full tracking of what you have read so you can skip to your first unread post, easily see what has changed since you last logged in, and easily see what is new at a glance.
- Email notifications for threads you want to watch closely.
- Being a part of the oldest wargaming community on the net.
If you are already a member then feel free to login now. |
|
 |
2010/01/23 11:25:22
Subject: The 7th Galen goes Gladiator! A 1500 pt League report Jan-Mar 2010
|
|

Rough Rider with Boomstick
|
A log of the participation of the 7th Galen Rockhounds in the 2010 40K Gladiator cup league
|

40K 5th ed W/L/D
 65/4/6, 65/4/6,  10/2/1, 10/2/1,  10/3/0, 10/3/0,  2/0/1, 2/0/1,  0/1/1 0/1/1
40K 6th ed W/L/D
 1/0/0 1/0/0
WHFB 8th ed WHFB
Empire: 12/3/2, Lizardmen: 16/3/2 |
|
|
 |
|
2010/01/23 11:47:22
Subject: The 7th Galen goes Gladiator! A 1500 pt League report Jan-Mar 2010
|
|
Rough Rider with Boomstick
|
OK! It's batrep time again! This time I will chronicle the participation of my 7th Galen IG army in this year's 40k Gladiator cup. The Gladiator cup is an annual league organized event wherein players battle within their respective designated gaming stores/areas over a period of around 2 months, and the top players from each area get to qualify for the final round in order to battle in "Gladiator" or knockout style, wherein only 1 gets to survive and win the prize. For this year, it was decided that a fixed 1500 list be used, at least until the end of the elimination round (this means that unfortunately Nid players will use the old codex, until at least the end of the elims). The general rules I have copied from the site of our gaming club:
Groupings and Games:
1. Players will be divided in to three Groups: Galleria-North, Bunker-North and ATC-South
2. Players will be required to play seven (7) games against players within their respective Groups. Out of these games they accumulate corresponding points based on VP difference, casualties, and bonus points made available during the weeks that follow.
3. Of the 7 games, a player may be allowed only one (1) rematch, but scores from both matches will be recorded. Note: Considering the number of players per Group, this should not be a problem.
4. Games can be arranged by agreement between players and played at their convenience, with at least a third player acting as witness. With Galleria, ATC and the Bunker as very visible venues for the games, any games arranged outside these three mentioned will require validation by the third player acting as witness.
5. In true Gladiator tradition, the Primary Objective of each game is to wipe out your opponent from the face of the battlefield. Other minor objectives will be announced at the start of each gaming week.
6. A gaming week starts every Friday and ends the next Thursday where a new Weekly Bonus Objective will be announced for the next gaming week.
7. Each player will use the 1500pt list submitted.
Points to be awarded:
1. Win-Loss:
To be determined by differences in Victory Points ( VP) scored for destroying enemy units. Kindly refer to page 300 of the 40k Rulebook for computing of VPs. For 1500pt games, a difference above 150VP determines the winner, while a 0-150VP difference will determine the draw.
a. Win (greater than 150VP difference): 5pts
b. Draw (0-150VP difference): 3pts each
c. Loss: 1pt
2. Casualties:
Award the following points (cumulative) to the Win-Loss score received:
a. Wiped out enemy HQ slot: +1pt
b. Wiped out enemy Elites slot: +1pt
c. Wiped out enemy Troops slot: +2pts
d. Wiped out enemy Fast Attack slot: +1pt
e. Wiped out enemy Heavy Support slot: +1pt
Kindly note that dedicated transports (Rhinos, some Landraiders, Raiders, etc.) do not count in resolving casualties nor units that do not count in the standard force organization (ex. Chaos Spawn, Lesser Daemons, etc.)
3. Bonus Points:
a. Wipeout (Remember those dedicated transports and non-counting standard force org elements? They count here.): +2pts
b. Bonus Points awarded in the Weekly Bonus Objective Scenarios (To be announced at the start of the gaming week): +2pts maximum +1pts each for a draw*
* An important note on Weekly Bonus Objective Scenarios: Points from Weekly Bonus Objective Scenarios may only be won ONCE, and may be attempted only TWICE by any one player for the given gaming week.
I belong the the ATC South Sector. Overall 41 players registered for the event, with my area having 13 players, and the other 2 having 14 players.
For my list, I wanted to try out new stuff, so I took out several units form my successful 2009 GT army, and tried out new stuff......
My list:
The 7th Galen Rockhounds go Gladiator....
 HQ
HQ: Captain Fernando's Command Squad (1 CCS, autocannon and standard) 105
Chimera with Multilaser and Hull Heavy bolter 55

Troops: Sherard's Guards
Platoon command squad (4 flamers) 50
Chimera with Multilaser and Hull Heavy Flamer 55
2 x infantry squads (autocannon, grenade launcher) 65 each
2nd squad has a Chimera with Multilaser and Hull Heavy Flamer 55
1 Special Weapon Squad with 3 meltaguns 65

Troops: Hounds of the Sidewinder
Platoon command squad (1 Flamer, 3 meltaguns) led by
Captain Sidewinder (counts as Alrahem) 135
Chimera with Multilaser and Hull Heavy Flamer 55
1st Squad (1 grenade launcher, 1 autocannon, sergeant with power weapon) joined by Commissar Sherwin (with bolt pistol and power weapon) 120
2nd Squad (1 grenade launcher, 1 autocannon, sergeant with power weapon) 75
1 Special weapon squad with 3 flamers 50

Troops: The Chain Gang, the Scum of Galen
10 penal legionnaires 80

Fast: Fortis Honorum - 1 Devil Dog (Melta cannon, Hull Heavy Flamer) 120

Heavy: No. 1 - 1 Leman Russ battle tank (Battle cannon, hull heavy bolter) 150
Heavy: Rain of Death - 1 Basilisk (Earthshaker cannon, hull heavy bolter) 125
Heavy: Thumper - 1 Griffon (Griffon heavy mortar, hull heavy bolter) 75

It's not the most efficient list in the world, but I had just finished painting the penal legion as well as the devil dog, so heck I wanted to use them! In addition, I want to see how well Captain Sidewinder (Al-Rahem) and his platoon does in a competitive environment, and I used the Col Schaeffer model to represent him.
I'll post some results later on....
|
40K 5th ed W/L/D
65/4/6, 10/2/1, 10/3/0, 2/0/1, 0/1/1
40K 6th ed W/L/D
1/0/0
WHFB 8th ed WHFB
Empire: 12/3/2, Lizardmen: 16/3/2 |
|
|
|
|
2010/01/23 18:03:38
Subject: The 7th Galen goes Gladiator! A 1500 pt League report Jan-Mar 2010
|
|
Rough Rider with Boomstick
|
To continue, the ATC South Sector as I have mentioned is composed of 13 players..the army type breakdown is:
4 SM armies (1 Dark Angel, 1 Blood Angel, 1 Space Wolf, 1 Crimson Fist)
1 Chaos Space Marine army
2 Nids
1 Tau
1 Chaos Daemon
1 Necron
1 Dark Eldar
1 Ork
1 IG (me!)
Another point of note is that in the elimination round it is OK to be unpainted, but those who qualify for the finals must have their army painted.....in addition, trash talking and challenges on the forum is the norm and encouraged!!!
So it's on to week 1! Here is the scenario:
Week1 Scenario - And So It Begins...
Deployment : Pitched Battle
Duration : 5 turns only
Special Rules :
Infiltrators and Scouts
Reserves
Deepstrike
Warp Shift - All deepstriking units MUST deviate (ie. all "Hit" deviation rolls will be re-rolled wink.gif ) Mishap rules still apply.
Disoriented Line of Attack - All outflanking units must declare an "entry point" on the edge of the table that they will enter. Roll deviation dice. If it scores a "Hit", models resolve movement reckoned from that point. If an arrow is rolled, move the entry point 2D6 inches along the general direction of that table edge. If the point is moved outside the corner of the table, the unit does not arrive (counted as delayed) and will re-roll reserves in the next turn.
Victory Conditions: VP score determines the Winner
Bonus Points Conditions (+2pts max):
If opposing army is reduced to less than half the army pointage - +2pts
If both opposing armies are reduced to less than half the army pointage - +1pts
If no opposing army was reduced to less than half the army pointage - +0pts
Game 1 - Week 1
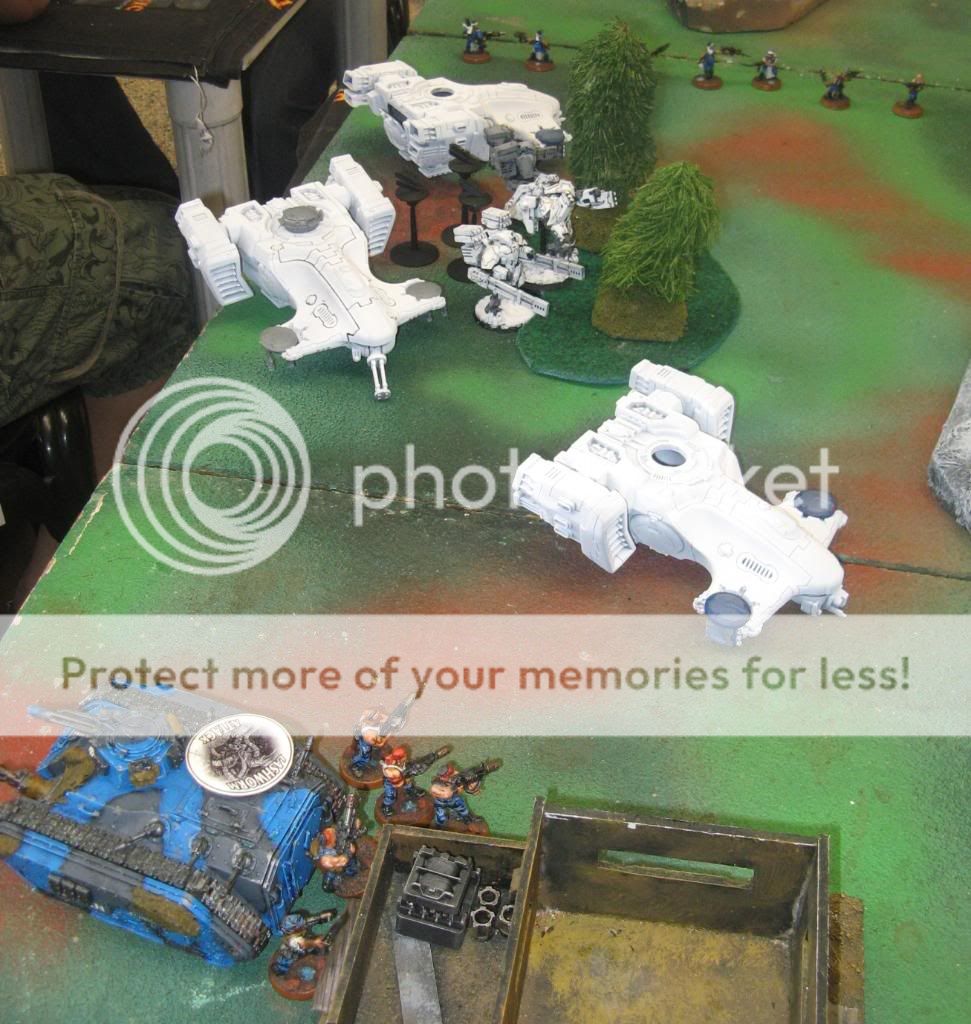
My opponent is Jhei's Tau, and we officially also begin the very first game in the South sector...he used this list...
HQ
Commander O’Maigawd
Missile Pod
Shield Generator
Positional Relay
Hard-wired Drone Controller
Hard-wired Blacksun Filter
Iridium Armor Plates
Stimulant Injector
Shield Drone (x2)
Elites
XV8 Crisis Battlesuit Team Shas'ui (x2)
Flamer-Twin Linked (x2)
Fusion Blaster (x2)
XV8 Crisis Battlesuit Team Shas'ui (x2)
Flamer-Twin Linked (x2)
Fusion Blaster (x2)
XV8 Crisis Battlesuit Team Shas'ui (x2)
Flamer-Twin Linked (x2)
Missile Pod (x2)
Troops
Fire Warrior Shas'la (x12)
>>Devilfish Transport
Disruption Pod
Targeting Array
Multi-Tracker
Kroot Carnivore (x12)
>>Kroot Hound (x8)
Kroot Carnivore (x10)
Kroot Carnivore (x10)
Heavy Support
Hammerhead Gunship
Targeting Array
Railgun
Smart Missles
Disruption Pod
Multi-Tracker
Target Lock
Hammerhead Gunship
Targeting Array
Railgun
Smart Missles
Disruption Pod
Multi-Tracker
Target Lock
XV88 Broadside Shas'ui (x2) with Leader
Targeting Array (x2)
Hard-wired Drone Controller
Hard-wired Multi-tracker
Hard-wired Target Lock
Shield Drone (x2)
Jhei by the way has a fully painted Tyranid army, but probably has temporarily benched them until he get s the new dex as well as models out, and has thus decided to use the Tau.
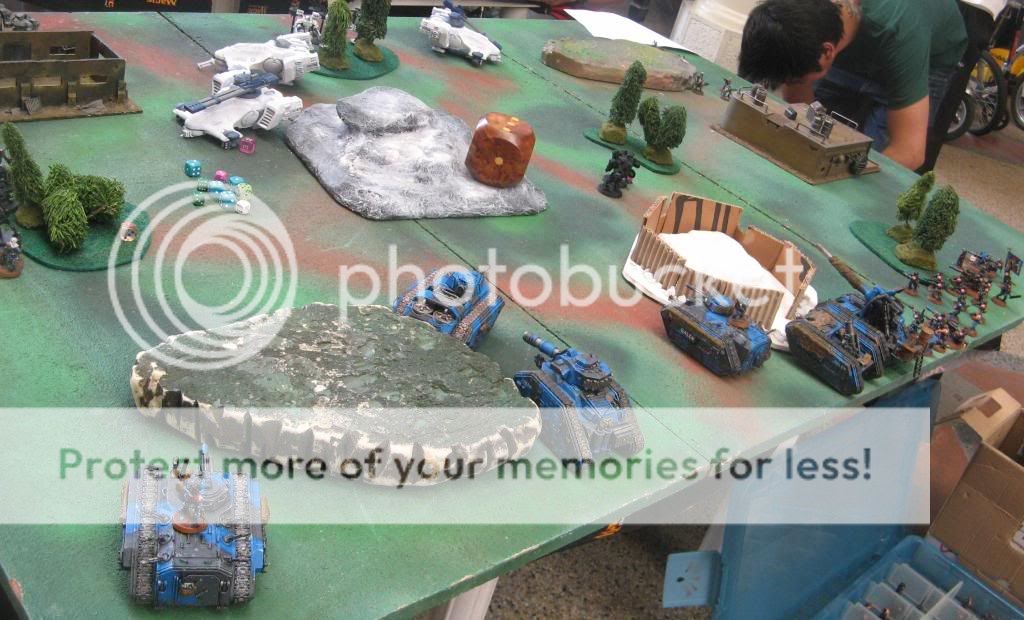
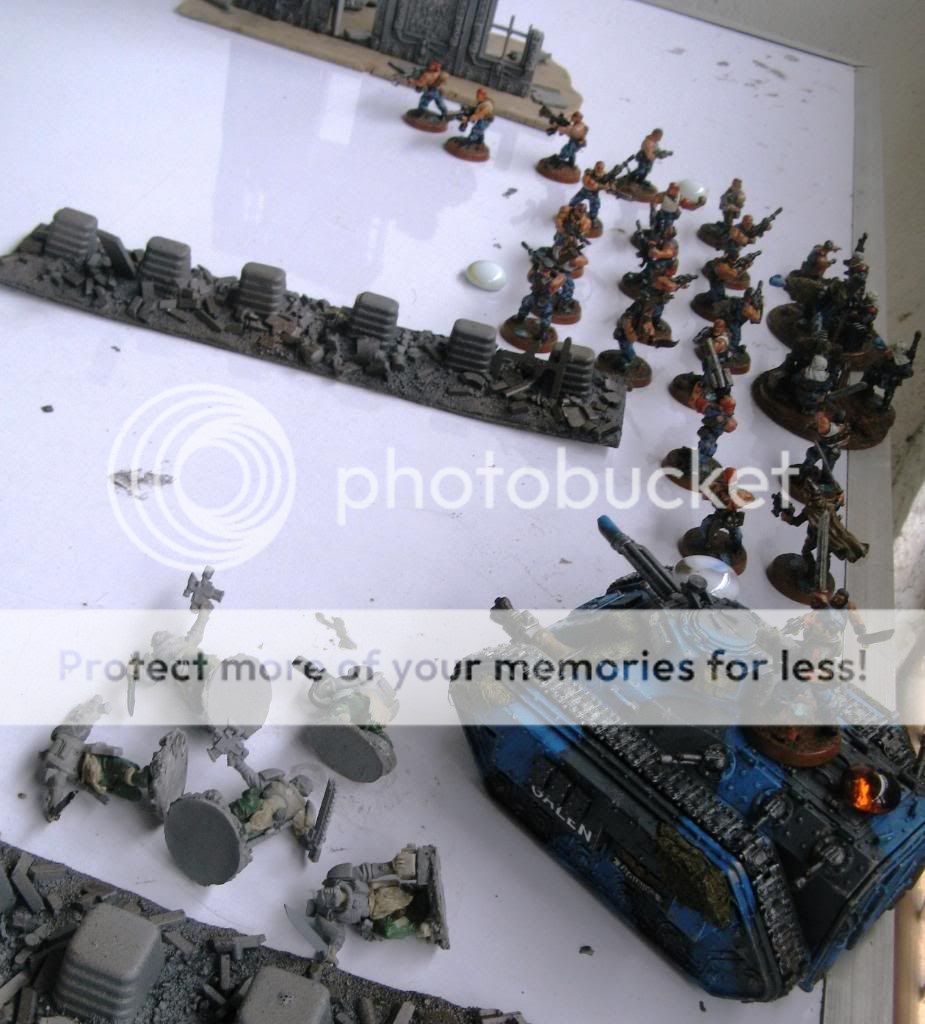
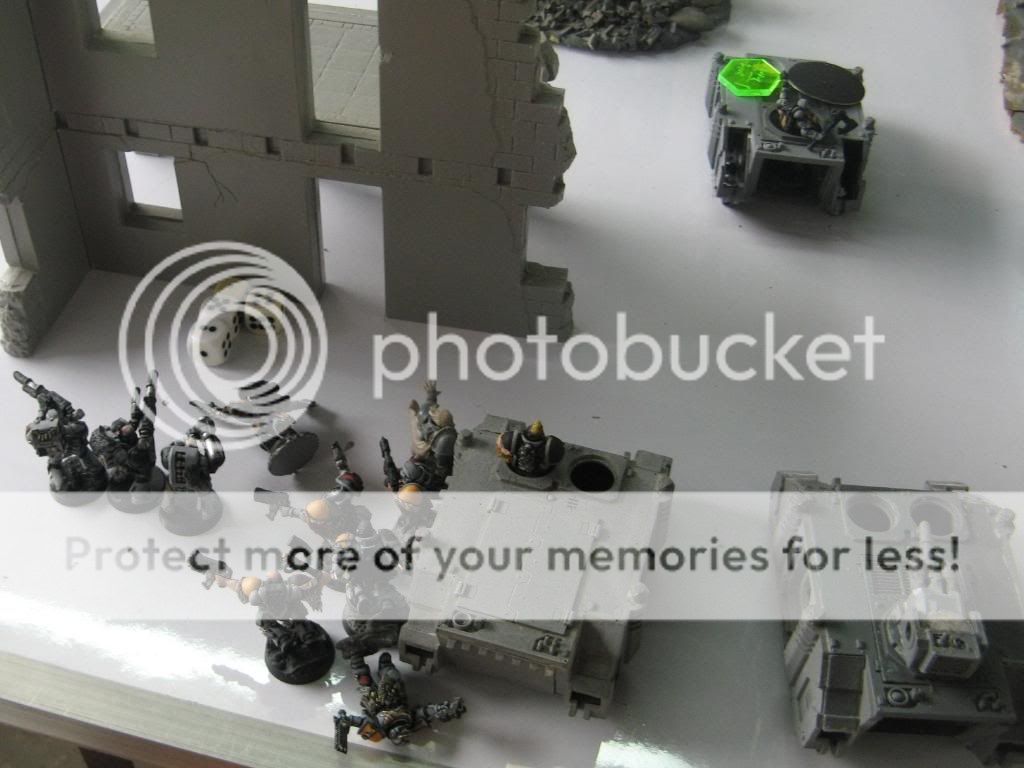
He wins the roll to go first, so I decide to reserve everything (the penal legion get knife fighters, meaning they have an extra CCW plus rending)! Jhei keeps his crisis suits in reserve for deep strike.
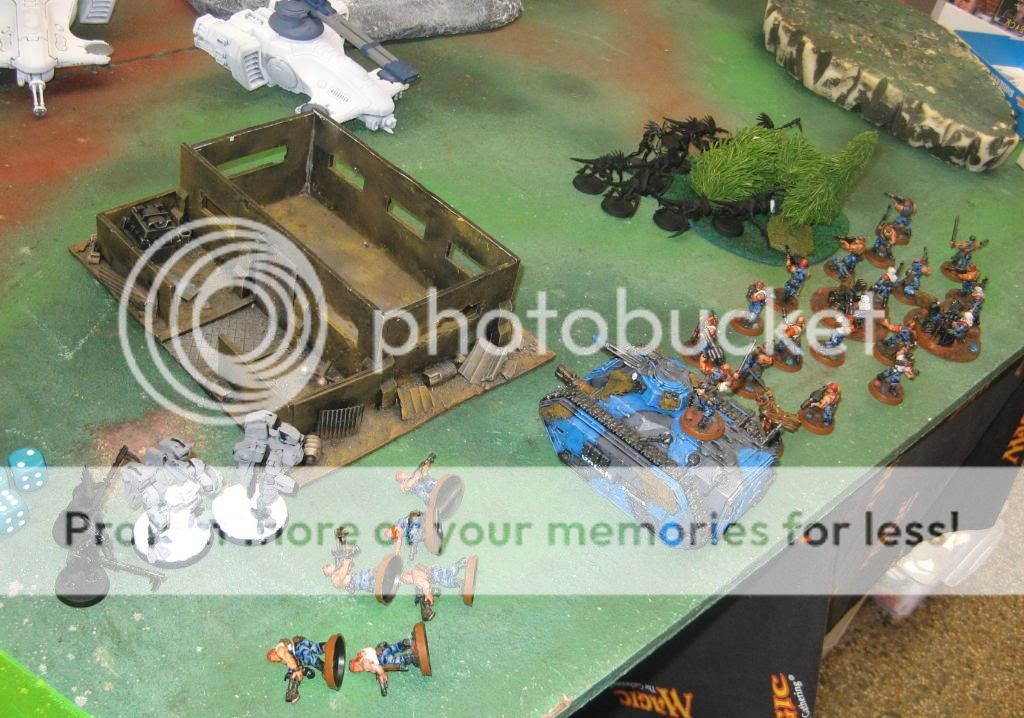
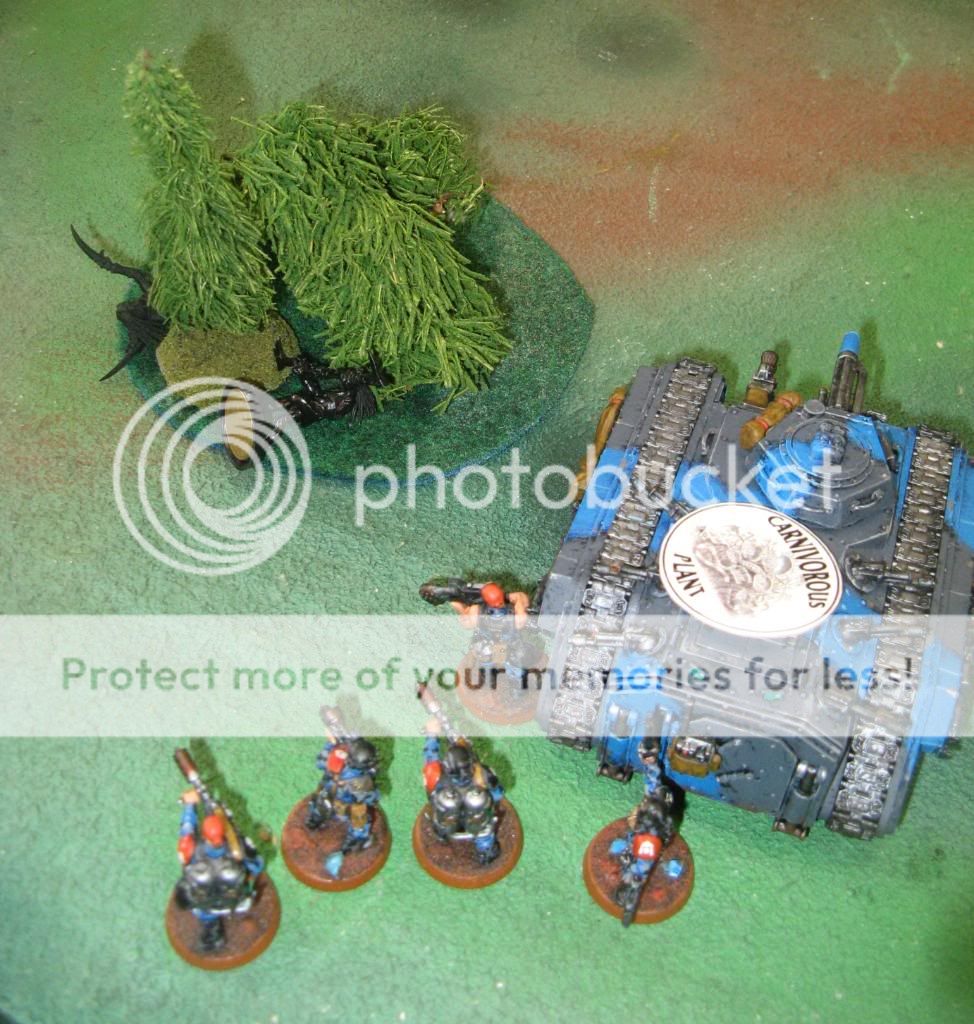
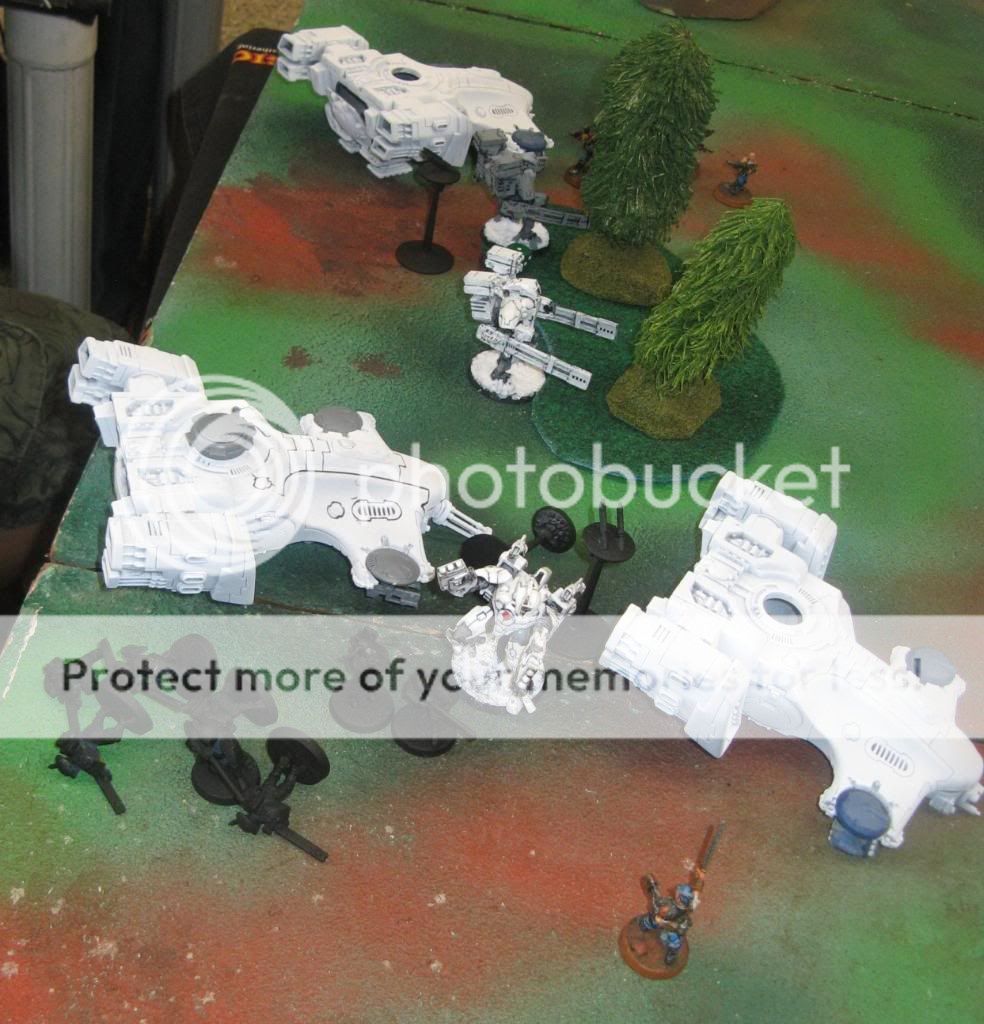
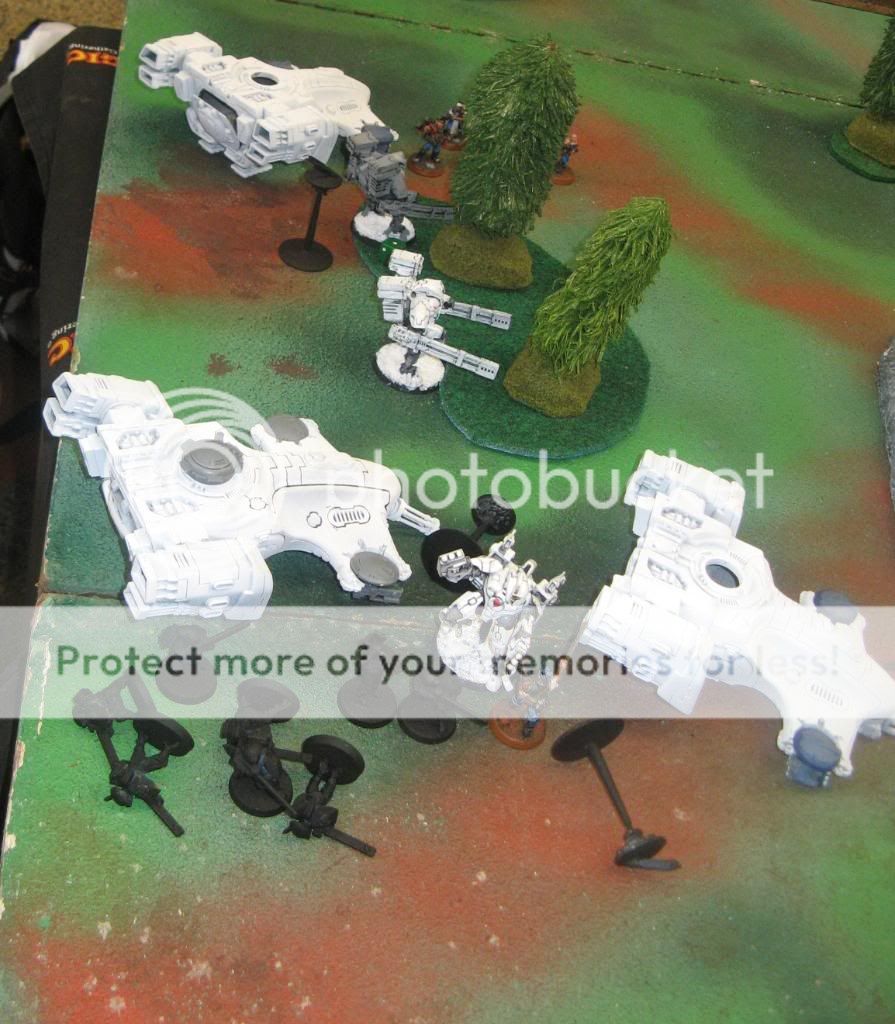
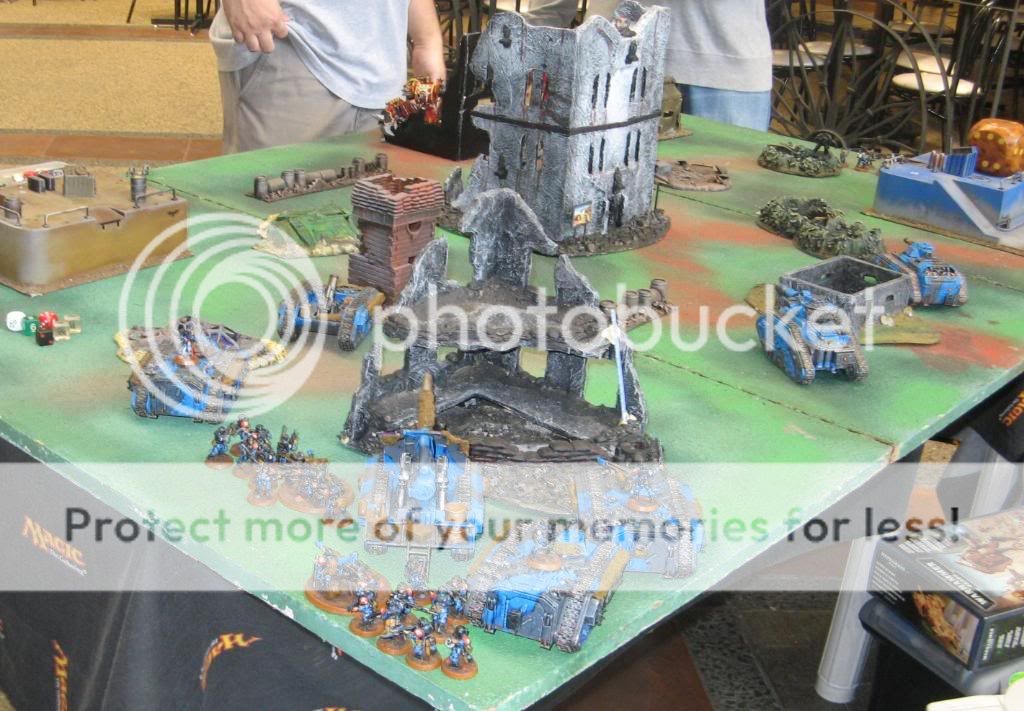
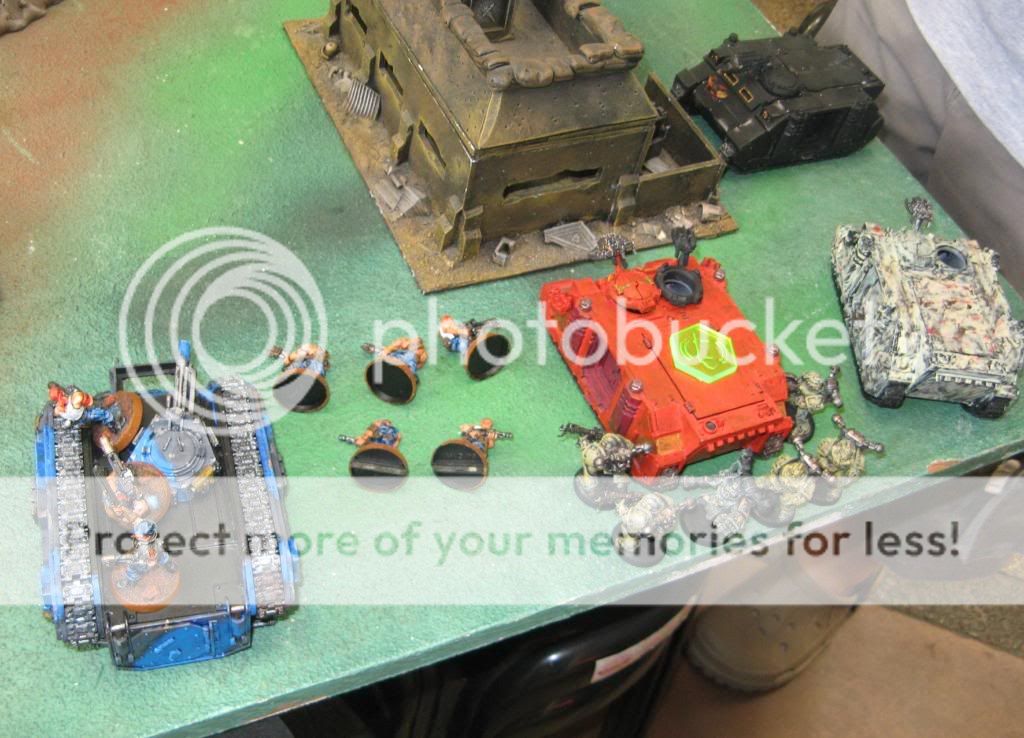
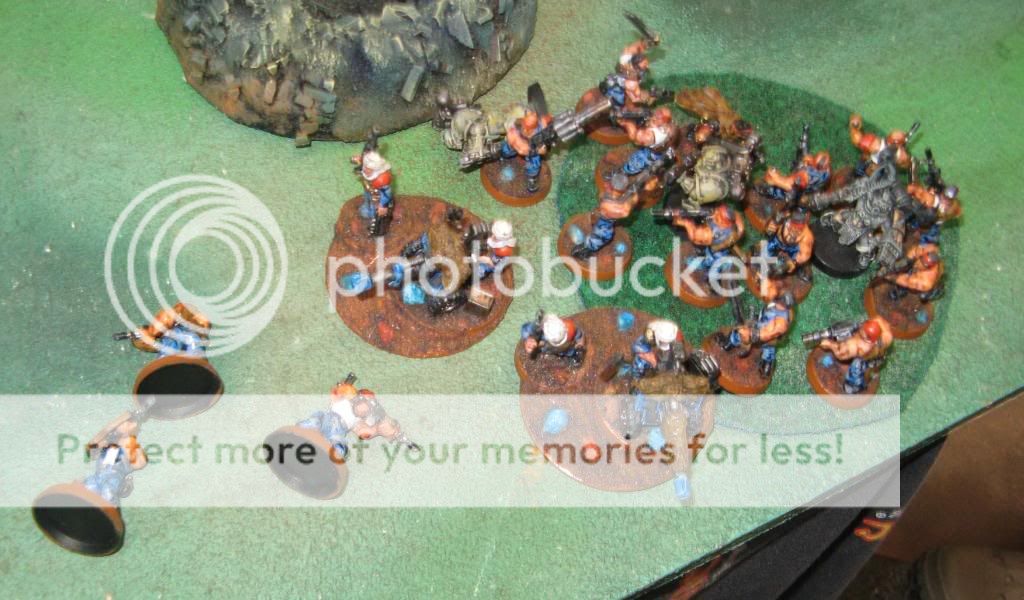
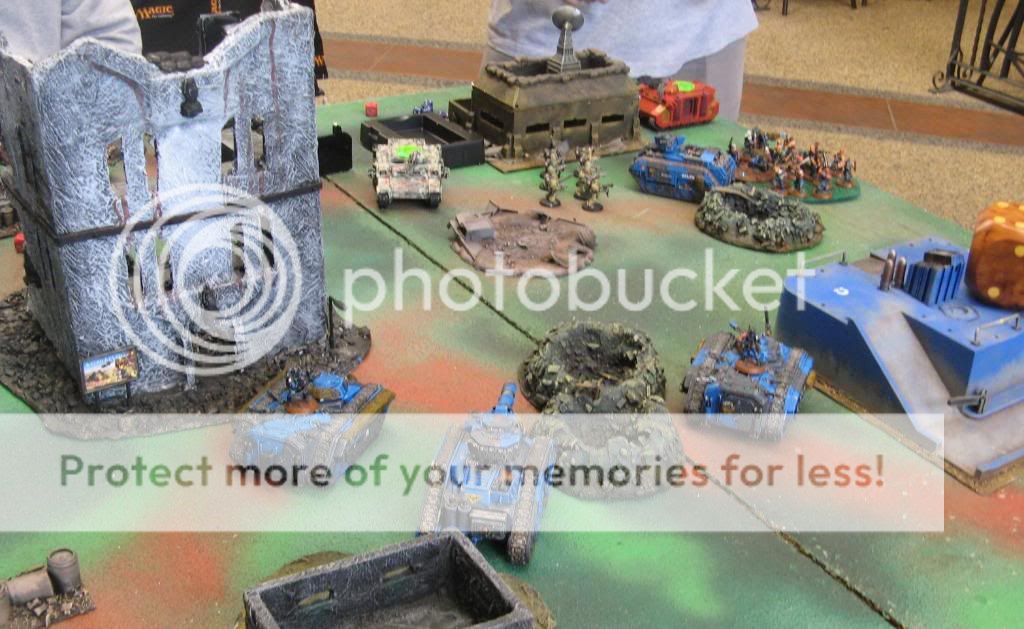
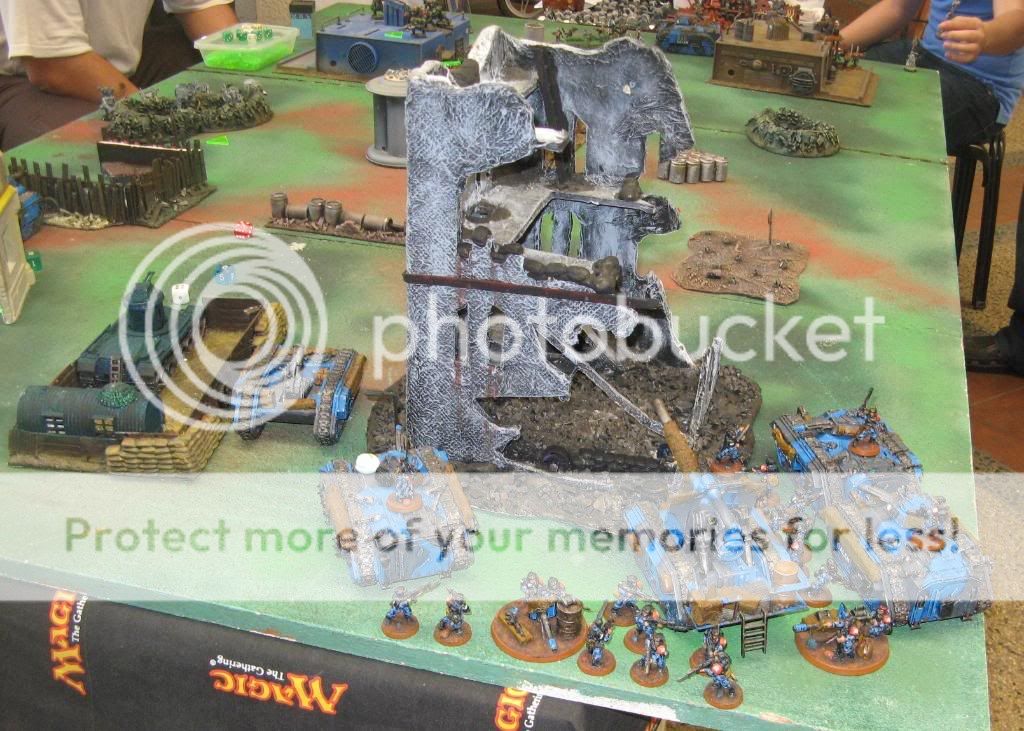
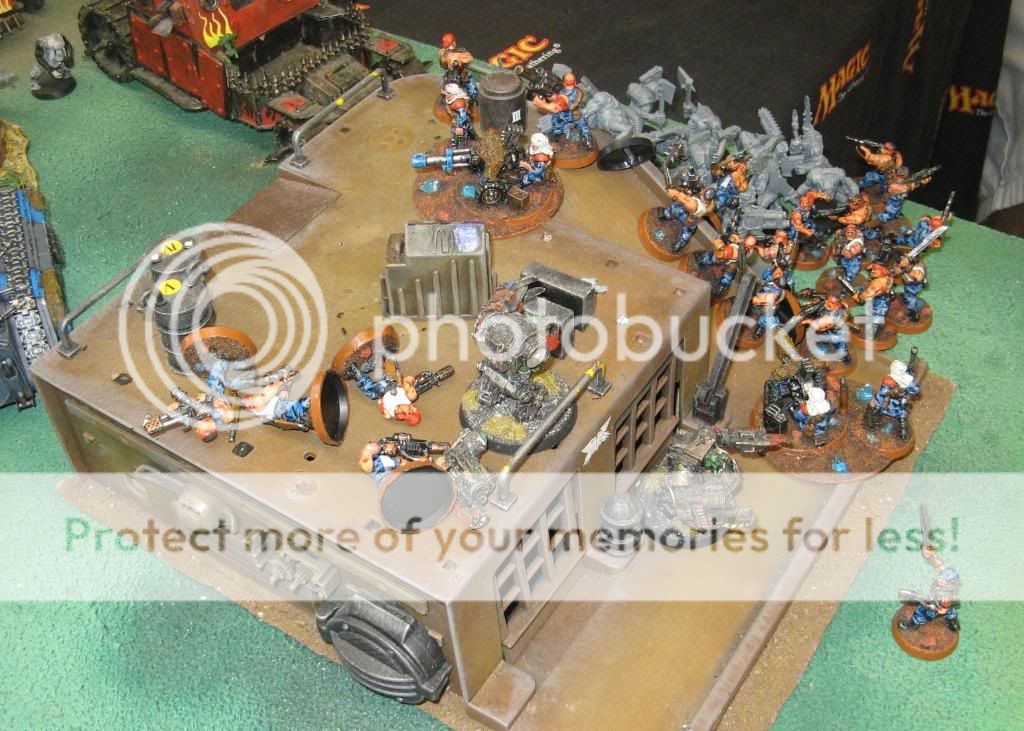
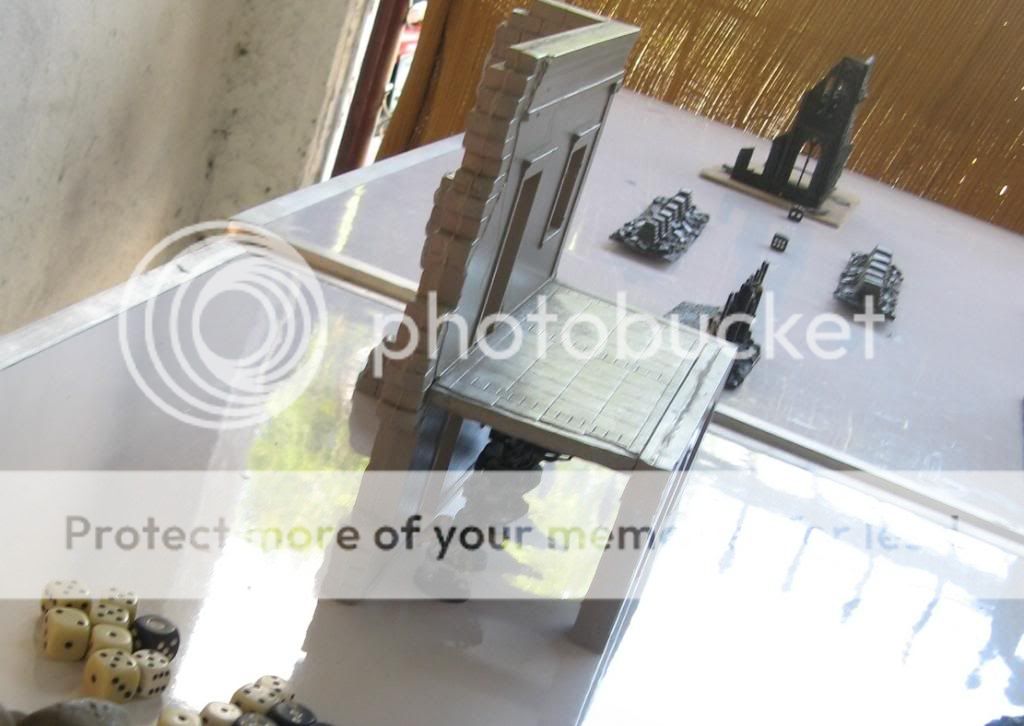
His deployment involves having Commander O'Maigawd join the broadsides in the central forest, and have the Hammerheads plus the devilfish with the embarked firewarriors flank this center. He curiously deploys his 2 10 man kroot squads within and on top of the right hand bunker, and keeps the large kroot+hound unit in front, to hopefully seal off his right flank...
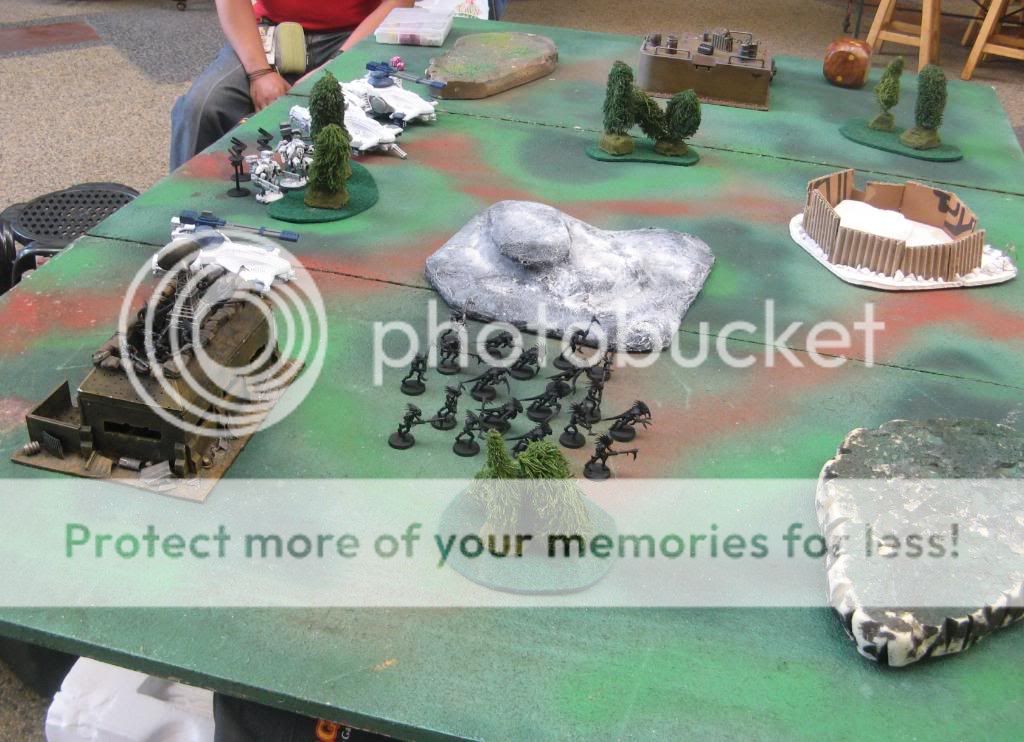
Tau end of turn 1
Tau turn 2
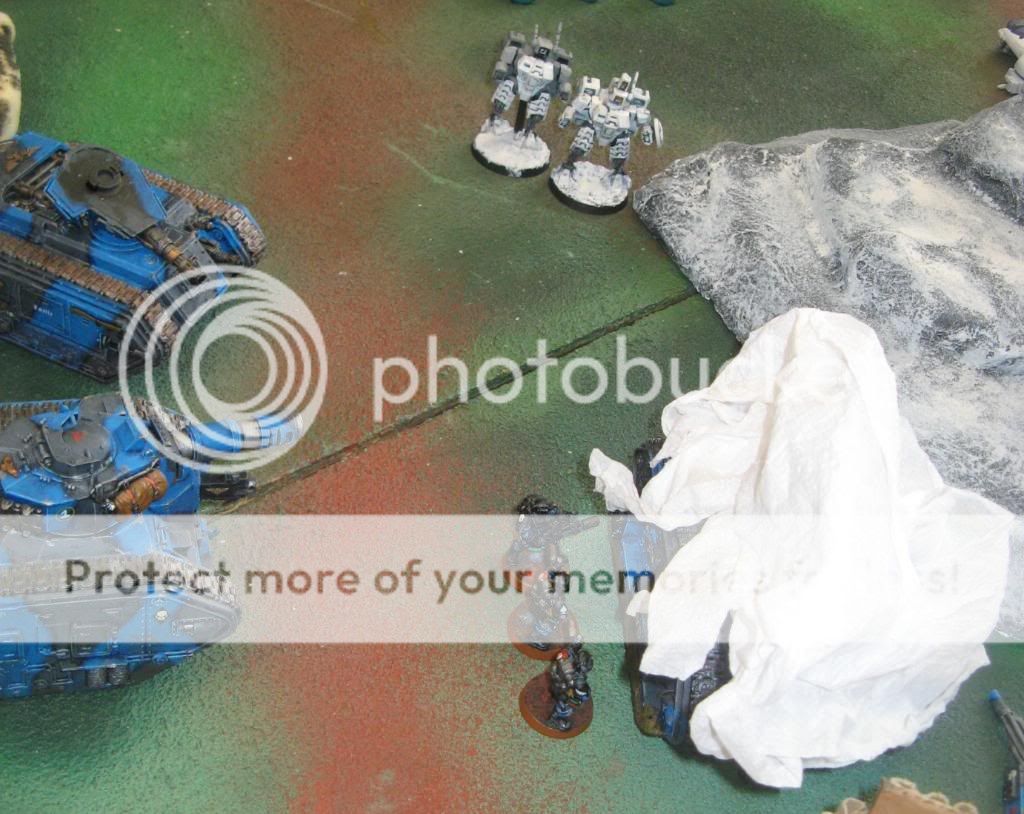
The positional relay has 1 crisis unit deep strike in, the warp shift causing the unit to land in an open area ahead of his deployment zone. A hammerhead and the devilfish moves to flank this team. The large kroot unit spreads out a bit, sniffing the air trying to find where the humans are. The other hammerhead floats to the right, looking for targets...
End of Tau turn 2
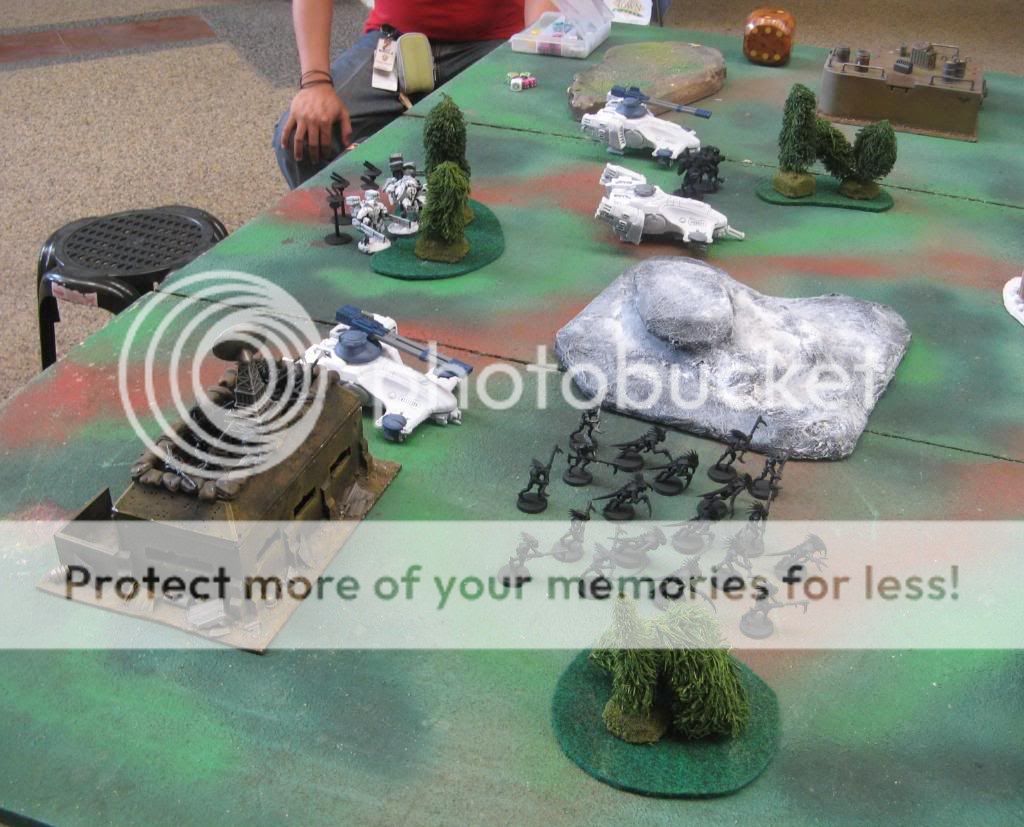
IG Turn 2
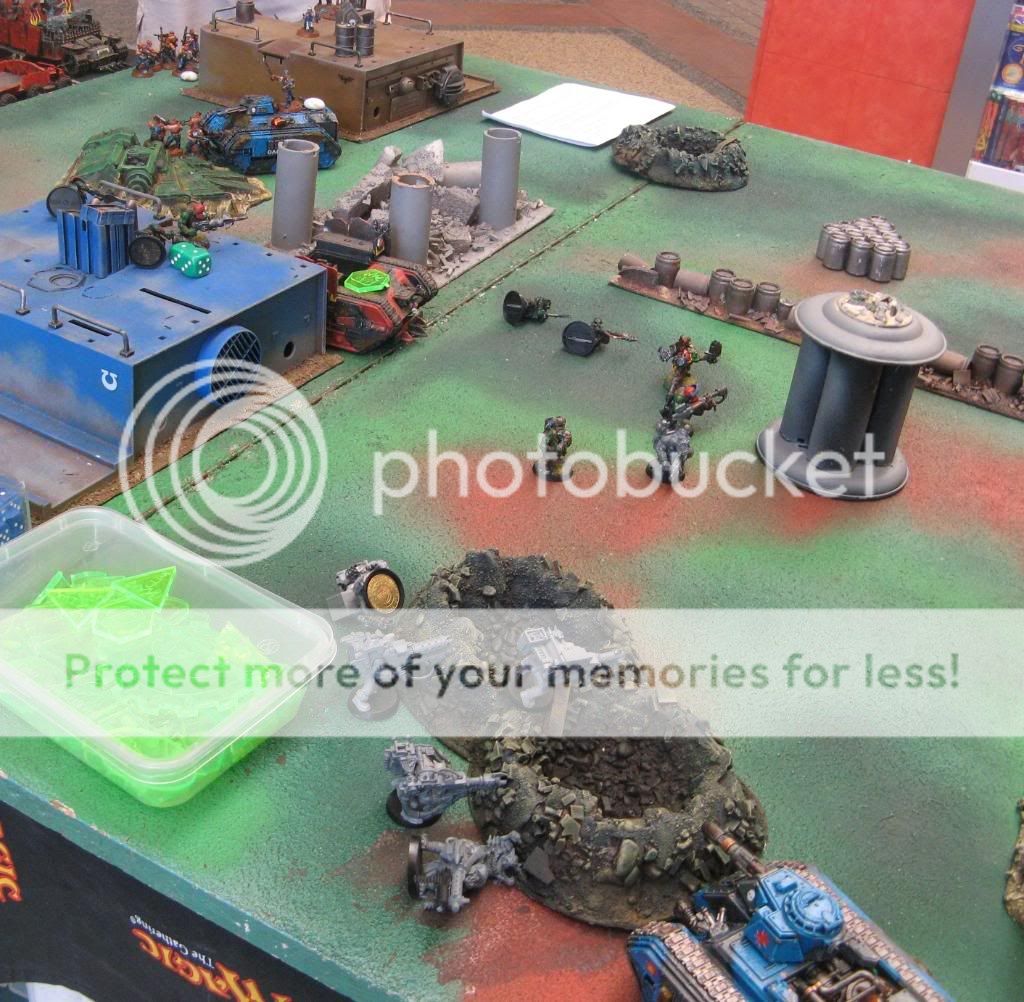
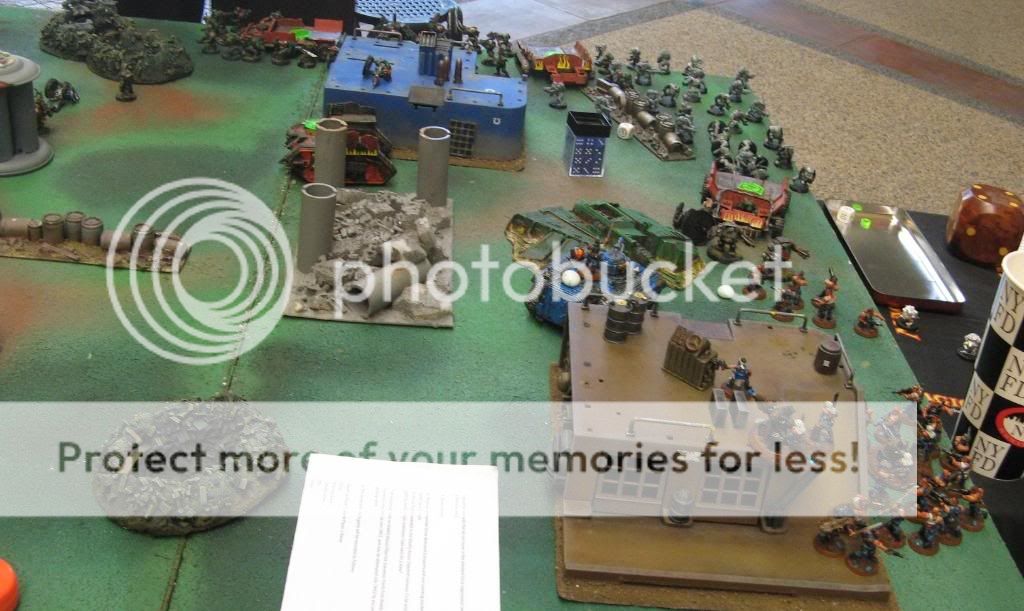
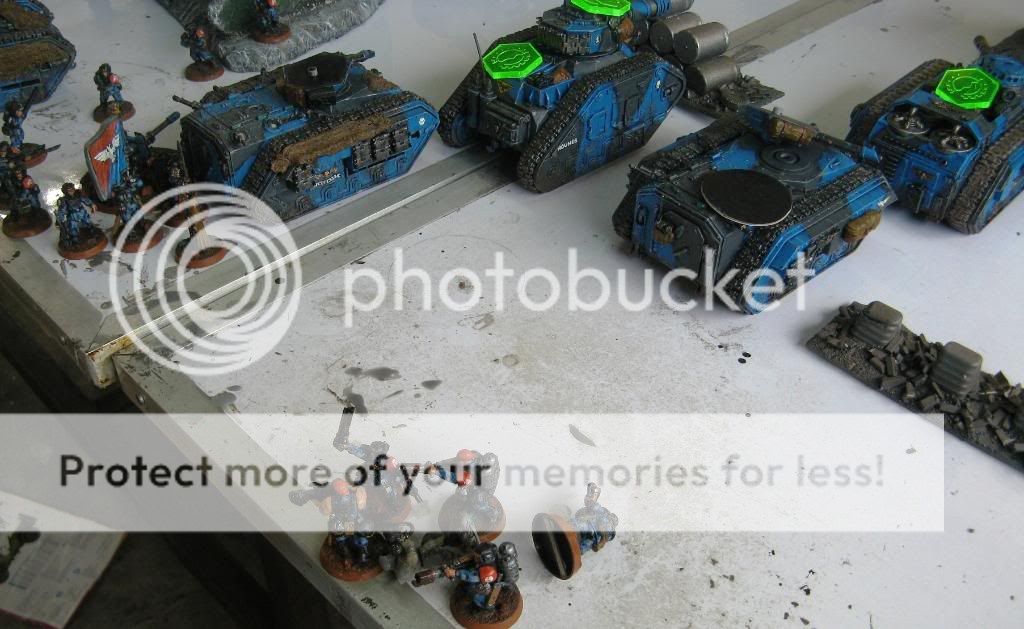
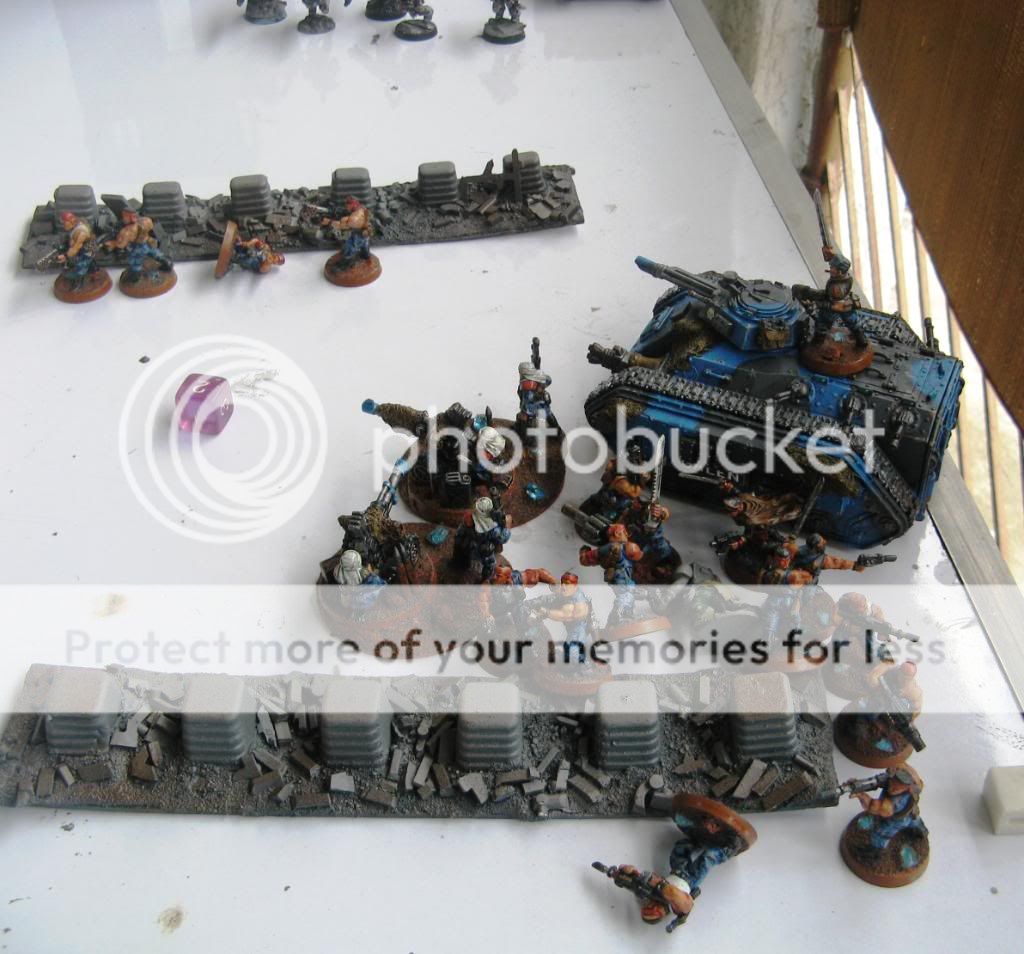
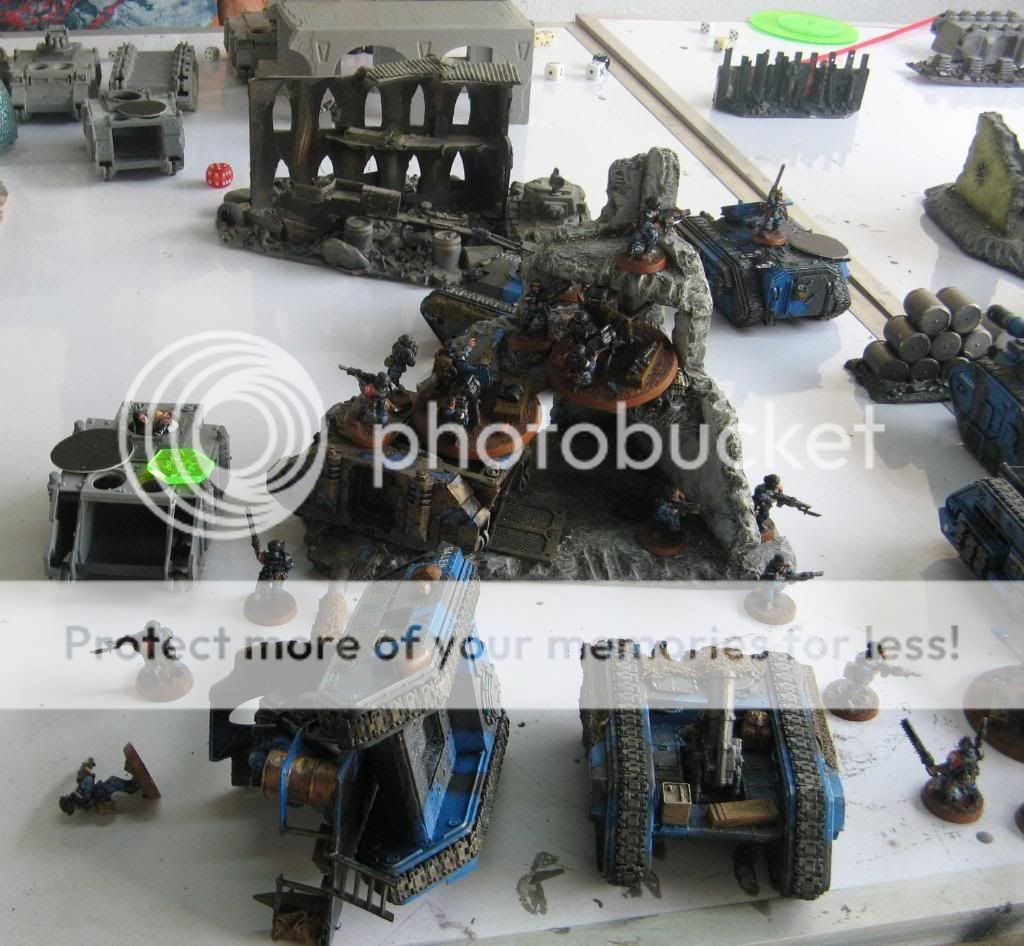
IG reserves start to arrive. Captain Sidewinders platoon outflanks the kroot, the entry point rolls causing deviations, but enough for the elements to move in good order. In addition, the penal legion outflanks on the IG right, the warp shifts causing the entry point to shift close to the table edge of the kroot, right behind a hill. The Company command squad also comes in, as well as the Griffon, which throws a track as it was trying to enter the fenced complex, but with the heavy mortar pointed in the right direction.
The Hounds of the Sidewinder outflank the Kroot!
The view on the opposite side, as the Griffon gets immobilised.
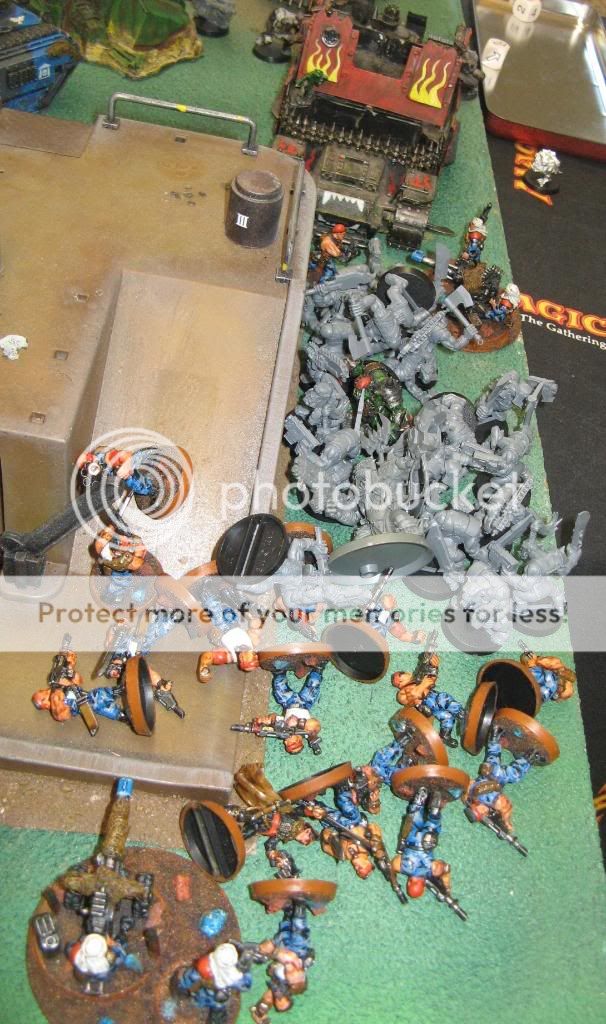
Shooting starts as the multiple flamers fry 4 kroot inside the bunker, and 8 kroot on top fall to the chimera's heavy flamer. The meltas from Sidewinder's squad then explode the entire bunker, and all the kroot inside fail to escape the crush of rockcrete, and the 2 last kroot jump clear. The large blob squad fires into the large kroot squad, and 9 kroot die, but remain steadfast.
The chain gang runs behind the hill, all other shooting is ineffective.
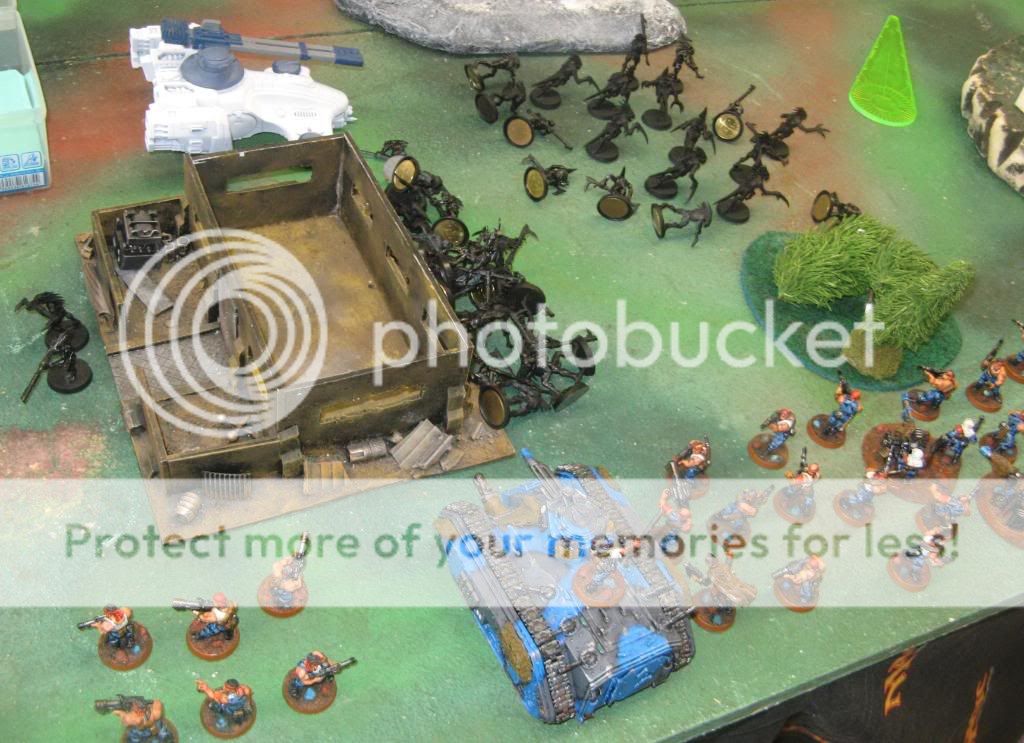
The Kroot are barbecued, gunned down, and crushed by the platoon of Captain Sidewinder!
Tau turn 3
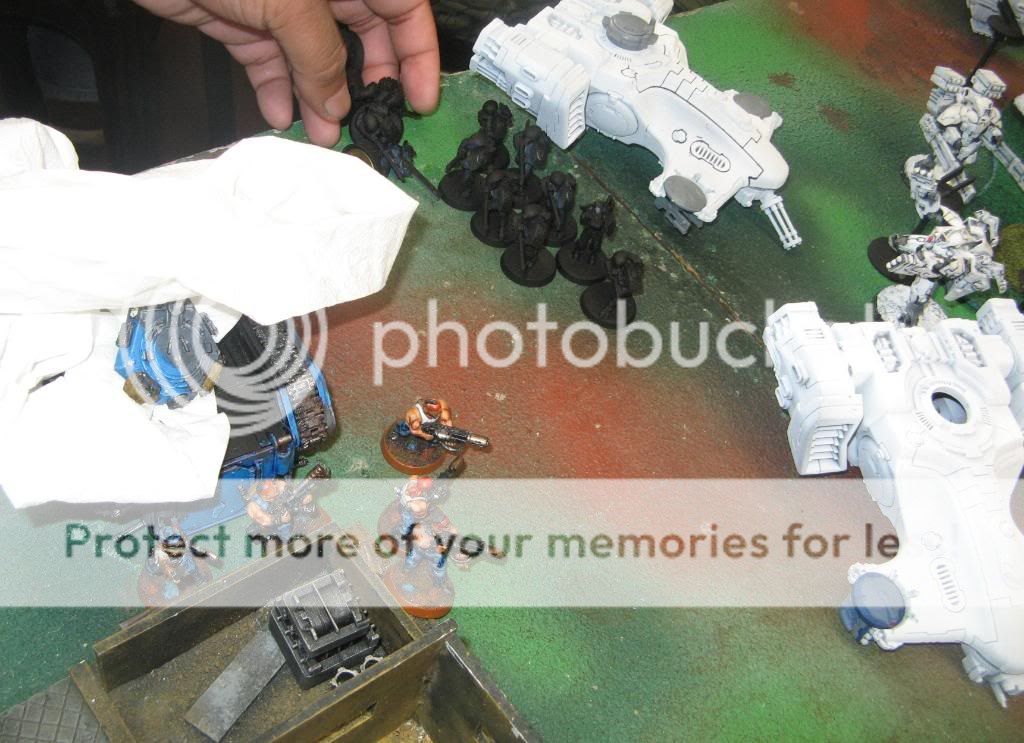
Another crisis suit team tries to teleport in front of Sidewinder's chimera, but narrowly misses a mishap as it barely appears in front of the flamer squad instead. The 2 hammerheads respond to deal with the threat on each side, and the devilfish spots the weakness on the Tau right flank, and rushes to reinforce that side. The kroot hound squad moves in to prepare to assault the IG blob squad. The 1st crisis suit team moves forward in order to engage the IG reserves.
The tau railguns destroy the chimera of the CCS, and follow up shooting causes 1 squad member to die, and the autocannon team is wounded, despite the squad going to ground. The newly arrived crisis team then wipes out the flamer SWS, and jumps back behind the ruins of the bunker. The kroot hounds and kroot warriors then assault and cause a lot of casualties, but some fall to the bayonets of the guardsmen. Still, the commissar had to execute 1 sergeant for cowardice in order for the squad to hold.
The chimera is destroyed, and the survivors go to ground in order to survive Tau shooting.
The Tau fight fire with fire, and payback is achieved.
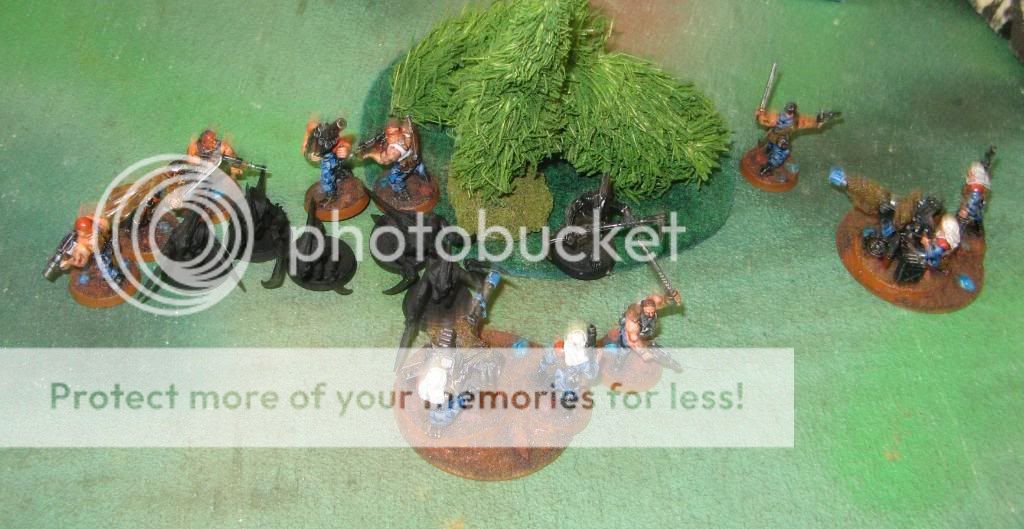
Brutal close combat action, and the survivors remain locked
IG turn 3
With the help of the astropath, the rest of the IG reserves all come in.
Here come reinforcements!
Sidewinder's chimera curls to the rear of the bunker, with the 2 kroot as well as crisis suits in sight. The chain gang continue to make a move toward the Tau center.
Shooting sees the devilfish shaken' and the grenade launchers plus guns of the new arrivals kill a crisis suit and leaves the last with 1 wound.
In the meantime Sidewinder's squad finishes of the 2 crisis suits, and the chimera flames the 2 kroot to cinders.
Close combat sees combatants from the big melee fall, and again Commissar Sherwin executes the last sarge in order to prevent the blob from fleeing.
Tau turn 4
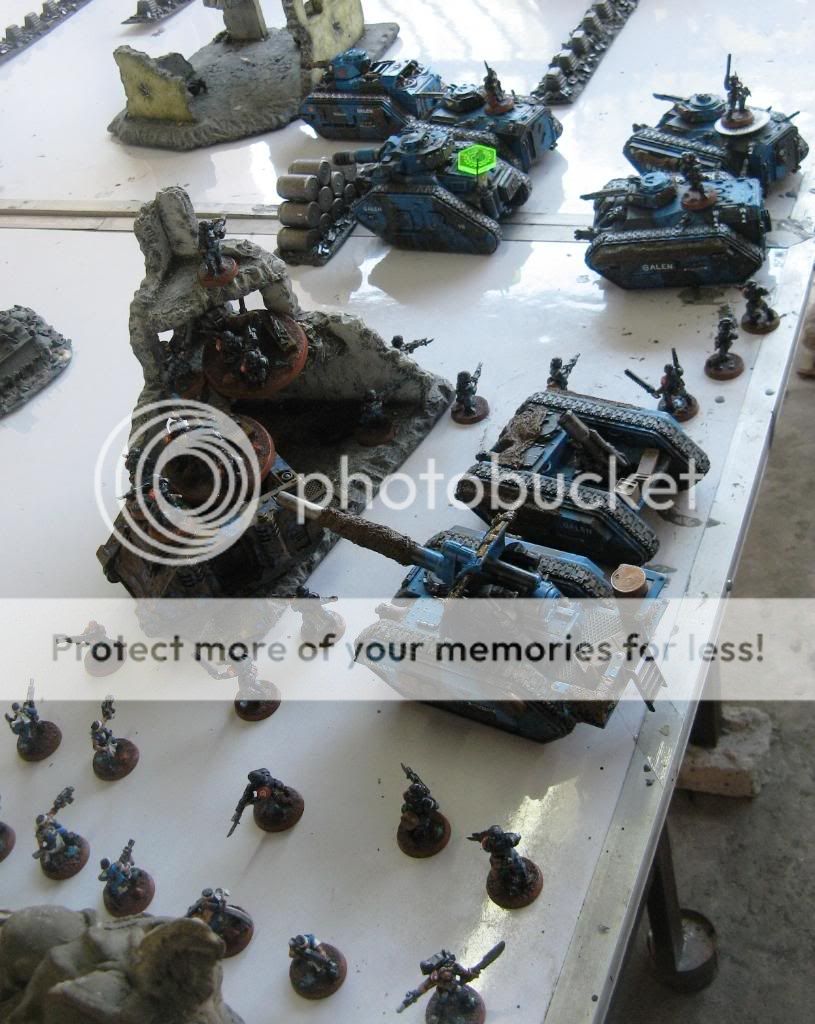
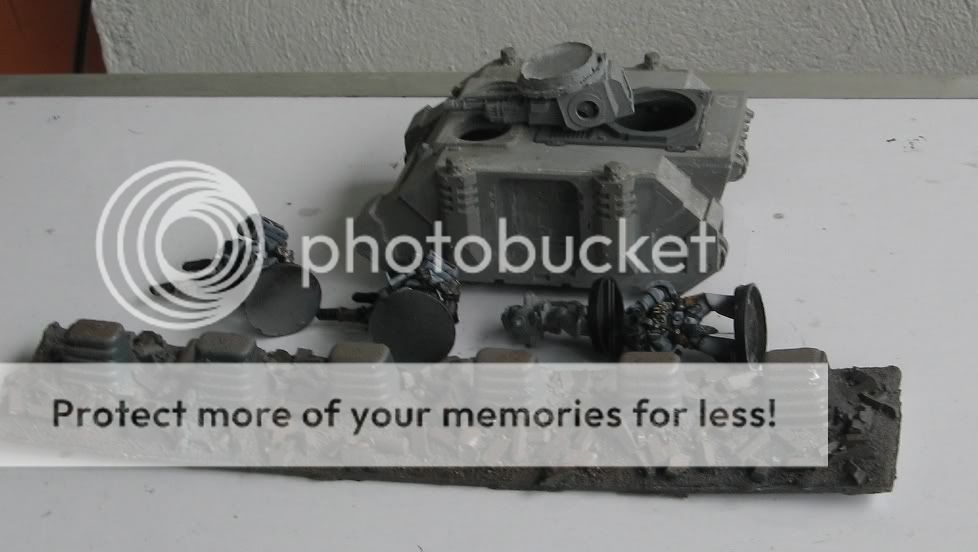
The last crisis suit deepstrikes in, but deviates behind a hill towards its lines. The shaken devilfish moves back towards the center, as do the 2 hammerhead. Shooting sees the devildog destroyed. The penal legion and IG infantry squads also loose members, but hold.
In the assault phase, the commissar cuts down the kroot until only 2 members remain, but is brutally hacked down. The surviving autocannon team is caught and eaten as it attempts to flee. The last 2 survivors then consolidate into a forest.
IG turn 4
Capt sidewinder's chimera moves forward and pops smoke as the squad disembarks facing the side of a hammerhead. The flamer toting PCS squad also disembarks from its chimera in order to finish off the kroot in the forest. The penal legion continues to tighten the noose on the surrounded tau, and move froward towards the center. The other guard transports and the Leman Russ also do the same and move forward.
Shooting sees the last 2 kroot burned to death, and the hammerheads are wrecked by the meltaguns of sidewinder's squad and a battlecannon round from the leman russ. The wounded crisis suit is also finished off by the metagun SWS team. The devilfish is shaken again, and the griffon and basilisk causes a shield drone to fall, but the broadsides and commander do not get pinned.
Down goes another crisis suit
No more kroot!
Sidewinder's squad wrecks a hammerhead, while the other is destroyed by the leman russ
Tau turn 5
Last turn! With nothing to lose, the last crisis suit jetpacks forward in front of the IG tanks. The devilfish moves forward and the firewarriors disembark in sight sidewinder's squad. The commander detaches from the broadsides and moves to support the firewarriors. Shooting has the follwoing results...
Tau shooting explodes the chimera, but the 3 meltagunners hold!
Sidewinder's chimera explodes, and takes several firewarriors down!

Sidewinder loses his squad members, but survives the shooting from the firewarriors!
IG turn 5
Capt. Sidewinder rushes forward by his lonesome, hoping to stick the Fang of the Rockhound into the commander's gut. The penal legion finally sees the chance to use their knives, and move into the center.
The surviving meltagunners gun down the last crisis suit team, while the devilfish gets stripped of its weapons, and immoblized, but survives, the blast of the earthshaker round also causing all but 2 firewarriors to die. The last warriors refuse to be pinned or run. Capt Sidewinder fires off the plasma pistol, but the shield drone absorbs the blast. The penal legion attempt to charge into the broadsides, but they get entangled in the forest and fail to reach! Sidewinder however manages to reach Commander O'Maigawd, and as he swung the deadly sword the shield drone rushes in at the last moment and gets cut in 2. The commander manages to get a punch in at the captain, so the combat is a draw!
Sidewinder rushes to engage the commander!
Mass carnage among the Tau in the final turn!
I pull out the win, and get the bonus points as well! The final score is 8-2 in my favor! Great game Jhei!
The unit of the match has to be Captain Sidewinder's squad - his chimera flamed the kroot, and the meltas helped finish off the majority of them in the bunker. They were also responsible for wiping out a crisis team as well as a hammerhead, and the man himself almost caused an instant death result on the Commander O'Maigawd by his lonesome!
|
|
This message was edited 1 time. Last update was at 2010/01/24 03:14:14
40K 5th ed W/L/D
65/4/6, 10/2/1, 10/3/0, 2/0/1, 0/1/1
40K 6th ed W/L/D
1/0/0
WHFB 8th ed WHFB
Empire: 12/3/2, Lizardmen: 16/3/2 |
|
|
|
|
2010/01/24 07:01:14
Subject: The 7th Galen goes Gladiator! A 1500 pt League report Jan-Mar 2010
|
|
Rough Rider with Boomstick
|
And now it's on to week 2....
The scenario for the week is the following...
Week2 Scenario - Beachhead
Deployment : Spearhead, All Troops in Reserve
Duration : Standard Random Game Length
Special Rules :
Infiltrators and Scouts
Reserves
Deepstrike
Established Beachhead - Unless Deepstriking, Outflanking, or other special means available to any specific army, entry of units in reserve is measured from the Home Quarter's farthest corner
Victory Conditions :
Total VP Score determines the Winner
Bonus VP :
For each SCORING UNIT (NOT INSIDE DEDICATED TRANSPORTS) contesting a quarter - +100VP
For each SCORING UNIT (NOT INSIDE DEDICATED TRANSPORTS) claiming a quarter other than its Home Quarter - +200VP
Please note that for this scenario ONLY Scoring Units can claim or contest quarters. Scoring Units gain no additional VP for staying in their Home Quarter unless its contesting against invading Scoring Units. No Scroring Unit can claim/contest more than one quarter at any time.
If for some reason that the beachhead would not allow units to enter or end their movement (because of friendly or enemy models occupying that space), the unit may enter from unoccupied point on the table edge closest to the far corner and resolve the unit's movement from there BUT MODELS MUST END THEIR MOVEMENT IN BASE- TO-BASE.
Bonus Points Conditions :
Player with the most number of claimed and contested quarters - +2pts
Players with equal number of claimed and contested quarters - +1pt each
Players with no claimed and contested quarters - +0pts
Game 2 - Week 2
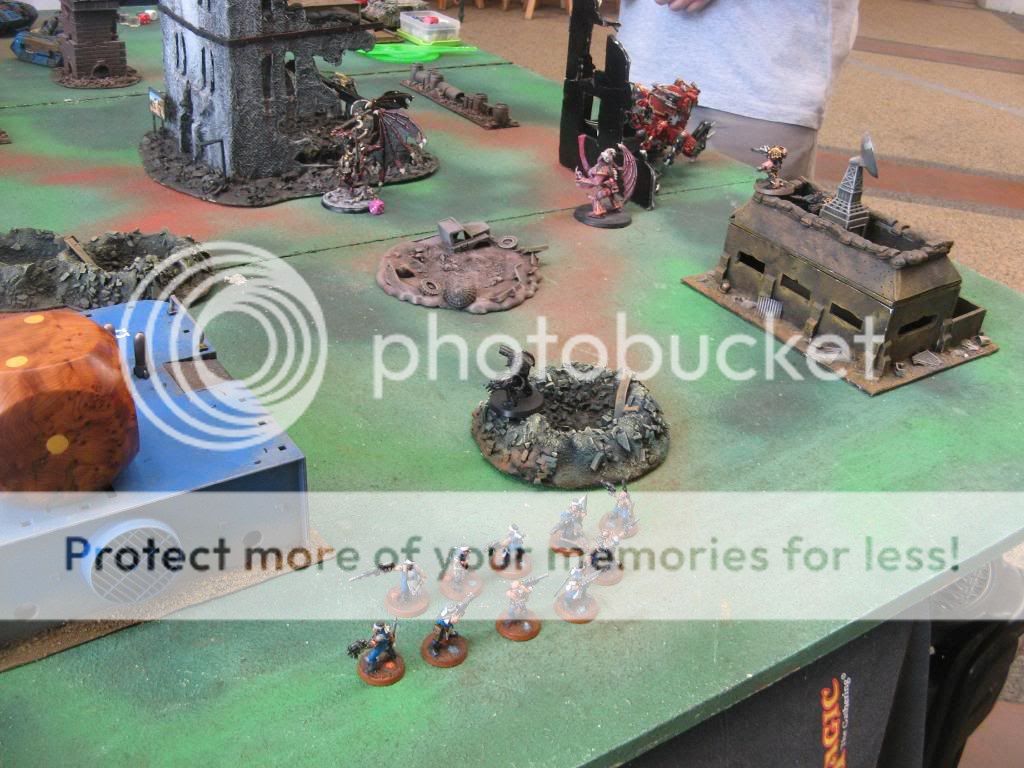
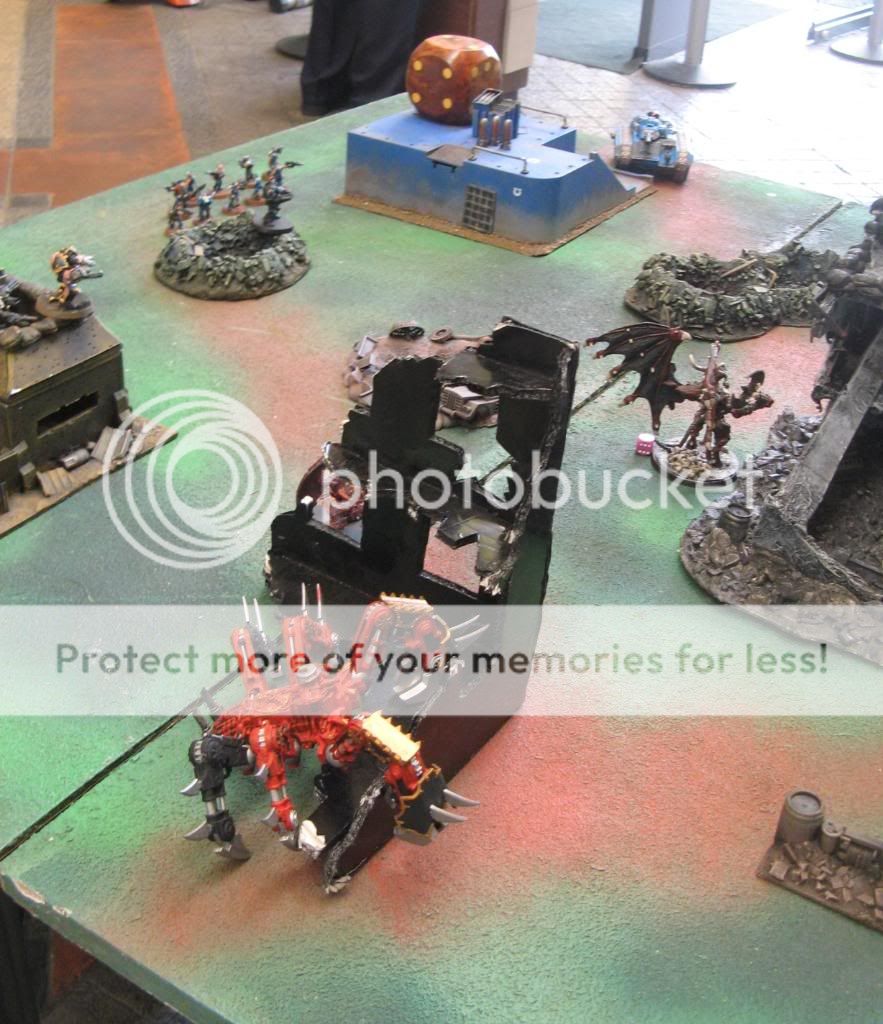
My opponent was Kent, using his quite successful Nurgle-Slaanesh Alliance
HQ
Daemon Prince + Wings + Mark of Slaanesh + Lash of Submission (the bloodthirster model I will call red)
Daemon Prince + Wings + Mark of Slaanesh + Lash of Submission (the pink daemon prince model I will call Pinky)
TROOPS
7 Plague Marines + Champion/Powerfist + 2 Meltagun + Rhino (black rhino)
7 Plague Marines + Champion/Powerfist + 2 Meltagun + Rhino (mottled rhino)
6 Plague Marines + Champion/Powerfist + 2 Flamer + Rhino w/ extra TL Bolter (red rhino)
HEAVY SUPPORT
2 Chaos Obliterators
2 Chaos Obliterators
Chaos Defiler
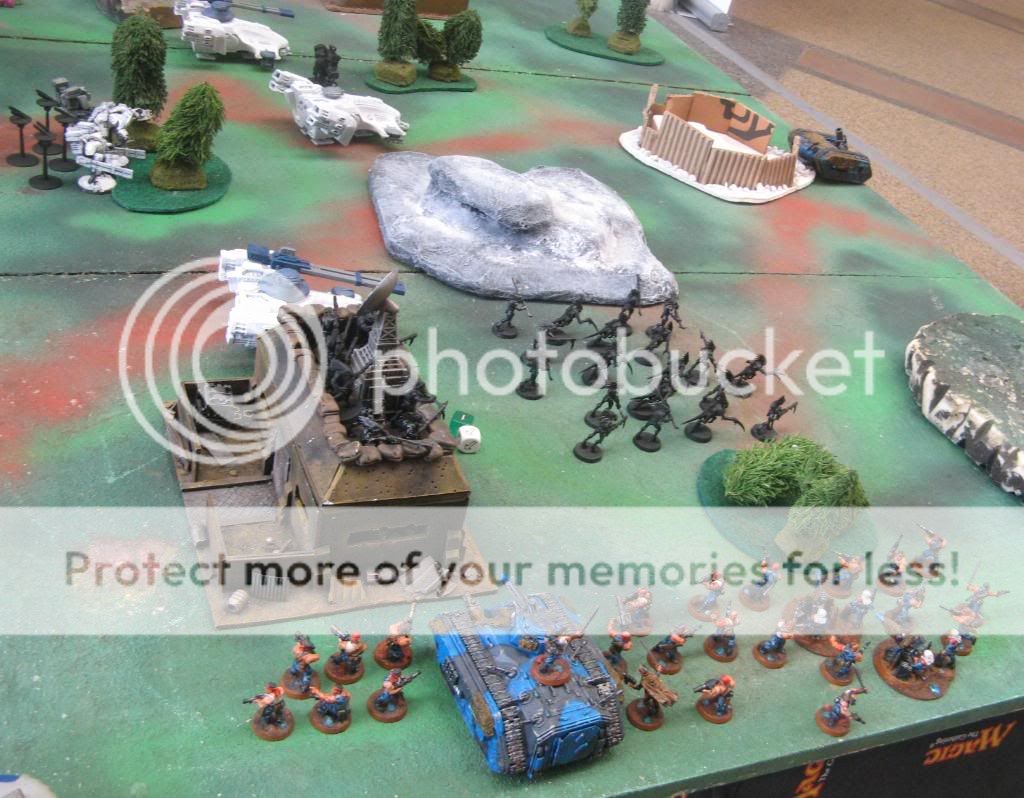
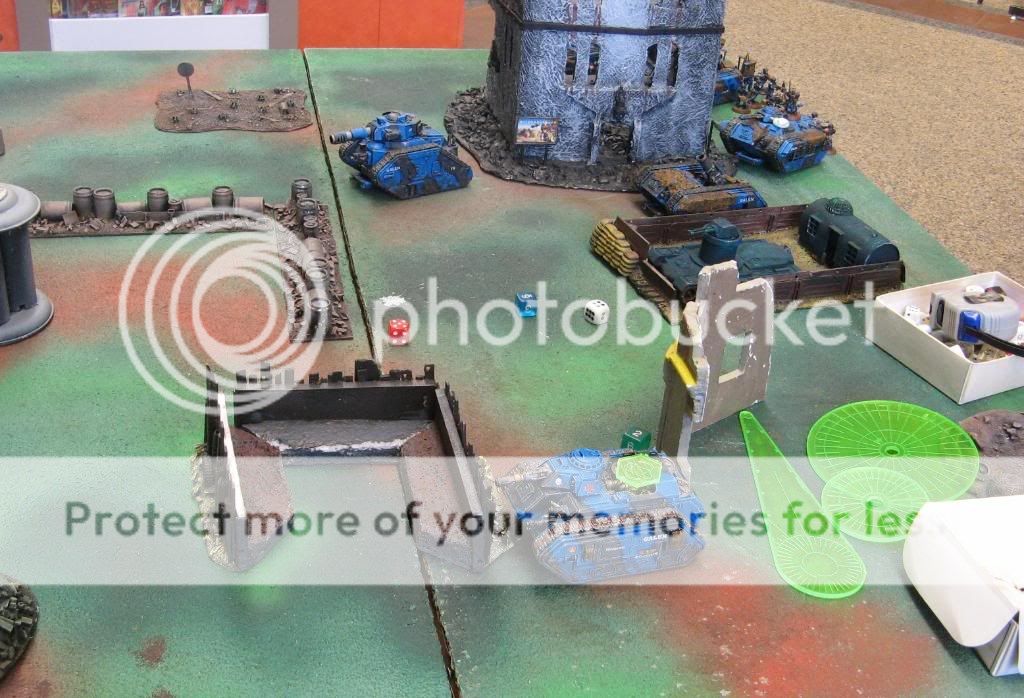
Kent won the toss, but gives the first turn to me...

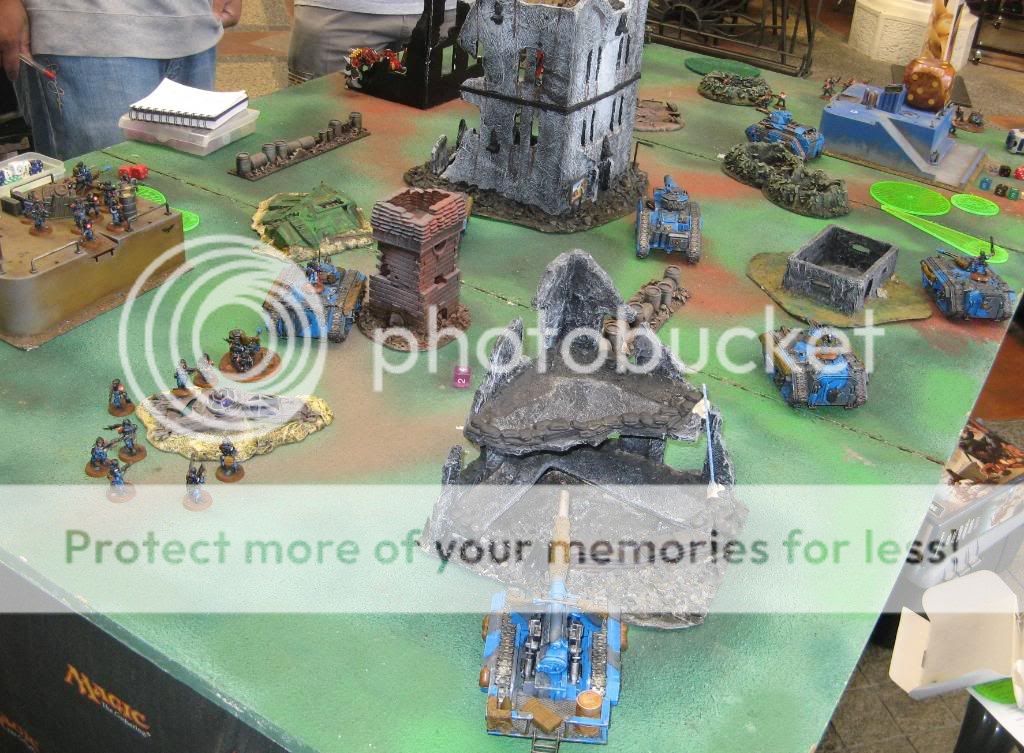
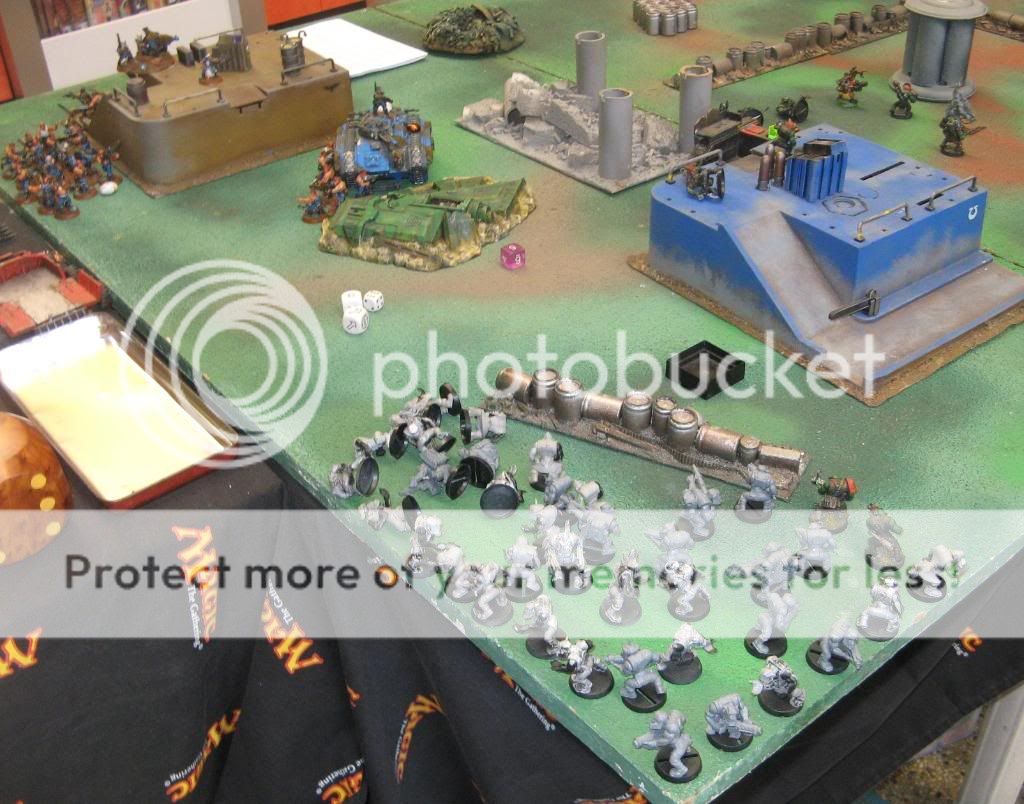
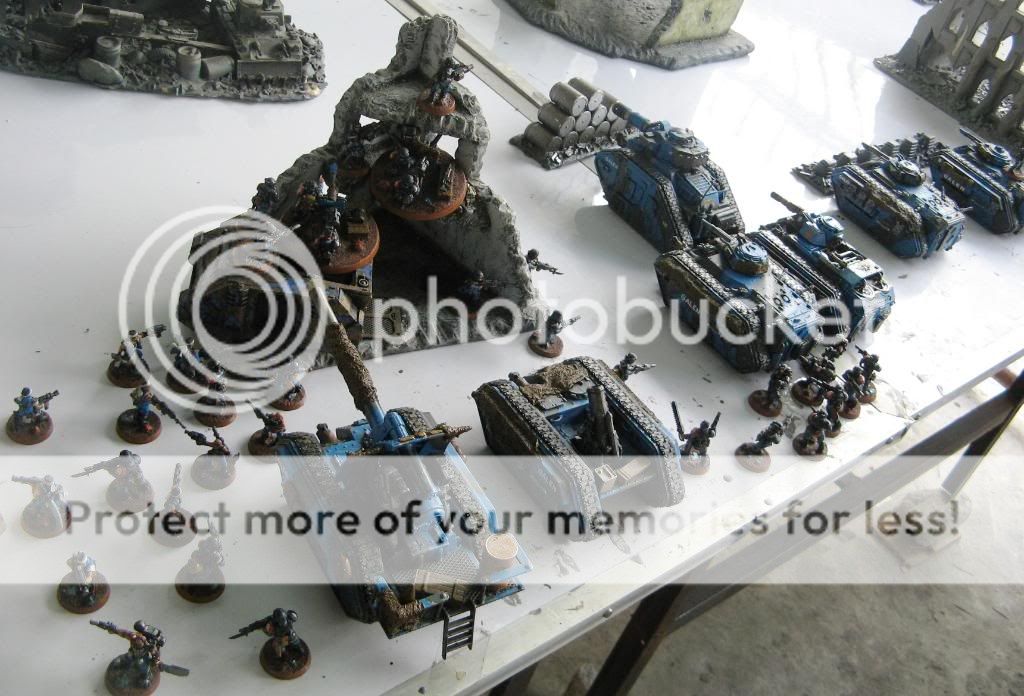
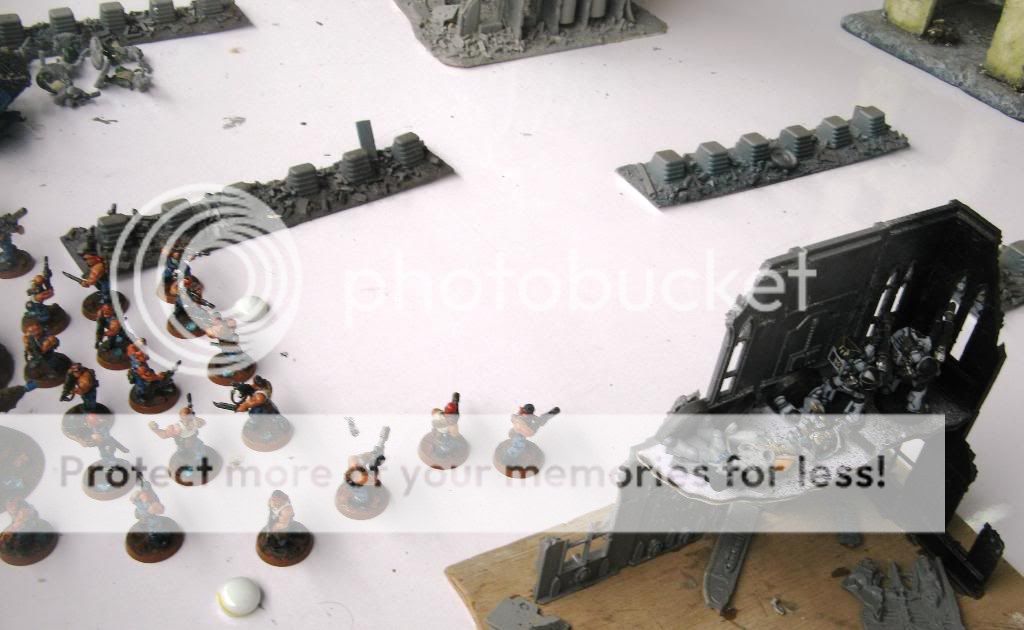
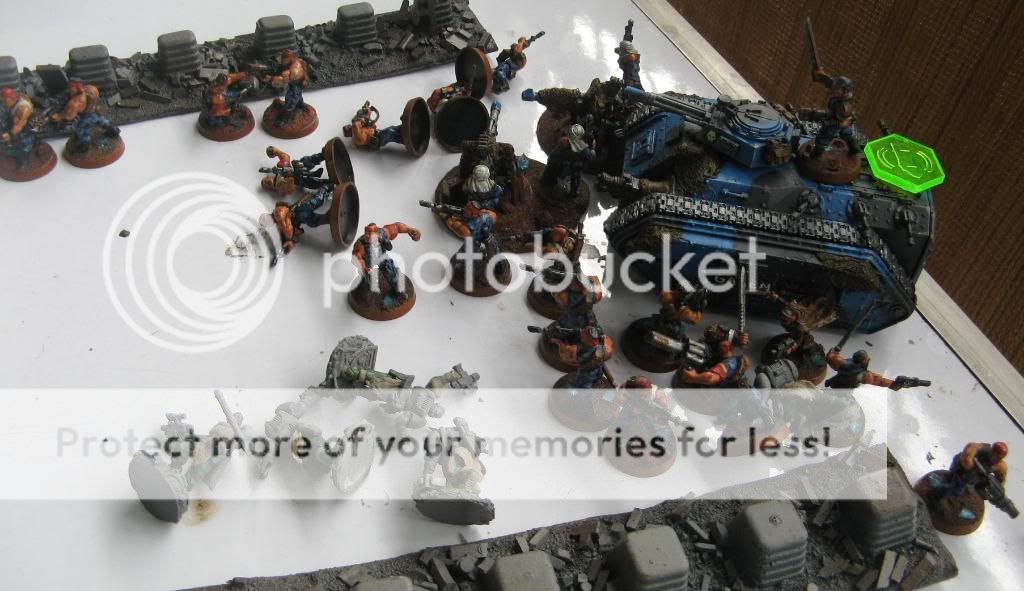
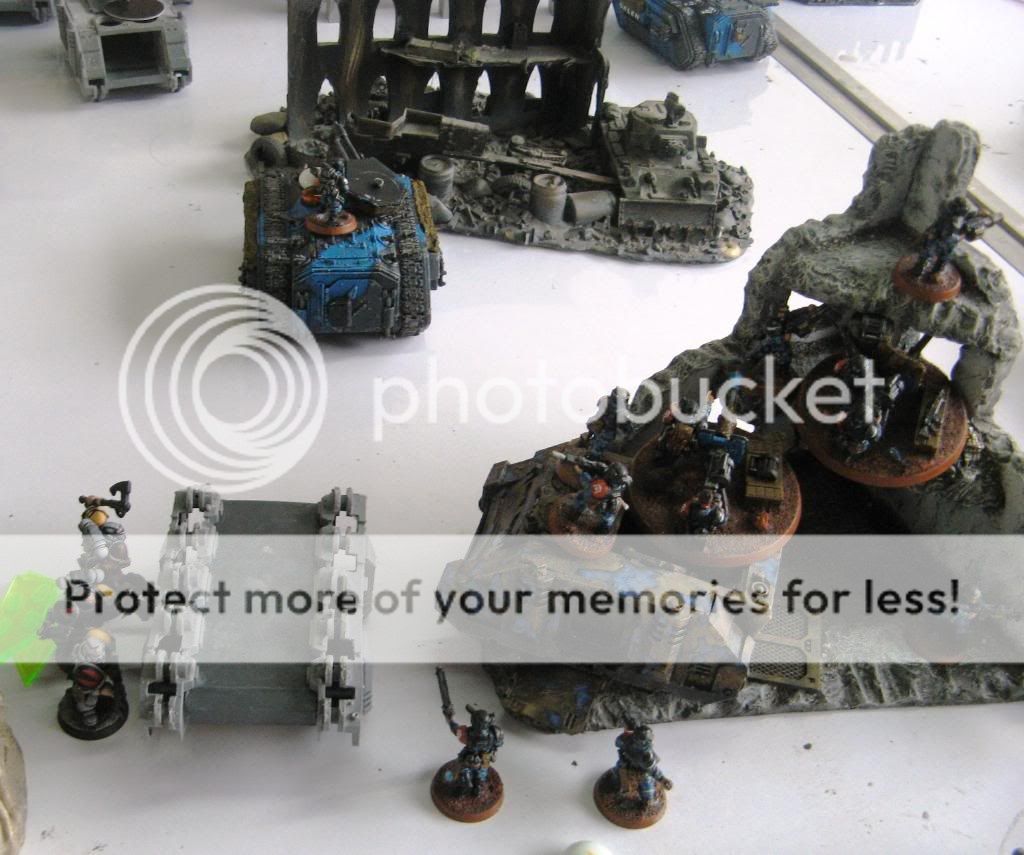
my deployment. The penal legion gets knifefighters as it's skill.
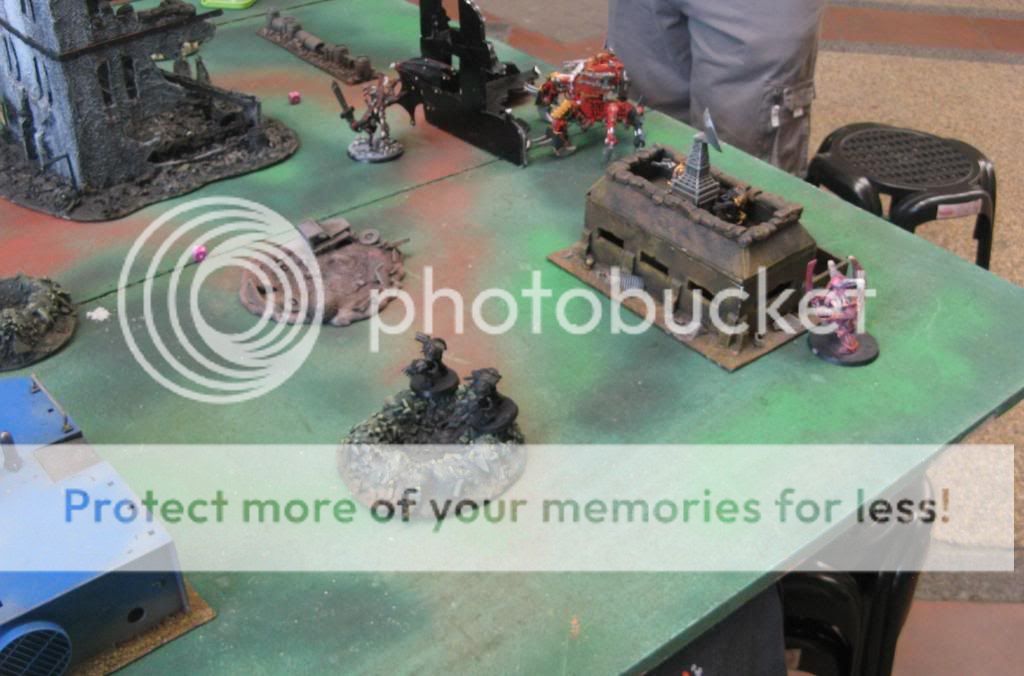
His deployment
He tries to steal the initiative, but fails.
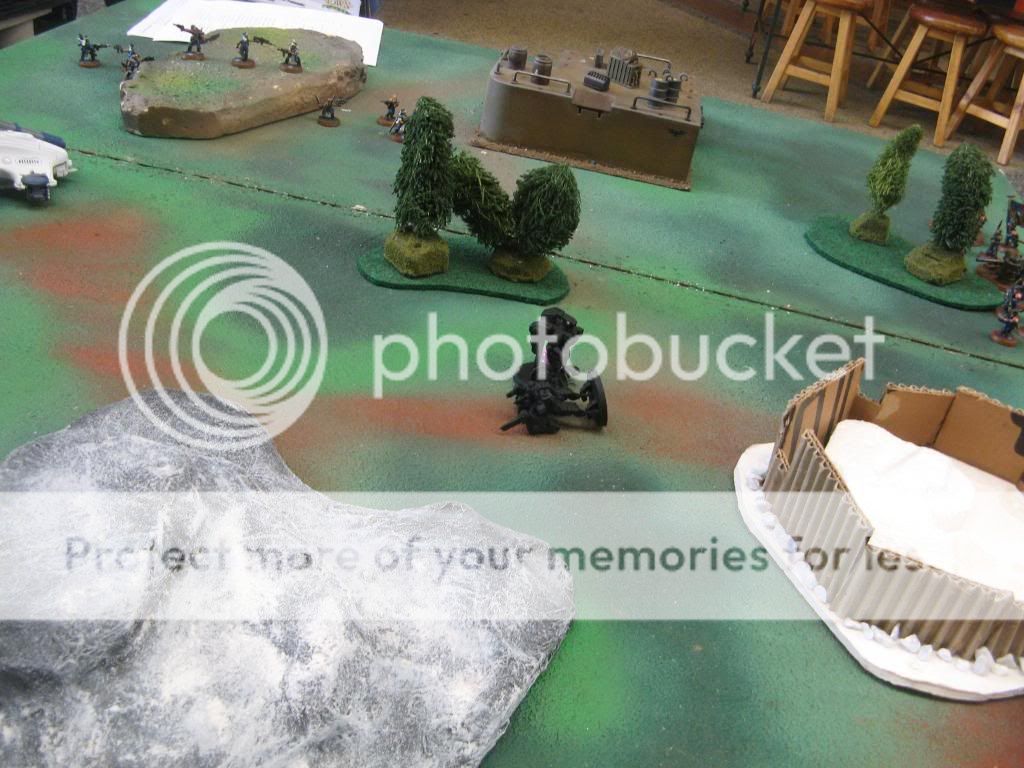
IG turn 1
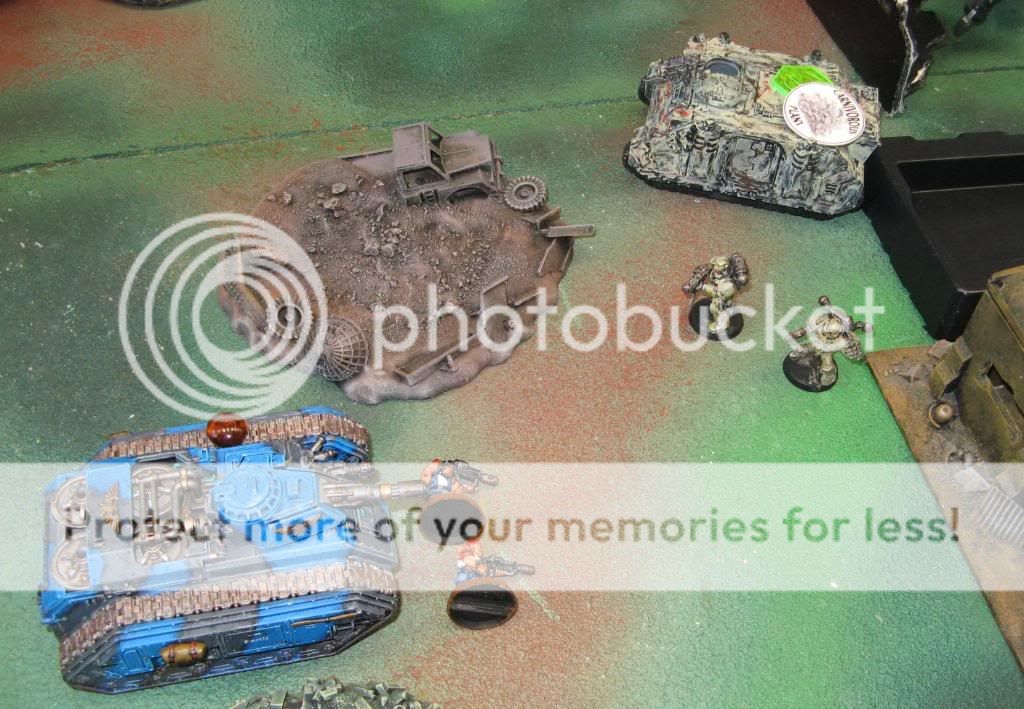
I move the devil dog and leman russ forward and to my right, to better firing positions. I also move the griffon and the CCS chimera where they can see the daemon princes with the multilaser and heavy bolter.
Shooting sees the devil dog vaporize an obliterator in the crater, and a heavy bolter round causes a wound to DP red. The basilisk hits the defiler, but the daemonic entity within shrugs of the "stunned" result. A point of note is that the Lemar Russ starts a gamelong habit of hitting it's target, but rolling 1's to wound, as it does so vs the daemon prince.

Shooting yields results for the IG!
CSM turn 1
Kent moves DP prince towards the center, while DP red hugs the wall if the central building. The defiler moves to the edge of the ruin in order to get netter LOS. The 3 remaining oblits morph lascannons and aim at the exposed devil dog, but all miss! The defiler aims at the chimera of the CCS, but the round deviates harmlessly.
IG turn 2
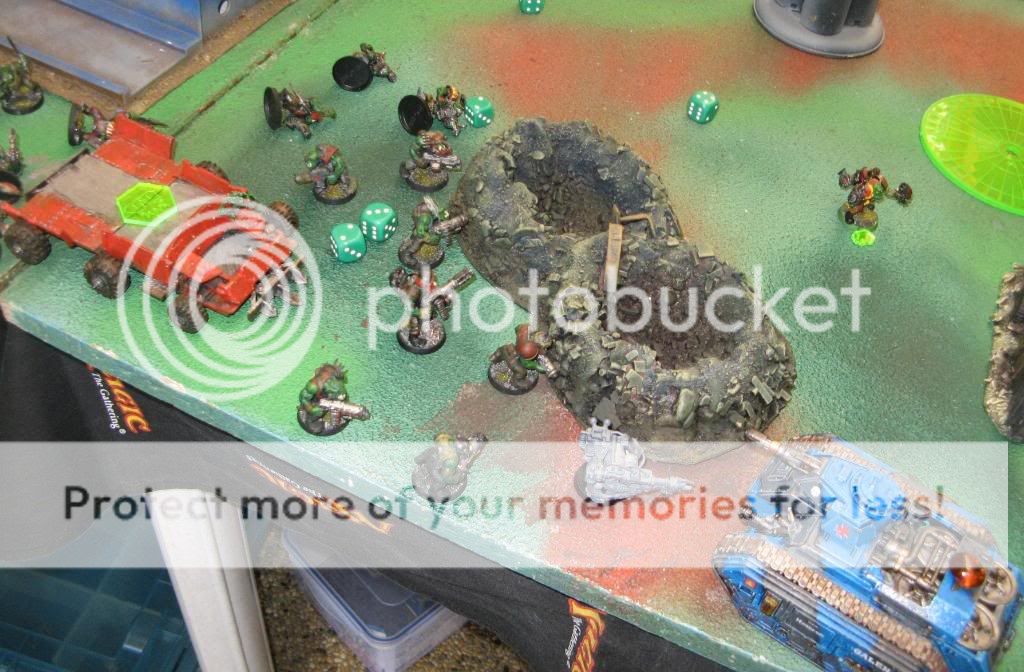
With the help of the astropath, the 1st platoon comes in from the beach head, while the chain gang outflanks the lone obliterator in the crater. The 2 infantry squads break left towards the left quarter, while the melta SWS gets in a chimera and joins the PCS chimera and breaks right. The devil dog and russ continue to move to good firing positions. Successful orders cause the 2 squads to run towards their objective. Shooting sees the devil dog cause another wound to DP red, while the leman russ hits but fails to cause a wound again! Autocannon and multilaser rounds shrug off the defiler, but the basilisk manages to lob an earthshaker round on top of the walker, the resulting hole causing the daemon within to escape shrieking back to the warp, the left over hulk now a useless wreck.
The penal legion assaults the oblit inside the turret, their knives finding weak points in the armor of the creature, bringing in down.
The chain gang outflanks the obliterator!
The 1st platoon arrives!
The defiler is wrecked!

Lots of rending wounds ensure the demise of the obliterator!
CSM turn 2
PM squad red arrives from their beachhead, and moves 12" to be in the gap between the table edge and the bunker.
With a devilish glint in their eyes, the 2 DPs fly over towards the penal legion. The lash the unit to form a line in between them, causing the chain gang to be pinned. The resulting assault has them using the squad as a jump rope, and even with their stubbornness the survivors flee but are swept by the DPs, but not before the penal custodian Sgt. "Ironjaws" Slaughter causes a rending wound on DP pink.
In the previous shooting phase, the 2 oblits miss the devil dog again!
The penal legionnaires are "gangbanged" into submission!
IG turn 3
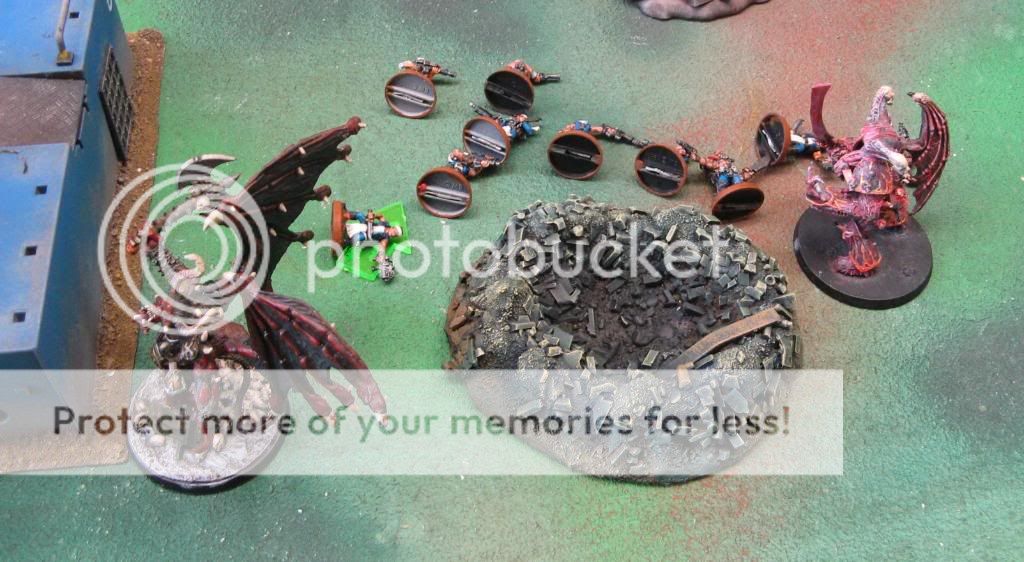
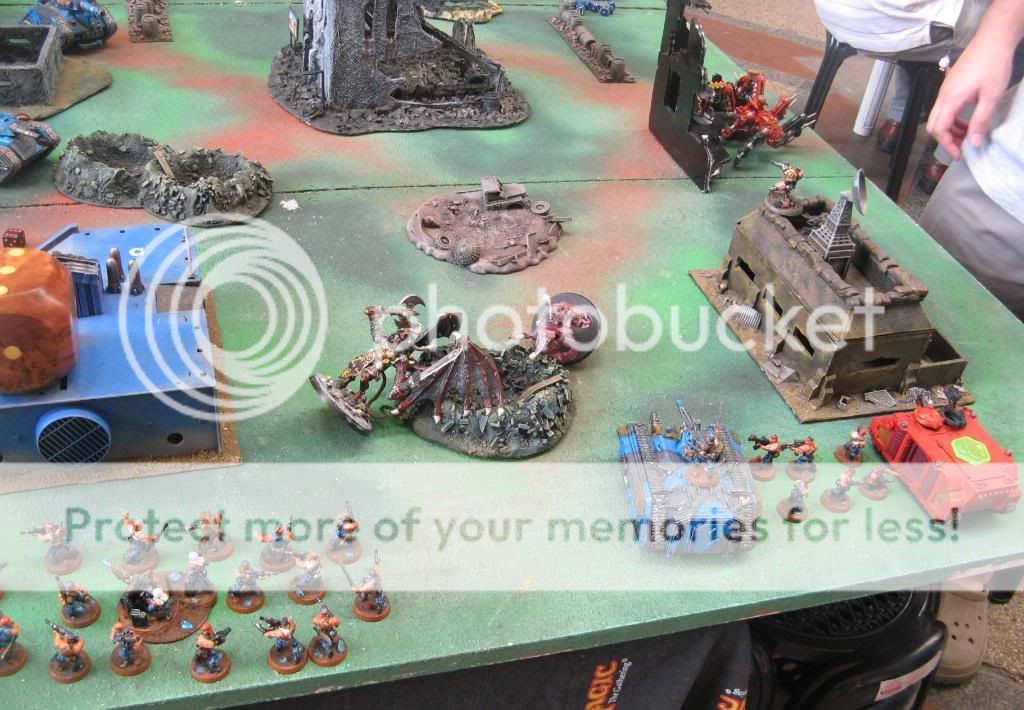
The resulting commotion acts as a beacon for the Hounds of the Sidewinder, as the Captain's platoon outflanks the 2 DPs, the obliterators, and the PM squad red. 1st platoon squads continues to run towards the left quarter, while the chimeras move toward the center. The LR and Devil dog continue to be mobile, always shifting positions.
The 1st platoon Ig squads again get good run results, as they near the desired firing positions. Sidewinder gives a successful "bring it down" order to the blob squad, and they manage to bring down DP red! A "like the wind" order enables the flamer SWS to fire at the oblits, then move besides the red rhino. The obliterator's shrug off the flames however. Between the tanks as well as weapons of sidewinder's squad, DP Pink also gets banished to the warp, but the captain gets burned from a plasma pistol overheat...curious since he was resupplied by the same munitorum clerk who issued the battle cannon rounds to the russ...
Critically, the basilisk stuns the red rhino, meaning the other rhinos in reserve cannot pass through that gap!
The Daemon Princes are destroyed while the stunned rhino becomes a roadblock!
CSM turn 3
Squads Black and Mottle finally arrive, but are forced to curl around the bunker due to the stunned red rhino. Squad red disembarks and readies their flamers.
The olbiterators finally manage to do something as they manage to explode the chimera of capt sidewinder. Only 2 meltagunners accompany the hero out of the wreck, undaunted and ready to fight. The red squad also burns the entire SWS team to cinders.
Payback by the red squad and the oblits.
IG turn 4
The elements of the 1st platoon finally reach firing positions. Sidewinder and his squad crawls out of the wreck and enters a crater in front of the oblits bunker. The devil dog and LR continue to be mobile.
The blob squad fails to hear the "like the wind" order of the captain, but he manages to issue it to the meltagunners. Another oblit is vaporized, but the captain is brought down by the malfunctioning plasma pistol! he is dragged to safety as his squad redeploys behind the crater.
The leman russ fires another dud round, rolling 2 1's to wound the plague marines. The basilisk shows how its done as an earthshaker round immobilizes the red rhino, and kills 2 CSMs.
The 1st platoon finally reaches firing positions!
Capt Sidewinder is brought down by his own plasma pistol, but the meltaguns bring down another oblit. The basilisk immobilizes the red rhino and kills several plague marines.
CSM turn 4
Squads black and mottle continue their curl around the bunker in order to join the battle. The last 3 members of squad red moves towards the crater wreck of the chimera. CSM shooting is ineffective as the last oblit fails to damage the devil dog.
IG turn 5
The devil dog gets aggressive and breaks out of cover, moving forward towards the bunker. The blob squad is furious at the loss of the Captain Sidewinder, and moves forward to engage the remnants of squad red.
In their firing positions, 1st platoon finally manages to join the fight. Shooting sees the black rhino exploding, although no CSM dies in the blast. The mottled rhino is also shaken. Pistol and GL rounds fail to wound any of squad red's members, but ordnance rounds kill all but 2 of squad black's unit.
The blob squads assault and manage to kill 1 plague marine, the blight grenades reducing the number of attacks. 3 guardsmen are lost, but due to the commissar they fight on!
The last oblit is killed, and squad black hunkers down in the wreckage of their rhino.
The combat between the blob and the CSM squad red is locked!

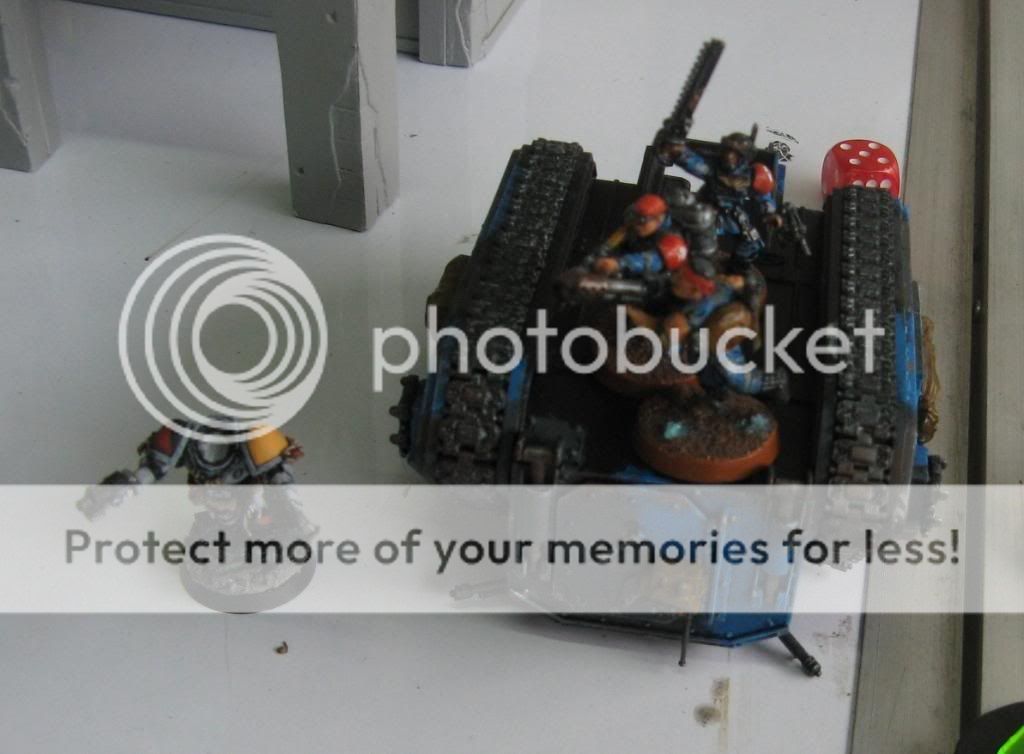
Had to show you this die which ended up on it's edge..freaky!!!
CSM turn 5
The mottled rhino continues to move forward and fires smoke, and the last members of squad black ready their weapons. They manage to kill the remaining members of Sidewinder's squad. The last 2 members of squad red kill a guardsmen while suffering no wounds, but the stubborn blob does not flee.
The valiant meltagunners meet their end.
A die is rolled, and a 3 ensures that there is a round 6.
IG turn 6
Without much ado, squad black is vaporized off the board. However, the rhinos shrug of all the fire, with the mottled rhino getting shaken.
In hth, 1 more plague marine falls to a power weapon, and the CSM champion misses with his power fists. He manages to survive the excess wound however caused by "no retreat", and the combat continues.
End of IG turn 6...not much CSM's remaining
CSM turn 6
Squad mottle disembarks, and finally the hated devil dog gets a melta round and is wrecked. The champion from squad red is finally killed, and the blob consolidates into a crater.
The devil dog is finally destroyed! The aspiring champion is hacked down!
Another die is rolled, and finally the game ends. Too bad, since with 1 more turn I could have wiped him out to get 13 points! but it was not to be, and i pull out the win with a score of 9-2. Thanks for the game Kent!
End of game dispositions, amid the casualties of the CSM army at his table edge...
The units of the match has to be the basilisk and the devil dog. The dunces of the match were the leman russ as well as the plasma pistol of captain sidewinder. Needless to say, Commissar Sherwin promptly executed the incompetent munitorum clerk after returning to base!!!
|
40K 5th ed W/L/D
65/4/6, 10/2/1, 10/3/0, 2/0/1, 0/1/1
40K 6th ed W/L/D
1/0/0
WHFB 8th ed WHFB
Empire: 12/3/2, Lizardmen: 16/3/2 |
|
|
|
|
2010/01/24 16:38:14
Subject: The 7th Galen goes Gladiator! A 1500 pt League report Jan-Mar 2010
|
|

Jealous that Horus is Warmaster
|
Great read, thanks for posting.
Good to see the Galen 7th utilising their newest shipments of hardware and manpower!
|
|
|
|
|
2010/01/24 20:43:12
Subject: Re:The 7th Galen goes Gladiator! A 1500 pt League report Jan-Mar 2010
|
|

Boom! Leman Russ Commander
|
Excellent reports, this will probably become a favorite thread of mine, with 7+ B-reps with this quality
Interesting army, not awesomely hard, but sometimes you just want to test new stuff
|
|
|
|
|
|
2010/01/25 12:53:14
Subject: The 7th Galen goes Gladiator! A 1500 pt League report Jan-Mar 2010
|
|
Rough Rider with Boomstick
|
Nice batreps as ever, good to see 'sidewinder' getting tested as I always wondered how useful he'd be in a mixed force, I look forward to the rest of the battles!
|
Run a whole lot of wfrp and other rpg's, play The Woods and Kill Team, gather and look mournfully at imperial guard knowing I'll never finish enough to use them on the tabletop  |
|
|
|
|
2010/01/25 13:35:28
Subject: Re:The 7th Galen goes Gladiator! A 1500 pt League report Jan-Mar 2010
|
|

Sword-Bearing Inquisitorial Crusader
Northern Virginia
|
I was quite excited when I saw you had more batreps I love reading thme good luck with your future games. I'm also glad Sidewinder is proving effective in competitive play.
|
"Paranoia is a very reassuring state of mind. If you think they are after you, you think you matter" |
|
|
|
|
2010/01/31 10:18:10
Subject: The 7th Galen goes Gladiator! A 1500 pt League report Jan-Mar 2010
|
|

Rough Rider with Boomstick
|
Thanks for the comments again! I will try not to disappoint!
OK, it's time for the next batch of batreps....
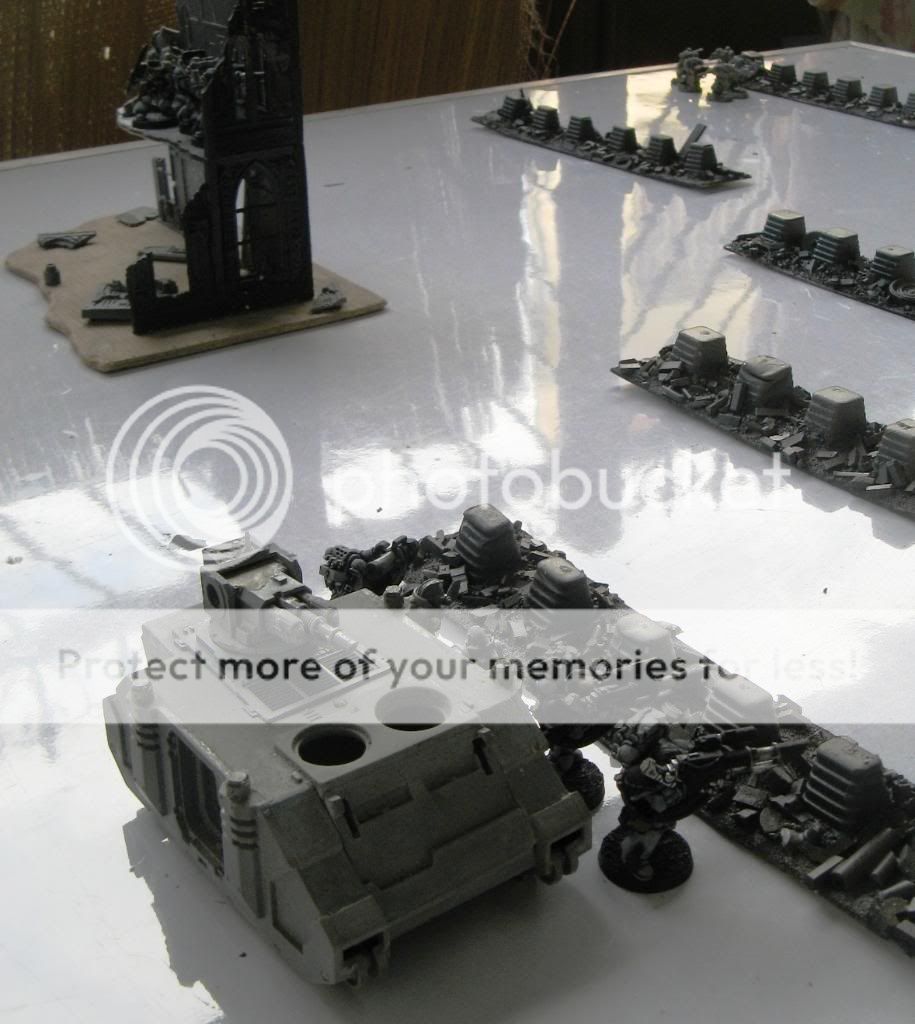
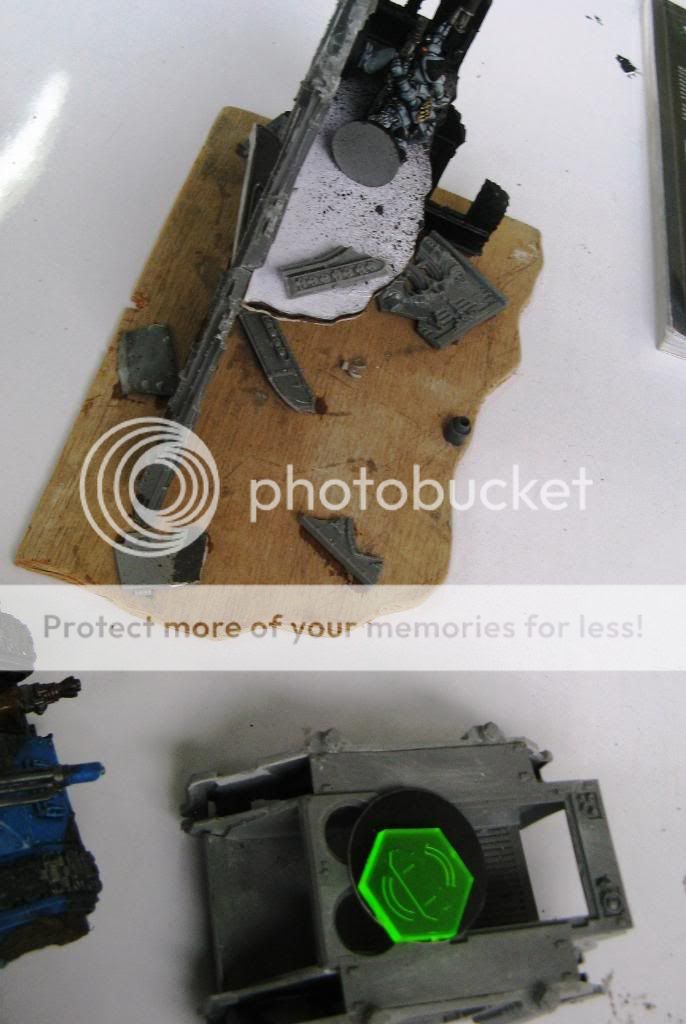
But before that, we were required to make 3 objective markers for a future scenario, so I made some simple ones...

My objective markers.....fuel drum, weapons cache, comms equipment...
Anyway, I fight another match for week 2, despite knowing that I cannot claim the bonus points, since my opponent Gelo is quite hard to catch for a game...
Game 3 - Week 2
Gelo plays horde ork, and used the following list:
HQ
Warboss "BossBeef"
- Power Klaw, Heavy Armor, Stikbombz
Big Mek "KnoWotz"
- KFF, choppa, Mek Tools
Elite
Burna Boyz "Toasties"
- Mek "BadUm" w/ Mek Tools, KMB
- 7 Burnas
Lootas "Thumpas"
- 8 Lootas
Tankbustas "Boomas"
- 7 Rokkitboys w/ 2 Bomb squigs
Troops
MegaNobz x3 (counts as troops because of warboss)
- trukk
Ork Boyz x 11
- slugga and choppa
- 1 nob with Powerklaw
- trukk
Ork Boyz x 19
- slugga and choppa
- 1 nob with powerklaw
OrkBoyz x 20
- shootas, 2 big shootas
OrkBoyz x 20
- shootas, 2 big shootas
OrkBoyz x 10
- shootas , big shoota
- trukk
Heavy
Looted Wagon
- skorcha, big shoota, red paint job
BattleWagon
- 2 Big shootas, red paintjob, grot riggers
That's over 110 models.....anyway I reckon that with his troops coming in from the corner it would end up as a slow turkey shoot, but as I find out gelo smartly used the "entry point" rule to actually "semi-flank" me, as will be described later....
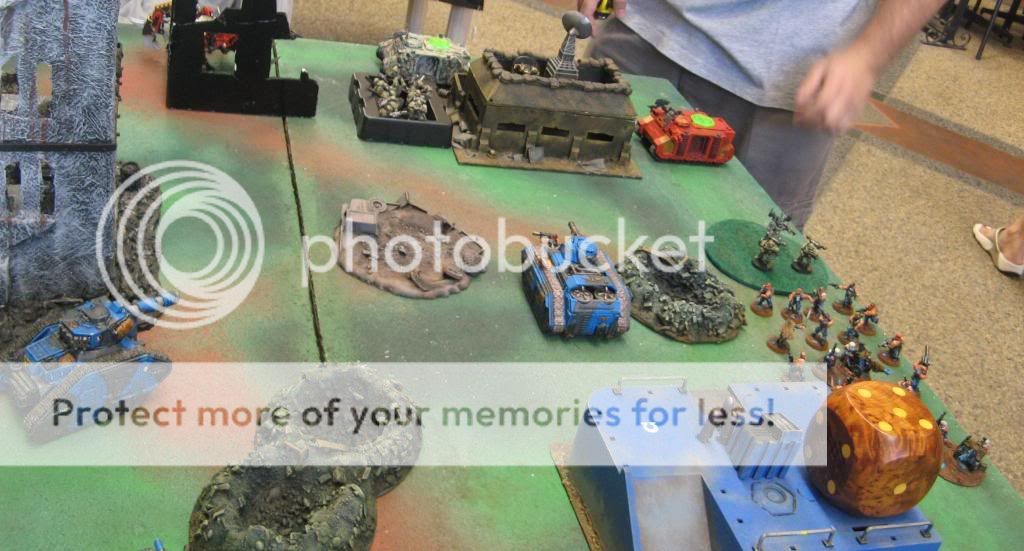
I win the toss and decide to go first.
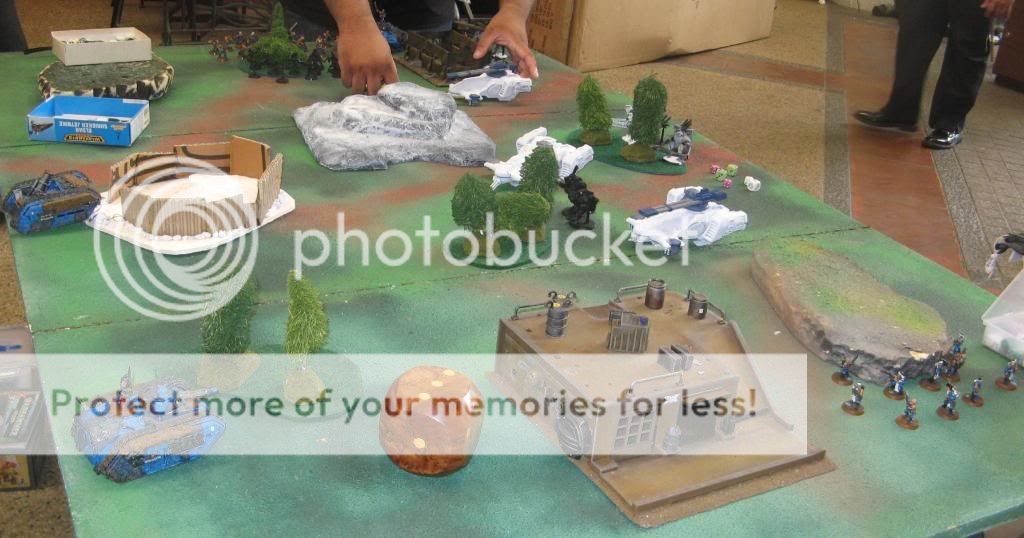
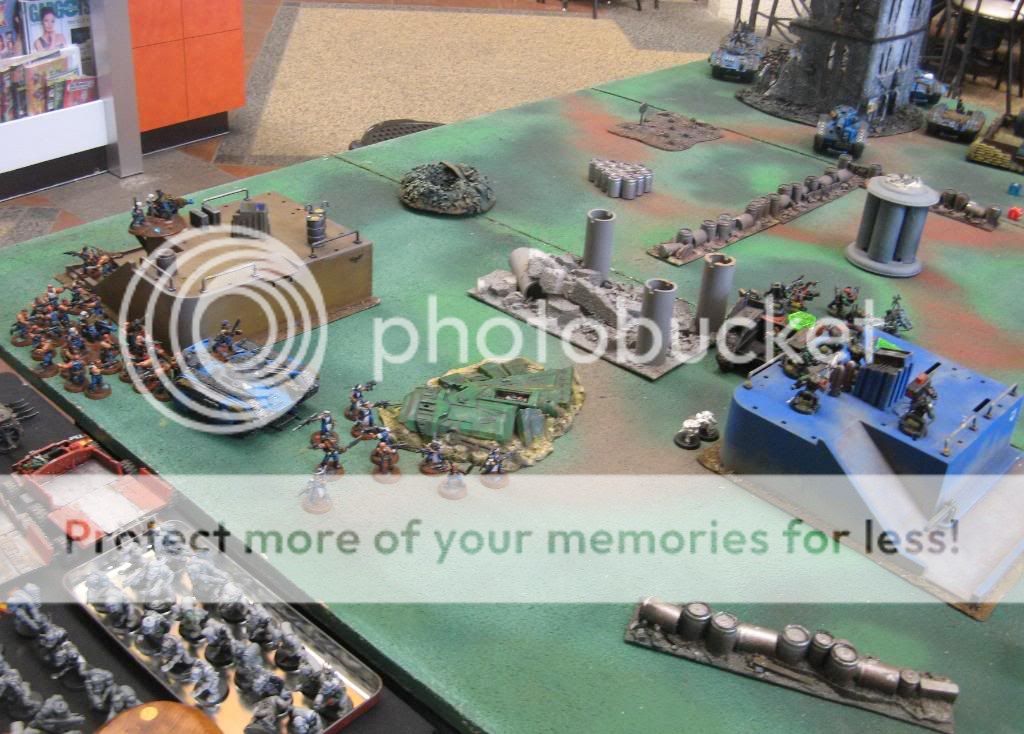
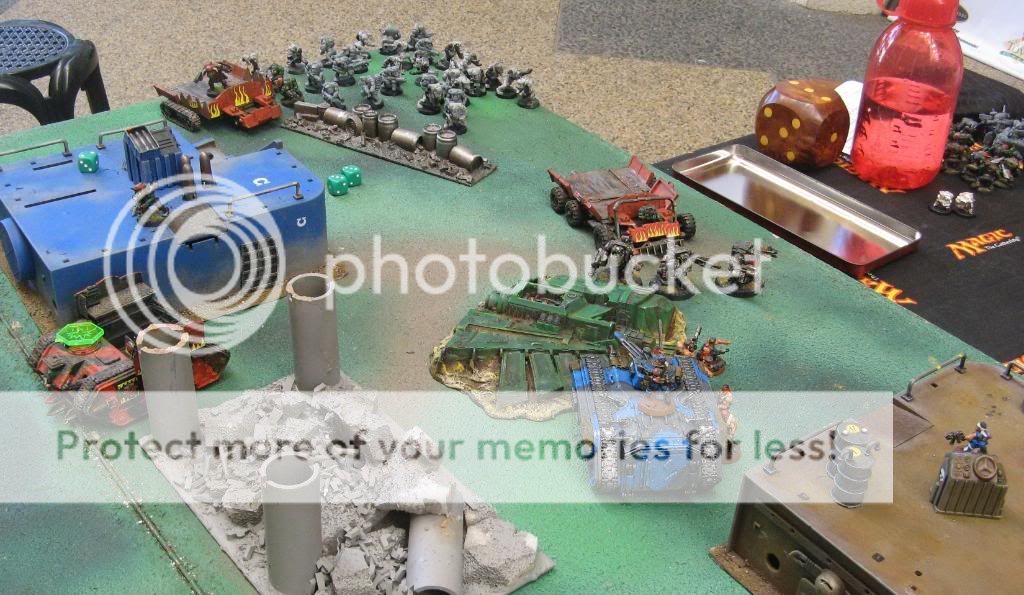
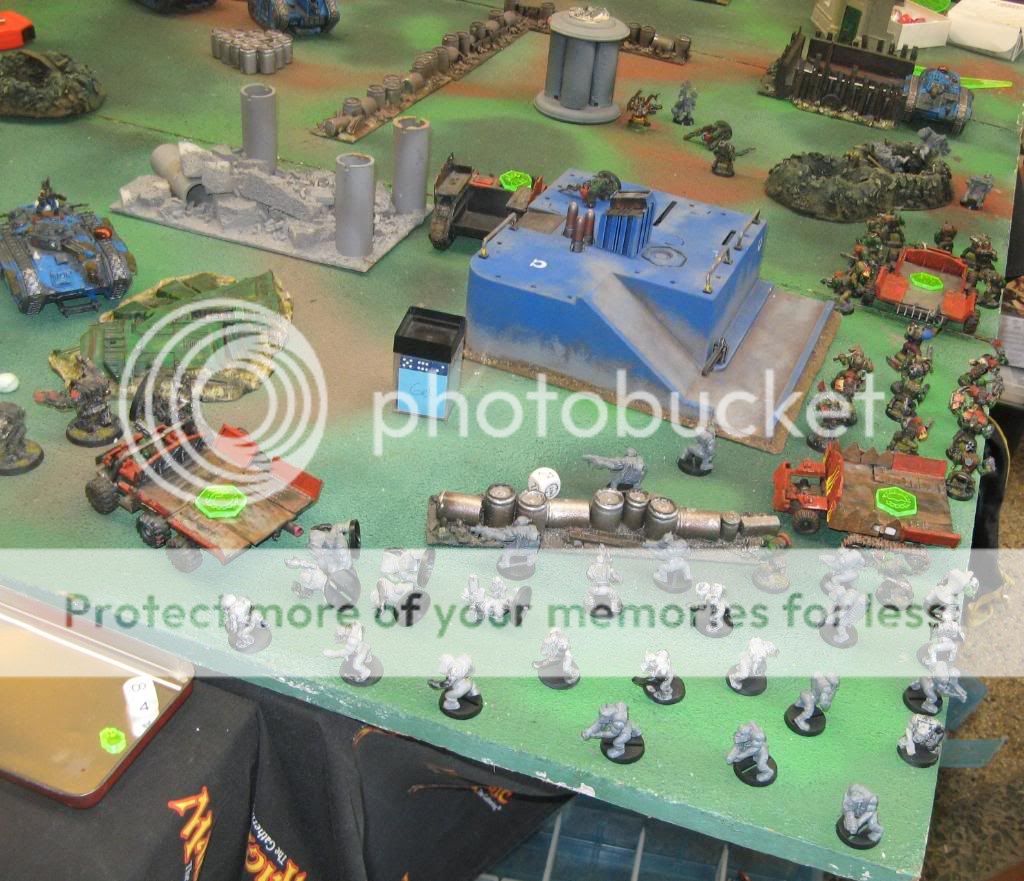
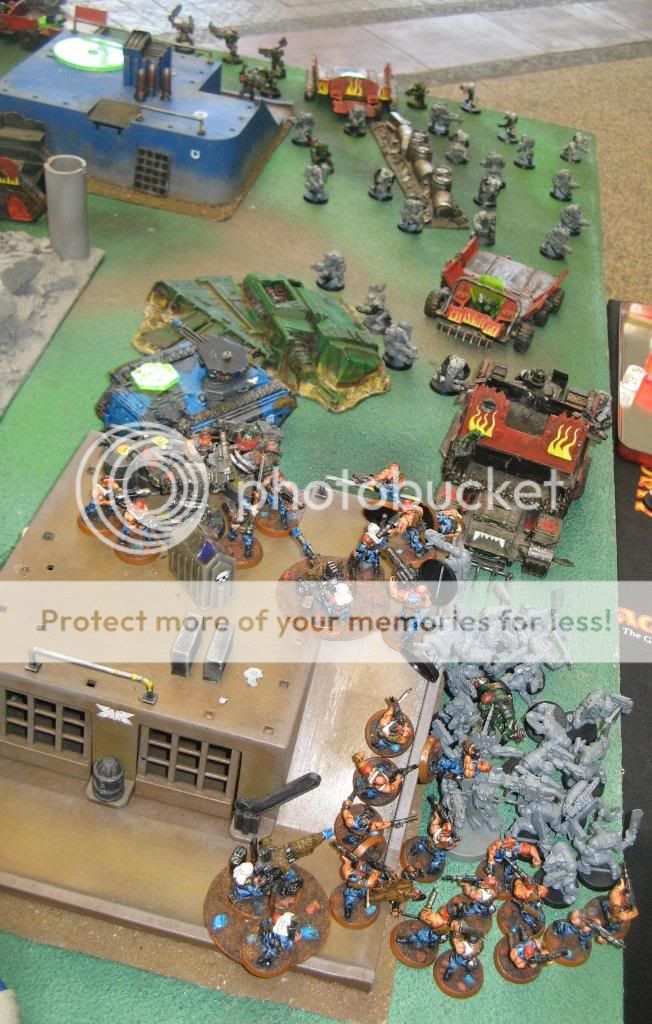
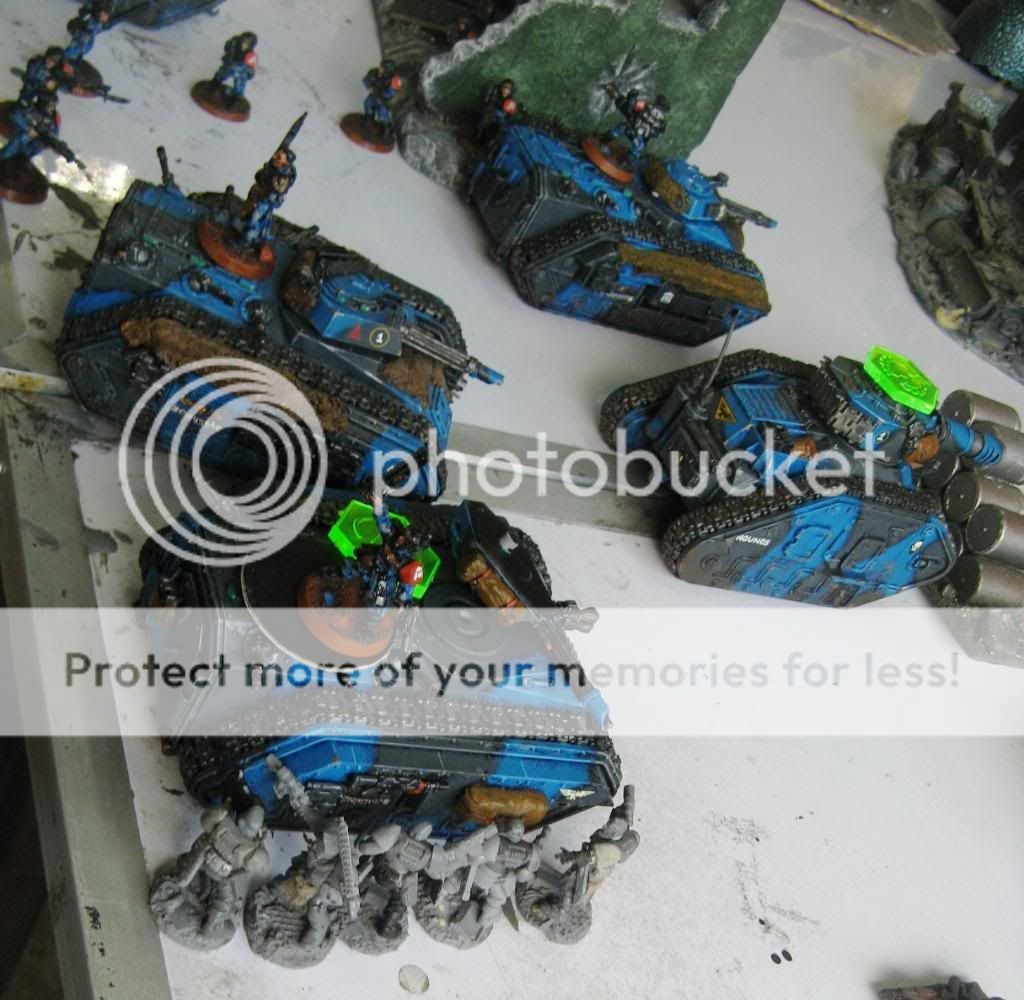
my deployment
Gelo decides to also put his warboss who joins 19 man slugga squad in the battlewagon in reserve....The burnas plus the big mek ride the looted wagon who deploy in between the tankbustas and the lootas..

The ork deployment
IG turn 1
I move the Devil dog and the Leman russ forward and to the left and right sides....the shooting phase was excellent as 2 lootas and tankbustas fall, and both units fail their pin checks and go to ground, with the tankbustas also fleeing to the top of the blue structure..the looted wagon is wrecked despite the KFF, but the burnas and Mek do not get pinned.

The lootas and tankbustas are pinned, the tankbustas later flee, and the looted wagon is wrecked!
Ork turn 1
The tankbustas rally on top of the building, while the burnas decide to trust the KFF of the Big Mek, and start advancing forward. The Kustom blasta of the Mek manages to shake the devil dog.
The devil dog is shaken, the burnas and Big Mek advance
IG turn 2
My reserve rolls are terrific, as the 1st platoon, Sidewinder's platoon, and the chain gang come in. I decide to have the outflanking units come in on the side of his entry point, but somewhere back, in order to claim that quarter and try to take advantage of my range. The 1st platoon foot squads start to make their move to claim my left quarter, while the 2 chimeras start to move to support the quarter where the outflankers are. the devil dog moves behind cover, in preparation to rush forward in later turns in order to use the heavy flamer. the LR moves also to my right....
the first platoon comes in
The LR and DD move to better positions
the hounds and chain gang outflanks!
The Ig squads from both platoons start to run to better positions. meanwhile, it is my hope that I can destroy Gelo's elites this turn before his reinforcements starts coming in, but I get one of those turns where the shooting gets flubbed, although 2 more tankbustas fall to the outflanking hounds. The resulting passed morale check starts and incredible trend which will last until the end of this game!
Ork turn 2
Gelo rolls poorly for his reserve rolls as only the 2 large shoota boyz units footlslog in. Gelo keeps 1 unit spread out at his entry point, meaning that future reinforcements will come in at the nearest point to this. He uses this tactic to seal off the sides of both table edges, meaning his entry points creep closer to me!
Ork shooting focuses on the chain gang, and the only survivor buggers off and makes for my table edge..other shooting proves ineffectual, even the bomb squigs flub their rolls versus sidewinder's chimera...
Dakka dakka!!!
IG turn 3
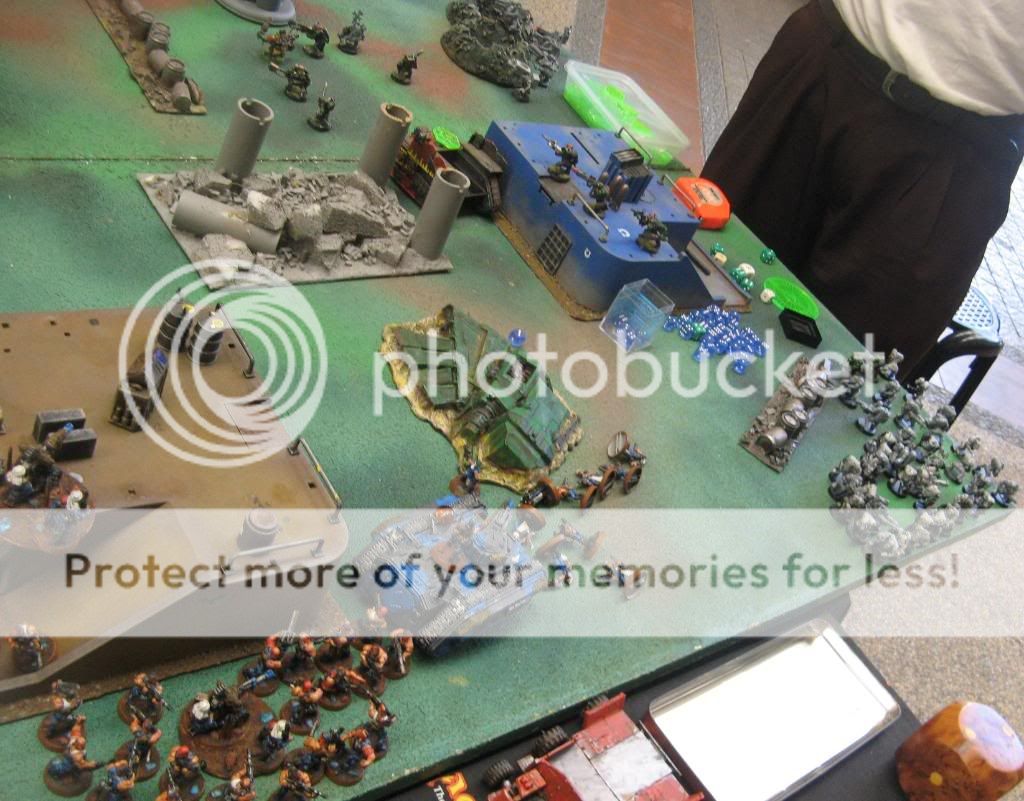
The devil dog now moves in towards the lootas, within heavy flamer range. The griffon and CCS chimera move forward to get them closer so that their weapons can affect the massing orks on Gelo’s corner, while the 1st platoon squads and chimeras continue to move towards their target table quarters.
Realizing gelo’s strategy, I focus my shooting in order to eliminate the Ork elites, and also shoot pie plates in the ork corner, hoping to panic the boyz and thus keep the entry points close to his corner. With his numbers, it would be impossible to wipe him out by shooting, so I was relying on the panic checks to do their thing, especially on units near his table edge. The tankbusta unit is reduced to 1 model, the devil dog flamer kills 2 more lootas, 2 more burnas fall, and half of the lead shoota boyz unit go down, and they all pass their tests!!!
The elites continue to remain steadfast in the face of IG shooting
Ordnance takes its toll on the ork boyz.
Ork turn 3
The truck units containing the meganobz, slugga, and shoota boyz all come in, leaving only the battlewagon mob led by the warboss in reserve. The truck with the meganobz heads straight toward the Hounds of the Sidewinder and dismount, while the other 2 continue to extend the edge and move in to support the lootas versus the devil dog, with the slugga boyz disembarking too.
Shooting has no major effect on the IG forces. The lootas go orky and decide to assault the devil dog to no effect, while the remaining burnas continue to advance. Luckily, the meganobz roll poorly and fails in their assault attempt.
Here comes the maganobz!!!

The trukk boyz pour in, while the lootas assault the devil dog to no avail!
IG turn 4
With the Ork beachhead expanding it is critical that I eliminate the ork units. I continue to focus on my strategy of shooting enough to panic, reasoning that the odds will turn in my favor especially vs. a Ld of 7.
The devil dog continues to focus its attention on the lootas, and only 1 remains after being burned by the heavy flamer. With the elements of the 1st platoon in range, other shooting wipes out the tankbustas, cause 2 more burnas to fall, either wrecks or immobilizes all the trucks (which was actually bad, as the presence of the vehicle of the wreck continues to extend the beachhead), and bring the shoota boy unit down to only 5 models. The Hounds of the Sidewinder fire meltaguns, plasma pistols, flamers, lasguns, and only 1 meganobz falls, enough to cause a ld check…..but the orks pass all the required ld checks on a 6 or 7!!!! Damn!!!!
Effective IG shooting, but still the boyz refuse to run, as the beachhead continues to expand!!!
Only 1 meganobz falls to the shooting of Capt. Sidewinder’s entire platoon!!!!
Orks turn 4
Warboss Bossbeef and his battlewagon mounted unit fails to come in. The meganobz moves towards sidewinder’s chimera, which did not move in order to fire all its weapons the previous turn. The last 5 shoota boyz decide the safety of an immobile truck is better than standing in the open, and mount it. The shootas from the wrecked truck advance to support the last loota.
Ork shooting causes only 2 of Sidewinder’s flamer guardsmen to remain. The devil dog continues to shrug off the shooting of the last loota. The meganobz wrecks the chimera of Capt. Sidewinder’s squad, the occupants piling out in good order.

The orks put pressure on the Sidewinder’s flank. Automatically Appended Next Post: IG turn 5
While it is obvious that a wipeout of the Orks is impossible, victory is still achievable depending on the control of table quarters. I move the 2 chimeras from the 1st platoon into the quarter where Sidewinder is battling with the meganobz, while 1 squad from 1st platoon is on my left quarter, with the shoota unit behind the loota contesting it.
Shooting is focused on eliminating/trying to panic units close to the edge again, as well as the meganobz. The devil dog flubs killing the last loota with a roll of “1” to wound, but the burnas are all eliminated, BUT the big mek survives with 1 wound remaining. The boyz unit behind the loota are brought down to 5 models, but the meganobz again survive shooting from Sidewinder’s unit, with all the meltas missing, and only 1 wound is caused from the plasma pistol as well as the flamers and shots from the SWS and blob squad!!!
More importantly, the orks pass all their ld tests again!!! These orks are unbreakable!!!
The last loota and the wounded Big Mek survive, while the Orks refuse to flee.
Ork turn 5
The battlewagon with the warboss and full slugga unit comes in, and with the extended beachhead easily reaches the units of Sidewinder’s platoon. Not only that, he comes in with a WAAAGGGHH, ensuring the meganobz is able to climb up the building to reach sidewinder’s squad too. The big mek joins the shootas, while the last loota decides to move to the rear. The shootas and big mek assault the devil dog, and good rolls means the tank is shaken and the heavy flamer is destroyed. The meganobz assaults sidewinder’s unit, his powerful sword Fang failing to find a weak spot, and the orks slaughter the squad members, as Sidewinder manages to escape. In the main combat, the power swords of the commissar and sergeant manage to slice the Ork Warboss done, but the resulting attacks from the enraged slugga boyz wipe out the blob squad and the flamer unit to a man!
The Warboss arrives with a WAAAGGHHH!!!
The assault finally affects the devil dog
Sidewinder is the only survivor of the assault of the Meganobz.
Warboss Bossbeef is killed by power weapons before the rest of the boyz wipe out the entire blob squad (Ha! Moral victory for me in bringing down his Warboss!!!).
The random game length die rolls ends up a 2, and the game ends. .Points are tallied, and I actually end up killing more. Now bonuses for table quarters are added, and all table quarters are contested…or are they? Upon rereading the victory conditions, only DISMOUNTED troop units can claim or contest, and I did not dismount the PCS and Meltagun SWS from their chimeras! This results in a huge 500 point swing in Gelo’s favor, and he ekes out a win, 7-1! Gak!!!
Anyway, it was 1 hell of a fun game, and with to be honest he deserved the win due to his amazing streak of at least 10 passed morale checks! Great game and a well played victory to Gelo’s orks!
There was no real unit of the match for me, although my ordnance vehicles did well in causing Ork casualties. The special weapon carrying guardsmen in Sidewinder’s unit were a disappointment, as they flubbed critical rolls in shooting at the meganobz.
For Gelo, the answer is simple. His dice did not let him down for the leadership checks, although to be fair they were consistent since he also rolled low for his shooting attacks and run rolls.
|
|
This message was edited 1 time. Last update was at 2010/01/31 10:18:52
40K 5th ed W/L/D
65/4/6, 10/2/1, 10/3/0, 2/0/1, 0/1/1
40K 6th ed W/L/D
1/0/0
WHFB 8th ed WHFB
Empire: 12/3/2, Lizardmen: 16/3/2 |
|
|
|
|
2010/01/31 11:32:55
Subject: Re:The 7th Galen goes Gladiator! A 1500 pt League report Jan-Mar 2010
|
|
Rotting Sorcerer of Nurgle
|
interesting reports, I loled reading the guy using the lash/oblit list and got creamed. good reads!
|
|
|
|
|
|
2010/01/31 16:53:21
Subject: The 7th Galen goes Gladiator! A 1500 pt League report Jan-Mar 2010
|
|
Rough Rider with Boomstick
|
Here is a summary of the next scenario:
Week 3 Scenario - Death To Your Heroes And All They Fight For...
Deployment: Pitched Battle ( HQ must be deployed no later than the 2nd Turn)
Duration: 6 Turns only
Special Rules:
Infiltrators and Scouts
Reserves
Deepstrike
Heroes At The Forefront - Mark the starting position of each HQ unit per army. At the end of game, no bonuses ( VP Bonuses or Scenario Bonuses) would be gained by the side who's HQ has not left the deployment zone and 18" away from its starting position.
For HQs/Heroes that arrive via reserves (deepstrike or outflanking), mark the starting point from the point where model entered via outflank or deepstrike, etc.
Victory Conditions:
Total VP determines the Winner
Bonus VP:
For each HQ destroyed or fleeing - +100VP
For each Named/Unique Character ( HQ, otherwise, including Counts As models) destroyed or fleeing - +200VP
Bonus Points Conditions:
For each HQ destroyed or fleeing - +1pt each
For each Named/Unique Character ( HQ, otherwise, including Counts As models) destroyed or fleeing - +2pts each
If you'll note, Bonus Points for this Scenario can exceed the usual 2pt maximum if your opponent has more HQs or Special Characters.
Game 4 – Week 3:
My opponent for the week was Donel and his “Cut and Paste” work in progress Space Puppy army…
His list:
HQ Rune Priest (living lightning, murderous hurricane) (joins squad in rhino)
Troops
Grey Hunters x 6
Mark of Wulfen
Rhino
Grey Hunters x 5, flamer
Razorback (TLHB)
Grey Hunters x 5, flamer
Razorback (TLHB)
Grey Hunters x 5, flamer
Razorback (TLHB)
ELITES
Wolf Scouts x 5
Melta gun
Wolf Scouts x 5
Melta gun
Wolf Scouts x 5
Melta gun
HEAVY
Longfangs x 5
2 LC
2 ML
Razorback ( LC TLPG)
Longfangs x 5
2 LC
2 ML
Razorback ( LC TLPG)
Longfangs x 5
2 LC
2 ML
Razorback ( LC TLPG)
Donel is known locally for his beautifully painted and converted armies, with a preference of FW stuff. As of now his Space Wolves is basically still in construction, thus some of the vehicles in the batrep are still in their “shell”…especially the HB razorbacks (the ones with missing front hull panels as well as the HB turrets).
We played in Donel’s garage on his whiteboard table, thus the more bright environment in the batrep…
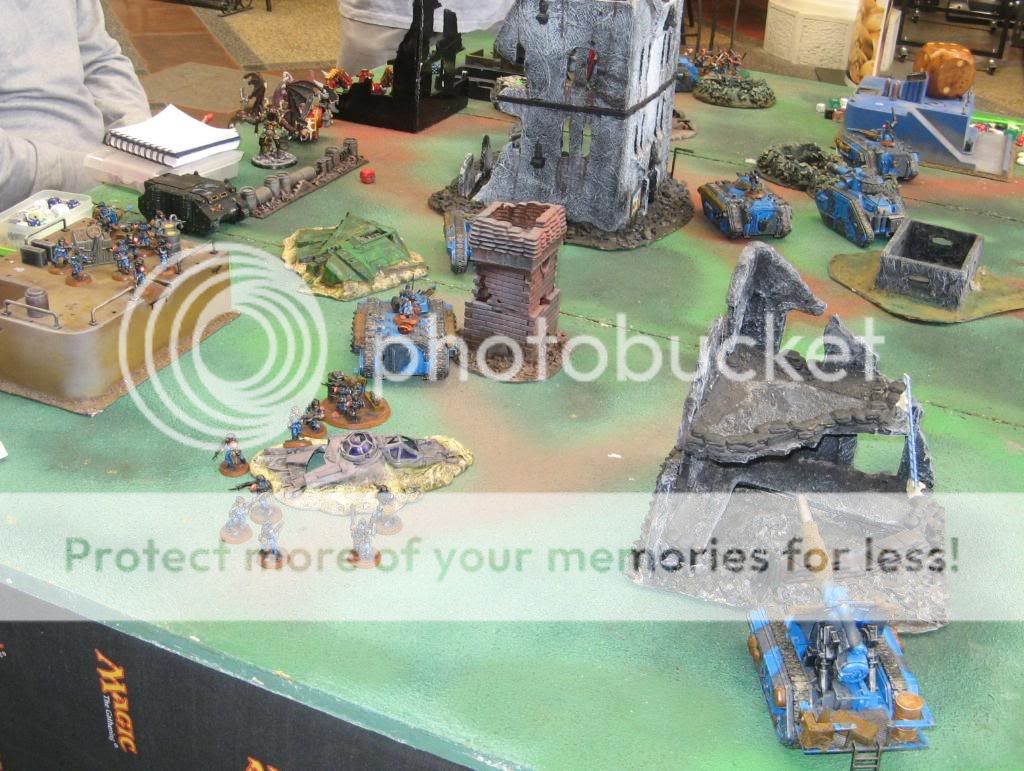
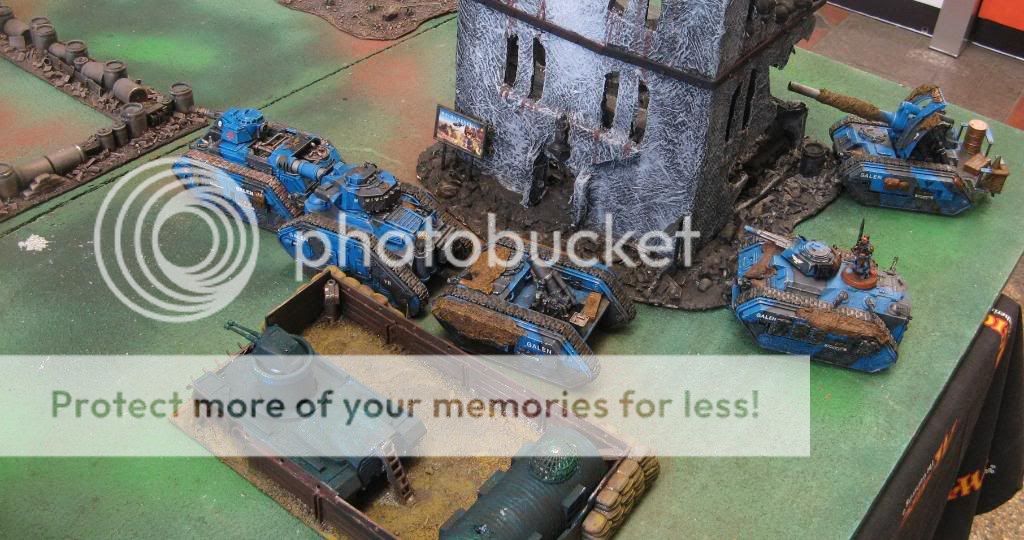
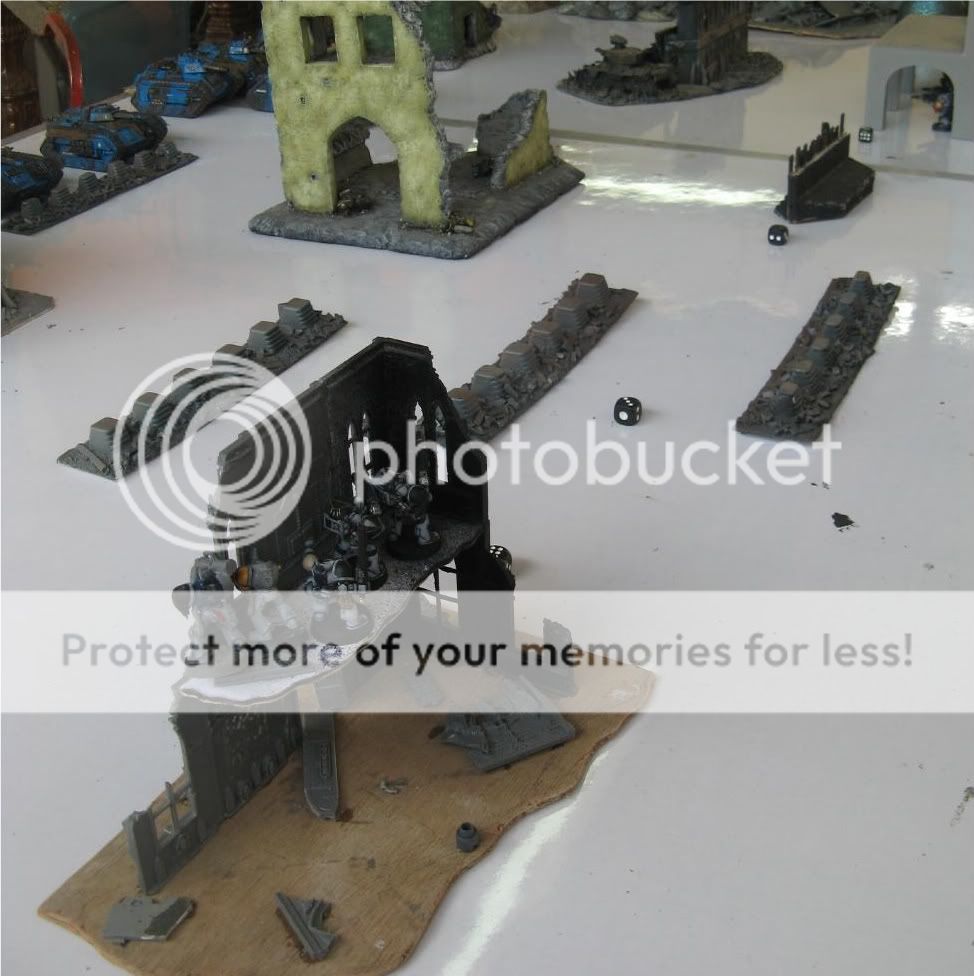
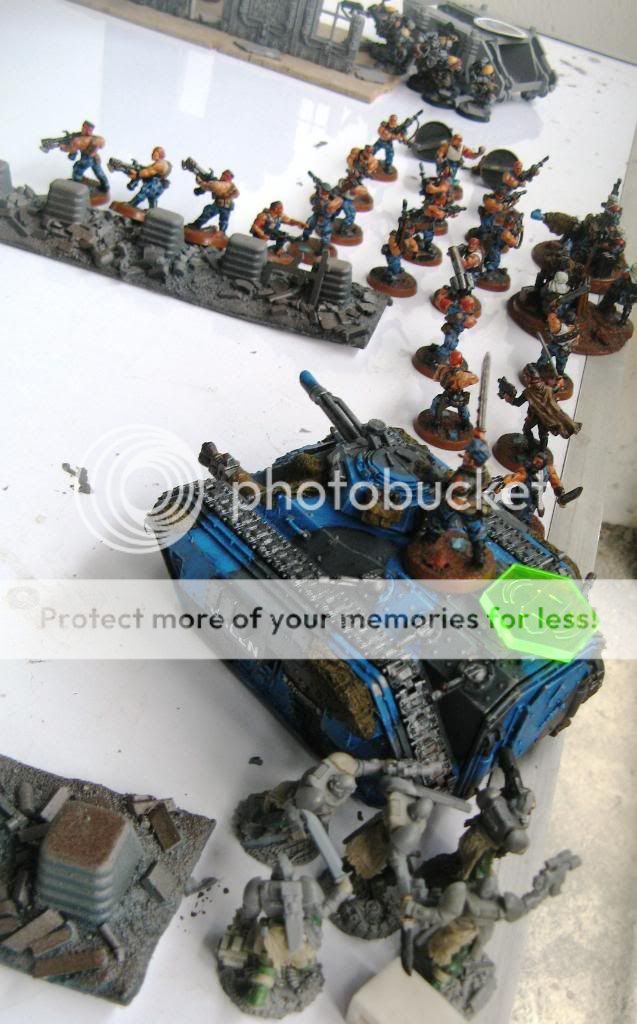
I win the toss, and decide to setup first. The difference here is that instead of bringing the chain gang from reserve I decide to use them as a flank guard (they have the gunslingers skill), as a precaution versus those meltagun toting wolf scouts. I use a 10 man infantry squad flanked by the tanks to seal off the right flank of the basilisk and griffon. I then set up my CCS on the right, with the intent of letting them board the chimera then move to the left, hoping to be more than 18” from the start point in order to claim the week 3 bonus points.
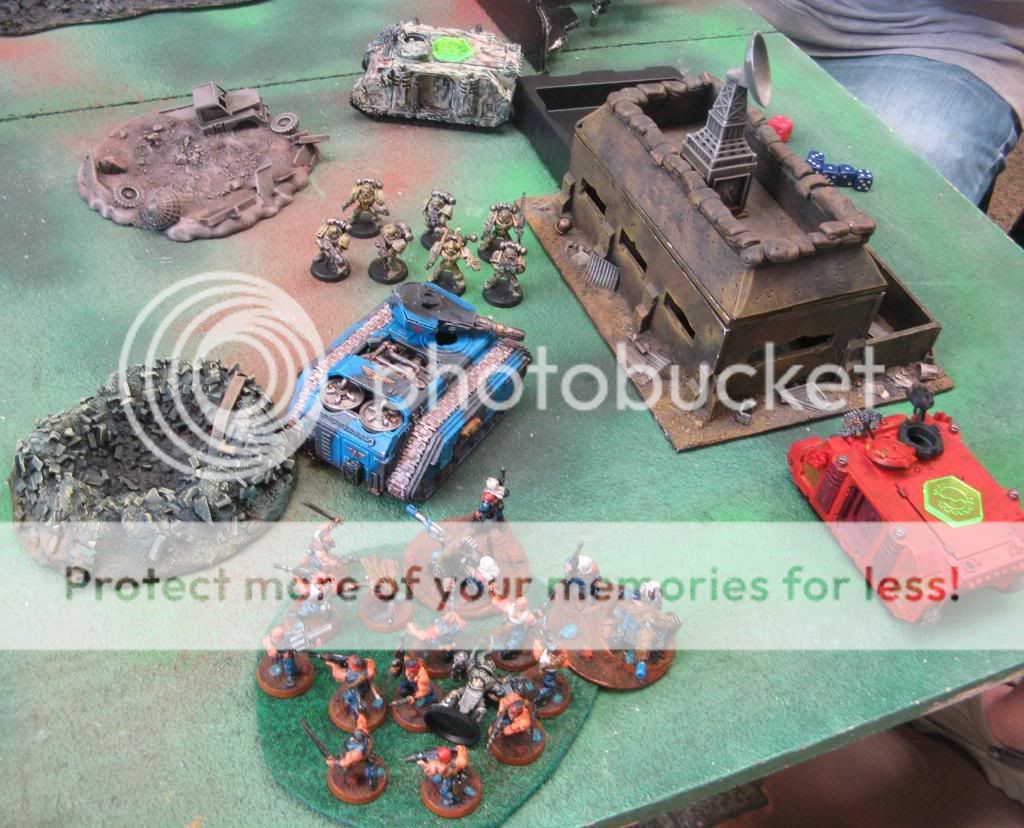
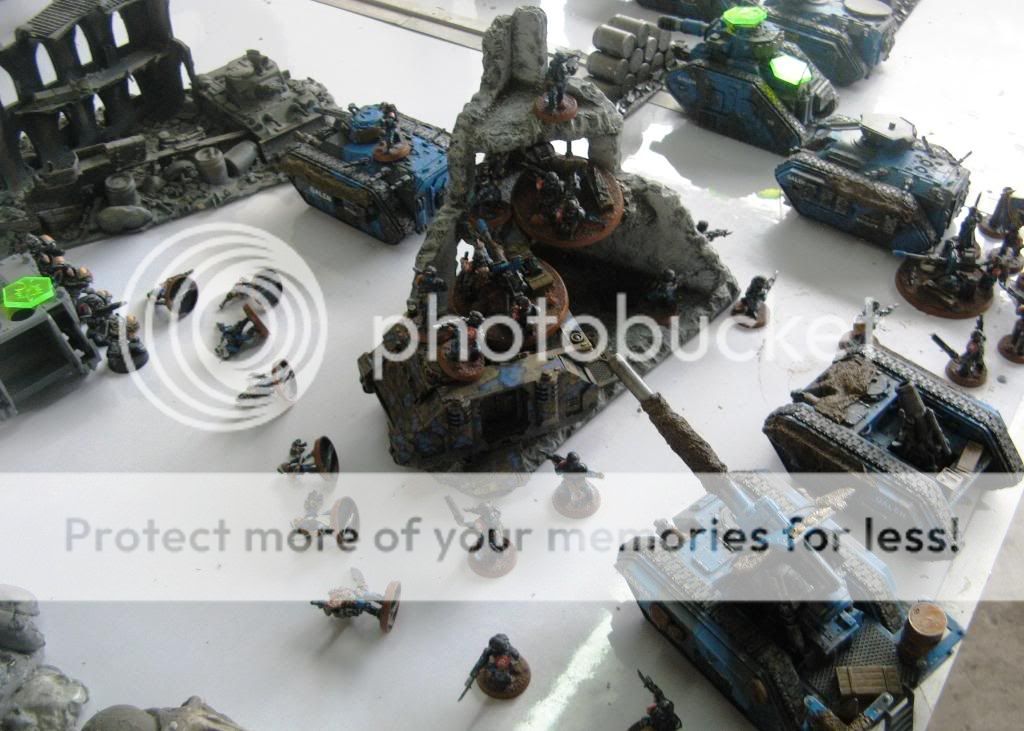
My deployment (left view)

Right view, starting point of the CCS marked
Donel then decides to set up just 2 long fangs squads (I will designate them LF1 and LF2), with their razorbacks in reserve, as a precaution versus first turn shooting. He immediately regrets the decision as he rolls a 6 and seizes the initiative!
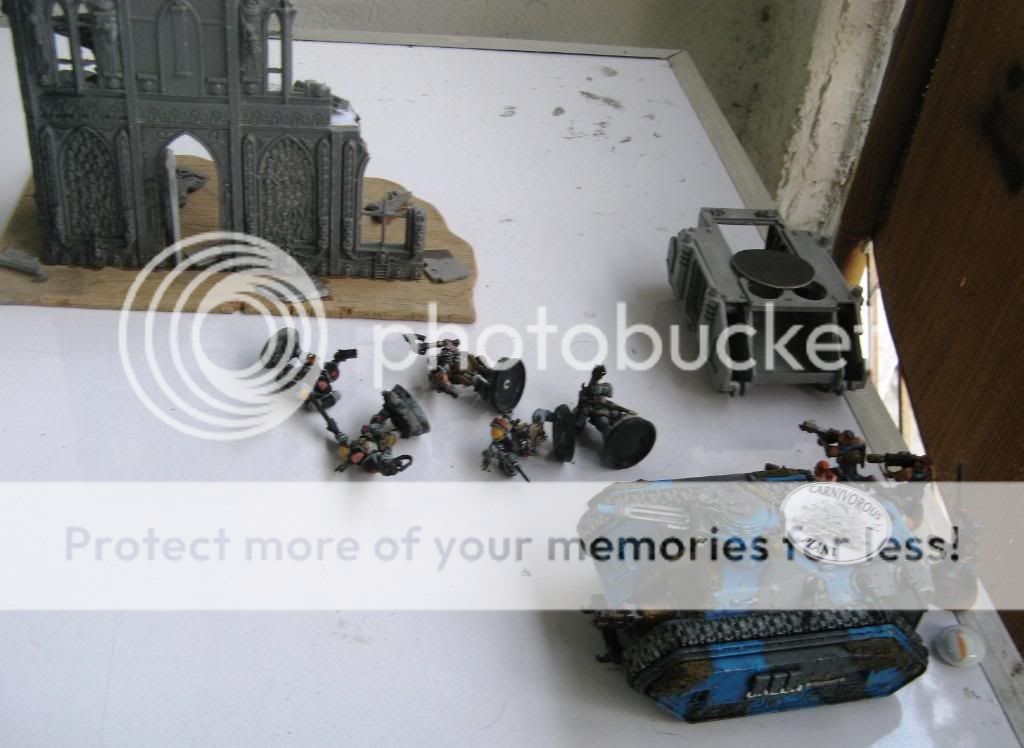
LF1 deploys on the leftmost ruin
LF2 deploys on the ground level underneath the rightmost building
SW turn 1
With just the 2 units, Donel proceeds to shoot. The result is that the Leman Russ gets immobilized.
IG turn 1
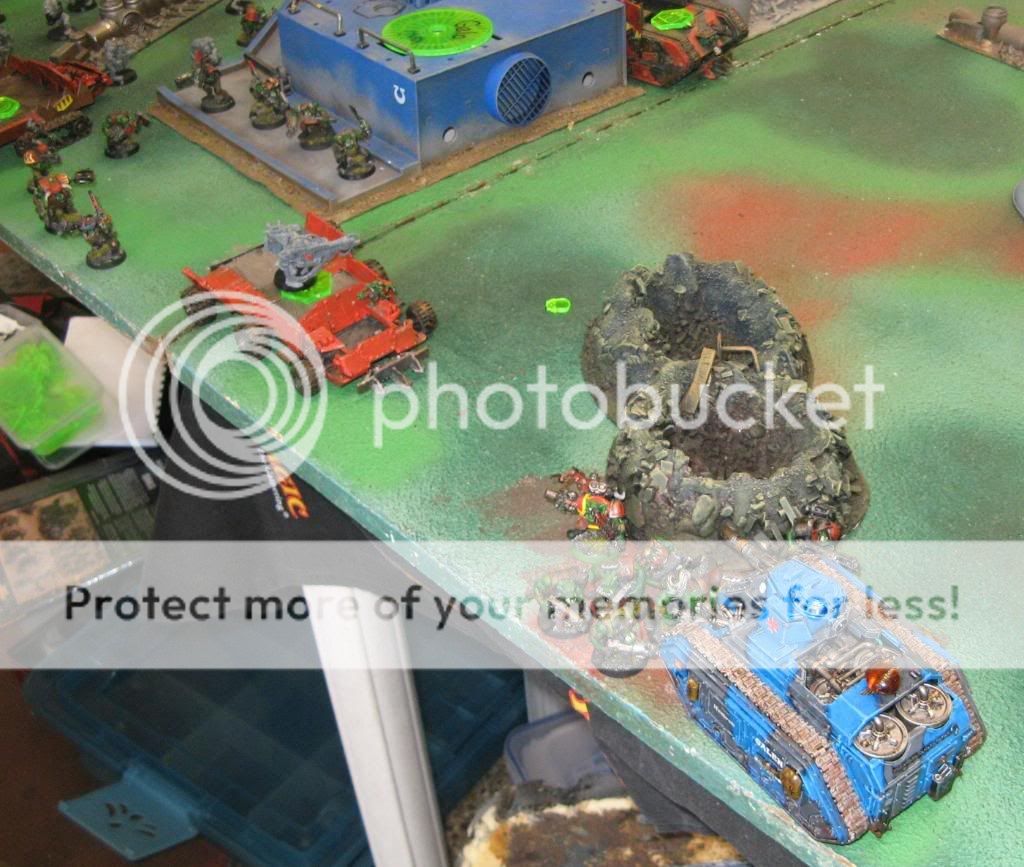
The CCS immediately mounts their chimera and makes a movement towards the IG firebase. The Devil dog starts to move forward, and the other chimeras also move to the left towards the table edge, with the PCS chimera moving 12” and popping smoke, just in case a wolf scout units appears on that side. The chain gang slowly spread out forward, making sure that the entry point of an outflanking wolf scout is farther from my firebase, in case donel outflanks to my left.
With all the units, shooting only brings down a ML from LF 2, cover saves and power armor proving equal to the task! However, Donel leaves a gap in LF2 more than 2”, ensuring that the unit must move back into coherency the next turn, denying that unit the ability to shoot.
 IG
IG position at the end of turn 1

1 Long Fang bites the dust
SW turn 2
The Rune priest together with the GH1 squad in the rhino, GH2 and LF3 in their razorbacks, and WS 1 come in from reserve. A 1 is rolled, meaning the WS outflanks from his left, which is the side opposite my deployment zone. The rhino positions itself behind the building of LF2, right behind a doorway so it has LOS to my lines. The razorback of GH2 moves 12” forward and pops smoke. LF3 deploys behind a line of tank traps, it’s lasplas razorback right behind them. LF2 moves into cohesion, the WS unit runs forward, and LF1 aims again for another round of shooting.
The Runepriest, GH1 rhino comes in, while the GH2 razorback moves forward and pops smoke.
Long fang 3 and it’s razorback takes firing position, while Wolf Scout 1 runs in front the far table edge.
Shooting from the Long Fangs immobilize the Devil Dog. Other shooting targets the LR, who shrug off all shots. The Rune priests successfully casts Living Lightning at the Basilisk, but fail to do damage.
IG turn 2
The Hounds of the Sidewinder show up, and outflanks to my right. The CCS chimera continues to move to the left, and the meltagun and PCS chimera move to the left, continuing to seal my table edge.
Shooting has mixed results. The basilisk stuns the rhino of the Rune priest, while the GH2 razorback avoids damage. The Griffon manages to kill 1 ML from LF3, as well as pin the unit. The Hounds of the Sidewinder on the other hand devastate the Space Wolf Units on his left. Wolf Scout 1 is wiped out by Sidewinder’s squad as well as the Hull heavy flamer of the chimera, and multiple flamers and lasgun shots kill all but 2 lascannon gunners of LF 1, successful “Like the Wind” orders ensuring the squads reposition themselves after shooting.
Wolf scout 1 is taken out by Sidewinder’s squad and their chimera!
 LF
LF 1 feels the heat, and only the lascannons remain!
 LF
LF 3 is pinned by the griffon
|
40K 5th ed W/L/D
65/4/6, 10/2/1, 10/3/0, 2/0/1, 0/1/1
40K 6th ed W/L/D
1/0/0
WHFB 8th ed WHFB
Empire: 12/3/2, Lizardmen: 16/3/2 |
|
|
|
|
2010/01/31 16:54:22
Subject: The 7th Galen goes Gladiator! A 1500 pt League report Jan-Mar 2010
|
|
Rough Rider with Boomstick
|
SW turn 3
More SW reserves come in. The remaining wolf scouts emerge (WS2 and WS3), WS2 decides to come behind the lines and emerges besides 1st platoon’s PCS in the chimera. WS3 comes out at the same spot of WS1, right besides Sidewinder’s Chimera. In addition, GH3 and it’s razorback emerges and moves 12” right besides LF1, the Grey Hunters dismounting in order to shoot. A Lasplas razorback also emerges and positions itself beside the stunned rhino, with the Rune Priest and the accompanying GH squad dismounting. GH2 and its razorback continue to move forward.
Shooting sees the Devil Dog the focus of several shots from the Long Fangs, Donel intent to get the +1 score in wiping out my only FA unit. However, the only result is that it ends up shaken, as cover absorbs most of the shots, including the living lightning from the Rune Priest. The HB of the GH2 razorback also kill 4 of the penal legion, while the flamer and bolters of GH3 kill 2 guardsmen and put 1 wound each on the autocannon teams of the blob squad, and kill 2 guardsmen from the flamer SWS, who then flee. WS2 then proceeds to destroy the multilaser from the PCS chimera, and WS3 stuns Sidewinder’s chimera.
In an effort to finish off the damaged chimeras, both scout units assault with their krak grenades. WS2 manages to shake the PCS chimera, but WS3 fails to do additional damage to the stunned chimera.
The PCS chimera is shaken and the multilaser destroyed.
Sidewinder’s chimera is stunned by the scouts, while the grey hunters kill some guardsmen and cause the flamer SWS to flee.
IG turn 3
With the wolf scouts on the board, I can now move the units guarding the flanks of my firebase. The remaining penal legion start to move forward, and the PCS disembark from the shaken chimera as they ready their flamers versus WS2. The Flamer SWS also rallies and take cover behind a line of tank traps. The blob squad decide that the WS3 is a more dangerous target than the GH3, as WS3 has managed to block of the exit of Capt Sidewinder’s chimera, preventing the Captain from disembarking. They thus move within assault range of the scout squad. The meltagun SWS chimera also moves in anticipation of the rush of GH2.
The autocannons from the infantry of the 1st platoon destroy the HB of the Gh2 razorback. Other shooting sees the pack leader from LF2 go down, and the unit flees behind the building. The Lemar russ shoots through the doorway, and kills 2 marines from the Rune Priest’s squad. The basilisk lobs an earthshaker round and hits the side of the LF3 razorback, wrecking it, and the blast also wipes out the entire LF3 squad, as the explosion comes from the their rear, negating cover.
Long fang 2 flees, while grey hunters fall, and the HB of the razorback is destroyed
Boom! The basilisk wipes out the elements of Long Fang 3!
Versus the scouts, the flamers of the PCS kill 3 from WS2. The commissar, sergeants, and grenadiers of the blob squad just fire pistols and grenades at WS3, but fail to cause casualties. The PCS and blob then charge their respective targets. WS2 fails it’s Ld check, and thus counterattack is not triggered, but WS3 counterattacks successfully. The PCS kills 1 scout and suffers no casualties, but the unit holds. WS3 causes 5 guardsmen to fall, but they lose 4 scouts. The commissar makes sure the blob does not flee.
The scouts take out more than they receive, but only 1 scout remains!
SW turn 4
The last reserves come in, with the lasplas razorback and the mounted GH4 coming out to reinforce the side of the rune priest, with GH4 moving forward and popping smoke. The razorback of GH2 moves forward and the unit disembarks. GH3 moves forward on foot, its razorback moving forward to its right. LF 2 regroups and remains in place. The rune priest and GH1 move forwards through the doorway of the building, promising the 7th Galen an “electrifying” show.
GH3 shoots at the flamer SWS and kill another guardsman, and the unit again flees. The rune priest manages to fry the chimera of the CCS into a flaming wreck, as Captain Fernando’s unit piles out in good order. The devil dog AGAIN bears the brunt of shots, but is just shaken. GH2 wipes out the entire penal legion in a hail of bolter rounds and flame.
The penal legion is wiped out, the command chimera is wrecked.
Assault sees WS2 kill a flamer guardsman before succumbing to the blows of the rest of the squad, and the last scout form WS3 kills a guardsman before also falling to the blob squad.
The last scouts fall in hand to hand combat!
IG turn 4
The flamer SWS rallies again, and the victorious PCS1 embarks on their chimera, and rush forward in full speed towards the SW lines. The meltagun SWS moves in order to engage the disembarked GH2, and Sidewinder’s recovered chimera moves forward 12” and pops smoke, while the Captain bravely disembarks beside GH3, despite being in range of its razorback.
Shooting sees the autocannons destroy 1 lasplas razorback. The melta SWS and its chimera manage to kill 2 grey hunters from GH2, while Sidewinder’s unit totally wipes out GH3. More decisively, the Leman Russ sends a battle cannon round through the doorway right where the rune priest is, and vaporizes him and his entire squad, save 1 grey hunter.
The meltagun SWS counterattacks GH2, while Sidewinder’s squad wipes out GH3! Automatically Appended Next Post: SW turn 5
Despite their casualties, the space wolves continue the fight. The lone survivor of GH1 moves, then runs forward behind a ruin. GH2 piles back into their razorback and move forward. GH4 and the last lasplas razorback continue to move forward. The HB razorback of GH3 traverses its turret, Sidewinder’s squad in its sights.
The lasplas razorback manages to send a searing lasershot which causes the basilisk to explode, shrapnel taking down a guardsman. The GH3 razorback kills 3 men from Capt Sidewinder’s squad, who hold. LF1 continues to snipe at the Devil Dog, who again withstands the shots.
The basilisk explodes!!!
IG turn 5
The melta SWS moves forward right in front of the advancing lasplas and GH4 razorbacks, the meltagunners with a clear sight to the rear of the GH2 transport. Sidewinder’s unit embark on their chimera and prepare to engage the GH3 tank. The blob squad readies their guns, as they spot the LF1 lascannon marines through the window they were shooting out of. The PCS chimera continues to move forward in the hope of reaching the LF2 squad in the next turn.
The meltas of the SWS wreck the razorback of GH2, the survivors are pinned in the wreckage as they emerge. The heavy flamer from the chimera fails to hurt the last member of GH1. Sidewinder’s unit and chimera stun the razorback of GH3. However, the autocannons, grenades, and lasguns from the blob squad finally take down the last members of LF1, the bob then moving “like the wind”
GH2 is pinned in the wreckage of their transport.
LF1 is wiped out, as the razorback is stunned.
SW turn 6
Final turn. GH4 moves forward and disembarks facing the side of the melta SWS chimera. The lone marine from GH1 rushes to engage the PCS chimera.
Shooting sees the GH4 squad and the razorback immobilize and weapon destroy the SWS chimera, and the GH1 grey hunter heroically manages to put a krak grenade in the speeding PC1 chimera, exploding it and pinning the 3 survivors!
GH4 neutralizes the chimera of the melta SWS
Heroic! A krak grenade wrecks the speeding chimera! (pardon the missing head which fell off earlier)
IG turn 6
The last turn sees me trying to finish off GH1, 2, and 4, but despite losing some marines all units survive. Nevertheless, the 7th Galen control the field and pull of the win 8-1, earning a bonus point for killing the rune priest, with my CCS and Sidewinder finishing more than 18” from where they started! A good fight from “never say die” Donel. Can’t wait to see his army finished and fully painted!
A few more marines fall, but not enough to be wiped out

The hounds sweep their side clean, with the exception of the stunned razorback.
The unit of the match has to be Captain Sidewinder’s platoon, who totally rolled over the opposition where it outflanked. The heavy support also did their job, and special mention goes to the Devil Dog, which did nothing offensively, BUT managed to survive the entire game despite drawing a lot of attention from the Long Fangs, which enabled my other units to win the game.
Midway through the league, I am roughly in 3rd to 5th place. Let us see if the next few weeks grants me the massacre victories I need to be in the top 2 when week 7 ends.
|
|
This message was edited 1 time. Last update was at 2010/01/31 16:55:24
40K 5th ed W/L/D
65/4/6, 10/2/1, 10/3/0, 2/0/1, 0/1/1
40K 6th ed W/L/D
1/0/0
WHFB 8th ed WHFB
Empire: 12/3/2, Lizardmen: 16/3/2 |
|
|
|
|
2010/01/31 22:30:04
Subject: Re:The 7th Galen goes Gladiator! A 1500 pt League report Jan-Mar 2010
|
|

Rough Rider with Boomstick
|
Nice Battle Report! Congrats on the victories! I have to ask though what's with the Carnivorous Plant marker? Also I really like the way Al Rahem is working for you. How do you find the artillery in your battles? Will they earn a pllace in future army lists?
|
You shouldn't be worried about the one bullet with your name on it, Boldric. You should be worried about the ones labelled "to whom it may concern"-from Blackadder goes Forth!
|
|
|
|
|
2010/02/01 01:12:33
Subject: Re:The 7th Galen goes Gladiator! A 1500 pt League report Jan-Mar 2010
|
|
Rough Rider with Boomstick
|
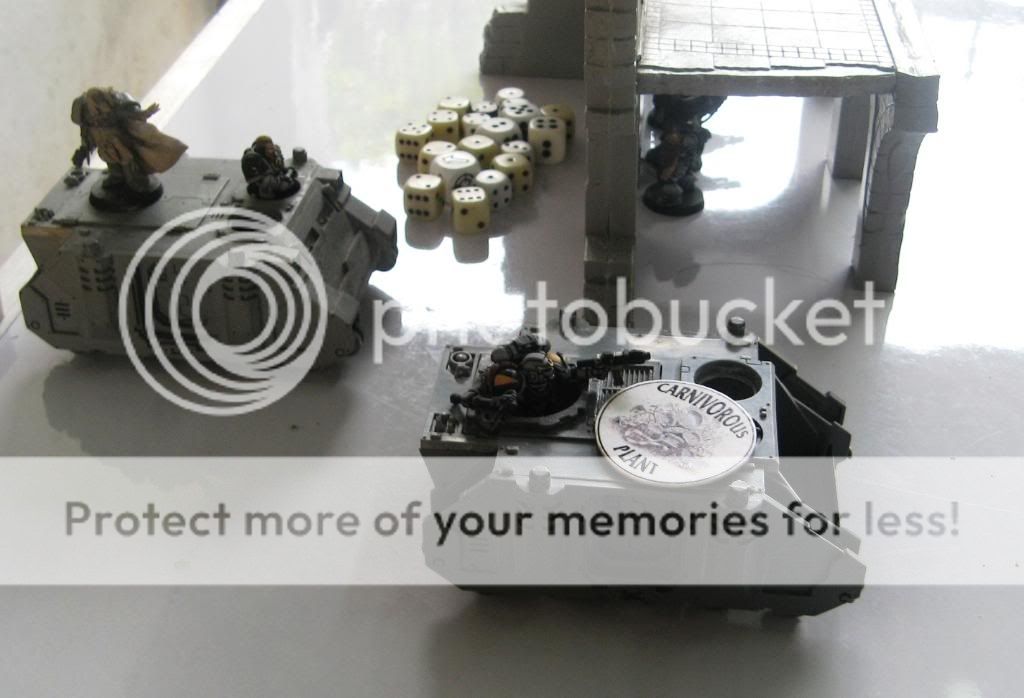
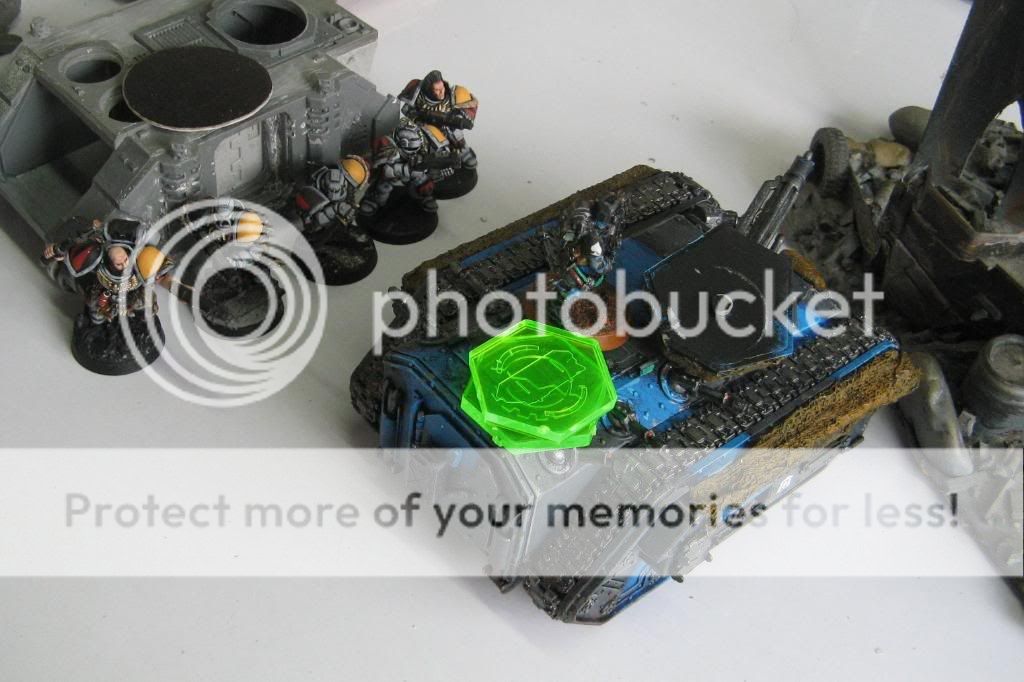
konst80hummel wrote:Nice Battle Report! Congrats on the victories! I have to ask though what's with the Carnivorous Plant marker? Also I really like the way Al Rahem is working for you. How do you find the artillery in your battles? Will they earn a pllace in future army lists?
The plant markers are leftover markers from the WHFB Lustria Jungle ruleset...I use them to mark smoke...the white side means smoke is on...when the smoke expires I flip the marker over to the black side to remind me the vehicle has used it's smoke launchers..
Artillery in 5th ed is very powerful, for the reason that it can fire indirect (remember if the target is in LOS you also subtract your BS, just like direct fire) and thus ignore cover saves, and also target the side armor of vehicles. For this, the basilisk and the manticore will be my staples in a truly competitive list...and both can also fire directly on the move.
|
40K 5th ed W/L/D
65/4/6, 10/2/1, 10/3/0, 2/0/1, 0/1/1
40K 6th ed W/L/D
1/0/0
WHFB 8th ed WHFB
Empire: 12/3/2, Lizardmen: 16/3/2 |
|
|
|
|
2010/02/03 18:33:32
Subject: The 7th Galen goes Gladiator! A 1500 pt League report Jan-Mar 2010
|
|

Brainy Zoanthrope
|
Some very nice reports here  . Good luck in future games!
|
|
|
|
|
|
2010/02/04 14:51:17
Subject: The 7th Galen goes Gladiator! A 1500 pt League report Jan-Mar 2010
|
|
Sister Vastly Superior
|
Somehow this army gets better, both visually and victory-wise every time you pull it out, I look forward to the next BatRep
|
"...I hit him so hard he saw the curvature of the Earth."
|
|
|
|
|
2010/02/04 16:21:41
Subject: The 7th Galen goes Gladiator! A 1500 pt League report Jan-Mar 2010
|
|
Poxed Plague Monk
The 11th circle of Hell
|
Great battle reports, its good to see IG laying the smack down
And that giant wooden dice is funky, what's it used for?
|
Once more down to the beach, dear friends, once more,
To drown our sorrows with our English beer!
In peace there's nothing so becomes a man
As modest stillness and humility;
But when the blast of alcohol blows in our ears,
Then imitate the action of the tiger:
Stiffen the sinews, summon up the blood. |
|
|
|
|
2010/02/04 23:41:41
Subject: The 7th Galen goes Gladiator! A 1500 pt League report Jan-Mar 2010
|
|
Rough Rider with Boomstick
|
I got the wooden die in morocco. I use it as a turn die, as no one will accidentaly pick it up to resolve things, unless i'm really pissed at someone and want to literally flatten his minis...hahaha!
|
40K 5th ed W/L/D
65/4/6, 10/2/1, 10/3/0, 2/0/1, 0/1/1
40K 6th ed W/L/D
1/0/0
WHFB 8th ed WHFB
Empire: 12/3/2, Lizardmen: 16/3/2 |
|
|
|
|
2010/02/06 09:33:25
Subject: The 7th Galen goes Gladiator! A 1500 pt League report Jan-Mar 2010
|
|
Sister Vastly Superior
|
That die should be used for rolling orbital bombardments... and intimidating your opponents.
|
"...I hit him so hard he saw the curvature of the Earth."
|
|
|
|
|
2010/02/06 10:50:34
Subject: Re:The 7th Galen goes Gladiator! A 1500 pt League report Jan-Mar 2010
|
|
Rotting Sorcerer of Nurgle
|
whens the next B-rep? its been quite a bit!
|
|
|
|
|
|
2010/02/06 20:11:17
Subject: Re:The 7th Galen goes Gladiator! A 1500 pt League report Jan-Mar 2010
|
|
Boom! Leman Russ Commander
|
We need a new page, too many pictures on this one  So I'll contribute the drive to page 2
Well played with an interesting army
|
|
|
|
|
|
2010/02/07 09:06:32
Subject: The 7th Galen goes Gladiator! A 1500 pt League report Jan-Mar 2010
|
|

Rough Rider with Boomstick
|
Thanks guys! I've travelling internationally since last week, all the way into this week now, so I am forced to skip week 4 (which is too bad since the scenario really favors me!)....I should be able to resume playing this weekend..
I kinda noticed the lag due to the volume of pics..may need to continue this on a separate thread...
|
40K 5th ed W/L/D
65/4/6, 10/2/1, 10/3/0, 2/0/1, 0/1/1
40K 6th ed W/L/D
1/0/0
WHFB 8th ed WHFB
Empire: 12/3/2, Lizardmen: 16/3/2 |
|
|
|
|
|
|
|
