| Author |
Message |
 |
|
|
|
|
Advert
|
Forum adverts like this one are shown to any user who is not logged in. Join us by filling out a tiny 3 field form and you will get your own, free, dakka user account which gives a good range of benefits to you:
- No adverts like this in the forums anymore.
- Times and dates in your local timezone.
- Full tracking of what you have read so you can skip to your first unread post, easily see what has changed since you last logged in, and easily see what is new at a glance.
- Email notifications for threads you want to watch closely.
- Being a part of the oldest wargaming community on the net.
If you are already a member then feel free to login now. |
|
 |
2010/02/16 02:28:31
Subject: Need some advice on painting this tank (pic heavy)
|
|

Drop Trooper with Demo Charge
|
|
|
This message was edited 1 time. Last update was at 2010/02/18 15:27:42

Marine Corps Recruit June 1st, 2010 |
|
|
 |
|
2010/02/16 03:16:07
Subject: Need some advice on painting this tank
|
|
Most Glorious Grey Seer
|
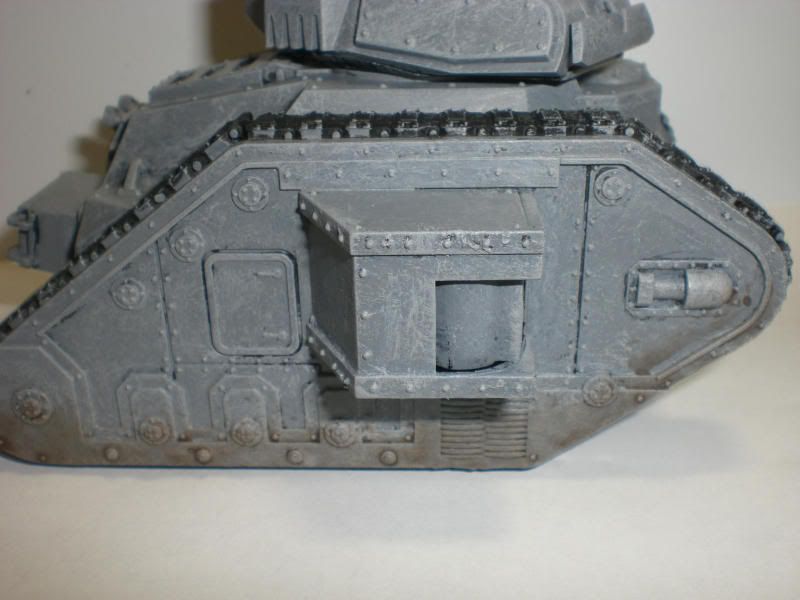
I'd start by using a wash on all exposed bumps, rivets, and surface joins (where two dissimilar surfaces are joined). You'll want to do some "gem" type painting of any glass surfaces like the viewport bits on the turret. Where parts natuarally wear and tear against each other, you'll want to put a metallic silver. Any recessed areas should be hit with dark grey or black to make the raised areas "pop" a bit more - unless you're working on a camo pattern in which case this may not be the best way to go.
|
|
|
|
|
|
2010/02/16 03:49:12
Subject: Need some advice on painting this tank
|
|
Stubborn Temple Guard
|
Paint the engine exhaust in a metallic (Boltgun Metal) and give it some progressively lighter washes of black and brown, top to bottom. It will make it look more like an exhaust port.
Don't believe ANYBODY when they say you need to jewel something. They are universally wrong (Sorry, Breotan). Jeweling should only be done with when you are doing light sourcing on the WHOLE model, otherwise it is very silly.
Honestly, what it needs is detail. The rivets are obvious, just picking those out as metal (Chainmail) and putting a wash around them will make the tank look more complete. Another couple coats of mud wouldn't hurt, either.
|
27th Member of D.O.O.M.F.A.R.T.
Resident Battletech Guru. |
|
|
|
|
2010/02/16 04:00:25
Subject: Need some advice on painting this tank
|
|
Drop Trooper with Demo Charge
|
Great advice so far. I planned on adding some metalics. Any advice on good weathering techniques?
|
Marine Corps Recruit June 1st, 2010 |
|
|
|
|
2010/02/16 04:16:21
Subject: Need some advice on painting this tank
|
|
Ollanius Pius - Savior of the Emperor
Gathering the Informations.
|
Weathering powders.
Invest.
|
|
|
|
|
2010/02/16 04:37:45
Subject: Need some advice on painting this tank
|
|

Leutnant
|
Gloss varnish the whole thing, then make a mix with white spirits and oil paints. Use this mix the go round every rivet and panel line. let it half try then use a dry brush to streak it. Looks a treat.
|
"Conan What is best in life??" "To crush your enemies, see them driven before you, and to hear the lamentation of their women" |
|
|
|
|
2010/02/16 12:34:34
Subject: Need some advice on painting this tank
|
|
Drop Trooper with Demo Charge
|
Btw, which wash should I use for everyones suggestions of "put some wash on blah".. Black? I saw one post a while ago about using sephia for rust streaks which I will try as well.
|
Marine Corps Recruit June 1st, 2010 |
|
|
|
|
2010/02/16 12:51:59
Subject: Need some advice on painting this tank
|
|
Courageous Questing Knight
|
muds a little crappy, but I like the general feel of the model.
Instead of just using a wash as a highlight, try vomit or bestial brown in a 2:1 mix of codex grey and drybrush it with a tank brush (the big one)
For paint chips, get boltgun metal and drybrush just at areas of wear and tear (gun joints, tracks, areas that move etc.) then finish off with a small area of bright (red?) colours to give it a stand-out.
I use Mordian blue on the sides of my rhino, and a a codex grey/dirty brown makes for extra excelent mud.
when you're done, wash (double diluted) gryphonne sepia into the mud. (don't make the mistake of using devlan mud, it's a pretty crappy mud colour.)
|
DR:90S+++G++MB+I+Pw40k096D++A+/areWD360R+++T(P)DM+
3000 pt space marine 72% painted! 
W/L/D 24/6/22
2500 pt Bretons 10% painted
W/L/D 1/0/0
http://www.dakkadakka.com/dakkaforum/posts/list/337109.page lekkar diorama, aye? |
|
|
|
|
2010/02/16 20:09:45
Subject: Need some advice on painting this tank
|
|
Leutnant
|
buy FW masterclass
|
"Conan What is best in life??" "To crush your enemies, see them driven before you, and to hear the lamentation of their women" |
|
|
|
|
2010/02/16 20:52:24
Subject: Re:Need some advice on painting this tank
|
|
Long-Range Ultramarine Land Speeder Pilot
|
Overall the basecoat looks good. Your improving from what work I've seen from you!
Don't use washes around the tracks at the bottom. Instead, grab a color of paint and stipple it around the tracks and anywhere else that would get muddy.
Use badab black to wash in between and around armor pannels, follow this with a light drybrushing of bleached bone. Finally, highlight very sharp edges as necessary.
Your chips look good, they just need to be better placed (around track guards is a really good place).
|
 The difference between commitment and involvement is like eggs and ham; the ckicken was "involved", the pig was "comitted". The difference between commitment and involvement is like eggs and ham; the ckicken was "involved", the pig was "comitted". 
NOW ACCEPTING COMISSIONS
Check out some of my best works at my Tumblr account: http://brotherzach.tumblr.com/ |
|
|
|
|
2010/02/16 22:21:15
Subject: Need some advice on painting this tank
|
|

Battle-tested Knight Castellan Pilot
|
A few things that I`ve used on my tanks recently.
For the tracks, I do three layers. First I paint the entire track Foundation Orange. Yes, really. 
Secondly, a heavy drybrush over the tracks, with Scorched brown (any dark brown will do.
And lastly, a very light metallic drybrush, like boltgun metal. It ends up looking like the tracks here:
http://images.dakkadakka.com/gallery/2010/2/6/81081_md-Chimera%2C%20Conversion%2C%20Death%20Korps%20of%20Krieg%2C%20Imperial%20Guard%2C%20Warhammer%2040%2C000.jpg
The only thing I´ve added on top of this, is a spray of 3:2:1 Water, Bestial Brown and Snakebite leather. I feel that this adds an extra layer of realism.
Grey Death also has an excellent tutorial on weathering. Oh, and try checking out this site: http://www.maschinenkrueger.com/joomla/
The guy doesn´t have that many how-to comments, but his stuff is really inspired, I especially love his exhausts and engines, they look very "real" to me.
Good luck with this, will be watching to see what you do with it.
|
Back on the path of the Imperial Citizen
Still rolling ones... 
 Krieg: More wins than Losses. Krieg: More wins than Losses. |
|
|
|
|
2010/02/16 22:57:06
Subject: Need some advice on painting this tank
|
|
Focused Dark Angels Land Raider Pilot
|
Yep, use Weathering Powders. Drybrush the tracks Boltgun Metal. Oh, and in the future, remove the flash/mold lines. Makes it much more realistic and nice looking.
|
|
|
|
|
2010/02/16 23:31:50
Subject: Re:Need some advice on painting this tank
|
|

Furious Fire Dragon
|
For the chips do a basecoat of tin bitz and then another coat over top of that with chainmail. Leave some small bitz of the tin bitz.
|
|
|
|
|
|
2010/02/16 23:43:59
Subject: Need some advice on painting this tank
|
|
Focused Dark Angels Land Raider Pilot
|
^The WHAT? Chips?
|
|
|
|
|
2010/02/17 00:56:39
Subject: Need some advice on painting this tank
|
|

Thunderhawk Pilot Dropping From Orbit
|
The model is a good starting point, but like many have already said I would apply a wash to the entire tank, probably Badab Black.
The next step would be to re-apply you highlights but taking a little more paint off the brush before you begin dry brushing this time.
After that its a case of picking out the details of the model, the exhausts and guns the commander etc.
For the chipped paint effect I notice you've used large rounded patches. For the best effect try to use small irregular black lines at different angles. Follow this with boltgun metal within the black. For newer scratches also add mithril silver as a final highlight. Also consider the placement of the scratches a little more. Try to imagine where the most wear and tear would occur on a tank, Track guards and hatches mostly with a few other areas.
Hope this helps and really look forward to seeing some updated photos in the future.
|

No trees were hurt in the making of this sig, however many electrons were disturbed.
|
|
|
|
|
2010/02/17 01:09:44
Subject: Need some advice on painting this tank
|
|
Drop Trooper with Demo Charge
|
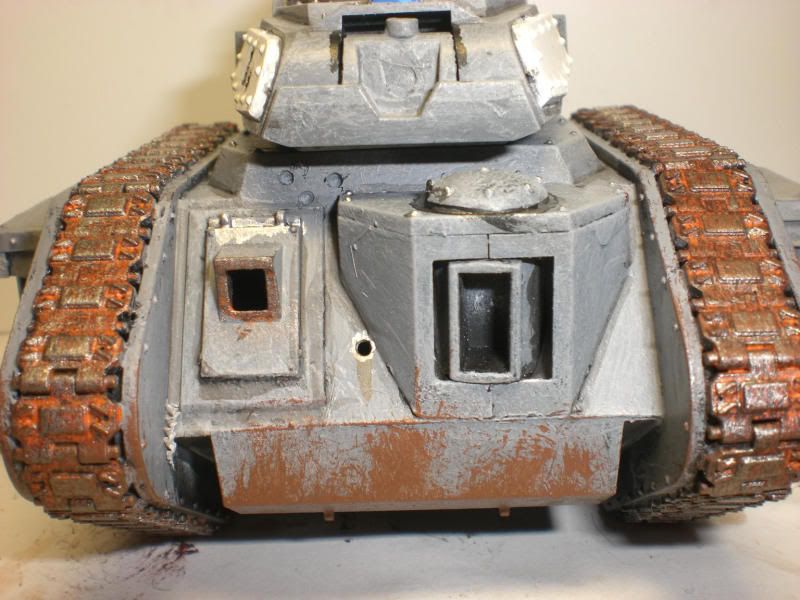
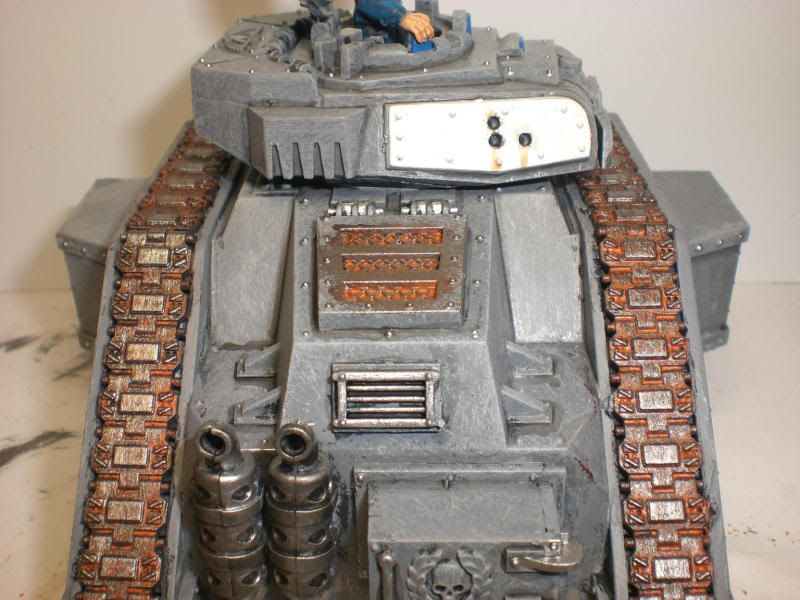
Ok so Ive been following everyones advice and here's what I got so far.. Hope you approve!
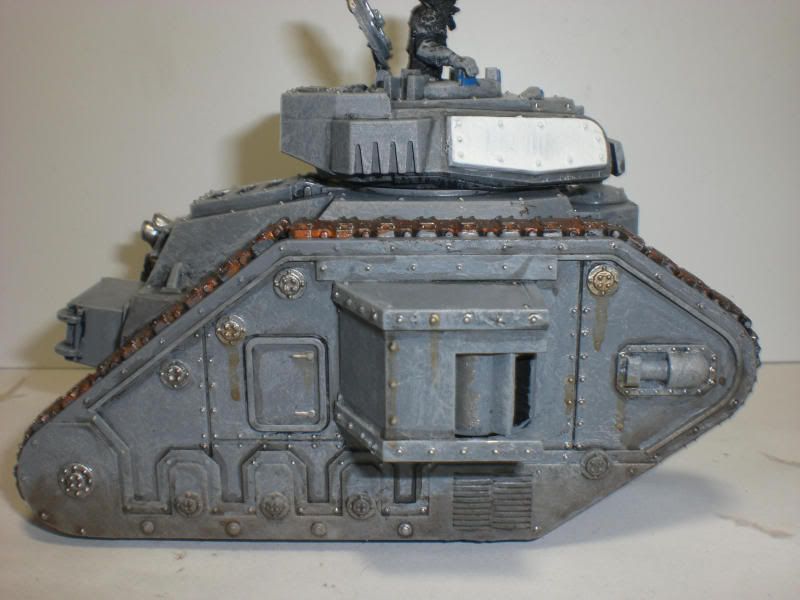
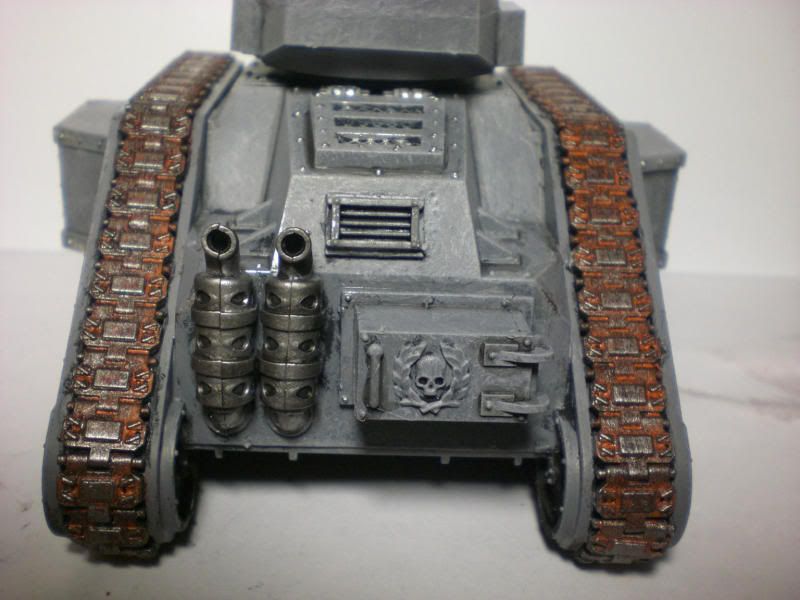
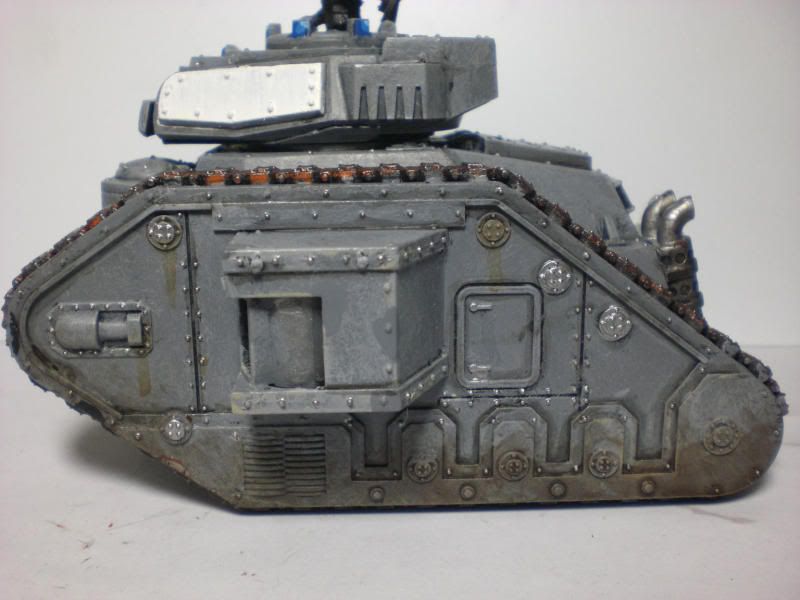
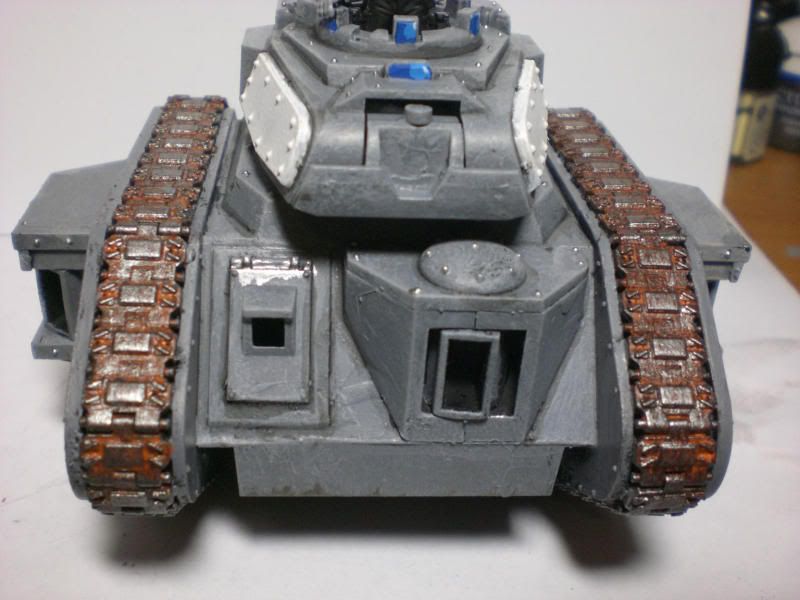
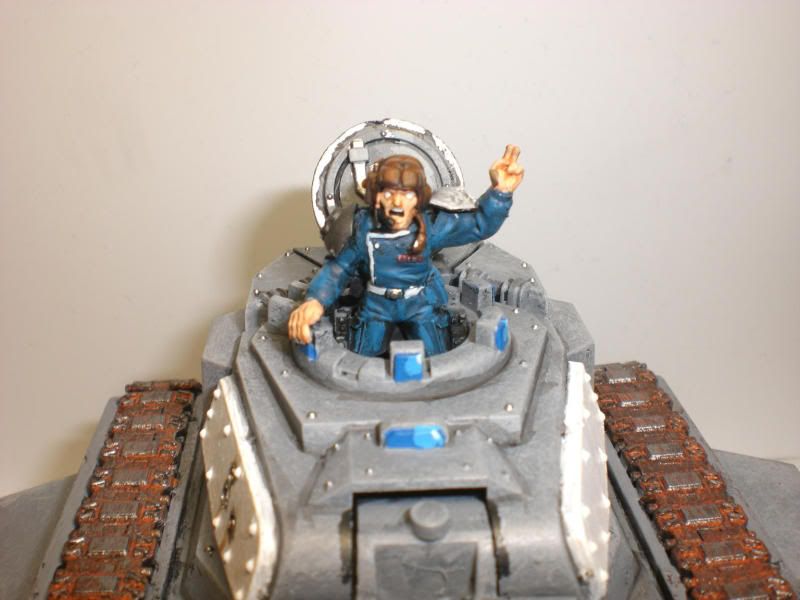
@Mattlov.. sorry I jeweled it haha. I had to add some bright colors other than grey.
I loved the rusted treads so much I went out and bought some orange foundation and scorched earth too. I need to redo the mud, add some new paint chips and then paint the commander..
Weapons will come later. Thanks!
|
Marine Corps Recruit June 1st, 2010 |
|
|
|
|
2010/02/17 01:22:11
Subject: Re:Need some advice on painting this tank
|
|
Been Around the Block
|
Fantastic improvement if I say so myself, looking good!
|
Throw enough Goblins at anything and it should go away, at the very least there will be less Goblins.
What does Eric Clapton and Coffee have in common? Both suck without Cream.
So a baby seal walks in to a club. |
|
|
|
|
2010/02/17 06:39:19
Subject: Need some advice on painting this tank
|
|
Battle-tested Knight Castellan Pilot
|
Nice job!
For mudding it up, I found Grey Death´s tutorial.
http://www.dakkadakka.com/wiki/en/Tank_Weathering
The only change I make to his article, is that I use a piece of foam, like a sponge or a blister pack foam, and dab the mud on with that.
The oil streaks look very nice too, by the way.
|
Back on the path of the Imperial Citizen
Still rolling ones...
Krieg: More wins than Losses. |
|
|
|
|
2010/02/17 13:49:22
Subject: Need some advice on painting this tank
|
|
Thunderhawk Pilot Dropping From Orbit
|
Wow, much better, just some guns and its ready to roll. Great job
|
No trees were hurt in the making of this sig, however many electrons were disturbed.
|
|
|
|
|
2010/02/17 23:55:57
Subject: Need some advice on painting this tank
|
|
Regular Dakkanaut
UK
|
Drill some bullet holes into the armour and paint the edges silver for that war torn look
|
|
This message was edited 2 times. Last update was at 2010/02/17 23:57:56
|
|
|
|
|
2010/02/18 15:25:23
Subject: Need some advice on painting this tank
|
|
Drop Trooper with Demo Charge
|
|
Marine Corps Recruit June 1st, 2010 |
|
|
|
|
2010/02/19 13:12:27
Subject: Need some advice on painting this tank (pic heavy)
|
|
Thunderhawk Pilot Dropping From Orbit
|
I'm liking it, I would personal take the rust from the engine cover and instead use the black for the look of soot and oil.
If you want to add a little texture to your mud, mix some flock, static grass, PVA glue and some brown paint together and apply to where mud would gather from the tracks.
|
No trees were hurt in the making of this sig, however many electrons were disturbed.
|
|
|
|
|
2010/02/19 13:19:50
Subject: Need some advice on painting this tank (pic heavy)
|
|
Lone Wolf Sentinel Pilot
|
CadianXV's Top Tip: Don't bother painting the eyes of minis, unless you're a) entering Golden Demon, or b) have a steady hand and a single bristle brush. For guardsmen, its really a waste of time. Flesh wash over dwarf flesh, highlighted with a 1:1 mix of dwarf flesh and elf flesh work wonders, and is all the detail you need.
|
|
This message was edited 2 times. Last update was at 2010/02/19 18:48:05
DR:90S+G+M++B++I+Pw40k00#-D+A++/mWD292R+T(M)DM+
FW Epic Bunker: £97,871.35. Overpriced at all?
 Black Legion 8th Grand Company Black Legion 8th Grand Company
 Cadian XV Airborne "Flying Fifteens" Cadian XV Airborne "Flying Fifteens"
 Order of the Ebon Chalice Order of the Ebon Chalice
 Relictors 3rd Company Relictors 3rd Company |
|
|
|
|
2010/02/19 13:56:43
Subject: Need some advice on painting this tank (pic heavy)
|
|
Most Glorious Grey Seer
|
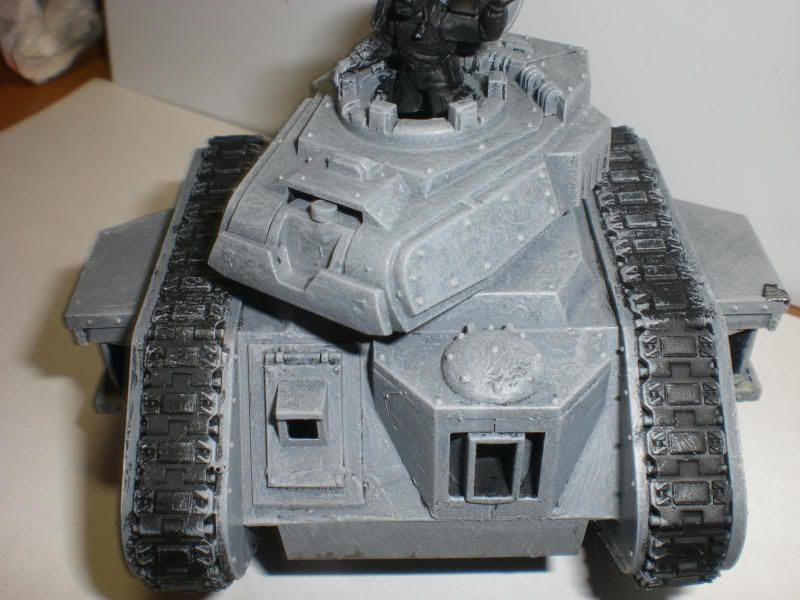
One thing that stands out is the lack of unit/organizational markings.
|
|
This message was edited 1 time. Last update was at 2010/02/19 13:57:01
|
|
|
|
|
2010/02/20 02:13:28
Subject: Need some advice on painting this tank (pic heavy)
|
|
Drop Trooper with Demo Charge
|
Thanks for the tips.. I think Ive put enough time into this damned tank haha! I like where it is now, but I will always improve on future projects. As for unit markings, the white on the turret is the markings haha. My army, everyone has white shoulder pads with a red cross (theyre knights templar themed). Most of my vehicles have a white patch with a bright red iron cross, but I felt like the red cross would look out of place on this model.
|
Marine Corps Recruit June 1st, 2010 |
|
|
|
|
2010/02/20 02:57:23
Subject: Need some advice on painting this tank (pic heavy)
|
|
Thunderhawk Pilot Dropping From Orbit
|
If your army is templar themed you should check out a kit breakers for the crosses out of the templar upgrade kit.
|
No trees were hurt in the making of this sig, however many electrons were disturbed.
|
|
|
|
|
|
|