Switch Theme:

MrGosh's First steps into Model Kits.  [RSS] Share on facebook Share on Twitter Submit to Reddit
»
Author Message
Advert


Forum adverts like this one are shown to any user who is not logged in. Join us by filling out a tiny 3 field form and you will get your own, free, dakka user account which gives a good range of benefits to you:
  • No adverts like this in the forums anymore.
  • Times and dates in your local timezone.
  • Full tracking of what you have read so you can skip to your first unread post, easily see what has changed since you last logged in, and easily see what is new at a glance.
  • Email notifications for threads you want to watch closely.
  • Being a part of the oldest wargaming community on the net.
If you are already a member then feel free to login now.


Made in nl
Whiteshield Conscript Trooper


Netherlands

Hello everyone,
My name is Dennis.

I have been lurking on this here board for quite some time now, and Finally decided to
register and start my very first Blog ever. But first a little bit about me.
I'm 24 years old, and have been playing/collecting warhammer for about 12 years now.
I have never painted a full army (probably not even a complete unit... yes I'm ashamed
of myself) Sadly enough I have no friends who enjoy the hobby aswell, and I can't say
my Girlfriend is a big fan, so It is a VERY lonely hobby for me. Recently I have finally
got a friend of mine to start playing a miniature game with me, although sadly he cannot
afford Warhammer, so we are going for Flames of War (which I will probably post
in this blog aswell). I'm quite excited as you can imagine, finally someone to share
my love for TANKS with ^_^. Now about this blog, I decided to inspire myself somewhat
with a real Model Kit, I used to built simple ones as a kid, but haven't touched one in ages.
After reading This Gorgeous Blog Yesterday, I decided to go for it,
and Here we are...

My "fix" will be: A German 2cm FlakVierling on Halftrack.
I have chosen to do this in blog style for several reasons, mostly I would love to hear your
Critisisms, cheers, booh's, helpfull insights and burndowns... etc.
Second, I hope this will give me the Edge I need to Finally finish something completely.
I have the first 2 pictures here, the box, and it's contents, some more will follow tonight
to show my Progress.
So far the plan is to slowly build it, and then Paint it in Afrikakorps colours.

The Box:


And its Contents:


This is the most comprehensive model I will have ever built, it includes some Photo-Etch pieces, something I have never
worked with, among rope, clear plastic, brass wire, and rubber tires. If Forgeworld would make sets like this, for this kind of
money, alot more of us would buy it. Anywho... I'm rambling. *please excuse my ramblings today, I'm quite doped up on
all kinds of meds, as I had my Wisdom Tooth pulled tuesday... no fun*
On with it!

This message was edited 1 time. Last update was at 2010/05/06 11:53:32


Made in fr
Lone Wolf Sentinel Pilot


Annapolis, MD, USA

Wow that has a lot of pieces.

My Blog http://ghostsworkfromthedarkness.blogspot.com/

Ozymandias wrote:
Pro-painted is the ebay modeling equivalent of "curvy" in the personal ads...
H.B.M.C. wrote:
Taco Bell is like carefully distilled Warseer - you get what you need with none of the usual crap. And, best of all, it's like being a tourist who only looks at the brochure - you don't even have to go, let alone stay.

DR:90S+GMB+I+Pw40k01-D++A++/areWD 250R+T(M)DM+ 
   
Made in nl
Whiteshield Conscript Trooper


Netherlands

Ghost in the Darkness wrote:Wow that has a lot of pieces.


Yes... Yes it does.
For those intrested its a kit by a Chinese maker called Trumpeter.
I had never heard of it, but it came highly recomended by the store onwer.
   
Made in au
Regular Dakkanaut


New Zealand

i reccomend airfix, ive used them and they are quite fun/easy to make (+ slightly cheap)

have a good one sorting out all those bits
   
Made in nl
Whiteshield Conscript Trooper


Netherlands

Murray wrote:i reccomend airfix, ive used them and they are quite fun/easy to make (+ slightly cheap)

have a good one sorting out all those bits


I know, there are LOOOAAADS of em >_< But Lets see it as a challenge.

Since this is the first time I'm ever working with Photo-Etch bits, i'm having
some trouble with them. there are several bits that I have to bend, but cannot seem
to do this straight enough (only have one pair of plier sadly enough) does anyone
have some tips ?
For instance: This bit,

had to be bend to be put on some sort of engine block *transmission I think*
and ends up like this...


As you can see, it's a bit crooked and bend around the edges because I can't seem to bend it straight.
   
Made in nl
Whiteshield Conscript Trooper


Netherlands

Well I managed to get some more done yesterday, it's not alot, but it's starting to look like... something *cough*

This is how it looks like now.

A bit more zoomed on the...whatever it is *again, transmission I think*

Boy has it been a learning curve. As said in previous post, I'm having difficulties with
the Photo-Etched objects, especially when I have to bend then, If anyone has some good tips for me about that
it would be Greatly appreciated If any experienced Model builders have some good tips of anykind, it would be
appreciated equally offcourse.
Sadly enough, I've allready mucked up big time, on a few occasions, putting pieces together backwards, spilling glue, etc. But hey,
it's a first for me to do these kinds of intricate kits.

I also have the Engine built, but no pictures yet, might make some tonight, and update this post with that.
Sadly enough the sprue wasn't completely straight, so it didn't fit together all that well, but I'm gonna hope it's going
to fit in there anyway.
ps: Another question, for those more experienced. Should I allready start painting certain bits ? or just leave things removable *like the engine hood*
so I can paint those parts later, together with the rest.

Thanks for reading
   
Made in us
Blood Angel Terminator with Lightning Claws


Virginia

I forgot how detailed real models are compared to the cartoon nature of 40K. I can totally relate to the solitary life of 40K, I live in an area where there is only 20K people in a 100 mile diameter circle. I really like those detailed diorama pieces (the blog you linked to). Good luck!

Terrain Blog Reaver Blog Guide to assembling Forge World Warhound titan
"So if I want to paint my house green, even if everyone else thinks it should be red, guess what? I'm going to paint it Jar-Jar." -George Lucas 
   
Made in nl
Whiteshield Conscript Trooper


Netherlands

jabbakahut wrote:I forgot how detailed real models are compared to the cartoon nature of 40K. I can totally relate to the solitary life of 40K, I live in an area where there is only 20K people in a 100 mile diameter circle. I really like those detailed diorama pieces (the blog you linked to). Good luck!


We used to have a pretty decent store here, where about 20 people came, but it's gone downhill, and now there's
no painting sessions, no more gaming there whatsoever. I couldn't even play there anyway, because I work at those
hours *the store i work in is open on the same hours* so that sucked, but atleast when I Strolled by there during break
time or before work, I had some people to talk with.
I love those Diorama's aswell, but decided to start easy

Now I worked some more this evening, mucked up ALOT more aswell

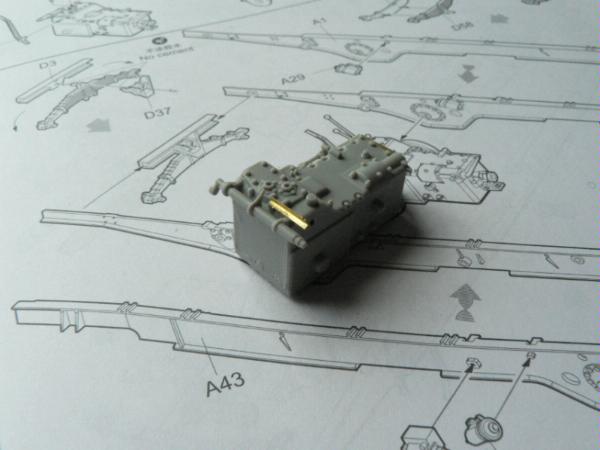
The engine part as promised, it's a really cool piece I think.


ps: My sincere excuses for the blurry pics, it's late, I'm on meds and I have no tri-pod or anything.

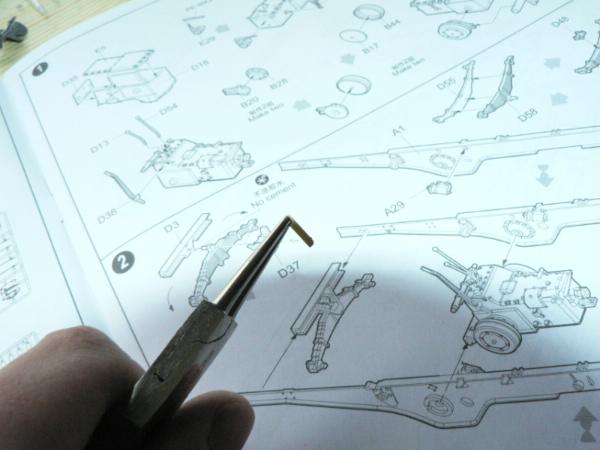
Now as if the Photo Etch wasn't giving me enough troubles as it IS, this kit decided to make
it even more difficult for me. Entré Pieces of rope and Copper tubing.
You'd think a piece or rope can't be THAT problematic... well it is if your tired and on meds I guess.
Misreading the instrutions of getting 900mm of rope, I cut of 9cm...*the rope added was 90 cm...*
I only found out about my mistake 30 minutes later

WRONG!
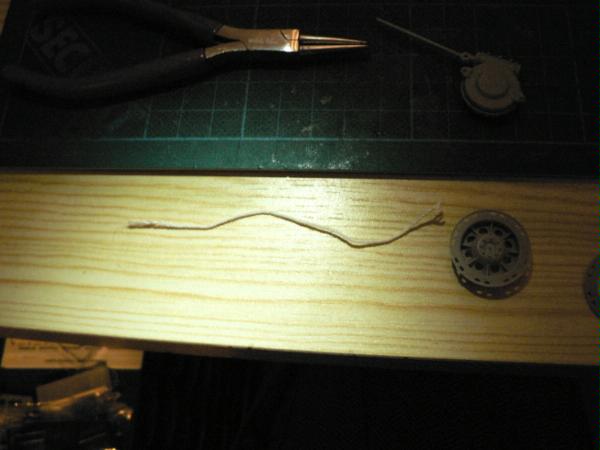
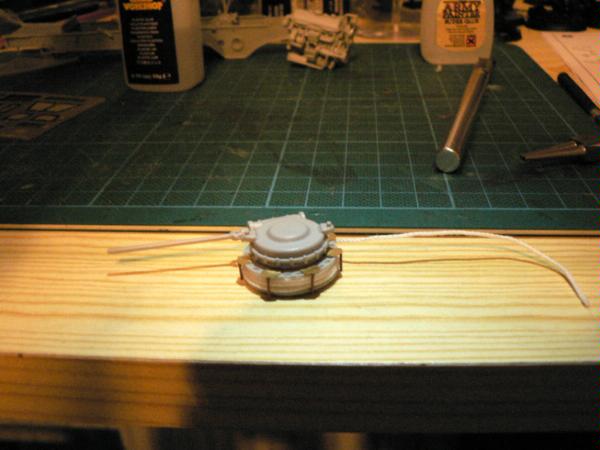
had to be wound around this little wheel thingie

I had glued it shut, because I had no idea what to do with it.
When I found out my little length issue, I tore it off, and used the remaining 80cm, which
seemed to be no problem what so ever (thank god)
Issue no.2 today:
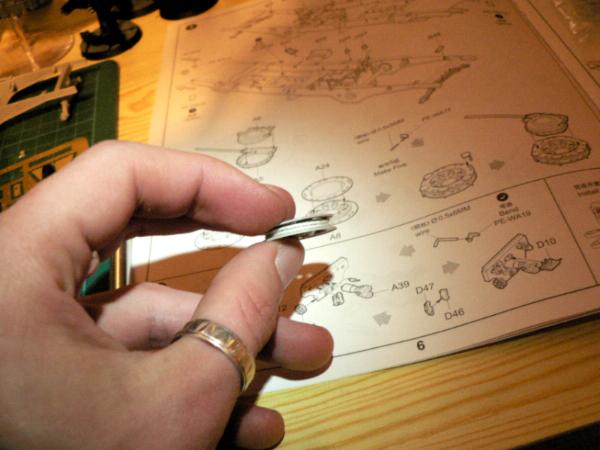
I needed to cut off 5x 5mm of copper tubing (from a piece that wasn't straight to begin with)
Which then had to be glued to a little piece of Photo Etch

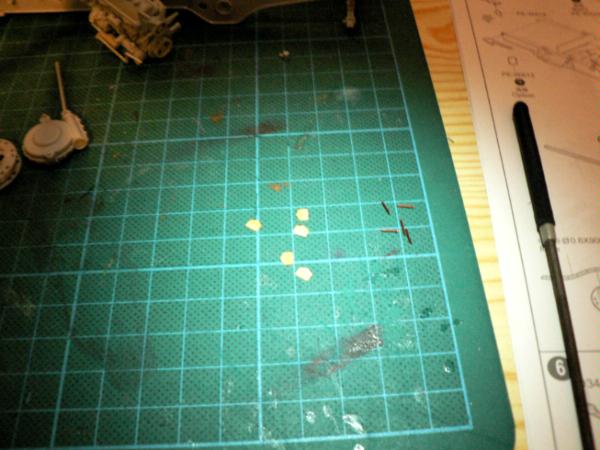
the squares on my cutting mat are 1x1cm. This was quite finnicky, but I succeeded !
To end up with these parts

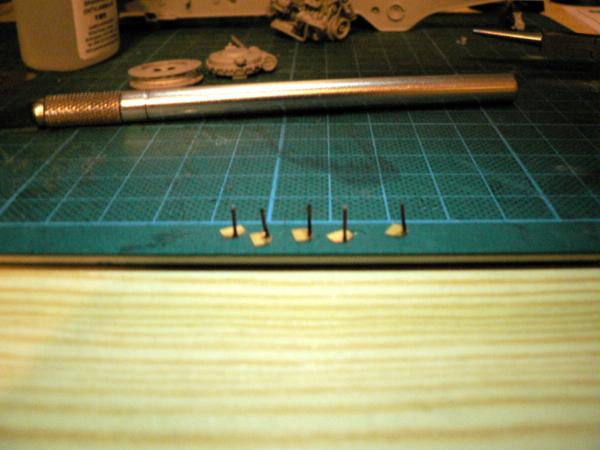
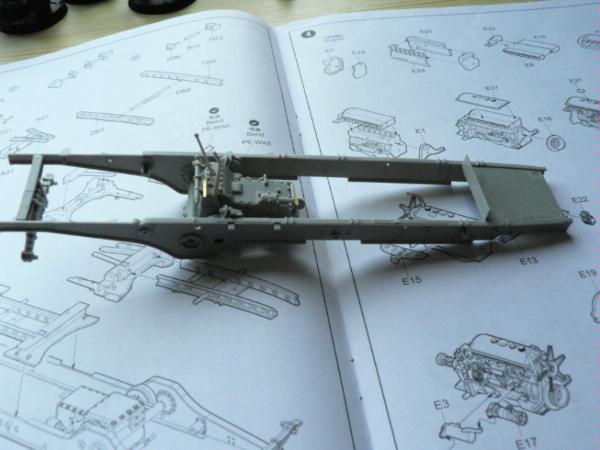
These then had to be glued on the wheel with the rope, ending up with this:(another bit has allready been attached on top at this point)


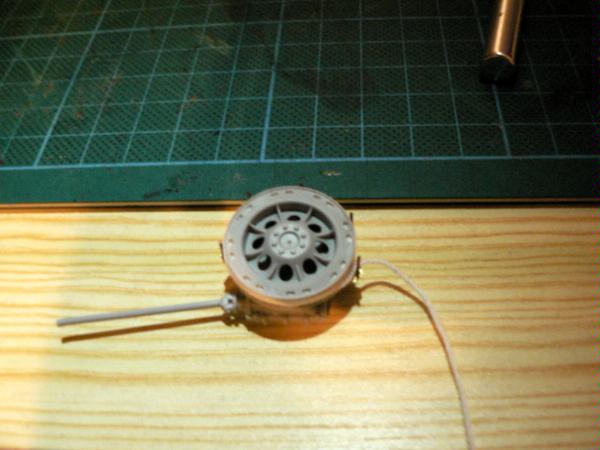
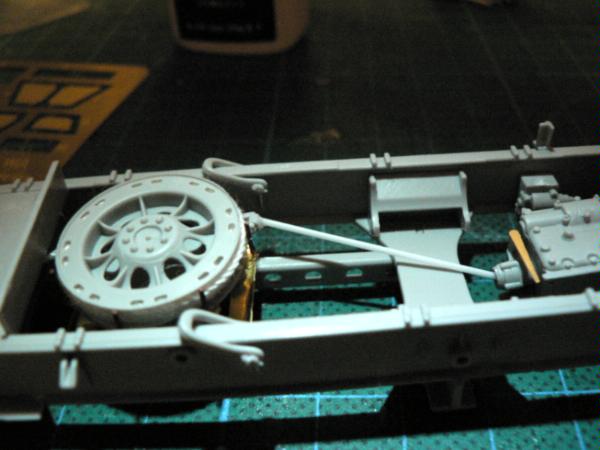
This bit then went into the under carriage, with the rope sticking out the back *A hook is going to be attached later*
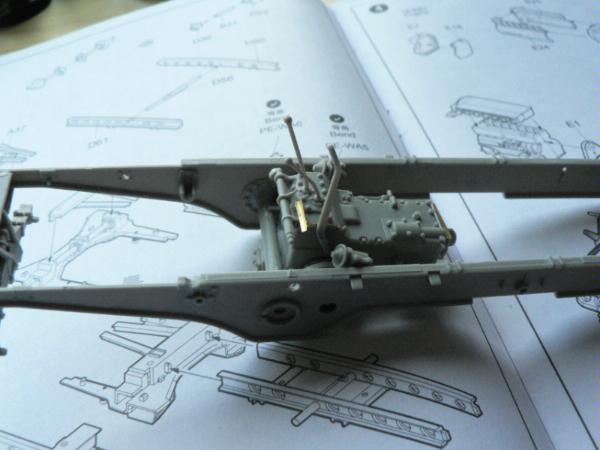
Carried on 2 small (and in my case crooked) photo etched pieces, that I aparently had exchanged, so the piece didnt end
up correctly. The rod on the piece above was supposed to fit into the Transmission box placed earlier, but in my case
stuck out completly the other way. I decided not to be overcome by this, cut the rod off, and added a piece of Plastic Rod of my own!

And this is where I ended tonight, My hands started to shake, and I was too tired to continue concentration on such small parts.


Again, thank you for reading, and I would love to hear some advice ^_^
Or atleast laugh at my mistakes (or learn from them... check, check again, check again... are you sure ? check again. then glue)
I've allready had to remove and re attach several pieces, just because they were upside down or something alike.

   
Made in us
Blood Angel Terminator with Lightning Claws


Virginia

How are you cutting your brass? I find it difficult to get a clean edge, I found a tool especially for this, but I haven't picked it up yet.

Terrain Blog Reaver Blog Guide to assembling Forge World Warhound titan
"So if I want to paint my house green, even if everyone else thinks it should be red, guess what? I'm going to paint it Jar-Jar." -George Lucas 
   
 
Forum Index » Dakka P&M Blogs
Go to: