I’ve been discussing the usefulness of the tyrannofex on another site. My stance is that the tyrannofex is not a good unit, but it seems like a lot of people think otherwise because it is highly survivable and a solid
AT unit with 2x 48” S10 shots per turn. So I’ve set up a game against a competitive Nid army, commandeered by my brother, against my Space Wolves.
Now this game won’t prove whether the tyrannofex is a good unit or not. One game is not indicative of anything. That would require probably 100 or even 1000 games. However, my intent here is not to show whether it is effective or not, but rather that it is such a low-threat factor that I can beat a nid player simply by ignoring his tyrannofexes.
So I will play with the following strategy:
- I will ignore it unless if I absolutely can’t (i.e. if I get assaulted by it or there’s nothing left within range to kill).
- I will kill off the rest of his army first. Only when I am presented with no other real threat will I take them out.
I know Nids have a hard time against Rune Priest-spam so I will not use Jaws of the World Wolf on the Tyrannofex, though all other nids will be fair game. Like I said, I will ignore the big gun-bug and that includes using Jaws on it.
Of course I did not tell my brother my strategy. I just told him I wanted to try playing against a good T-fex list and reassured him that I won't Jaws his T-fexes.
SPACE WOLVES (My list)
Ragnar Blackmane
Rune Priest Blackheart - Chooser, Boltgun, Jaws, Living Lightning
Rune Priest Loki - Chooser, Hurricane, Living Lightning
Rune Priest Goldmoon - Jaws, Tempest's Wrath
Inquisitor Ally - Bolt pistol,
CCW, Emperor's Tarot, Targeter, 2x Mystics
8x Wolf Guards - 4x w/2x Combi-flamers & 2x Combi-meltas & Powerfists (attached to Grey Hunters), 4x w/Combi-meltas in Drop Pod
10x Grey Hunters - 2x Meltaguns, Power weapon, Wolf Standard, Drop Pod
10x Grey Hunters - 2x Meltaguns, Power weapon, Wolf Standard, Drop Pod
8x Grey Hunters - Meltagun, Power weapon, Wolf Standard (Ragnar +
WG here)
6x Grey Hunters - Meltagun, Power weapon, Wolf Standard, Rhino (
RP +
WG here)
6x Grey Hunters - Flamer, Power weapon, Wolf Standard, Rhino (
RP +
WG here)
6x Grey Hunters - Flamer, Power weapon, Wolf Standard, Rhino (
RP +
WG here)
6x Long Fangs Alpha - 5x Missile Launchers
6x Long Fangs Beta - 5x Missile Launchers
Land Raider - Extra Armor, Multi-melta (Ragnar's unit here)
Total - 2499

This is pretty much my finalized 'Ard Boyz list. After this game I've got to work on my army. I have 1 more drop pod to build and some figures and vehicles to paint.
TYRANIDS
Hive Tyrant - 1x
TL-D's, Heavy Venom Cannon, 2x Tyrant Guards
Deathleaper
2x Hive Guards
2x Hive Guards
Tervigon - Catalyst, Cluster Spines, Onslaught, Toxin Sacs
10x Termagants
Tervigon - Catalyst, Cluster Spines, Onslaught, Toxin Sacs
10x Termagants
10x Genestealers
Harpy - Cluster Spines,
TL-Heavy Venom Cannon
Harpy - Cluster Spines,
TL-Heavy Venom Cannon
2x Carnifexes - Scything Talons
Tyrannofex - Cluster Spines, Desiccator Larvae, Rupture Cannon
Tyrannofex - Cluster Spines, Desiccator Larvae, Rupture Cannon
Total - 2500
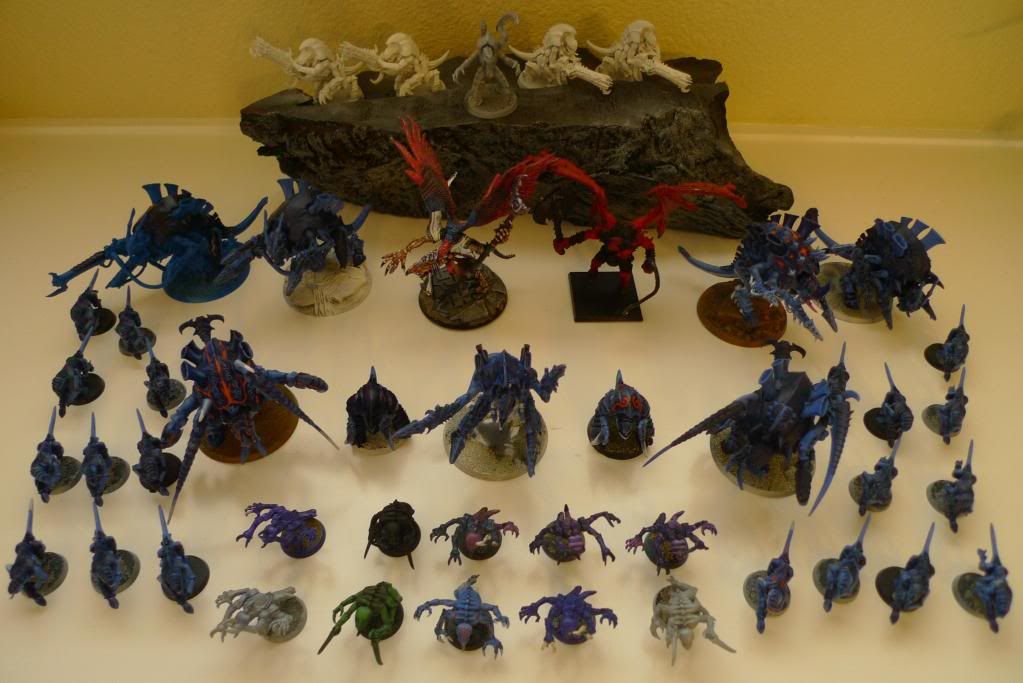
We used some proxies here.
Back row - Hive Guards, Deathleaper, Hive Guards
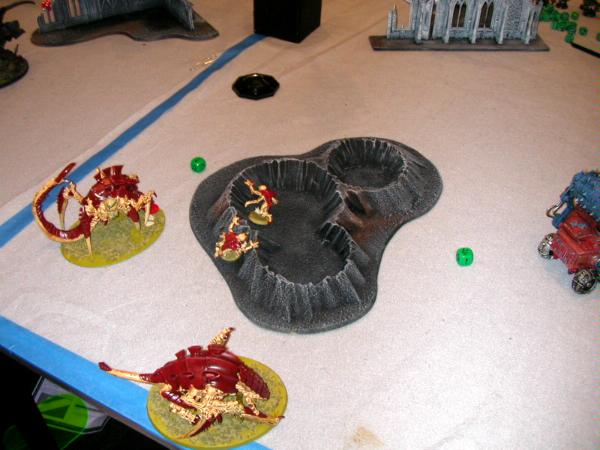
3rd row - Tyrannofexes, Harpies (the Daemons), Carnifexes (I brought the dakkafexes by mistake)
2nd row - Termagants, Tervigon, Hive Tyrant w/guards, Tervigon, Termagants
1st row - Genestealers
Unfortunately, I didn't take pictures during the game.
Mission: Seize Ground - 3 objectives
Deployment: Pitched Battle
Initiative: Tyranids
Deployment:
There is a large area terrain in the middle of the board. On both its left and right are an impassable terrain that blocks
LOS. There are 3 other smaller patches of area terrain - 2 on my side and 1 on his. I place my objective towards my right side of the board, he also places his towards his right (near his area terrain) and I put the last terrain to the right of the center crater.
He deploys his gaunts in the front to act as screens. He staggers the 2 carnifexes in the middle between the gaunts. Behind the right gaunts he then places his hive tyrant + guards, 1 tervigon and 1 tyrannofex. Behind the left gaunts he places the genestealers, 1 tervigon and 1 tyrannofex. He decided to deploy his genes normally as I would probably castle up in the center if he outflanked them (plus, he didn't have hive commander). He staggers his Tyranid monstrous so that they are not all lined up perfectly for my Rune Priest's Jaws should I drop pod them. He places 1 harpy and 1 unit of hive guards behind each of the impassable terrains. The only thing in reserve for him is the Deathleaper.
I'm not at all concerned about his tyrannofex's S10 guns as I defiantly deploy my
LR up front without any cover along with Blackheart's rhino. I then place Loki's rhino behind my
LR and another rhino behind Blackheart's rhino. To the right and left of my transports, I deploy 1 squad of drop pod grey hunters and a squad of long fangs each. Goldmoon will go with the unit of drop podding wolf guards. Thus, in my reserves are Goldmoon+
WG's in drop pod and 2 empty drop pods.
The Deathleaper reduces Blackheart's
LD to 8 and I fail to seize the initiative.
Tyranids 1
The right tervigon spawns 13 gaunts and the left one spawns 11 but stops on doubles. Everything moves forward and whatever can't shoot runs. The tervigons catalyst his hive tyrant and carnifexes. He then fires both tyrannofexes and all 3 heavy venom cannons at my land raider and gets not so much as a single scratch on it. Hive guards are out of range of my rhinos so each unit shoots at a squad of foot
GH's, killing 1 from each squad.
Space Wolves 1
Here comes the pain. I drop Goldmoon + wolf guards onto his objective. It scatters out of contesting range but is still in a very good position to hurt him with Jaws. Blackheart's rhino moves forward and they disembark. Goldmoon's Jaws goes off despite rolling
3d6 from Shadows of the Warp and it takes out 1 carnifex, 1 tyrant guard and the still-fertile tervigon. The wolf guards then put 1W on his hive tyrant and another wound on his tyrant guard with their combi-meltas. Blackheart also passes his psychic test and uses Jaws to take out the other carnifex. Loki's Living Lightning does 1W to the right harpy and the long fangs put 3W on the other tervigon. Finally, my
GH's take out 7 gaunts from the left gaunt squad.
Tyranids 2
The Deathleaper drops on down by Goldmoon. Everything else advances. The right tyrannofex goes after the wolf guards and the 13 gaunts after Goldmoon. His right harpy flies towards the closest target which is my inquisitor's unit. The left harpy moves forward but stays behind the impassable terrain as it tries to flank my left side.
The right t-fex drops a large blast and a template on the wolf guards (the template also hits Goldmoon who successfuly saves) and kills 3. The right harpy fires at the Inquisitor and kills his 2 mystics. The left hive guards shake Blackheart's empty rhino and the right hive guards stuns Loki's ride. His hive tyrant only kills 1 grey hunter from Blackheart's unit and the left t-fex stuns the
LR, which then gets reduced to shaken due to extra armor. The tervigon tries to catalyst itself but is blocked. The gaunts and Deathleaper fail to wound Goldmoon.
In assault, the harpy assaults the inquisitor and kills him. The t-fex mauls the last wolf guard. The gaunts charge Goldmoon and they tie combat with 1W apiece.
Space Wolves 2
1 empty drop pod drops near the middle objective (not sure if it is contesting). The
LR advances about 12" and Ragnar's unit disembarks. Loki's unit disembarks and moves up as well. Both right and left
GH's also move up. Blackheart moves up slightly but decides not to use his psychic powers when I found him to be within the hive tyrant's shadows in the warp range.
Loki's unit and the right
GH's shoot down the wounded right harpy. The 2 long fangs and my
LR target his tyrant but he makes all his cover saves and is unharmed. Ragnar's unit and left
GH's fire at his genestealers and only kill 3 thanks to a lot of cover saves made on his part.
Goldmoon dies to his gaunts in assault. Ragnar and the
GH's furiously multi-charge the genestealers and 2 squads of gaunts. The genes whiff big time, failing to kill a single grey hunter, and Ragnar by himself wipes out the entire squad of 7 genes whereasthe gaunts fall to my grey hunters.
Tyranids 3
Things are looking grim for the nids. His harpy fails its Instinctive Behaviour test and just lurks behind the impassable terrain. The Deathleaper goes back into reserves. The squad of gaunts near his objective and out of synapse fails their
IB test and runs towards his area terrain, claiming his objective in the process. Everything else advances.
The hive tyrant shoots down 4 from Blackheart's unit, including my wolf guard. 1 T-fex fires at the
LR and does nothing. The other T-fex drops a large blast on Ragnar's unit but they pass all their armor saves. The tervigon catalysts itself and also drops a large blast on Ragnar's unit, killing 2 grey hunters. The right hive guards wreck 1 empty rhino. The left hive guards fire at my
GH squad but fails to kill any.
Because his hive tyrant is still partially in terrain, he fails to assault Blackheart's 3-man unit. The left hive guards assault the squad of
GH's they fired upon and kill 1 in combat. They remain locked. His gaunts who were screening for his hive tyrant assault Blackheart's unit and kill my flamer-
GH. In return, I kill 3 of his gaunts and he loses another 1 to No Retreat.
Space Wolves 3
My last drop pod comes in and contests his objective. My rhino with grey hunters heads towards my objective and pops smokes. The rest of my units advance towards his units. Shooting from my
LR,
GH's and Loki's unit kills his tyrant guard and puts another 2 wounds on his hive tyrant (1W left). The long fangs only manage to put 1W on his tervigon due to cover and
FNP, and Ragnar's unit puts another wound on it with a melta shot (1W left).
Loki's unit and my right
GH's charge the tyrant and kill it, but not before losing Loki and 2 grey hunters. Ragnar's unit charges the tervigon and also kill it, losing 2 grey hunters in the process. Finally, the left
GH's who are locked in combat with his hive guards use their wolf standard and wipes out the 2 hive guards.
With just his Deathleaper, 2 tyrannofexes, 1 harpy, 1 squad of hive guards and 1 squad of gaunts remaining, the nids decide to retreat and come back to fight another day (he concedes).
Victory to the Space Wolves!


 .....Bay Area Open GT 2013 - Best Tyranids
 .....LVO GT 2014 Team Tournament - Best Generals


 Renegades -
 W/L/D
W/L/D 
 W/L/D
W/L/D