| Author |
Message |
 |
|
|
|
|
Advert
|
Forum adverts like this one are shown to any user who is not logged in. Join us by filling out a tiny 3 field form and you will get your own, free, dakka user account which gives a good range of benefits to you:
- No adverts like this in the forums anymore.
- Times and dates in your local timezone.
- Full tracking of what you have read so you can skip to your first unread post, easily see what has changed since you last logged in, and easily see what is new at a glance.
- Email notifications for threads you want to watch closely.
- Being a part of the oldest wargaming community on the net.
If you are already a member then feel free to login now. |
|
 |
2010/05/20 01:44:02
Subject: Scratch-built cracked and damaged cobblestone roads.
|
|

Yellin' Yoof on a Scooter
|
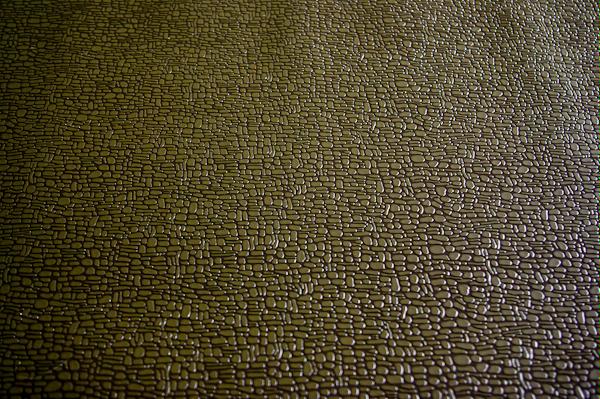
I've had this sheet of 2'x3' cobblestone textured vinyl sitting in my closet for a few years begging to be used for something. I picked it up for a few dollars in a clearance bin at Hobby Lobby after Christmas. It's a mat for setting up miniature dioramas , but I'm going to cut it up and make distressed and decaying roads out of it. The mat looks like this:
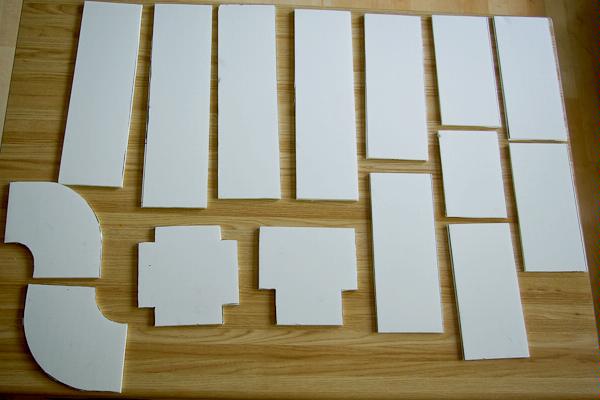
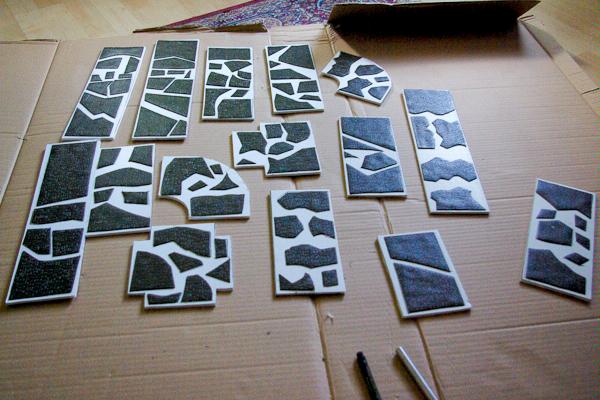
Yesterday while I was at the grocery store I found some sheets of foam-core in the school section. It was undamaged, and best of all, it had "ghosted" lines creating a grid of 1/2" squares all over it making it easy to measure out and cut everything straight with almost no effort. I cut that one sheet into a variety of interesting road shapes. At first I thought 1 sheet would not make very much road but was surprised once I started laying these out in different ways. This is plenty for my table.
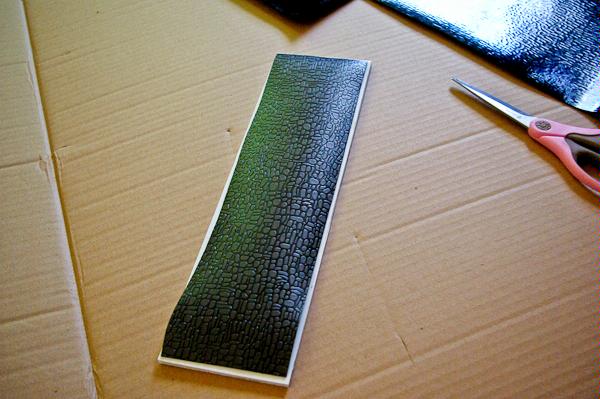
I cut strips out of the cobblestone mat that were slightly smaller than the road piece. I was worried that I would not have enough mat to cover all the roads. That's when I got the idea that the roads would be decaying, destroyed but still usable streets.
I then started cutting the strips into smaller, jagged pieces which I hot-glued to the foam-core road pieces:
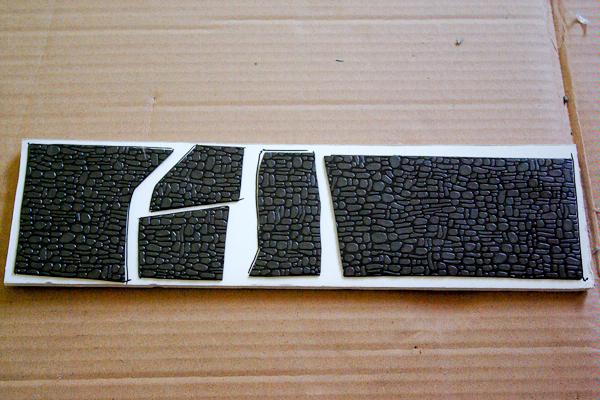
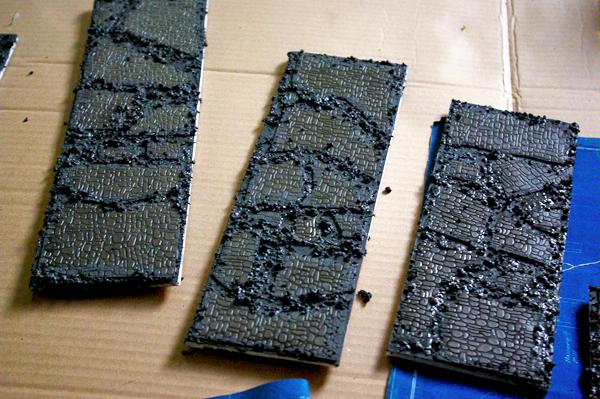
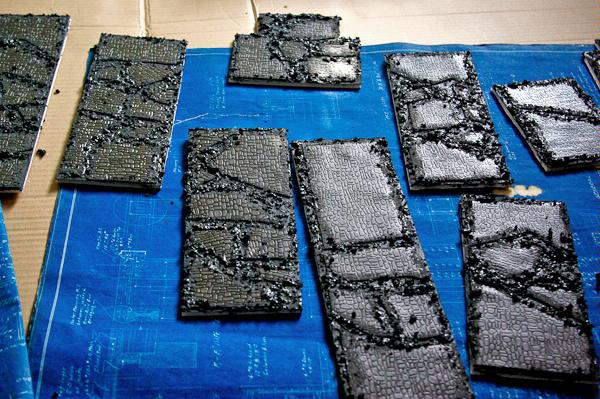
Then, using a mixture of gray paint, cat litter and water, I filled in the gaps between the cobblestone bits with it. Once these are dry I will start painting the streets. Everything is still downstairs drying right now. I should be able to post the final pics tomorrow.
|
|
|
|
 |
|
2010/05/20 01:46:21
Subject: Scratch-built cracked and damaged cobblestone roads.
|
|

Mounted Kroot Tracker
|
Looks interesting, good luck on the final results.
|
Night Watch SM
Kroot Mercenaries  W 2 - D 3 - L 1 W 2 - D 3 - L 1
Manchu wrote: This is simply a self-fulfilling prophecy. Everyone says, "it won't change so why should I bother to try?" and then it doesn't change so people feel validated in their bad behavior.
Nightwatch's Kroot Blog
DQ:90-S++G++M-B++I+Pw40k08#+D+A--/cWD-R+T(S)DM+
|
|
|
|
|
2010/05/20 01:46:39
Subject: Re:Scratch-built cracked and damaged cobblestone roads.
|
|
Crazed Wardancer
|
I saw this and basically wanted to squeal in delight.
|
painted: 12 dryads,9 glade guard,2 glade guard scouts.
assembled but unpainted: 2 glade guard and the lord's bowman, 8 glade guard scouts, sexy elf lord
in the box: , 8 glade riders, , one female spellsinger, Orion, Ariel, the faerie queen. SOB immolator, 15 sisters. |
|
|
|
|
2010/05/20 04:20:59
Subject: Scratch-built cracked and damaged cobblestone roads.
|
|
Tough-as-Nails Ork Boy
|
I like it. Not a huge fan of foamcore, I really dislike the give it has as a terrain piece. However, this looks great. Good idea.
|
|
|
|
|
2010/05/20 07:38:01
Subject: Re:Scratch-built cracked and damaged cobblestone roads.
|
|
Anointed Dark Priest of Chaos
|
FYI: That vinyl will react with certain sprays/primers and give off tons of fumes and remain "sticky" indefinitely...
I used it on some terrain pieces once and scrapped it due to this...
be sure to seal it with wood glue, etc. prior to any spraying...
|
|
|
|
|
|
2010/05/20 16:33:38
Subject: Scratch-built cracked and damaged cobblestone roads.
|
|
Yellin' Yoof on a Scooter
|
Thanks for the tip. I was going to use a clear acrylic matte finish to give it a paintable surface. Now instead I will use a watered down glue instead to cover the vinyl first.
|
|
|
|
|
|
2010/05/20 17:37:50
Subject: Scratch-built cracked and damaged cobblestone roads.
|
|

Using Inks and Washes
|
Thanks for the tute, I think I'll try this out!
|
|
|
|
|
2010/05/20 18:03:15
Subject: Re:Scratch-built cracked and damaged cobblestone roads.
|
|
Disbeliever of the Greater Good
near Philadelphia, PA, USA
|
I really like where you're going with this. The only caution I would give is that be careful with the amount of adhesive you use to affix the mat to the foamcore. Foamcore has a tendency to warp.
I would suggest 1/8" MDF. You can get a 2'x4' 'project sheet' of it for about $5 at Home Despot or similar.
Otherwise, its very cool and look forward to seeing the results!
-Ratchet
|
|
|
|
|
|
2010/05/20 18:28:01
Subject: Scratch-built cracked and damaged cobblestone roads.
|
|
Yellin' Yoof on a Scooter
|
A few of the pieces did warp but only slightly. I am going to paint the underside of those pieces to warp them back the other way and should even them back out. I would have preferred doing them on hard-wood planks but just didn't have the cash this week. I have enough vinyl sheet left over to make a 2nd set on hard-wood if I decide to.
|
|
|
|
|
|
2010/05/21 00:29:54
Subject: Re:Scratch-built cracked and damaged cobblestone roads.
|
|
Bounding Assault Marine
|
Looks good to me. Seems like you are pretty lucky when shopping to!
|
|
|
|
|
2010/05/21 01:02:08
Subject: Scratch-built cracked and damaged cobblestone roads.
|
|
Yellin' Yoof on a Scooter
|
Good news. Painting the opposite side of the foam-core did warp it back into being almost perfectly straight. Now to add some color and dry-brush it.
|
|
|
|
|
|
|
|
