| Author |
Message |
 |
|
|
|
|
Advert
|
Forum adverts like this one are shown to any user who is not logged in. Join us by filling out a tiny 3 field form and you will get your own, free, dakka user account which gives a good range of benefits to you:
- No adverts like this in the forums anymore.
- Times and dates in your local timezone.
- Full tracking of what you have read so you can skip to your first unread post, easily see what has changed since you last logged in, and easily see what is new at a glance.
- Email notifications for threads you want to watch closely.
- Being a part of the oldest wargaming community on the net.
If you are already a member then feel free to login now. |
|
 |
2010/03/16 02:09:18
Subject: Beginner Imperial Fists
|
|

Crazed Spirit of the Defiler
|
Yes - I would suggest going yellow to being with, thin coats, don't worry too much about it running into the cracks - then wash with Sepia or Devlan Mud into the cracks - it will darken it significantly. If you want it darker than that, use very thin bestial brown into almost a washlike consistancy and run that into the cracks.
|
|
|
|
 |
|
2010/03/16 04:57:21
Subject: Beginner Imperial Fists
|
|

Thunderhawk Pilot Dropping From Orbit
|
This is great progress you're making, believe me. Yellow is one of the hardest colours to paint for me personally.
The way I went about it was pretty much the way Lorgar's_Blessed has said. I primed with Iyadan darksun, then added the sepia wash then drybrushed sunburst yellow lightly until it came up to the colour I wanted.
Hope this helps I'll try and put up an image in my gallery for you to check out if you like, all the best.
|

No trees were hurt in the making of this sig, however many electrons were disturbed.
|
|
|
|
|
2010/03/16 09:09:50
Subject: Re:Beginner Imperial Fists
|
|

Xeno-Hating Inquisitorial Excruciator
|
I rescued a bit of the detail with a very subtle Devlan Mud wash, then I gave it the first highlight, covering most of the armour in a nicely thinned down coat of Golden Yellow. No particular problems this time, though the previous consistency problems remain quite visible. I think if I'd been painting on a smooth canvas this highlight would have been about right though.
The biggest lesson I learned today is to paint faster. Not only is this good in of itself, but my nervousness and hesitation were big contributors to the problems I had with visible brushstrokes and chalky thick coats. I think with yellow you just have to get it watered down and use wide brush strokes along the entire surface you're painting.
Next I'll be mixing paints for the first time as I gradually bring up the highlight.
As far as the yellow scheme I'm going to use going ahead, I've more or less settled on Gryphonne Sepia guidewash -> Iyanden Darksun basecoat -> Devlan Mud detail wash -> highlight from Golden Yellow to Sunburst Yellow. I think once my technique catches up with my ideas this will look pretty close to what I'm looking for.
|
|
|
|
|
2010/03/20 13:28:30
Subject: Re:Beginner Imperial Fists
|
|
Xeno-Hating Inquisitorial Excruciator
|
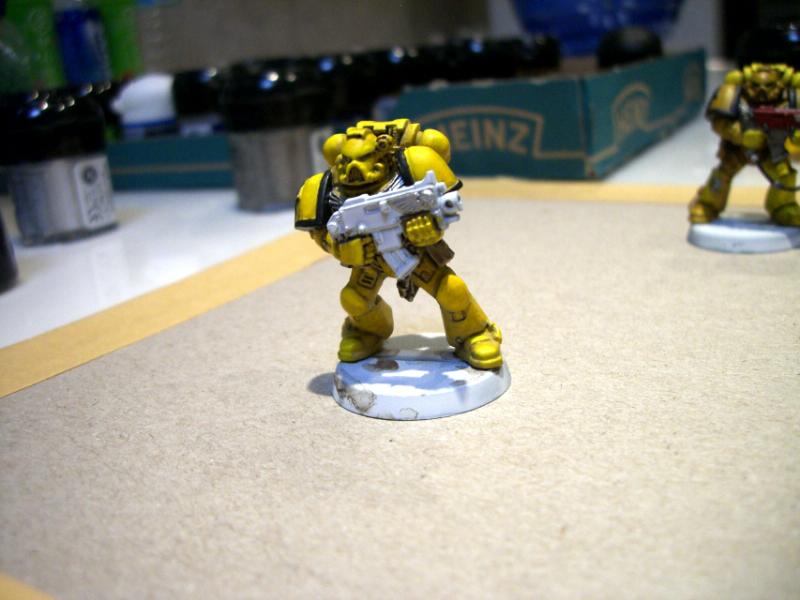
I've finished the yellow parts of my second marine prototype. I've also begun to add the black and silver parts. I'm actually in a hurry to start my next marine, because I've made leaps in my palette control which was the main factor holding me back. I painted another practice sprue and succeeded in painting a truly smooth and consistent watered down layer for the first time, so it's a bit painful to continue painting over this marine's uneven thick undercoats. I think it's important that I finish him though, just because it will be an important milestone for me. I might also continue to learn some important lessons that will be useful for the next guy. I'm painting a lot faster now too, so the whole process of painting is becoming much more rewarding.
So to finish this guy I need to paint the gun, purity seals and holsters, wash the metals with Badab Black and drybrush them with Mithril Silver, paint the eyes (Dark Angels Green, Scorpion Green and a tiny dot of Skull White), and scribble on the purity seal with my newly arrived micron pen. I'll also have to decide how I'm going to base them and give that my first go. Then I'm going to try and get through the remainder of the AoBR squad as a batch as a final test of my scheme before I open up a P&M blog and start my army proper.
|
|
|
|
|
2010/03/20 18:43:07
Subject: Beginner Imperial Fists
|
|

Mutated Chosen Chaos Marine
In a Toyota, plotting revenge.
|
That's a nice yellow! Good job
|
metallifan said: I almost wonder is "Matt Ward" another pen name for C.S. Goto?
metallifan said: The Imperium would probably love Hitler...
Play KoL! Click my sig to go to the main website and sign up!
 |
|
|
|
|
2010/03/30 16:27:41
Subject: Re:Beginner Imperial Fists
|
|
Xeno-Hating Inquisitorial Excruciator
|
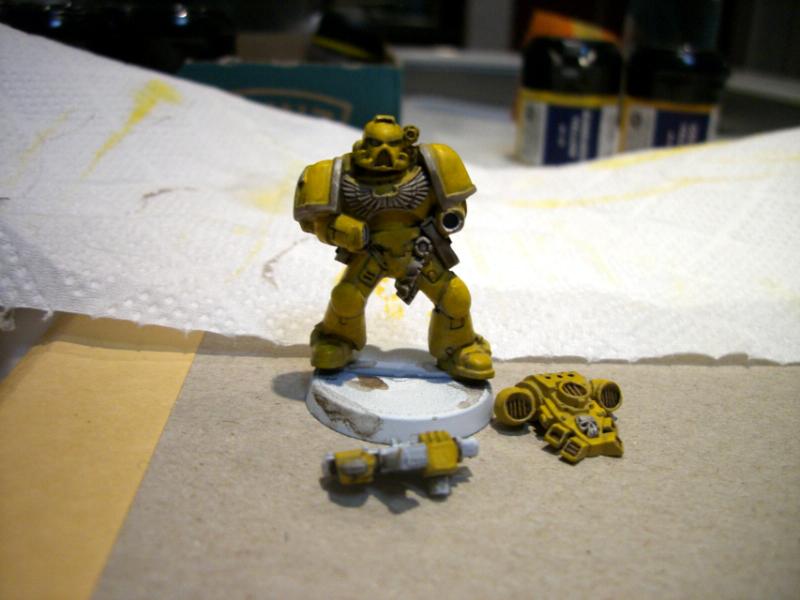
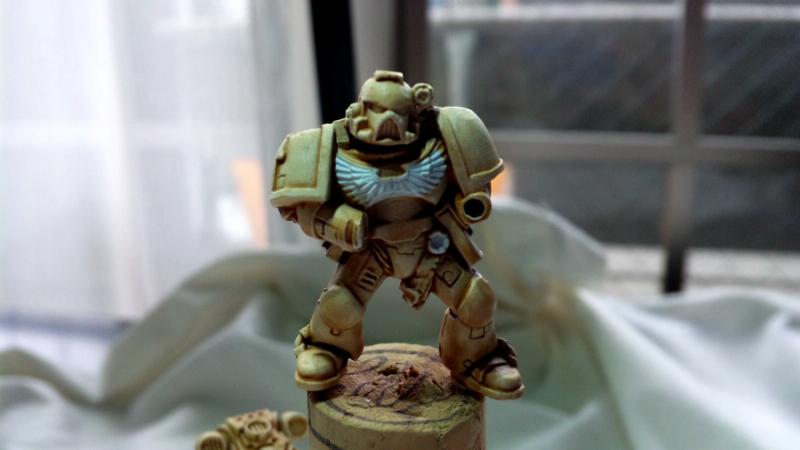
Some progress at last. I've been stuck at work for the last few days, but I had a decent painting session today, and I've almost finished my first minature.
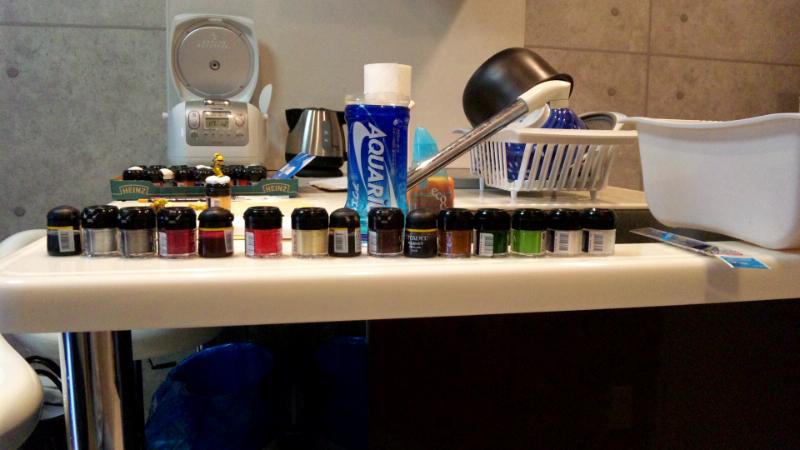
Here's what I started with.
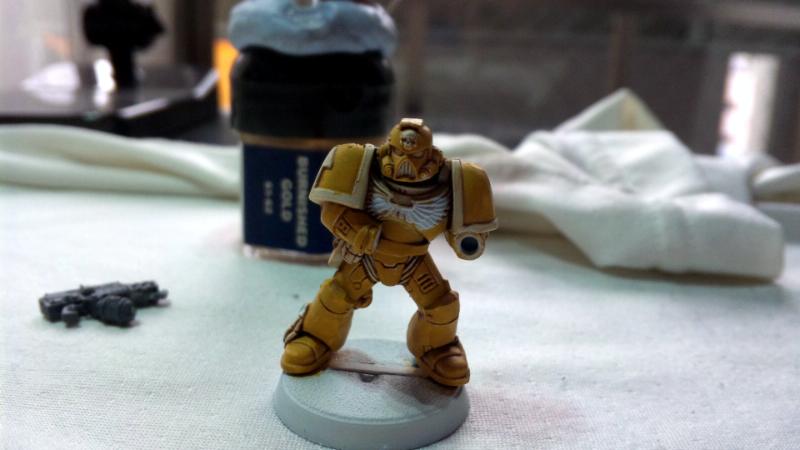
My motivation wasn't so high because I really wanted to get on with the next guy so I didn't have to suffer through the blotchy undercoat this guy got, but I knew I had to get him finished. I tried to be a bit more organised, so as you can see I used some blu- tac on a (full) pot of gold to hold him steady, and I lined up all the paints I planned to use.
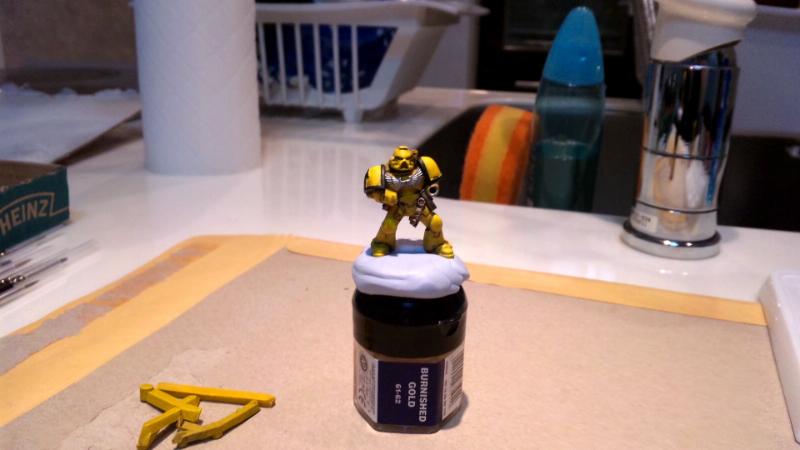
And this is what I ended up with.
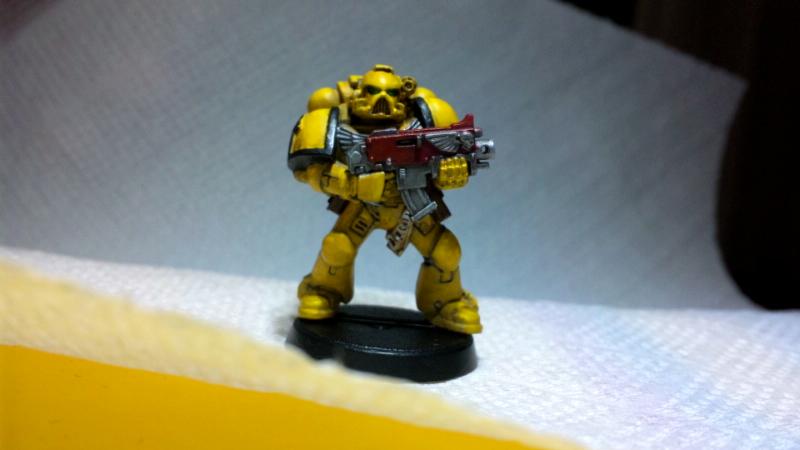
I just need to give the shoulder pad trims a quick edge highlight, then do the base. Oh and I'm going to throw a decal on the shoulder pad for training purposes. I'm not going to bother cleaning up the imperfections, since this guy is just a stepping stone.
Stuff I've learned today:
Scorpion Green looks ridiculous next to Dark Angels Green in eyes. Quickly corrected.
Drybrushing has to be done really gently, and tends to mess up adjacent colours.
Every different paint needs to be treated in its own particular way.
Micron pens are great.
AoBR Marines are really goofy models and I can't wait to get onto my first true tactical squad.
Toothpicks, or at least those that come with chopsticks in Japan, do not apply smaller dots than fine detail brushes.
If in doubt, add more water and load less paint on your brush.
I need to be more bold with my highlights.
|
|
|
|
|
2010/03/30 17:17:32
Subject: Beginner Imperial Fists
|
|
Avatar of the Bloody-Handed God
Inside your mind, corrupting the pathways
|
Looks pretty damn groovy.
|
|
|
|
|
|
2010/03/30 22:10:44
Subject: Beginner Imperial Fists
|
|
Mutated Chosen Chaos Marine
In a Toyota, plotting revenge.
|
Nice! I think the helmet pipes should be black or something.
|
metallifan said: I almost wonder is "Matt Ward" another pen name for C.S. Goto?
metallifan said: The Imperium would probably love Hitler...
Play KoL! Click my sig to go to the main website and sign up!
|
|
|
|
|
2010/03/31 16:37:19
Subject: Re:Beginner Imperial Fists
|
|
Xeno-Hating Inquisitorial Excruciator
|
Thanks for the comments.
I planned to get stuck into all of the remaining marines in my AoBR squad today, but I was lazy and got bogged down in endless mold line removal.
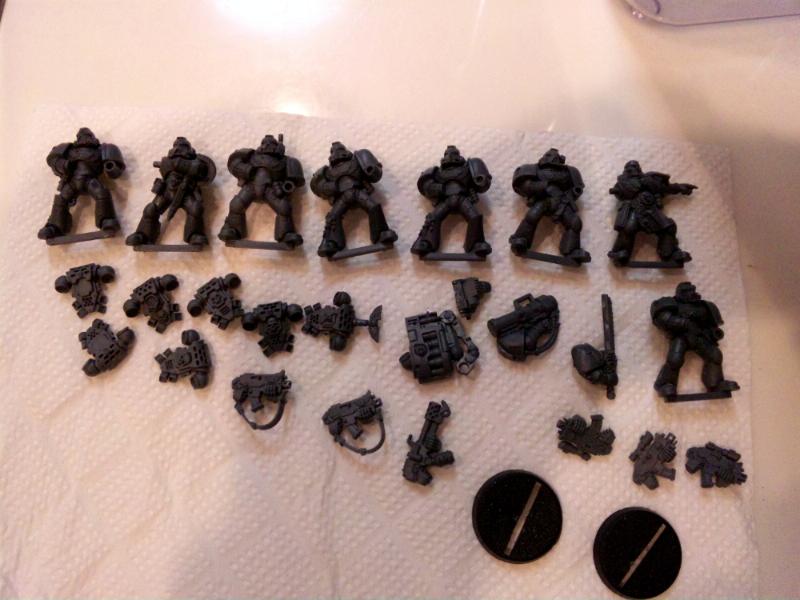
Is there any way to make this go faster? I've been using a craft knife and sliding it along the lines, since my experience with files was not so great. I got lazy after doing too much and did this:
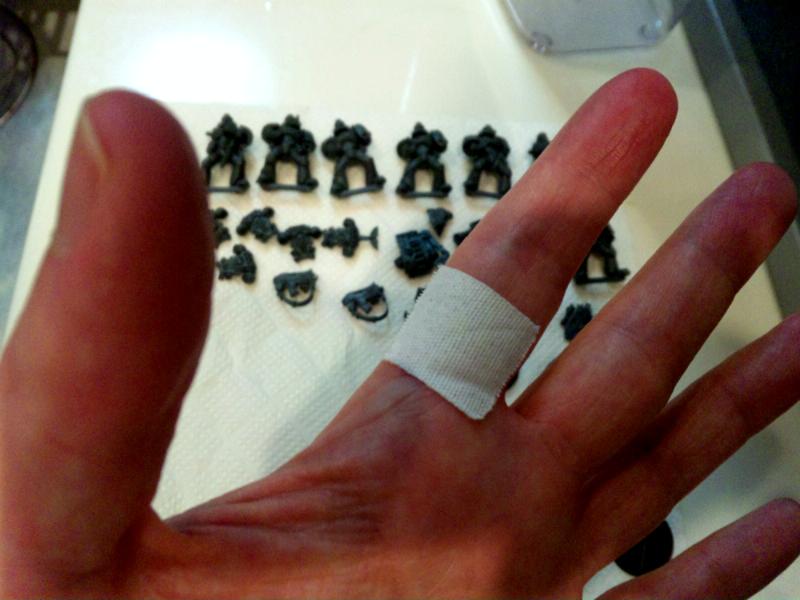
Just a pin prick really. What I really wanted to ask you guys about is transfers. I did a test run today just to get the hang of them, and it actually went pretty smoothly on the whole, but as expected the transfer can't sit flat on the shoulder pad since it's too curved a surface.
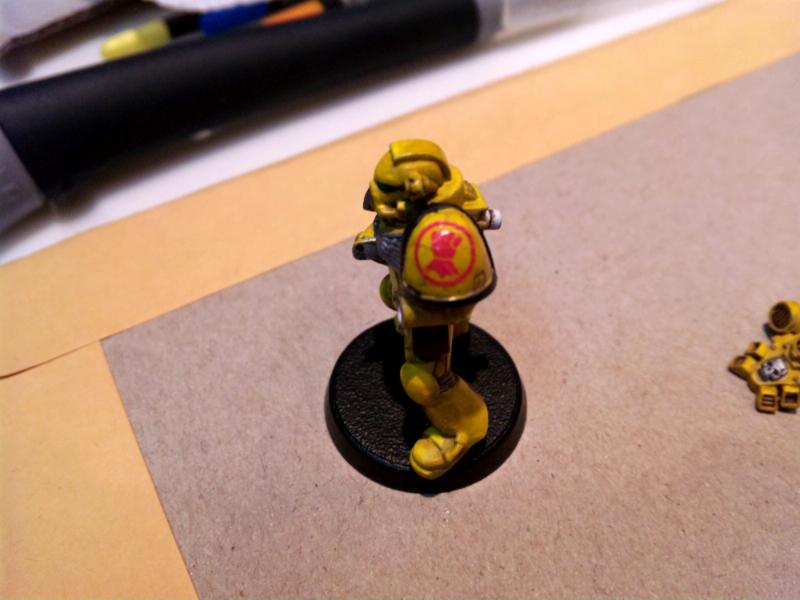
Yeah, I know, the hot pink fist looks very very silly, but that's what happens when you're only supplied with inferior successor chapter product in the starter box. My eventual marines will obviously be getting the real deal.
Anyway, the creases obviously won't do, but they're inevitable if I'm gonna get the transfer down flat as it is, so I'm gonna have to try something different. I'm gonna try cutting slits in the next transfer and see if that gets it down. I might have to touch up the circle by with a lick of black (or pink!) paint that way though. How are these transfers generally applied to shoulder pads? I guess the non-round transfers can be given slits without cutting in to the design itself, or else the creases can be worked away from the design then cut off, but I don't have that option with my circular design. I'm also worried that I won't be able to paint over gaps caused by my slits without it looking obvious. The nuclear option would be to go with the metal Imp Fist shoulder pads, but I'd rather not since they're pricy, metal and it'd force me to get metal shoulder pads for both shoulders so that they don't look out of place. Oh and I'd really rather not rely on free hand because even if I didn't make a great big mess of it I'd never get them to look consistent.
Oh I should say I cut right along the edge of the design, used water to prepare the transfer and then used plenty of gloss varnish on the shoulder pad to make setting the transfer in place as smooth as possible. I then used the flat end of my craft knife to gently flatten out the transfer, which I was eventually able to do, but only by bunching together the edges, mostly invisibly, but in a few places leading to those visible creases. Maybe if I just keep at it I'll be able to hide the creases just by massaging it more carefully into place, but the impression I got was that the problem was with the physical dimensions of the transfer and the surface.
|
|
This message was edited 3 times. Last update was at 2010/03/31 16:48:57
|
|
|
|
|
2010/03/31 16:50:19
Subject: Re:Beginner Imperial Fists
|
|

Leutnant
|
this guy has some very nice IF marines, and having followed the scheme myself for a model I have to say its a really good way to go. it gives them a very bright coloring while staying away from the lighter tones.
http://www.dragondawn.com/kingstonknights/work_paint_art_01.html
hope this helps a lil
|
|
|
|
|
|
2010/03/31 17:01:49
Subject: Beginner Imperial Fists
|
|
Xeno-Hating Inquisitorial Excruciator
|
I was thinking of slashing one of my poor marines to death with a craft knife to mimic the extensive damage to the armour in my source art, so it's nice to see another guy doing something similar. Thanks for the link. I bet that guy wouldn't approve of my hot pink fist marine.
|
|
|
|
|
2010/03/31 17:08:58
Subject: Beginner Imperial Fists
|
|

Trigger-Happy Baal Predator Pilot
|
Hey nice work. I wish I could have painted my first minis to this kind of quality.
|
|
|
|
|
|
2010/03/31 17:30:57
Subject: Beginner Imperial Fists
|
|
Xeno-Hating Inquisitorial Excruciator
|
Thanks for the compliment. I'm still eager to improve though.
Quick update. I tried to give the transfer a bit of post drying work, and because I'd put down loads of varnish under the transfer but none over the top it was really brittle, and the creased areas broke off with the slightest pressure. This sounds like a disaster, but it removed the creases and it actually looks fairly natural, as though the icon has partially worn away over time. I don't really want to settle for this look, but I find it quite reassuring. This way I know that if I screw a transfer up on one of my models in future I can at least make it look half decent. I could even fill in the broken areas with paint or micron pen. This is just a fallback though, I'd still love to hear anyone's advice on getting the damn things to sit flat on the shoulder pad.
|
|
|
|
|
2010/03/31 18:31:21
Subject: Beginner Imperial Fists
|
|
Avatar of the Bloody-Handed God
Inside your mind, corrupting the pathways
|
Regards the chapter marking decals - have you thought about making a stamp? Make a small blob of GS, flatten one end and stick the decal on. Then press the decal/ GS construct onto the shoulder plate to get the curve right (make sure you put it on the right way up so that the decal is the correct way round). Leave the blob to set. Then you can use a lot of patience and a very sharp knife to cut away the "clear" sections of the decal, leaving the design in place and raised. Then you just slap some paint on it and press it to the shoulder pad for easy, unlimited symbols 
|
|
This message was edited 1 time. Last update was at 2010/03/31 18:31:53
|
|
|
|
|
2010/04/01 04:04:34
Subject: Beginner Imperial Fists
|
|
Xeno-Hating Inquisitorial Excruciator
|
That's an awesome idea, but I really don't want to have to paint white circles on the pads, and the Imperial Fist transfers include the white, so there are no clear areas. I think I'm stuck experimenting with slits or settling for 'worn' icons or painting over the broken parts of the transfer.
|
|
|
|
|
2010/04/01 04:19:22
Subject: Re:Beginner Imperial Fists
|
|
Doc Brown
|
Mistake.
|
|
This message was edited 1 time. Last update was at 2010/04/01 04:21:04
"From the fires of Betrayal unto the blood of revenge we bring the name of Lorgar, the Bearer of the Word, the favored Son of Chaos, all praise be given to him. From those that would not heed we offer praise to those who do, that they might turn their gaze our way and gift us with the Boon of Pain, to turn the Galaxy red with the blood, and feed the hunger of the Gods."
-Excerpt from the Three Hundred and Forty-First
Book of Epistles of Lorgar
Cheese Elemental wrote:That made me think... what's a good pick-up line in the Imperium?
"Hey baby, my plasma cannon's running hot and I need to purge you in the name of the Emperor tonight."
|
|
|
|
|
2010/04/01 04:58:16
Subject: Beginner Imperial Fists
|
|
Xeno-Hating Inquisitorial Excruciator
|
I didn't think I'd be able to find it in Japan but I've tracked down some microsol online and it will arrive in a few days. I was under the impression that microsol was just for getting the decal to blend in better, but having read more deeply I realise that it is designed precisely to get them to fit to irregular surfaces. Hopefully this will solve the problem.
|
|
|
|
|
2010/04/14 14:01:16
Subject: Beginner Imperial Fists
|
|
Alluring Mounted Daemonette
|
im also doing imperial fists
what i do for my yellow is as follows:
1. skull white basecoat
2. blazing orange over all the bits you want yellow
3. dry brush golden yellow over the orange 3 times
4. wash with ogryn flesh
5. highlight with sunburst yellow 2 times
i'll try submit some pics as soon as i can find my camera
|
Glory to the Twelfth! Glory to Angron!
"Because we couldn’t be trusted. The Emperor needed a weapon that would never obey its own desires before those of the Imperium. He needed a weapon that would never bite the hand that feeds. The World Eaters were not that weapon. We’ve all drawn blades purely for the sake of shedding blood, and we’ve all felt the exultation of winning a war that never even needed to happen. We are not the tame, reliable pets that the Emperor wanted. The Wolves obey, when we would not. The Wolves can be trusted, when we never could. They have a discipline we lack, because their passions are not aflame with the Butcher’s Nails buzzing in the back of their skulls. The Wolves will always come to heel when called. In that regard, it is a mystery why they name themselves wolves. They are tame, collared by the Emperor, obeying his every whim. But a wolf doesn’t behave that way. Only a dog does. That is why we are the Eaters of Worlds, and the War Hounds no longer."
—Captain Khârn of the World Eaters Legion's 8th Assault Company, from his unpublished treatise The Eighteen Legions |
|
|
|
|
2010/04/14 14:16:13
Subject: Beginner Imperial Fists
|
|
Frothing Warhound of Chaos
|
Wow, seriously, well done mate, painting yellow is a daunting aspect for all table top gamers, it is good to see sombody just getting stuck in, and giving it a go. You should be really pleased with your self, because you have to be quite skilled to paint good yellow.
Automatically Appended Next Post:
Wow, seriously, well done mate, painting yellow is a daunting aspect for all table top gamers, it is good to see sombody just getting stuck in, and giving it a go. You should be really pleased with your self, because you have to be quite skilled to paint good yellow.
|
|
This message was edited 1 time. Last update was at 2010/04/14 14:16:29
|
|
|
|
|
2010/04/14 14:21:12
Subject: Beginner Imperial Fists
|
|
Freelance Soldier
Bristol, UK
|
Have a look online and try and find a tutorial which shows you a well painted mini and as part of it shows you the thickness the paint should be. People use the image of the 'consistency of milk' but this isn't always easy to imagine, better to see it in a video if you can.
The main reasons I can think of why the paint would run into all the cracks are that it's too thin, you're using too much on your brush or that your fine control of the paint needs work.
If your paint is too thin get a piece of paper towel and after you've put the brush in your paint just run it lightly over. This will help ensure that if the paint runs a little too much it won't go into all the cracks. This will also help you not to use too much on the brush.
Fine control comes with plenty of practice, knowing how the paint brush will behave when you move it etc. Try to always make sure you have a fairly sharp tip on your brush so that you can use small amounts of paint and just paint slowly and carefully until you get the hang of it. Speed comes later. Good care of your brushes will help.
If you find your paint drying out a little quickly then you can use a slow dry additive. Personally I use about a 1:1:10 slow dry, flow aid, water mix to try to give the paints a little longer life and better control.
Keep practising and mixing and you'll be painting to a good standard in no time.
|
Can I suggest skipping forward 10 years to the age where you don't really care about what people say on the internet. Studies show that it decreases your anger about life in general by 37%. - Flashman |
|
|
|
|
2010/04/14 18:02:58
Subject: Beginner Imperial Fists
|
|
Veteran Wolf Guard Squad Leader
|
Not bad, seeing as yellow is a really hard colour to use 
|
30K Blog: hobbyfromtheaett.blogspot.com
  Bran Redmaws Great Company - 5500pts Bran Redmaws Great Company - 5500pts
30K Space Wolves - 1500pts
  Deathguard -2300 pts Deathguard -2300 pts  |
|
|
|
|
2010/06/20 06:21:02
Subject: Re:Beginner Imperial Fists
|
|
Xeno-Hating Inquisitorial Excruciator
|
Work has kept me away, but I got some painting done while watching the football. I'm still painting backwards, with a brown guidewash followed by a proper yellow basecoat. Not sure if I'm wasting my time, but I like that I can leave the guidewash exposed to simulate shadows in recessed areas. I guess it's like having the advantages of priming black even though I use white for a better shade of yellow. Hopefully I'll put this starter set squad behind me soon and start a proper plog for my actual Imperial Fists army. I've already started working on that - you might be able to see an out of focus conversion in one of the pictures below.
|
|
|
|
|
2010/06/20 06:38:00
Subject: Beginner Imperial Fists
|
|
Dakka Veteran
|
I read your idea about slashing one of the marines armors to gak..

I did a similar thing over his left eye. I used an exacto, scored 2 holes, and painted the whole helmet. The slashes looked unconvincing, because you could tell they were shallow, because they was some paint in there. It didn't look like real damage, but fake. SO, I used a very fine brush and some black ink to color in the slashes, as well as outline the helmet's nooks and crannies. Looks very good, its hard to get a high res picture close enough to the face for you to see it, but its nice.
consider using black ink to color in any slashes you make, otherwise it will just look fake :-/
|
|
This message was edited 2 times. Last update was at 2010/06/20 06:40:00
 After the orbital strikes, Thunderhawk bombardments, Whirlwinds, Vindicators, fusion and starfire and finally Battle Brothers with flamers had finished cleansing the world of all the enemies of Man, we built a monastery in the center of the largest, most radioactive impact crater. We named the planet "Tranquility", for it was very quiet now. After the orbital strikes, Thunderhawk bombardments, Whirlwinds, Vindicators, fusion and starfire and finally Battle Brothers with flamers had finished cleansing the world of all the enemies of Man, we built a monastery in the center of the largest, most radioactive impact crater. We named the planet "Tranquility", for it was very quiet now.
|
|
|
|
|
2010/06/20 19:45:24
Subject: Beginner Imperial Fists
|
|
Storm Trooper with Maglight
|
Nice painting better than the combat squad i ruined today would you have any tips for an imperial fist player?
|
I apologise to anyone who interacted with me around 2009-2012. |
|
|
|
|
2010/06/21 06:01:57
Subject: Re:Beginner Imperial Fists
|
|
[ARTICLE MOD]
Huge Hierodule
|
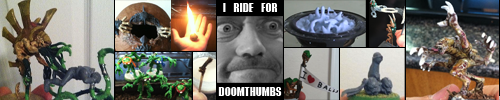
Here's how I did my yellow (over black primer). I basecoated with Dheneb Stone, then followed with Golden Yellow.

|
|
|
|
|
|
|
|


 2000 points
 500 points
 1500 points "You don’t want to play Blood Angels to be different you play them because you finally realized that they go crazy and drink blood yet haven’t been killed off by the Inquisition. Proving that they are just bada**”