| Author |
Message |
 |
|
|
|
|
Advert
|
Forum adverts like this one are shown to any user who is not logged in. Join us by filling out a tiny 3 field form and you will get your own, free, dakka user account which gives a good range of benefits to you:
- No adverts like this in the forums anymore.
- Times and dates in your local timezone.
- Full tracking of what you have read so you can skip to your first unread post, easily see what has changed since you last logged in, and easily see what is new at a glance.
- Email notifications for threads you want to watch closely.
- Being a part of the oldest wargaming community on the net.
If you are already a member then feel free to login now. |
|
 |
2016/06/11 03:52:04
Subject: Re:looted drop pod and udder stuff
|
|

Tail-spinning Tomb Blade Pilot
My ancient "lab"
|
Loving each and every one of your conversions. As a SM and Tau player, you've wounded me, truly. Looking forward to even more of these Orkish builds!
|
|
|
|
 |
|
2016/06/16 16:31:57
Subject: Re:looted drop pod and udder stuff
|
|
Sneaky Striking Scorpion
|
@JustaerinAtTheWall - thanks for the compliments. I'm sorry to say this but this isn't going to make you feel better, just fyi. You see my hate for space marines and tau just tickles me pink to abuse their stuff like this. The fact that their stuff just looks really cool after being Orked out is just pure bonus. However, they are not alone in my abuse of them, no army is safe around me except Tyranid. Sitting in the wings is an imperial valkyrie waiting to bee trukked out, and i already have two looted Leman Russ tanks as well.
On that note...
Welcome back to another edition of Mek Boss Lojakk's garage specials. Today you will see the beginnings of my tracked and treaded Killa Kans, and Kromlech's Clanking Destroyer. Now I've already gone in and built the torsos for these guys as well as their arms, seems like an unnecessary step to blog on, as i really didn't do anything different than anyone else whos built them.
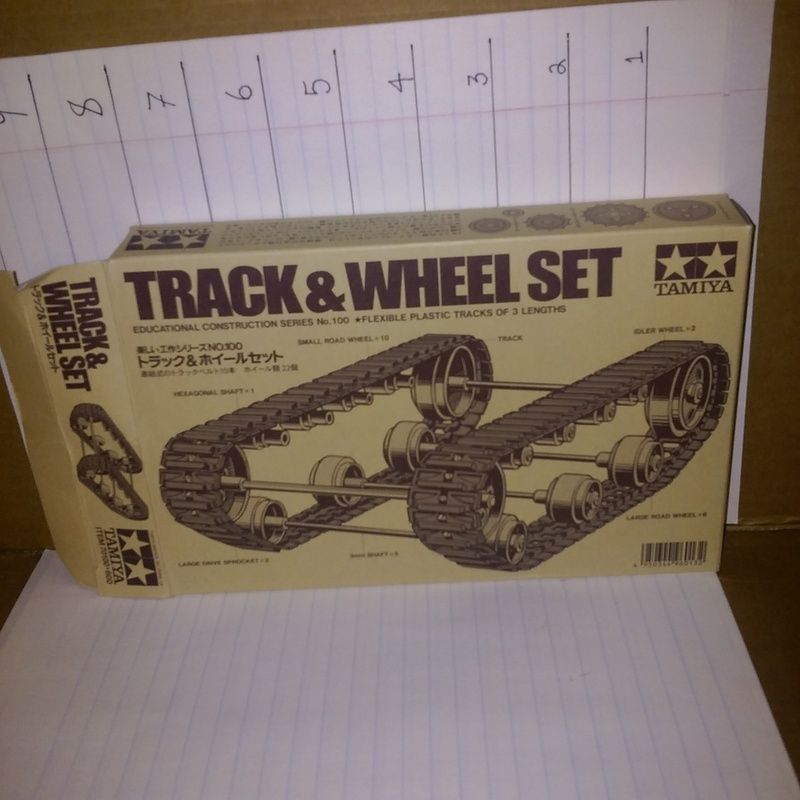
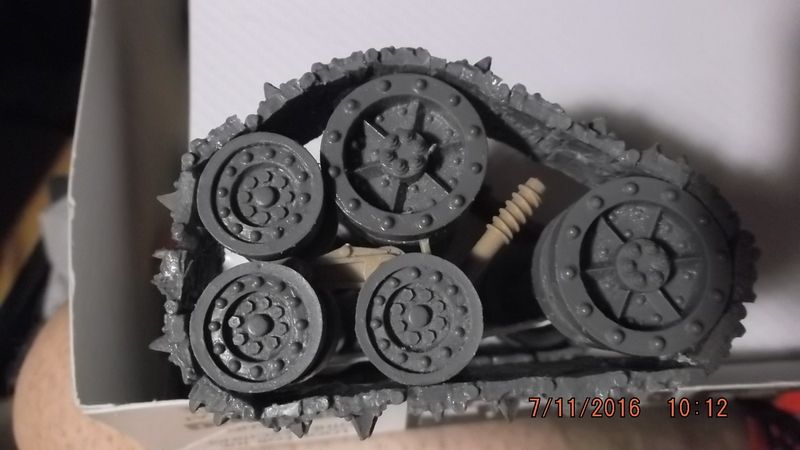
But, here's where things change. As i stated before i ordered a bunch of Tamiya tank track and wheel sets from overseas, here's what the box looks like for those interested.
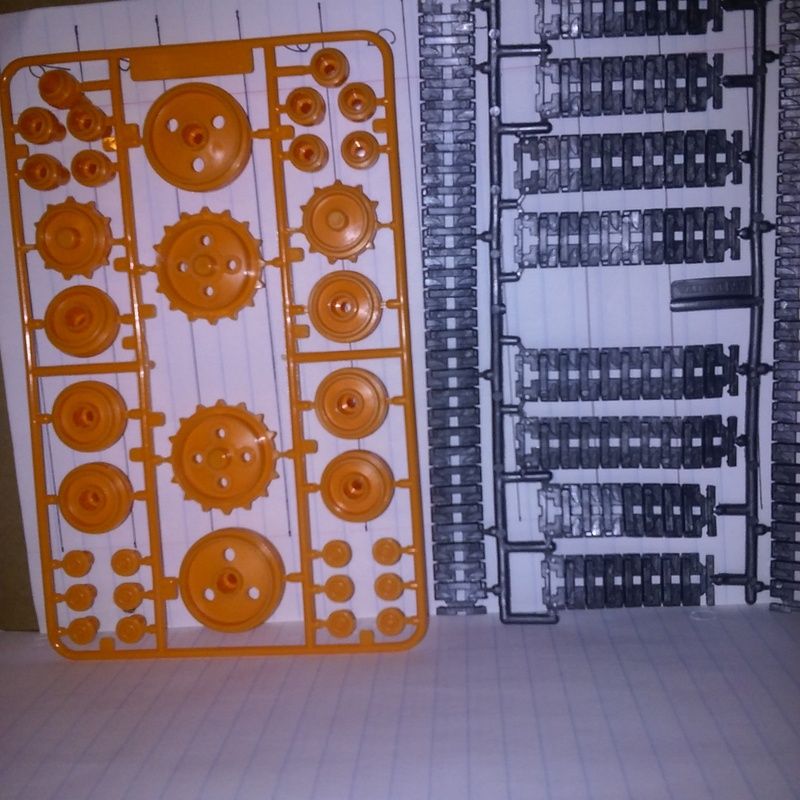
And this is what comes in the box along with some metal screws and axle posts. Based on the back of the box, i guess these are supposed to replace broken parts on motorized kits. Happy surprise, i didn't think the center wheels would be big enough for the clanking destroyer, and i didn't notice that two of the smaller wheels are also drive wheels. I was figuring the whole amount would only be big enough for the kans.
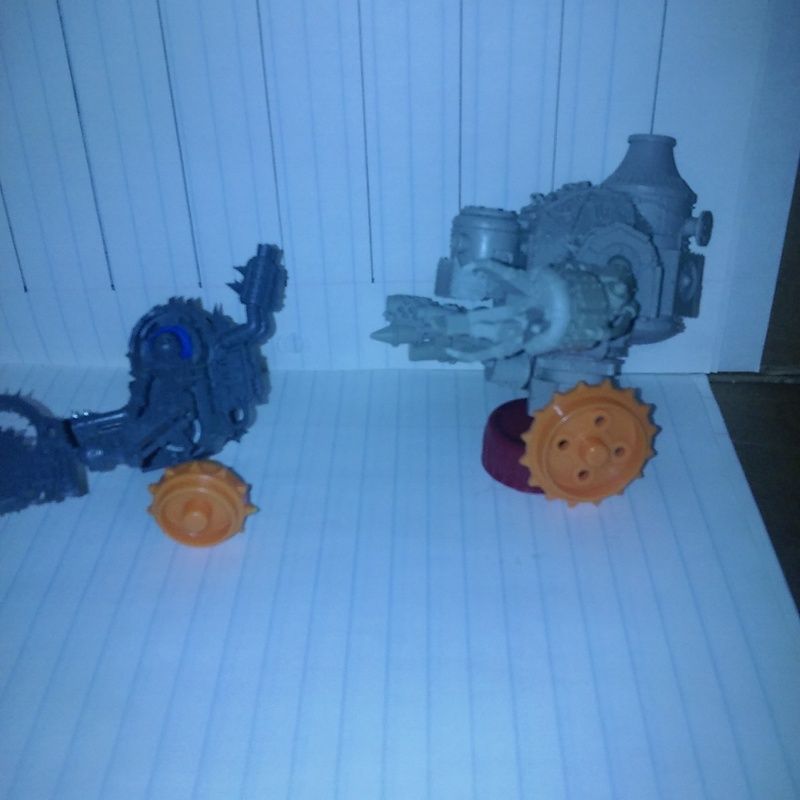
Here's a small drive wheel next to a kan for scale.
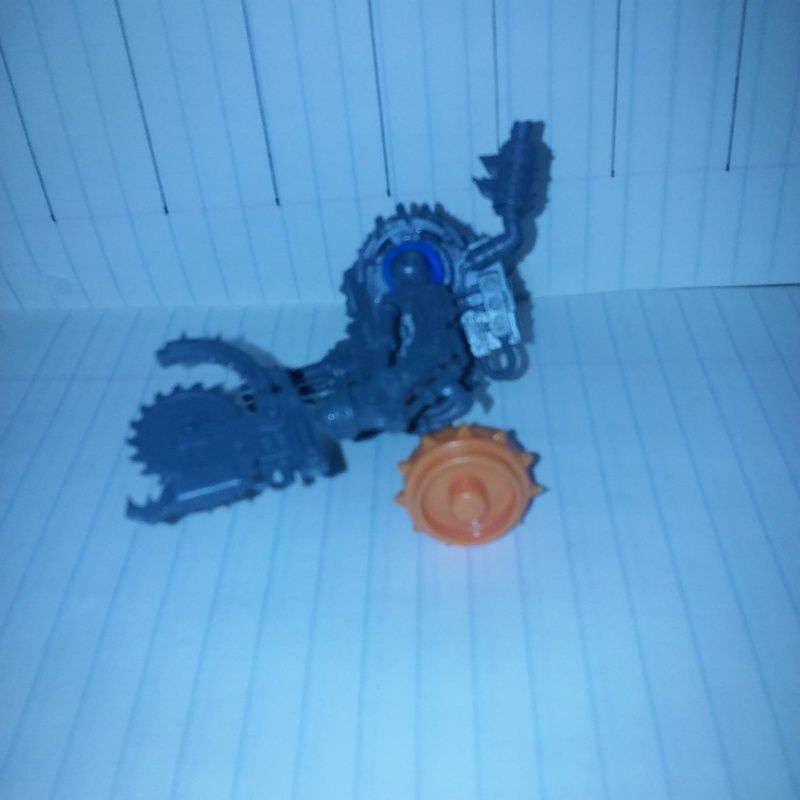
And the large drive wheel next to the destroyer.
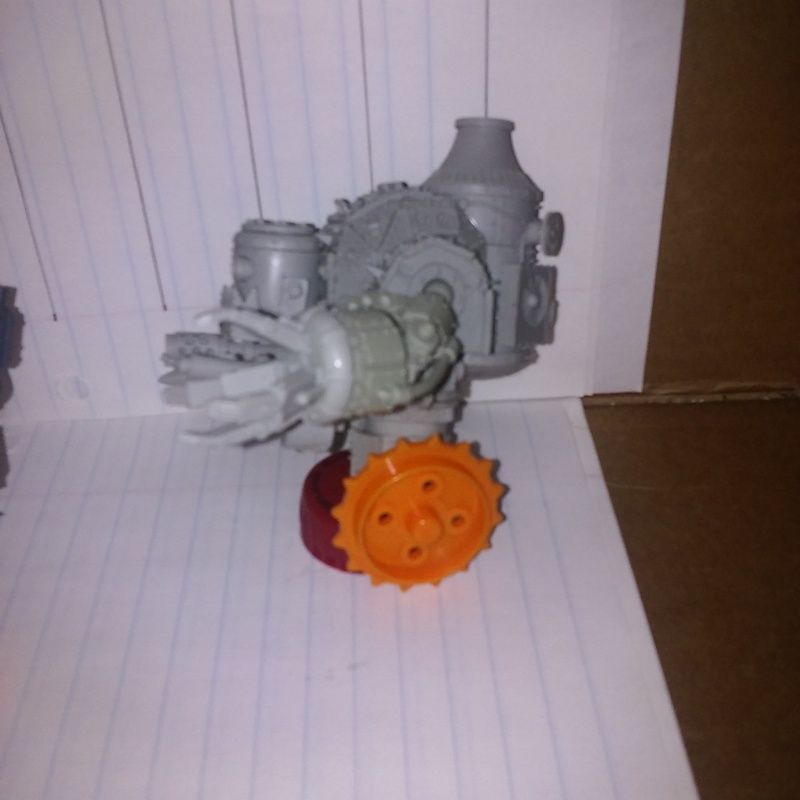
It's a good thing there are six of the small wheels and ten really small wheels. Some of the six will have to go on the destroyer and deff dreds as road wheels, while the ten really small ones will be used on the kans.
I'm going to have to do one of two things either A) drill the hip of the kans/destroyer to fit the posts On the back of the wheels into them or B) and i think this will new the easier of the two, cut the posts off the wheels. If i cut the posts I'll still need to drill but not as excessively, so the screws will make for a nice and tight fit.
I'm covering for a guy as work who seriously burned his hand, this means i only have one day per week off for the next month, maybe longer. This is going to affect how fast these things go together, but i should have more for show and tell by this weekend.
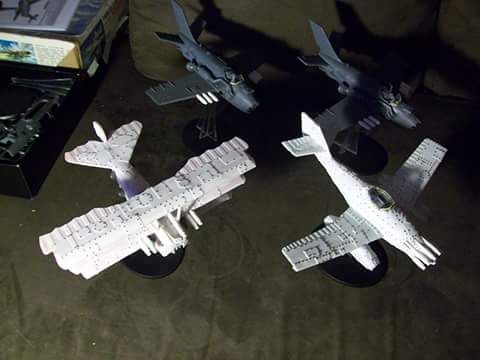
Also before i forget, i mentioned previously about two tri plane designs that impressed me and make me want to build my own. The first i already posted further up, but finally here is the second one. This was built by a guy on facebook in one week. And before you ask, he cheats, those rivets aren't what you think they are. Those are nail art studs for fingernails, that he orders from ebay. Rather smart in my book, much better than sitting around trying to chop up plasticard rod.
Hope you enjoyed this weeks episode, tune in next time for more Orky shenanigans. And Boss Lojakk leaves you with this final priece of advice, "hod on ta da pin, trow da udder part."
|
fav movie quotes: "Well let's put her in charge man! - - "Step up to red alert." "Are you sure sir? It does mean changing the bulb." - - "The escape pods not an option, it escaped last Thursday."
Kirasu - Q: What comes out of an Eldar cocoon? A: Corsair butterflies!
|
|
|
|
|
2016/06/17 20:21:03
Subject: looted drop pod and udder stuff
|
|
Rogue Inquisitor with Xenos Bodyguards
|
Dakka jets, wheel-track sets, I can't wait to see the Orky-Shenanigans! 
|
"Your mumblings are awakening the sleeping Dragon, be wary when meddling the affairs of Dragons, for thou art tasty and go good with either ketchup or chocolate. "
Dragons fear nothing, if it acts up, we breath magic fire that turns them into marshmallow peeps. We leaguers only cry rivets!


|
|
|
|
|
2016/06/20 10:17:06
Subject: looted drop pod and udder stuff
|
|

Growlin' Guntrukk Driver with Killacannon
|
Ditto.
|
|
|
|
|
|
2016/06/20 16:26:51
Subject: looted drop pod and udder stuff
|
|
Sneaky Striking Scorpion
|
If only i had something to show that would be great. Sadly, I'm going to have to rethink this. The drive wheel on the clanking destroyer is fine, but not on the Killa Kan. The wheel set to the hip of the kan, sits to high for the arms.
So, I'm going to have to build or come up with something that can be used as a gear box/secondary engine. This will set the drive wheel lower, allowing the arms of kan to sit properly. As for the destroyer, he also will benefit from a new box added to his hip. The size of the hip join he has now is a tad small in all ways height, width, and depth. Also being made of resin, and having that small of an area holding that much weight, I'm not liking the idea of drilling into him for a better fit.
I also need to figure out if i want to spend the money ordering Krusher pattern treads from blood and skulls, use the rubber treads provided by tamiya, or use the ripper treads i already have on the kans. I do have a very few krusher pattern treads that I'm going to use on the destroyer. Hopefully, i have enough.
I've also won some more eBay auctions so in a few days i can start working on some more dakkajets. I've also got two models incoming. one is the red baron fokker and the other is a british bi plane from the same era. Going to make the baron my fighter ace flyboss, and the other one his lieutenant. With the eBay auctions I'll have the parts needed to build the Dakx-wing.
On facebook the ork waagh page is getting ready to start a mek build for July, so I'm thinking I'll hold off on the Dakx-wing so i can use its build for their competition. That means July before i start it, and end of July before i post anything about it. I will take pics with my crappy phone all through the build so as to have the whole wip to post up here for it.
I have to work tonight and its going on noon, time for sleep. Have a good one, friends.
|
fav movie quotes: "Well let's put her in charge man! - - "Step up to red alert." "Are you sure sir? It does mean changing the bulb." - - "The escape pods not an option, it escaped last Thursday."
Kirasu - Q: What comes out of an Eldar cocoon? A: Corsair butterflies!
|
|
|
|
|
2016/06/26 16:26:13
Subject: Re:looted drop pod and udder stuff
|
|
Sneaky Striking Scorpion
|
All right, welcome back. As requested We have a small amount of progress on the orky shenanigans of the tracked killa kans. Also more parts and models came in for the dakkajets, so they are getting closer to the next item of build In the lineup.
Onwards to the Killa Kans. They definitely will be sitting higher, thus increasing line of sight, but i expect no one will complain as this goes both ways.
They also have a wider profile as well, so I'm going to have to make sure opponents know they need to measure to the hull rather than the tracks. Same goes for templates.
At any rate lets give you a picture so you can see what I'm talking about.....
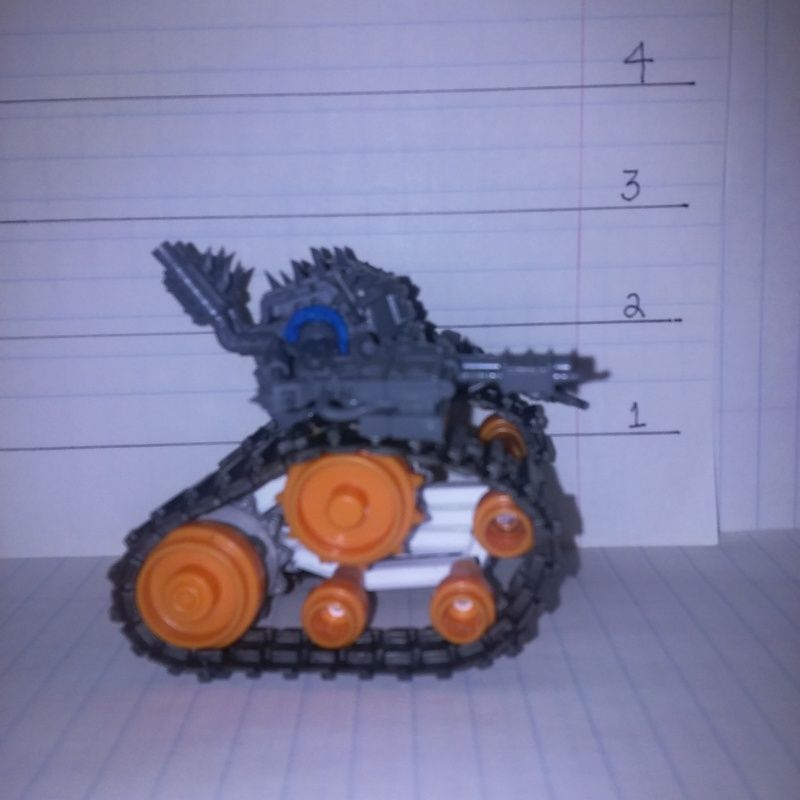
As you can see here and In the following pics, each line on the paper In the background is one inch. This gives y'all an idea of how much this guys profile has increased. I also feel that this whole idea of treaded walkers will definitely allow them to fit In with the basic theme of speed freaks now.
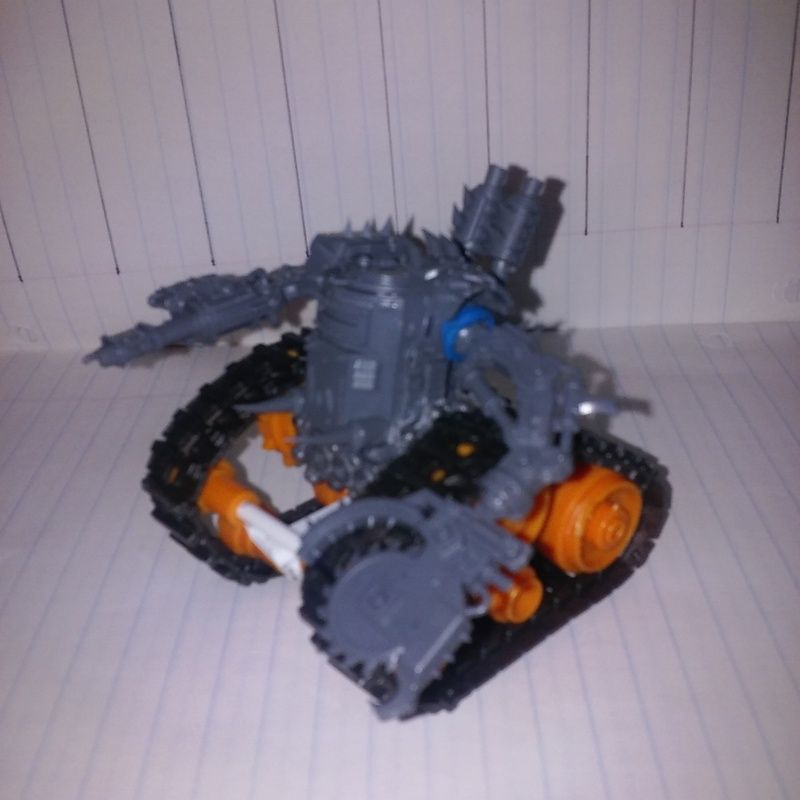
What i did here was after sitting and trying to think of the easiest solution to this, i delved into the remains of my Pegasus Hobbies Chemical Plant, and pulled out two pieces for small storage tanks. I also used a couple of end caps for this as well. The interior area between the tracks is just different types of plasticard rod to help me frame things out so i could attach the small road wheels.
I'm thinking from a rule of cool standpoint of putting two close combat arms on this guy, and using the three holes in the front here on the Chemical plant piece for a pair of big shootas, as you can't go wrong with more Dakka. I think This guy might also stand tall enough to fall under counts as rule for a Deff Dred. Now i know that with the increase In height of this guy, that when i do the same to the deff dreds it will also increase their height bringing this guy back down to killa kan. I think this treatment might also increase the morka/gorkanaughts height As well, but I'm not a 100% certain of that. As for the looted dreamscape leviathin mortis i doubt it.
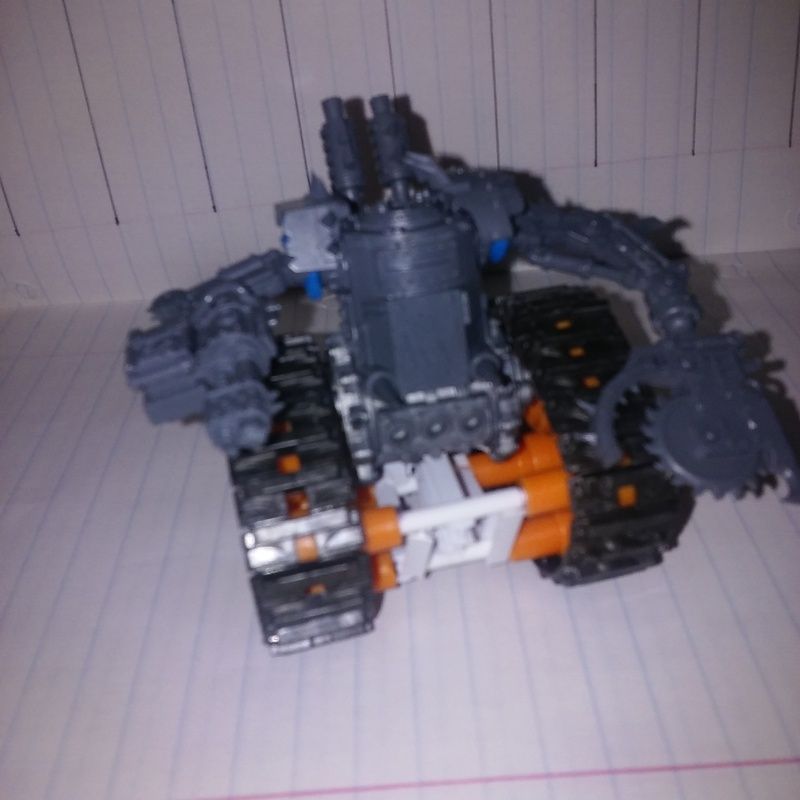
Here on the back side is the other piece of storage tank i used, its exactly the same as on the front. This means three holes that need filled, and what I'm going to do there is add exhaust pipes. On the top of the tread frame I'm going to loot an idea i saw from either Shasolenzabi, or Victor. Using really small rod and wire, create a plate that looks like engine electronics. Cut a hole, glue the plate in, and then create a frame, and cover using some wire mesh i have to go over the engine plate. This will give detail to the back side without taking away from the kans detail.
The only thing i haven't figured out at this point is how much of that frame work i should cover up, thus leaving the tread wheels open for veiwing, or if i should just cover the bottom, and then create an armor frame to cover the tread wheels. In either case, i know that framing has to be covered. Easiest solution is to cover the bottom and cover the wheels, but as modelers we don't always go for easy.
So what do y'all think would look best, cover the wheels or leave them uncovered? At any rate, now that i have one of these built, I'll go more in depth with photos of what I'm doing to post up here. As always though, constructive criticism and ideas are always welcome.
Have a good week, and model on.
|
fav movie quotes: "Well let's put her in charge man! - - "Step up to red alert." "Are you sure sir? It does mean changing the bulb." - - "The escape pods not an option, it escaped last Thursday."
Kirasu - Q: What comes out of an Eldar cocoon? A: Corsair butterflies!
|
|
|
|
|
2016/06/26 17:30:10
Subject: looted drop pod and udder stuff
|
|
Rogue Inquisitor with Xenos Bodyguards
|
With Orky Tek, you cannot go wrong either way! exposed wheels works as would armor covers, the tracks came out big enough a Dready could also be seated on that, (Lower weapon/amr slots being just shooty stuff, leave the upper arms for the crushy bits!
All in all, that is looking like one fast Kan! Needs a red paint job!  
|
|
This message was edited 1 time. Last update was at 2016/06/26 17:30:33
"Your mumblings are awakening the sleeping Dragon, be wary when meddling the affairs of Dragons, for thou art tasty and go good with either ketchup or chocolate. "
Dragons fear nothing, if it acts up, we breath magic fire that turns them into marshmallow peeps. We leaguers only cry rivets!
|
|
|
|
|
2016/07/13 17:46:24
Subject: Re:looted drop pod and udder stuff
|
|
Sneaky Striking Scorpion
|
Ok, small update so that people don't think I've forgotten about this.
We now have a replacement at work for the guy who burned himself, which means I'll be going back to working 5 days, instead of 6. This means more time to work on projects.
I also was able to get a 16mp Fujifilm camera off EBay for around $20 dollars. Sally, since its a used camera, the flash won't work, and it's stuck in macro state. Still, for what I'm using it for it should be sufficient, and should also provide much crisper pictures than the crappy phone camera. I'll go back in and take pictures of the completed projects with the new camera and update this blog with them. Probably the best way to do that will be to edit each post if possible, if not then I'll make a single post with all the updated photos on spoiler so it won't take forever to load the page like it does with page one.
Now for info on the tracked Killa kans. I decided for the second one I'd use the resin tracks i have in the "krusher pattern set 00" From blood and skulls. I must say that i really hate how market plastics don't like super glue or plastic glue. Every time I'd get the wheels to finally stick in place, and start working a new section of the build, another one of the wheels would pop off. Finally, broke down, said a nasty word or three, probably more than that knowing my pension for off color language, and used the very limited amount of resin wheels i have left.
So, the build of the tracks, while being slow do to work and issues with glueing, is coming along, and as of this morning only needs one more plasticard plate to finished it off. From there I'll need to figure a way to attach the Kan to the tracks in a believable fashion, and then detail it. As for the original Kan i still need to plate off its body, and i have decided to run with armor plate over the plastic wheels like some of the old German tanks had. Especially since the wheels aren't very detailed and the whole thing is in one piece. Easier to do this than trying to fill in the back around all that plasticard rodding i used.
Hopefully, this weekend will see me uploading to my photobucket account, and then posting them on. here.
.
|
fav movie quotes: "Well let's put her in charge man! - - "Step up to red alert." "Are you sure sir? It does mean changing the bulb." - - "The escape pods not an option, it escaped last Thursday."
Kirasu - Q: What comes out of an Eldar cocoon? A: Corsair butterflies!
|
|
|
|
|
2016/07/26 11:02:33
Subject: Re:looted drop pod and udder stuff
|
|
Sneaky Striking Scorpion
|
So the idea of being able to post last weekend went all bollocks, but i was able to get the photos off the new camera and online the other day. So here we go.
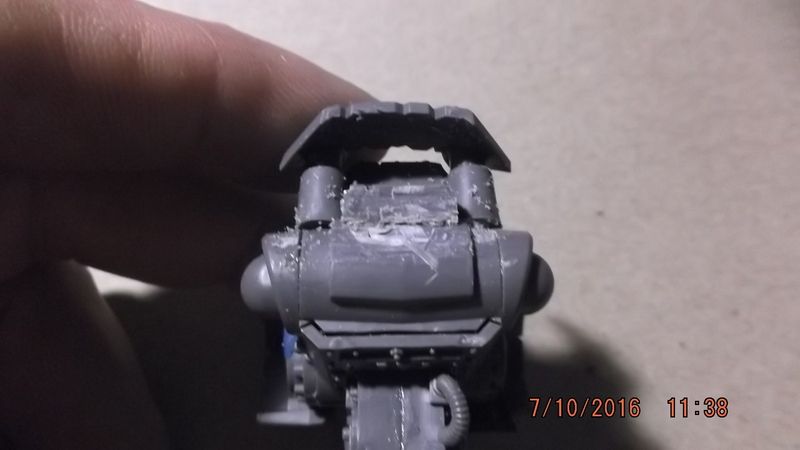
So i wanted to try using the resin treads that Machinator from Blood and Skulls sent free along with the treads i used on the drop pod. What he gave me was several tracks of his Krusher pattern set. Let me tell you straight off, this idea was a fail, not because of his treads, the Tamiya wheels, or Gale Force Nine's super glue. The fail is in actually getting all three to work together. The glue works great as long as your not trying to glue resin to after market plastic. The plastic wheels work fine as long as your glueing them to a piece of plasticard, somewhat. I've found that the glue and the plastic just do not like each other and so you have to do a bit of extra to get them working right. You have to score the plastic so its not smooth, and in some cases I've had to go So far as to use pins.
Eventually, i gave up and dug into my very limited supply of resin wheels and ended up here.

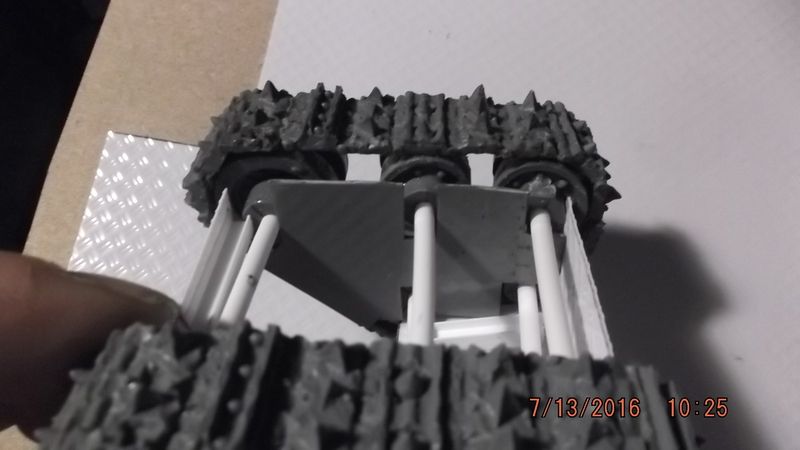
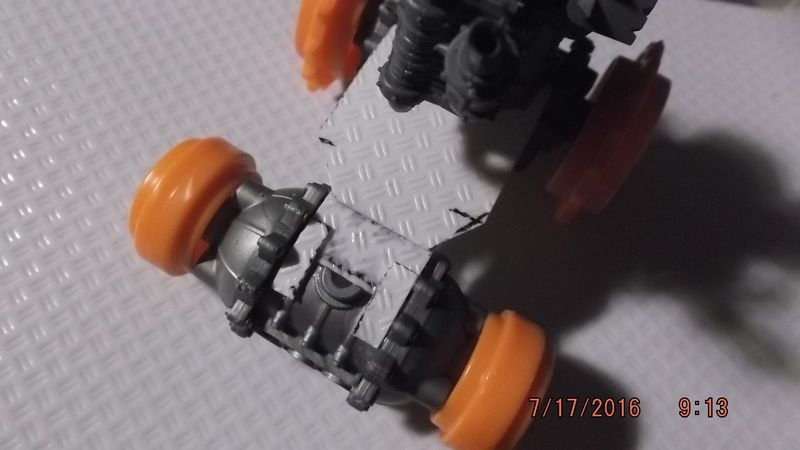
This one shows the axles being attached prior to plating for the body.
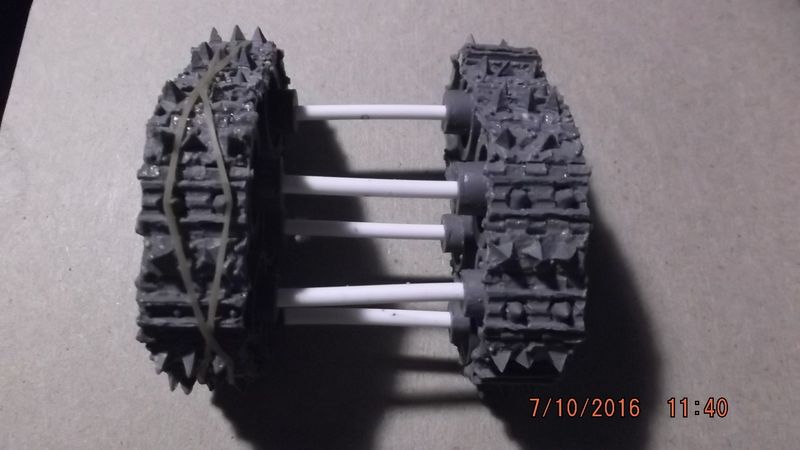
Yes the one axle is off kilter. For sone reason i still don't know, the one set of tracks didn't line up the same as the other set, but they are very close, so as long as you can't see the axle you can't really tell the difference, but hey, that's orky building for you.
Now, i had already built all five kans, leaving off the legs, back when i started working on that first tracked Kan. Btw, these will be henceforth refered to as Killatracks. At any rate i had to go back in and remove some gubbins from the bottom of the Kan. This was so i could glue the body to track plating.
One thing I've noticed with This camera is that its very specific about what it brings into focus and what it doesn't, as you'll see in This next pic. I started adding plating to the tracks, in some cases like the bottom, I was able to directly use the axle rods to glue the plates to. Other areas required using extra, in this pic I used a piece of H beam, but honestly anything would work, square rod/tubing, gw sprue, angle beams, etc.
This pic has better focus than the last one. I think my hands shook just ever so slightly on the last one, and that's why it lost some sharpness to the picture.
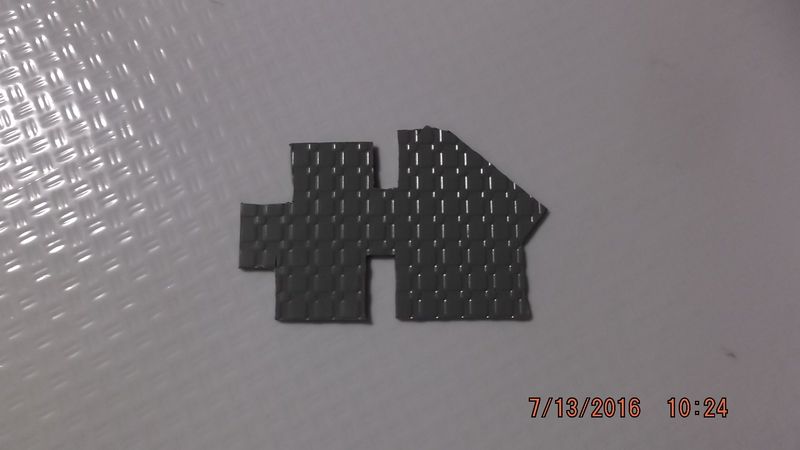
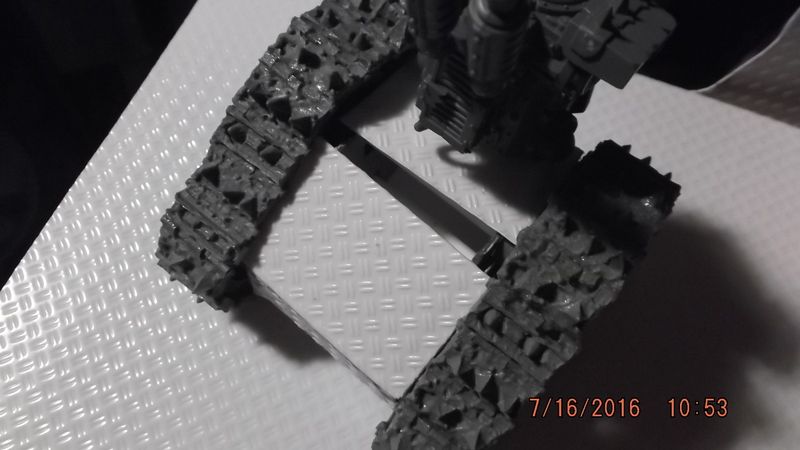
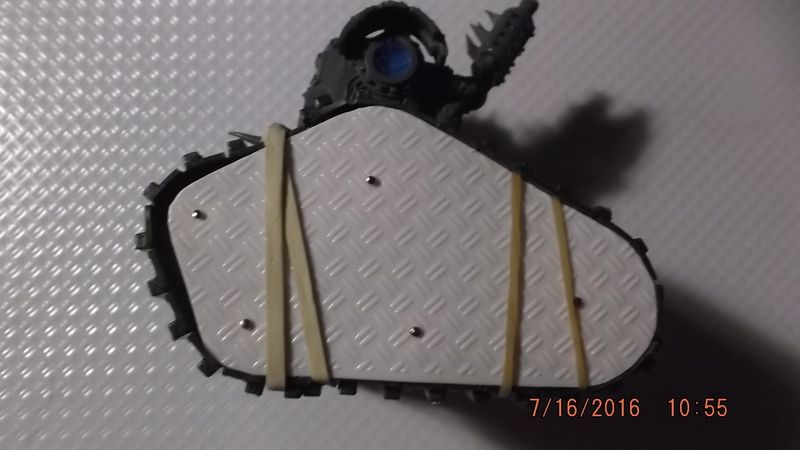
I wanted to close off the backside of the tracks as well in order to hide the giant hollow area between the tracks. Kinda pointless to block off the area with plating only to leave it visible between the wheels. So using cardboard and some ingenuity I finally got this piece of plating for the inside of the tracks. I had to do some dry fitting and fine tune some cuts, but finally got it to fit in properly. I'm not sure what it is, other than plastic. I found it walking home from work one morning and snagged it up. It was a rather large piece about three feet square, and it seems to be primered already. When you cut it, you can see a darker layer in the middle. Doesn't matter to me though, its in a pattern I've never seen on plasticard sheeting so as far as I'm concerned its a bonus.
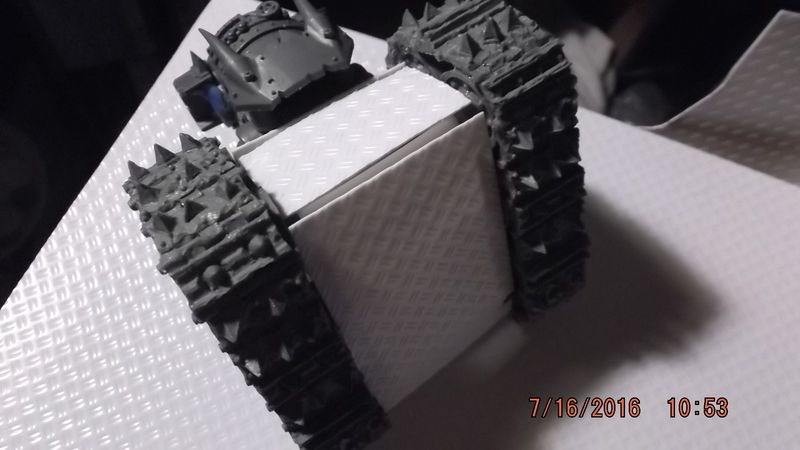
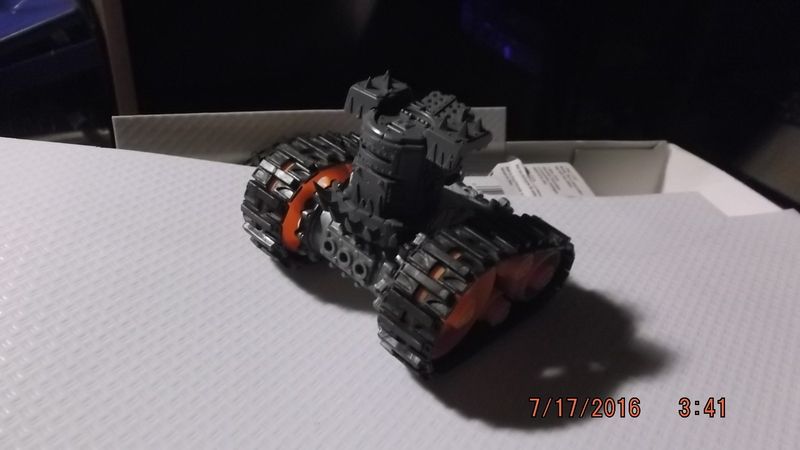
Here's the body of the Kan attached to the track body, this is the back of the Kan, and the next is front/bottom.
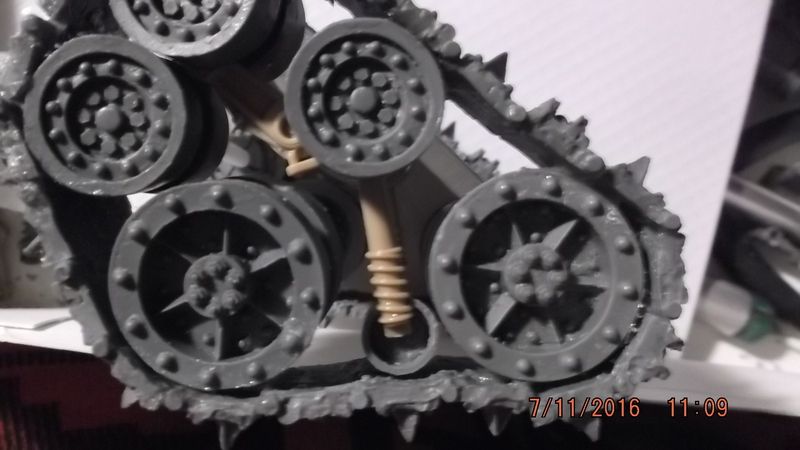
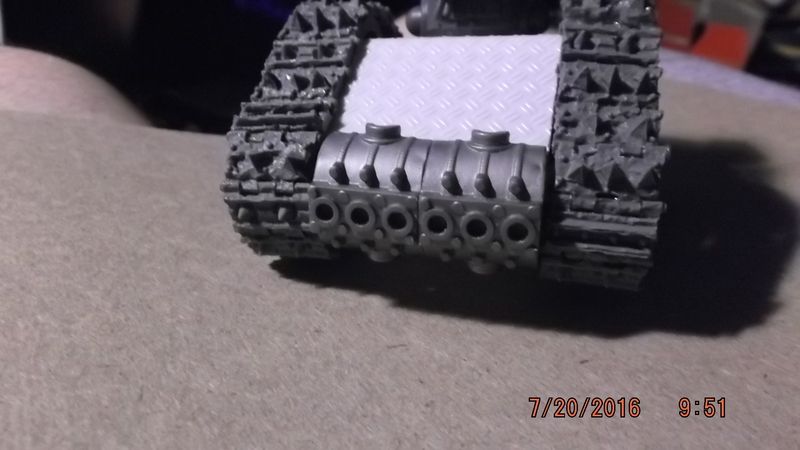
I still had a large gap in the wheels that I didn't like. So again using some tamiya parts and ingenuity, i ended up with the following. In This first pic the actual tamiya product is on top and the modified piece for Kan is the bottom.
This is nothing more than a spacer to widen the resin wheels, thus enabling them to fit blood and skull tracks of different widths.
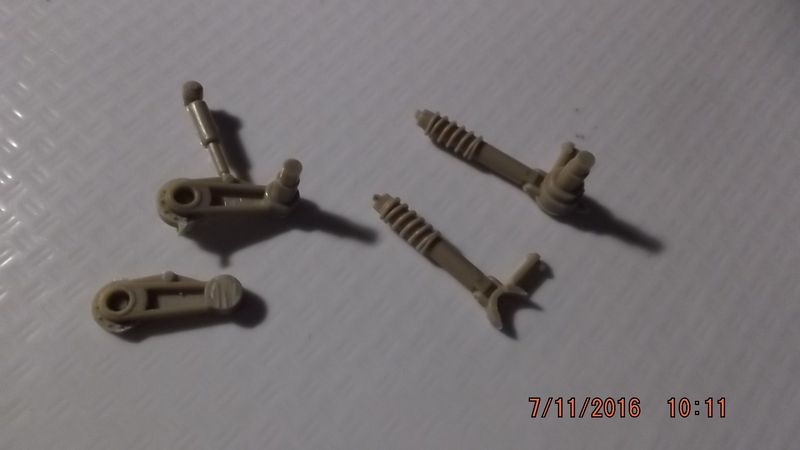
Here we see the leg attachment for the kans cut off From the others. In the second pic you can see where i cut into and created a rounded channel to fit the shock absorber into.
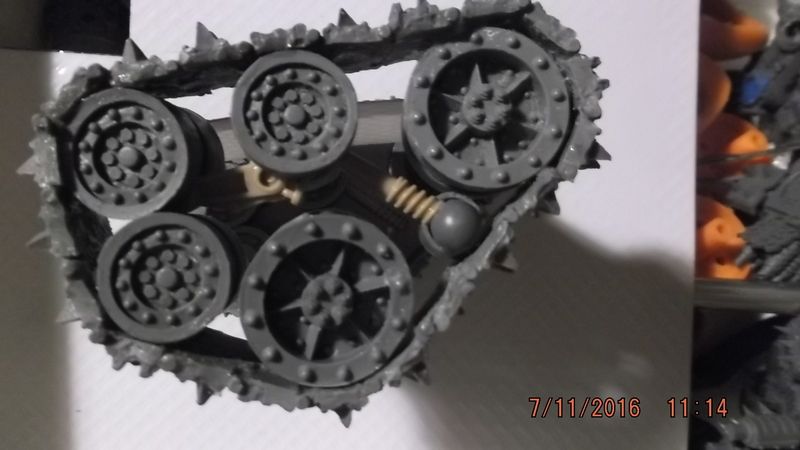
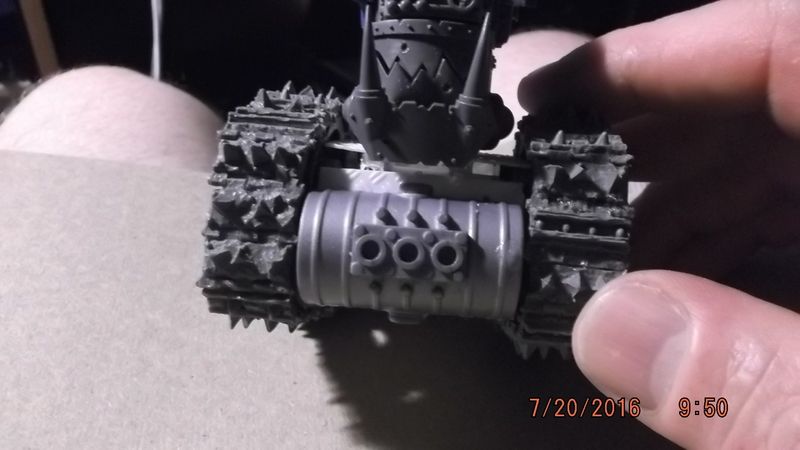
The new and improved gubbins is added to the track, thus filling in the gaps.
The spacer is added to the back to create a more stable platform for the shock and to stimulate the body of the shock tower.
And Here we cap the shock tower off. Not quite a perfect match, but with a bit of liquid green stuff no one will notice unless they look really, really closely, and that's Not likely to happen on the table top.
So there you have it. The second Killatracks done. I didn't get much sleep yesterday, and several times I've almost nodded off while posting this, so I'll end here for now. After I've gotten some more sleep, and since i have tomorrow off work like i did tonight, I'll finish posting the work for the Killatracks number three and four.
Goodnight and i hope you like this Kan version. Again constructive criticism is always welcome.
|
fav movie quotes: "Well let's put her in charge man! - - "Step up to red alert." "Are you sure sir? It does mean changing the bulb." - - "The escape pods not an option, it escaped last Thursday."
Kirasu - Q: What comes out of an Eldar cocoon? A: Corsair butterflies!
|
|
|
|
|
2016/07/27 15:37:20
Subject: Re:looted drop pod and udder stuff
|
|
Sneaky Striking Scorpion
|
Right, so here i am again getting ready to finish the wip post for Killatracks number three and four, but before i get into that there's something else that needs touched on first.
So lets start with the vegetables on this plate. That would be the camera. I really need to know if the pics on the new camera look better than the ones taken with my phone. To me they seem to be a tad bit clearer, more focused, and sharper than the phones, but Since I'm viewing them via the phone to post on here its hard to tell on some of them. So please, give me feedback on this folks it would be appreciated.
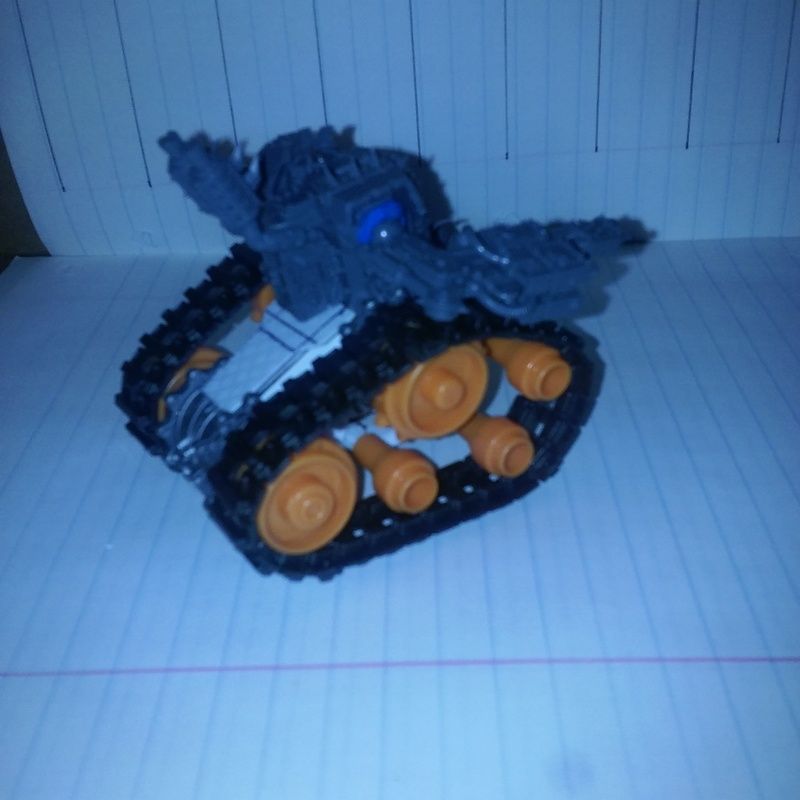
Now for the potatoes on the plate. Remember Killatrack number one? The one that's way up there near the top of the page? If you go back and look, it still had open air between the tracks, well not anymore.
It wasn't intentional but it came out with this interesting little shelf on the front. Its to small to put a grot turret on, but it is big enough to either A) stick a set of guns into the holes, with ammo belts running down into the plate or B) put a small hatch there and have a grot sticking out either just peeking or maybe aiming his slugga at the enemy. Not sure which to do yet, any further ideas from you or your fav choice of the above options will help the decision process. Here's the pic so you have the idea.
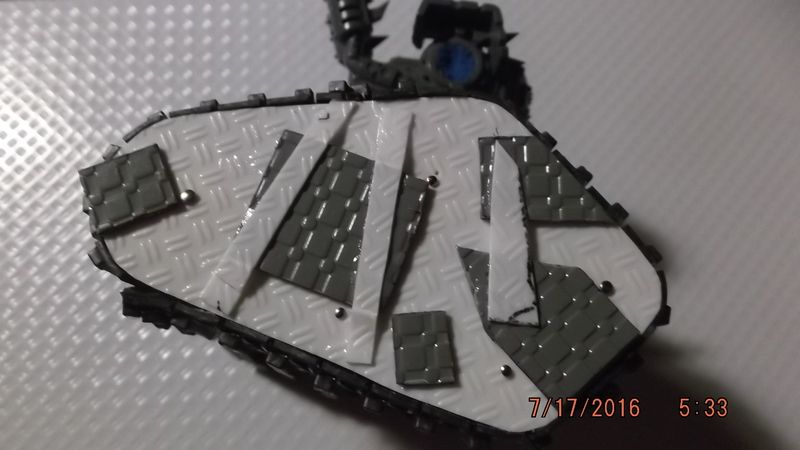
I also decided that since the plastic tamiya wheels aren't very detailed I'd give this guy armor plating which would hide the vacuum between the tracks and still look different from the other Killatracks. I had to score the wheels and use pins to hold the plate on.
As a break from building the other Killatracks, i keep jumping back to this one. This time i started adding detail to the track armor to break up that giant plate.

Taking another break, and this time added detail to the other side. Pretty much the only thing to do now is to finish the edging, add rivets, more exhaust pipes, and detail that front shelf.
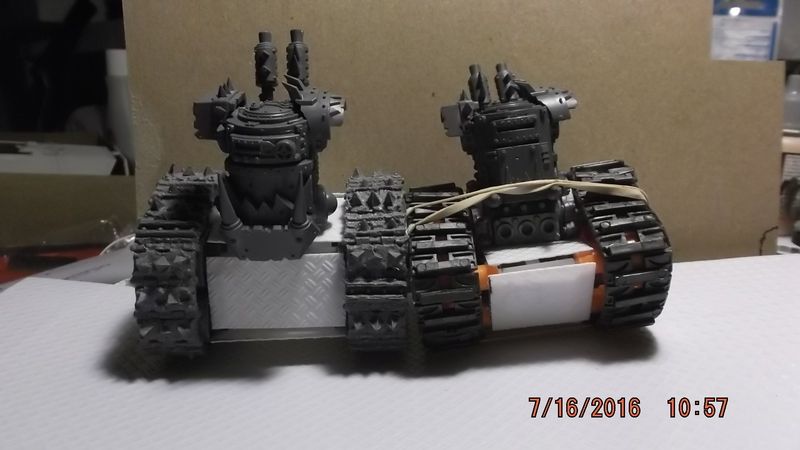
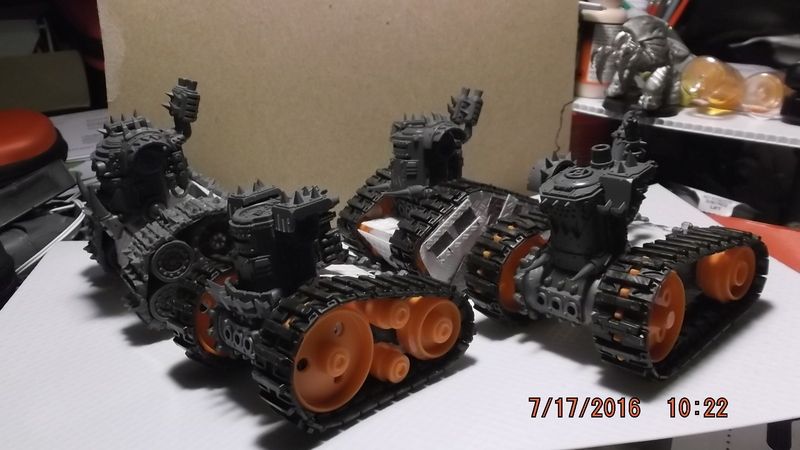
Here's some pics of numbers one and two side by side. As you can see number two came out even taller than number one. They do look rather intimidating though.
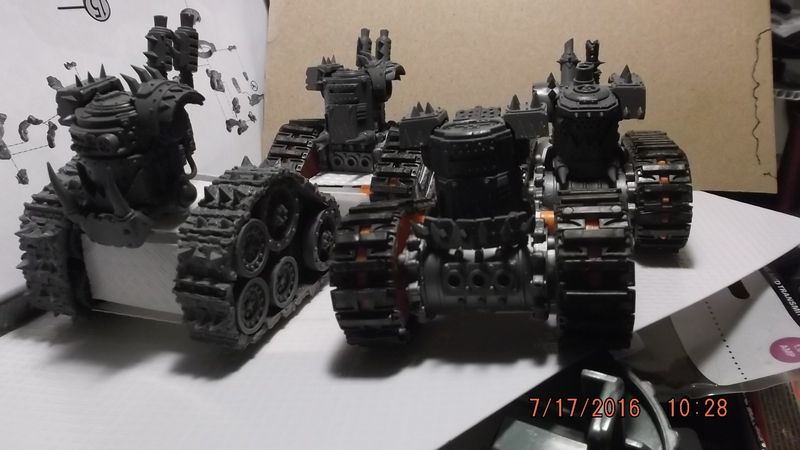
Now on to the meat, and then finally desert. You'll like the desert, i can promise you that.
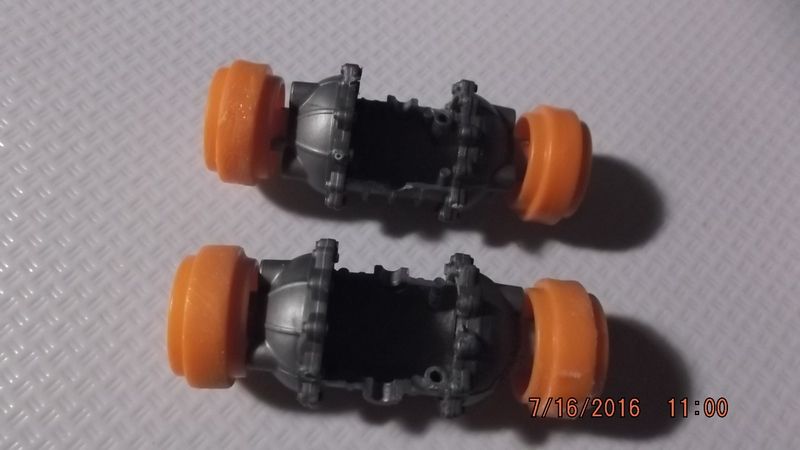
Allright, with Killatracks number three and four, i wanted them to look different from the other two and i wanted them smaller. Since all of these Killatracks are basically experiments in the works, i can't really go wrong. All i end up doing is finalizing a build process into what i actually want so i know what to do in the future. Especially Since i want three formations of nine kans each. I also already know how i want each formation to look. This unit is obviously tracked, the next unit of nine will be wheeled, and the third unit of nine will be anti-grav. Anyways, i decided to use just one wheel for the front drive and a second idler wheel on the back, using two road wheels in between. One on top and one on bottom.
Number three.

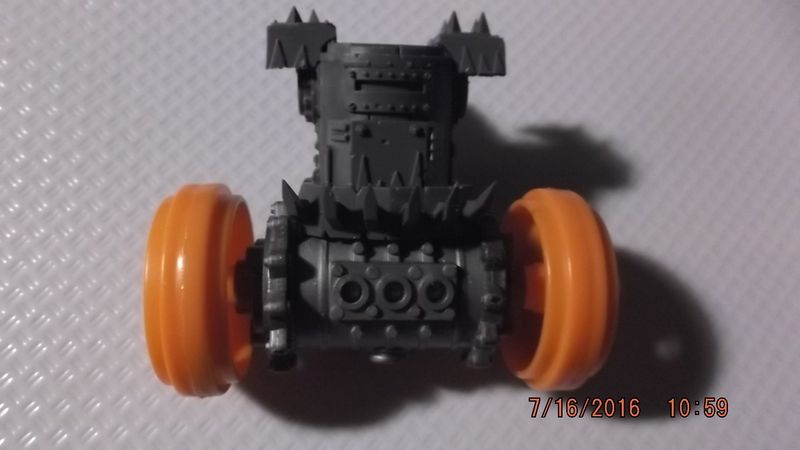
Number four.
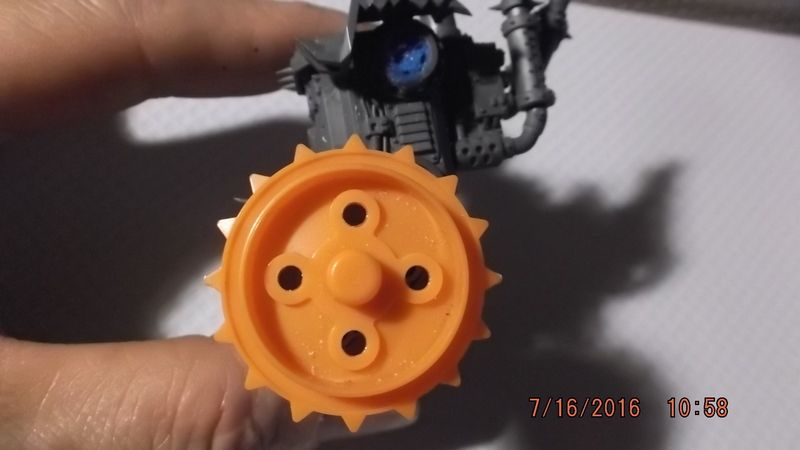
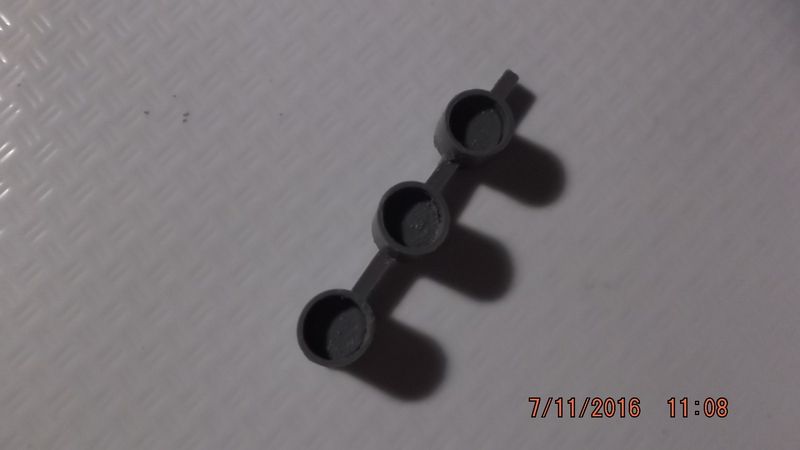
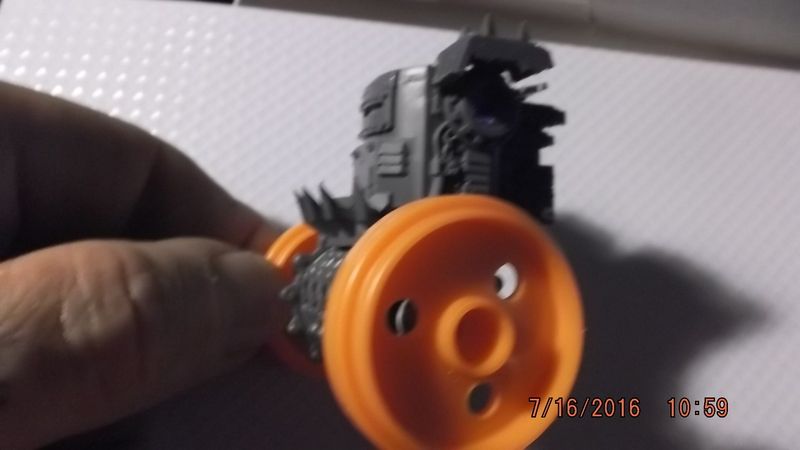
The rear idler wheels for three and four are exactly the same, so here they are in one pic, so i don't have to waste space posting another pic further down.
The inside (rear) of the idlers.
And the front (outside) of the idlers.

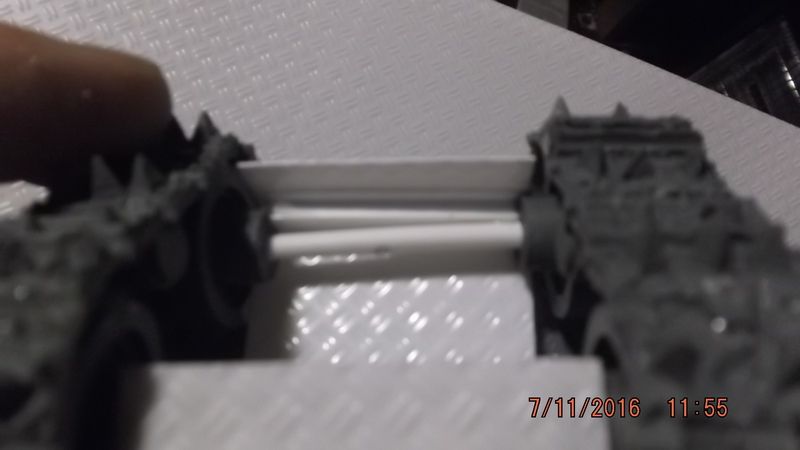
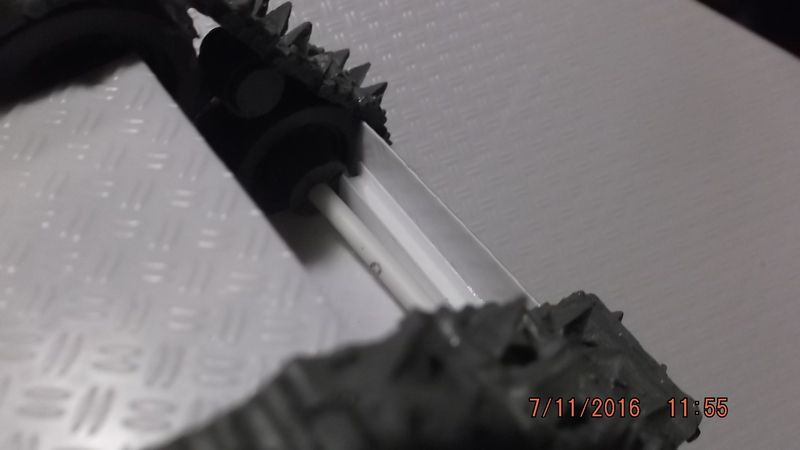
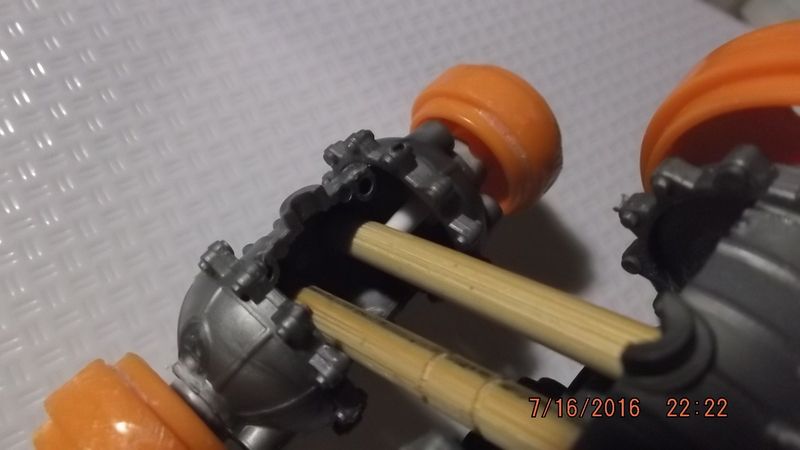
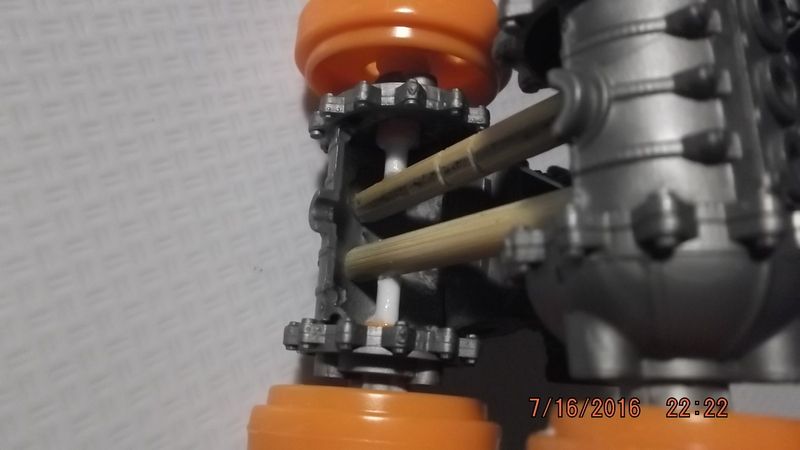
I needed a way to attach the front and rear together, and came up with this, a pair of chopsticks that were lying around cut down to size and glued in place. This gives me the length that i want and in the end it actually looks quite good, as you'll see further on.
Number three.

Number four.
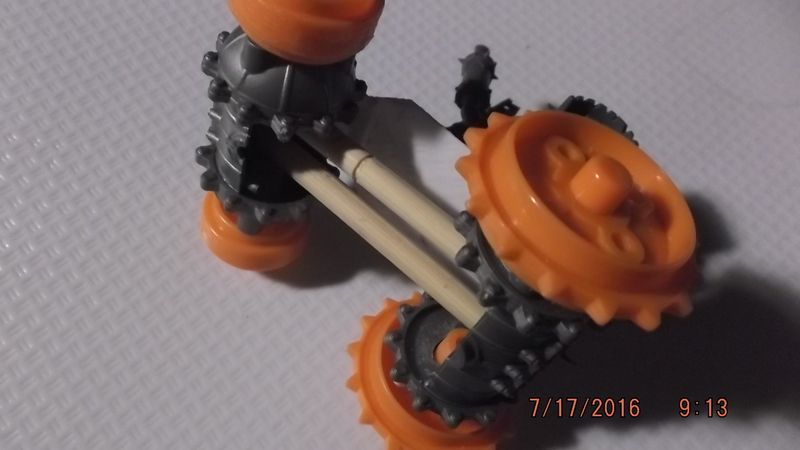
Here you can just see the tip of the plasticard rod i inserted into the wheel for a bit more stability. The rod was glued to both the inside of the Tamiya wheel and the stick. The stick was also rounded on both ends so it would glue better to the inside of the pod.
Number three.
Number four.
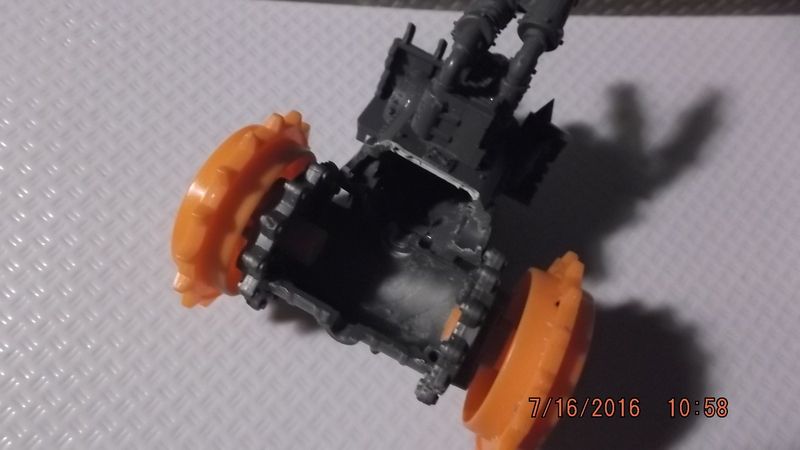
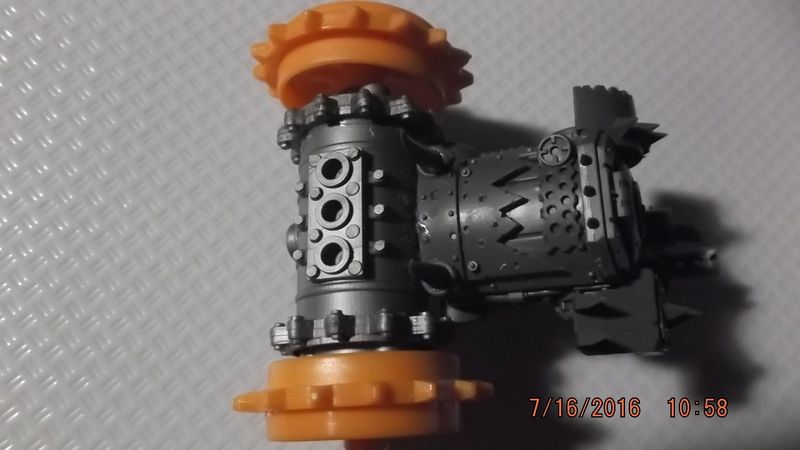
I then started plating in the bodies and adding in the road wheels.
Number three.
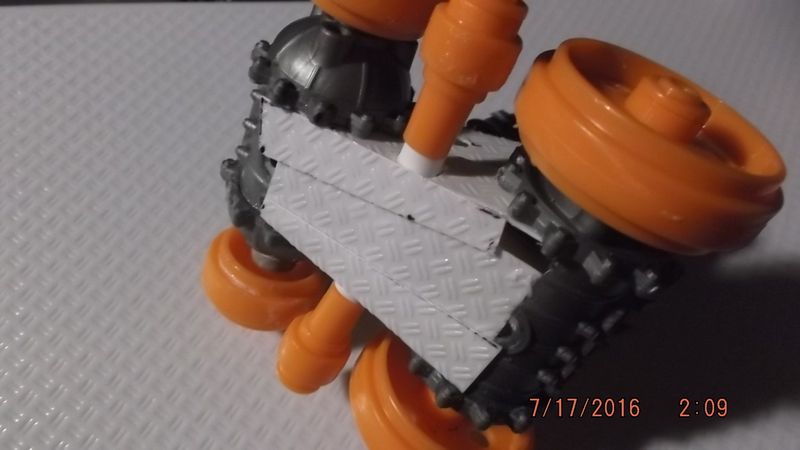
Number four.


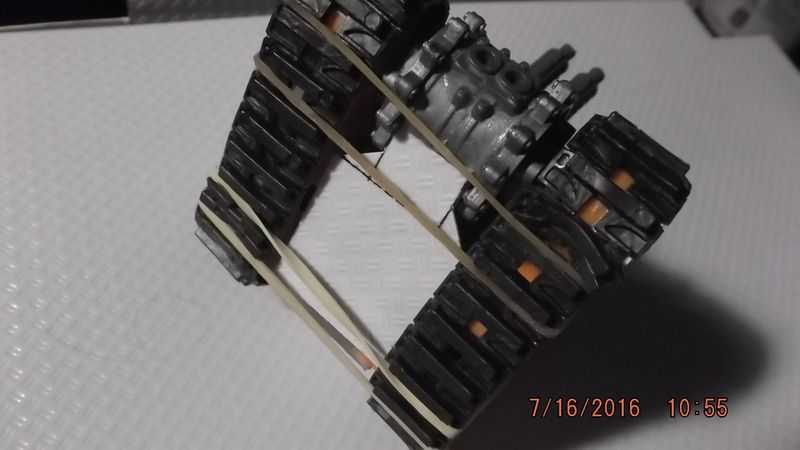
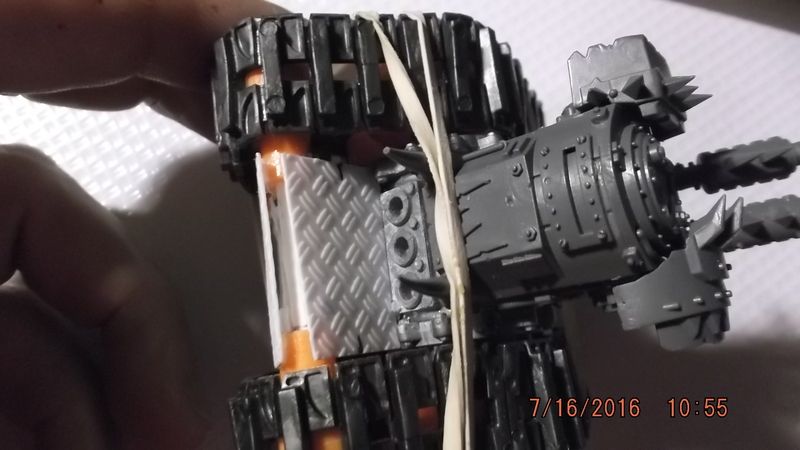
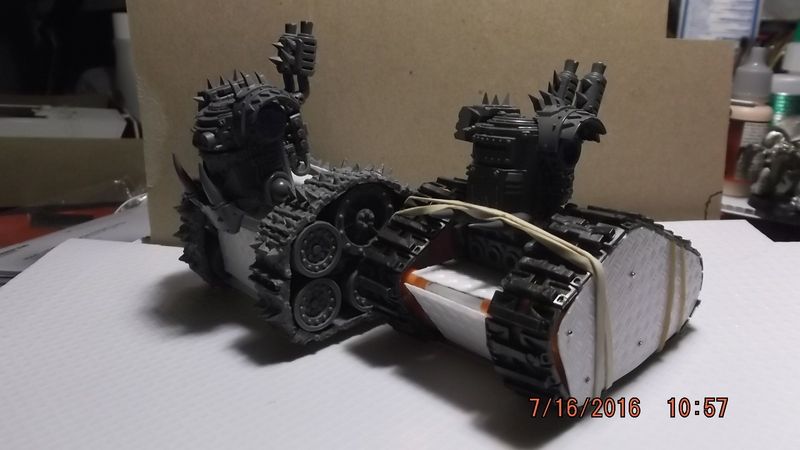
Got the road wheels in and straightened out, finished plating the body, and then added the rubber tamiya tracks onto the model. Again, only thing left is details and rivets.
Number three. The tracks actually sit a bit further away from the body on this one than they do on Number four.

Number four. I forgot to take a pic of Number four from the backside.

I went back to Number two and added detail, if you can call cheating detailing, to the front and back to have it look similar to the others.
 Automatically Appended Next Post: Automatically Appended Next Post:
But, i promised desert so here we go. All four Killatracks side by side. Even without arms, these guys just look Mean, and ready to kick ass.
That was the ice cream on the side, now for the cake.
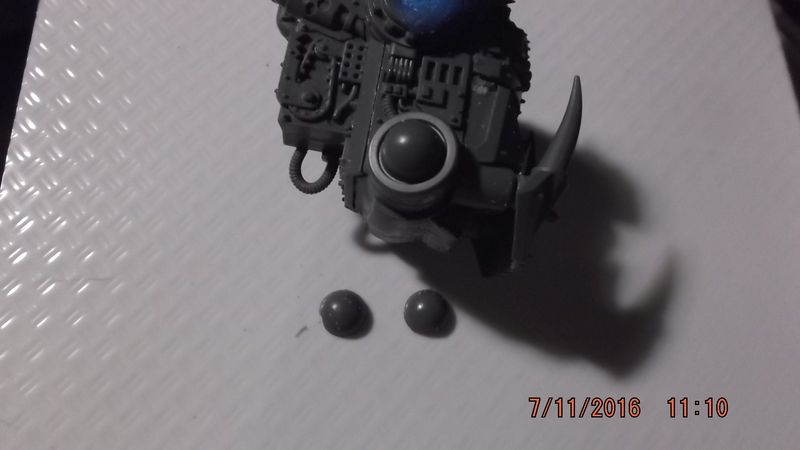
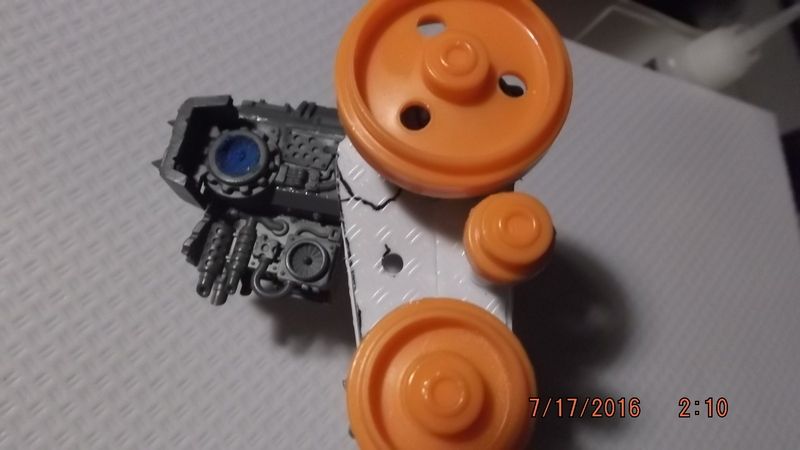
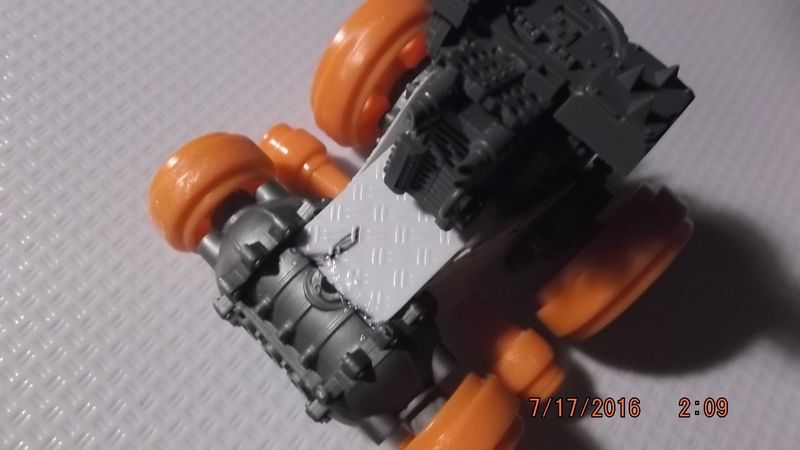
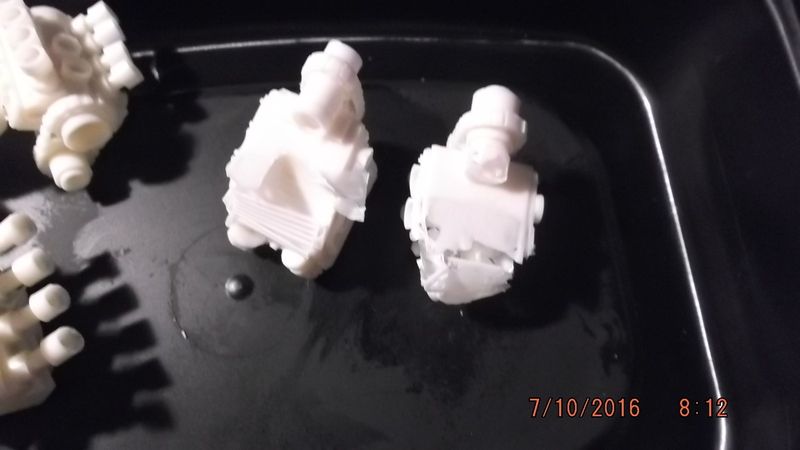
I was playing around on facebook, again, and one of the guys on the gorkamorka page was asking about resources for the game. I went in and posted a link to a gorkamorka site. I then promptly went back to the site with all the excitement of a kid in a candy store, and from there directly to Fox Box to place an order for these. These things are beautiful. Very nice casting, good detail, little to no flash or mold lines, and best of all, way cheaper than a GW Engine off EBay. And you get THREE of them in one order, that's a deal y'all just can't pass up.
Engine blocks
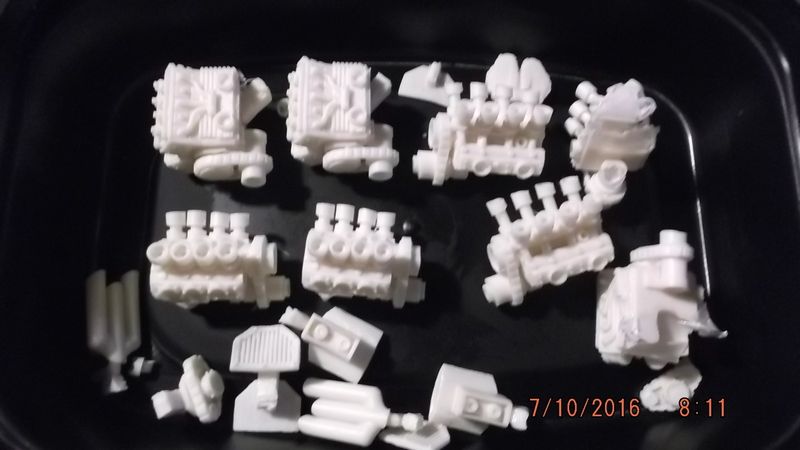
Engine gubbins
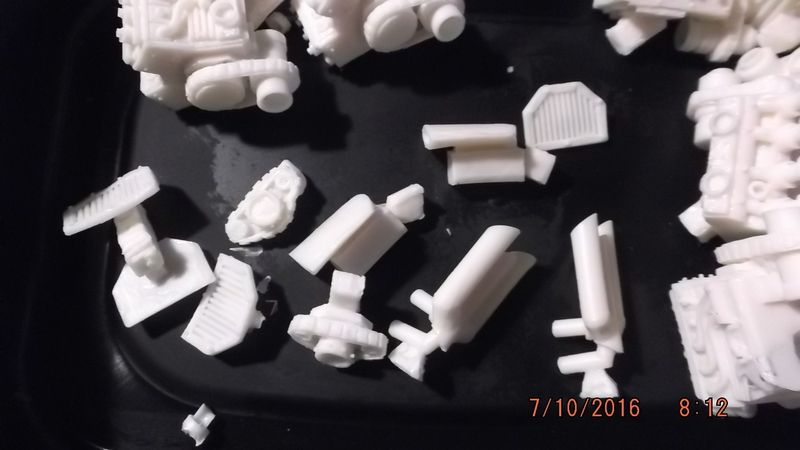
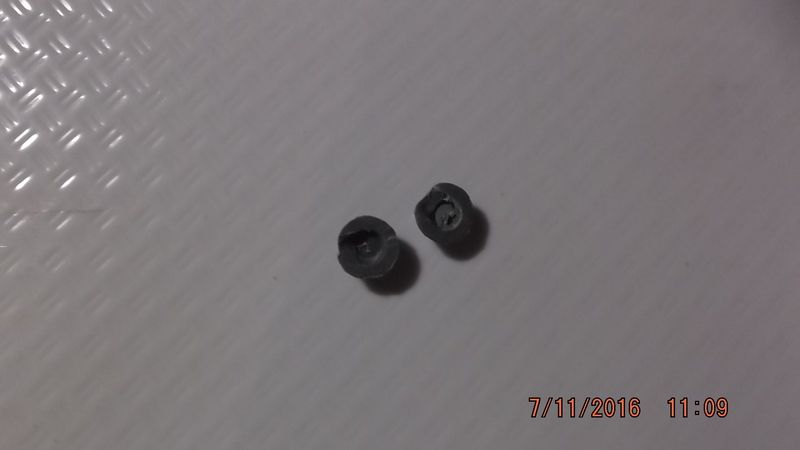
I ordered two sets for a total of six engines. When i opened my order i found these two miscasts. On further inspection i realized they sent the full order off six engines and threw in the miscasts on top of it all.
So I'm going to cut those miscasts down and use them to custom up some of muy other vehicle engines. To me that's a bonus worth having.
And now for the icing on that cake.
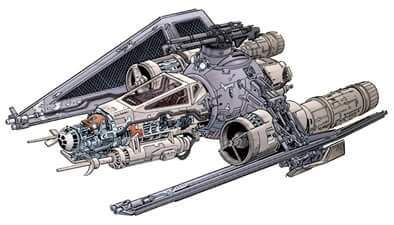
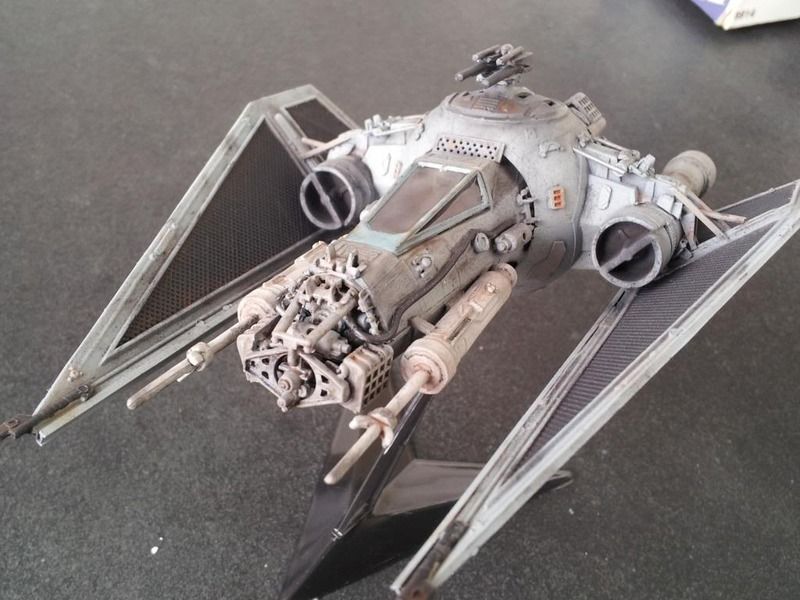
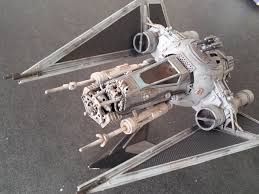
Back near the top of this page, i spoke about doing some more dakkjets, mainly the Daxwing and a looted tie fighter. Well, i couldn't figure out how to loot a tie fighter into a dakkajet. Then one day i was playing around On facebook, and On the starship modeler page a guy posted an image that i promptly searched Google for more of. This is that image and images from the search, and based off these this will become my looted dakkajet. Its known as a Z'ceptor for those who are interested. And I'm currently missing only one piece of the puzzle to start building it, as far as i know.

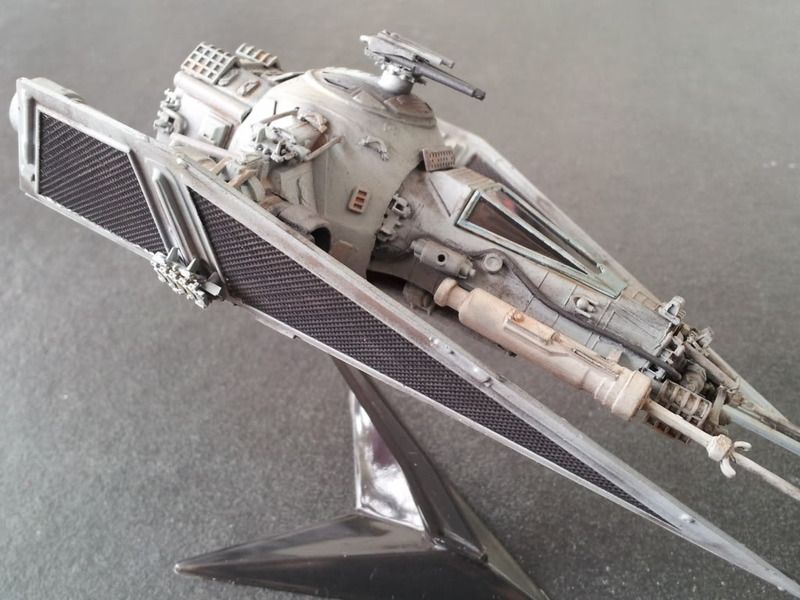

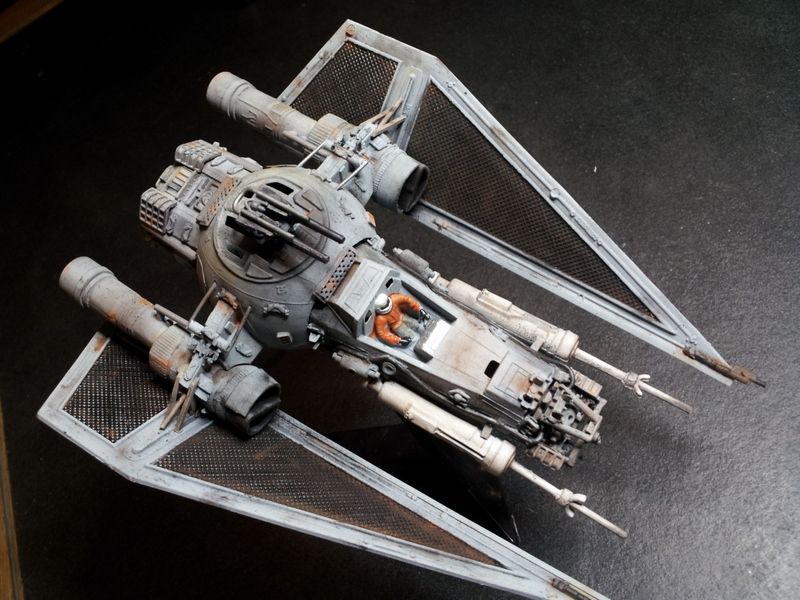
So there ya go. A full course meal for all your modeling hunger. Hope y'all enjoyed it, and I'll see y'all back here again soon for more orky shenanigans from Mek Boss Lojakk's garage.
|
|
This message was edited 1 time. Last update was at 2016/07/27 16:02:09
fav movie quotes: "Well let's put her in charge man! - - "Step up to red alert." "Are you sure sir? It does mean changing the bulb." - - "The escape pods not an option, it escaped last Thursday."
Kirasu - Q: What comes out of an Eldar cocoon? A: Corsair butterflies!
|
|
|
|
|
|
|
|