Switch Theme:

Quick and dirty bandages  [RSS] Share on facebook Share on Twitter Submit to Reddit
»
Author Message
Advert


Forum adverts like this one are shown to any user who is not logged in. Join us by filling out a tiny 3 field form and you will get your own, free, dakka user account which gives a good range of benefits to you:
  • No adverts like this in the forums anymore.
  • Times and dates in your local timezone.
  • Full tracking of what you have read so you can skip to your first unread post, easily see what has changed since you last logged in, and easily see what is new at a glance.
  • Email notifications for threads you want to watch closely.
  • Being a part of the oldest wargaming community on the net.
If you are already a member then feel free to login now.


Made in us
Despised Traitorous Cultist


The Desert

For those of you want some battle damage on your models, here is a nice tutorial.
I am using my bandages as mummy wrap on my CSM, but someone could use them as eye patches, or on limbs to represent bandages as well (it would look nice on IG units)
Once I get back from class today, I will add pictures for every step to make it easier for people.


Supplies needed:

White Glue (like Elmer's school)
Model Glue
Printer paper
Razorblade (or scissors)
A dirty paintbrush you don't care about


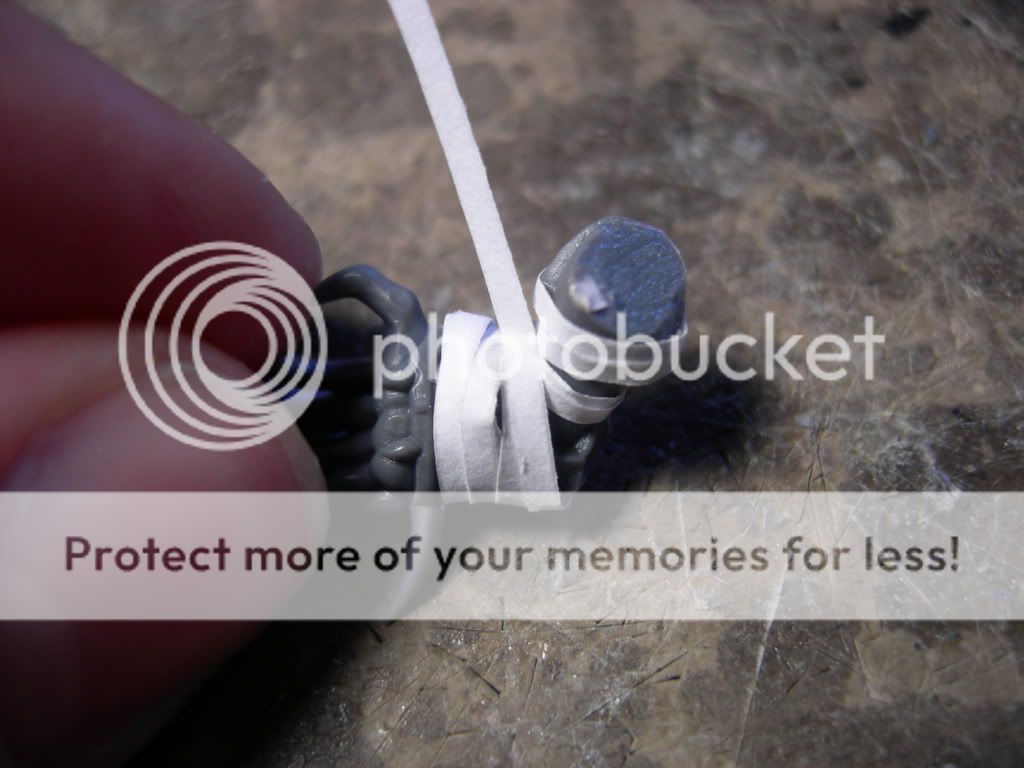
Step 1. Cut the paper into strips that are thin enough to your needs.


Step 2. Place a small dab of model glue on the desired starting point for the bandage. Let it dry.


Step 3. Once it is dry, wrap the desired piece until you are satisfied, or your strip runs out. Then use another small dab of superglue to hold it in place.


Step 4. Once it is dry again, take your paint brush and dip it in the glue. Put a medium thickness glaze around the entire area that was covered. It might take 2 or more coats for the paper to harden, so be patient.


Step 5. Once your model is dry, it is read for paint. Prep it like you would any normal paint job (including primer).

Step 6. Optional. If you want it to look dirty, here is how I painted mine. Using a slighly off-white base, I covered all the bandage areas. I then put a heavy coat of ogryn flesh wash over the entire bandage to give it a weathered effect.

Your final results should look similiar to this


Edit (9/29/10)
Here are some better pictures of the final result.


This message was edited 3 times. Last update was at 2010/09/29 21:47:05


Made in gb
Ork-Hunting Inquisitorial Xenokiller


Lovely Stuff. I'm gonna have to try this on some of my Imperial Guard. Have you got a blog or something on your Mummy-Marines. They look rather interesting.

On-Dakka Deathwatch Blog

DA:90S-GM--B++I+Pw40k#--D++A++/eWD305R++T(M)DM+

[TYRANIDS] - Recycle, the posibilities are endless.


Made in us
Despised Traitorous Cultist


The Desert

I don't have a blog, but I have a WIP thread for my entire army here http://www.dakkadakka.com/dakkaforum/posts/list/316840.page


Added more pictures on the process.

This message was edited 1 time. Last update was at 2010/09/13 21:08:59


Made in us
Lone Wolf Sentinel Pilot


In Revelation Space

Lol. That would be so hilarious to field with a squad of regular, non battle damaged marines. I think if I used this, I wouldn't make my space Marine Look like a mummy. I'd just put the bandages around his arms and stuff. (They are even over his face in the picture, wtf?)


http://www.spacex.com/company.php
http://www.penny4nasa.org/ SUPPORT MORE FUNDING FOR NASA

May the the blessings of His Grace the Emperor tumble down upon you like a golden fog. (Only a VERY select few will get this reference. And it's not from 40k. )


Made in us
Furious Fire Dragon


ROK

Mumrines... meh why not.

Nothing currently, got out of the hobby, maybe getting back in? 
   
Made in us
Hunting Glade Guard


it looks like hes flipping me off

2500 points Hive Fleet Hydra
7000 points Sons of Lucifer
looking start 
   
Made in us
Crafty Bray Shaman


OH MY GOD THE SECOND MODEL IS AWESOME!!!!

Sorry, Egyptian fan since 3rd grade.


Made in us
Wicked Warp Spider


Chicago

While this is a great idea for display minis, I'd really recommend against using this method for minis you intend to game with. That paper (even heavy bond "printer" paper) simply won't hold up over time.

The constant in-and-out of bags/cases, abuse on the tabletop, not to mention any unfortunate accidents could easily gouge and tear the paper.
   
Made in us
Chalice-Wielding Sanguinary High Priest


Arlington TX, but want to be back in Seattle WA

thats a pretty cool technique.....if I ever want to mummify space marines?

4250 points of Blood Angels goodness, sweet and silky W12-L6-D4
1000 points of Teil-Shan (my own scheme) Eldar Craftworld in progress
800 points of unassembled Urban themed Imperial Guard
650 points of my do-it-yourself Tempest Guard
675 points of Commoraghs finest!

The Dude - "Jackie Treehorn treats objects like women, man."

Lord Helmet - "I bet she gives great helmet."


Made in us
Despised Traitorous Cultist


The Desert

ancientsociety wrote:While this is a great idea for display minis, I'd really recommend against using this method for minis you intend to game with. That paper (even heavy bond "printer" paper) simply won't hold up over time.

The constant in-and-out of bags/cases, abuse on the tabletop, not to mention any unfortunate accidents could easily gouge and tear the paper.


The glue hardens over the paper, making it just as durable as the plastic the minis are made out of. I have used the models in about 30 games, and taken moved it around constantly between cases without any wear. If you held the model in your hand and felt the wraps, you would think they were made from GS.

Element206 wrote:thats a pretty cool technique.....if I ever want to mummify space marines?

I was thinking that someone could use them for bandages (like a quick wrap around an arm or headbands) for IG.

This message was edited 5 times. Last update was at 2010/10/16 21:32:53


Forum Index » Painting & Modeling Tutorials
Go to: