Switch Theme:

Step-by-step Waterslide Decals  [RSS] Share on facebook Share on Twitter Submit to Reddit
»
Author Message
Advert


Forum adverts like this one are shown to any user who is not logged in. Join us by filling out a tiny 3 field form and you will get your own, free, dakka user account which gives a good range of benefits to you:
  • No adverts like this in the forums anymore.
  • Times and dates in your local timezone.
  • Full tracking of what you have read so you can skip to your first unread post, easily see what has changed since you last logged in, and easily see what is new at a glance.
  • Email notifications for threads you want to watch closely.
  • Being a part of the oldest wargaming community on the net.
If you are already a member then feel free to login now.


Made in gb
Longtime Dakkanaut


Nottingham, UK

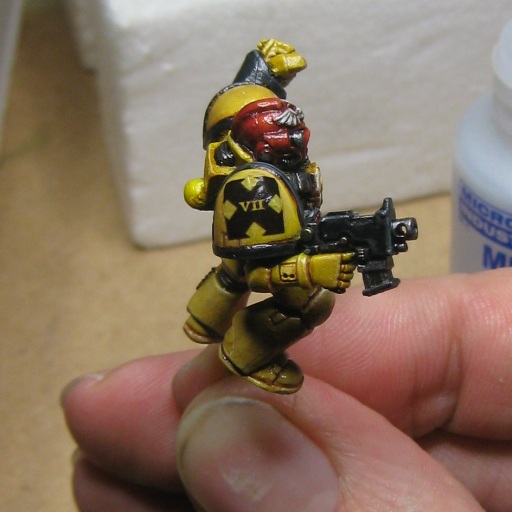
I do intend to put together a full .PDF for an IF assault marine from start to finish, so this is just a temporary thing. I see the questions asked a lot, so thought this may help.

You will need:
A sharp knife. REALLY SHARP.
A pair of good quality scissors.
A pair of really good tweezers. Mine are swiss jewellers' tweezers that I inherited from my late father. They're older than me, and will most likely survive me into the service of one of my kids.
Microsol.
Microset.
A wet pallette (without parchment) - a sponge in a tub of water is ideal.
A soft brush - a used (clean) drybrush is great.
Gloss varnish (as a seal)
Matt varnish (to finish)


Step 0: Gloss the mini! This is important, you need a flat, smooth surface for the decal to sit on. Matt surfaces have a roughness to them that will trap air under the decal, causing it to silver. You don't want this.


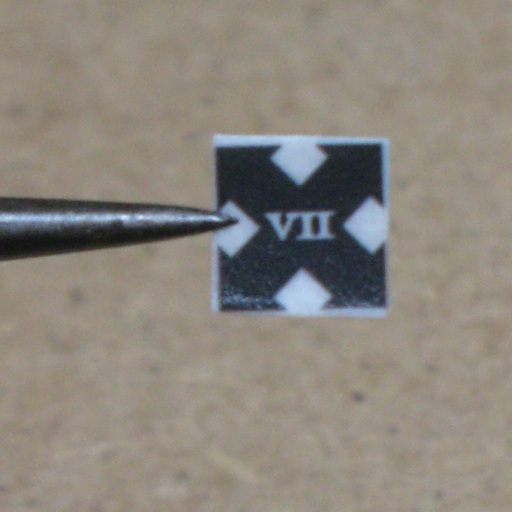
Step 1: Trim the decal you're going to apply as close as possible to the printed area. You may want to leave a little bit of film to act as a 'handle' for pulling the decal around if the decal has a lot of printed area on it.


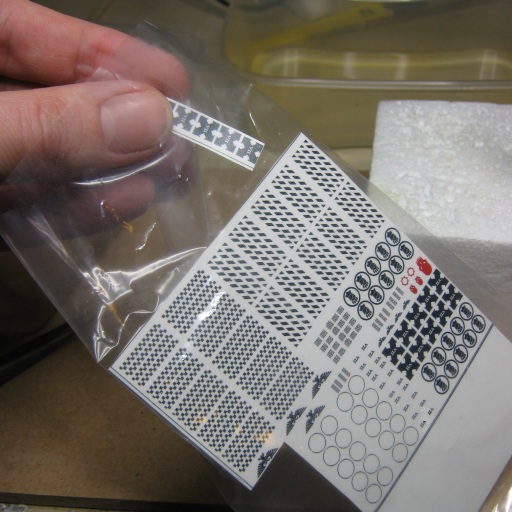
Step 2: Put the rest of the decals away. You don't want to splash them, spatter them with paint or otherwise mess with them right now. They're safest in a baggy and put aside. Honestly, don't skip this step - only have out the decals you're actually going to be immediately working with.


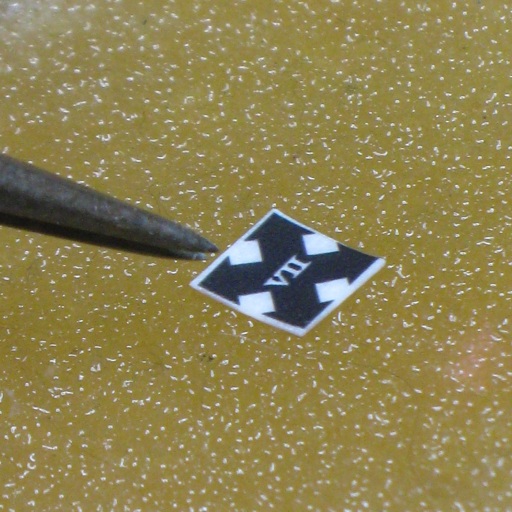
Step 3: Place the decal on your wet pallete, printed side up. The water will leech into the backing paper, loosening the decal from the other side, without running the risk of washing away your printed decal (if you possibly didn't seal it too well when printed), or washing away the adhesive. It's also a lot more controllable than having a sopping wet decal.


Step 4: Apply Microset to the glossed model. This stuff softens decal film (a bit), and also seems to improve adhesion. I've heard of folks using spirit vinegar, but I wouldn't know the concentration to use. For the sake of a couple of quid (UKP) this stuff lasts for ages and does the job.


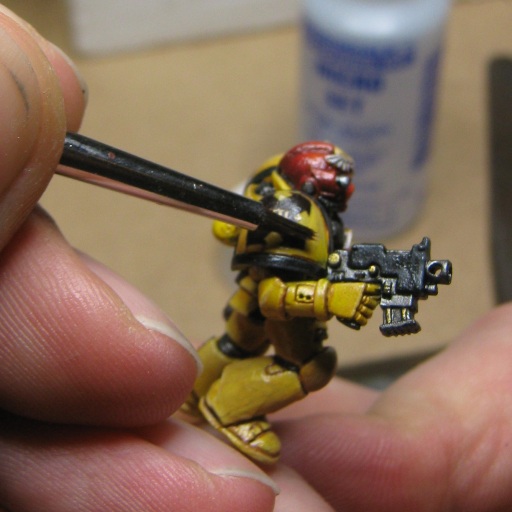
Step 5: Once the decal is loose, place the decal (on its backing paper) on the model near where you want it to be. Use the tweezers (or a cocktail stick) to gently coax the decal off the backing paper onto the model. Generally, once about 50% of the decal is in contact with the model you'll be able to draw the backing paper away. Pull, don't push - pushing will cause the decal to fold, and you don't want that.


Step 6: Adjust the position of the decal so it's in the correct place. Don't worry about it sitting flush just yet, right now it just needs to be aligned correctly - here I've paid attention to the bottom edge. You can see that the top is still loose.


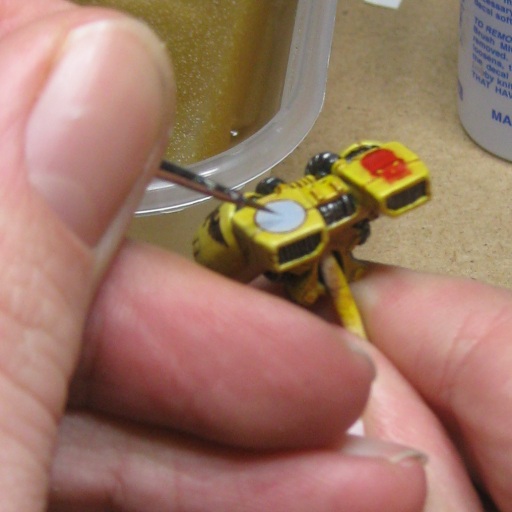
Step 7: Using the brush, start to press down with the side of the brush, rolling it slightly to start bedding the decal down. The brush will also pick up excess solution (so you'll have to dry it occasionally). The decal WILL start to fold in places on a curved surface - don't worry about this too much, just make sure you don't crease it over - it's like ironing your shirt or trousers - you work the creases to the edges. Allow the decal to rest a bit at this point, the setting solution will already be making it fragile and we now want to make sure it doesn't move.


Step 8: The decal is now nearly done - just raised in a few place. Using the brush we apply a bit of MicroSol (the stronger of the two solutions). This will really soften the decal and allow us to bed it down. However, if you move the decal now it stands a really good chance of tearing. So don't. You may notice the decal crinkle a bit - this is OK, don't panic - it will settle down as the solution evaporates.


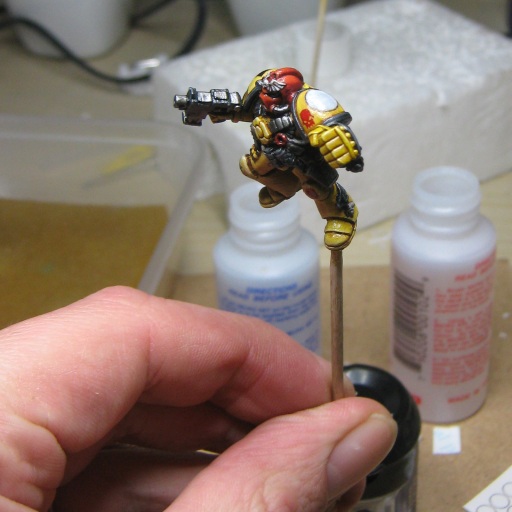
Step 9: With the brush (dry), gently press down on the decal to remove the excess solution and help the decal conform. It's pretty much a repeat of step 7, only with the stronger solution. It's really important not to move the decal at this point. Allow the decals to set. If you're not using any 2 stage decals, proceed to varnishing.


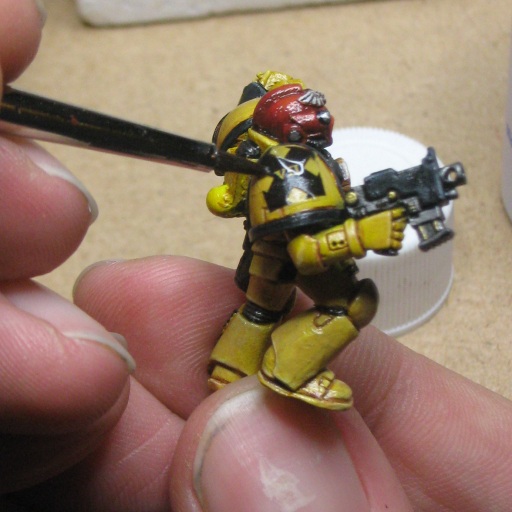
Step 10 & 11: I've used a few 2 stage decals - My IF logos don't have white on them, so the first decal I apply is a plain black ring, which I then paint in with light grey highlighted with white. I then quickly gloss again (particularly on the areas I've painted) allow that to dry, and apply the upper decal so it aligns with the black ring I put on under it.


Step 12: Varnish the mini. It's a really good idea to put on a protective gloss coat to seal the decals and protect against them being rubbed off (especially home-printed decals like these). Then matt down. Job done.


Made in gb
Longtime Dakkanaut


Nottingham, UK

The full .pdf version of this tutorial is now available via my blog.


Made in us
Last Remaining Whole C'Tan


Pleasant Valley, Iowa

1.) What are you using to "gloss the model"?
2.) What kind of paint do you use to seal the decals? I have problems with this (clarificaton - the sheet of decals after printing, not when you applying)
3.) Although this is a little offtopic, I really like how you painted that marine - I'm definitely going to paint mine differently from now on (the chest buckle, and the middle part of the jump pack).

This message was edited 1 time. Last update was at 2010/12/15 08:30:41


 lord_blackfang wrote:
Respect to the guy who subscribed just to post a massive ASCII dong in the chat and immediately get banned.

 Flinty wrote:
The benefit of slate is that its.actually a.rock with rock like properties. The downside is that it's a rock
 
   
Made in gb
Longtime Dakkanaut


Nottingham, UK

I use Klear floor polish as a gloss and as a sealant on decals. When sealing the decal sheet, apply at least three light coats through an airbrush, waiting for each to dry before doing the next. The .pdf version of the tutorial covers things in a bit more depth.

Klear in the US is known as 'Future'. In the UK they've recently (according to rumor and the bottle) changed the formula, and its usefulness for modelling purposes is now open to debate. I'll try it out at some point but last time there was a rumour about a potential stoppage/change I stocked up. A lot.

This message was edited 1 time. Last update was at 2010/12/15 10:15:48


Made in gb
Longtime Dakkanaut


Purging on ctf_2fort

This is THE best way to do decals, IMO of course. A very nice article, and a brilliant paint job!

This message was edited 2 times. Last update was at 2010/12/15 22:58:04


Made in us
Last Remaining Whole C'Tan


Pleasant Valley, Iowa

winterdyne wrote:I use Klear floor polish as a gloss and as a sealant on decals. When sealing the decal sheet, apply at least three light coats through an airbrush, waiting for each to dry before doing the next. The .pdf version of the tutorial covers things in a bit more depth.

Klear in the US is known as 'Future'. In the UK they've recently (according to rumor and the bottle) changed the formula, and its usefulness for modelling purposes is now open to debate. I'll try it out at some point but last time there was a rumour about a potential stoppage/change I stocked up. A lot.


OK, I read the PDF (and again, fantastic job). But, before I try this, I want to make 100% sure I'm on the same page as you as my question was poorly phrased - my bad.

Forget the model at all for a second. You print off your decals on an inkjet printer with decal paper. Super. At this point you need to seal the sheet of paper before it can be used. I don't know what I used the first time I did this, but it worked awesome. Unfortunately everything I've used subsequently has totally sucked: I've tried at least 4 different brands of high-gloss spray paint and none of them have given the same satisfactory results as whatever I did the first time. They all look, for lack of a better word, grainy after the paint dries. Sometimes during application, the print starts to rub off, which makes me think I didn't use enough of the sealant, but the crappy grainy effect seems to get a little worse with each coat so I usually stop at 3.

I believe you're saying I can seal the printed decal paper, after printing, with future floor polish. Is this correct? If so I'm stoked, as I have both an airbrush and a 5 year old bottle of future which I suspect might last me another 50.

 lord_blackfang wrote:
Respect to the guy who subscribed just to post a massive ASCII dong in the chat and immediately get banned.

 Flinty wrote:
The benefit of slate is that its.actually a.rock with rock like properties. The downside is that it's a rock
 
   
Made in gb
Longtime Dakkanaut


Nottingham, UK

Yep. I use Klear, which is the UK equivalent. When printing, make sure you set your printer to do it's best resolution and ink density (set for photo quality on glossy paper). LET IT DRY THOROUGHLY. Can't stress that enough. I leave mine for at leaset a couple of hours in a warm room before starting to seal them.

Partly it's this waiting time (and the waits between coats of sealant) that's made me get obsessive about looking after the decals once they're ready. It's a pain in the ass to have to go through the process all over again because of something stupid happening. And let's face it if something can go stupidly wrong, it usually does.


Made in us
Last Remaining Whole C'Tan


Pleasant Valley, Iowa

Thanks for the tip. I'll try your method this weekend.

 lord_blackfang wrote:
Respect to the guy who subscribed just to post a massive ASCII dong in the chat and immediately get banned.

 Flinty wrote:
The benefit of slate is that its.actually a.rock with rock like properties. The downside is that it's a rock
 
   
Made in ie
Regular Dakkanaut


Ireland

Wow, that decal solution sure seems to do the trick. I have only ever used water and while sticking them to flat surfaces has been fine, I have always ended up with little ripples on curved surfaces. Any online stores I can get this stuff from?
   
Made in us
Last Remaining Whole C'Tan


Pleasant Valley, Iowa

yeah, there's a few.

 lord_blackfang wrote:
Respect to the guy who subscribed just to post a massive ASCII dong in the chat and immediately get banned.

 Flinty wrote:
The benefit of slate is that its.actually a.rock with rock like properties. The downside is that it's a rock
 
   
Made in us
The New Miss Macross!


Deep Fryer of Mount Doom

thanks for the great article. i found out the hard way that decals look alot better with a gloss surface under them and ended up having to lightly paint over a decal on the "clear" areas that were cloudy since i applied them to a completely matte surface. :( eh, lesson learned and just in time for me to make my first baneblade with even bigger decals.

with microsol, do you wait until the decal has dried to apply it or do you pretty much do those first few steps one right after another?
   
Made in gb
Drop Trooper with Demo Charge


Bedfordshire, United Kingdom

I tend to let it dry before applying the second soloution. If its a paticualy old decal or a uneaven surface multiple coats of te second solotion work well. Also if you do get silvering pricking it with a knife can aleviate it.

If your using commercial decals like GW or Forgeworld produce you dont need to varnish them on the sheet, they are screen printed and varnished as part of the process.
   
Made in gb
Longtime Dakkanaut


Nottingham, UK

Remember to use a *really* soft brush for the decal solutions. Too stiff and it can tear the decal. Well used (but clean) drybrushes are great as they get nice and soft.


Made in us
Powerful Orc Big'Un


Somewhere in the steamy jungles of the south...

This technique seems a bit...overkill. I usually just apply the decals before I seal the model, and I just use an Olfa snap-off blade, a brush, and some cold water. It works pretty well.

I do applaud you for having the patience to do it this way, plus the tutorial is very well written.

_Tim?


Forum Index » Painting & Modeling Tutorials
Go to: