| Author |
Message |
 |
|
|
|
|
Advert
|
Forum adverts like this one are shown to any user who is not logged in. Join us by filling out a tiny 3 field form and you will get your own, free, dakka user account which gives a good range of benefits to you:
- No adverts like this in the forums anymore.
- Times and dates in your local timezone.
- Full tracking of what you have read so you can skip to your first unread post, easily see what has changed since you last logged in, and easily see what is new at a glance.
- Email notifications for threads you want to watch closely.
- Being a part of the oldest wargaming community on the net.
If you are already a member then feel free to login now. |
|
 |
2011/04/24 12:38:12
Subject: Modelling hands in Milliput / Greenstuff
|
|

Repentia Mistress
|
Hi All,
I'm doing some conversions at the moment using old school 2nd ed models (eldar guardian bodies) with 5th ed. weapons (tau pulse carbines).
The one component I have zero of is hands. The carbine bits (right arm) have hands attached but the 'other' (left) hands I need to model somehow.
Does anyone have any advice regarding modelling/sculpting of hands, perhaps using milliput?
I've tried a few test pieces but all I get is models that look like they are wearing winter mittens.
TT
|
|
This message was edited 1 time. Last update was at 2011/04/24 15:37:17
|
|
|
 |
|
2011/04/24 20:23:39
Subject: Modelling hands in Milliput / Greenstuff
|
|
Regular Dakkanaut
Stevenage, Herts, UK
|
Perhaps you could post pics of what you have done, so we could advise you how to improve...?
Thanks
Stuart
|
Sculptor of miniatures

Follow me on Twitter: @Silent_Spectre |
|
|
|
|
2011/04/24 21:06:07
Subject: Modelling hands in Milliput / Greenstuff
|
|
Repentia Mistress
|
Will do so when I return home... tomorrow afternoon most probably.
|
|
|
|
|
2011/04/24 21:12:52
Subject: Modelling hands in Milliput / Greenstuff
|
|
Avatar of the Bloody-Handed God
Inside your mind, corrupting the pathways
|
To sculpt hands around the barrel of the gun:
Place a thin (1mm) thick strip of the putty in the place you want the hand to be, wrapped around the barrel in a "U" shape. Gently press into place and smooth the top surface.
Take a sharp blade and wet it - trimming the strip into the approximate size and shape of the hand, trimming most of the back portion of the "U" off to leave what will be the thumb.
Taking a sculpting tool, or the sharp blade, wet it and gently score 3 lines in the front part of the "U" to create the fingers. Gently round the tips of the fingers and thumb.
Allow to set.
Place a small ball of putty on the base of the hand (the bottom of the "U") and smooth into the fingers to create the main body of the hand and wrist.
Depending on the trigger/handle set up on the gun, it is a similar process to sculpt the other hand.
|
|
|
|
|
|
2011/04/24 21:29:26
Subject: Modelling hands in Milliput / Greenstuff
|
|
Repentia Mistress
|
Thanks for the replys. I have taken a photo using the laptops atrocious camera.
I did try the approxmiate procedure as outlined by silvermk2 last night, but all I got were hugely bulbous hands. I'm unsure if this is due to the material (milliput), the blade I was using, or something else. The best I can do is this 'mitten' you see below.
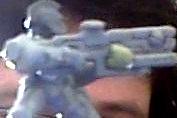
Any help would be greatly appreciated. I am a beginner with sculpting so this might be the biggest factor!
|
|
|
|
|
2011/04/24 21:35:23
Subject: Modelling hands in Milliput / Greenstuff
|
|
Avatar of the Bloody-Handed God
Inside your mind, corrupting the pathways
|
Looks like you need to use a lot less putty - as I say, somewhere around 1mm thick is ideal.
When you score the grooves for the fingers, you can "rock" the blade/tool from side to side to press the putty from the grooves into the fingers, creating almost triangular fingers. Then you can gently smooth them down using your finger (dip it in water first and dry off the excess - you want damp rather than soaking) by drawing your finger along the ridges and very gently pressing down (the lightest of strokes).
This will round the triangular shape and make it more finger-like.
|
|
This message was edited 2 times. Last update was at 2011/04/24 21:35:56
|
|
|
|
|
2011/04/25 08:04:00
Subject: Modelling hands in Milliput / Greenstuff
|
|
Repentia Mistress
|
OK thanks silver I will give your exact procedure a try. If I make good progress I will post the results up.
|
|
|
|
|
2011/04/25 08:22:39
Subject: Modelling hands in Milliput / Greenstuff
|
|
Avatar of the Bloody-Handed God
Inside your mind, corrupting the pathways
|
Good luck  Edit: Also, if you mix more yellow into the mixture, it will create a softer putty that is easier to get nice smooth shapes with (takes longer to cure though).
|
|
This message was edited 1 time. Last update was at 2011/04/25 08:23:53
|
|
|
|
|
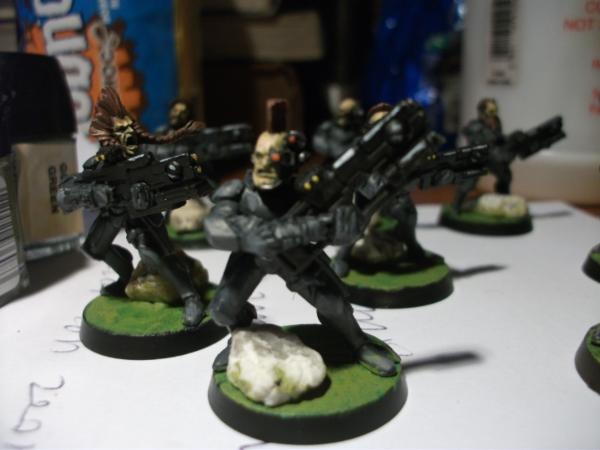
2011/05/10 20:16:19
Subject: Modelling hands in Milliput / Greenstuff
|
|
Repentia Mistress
|
|
|
|
|
|
2011/05/10 20:32:47
Subject: Modelling hands in Milliput / Greenstuff
|
|
Avatar of the Bloody-Handed God
Inside your mind, corrupting the pathways
|
Does look pretty good. Well done!
With practice, perfection 
|
|
|
|
|
|
2011/05/10 20:58:21
Subject: Modelling hands in Milliput / Greenstuff
|
|
Repentia Mistress
|
Thanks!
Another 24 old school guardians on the way from ebay, 24 milliput hands coming up....
|
|
|
|
|
|
|