Switch Theme:

Tutorial/Review: Pigments SwM  [RSS] Share on facebook Share on Twitter Submit to Reddit
»
Author Message
Advert


Forum adverts like this one are shown to any user who is not logged in. Join us by filling out a tiny 3 field form and you will get your own, free, dakka user account which gives a good range of benefits to you:
  • No adverts like this in the forums anymore.
  • Times and dates in your local timezone.
  • Full tracking of what you have read so you can skip to your first unread post, easily see what has changed since you last logged in, and easily see what is new at a glance.
  • Email notifications for threads you want to watch closely.
  • Being a part of the oldest wargaming community on the net.
If you are already a member then feel free to login now.


Made in us
Long-Range Black Templar Land Speeder Pilot


UT

so I recently bought some more awesome stuff from secret weapon mini's, and like a fanboy here I am...

Weathering Pigment set: Earth and mud.

they have a tutorial you can see here.

now thats awesome but how does it translate to something other then that one very specific example? well I got a bastion the other day and I needed a test model. Armed only with a garbage GW brush and 4 powder sets I set off.


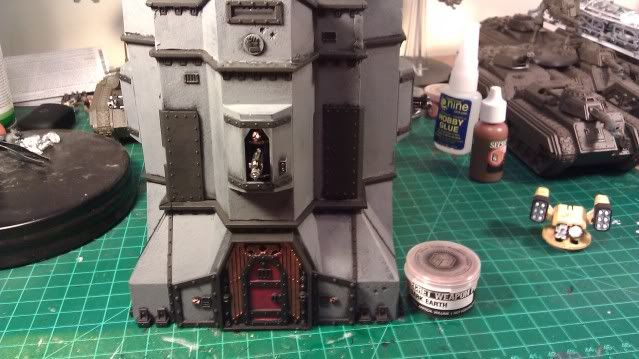
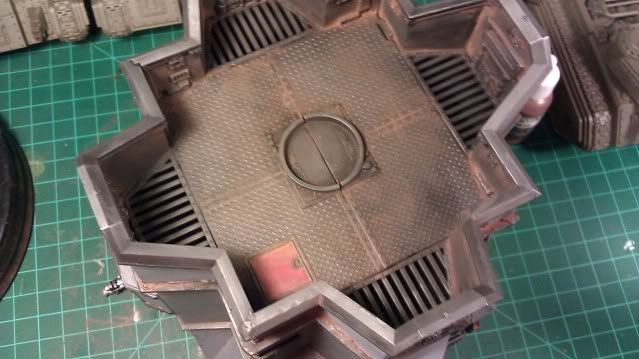
this Bastion I didn't really want to spend more time on the grey itself. I was just trying to test the powders. so I dry brushed grey, and went over everywhere I wanted to weather with black.


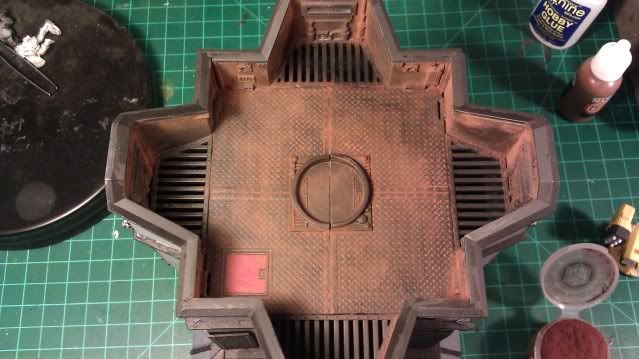
The first layer takes the most to lay down. After this its just adding more brighter collors. all you have to do is take the pigment and spread it out over the area. A lot will fall off and thats fine, just make sure you don't make a huge mess of your table.


with this layer, simply put it on in random areas. make sure you pull the brush in one direction. If it goes in a lot of different ways it'll look strange.


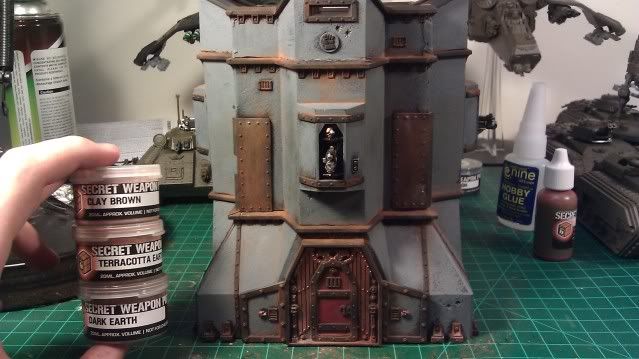
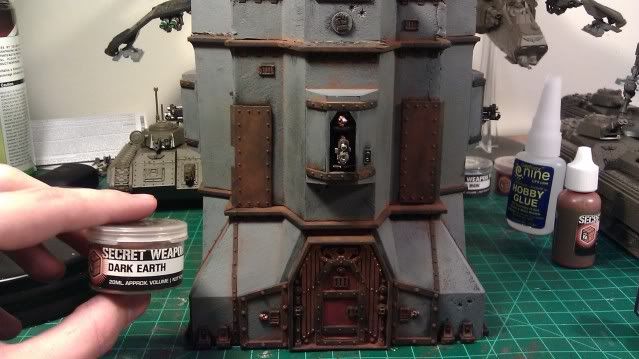
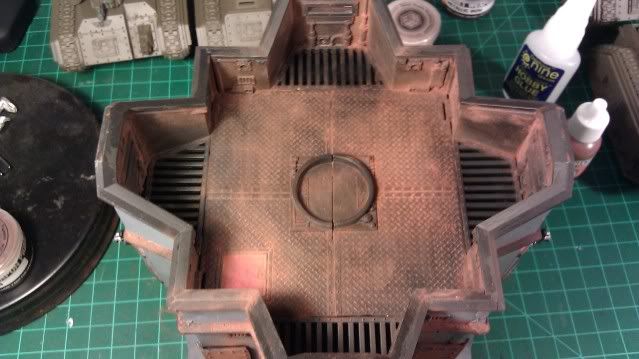
Clay brown I used very sparingly in certain areas to give it more variation. All of these steps where a huge mess. I got pigment all over the model and the table and it looked awful at first. after it's done it looks amazing. add's depth and realism to the finished model.


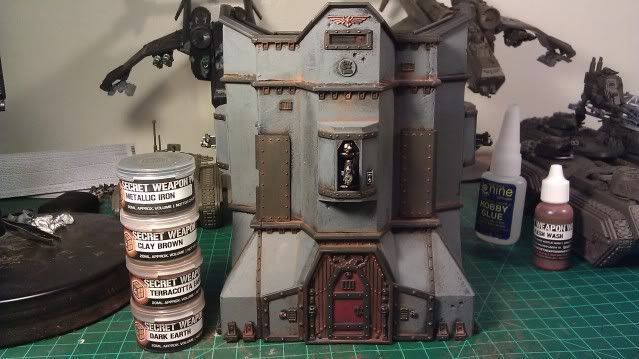
the final step all you do is put the metallic pigment on your finger and rub the model wherever you want metal. This gets out all the pigment that would fall off easily and not to mention makes it look ace.


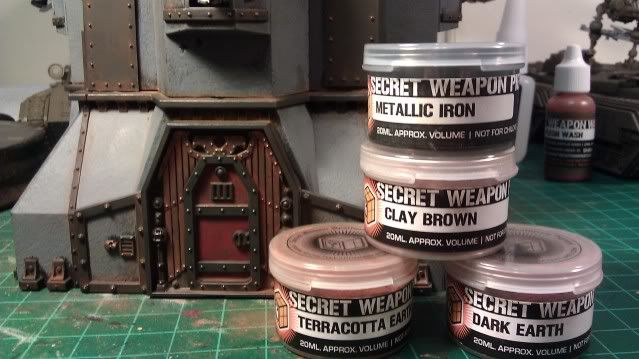
Overall this set is amazing, I would highly recommend it if you haven't already tried pigments. I'm going to be starting a new army of knights of dorn soon using this pigment set.

Thanks guys hope this helps. C&C Welcome.

A gun is a medium, a bullet a brush. 
   
Made in nl
Reverent Tech-Adept


A tip to increase the realism and randomness of the spots:
After you applied the dry pigments to the model, get a clean old brush, load it with thinner (alcohol or white spirits) and wet the surface you just weathered. You just need to touch the surface and the thinner will spread. That way the pigments will mix and mingle. After the thinner evaporated, you'll end up with powders again.

Other than that nice article!
   
Made in us
Long-Range Black Templar Land Speeder Pilot


UT

fiddler6291 wrote:A tip to increase the realism and randomness of the spots:
After you applied the dry pigments to the model, get a clean old brush, load it with thinner (alcohol or white spirits) and wet the surface you just weathered. You just need to touch the surface and the thinner will spread. That way the pigments will mix and mingle. After the thinner evaporated, you'll end up with powders again.

Other than that nice article!


thank you I"ll try that, I was a little worried about how little the colors showed up in different area's. I must say though that the pigments have made the single largest impact in my hobby since GW did wash's.


A gun is a medium, a bullet a brush. 
   
Made in us
Loyal Necron Lychguard


Palm Beach, FL

Are the powders just loose on the model? If you touch them, will they rub off?
   
Made in gb
Pestilent Plague Marine with Blight Grenade


Bristol, UK

I guess your best bet is to hit ut up with some hairspray or spray fixative. Hairspray is practically the same thing but a shedload cheaper - it's what we used to use on chalk pastels in college.

   
Made in gb
Calculating Commissar


Reading, Berks

You can also mix the powders into water and paint them on like that.

Any of these application methods will need the powders to be fixed as they will get rubbed off with use. Spraying on a varnish will blow off some of the powders and dissolve others which will tone down the effect you've achieved.

the other option for applying/fixing the powders is to mix them into a gloss varnish to create a thick paste effect, which is great for creating clumps of mud. This doesn't need fixing afterwards as the gloss varnish will already have done that for you.


Made in us
Long-Range Black Templar Land Speeder Pilot


UT

MasterSlowPoke wrote:Are the powders just loose on the model? If you touch them, will they rub off?


yes they'll rub off, when you do the final layer of metallic it pulls most of it off anyway so it doesn't stick to you, and yes I applied them dry straight out of the bottle. I was surprised how well they stick to a brush.

if I saw a spot with to much I would hit it with a can of compressed air to get rid of the extra but it doesn't blow it all off. I don't want to seal it because it doesn't cause that big of a problem. As long as you don't try rubbing it off you can pick it up without worrying about it. the worst I had was a little bit of the metallic stayed on my hand after I laid it on the top.

It's surprisingly well attached to the model. I do want to try mixing the pigment with water effects, and gloss varnish to make different types of mud for the hollow bases.

A gun is a medium, a bullet a brush. 
   
Made in us
Hurr! Ogryn Bone 'Ead!


MiG sells "fixer". You just dab it on with a clean brush and voila, the pigment is permanent. A more expensive, but more precise solution.

The Emperor loves me,
This I know,
For the Codex
Tells me so....

http://fallout15mm.wordpress.com/ 
   
 
Forum Index » Painting & Modeling Tutorials
Go to: