Alright Dakka! It's that time of year again! 'Ard Boyz prep time! Last year fellow dakkite acsmedic and I faced off with his Death Company blood angels vs my Monster Farm tyranids, I won by the bare skin of my teeth (talons?). Now he's out for revenge, and I'm cutting teeth with a new army I've only had for a week so far - Tau! His army of choice? Well what else but the evil, dictatorial, slave-driving DARK ELDAR! Our game will be this weekend, I'll take pictures and post the results after all the dust settles. Until then, we have agreed to post our army lists with a poll to see what the community thinks. The game(s) will be a randomly determined mission from the 'Ard Boyz missions for 2011.
And without further Ado, the lists! (sorry jy2, i stole your format! It's so effective I just had to!)
2500 Points - Tau-Rific! HQ: Commander Shas'
el - Airbursting Fragmentation Projector,Bonding
Knife, Hard-wired Blacksun Filter, Hard-wired Multi-tracker, Stimulant Injector, Missile Pod, Targeting Array
2 Shield Drone
Elite: Stealthsuitsx3 - Team Leader/Markerlight/Hard-Wired Drone Controller
2 Marker Drone
Elite: Crisis Battlesuits - Team Leader/Missile Pod/Burst Cannon/Targetting Array/ Hard-Wired Multi-Tracker/Blacksun Filter,
2x Crisis Suits with Missile Pods/Burst Cannons/Multi-Tracker
Elite: Crisis Battlesuit - Team Leader/Fusion Blaster/Hard-Wired Multi-Tracker/Plasma Rifle/Targetting Array
2x Crisis Suits with Fusion Blaster/Plasma Rifle/Multi-Tracker
Troops: Kroot Carnivore Squad
15 Kroot Carnivore Squad,
3 Kroot Hounds
Troops: Kroot Carnivore Squad
14 Kroot Carnivore Squad
3 Kroot Hounds
Troops: Fire Warrior
8 Fire Warrior
1 Devilfish + Disruption Pod + Multi-Tracker + Targeting Array
Troops: Fire Warrior
8 Fire Warrior
1 Devilfish + Disruption Pod + Multi-Tracker + Targeting Array
Troops: Fire Warrior
8 Fire Warrior
1 Devilfish + Disruption Pod + Multi-Tracker + Targeting Array
Troops: Fire Warrior
8 Fire Warrior
Fast Attack: Pathfinder
8 Pathfinder
1 Devilfish + Disruption Pod + Multi-Tracker + Sensor Spines +Targeting Array
Fast Attack: Piranha Light Skimmer
1 Piranha Light Skimmer + Disruption Pod + Targeting Array +
Fusion Blaster
Fast Attack: Piranha Light Skimmer
1 Piranha Light Skimmer + Disruption Pod + Targeting Array +
Fusion Blaster
Heavy Support: Broadside Battlesuit
1 Broadside Battlesuit,+ Hard-wired Blacksun Filter + Hard-wired Target
Lock + Advanced Stabilisation System + Team Leader
1 Broadside Battlesuit, + Advanced Stabilisation System
2 Shield Drone
Heavy Support: Broadside Battlesuit
1 Broadside Battlesuit,+ Hard-wired Blacksun Filter + Hard-wired Target
Lock + Advanced Stabilisation System + Team Leader
1 Broadside Battlesuit, + Advanced Stabilisation System
2 Shield Drone
Heavy Support: Broadside Battlesuit
1 Broadside Battlesuit,+ Hard-wired Blacksun Filter + Hard-wired Target
Lock + Advanced Stabilisation System + Team Leader
1 Broadside Battlesuit, + Advanced Stabilisation System
2 Shield Drone
Created with Army Builder® - Try it for free at
http://www.wolflair.com 2500 Points - Beast cult DE! Vect
haemi -webway
2 haemi venom blade and liquifier
Troops
8 wyches hekatrix w/agonizer, haywires
raider
FF,
NS,
GT,
ES 8 wyches hekatrix w/agonizer, haywires
raider
FF,
NS,
GT,
ES 9 wyches hekatrix w/agonizer, haywires
raider
FF,
NS,
GT,
ES 5 warriors w/blaster
raider
FF,
NS,
GT,
5 Warriors w/blaster
Venom
NS,
GT,xtra splintercannon
5 Warriors w/blaster
Venom
NS,
GT,xtra splintercannon
Fast Attack
Beastmasters 5
khymerae x10
clawed fiend x1
razorwings x4
Beastmasters 4
khymerae x9
razorwings x4
Heavy Support
Ravager x3 lance
NS,
FF,
GT Ravager x3 lance
NS,
FF,
Razorwing x2 lances
NS,
FF Looks like quite a matchup. If i'm unable to stop his rush quickly his troops will make mincemeat of my firewarriors, suits, and broadsides. We will update with commentary, and I'll photograph the game for the report when we play this weekend!
Alright everybody, here's what you've all been waiting for - The report!
The Mission: Git That Dirty Git! - Annihilation, Pitched Battle, Night fighting turn 1, with a traitor. Acsmedic received one of my Kroot, while I got one of his Wyches.
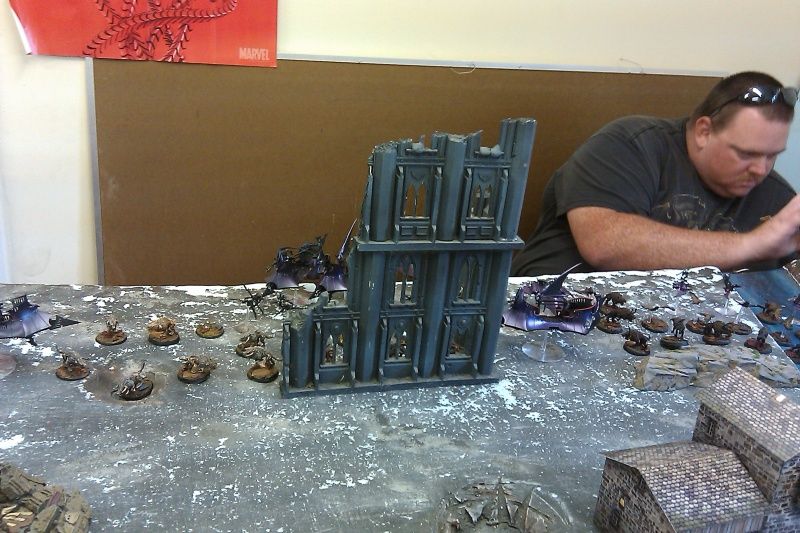
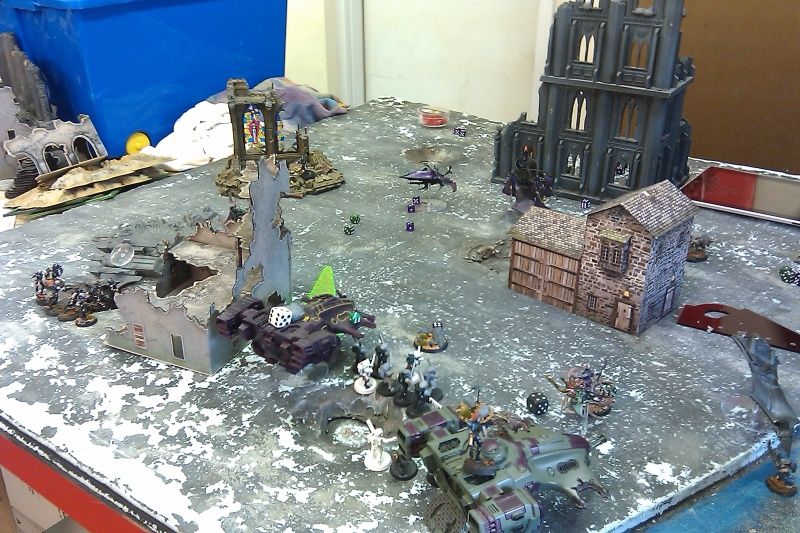
Dark Eldar won the roll to go first, and took it. Here is deployment:
[img
[/img]
![]()
" border="0" />
Dark Eldar Deployment - Razorwing jetfighter is in reserve.
![]()
" border="0" />
Tau Deployment - I made a castle in the bottom right corner. 2 Devilfish are in reserve, one with the traitor. The helios crisis suits are deep-striking. Not pictured on the left flank are a piranha skimmer and the pathfinders in an upper level of some ruins.
Tactical notes - (these will be posted from my perspective, as i don't want to put words in acsmedic's mouth) - I castled on one side to avoid the larger of the 2 beast squads on the table for a turn or two, but left the pathfinders and pirahna as bait, hoping to draw the enemy into a fire lane. The castle is wrapped in 2 kroot squads, again taking into account the beasts will find combat very quickly.
DE Turn 1 Summary -
DE manages to see and shoot my pathfinders with lances/venom fire and drops 4 models. The pirahna is successfully out of
LOS. Vect's wyches uses
ES to boost adjacent to the ruin they are hiding in. The large beast squad in the middle of the table moves forward and runs something like 3". The smaller beast squad moves and runs, but aren't quite yet in range to assault. Wyches assault my first kroot wrap around my castle, chew apart my kroot, But we hold. I might have killed a wych or two but I don't remember.
Tau Turn 1 - I answer back in kind by cruising my devilfish to block his beast squad while still being able to shoot the wyches through the building they're hiding in after attacking my kroot. I love tank shock! As an aside, between our two games we played yesterday I must have caused over 20 morale checks with tank shocks and pinning..
acs medic only ever failed 2. The 4 pathfinders (who made their morale) lit up a raider on the far left side of the board. One of my broadsides pulled a marker to ignore night fight and exploded it...good start! 2 models died in the blast, but they weren't pinned and made morale. The piranha wrecks vect's vehicle, but they pass their pinning check...boo. On the right side of the board I fired my crisis team at the beast squad but I think only missile pods were in range. Between cover saves and kymaera he doesn't lose many models. Burst cannons and gun drones fire at the beasts by the building, again not doing much. In close combat my kroot somehow manage to kill all but 1 wych before dying to a sweeping advance.
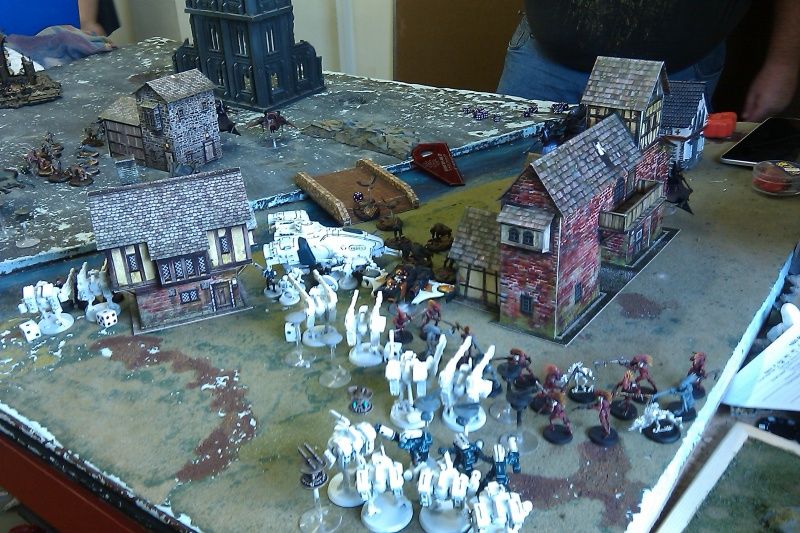
Pictures at the end of Game Turn 1:
![]()
" border="0" />
![]()
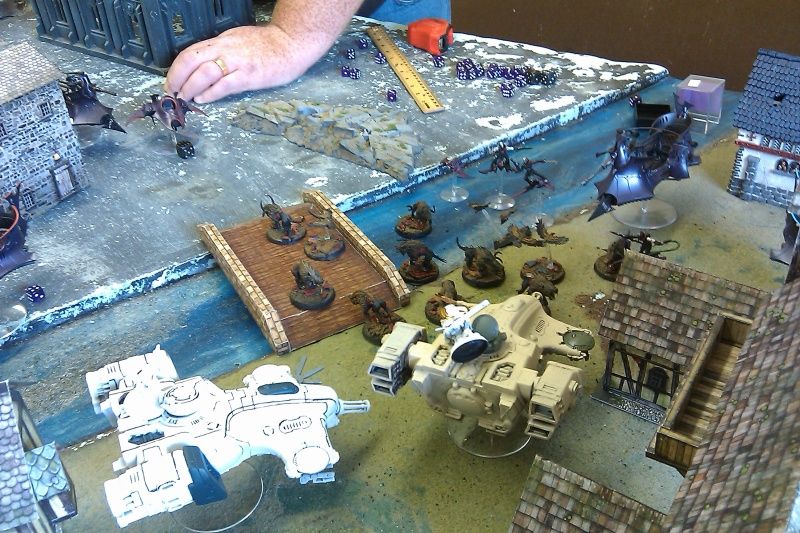
" border="0" />
![]()
" border="0" />
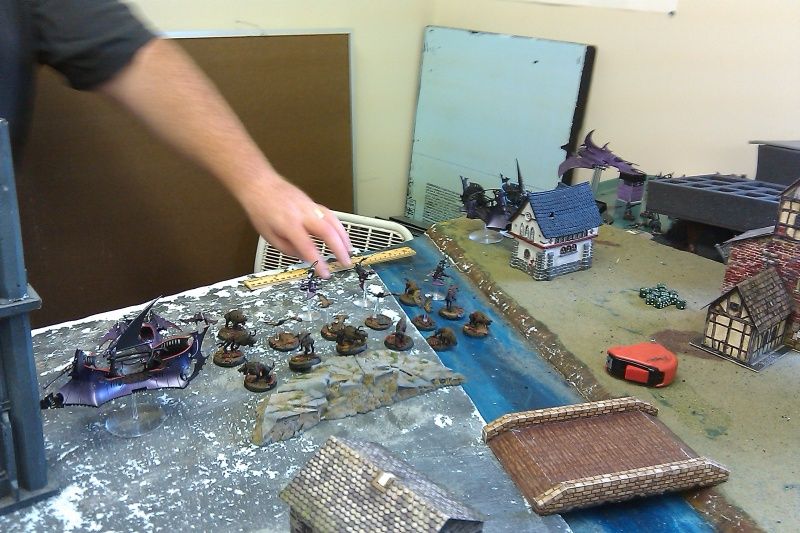
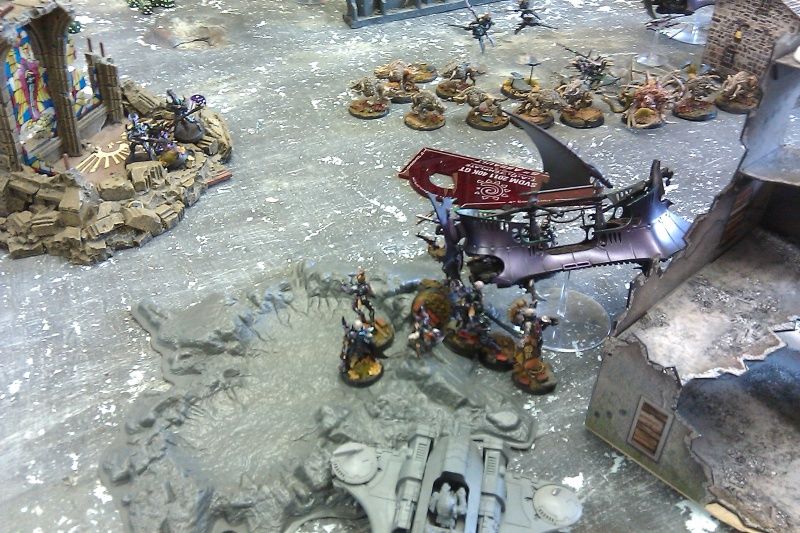
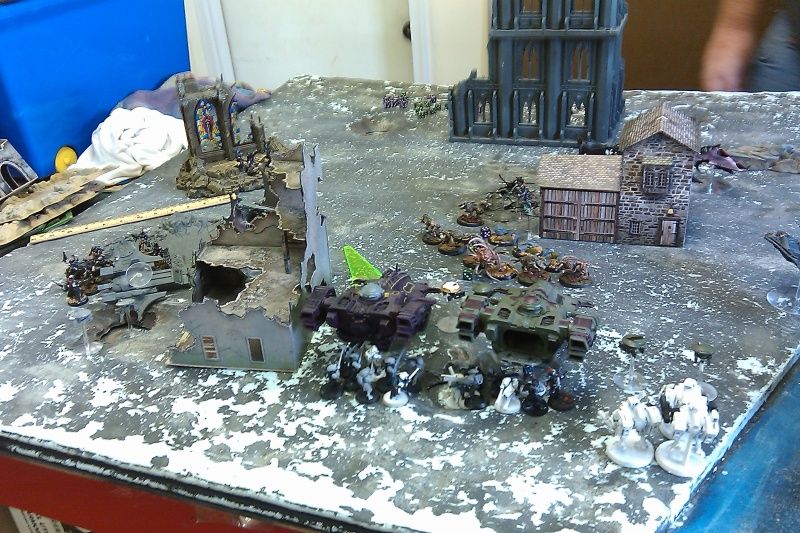
DE Turn 2 -No reserves yet. A raider full of wyches goes for my far left broadside team (leaving their haemonculous in the raider when they disembark, but taking his pain token with them...those conniving bitches...haha). The beasts obviously go for my fish, that are in their way to my tasty suits. His dark lances line up some shots, i fail my d-pod saves, and wreck the pathfinder's fish that had fire warriors in it (they jumped in on my first turn) and pins them. Shooting sees the middle broadside team take a wound on both the team leader and the grunt. Vect's haemi leaves the squad and boils my pathfinders in the ruin with an ap2 liquefier gun! Beasts assault and explode the other devilfish, with minimal-to-no-casualties. Vect's team assaults the piranha and stuns/immobilizes it with haywire grenades, and rips off the fusion blaster. The single wych goes for the gusto and assaults my other kroot squad, pulling them away from their screening duties. Somehow we manage to lock in combat. In the combat that would rage until late turn 4, a squad of wyches assaults my broadside team, keeping them from their shooting duties.
Table after
DE turn 2 -
![]()
" border="0" />
![]()
" border="0" />
Tau turn 2 - All of my reserves come in, now where do I put my helios suits? With such low range and no obvious targets (plus my half of the board was very crowded with the entire dark eldar army over there) I placed them within rapid-fire range of the large beast squad, but they scattered back and to the right about 6 inches. I passed my single
DT test, and was good. The two devilfish moved up 12" in an attempt to
FoF the beast squad to a manageable size (or cause a morale check). I disembarked gun drones to help block an assault after the shooting phase was done. My unharmed piranha zoomed forward to the gap that had been created by the exploded devilfish. The stealth marker team was doing its job fairly well this game, painting targets with markerlights until the bitter end. Here is where I moved forward with my
HQ crisis team and unloaded on the beast squad. I think in the shooting phase i caused something like 14 wounds with missile pods, burst cannons, and the AFP on my shas'
el. The other beast squad lost some kymarea and a base of razorwings to 32 rapid-fire pulse rifle shots, plus the fusion blaster and plasma rifles on the crisis teams. The gun drones caused 2 pinning checks, they passed both, and they passed morale at the end of the phase...oh crap. The broadside teams that could shoot both whiffed, maybe one raider was wrecked I don't remember. At the end of the turn I managed to get my kroot out of assault with the wych and consolidate backwards...Into a nice little clump that will come into play very soon...
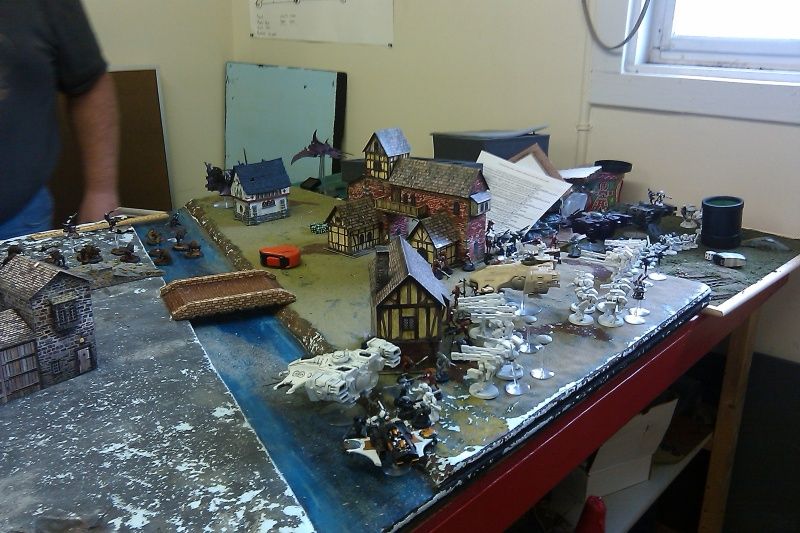
End of tau turn 2 -
![]()
" border="0" />
![]()
" border="0" />
DE Turn 3 - The razorwing hits the table! And it lines itself up right with that big clump of crisis suits, broadsides, and stealth suits, and kroot. This isn't going to be good for me. The beasts move around the pirahna, ready to take it out. The other beasts move and roll a

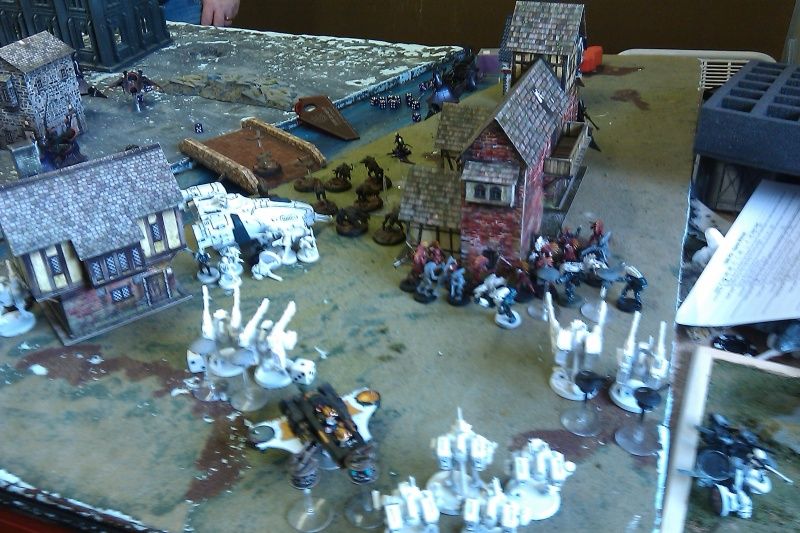
for their run roll...Enough to get a line to my crisis suits from around my gun drones with a 12" charge. Damn! Vect and his girls don't do much, just hang out in a crater/building after having wrecked my piranha with auto-hitting haywire grenades. Shooting takes the piranha out of the equation, but the real champ this phase was the Razorwing Jetfighter - He targetted one of my drones on a broadside team and managed to cause 11 hits (9 wounds) on Kroot, 7 or 8 hits (6 wounds) on the broadside team, 4 wounds on my crisis team in the back, and 3 or 4 wounds to my stealth team. My suits for the most part made their armor saves but the kroot, having no cover or armor, didn't fare well. I believe they fell back after losing morale. Dark lances took out one broadside team even w/ cover and shield drones. The wych/broadside battle continued on in the assault phase. The beasts multicharged my firewarriors and my last broadside team. We somehow lock in combat.
On the other side of the game table, the beast squad multi-charges 2 sets of 2 gun drones, both devilfish, and the crisis team. They kill everything, only the green fish is unhurt. The purple fish gets immobilized and weapon destroyed.
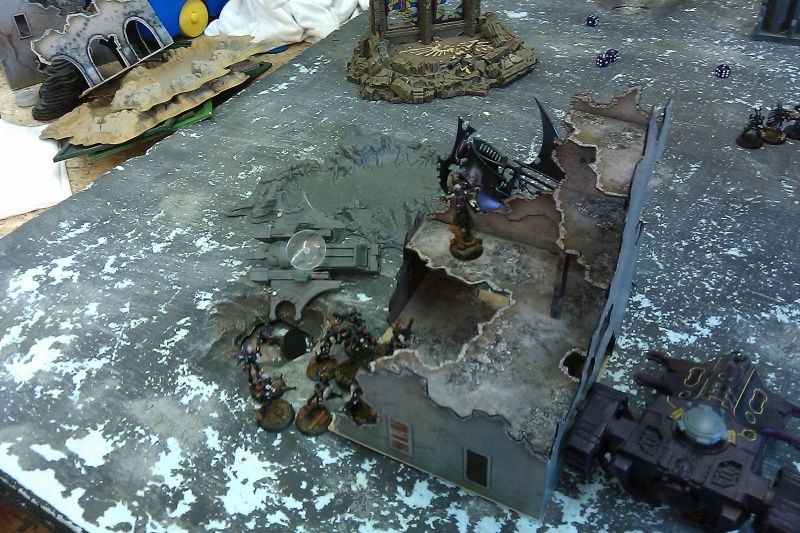
End of
DE turn 3 - Sorry for the blurry pic
![]()
" border="0" />
![]()

" border="0" />
Tau turn 3 - Wow! That was a lot of losses for me...In fact At this point i realize i'm just playing the game out for experience's sake, his battlefield position (and the fact that what I need to shoot at has typically been locked in combat all game) has given him quite the advantage. Plus I should have known better to clump up my models with a razorwing in reserve. Anyhow, i pretend my
HQ is farsight and move towards the beasts in combat with my firewarriors and broadsides in an attempt to help them out. The kroot fell off the table, so they were done. The Traitor who was in the green devilfish hops in, then the tank shocks through the beast squad..they pass morale. The firewarriors make a last stand and rapid-fire into the beasts, but they don't cause enough wounds to get through the wound-allocation shenanigans. In combat my
HQ team holds, but the fire warriors and broadside flee.
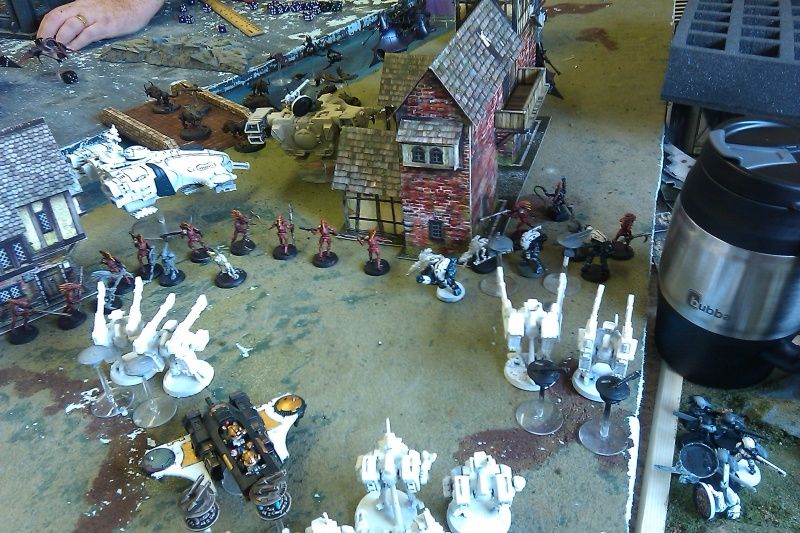
Tau turn 3
![]()
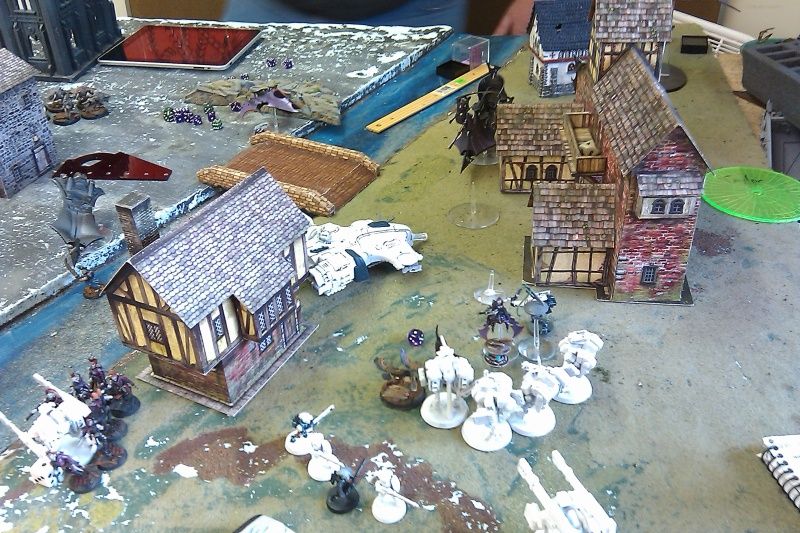
" border="0" />
![]()
" border="0" />
That was the last picture I remembered to take before the very end of the game. The last couple turns played out pretty quickly so i'll give a little update for each one then display the post-battle photos.
DE turn 4 - Just mopping up. His wyches finally defeat my last broadside and consolidate in a v pattern towards my corner of the board. shooting manages to bounce off of the traitor's devilfish. Venoms fire into the larger fire warrior team and drop them down to 5 models. The smaller fire warrior team takes a beating from a liquefier gun and drops to 2 models. Both fail morale but only fall back a few inches each. Beasts assault, the fire warrior squads each make their morale checks and fight the combat, but lose and are both wiped out and/or swept. Razorwings wreck the immoblized devilfish. I managed to win combat vs the smaller beast squad and get my crisis suits out of combat.
Tau turn 4 - The traitor cruises towards the
DE deployment zone hoping to evade the 6+ dark lances/blasters and the beasts for one more turn. The stealth marker team lights up the wyches and the crisis command squad lays into them with everything. they don't get back up. I made a mistake and thought my broadside had a bonding knife, and regrouped/fired with him. I checked my list and we un-did the immobilized result he managed on a ravager, and pulled the suit from the table. Something stunned a ravager, too, but I don't remember what exactly. The firewarriors regrouped and moved towards a small building. They rapid-fired and killed a haemonculous.
DE turn 5 - I feel lucky with the devilfish after his shooting phase and it's still alive...then the beasts assault it and wreck the thing. The traitor hops out on the other side, making a run for the deployment zone. On what's left of my base, dark lances fry the command squad leaving 4 smoking pairs of boots in their stead.
Tau turn 5 - Ok, all I have left is the stealth team, a few fire warriors, and the traitor - I run the traitor towards his deployment zone, hoping the game will end and give me a few battle points despite the obvious loss. The firewarriors and stealth team just try to hide.
We roll, the game goes to turn 6 - He manages to kill the traitor and we call it there.
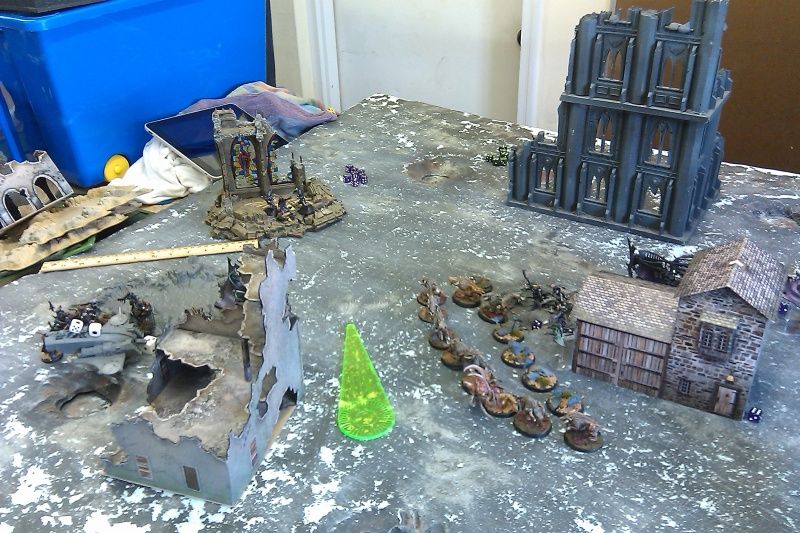
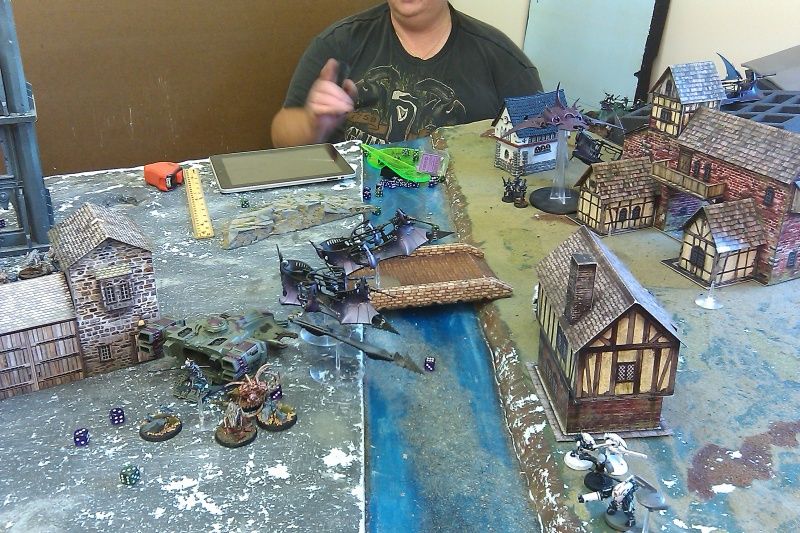
Final pictures of the battlefield:
![]()

" border="0" />
![]()
" border="0" />
![]()
" border="0" />
VICTORY TO THE DARK ELDAR, 22 KP TO 8 End-of-Battle reflections - Well, that was rough! I know the threat range for beasts are huge, as are wyches in raiders...I don't get that much chance to shoot at them before they've locked up my lines. I could probably have done better if I had chosen the other half of the board that was more open to castle in, since his shooting was mostly splinter fire from 2 venoms and I would have been able to call cover saves from his dark lances. Also being a
KP mission my fire warriors should have been deployed gunline style to take those 30" single shots at the beasts as they closed the gap into my kroot. I think having smaller kroot squads would be better too, anything staying locked in combat on my turn is something i can't shoot with, and an enemy i can't shoot
AT. Overall it was a great game, intense but not in a bad way, and Taylor is always a very difficult person to win against. Congratulations to acsmedic for the win, he deserved it.


 .....Bay Area Open GT 2013 - Best Tyranids
 .....LVO GT 2014 Team Tournament - Best Generals


 Good luck next weekend.
 ) were important because it helped show me some mistakes not to make this saturday.
 j/k
j/k