| Author |
Message |
 |
|
|
|
|
Advert
|
Forum adverts like this one are shown to any user who is not logged in. Join us by filling out a tiny 3 field form and you will get your own, free, dakka user account which gives a good range of benefits to you:
- No adverts like this in the forums anymore.
- Times and dates in your local timezone.
- Full tracking of what you have read so you can skip to your first unread post, easily see what has changed since you last logged in, and easily see what is new at a glance.
- Email notifications for threads you want to watch closely.
- Being a part of the oldest wargaming community on the net.
If you are already a member then feel free to login now. |
|
 |
2011/09/16 15:33:05
Subject: Trench WIP Tutorial as i go!
|
|

Bugswarm
|
My 2' by 4' modular trench piece.
I got my supplied from Michaels craft store, Home Depot, and extra boxes i had laying around.
List. 1. 2-2'x4' styrofoam boards. 4 dollars each. 2. 2 burnt umber "studio 71" paint. 5 dollars each 3. Hot wire cutter 10 dollars 4. Box cutters with extra long blades about 3 dollars 5. Large brushes, 4 dollars 6. Card board. Ill add more as it comes to me
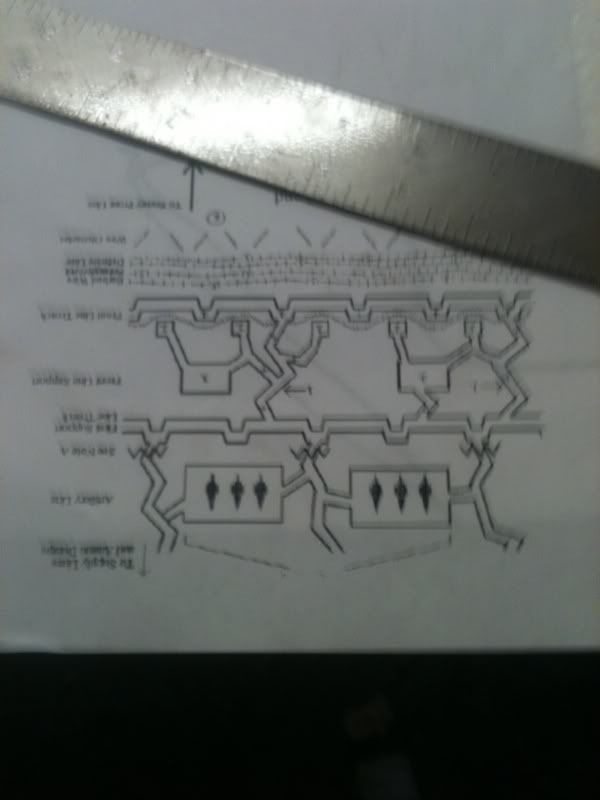
First thing i did was based the bottom piece of 2x4 foam in the burnt umber. Then I googled "WW1 trench layouts" and printed a bunch of layouts and descriptions. Since im building this for my buddy who is going for a heavy artillery battery for his Imperial Guard, so I picked a layout that can fit 4 comfortably 5 cramped SPG's self propelled guns aka basilisks. Then i proceeded to layout my trench, its a little different because of area concerns. Make sure you lable and mark well, it gets confusing cutting it out and turns into a puzzle.
The layout i used.
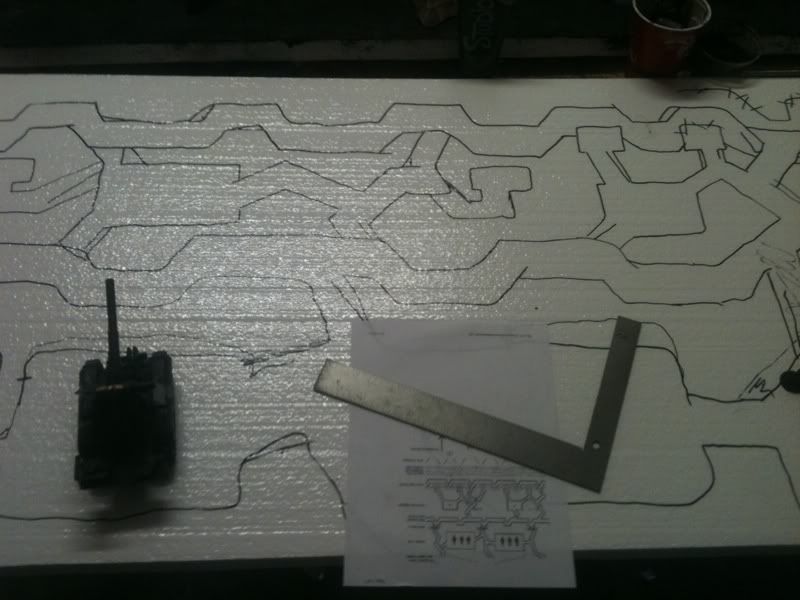
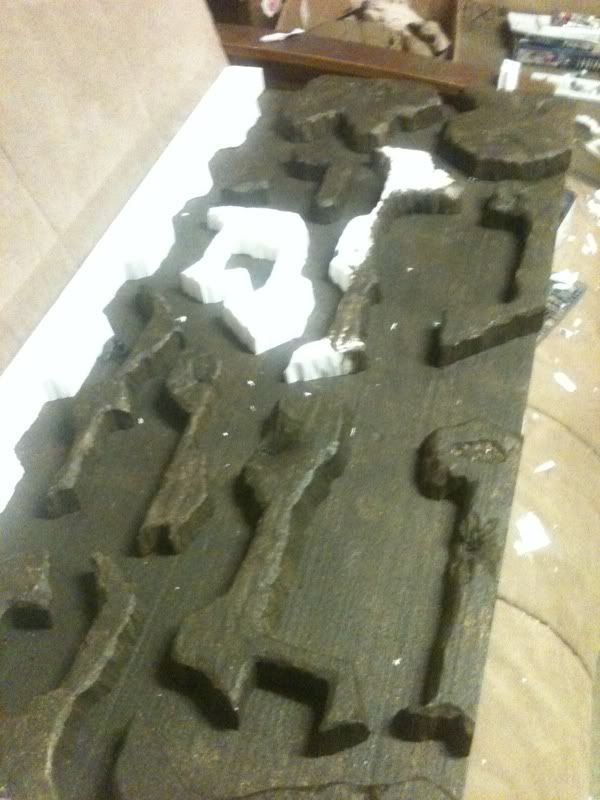
The top peice layed out.
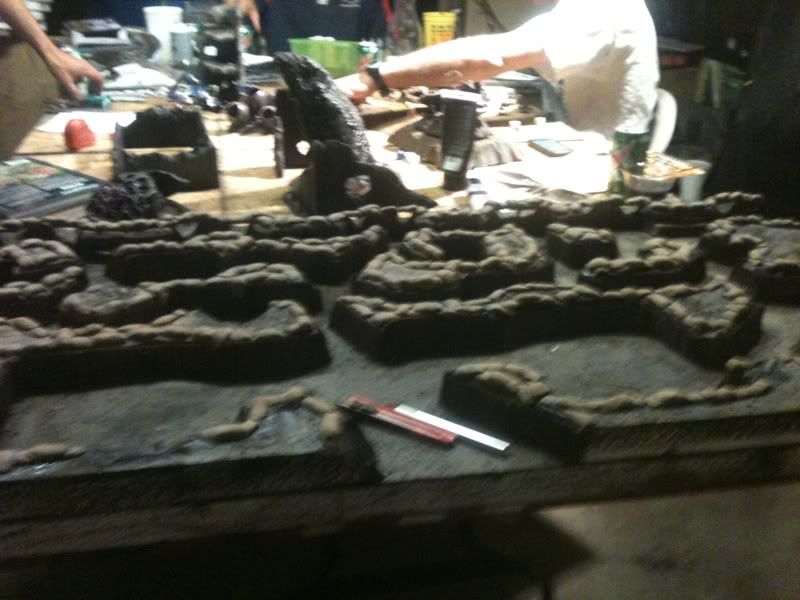
The peices all cut out . You definitely want to make sure the go right where they belong on the base board. Otherwise youll have a puzzle to put together when your done. I used a ten dollar hot wire foam cutter i got from a craft shop. These things are a neccessity when it comes to terra forming foam. Make sure you watch your fingers and the angles of your cuts your going to want almost 80-90 degree angles. And dont worry about smoothing it out. Ill get to that.
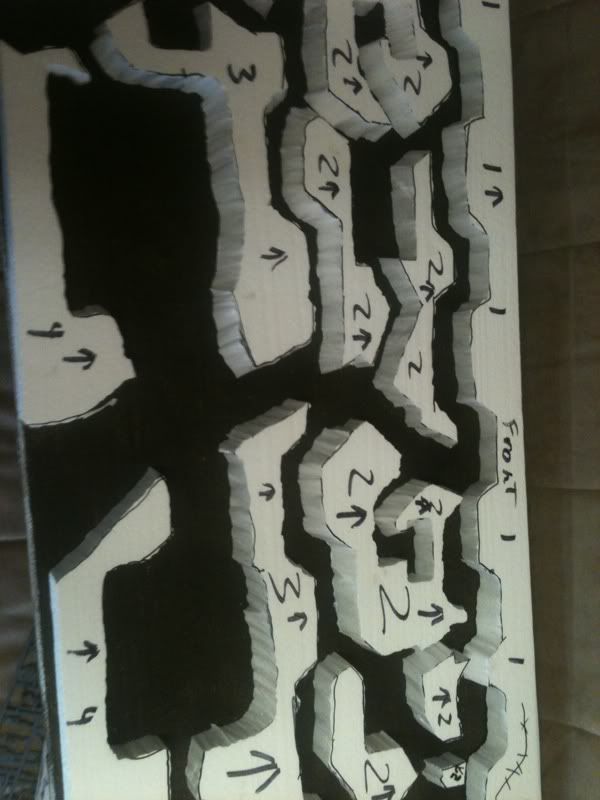
Make sure once the peices are cut out you have room for your units. My trench is a tight squeeze i had to go through and re check every gap. A mistake i made and hopefully you can avoid is makw the trenches a 1/4 inch wider to compensate for the trench walls later.
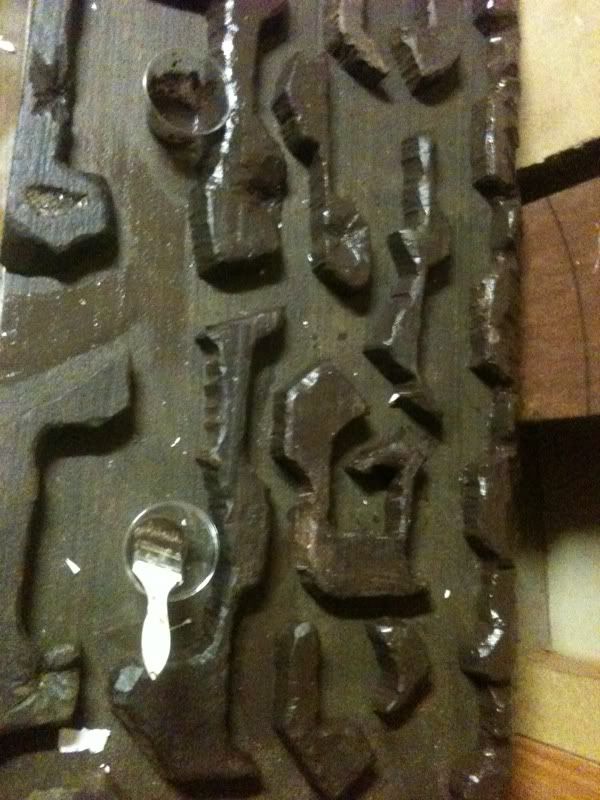
Ok once you have it all cut out and inplace. Take the razor and use it on the edges of the trenches. Use it to smooth out the unnatural angles. Also put in any craters puddles or cracks in terrain you want now because itll be alot more difficult later on. I usually use the razer to carve out craters it gives a good blast effect.
Once your done with the detailing and smoothing. Move on to painting, i used a large amount of "burnt umbar" from studio 71. Its a nice acrylic and you get a decent amount for the price. Make sure you dont glue it all down until its all painted, makes the process easier.
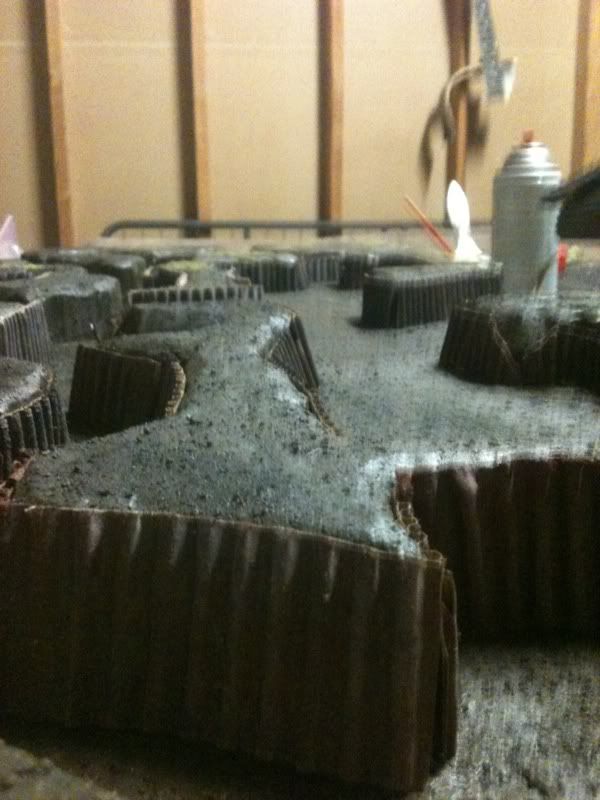
Sorry i was slacking on pictures for next step. Basicly to texture my terrain I go out front get a cup of sand, pour in a bunch of glue. And mix with stucco coloring powder or paint. Then brush it onto the painted down trenches. The downfall to this is sometimes the rocks will bust off taking the undercoat of paint with them leaving a white spot of foam. This should be too bad if you did a good undercoat though.
 Automatically Appended Next Post:
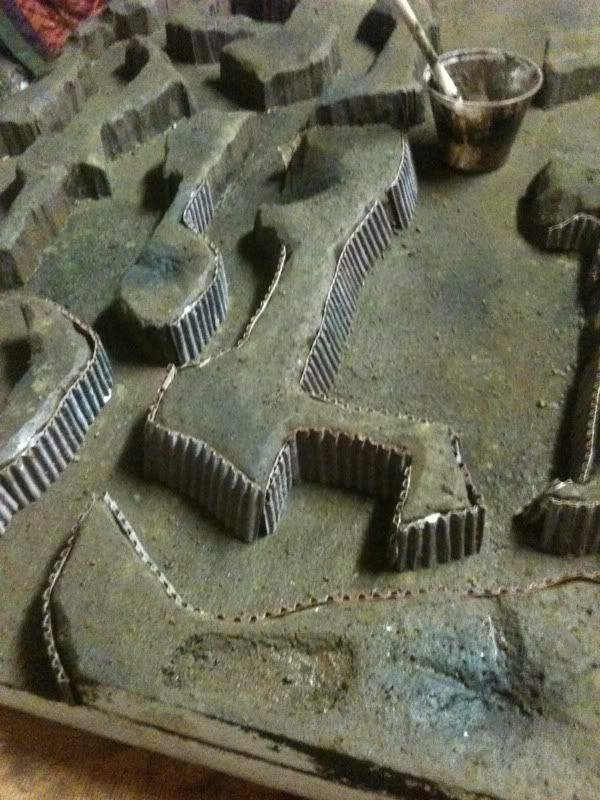
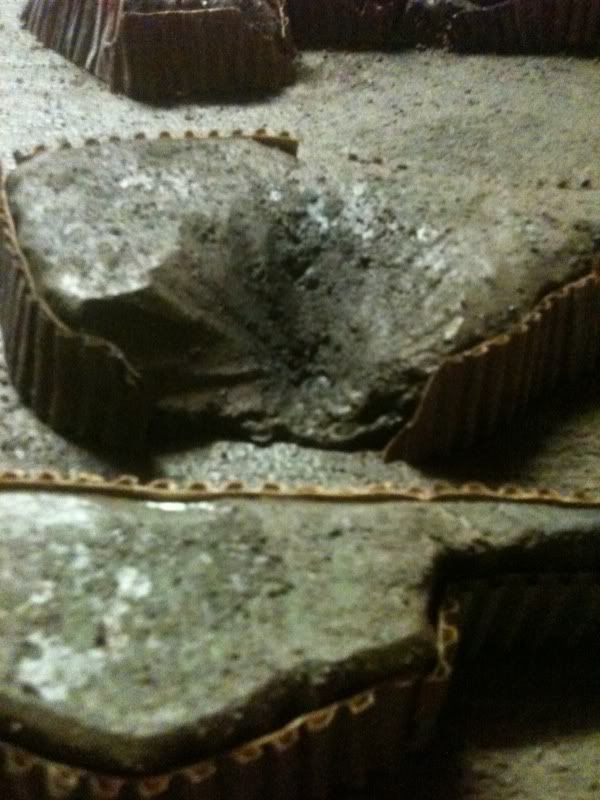
 Then after you texture The trenches go ahead and toss some black pai nt into the craters. Next step is tedious, it requires you to make all the siding for trench walls. Its optional but it really ties the room together. To make corrugated paneing i rip cardboard boxes in half then sand the excess paper of the corrugated parts. After that i base coat in a red rust color then use hairspray and sprinkle sea salt over them then when the hairspray dries a go over with a coat of light to medium grey then lightcoats of black. After that you can break off the sea salt to reveal the orange red rust under coat thus producing little paint chips. Then cut strips to fit the trench walls. You have to be carefull here as to not make tight trenches even tighter. If so crush the cardboard into the wall making it flatter at bottom.
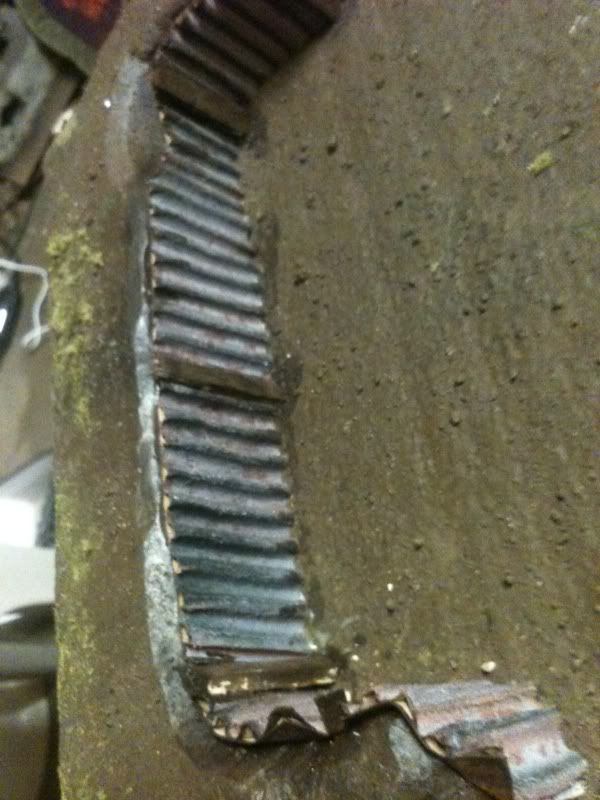
A crater wall
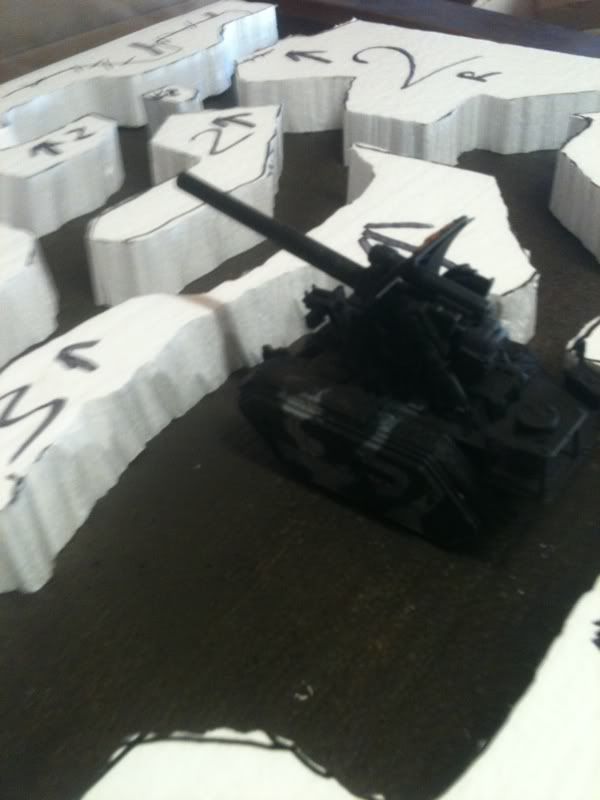
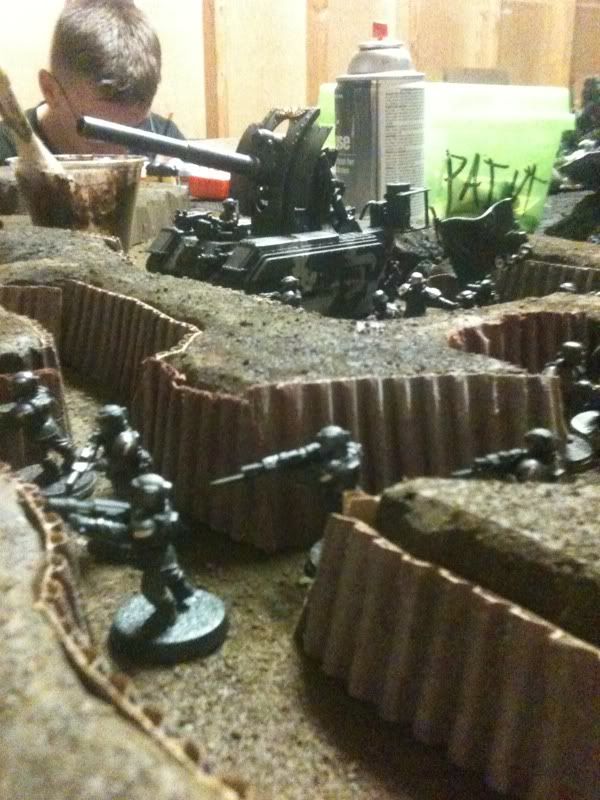
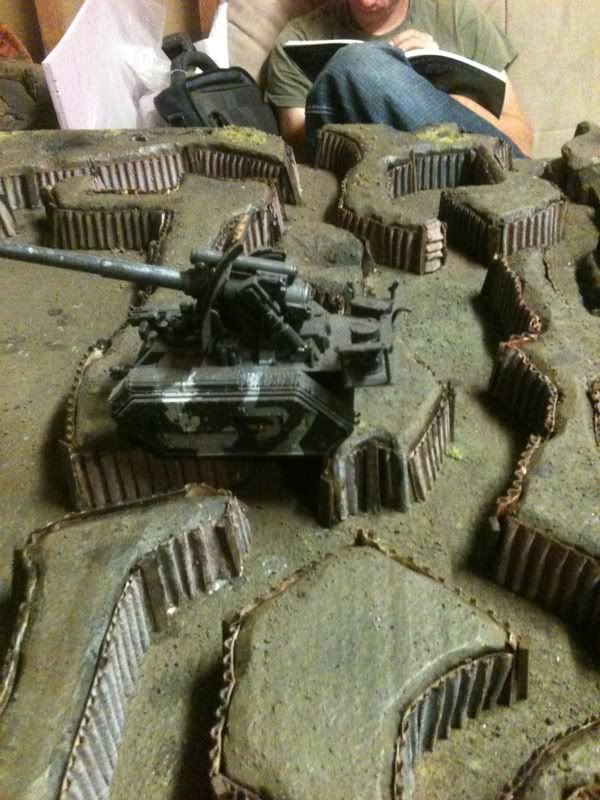
Infantry patrolling the trenchline with basilisk in artilery position
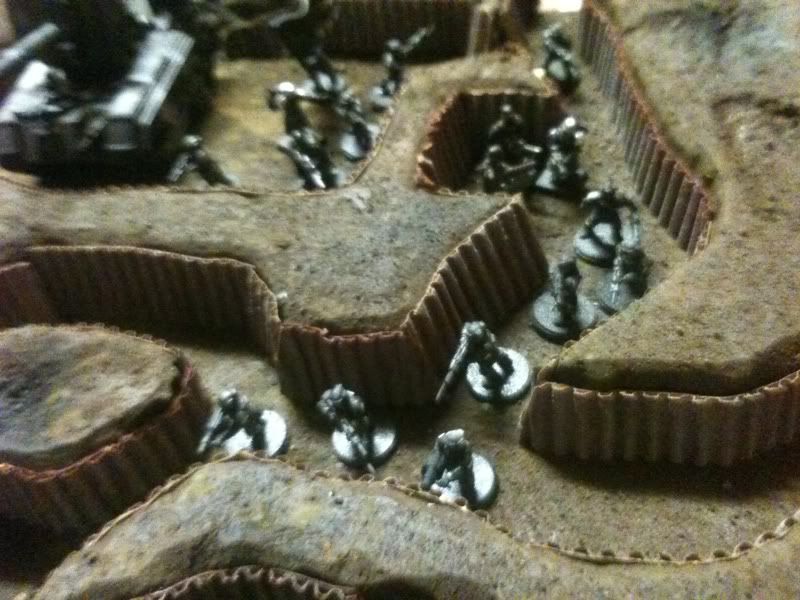
Another image of infantry in trench.
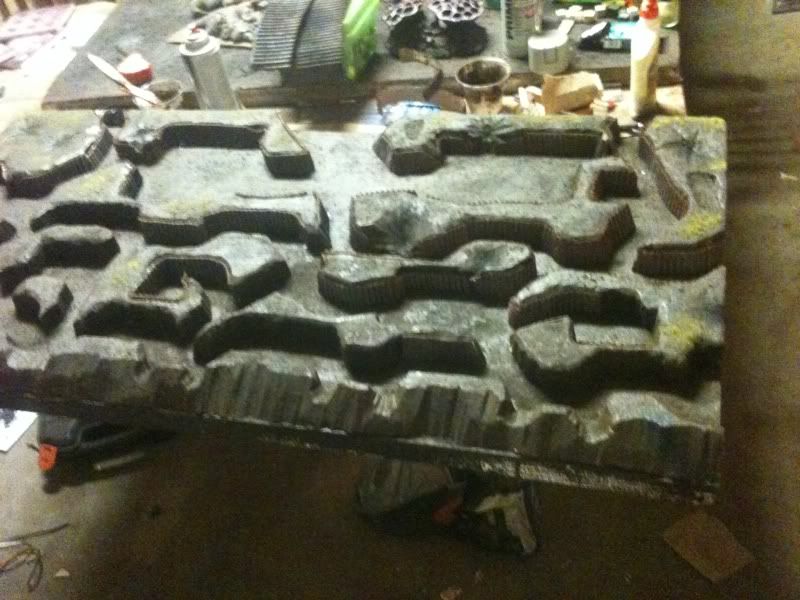
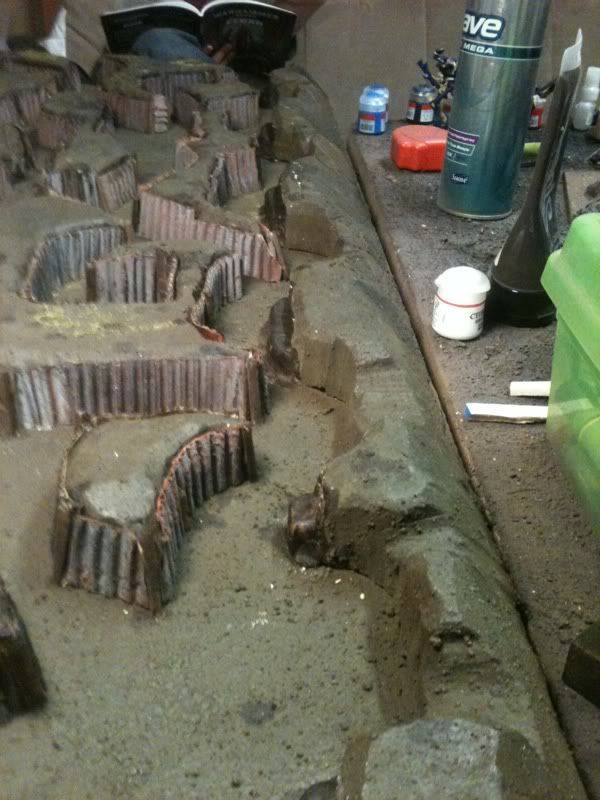
Front view of the walls 70 percent finished. Also experimented with some flock
Look down a fork in the trenches
Thank you all who is interested. This is a tutorial as i go so right now this is how far i am. Ill be adding more tonight, next up after the corrugated walls is sandbags... Yay.. But that will make these trenches pop. And then beam supports, fire points amd lastly water effects and barbed wire.
|
|
This message was edited 1 time. Last update was at 2011/09/16 15:50:04
|
|
|
 |
|
2011/09/16 16:15:26
Subject: Trench WIP Tutorial as i go!
|
|

Regular Dakkanaut
|
Unfortunately, I can't see the pics at work :( , but from the text it sounds very promising. I will follow this and steal your ideas for the basing work I plan on doing for my Titan  .
Thanks for the tutorial
|
 Night Lords: 5500 points / 1750 points painted Night Lords: 5500 points / 1750 points painted
 Orks: 1250 points / 300 points painted Orks: 1250 points / 300 points painted
 Orcs & Goblins: 6000 points / 2500 points painted Orcs & Goblins: 6000 points / 2500 points painted
 Tomb Kings: 3000 points / 1500 points painted Tomb Kings: 3000 points / 1500 points painted |
|
|
|
|
2011/09/16 16:29:21
Subject: Re:Trench WIP Tutorial as i go!
|
|
Bugswarm
|
Thank you for reading it. And no worries pretty much every idea and trick I had probably gotten from dakka dakka. I cant wait to get off work and get back to finishing it.
|
|
|
|
|
2011/09/16 20:17:21
Subject: Trench WIP Tutorial as i go!
|
|
Conniving Informer
|
How wide are the trenches on average? It seems to me that anyone intending to ride their rhino or chimera on in would be hard pressed to get any further than a handful of inches before becoming stuck meaning the more mech-centric armies are a little gimped, and so I do not think this would be an ideal board for regular wargaming.
I do like the idea though, and may have to use it some time in the future!
|
|
|
|
|
2011/09/16 21:12:14
Subject: Trench WIP Tutorial as i go!
|
|
Bugswarm
|
They are skinny some places 1 inch across. I will be putting plates for vehicles to cross the top and its a modular peice so it can be used whenever Automatically Appended Next Post: Ok current update. I finished placing the walls and support beams i used balsa wood and wood glue woth the burnt umbar paint on them. I also touched up the bare spots on trench walls while i painted. Use a heavy water based mix.
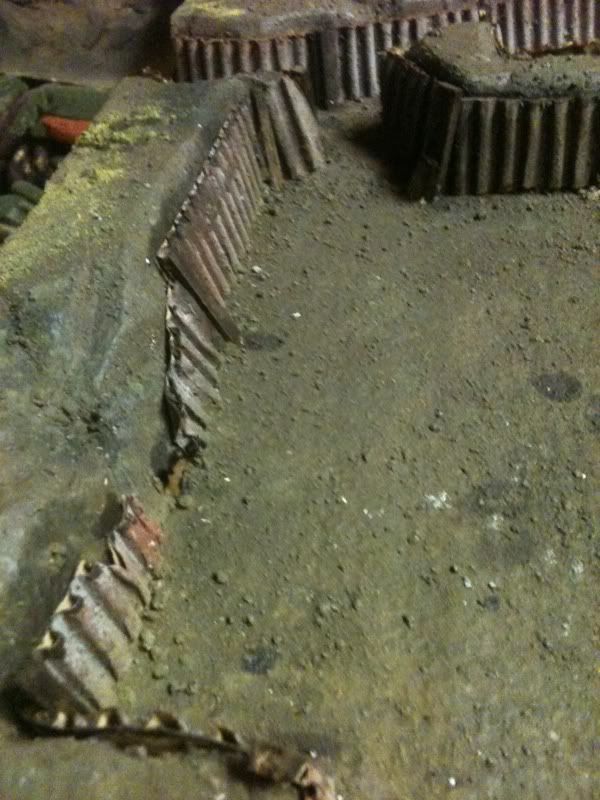
After that i decided to carve a gap into the front line and mould a small firing step to allow more firing positions. This way i could make more space with a false step allowing the base to slip into terrain. This lets the units get up against the wall and have space for troops to move behind them.
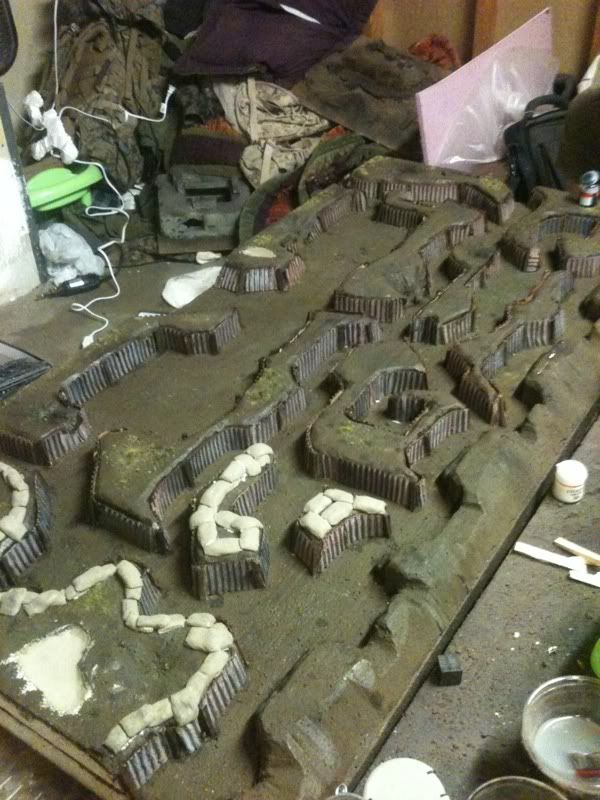
Then the funnest most satisfying part. The tedious sand bags.
Mini tutorial yay.
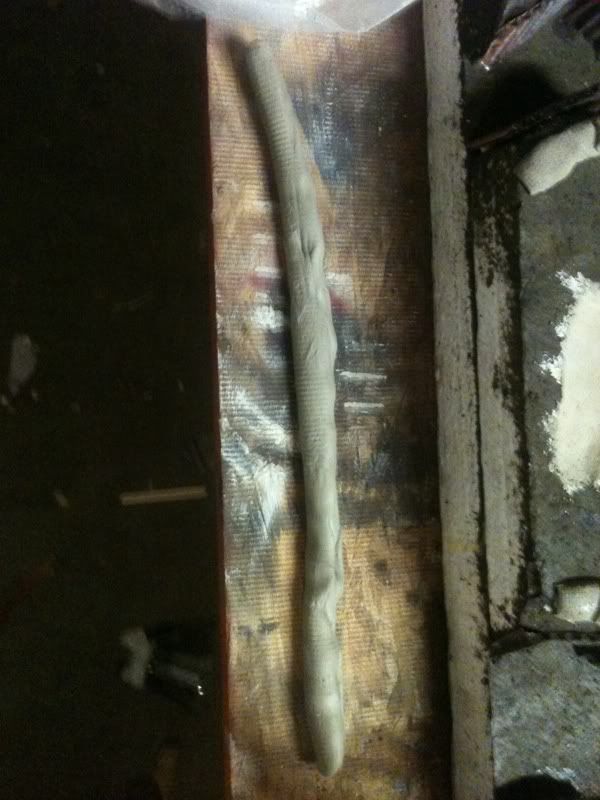
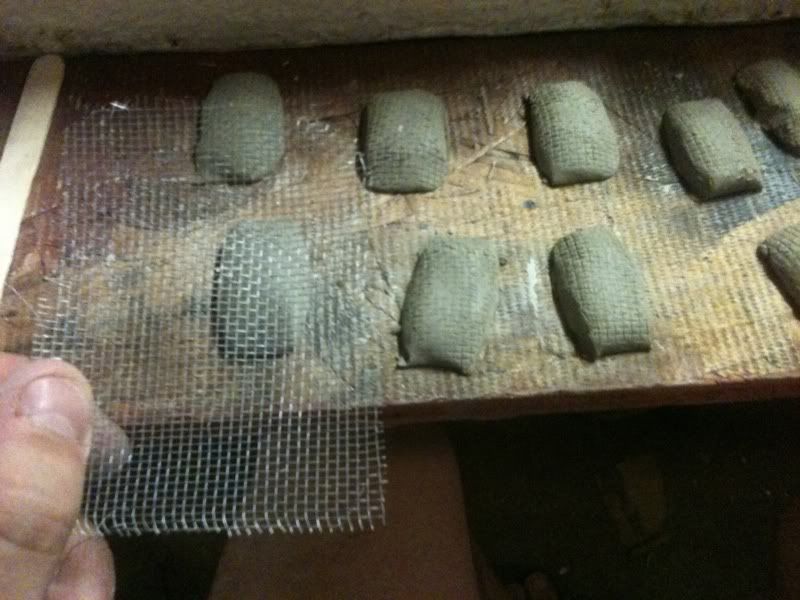
First take a roll of clay as long as you want but about a half inch in diameter
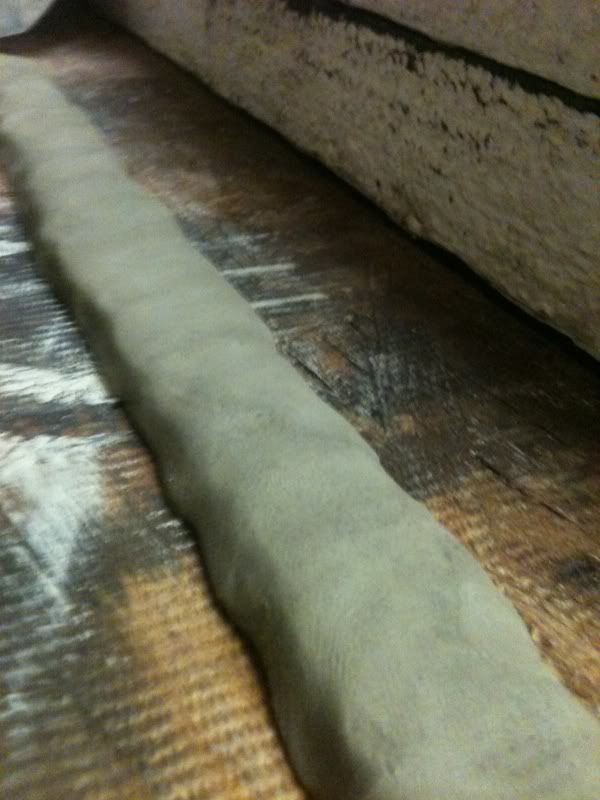
Than mould it to table like so
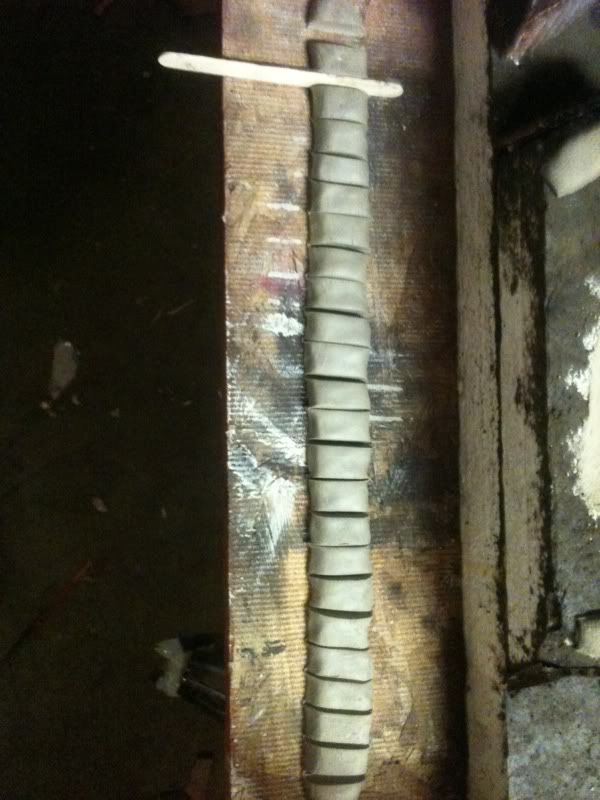
Then take a popsicle stick or a cutting too and cut rectangles down the line.
Then mould each bag to look smooth/ saggy
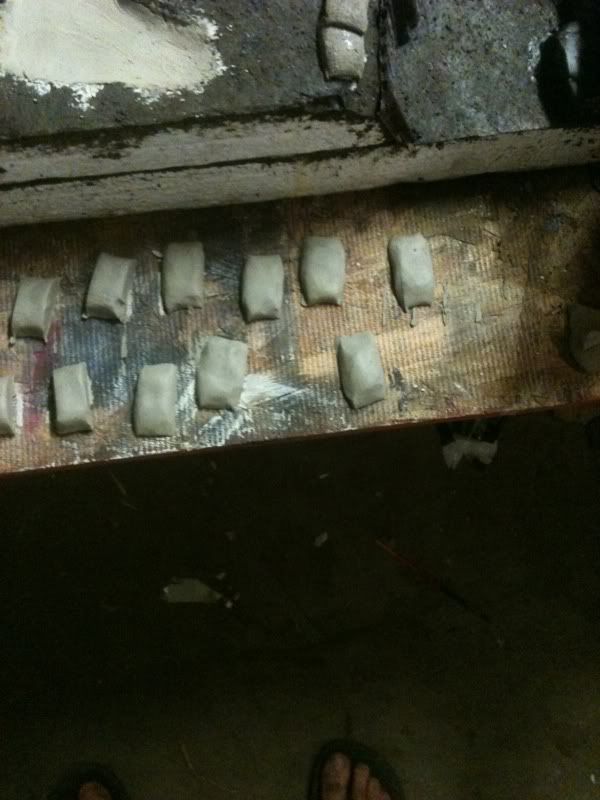
And last use a square of metal screen or mesh to imprint a texture.
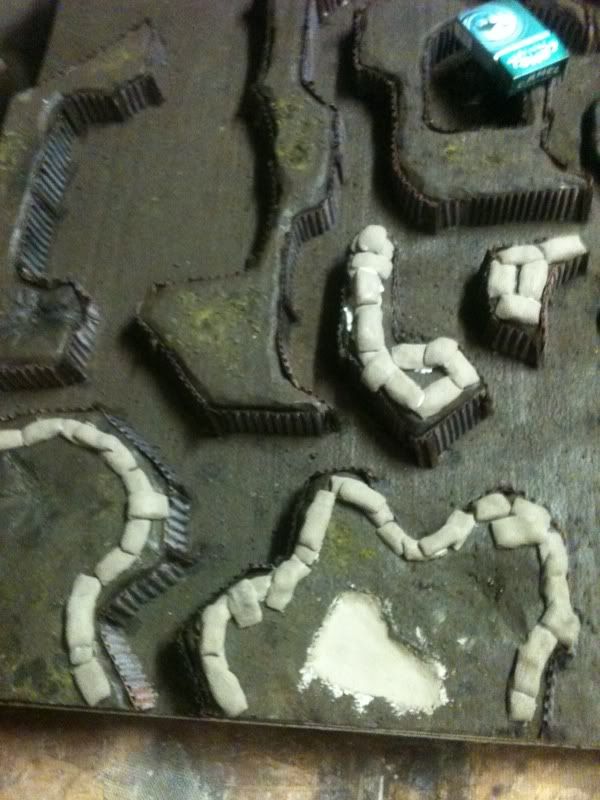
When attaching use a glue preferably wood glue and use your imagination to stack them and mold them to the terrain

And for you who wish to see vehicles. I only have my buddies basilisk but theirs 5 point where you can roll over the trenchs. This is just one spot. I dont think my pictures do justice to the scale of these trenches.
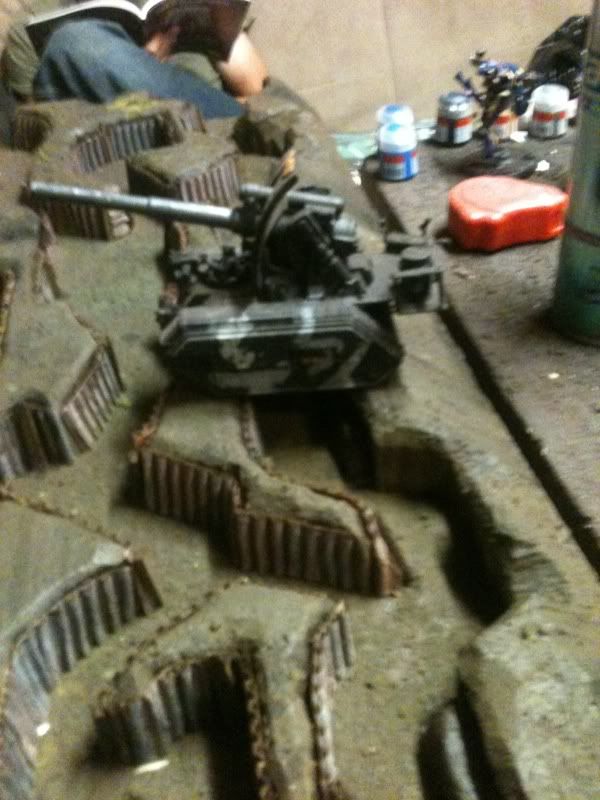
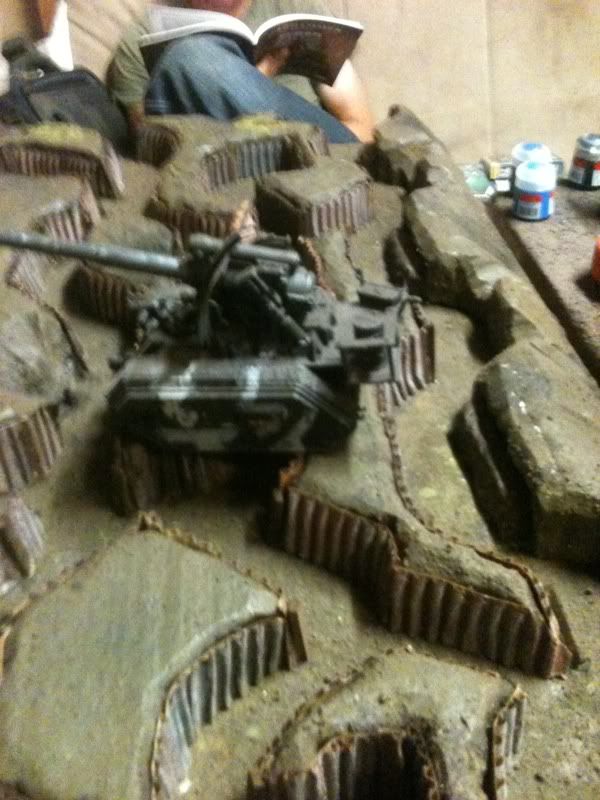
And the updated big picture.
 Automatically Appended Next Post: Automatically Appended Next Post: 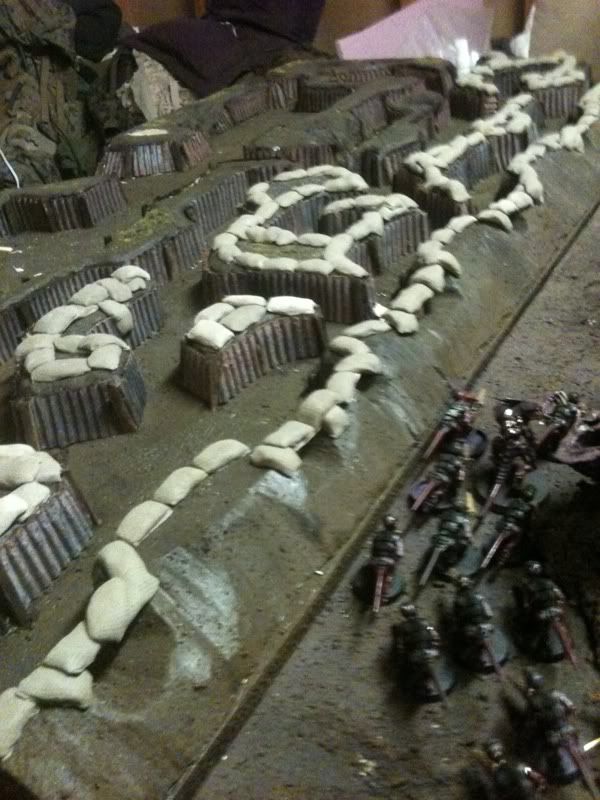
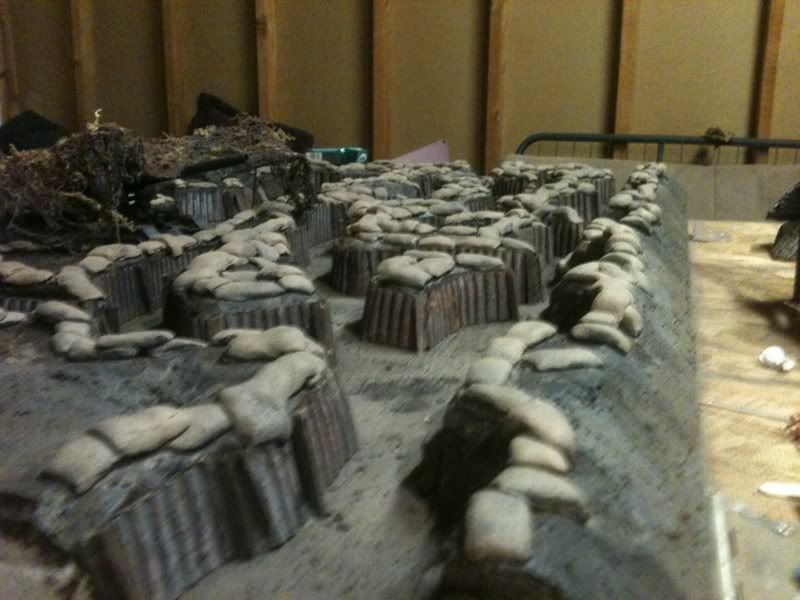
Fighting positions built up and sandbag torture is starting to take effect. A 5 minute production produces about 20 bags. So its really not that bad.
|
|
This message was edited 2 times. Last update was at 2011/09/17 08:38:27
|
|
|
|
|
2011/09/17 18:28:04
Subject: Trench WIP Tutorial as i go!
|
|

Pyromaniac Hellhound Pilot
|
few questions about your terrain project.
1. Which historical reference do you use for your trench system? Does the number of tiers effect the combat results?
2. What type of 'clay' do you use for sandbag?? a 'pottery' type. or specialized 'modelling clay'? i'm not sure if this clay has the same durability as epoxy putty?
And does half inch diameter the closest representation to the proportions of actual military sandbag?
And the distances between each cuts while dicing the clay to make sandbag. please =^.^=
3. About the trench depth. does it really repesents actual trench system? (and i'm not sure if it's too deep to allow defensive fire throughout the NO MAN'S LAND.
4. about corrugated steel thing. it looks like you use corrugated cardboard but i'm not sure if you soak one with lacquer/any woodworks chemicals to strenghten them before painting? (i've never try one but heard that there's such alternatives to make 'cheap plasticard' i'm not sure If i heard the right myths)
|

http://www.dakkadakka.com/dakkaforum/posts/list/408342.page |
|
|
|
|
2011/09/17 18:34:35
Subject: Re:Trench WIP Tutorial as i go!
|
|
Wicked Ghast
|
Awesome !!! i love trench boards had one in my home town FLGS was always a blast to play on. Hope this puppy see's many a battle 
|
|
|
|
|
2011/09/17 21:02:45
Subject: Trench WIP Tutorial as i go!
|
|
Bugswarm
|
Okay, lone cat to try and answer your questions.
1. I used a printout from a worl war one british trench layout i found on good. Its not exact just referenced. Also i dont play warhammer i just build for my buddys and watch haha. But ill find out when its finished.
2. I used amaco "natural clay" it has a tendancy to shrink sometimes but they drie very hard, hold the texture very well, and attach very well with woodglue. Dont know about epoxy putty, im a cheapskate scratch builder  the measurements are actuelly different everytime i dont know the scale to make real sized ones and i had Alot to make so they all differ in size but not much. Slices between cuts just determines this, here let me make a simple equation. The fatter the roll andfarther apart the cuts means fatter wider sandbags. But skinnier cuts will produce longer thinner sandbags.
3. The trenchs are about 1.5 inches deep from foam then with sand bags about two inches. The only way to fire or take fire from outside trench is artillery or standing on the firing steps or in a murder hole i have pictures of above.
4. The corrugated steel is infact just cardboard. I tear it apart than use a gritty sandpaper to quicly sand away the scraps of paper stuck to it then base coat it with red oxide spray paint, hairspay it the sprinkle seasalt. Then apply grey and black primer then allow to dry. Then crack the sea salt off showing paint chips. After painting the cardboard and gluing it to the walls its very tough and hard now.
And field marshal, thank you! Its my master peice so far got alot of work still.
|
|
|
|
|
2011/09/19 06:05:41
Subject: Re:Trench WIP Tutorial as i go!
|
|
Bugswarm
|
Update. Once you finish the sand bags go over them in a color of your choice i wanted to keep them burlapy so i chose a airbrush of blackthen khaki.
|
|
|
|
|
2011/09/19 06:58:04
Subject: Trench WIP Tutorial as i go!
|
|
Stone Bonkers Fabricator General
A garden grove on Citadel Station
|
This is awesome. Good tutorial, techniques, and results. Only bummer is that you don't get to use a trench board that often.
|
ph34r's Forgeworld Phobos blog, current WIP: Iron Warriors and Skaven Tau
+From Iron Cometh Strength+ +From Strength Cometh Will+ +From Will Cometh Faith+ +From Faith Cometh Honor+ +From Honor Cometh Iron+
The Polito form is dead, insect. Are you afraid? What is it you fear? The end of your trivial existence?
When the history of my glory is written, your species shall only be a footnote to my magnificence. |
|
|
|
|
2011/09/21 18:22:29
Subject: Re:Trench WIP Tutorial as i go!
|
|

Dakka Veteran
|
Super awesome tutorial.
I will make one when I figure out a way to play on it.
|
|
|
|
|
2011/09/21 21:32:17
Subject: Trench WIP Tutorial as i go!
|
|
Stalwart Veteran Guard Sergeant
|
dope!
|

http://www.dakkadakka.com/core/gallery-search.jsp?u=41398
http://www.facebook.com/pages/PALEHORSE/117277948287076?ref=tn_tnmn |
|
|
|
|
2011/09/26 17:51:01
Subject: Trench WIP Tutorial as i go!
|
|

Servoarm Flailing Magos
|
Very nice work. Excellant tutorial
|
"Praise Be To The Omissiah!"
"Three things make the Empire great: Faith, Steel and Gunpowder!"
Azarath Metrion Zinthos
Expect my posts to have a bazillion edits. I miss out letters, words, sometimes even entire sentences in my points and posts.
Come at me Heretic. |
|
|
|
|
2011/09/26 18:49:04
Subject: Trench WIP Tutorial as i go!
|
|
Storm Trooper with Maglight
Milwaukee, WI
|
5'ed and subscribed. This is amazing.
|
18th Gamtilla Secundus Dragoon Guards Regiment: “The Lord Governor’s Own” |
|
|
|
|
2011/09/27 11:48:53
Subject: Trench WIP Tutorial as i go!
|
|
Regular Dakkanaut
|
Nice! I'm thinking I'm going to steal some of your ideas for my own (eventual) trench project. I think mine will be modular though, so I can make it as big or small as the mission and map call for.
|
|
|
|
|
2011/09/27 14:48:13
Subject: Re:Trench WIP Tutorial as i go!
|
|
Wondering Why the Emperor Left
|
This is awesome! I might try this on a smaller scale.
|
|
|
|
|
2011/09/27 16:29:27
Subject: Trench WIP Tutorial as i go!
|
|

Necrotech
|
Amazing  I envy those termaguants about to fight
|

Help him grow please :3 |
|
|
|
|
2011/09/27 16:47:52
Subject: Trench WIP Tutorial as i go!
|
|
Avatar of the Bloody-Handed God
Inside your mind, corrupting the pathways
|
Looks pretty cool, if a little cramped.
I particularly like the card walls - I was wondering how you were going to edge them.
|
|
|
|
|
|
2011/10/01 20:43:08
Subject: Trench WIP Tutorial as i go!
|
|
Pyromaniac Hellhound Pilot
|
which brand of polymer clay do you use?
super sculpey or Japanese 'Homespun'? (the latter is dem cheaper i'm not sure if this one is more suitable to make sandbag or hesco)
|
http://www.dakkadakka.com/dakkaforum/posts/list/408342.page |
|
|
|
|
2011/10/04 04:19:06
Subject: Trench WIP Tutorial as i go!
|
|
Lone Wolf Sentinel Pilot
|
Water. It needs water.
Water was literally the ban of existence for soldiers in WW1. When it rained, the rain flooded the trenches, and would create huge mud pits that never dried. The phrase "trench foot" is from this time, because troops would spend literally all day standing in water. Because they couldn't keep anything dry, the skin on their feet would literally rot right off their foot. When men pulled their boots off, the skin would come with them (no lie).
So, add some water effects, and make some puddles. It would be so awesome, and accurate.
|
|
|
|
|
|
2011/10/29 12:22:55
Subject: Trench WIP Tutorial as i go!
|
|

Basecoated Black
|
A man after my own heart great job mate
|
|
|
|
|
2011/10/29 12:55:20
Subject: Trench WIP Tutorial as i go!
|
|
Wicked Warp Spider
|
Wow, that's an amazing project. I really like that you researched a proper layout instead of just knocking together a couple small pieces. Be aware that 40k is not well suited (in terms of gameplay) to real life tactics and fire patterns though!
|
 Eldar Corsairs: 4000 pts Eldar Corsairs: 4000 pts
 Imperial Guard: 4000 pts Imperial Guard: 4000 pts
 Corregidor 700 pts Corregidor 700 pts
 Acontecimento 400 pts Acontecimento 400 pts |
|
|
|
|
2011/10/30 03:57:01
Subject: Trench WIP Tutorial as i go!
|
|
Multispectral Nisse
|
Looks awesome I will have to borrow the idea for my Dkok
|
Hydra Dominatus
World Wide War Winner |
|
|
|
|
2011/10/31 01:39:26
Subject: Re:Trench WIP Tutorial as i go!
|
|
Trustworthy Shas'vre
Cruising in my CRASSUS ARMORED ASSAULT TRANSPORT
|
I gotta try this!
|
I guarantee you that I'm not really as smart as the test says:

Test Your IQ |
|
|
|
|
2011/10/31 05:04:09
Subject: Trench WIP Tutorial as i go!
|
|
Raging Ravener
|
I always wanted to make trench terrain. Thats cooler than a dry ice.
|
|
|
|
|
2011/10/31 11:32:35
Subject: Trench WIP Tutorial as i go!
|
|

Fighter Pilot
Townsville, Queensland
|
That is fething awesome!
|
 2000pts 2000pts
 5000 pts 5000 pts
 1 squad 1 squad
Leigen_Zero
"Armour? orks have armour? 6+ you say?
I don't think I've ever had to roll an armour save for my boyz outside of CC "
(\__/)
(='.'=) This is Bunny. Copy and paste bunny
(")_(") to help him gain world domination.
|
|
|
|
|
2011/11/09 13:46:20
Subject: Re:Trench WIP Tutorial as i go!
|
|

Hellacious Havoc
|
lol I say your shirt in the picture and was like is that guy a Marine? then i saw the high reg and Ilbie pack on the floor and I was like yep he def is. Semper Fi brother
|
 = 2000 = 2000
 |
|
|
|
|
2011/11/09 14:17:38
Subject: Re:Trench WIP Tutorial as i go!
|
|
Furious Raptor
|
Great looking trenches man!
I appreciate how simple this tutorial is, and how good it looks at the same time. Its usually simple and ugly, or very complicated but looks gorgeous. Way to rein it in!
|
 Serpintine Heralds: CSM - 2500 points Serpintine Heralds: CSM - 2500 points
Steel Cadre: Tau - 2000 Points
 Blackpowder Legion: Crons - 2000 Points Blackpowder Legion: Crons - 2000 Points
 Palanthine Purebloods: SM - 1000 Points Palanthine Purebloods: SM - 1000 Points
 Hive Fleet Basilisk: Nids - 1000 Points Hive Fleet Basilisk: Nids - 1000 Points
 301st Dragonborn: IG - 500 Points 301st Dragonborn: IG - 500 Points |
|
|
|
|
2011/11/09 16:02:22
Subject: Trench WIP Tutorial as i go!
|
|

Thunderhawk Pilot Dropping From Orbit
|
My FLGS had a trench board but it was like the front lines off the two teams trenchs so there was only one line on each side and a kill box in the center
|
|
|
|
|
|
2011/11/10 18:23:35
Subject: Trench WIP Tutorial as i go!
|
|
Brainy Zoanthrope
|
Great tut, may have to replicate (Not exactly  )...
|
Current Armies:
~2500pts _--_--_--_~1750pts _--_--_--_~1000pts  _--_--_--_~1300pts _--_--_--_~1300pts  _--_--_--_~750pts _--_--_--_~750pts  _--_--_--_~2000pts _--_--_--_~2000pts |
|
|
|
|
|
|