| Author |
Message |
 |
|
|
|
|
Advert
|
Forum adverts like this one are shown to any user who is not logged in. Join us by filling out a tiny 3 field form and you will get your own, free, dakka user account which gives a good range of benefits to you:
- No adverts like this in the forums anymore.
- Times and dates in your local timezone.
- Full tracking of what you have read so you can skip to your first unread post, easily see what has changed since you last logged in, and easily see what is new at a glance.
- Email notifications for threads you want to watch closely.
- Being a part of the oldest wargaming community on the net.
If you are already a member then feel free to login now. |
|
 |
2011/10/01 15:49:49
Subject: Blood Angel bloggery by Skarpa: Scratchbuilt DC Dreadnought primed, post 24
|
|

Chosen Baal Sec Youngblood
|
I've been playing WH 40k for quite a while, but my hobby has been somewhat on/off. I think I started something like mid/late nineties, during the 3rd edition. My army has always been the Blood Angels. I played for a while but then the gaming went on a long Hiatus. Next time I dug up my minis in 2007 and was pretty enthusiastic about the hobby for a few years but then the little red guys got buried in the closet again. My friend got me interested in the gaming again and for past month I've been very excited about this stuff. I decided to make this project blog to encourage me to finally get at least decent sized army assembled and painted. I have quite a few minis but I've always been more interested in assembling and converting than painting. I made a quick inventary of my storage boxes and the contents are as follows:
HQ:
Chaplain
Librarian
Old command squad
A few leaders
Elites:
15 or 20 dakka termies
10 assault termies
Troops:
20-30 tactical marines
roughly 30 assault marines
5 cc scouts
10 sniper scouts
5-10 DC (normal assault marines painted in DC colour scale)
Fast Attack:
3 land speeders
Baal predator
3 bikes
2 attack bikes
Old razorback
Heavy Support:
10 or so devastators
Predator
Whirlwind
Dakka dreadnought
Perhaps half on the minis are completely unpainted, a few squads are actually finished and the rest are in various stages of work in progress.
Here are a few minis that I'm fairly satisfied with. Quality of the pics is not very good. I used the gallery software autoadjust. Sure, the red is more vivid now, but the pics are more grainy and less detailed.
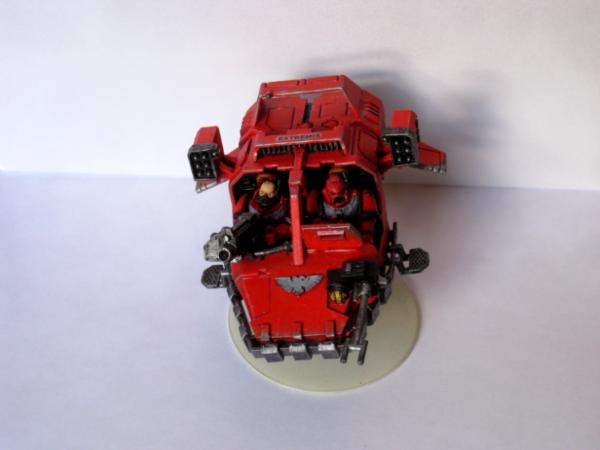
Land Speeder Typhoon - The missile pods are actually from a terminator box. The speeder is bought secondhand and painted over without removing the previous paint which is somewhat visible. Still I like it.
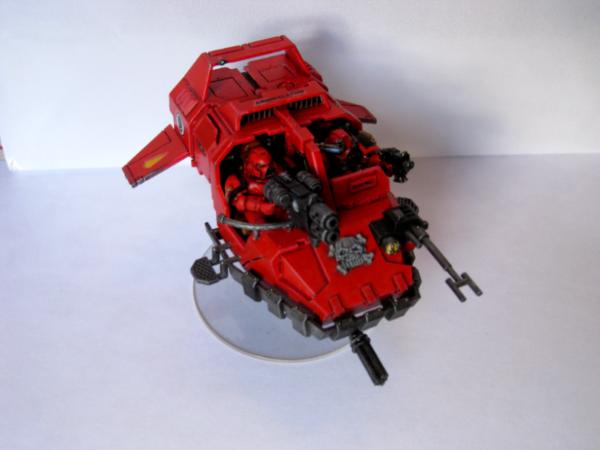
Designed to be the leader of a Land Speeder Squadron. Therefore the fancy shoulder pads on the pilot and the skull enblem on the hood.
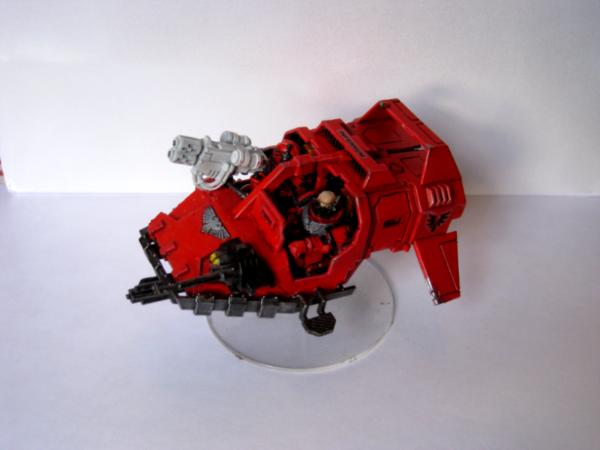
Just a basic Land Speeder. Guns need to be magnetized and painted.
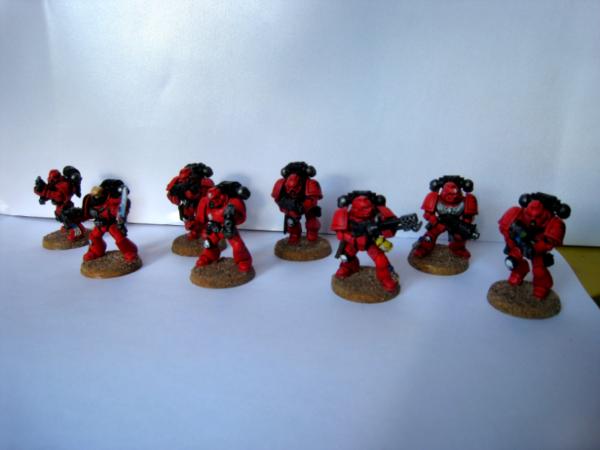
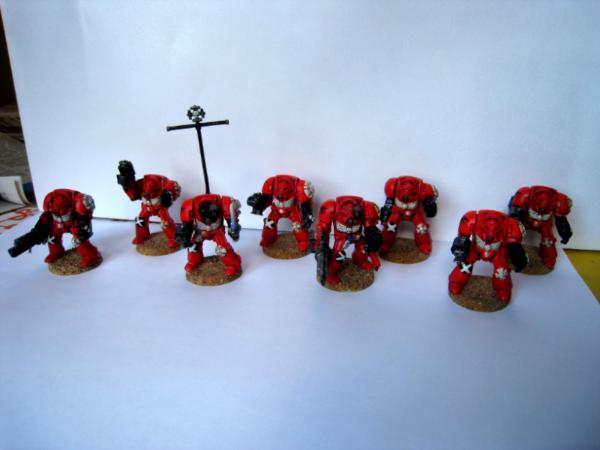
My so far best effort at painting a tactical squad.
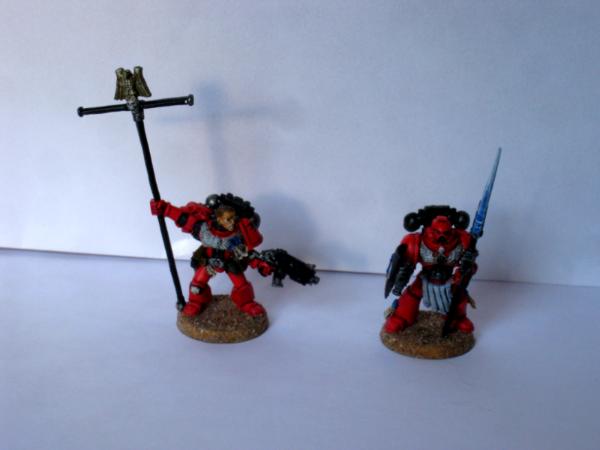
On the left there is a basic standard bearer from 3rd ed. command squad. I think the guy on the right was supposed to be the company champion. The combat shield is made of a dark elf shield and the power spear blade is from a dark elf swordsman. I'm not quite sure what to do with this guy. I could propably use him as a Veteran. Shiled needs to be replaced with a better one and the paint job on the power weapon needs to be redone. But I quite like him.
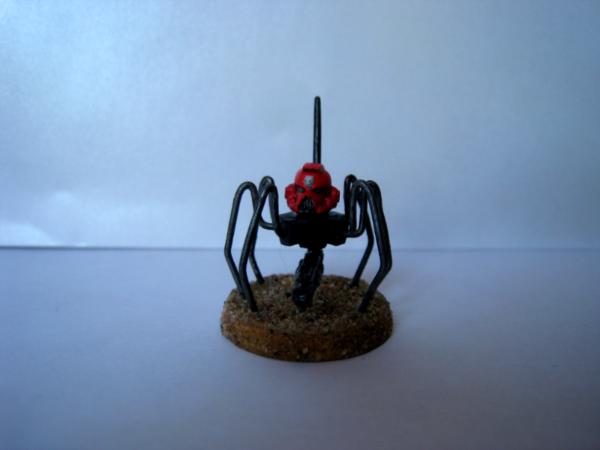
This guy was the familiar for my librarian. Made of steel wire, sprue, bolter and an antenna. Not much use for him anymore since they desided to get rid of the familiars.
A few termies are somewhere else. I may have used the bodies for assault termies. These guys need the new 40 mm bases.
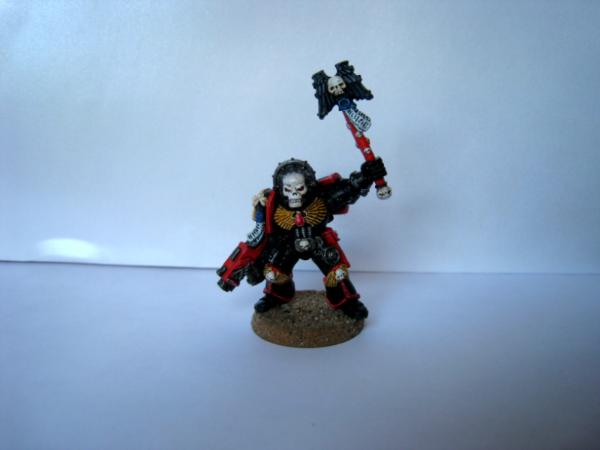
My chaplain, best paintjob so far. Only the jump pack needs to be finished.
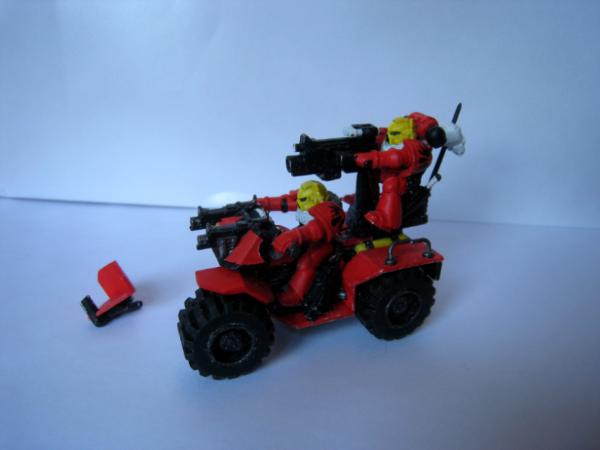
Kitbash/scratchbuild attack quad. Made of one Space marine bike, plasticard, and assorted bits. Painting this never got finished and model has suffered some damage during storage/transportation. The wheels are LEGO wheels with the hubcabs from the biker box.

Note the rear lights from an old rhino set.
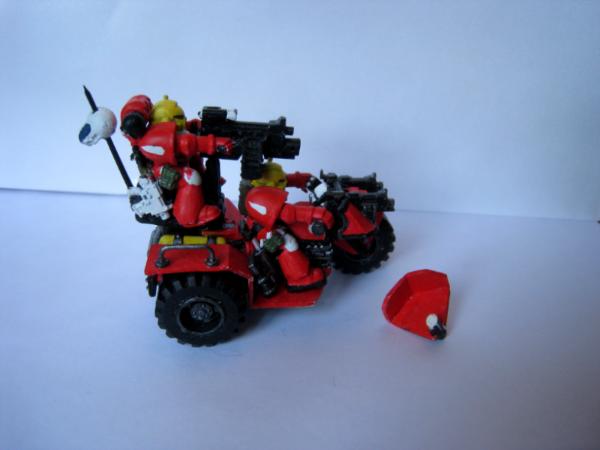
Note the Ultramarin style 'nid skull.
In future this blog will contain building/painting pics, battle reports, army lists and various thoughts to cross my mind conserning the hobby.
|
|
This message was edited 10 times. Last update was at 2011/11/18 07:54:16
|
|
|
 |
|
2011/10/01 16:21:27
Subject: Blood Angel bloggery by Skarpa
|
|

Decrepit Dakkanaut
|
Really like that attack bike, reminds me of an old Dark Future picture.
|
|
|
|
|
|
2011/10/02 10:05:04
Subject: Re:Blood Angel bloggery by Skarpa
|
|
Chosen Baal Sec Youngblood
|
I purchased the 5th ed. rule book and Blood Angel codex and have been reading a lot of blogs and articles about nature of tactics in this edition. Favourite ways to play Blood Angels seem to be mech spam and jump pack spam. Full mech interests me for I have always liked tanks, even if it's hard to see when looking at my list of minis. Stormraven seems like pretty interesting choice. Although not for small games since you need at least two for them to make any sense.
My friend challenged me into 1500 pt. game against his IG. I wanted to try out a bit more mechanized list than I used to use in 4th ed. Here's the list. As a mech list it's pretty crippled by my lack of tank minis:
HQ:
- Reclusiarch, melta bombs 135
Elites:
- Sanguinary priest, lightning claw 65
- Sanguinary priest, jump pack 75
Troops:
- 5-man death company, 4 power weapons, 1 power fist las- plas razor 275
- 10-man assault squad, jump packs, flamer, meltagun, power fist 230
- 5-man assault squad, flamer, meltagun, power weapon, TL- LC razorback 185
Fast Attack:
- Baal Predator, asscans + heavy bolters 145
- Speeder, MM+ HF 70
- Speeder, MM+ HF 70
Heavy Support:
- TL- LC Predator 115
- Dreadnought TLLC 135
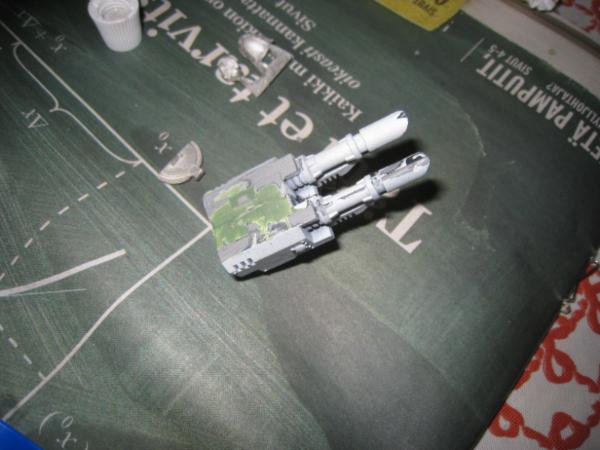
For this list I needed to modify my whirlwind into a razorback. I wanted to do a las- plas razorback but didn't have extra plasmaguns so I went for TLLC instead.
Most of the parts needed for Razorback conversion.
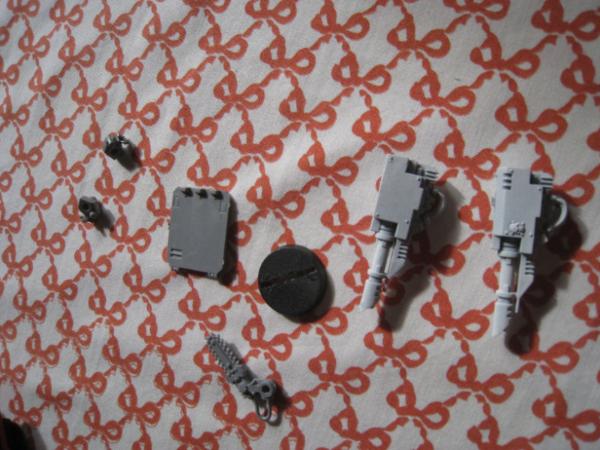
Cut off the blade of the chainsword to form a stand for the guns.
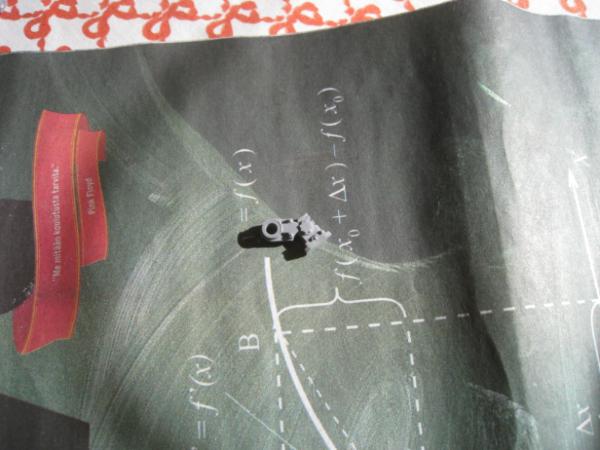
Sand the inner faces of the lascannons smooth and cut an indent for the stand. Glue the guns together. By the way, you might want to be careful with the modelling knife. I'll never be able to give thumbs up anymore. (actually it was a table saw)
Learning how to use Greenstuff. Lesson 1: Greenstuff doesn't sand well. This was actually first time I used greenstuff and I wasn't really familiar with it's properties. This was a worthwile lesson.
I decided to use this stuff instead. Surprisingly the putty had not gone completely solid even though it's about 15 years old. I added some polystyrene cement to revive the putty. It shrinks when it dries so you need more layers when filling bigger gaps but it sands better than greenstuff.
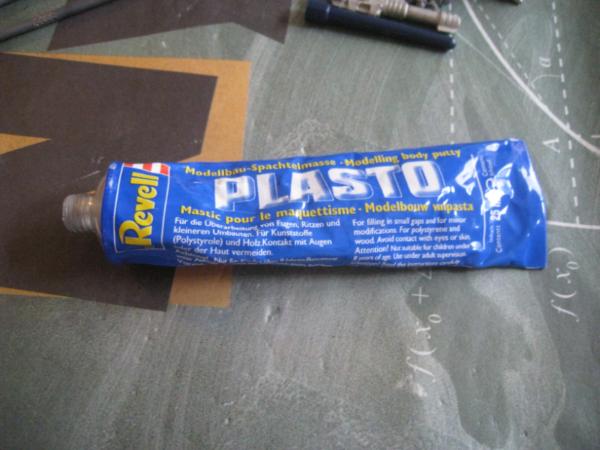
Much better.
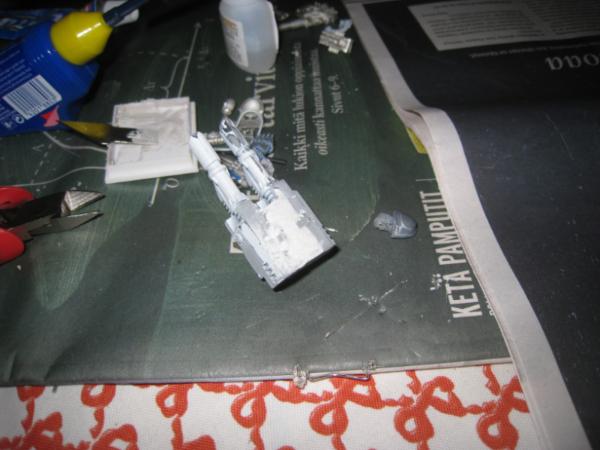
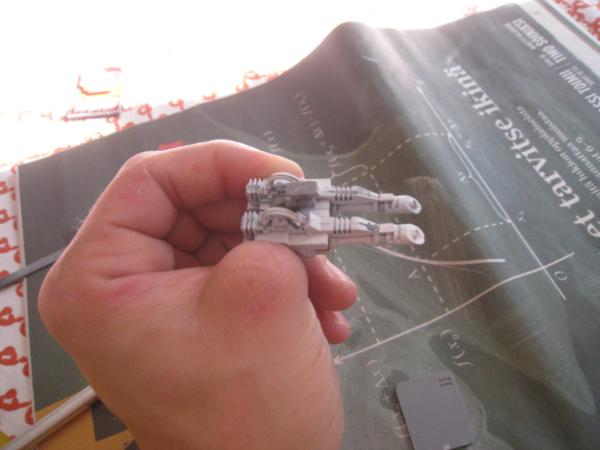
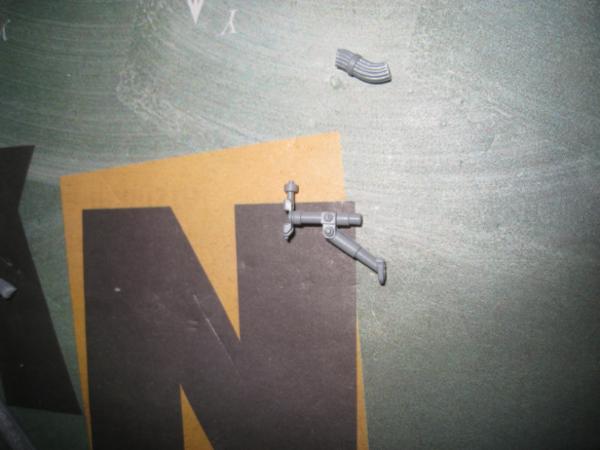
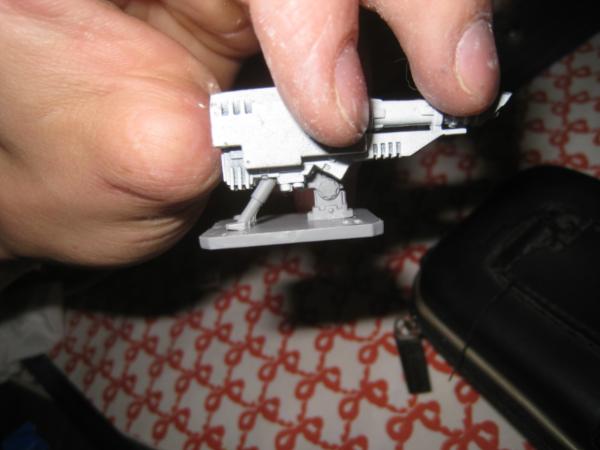
I took hydraulics for the guns from this stand. I think its perhaps some sort of IG gun stand. In this pic I already cut off one of the legs.
Both guns have their own hydraulic sylinder it it's not that evident in this pic. The gun still seems to be missing something. I know, power cords.
Power cords came from my bitz box. No idea where they are originally from.
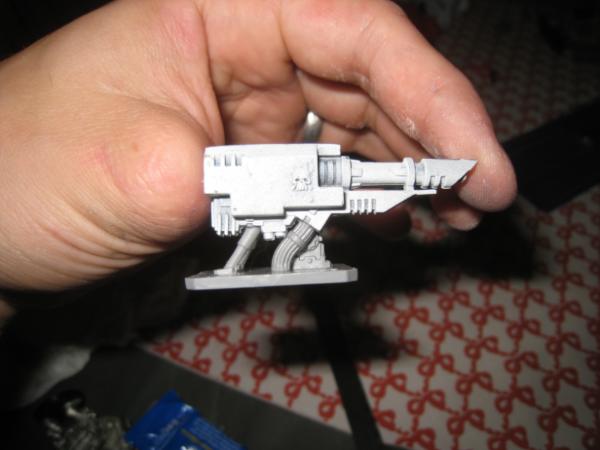
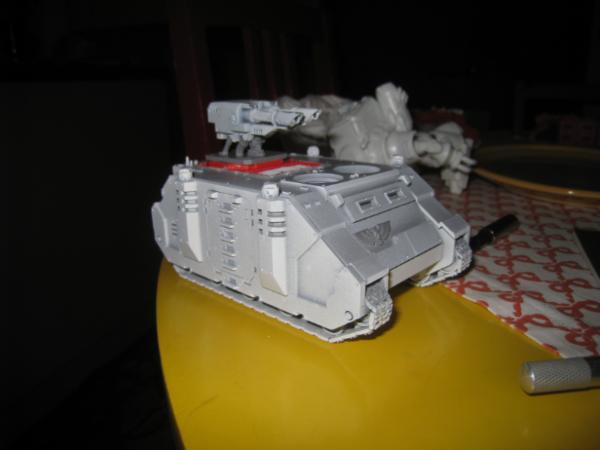
Whirlwind successfully turned into razorback. The end result is Ok, but not as good as I'd like it to be. Biggest eyesore is the square baseplate of the turret. In future I may use plasticard to fabricate something closer to GW razorback turret base. At the moment it will serve its purpose and I didn't destroy any of the whirlwind parts so it's quick to alternate between these two by changing the turret and radar dish. The seams of the tank look terrible but that's because the top is not yet glued on. I haven't finished painting the insides of the tank.
I also made another sanguinary priest for my army using this excellent tutorial: http://www.heresy-online.net/forums/showthread.php?t=69370
Head is from SM leader box. It had suitably advanced optics on it. The torso is not from a jump pack marine but the ducting or whatever across his chest resembles the jump pack harness. I've always wondered about this torso. What is the meaning of the round thing in the middle of his chest? Perhaps someone can enlighten me on that issue.
Shoulder pad from a Blood Angels vehicle sprue and bionics from SM leader box.
So how did the game go? Terribly. My DC razorback was immobilized at the first turn and soon after that the DC was wiped out. The land speeders scattered and splattered. I was almost tabled. I wasn't expecting much else. Still, the game left me with a good impression about the capabilities of razorbacks and predators. After the game I used the gift voucher my friends gave me for my birthday and bought two Stormravens. More of that in the next post.
|
|
This message was edited 1 time. Last update was at 2011/10/02 10:08:03
|
|
|
|
|
2011/10/04 17:25:31
Subject: Re:Blood Angel bloggery by Skarpa
|
|
Chosen Baal Sec Youngblood
|
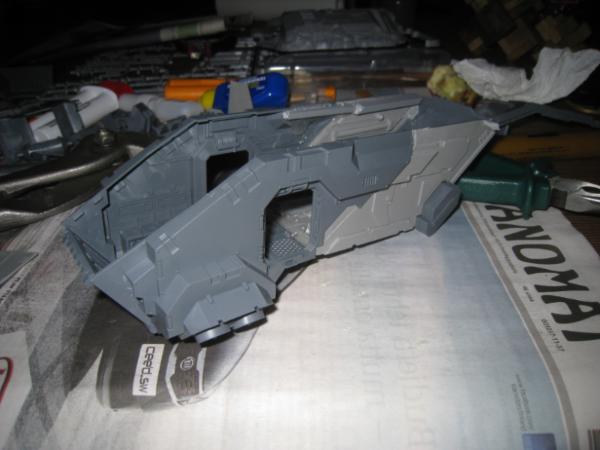
When I went to Internet and saw the Stormraven there, I thought to myself: what the ****? Okay so my reaction to the model was pretty much the same as everyone elses, with the same issues about the model. I did like the individual details of the model but the proportions were horribly wrong. And Why is it smaller than Valkyrie even though it hould have greater transport capacity? I was disappointed for I had wanted to field the Stormraven but couldn't bring myself to put dough in such a butt-ugly model. Then, luckily I saw the Chapterhouse Studios modification kit in some blog. Found it: http://www.tabletopgamingnews.com/2011/09/03/50172/ The model looks completely different. It actually looks like airborne model, but retains the boxy and angular shape of other SM vehicles.
So I decided to get two Stormravens with the modificaion kits. I also bought a bunch of magnets to make all the weapon loadouts easily available. This is the first time for me working with resin parts and also first time to use magnets, So I have alot to learn. I used this blog http://warbuilder.wordpress.com/2011/02/22/magnetizing-the-blood-angel-stormraven/ as my guideline for magnetising the model. I must say that the quality of GWs recent plastic kits impresses me. The model was a snap to put together with minimum need to file down mold lines etc. The resin parts needed more attention: filling cavities, fitting parts together etc. but nothing major in that region either. The design of the mod kit is good. The parts fit cleverly to the model. So here's some pics.
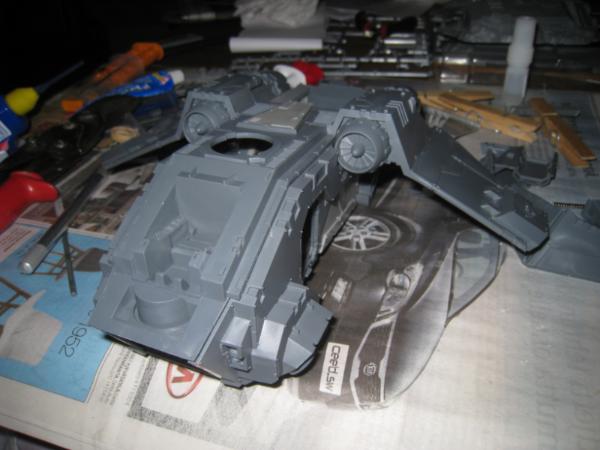
First Stormraven coming together. Especially in the top edges the chapterhouse side plates are very thin. You can see the rear rubber band bending the sideplates quite violently. Therefore I used the tail as a spacer to protect the parts.
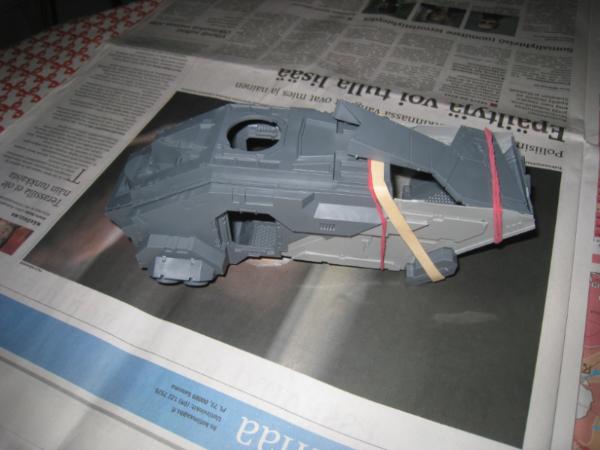
I decided to just glue the hatches closed. Why waste time painting the insides when I already have problems getting my army painted from the outside?. Since I'm not making the insides visible, I decided to make some reinforcements. The Chapterhouse side plates were very thin at the top edge so I glued a strips of sprue to keep them in shape. Also, the bottom plate is pretty thin and flexes quite alot when pushing the stand into place. I glued two strips of sprue to make the floor more rigid. As an afterthought I reinforced the joint between the original hull and the extension with some sprue and put an extra strip of epoxy glue on the insides of all joints. Sure I managed to make the thing look ugly from the inside but rather that than having to glue the piece together after every ever little bump. Anyway, the main purpose of my minis gaming, not showcase. Incidentally, I tested the impact resistance of one of the Stormravens by dropping it on the floor: no damage whatsoever.
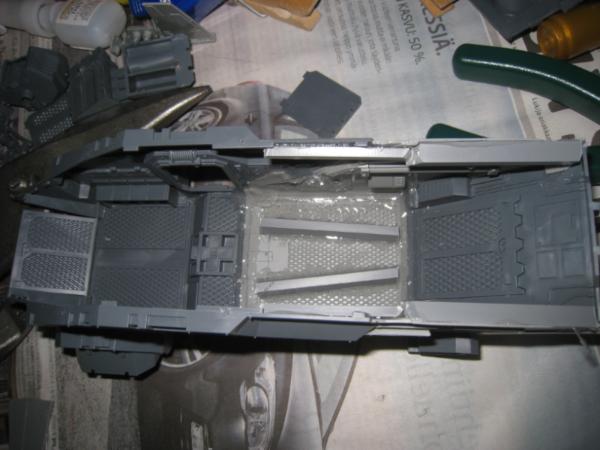
Looking good. After taking this I glued pieces of sheetmetal to the insides of the side doorways so I can magnetize the doors and hurricane bolters.
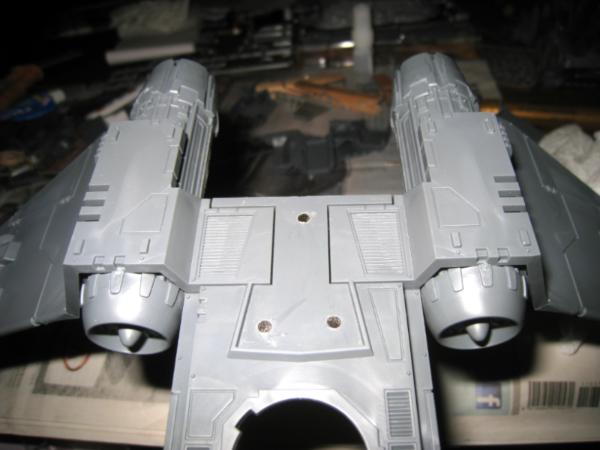
I wanted to make the wings detachaple to ease the transportation of Stormravens. For that purpose I glued a row of 3 mm disc magnets in the groove under the fixing point of each wing.
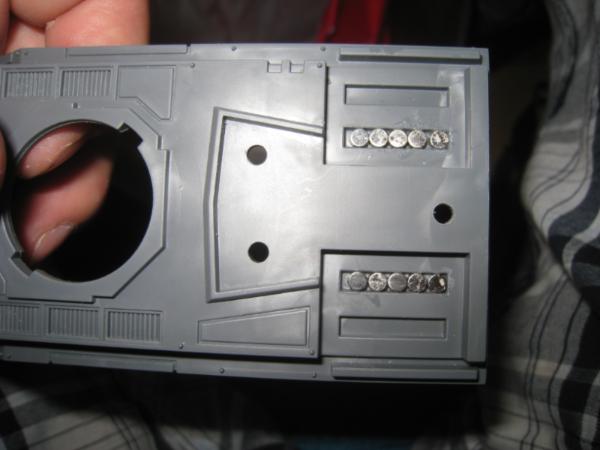
I then glued a piece of 0,7 mm sheetmetal under each wing.
The wings sit there nice and tight. The engines needed to be modified a bit. Originally they have small pieces connecting them to the tail of the machine. These needed to be cut off for the engines to fit in position.
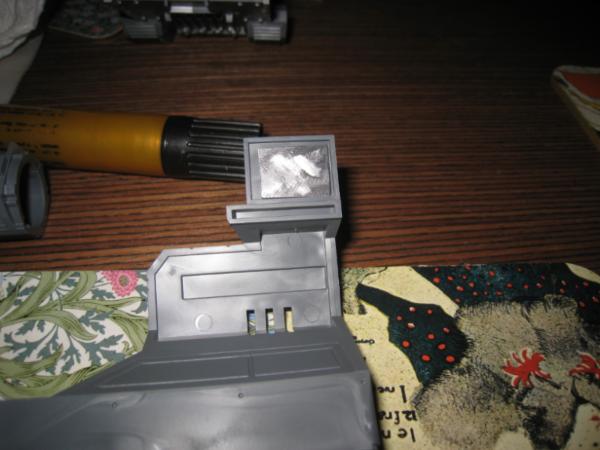
Chapterhouse kit comes with a small plate to cover the place of the air intake tower. To magnetize this I cut a piece of sheetmetal in the same shape and glued it under the plate.
I then drilled three holes where the plate would sit and glued magnets in them. (Visible in earlier pics) Now the covering plate and the wings are easily detachable.
Rest of the assembly of the hull is pretty straightforward and follows the instructions given in the assembly manuals. I glued one 3 mm magnet on the inner face of each door. Thats plenty enough to hold the doors tightly there and actually they are a little bit hard to take off. Best way is to take a large, strong magnet and use that one to get a hold of the door. The fixing point of the stand in the Chpaterhouse floor plate required some carving in order to stick the stand there deep enough.

Next problem to tackle was the turret. What I would do modelvise is to stick the guns under the wings and get rid of the whole turret. Chapterhouse kit actually comes with a covering plate for the turret hole. This would give the model the nice, sleek lines, as seen in the previous pic. But, as mentioned before, the main function of my minis is the gaming, so I wanted to keep the turret in the original position. Alot of people have converted the turret to resemble the Razorback turret. I find it much better than the original turret but still I doesn't quite please my eye. In my opinion, the best solution I've seen is in this blog: http://www.bolterandchainsword.com/index.php?showtopic=213819&st=100. That's the way I decided to take. So here we have the turret parts. I cut away the top of the turret, just above the gun fixing points. I need to use plasticard to make new, flat top for the turret.
 
Alas, I have no plasticard at the moment so the turret needs to wait. I tried the turret on and It's okay but makes the model look a little bit front-heavy.
 
With the air intake tower sitting behind the wings the model actually looks quite balanced. I think I will install the piece over there even though I was originally planning to lose the whole air intake. This is actually where Chapterhouse instructions tell you to install the part but I think it's sort of an afterthought since air intake doesn't quite fit on the chapterhouse piece of roof. The angles are wrong so it will need a little modificating.
 
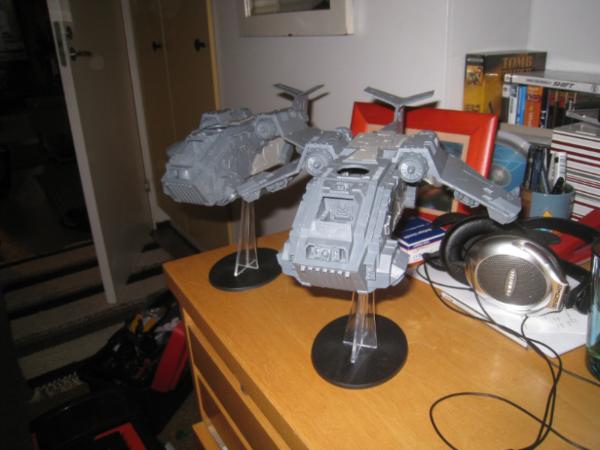
Since I didn't have plasticard for the turret I built both Stormravens up to the same point and them put them away to wait for the plasticard. It's a bit hard to come by in Finland.
Another pic-heavy update. Does anyone one what is the limit of Gallery size for one person?
PS: I just read through my post and realized just how overly complex and sometimes plain incorrect English I write. So, congratulations if you made it this far. And don't hesitate to give me feedback for language as well as models. Comments and critique are always welcome.
|
|
This message was edited 3 times. Last update was at 2011/10/04 19:34:09
|
|
|
|
|
2011/10/09 19:45:17
Subject: Re:Blood Angel bloggery by Skarpa: Building two Stormravens with Chapterhouse extension kits.
|
|
Chosen Baal Sec Youngblood
|
I finally Found some plasticard from Finland. It is from company selling tools and plastics for industrial use. (Etra or Teollisuusetola for you Finnish guys) Sheet styrene was sold in peaces of 1m x 2m pieces for a pretty affordable price. So now I have ample supply of 1 mm plasticard. I did some work on the Stormravens but another project took most of my time this weekend. I have been considering on buying a Furioso dreadnought but having such a large amount of plasticard inspired me to make my own instead. So I started measuring my dread and cutting up plasticard. Here are the pieces to put together the breast plates.
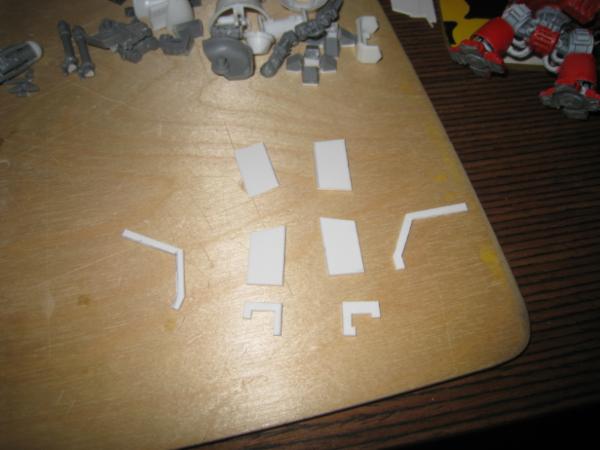
And here are the side sections of the torso almost finished. I decided I would try to stay as faithful to GW dread as possible.
Torso coming together.
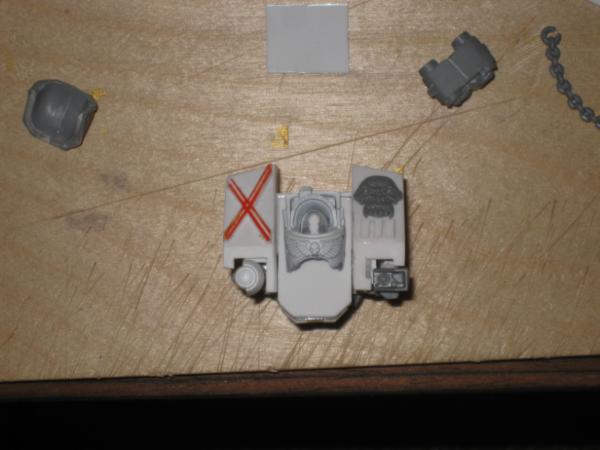
Torso with some details. The optics on right are from HK missile. The lense on left comes from butchered mecha. I cut up a cross for his right shoulder out of plasticard.
I plan to make the sargophagus out of terminator torso. Propably I will use a termy hed for him. I'm not quite sure what to do with the lower part of the sargophagus. I had one Idea but I didn't look good.
For his waist I cut up the underside of Tau drone. I may magnetize the waist to make him more posable.
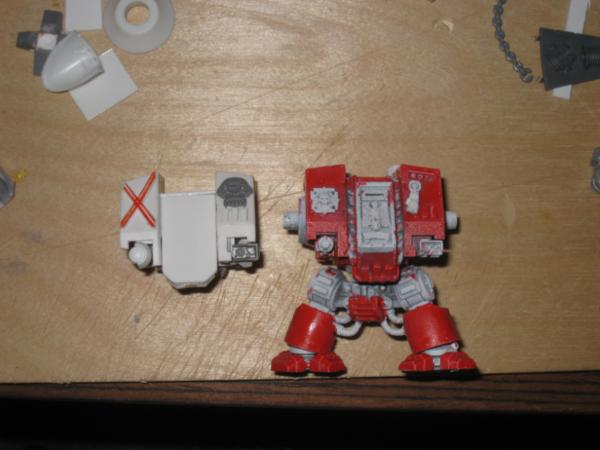
Comparison shot with GW dread. I quite like the results so far. on top of the torso I left space for the magna grapple
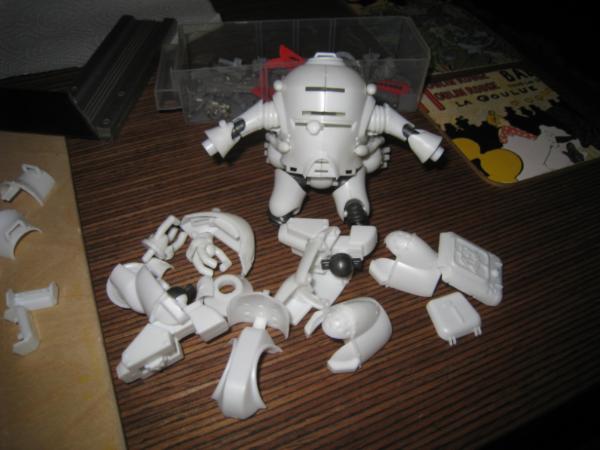
I butchered some anime mecha to use as bits for various projects. It's a random model I picked up cause it was cheap.
Here's a leg and foot for the dread. The toes are made of sprue, mounted on plasticard. I'm not hundred percent satisfied with the feet. Toes are more narrow than in GW dread and whole foot turned out slightly smaller. I will put together the dread and then decide If I need to remake the feet.
The leg is made of autocannon and some plastic rods for the sylinders. The joint is Autocannon magazine and the ancle is a hemisphere from the mecha kit. I like it how the ball joint in the ancle makes assembly and posing very easy. In this pic the ancle is not yet glued.
We'll get back to the stormravens when I make any major progress on them. Ath the moment I'm so enthusiastic about this Dread that I'm likely to finish this first.
|
|
|
|
|
2011/10/15 14:06:23
Subject: Re:Blood Angel bloggery by Skarpa: Scrap/scratch-building a DC dread, post 5
|
|
Chosen Baal Sec Youngblood
|
Hm. Still no comments. But I'll keep throwing my stuff here in case someone is interested in it. The torso of the dread is coming along nicely. I hope to finish it this weekend.
Magna grapple. The grapples themselves and the cable drums come from the dread grapple/winch thingies under the stormraven tails. Cable drums needed to be shortened. I'm not sure yet what I'll do with the mechanics between the cable drums.
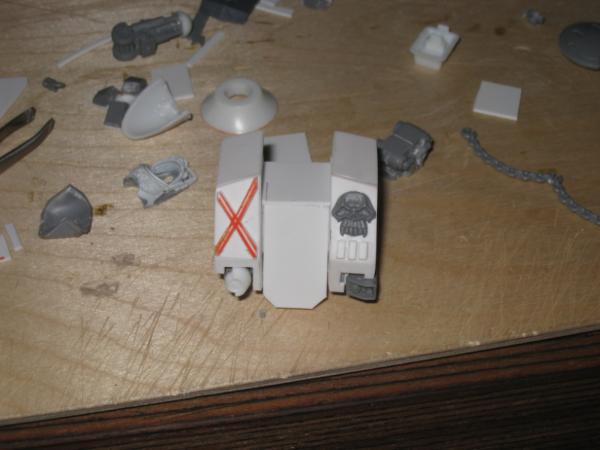
I decided to use the shin plate from scrapped mecha for the lower part of the sarcophagus. Earlier I was planning to use this part for the shin guard of the dread but I'll need to come up with something else for the shin guards. The imperial eagle motif comes from some tank sprue. I heated it up over a boiling kettle to bend it around the round surface but managed to break off one of the wings in the process. I'm not sure yet of the termy head on the dread.
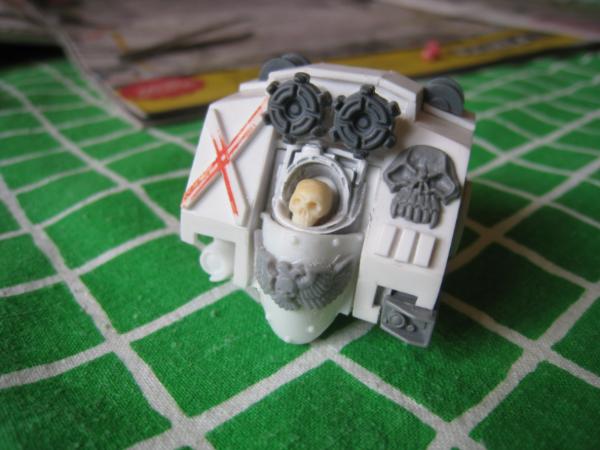
I think I'm leaning towards a skull on him instead of the termy head. Opinions? This skull is only to give the basic idea. Itl comes from the Hero Quest board game but it's way too small. If I go with the skull I need to find a more suitable one. Mayhaps a resin skull from some bitz shop. Also some chaos helmet without the horns might be possible.
Left side mostly finished.
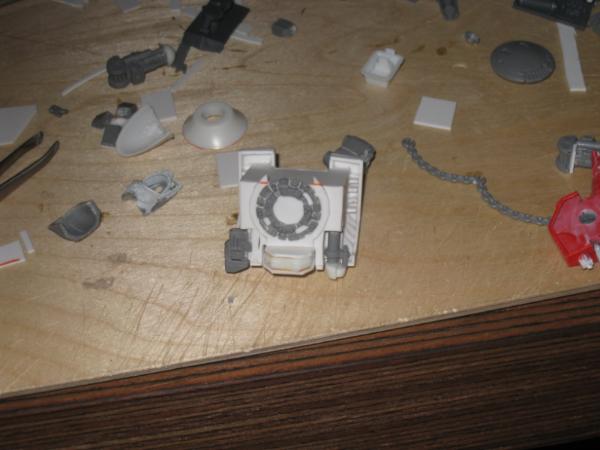
Rear end mostly finished. Needs just the exhaust pack. from this pic you can see pretty well how I made the shoulders. I cut circles of differend sizes out of plasticard and glued them atop each other to create the stepped shape of the ones on GW dread.
Right side. Macro photography is not great friend of my model. It really brings out all the small imperfections like smudged glue trails. Still I'm pretty pleased with the results since this is my first actual scratchbuild. Anyway I think painting it black will hide most of the flaws.
|
|
This message was edited 1 time. Last update was at 2011/10/15 19:23:15
|
|
|
|
|
2011/10/21 19:52:43
Subject: Re:Blood Angel bloggery by Skarpa: Scrap/scratch-building a DC dread, post 5
|
|
Chosen Baal Sec Youngblood
|
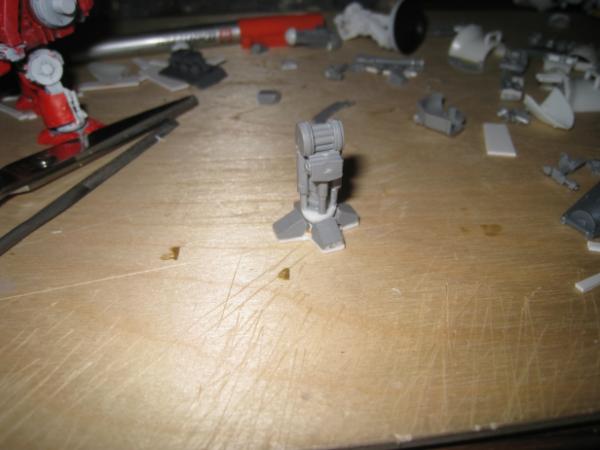
Some progress with the dread is made. I was lucky enough to find a guy selling polystyrene profiles so I bought different sizes of pipes, square pipes, rods and square rods as well as some different thicknesses of plasticard. This has made my job easier. The legs are finished except for some decorations. I was doing okay with the exhaust pack but I screwed up when I tried to cut the cooling slits for the powerplant covers. The arms I have started. Before continuing I need to find something with the correct shape for the forearms. Propably pens or markerpen caps. But enough of yak, let's get to the pictures:
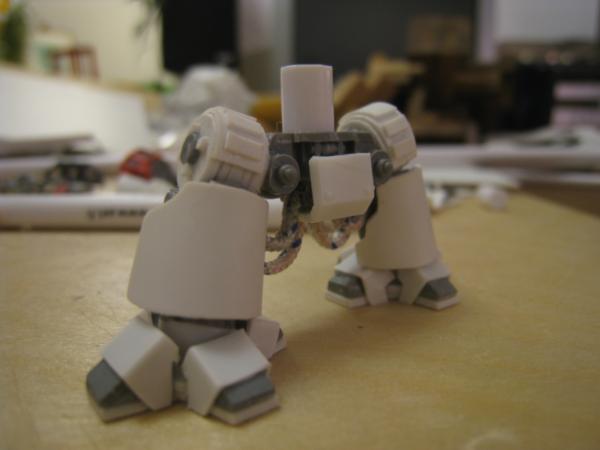
The feet were indeed too tiny for the dread so they needed to be redone. I moved the toes further apart and beefed them up with pieces of square polystyrene pipe. Contrary to my original plan, the front sides of the hip joints are visible So I needed to redo them also. Each joint is made of five plasticard circles + the joint covers and details. (I watched a bunch of Futurama episodes when working on the dread and I'm not able to write hip joint without thinking about the bar in the show)
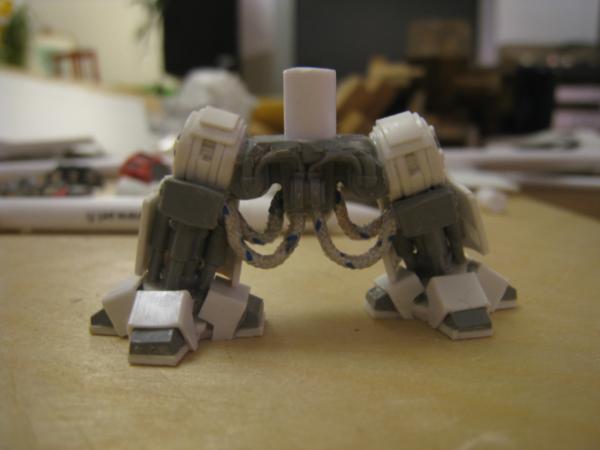
I have asked a few of my friends, playing guitar to put aside old quitar strings for me but I don't have any yet. The hoses are made of thermocouple wire. It is stiff but easily shaped wire with textile sheath. Normally it's used for measuring temperatures. The crotch piece is the base of Battle for Macragge force field pylon shaved down.
Side view of the leg. Shin guards are plasticard, heated up with steam and bent into shape.
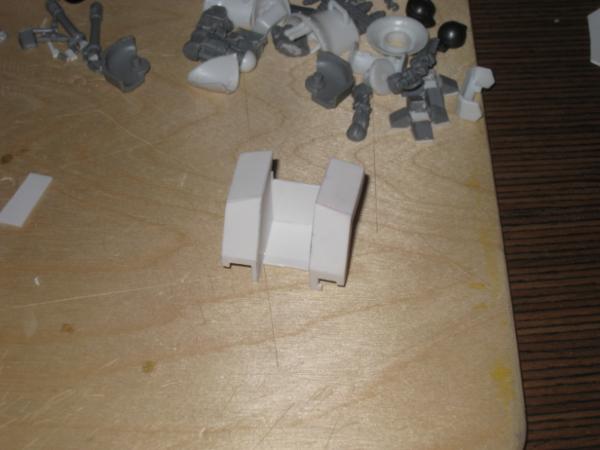
Dread so far. The waist is made with two pieces of pipe, one fitting snugly inside the other one so it doesn't need glue.
I ordered a bunch of bits including some resin skulls, so soon he should have suitably sized head. I also ordered a few plain 60mm bases. I have interesting idea for basing but we'll see. It will require using some painting techniques that I'm completely noob with. (Okay, lets face it, I'm completely noob in painting, period)
Comments and critique are extremely welcome.
|
|
This message was edited 2 times. Last update was at 2011/10/24 18:33:08
|
|
|
|
|
2011/10/21 20:21:42
Subject: Blood Angel bloggery by Skarpa: The legs of the scratchbuilt DC dread finished, post 7
|
|

Journeyman Inquisitor with Visions of the Warp
|
That dread is wicked! great work. I am really going to have to get me some plasticard.
|
|
|
|
|
2011/10/21 20:39:31
Subject: Blood Angel bloggery by Skarpa: The legs of the scratchbuilt DC dread finished, post 7
|
|
Death-Dealing Devastator
|
That is the best looking scratch built dread I think I've ever seen! How did you get the leg plates so perfect? Heating over a rounded/cylinder surface? Or were those part of the mech toy?
|
|
|
|
|
|
2011/10/21 20:57:12
Subject: Blood Angel bloggery by Skarpa: The legs of the scratchbuilt DC dread finished, post 7
|
|
Dakka Veteran
|
Stunning work.
|
|
|
|
|
2011/10/21 20:57:26
Subject: Blood Angel bloggery by Skarpa: The legs of the scratchbuilt DC dread finished, post 7
|
|
Chosen Baal Sec Youngblood
|
Johnnyhorse wrote:That is the best looking scratch built dread I think I've ever seen! How did you get the leg plates so perfect? Heating over a rounded/cylinder surface? Or were those part of the mech toy?
Thanks alot for encouraging comments, all of you. I haven't figured out yet if my phone supports the multiquote function of the board. The leg plates are 1 mm plastcard heated up over the spout of boiling kettle and wrapped around a marker pen. The pen has slightly tapered shape (thicker in one end than the other)which helped in creating the right shape. I used a clothes peg to keep the plasticard wrapped around the pen when cooling down so it would harden in correct shape.
|
|
This message was edited 1 time. Last update was at 2011/10/22 10:38:04
|
|
|
|
|
2011/10/24 16:27:55
Subject: Exhaust pack finished
|
|
Chosen Baal Sec Youngblood
|
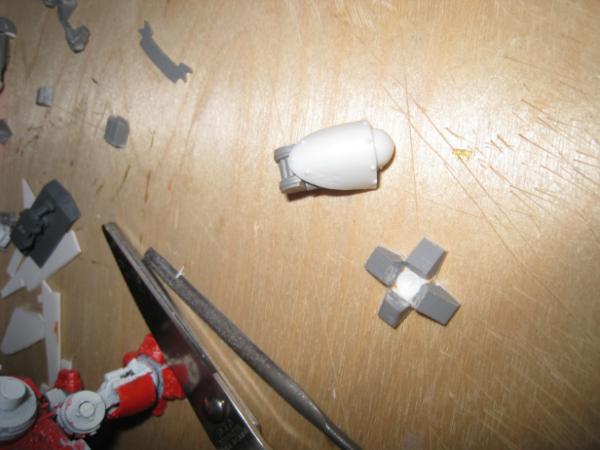
I finally got some guitar string. On saturday I went to have a party with my friend who plays guitar on regular basis. He gave me an old E-string, steel core and nickel wound. I noticed that guitarstring is not very easy to work with. It tends to spring back after you bend it. That's because the steel wire is hardened. I blast the string red hot with a blowtorch and let it cool down slowly. This process is called drawing or tempering and it counters the effects of hardening. After this the string was nicely malleable and held it's shape after bending like a regular steel wire. Also, there is dark, slighty matte, oxidised layer on top of it so i think paint will stick to it better. Here's a couple pics of guitar string usage:
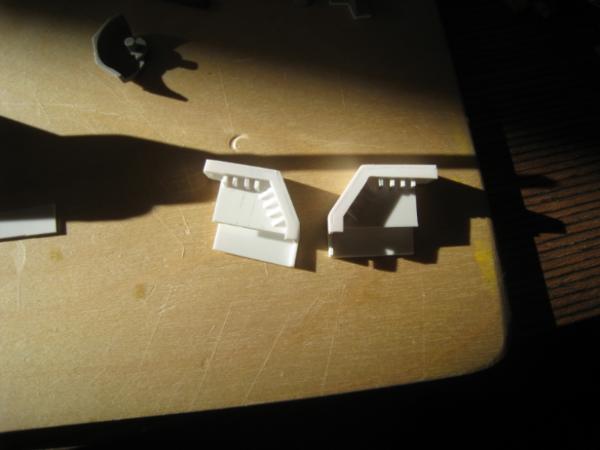
The exhaust pack finished. The centre section comes from a regular marine backpack. The Side section covers are bent plasticard. I had some problems with the cooling slits on the sides of those. At first I tried to cut the slits through but I wasn't able to cut neatly enough and the ridges between the slits were too narrow and weak. I had to scrap the covers and make new ones. This time I carved the slits on plasticard before bending it. The result is much better and satisfies me, even though they it's far from perfect. You can see a crack in the left cover caused by inadequate heating before bending. I'll paint it as battle damage.
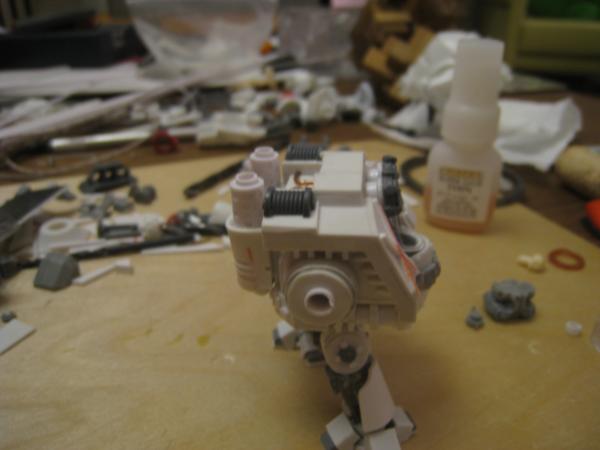
Side view. There is a short length of polystyrene pipe to act as a shoulder joint.
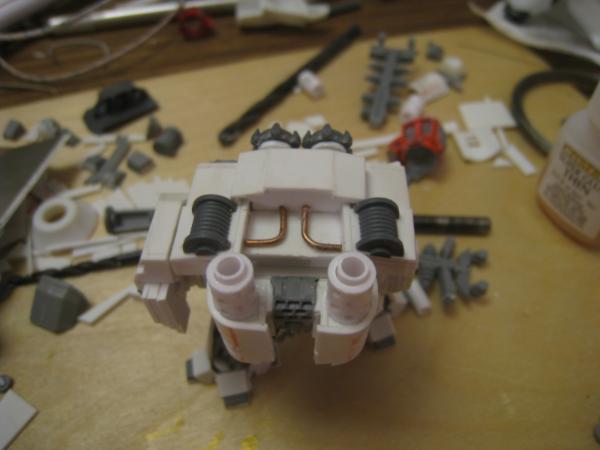
I put two lenths of steel wire to represent the towing cables going from winches to magna grapples. They still need pulleys for the cable to go around. It's very simplified version from the mechanics on GW model
The shoulder is staying there nicely with mere friction. The peg is actually just a tiny bit thicker than in GW model so it also works with GW arms. I used drill and pinning to make actually functional joint for raising and lowering the elbow. On GW model you can see the joints for dreadnought elbow but they are cast solid. I want to make use of those joints and make the arm more posable. Once I have the desired position I'm likely to glue the arm stiff for durability reasons. Even with all the joints functional, dreadnought has pretty restricted arm movements. It would, for example, be impossible for dread to reach anyone standing right in front of it without turning its torso.
|
|
This message was edited 1 time. Last update was at 2011/10/24 17:49:41
|
|
|
|
|
2011/10/24 16:54:52
Subject: Blood Angel bloggery by Skarpa: Exhaust pack of the scratchbuilt DC dread finished, post 12
|
|
Xeno-Hating Inquisitorial Excruciator
|
That's one of the best scratch built dreads I've ever seen! In fact thinking about it, it's one of the best scratch builds I've ever seen! Subscribed
|
|
|
|
|
|
2011/10/27 08:02:24
Subject: Blood Angel bloggery by Skarpa: Exhaust pack of the scratchbuilt DC dread finished, post 12
|
|

Chosen Baal Sec Youngblood
|
Farty Wiffmas wrote:That's one of the best scratch built dreads I've ever seen! In fact thinking about it, it's one of the best scratch builds I've ever seen! Subscribed
Thanks alot!
There hasn't been much progress on the dreadnought front. I had a game against a friend playing necrons and I wanted to try out an all jump pack list:
HQ:
- Librarian, jump pack, unleash rage, shield of sanguinus 125
ELITES:
- 3 x Sanguinary priest, jump packs 225
TROOPS:
- Assault squad 1: 10 marines, power fist, flamer 220
- Assault squad 2: 10 marines, power fist, flamer 220
- Assault squad 3: 10-marines, power fist, flamer 220
- 9-man DC, power fist, Lemartes 485
TOTAL: 1565 - 65 points over the limit :(
My friend was running something like this:
HQ
- Lord, warscythe, resurrection orb, phase shifter + some thingamajig I forgot
- Lord, warscythe, resurrection orb
TROOPS:
- 13 warriors
- 12 warriors
- 10 warriors
FAST ATTACK:
- 5 destroyers
- 3 scarab swarms
HEAVY SUPPORT:
- Monolith
TOTAL: 1500
I may have forgotten something.
The game was quite brutal. We rolled annihilation and spearhead. Necrons got the first turn and deployed for stand and shoot. Monolith, 1 warrior squad and one of the lords were left in reserves, warriors to be deployed via the monolith. I deployed all my marines in a great swarm behind one large rock, denying my opponent the LOS.
1st Turn:
Necrons:
- Scarabs advance
BA:
- Assault Squad 1 and Assault Squad 2 dart for next possible covers to target differend Necron flanks.
- DC and Assault Squad 3 shift forward but stay behind the large rock.
2nd Turn:
Necrons:
- Monolith deep strikes behind BA lines and fires particle whip, killing two DC marines.
- Warriors fire at partially exposed assault squad 1 with no results.
- Scarabs charge the Assault Squad 1 and kill one marine but lose combat by a wound. Combat goes on.
BA:
- Assault Squad 2 with the Librarian charge the Destroyers, killing all.
- DC and Assault Squad 3 attack the Monolith and manage to wreck it with lucky power fist blows. The warrior squad left in reserves is destroyed along with the monolith.
- Three more scarabs are killed in CC but combat continues.
Turns 3 and 4.
- BA steam rolls the remaining necrons. Second lord comes in from reserves but doesn't change the outcome. Necrons phase out at turn 4.
After the game I noticed a miscalculation in my list. I had two DC marines too much but in all fairness, the two marines made no difference in the outcome. I do need to be more careful in future, though. It will be interesting to see how the new codex changes the way the necrons play.
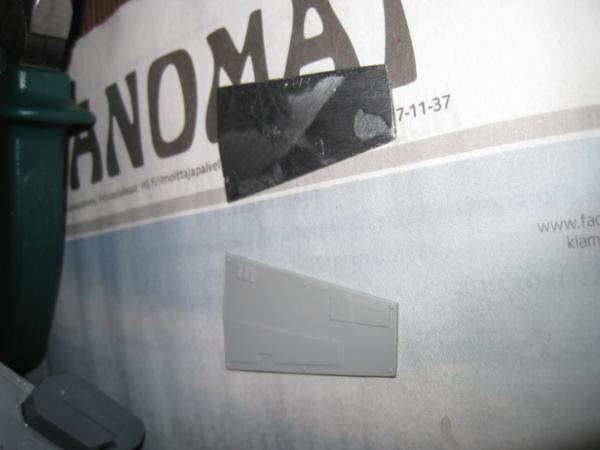
On a side note: I'm planning on building a few drop pods for my dreadnoughts. I'll be using the templates published by GW France as the basis for my pods. You can build pretty sweet-looking models using these templates: Click! (especially the example pic on top of the page) However, I want my pods to have opening doors and be able to house an actual dreadnought with the base, so I need to evolve this model a bit. I had some loose time at work so I whipped up a quick 3-D model following the templates:

I will make the necessary changes to the model and make my own templates. Hope to finish one before christmas (I've learnt to not push myself on too strict schedules.)
EDIT: Correct a couple typos
|
|
This message was edited 1 time. Last update was at 2011/10/27 08:08:28
|
|
|
|
|
2011/10/30 18:51:51
Subject: Re:Blood Angel bloggery by Skarpa: Scratchbuilt DC dread - Exhaust pack finished, post 12
|
|
Chosen Baal Sec Youngblood
|
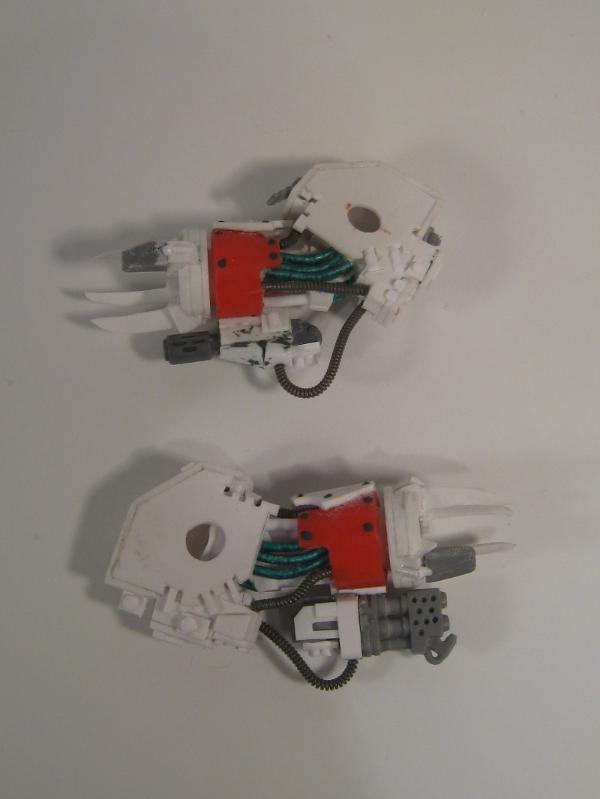
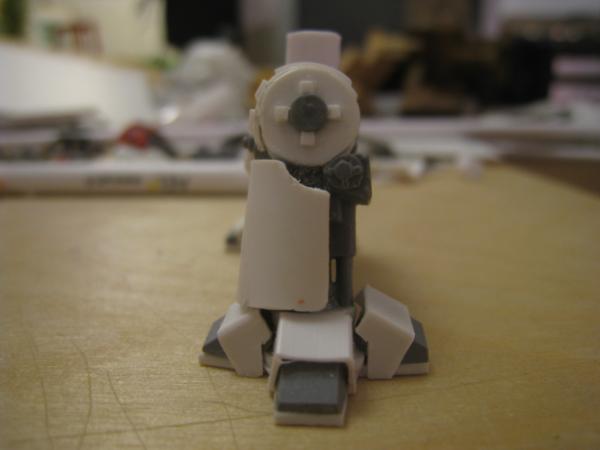
Watch out! He's coming right for you
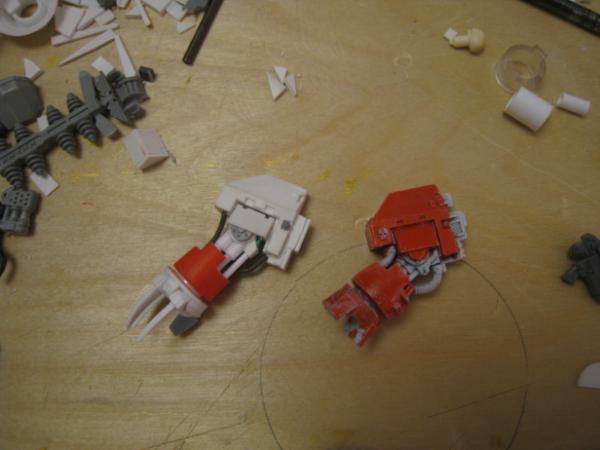
Left arm is mostly finished. Forearm is made of markerpen cap. It is a bit more angular than the original. The talons are cut from plasticard and filed sharp. I modeled the arm almost straight at elbow to give it a bit different look and to achieve the desired pose. Arm still needs the flamer and some detailing.
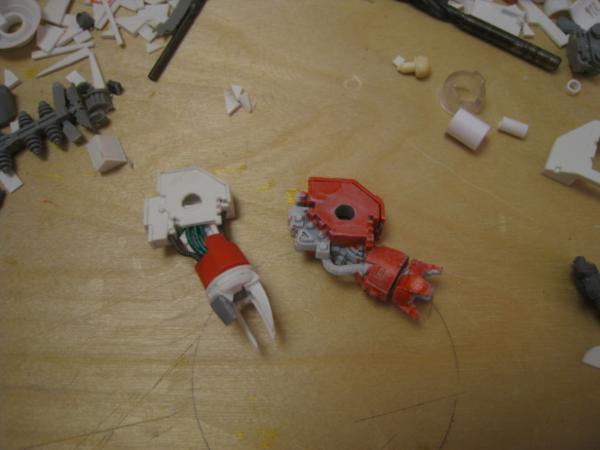
Inside of the arm.
|
|
This message was edited 1 time. Last update was at 2011/10/31 06:54:51
|
|
|
|
|
2011/11/02 15:45:38
Subject: Drop pod model
|
|
Chosen Baal Sec Youngblood
|
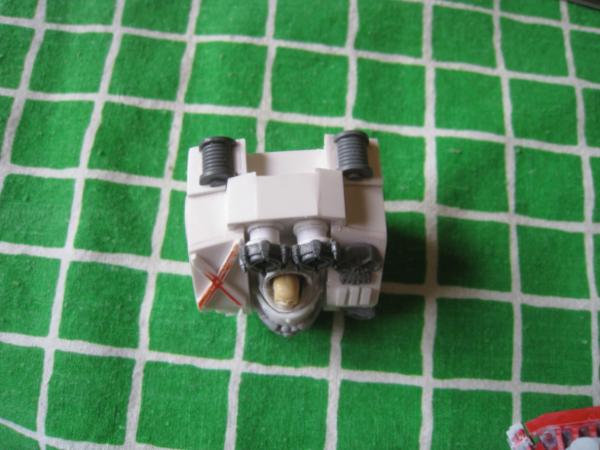
Just a quick update to show my progress on the drop pod. I made quite a few modifications to my drop pod 3D model. It now has opening doors and the dimensions follow the forgeworld model more closely:

Old model for comparison:
This model is made according to templates released by GW France.
Drop pod with doors open:
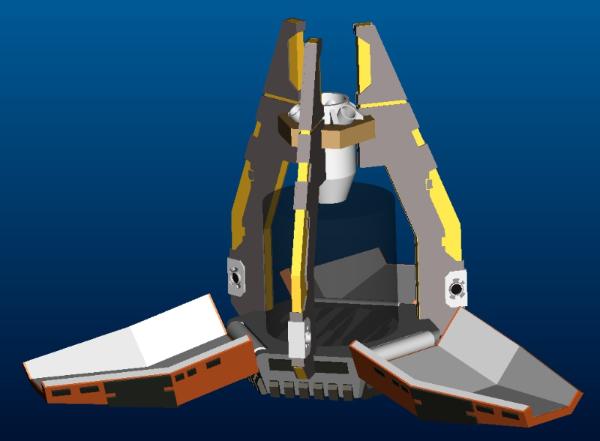
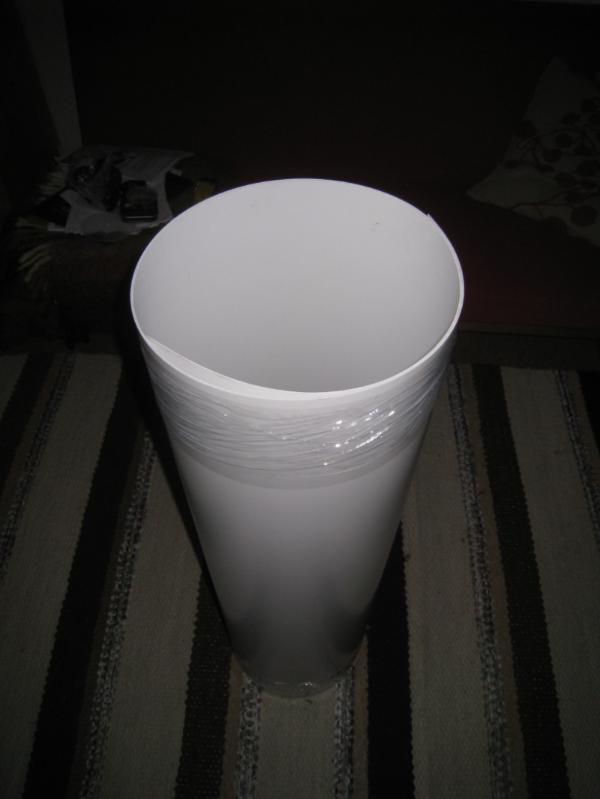
Transparent cylinder is a placeholder for dreadnought to make sure he fits inside.
|
|
|
|
|
2011/11/02 15:55:20
Subject: Blood Angel bloggery by Skarpa: Scratchbuilt DC dread - Left arm almost complete, post 15
|
|
Xeno-Hating Inquisitorial Excruciator
|
That's really cool and the design is very close to the forge world one. Do you use 3D design in your job, because you've got some serious skills! 
|
|
|
|
|
|
2011/11/02 16:06:24
Subject: Blood Angel bloggery by Skarpa: Drop pod - 3D model almost complete, post 16
|
|

Happy We Found Our Primarch
|
This is pretty cool! You shouldn't let the lack of comments deter you from showing your skills off.
I would suggest a skull, or a painted faceplate (something akin to the Librarian Dreadnought's face) for the face of your scratch DC dread. Can't wait to see more!
|
|
|
|
|
2011/11/02 16:08:20
Subject: Blood Angel bloggery by Skarpa: Scratchbuilt DC dread - Left arm almost complete, post 15
|
|
Chosen Baal Sec Youngblood
|
Farty Wiffmas wrote:That's really cool and the design is very close to the forge world one. Do you use 3D design in your job, because you've got some serious skills!
Thanks, I work as a design engineer and that's the software I work with.
|
|
|
|
|
2011/11/02 16:09:47
Subject: Blood Angel bloggery by Skarpa: Scratchbuilt DC dread - Left arm almost complete, post 15
|
|
Stealthy Warhound Titan Princeps
|
Skarpa wrote:Farty Wiffmas wrote:That's really cool and the design is very close to the forge world one. Do you use 3D design in your job, because you've got some serious skills!
Thanks, I work as a design engineer and that's the software I work with.
I KNEW I picked the wrong major... should have asked myself, which of these will be useful for warhammer?
|
|
|
|
|
2011/11/02 17:51:19
Subject: Blood Angel bloggery by Skarpa: Scratchbuilt DC dread - Left arm almost complete, post 15
|
|
Chosen Baal Sec Youngblood
|
Chaos Raptor wrote:This is pretty cool! You shouldn't let the lack of comments deter you from showing your skills off.
I would suggest a skull, or a painted faceplate (something akin to the Librarian Dreadnought's face) for the face of your scratch DC dread. Can't wait to see more!
In the beginning I got no feedback and I almost stopped posting my work but recently there's been a lot of positive response and it feels great, so no worries. Currently I'm set on skull for head as opposed to terminator head. I got some resin skulls but they are way too small. Of course a bare skull is much smaller than a helmeted head of same scale. I might use chaos marine head as I really like how it looks:

Pic comes from here: http://bren1974.deviantart.com/art/Chaplain-Dreadnought-189301095 I just need to find a suitable one at right price
Horst wrote:Skarpa wrote:Farty Wiffmas wrote:That's really cool and the design is very close to the forge world one. Do you use 3D design in your job, because you've got some serious skills!
Thanks, I work as a design engineer and that's the software I work with.
I KNEW I picked the wrong major... should have asked myself, which of these will be useful for warhammer?
That's how I make all the major decisions in my life ;D
|
|
|
|
|
2011/11/05 19:47:06
Subject: Re:Blood Angel bloggery by Skarpa: Drop pod - 3D model almost complete, post 16
|
|
Chosen Baal Sec Youngblood
|
|
|
|
|
|
2011/11/05 20:00:31
Subject: Blood Angel bloggery by Skarpa: Scratchbuilt DC Dreadnought 95% done, post 22
|
|
Perturbed Blood Angel Tactical Marine
Minnesota, USA
|
Thats so amazing. Awesome work. I really like all the fine details such as the power cables and rivets!
|
|
|
|
|
|
2011/11/18 07:53:15
Subject: Blood Angel bloggery by Skarpa: Scratchbuilt DC Dreadnought 95% done, post 22
|
|
Chosen Baal Sec Youngblood
|
gman1401 wrote:Thats so amazing. Awesome work. I really like all the fine details such as the power cables and rivets!
Thanks alot!
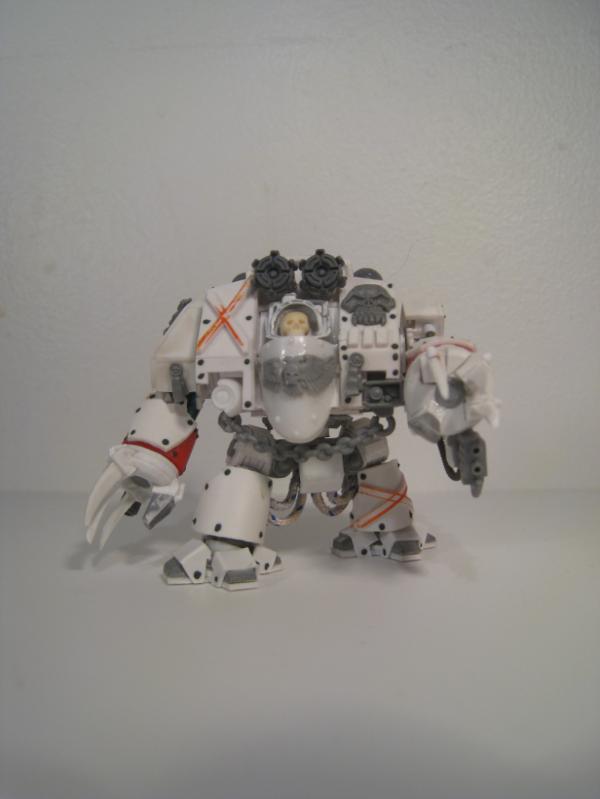
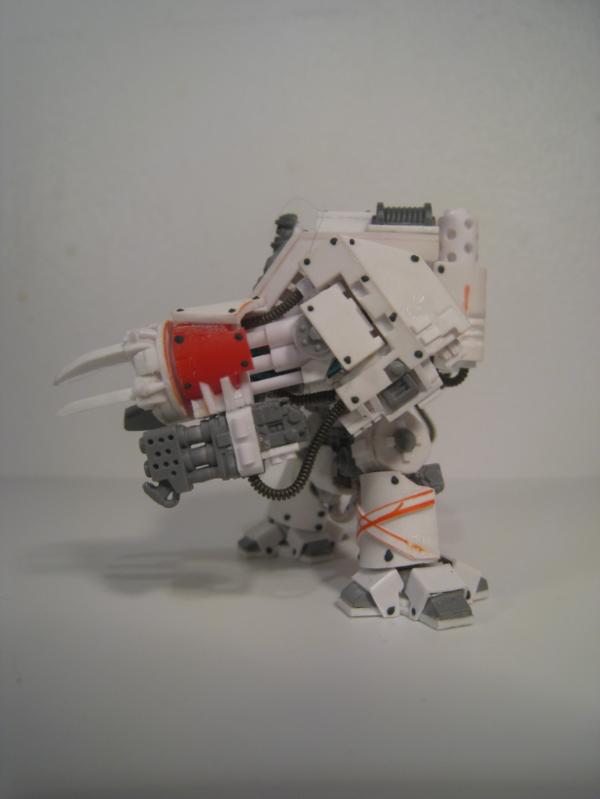
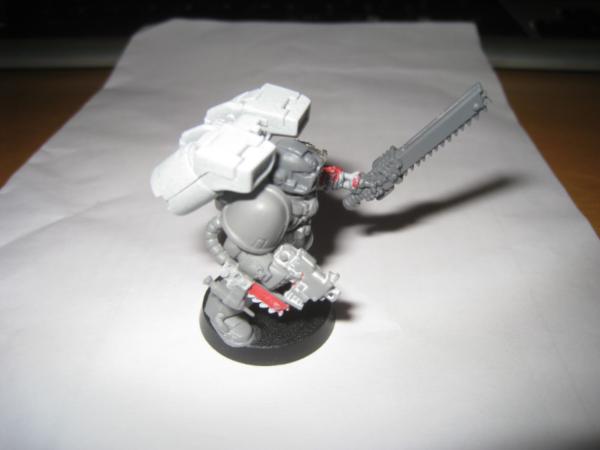
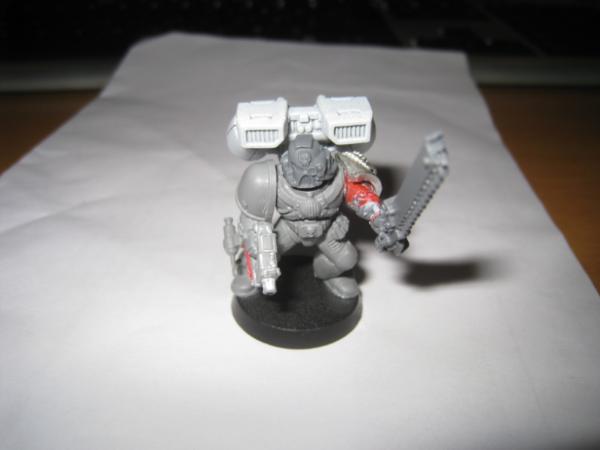
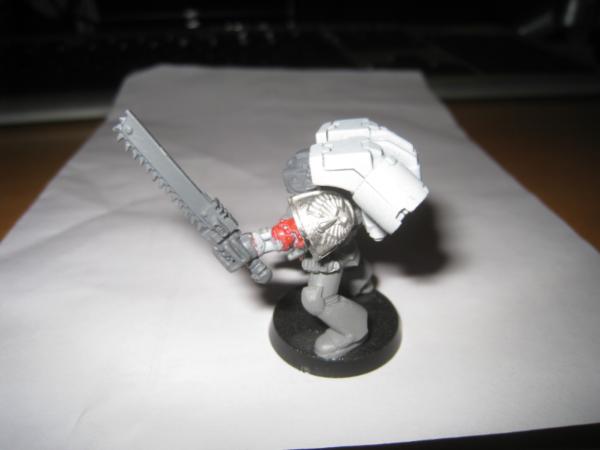
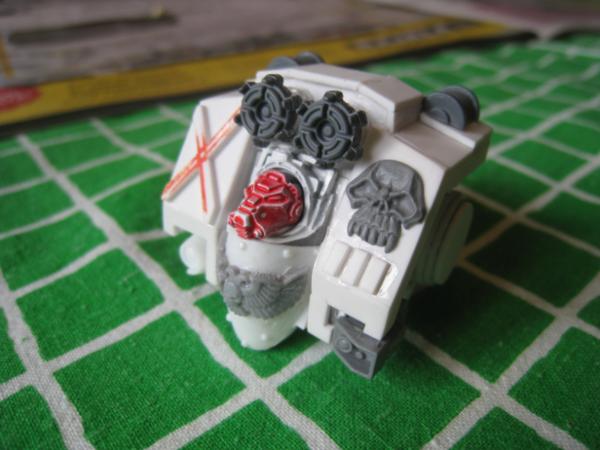
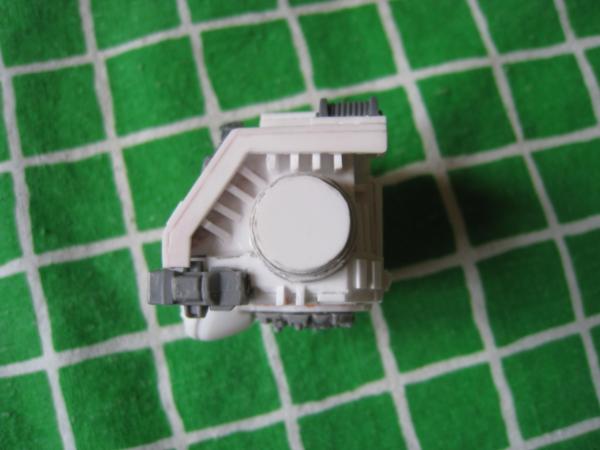
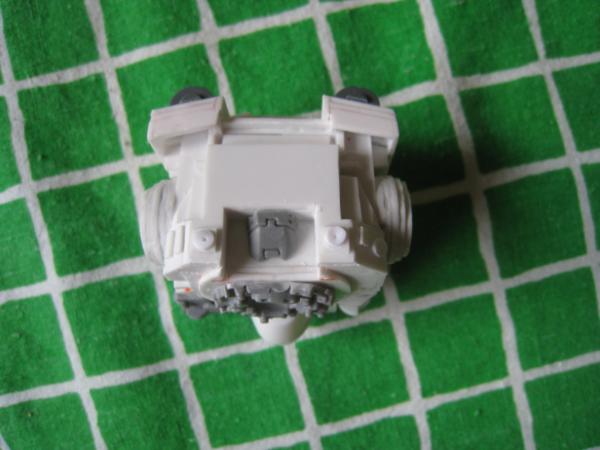
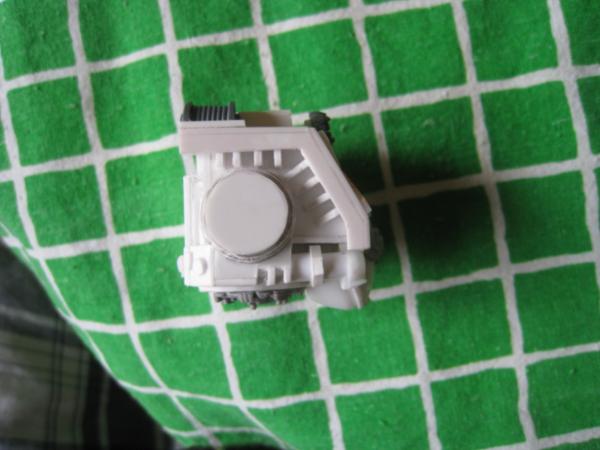
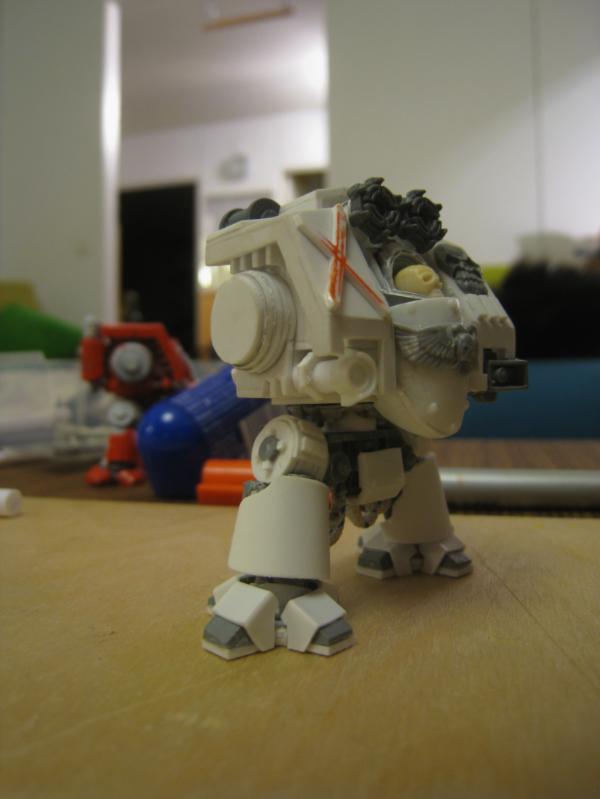
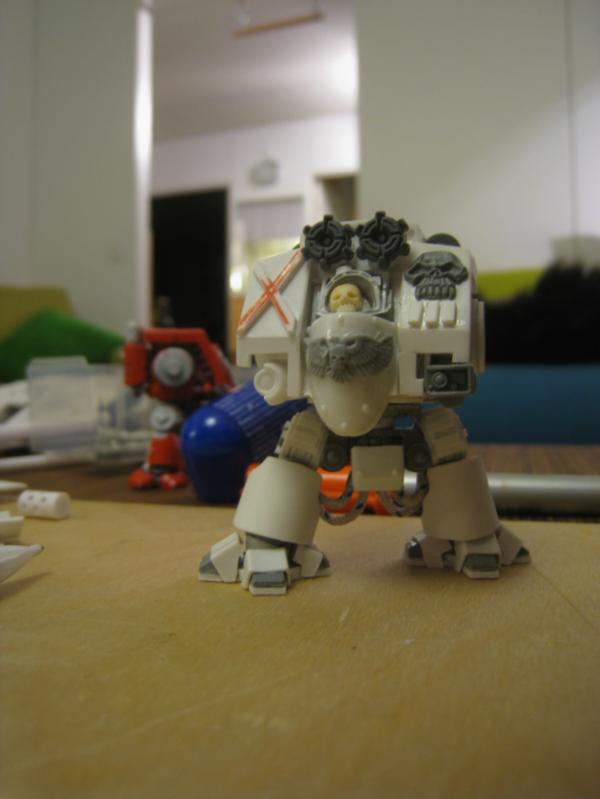
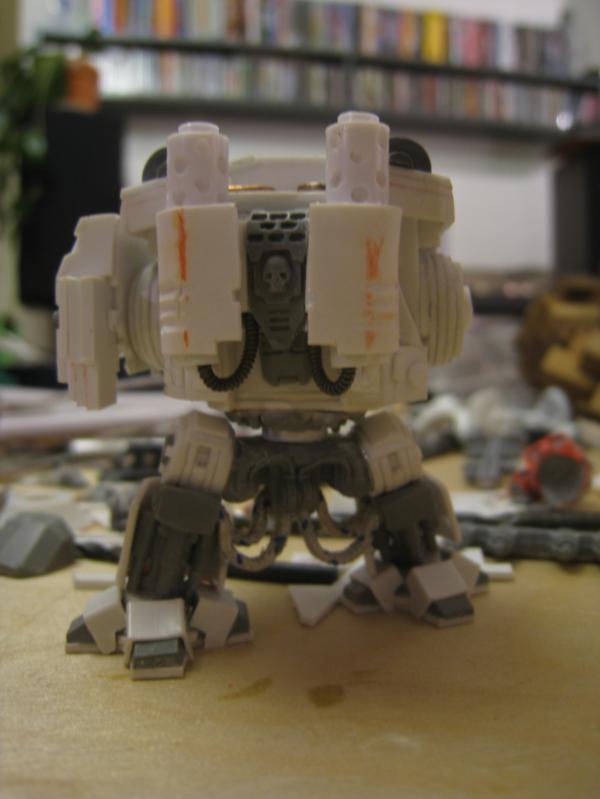
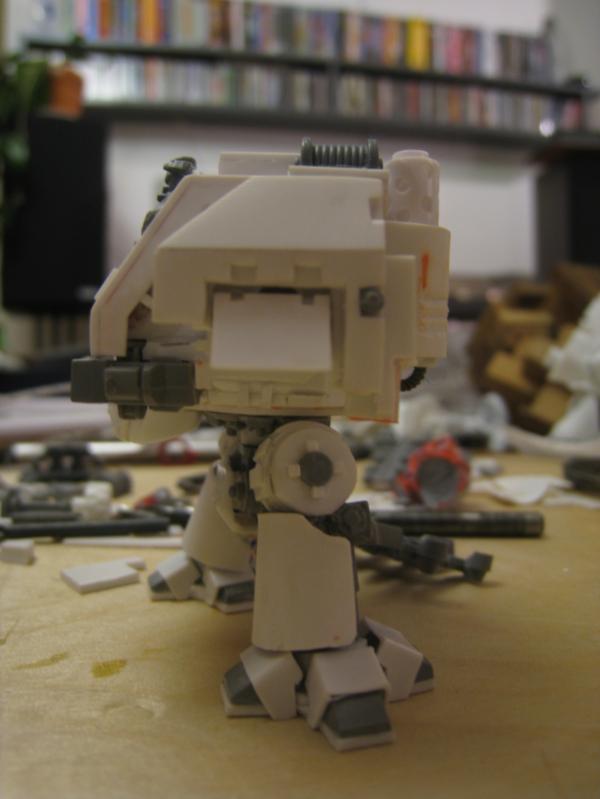
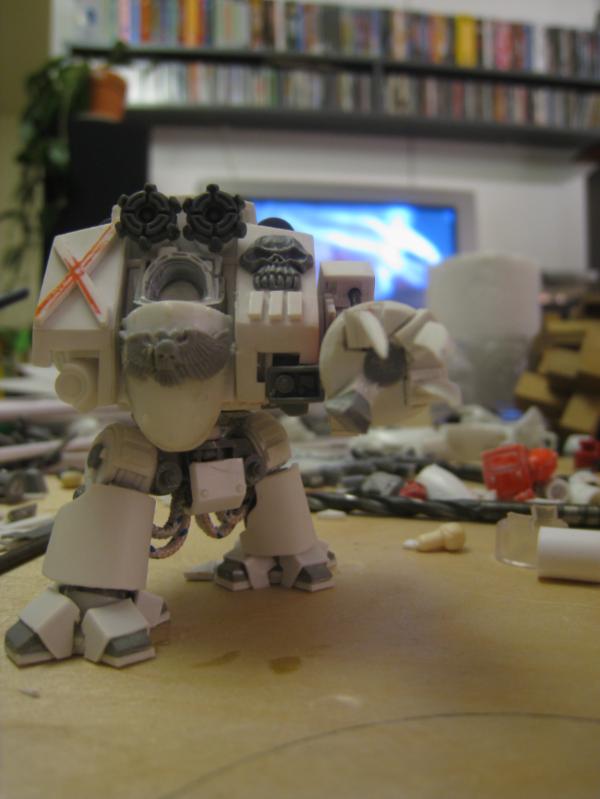
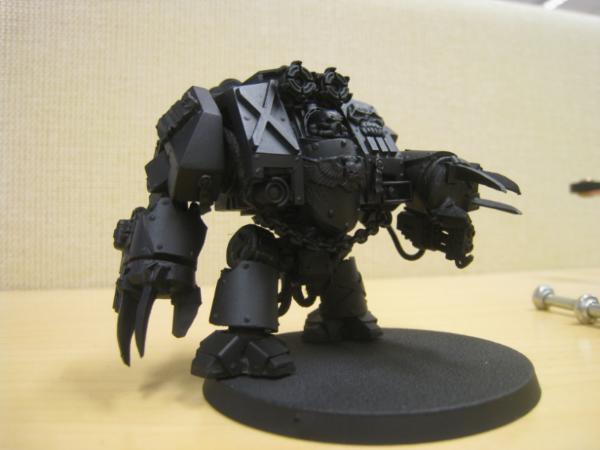
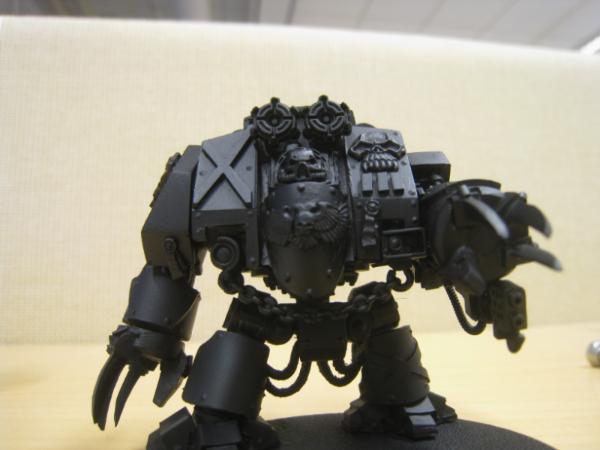
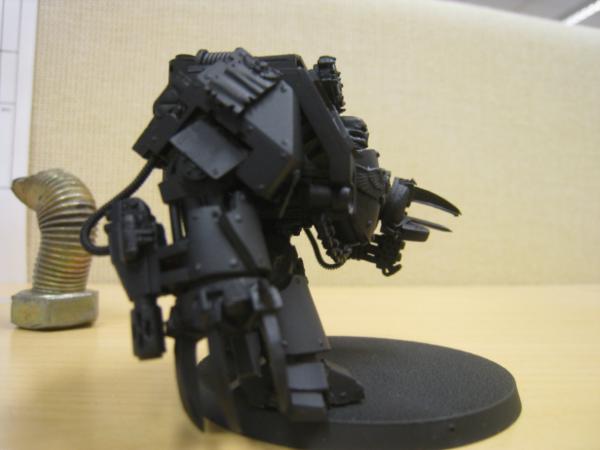
Lately I've been busy with non- 40K-related stuff so there hasn't been much progress with the dread. I did get a head for him and got him primed and I must say I'm very pleased with the result. Proper head and uniform colour make him that much more intimidating. Here's a couple pics. The pose is not final and there is a reason why he's placed at the back of the base. It will all become clear in due time.
|
|
|
|
|
2011/11/18 08:29:04
Subject: Re:Blood Angel bloggery by Skarpa: Scratchbuilt DC Dreadnought primed, post 24
|
|

Sadistic Inquisitorial Excruciator
|
Man ,you have your place among the Badass Dreadnought Builders Association 
Your plasticard skills are remarquable, this dreadnought is great. Did you use a particular template for it?
|
|
|
|
|
|
2011/11/18 08:37:52
Subject: Re:Blood Angel bloggery by Skarpa: Scratchbuilt DC Dreadnought primed, post 24
|
|
Longtime Dakkanaut
|
From one scratch builder to another..BRAVO!
Very well done, and dare I say better in alot of ways to GW, very well done, we scratch builders are not very common, and your skills are at the top of the heap.
|
|
|
|
|
|
2011/11/18 10:36:41
Subject: Re:Blood Angel bloggery by Skarpa: Scratchbuilt DC Dreadnought primed, post 24
|
|
Chosen Baal Sec Youngblood
|
Hyenajoe wrote:Man ,you have your place among the Badass Dreadnought Builders Association
Your plasticard skills are remarquable, this dreadnought is great. Did you use a particular template for it?
The dreadnought is not based on any templates. I just used my 4th. ed. plastic dreadnought as a reference and made all the measurements etc. from that. I didn't have any of the furioso-specific parts (magna grapple, blood talons, ectra armour on forearms etc.) at hand, so those are based on pics found around the net.
EDIT: I just had a look at your Emperor's children dread. Great work! I hope to get to your level of painting some day.
Soo'Vah'Cha wrote:From one scratch builder to another..BRAVO!
Very well done, and dare I say better in alot of ways to GW, very well done, we scratch builders are not very common, and your skills are at the top of the heap.
I had a look at your stuff and it's great, especially like the Mont'Ka. I wouldn't rank myself quite as high as you seem to do. My stuff is far behind from the awesome things you can find online. But I'm learning more all the time and hope to improve my skills. I'd say my best assets are patience and willingness to work on small details. I think that greater attention to little details would help a lot of scratchbuilders to achieve far greater results.
Thank you both for your compliments.
|
|
This message was edited 2 times. Last update was at 2011/11/18 10:46:47
|
|
|
|
|
2011/11/18 11:00:36
Subject: Re:Blood Angel bloggery by Skarpa: Scratchbuilt DC Dreadnought primed, post 24
|
|
Sadistic Inquisitorial Excruciator
|
Skarpa wrote: The dreadnought is not based on any templates. I just used my 4th. ed. plastic dreadnought as a reference and made all the measurements etc. from that. I didn't have any of the furioso-specific parts (magna grapple, blood talons, ectra armour on forearms etc.) at hand, so those are based on pics found around the net.
This makes your work even more impressive!
Skarpa wrote: But I'm learning more all the time and hope to improve my skills. I'd say my best assets are patience and willingness to work on small details. I think that greater attention to little details would help a lot of scratchbuilders to achieve far greater results.
Dakka P&M Blogs section is one of the finest place I've found to learn about modelling. You're right about details, but patience is sooooo hard to keep sometimes
|
|
|
|
|
|
|
|