Switch Theme:

Grey Knight Nemesis Dreadknight - Custom Pose (WIP) - Pics a plenty - Now with 100% more Draigo!  [RSS] Share on facebook Share on Twitter Submit to Reddit
»
Author Message
Advert


Forum adverts like this one are shown to any user who is not logged in. Join us by filling out a tiny 3 field form and you will get your own, free, dakka user account which gives a good range of benefits to you:
  • No adverts like this in the forums anymore.
  • Times and dates in your local timezone.
  • Full tracking of what you have read so you can skip to your first unread post, easily see what has changed since you last logged in, and easily see what is new at a glance.
  • Email notifications for threads you want to watch closely.
  • Being a part of the oldest wargaming community on the net.
If you are already a member then feel free to login now.


Made in us
Blood Angel Neophyte Undergoing Surgeries


Burbank, CA

Got a great gift from the guys that run my local comic shop. They know that I was a fan of the GK Dreadknight model, but I'm currently working on a Blood Angels unit so didn't buy it. However, they had the Black Box promo kit, and gave it to me, so I had another project.

Although the model is cool, I think the pose is terrible, so I set about correcting that first off. I didn't want to do major reconstructive surgery, so I tried to find an inspiration image that I could use as a foundation that I believed could be achieved with minor cuts and green stuff. Then I found this:


It's called The Motherland Calls. I liked the dynamic nature of the pose, even though the overall figure is relatively upright. Instead of calling at her comrades, my Dreadknight would be laying down Gatling Psilencer fire with the left arm. I would raise the sword as high as I could without the need to cut the arms. With that locked down, I set to work.


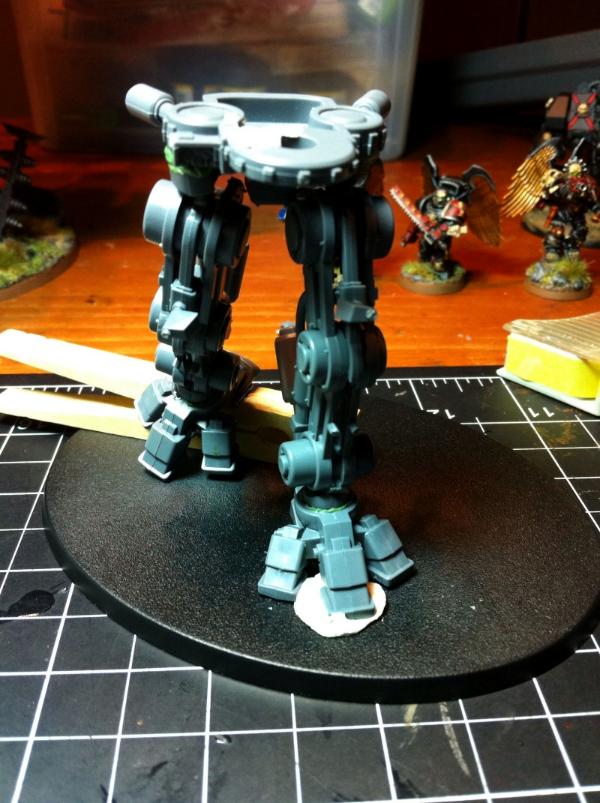
Step one was seeing if I could get the legs the way I wanted them. The parts were tacked together with museum putty, which also holds a variety of poses. When done, it cleans right off.


The feet attach with ball joints, so no problem getting this into position.


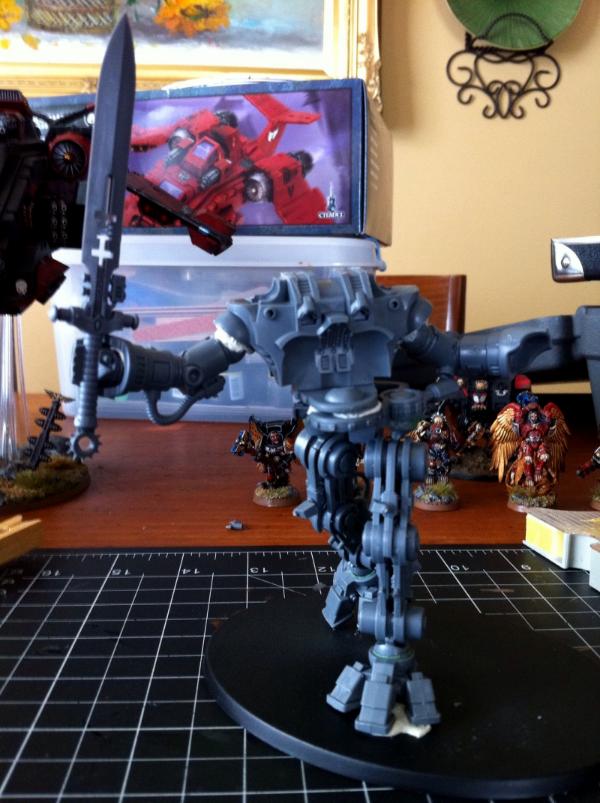
Next, the torso. I had to remove the peg that stops the sideways rotation, and then I was able to get it where I wanted. Also, this was about as high as the right arm would go without major cutting, which I wasn't willing to do. So a bit of compromise, but the more I looked, the more I liked it.


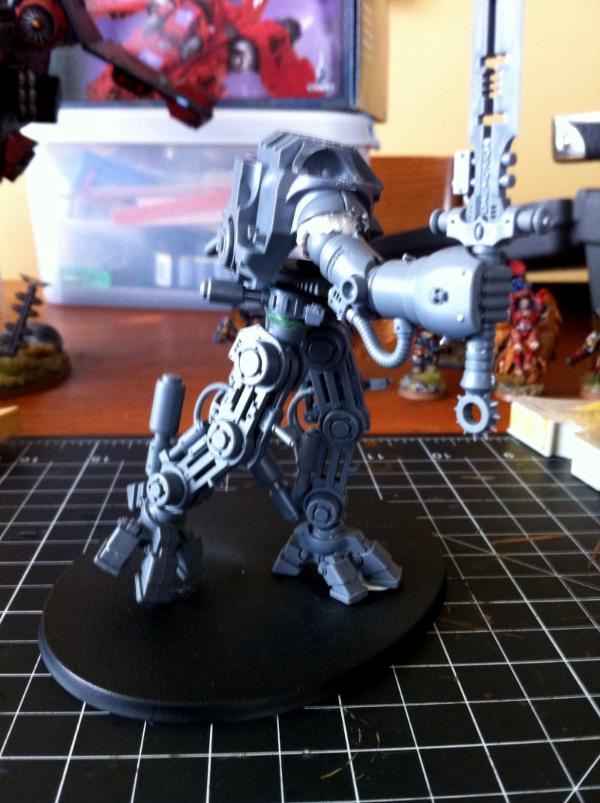
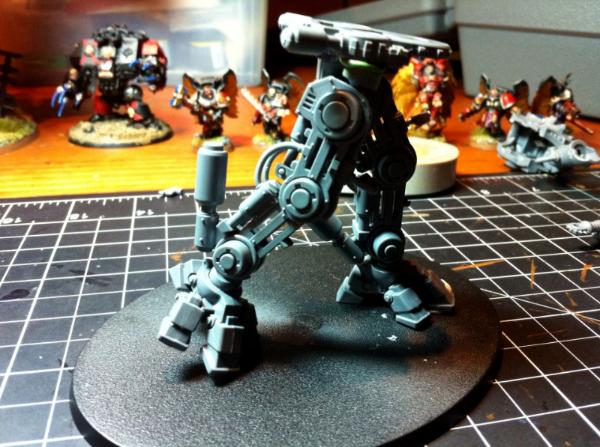
From the side, you can see where the legs attach to the torso. I filled them in with GS, and then rounded off the tops of the leg attachments, in essence creating new ball joints.


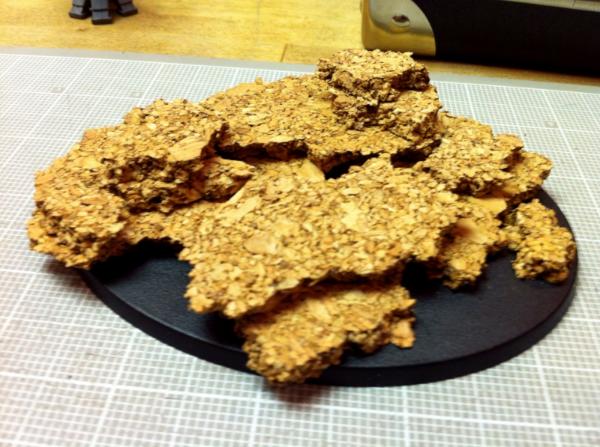
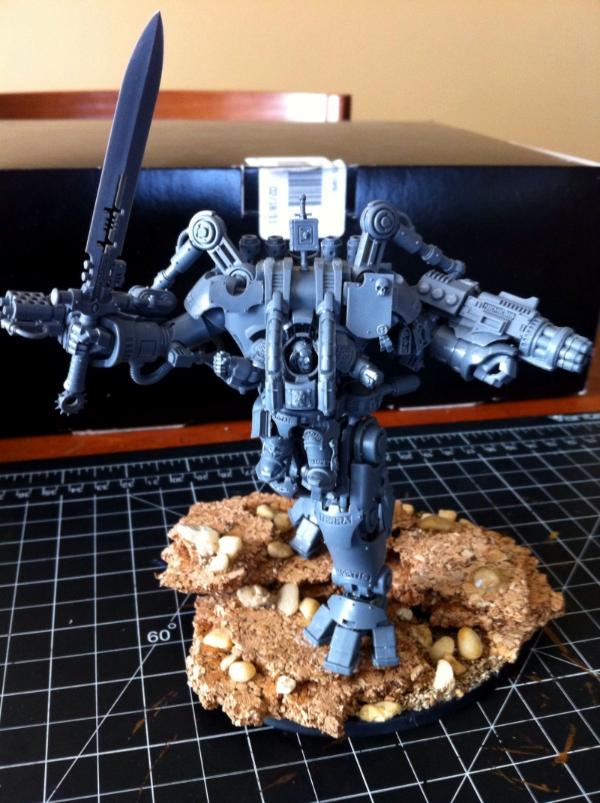
I always base my figures as they come together, as I like to see a unified composition. This is done in the traditional manner using broken cork.


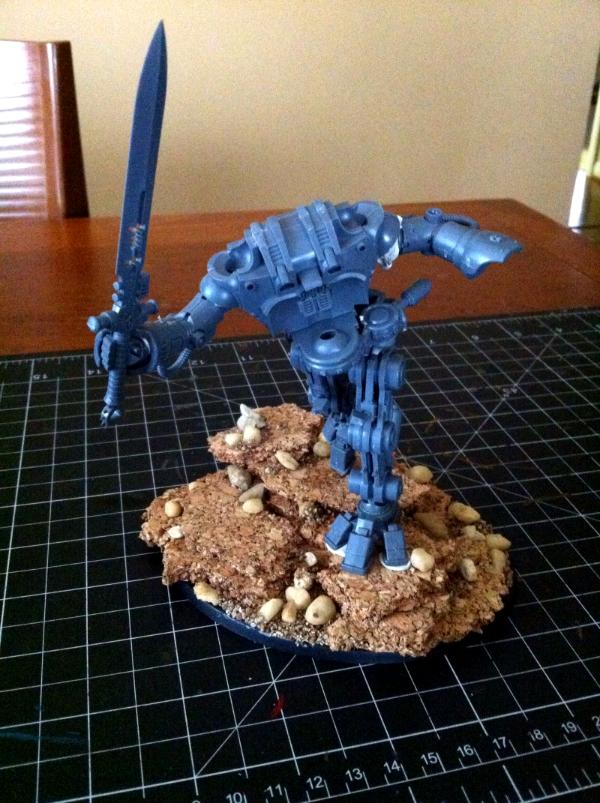
Test of the pose on the base. I didn't like the figure leaning forward, so this was adjusted. Also, the position on the base felt wrong, so I moved it to the left, and had the torso facing forward while the legs walk at an angle. Also, I set it further off to the left, creating a large zone of negative space. I may fill that later with some artifact or basing component (I've been wanting to use some bases from Scibor for a while, so I have been thinking about getting their kit which has the broken statutes. I think it could work well).


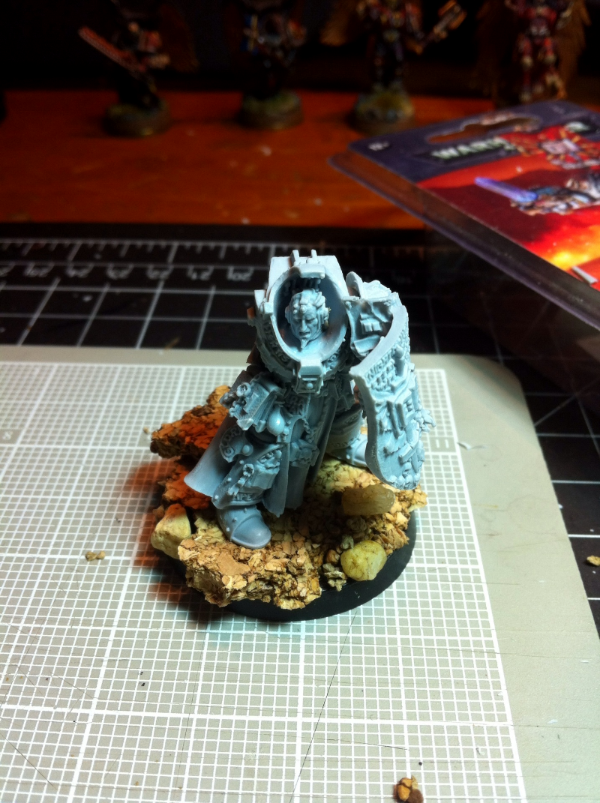
All together. The hardest cutting and filing came in modifying the pilot. I had to completely remove one leg and replace it with a donor part from another terminator. I also used an extra accessory (the large book) as way to hide any sloppy green stuff work on my part.


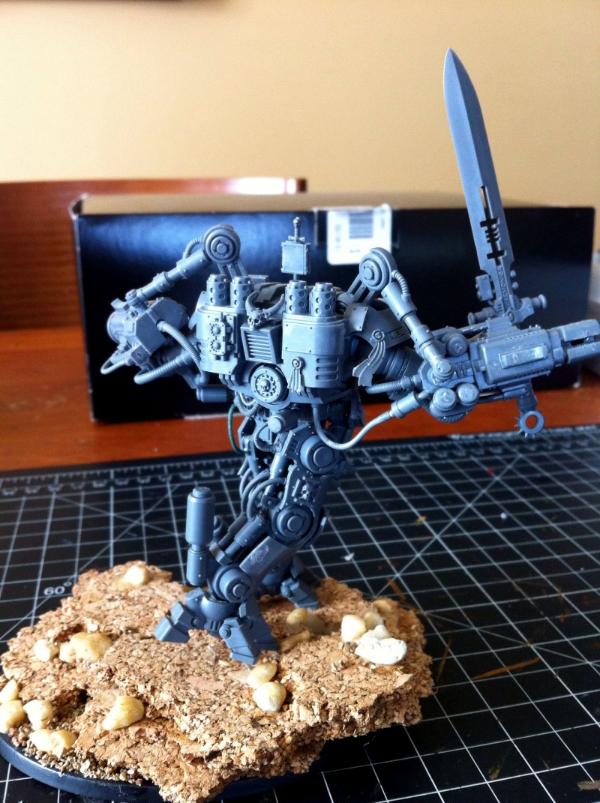
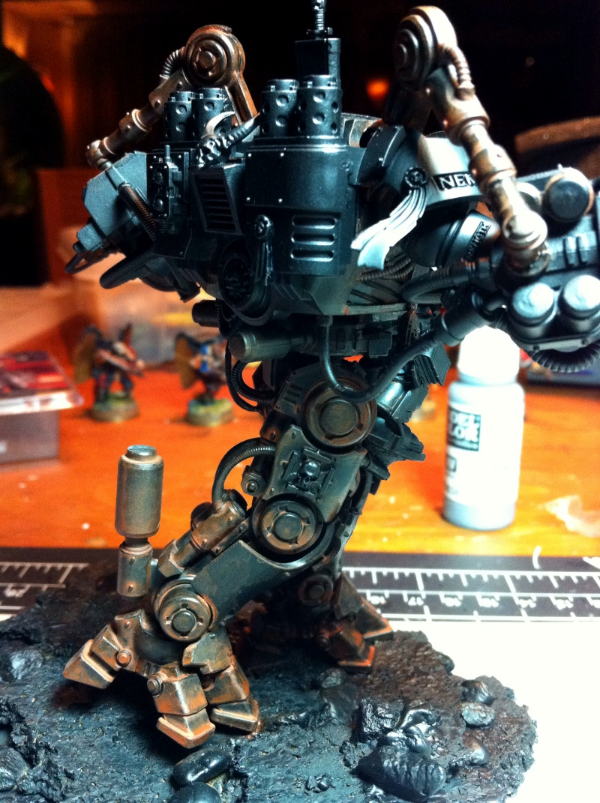
I added additional hoses, and a demon skull to the back to create some interest.


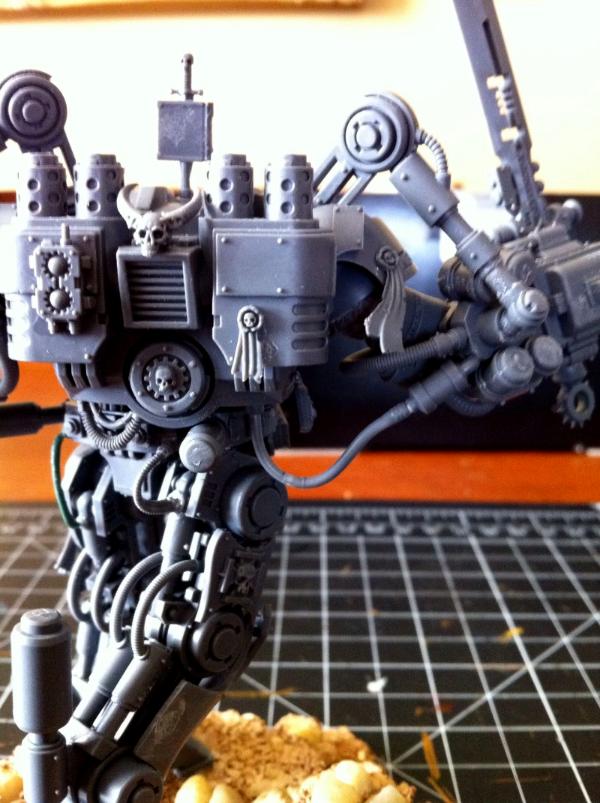
A better view of the back.


The pilot. I had some further smoothing out to do on the legs, but the book does a nice job of hiding most of the seams.


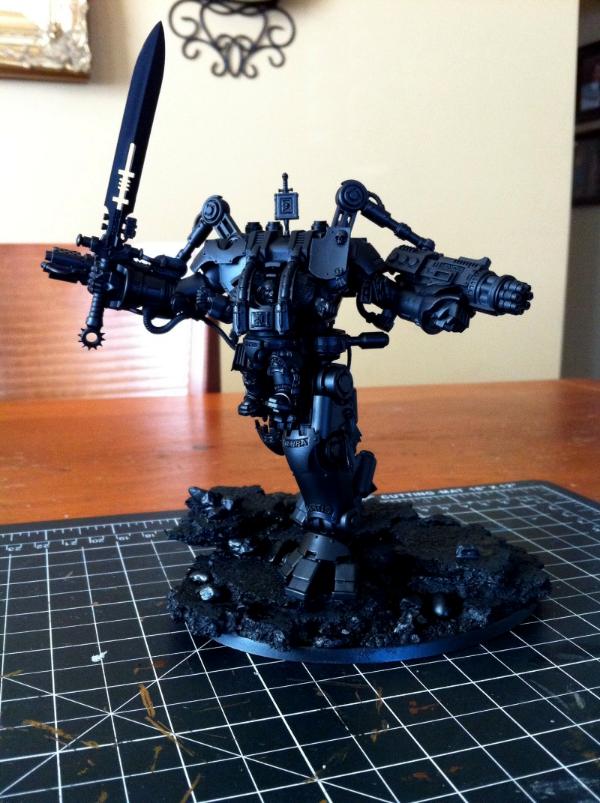
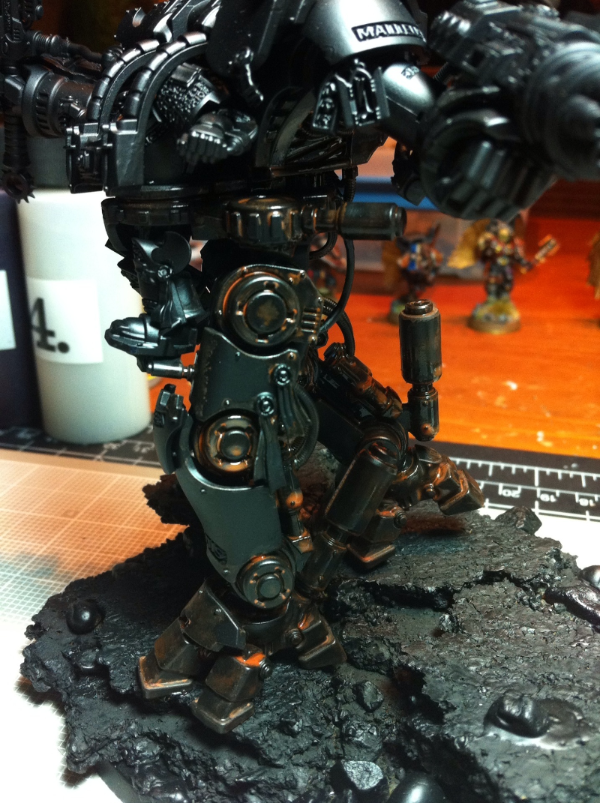
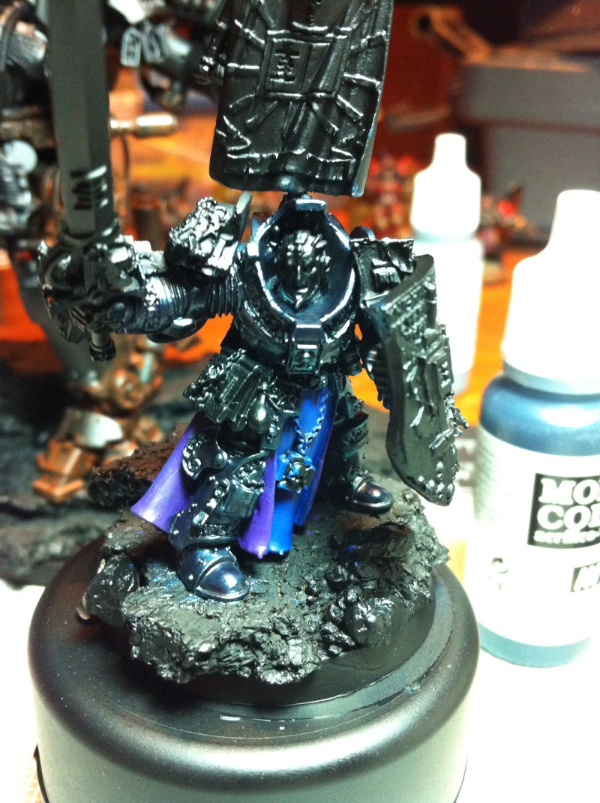
Shot with Chaos Black primer. The pose certainly captures the essence of the inspiration in my mind, so I was pleased with the result.


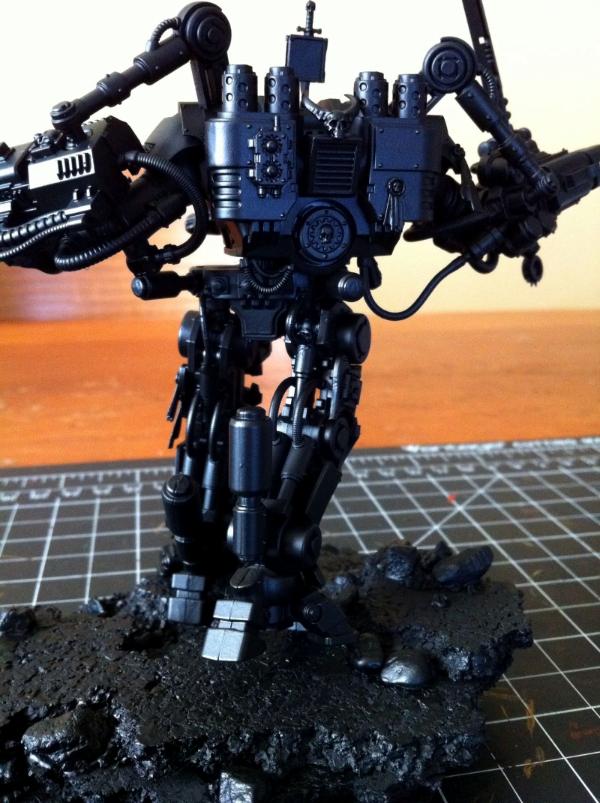
Some seams will need to be cleaned up (I always catch these after priming, grrr).


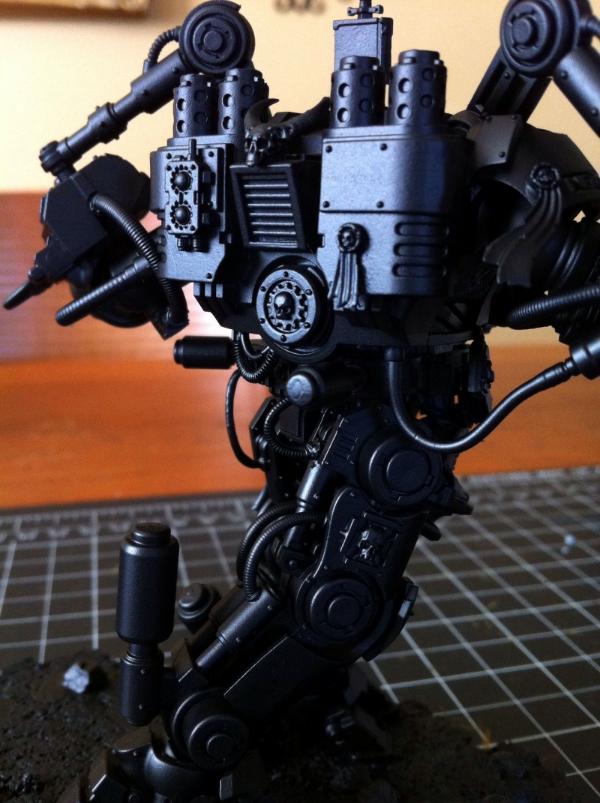
Additional details and green stuff blend together in a sea of black.


Almost ready for the demon hordes.

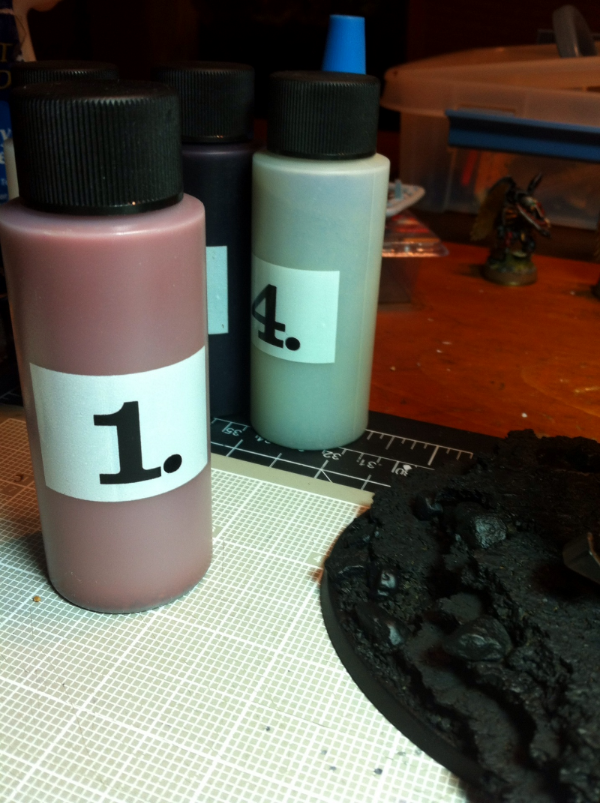
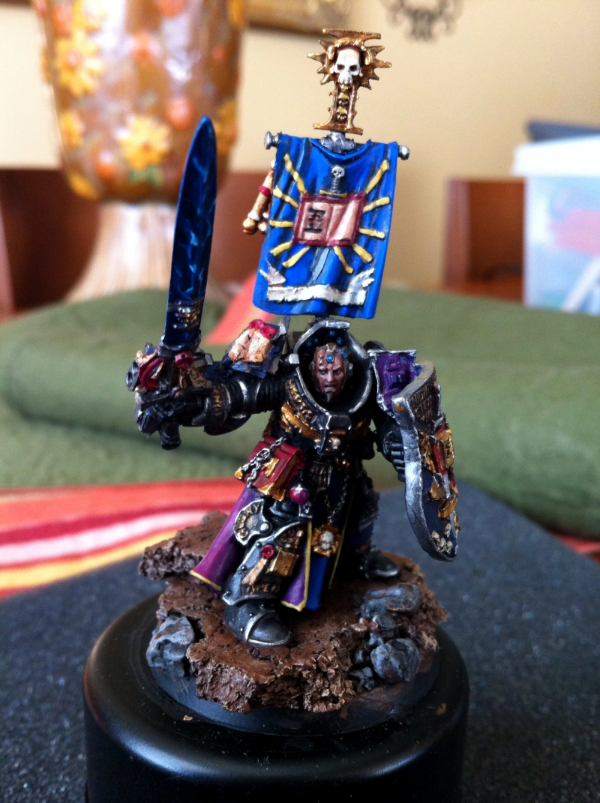
The Dreadknight is going to be painted in a non-traditional color scheme - right now, my inspiration is German armor from WWII (a grey Grey Knight?), with some details of Lozenge pattern from WWI. Lots of rust everywhere. Red and gold highlights. I'll be hitting this with the airbrush and brushes over the next few weeks. Thanks for looking.

This message was edited 1 time. Last update was at 2012/02/17 20:53:14


Made in us
Hardened Veteran Guardsman


Danbury, CT

That is beautiful. Hope the paint scheme will be able to fit the pose.

Ultramarines Legion 138th Company
Ultramarines Legion 19th Reserve Armour Company

Merican 1st Infantry "Merican Legion" 
   
Made in us
Blood Angel Neophyte Undergoing Surgeries


Burbank, CA

Thanks, calgar. I'll get some pix up of the painting process later this week.

   
Made in us
Ultramarine Terminator with Assault Cannon


I think it's brilliant.
   
Made in gb
Longtime Dakkanaut


Scotland

Great pose!

You know that lady is made of incredibly poor quality Concrete and wont last the next fifty years? Soviets werent the finest quality builders lol.

Mary Sue wrote: Perkustin is even more awesome than me!


Made in us
Blood Angel Neophyte Undergoing Surgeries


Burbank, CA

Perkustin wrote:Great pose!

You know that lady is made of incredibly poor quality Concrete and wont last the next fifty years? Soviets werent the finest quality builders lol.


I didn't know that is concrete. That statue is massive. Hope it holds up long enough for me to see it in person.

   
Made in us
Blood Angel Neophyte Undergoing Surgeries


Burbank, CA

Been a while. Life has been calling, but got back to the Dreadknight. Here are the updates, including Draigo goodness:


I'm using Rust All for the bottom of the Dread. My goal is that it looks like this thing sees combat 365 days a year, so there isn't a lot of time for maintenance (or cleaning out Daemon guts).


First coat applied. It will take at least three or four coats to get the look I want.


A better look at the effect. The product is actual rust in a solution of alcohol.


I still hadn't settled on a paint scheme, so I thought I would establish one on another figure, then I found this at my local shop - Draigo in Finecast. I don't really have a problem with the Finecast models, but this one had all kinds of issues, including misaligned moulding and parts that were miscast. Gah.


This is how Draigo's sword looked out of the clamshell.


And a little work with the sanding stick brought it back, though his sword is a little shorter now. Don't think anyone will notice.


Because my primary army is Blood Angels, I just didn't want to paint silver and red for these Grey Knights. So, I decided on black/silver armor, blue and purple as the primary colors, and deep bluish grey for what would normally be red - weapons, details, shoulder pads.


Draigo almost complete. I'm happy with the colors. I tried a number of glazing techniques that were new to me on this mini, but now I'm planning to do on my models.


From the side, you get a good view of the grey color that will be dominant on the Dreadknight, along with the blue.


A good view of the blue color against the darker steel.

I'm going to be working on the Dread again this weekend, so hopefully more pictures to post soon. Thanks for following along. All comments welcome.


Forum Index » Dakka P&M Blogs
Go to: