Switch Theme:

Little metal robots - a blog of building my necrons.  [RSS] Share on facebook Share on Twitter Submit to Reddit
»
Author Message
Advert


Forum adverts like this one are shown to any user who is not logged in. Join us by filling out a tiny 3 field form and you will get your own, free, dakka user account which gives a good range of benefits to you:
  • No adverts like this in the forums anymore.
  • Times and dates in your local timezone.
  • Full tracking of what you have read so you can skip to your first unread post, easily see what has changed since you last logged in, and easily see what is new at a glance.
  • Email notifications for threads you want to watch closely.
  • Being a part of the oldest wargaming community on the net.
If you are already a member then feel free to login now.


Made in gb
Storm Trooper with Maglight


UK - Down South - GB

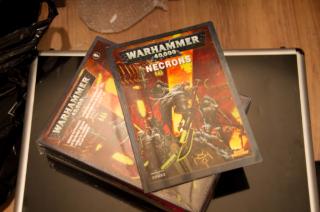
I got a battleforce + box of warriors + lord and a codex for my birthday. Ive started building them. Heres the work in progress.

So far ive assembled (partial) the small box of warriors and basecoated.

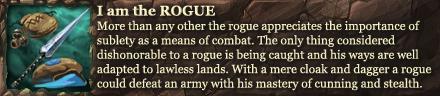
#1 unboxed loveliness!


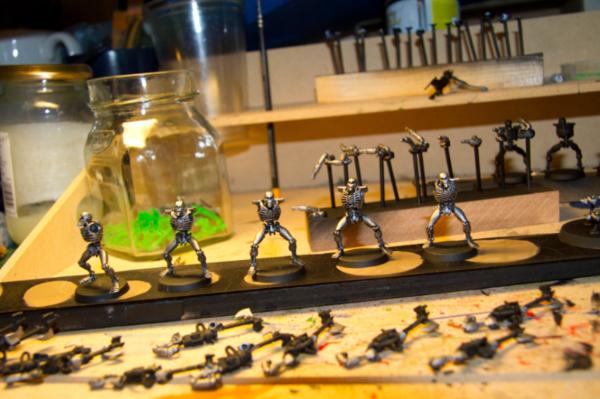
2# arms, guns and bodies


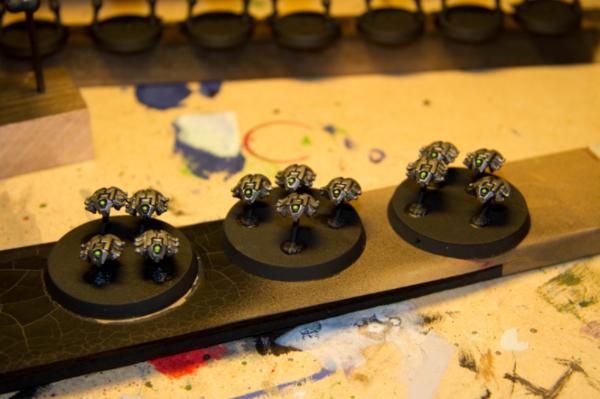
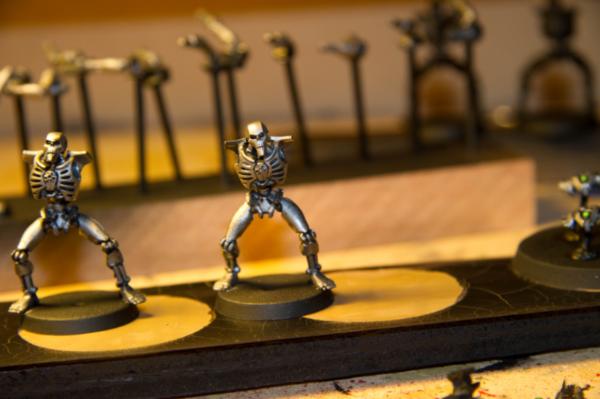
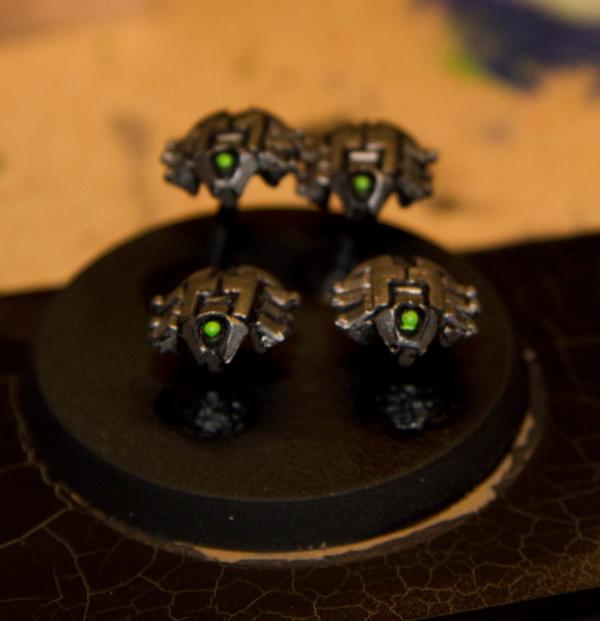
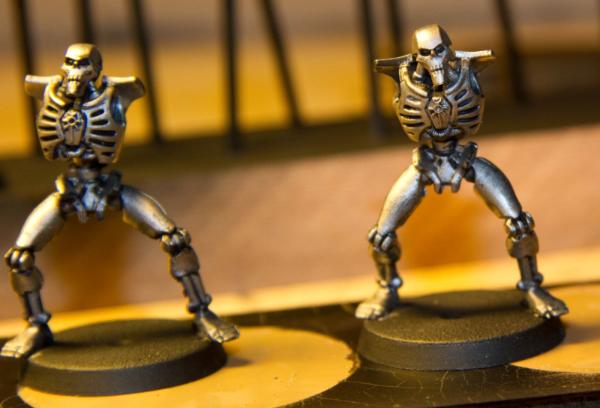
3# more basecoated crons


Some blurb.

I usually build the minis completely then basecoat using GW black primer, however this time i wanted to try out a different assembly method.

Process

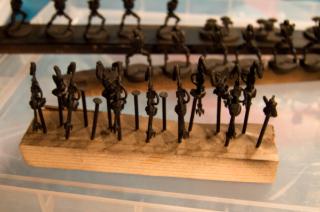
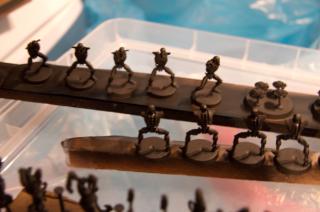
1. I glued legs / head and torso together and then glued them to an unbased temporary base
2. I assembled the gauss player minus the green neon tube and the under gripped arm.
3. Prepped for basecoating by removing the mold lines and sprue waste.
4. With the use nails and tac i sprayed them with 1 coat of GW primer.

Photos above show the results.

One thing that bothers me is that to remove the sprue connection points on the skulls i wasnt able to keep the skulls looking clean around the jaw line. Is there some special trick?

Progress follows tommorow. along with my thoughts on the colour schemes.

A things that i need to find out before i start my next box.

Questions... and... hopefully some helping answers!

1. how to clean heads better (minimising damage to the model)
2. how to kitbash cryptek's from whats in the battleforce box. Can this be done?
3. quick painting schemes?
4. best rusting / washing technique for metalics.

This message was edited 2 times. Last update was at 2012/02/26 21:33:46


Made in au
Stabbin' Skarboy


Queensland (Australia)

Can you please enlarge the pictures, I can't really comment on them if I can't see them too well.

From what I CAN see those look awesome.

My Answers:

Cleaning heads are pretty easy to do without harming the plastic, but patience is the key. Get either a box cutter (stanley knife) or a exacto knife (scalpel). Instead of trying to CUT the part off try and scrape it off with the side of the blade. Do this by slidding it back and forward over the mould line, but don't put pressure on the blade, let it slowly work it way down to a smooth point.

Hmm, about the kitbashing idea. I had a look at the necron battleforce and couldn't find much pieces related to a cryptec, but this IS what I found. The head of the pilot the Doomsday Arc is quite similar to the head of the Cryptek. The problems you might run into would be his staff and his weird cloak thingy on his back. I reccomend practicing some skills with greenstuff until you are confident with sculpting, and then give it a shot. The best thing you can do in this hobby is try new things and step out of your confort zone, otherwise there is no possible room for improvent.

Choose what colour paint scheme you like the most, and maybe then we can help guide you towards a good colour scheme. There are some different schemes in this article, maybe there is something here you might like! http://www.games-workshop.com/gws/content/blogPost.jsp?aId=18600001a

I play orks so I have know quite a few techniques, but the fastest eisiest and great looking techniquie would have to be using a wash. Paint your entire necron, and where ever you want the rust, simply give that area a sepia wash, maybe two. This is what I use...

I wish you all the best with your necrons! Im subcribed!

MaximusPrime

This message was edited 1 time. Last update was at 2012/02/27 06:34:23


The Humies Waste presious time with slow and boring speeches; While the Oks just get it over and done with in one simple WAAGGGHHHH!!
My Dakka Blog: http://www.dakkadakka.com/dakkaforum/posts/list/422595.page
My Blog: http://apainterstabletop.blogspot.com/
 
   
Made in gb
Storm Trooper with Maglight


UK - Down South - GB

Thanks for the comments. I'm quite new to army blogging and i couldnt work out how to get the images (hosted on dakka in my gallery) to link directly to my blog. So i just used the medium sized images on the blog.

Big thanks for the necron painting article on GW, i think i must have missed that. In a rather annoying way i cant seem to find the issue of WD which had the necron launch article in it. I know it was one of the last few of 2011.
   
Made in au
Stabbin' Skarboy


Queensland (Australia)

Haha, thanks. I don't have the necron WD your talking about but I do have a White Dwarf with a technique for some pretty cool looking blue necrons!


The Humies Waste presious time with slow and boring speeches; While the Oks just get it over and done with in one simple WAAGGGHHHH!!
My Dakka Blog: http://www.dakkadakka.com/dakkaforum/posts/list/422595.page
My Blog: http://apainterstabletop.blogspot.com/
 
   
Made in gb
Storm Trooper with Maglight


UK - Down South - GB

Some progress to report today.

I finished the basecoat of bolt gun metal on the first of the warriors. Painted the gauss flayers partially and the remaining limbs.

Painted the scarab swarms with bolt gun metal and scorpion green sensor eyes.

Im giving some thought to getting hold of some orange plastic rods to replace the green rods that are supplied as standard. However i need to look into this more for suppliers and costs.

Note to self. Need to look into light emitting shading and overspill paint techniques for the green energy and sensor areas.

Continue tommorow and add some more photos of progress.

Ive set my self a rule. 1 box / squad must be fully painted at a time before assembling the next squad box.

#1 work in progress armless-crons

#2 scarabs groups

#3 still no arms for the armies!

4# scarabs close up (i just noticed i wast to accurate on the eye sensory aray oooops!)

5# close up of the armless army

This message was edited 3 times. Last update was at 2012/03/02 09:31:53


Made in us
Hellish Haemonculus


Boskydell, IL

Yeah, that rule will save you a lot of depression in the future. I have a whole army assembled but in various levels of "unpainted." When you see all the work stretching out you can't help but feel a little gut-punched. Or I can't anyway. I like the assembly so much more than the painting, it helps keep me motivated if I know that I'll be able to build more stuff as soon as I finish painting THIS stuff. Your Necrons look nice though. You should post some more pics!

Welcome to the Freakshow!

(Leadership-shenanigans for Eldar of all types.) 
   
Made in gb
Storm Trooper with Maglight


UK - Down South - GB

Added yesterdays progress to the blog (photos)
   
 
Forum Index » Dakka P&M Blogs
Go to: